michael mott
-
Posts
5,200 -
Joined
-
Last visited
Content Type
Profiles
Forums
Gallery
Events
Everything posted by michael mott
-
 Bob you have no idea how much I am enjoying watching you build this launch, it looks super. Like Lawrence I wait in anticipation for the next update. Michael PS Brrrrrrr it is -20 c here today and for the last couple of days.
 -
Looks great Nils, I am definitely gaining a new respect for these ships that you build and the level of detail that you add. Yes and he might be done before I have finished fixing a few divets on the Albertic. Michael
- 2,625 replies
-
- 6
-

-
- kaiser wilhelm der grosse
- passenger steamer
- (and 1 more)
-
Tony, and Wefalck, thanks for those interesting photographs of traditional work being done with "low tech". All the work that we do in my view is a set of procedures that we learn from successes and failures, we continue to use and improve those that work and generally discard those that don't. The ones that work are also subjected to our human inventiveness and we look for ways to assist those methods that work. Sometimes a happy accident leads to a whole new way of accomplishing a task. It is with this mindset that I am willing to try out new or different ways of getting to that success mentioned earlier, this often comes as a result of a simple question "what if?" This whole thread was the result of Druxey's question to Wefalck "This sounds like a very versatile tool, Wefalck! At low setting, have you used it for bending wood?" and his Answer "No, had no need (yet)" Having made a steam box to bend small pieces of wood and also watched Chuck's planking video where he bends a small piece of wood with a regular hair drier type hot air gun, I thought it would be worth following up on Druxey's question, will I use this for all my heat bending in the future probably not but i will definitely use it for quite a few time that I need to bend a small piece of wood. Don I have not tried to edge bend yet I suspect that it will work well enough the key it my view is to ensure that the wood stays flat as the bending is done, perhaps another form of jig needs to be devised which can be as simple as small wooden clamps set to prevent the the tendency for the wood to want to rotate to bend in the thin direction. Michael
-
Very nice way to produce a set of matching finger joints on a set of skylights, I like it and have filed it away for future use. Michael
-
Really beautiful workmanship on the rigging Chuck. Michael
- 1,051 replies
-
- 7
-
-
- cheerful
- Syren Ship Model Company
- (and 1 more)
-
Frankie, I respectfully have to disagree with you on this one. I can shave with the # 11 that I resharpen. just because a tool was designed to be thrown away, doesn't mean that you have to follow the rules. I haven't purchased a new #11 since 1984 Michael
-
Thanks for all the visits and positive comments. My new miniature sander works nicely by using the same principle as when I was sanding drywall I can get a nice even pressure in some tight corners. Michael
- 749 replies
-
- 18
-
-
- albertic
- ocean liner
- (and 2 more)
-
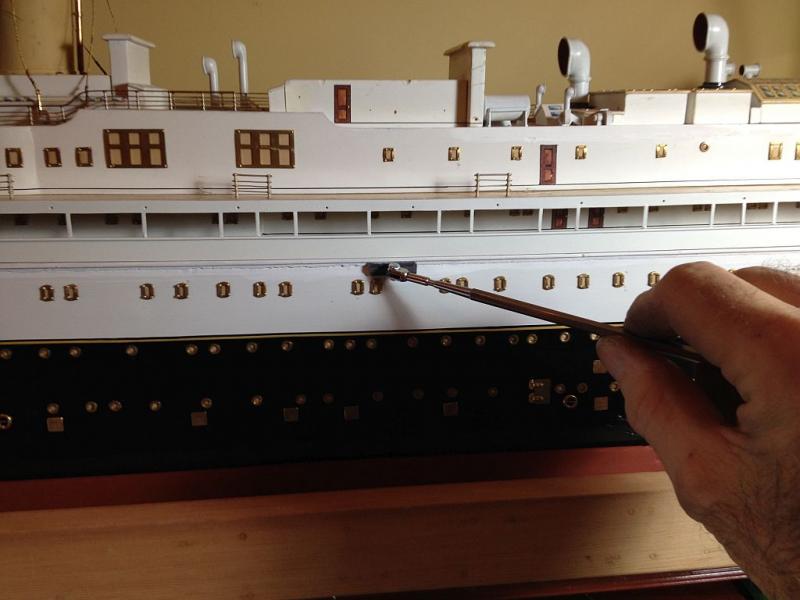
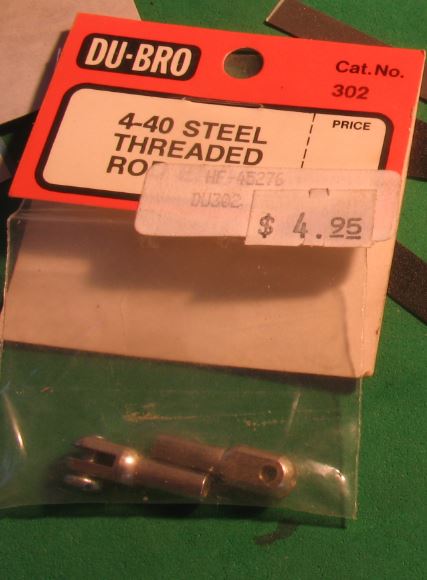
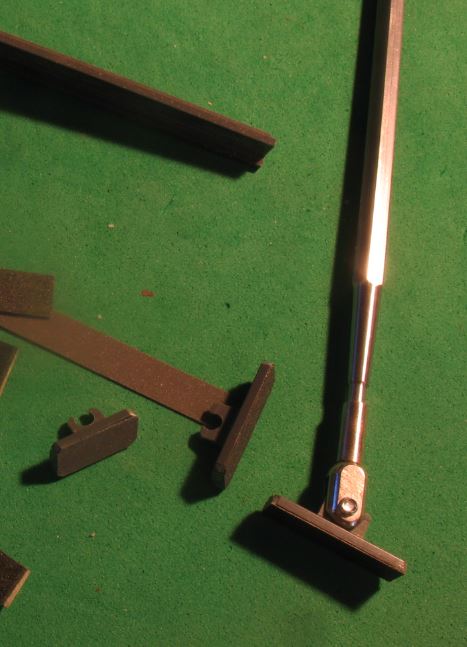
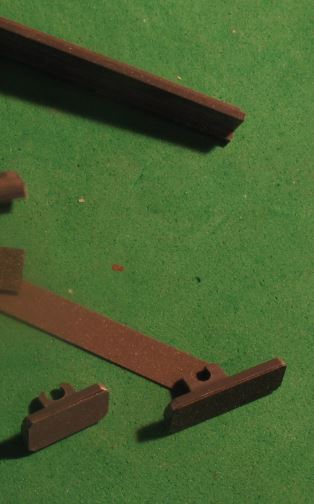
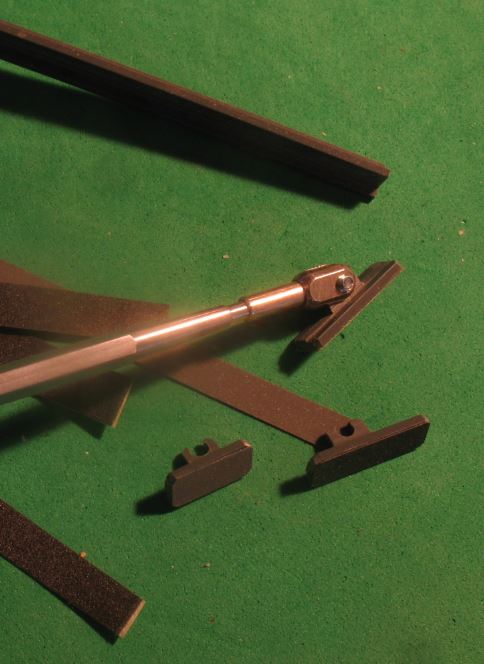
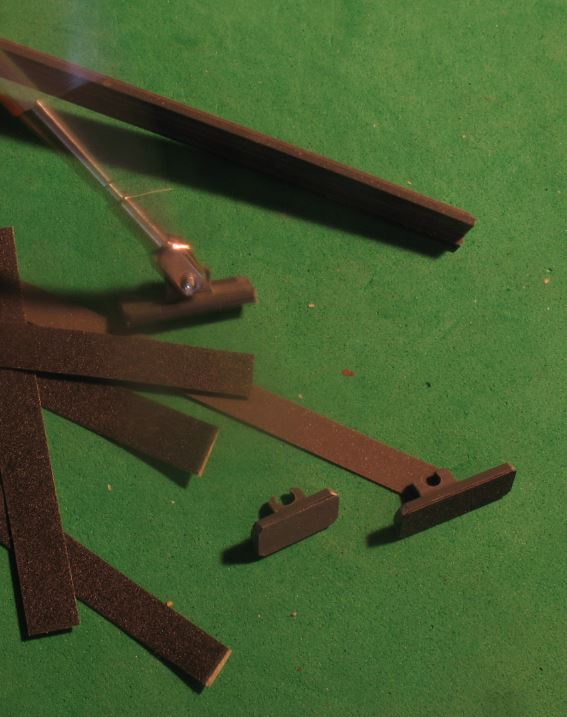
I have been making up small sanding pads on the ends of some small section sticks to get to some tight spots on the ship restoration. Perhaps it was reading Stunt Flyer's build log and seeing the control line model on the wall, but something clicked. I went to the resource drawer and rummaged through the model airplane control bits and found just what I needed. I had some nice steel 3/16 hex stock on the shelf tapered one end and reduced the diameter to thread for 4 x 40 so that I could attach the control end. Then I pulled a length of Plastruct "T" section out of the plastic bin to make some pads I drilled the tabs so that they would snap onto the bolt in the end of the control link, this way I can make a number of different lengths and stick different grits or polishing fabric to the pads It seems to work well, I guess all that drywall sanding when I built this place stuck in the back of my mind. Now sanding the side of the hull will be much easier for the little helpers. Michael
- 2 replies
-
- 25
-
-
Very clean work Mike. and thanks for the info on the camera. Michael
- 452 replies
-
- 3
-
-
- cheerful
- Syren Ship Model Company
- (and 1 more)
-
Another third hand
michael mott replied to michael mott's topic in Modeling tools and Workshop Equipment
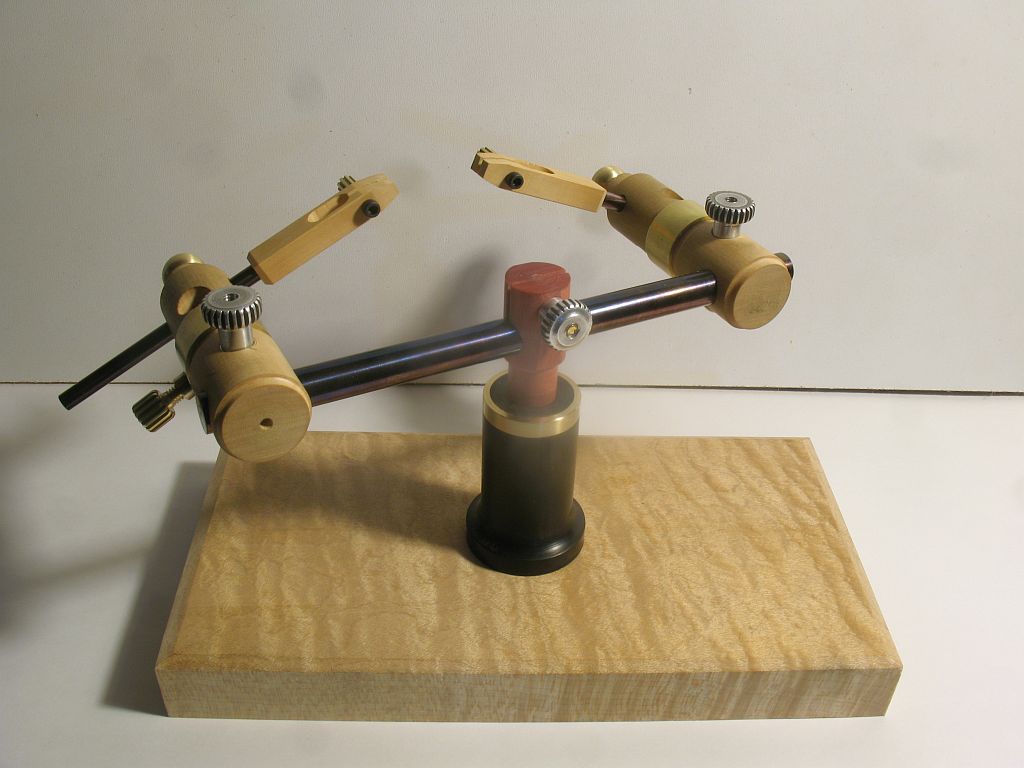
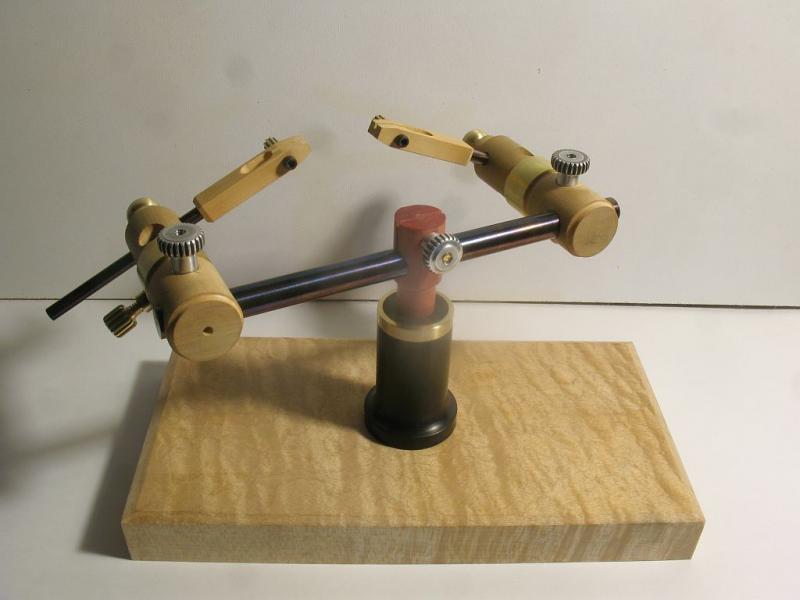
The simple inexpensive third hand is good but I just could not leave it there. I had to try a few more Ideas. A couple of different ways to clamp the parts together without marring any finishes, using split nuts etc. Castello, Padouk, Ebony, Fiddleback Maple, Brass, and Blued steel This one is strictly for rope rigging tasks. Michael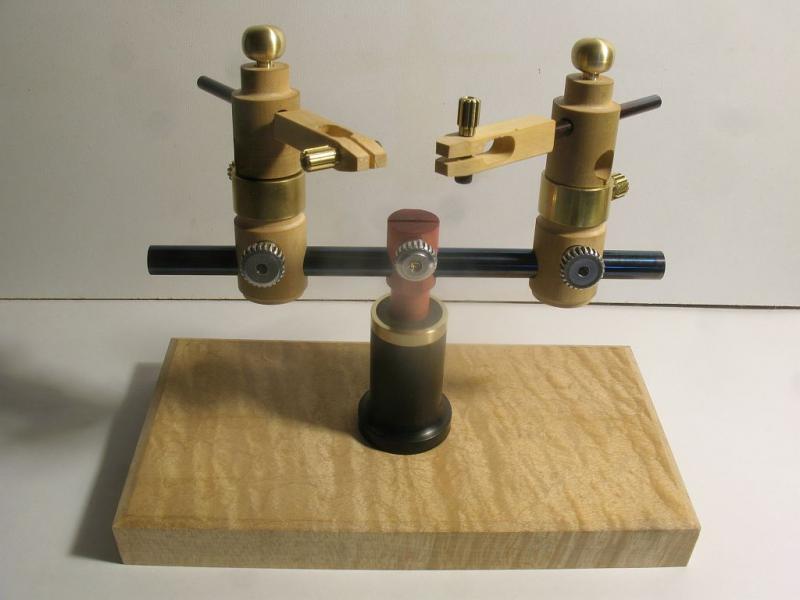
- 13 replies
-
- 13
-
-
Pierre, that looks just a bit too tidy..... Are you sure that you actually work in there? Very nice workspace. Michael
-
Steve I like the engine a perfect size for miniature machine work, Are you going to paint it and leave the brass work as a contrast? Michael
- 208 replies
-
- 3
-
-
- john cudahy
- finished
- (and 1 more)
-
Looks like a great start Mike, any particular reason you chose Beech wood? Michael
-
Thanks for posting the sailing video of Carrianne Bill, looks like a great way to spend an afternoon or two or three. The sloop is looking very sharp. Michael
-
Some criteria for starting a new group project
michael mott replied to Chuck's topic in Group Projects on Model Ship World
I too am interested in this one, I need to make sails for two sailboats and some hands on experience would be good, it is an area that I have been avoiding for a while now. Michael -
Beautiful work on the hinges Keith., I just found some 1/32 brass tube so I am going to try your method for some small hinges. Michael
-
Looks great Mark, but I'm still waiting for that large sheet to be removed. Michael
-
Another third hand
michael mott replied to michael mott's topic in Modeling tools and Workshop Equipment
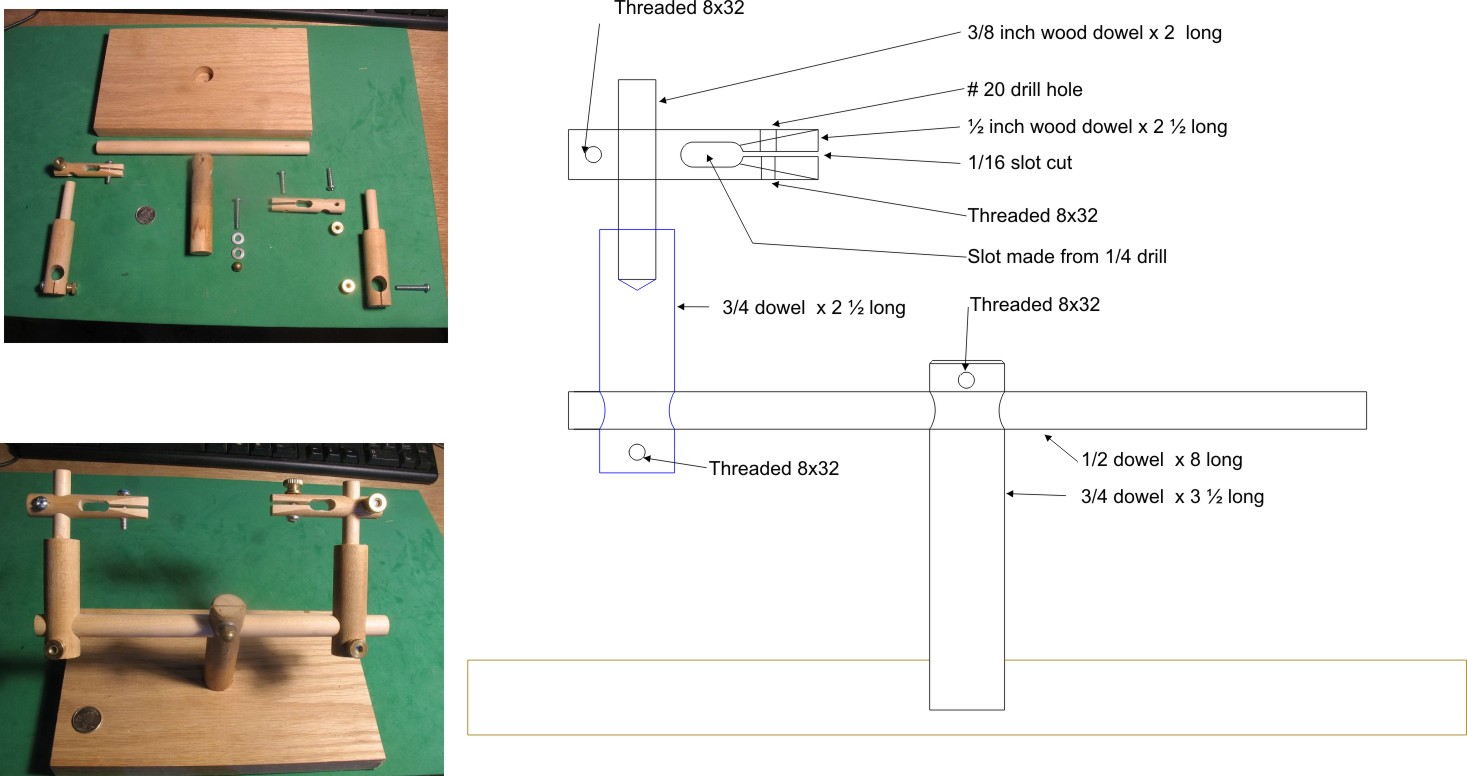
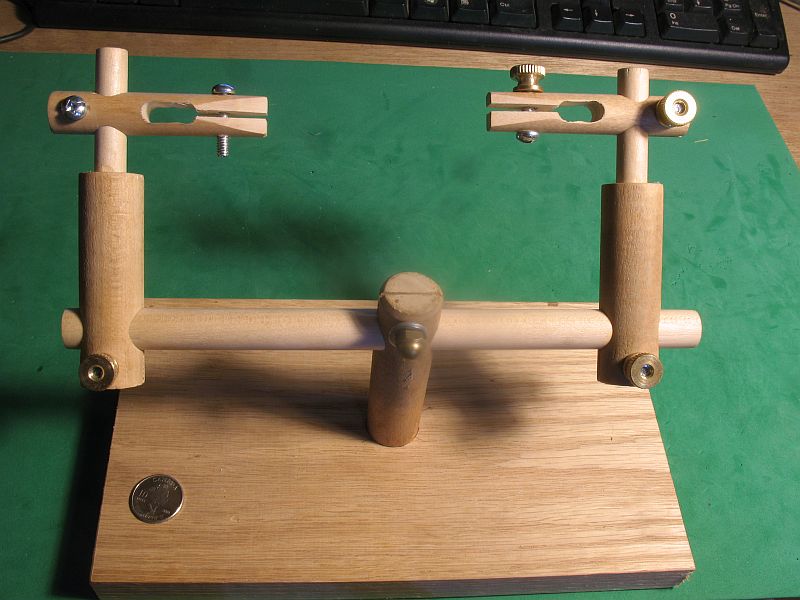
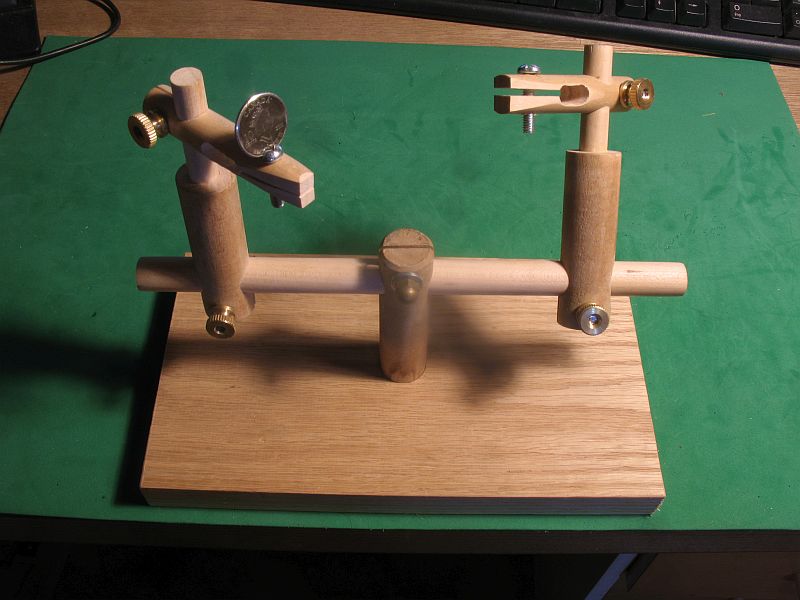
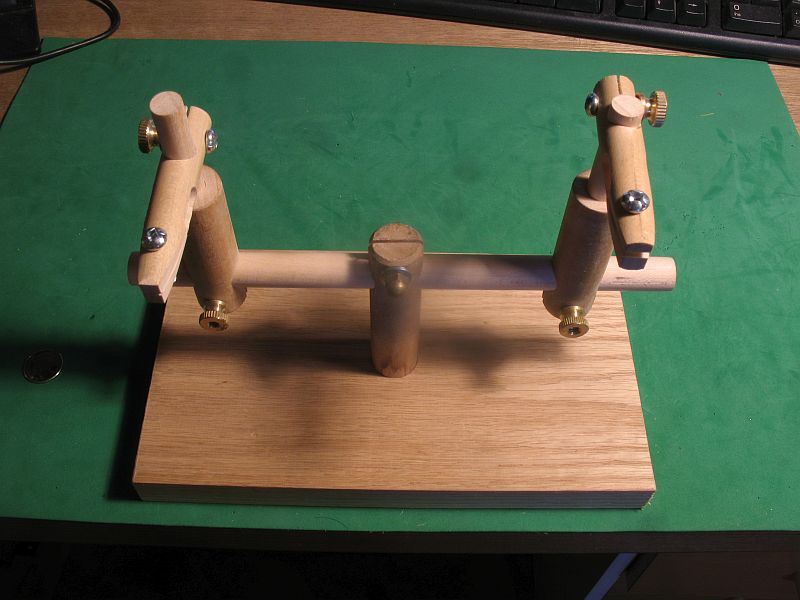
I should have just posted this here. Jim thanks for the compliment The tool is made from stock wooden dowel 1 x 3/4 x 3 1/2 long 2 x 3/4 x 2 1/2 long 1 x 1/2 x 8 long 2 x 1/2 x 2 1/2 long 2 x 3/8 x 2 long 6 off 8 x 32 x 3/4 long round head machine screws 1 off 8 x 32 x 1 long round head machine screws 7 off 8 x 32 brass thumb nuts 1 piece wood for base, mine is 8 x 4 1/2 x 3/4 oak The top clamp arms do not have the second rotation but for most tasks this would not be an issue there is still lots of control, and on my one I ran out of brass thumb nuts so I had to use different nut on the base post, and the 8 x 32 round head screws are reversed on one side to show that it can be done without the brass thumb nuts. basically the screws are threaded in from the bottom with the clearance hole on the top so that the brass thumb screw presses the top half of the dowel down. without the thumb nuts the machine screw pulls down the wood. wood third hand tool.pdf 287.75KB 0 downloads So I hope that this information is useful to those who want to make one for themselves The only machine tool I used was a drill press to drill all the holes, this could have been accomplished with a good hand drill hand tools included a small back saw a hack saw a thin file an 8 x 32 second tap Michael- 13 replies
-
- 11
-
-
Well that is just what I did all day today. The tool is made from stock wooden dowel 1 x 3/4 x 3 1/2 long 2 x 3/4 x 2 1/2 long 1 x 1/2 x 8 long 2 x 1/2 x 2 1/2 long 2 x 3/8 x 2 long 6 off 8 x 32 x 3/4 long round head machine screws 1 off 8 x 32 x 1 long round head machine screws 7 off 8 x 32 brass thumb nuts 1 piece wood for base, mine is 8 x 4 1/2 x 3/4 oak The top clamp arms do not have the second rotation but for most tasks this would not be an issue there is still lots of control, and on my one I ran out of brass thumb nuts so I had to use different nut on the base post, and the 8 x 32 round head screws are reversed on one side to show that it can be done without the brass thumb nuts. basically the screws are threaded in from the bottom with the clearance hole on the top so that the brass thumb screw presses the top half of the dowel down. without the thumb nuts the machine screw pulls down the wood. wood third hand tool.pdf So I hope that this information is useful to those who want to make one for themselves The only machine tool I used was a drill press to drill all the holes, this could have been accomplished with a good hand drill hand tools included a small back saw a hack saw a thin file an 8 x 32 second tap Michael

- 749 replies
-
- 18
-
-
- albertic
- ocean liner
- (and 2 more)