michael mott
-
Posts
5,200 -
Joined
-
Last visited
Content Type
Profiles
Forums
Gallery
Events
Everything posted by michael mott
-
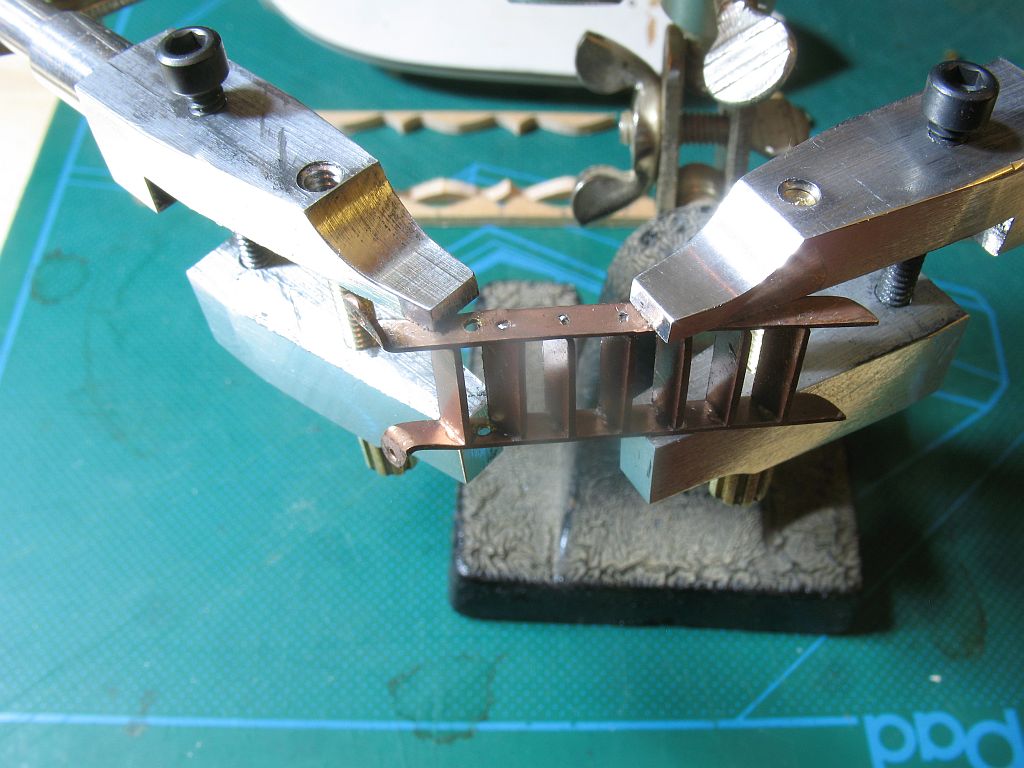
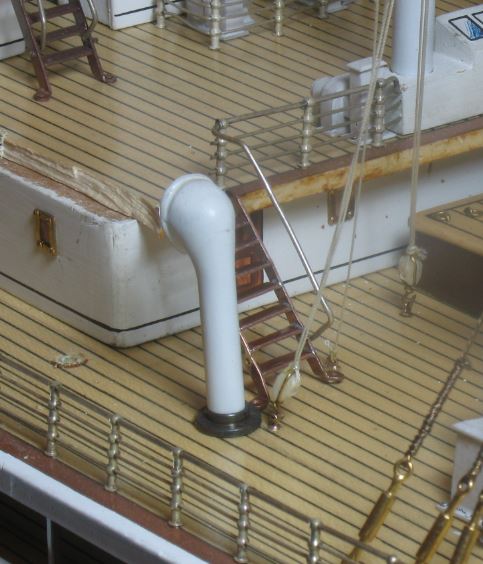
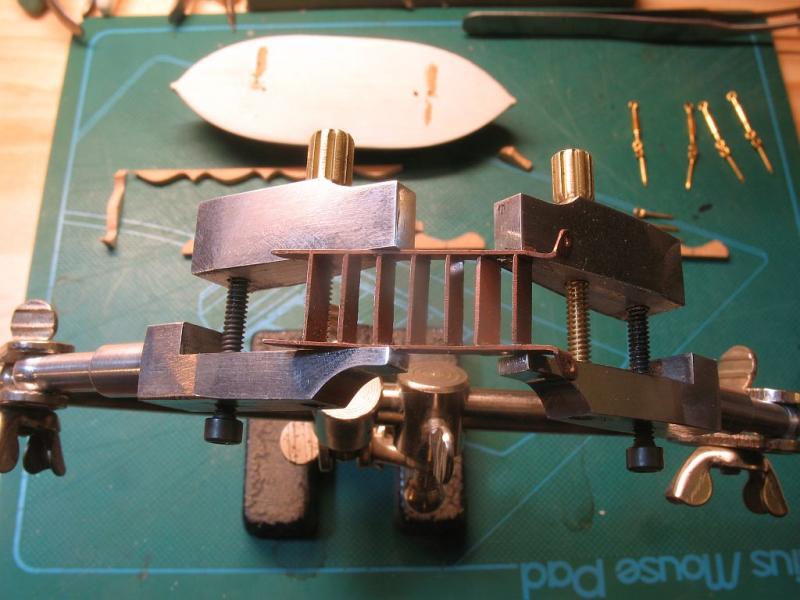
 Druxey thanks for your kind comment. Gary, thanks for dropping by. This evening I used the new third hand to aid in soldering the aft stairs back together, it took a little while to get the hang of adjusting the fixture, but the control is super, I am pleased with the operational aspects of it. Did not take any pics of the actual soldering but after washing it off I used the fixed stairs to reshape the starboard handrail, the port handrail is still fixed to the lifeboat deck. So from here to here Michael
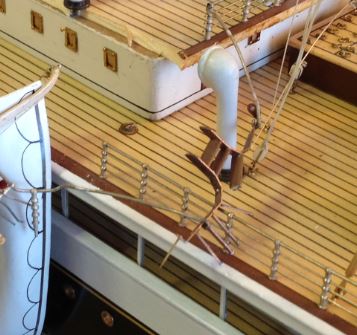
- 749 replies
-
- 16
-

-
- albertic
- ocean liner
- (and 2 more)
-
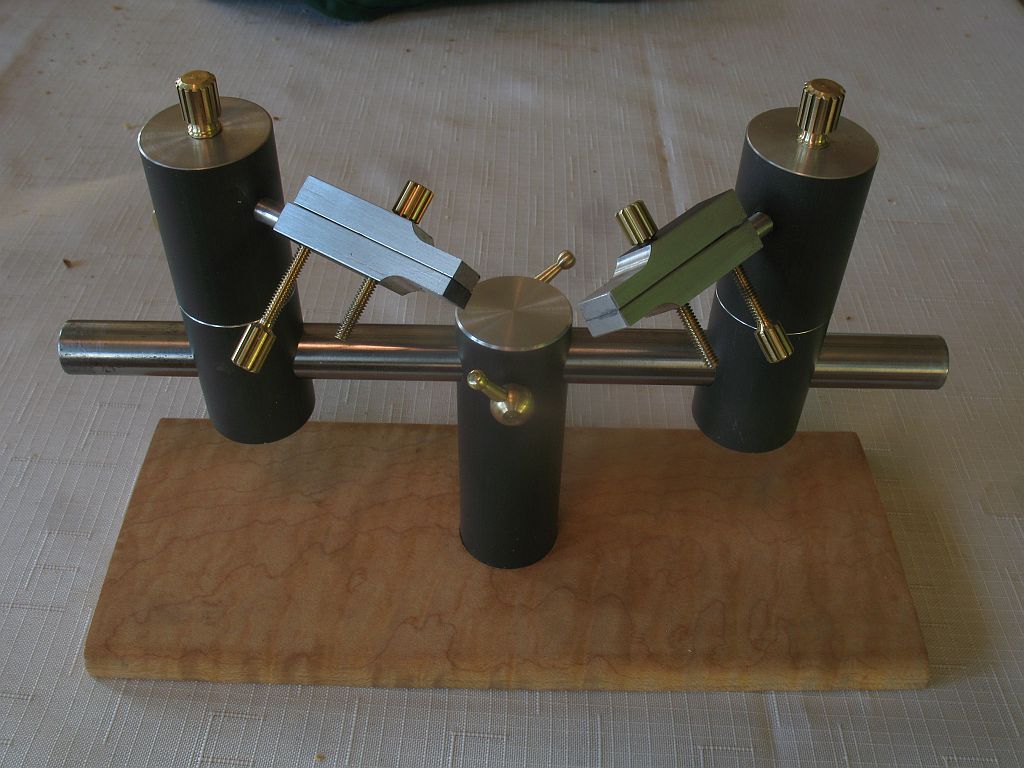
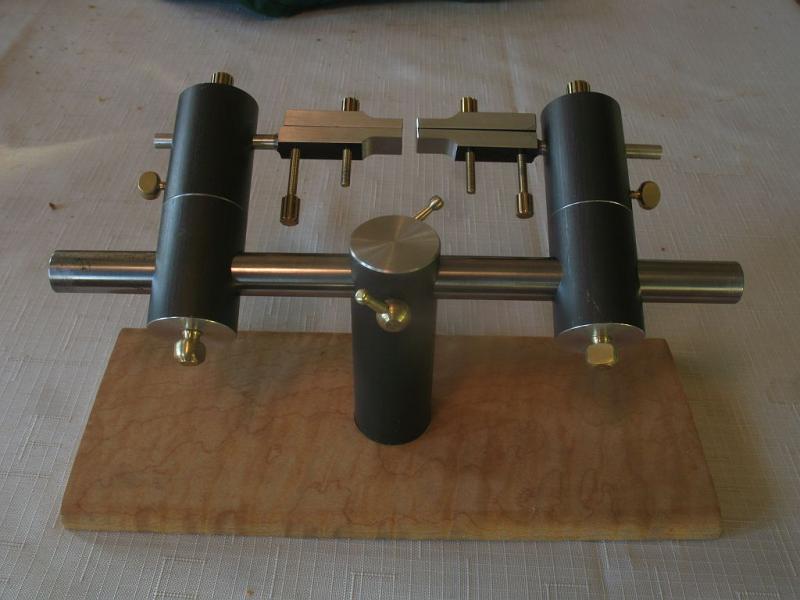
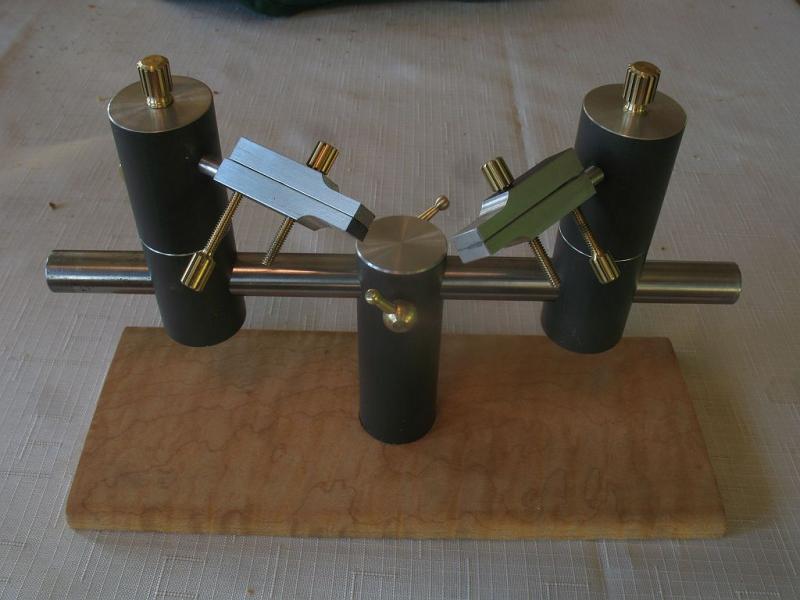
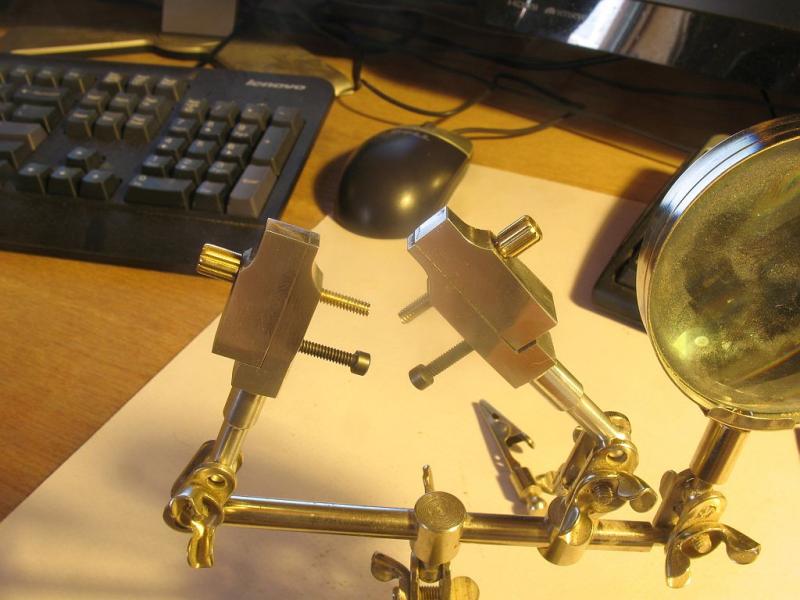
Wefalck, I have not resolved it yet I am getting the brass wire on Monday, I have to maintain the same color as the other wires. Regarding the soldering station. I am thinking about some jaws as heat sinks and some not. Thanks for the links I will have a look when I get back from the city later tonight. Carl thanks for your feedback on the fixture. Here is the latest version Mark 3 I made a different base that is a little wider front to back, this one a scrap of fiddle-back Maple I will use the birds eye for some other tool down the road. This new configuration allows for all the screws to be tightened by hand without the Tommy bar, it also has the advantage of being able to now rotate the set up by loosening the central screws . Michael PS The doc says my shin is healing well but I am not quite out of the woods yet.
- 749 replies
-
- 16
-
-
- albertic
- ocean liner
- (and 2 more)
-
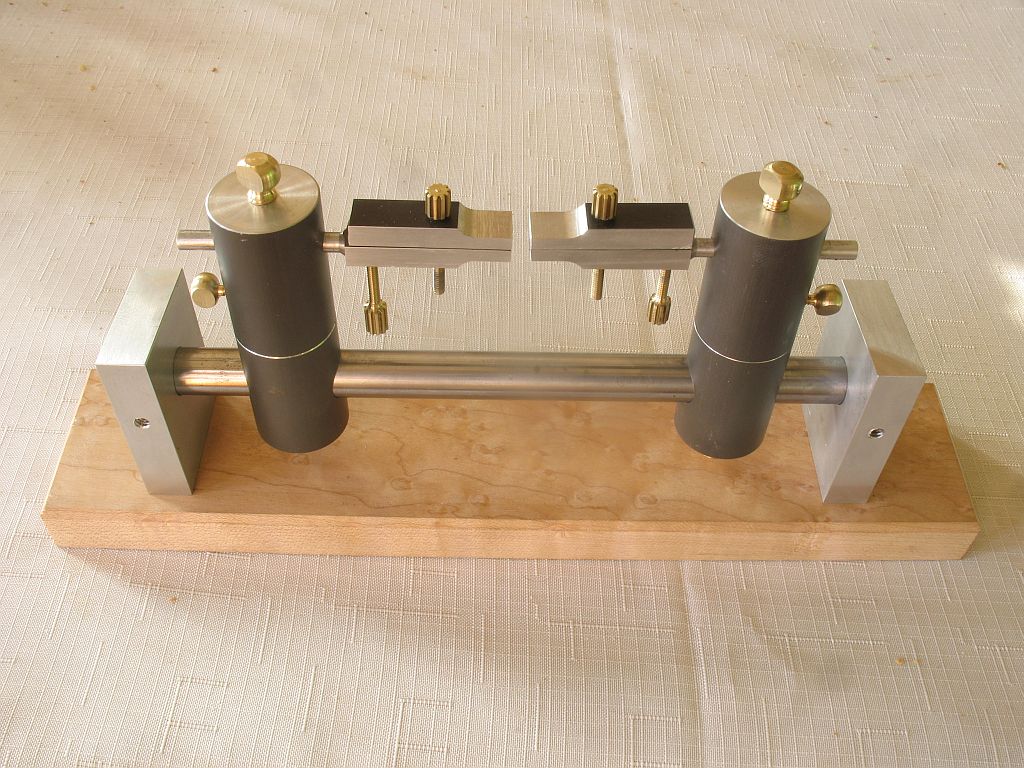
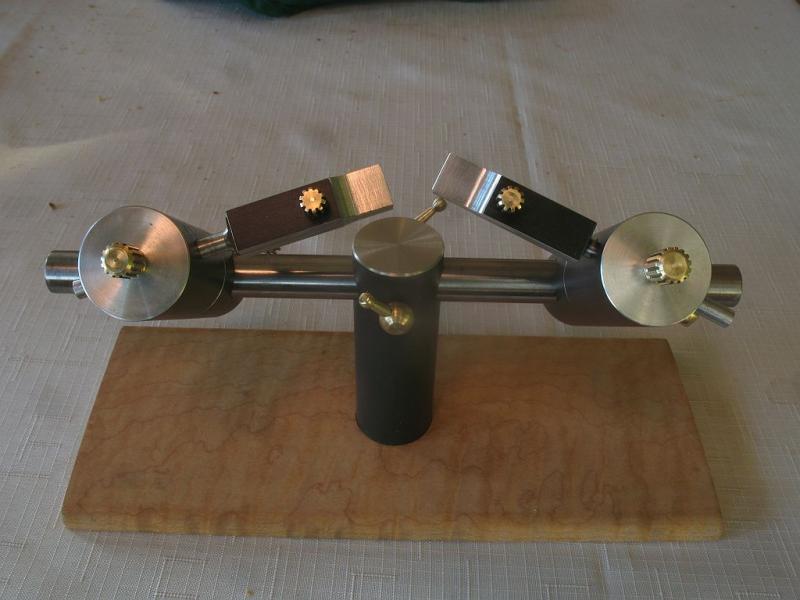
Thanks for the thoughts about the fixture being art. Druxey, and interesting thought. The current design was something that developed as a result of the bottom locking screw being on the bottom instead of the side, and the difficulty of reaching in under the unit in the upright position. Like all tools this one is a work in progress. The use of it will no doubt induce further refinements. The first being the way the the horizontal bar is mounted. Unlike the commercial one I chose to mount the bar with a support at each end. In retrospect perhaps a central support, and higher off the base would be a better design. The old saying that "form follows function" is clearly being compromised in the present design....... I'm workin' on it. Michael
- 749 replies
-
- 7
-
-
- albertic
- ocean liner
- (and 2 more)
-
Nils because of my own project I am seeing just how much fine work you have accomplished with this ship. The thing that just struck me though is the small size of the base on which the model is sitting. It would make me very nervous with such long overhangs. Michael
- 2,625 replies
-
- 4
-
-
- kaiser wilhelm der grosse
- passenger steamer
- (and 1 more)
-
Mike a beautiful job on your construction so far. I smiled at the juxtaposition of the jewelers saw and Axe on the wall in the background...... both ends of the cutting tool spectrum. Michael
-
MONTAÑES by Amalio
michael mott replied to Amalio's topic in - Build logs for subjects built 1751 - 1800
Beautiful lines of clean planking. Michael -
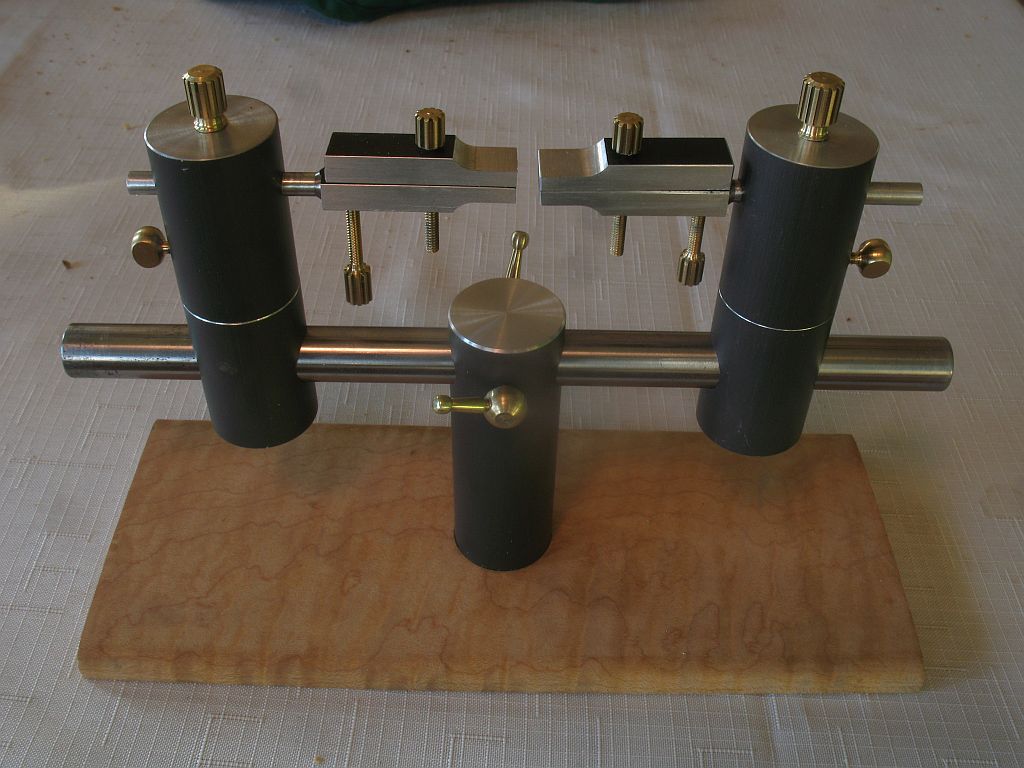
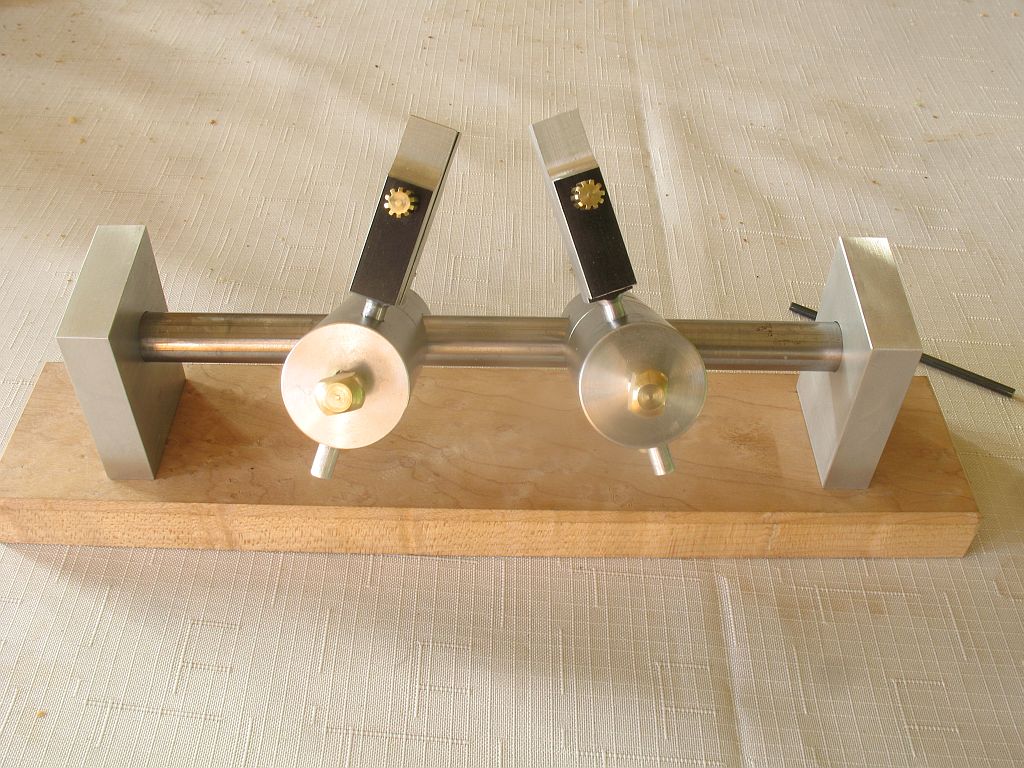
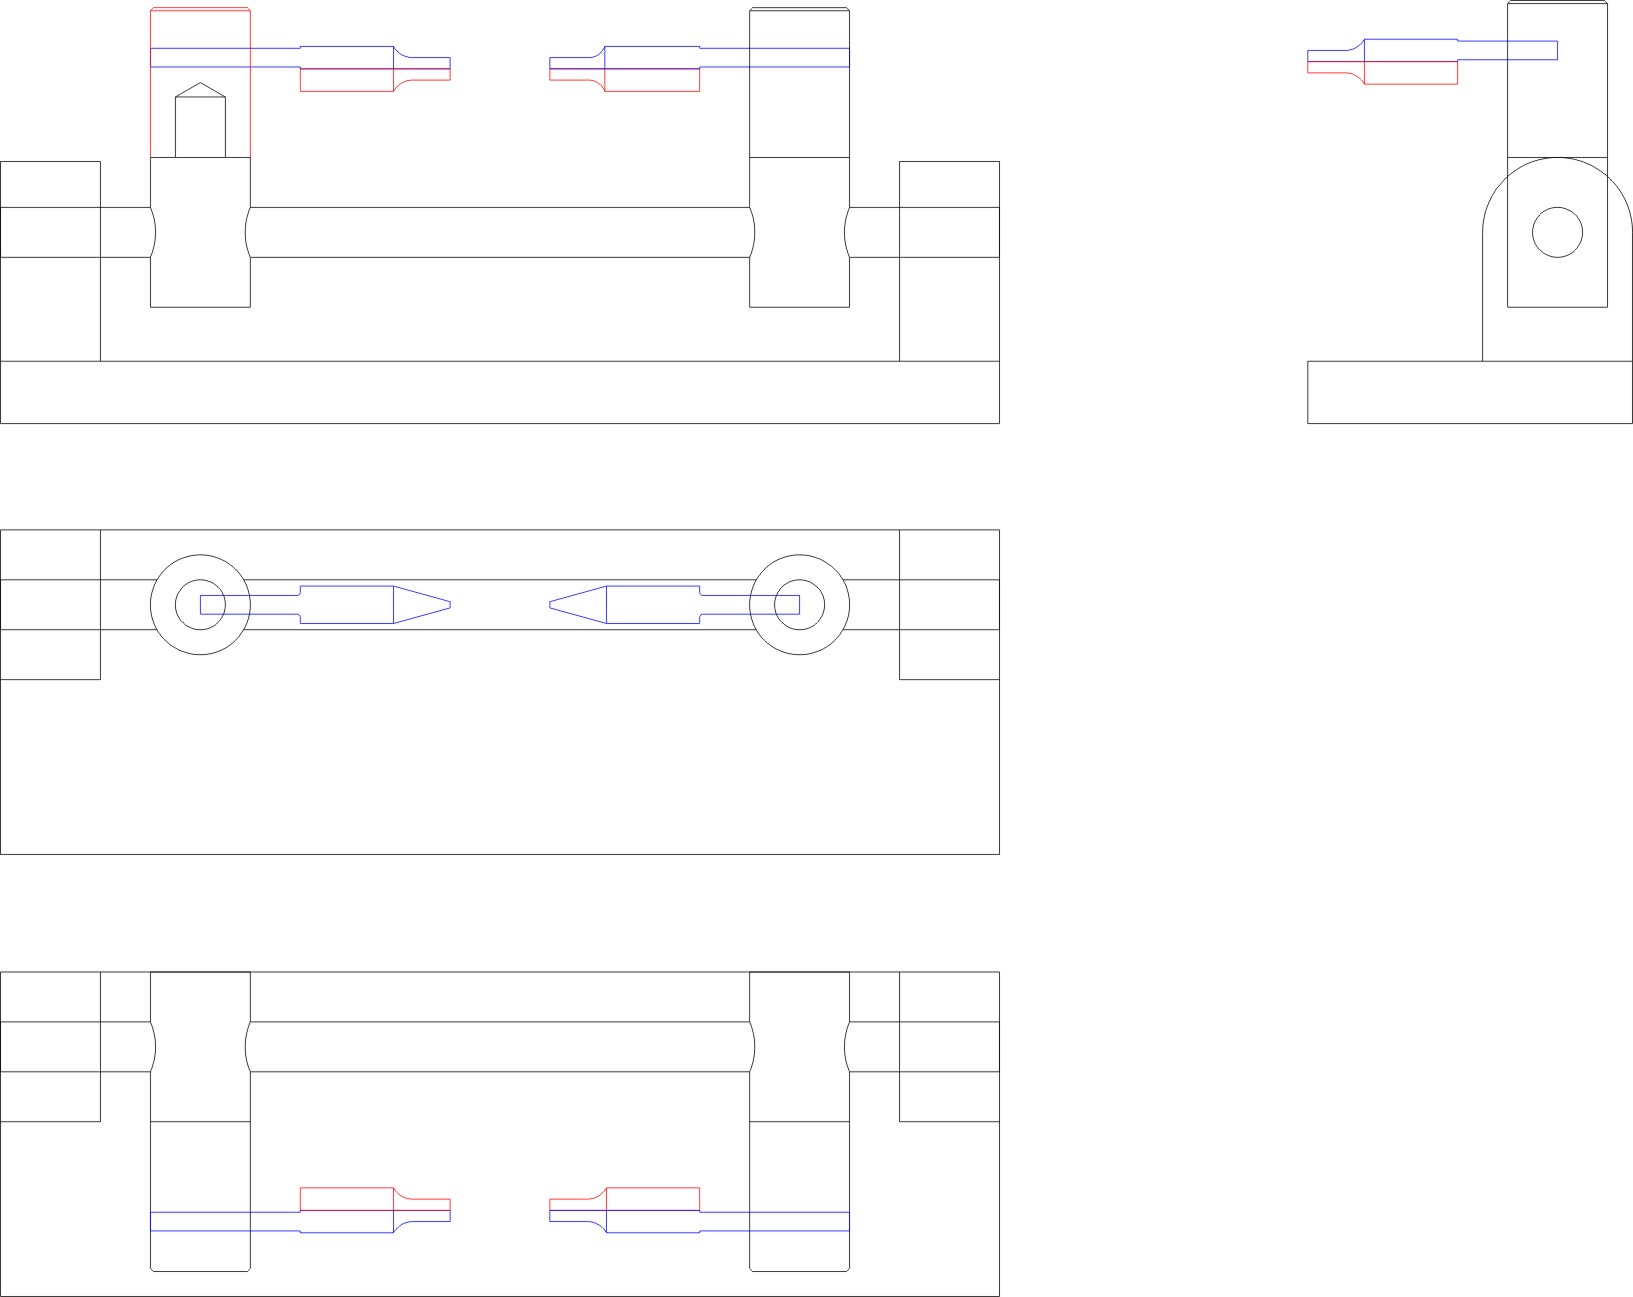
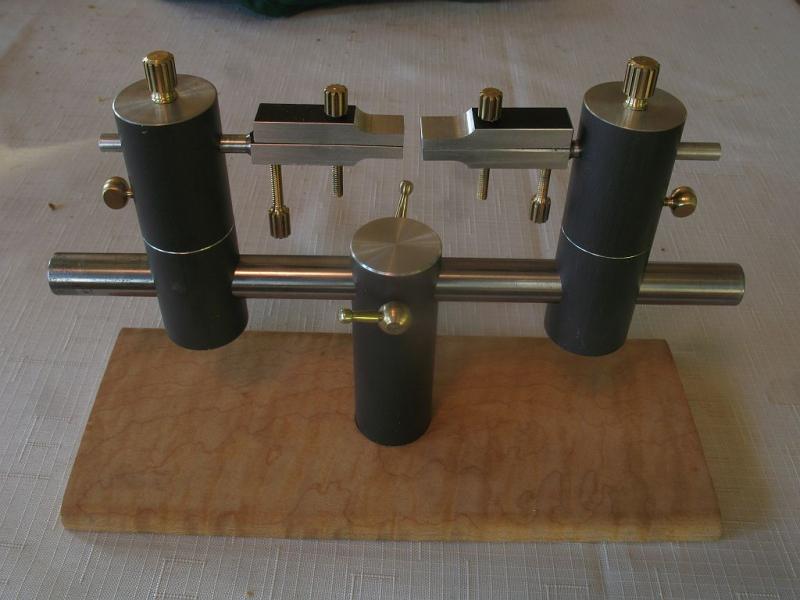
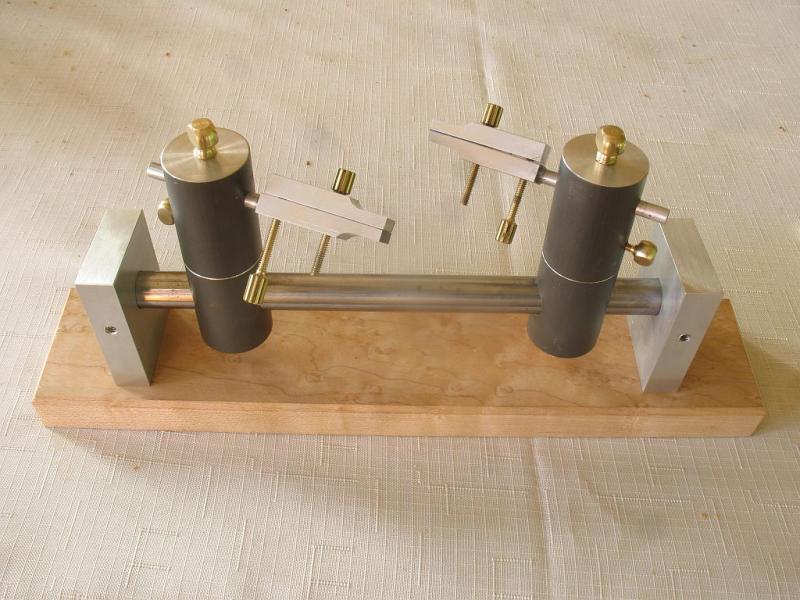
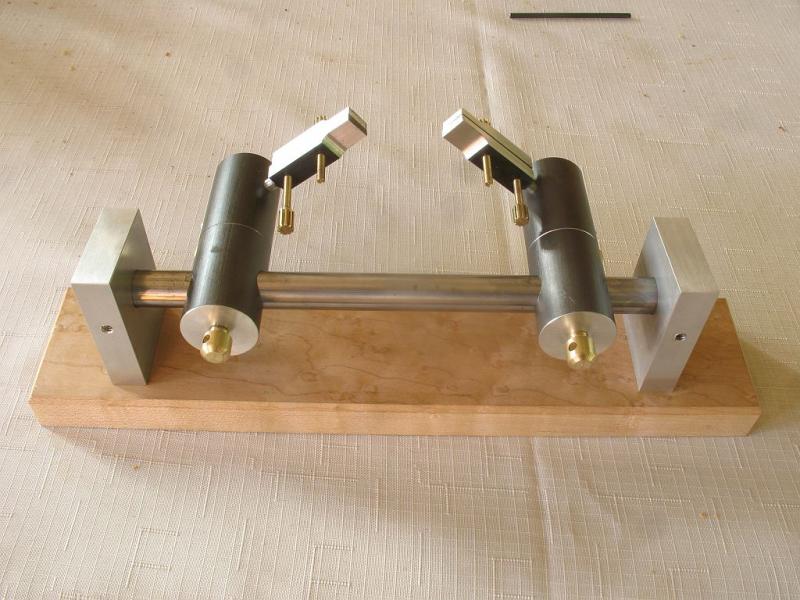
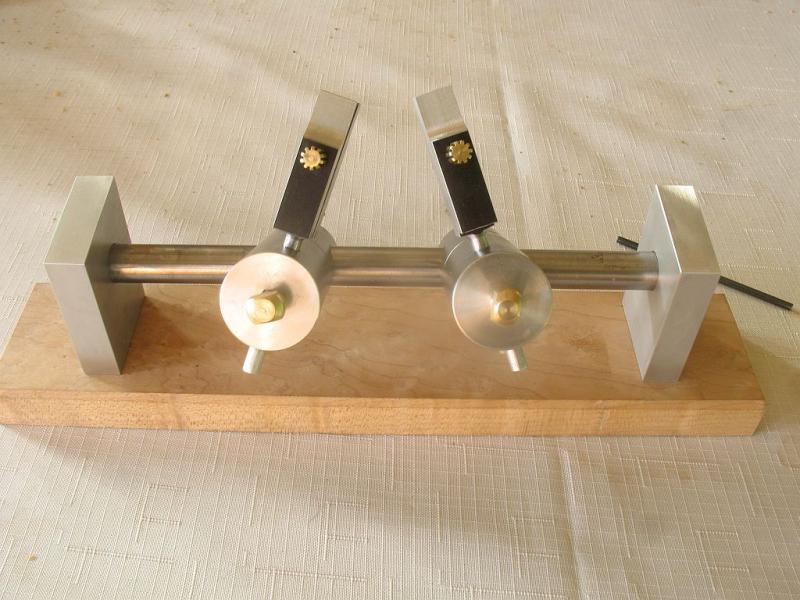
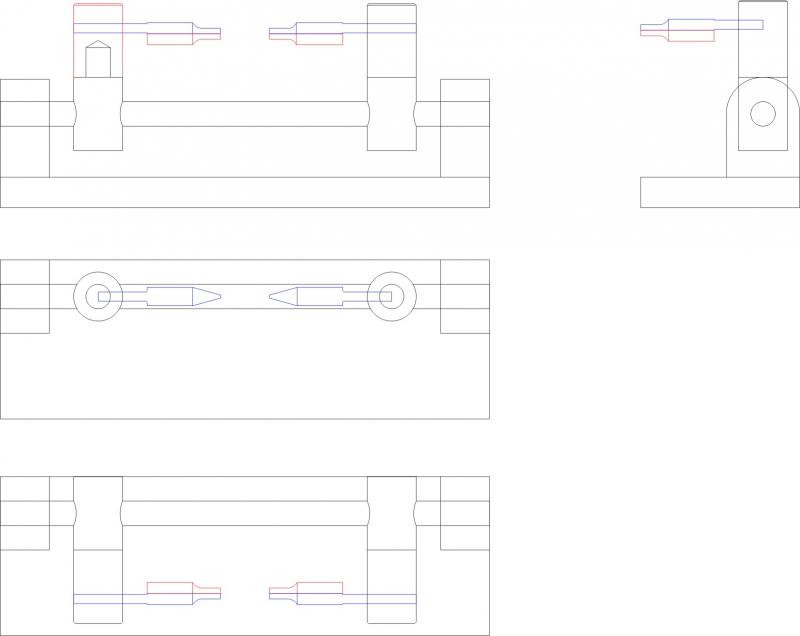
Version 2 of the third hand device, I raided the scrap metal pile, and with a bit of cutting, milling, and Lathe work, came up with a more controllable fixture. Gerald's tools are definitely an inspiration to make better tooling. The clamps are easily removed, and different jaws are able to be inserted. All the rest of the materials are left over bits or salvaged material. The anodized aluminum for the clamps is the same material that I used for Maria's lee boards The small 4x40 clamp screws are made from some 11 tooth brass pinion stock. The top thumb screws are 1/4 x 28 made from some 3/8 brass rod. The side rotation lock screws are 4x40 and also made from 3/8 brass rod. The bottom lock screws are also 1/4 x 28 and are locked with some 1/8th rod Here is a simple drawing, it was mostly a concept drawing and it was followed for the 1" diameter rotating elements soldering tool.pdf Michael

- 749 replies
-
- 19
-
-
- albertic
- ocean liner
- (and 2 more)
-
Nils, the soldering on this model all appears to be soft solder. I have an electronic Weller soldering station with adjustable temp settings, so I will be using it. The overpainting was very poorly done, there are heavy brush strokes, with the color laid on horizontally on the upper band and vertically on the lower portion. The paint is also uneven around the gold bands. I will do the color trials when the light is even later in the day. Oh and by the way the folk who you recommended for the Humbrol paint were very efficient and I have the paint already. Again thank you to all who are interested in this project and who have shown it by visiting. Michael
- 749 replies
-
- 7
-
-
- albertic
- ocean liner
- (and 2 more)
-
John Yes I hear what you are saying. I found the comments about the lack of authentic information relating to the original White star color, interesting all the same. Because the paint on the funnels on the model are really quite rough, and the fall chipped the paint off in a few spots. I think that matching a hue that when dry is as close a match to what is on them at the moment. Then I can clean them up and repaint them. The big question is to take them to the Bassett Lowke finish or the repainted finish. Michael
- 749 replies
-
- 5
-
-
- albertic
- ocean liner
- (and 2 more)
-
Had a really good look at the funnels today regarding the color of the white star line, The funnels on the model are quite grubby and there are a lot of little chips and dirt marks, they have definitely been repainted at some time. They are the only parts of the ship that are painted the funnel color. The repaint was fairly sloppy over the gold bands. I am considering completely repainting the funnels. The website I linked has some interesting comments about the color of the funnels of the white star line. What do the members think about this particular issue? Michael
- 749 replies
-
- 6
-
-
- albertic
- ocean liner
- (and 2 more)
-
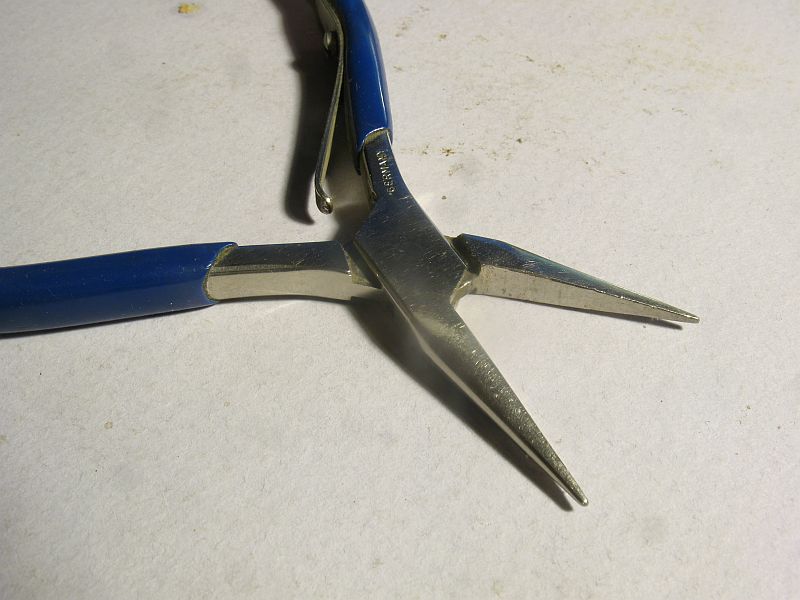
Druxey all the parallel pliers I have seen have been rather beefy regarding the jaws. I found that the very fine 5 inch needle nose that I have worked very well at getting in between the steps. the pliers are completely smooth inside the jaws so they do not mark the metal that is being gripped. I cannot remember when I purchased them but it must be at least 30 years ago and they still seem good as new and there are a ton of squeezes on them. Michael
- 749 replies
-
- 7
-
-
- albertic
- ocean liner
- (and 2 more)
-
Vaddoc that stem looks like it glued up really well, with such fine veneers it will look almost like a piece of solid wood bent. Michael
-
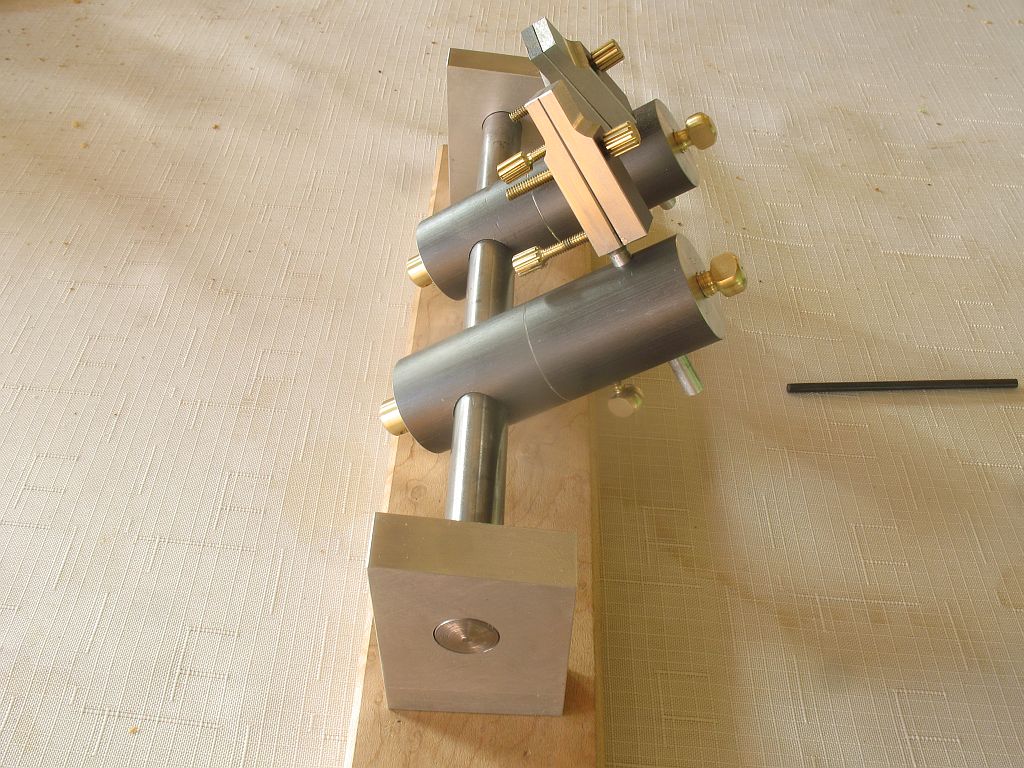
John thanks I am working on a new base for the clamps I want something a little more positive and rigid the little plates that hold the clamps are a bit fiddly. Joe the clamps I made are similar in their function to these little machinists clamps clamps from Lee Valley Michael
- 749 replies
-
- 3
-
-
- albertic
- ocean liner
- (and 2 more)
-
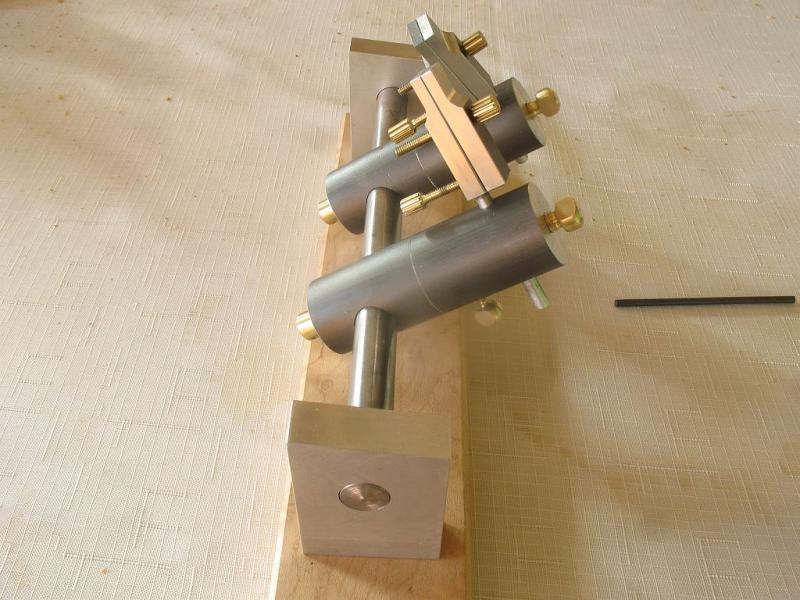
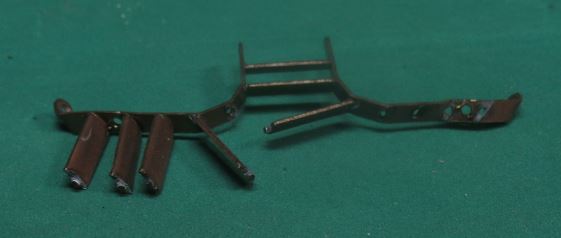
Thanks for all the positive comments. Inspired by Gerald's machine tools for working on his Clyde model I did a small upgrade to this little holding fixture, I can see further modifications in the wings. I needed some better clamping elements and so made some up along the lines of the tiny toolmakers clamps that Lee Valley sells that Gaetan recommended. I needed a good way to hold the aft stairs while soldering them back together. after removing them this is what I started with. after some careful bending with some fine needle nosed pliers I managed to get them back into a reasonable resemblance of their former shape. The new holding clamps will allow me to re-solder the steps tomorrow. Michael


- 749 replies
-
- 19
-
-
- albertic
- ocean liner
- (and 2 more)
-
Checking the roundness with the drafting template is such a simple idea, I have used shaped templates my whole modelmaking career, and never though about using one of these. It is this sort of out of the box thinking that I find so inspiring. A question Ed, the clamping plate and clamps that you show in the first pic of the milling of the mast, did you make these or are they a commercial item? Michael
- 3,618 replies
-
- 6
-
-
- young america
- clipper
- (and 1 more)
-
Cutty Sark by NenadM
michael mott replied to NenadM's topic in - Build logs for subjects built 1851 - 1900
Nenad folding up the second canvas is a brilliant solution in my view. Getting ready to lay it out or folding it up ready to open the hatch, perfectly ambiguous but a good looking detail. Michael- 4,152 replies
-
- 10
-
-
- cutty sark
- tehnodidakta
- (and 1 more)
-
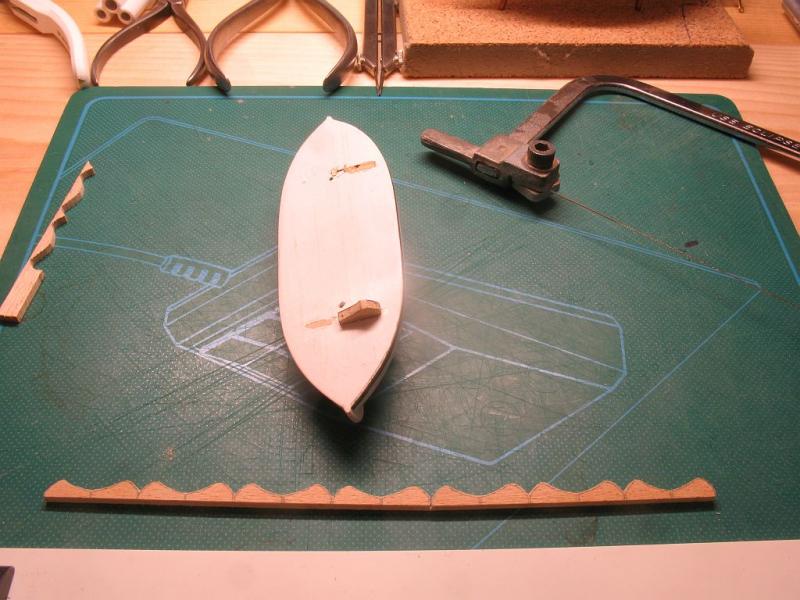
The new model space is working out very well, feels very comfortable, and the worry of variable temperature affecting the model is gone. Put a small strip light over the new work area under the ship. The collapsible lifeboats lost all of the small wood cradles except one, I used it as a template and did the first rough shaping of 14 pieces with the jewelers saw. 1 more to go I need to set up a small vice next in order to file them down to the final size. then I will separate them all. I did think about it Denis but decided to keep it simple. And I am also getting inspired to work on the cutter as well now. I am beginning to see the advantages of having a clean room as well as the workshop for the different types of work. Michael
- 749 replies
-
- 15
-
-
- albertic
- ocean liner
- (and 2 more)
-
Or even loading for that matter. Michael
- 1,051 replies
-
- 2
-
-
- cheerful
- Syren Ship Model Company
- (and 1 more)
-
Thanks frank, I thought it might be Corian, it is a good material for these types of jigs. it is actually a good all round material for a few applications. and off-cuts are easy to come by at the kitchen counter suppliers. Michael
- 649 replies
-
- 5
-
-
- dunbrody
- famine ship
- (and 2 more)
-
Frank very nicely done on the spider band. Some of your pictures show a non metallic jig material, is it Corian or one of the same type of substrates, or something else entirely? Michael
- 649 replies
-
- 5
-
-
- dunbrody
- famine ship
- (and 2 more)
-
Very nice work on the running light I shall remember the way you achieved the recessed glass part. Michael
-
Dave that bowsprit rigging looks to be as challenging a piece of rigging as any that I have seen well done. Michael
- 962 replies
-
- 5
-
-
- sovereign of the seas
- ship of the line
- (and 1 more)
-
Oh this is going to be a lot of fun to follow, I'm in the one of the front row seats. Micheal
-
Wow!! I really like the flag cabinet and the drawer the seats look like white vinyl or Leather. Michael