michael mott
-
Posts
5,200 -
Joined
-
Last visited
Content Type
Profiles
Forums
Gallery
Events
Everything posted by michael mott
-
 I shall also see how that works, thanks for the tip. Michael
 -
Buck, that is superb work on the hinge and the screws. Thanks for the tip about enlarging the images on the screen I did not know that one. Michael
- 515 replies
-
- 3
-

-
- artesania latina
- whaleboat
- (and 1 more)
-
The story of the chain falling down the hole had me laughing to myself... at your expense of course. Super details, they just keep appearing, very inspiring and you sound like you are having a lot of fun. Watch out for that spear fishing though it can be tough on the paws. Michael
-
Keith if you put a sharp point in your mill and just use it to make a small spot like a centre punch go along and index each position make the spots then back track the mill table replace the point with your drill and index as you drill each hole they will all be in line. Michael
-
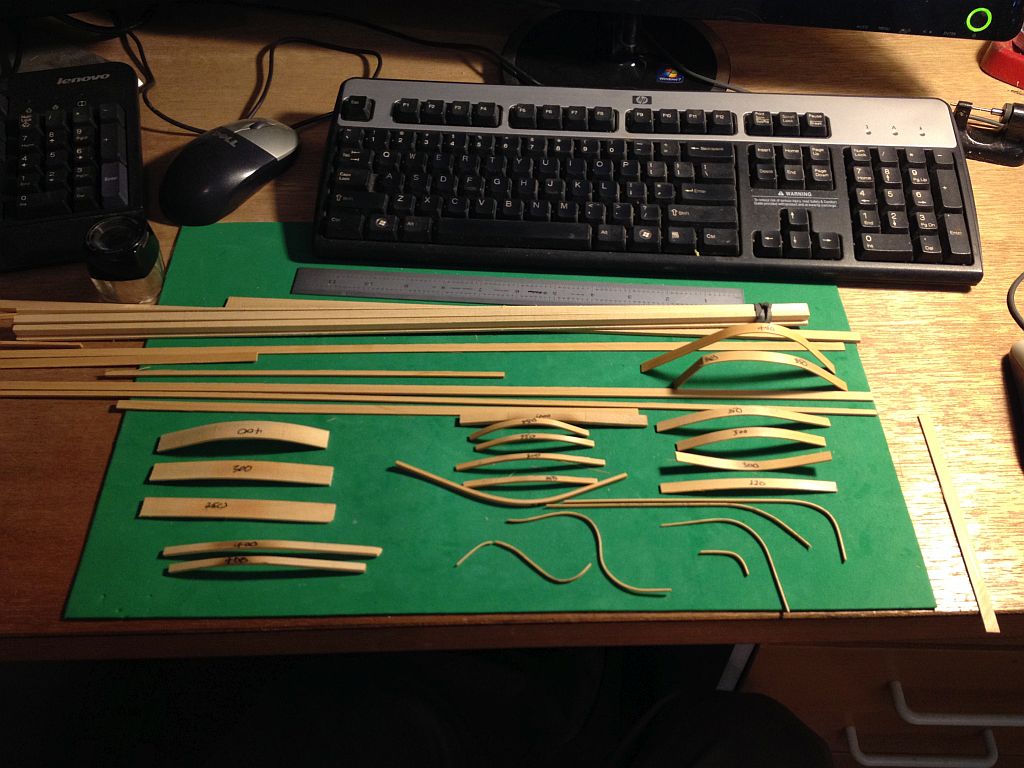
Brian I take it then that you do not use scalpels or micro saws or modern glues, but get out the adze or take a spell in the saw pit then split up some treenails, oh and heat up the old glue pot..... I couldn't resist Sir. One has to accommodate all modes in this wonderful hobby of ours. Pressing on, after an evening of cutting and testing a variety of width thicknesses and temperatures, I am not sure that a chart would be all that useful. This is what I discovered though. I used my small clamp fixture to hold the various test pieces. The smallest being .025" x .085" and largest being .125" x .280" of Castello The smaller sizes worked well with a setting of 212f It was better to use the hotter temperatures with the thicker wood. I was able to bend easily .060" x .225" with 300f and very easily with 450f because the nozzle is so focused I was able to hold the wood quite close to the bend area . All of the bends were free formed and let go a few moments after the heat was removed. I had 2 structural failures because I was too aggressive with those bends. It was easy to char the wood at 400f The heat gun is very easy to adjust and only takes moments to get to temperature, In my view the tight focus of the heat is the best feature of this tool Here are a couple of shots of the tests, the five pieces on the left are yellow Cedar from .070" x .450" and .162" x .10" I would recommend this tool to anyone who needs to do any heat bending or soldering This was just done with the same hot air, the thin strip of flat stock .007" x .062" joined to a small section of 1/2 round .038" x .020" I placed a small piece of flattened solder between the springy flat piece and the 1/2 round. Michael

-
Hello all I have only done one test so far, it is my intention to do some extensive testing across a range of Temperatures and times with different thicknesses and types of wood. as soon as that is complete I will publish a chart of my findings here. Michael
-
I like the holding jig for polishing the edges of the dead eyes. Michael
-
Dave there are lines and blocks on the drawing....what more do you want? Seriously they do look rather spare. Understanding the functions of the various lines and how they are used is invaluable for setting up the rigging on any ship or boat. The early ships of era that you are modeling must have been rigged in similar ways to the later rigs. is it possible to take the information from the more modern rigs and extrapolate backwards to the paintings and artwork of the ship? Michael
- 962 replies
-
- 6
-
-
- sovereign of the seas
- ship of the line
- (and 1 more)
-
Denis thanks for the tips on painting, The colder weather here is an issue to deal with for sure. I have to work hard to keep the temperature even-ish in the shop during these colder months, I use a wood stove to keep the shop warm and that is the main reason that I chose to keep the model in the house. I just finished lighting the wood stove which heats up the floor via a heat exchanger that keep the glycol in the loops warm.I monitor a number of parameters throughout the day. for instance this morning at 8:45am inside temp 5c outside temp -5c glycol out to floor 50f glycol back to tank 45f weather overcast By mid day the glycol is up to 60 -65 out and 55-60 back in and the shop gets up to 15-18c it is odd using both scales but the gauges are that way and it keeps me aware of the differences. I do this a few times per day I knew that the fluctuation would not be good for the model so that is the reason for setting up the spare room as a clean room for the model. Frankly it is a lot more comfortable. when the temp gets to the lower extremes of -25 to -30c then I have to keep the fire lit all the time makes for short sleeps. I too keep the liquids paint etc in the house over the winter. Michael
- 749 replies
-
- 5
-
-
- albertic
- ocean liner
- (and 2 more)
-
Hello Les I think a good number of us go through periods of low motivation on our projects. The rest or change of pace or subject matter can be so refreshing. The intensity of what we do sometimes can feel like too much, The most important thing in my view is not to beat yourself up over it. The work most of us do is a hobby and it is meant to be enjoyable and relaxing, if it not either then do take a break. The inspiration to get back will come soon enough. Michael
-
Carl I am practicing on some scrap metal... it just happens to look like a funnel michael
- 749 replies
-
- 10
-
-
- albertic
- ocean liner
- (and 2 more)
-
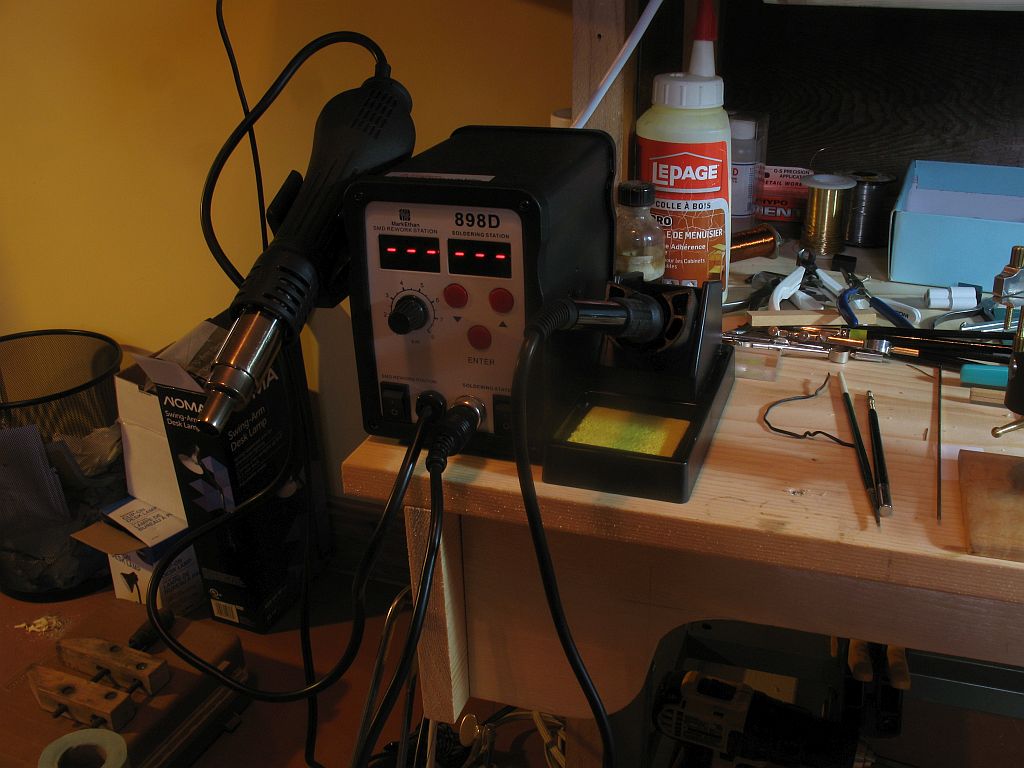
It is one of these the unit on the left is the hot air soldering handle mine came with three nozzles 1/2 inch 1/4 inch and 3/16ths The air can be dialed from very low to quite high over a scale of 1-8 the temperature can be adjusted in 1 degree increments from 100c to 480c This temp range also applies to the soldering Iron side on the right hand side this is the unit that I purchased. Michael

- 29 replies
-
- 14
-
-
Druxey, the thing is I knew this! I have done a great deal of painting on the Architectural models, and with a great variety of colors textures and finishes both gloss and flat. but it has been about 20 years since I did all that. I'm going to put it down to a memory lapse, or its November and it's getting cold. Wefalck doing that would send me to the funny farm. Basically how I used to do it, I also used to cut some enamel with Lacquer thinner it dried faster as well. I had not given the baking any thought, but would certainly be worth doing some experiments with it. I did build myself a small turntable for the funnels, the key is getting the paint filtered as well "Ladies Hose" works very well for this. Michael
- 749 replies
-
- 7
-
-
- albertic
- ocean liner
- (and 2 more)
-
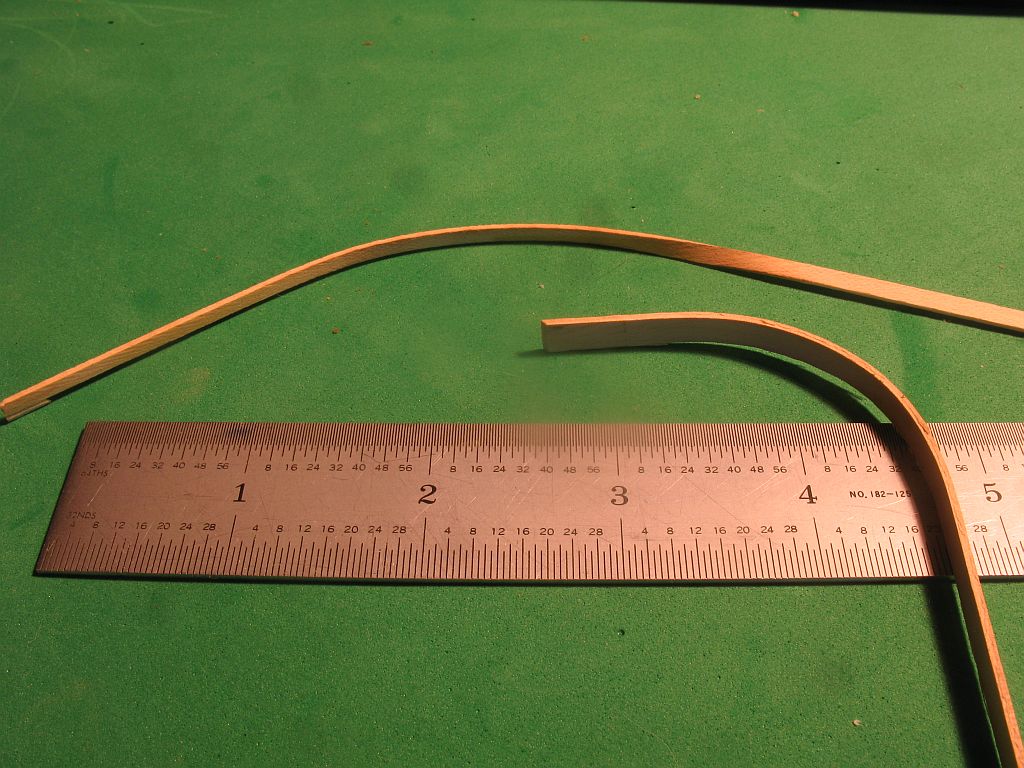
A recent tool acquisition and remembering Chuck's tutorial on planking, and Druxey's question regarding the hot air soldering station for bending wood. I can say that the tool works brilliantly for this task. The photograph shows a strip of hard maple .041" x .125" using the middle sized nozzle 1/4 inch diameter and using the highest temp setting the strip became very pliable in seconds The other strip is .o41" x .2" Castello and it was the same in seconds it became very flexible and bent very easily. Obviously there are all sorts of other tests that can be done at varying temps etc but I have a feeling that this tool will be a very useful one in the tool kit from now on. Thanks again to Wefalck for putting me onto this tool. Michael

- 29 replies
-
- 13
-
-
Kevin, I like your attitude and the clarity of your videos, thanks for doing these. Michael
-
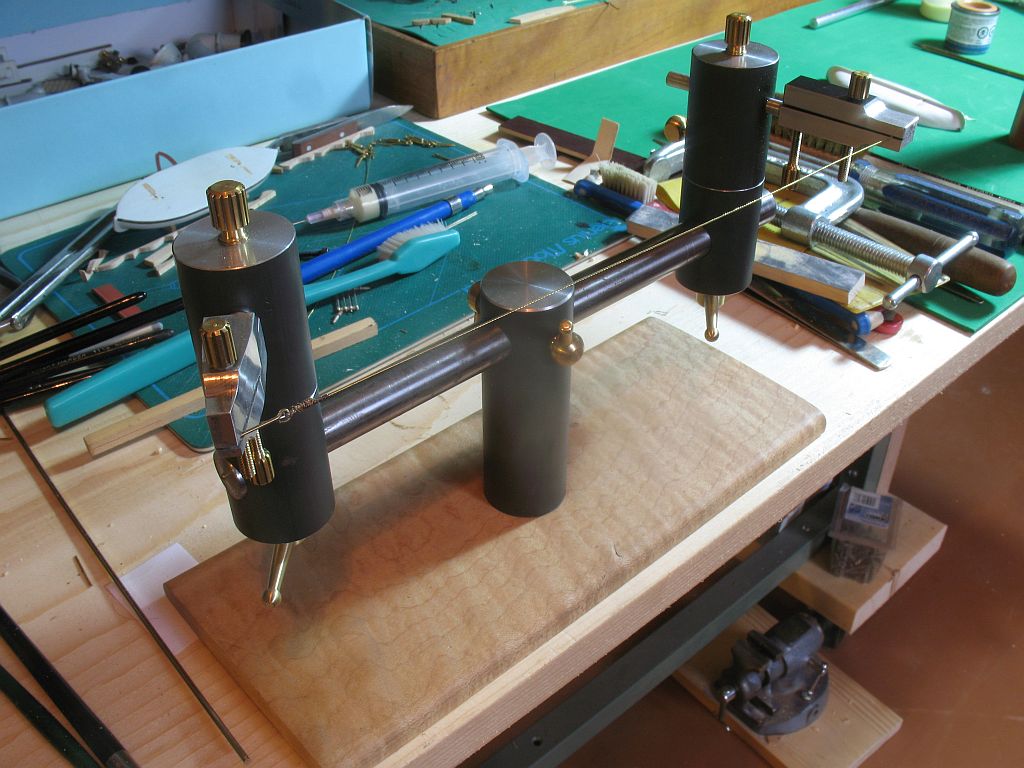
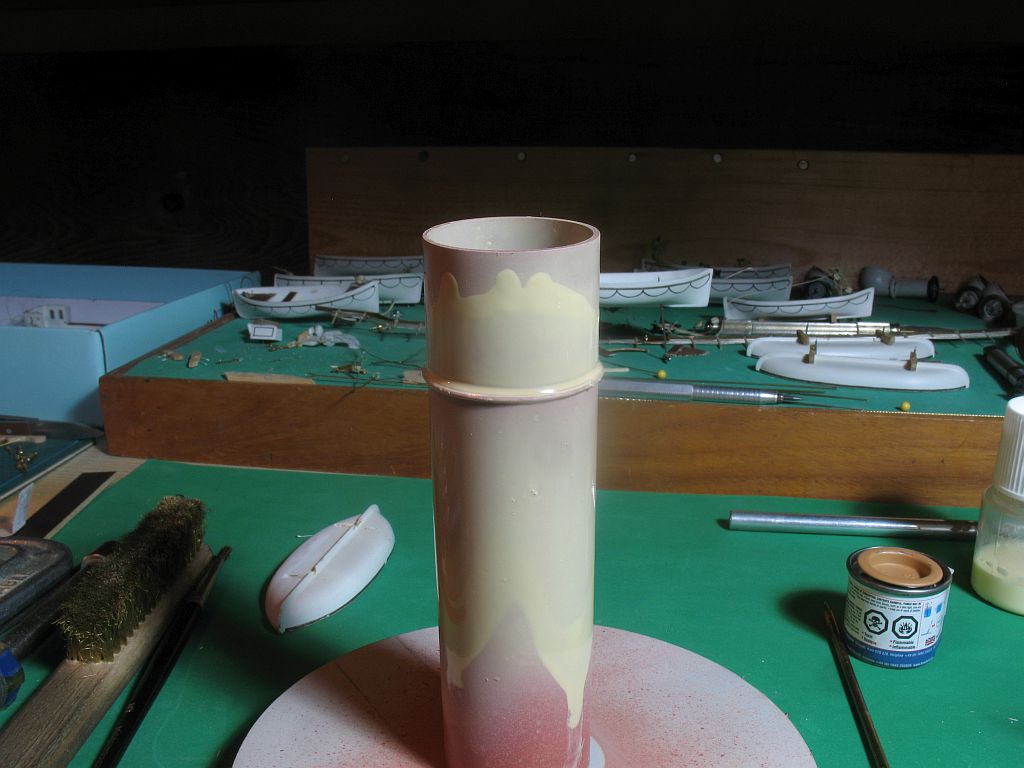
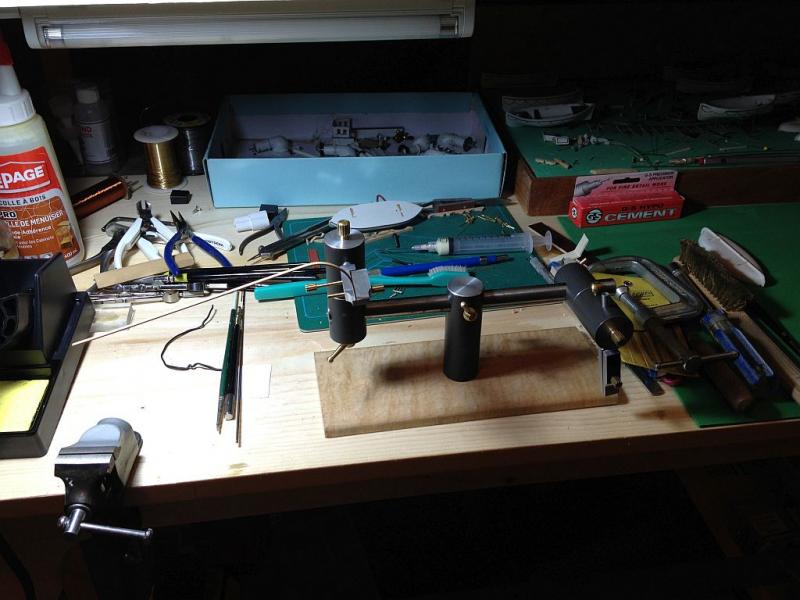
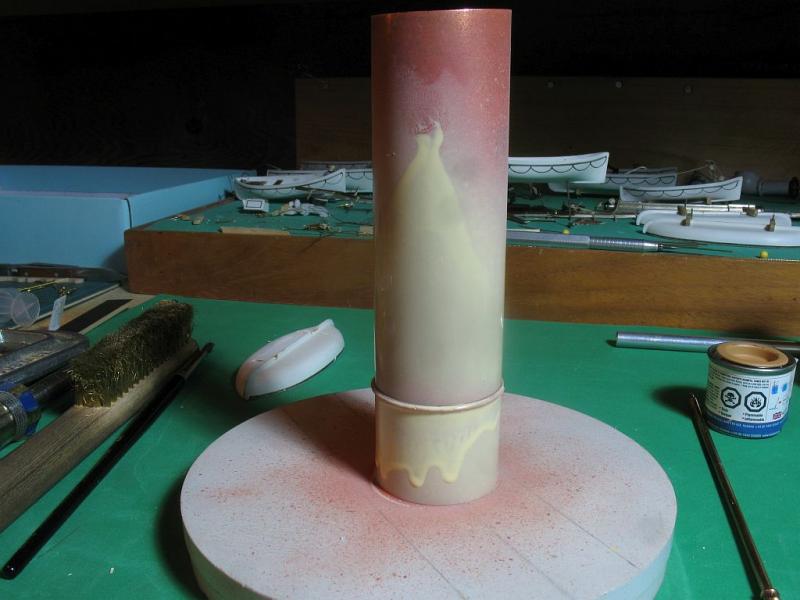
Nils thanks. Don I see that you jest, seriously though I am not at all confident that I could do that. Now the soldering station seem substantial with a replacement element for the hot air gun and all looks good out of the box. I stretched a piece of wire to do the obligatory test of coloring it with the hot air The sound of the fire alarm right above my head just about caused me a heart attack,.... the cat shot out of the room like a rocket. The heating test was stopped whilst I found a chair to stand on to turn off the offending sound. Decided to go out and put the top coat over this..... I am going to have to get some filters, the primer coat looked brutal. Now for your communal entertainment and afternoon chuckle. I need some practice with the airbrush...it's been a while and I am definitely rusty with the right settings and thinness of the paint. It was much too thin and ran down so I turned it upside down to dry, when it is dry I will remove all the paint and start over with the method that Ed described and after getting some filters with paint it again Now I'm going to go and sit and think about all this while I have some lunch. Michael


- 749 replies
-
- 12
-
-
- albertic
- ocean liner
- (and 2 more)
-
Why didn't I think of this.... A great suggesting Ed Yup! I have already given the test funnel a coat of Zinc Chromate, left it overnight as per the recommendations for the Poly scale paint that I used. That said it is a test funnel to sort out just this sort of procedure, so I will use the method Ed suggested after seeing how this first test works out. I have done a lot of masking on Commercial Architectural models over the years mostly using various types of tapes. The standard procedure was to paint, mask repaint with same color to seal the edge then apply the new colour. then to remove the paint befor the paint fully hardened. This particular restoration is new territory hence my caution and the various tests to get as close as possible to the original. The interesting thing is I am constantly reminded of an early comment about discovering the hidden damage, I think that more challenging than that even, is discovering the earlier repairs (not always as good as I would have preferred) that I have to work around. And today I get to go pick up my hot air soldering station from the post office. Thanks for the intro to this tool Wefalck. And Yes I will also test it to see if it works well for bending wood Druxey. Not sure you want to do that Jud, I managed to blow a straight eight engine in a 1948 Pontiac 4 door sedan after too long in a parade, the engine overheated so I pulled out dealt with the radiator but was unaware that the oil had also been compromised by the event, ten miles down the highway was all she wrote. The bottom end racket that occurred was enough to scare the coyotes for miles around. It cost a LOT of money to rebuild. Thank to all who have been following along and for those who have done some recent catch ups I really appreciate the interest and the helpful suggestions. Jack I used some gel type non toxic paint stripper on the side, it took a while with toothbrushes and multiple coats but did a good job. Michael
- 749 replies
-
- 5
-
-
- albertic
- ocean liner
- (and 2 more)
-
Sorry to hear that you are a little under the weather. the winches are looking very nice. Michael
-
Mike, your work on this ship is really first class, the mast and hoops look very nice. Michael
- 452 replies
-
- 3
-
-
- cheerful
- Syren Ship Model Company
- (and 1 more)
-
Ed thank you for the great step by step of the banding process. Michael
- 3,618 replies
-
- 6
-
-
- young america
- clipper
- (and 1 more)
-
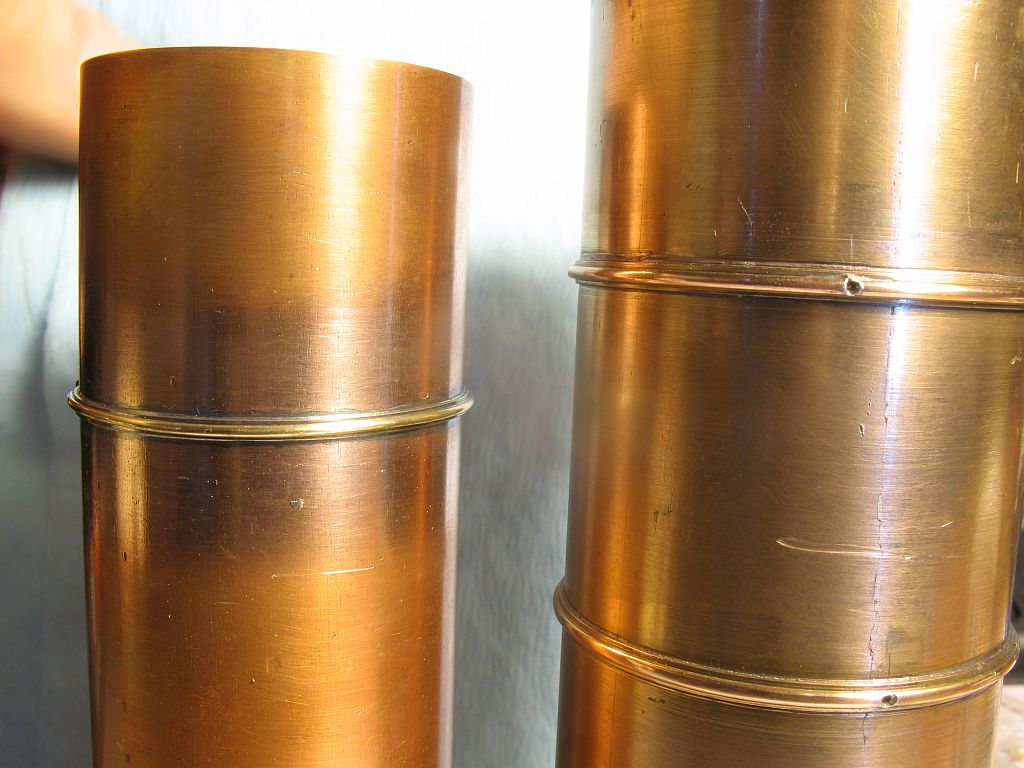
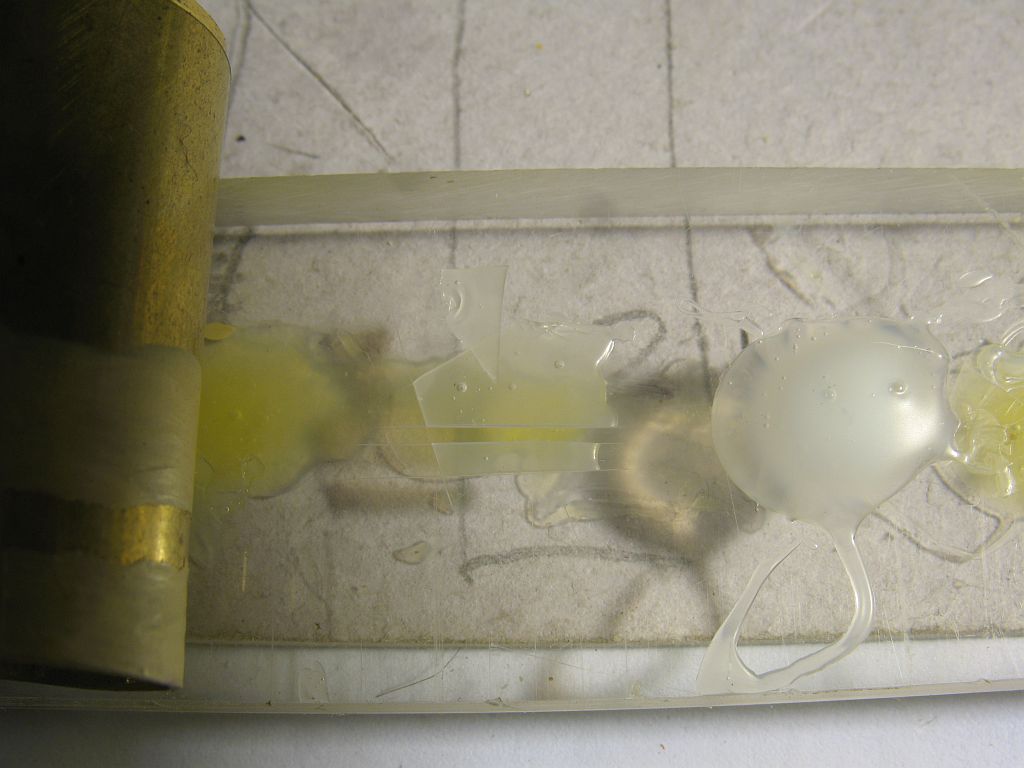
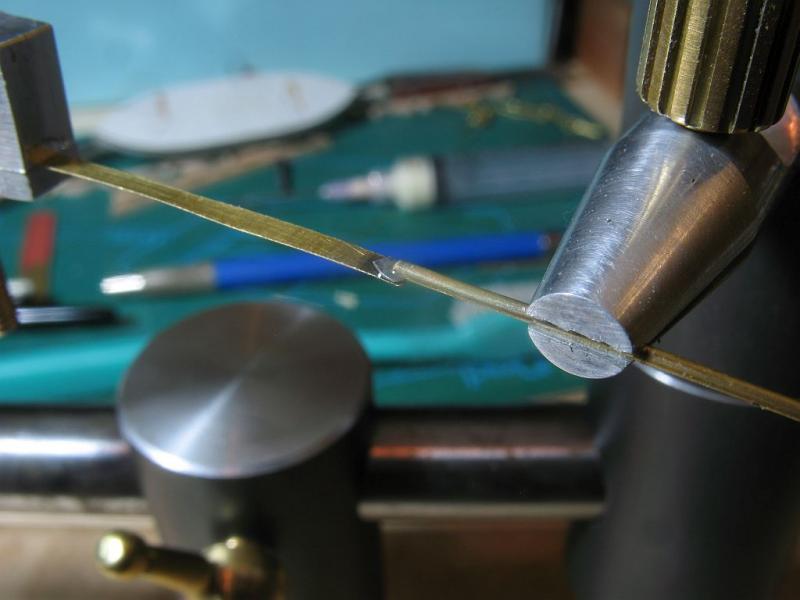
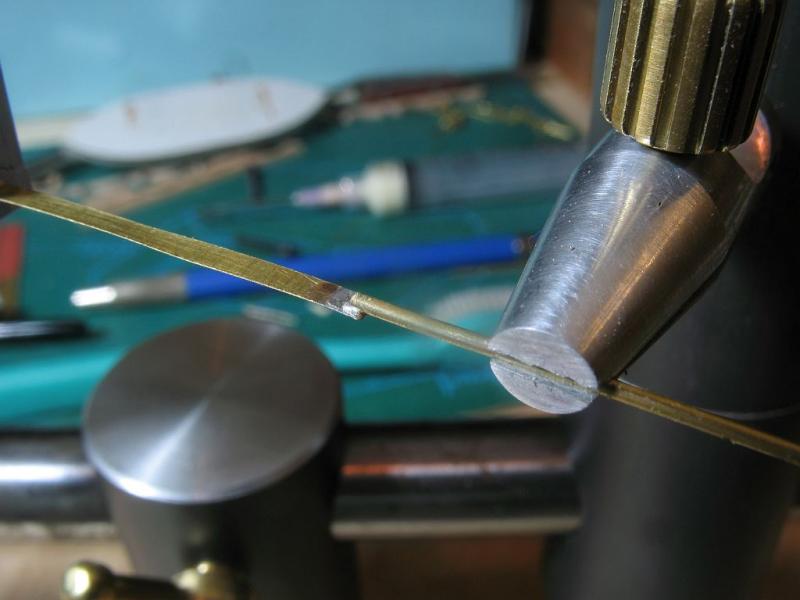
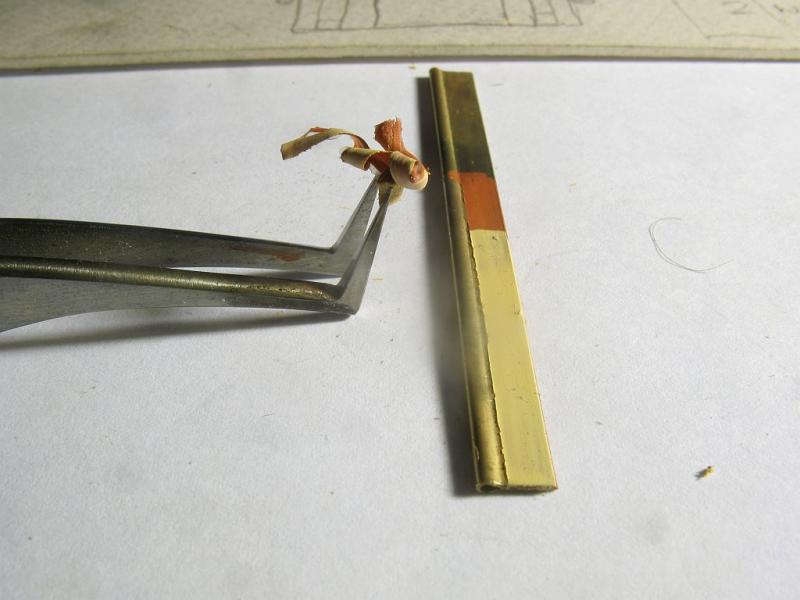
Thanks for all the likes and helpful feedback. I soldered up a piece of copper and brass to mimic the funnel bands, it was tricky getting the section close. I think Bassett & Lowke used a profile tool and cut some rings which were slid over the tube. I did a composite soldering job, by first soldering a flat strip then adding the half round profile which was made from some .032" that was draw filed to the half round section. The back side is a bit ugly it is a little smaller but cleaned up is will be adequate for the paint test. Michael


- 749 replies
-
- 16
-
-
- albertic
- ocean liner
- (and 2 more)
-
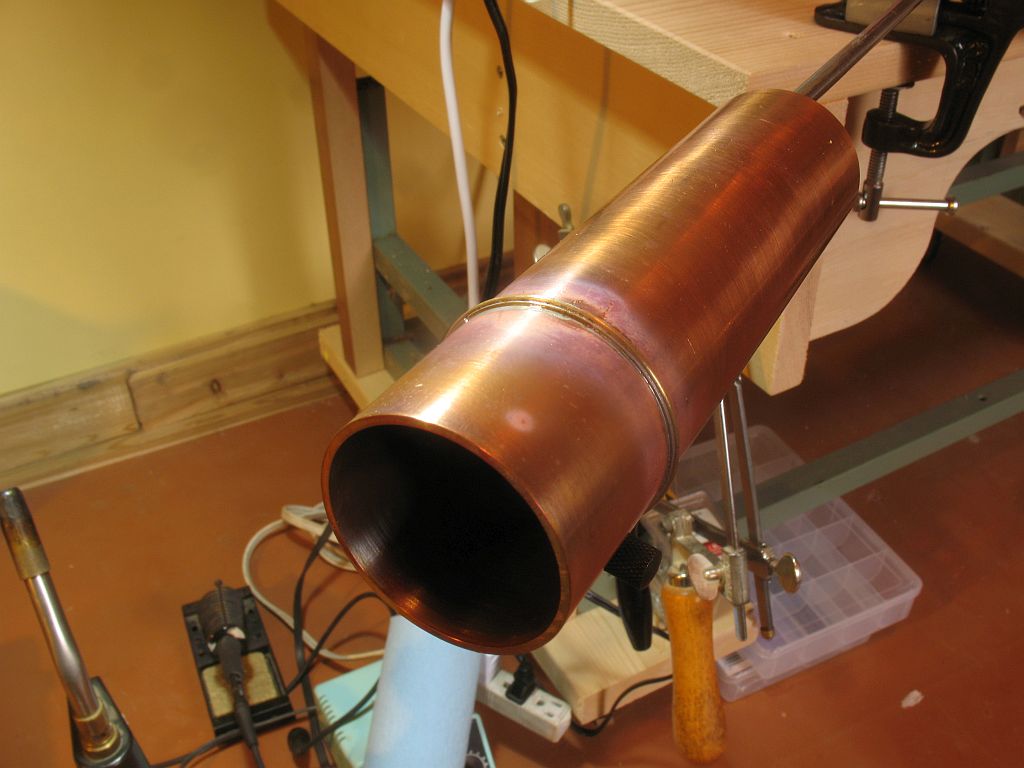
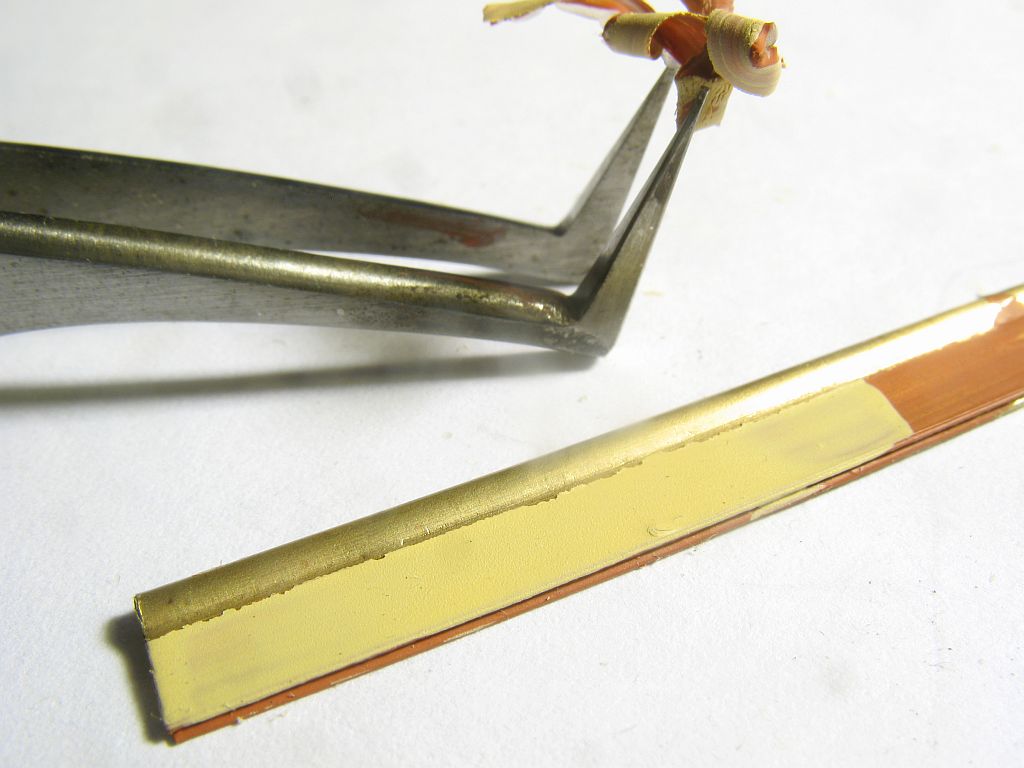
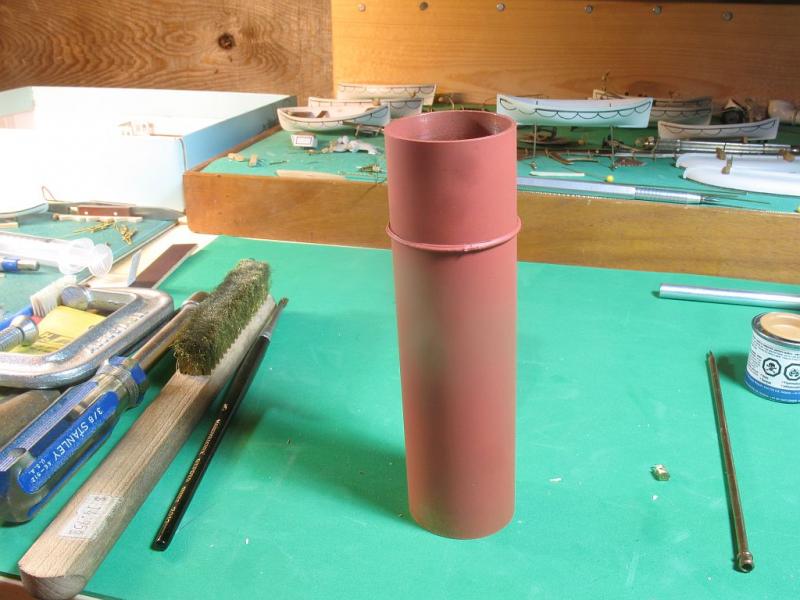
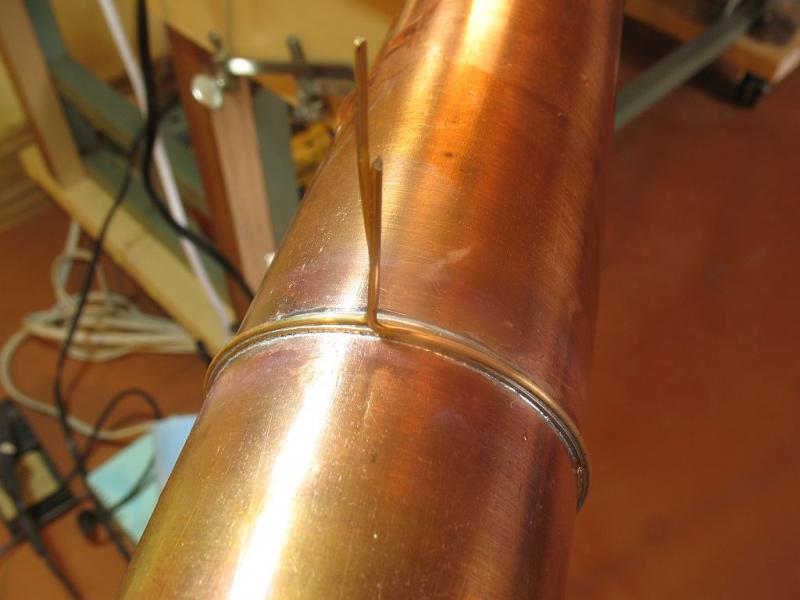
Being a little hurried I peeled off the mask from the hinge section the Humbrol had only been on for 1 3/4 hours. slopped on with a flat brush. My first impression is that the mask peeled off very nicely, the edge looks jagged from the fillet of paint that is left standing. the paint is still soft. it was uneven in thickness from the single coat of paint, at the surface of the brass the line is absolutely sharp. When I watched some of the masking videos that are available I noticed that the completely dry paint left a clean edge when it was airbrushed over the mask. The model paint has a very fine pigment grind and requires much less paint than the commercial paint for painting larger materials. Also I did not thin the paint at all just thick straight out of the tin. when this is airbrushed it will be far better. The Humbrol instructions claim 6 hours between coats of paint. Encouraged by these first tests I an going to do an experiment on some brass tube of similar diameter with a strip of brass soldered around, I will follow the exact procedures that I hope to follow on the ship's funnel. I will also allow the proper times for drying and repainting. Michael

- 749 replies
-
- 12
-
-
- albertic
- ocean liner
- (and 2 more)
-
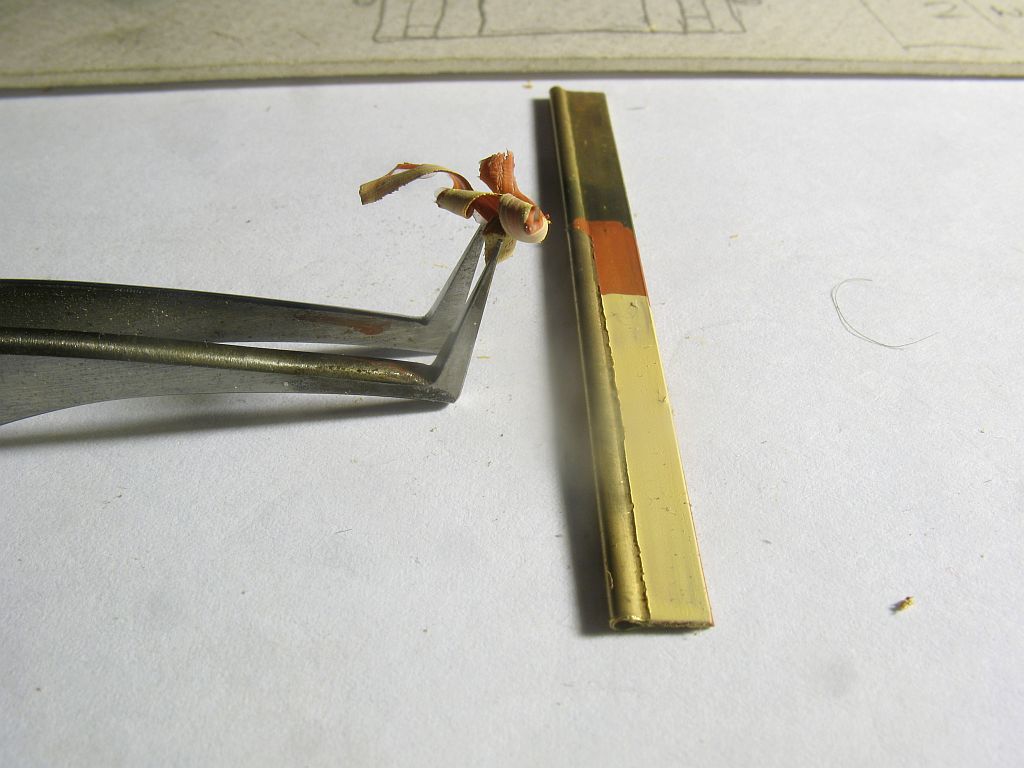
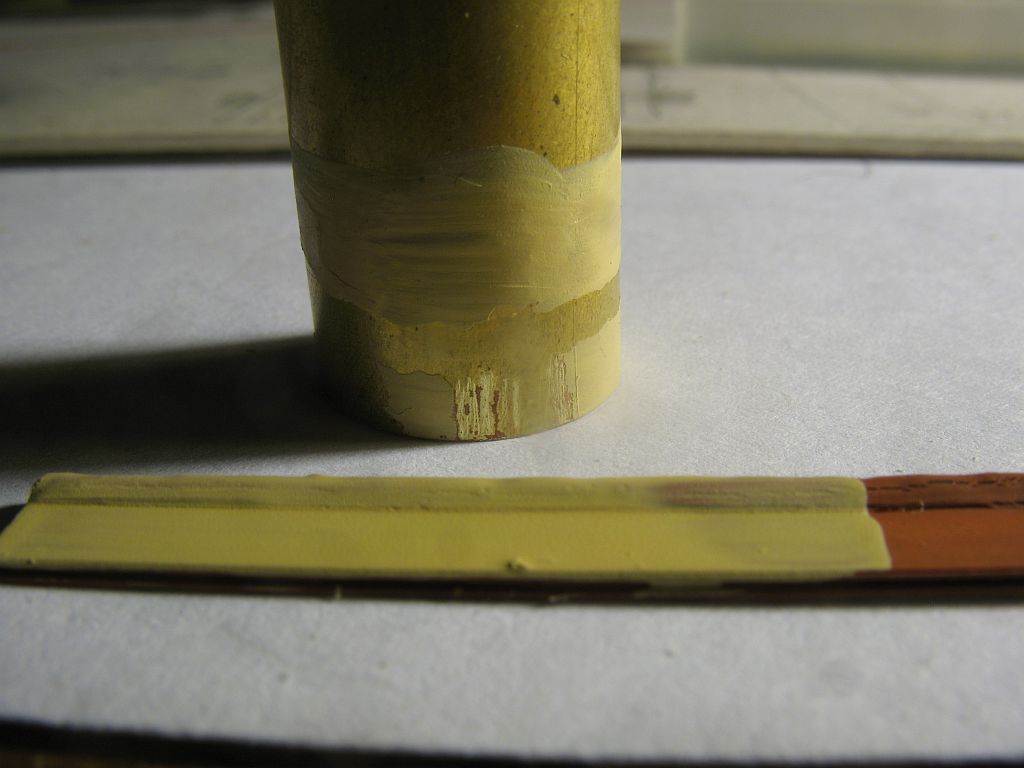
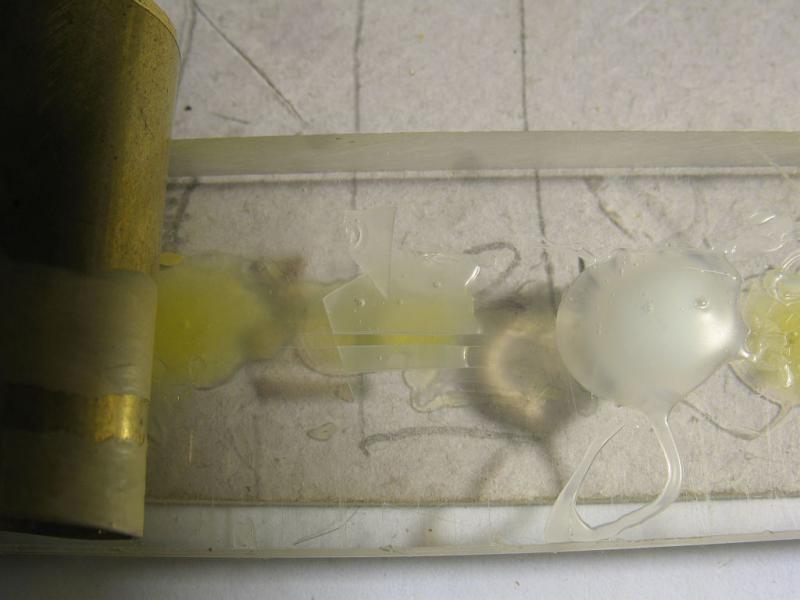
Druxey, this had occurred to me, I intuitively rejected the idea when it crossed my mind. This morning I revisited the idea because of your suggestion. No matter how gently I scraped the patina came away as well. I was even able to remove only the top layer of paint in a couple of places as you can see by the zinc chromate traces. I think that there are definitely situations where this would work as a viable option. I do not want to risk removing the patina on the funnels though. This next picture shows the cut edge more clearly on the "No Sew" mask. it is very clean, although the "mask is flexible it is more plastic like than rubbery. The gap knifed out is .020" and it peeled out very nicely. When the paint is dry on the brass hinge test piece I will see how it looks at the edge between the rounded and flat sections which will give me a reasonable expectation of how it will look on the funnel. Carl thanks for the suggestion of the other mask solutions. the Windsor & Newton is a latex type similar to the Pebeo which I have and it peeled off the brass in a rubbery way similar to rubber cement which I have also tried. they work great on watercolour paper, and have used them successfully for that purpose. Michael

- 749 replies
-
- 10
-
-
- albertic
- ocean liner
- (and 2 more)
-
Russ no need to apologize for anything, it is always the journey that we take in our work that leads to knowledge and insight. I like the look of your model and am enjoying following along. Michael