michael mott
-
Posts
5,200 -
Joined
-
Last visited
Content Type
Profiles
Forums
Gallery
Events
Everything posted by michael mott
-
 Mark your workmanship is showing what a graceful hull this is, I look forward to the fitting out of the deck and cockpit details. Michael
 -
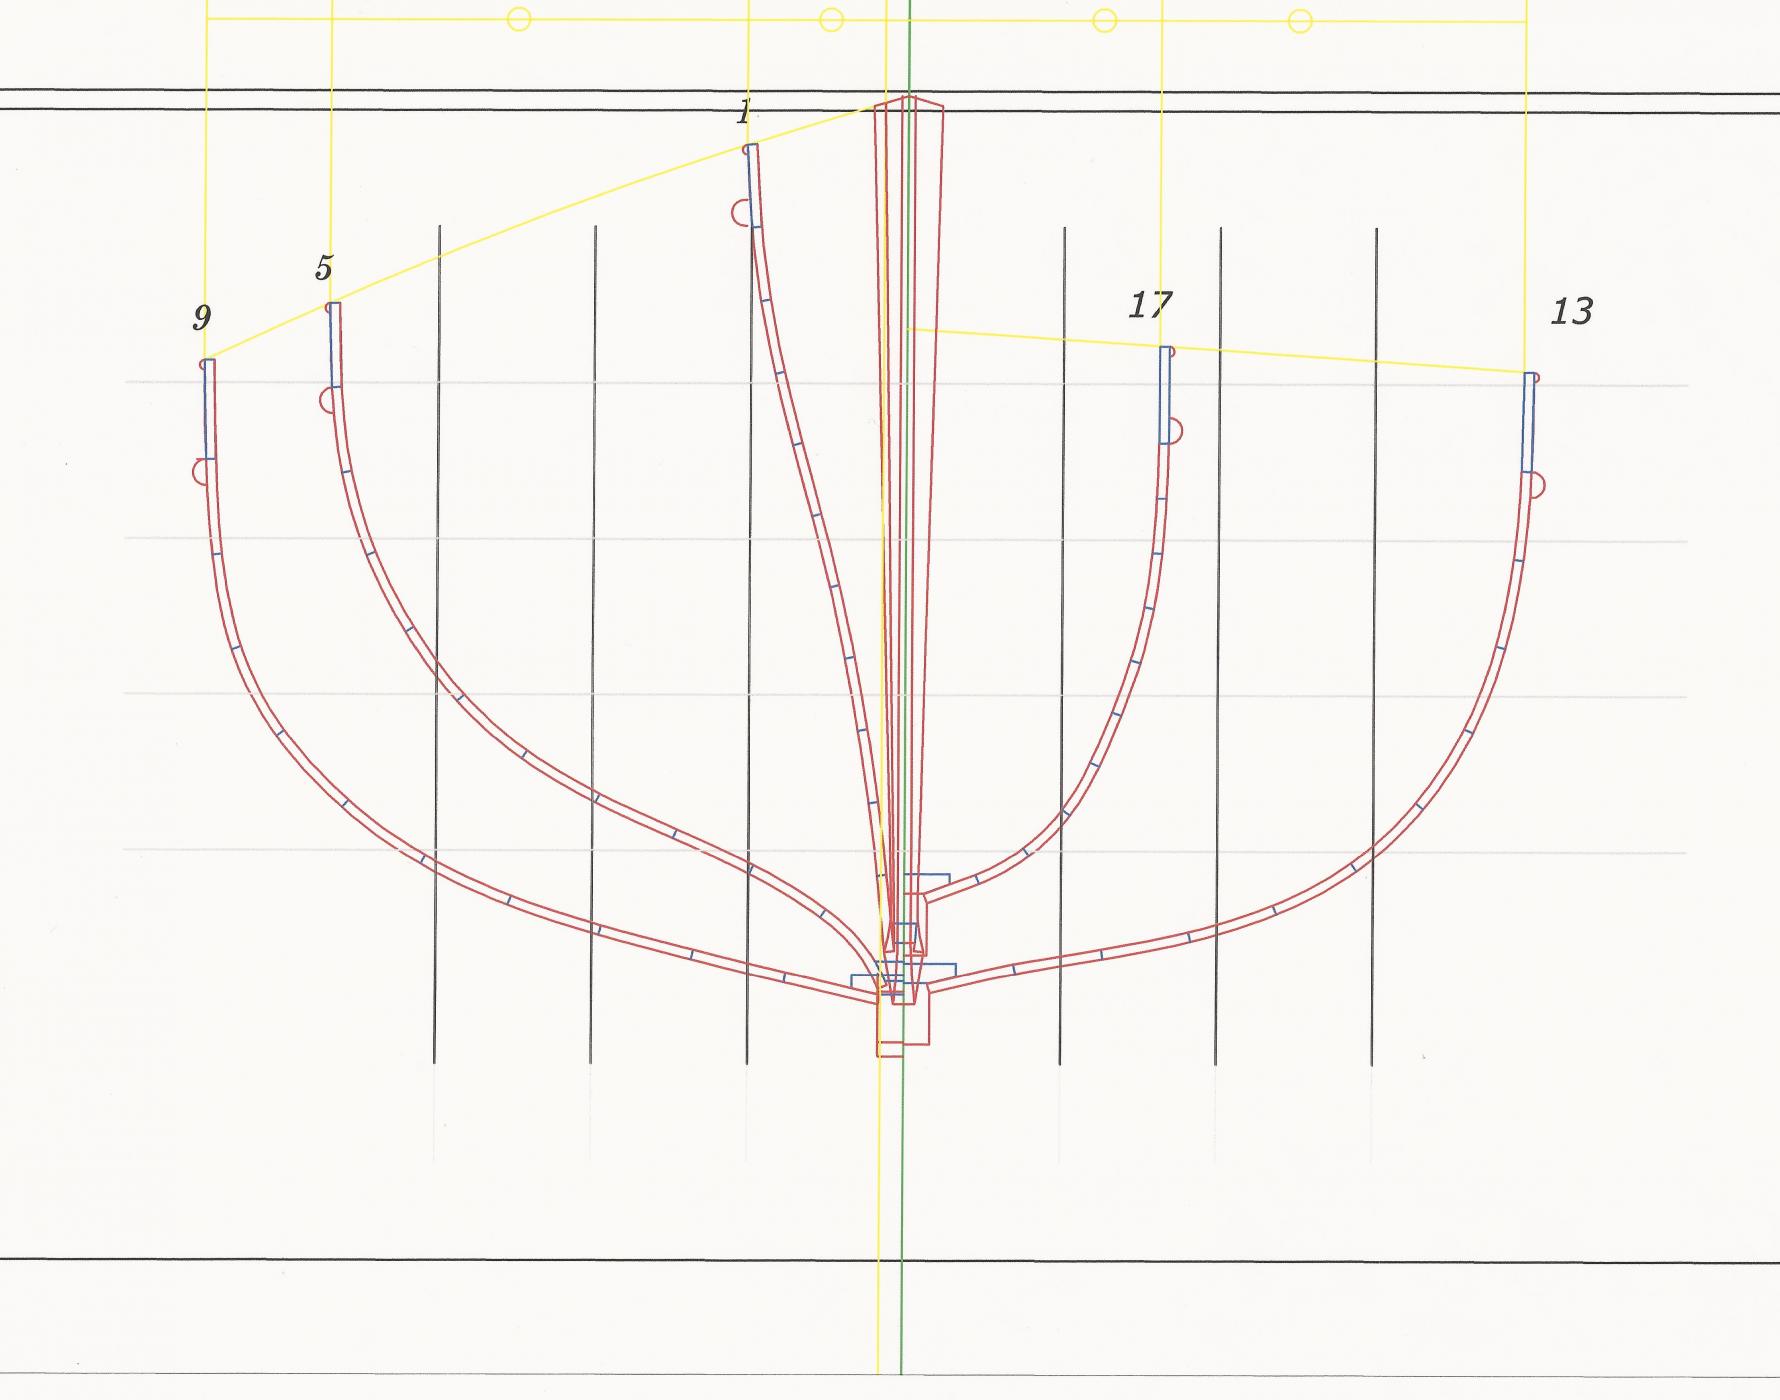
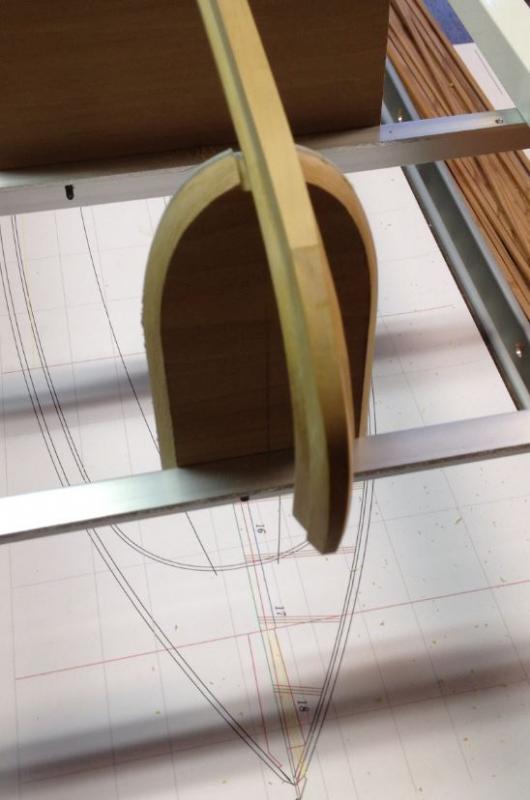
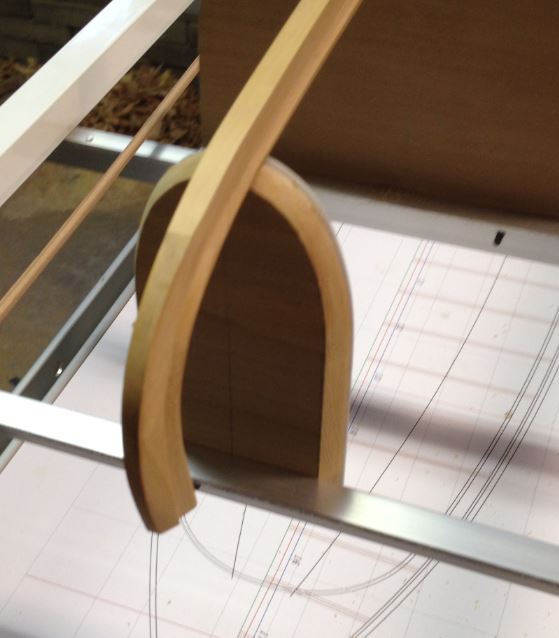
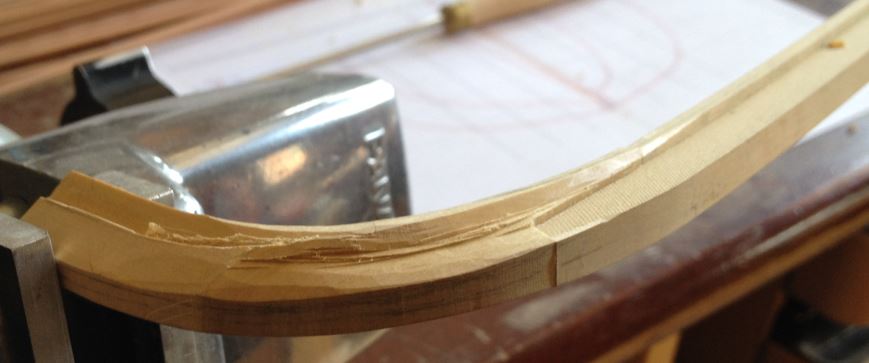
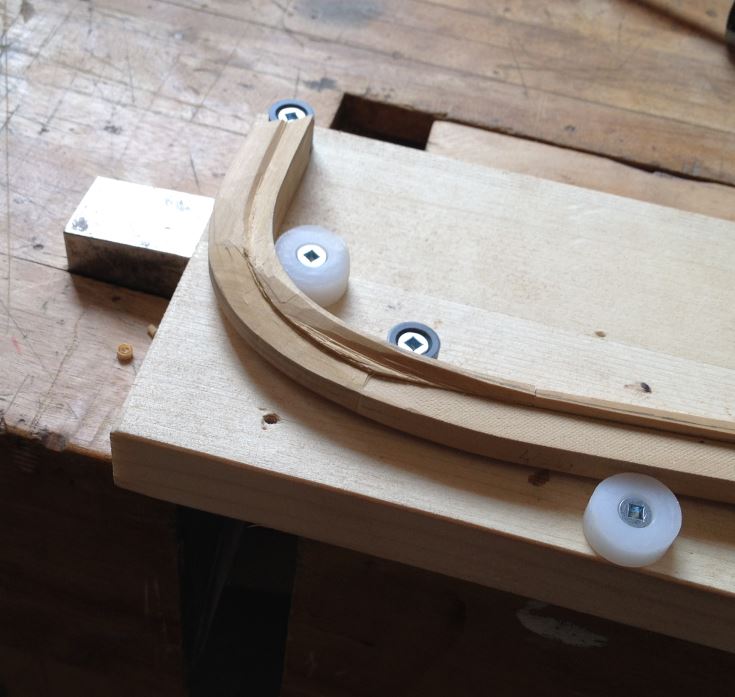
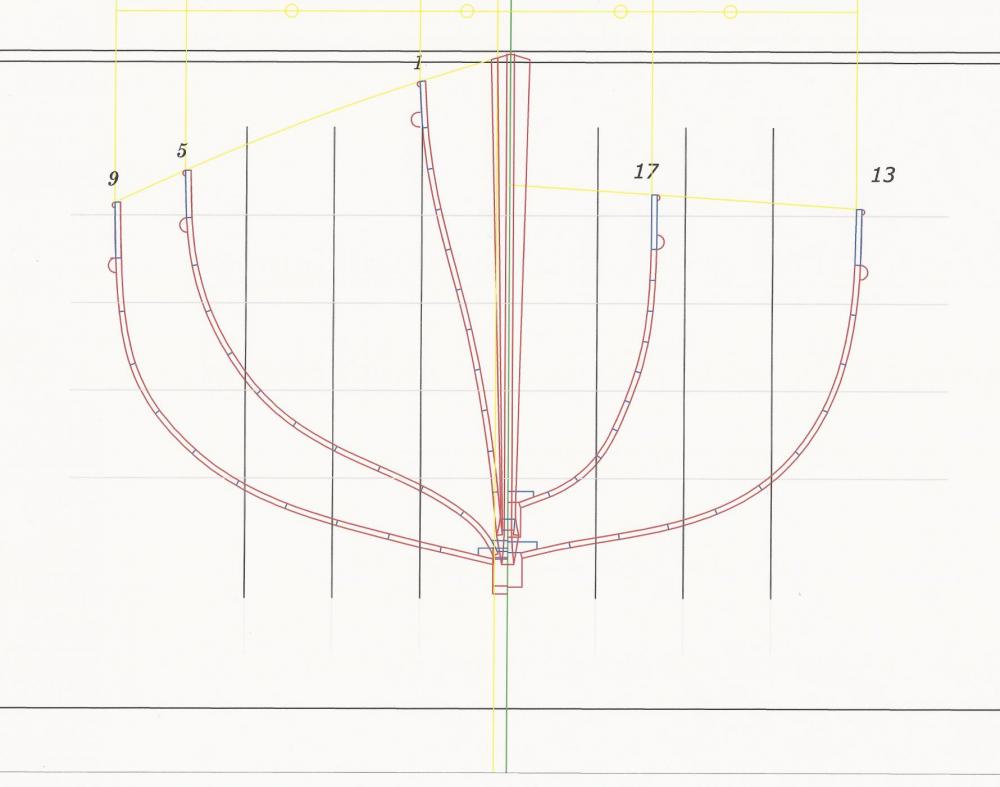
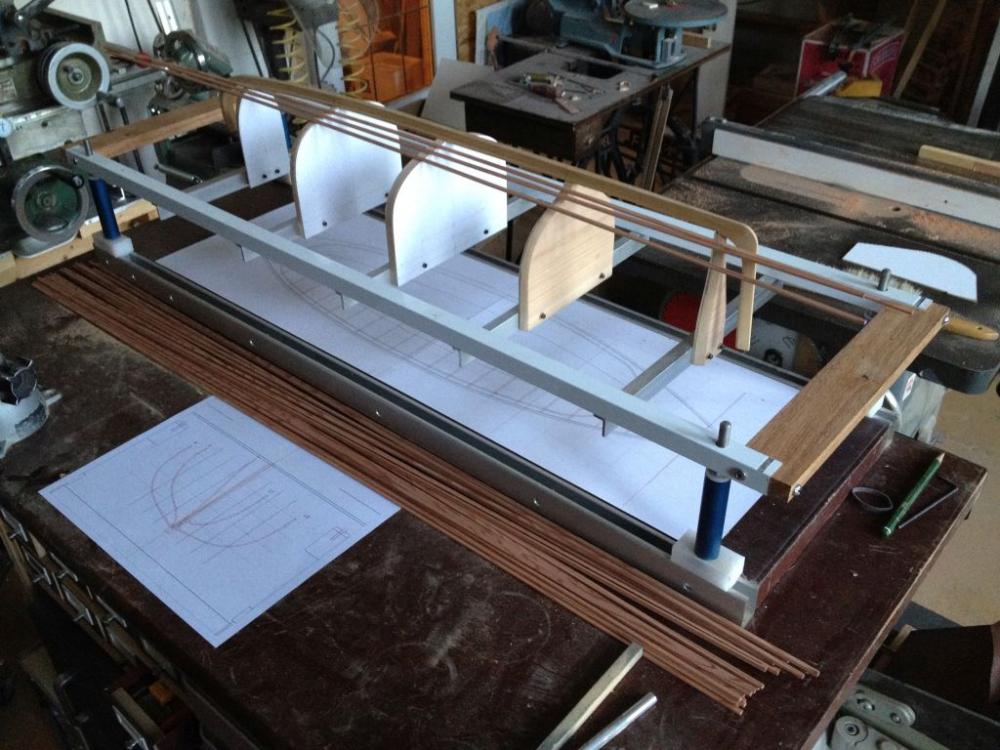
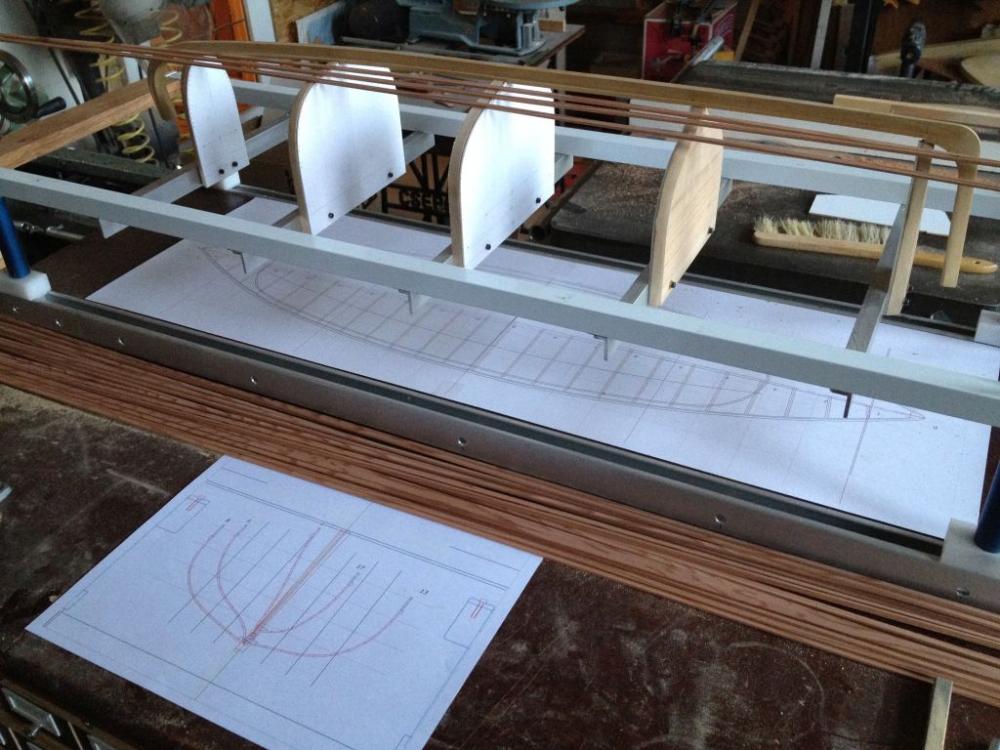
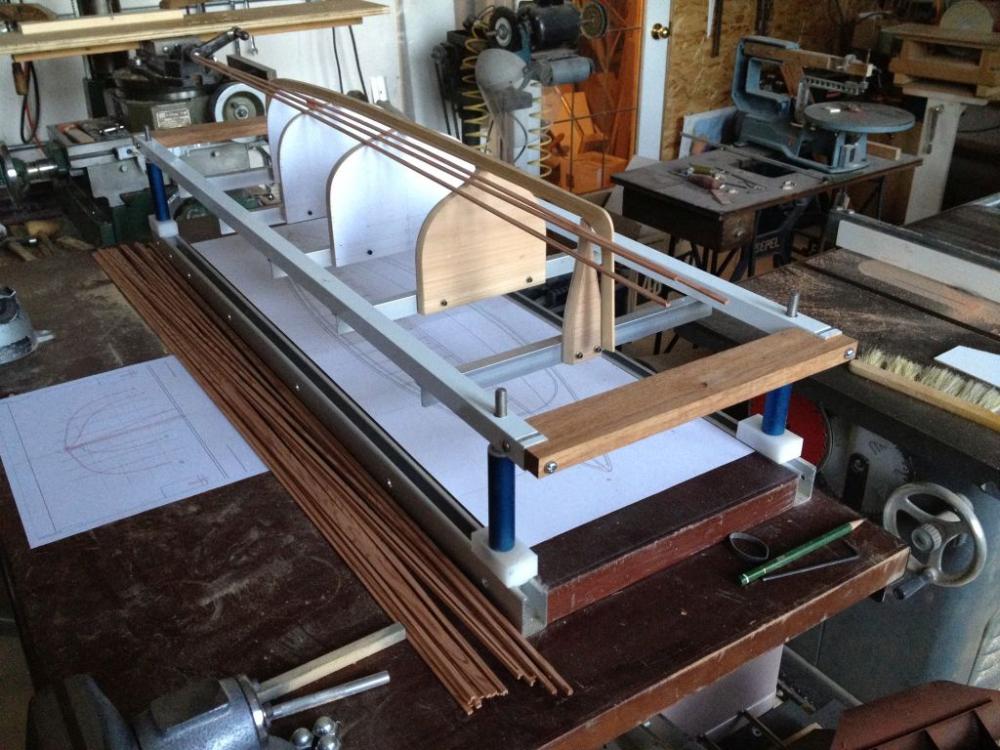
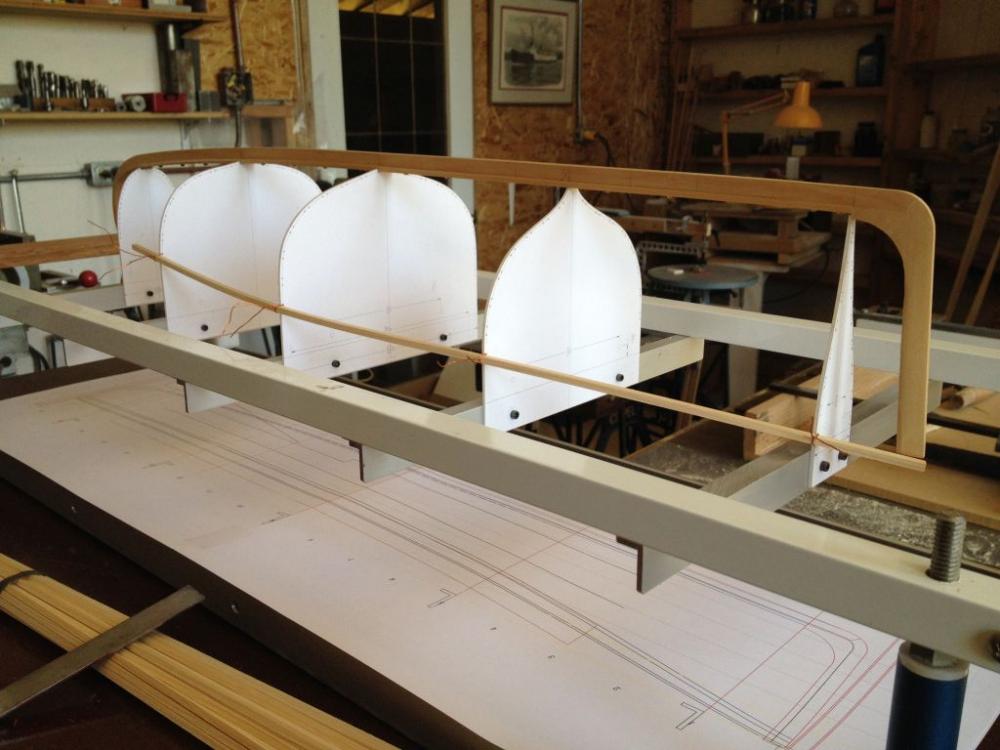
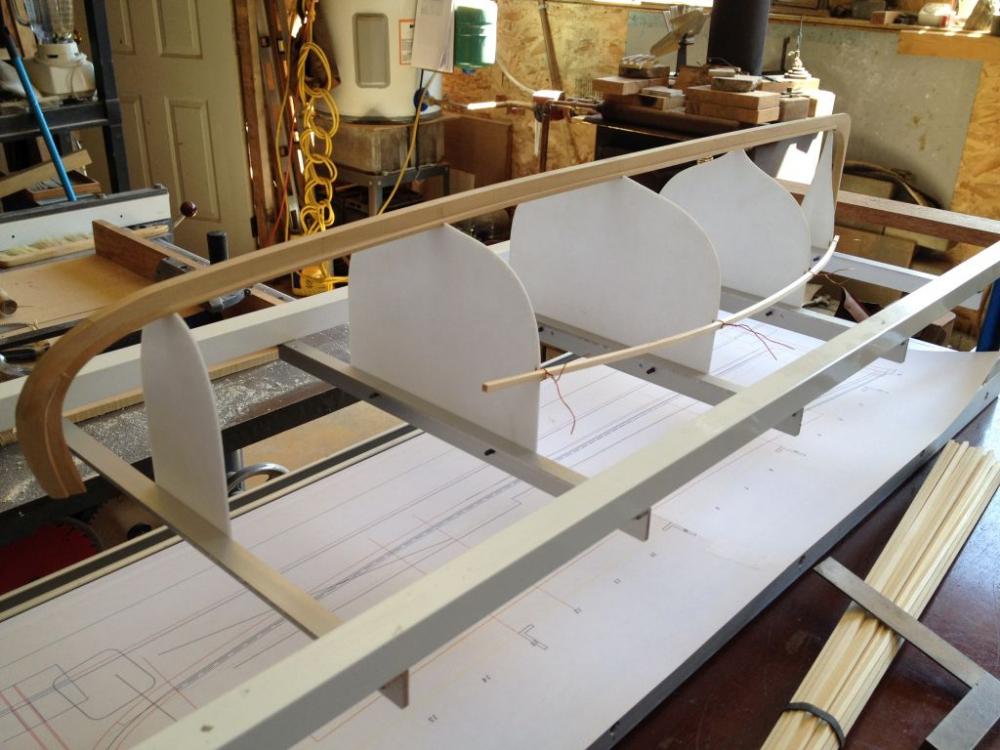
I have given this a lot of thought and have spent some time revisiting the number of bulkheads. I'm probably just second guessing myself at this point. I am thinking that I might change the number of bulkheads by adding a few more. I have also updated my drawing of the body profiles using Corel Draw version 17 which has some features that I used to use changed, and new features added, that I have to learn. Its that old dog new tricks thing. Overall I like the way it has changed from my version 11 body profiles for forum post.pdf My gut is telling me I will be doing a bit more form work before the ribands get added. I am happy with the way the stern post turned out. sorry about the shaky i phone pics Michael
-
Gaetan Your photographs are always so intriguing, not only do they show your incredible modelwork, but often there are glimpses of details of your working environment. I find the accidental details as interesting as the model itself. Michael
- 728 replies
-
- 8
-

-
- le fleuron
- 64 gun
- (and 1 more)
-
Now why didn't I think of that? Giampiero very nice work not only on the hinge but the rest of the model look wonderful too. Michael
-
Ian, I completely understand your sentiments I think that we all go through this feeling here and there. Checking out the last few pictures of the boat, my what a wonderful job with the different colours and the finishing of them really shows off your skills. It really looks super. Michael
-
Cabrapente looking at your pictures of the rigging and the detail looking toward the deck from the masts, I am not surprised that it takes years to build these models, You are doing a wonderful job on all these details. michael
- 332 replies
-
- 1
-
-
- le fleuron
- 64 gun
- (and 1 more)
-
Hi Bob My plan is to do just that and include as many ribbands as possible and still allow access to placing the ribs the ribs will be held in place initially with either copper wire or some heavy thread. The details if the construction of the hull are a little sketchy this picture shows the floor timbers they look at first glance to be placed over the ceiling boards, but the rivets or bolts along the bottom edge tell me that they are fixed to the ribs, these were in all likelyhood set in place before the planking which would make their installation far easier than if they were placed afterwards. I have no information about how the floors or ribs were fixed or set against the keel plate at the moment so this will need to be sorted before the ribbands are set. Work continues on the sternpost a tricky devil for me but child's play for the likes of those who carve the fantastic figure heads like the one on Johann's barge. It is good to back to cutting wood. Michael

-
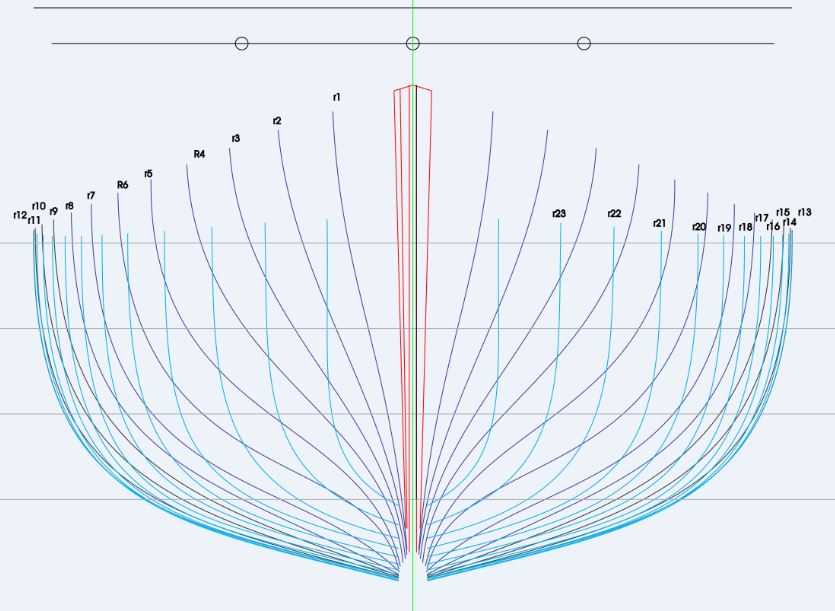
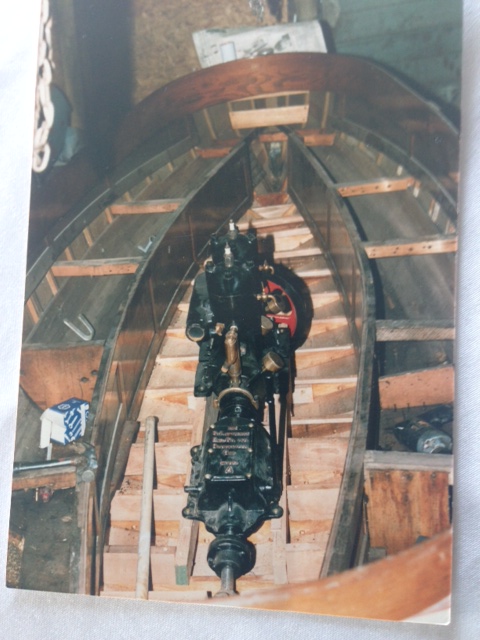
Thanks for the visits Nils the bulkheads will not be part of the finished model. My intention is to set the stringers in order to prepare and place the ribs the stringers will be removed as the planks are fitted. in post #56 I outlined the process. My hope is to use the Buffalo Engine to drive the launch. my thoughts are to add at least 8 or 10 ribands to each side evenly spaced. My understanding is that the ribs on the full size are 3/4 by 1/2 inch. In rereading Roger's notes there is a plate on top of the keel that is 4 inches by 3/4 inches and tapers toward the bow and stern. this plate forms the upper side of the bearding line for the planking and gives a greater area to attach the garboard strake. I am going to make the keel, keel plate, stem and sternpost out of the Castello Boxwood. I need to make the ribands strong enough to not deform when I set in the frames. something that has crossed my mind is to use some thread to hold the frames (ribs) to the ribbands while they set. The fir test frames were pretty flexible, however I am also going to test the Castello for the frames as well, they will be 3/32 x 1/16th full size on the model. The original was planked in Yellow Cyprus I am still thinking about the planks and will likely go with Costello for them as well here is a drawing showing the sections at the same stations as the form bulkheads. michael
-
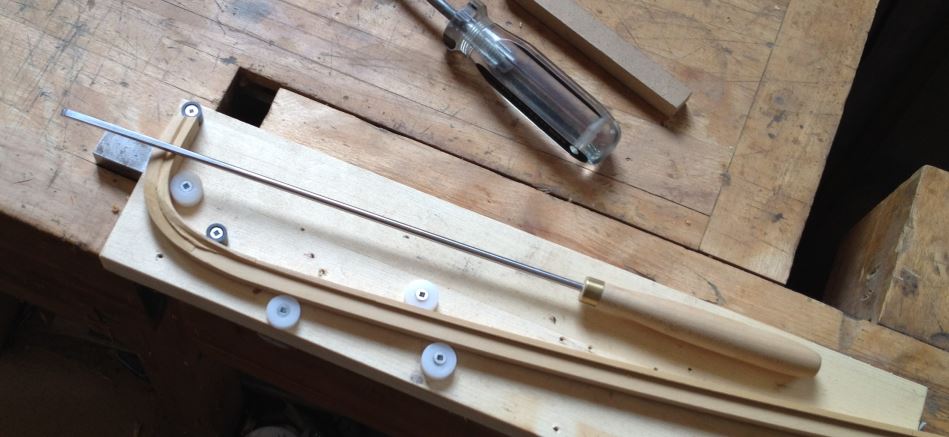
Lawrence thanks for your thoughts. Today The boat was retrieved from high shelf. The first task was to clean up the dust the a test fit of one of the stringers to see how well this process will work. it was apparent that the spacing of the holes for the stringer along the sheer were wrong. I also decided to add some wood to the forms, this will enable me to fix the stringers with some tiny brass screws, I also cut some new stringers. The new stringers are redwood 1/8th x 1/16 inch. The next task is to finish the shaping of the stem and sternpost. Michael

-
Patrick when I look at the close ups I keep forgetting how small this model is. As so many have already mentioned focus on what you have achieved it is truly amazing. The next model is always going to be another challenge and we bring the knowledge forward from what we learned on the last, there is no such thing as perfect because there is always room to improve. Your work continues to inspire. Michael
-
Nils you make it all look so easy every time I check in you have leapt ahead miles. Michael
- 2,625 replies
-
- 6
-
-
- kaiser wilhelm der grosse
- passenger steamer
- (and 1 more)
-
Absolutely superb workmanship on this Anchor I especially like how you solved the flared square section and the sizing of the bands. Michael
- 3,618 replies
-
- 5
-
-
- young america
- clipper
- (and 1 more)
-
Yes the Ambient levels of humidity are the key, I had assumed a change geographically from one location to one that is temporarily low. Which likely means that unless the humidity can be kept at the same as it was when the hull was assembled in the first place, which can be an unknown unless one works in a humidity controlled environment all the time. The wood might have been assembled in a much higher humidity or the wood had not reached equilibrium before being worked into frames. The opposite danger is of course the expansion of the frames pushing against the stern and stem when encountering large changes in humidity. from say Arizona to Florida, Michael
-
Ben, Looking at those last shots inside the hull tells me that the wood has definitely shrunk across the grain, do not discount the wet towel Idea, when I took the tarp off my large boat maria this spring the deck planks had done the exact same thing because of the low humidity. One of the reasons that oakum caulked boats do not like being out of the water they shrink across the planks and then leak until they swell back up. I was pouring water over the oiled planks for three days without much success then changed my strategy and laid wed towels over the deck and it all swelled back up in a day. I would expect that once the wood swells back that the other issues will also lessen. I cannot hurt and is much less work that tearing it apart. once the wood has swelled then keeping the humidity stable should hold things untill the longitudenal elements are added. Michael
-
Thanks for the explanation Ed. Interesting issue with the tailstock for the brass, the use of the chuck is basically the same as using a fixed or traveling steady, that usually have three bars that fit around the work. The edges of the jaws serve the same purpose. Sometimes it is the easiest solution. Michael
- 3,618 replies
-
- 4
-
-
- young america
- clipper
- (and 1 more)
-
I agree with all the comments regarding the Anchor exquisite, that said I noticed that the main part of the body looks as though it is the same as the drawing underneath, and it looks like you shortened the bar that goes through. I am curious about whether the scale of the drawing is full size or you changed your mind about the bar. Michael
- 3,618 replies
-
- 5
-
-
- young america
- clipper
- (and 1 more)
-
Good Afternoon Druxey. Well Sir you certainly raised the bar for us all, I am just wondering though.... how are the standards raised? internal halliards? A stunning looking model all round, you are tempting me to try something small. Regards Michael
- 641 replies
-
- 8
-
-
- greenwich hospital
- barge
- (and 1 more)
-
A most impressive recovery, and a stunning looking yacht. Michael
-
Patrick they would be taking me away in a straight jacket.... I don't know how you do it ... i just sit and shake my head. Michael
-
Oh No! surely you will be finishing the ship, or perhaps you mean intermittent builder. you are doing a beautiful job on the model. Michael
-
Bob, thanks for this, I am always happy to learn something new each day and this is a prize. i shall file this one away for some future projects for sure. Michael
- 348 replies
-
- 4
-
-
- pequot
- cable ship
- (and 1 more)
-
Mechanical Solar System by jim_smits - Eaglemoss
michael mott replied to jim_smits's topic in Non-ship/categorised builds
Hi Jim I just found your thread and what a wonderful project, I used to work at a science centre and planetarium in Edmonton, where special projectors were custom built before they converted to a digital projector. I spent many hours working out the gears for a Jupiter only Orrery with all its moons. I never got farther than doing the gear ratios. I love the look of your one. Michael -
Hi Patrick, kudos for reaching your milestones. I too like the shot with all three decks the volume of detail that you are able to show at this small scale is quite remarkable, The bowls of fruit in the background alway put the scale into perspective for me. Michael
-
I would think that the sweeps would be set on the other axis given that the section at the thole pins are restricting the rotation of them. Other than that they look quite extraordinary. michael
- 641 replies
-
- 6
-
-
- greenwich hospital
- barge
- (and 1 more)