michael mott
-
Posts
5,200 -
Joined
-
Last visited
Content Type
Profiles
Forums
Gallery
Events
Everything posted by michael mott
-
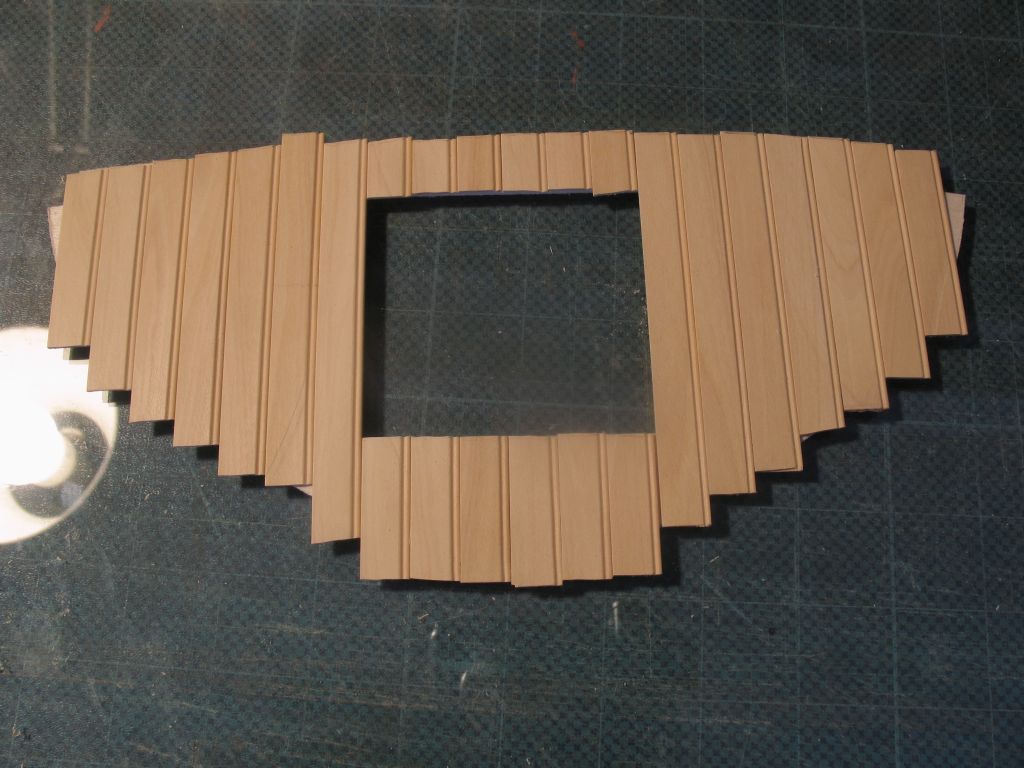
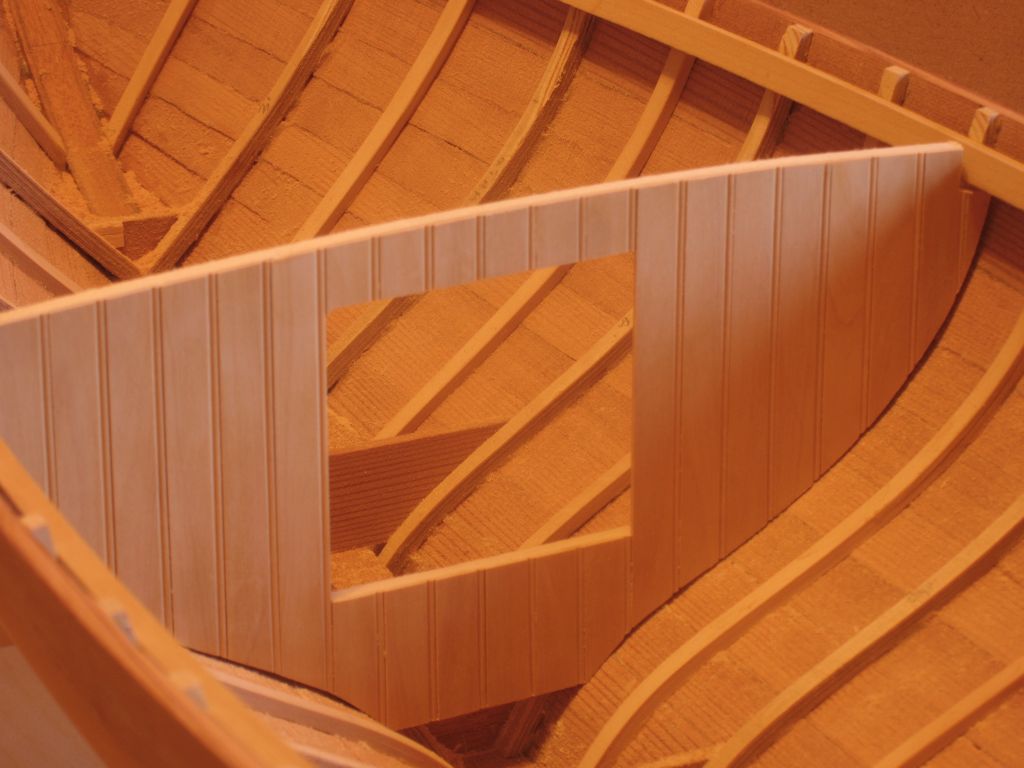
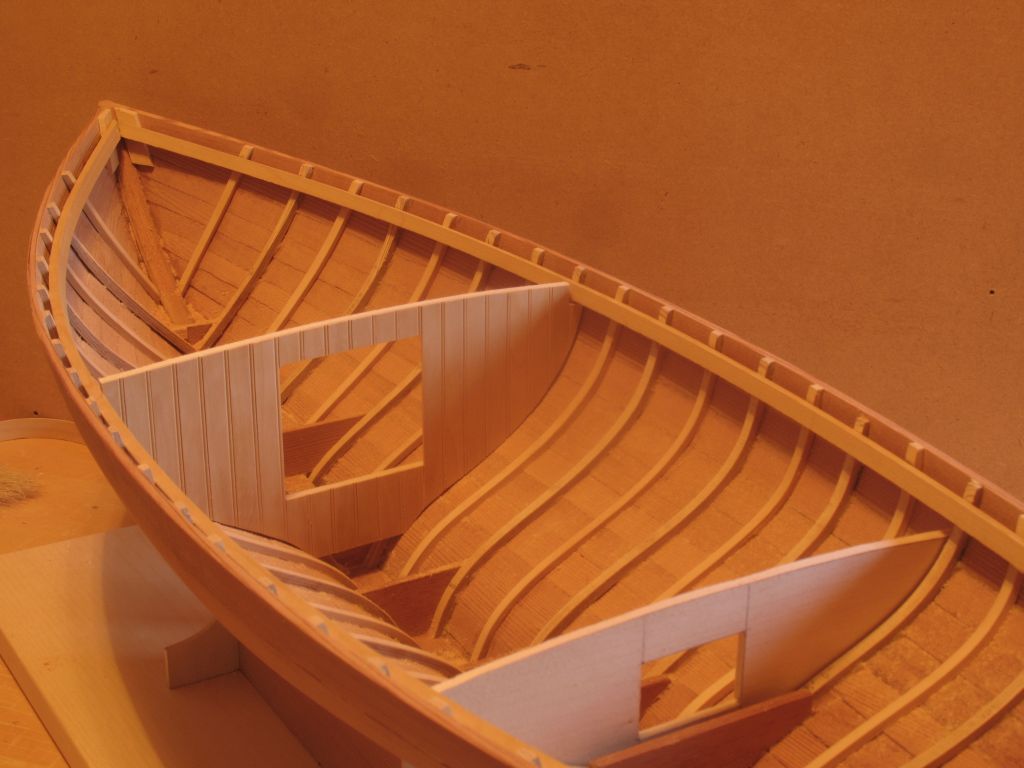
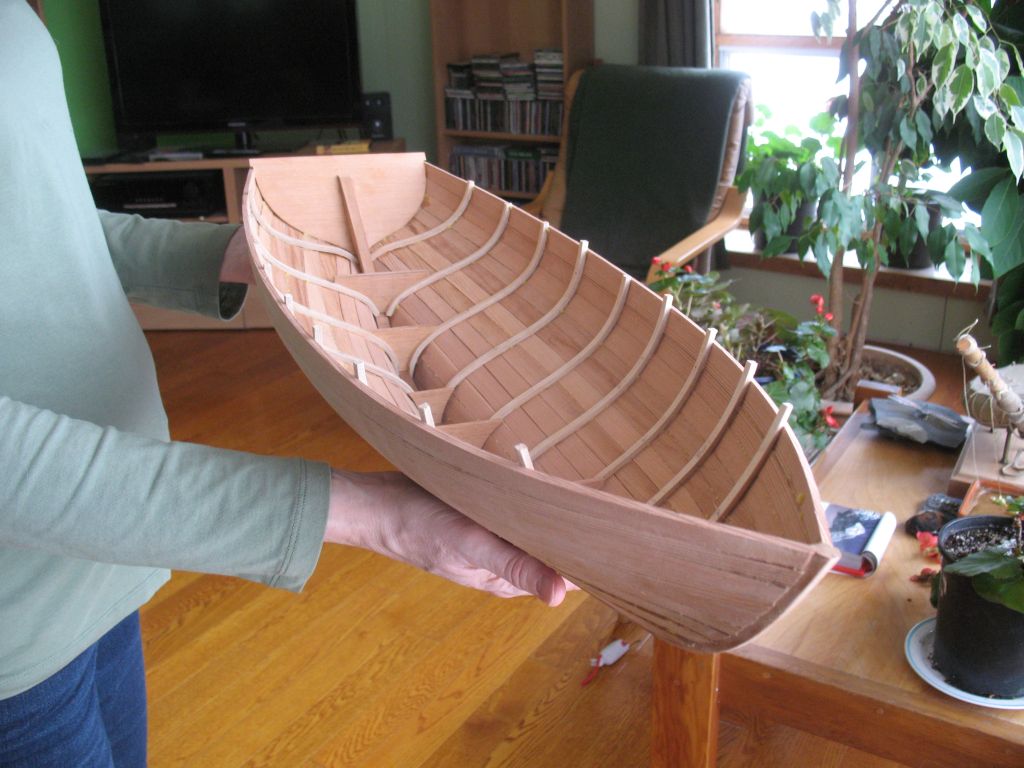
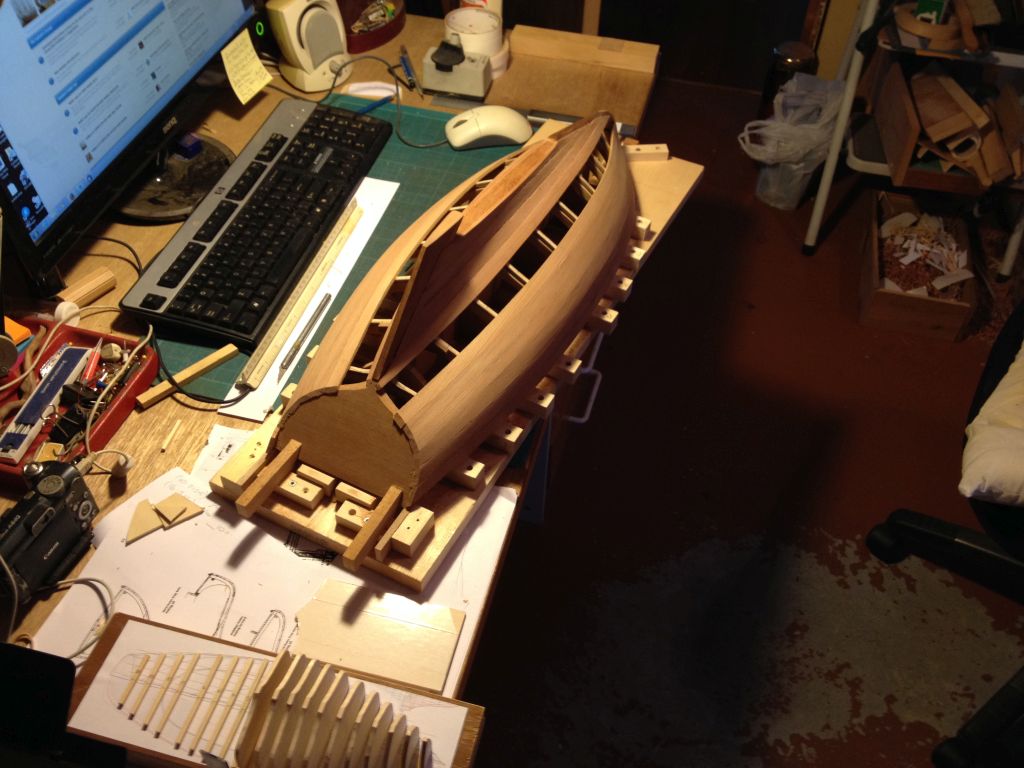
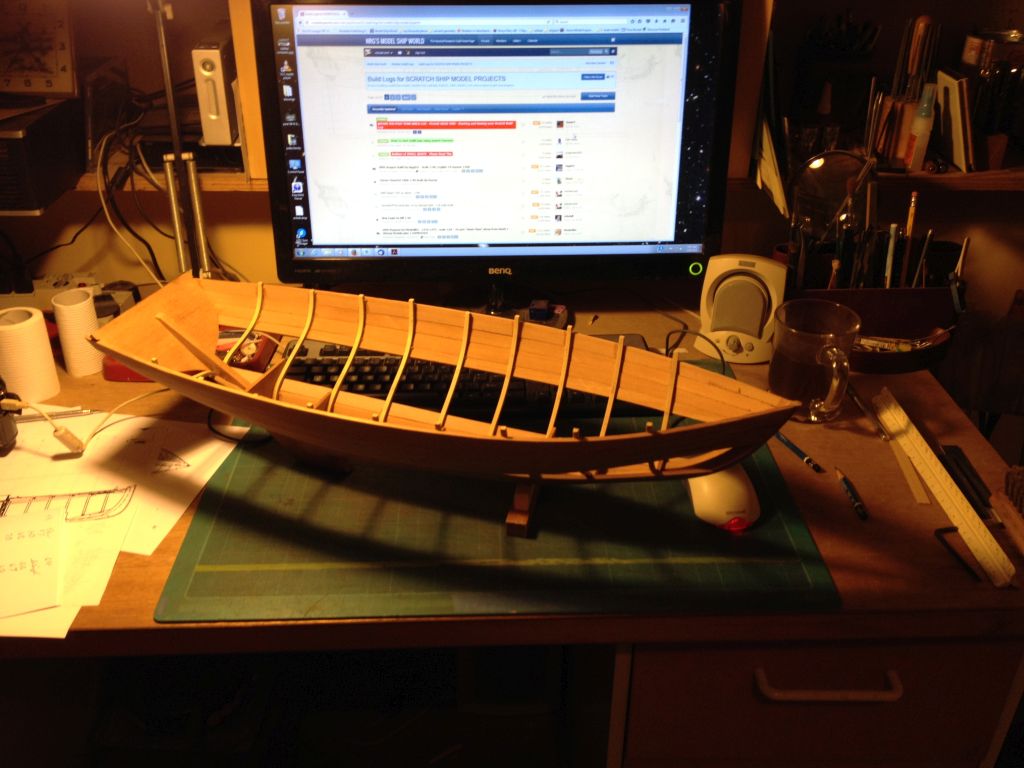
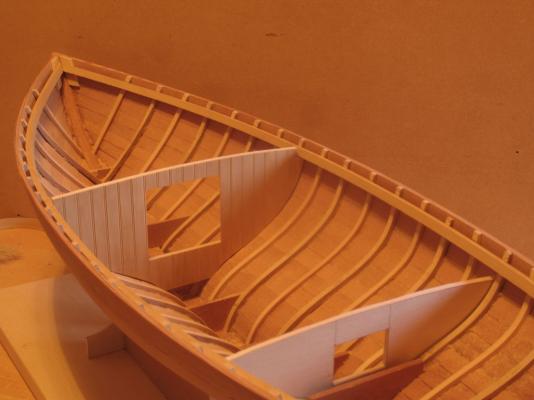
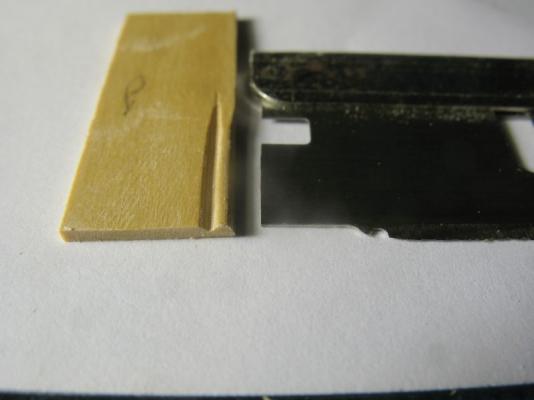
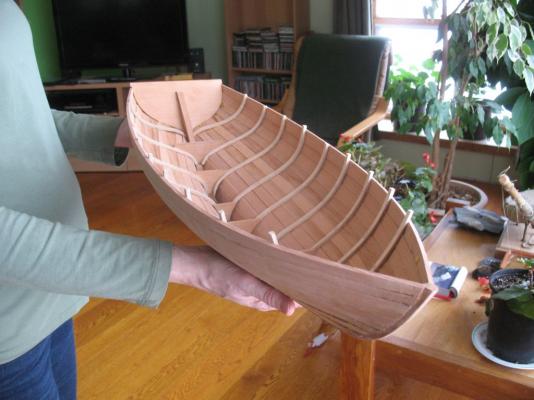
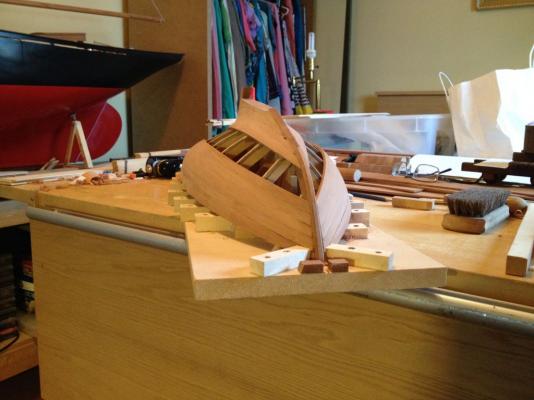
 Thanks for all the likes. build part 23 I though about the interior finishes and decided that I would dress it up a little. The forward bulkhead needed something more than just a sheet of fancy plywood, so I made a small scraping tool ala Druxey and made some molded planks of Costello 3/8th x 3 inches beaded on one edge to give a bit of style. I am also going to add some louvered doors. Also glued in the ledge stringer, it is a little lower that the sheer to support the deck beams. Temporary placement of the fore and aft bulkheads Michael


-
Drastic measures indeed. Michael
-
Hi Mark, I just reread your whole log , I find it useful sometimes to pull the whole of the builders thinking back together. Over the long incremental reads I sometimes lose the reason and thoughts that go into the whole. Also knowing what know now, that I didn't when you switched from the notion of putting the ribs in after and that of gluing to the building frames. On my next hull I am going to give the process of bending the ribs first inside some ribbands (full size practice). I believe that on models that are the size of 1 inch to the foot and up this will be a viable method. I am also thinking that your extra high moulds are a good way to gain access to the inside. The other thought is that in some ways the method developed by Harold Hahn with the support board outside the frames gives unobstructed access to the inside. If you were to make your next build structure wider by somehow getting the aluminum bars to the outside Your build frame with the double run of aluminum bars would be similar to the reversible frame that I developed for Skipjack. What I am now thinking is to use a combination of taller build molds as you have done in combination with stronger ribbands, bend the frames from Costello with a single lamination 2x 3/64 or 2x1/16 I am very sure that this will provide enough strength. The frames can be bent one lamination at a time to ease the tension on the ribbands, this will be slower to do all the ribs but I am confident that a superior hull will result. All of this in an open frame that can be reversed easily to enable work on both the outside and inside at the same time. perhaps a locking rotisserie type build structure. Anyway back to your own model she is looking very nice, noting that you had to add a steeler is this a result of using strip planks versus using wider spieled ones? Michael
-
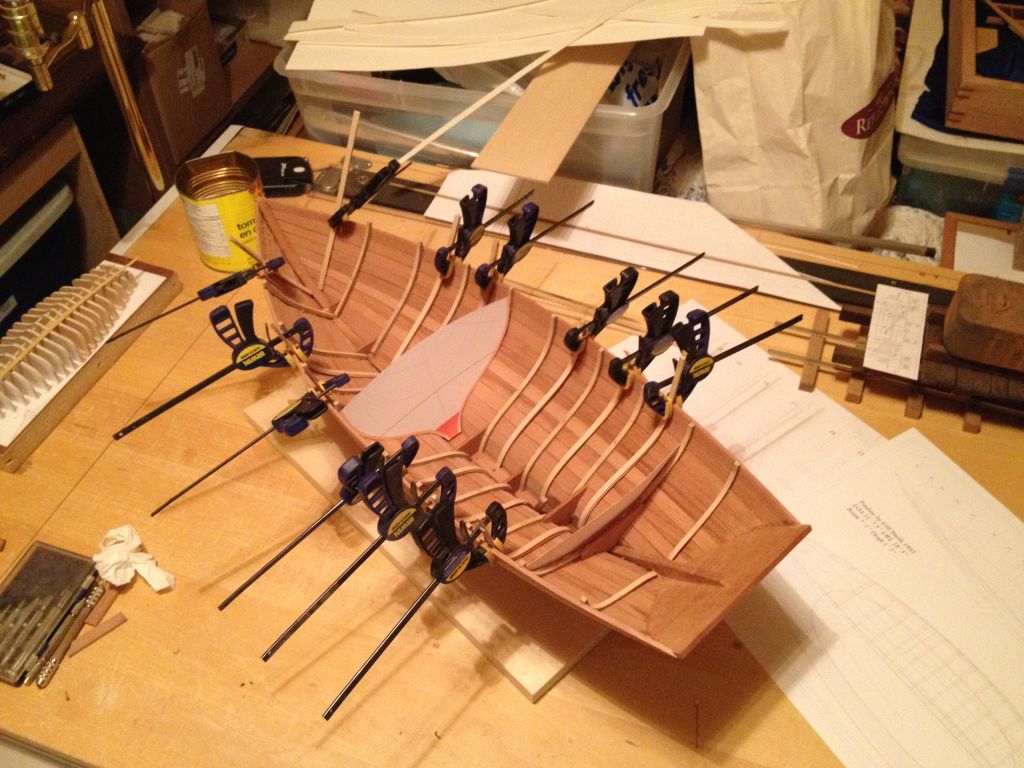
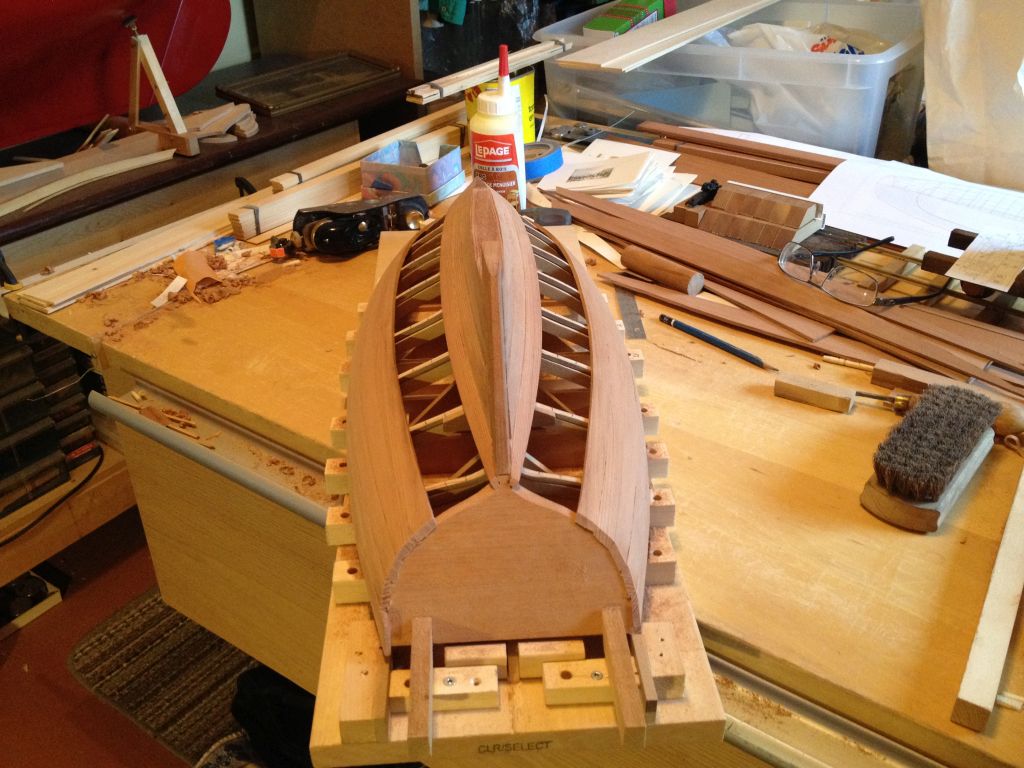
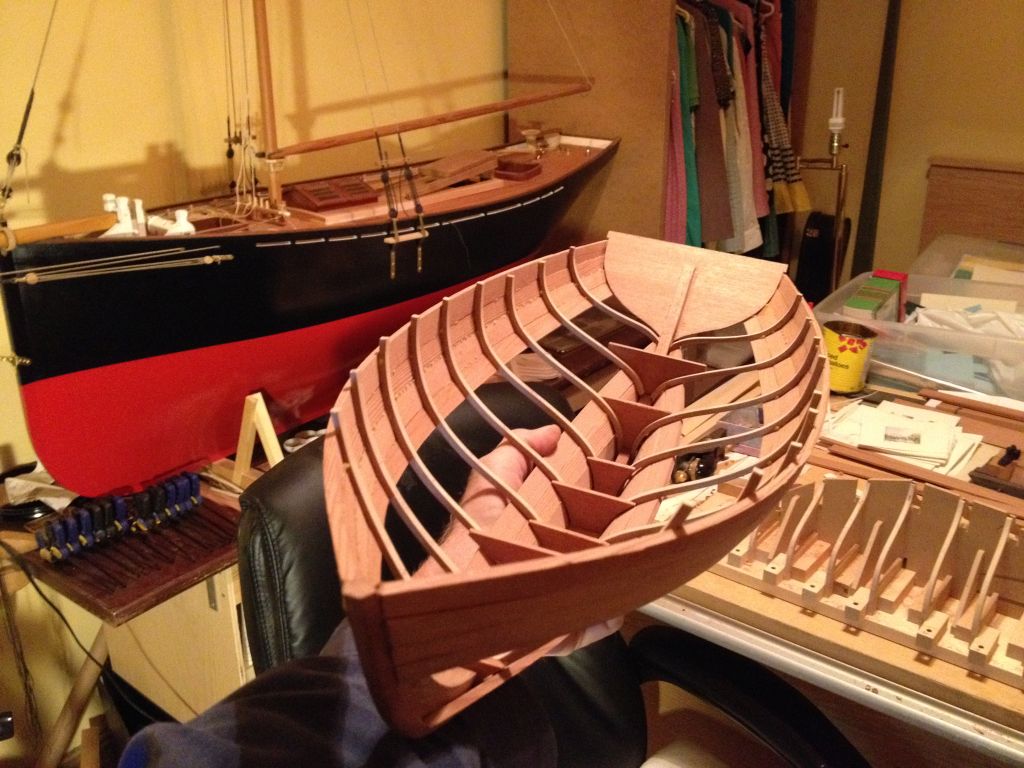
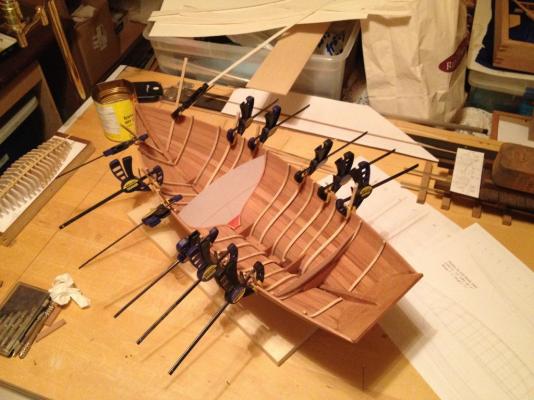
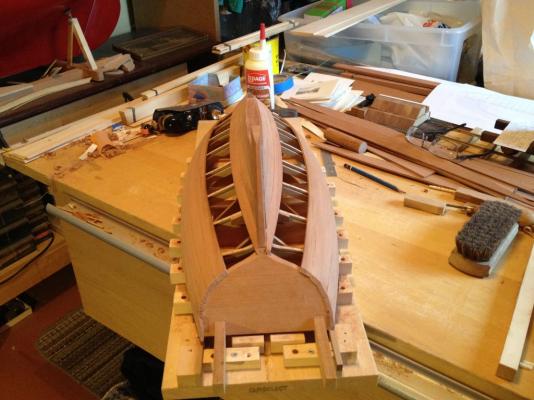
Thanks for the likes and comments. Build part 22 In gluing up and cleaning up the Costello I am now convinced that it will be the best way to make "steam bent" frames for these small boats in the future. If I were going to leave the inside as varnished wood instead of a painted one I would remove the laminated birch framse in lieu of the Costello ones. this frame laminated from two layers of 1/16th is not only very strong is looks nice. Most of the additional frames have now been glued in place a few more to go there are a few rejects in the upper right corner Michael


-
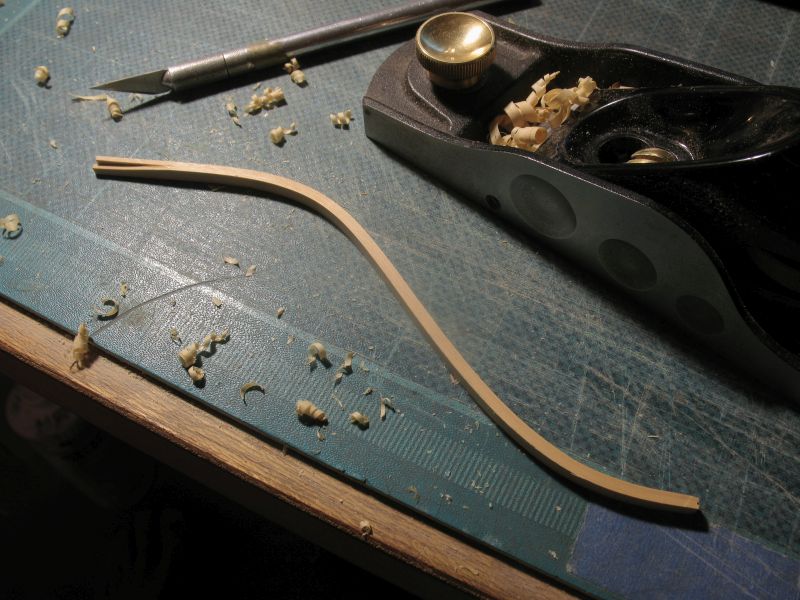
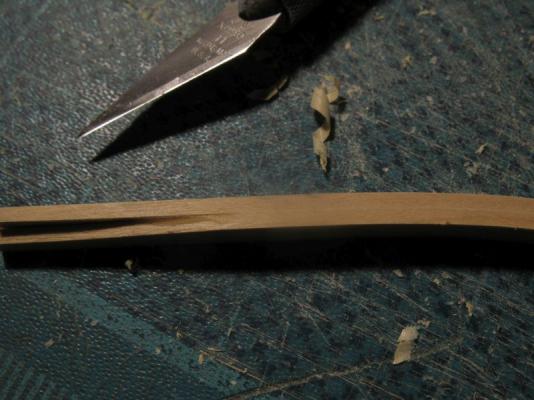
Thanks everyone for the kind comments and likes. Patrick I missed replying to your question sorry. I will sail it as a pond yacht. no radio. Build part 22 I cut a number of strips of 1/16th thick strips of Costello Boxwood and soaked them in alcohol (thanks for that tip Pete) and they bend very nicely. once they are dry and glued together I will add a third which will make them 1 1/2 inch molded. Michael
-
Nils, you have to be the master at re-purposing items from other disciplines. Michael
- 2,625 replies
-
- 6
-

-
- kaiser wilhelm der grosse
- passenger steamer
- (and 1 more)
-
Jon, you could also look into melting down some used wheel balance weights with a propane torch. Michael
-
Ta da... I know I need a hair cut. Now to make a cradle and get on with some final sanding before working the topsides. Michael

-
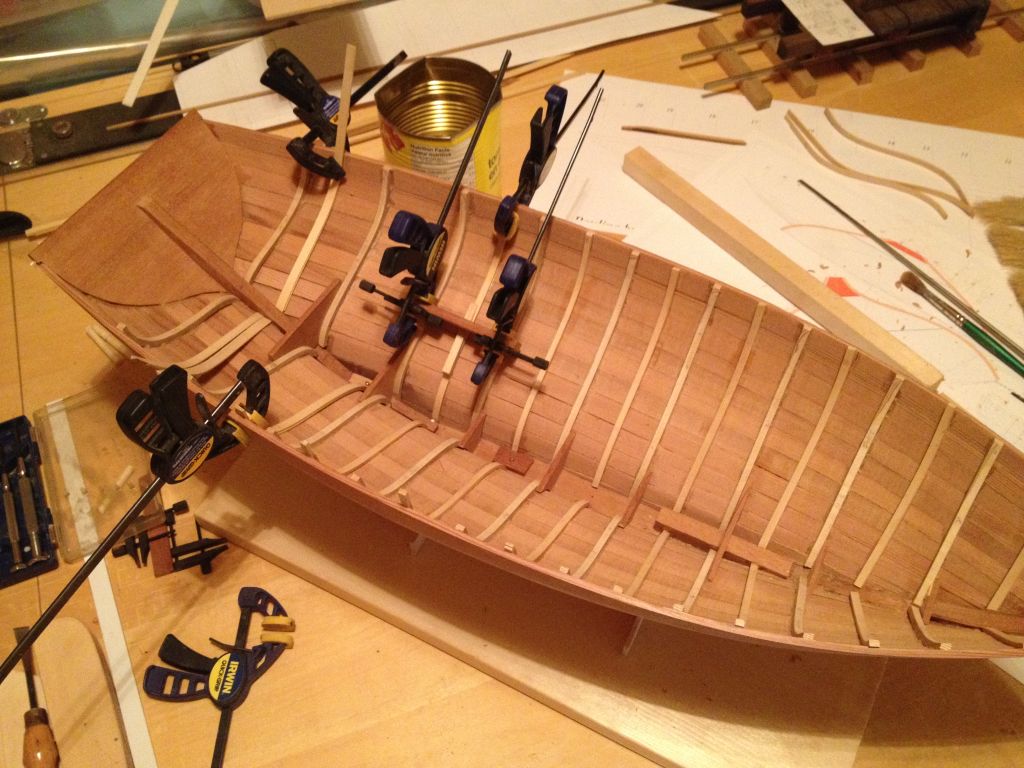
Thanks for the visits comments and likes. Build part 21 The last plank is glued in on the port side and only the last one on the starboard to go. it took a while to get it fitting snug and to avoid swelling the wood in the steam box I warmed up the plank with a commercial hot air gun which made it quite flexible without being wet and needing to dry. I was able to get the plank to stay in place without clamps before gluing. I have done a little rough sanding and it looks reasonable so far. Michael

-
Sweet, what a lovely form this boat has. Michael
-
John My frozen electrons are having a difficult time navigating the equator...... Michael
-
Ooops....I forgot that was in the area..... Michael
-
Druxey are the central spine elements the same wood or are you using something else? Michael
- 641 replies
-
- 2
-
-
- greenwich hospital
- barge
- (and 1 more)
-
Thanks for all the likes and visits. Build part 20 Down to the last two planks on each side now. I have been checking the open distances with a rule to ensure that they are even on both side now. I am getting excited now about getting the last few planks secured, and have been giving the last ones a bit of thought regarding holding them in place. I am not sure yet how that will transpire. Michael


-
Build part 19 The next pair of planks now secure to the hull only three more pairs to go. Michael
-
Pete that looks super! Michael
-
Mark the hull is looking very nice. Not long now before you will be able to sit her in a cradle and work on the topsides. Michael
-
Thanks Bob, are the boats that have the planks clear like the mahogany varnished ones also given a coat of glass? Michael
-
Congratulations Nils, I am amazed by the number and speed that you accomplish all these beautiful models. It is good that you put them into the glass cases to protect them. Michael
-
Good morning Nils, the steam into the box is very simple a hole in the lid that fits on top of the saucepan is all there is. The steam is slowed down from escaping by the tea towel over the end where the slot is for the steam to escape I have edge glued all the planks. I have never used any of the epoxy coatings, I will need to look into that. I know that Pete uses the West Epoxy System product. I am not sure about leaving the planks clear or whether to paint the hull, If I paint it then a coat if glass might be a good thing. I,m thinking about it. Thanks Pete, I am going to get some plaster the next time I am in the city. I am glad you think so Deon. Michael

-
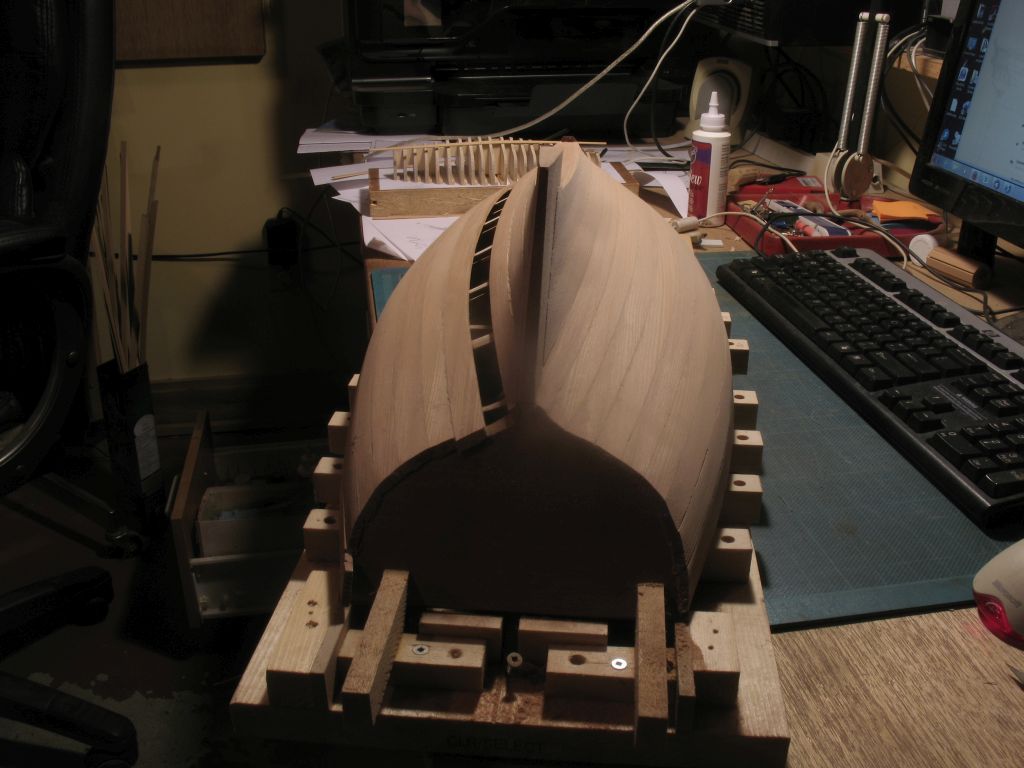
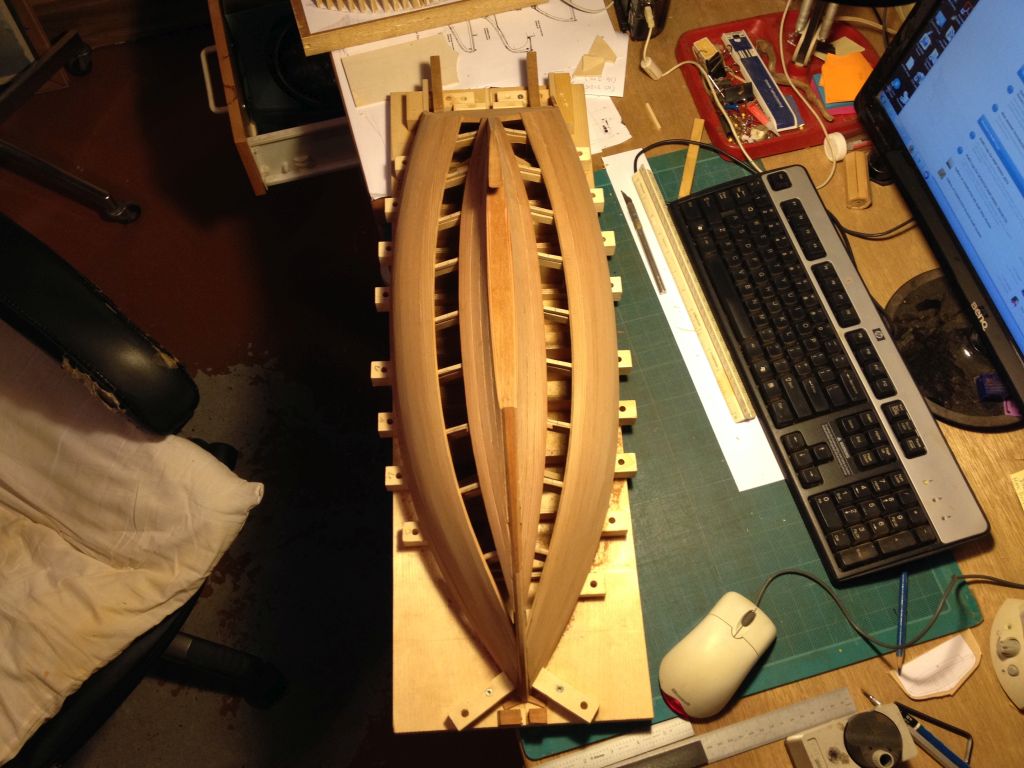
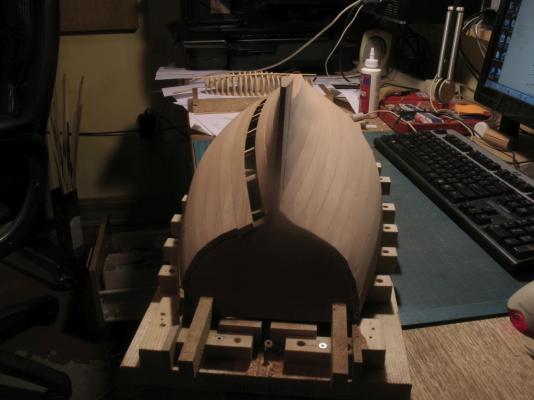
Before going any further I though it might be wise to see how easily the model would come off the building board while I still had access to the ribs on the building formers, a couple of spots were tacked but they came un-tacked with a little coaxing. Now I am a "happy camper" Michael