michael mott
-
Posts
5,200 -
Joined
-
Last visited
Content Type
Profiles
Forums
Gallery
Events
Everything posted by michael mott
-
 Hi Mehmet I just found you build, it looks great I will follow along now. Michael
- 83 replies
-
- 3
-

-
- sponge boat
- finished
- (and 1 more)
-
My that looks like a lovely bit of work, you make it look all to easy.... but yes..come to the dark side Luke....1 1/2 ....1 1/2 you can feel the force Michael
- 258 replies
-
- 7
-
-
- buzzards bay
- herreshoff
- (and 1 more)
-
Great progress Vaddoc, now that you have ventured into the rope making part, there are no end of possibilities for your rigging, Druxey's comment about the lay of the rope, is something you might want to look into a little. Your comments about the positions of the belay pins, and the details like the length of the main boom and gaff jaws are all things that from my own experience with sailing my yawl, are things that sort themselves out pretty quickly when you are dealing with the wind. Your machine looks fine, and after a while there will be tweaks that you will decide to make to suit how you work and what you want to do, it is the nature of the beast. Michael
- 253 replies
-
- 2
-
-
- ketkch
- gaff-rigged
- (and 1 more)
-
-5celcius and I thought it was cold here. No working outside is not for me in these temps. Pete you have done a great job on the hull almost a shame to paint it but the time you have taken to get the shape right will pay off in spades. Michael
- 258 replies
-
- 5
-
-
- buzzards bay
- herreshoff
- (and 1 more)
-
IF YOU HAD A CHOICE
michael mott replied to Burroak's topic in Modeling tools and Workshop Equipment
Greg, Noting that you have been doing woodwork for 30 years, and your question regarding a sled, I think that the sled is a very useful device they can be made quickly from a variety of thicknesses of either good quality aircraft ply or MDF the sled does not need to have more than one long guide either to the side as the fence or underneath to fit the standard slot in the table. As Julie noted there are smaller blades that fit onto the full sized table saws and with zero clearance slot you have the power needed to cut through most materials. I in fact prefer the stability of my old unisaw with a small blade 6 1/4" or 7 1/4" these are inexpensive and quite adaptable. Regarding the other power tools My personal preference has been a bandsaw and a drill press, Although I am also very fond of my jewelers saws. Michael -
Jason thanks for the clarification. Michael
-
Nice pair of knockers on the doors Denis they almost look like lions heads, now that would be neat. Michael
-
Hey Jeff, good to see you still working on the ship. well the whole move to BC is not in the cards at the moment. Things change and we adjust to the change. We are here for the time being and are not planning on moving at the moment. Michael
-
Jason very nice work so far, I am curious about the top of the mizzen mast and the way that the additional piece is joined at the slight angle, looking at the full size boat the mizzen appears to be constructed from a single spar. Michael
-
Julie very nice way of working, I particularly like the use of the small bench vises, funny how I had never thought of that, and yet I have all sorts of clamps, and the vises are just a different clamp. Here's the thing why don't you finish this one with a painted hull as the original and with your skills at getting you feet wet with the "kindergarten" tools I know you can use the "grown up" ones looking at pictures of your shop. The get the plans for Shamrock V which was another one of the Americas Cup yachts and had metal frames but was planked with wood then you can show them side by side.....just sayin' One has to plant a seed every now and then. Michael
-
Nils what a great looking model you are building, The painting pictures surprised me, what type of paints are you painting with, I know you have probably already mentioned it but I cannot remember. Michael
- 2,625 replies
-
- 3
-
-
- kaiser wilhelm der grosse
- passenger steamer
- (and 1 more)
-
Exquisite work Glen I wish I lived round the corner to pop in and see this in person. Michael
-
Very nice John, Did they use screens at all to at least keep the bugs at bay? Michael
- 745 replies
-
- 3
-
-
- francis pritt
- mission ship
- (and 1 more)
-
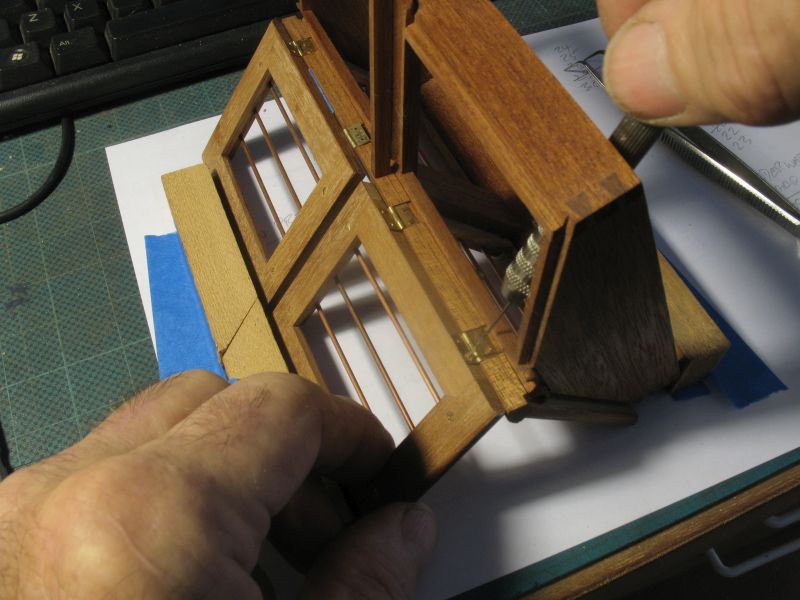
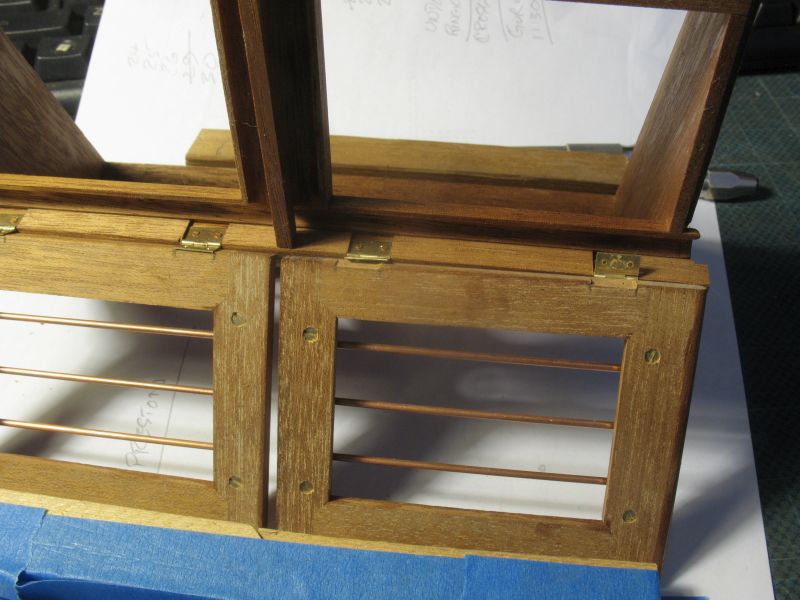
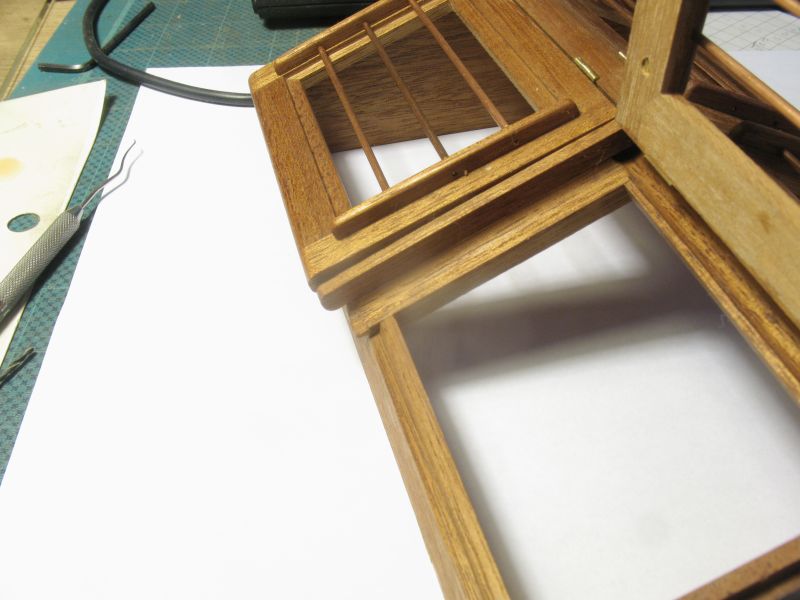
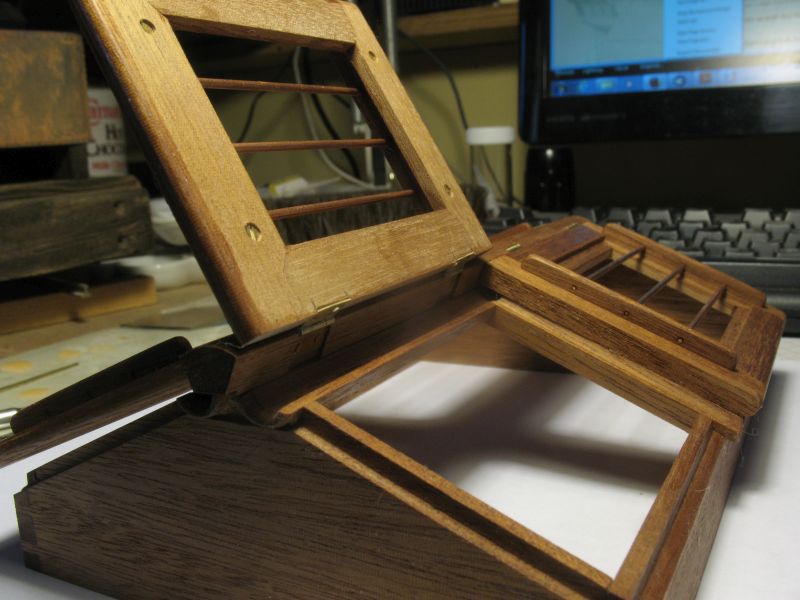
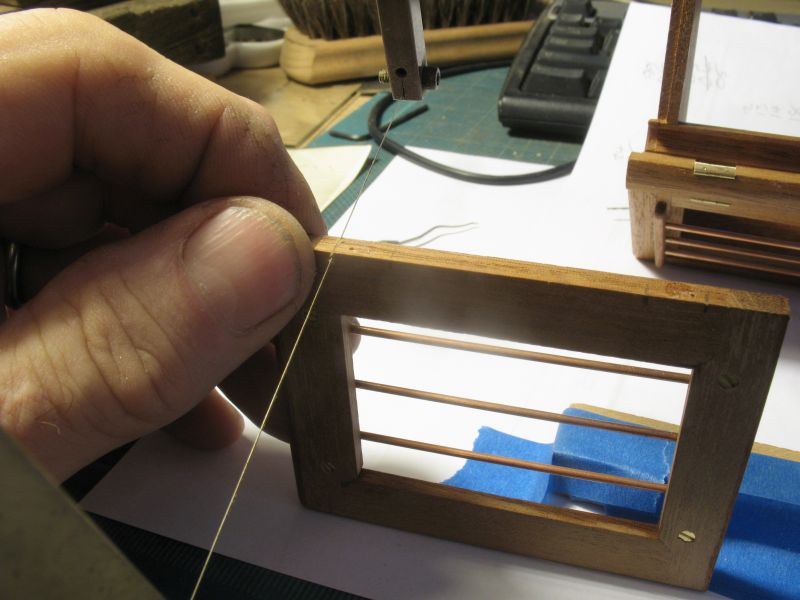
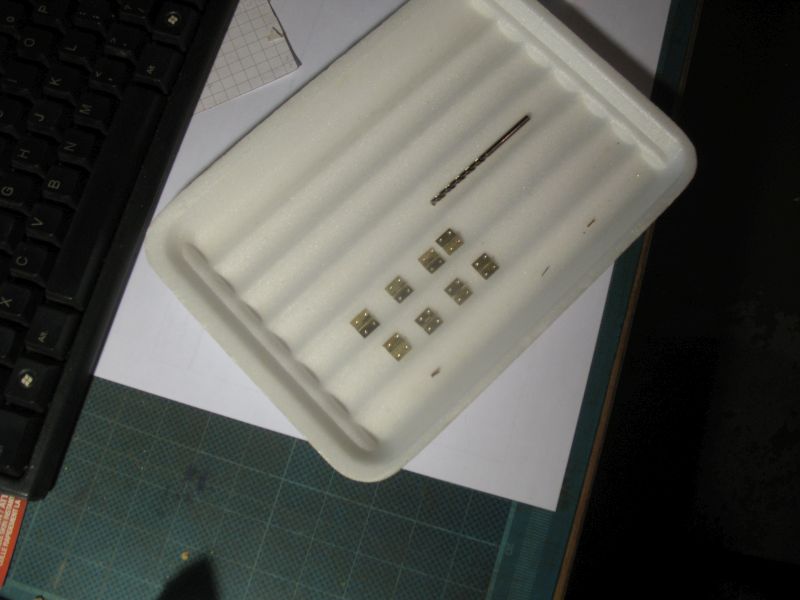
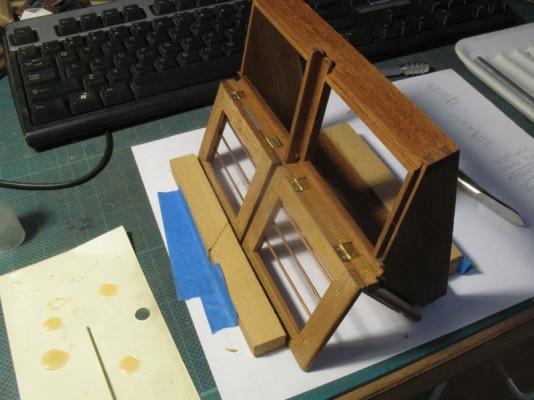
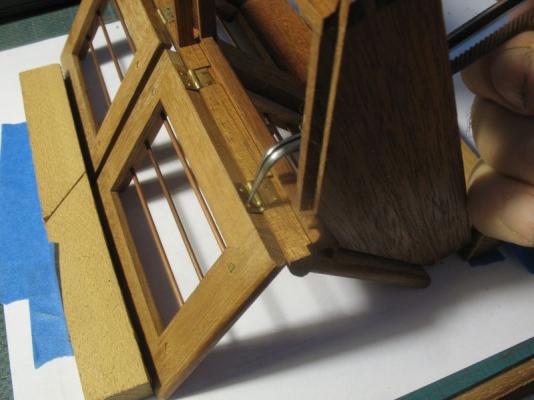
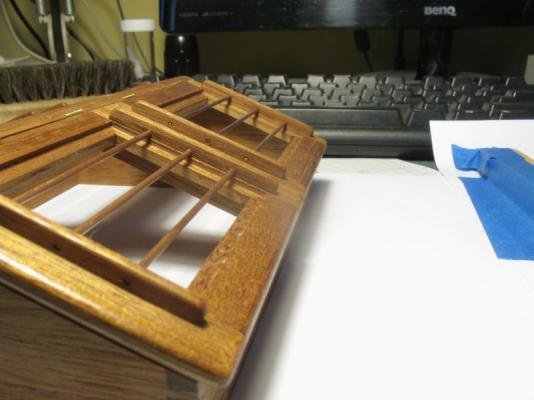
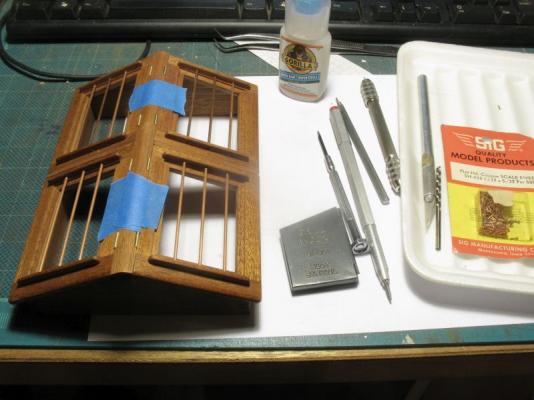
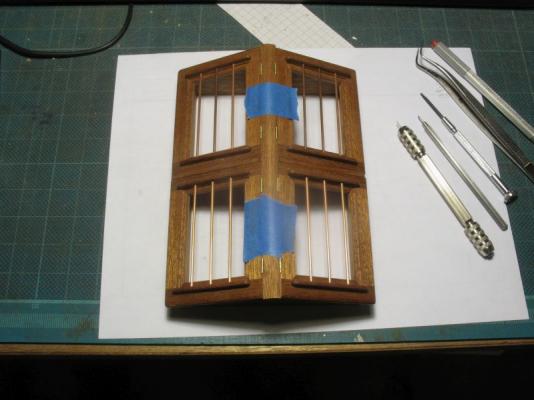
Thanks for all the positive comments and likes they are really appreciated. I just got home from the Hospital, Judy is improving. This morning i had a little time before heading into Edmonton to work on the skylight. I created a crude jig on a sheet of paper with a couple of blocks stuck down with some masking tape. This was to enable working on the light while temporarily attached with the glue. When the lights were opened up one of the temporary glue joints let go so I started the hole drilling with the hinge that was still glued to ensure that the position of the light remained fixed relative to the ridge and central divider between the lights. Because of the set up angle I was able to drill the holes for the rivets in the lights. The rivets were pressed in and then glued with some thin Acc glue After completing the lights on the first side I set it up to see how they looked......not good they did not sit down fully This was one of those moments that had intuitively crossed my mind earlier when making the slots for the hinges in the top ridge. one of the thoughts was to set the hinges into the ridge the full depth of the folded hinge to eliminate the hassle of getting the notches perfect on the lights. It also allowed the lights to seat up fully well almost fully to the ridge. The thing that I had completely failed to really understand was the minute amount of the rivet heads was enough to prevent the hinges from fully closing....what to do? the hinges were set with pins and glued. I decided to deal with this later and made a change with the second side. The change involved setting up the lights so that the hinges could be mounted so that from the top when the light were closed thee looked clean, but that they would be slightly open underneath to allow for the heads. The second side was drilled as the first side and the countersinks were made just a little larger then the hinges were unglued with a number 11 blade after marking their positions. Then using the jewelers saw I cut them back at an angle from the topside to the bottom side. then using the #11 I removed the slight wedge and cleaned it up with a needle file. The next pic shows the one on the right has been modified and the one on the left is next to be done. After fitting the first one and testing it to see if my fix would work I was satisfied that it would. Then completed the second one, all that remains is to un-glue the well glued ones that I did first. the next pic shows the lights seated down fully on the second set. Moral of the story... do a test first! but then you all knew that didn't you Michael


-
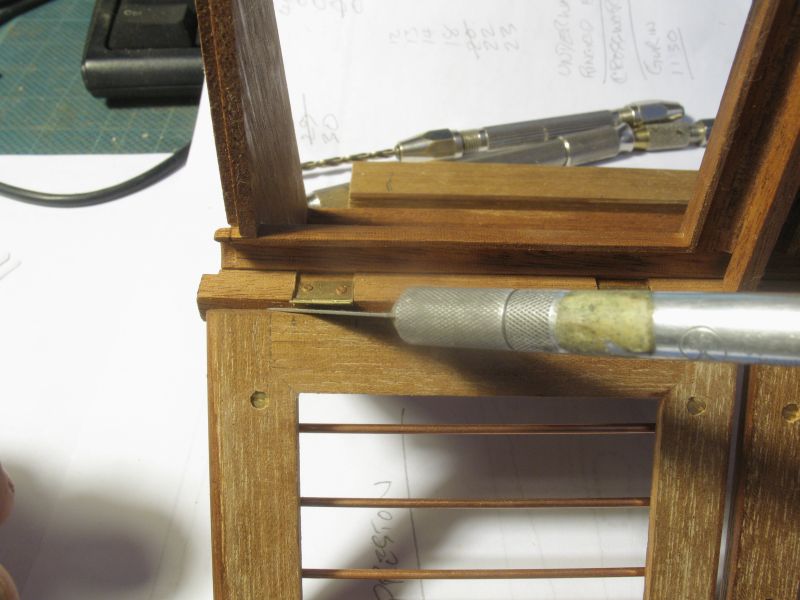
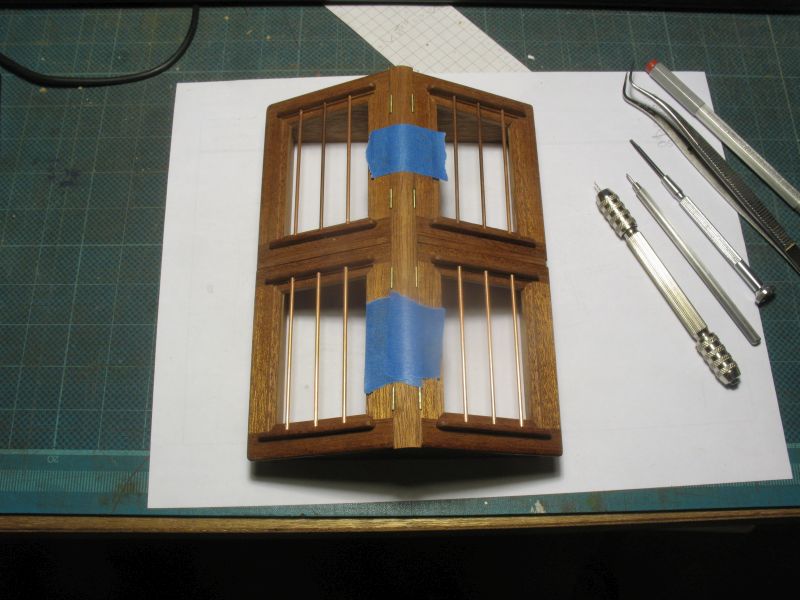
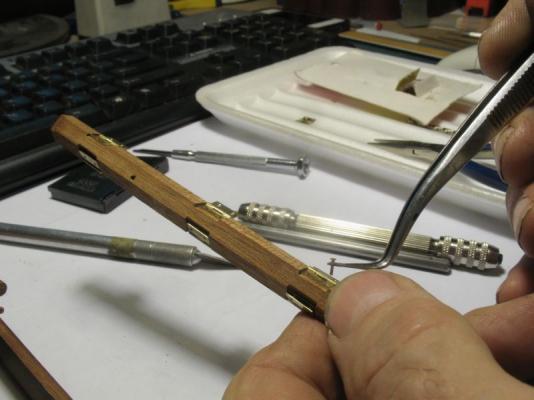
Again Thanks for all the positive support and likes. I mounted the hinges today first on the ridge. small awl first made a location for the drill and then drilled with the #68 drill mounted in a pin chuck to drill the holes then one of the rivets pushed home. Once all the hinges were mounted I used tiny drops of thicker ACC glue Gorilla brand to temporarily hold the hinges onto the lights I will wait till the morning before opening them to add the rivets to them once they have set. The blue tape is just to hold them overnight from sliding until the glue completely hardens. Michael
-
Thanks everyone. Druxey I had not thought of burs probably because they really have not been part of my modelwork tool chest agency. I shall have to look into what is available from the jewelers tool shop in Edmonton when I have a few pennies to spare. I do have a Dremel with a flex shaft, but mostly it never occurs to me to use it. Perhaps I should do a bit of out of the box thinking and plug it in occasionally. PS it is still snowing traffic is evidently rather snarly in Edmonton till this system passes. Michael
-
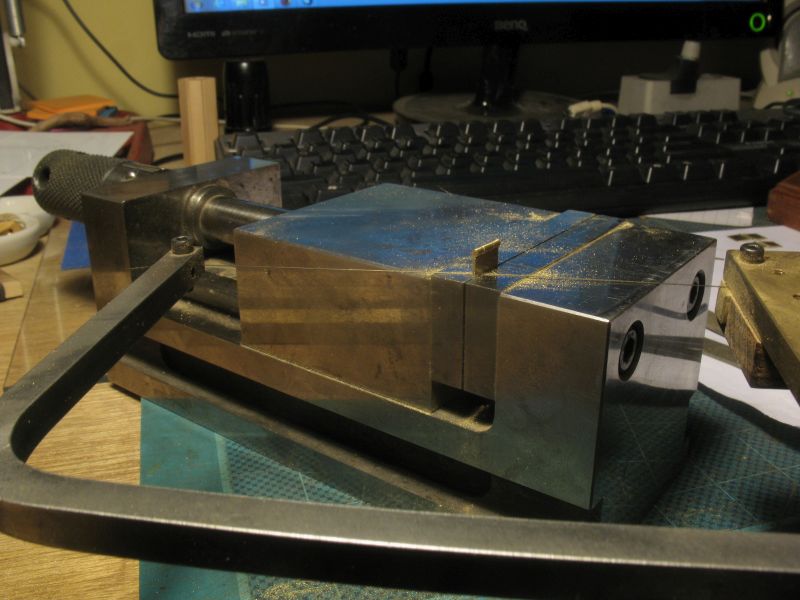
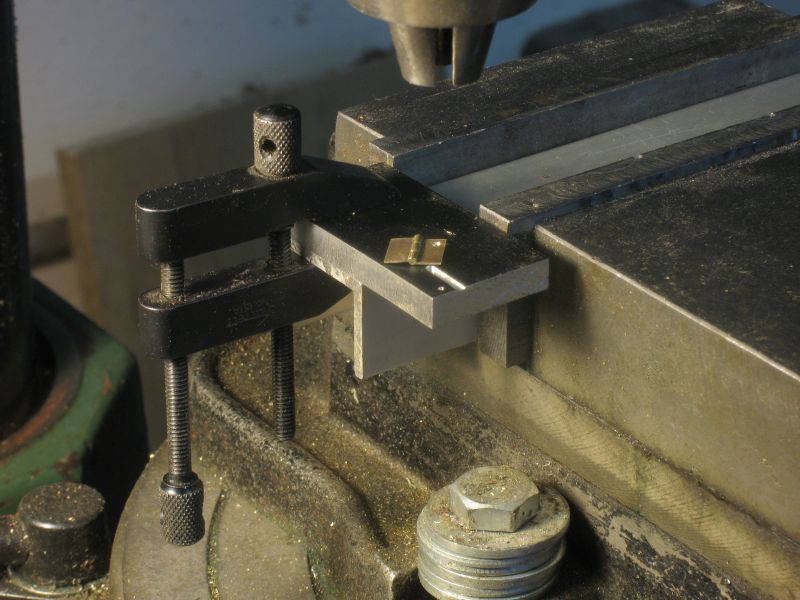
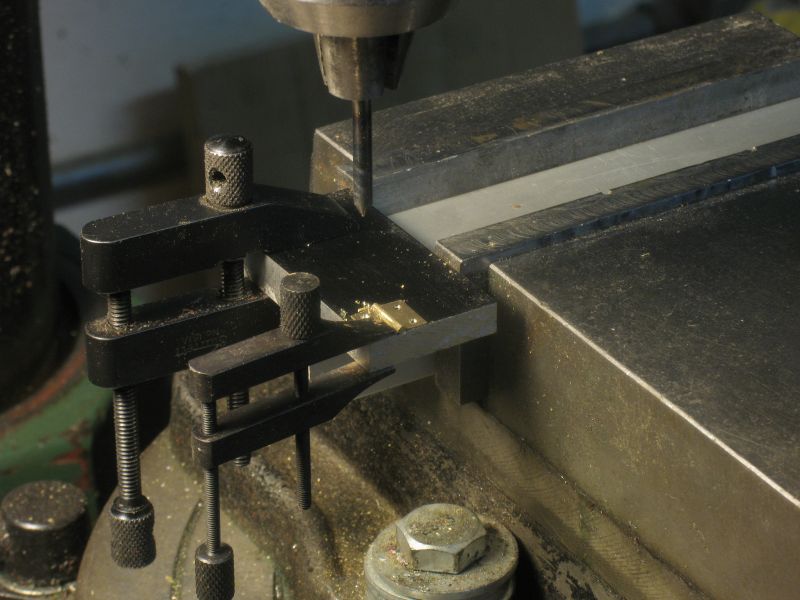
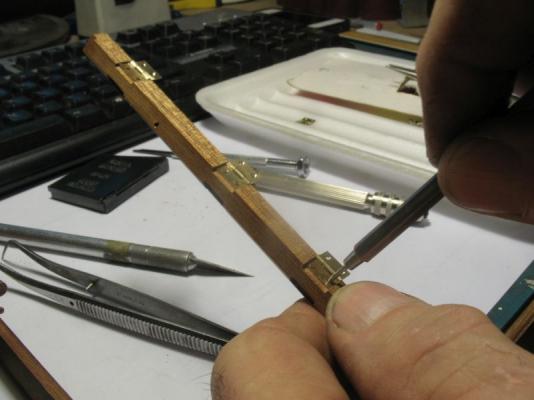
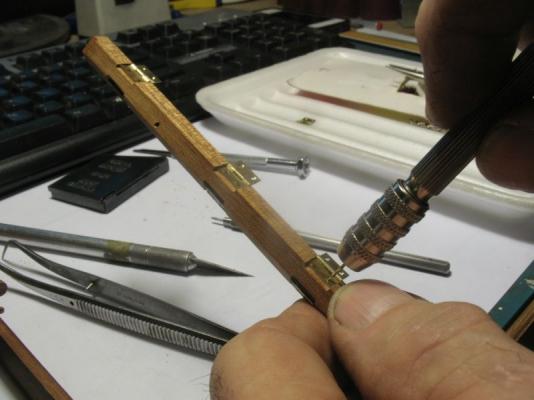
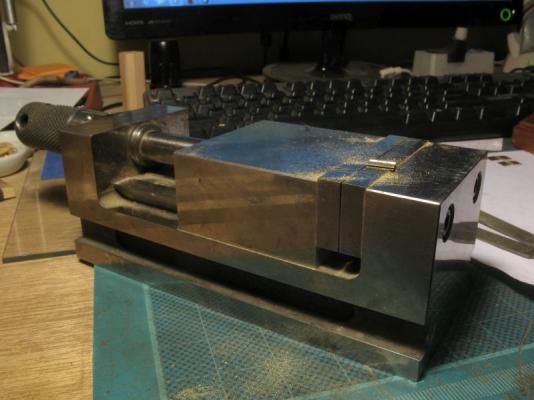
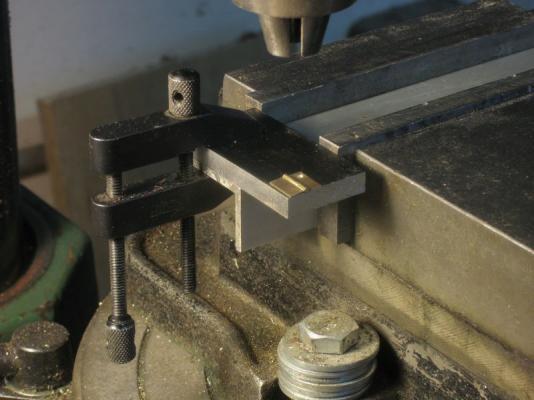
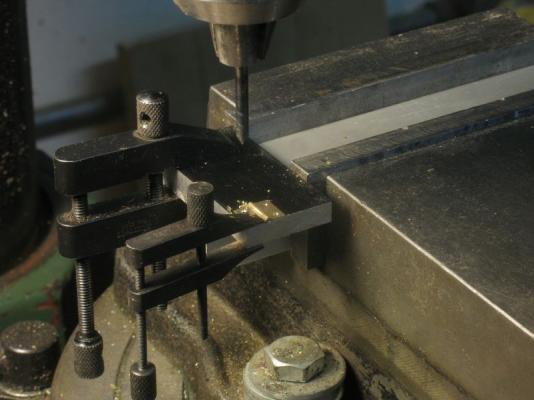
Thanks for all the likes and concerns for Judy, it will take a while but I'm confident all will work out well. Been a long week, but it is snowing and the roads are bad so since I had to stay home today I did manage to work a little on the hinges, picking up where I left off on Tuesday. Feels like I'm using up way too many electrons to show 32 holes in a few bits of brass. But here goes. The hinges were clamped and cut to size using the vice as a guide for the saw blade. I made a simple clamping jig so that I could drill all the holes with just 2 positions of the table. first I milled a relief slot with a 1/16th end mill in some hard aluminum scrap and clamped this in such a way as to give me the ability to use the small toolmakers clamps on the hinges. The hinges were then drilled first in the bottom left and rotated so that the top right was next.The drill diameter was .032" This shows the clamp to drill the top left which when rotated becomes the bottom right.... Are you confused yet? also the home made precountersink All drilled the drill in the picture was used between my fingers in a twirling motion to set a bit of a countersink for the 1/32 flat head rivets which will represent the screws and hold everything together. Now I just have to sort out the sequence for attaching them. Michael


-
Thanks everyone it helps a great deal... having some family health concerns right now so things might be a bit spotty for a while. Julie thanks for the link I smiled when I saw Edmonton on the stern it is 50 miles west of here I go into Edmonton a lot and now it will be more frequent trips to the Hospital. to see Judy. Michael
-
Looks good Pete, remind me again what wood you are using to plank with. Michael
- 258 replies
-
- 4
-
-
- buzzards bay
- herreshoff
- (and 1 more)
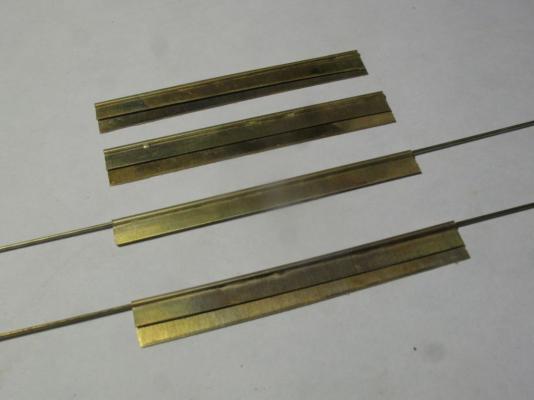
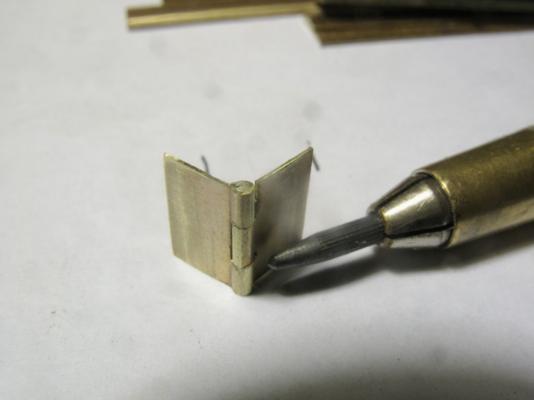
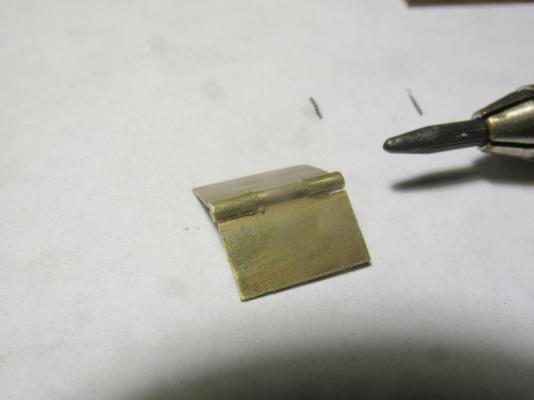
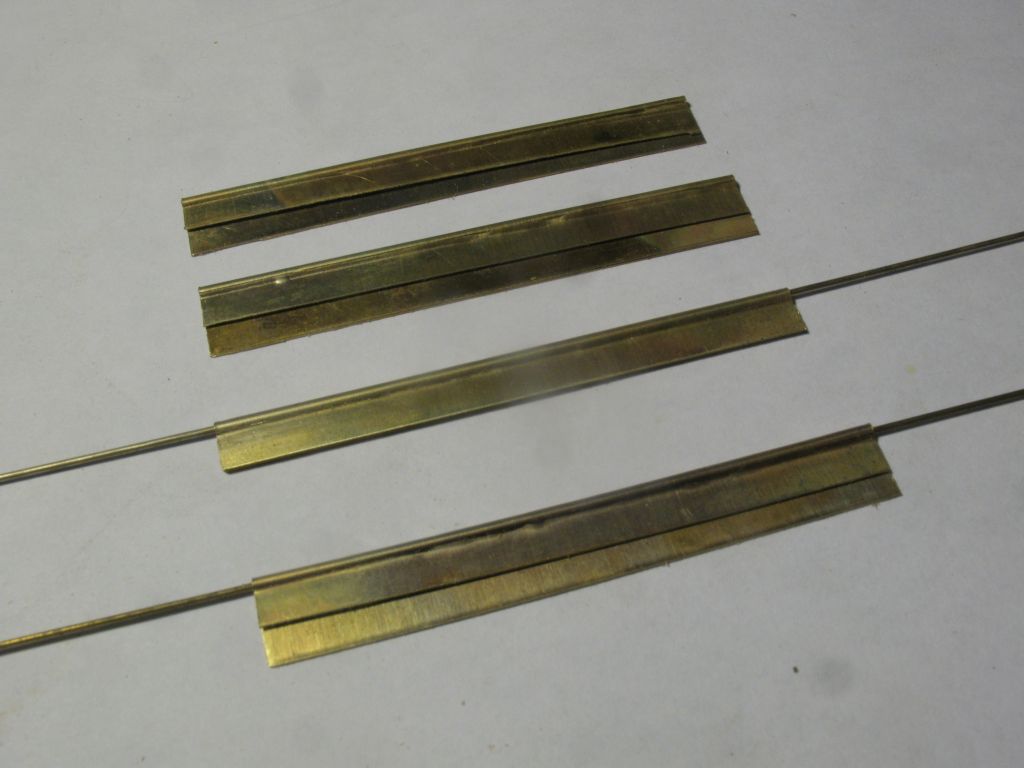
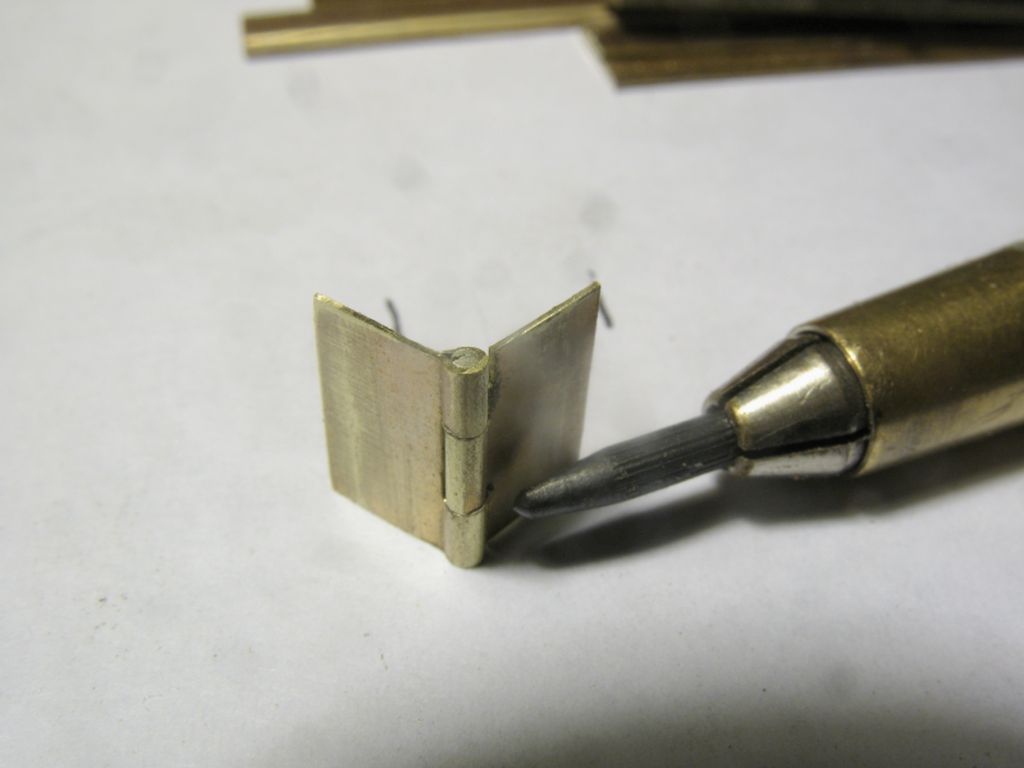
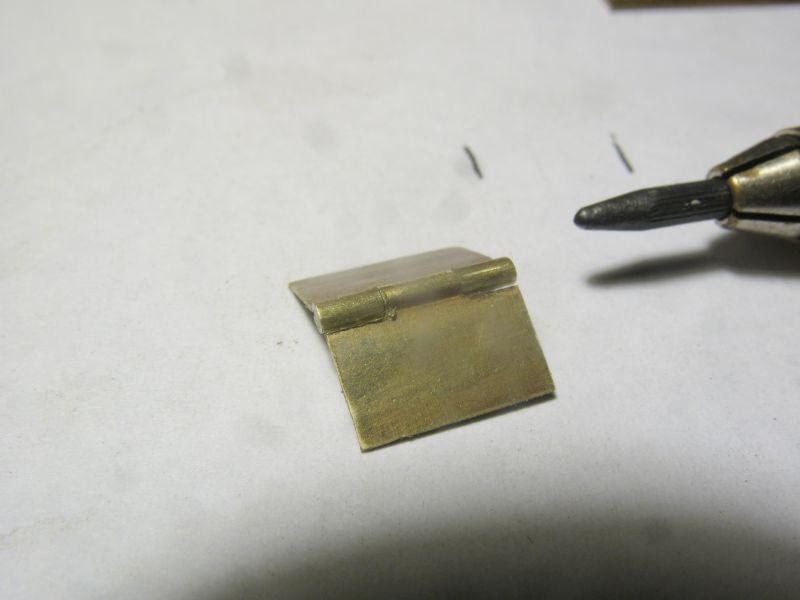
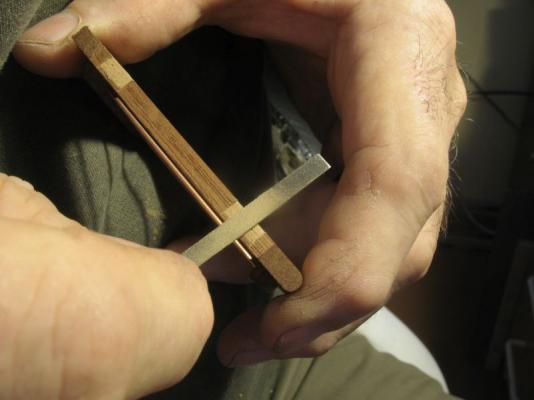
-
Thanks for all the positive comments and other feedback. I made a start on the hinges, they are cut from .010" brass sheet. scales out to roughly .078 which is 14 gauge sheet. which seems reasonable enough. the strip was annealed by heating to red and then quenching in water, I could have let it cool down on its own and would have the same result. then it was folded over on itself in the milling vice with a length of .032" steel rod to support the rounded portion after the fold was nearly complete I set the folded metal so that as the vice squeezed the brass it pushed the steel rod upwards to form the full round, similar to what we do when we wrap a piece of paper around a dowel and then pinch it to become tight our finger slide a little as the paper closes together. A couple of pieces were cut off using the jewelers saw with a #7 blade the finest I have. The notches were filed out with needle files with some brass .032 rod inside as support. next I used the jewelers saw to cut off the folded flap close to the rounded portion, in order to lessen the flex of the blade I shortened the throat of the saw to approx 3 inches. Once all the rest are cut and assembled I will use the drill press to drill and countersink the holes. Just 7 more to go. Gee the close ups are brutal they show every flaw. The pieces were assembled and then squared up with a 6 inch #4 flat file Michael