


gak1965
-
Posts
603 -
Joined
-
Last visited
Content Type
Profiles
Forums
Gallery
Events
Posts posted by gak1965
-
-
This is an example of someone who did an amazing job on the Revell USS Constitution with the thermoplastic sails. WAY out of my league: https://modelingmadness.com/review/misc/ships/carcon.htm.
- Marten and popeye the sailor
-
 2
2
-
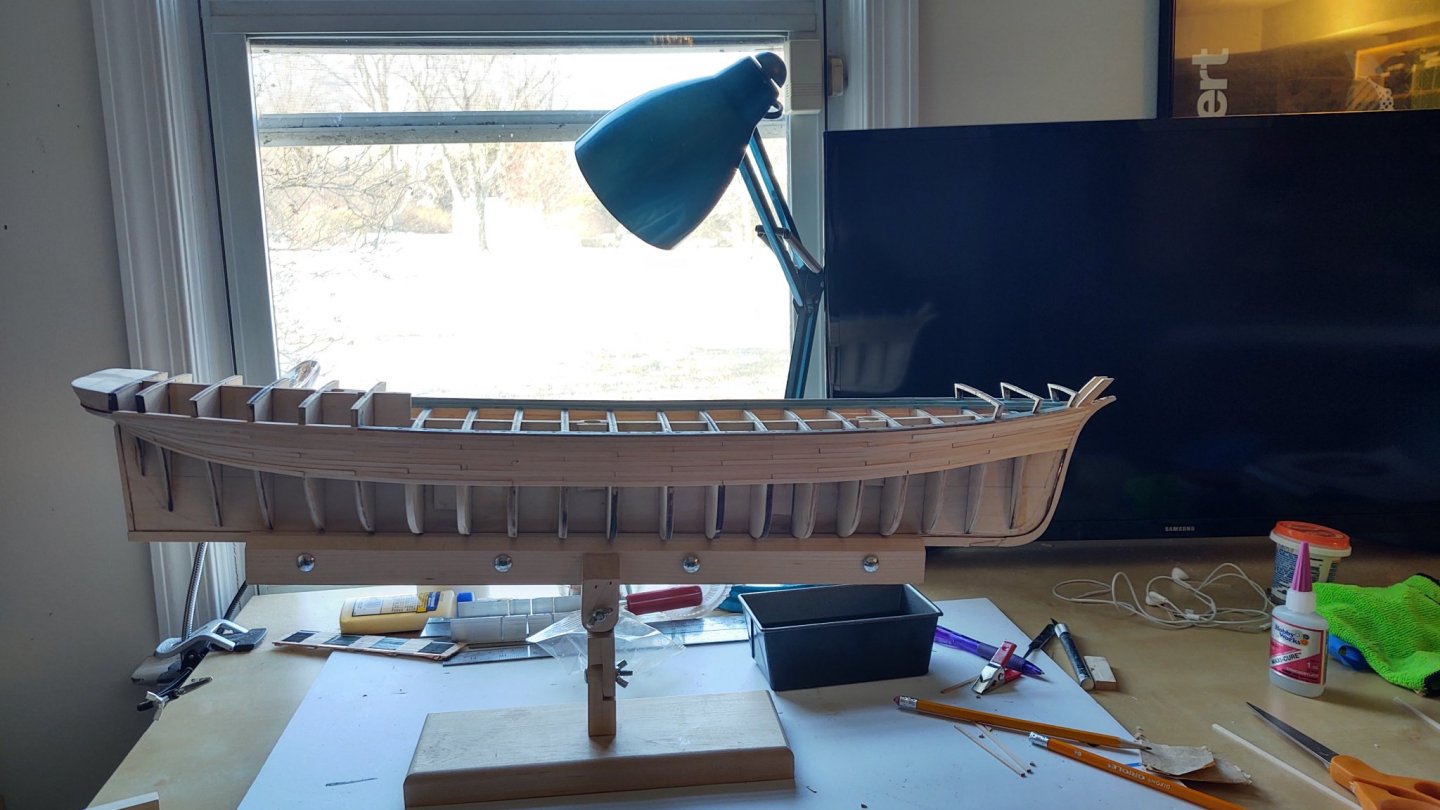
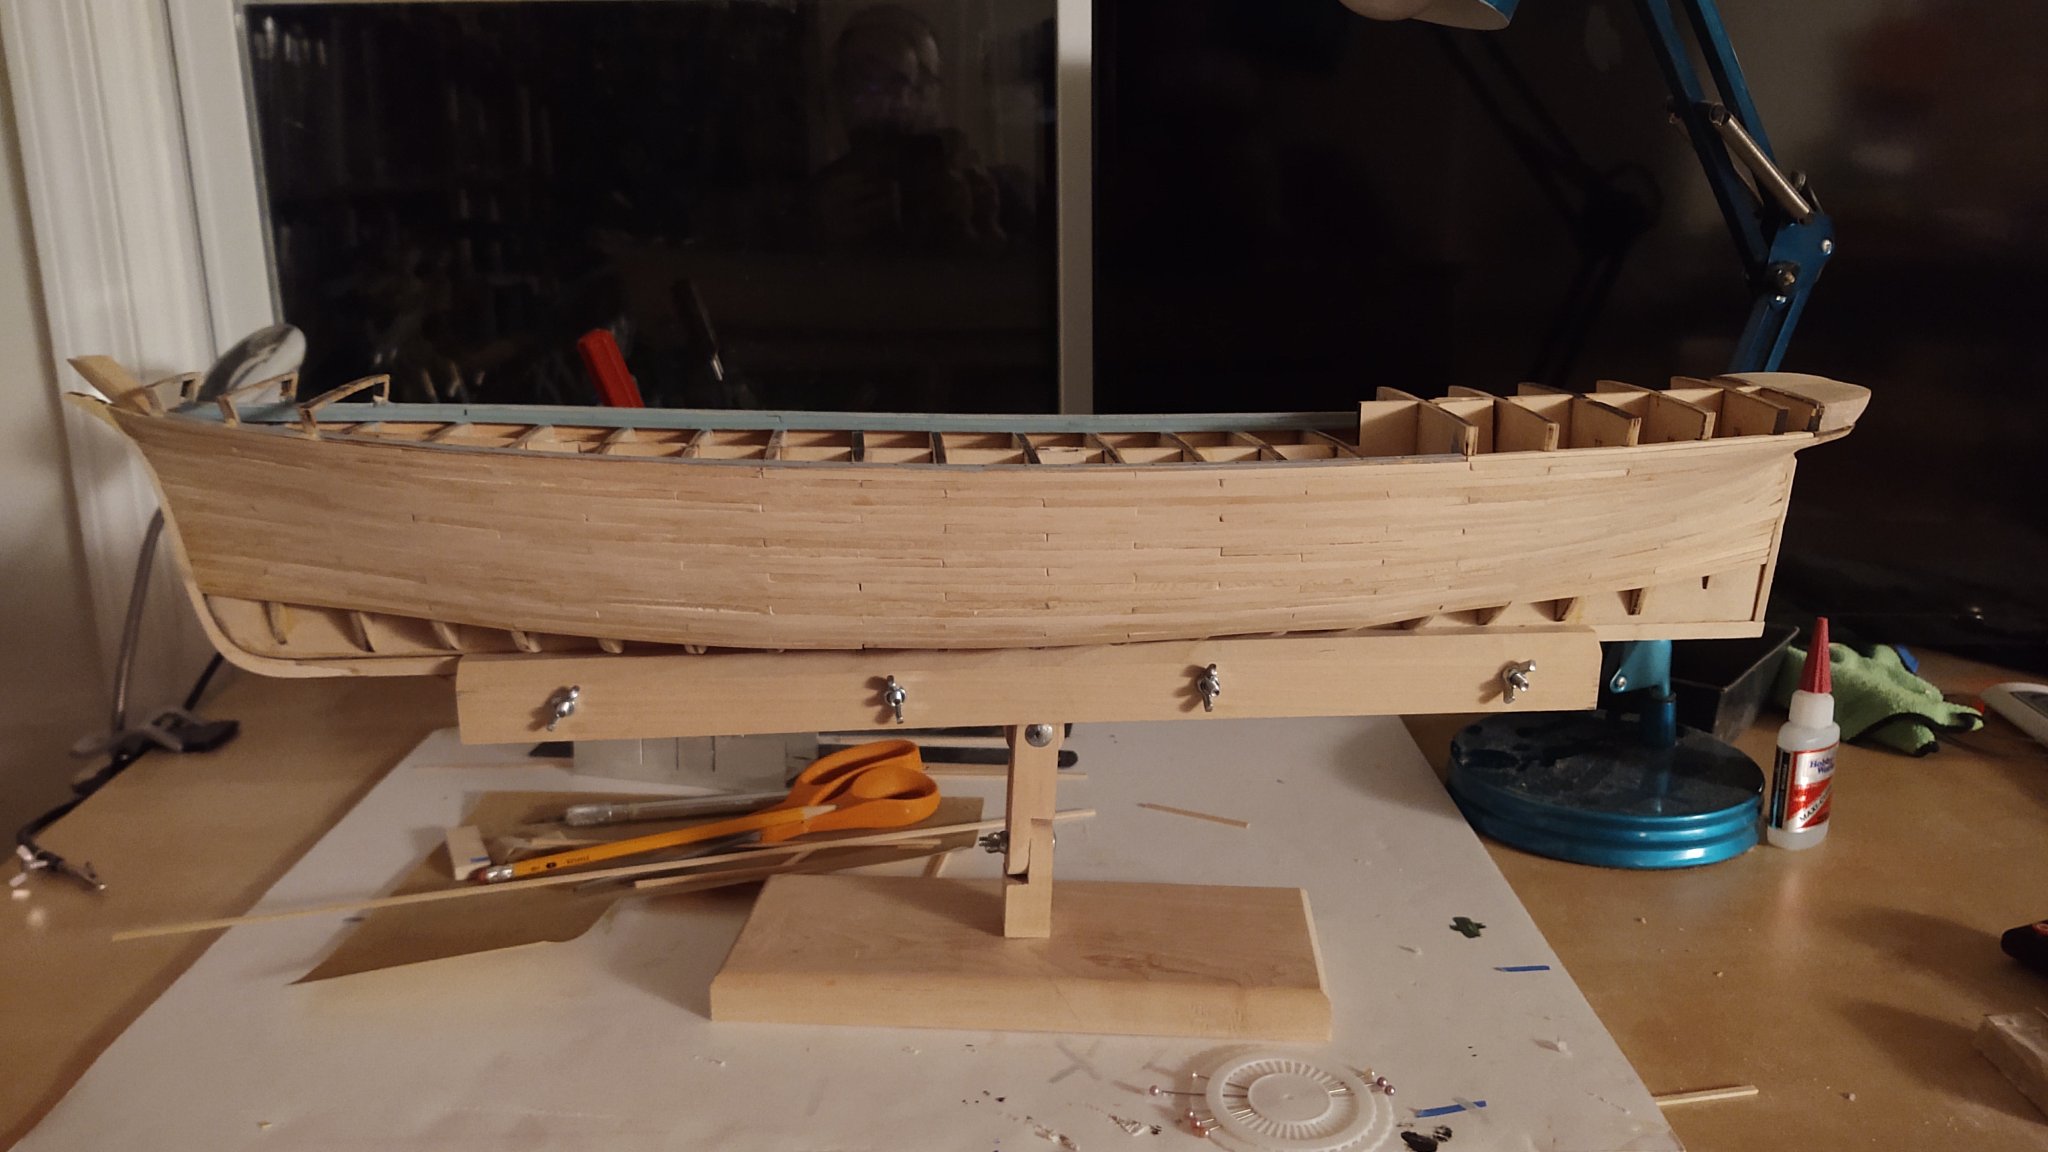
And another brief update. Planking is proceeding apace. I've added a few steelers in the stern to reduce the amount of bend required. Should be done in another week or so, followed by an extended session with wood filler and a number of grades of sandpaper.


-
On 2/26/2021 at 2:24 PM, Ian_Grant said:
I don't like the thermoplastic sails that came in the kit, and never having made cloth or silkspan sails I think trying to make 43 is too much.
According to Underhill even the largest steel wire on the standing rigging is 4-1/2" or about 1" diameter which at 1:150 scale is less than 0.25mm. That is almost the smallest thread used on the Heller Victory. I bought some Coats and Clark XP Heavy Duty thread in grey, measuring about 0.25mm. It looks very small but held up against the masts it's ok.
I've seen people do good things with thermoplastic sails, but not me. I left them out of my Connie and there weren't any in the Passat.
-
This is a bit late, but...
There may be some records in the National Archives from the Army Quartermaster General's office with the receipts (in any case, Ed Bearss cited records indicating that Eads had submitted receipts.
And, if you look at Hard Luck Ironclad, the Ingalls Shipbuilding examination of the Cairo listed the exterior as 'black', interior as 'white washed', with colored identification bands on the stacks.
The ship looks great - and not convinced I would do anything about it.
- mbp521, mtaylor, Keith Black and 1 other
-
4
-
Are you planning to rig with sails? And if not, are you going to rig the bunts and leeches? Unlike Preussen, my Passat's instructions didn't include the bunts and leeches. I did put the blocks on - that gave it some visual interest without overly cluttering things up at 1:150.
-
6 hours ago, Ian_Grant said:
Interesting wire, but even the "fine" grade at ten thou is a bit heavy for ratlines at 1:150 scale. I believe Blue Ensign employed fine wire in his "French 74" build. Might end up going that route.
Yeah. That was on a 1:64...
-
Hi Brad,
For my future reference was the fit tight vertically, horizontally, or both? Either way, looking great!
-
On 2/15/2021 at 11:36 AM, Ian_Grant said:
The many ratlines will be a chore assuming I can find something small enough and non-fuzzy with which to rig them.
Better than the Passat instructions. I once used this: https://www.amazon.com/Line-Simulating-Wires-Charcoal-Black/dp/B00P2QVMJ0/ref=asc_df_B00P2QVMJ0/?tag=hyprod-20&linkCode=df0&hvadid=309748512713&hvpos=&hvnetw=g&hvrand=1081979806894319198&hvpone=&hvptwo=&hvqmt=&hvdev=c&hvdvcmdl=&hvlocint=&hvlocphy=9007783&hvtargid=pla-585644113181&psc=1 to make ratlines. It is rubber 'line' that is used by model railroaders to make telephone and power lines that 'dip' properly. Now, I don't know about longevity, and I used glue to hold them in place (I imagine knotting that could be problematic) but there is no question of fuzz.
- popeye the sailor and egkb
-
2
-
On 2/7/2021 at 1:44 PM, BETAQDAVE said:
George, here are the plan details. You can easily see the conflict between the royal yards and the crows nest.
The yard and or sail would be right about eye level with the lookouts.
She’s looking great, and progress is being made. I’m still not convinced there is an inconsistency. The instructions for the MSW Charles W. Morgan point out that:
”The fore and mainmasts have royal yards, but the fore royal yard is sent down while the ship is on the whaling grounds. This is how Morgan is displayed. The main royal yard is rigged similar to the topgaleant. It has no bunt or leechlines, but it does have running lifts. Blocks are seized to the mast.”
The original of the USB Niagara also had royals that were not just sent down when not in use but unbraced. If the lookouts are for spotting whales, and the royals were only set aloft under light winds in transit you could have both without conflict.
In any case, it’s your ship and you choose what context to show it in.
Best wishes for continued success.
George
-
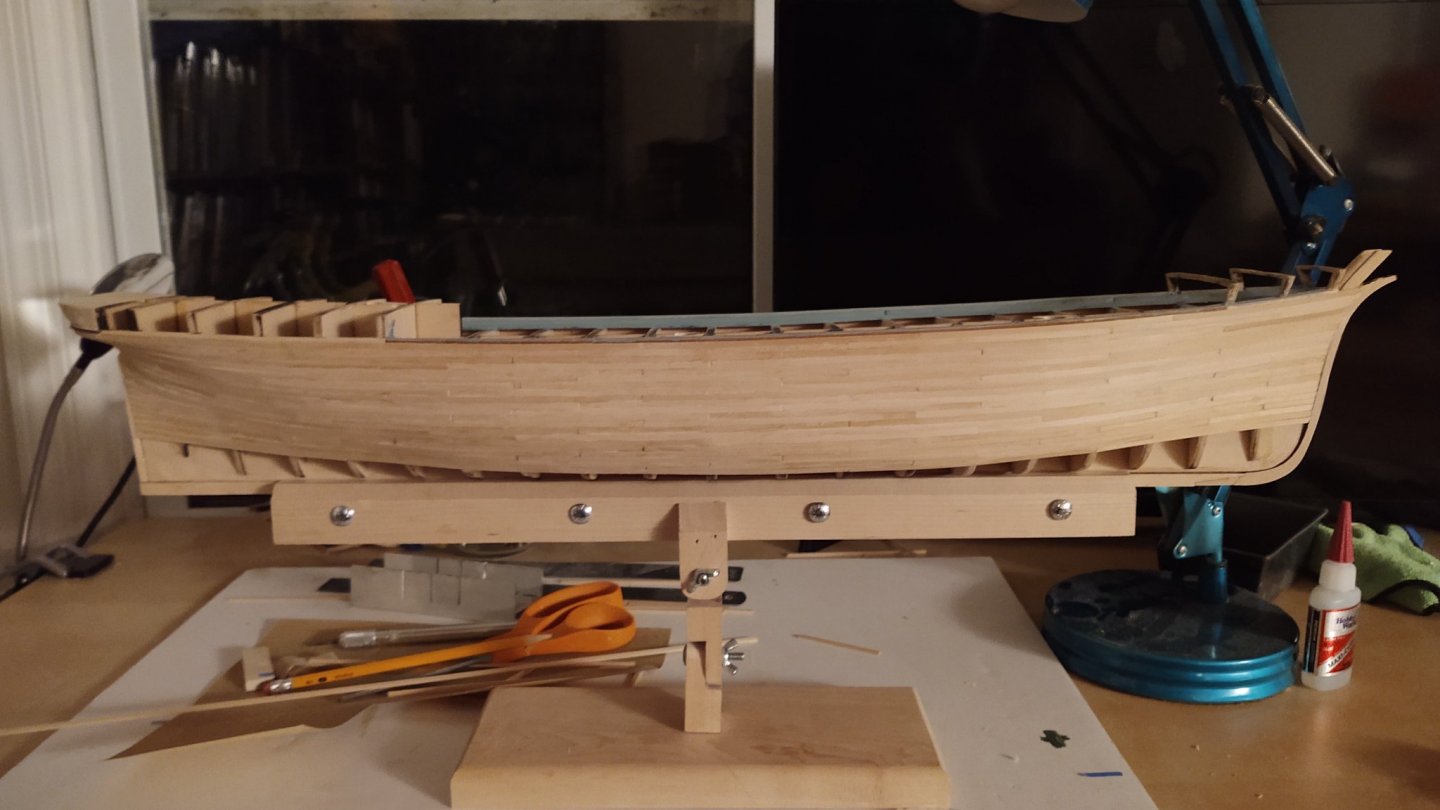
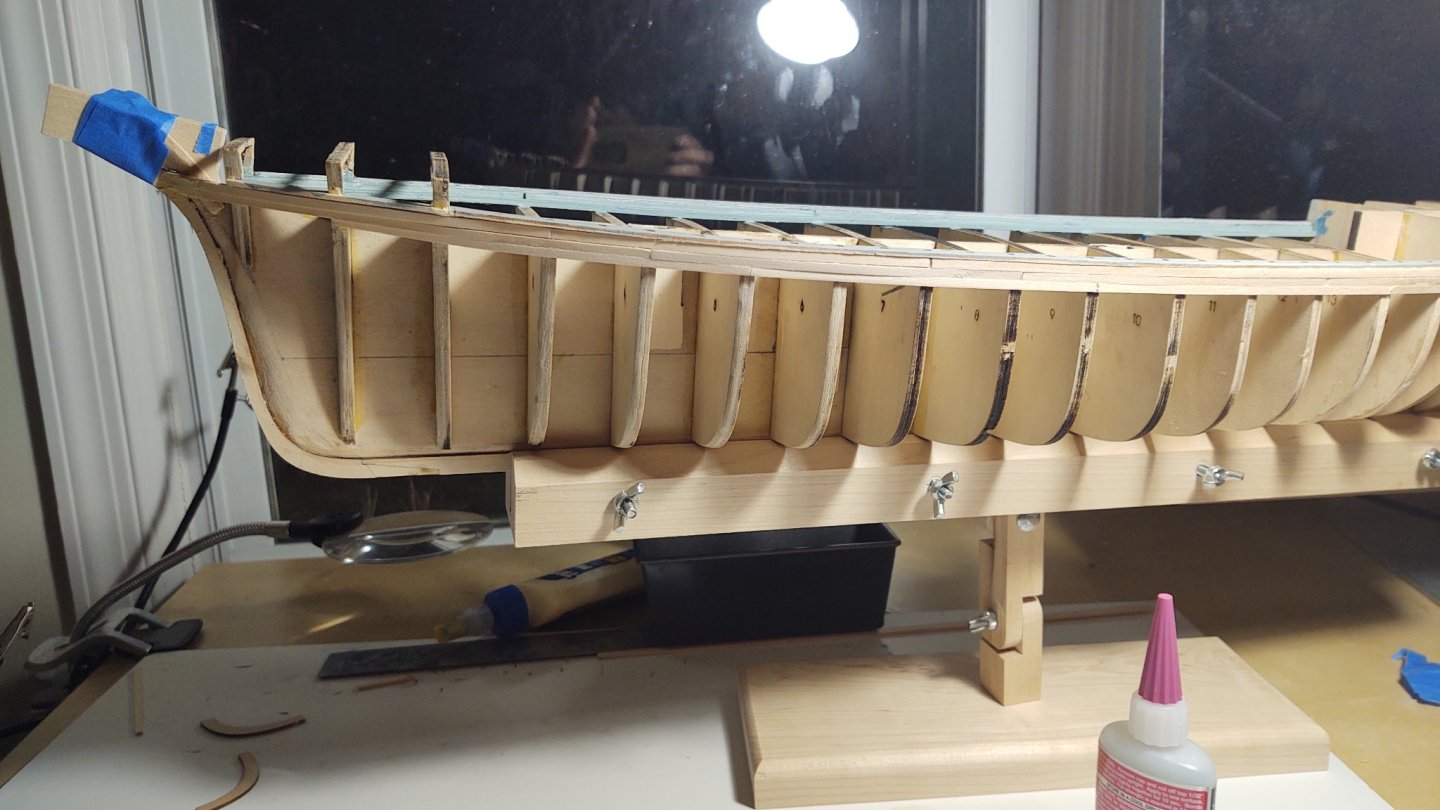
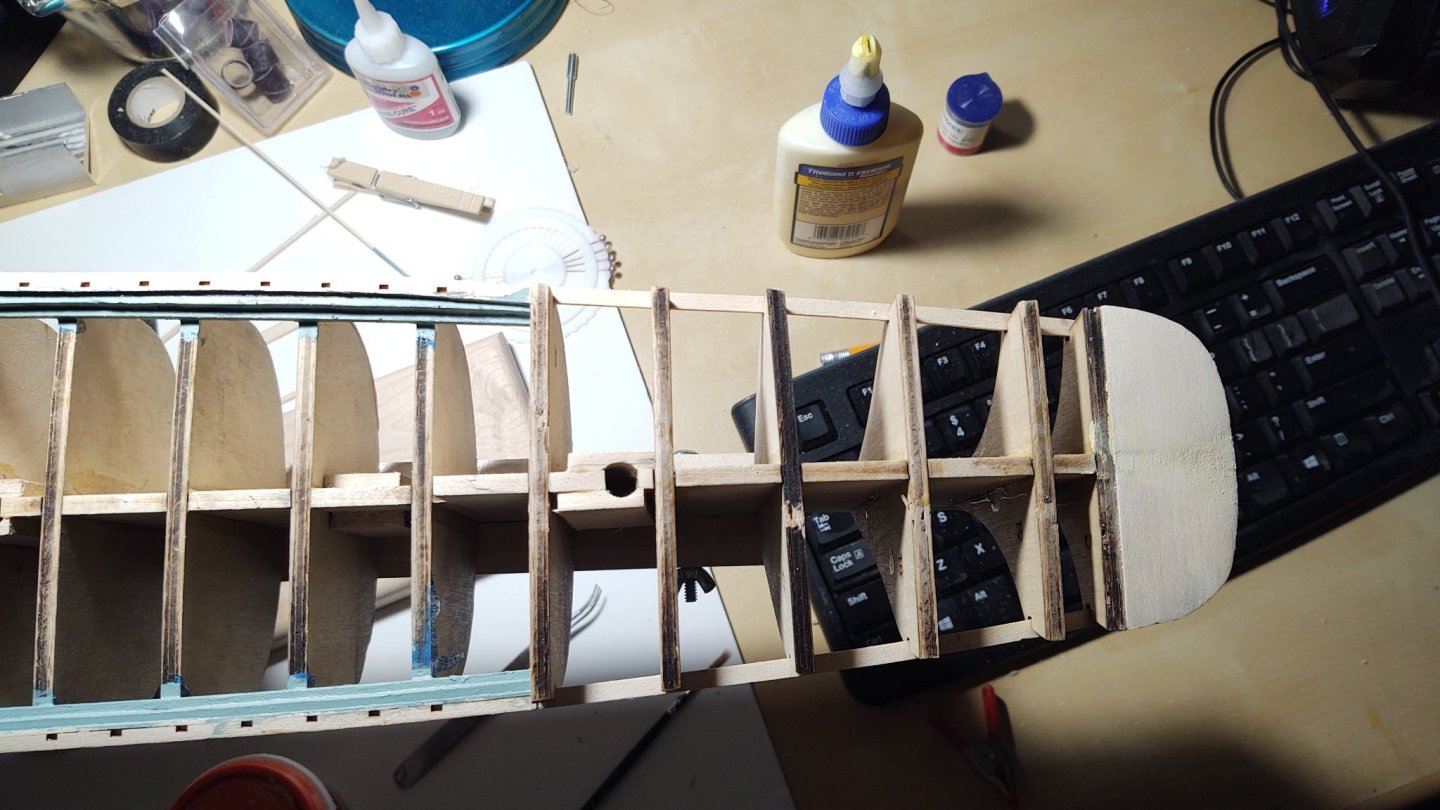
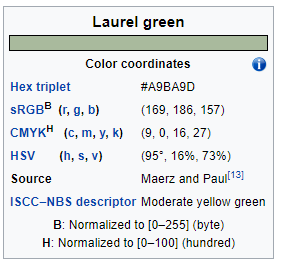
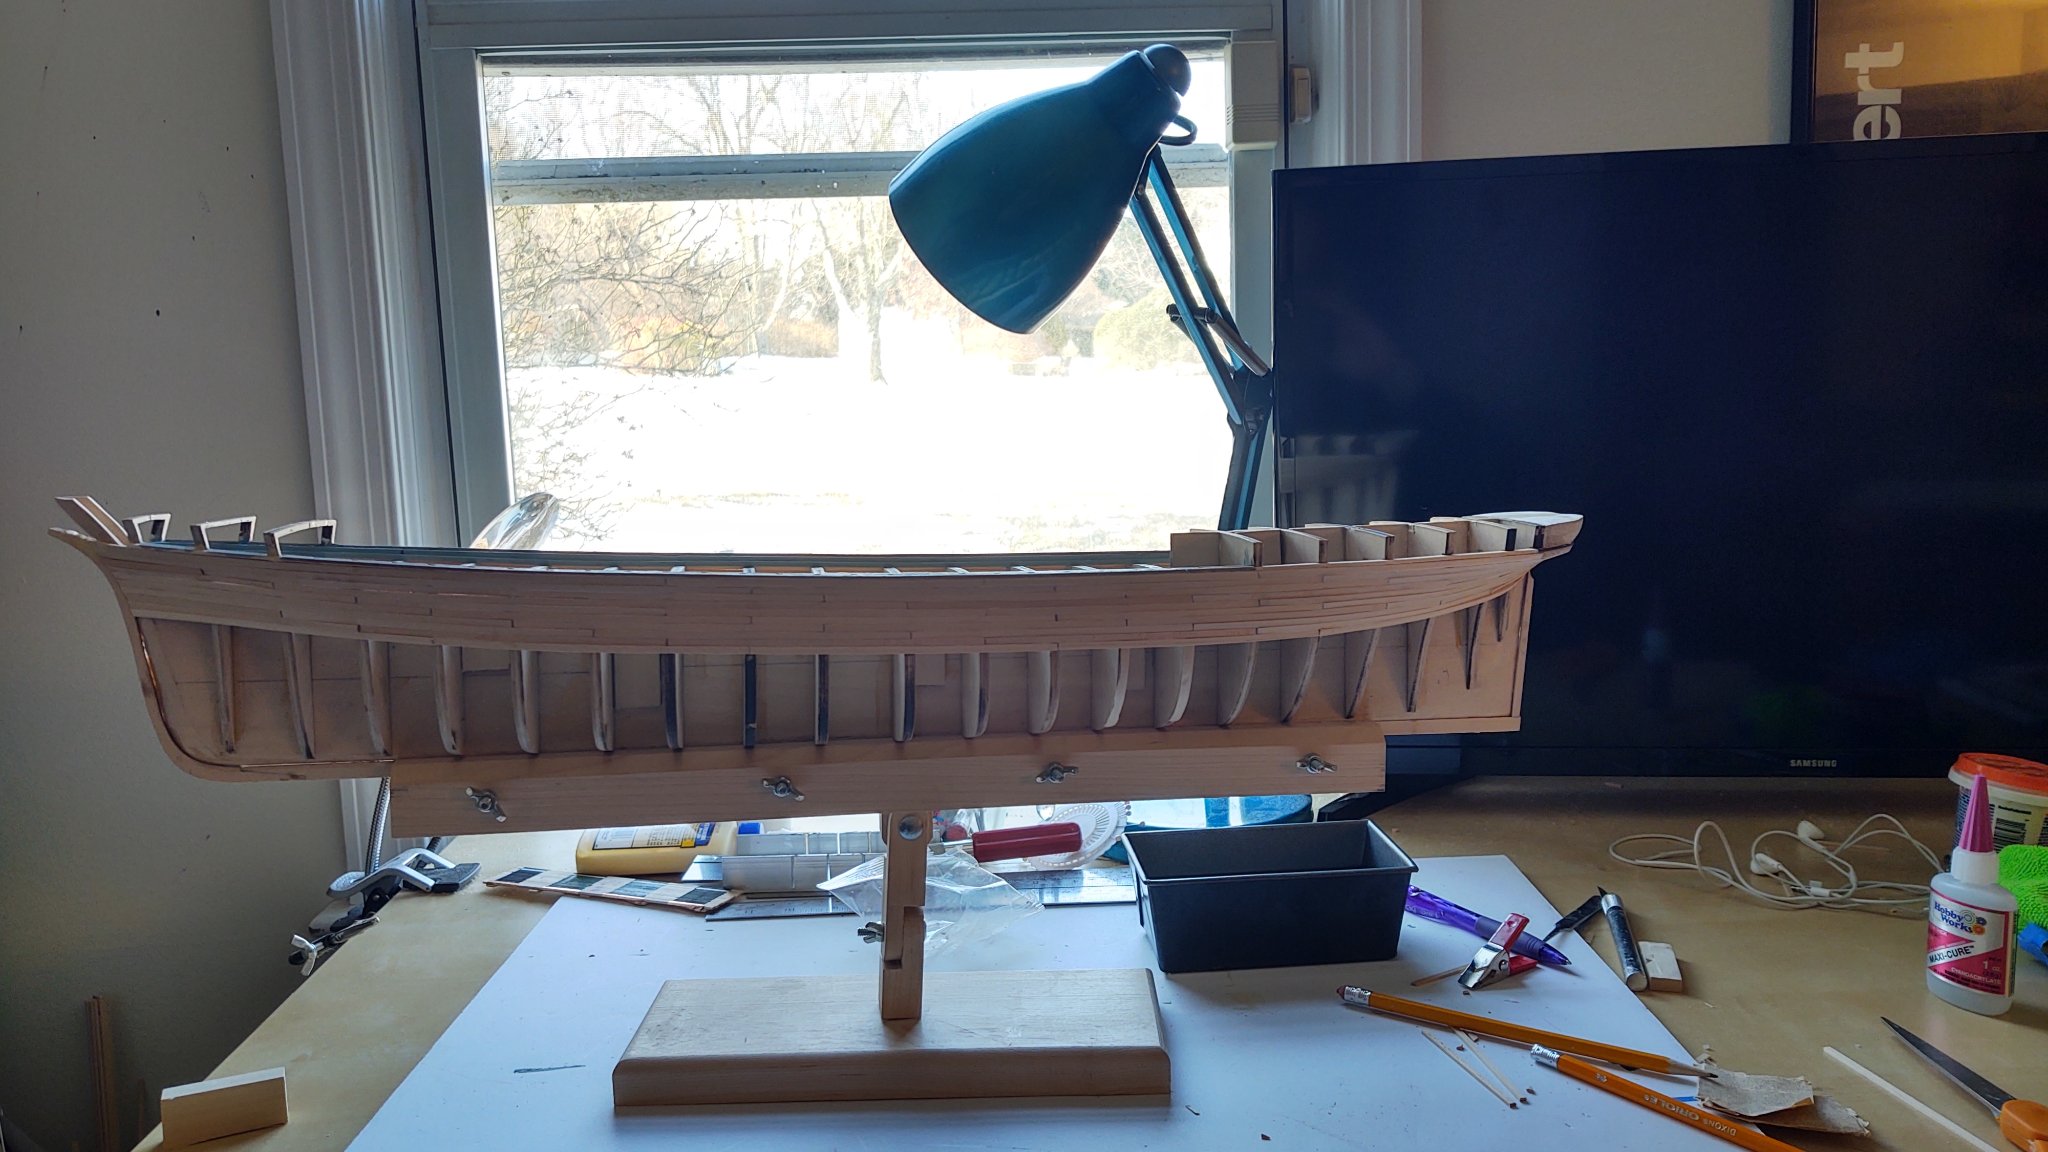
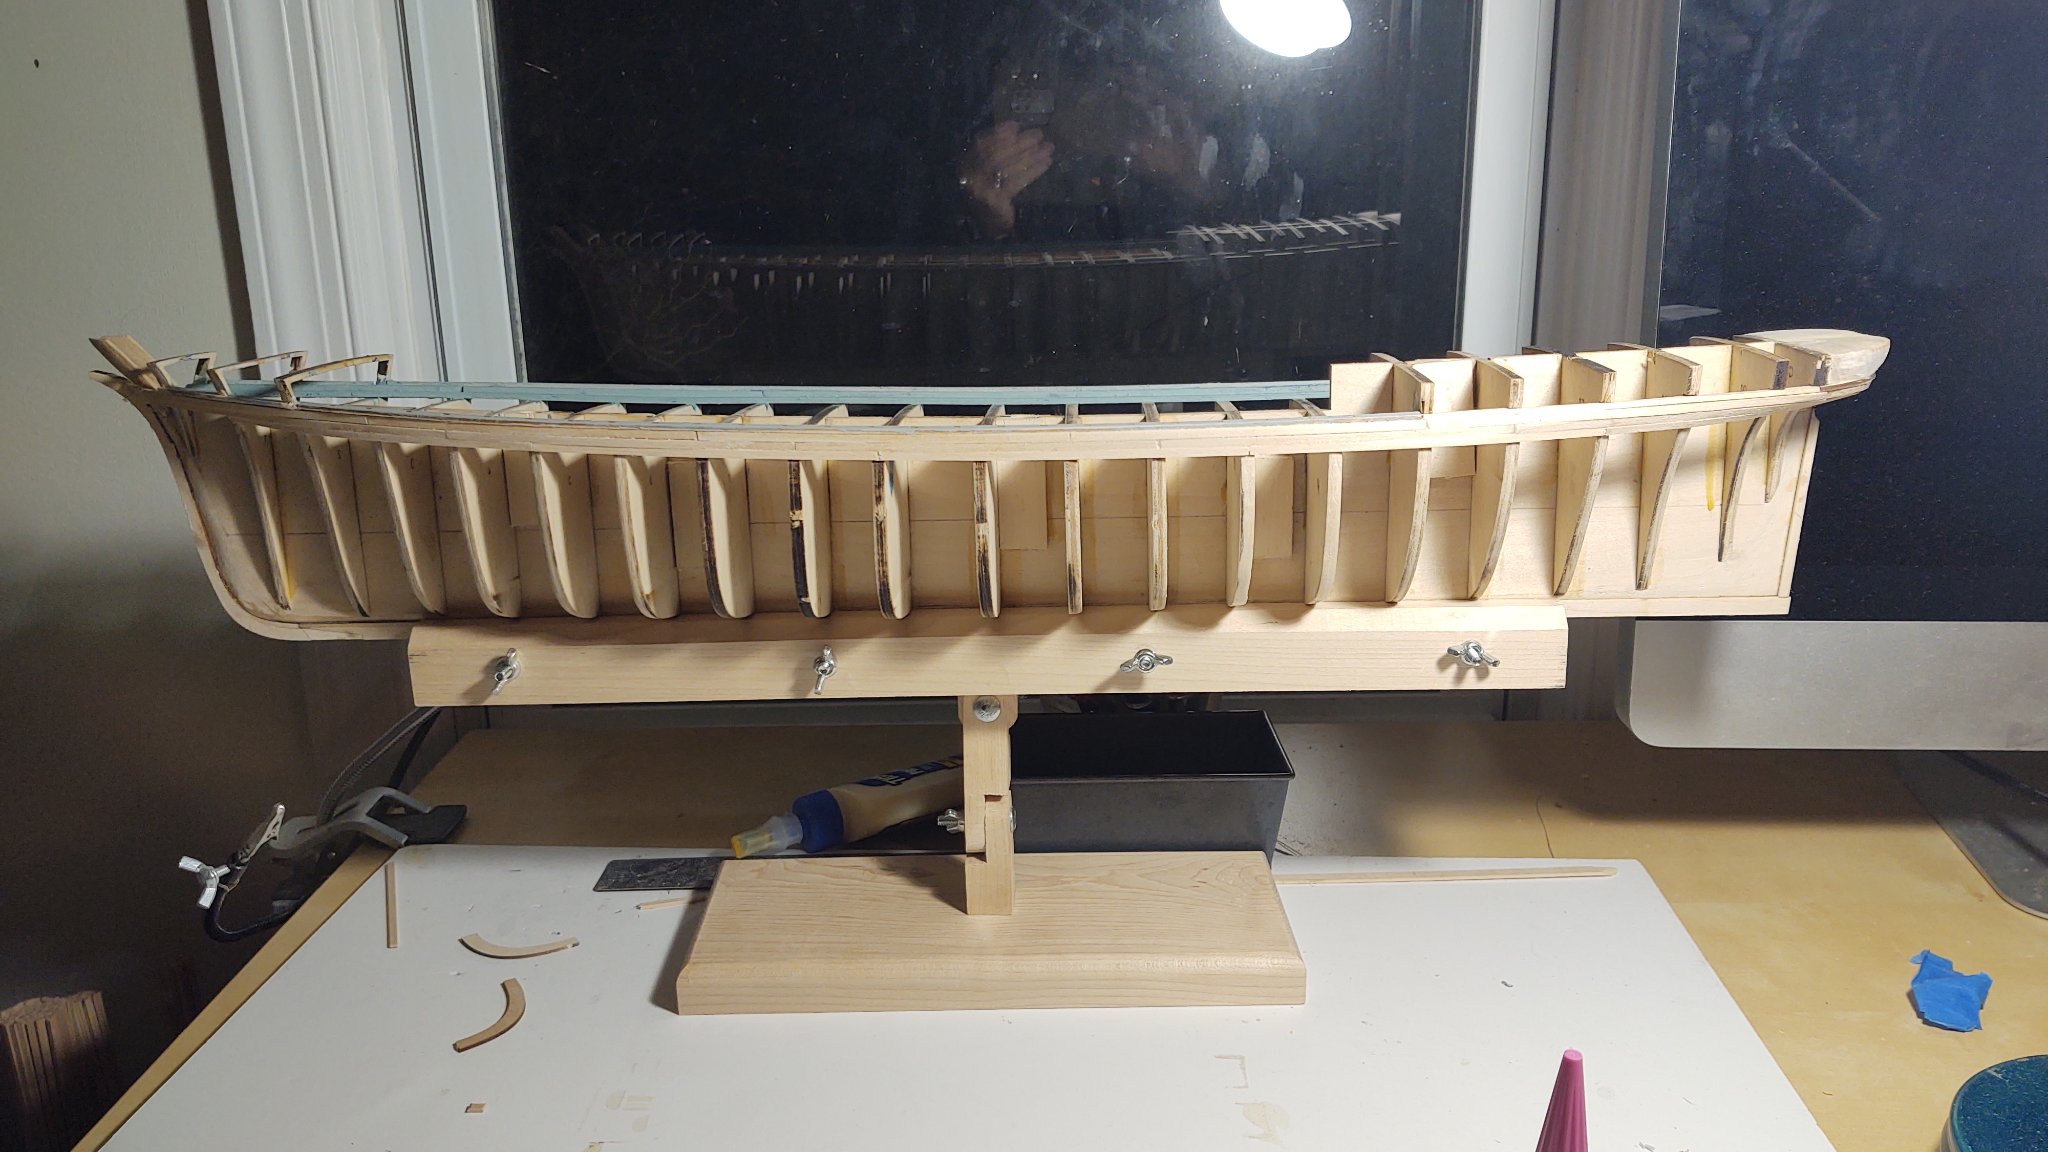
Just a bit of an update. Progress is slow but steady. I have 10 full strakes on both the port and starboard sides, and the bulk of the knuckle is formed. I'm using a "5 bulkhead" scheme, but will likely move to a longer plank once I've dropped into the region that is going to be plated.
One interesting (for lack of a better term) observation related to COVID impacted supply chains is that I can no longer get Tamiya tape from my local store. They have none, of any size. The store people tell me there is one factory and they are not producing at anywhere near the previous level due to COVID safety protocols My color test sections used conventional painters tape which doesn't work as well for me. I'm glad that they are following protocols and will get by, but just mention it for some color.

-
Hi @Overworked724, I don't have an airbrush, so old school for me. I may try some Model Master colors. "Russian Marker Red" and "Gelb" worked well as the red and yellow on my Niagara and the finish was pretty flat.
-
On 2/18/2021 at 10:52 AM, Keithbrad80 said:
..., they were specifically made to remove IPs, little strings on your uniform.
That brings back memories. Haven’t heard anyone talk about an IP in like 35 years...
- mtaylor, thibaultron, Canute and 3 others
-
6
-
-
Great work, Ian she looks fantastic! I assume from your comments that you are not going to try to use the "ratline machine" that Heller includes with their kits, which is a good thing. I tried this years ago when I built my Passat and it was a complete failure. The good news was that the turnbuckle 'deadeyes' (which don't seem to be what you have here) were extremely sturdy, considering. Despite putting a fair bit of tension on them as I rigged the shrouds and backstays, I didn't have a single one break.
How are the rigging instructions? Given that you have described every other problem I had with Passat, I'm curious how the instructions look. The Passat instructions were decent for the standing rigging, but really awful for the running rigging. It showed the clew lines and the braces (plus the running rigging on the jigger) and not much else. Also, the translations from French were all on the last page, completely divorced from their content; is that true of Preussen too? With regard to the ratlines, the Passat instructions suggested using all 5 shrouds, the real ship (as currently configured uses the 3 central shrouds, periodically extending to the exterior 2. I don't know if there are good pictures indicating how they were rigged on Preussen.
I love the idea of a 3D printed Jarvis brace winch. At 1:150, they are a real pain in the posterior to rig up though. There are real detail limits at that scale.
Good luck!
George K
-
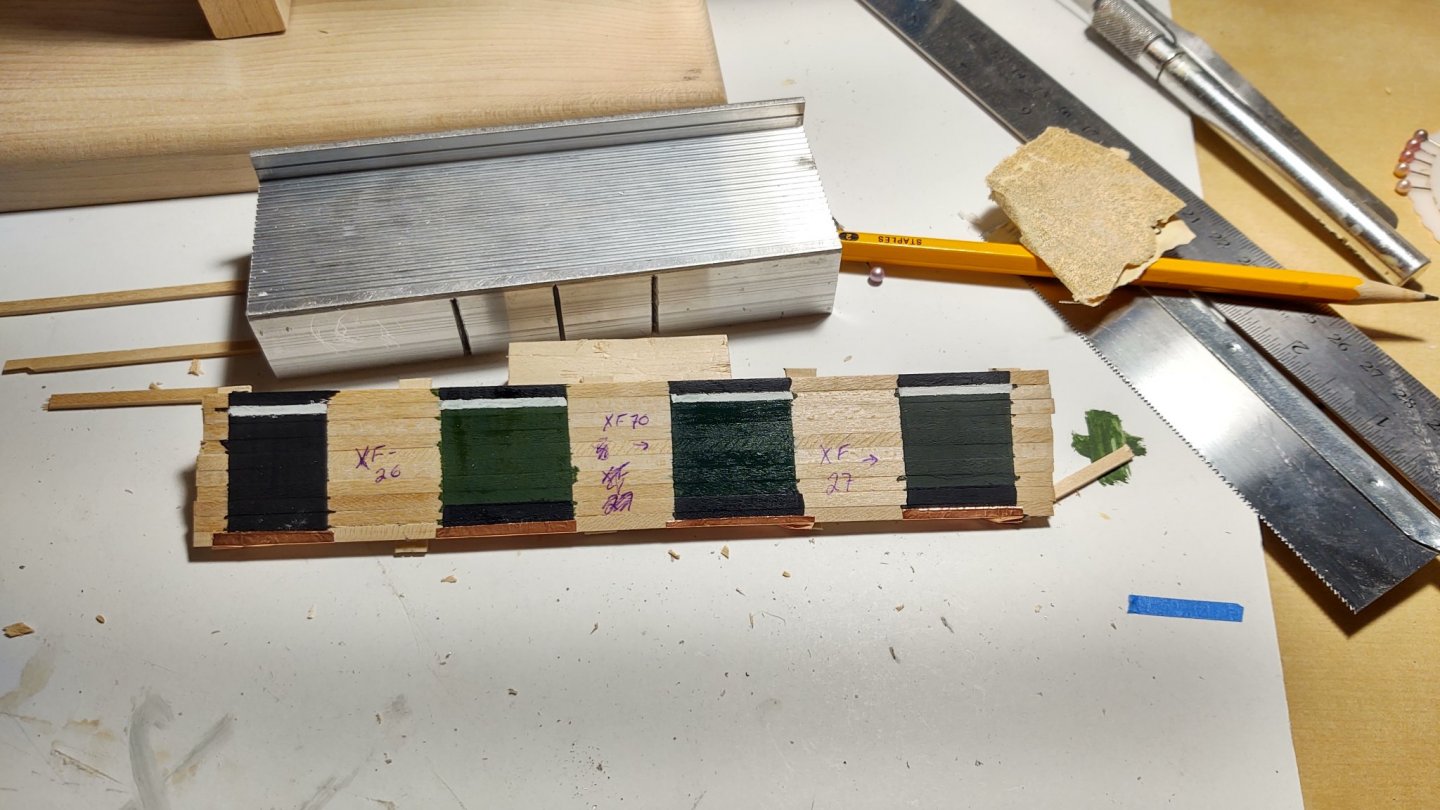
Planking continues on the starboard side. While that is going on, I've been looking at some possible colors based on the note that McKay wanted to paint her green. From left to right, we have plain black with a white planksheer, Tamiya XF-26 (Deep Green), Tamiya XF-70 (Dark Green 2) and Tamiya XF-27 (Black green). While the colors are focused toward (frankly) 20th century military and cars, they are all consistent with colors described up to the mid-19th century. I presume so many greens were available because copper compounds provide easy pigments, but who knows. In any case, I am pretty sure I'm going to go with either the Deep Green or the Dark Green 2. If you were going to paint a ship green, I assume you would want a color readily distinguishable from black. Either way, I am going to put a black "boot stripe" between the cap row of the copper plates and before the start of the green (as shown below). I know that this is ahistorical, but I'm going for what he wanted to build, not what he did, so...

- gieb8688, Cathead, Keithbrad80 and 1 other
-
4
-
What a great looking ship!
-
Thank you for the likes on the work! Just a brief update to indicate that I am still working on the ship. Hopefully things will speed up a bit now that I've finished remodeling my wife's office/craft space. Having both of us work from home has made such spaces more important. Fortunately our older daughter has been stably employed since her graduation in May, so we were able to repurpose what had been her room, even though she would have preferred we keep it as a shrine to her. There will be another brief slowdown in the shipyard when I repaint my (formerly our) home office, but it's a smaller job, so hopefully less time. But I digress.
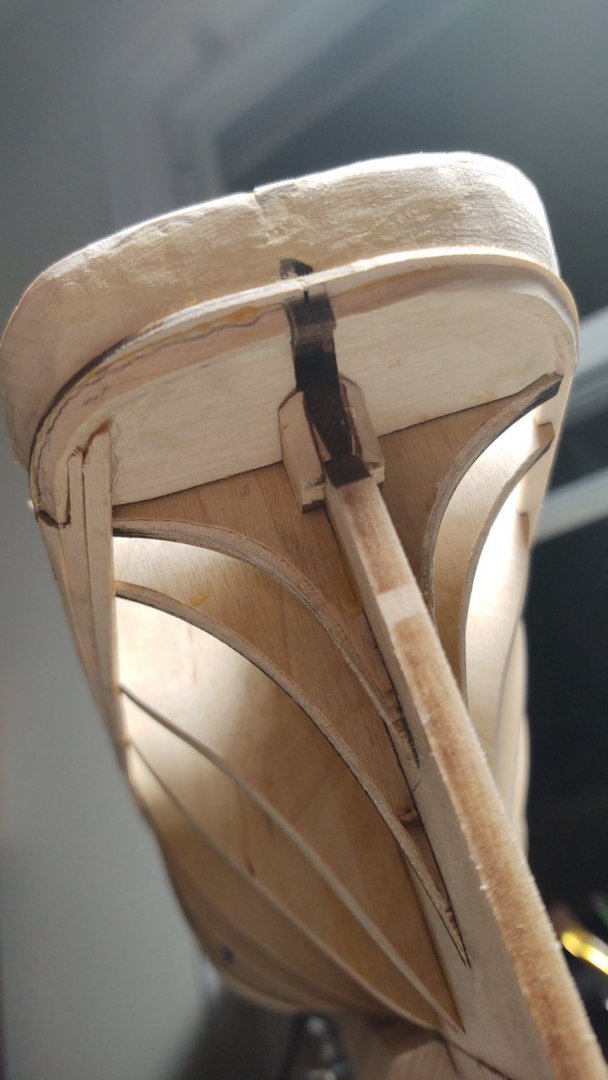
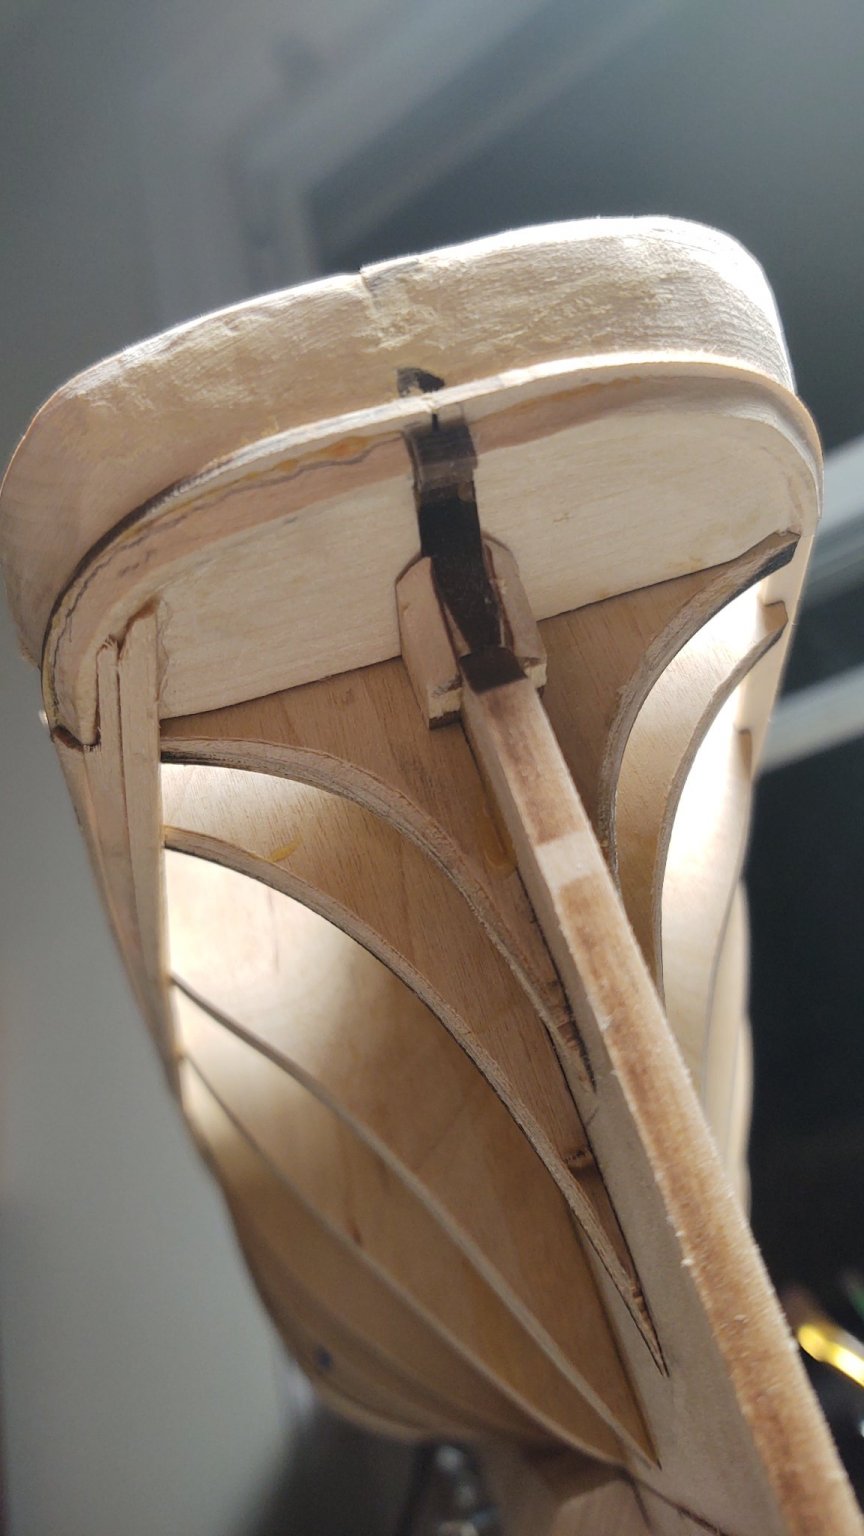
Planking has begun, beginning from the planksheer and working my way down. I've only got three full strakes on one side in place, but that has pushed past the knuckle in the stern, so it will be relatively straightforward from here. A couple of things that I have already observed. I will most likely get a 1/32 square plank and even out the external planksheer once things are sanded. The first plank around the knuckle had to be cut and steam bent. I may also put a small veneer (again maybe 1/32) on the (nearly) vertical portion of the stern rabbet piece so that things will flow better. And, once again, I need to remind myself that putty, sanding and paint will cover a multitude of sins while still showing the plank definition that we aim for. The gaps and unevenness will be removed in post-processing, so to speak.
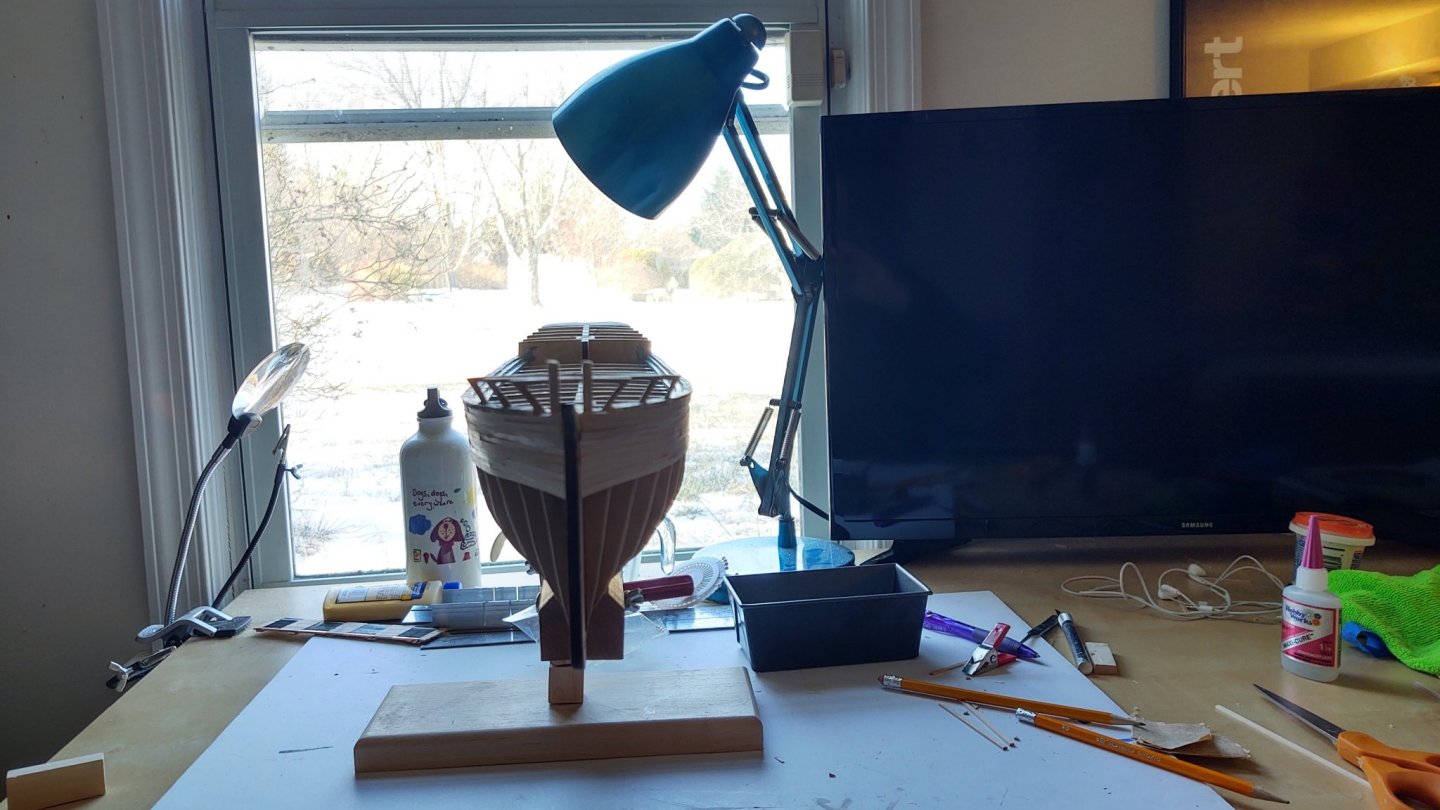
The blue painters tape in the last photo is covering a piece of wood I cut down to fit between and above the knightheads. That way, when I eventually turn it over to finish the planking I (hopefully) won't break the knightheads. We'll see if that actually works.
Thanks again!
George

- gieb8688, Keithbrad80 and Cathead
-
3
-
-
Cgreat job. Could be the new box art!
-
On 4/20/2018 at 11:52 AM, BETAQDAVE said:
Before I actually started construction, I decided that I wanted to do a search in the internet for more details of the actual ship. One thing that really caught my attention right off the bat, was the fact that the real ship only had four sails on the main and foremasts and not five as shown both in the kit and my set of blueprints. These two pictures below show both the box art and one of the pictures that I found showing the ship as it was built.
Discovering this, I decided to really do some digging to see if any other discrepancies were evident. There were a few, but nothing as glaring as the sails.
Hi Dave,
Great build log, really fantastic work you are doing. I was curious about your concern about the sails. I am not an expert in this area, but the picture above shows what I think are a course yard, a set of split topsails, and a topgallant yard, but with what looks like either a separate royal mast or maybe I'm just seeing the point where the topgallant lift blocks are attaching to the mast. Either way, looks like plenty of spar to mount a royal. My understanding is that a lot of ships with royals didn't loft the yard unless they were actually using the sail, otherwise, it was stored, so I'm not sure that there is any inconsistency there. Do the plans you have comport with the topgallant lift blocks being where they are as compared to the painting?
At the end of the day, you could model her as she is shown in the painting without the royal yards- it's really just a choice.
Regards,
George
-
Deckhouse looks great Bradley. Cutting out the windows and doors will make it look great!
-
Waterway and binding strake painted twice - the first color was way too brilliant (The color is more uniform than suggested in the photos below - the flash kinda blew out the color out on the top side of the photos). Filler blocks complete and installed. Last step prior to planking will be to mask off the waterway and paint the planksheer.
.thumb.jpg.d237fcaabd0404aceb5dc5099bd97f9b.jpg)

-
On 1/28/2021 at 2:01 PM, rwiederrich said:
Coming along nicely. I like the idea of painting her green as originally designed by McKay....getting the *right* green may be more of an issue. It may take some research to find what color compositions existed for green back in the 1850's.
Rob
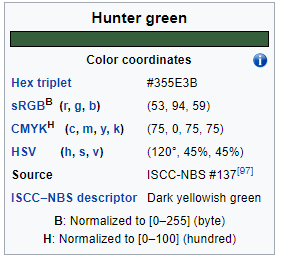
A bit of follow up on this. Obviously, the USS Constitution had "dark green" bulwarks as far back as 1812. However, there are (according to Wikipedia, anyway) a lot of greens that were indicated as colors in the 19th Century. Modern versions of some of these colors include Hunter Green ('general 19th century'):
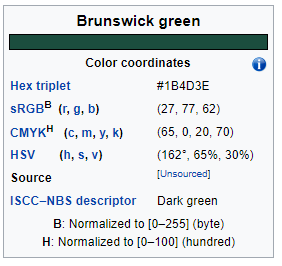
Then we have Brunswick Green (earliest English reference 1764), uses Prussian blue plus a yellow:
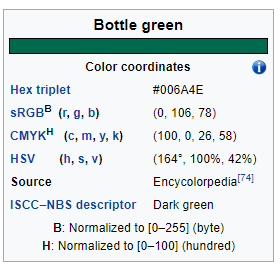
Bottle green (earliest English reference 1816)
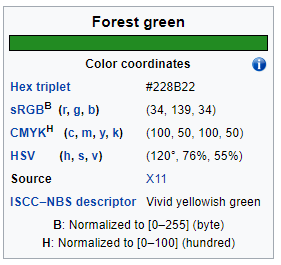
Forest Green (earliest English reference 1810)
and laurel green (earliest English reference 1705)
Arsenic based emerald green dyes (as opposed to paints) were developed in 1814, unknown if they were ever put into paint (as opposed to say wallpaper and fabric).
-
On 1/28/2021 at 2:01 PM, rwiederrich said:
Coming along nicely. I like the idea of painting her green as originally designed by McKay....getting the *right* green may be more of an issue. It may take some research to find what color compositions existed for green back in the 1850's.
Rob
Thanks! I agree that matching historical colors is a major challenge for anything. Not like you can just ask for a swatch, and what materials survive from relevant periods tend to have had significant color changes due to exposure to light, chemicals, and plain time. The decision is going to need to be made soon, as I'm working on the filler blocks and have decided not to put the bulwarks and timberheads on until the hull is planked. My expectation is that I will just wind up breaking them with the hull upside down for planking, so we go with plan B. Plank up to the planksheer, add the timberheads and then add the bulwark planks (and the ceiling ones).


.jpg.5e7c6adade6c9f3ca5eb1dcc273dd7f8.jpg)


USS Cairo 1862 by MPB521 – FINISHED - Scale 1:48 - American Civil War Ironclad - First Scratch Build
in - Build logs for subjects built 1851 - 1900
Posted
Ed Bearrs who wrote Hardluck Ironclad and was part of the recovery team just died last September (he was 97).