


gak1965
-
Posts
698 -
Joined
-
Last visited
Content Type
Profiles
Forums
Gallery
Events
Posts posted by gak1965
-
-
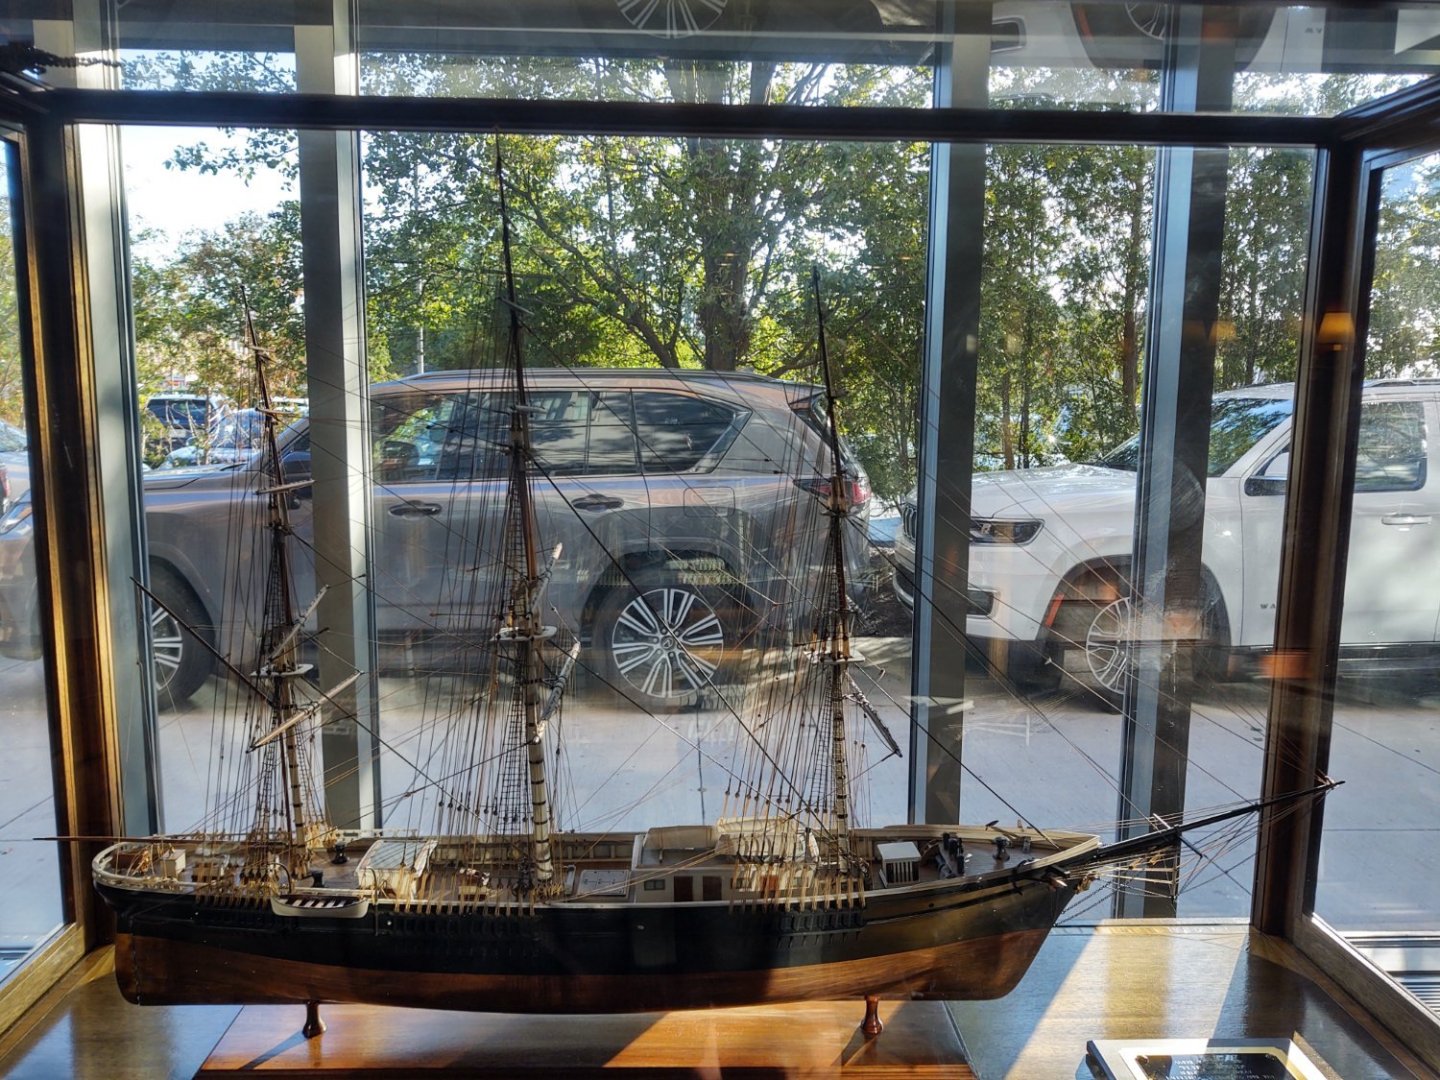
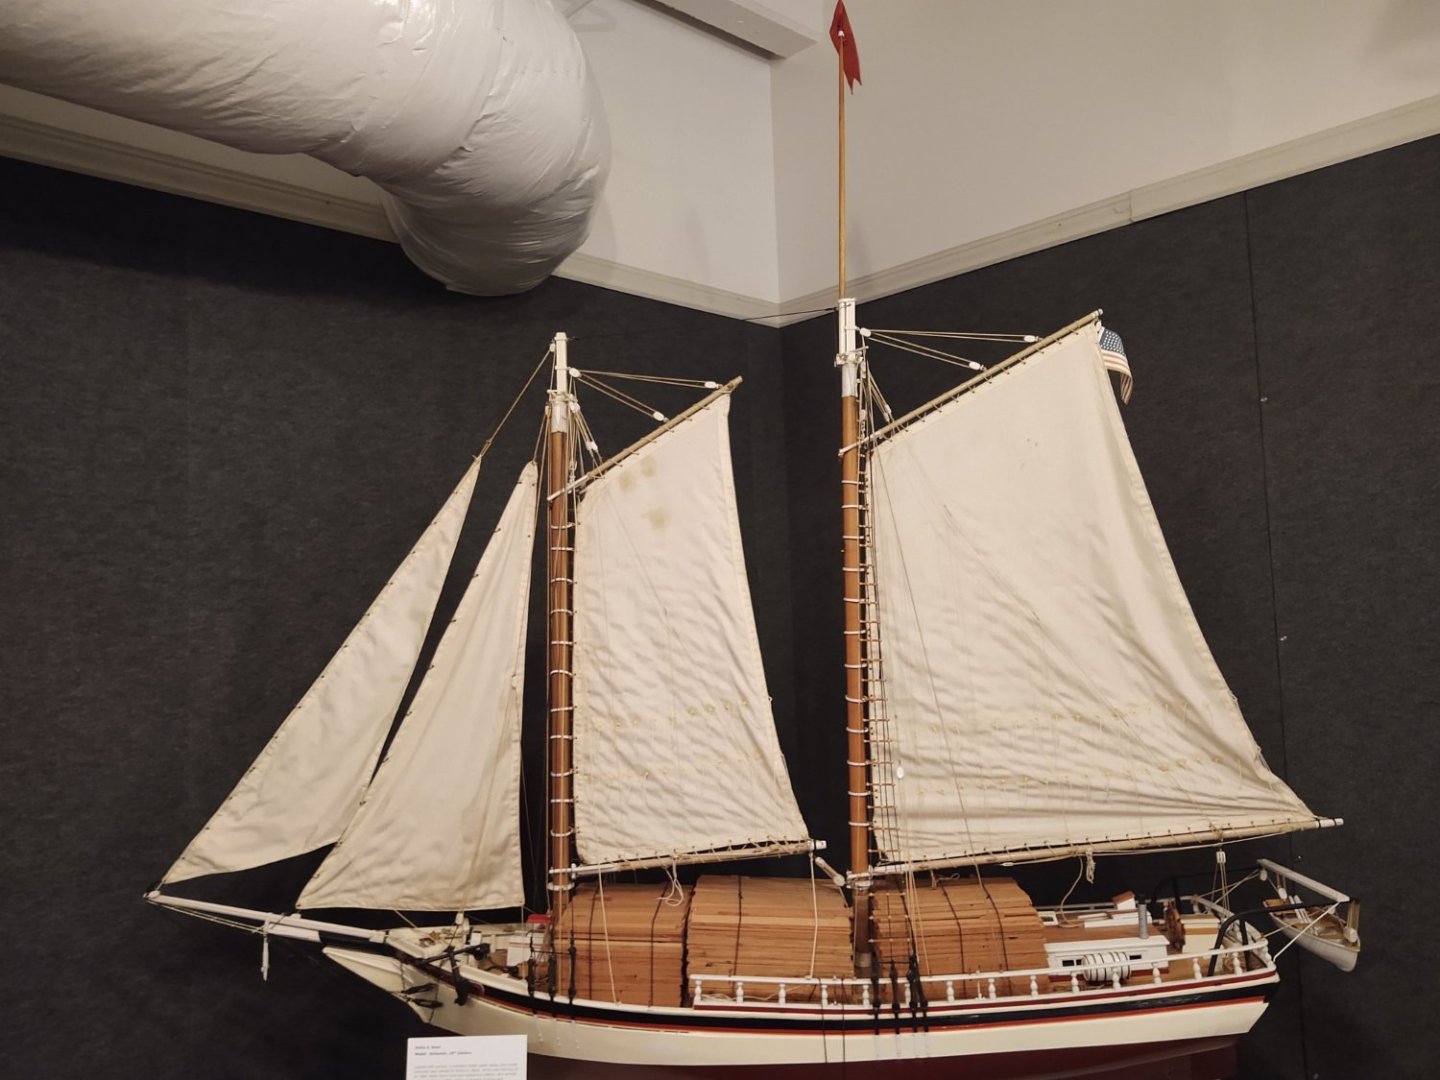
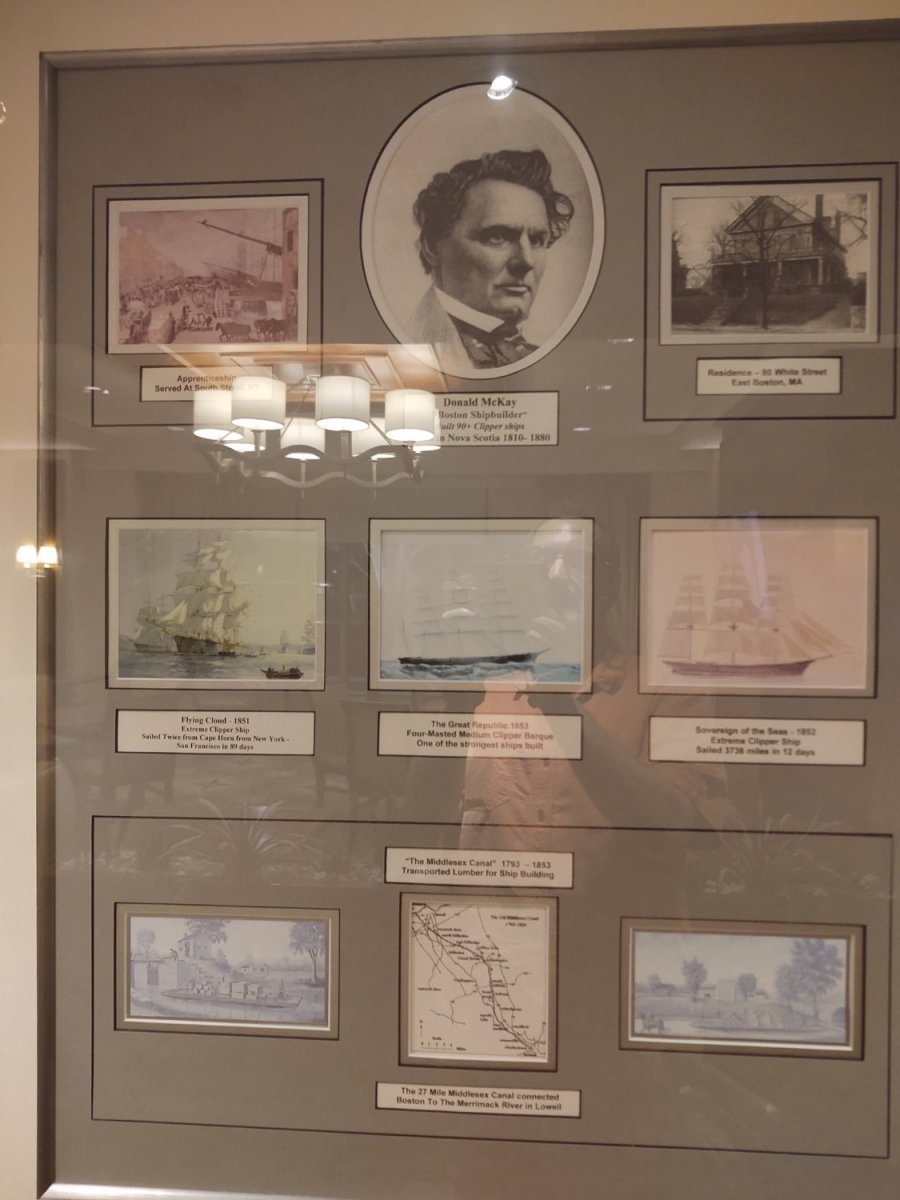
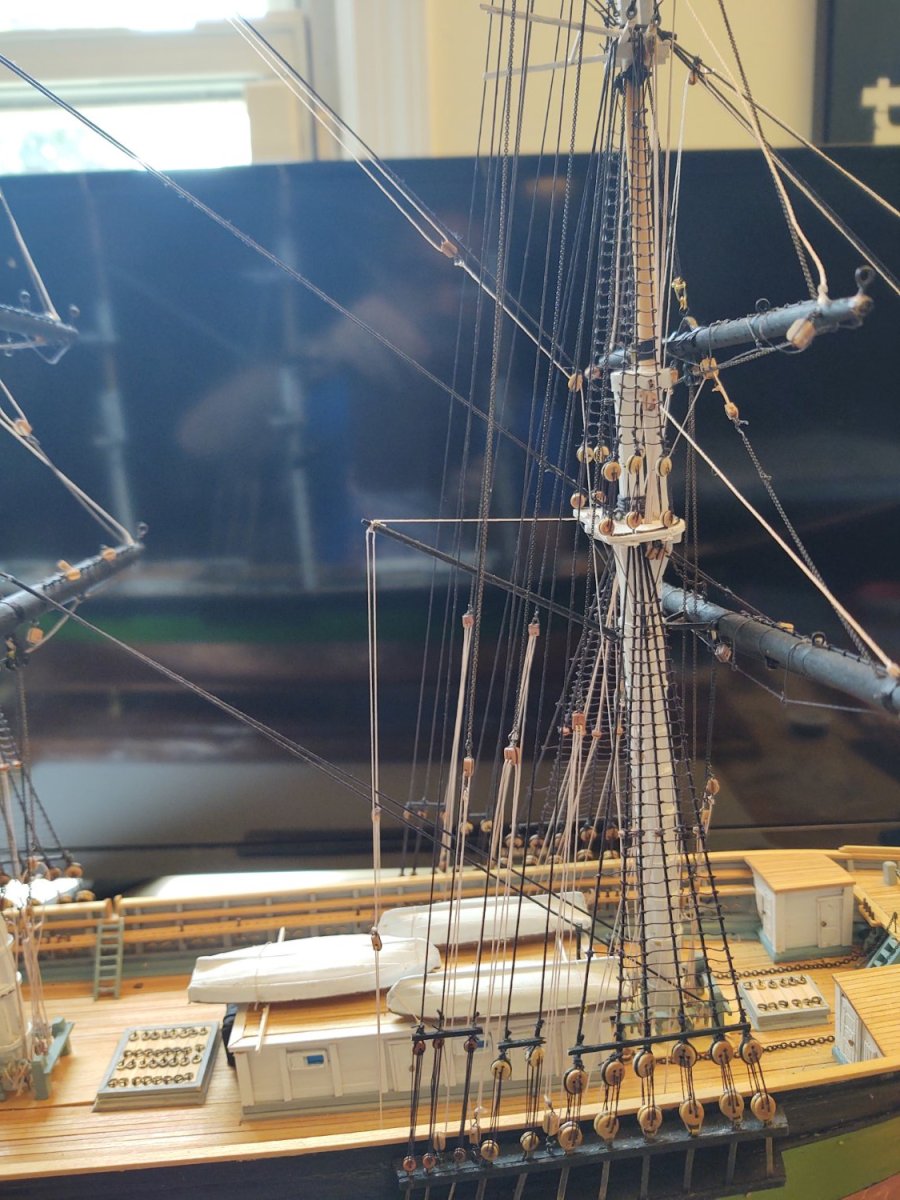
So, I am in Boston helping to move one of my kids, and these were in the hotel (a residence inn in Charlestown, just off Constitution Wharf. Donald McKay and some of his ships:

And a very nice model of the Flying Cloud, which my photo does not do justice.
Regards,
George
- VitusBering and Cathead
-
 2
2
-
Sorry, misunderstanding. I built a model of the PoB II, not the ship.
As a result, I have a set of plans and I was looking at my model and whilenI put stuns'l irons on the square topsail, I didn't see any irons on the mainsail, so concluded that they just lashed the ringtail boom.
-
I've built the PoB, no obvious irons in the plans on the main boom (and these are based on the actual ship, so no guessing). Must just be lashed with the top raised like a stuns'l yard
-
4 hours ago, Rick310 said:
Every painting I‘ve seen always shows a sail on the crojack( lower mizzen) yard although they are rarely portrayed as set.
Yeah, same here, even though I keep reading that it wasn't standard, and that the yard was mainly there to foot the topsail. Supposedly, the way to tell is if the yard has footropes (no footropes, no sail bent), but that isn't likely to be resolved with the data we have available.
4 hours ago, Rick310 said:Where are you getting your blocks from? I am trying to get some more from Syren but they have been unavailable for some time now.
Just from Model Shipways, standard blocks. At this point the Syren blocks would be beautiful blocks in a sea of mediocrity. Supposedly they shipped yesterday. I can mount the remaining yards and their lifts and halyards (without the halyard tackles) and then work on making the stuns'l booms until they arrive.
As it is, I'm off to Boston tomorrow to help one of my kids move (all of 1.5 blocks, but she needs to keep all of her stuff overnight in a truck because her old lease ends on Thursday and the new lease doesn't start until Friday, and the insanity of Boston rentals is that there is no way to start early or extend a day. The upshot of which is that I will have some enforced 'no build' time for the blocks to reach me.
Geirge
-
16 hours ago, ClipperFan said:
llustrated London Times, 22 September 1866 "The Great Tea Race from China to London, the Taeping and Ariel off the Lizard" actually shows the use of both water sails by each racing tea clipper (the ones beneath the lowest studding sail boom) and even a jaime green sail (the trapezoidal sail rigged beneath the Taeping's bowsprit). The only one not illustrated, which you asked about is a ring tail, which is an outrigger sail to the spanker.
FYI: I really like your "to do list" and how you cross off each task as you complete it.
Crikey. And I see the royal stuns'ls as well. Those watersails look dangerous to me, catch a wave and rip off the booms, and do goodness knows what other damage. Of course you'd only set them for light winds, so when there is a lesser chance of waves...
I wonder if there was a ringtail iron or if they just lashed a short spar onto the spanker boom and gaff. The Butterworth painting doesn't show it, so I guess I'll leave it for now.
-
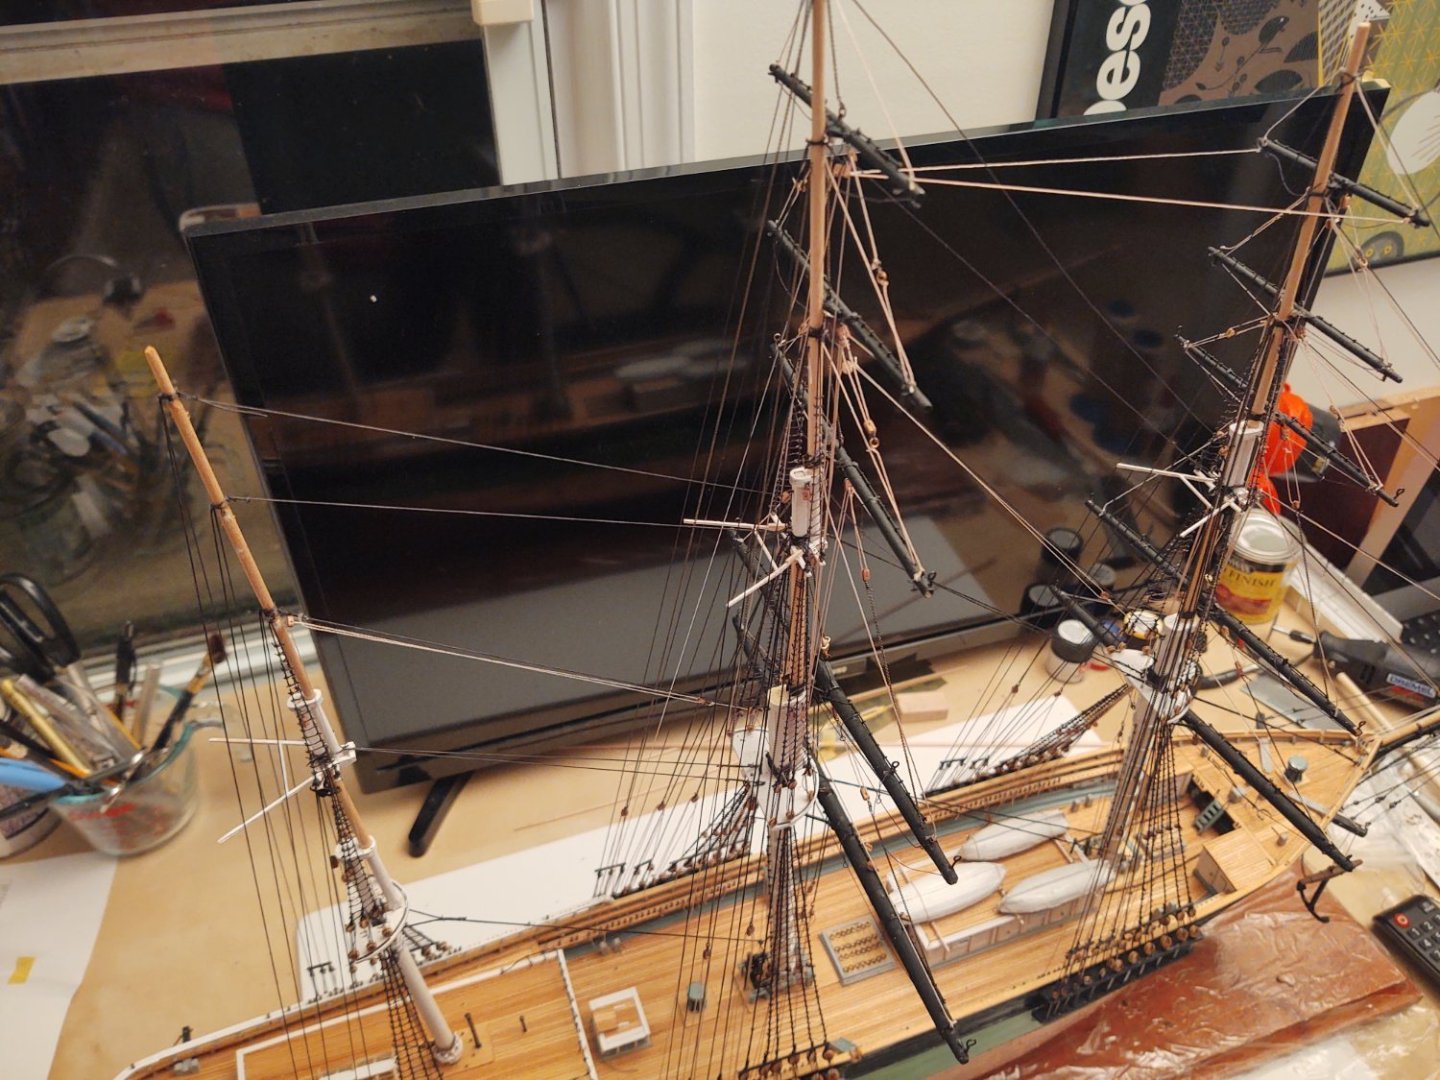
One last weekend update. I've added the mizzen top yard and the mizzen topgallant yard, with the halyards and lifts for all three (including the course). I can't do the chain sheets and the associated clews until the double blocks arrive, hopefully soon. In the interim, I'm going to add any missing blocks for the braces, and work on the stuns'l booms. As can be seen, I've test fitted the spanker boom (it needs stuff added to it), but it's at least out of the way now.
Ship as it currently appears:
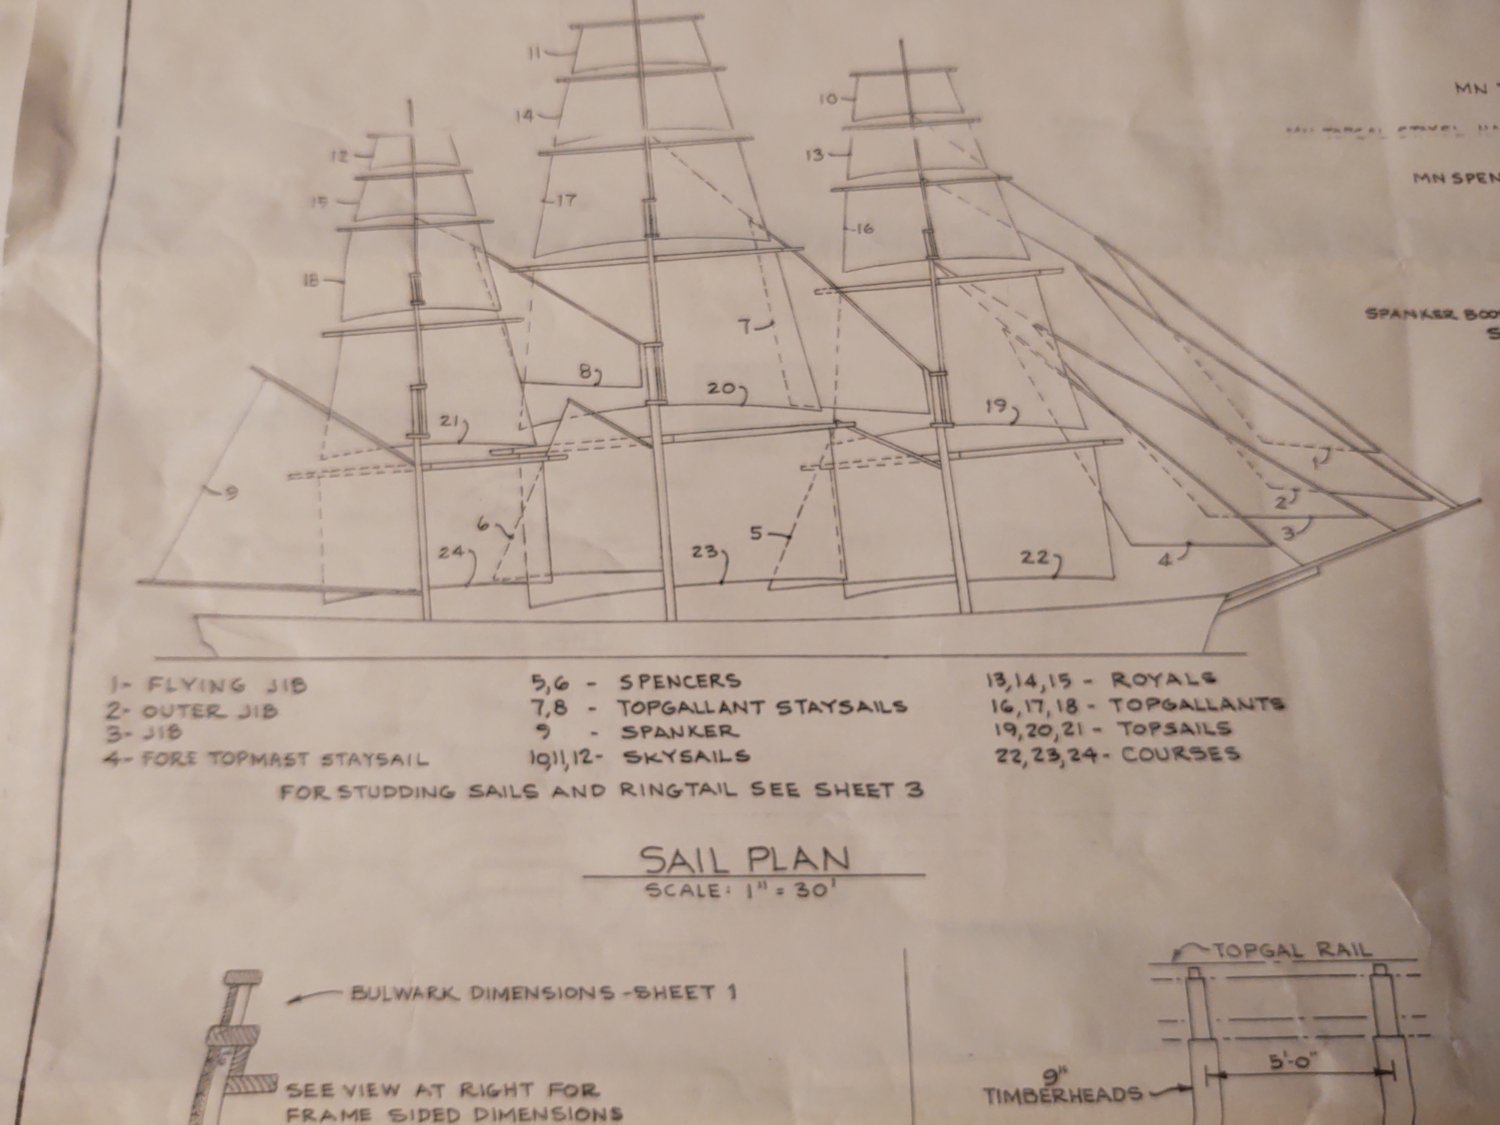
BTW, for the cognoscenti out there. I was looking at the Boston Daily Atlas article (http://www.bruzelius.info/Nautica/News/BDA/BDA(1851-11-04).html) that @ClipperFan and others have pointed out, and it lists the lowest yard on the mizzen as a crossjack. I've seen indications online that it's called a crossjack (a) only if it carries a sail, (b) only if it doesn't carry a sail, and (c) regardless of whether it carries a sail. The article doesn't talk about the specifics of the sails that it carries - except to say that it carried sails peculiar to clippers: royal (!) stuns'ls, staysails, watersails, and a ringtail. Was it common for clippers to carry a sail on the crossjack? The Butterworth painting shows a sail, but Crothers says it was unusual. For royal stuns'ls are those just the stun'sls footed on the topgallant stuns'l boom? In Anatomy of the Ship for the Constitution those sails are called topgallant stuns'ls, but did the lingo change? I would have thought a ringail would require a set of booms similar to a stuns'l boon on the spanker boom and gaff, but there is nothing there. And watersails? What I've seen described is some kind of stuns'l that sounds like it hangs from the stuns'l boom mounted on the hull and dropping nearly to the water. I'm not planning on putting on sails, but has anyone even heard of such a thing?
Anyway, the list:
mizzen yards:
52Jib halyards: 4lifts:
104Jib downhauls: 4sheets: 8
Staysail halyards: 2clews: 8
Staysail downhauls: 2halyards: 4
Spencer gaff:
21 Braces:3024topping lifts:
21 Stun'sl booms on hull: 2vangs:
42 Stun'sl booms on yards: 12Spanker boom: 1 Davits: 4
sheets: 2 Boat tackle: 4
Spanker gaff: 1 Decals: 3
throat halyard: 2 Gilded balls on mast trucks: 3
peak halyards: 1 Fairleads on shrouds:
84topping lifts: 2
outhaul sheets: 2
vangs: 2
ensign halyard: 1
Change:
+0 (Nothing Added!)
-14 (2 yards, 2 halyards, 4 fairleads, 6 lifts)
-2 (corrected to 8 sheets and 8 clews)
Net = -16
Remaining items: 98
As always, thanks for looking in.
Regards,
George
-
BTW, this clears something up for me. There are 6 sheets of plans in the POB kit, and I was kinda baffled as to why they were labelled sheets 1-4 of 4 and 1 - 2 of 2. It makes sense now, as the 4 sheet segment has the framing, overall views, belaying plan, and the running rigging on the yards, and it's what must have been the plans for the solid hull ship (says 1979, revised 1982 and copyright 1994). The 2 sheet set are the additions for the POB model (bulkheads, false keel, planking pattern, counter, etc.) Labelled 1993 and copyright 1994, both sets by Ben Lankford.
Historical research and design never stop moving do they.
Regards,
George
-
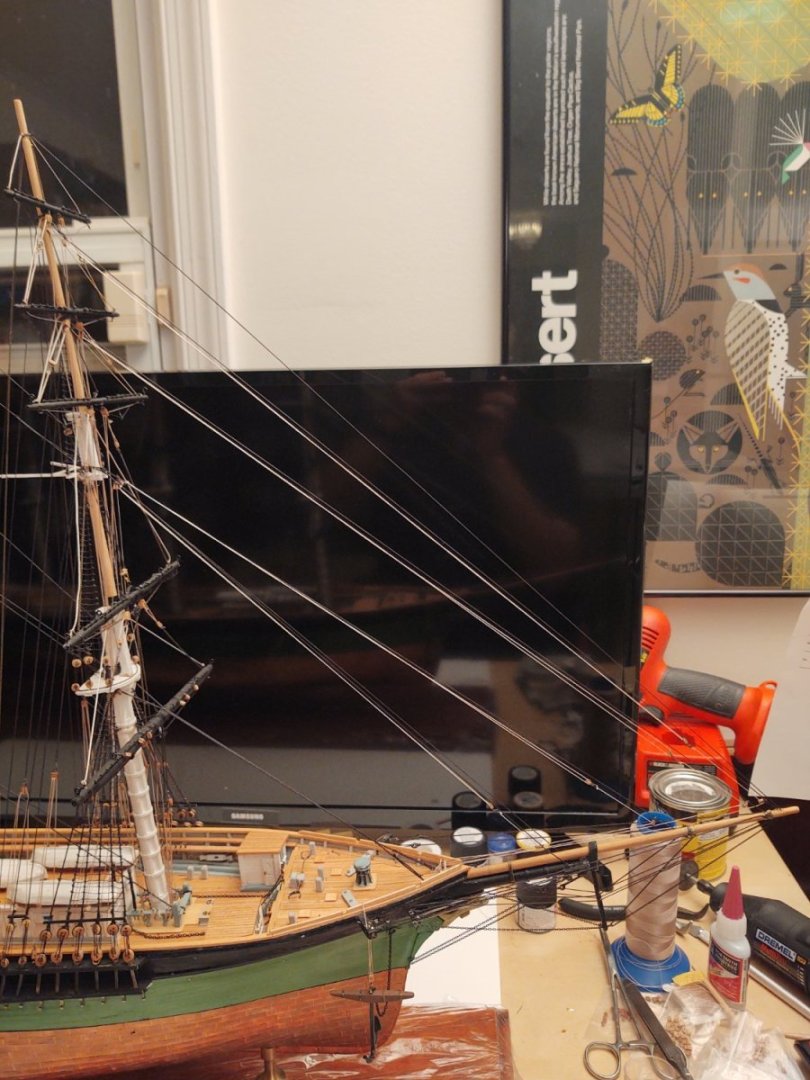
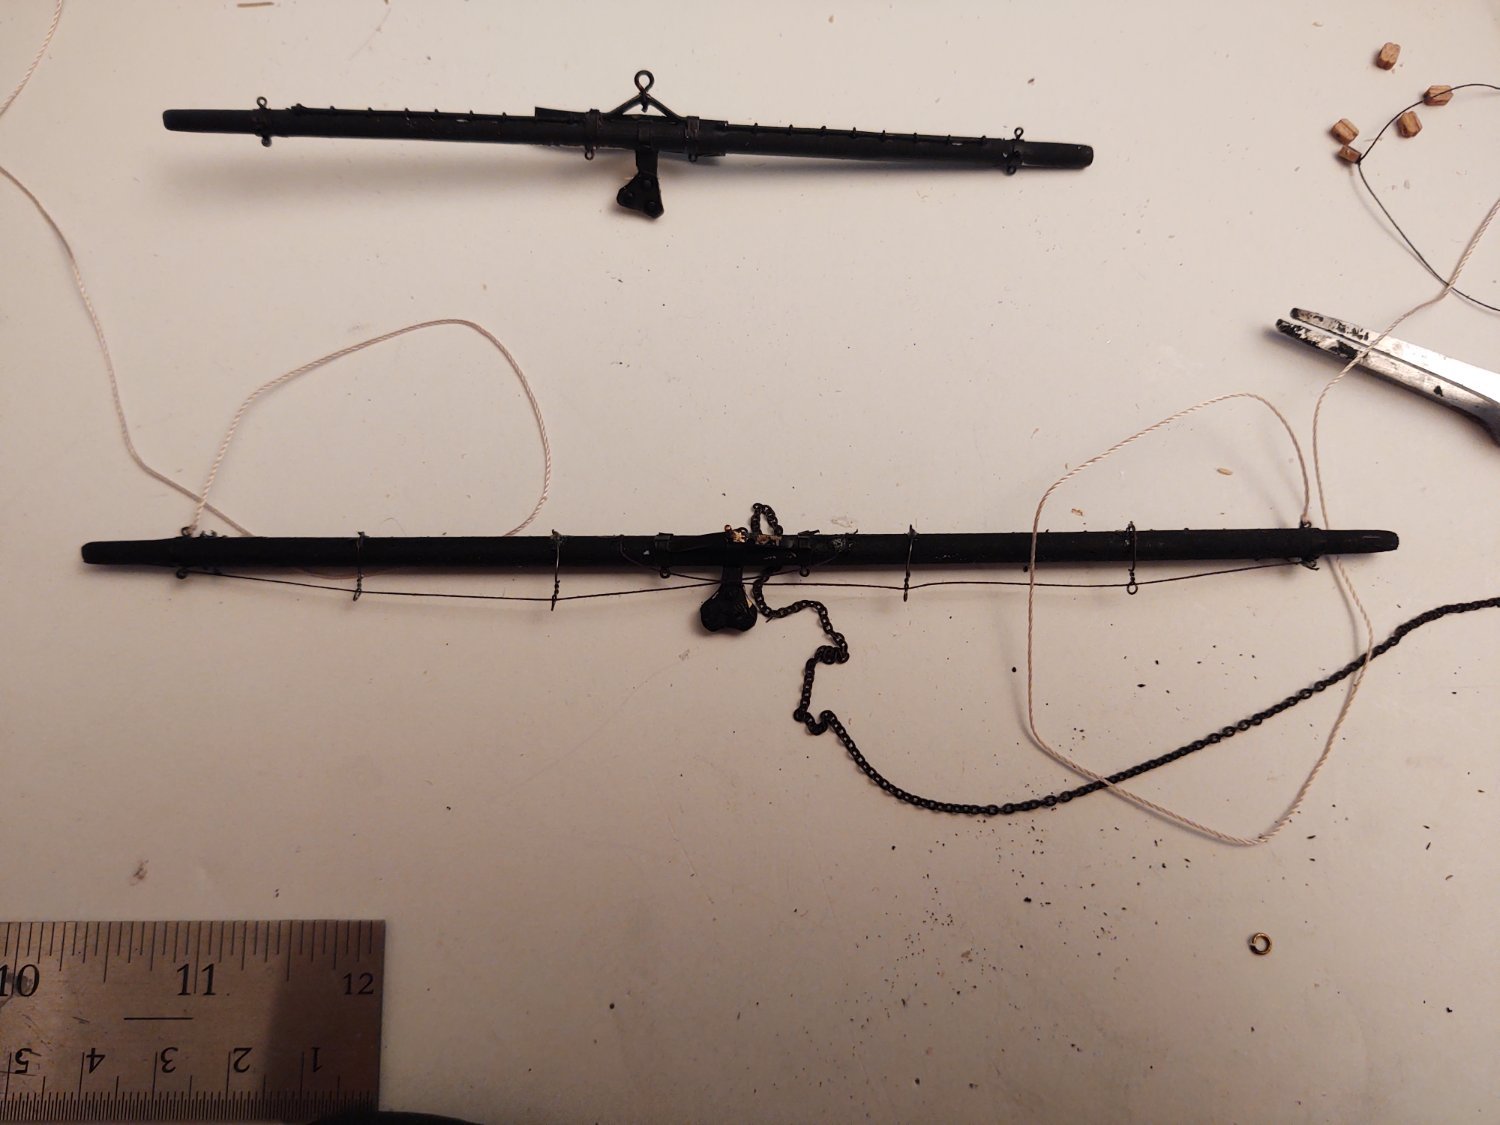
Starting to see the light at the end of the tunnel, so another update. First, made the spanker boom and gaff:
Everything painted black. Top to bottom spencer, spanker gaff, spanker boom, mizzen yards.

Two yards prepped with foot ropes and key blocks skysail (above) and course (below):
And first mizzen yard bent:
The free ends of the lifts (or more to the point their tackles are not yet fully in place, so I can't knock them off the list, but coming.
One thing I found out is that I am going to hit a wall after the mizzen top yard because (deep sigh) I don't have enough 1/8 double blocks. More on order, not sure when they will arrive. If I finish the top yard before the extras arrive, I guess I'll work on the stuns'l booms.
So, the list:
mizzen yards:
54Jib halyards: 4lifts: 10
Jib downhauls: 4sheets: 8
Staysail halyards: 2clews: 10
Staysail downhauls: 2halyards: 4
Spencer gaff:
21 Braces:3024topping lifts:
21 Stun'sl booms on hull: 2vangs:
42 Stun'sl booms on yards: 12Spanker boom: 1 Davits: 4
sheets: 2 Boat tackle: 4
Spanker gaff: 1 Decals: 3
throat halyard: 2 Gilded balls on mast trucks: 3
peak halyards: 1 Fairleads on shrouds: 8
topping lifts: 2
outhaul sheets: 2
vangs: 2
ensign halyard: 1
Change:
+8 (shroud fairleads)
-1 (mizzen course yard)
+0 (corrected 8 sheets and 10 clews, not other way around)
Net = +7
Remaining items: 114
For some reason my list keeps growing every time I add things to the ship. I feel like Achilles, perpetually unable to catch the tortoise. Hopefully, no more major additions, and I should be able to get one more yard, 4 lifts, 1 halyard, and maybe some stuns'l booms if the new blocks take some time.
Thanks for looking in!
George
-
10 hours ago, Rick310 said:
Also George, I also thought that sts’l referred to the stuns’l , not the staysails and it took me awhile to figure that out as it didn’t make any sense.
Rick
It is defined in the general notes in sheet 4 of the '94 plans, but sheesh; add the extra 2 letters and be clear.
-
-
Rick,
My 1994 revision of the plans label the sails as you describe (see photo, sails labelled 1-4), and the belaying plan uses the same terms (although it annoyingly uses sts'l for staysail which I originally interpreted as stuns'l). The belaying plan uses those terms and I belayed the downhauls to the 4 pin rail in the stem, and the halyards to the fore fife rail. No sails, so no sheets. Not sure what your older version of the plans show. If they disagree I'll DM you the pin locations on the '94 plans
Regards,
George
 belayed the jib
-
Thanks Vlad, it does feel like I am getting close to the end, although despite my current work, I have to add to the list of things to do with no items removed.
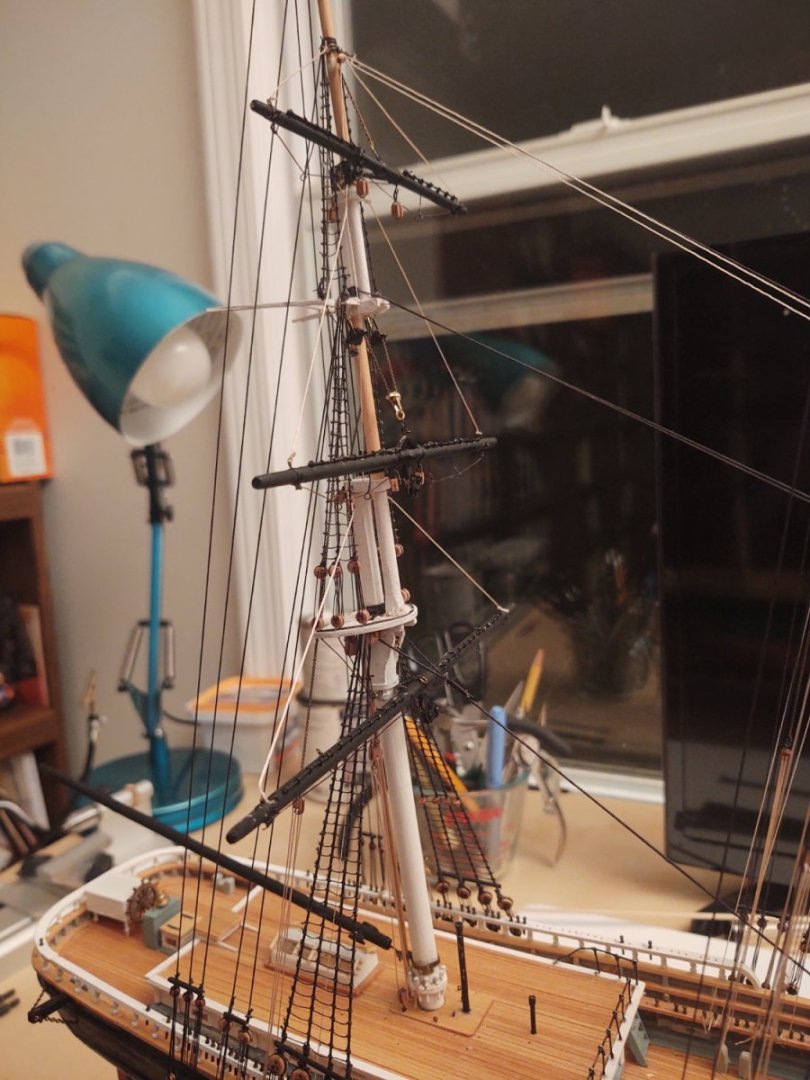
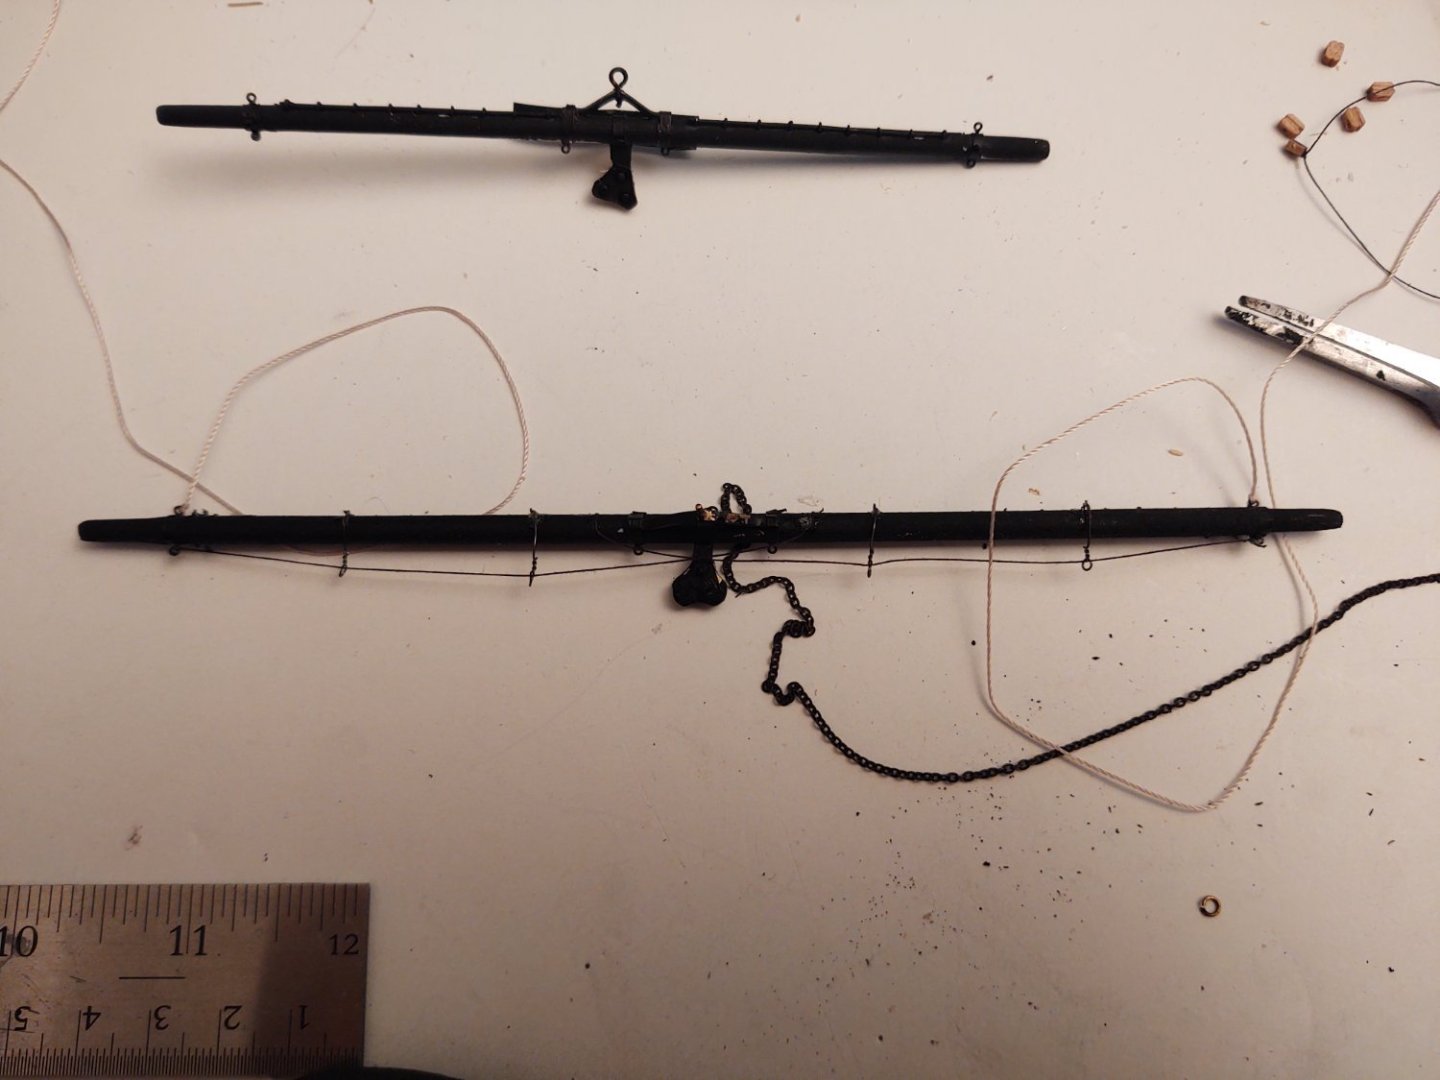
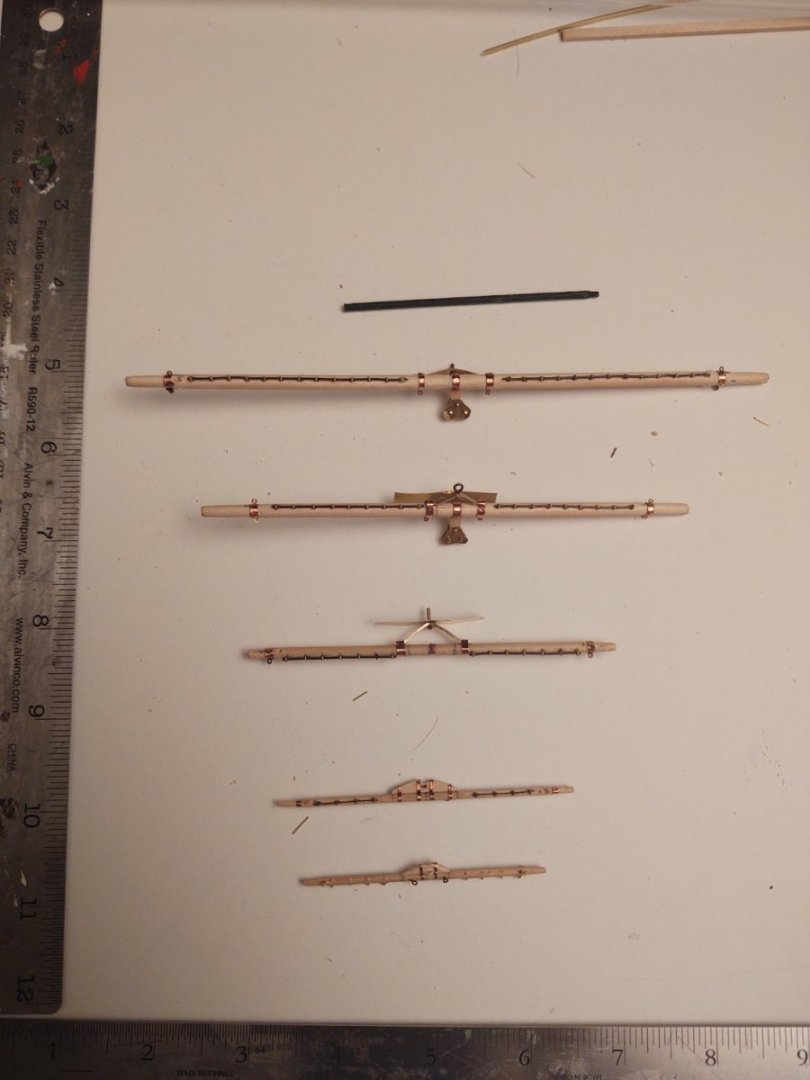
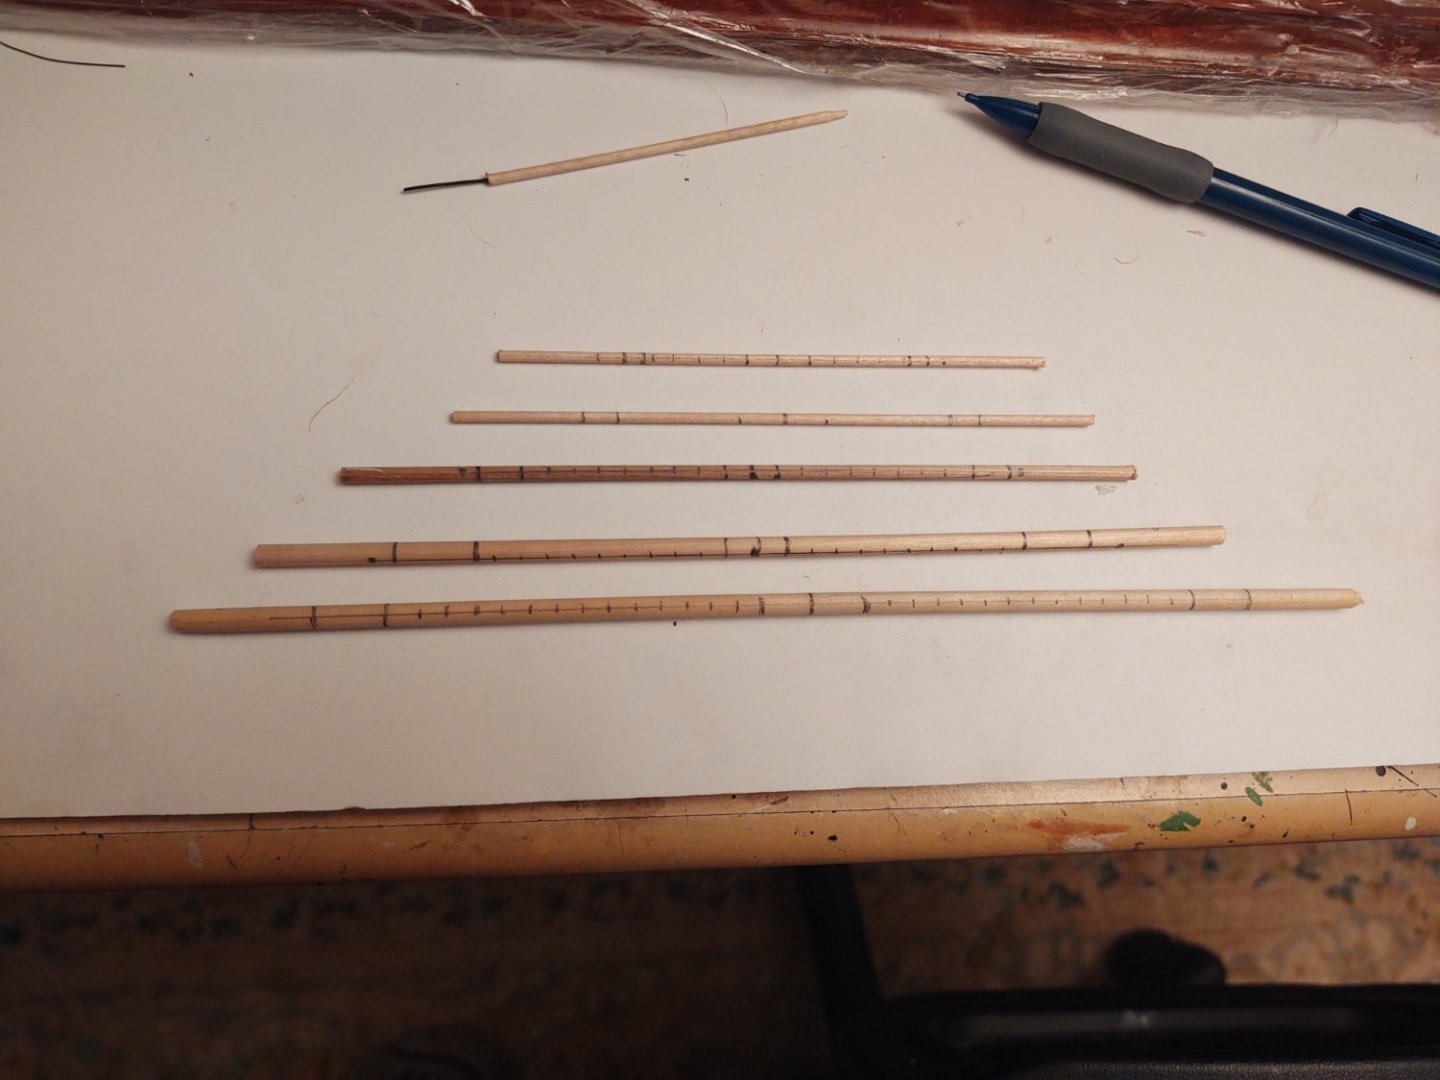
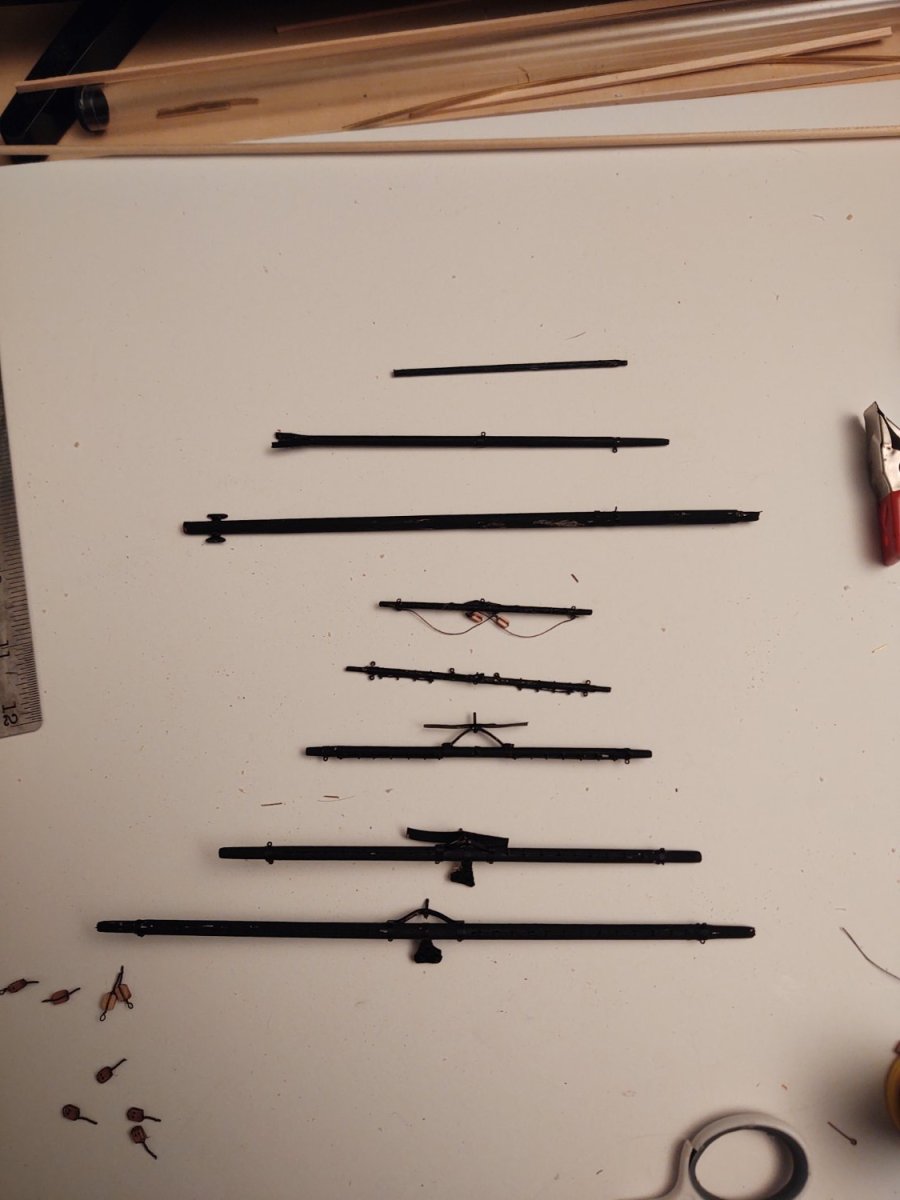
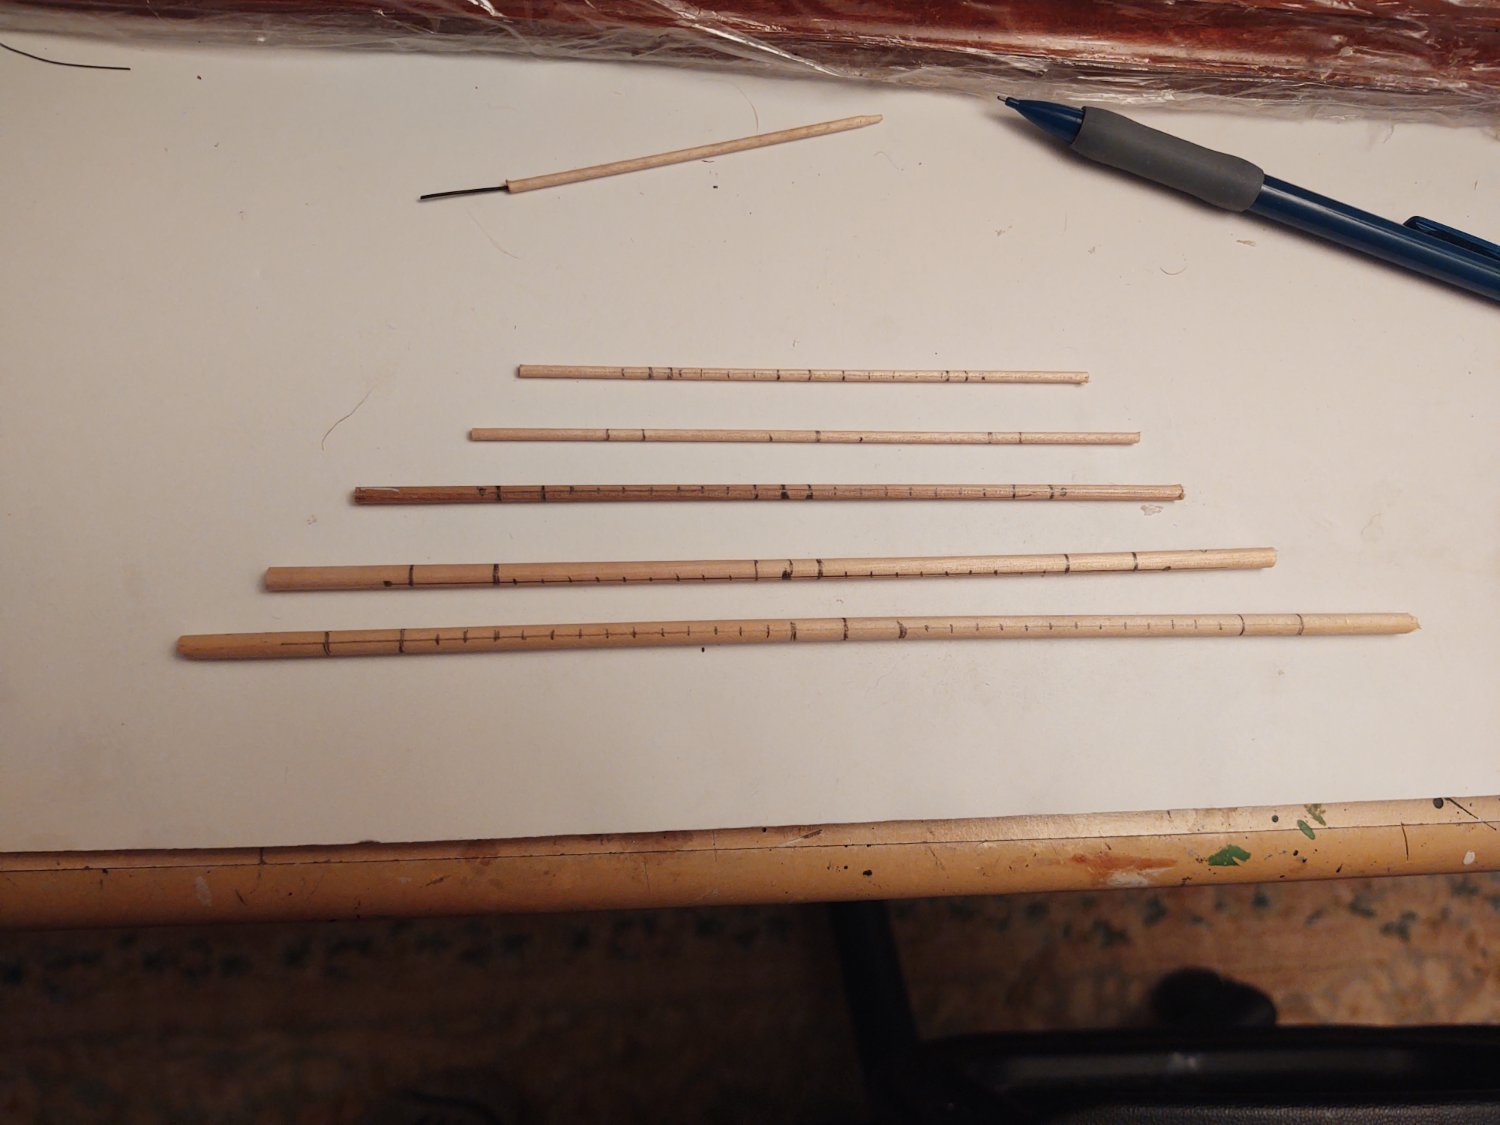
So, the mizzen yards are built. Photo below shows them, and I put some rulers in the frame to indicate size. These are way smaller than the main and fore (the skysail yard is only 2.5 inches wide). I wound up buying some extra 1/8 and a package of 1/16 inch dowels to make the topgallant and royal/skysail yards respectively. The 1/16 yards will be useful for the stuns'l booms as well, as the 5/64 (7.5 inch at scale) dowels were too large for all but the main course yard. This way, I'll have less to shave off and will be more likely to make better formed booms. Anyways, "iron bands" and eyebolts done, cranes in place, iron sheet blocks built and attached and jackstays in place; ready to paint. The black yard is the main spencer boom, just need to put it on once the mizzen yards are in place.
So, the list. I realized that I forgot the mizzen halyards, so the list is now:
mizzen yards: 5
Jib halyards: 4lifts: 10
Jib downhauls: 4sheets: 10
Staysail halyards: 2clews: 8
Staysail downhauls: 2halyards: 4
Spencer gaff:
21 Braces:3024topping lifts:
21 Stun'sl booms on hull: 2vangs:
42 Stun'sl booms on yards: 12Spanker boom: 1 Davits: 4
sheets: 2 Boat tackle: 4
Spanker gaff: 1 Decals: 3
throat halyard: 2 Gilded balls on mast trucks: 3
peak halyards: 1
topping lifts: 2
outhaul sheets: 2
vangs: 2
ensign halyard: 1
Change:
+5 (mizzen halyards)
-0 (nothing off the list
Net = +5
Remaining items: 107
[sigh]
Well, the braces (24) will go quickly once the yards are in place. And, once painted (and with the foot ropes in place, it was only about 2 weeks to clear what is basically 37 items (yards, halyards, lifts, clews, and sheets) for the main, so maybe not too long before we see yards on 3 masts...
Thanks for looking in,
George
-
Welcome from a 58 year old. But still years from retirement, I'm afraid...
George
- mtaylor and Swordfish073
-
1
-
 1
1
-
3 hours ago, VitusBering said:
Instead of a drop a gush happened and the glue ran down the shrouds.
There is always a minor disaster and once you are finished no one will notice. On my Niagara my drill caught a line and ripped the jibboom in half (while rigged). Took hours to repair but no one notices. On the Flying Fish I accidentally yanked a sheet tackle out of the deck, and in the process (a) failed initially to reinstall it, (b) drilled a new hole only to accidentally CA glue a drill bit attached to my pin vise into the deck, and then (c) break both sheets and the yard truss holding it to the mast removing the pin vise and drill bit. Despite all that, I doubt anyone would know if I didn't tell them.
Consider this the modeling equivalent of how Amish quilters supposedly put intentional mistakes in...
Regards,
George
- Ian_Grant, FrankWouts and VitusBering
-
3
-
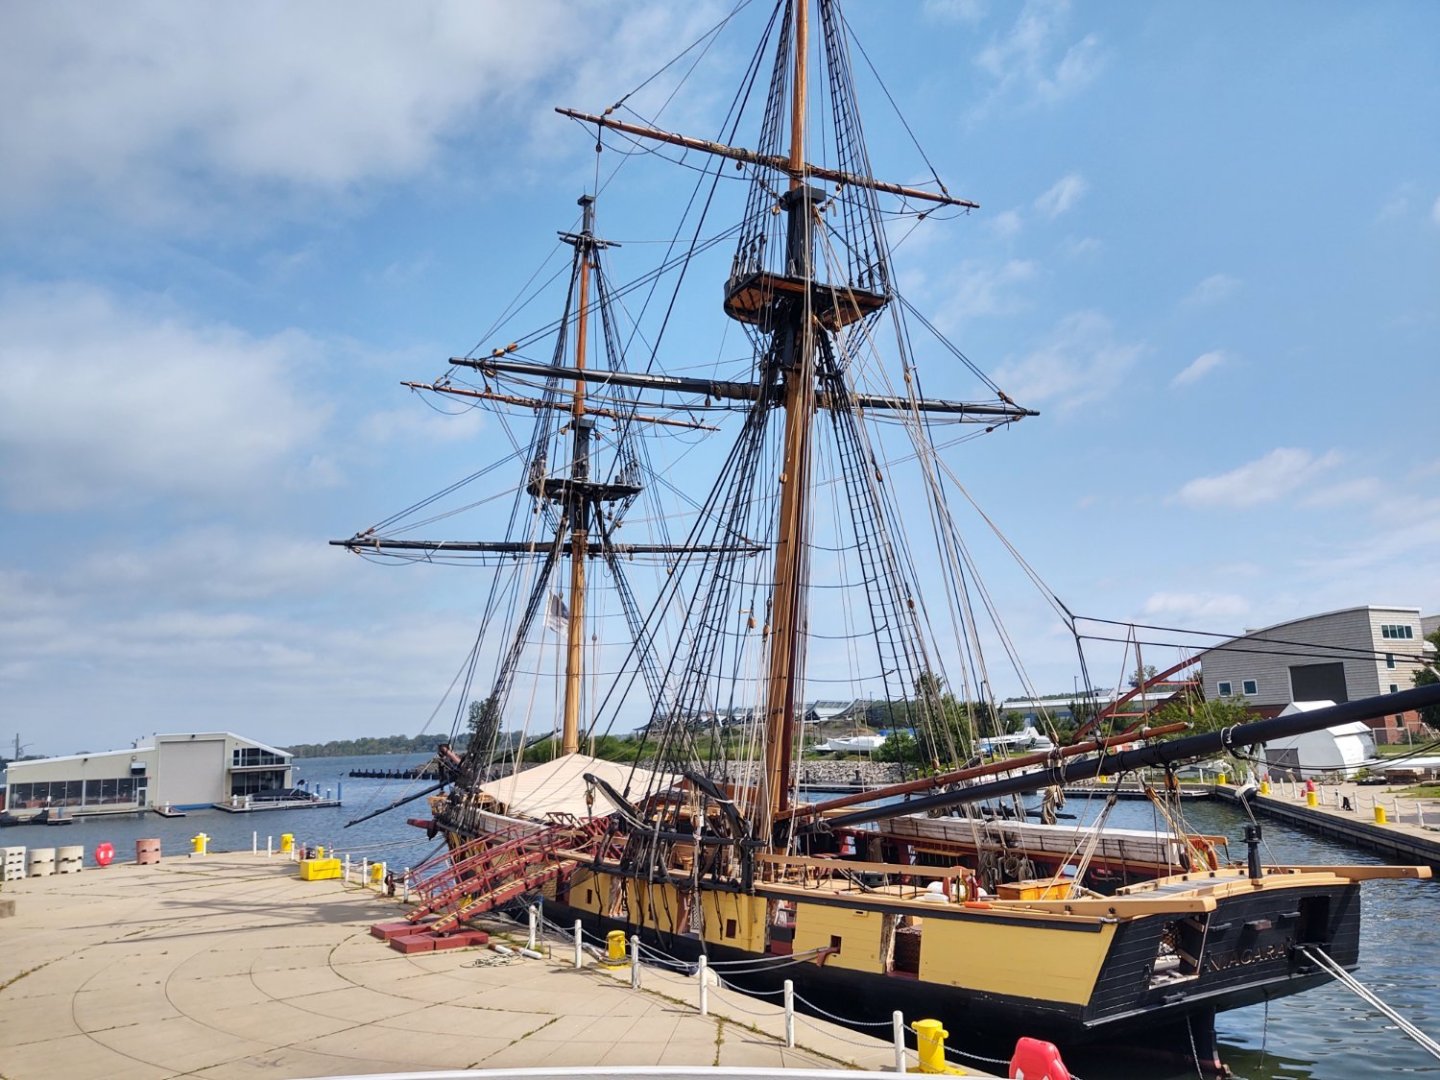
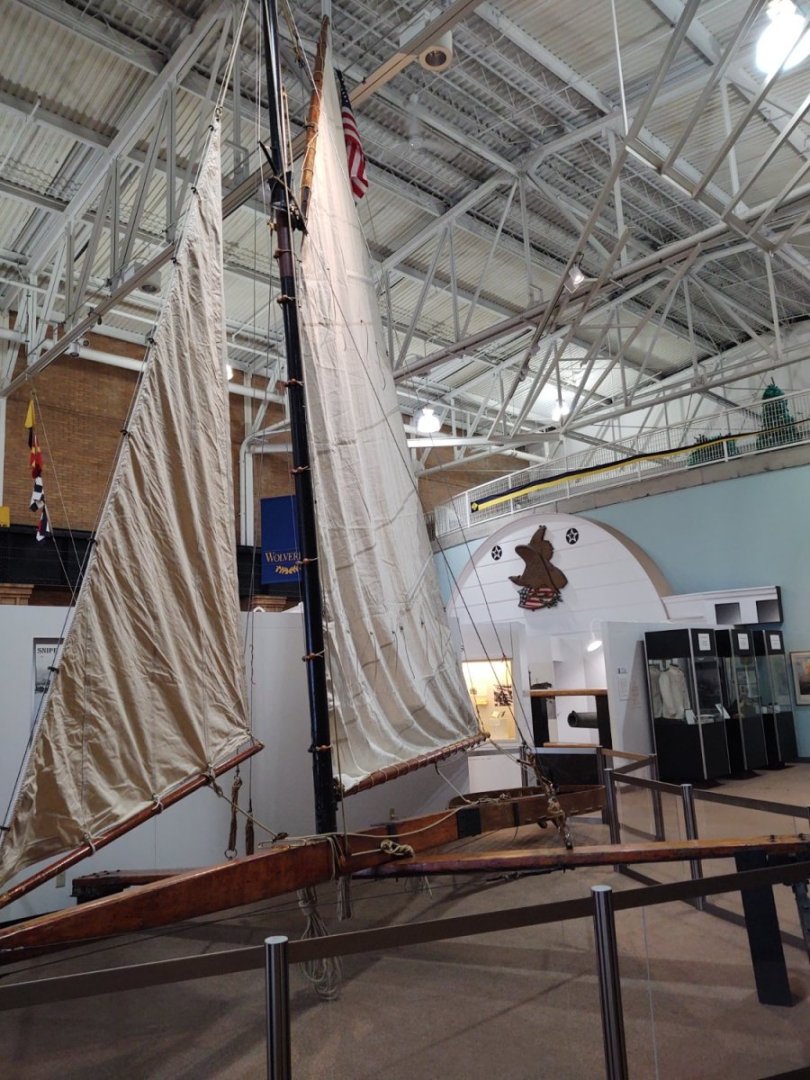
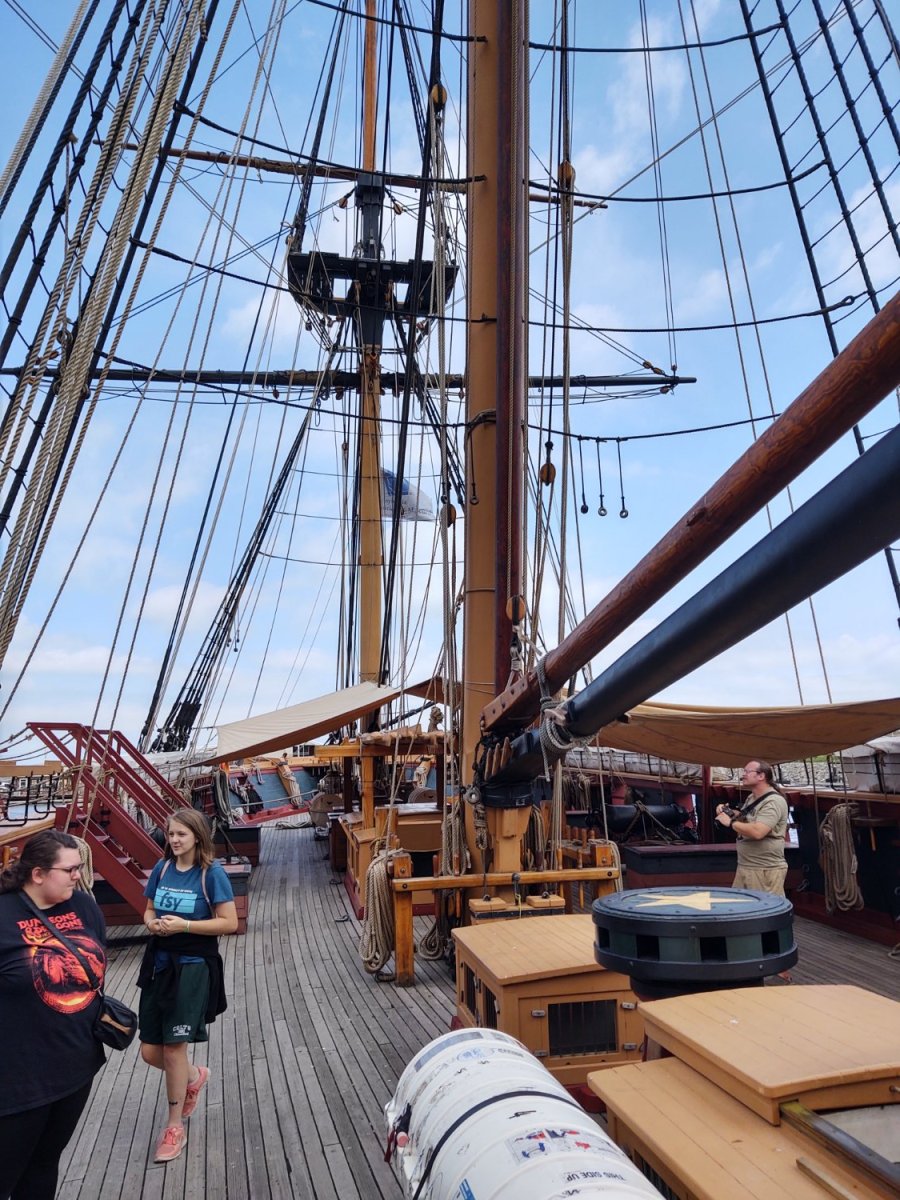
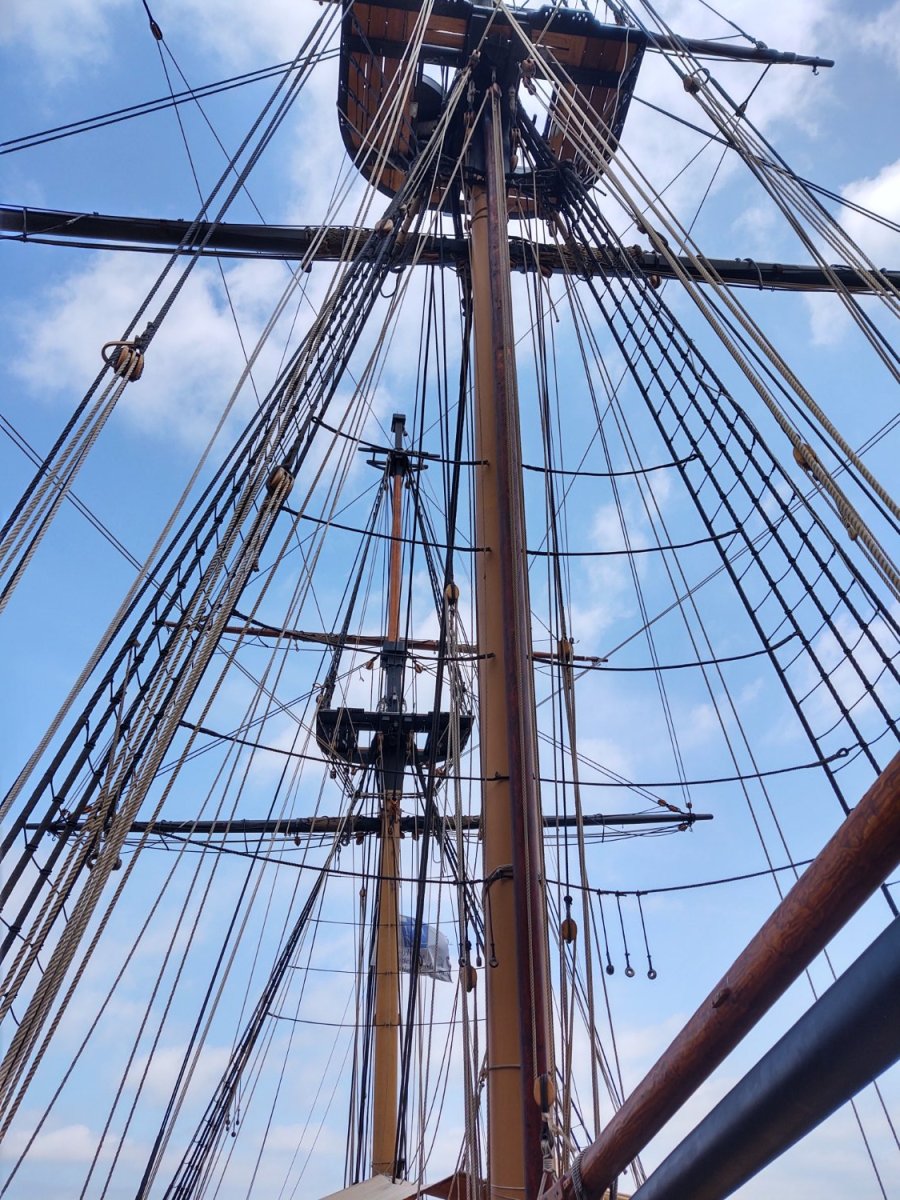
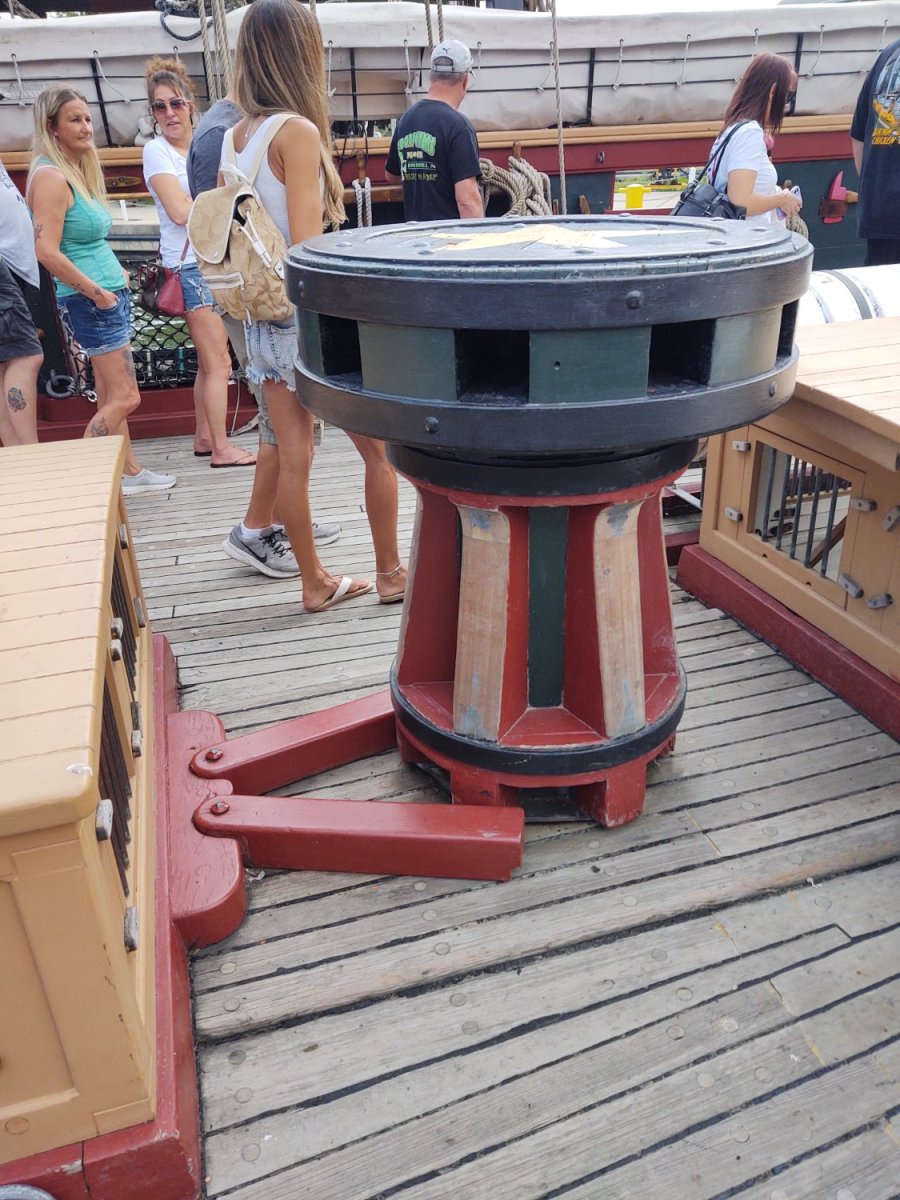
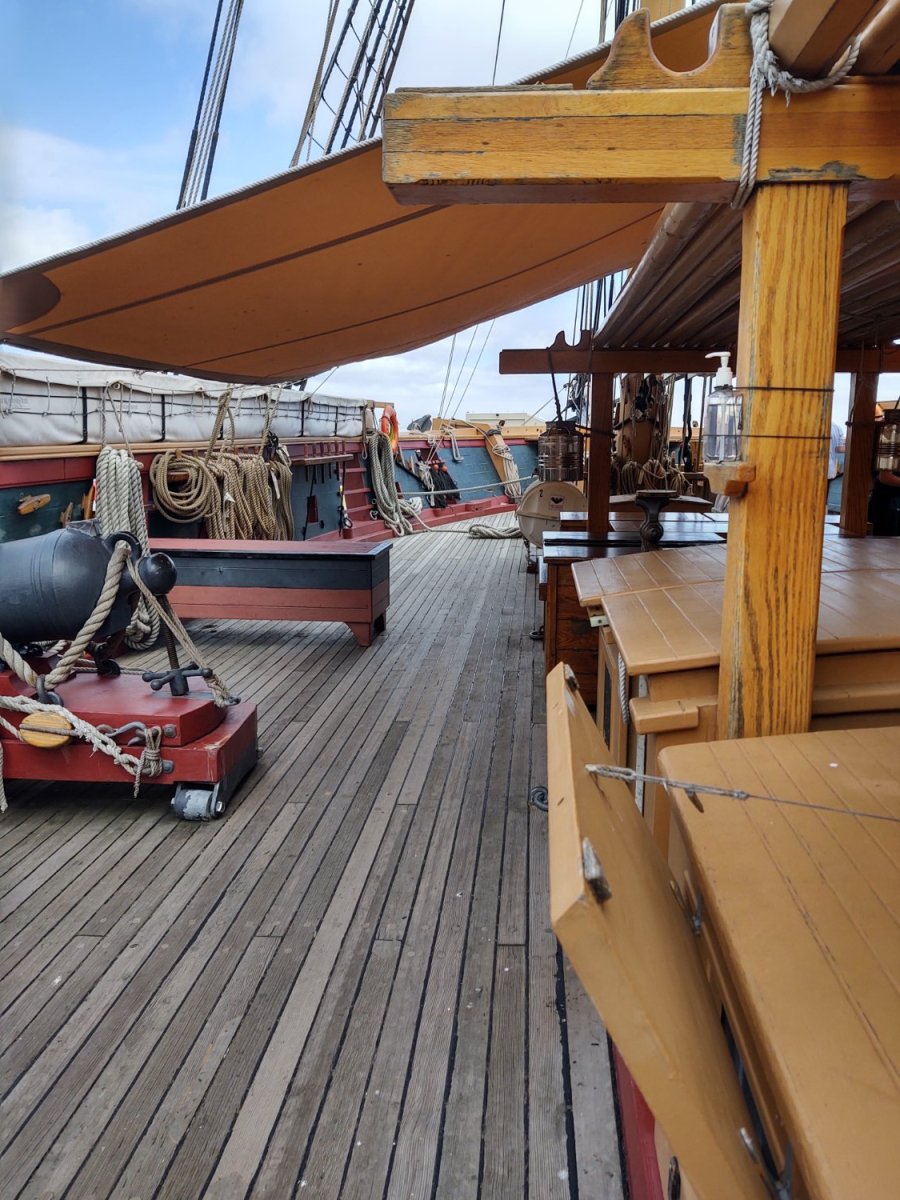
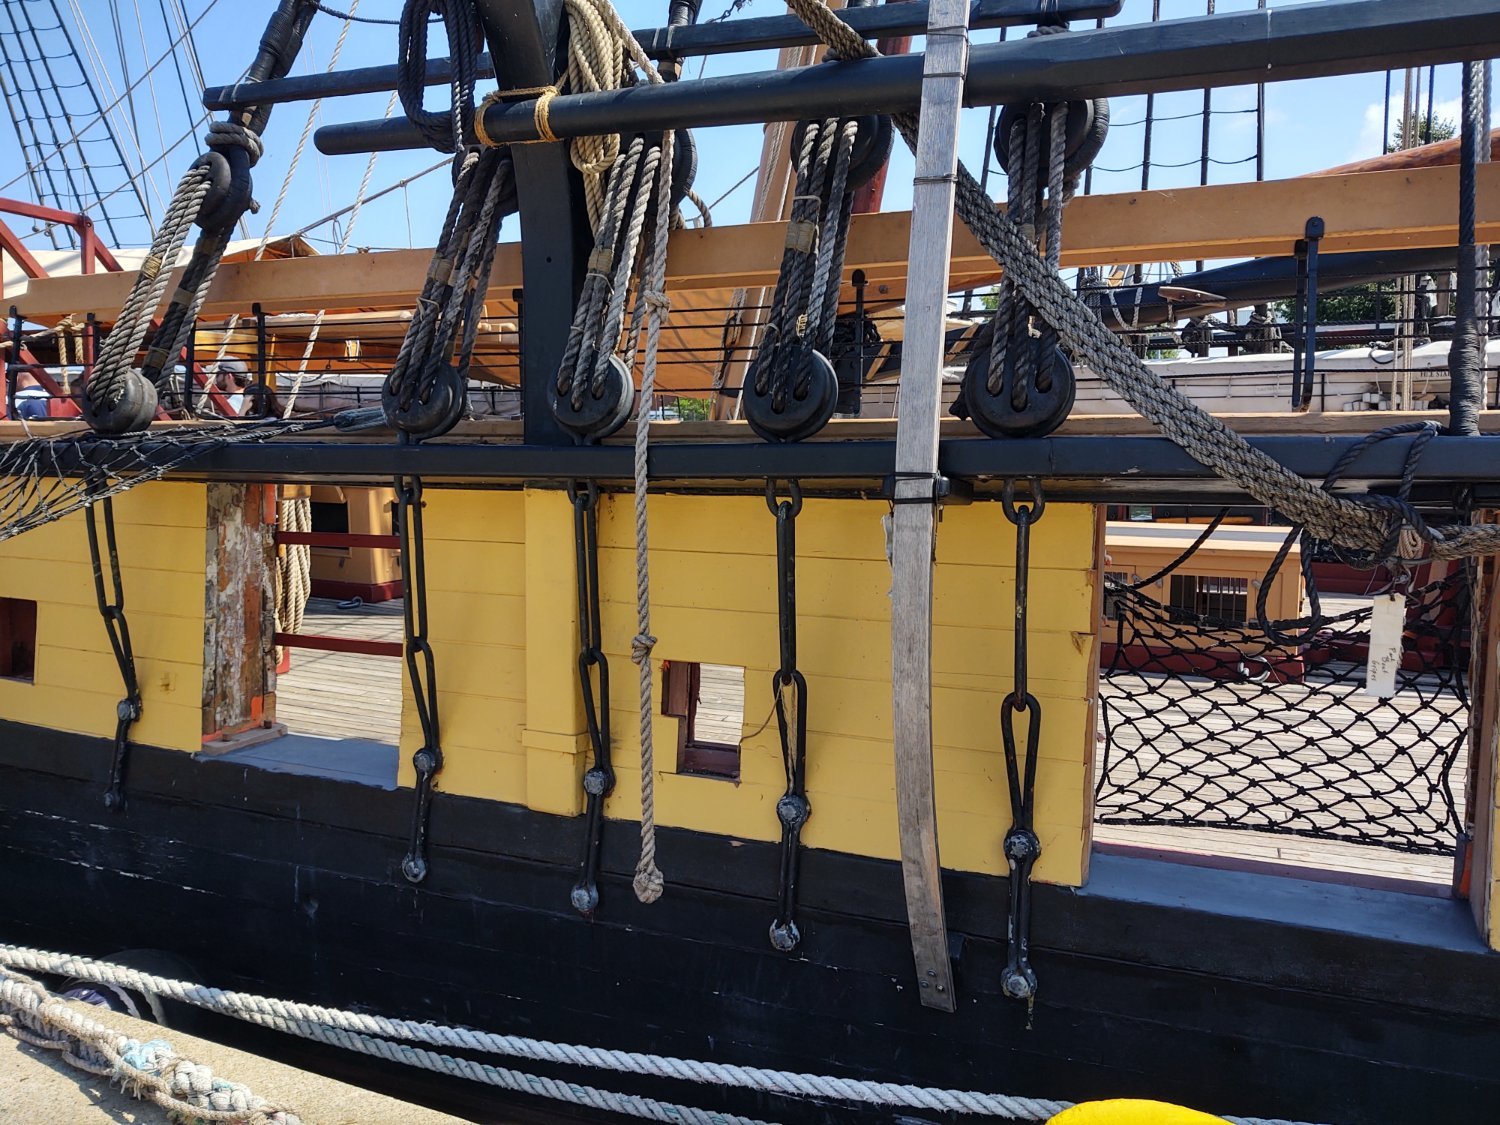
So having gone to the museum and now toured the ship, I was talking to one of the crew and it turns out that they didn't damage a prop, they lost a prop. They were motoring into the harbor, engines start sounding really bad. After they dock a pair of them dive to have a look, and the prop is just missing.
Still, interesting tour of the ship.


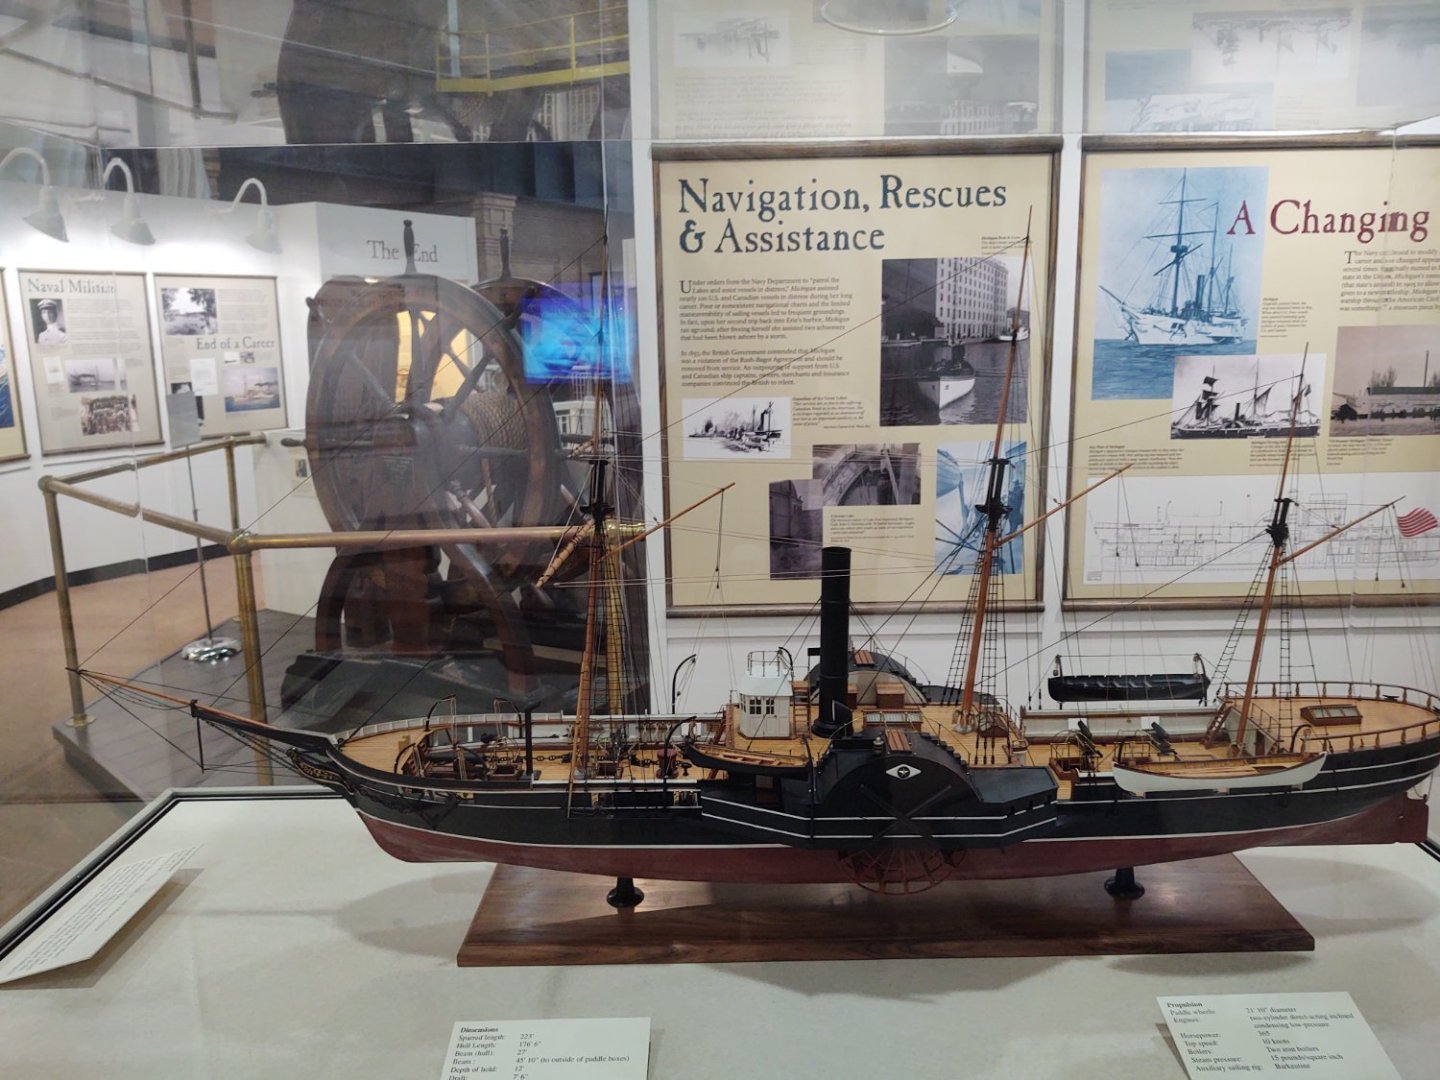
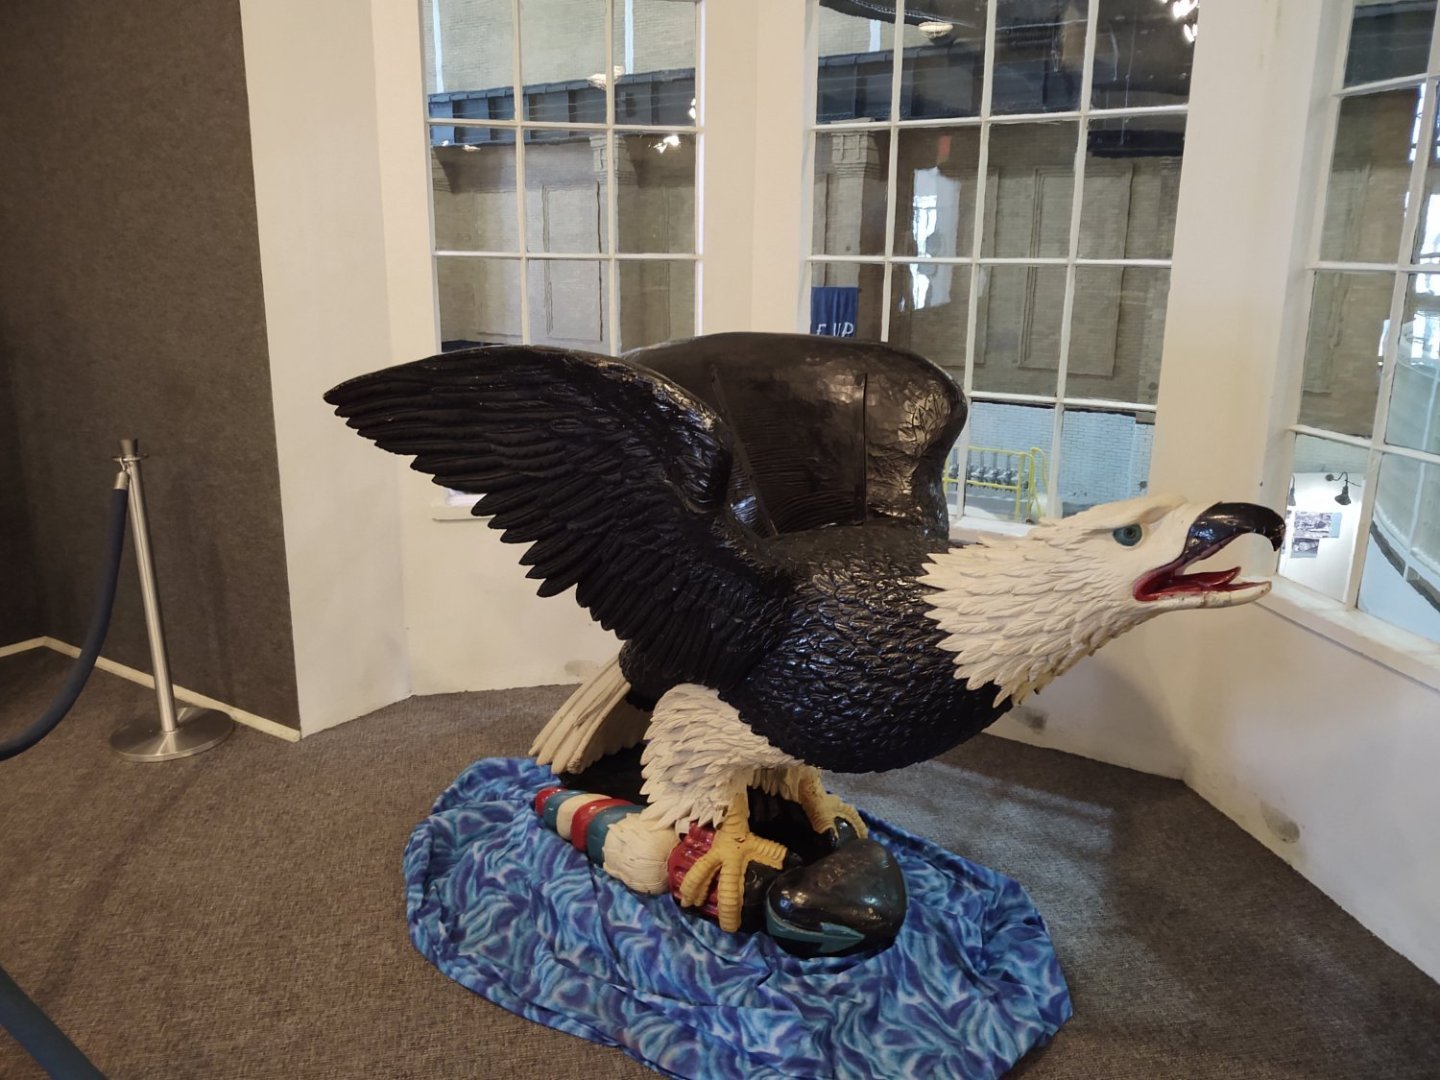
And some cool things in the museum which has an exhibit on the USS Michigan (1843) including her bow and a model as well as various other artifacts:
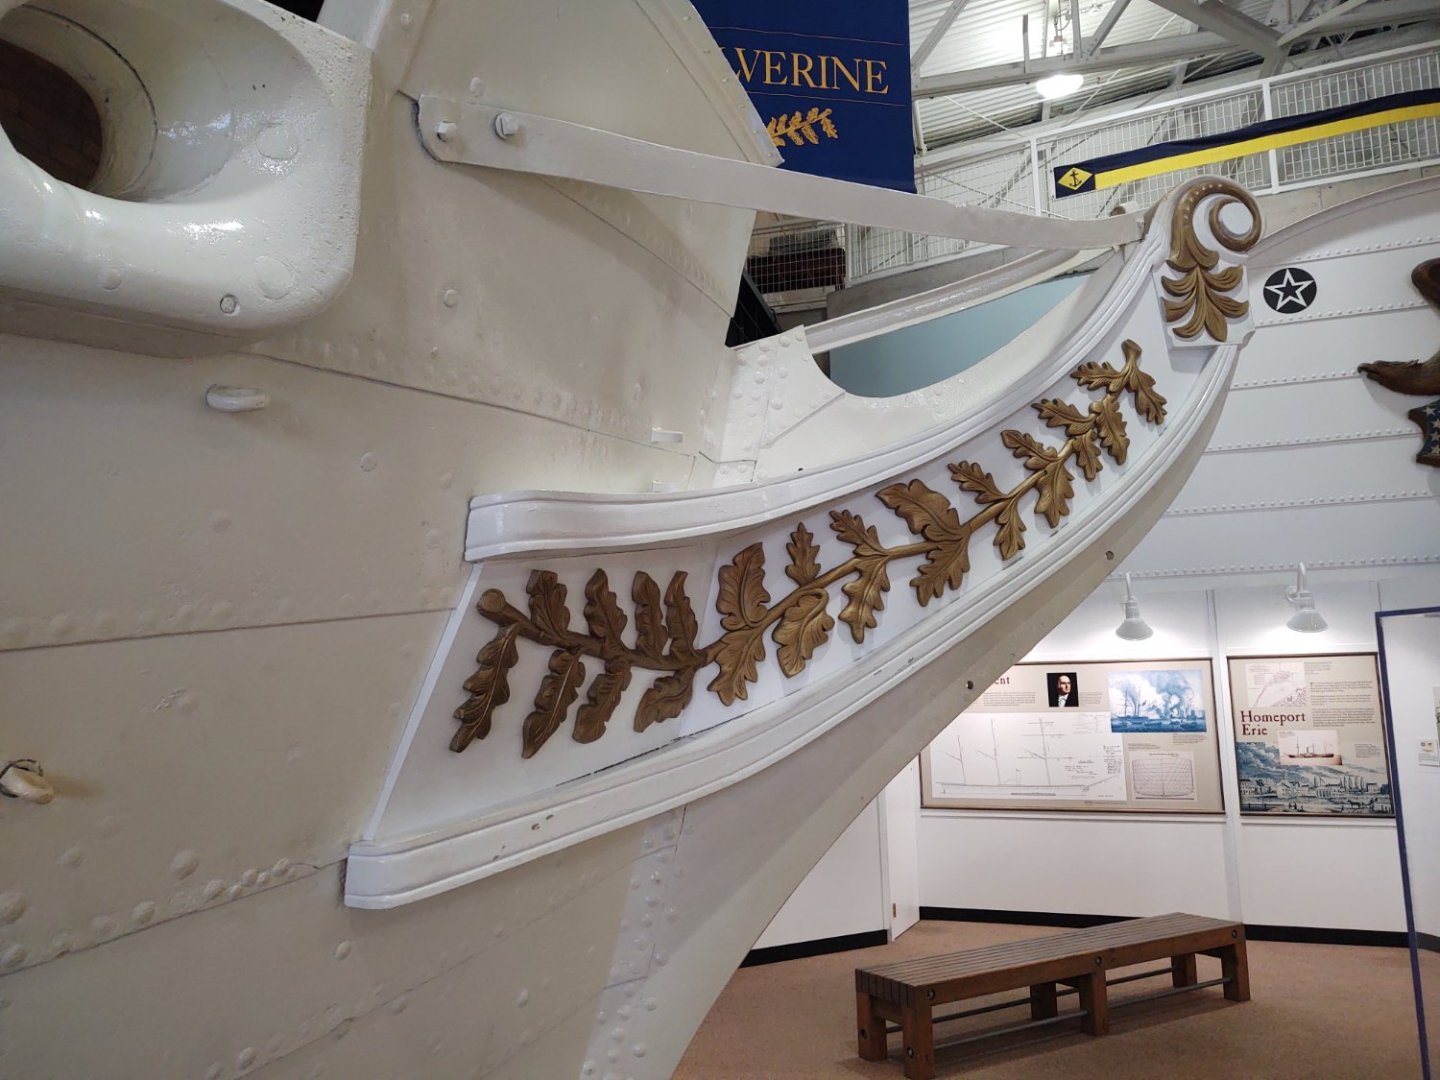
a decoration from the cabin on a coast guard cutter..
Other models:
And a classic iceboat
- Roger Pellett, mtaylor, Canute and 2 others
-
5
-
Looks good! The ironwork on the top is really nice; I just faked it with some 24 gauge wire. Before you permanently mount the lower masts, you might want to drill the holes (but not necessarily install either the bolts or tackles) for the top and topgallant sheet and course lift tackles. The area inside of the fife rails becomes hard to get to once the mast is in place, particularly for a pin vise, although preinstalling the tackles (as I did) didn't work all that well.
FWIW, I found I could fit 24 gauge wire into the small jackstay eyebolts supplied with the kit, but your bolts look like they worked a charm. One thing I am not sure of is what the diameter of the real jackstays on the yards were. 24 gauge wire is pretty thin, but it's 2 inches at scale, I wonder if we should use finer wire, particularly on the mizzen yards.
Regards,
George
-
4 hours ago, wefalck said:
I am aware that risk awareness dramatically changed over the centuries, but when the boat is moving, the boiler deck may have not been a very stable and safe place. Perhaps the ladies and others just posed there for the picture, but would not normally be admitted there - hence, some simple ladder or the like for the crew may have been sufficient at the time of this picture
I think the bigger issue would be standing next to the stacks. Those things must have been hotter than Hades, bump into them and get a real burn, not to mention the general heat.
- FriedClams, Canute, Ras Ambrioso and 3 others
-
6
-
On 8/6/2023 at 5:33 PM, Jared said:
Re: "By the way, if anyone knows how to embed a more proper two column view - I'd love to know - otherwise I'll just copy/paste this sorta messy version." I use PowerPoint to create mine then do a screen capture to produce a Jpg. file to post
Yeah, I did that for my table of yard sizes, although I find the text doesn't zoom well. I also tried rendering an HTML table but it rendered as the HTML tags rather than as a table...
-
6 hours ago, Tigersteve said:
Really great, complex work.
SteveThanks Steve
-
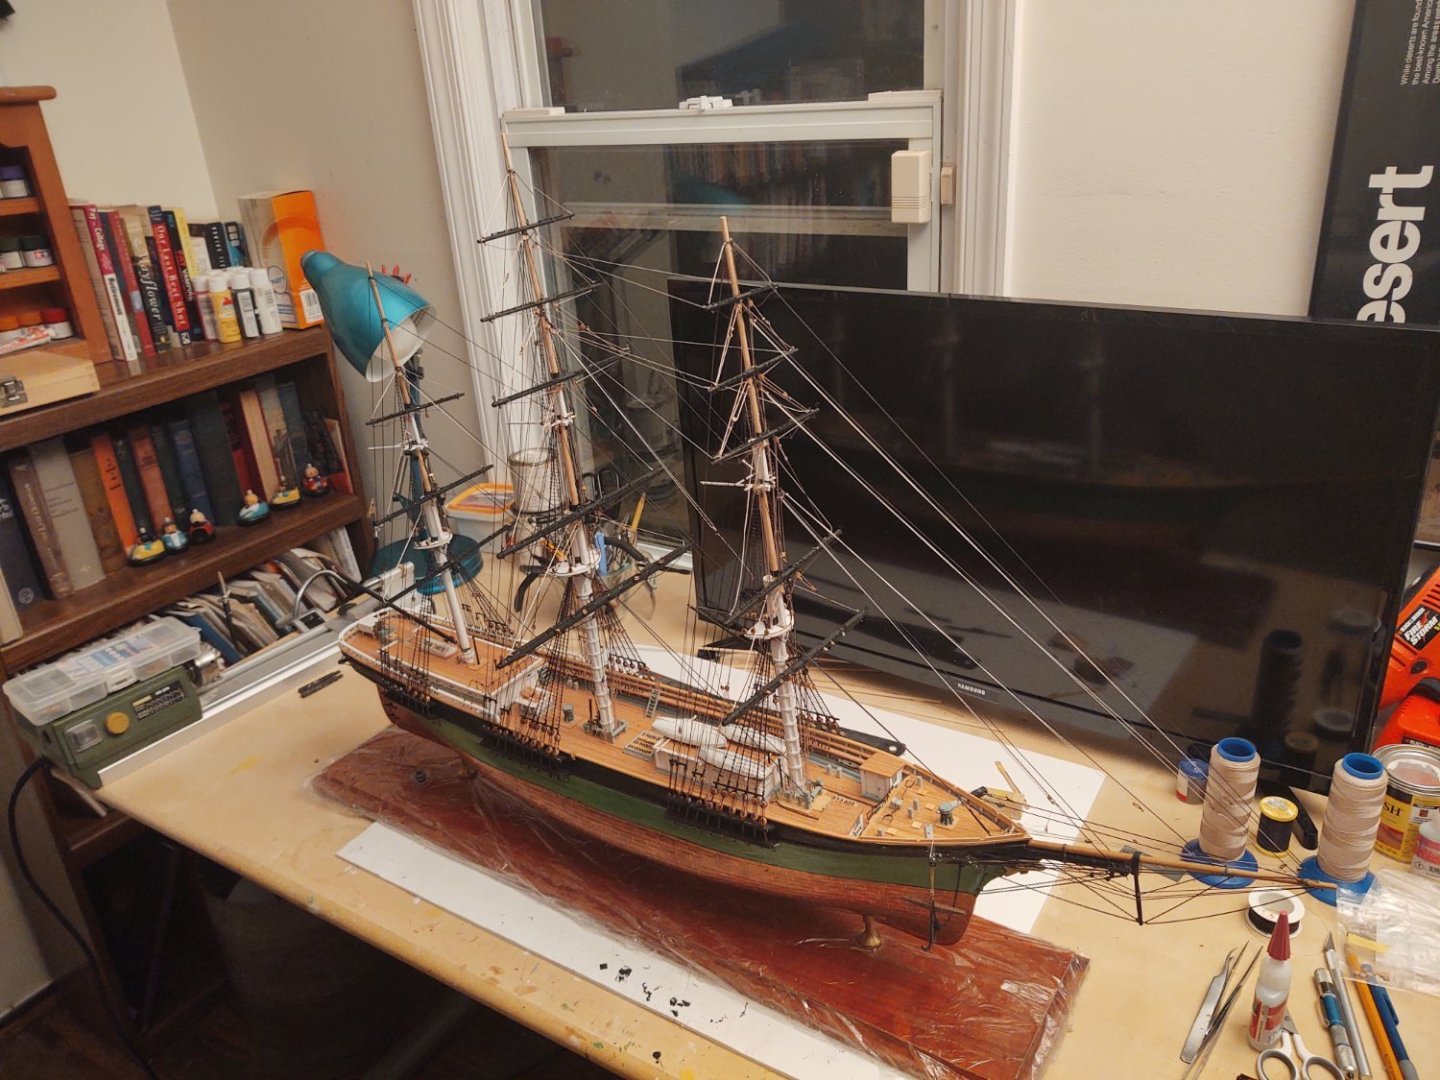
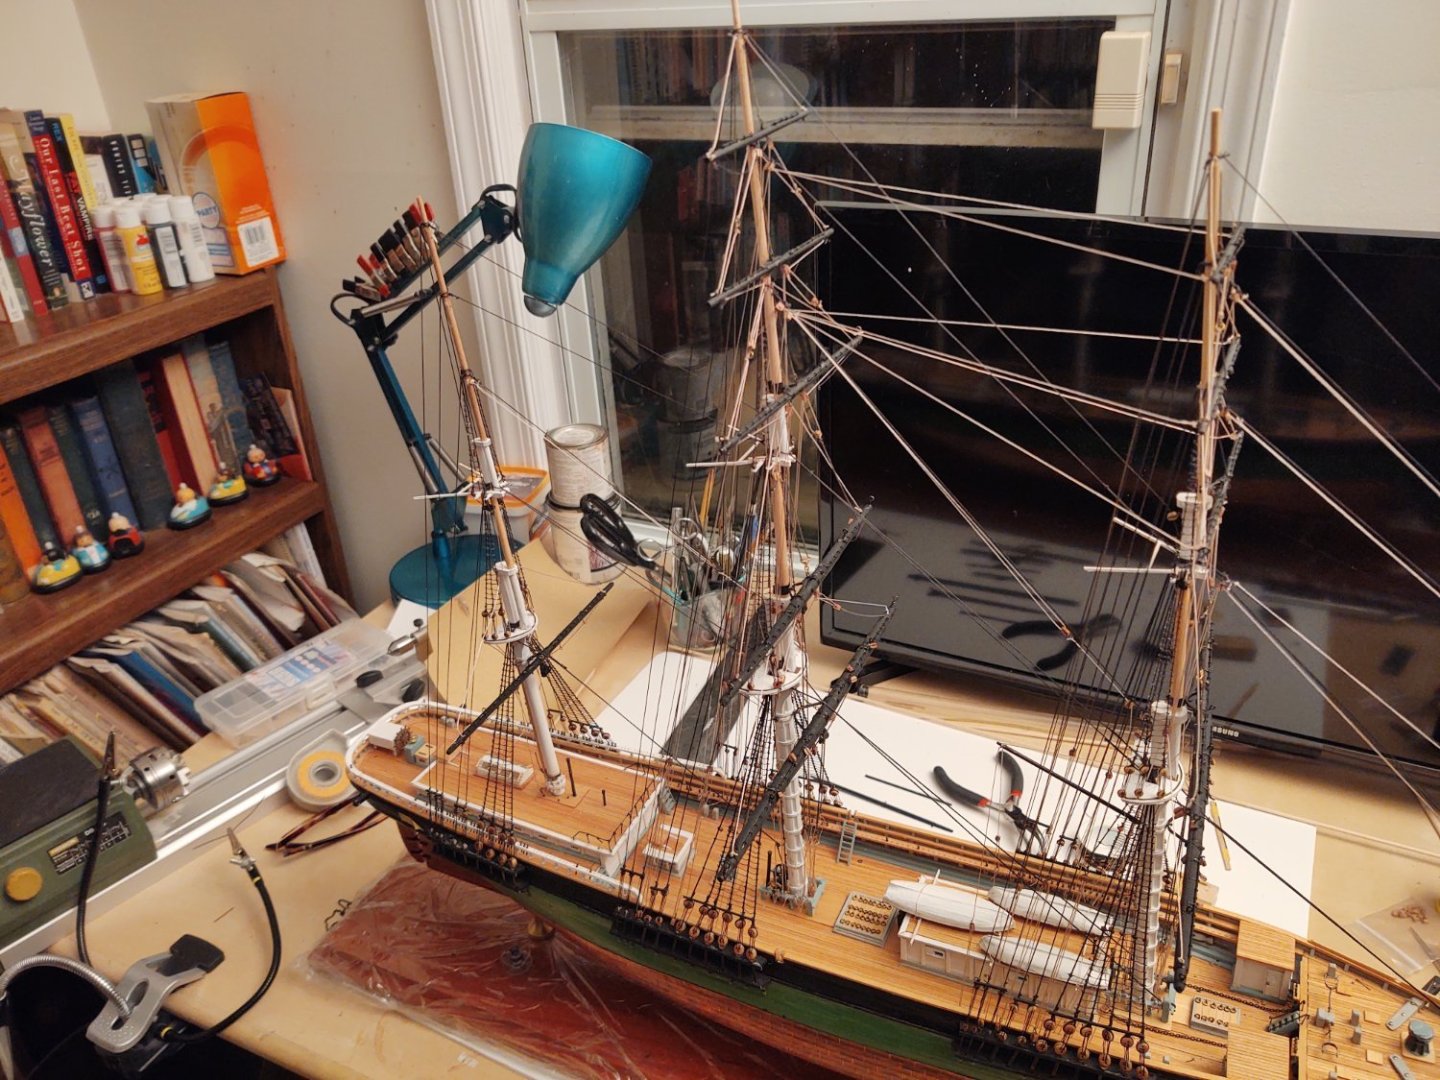
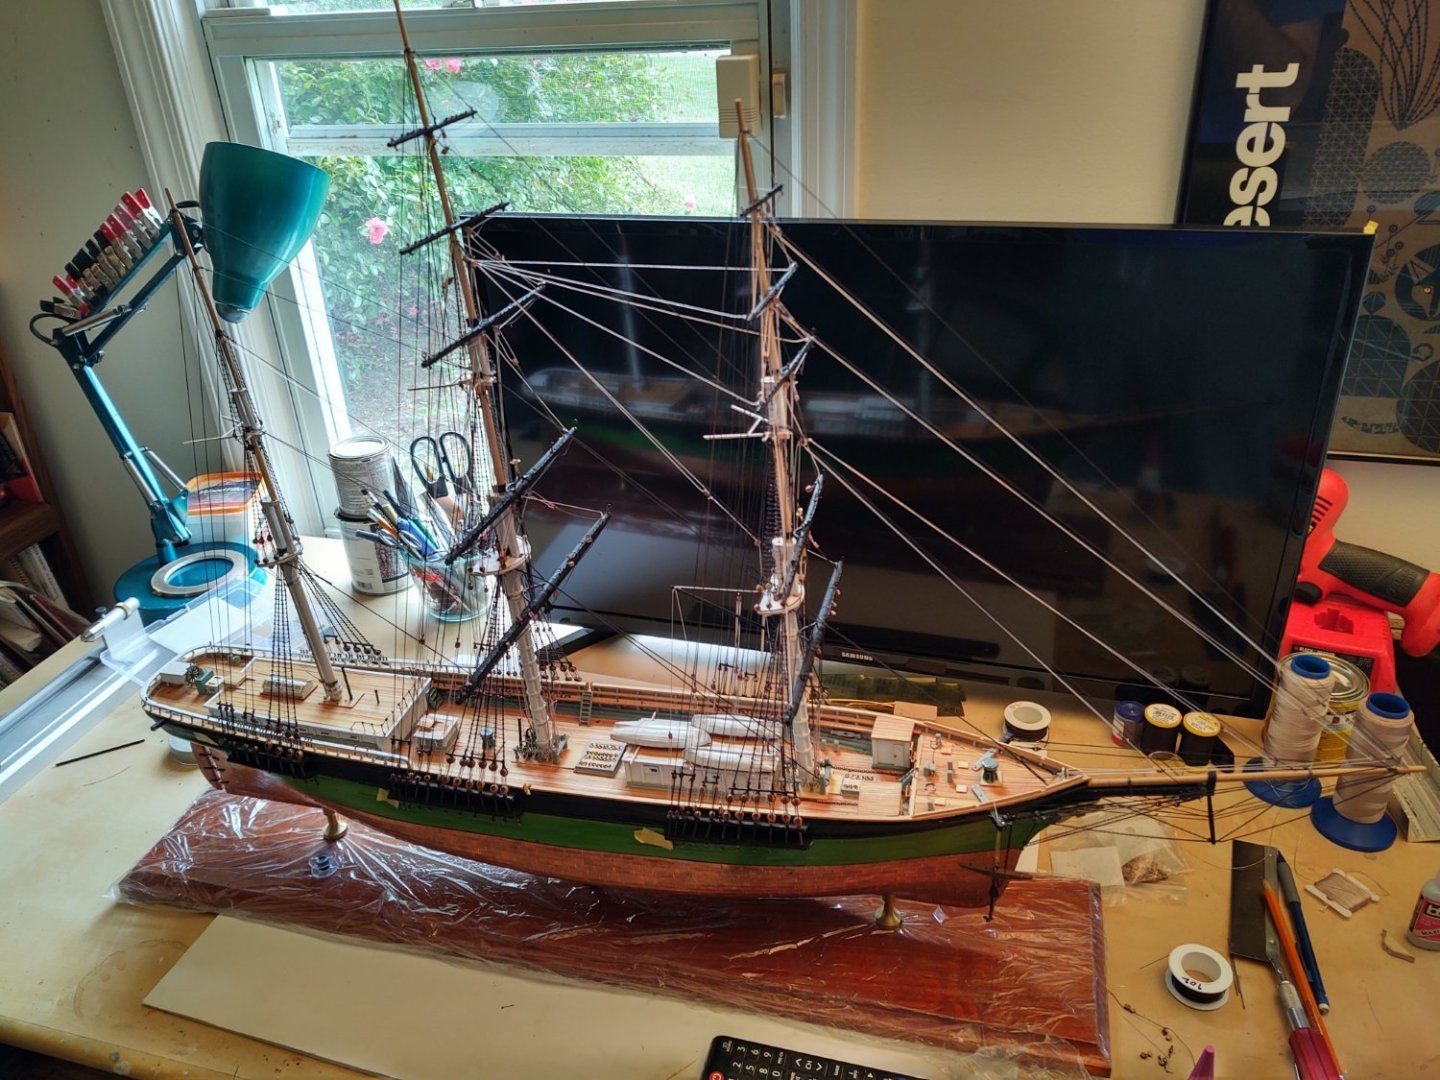
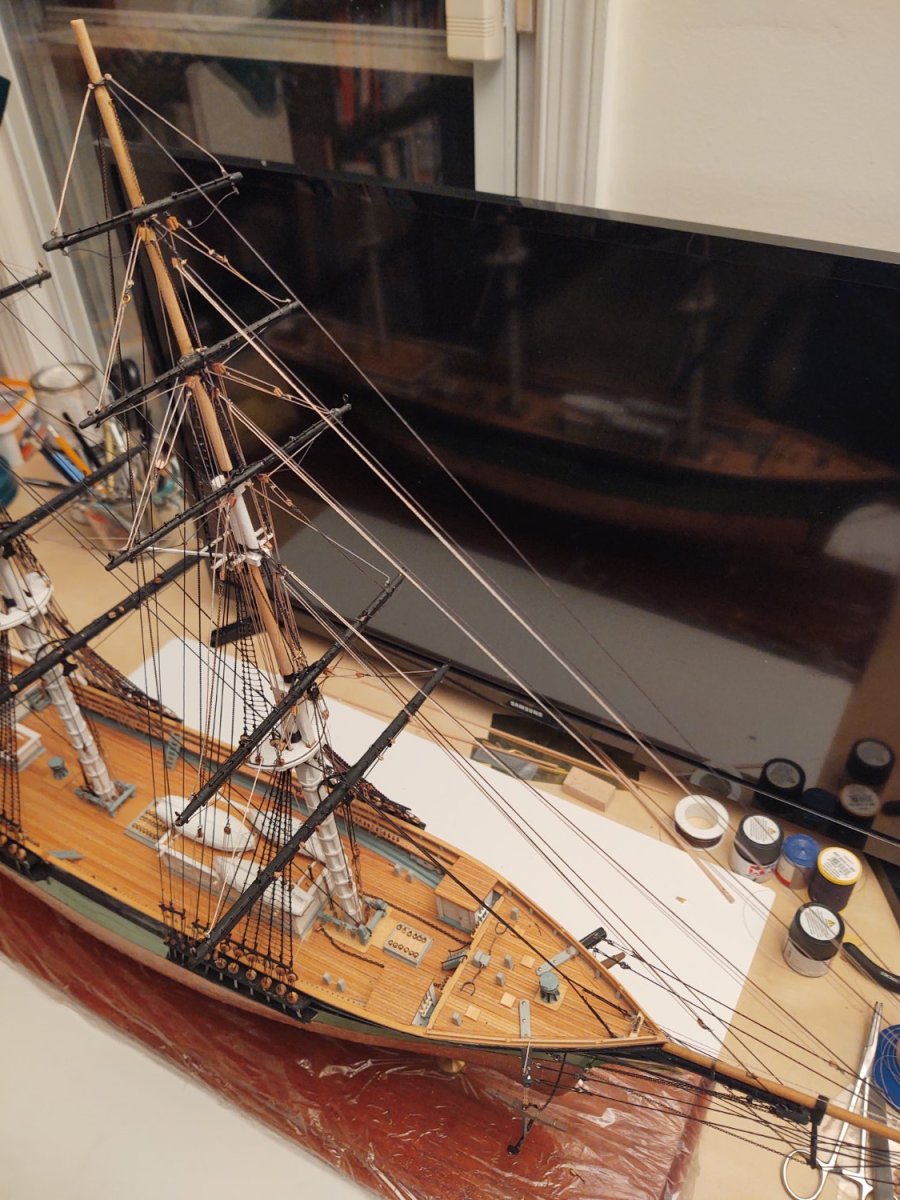
Short update. Fore spencer gaff mounted and rigged.

Fore royal and topgallant braces rigged:
Whole ship:
Current status of list:
mizzen yards: 5
Jib halyards: 4lifts: 10
Jib downhauls: 4sheets: 10
Staysail halyards: 2clews: 8
Staysail downhauls: 2Spencer gaff:
21 Braces:3024topping lifts:
21 Stun'sl booms on hull: 2vangs:
42 Stun'sl booms on yards: 12Spanker boom: 1 Davits: 4
sheets: 2 Boat tackle: 4
Spanker gaff: 1 Decals: 3
throat halyard: 2 Gilded balls on mast trucks: 3
peak halyards: 1
topping lifts: 2
outhaul sheets: 2
vangs: 2
ensign halyard: 1
Change:
+2 (spanker sheets)
-8 (1 spencer gaff, 1 spencer topping lift, 2 spencer vangs, 4 braces)
Net = -6
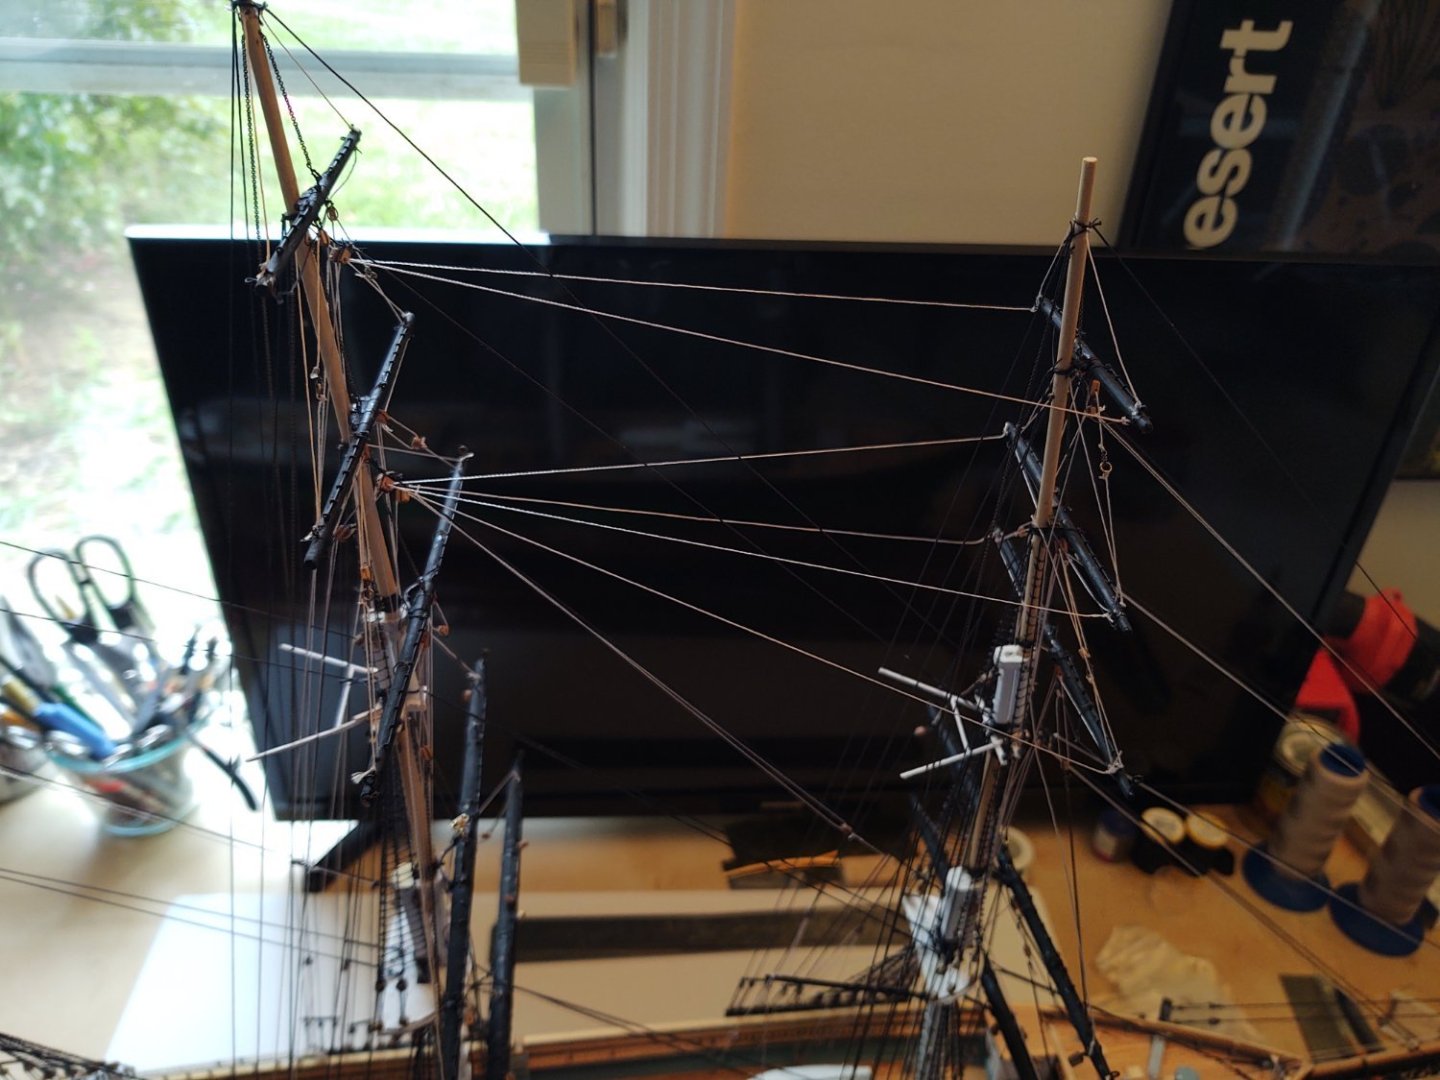
I made the other spencer gaff, but I'm not going to install until the mizzen yards are in place. Similarly, I put some of the blocks on for the fore and main top braces, but I'm not going to actually mount the braces until the mizzen yards and the associated topgallant, royal, and skysail yards, because once the lower and top braces are in place, it's going to be even harder to get my hands in there, so I need to get moving on the yards. At least the mizzen yards don't need stun'sl irons.
Regards,
George K
- VitusBering, Jared, Cathead and 4 others
-
7
-
On 7/29/2023 at 10:37 AM, Rick310 said:
If you get back up here, let me know, would very much like to get together with you sometime.
Thanks Rick, next time we are up that way, I'll take you up on that!
14 hours ago, ScottRC said:Coming along nice with the rigging.
This boat that you rode to the lighthouse looks a lot like an old 40' USGC utility.
Hi Scott. Thanks. It definitely does look like a USCG utility, and I think this is a 40', although it has a single prop.
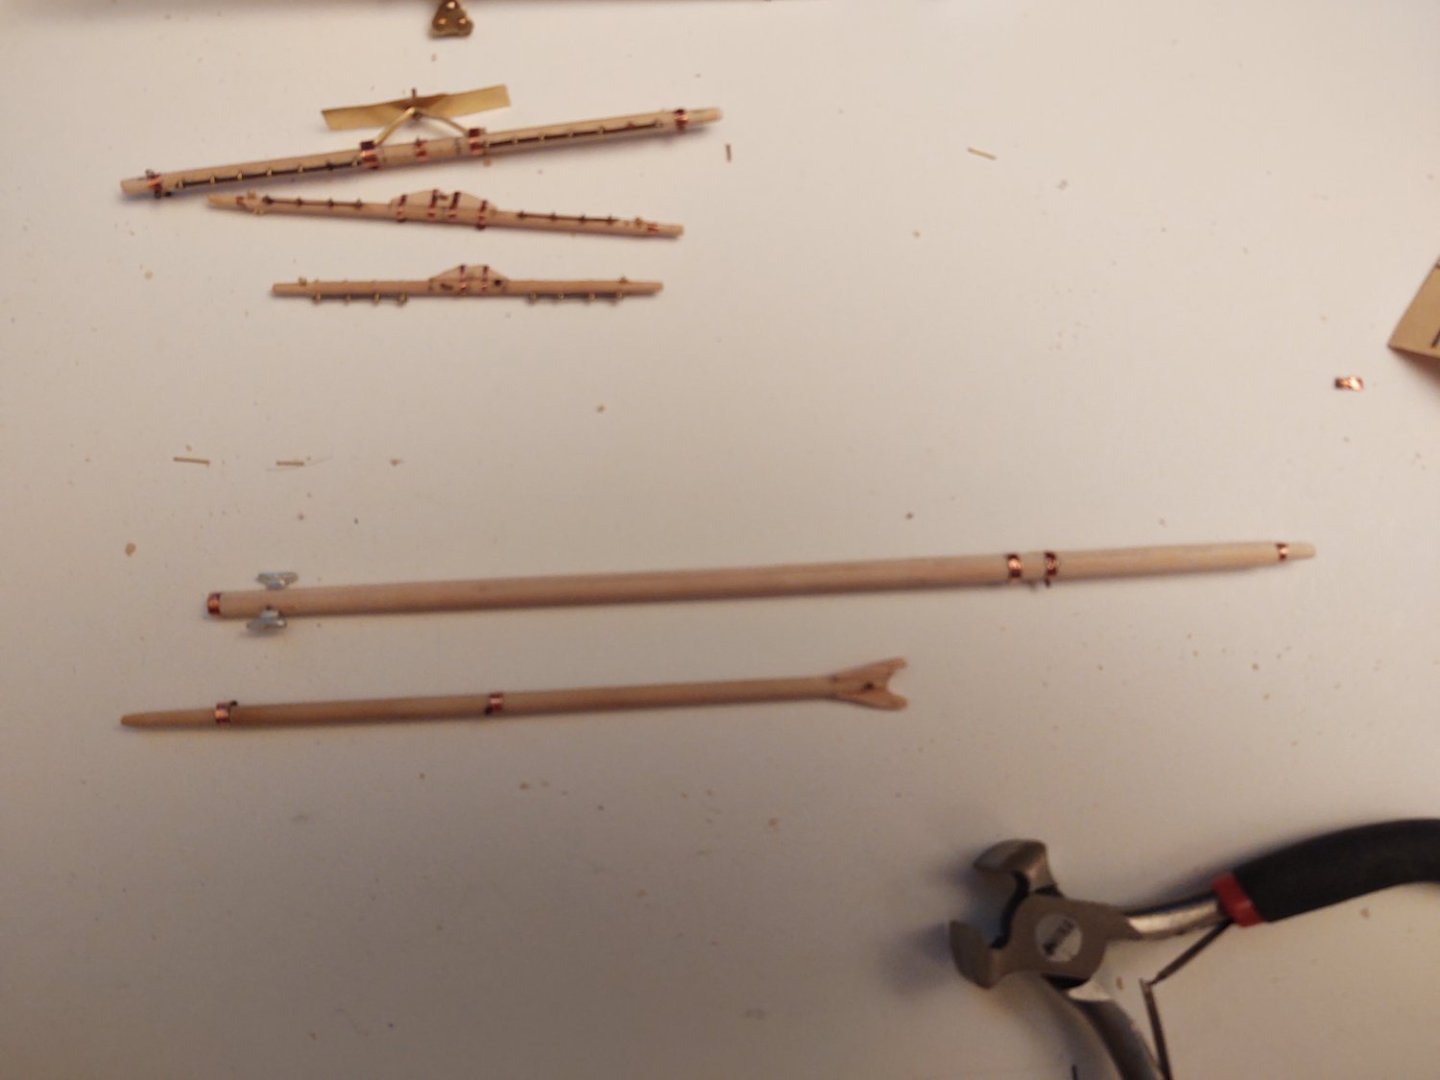
Mizzen yard construction has begun. Got the right size dowels and mark them up for the myriad holes that need to be drilled for the myriad jackstay eyebolts, and the locations of the yardarms, and the centers where the cranes or yokes reside. Spencer gaff on top; the black piece coming out the back is a bit of wire that is going to be used to mount it on the mast (there is an eyebolt just waiting for it above the spencer jackstay).
Since I was doing the jibs, I figured, what the heck, I'll do the staysails, as shown below. And since the only thing left between the fore and main are the spencer and the braces, I figured I'd start on the fore braces, working my way down from the skysail. By the time I get to the topmast, I think I'm going to have to have the spencer in place, b/c I think once I get the top and course braces in place the pins are going to be a lot less accessible. But, by that time, hopefully putting the mizzen yards in place.
So, progress on the list:
mizzen yards: 5
Jib halyards: 4lifts: 10
Jib downhauls: 4sheets: 10
Staysail halyards: 2clews: 8
Staysail downhauls: 2Spencer yards: 2 Braces:
3028topping lifts: 2 Stun'sl booms on hull: 2
vangs: 4 Stun'sl booms on yards: 12
Spanker boom: 1 Davits: 4
Spanker gaff: 1 Boat tackle: 4
throat halyard: 2 Decals: 3
peak halyards: 1 Gilded balls on mast trucks: 3
topping lifts: 2
outhaul sheets: 2
vangs: 2
ensign halyard: 1
I figure if I put 2 braces on per day, I can really make what otherwise will look like a big job go quickly.
Two notes. While working on the ship yesterday, I was trying to install part of one of the staysails, and knocked the main course yard. This yanked the starboard main top sheet crane from the deck. Trying to repair that found me with my pin vise partially glued into the deck at the main fife rail, and pulling that out, led to breaking the port top sheet chain, and knocking the main course yard askew. [VERY DEEP SIGH]. It took about 2 hours to repair everything. I doubt anyone would ever notice, but sheesh. One step forward, 8 steps back. I had something similar happen with my Niagara where my drill caught a line on the bowsprit and it took me hours to repair all of the damage. In both cases, thank heaven for modern adhesives.
Second, remember that the mooring chocks may interfere with the belaying pins. I had to pull a couple and cut them shorter, otherwise I couldn't get the lines around the bottom as they pin bottom was touching the chock. Just something to think about.
As always thanks for the likes and looking in.
Regards,
George K
-
2 hours ago, Rick310 said:
Getting really close now, FF looks great!!
I’ve been on vacation in Pemaquid Maine for the last 2 weeks so I’m really itching to get back to working on the model.
Well Done!!!
Rick
Thanks Rick.
I love that part of Maine. Back in '94 my wife and I biked up the coast from Portsmouth to Bar Harbor, and included a stop at Pemaquid Point, and one of our daughters used to go to/work at a camp in Maine, so we would come up many summers. We've stayed at the Hotel Pemaquid a couple of times over the years, and it's hard to beat blueberry pancakes at the The Seagull.
George
-
Jib rigging:

The list:
mizzen yards: 5
Jib halyards: 4lifts: 10
Jib downhauls: 4sheets: 10 Staysail halyards: 2
clews: 8 Staysail downhauls: 2
Spencer yards: 2 Braces: 30
topping lifts: 2 Stun'sl booms on hull: 2
vangs: 4 Stun'sl booms on yards: 12
Spanker boom: 1 Davits: 4
Spanker gaff: 1 Boat tackle: 4
throat halyard: 2 Decals: 3
peak halyards: 1 Gilded balls on mast trucks: 3
topping lifts: 2
outhaul sheets: 2
vangs: 2
ensign halyard: 1
By the way, if anyone knows how to embed a more proper two column view - I'd love to know - otherwise I'll just copy/paste this sorta messy version. Will probably do one of the staysails next, followed by the spencers while working on the mizzen yards.
As always, thanks for looking in!
Regards,
George K
-
FYI.
The Admiral and I were planning a weekend in western New York in mid-August that was going to include a day-sail on the US Brig Niagara in honor of having built the Model Shipways kit a few years ago. However, we got a notice today that they were going to be refunding our money because the rest of the sailing season has been cancelled. The announcement is here: https://www.media.pa.gov/pages/phmc-details.aspx?newsid=438. It appears that there was damage to one of the (restored|replica) ship's propellers and they won't be day sailing until they are replaced and maintenance is done on the ship's engines.
I called, and they said that the ship will likely be in Erie until sometime in September, and that you can still tour it as part of museum admission, or go on the Lettie G. Howard, a a two masted gaff schooner built in 1893 (space available) that's on loan from the South Street Seaport musuem.
Regards,
George
- Roger Pellett, Canute, Snug Harbor Johnny and 2 others
-
2
-
 1
1
-
 2
2


Flying Fish by gak1965 - FINISHED - Model Shipways - 1:96
in - Kit build logs for subjects built from 1851 - 1900
Posted
Here are a couple more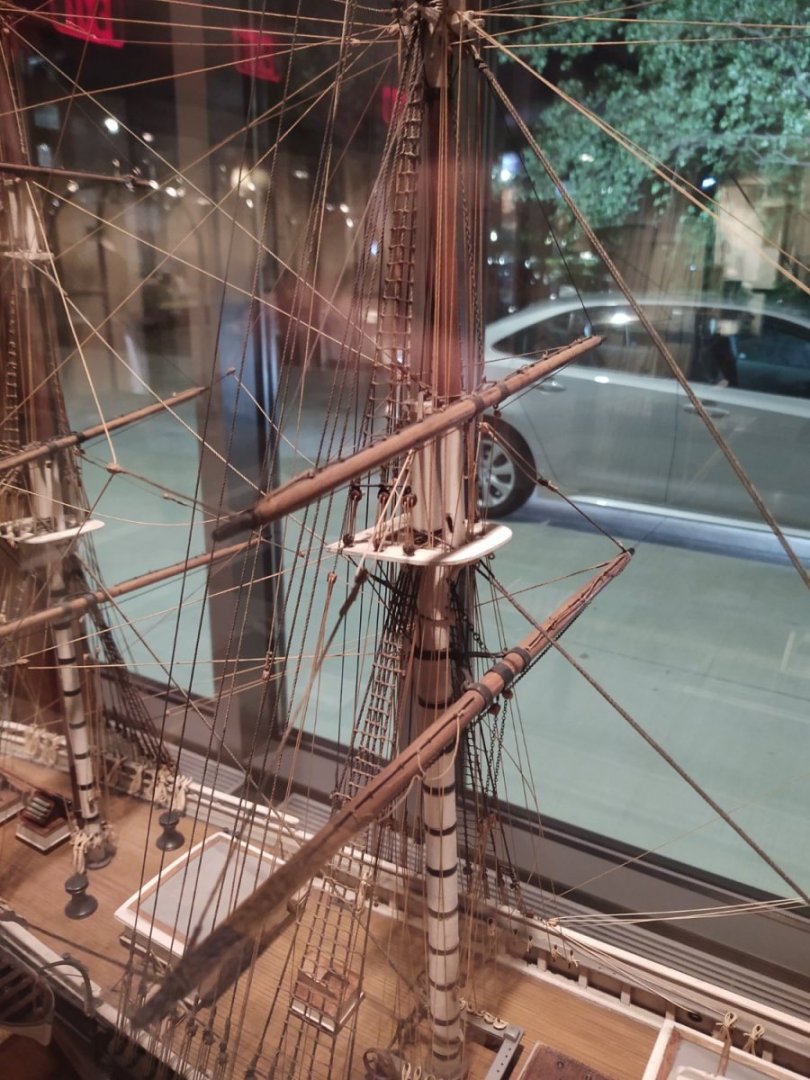
It's a beautiful model. Interestingly, it is really nice looking but is rather light on the running rigging. It has the halyards, lifts and braces, and the sheets, but dispensed with the clews, staysail outhauls and halyards, bunt and leech lines and associated blocks, and the footropes. Amazing how beautiful a model you can make with just the basics.