HOLIDAY DONATION DRIVE - SUPPORT MSW - DO YOUR PART TO KEEP THIS GREAT FORUM GOING! (Only 20 donations so far - C'mon guys!)
×

ggrieco
-
Posts
276 -
Joined
-
Last visited
Content Type
Profiles
Forums
Gallery
Events
Everything posted by ggrieco
-
 Thanks everybody, Greg, I've never tried this before and hope it works. It helps that I don't have any crown to the deck to deal with and Heroine had no hogging trusses that would have made alignment very difficult. The shear is minimal and the two decks run parallel with a nine foot separation. I have selected a couple of post locations that I consider crucial and have worked in a slight fore and aft allowance for the rest to adjust them as needed. It all seems to work well in AutoCAD, I just hope there are no surprises.
 -
Wow! You've really made some progress. I'm having a hard time catching up. She is really coming along beautifully!
- 649 replies
-
- 5
-

-
- dunbrody
- famine ship
- (and 2 more)
-
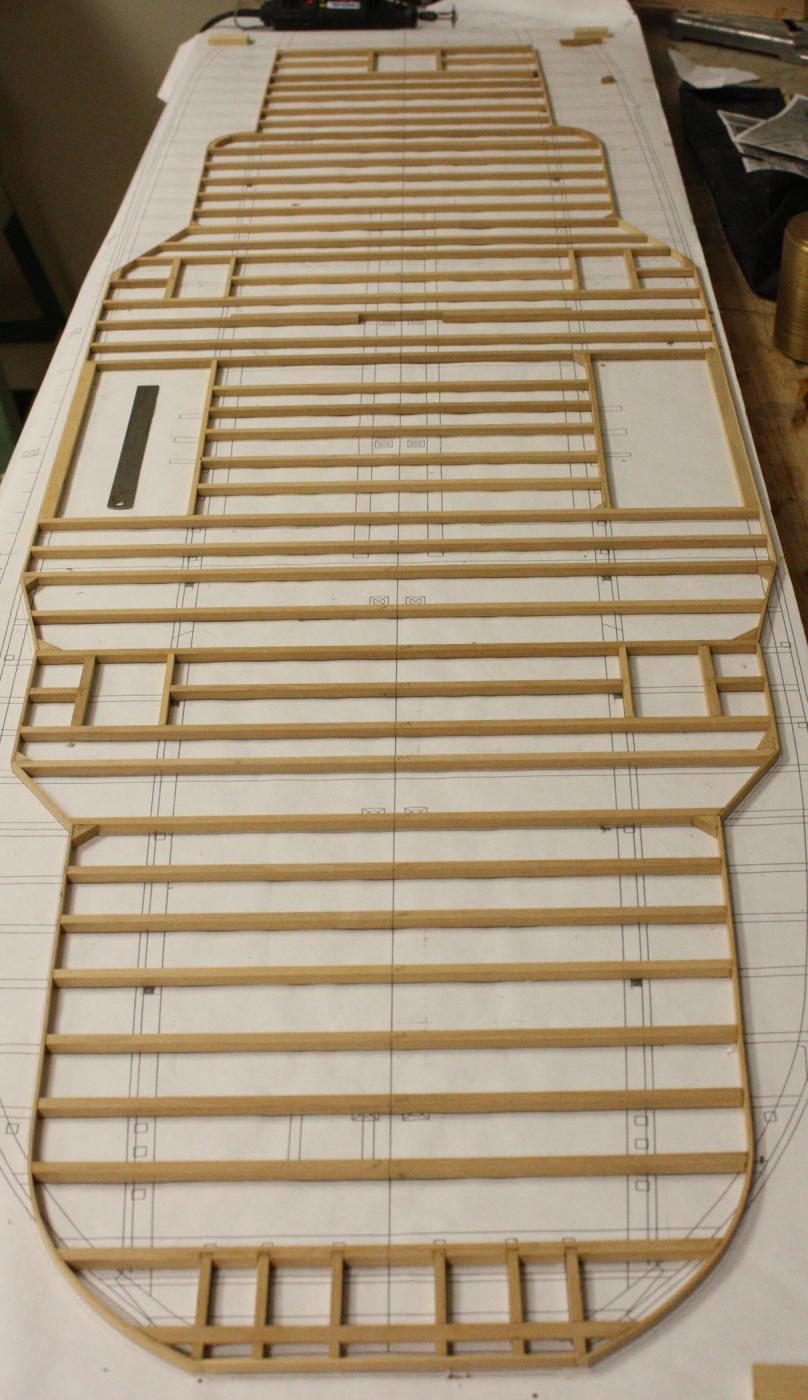
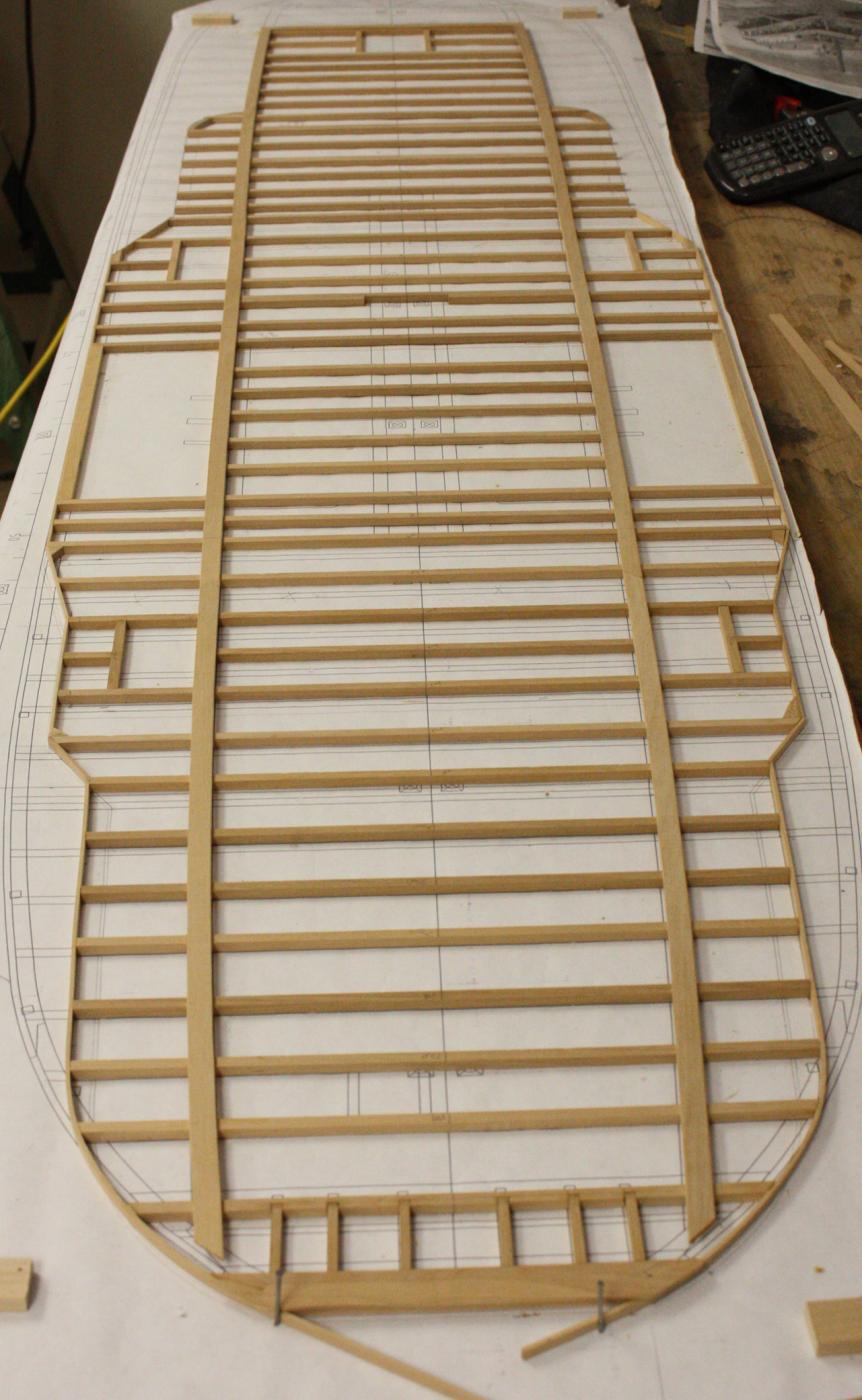
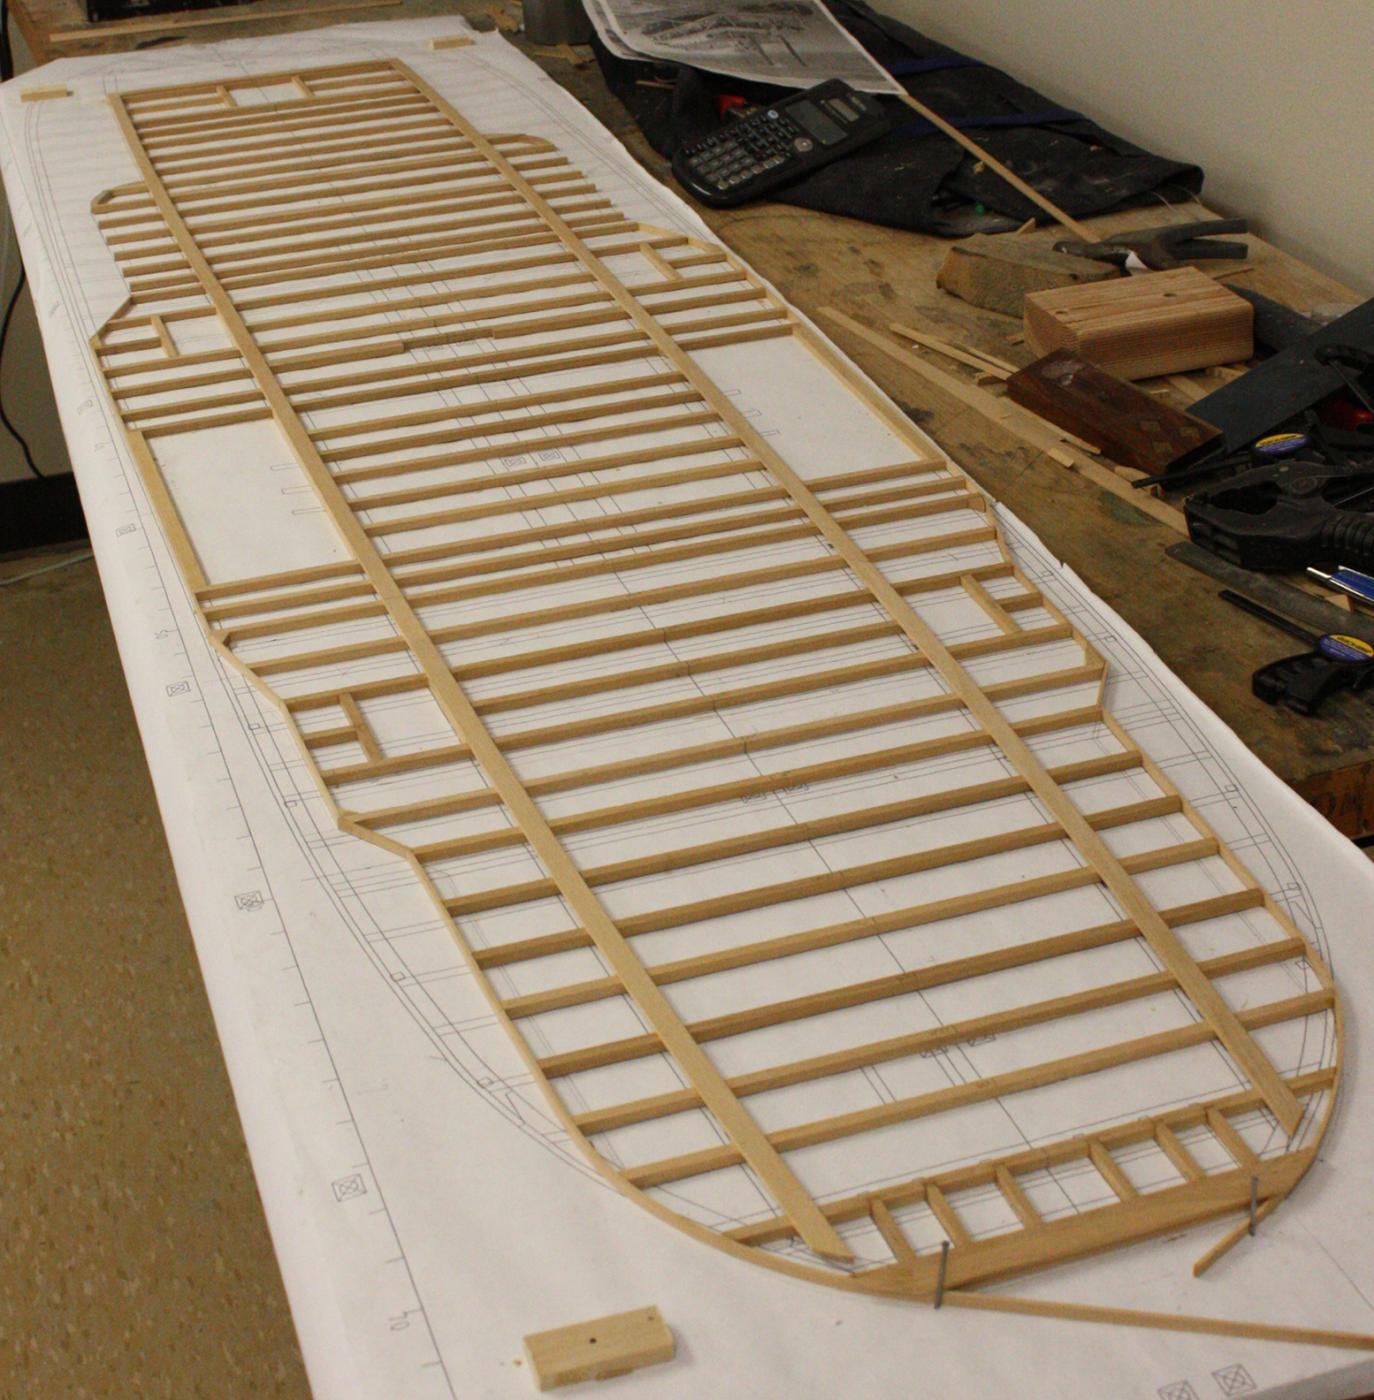
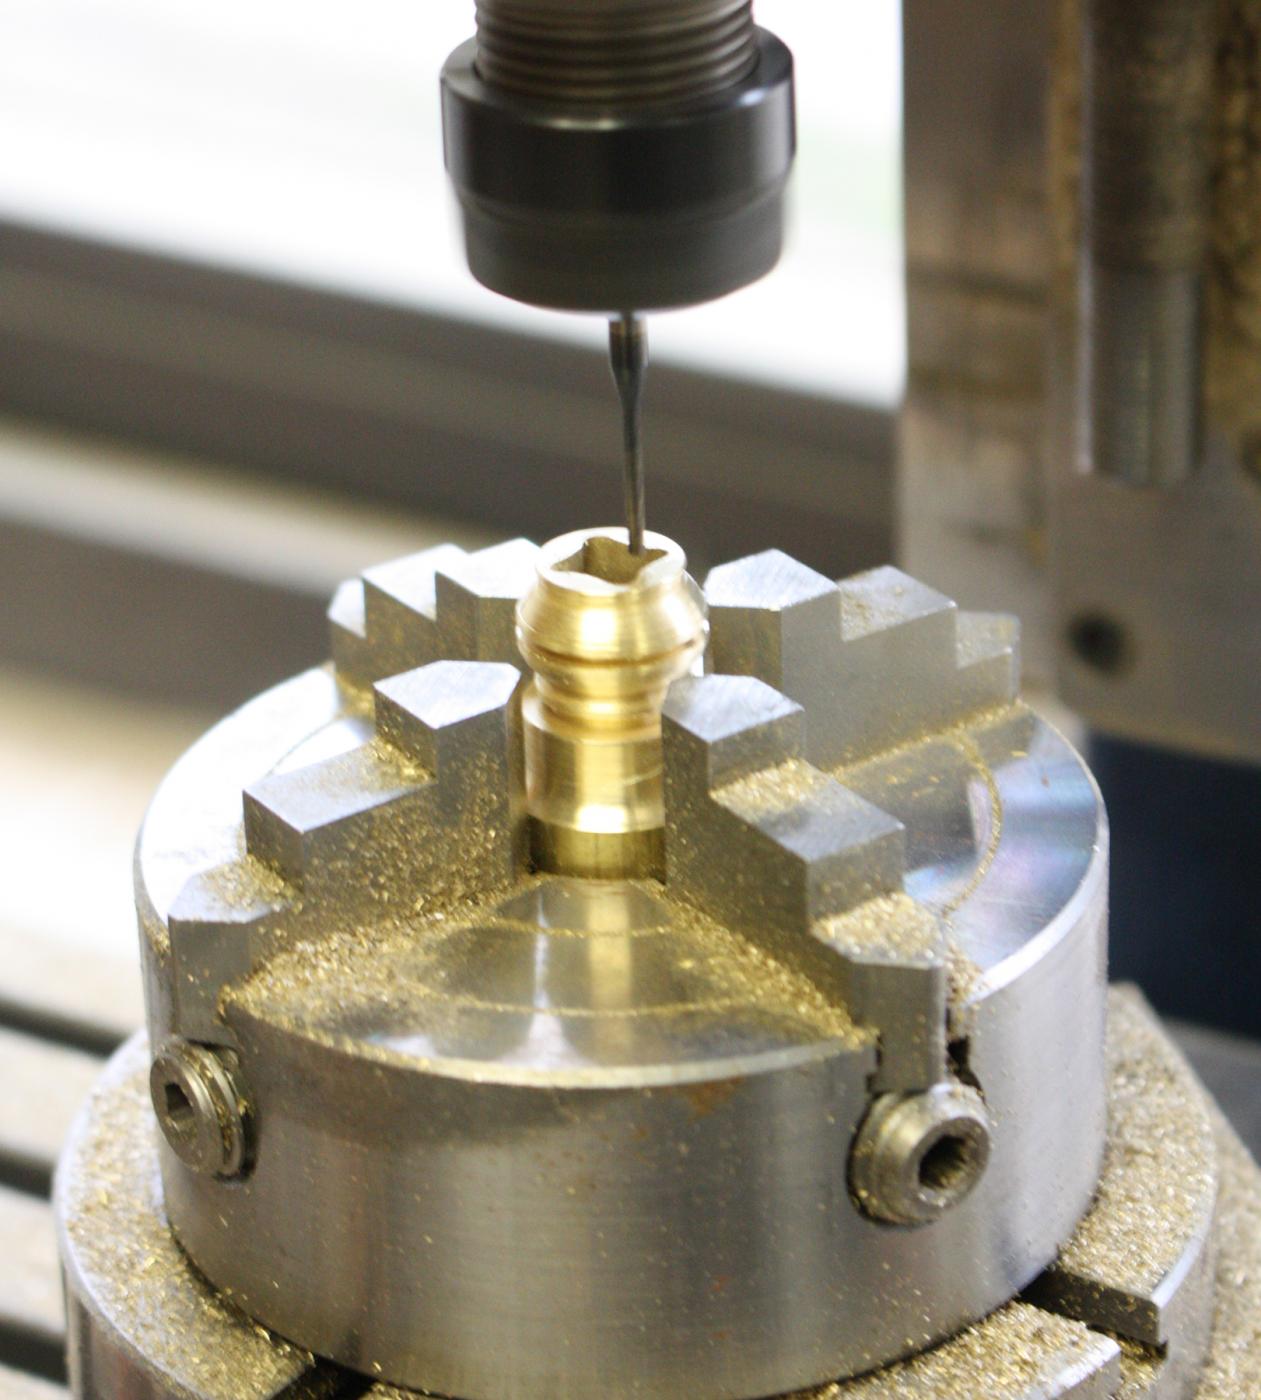
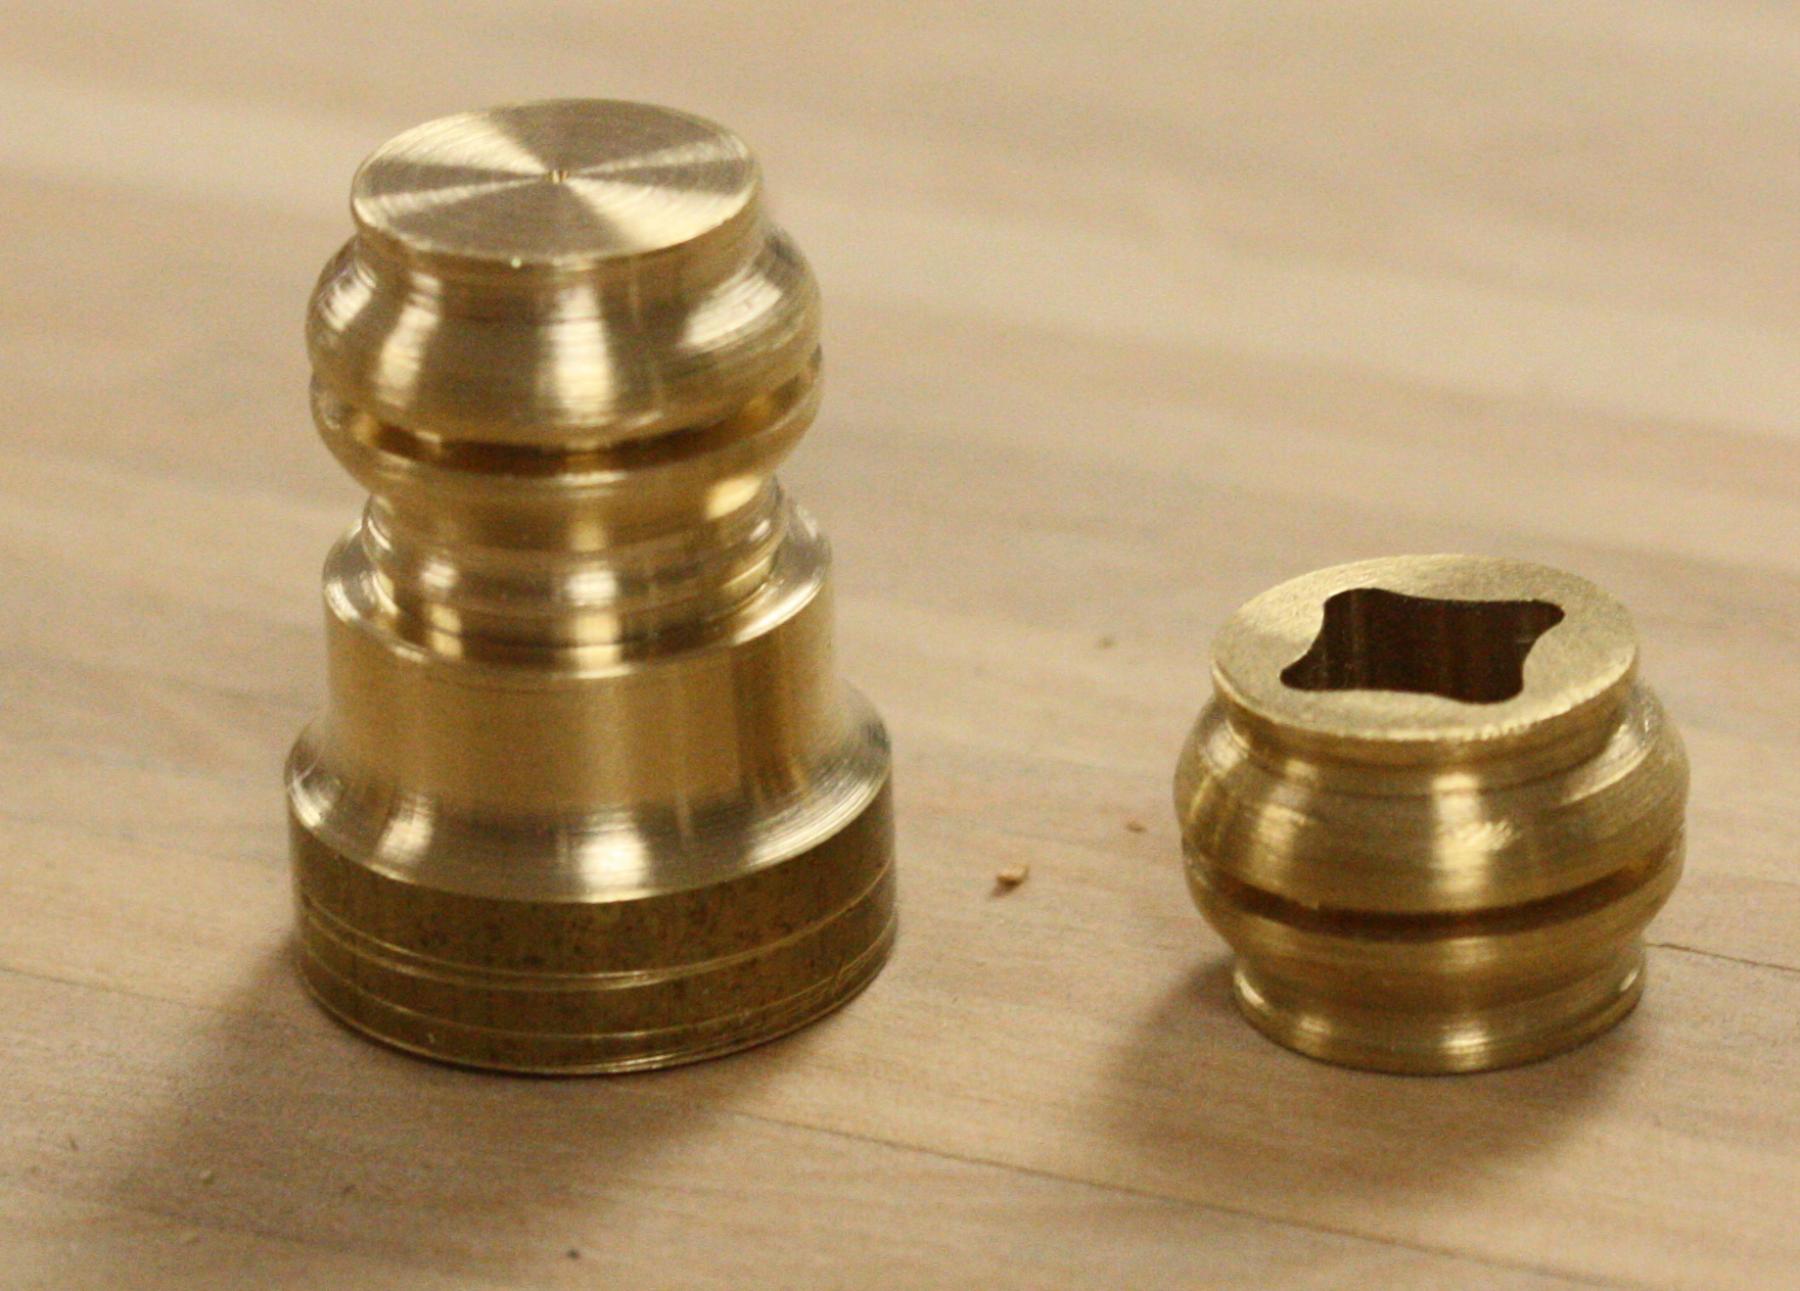
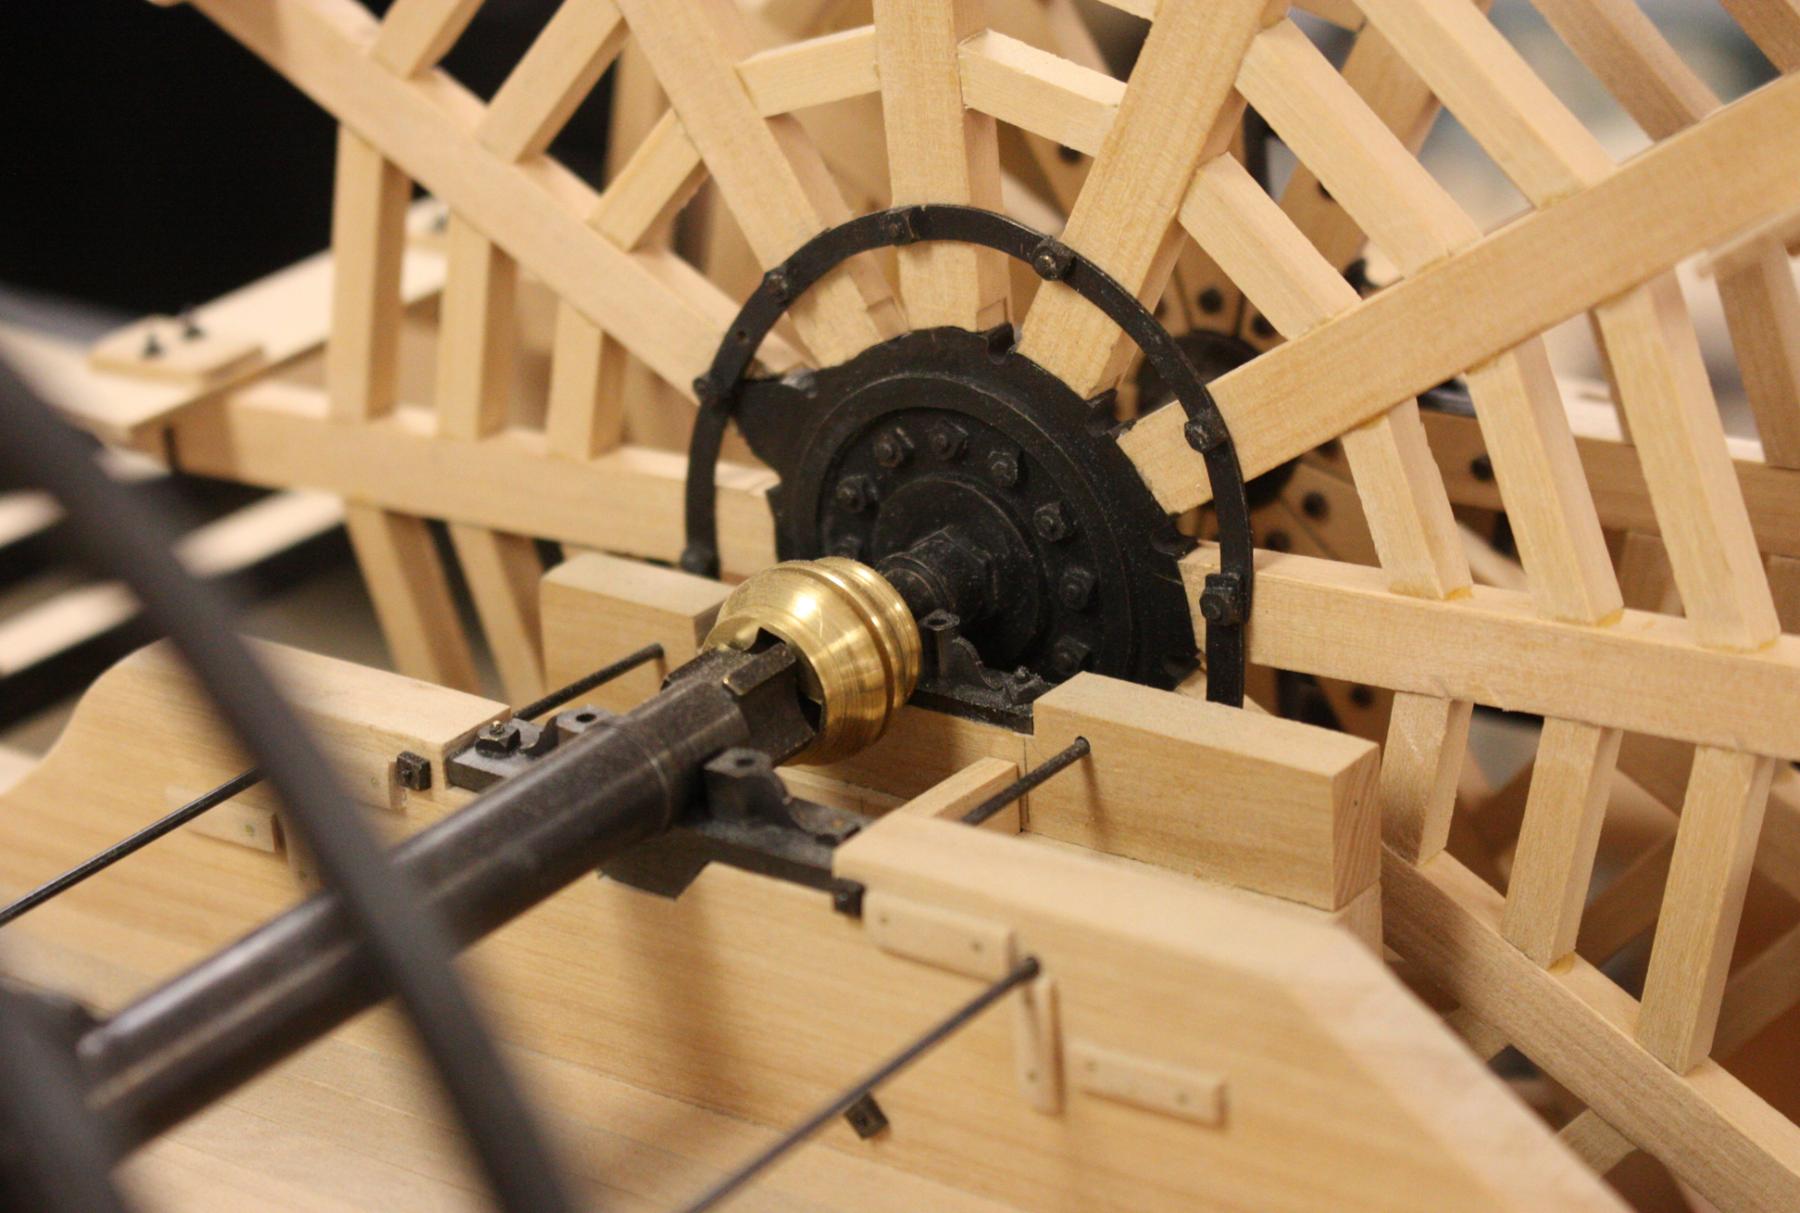
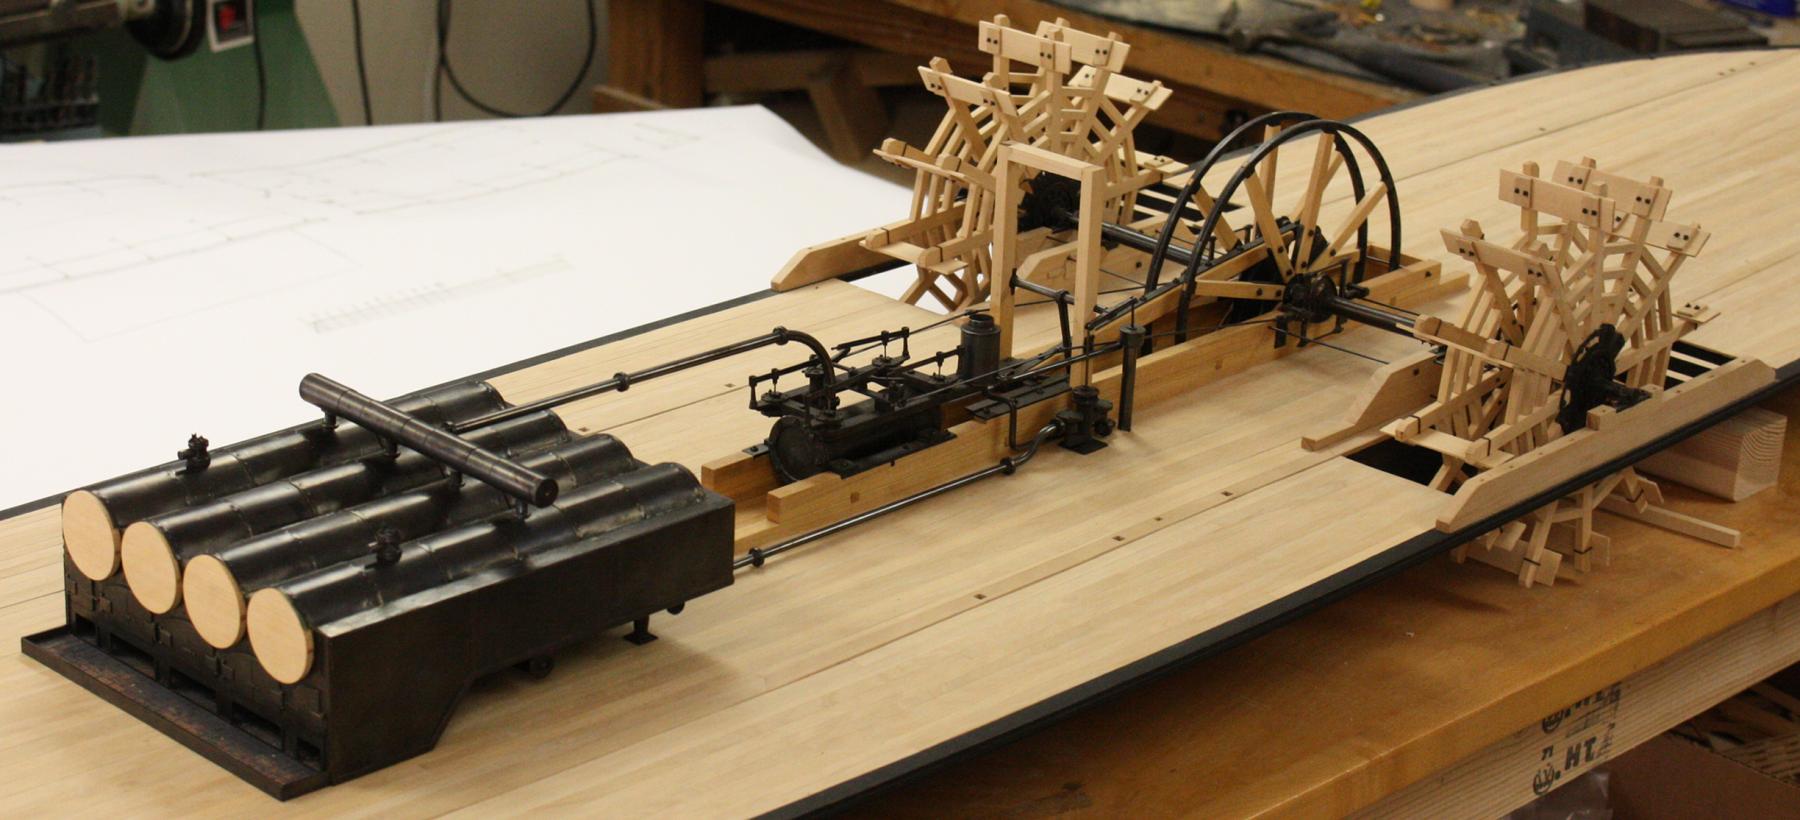
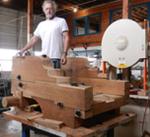
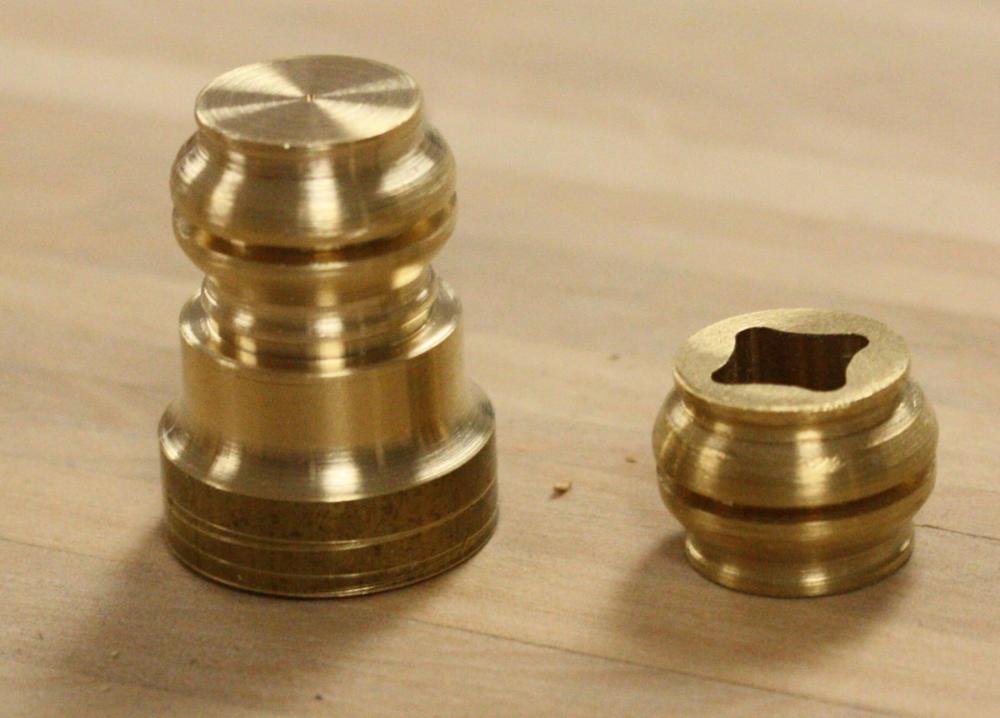
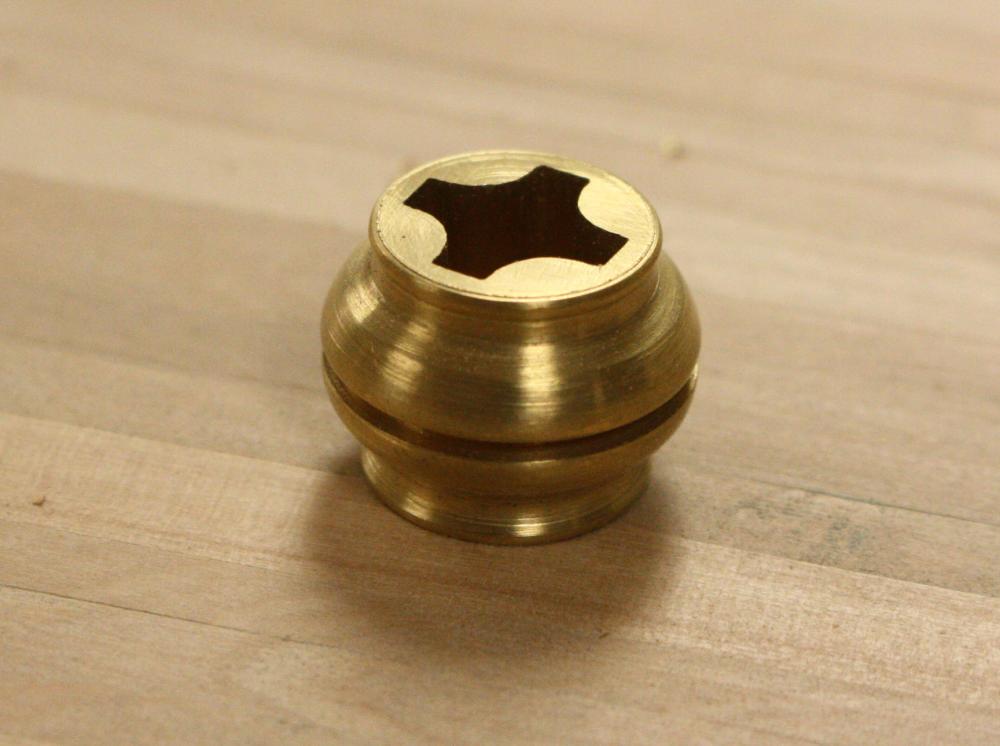
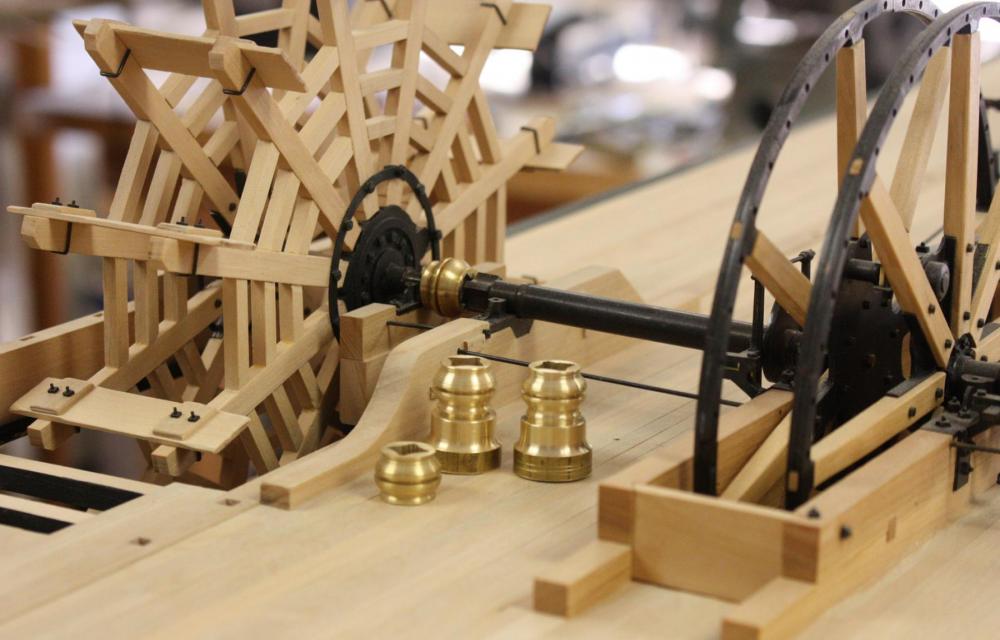
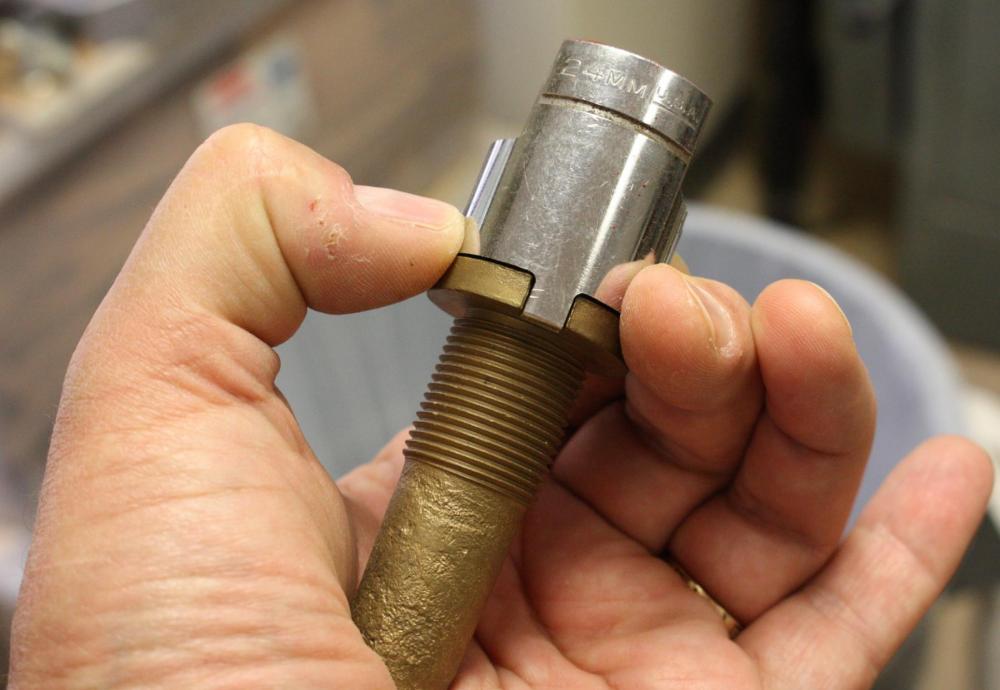
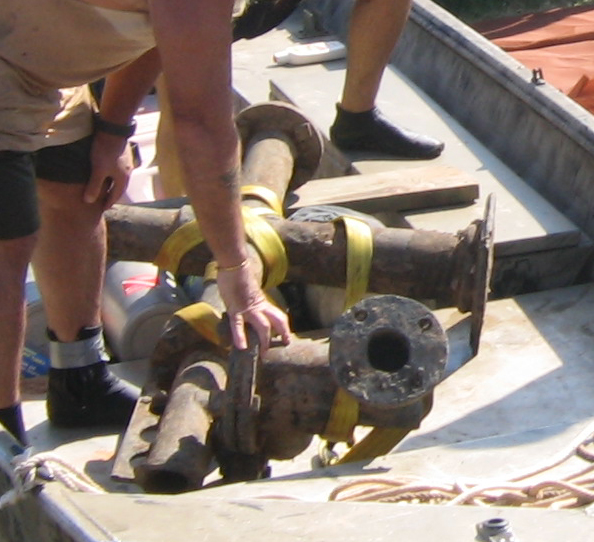
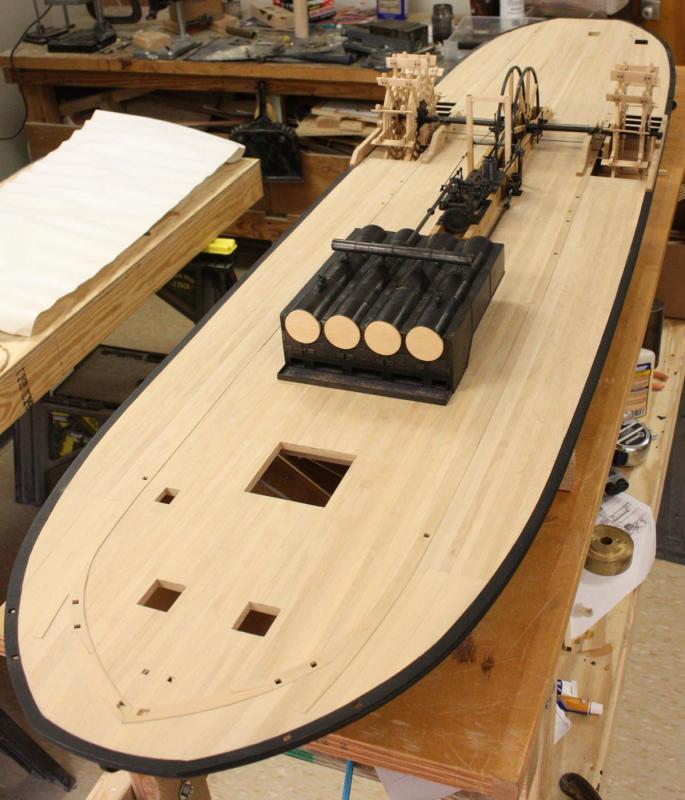
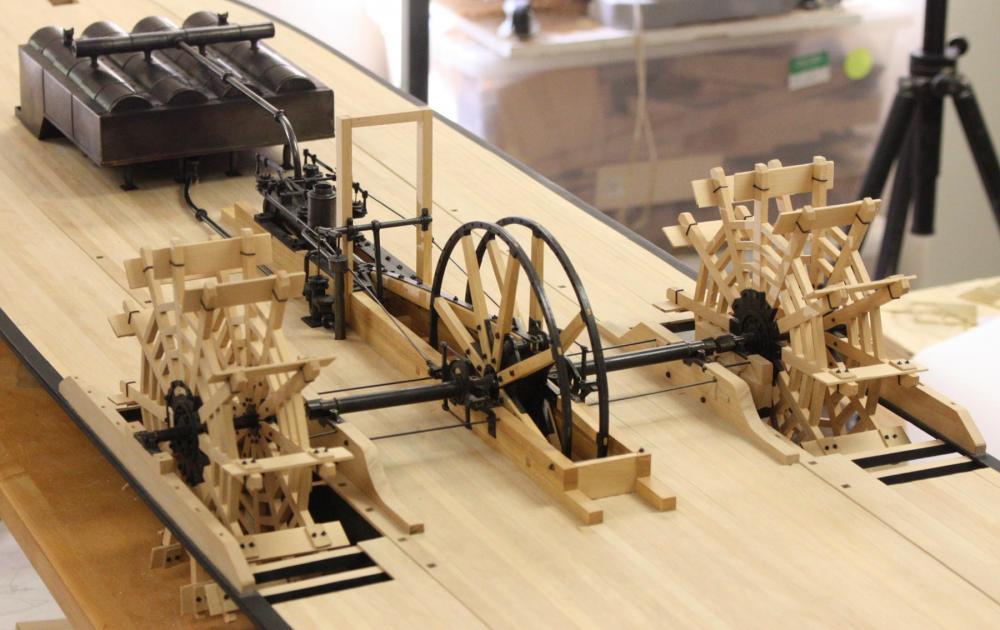
Hello Everybody, I didn't get a chance to post last week. I took a few days off to take the family to the beach before the Memorial day weekend. We had a great time but returned to Tornadoes and floods in College Station. Since my last post, I spent three days framing the boiler deck and two days tearing it apart and rebuilding it. One incorrect measurement threw several of the beams out of location. I think everything is finally correct and I should be able to drop the deck on the model in the coming week. The deck before the rebuild. After rebuild. The shifting of the deck beams is difficult to see but, I also found it necessary to extend the overhang of the walkway by a few inches. The notch in the doubled beam amidships will fit around the two posts supporting the feedwater pump lever. I've been putting off securing the paddle wheels in place -- it's easier to move the model with the wheels off. Now that the boiler deck is going on, it's time to assemble the clutch mechanism for the paddle wheels. Milling the pocket for the shaft end. Before and after milling. The final contour was hand filed. Test fitting one of the throw-out bearings. The original throw-out bearing weighed over 300 pounds. Amazingly, when we reassembled the the original pieces, the heavy bearing slid easily and smoothly along the shaft end with only the moderate pressure of one finger on each side.


- 701 replies
-
- 34
-
-
Brig Eagle by robnbill - 1:48
ggrieco replied to robnbill's topic in - Build logs for subjects built 1801 - 1850
She's looking beautiful Bill. I'm looking forward to the rig going together! -
I agree with Patrick. The clamps are beautiful. A true sign of someone who takes pride in their efforts!
- 968 replies
-
- 4
-
-
- hahn
- oliver cromwell
- (and 1 more)
-
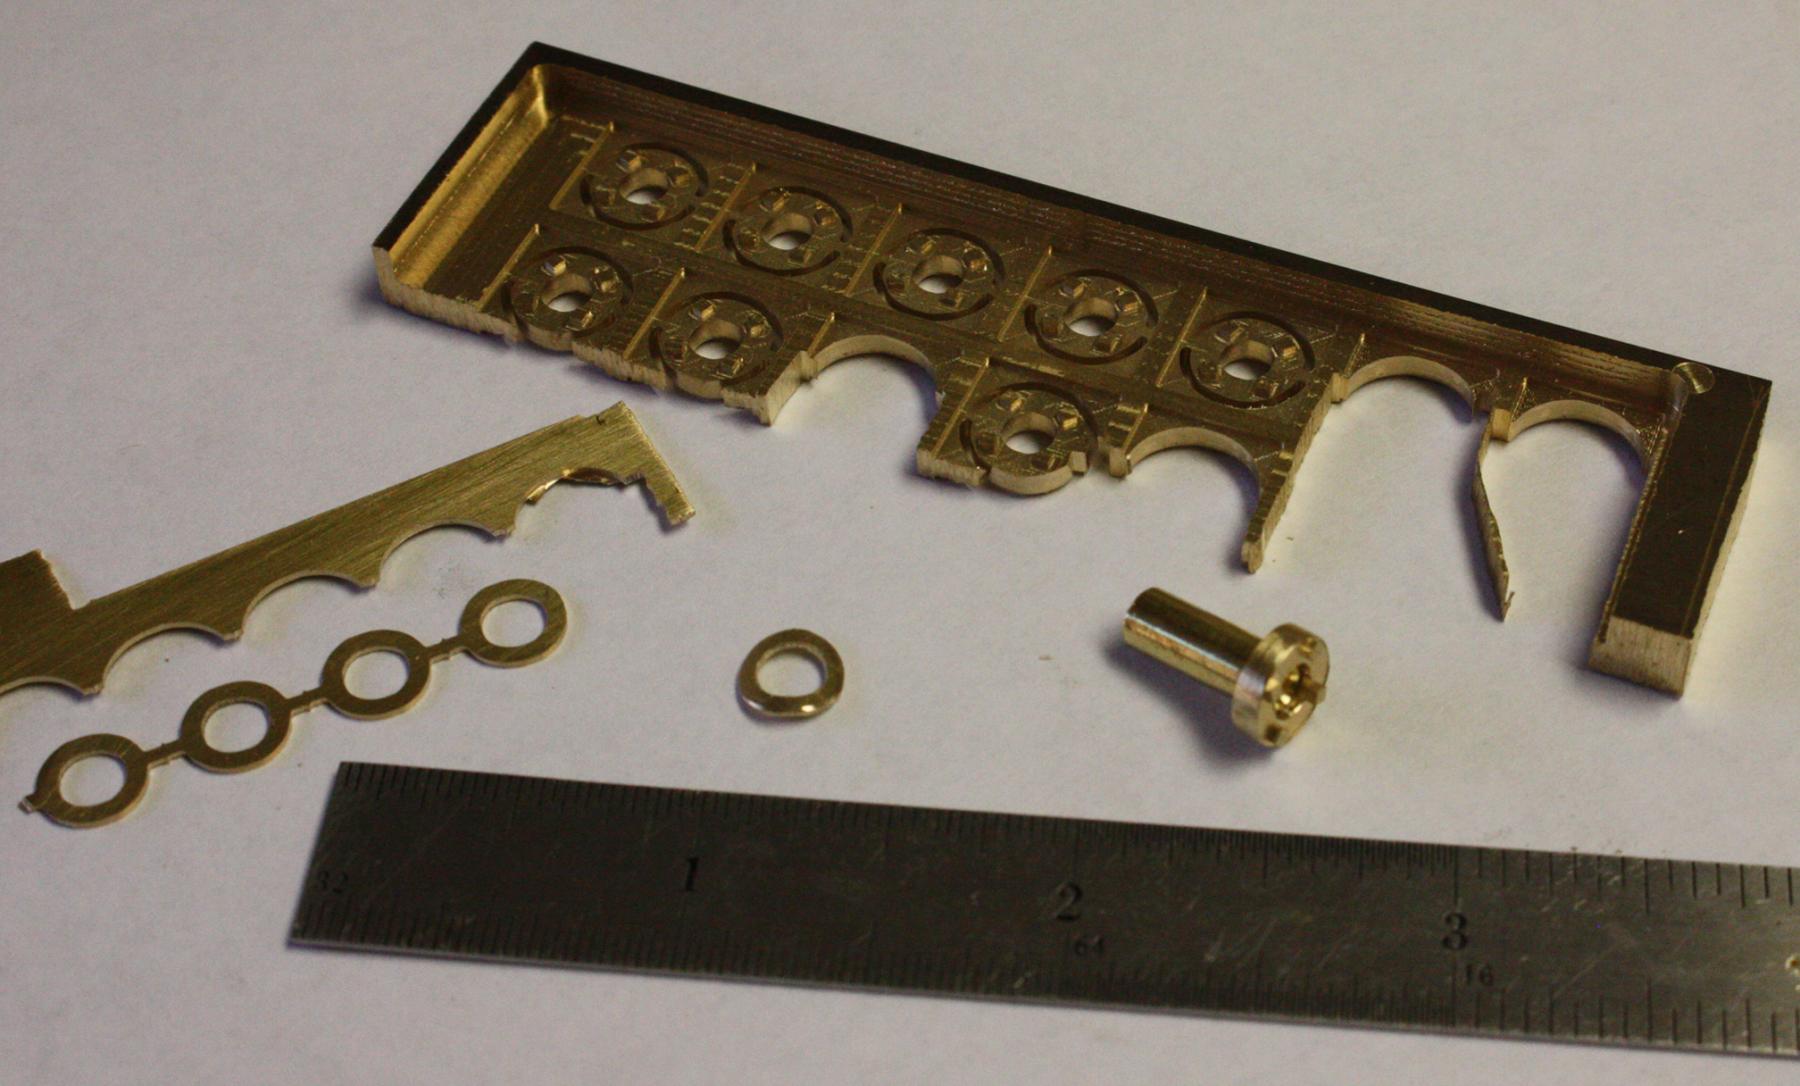
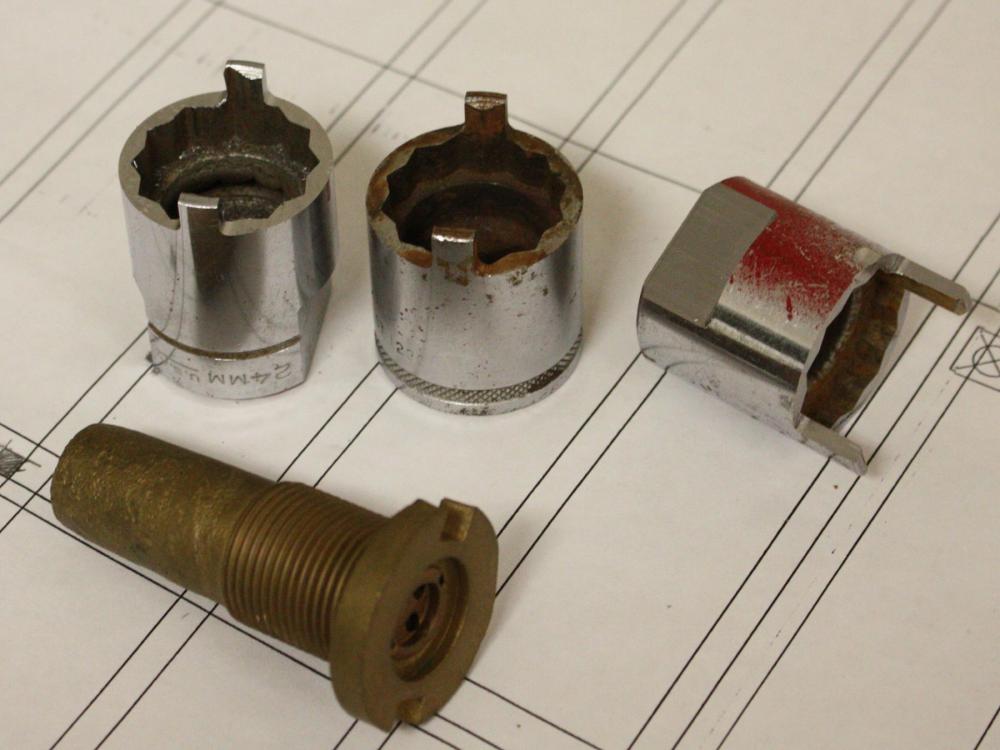
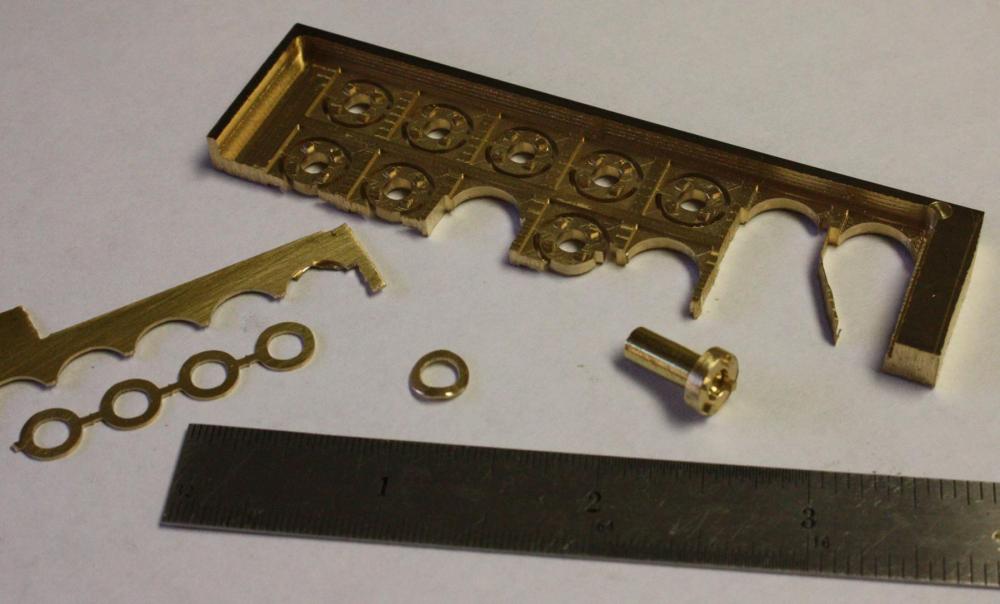
Thanks everybody, Scott, yes, when I was asked to make the wrenches, I doubted that I would be able to cut them cleanly. I didn't want to ruin a new half inch mill so I bought a re-pointed carbide end mill off eBay for 3 dollars. It cut through the steel like butter. I think the corner radius helped. I was so impressed I went back and bought a second one. Cathead, your exactly right about the cabins. They're pretty simple and should go together quickly.
-
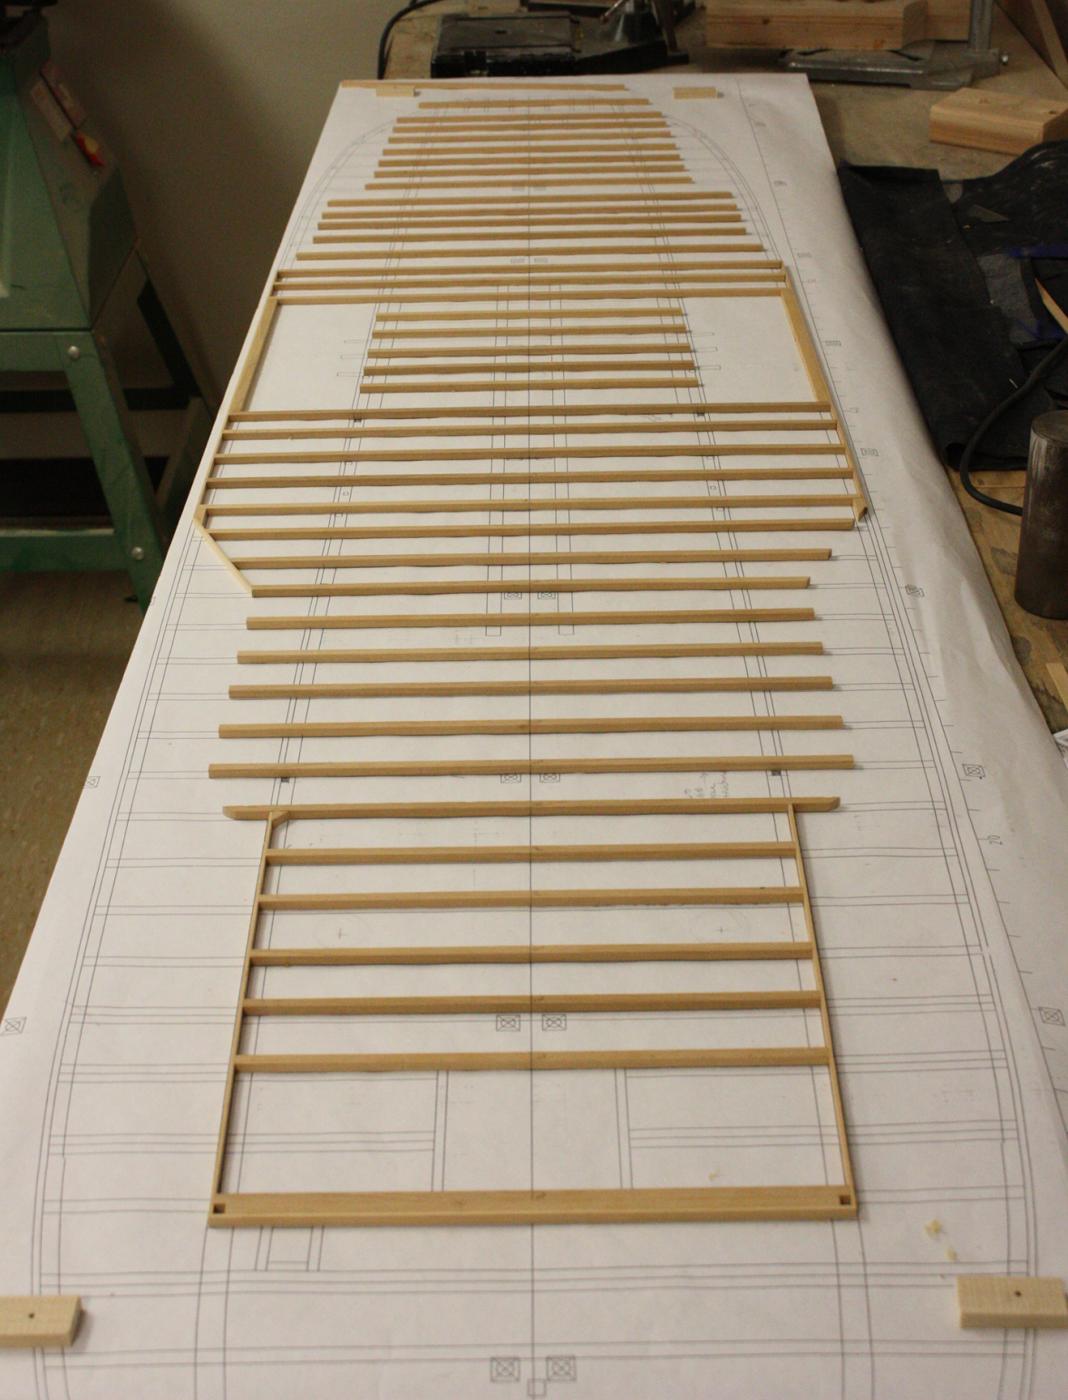
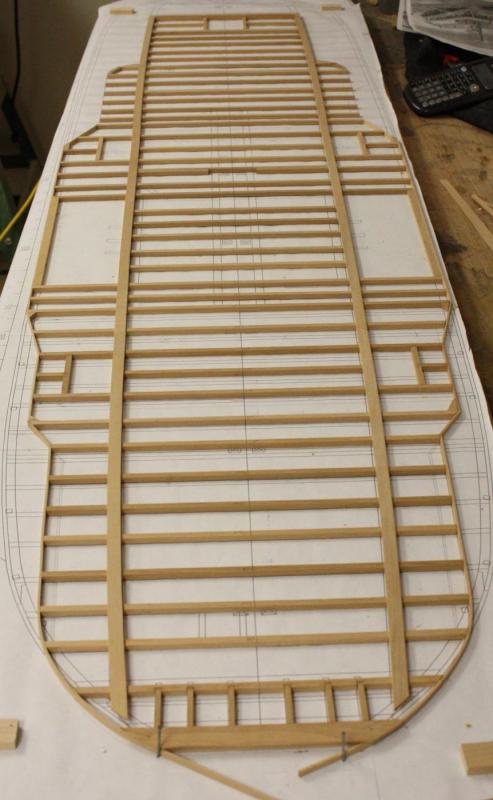
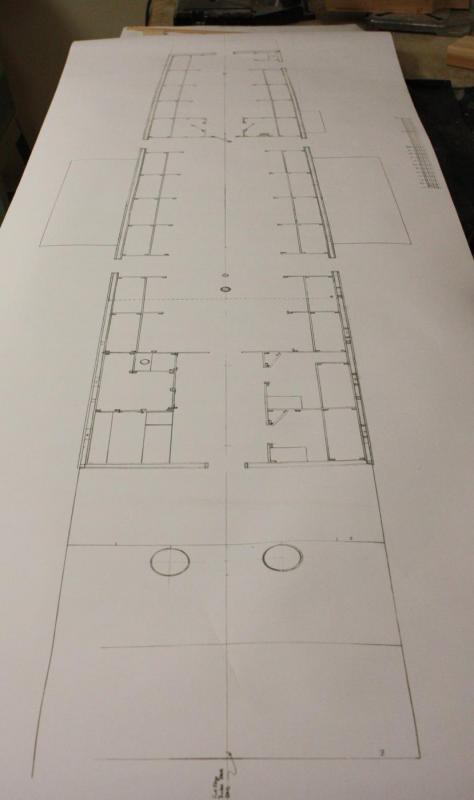
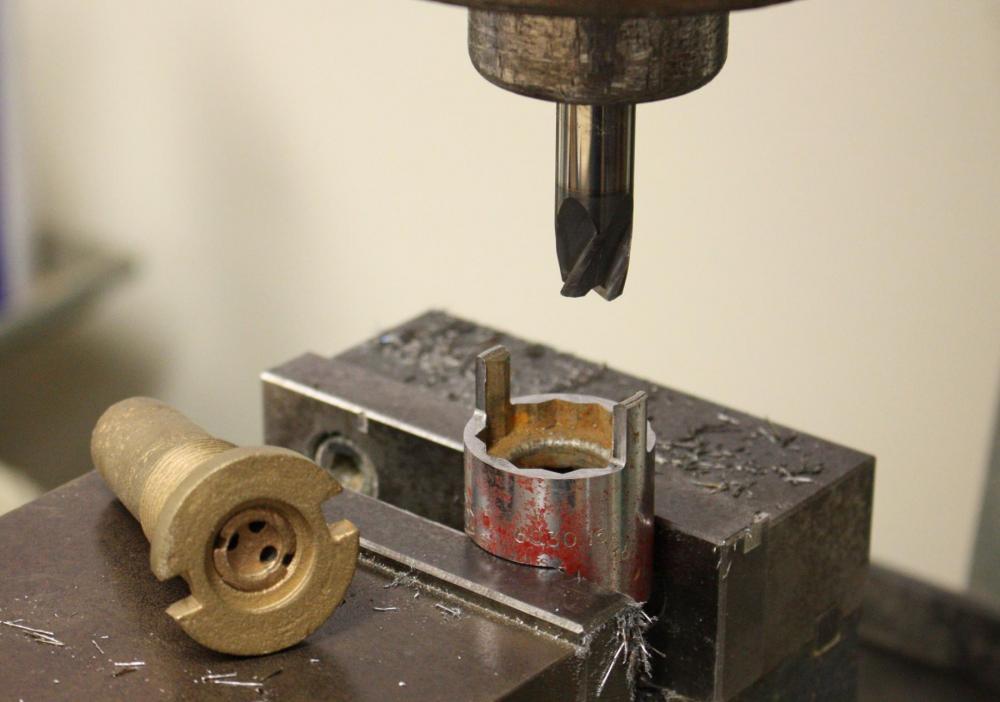
Not many photos this week. With the engine complete I've moved on to the boiler deck. I'm going to attempt to build it flat and lay it onto its supporting posts. I've drawn the deck beams along the proper sheer in AutoCAD to get the proper beam spacing. I did the same for the main deck If all goes as planned, it should shorten to the proper length when bent to the sheer. Kevin's sketch of the boiler deck cabin arrangement. Boiler deck being assembled on a drawing of the flattened main deck. This post was light on photos so I decided to throw these in. Our conservation lab has received a large number of artillery shells from the C.S.S Georgia and they needed wrenches to remove the fuses (the explosive has been rendered inert by years of submersion in salt water) The manager of the lab, Jim Jobling, came up with the idea of using socket wrench sockets for the job. It took me five minutes to mill down the teeth and they work beautifully.

- 701 replies
-
- 31
-
-
Thanks everyone! Gerhard, we aren't 100 percent sure about the four boilers since they were salvaged early from the wreck but, Kevin's comparison to the Yellowstone and a couple other contemporary vessels suggest that it had four tubes. Another difference though, these early boilers probably only had a single flue down the center of the tube where later vessels had two or more. If I recall correctly, each of Cairo's boilers had five flues making it much more efficient at producing steam. Cairo's boilers would have provided an impressive amount of power!
-
She's beautiful, can't wait to see her rigged!
- 64 replies
-
- 4
-
-
- 18th century longboat
- model shipways
- (and 1 more)
-
Thanks everybody, I really appreciate your kind comments. Finally the kids are getting ready for bed and I can relax with MSW. It has really become a high point of my weekend, sitting down with a glass of wine and admiring everyone's incredible work!
- 701 replies
-
- 12
-
-
I wish I had seen your work earlier. Just beautiful!
-
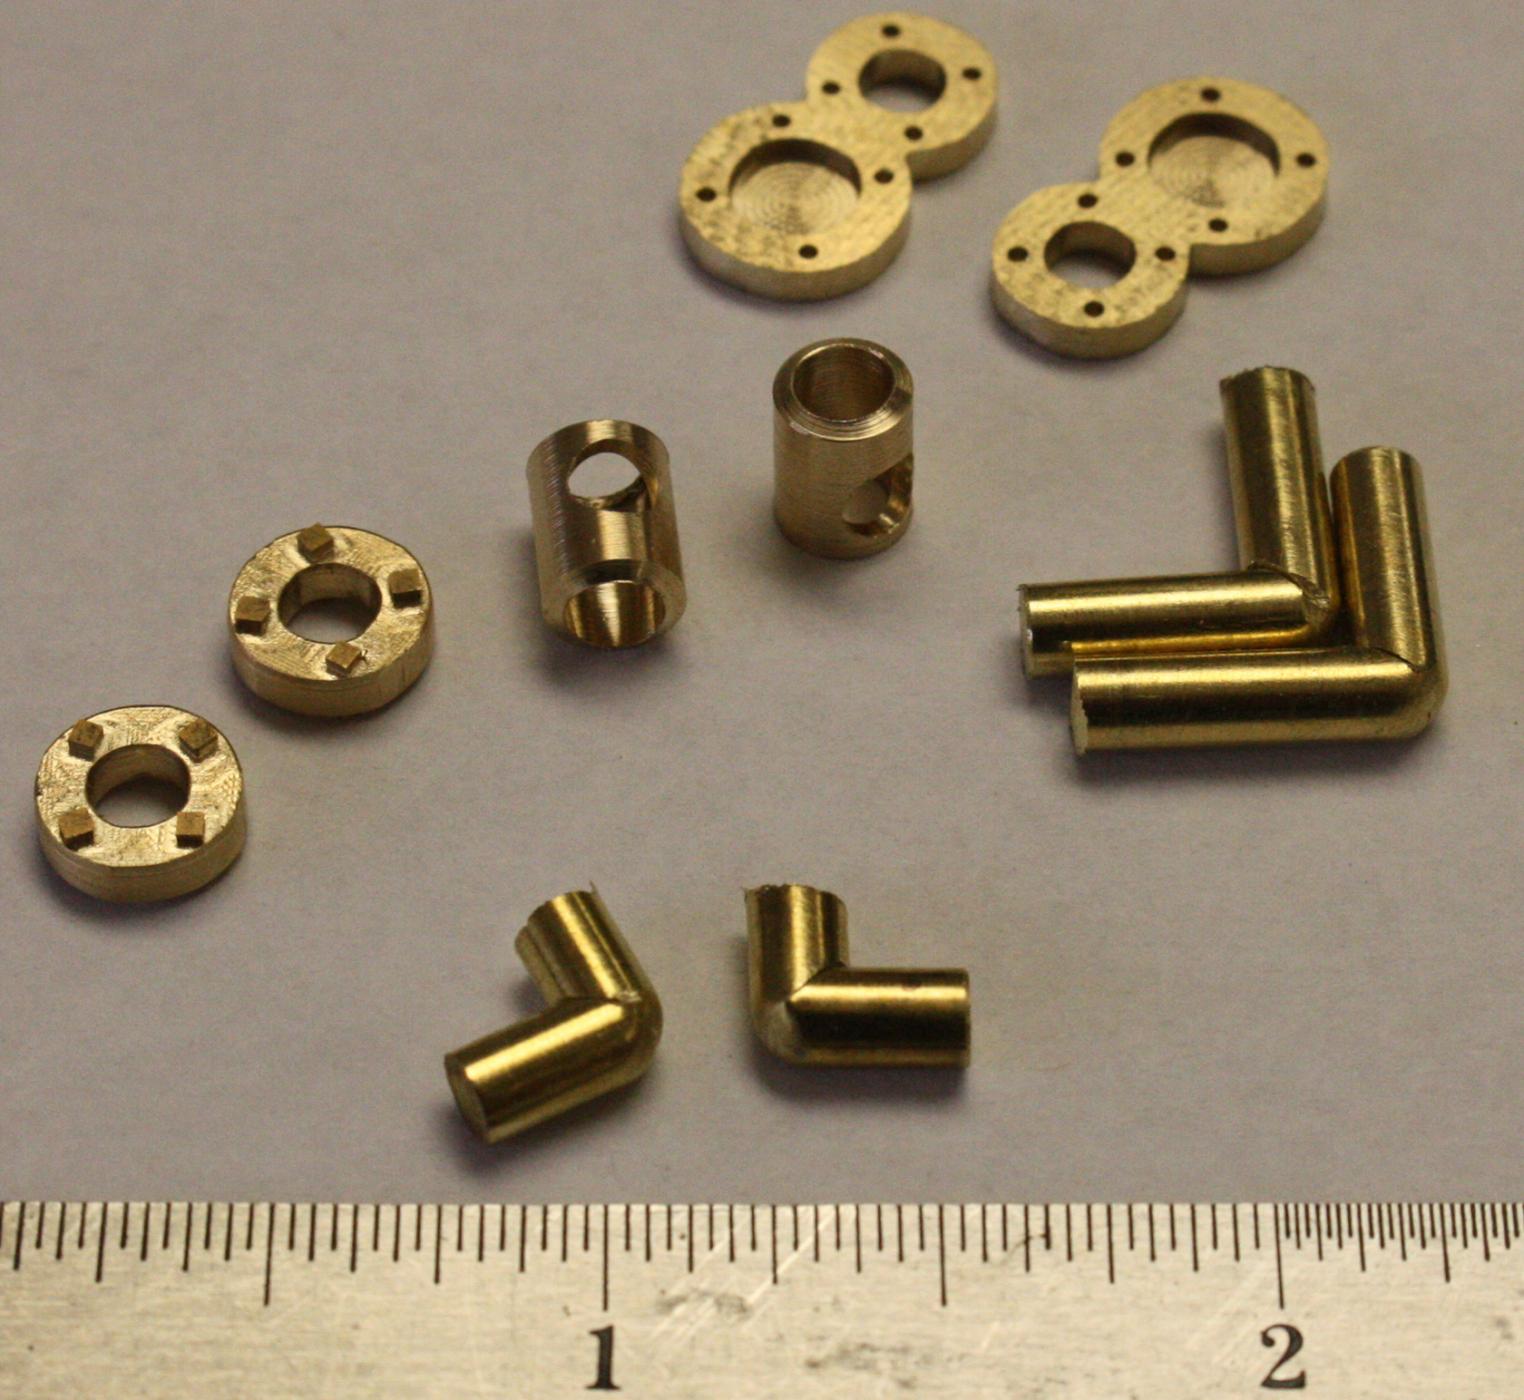
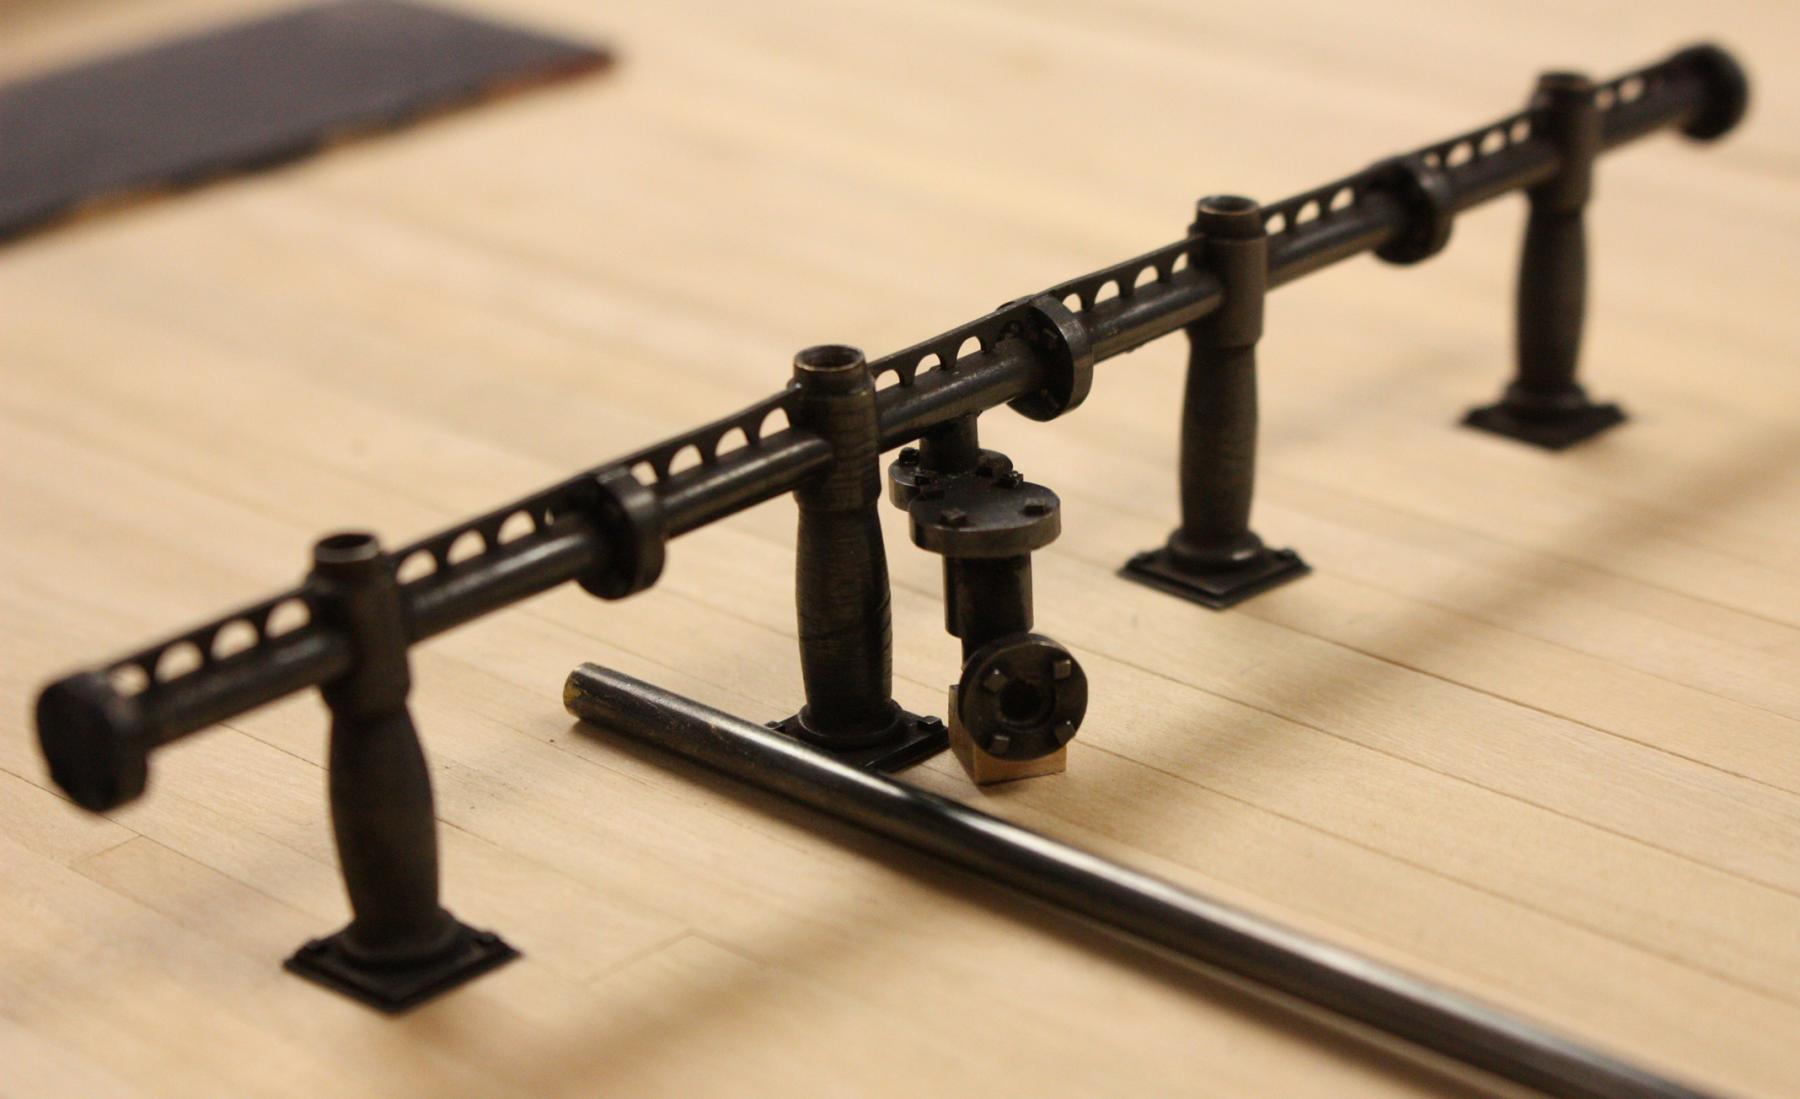
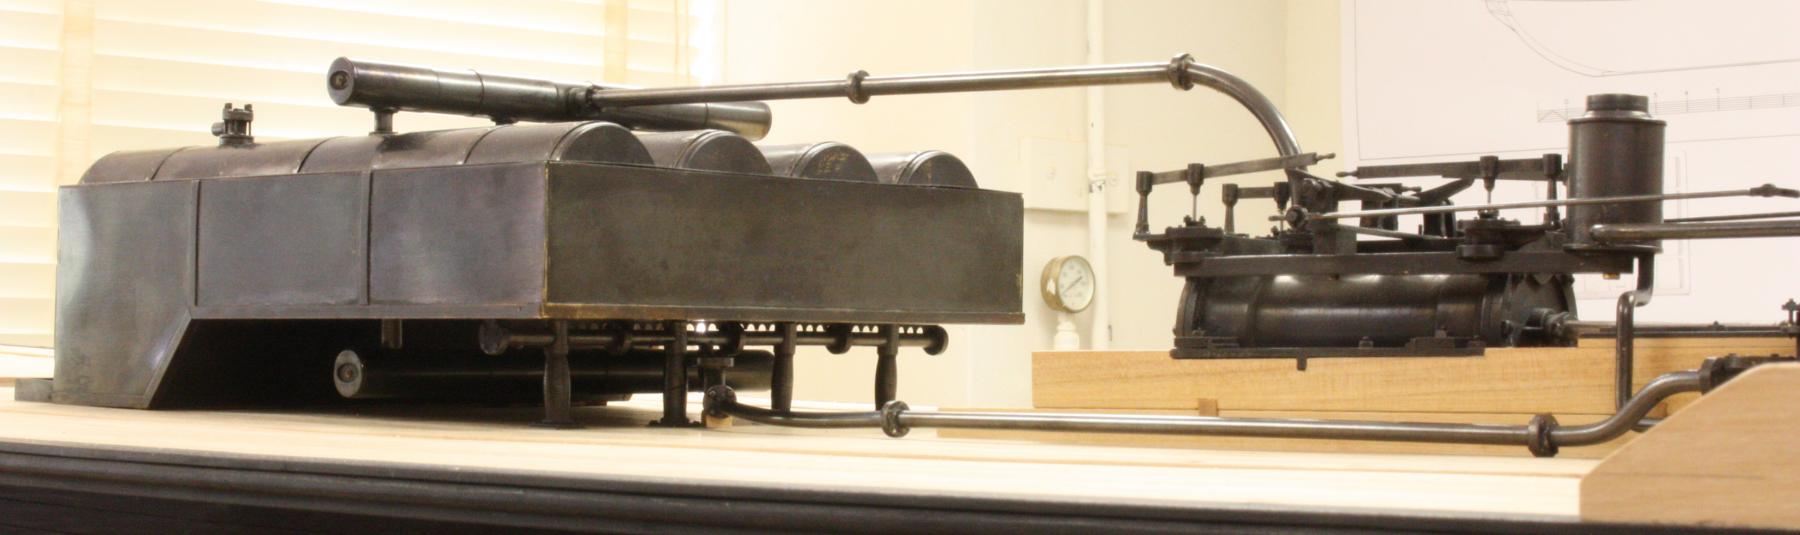
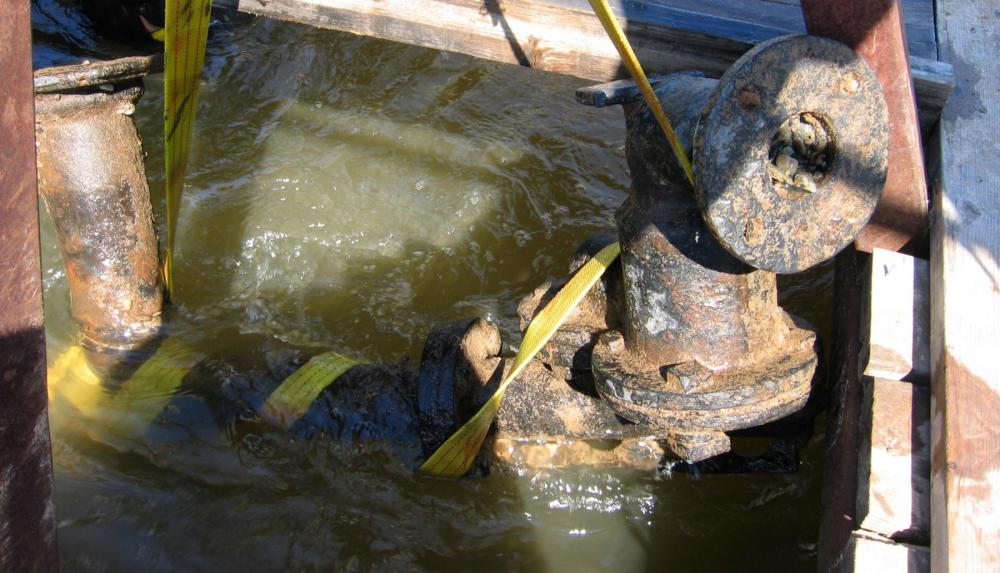
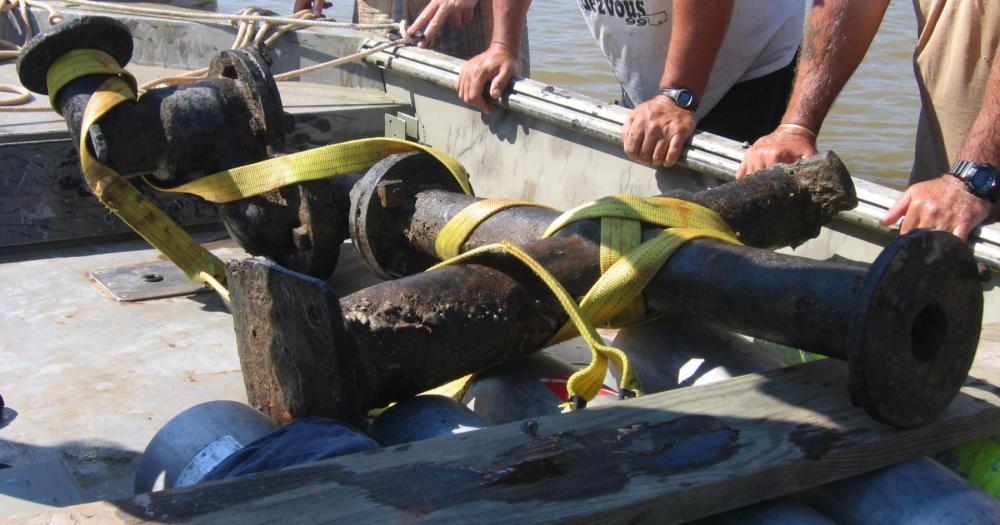
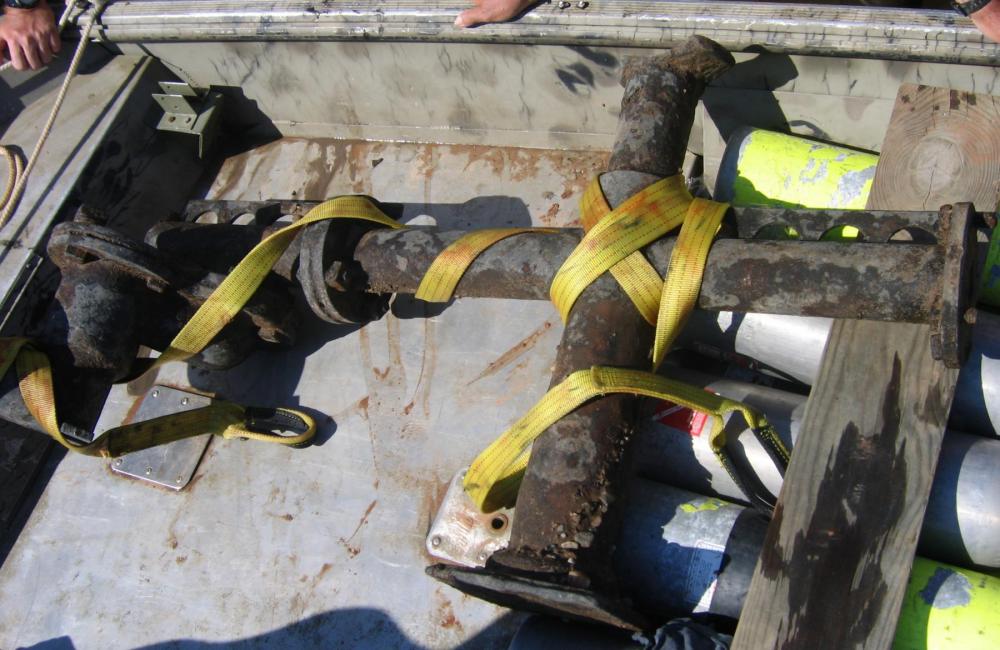
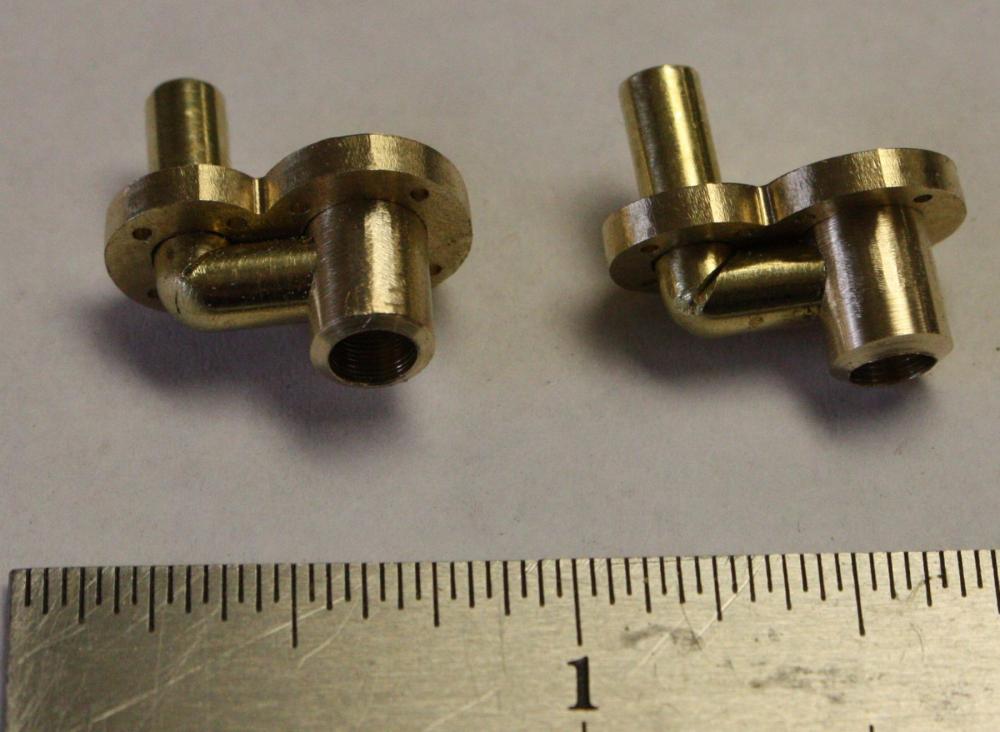
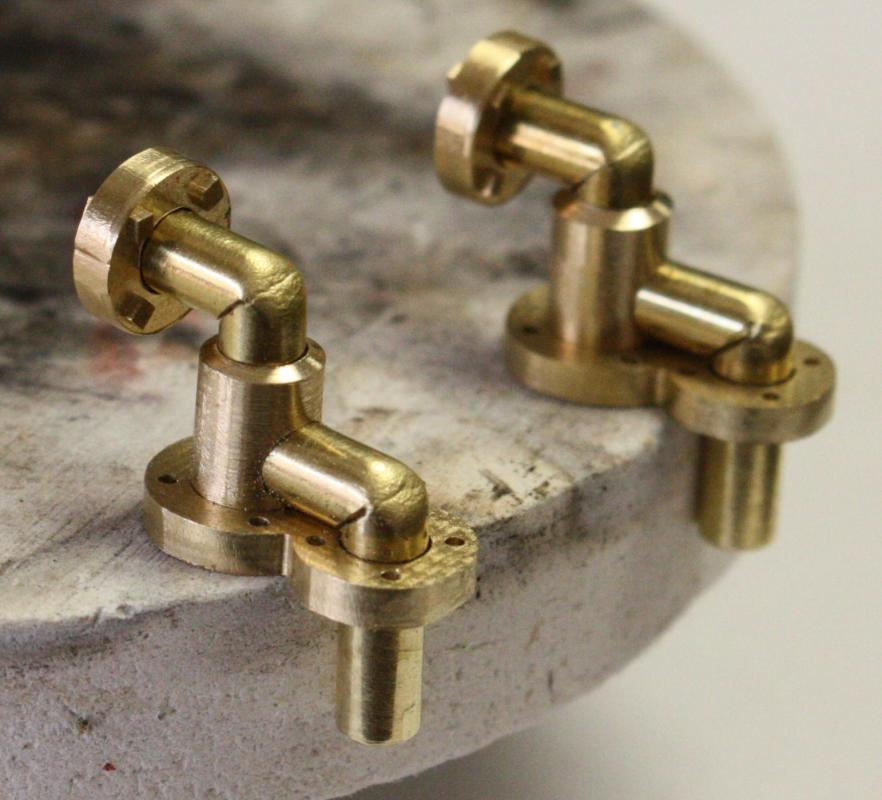
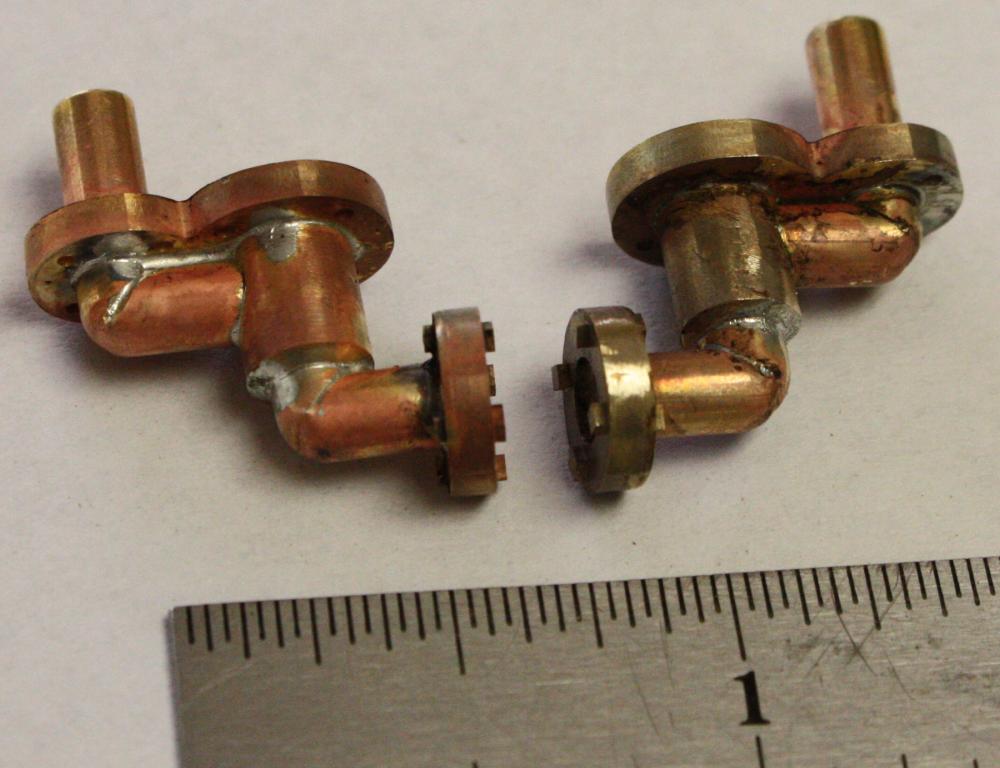
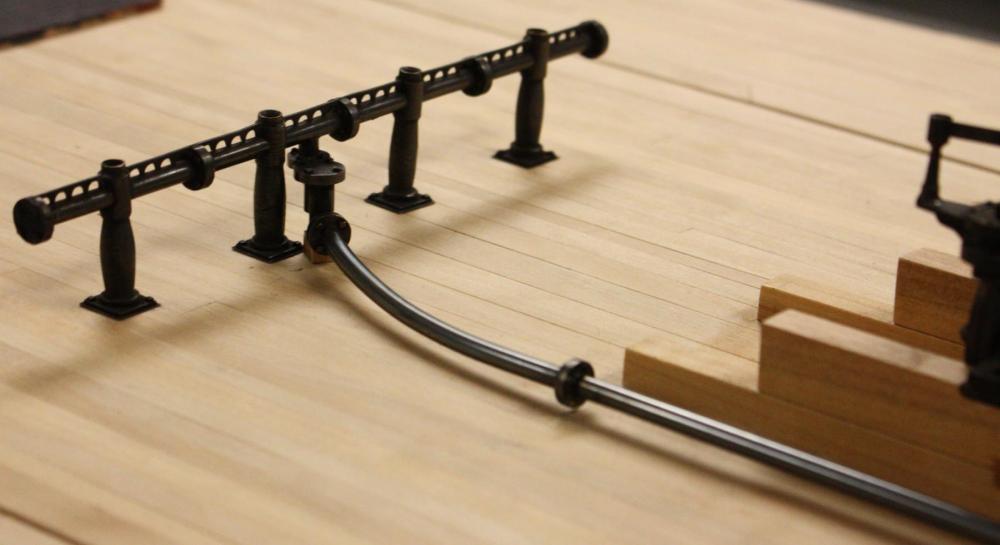
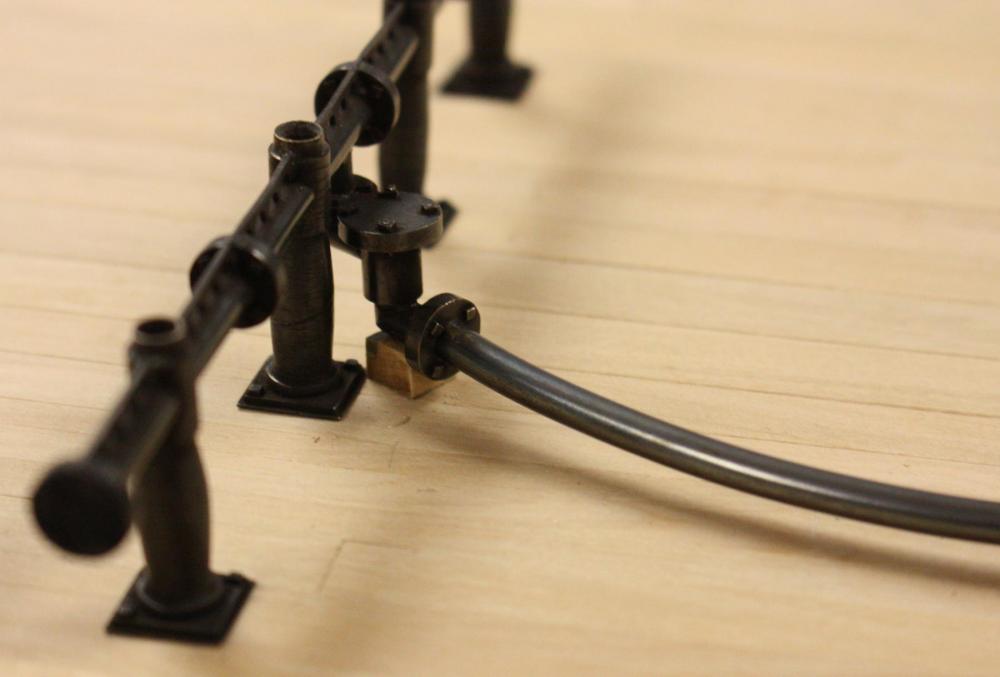
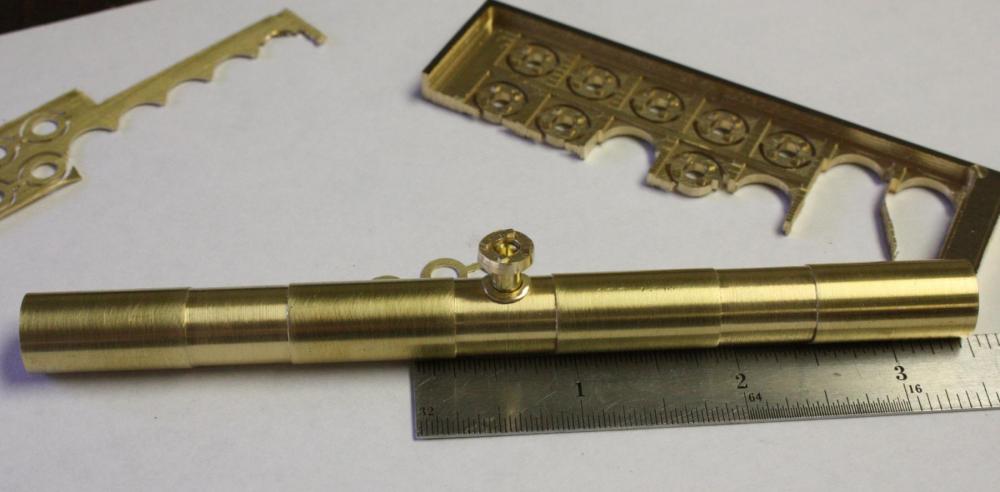
This week I completed the last significant part of the machinery. We are fortunate to have the feedwater check valve still attached to one of the arms of one of the standpipes. The valve comes off of the standpipe at about a 45 degree angle. The probable location of the water line suggests that the valve could not have been on the port-most standpipe but the exact location could not be determined from the remains. I opted for the inboard port standpipe because it places the valve closest to centerline. In Alan Bate's Western River Steamboat Encyclopoedium he mentions that one method of preventing breakage in the long steam and water lines was to include a length of pipe with a large radius curve. This seemed to work well in this location. Standpipe and check valve being lifted from the river. Check valve parts fresh from the mill and lathe. Check valve in place on the standpipe. The valve had a short foot cast into the bottom of the body. This indicated the the valve probably sat on a block to support its weight. Safety valves and steam line from the steam drum to the engine added. This steam line will be slung from the deck beams of the boiler deck. I'm leaving the lever and weight off of the safety valve until the boiler deck goes in. I can only imagine how many times I'd knock it off if I had to work around it.


- 701 replies
-
- 38
-
-
Papegojan 1627 by mati - FINISHED - 1/48
ggrieco replied to mati's topic in - Build logs for subjects built 1501 - 1750
Beautiful Matt! I just love the lines of these Dutch vessels and your craftsmanship and attention to detail are incredible! I will be following this one if you don't mind! -
Kurt, Thanks for the info. I'll look for some of the Bob Smith CA and give it a try. I've used super glue in the past but only where I could also rely on a mechanical fastener as well. It has always been the non-BSI stuff from Lowes. I will certainly make a change. Matt, Thanks so much for the information and links. Looking over the JAX products, I saw several other products that I know would be useful. I do a lot of metalwork where the different patinas and platings would come in handy. I do appreciate you taking the time to pass along your tips. Cathead, I'll let you know how the new boilers turn out with the new techniques as soon as I get back to them. For the meantime, however, I think I'm going to take a little break from the thin sheets.
-
Thanks Patrick, Matt, Thank you for the tip, I have to admit I haven't heard of JAX but I will look into it. I use a lot of the brass black and am a little concerned about health effects. I'd like to find something With less of a health warning. Steven, what you suggested does sound like a good method. The reason I went with the method I used was that I wanted to understate the rivet heads. In many of these older boilers, the heads are hammered almost flat. I had hoped to just give a hint of them. The problem is, on a flat surface, the punch tends to push the metal outwards into the plane of the sheet, deforming it. Your method would push the metal out of the plane of the sheet eliminating that deformation. I will give it a try on the second boiler and let you know how it works. Cathead, I think my biggest regret was using epoxy to glue everything together and not providing a better clamping system for assembly. When I test fit the plates they mated perfectly. Once I got a little epoxy under them they no longer wanted to sit flush. I rushed to provide more clamps and wedges and it all just got worse. In addition to glue seeping out, the epoxy was just thick enough the provide resistance to the thin brass and deform it. I have never felt that I could rely on super glue long term but I think it would have performed better. I would love to hear what you and other model builders feel about super glue. I once heard that it crystallizes over time and may eventually weaken. Kurt, I like the sensipress and it has done a nice job on your boiler. As I mentioned to Steven, the pocket in the lower die does give the metal somewhere to go and I'm sure it will help with the deformation problem. i will definitely look into this! Thank you. Thanks again everyone for your comments and like. They have all been very helpful.
-
Once again, I am amazed by your painting skills! I wish I could paint like that!
- 641 replies
-
- 4
-
-
- greenwich hospital
- barge
- (and 1 more)
-
Great post Bob! I've wanted to try this in the past but thought it might be too difficult. Your description is very clear and makes it seem more approachable. Thanks!
- 348 replies
-
- 6
-
-
- pequot
- cable ship
- (and 1 more)
-
Looking beautiful Ed! I really appreciate your in depth descriptions of what you're doing. I come away with a new technique every time I stop by. You're making me really want to get back to sailing vessels!
- 3,618 replies
-
- 6
-
-
- young america
- clipper
- (and 1 more)
-
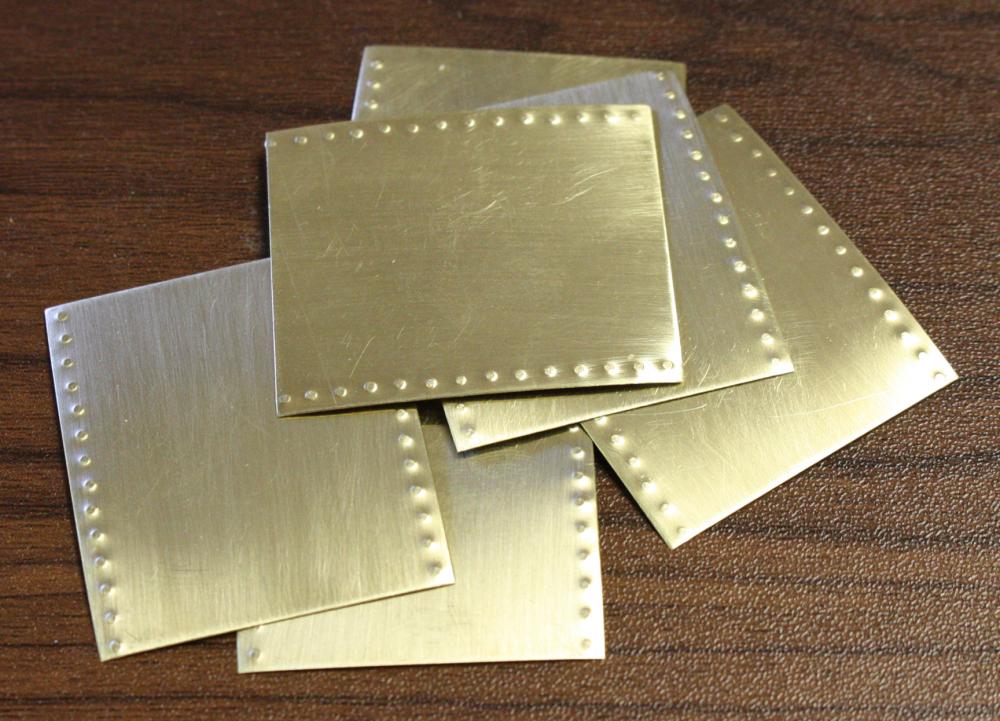
Thanks everybody for the comments and likes! Cathead, I appreciate the comment about building Bertrand's boilers not being your favorite part of the build either. I was so disappointed that I considered not posting any photos of it. But, as you said, under the boiler deck, there will be only a limited view of it. I do want it to be open on the port side, however. Most of the planking will be absent including the lattice adjacent to the boilers. In Kevin's notes for reconstructing the profile, he states that this arrangement can clearly be seen on the Steamer Selma (circa 1835) and also mentions the Ohio (1832), the Napoleon (1831), and the Germantown (1846). The lattice would allow some cross ventilation while also providing a partition. Kevin mention stacks of wood for the boiler piled against the lattice. The rivets were done with a center punch and a very light hammer. I have a couple of pounce wheels that I've used for coppering in the past but they made little impression in the .01 brass. On the second boiler I may try .005 brass and a pounce wheel. I'll keep you informed if I find something that seems to work better.
-
Thanks Ed, Yes, i pour it full strength in the bottom of a wide plastic pan, drop the part into it and scrub it submerged with a soft tooth brush. No matter how well I degrease it, there are spots where it doesn't immediately take. Scrubbing the spots with the brush eliminates them quickly. I wear rubber gloves and dip the parts in fresh warm water, rubbing the surface with the fingertips. I do this quickly- otherwise the black builds up and flakes off. I dry the part and then repeat the process 4 or 5 times until I get the finish I want. Unfortunately, the boilers were a nightmare. I used two part epoxy to fasten everything together and I just made a mess. In the process I scratched, smudged, smeared, and ruined the finish on just about every surface. I went home totally disappointed on Tuesday and then spent Wednesday morning buffing and retreating the entire structure with q-tips. It is still not as clean as it was before assembly but, it does give it a bit of the grungy, worn out look that the original boiler probably had.
- 701 replies
-
- 12
-
-
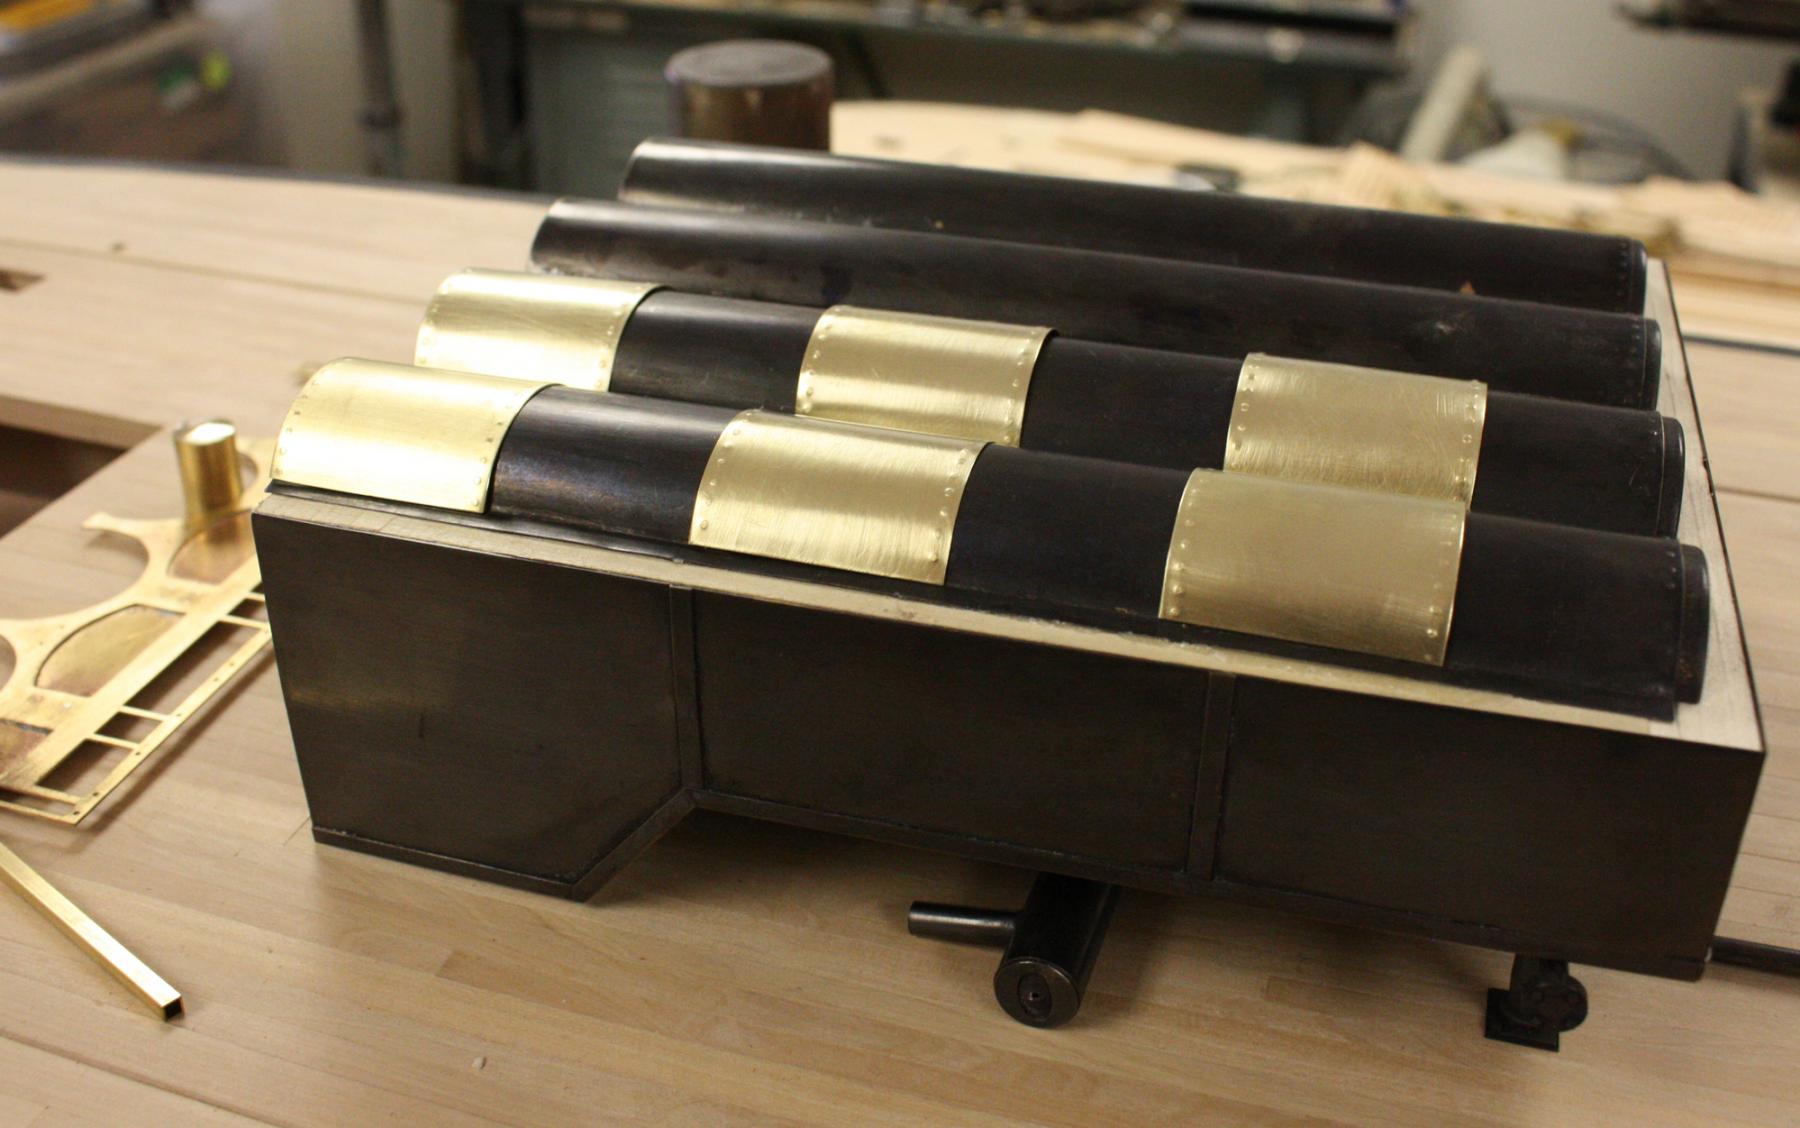
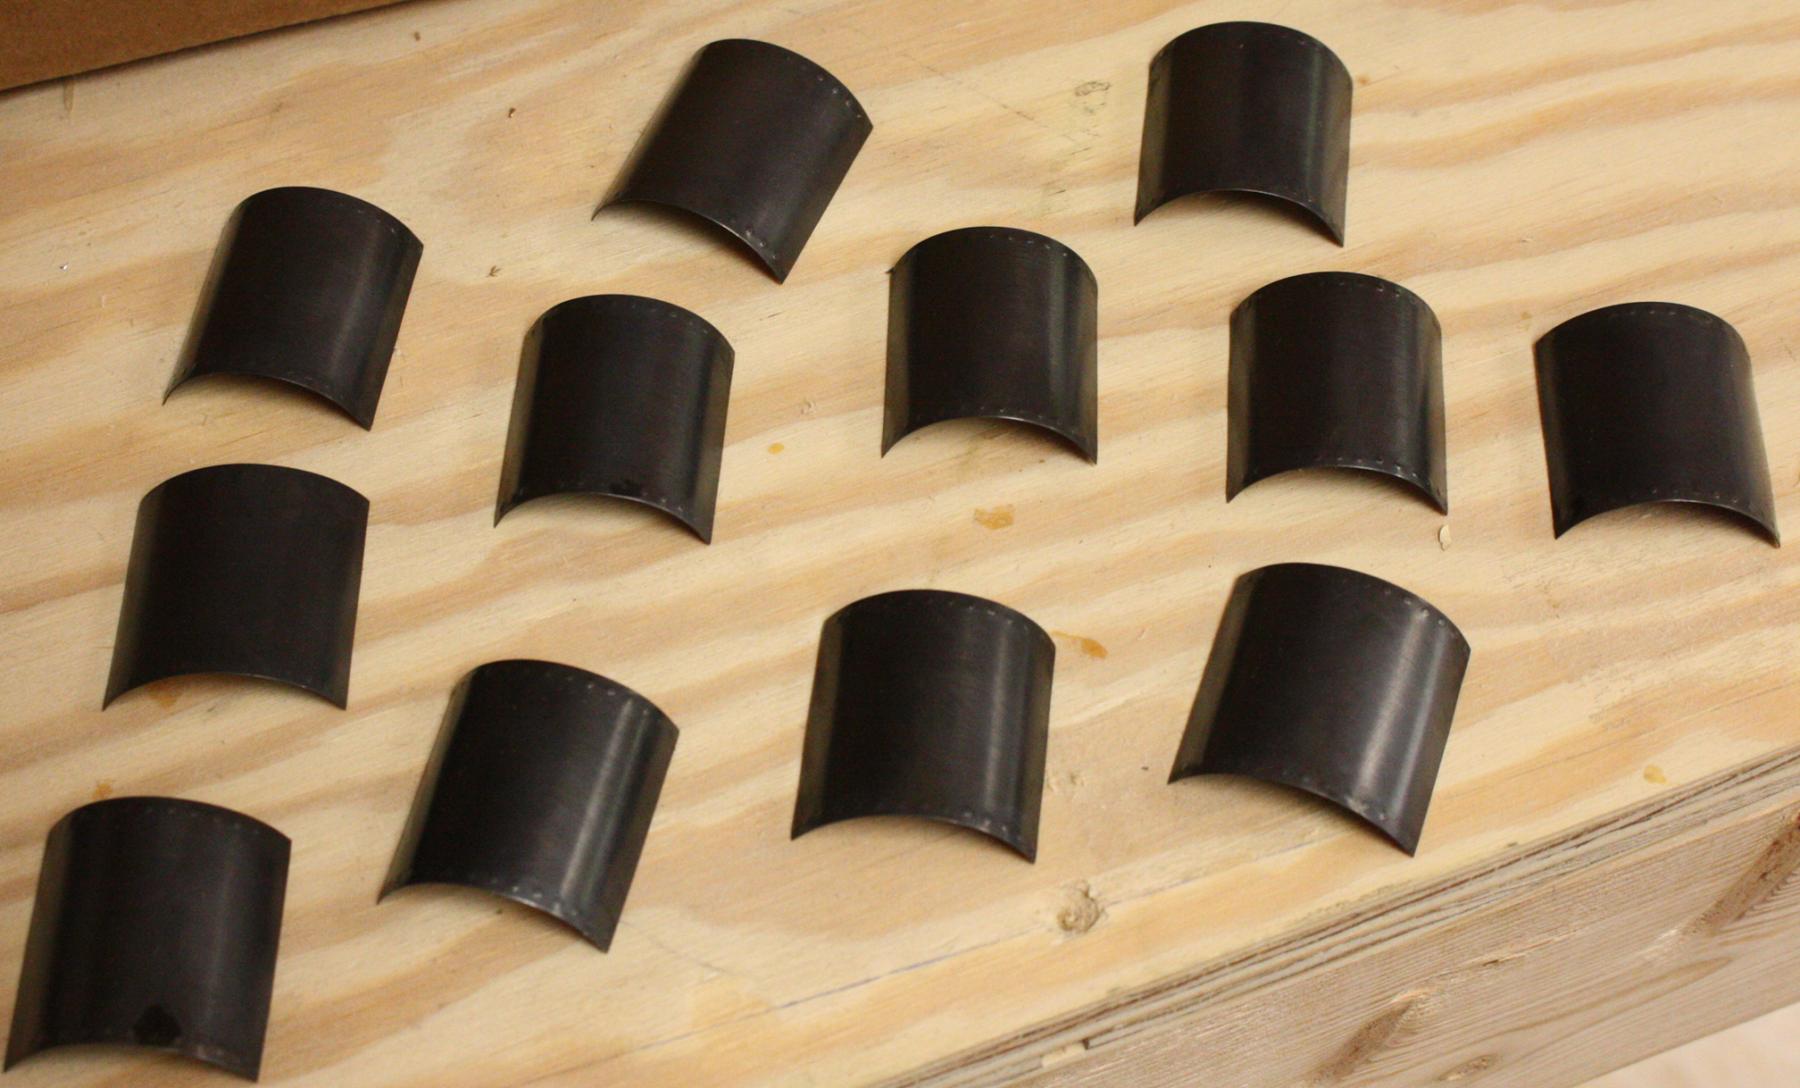
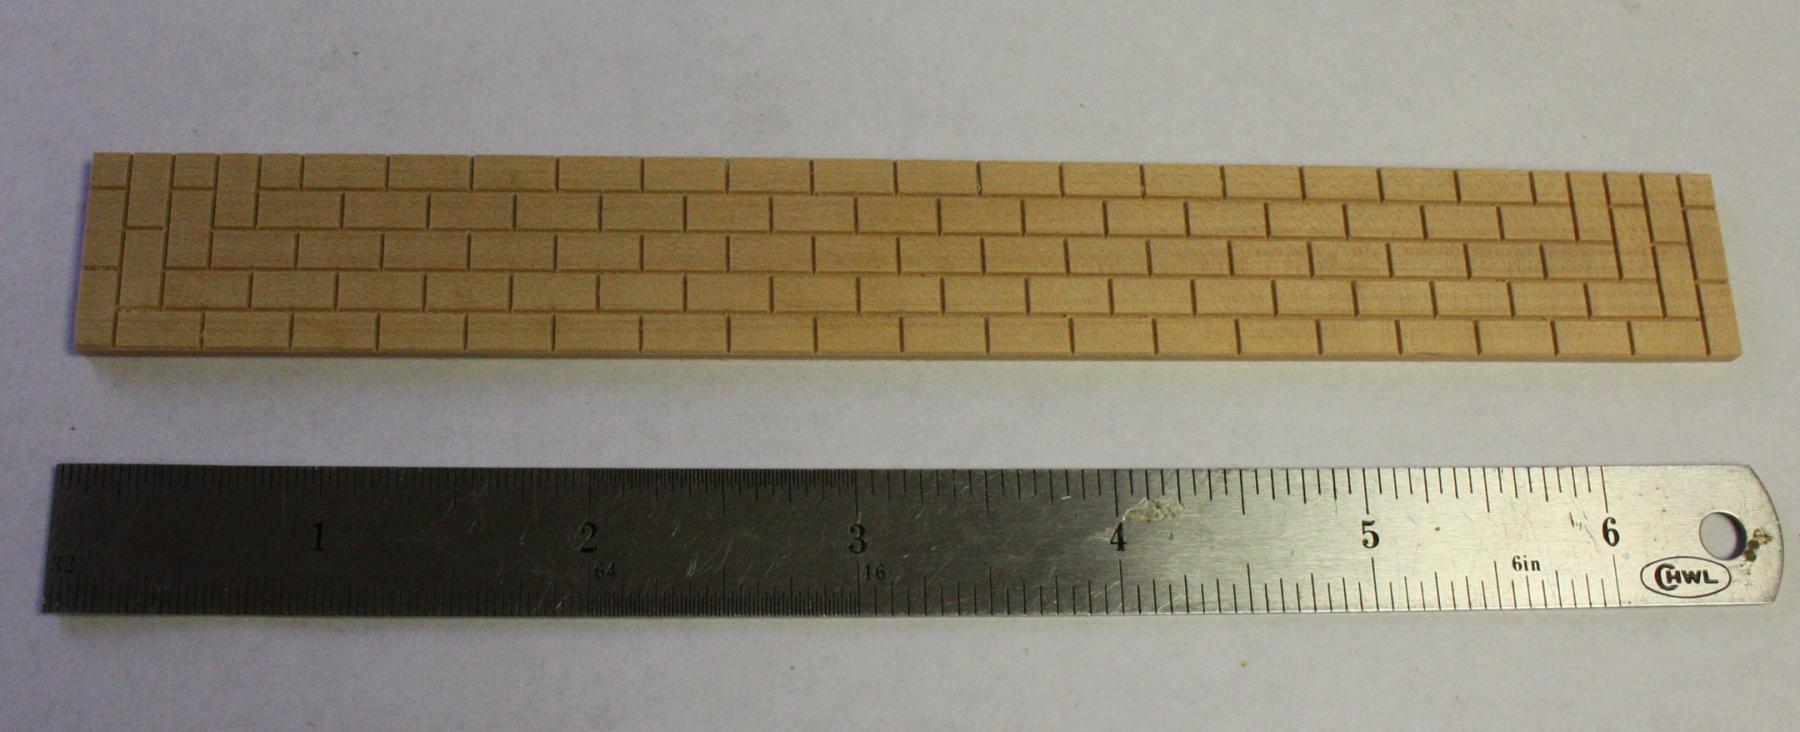
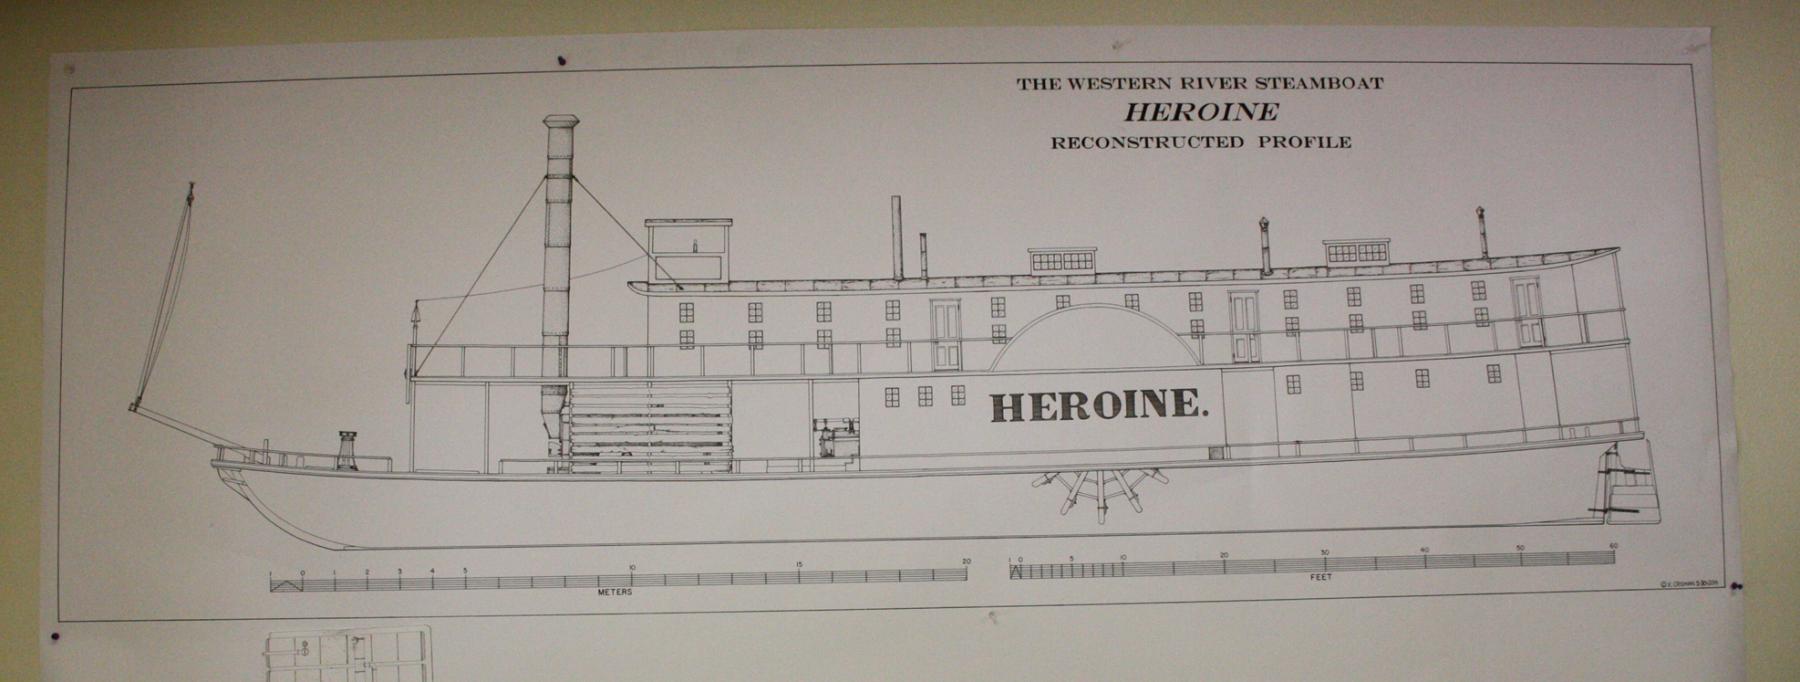
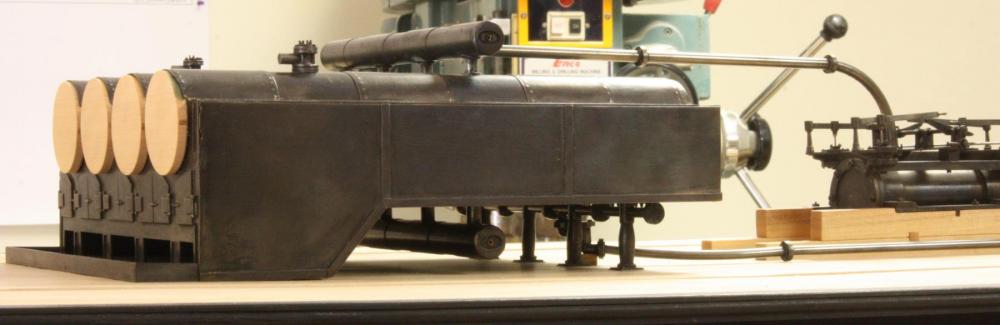
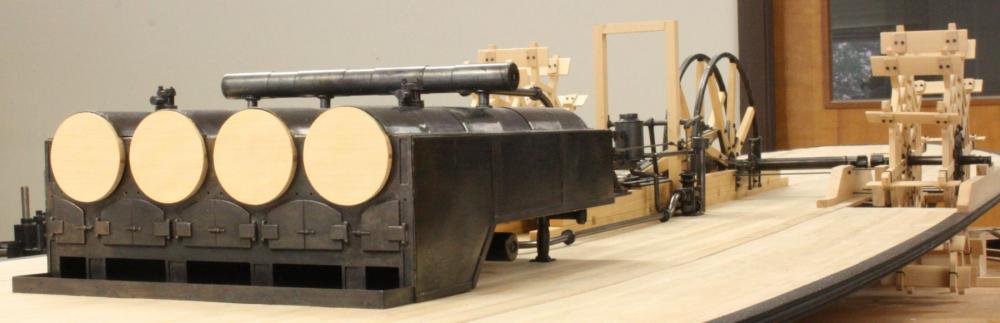
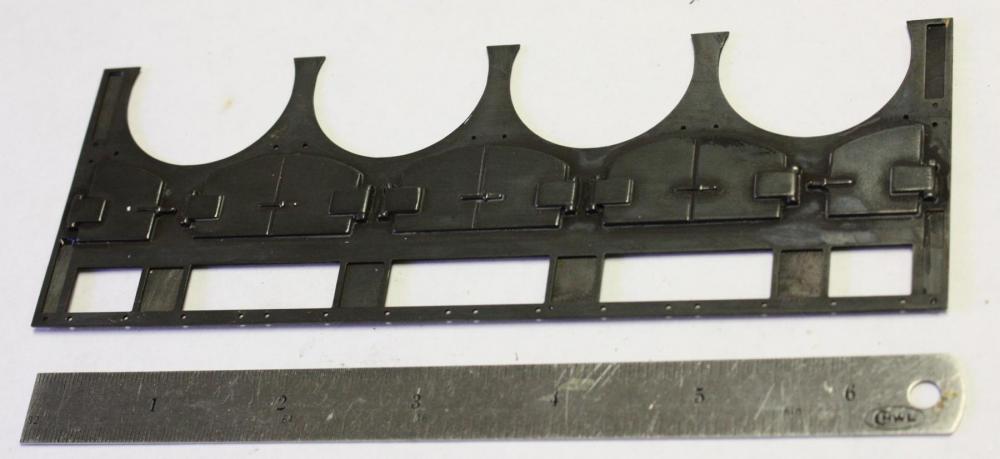
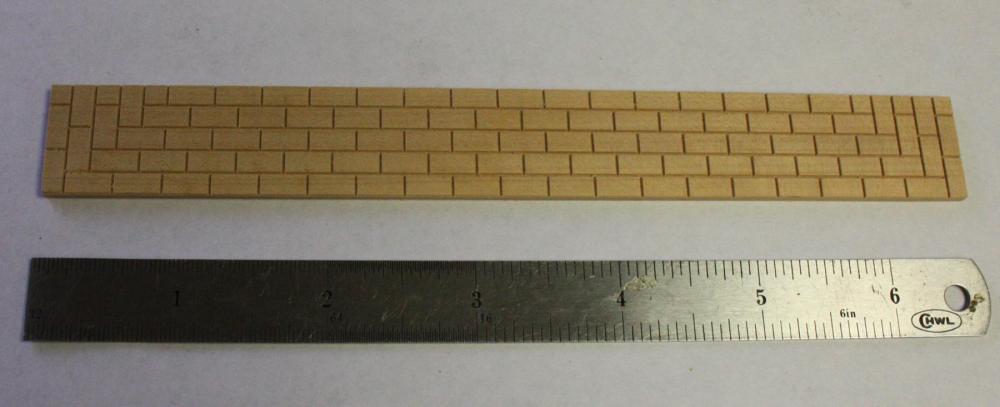
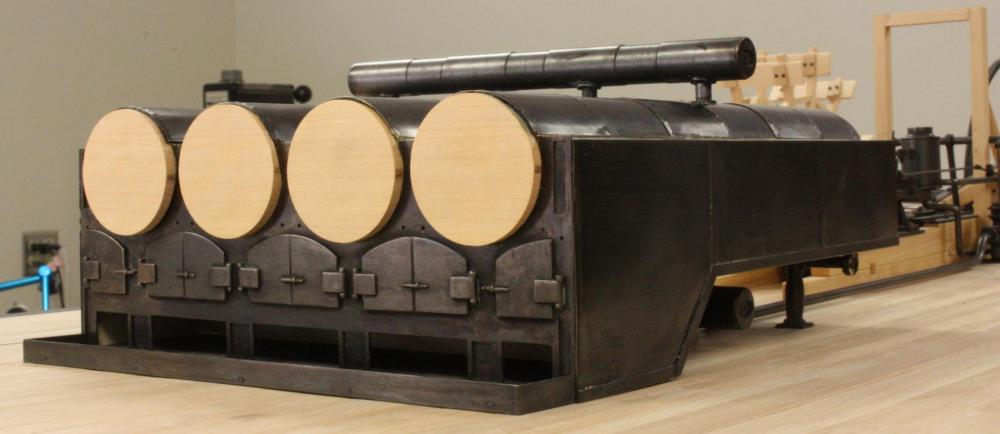
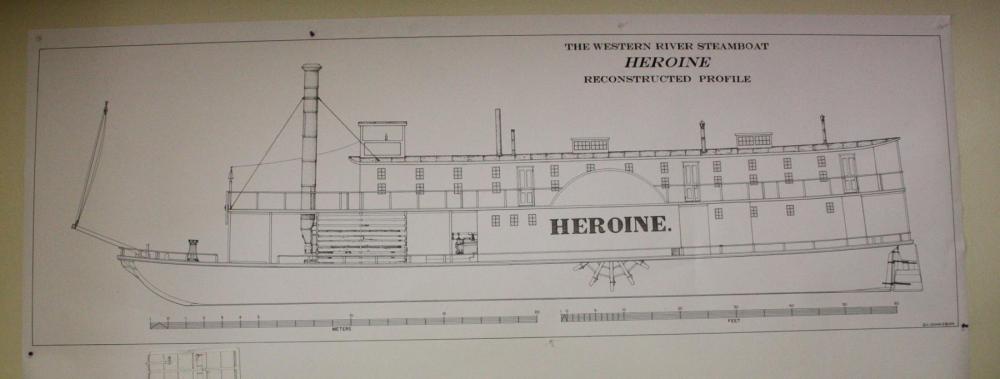
I had a pretty frustrating week trying to assemble the boilers. I'm not satisfied with the appearance of the .01 thick brass. Embossing rivet heads in it created some distortion in it that was difficult to eliminate. I'm just happy to be done with it. Brass plates with embossed rivet heads. Testing fit of boiler plates. Blackened boiler plates. The steam drums were constructed similar to the mud drums with the addition of the flanged pipe for the steam supply line. Front of firebox and panel inserts blackened. Panels inserted. Kevin's notes point out that Heroine probably had a brick lined ash pan but not an ash trough to the side of the vessel. He points to an example excavated from the wreck of the New Orleans. Several firebricks were found in Heroine's remains measuring 4" X 8 1/2" X2 1/8. Brick lining of the firebox Brick lined ash pan added. I added the wooden plugs where the boiler caps should be. They will provide a fastening point for the boilers breaching and will not be seen. Boilers almost complete. I still have to add the feedwater check valve and safety valves. Next week I will finally get to work on the upper works. After a frustrating week with brass sheet, I'm looking forward to getting back to woodwork. Below is Kevin Crisman's reconstruction of Heroine's profile.


- 701 replies
-
- 27
-
-
ancre La Salamandre by tadheus - 1:24
ggrieco replied to tadheus's topic in - Build logs for subjects built 1751 - 1800
Beautiful Paul, It's hard to believe the transom and rudder photos are not of a full size vessel! -
Looking Beautiful Erik!