HOLIDAY DONATION DRIVE - SUPPORT MSW - DO YOUR PART TO KEEP THIS GREAT FORUM GOING! (Only 20 donations so far - C'mon guys!)
×

ggrieco
-
Posts
276 -
Joined
-
Last visited
Content Type
Profiles
Forums
Gallery
Events
Everything posted by ggrieco
-
 As always, I'm blown away by the detail! When she's completed, she will have as many parts as the full size vessel!
- 2,625 replies
-
- 5
-

-
- kaiser wilhelm der grosse
- passenger steamer
- (and 1 more)
-
Not a bad result at all. Beautiful work with the carronade!
-
Good luck Robin, I look forward to following your build!
- 473 replies
-
- 1
-
-
- greek bireme
- dusek
- (and 1 more)
-
Thanks Keith, Robin, Tom and KirbysLunchBox for your comments and everyone else for the likes. I think you may have a good point KirbysLunchBox, if you did have to replace a spoke the extra overhead would be useful.
-
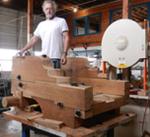
Love the saw horses! The suggestion of work in progress makes the photo come alive.
- 34 replies
-
- 7
-
-
- steamer
- sternwheeler
- (and 1 more)
-
Thanks everybody, Sorry for the brief photo description. The virus that the kids have had for the last few days finally made it around to me this morning. After uploading the photos I decided that I just wanted to crawl back into bed. Hopefully, I can focus on more details this next. Good point Cathead, I tend to focus on the structural aspects of the boat and often miss the socio-economic considerations. It is interesting to see how the industries are all tied together.
-
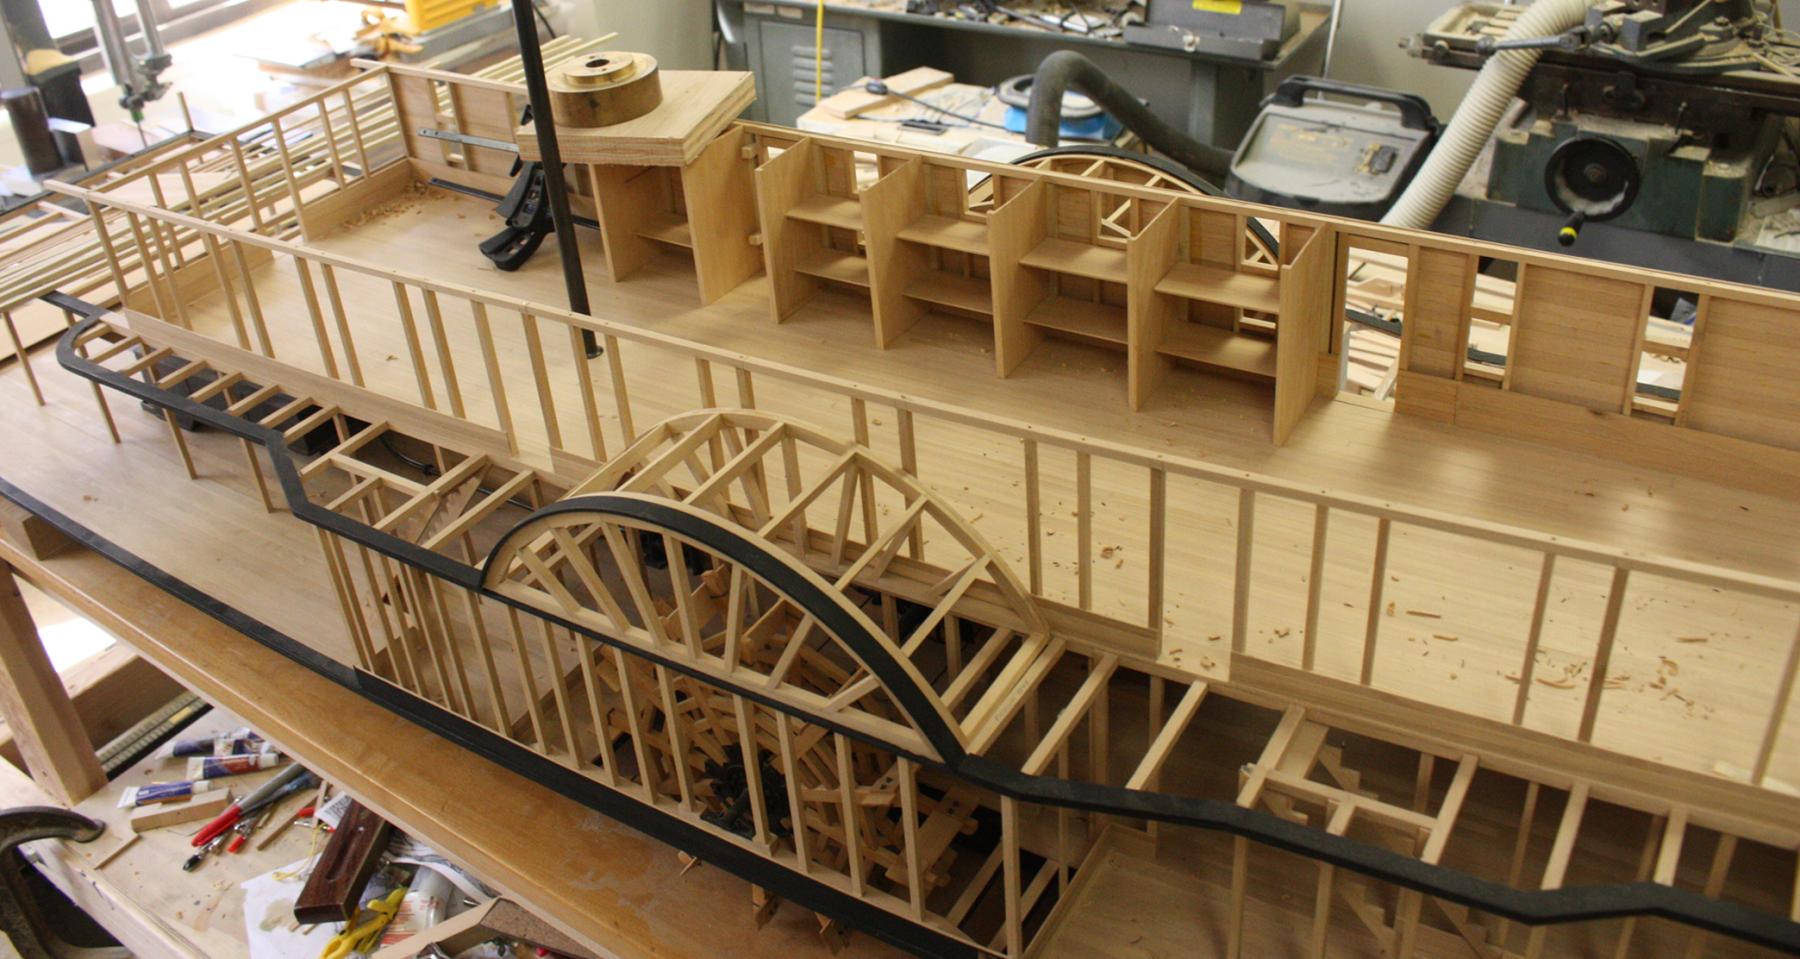
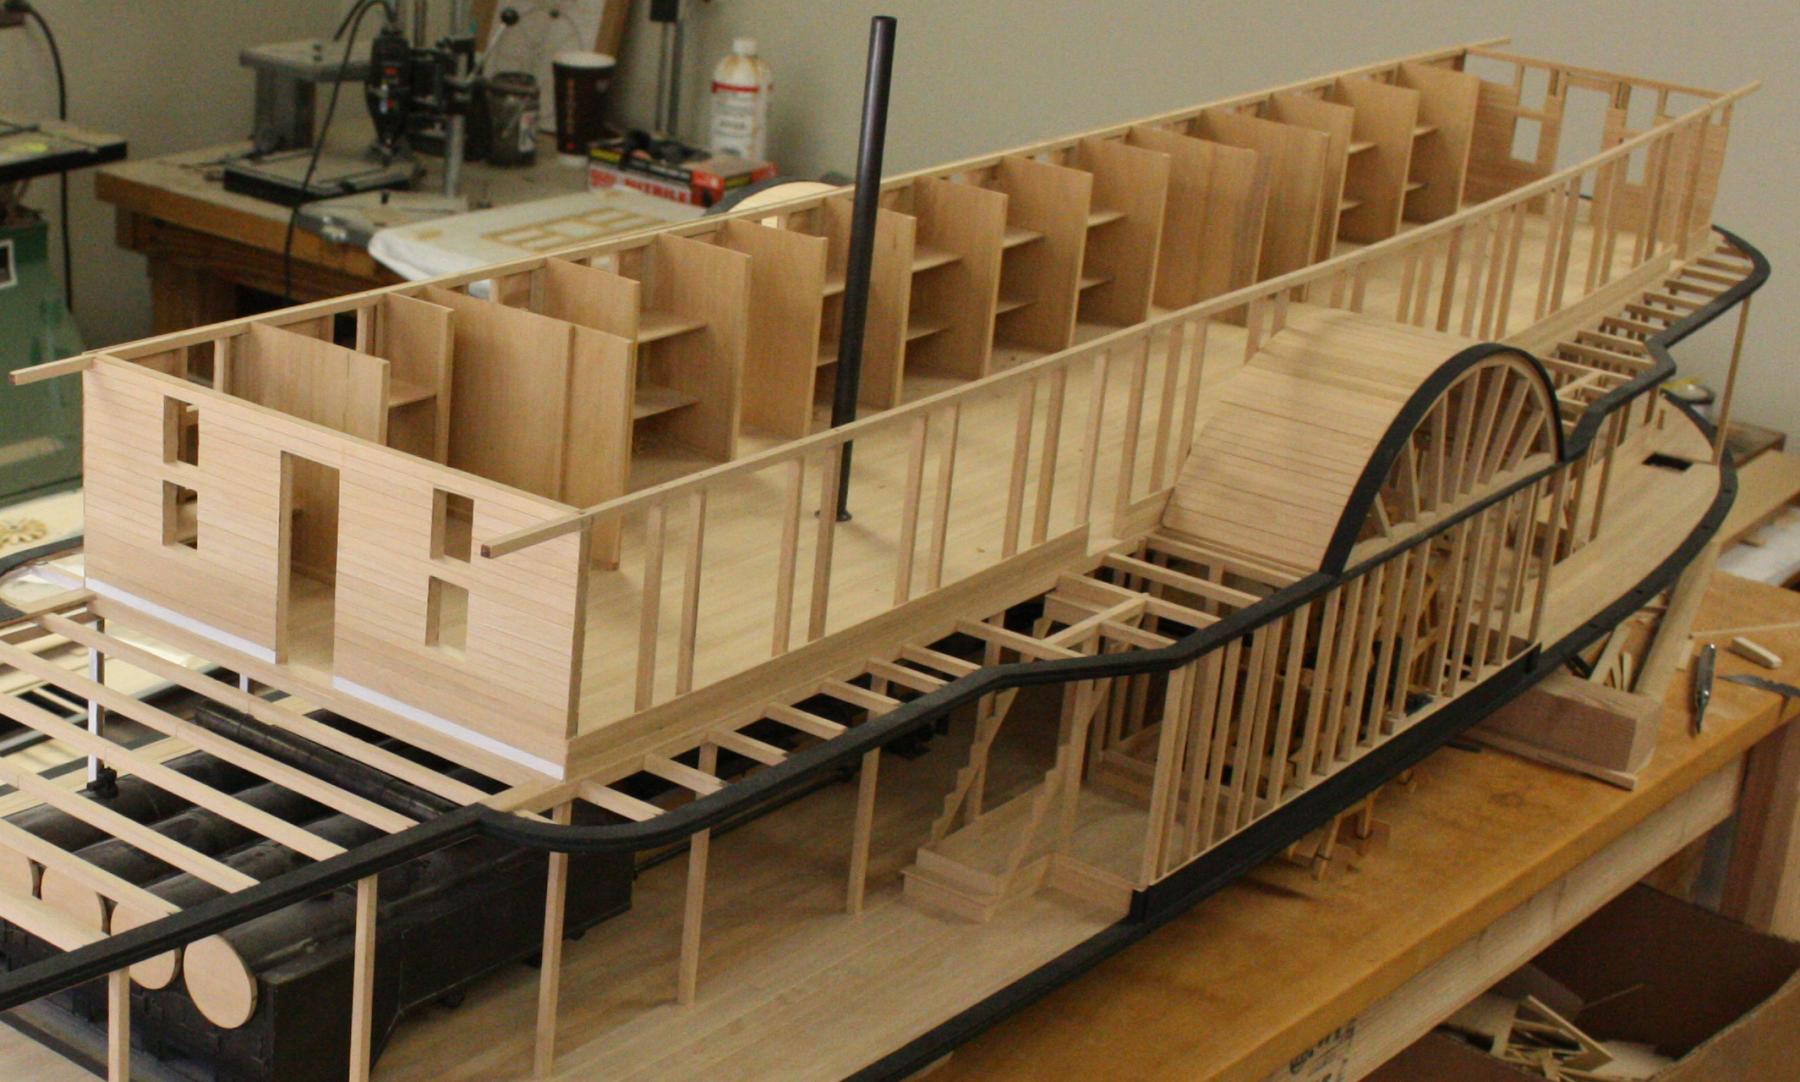
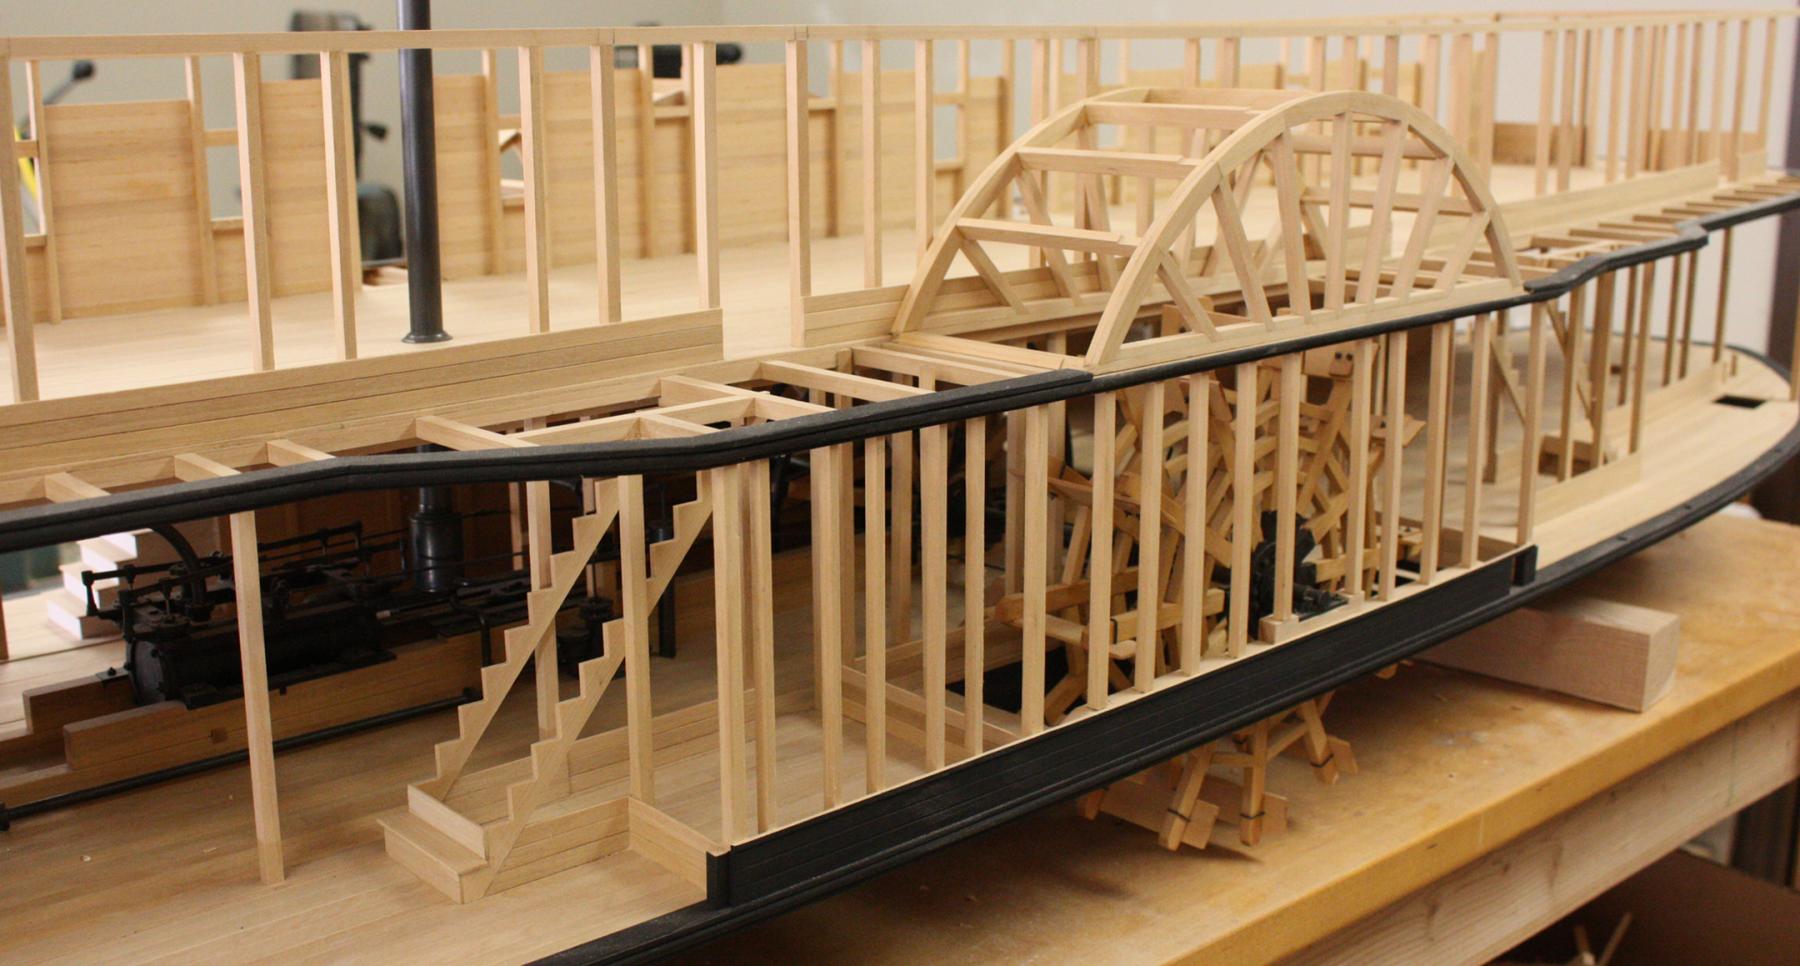
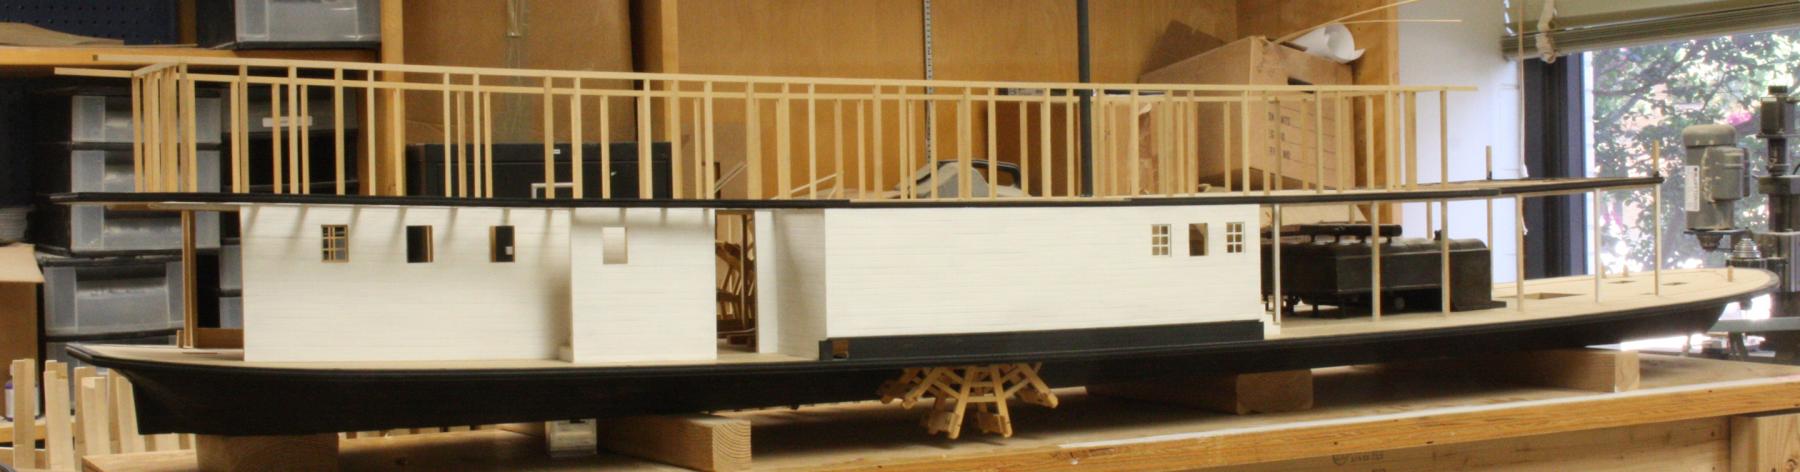
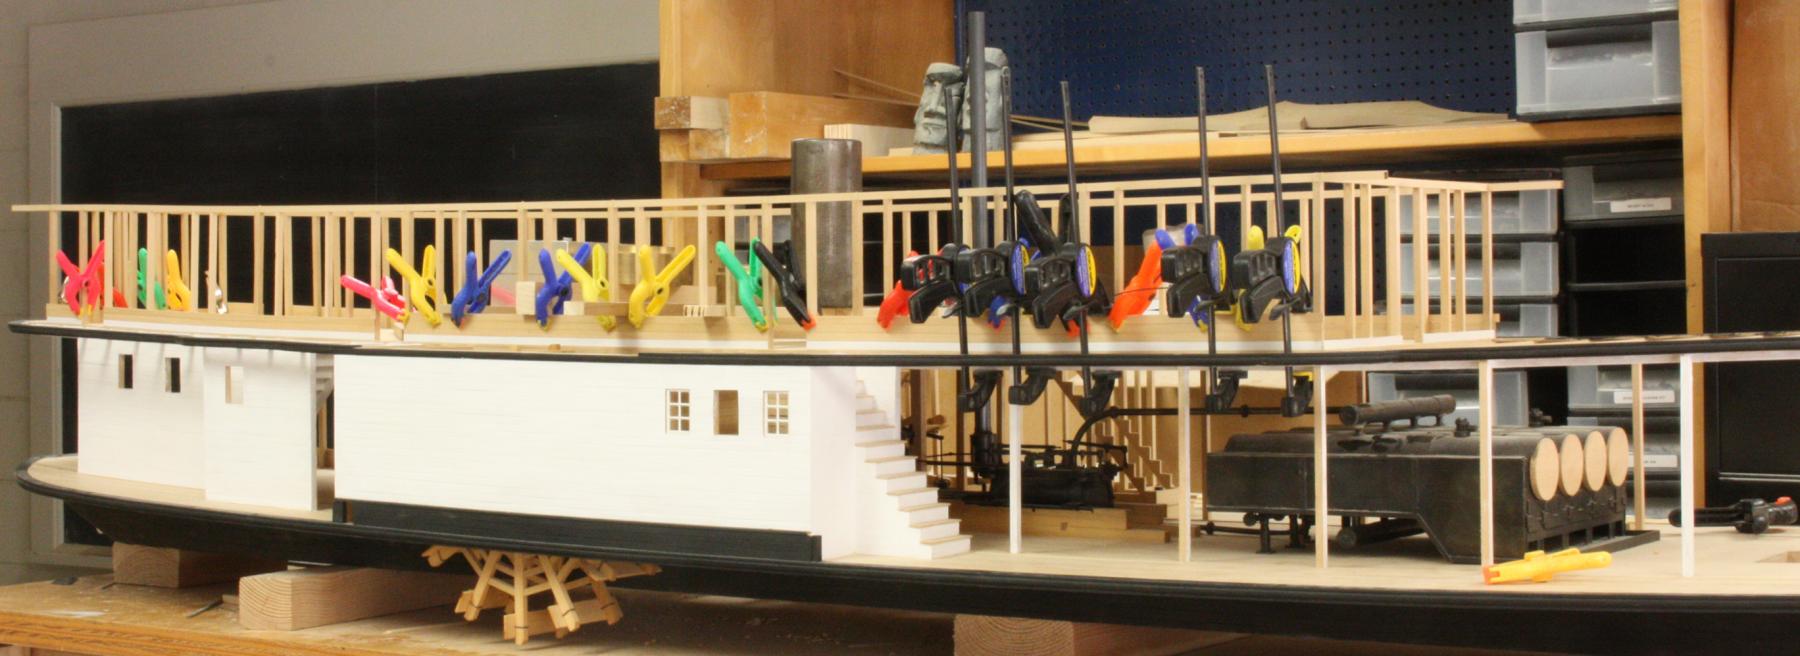
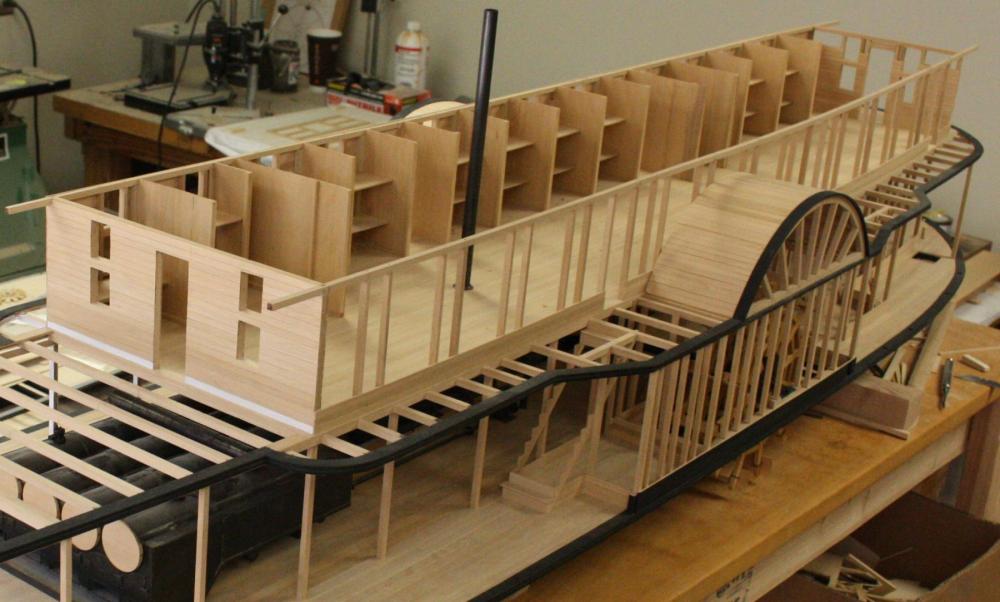
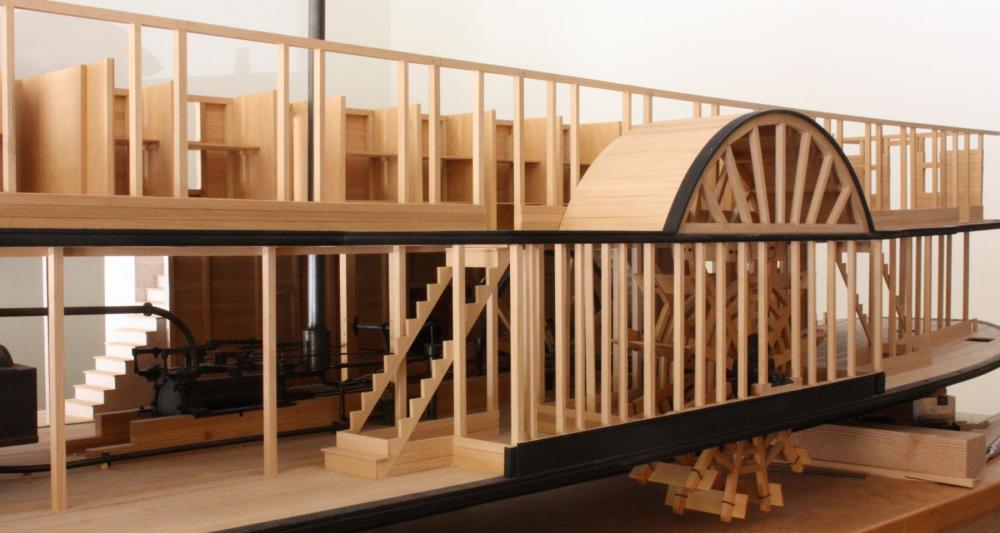
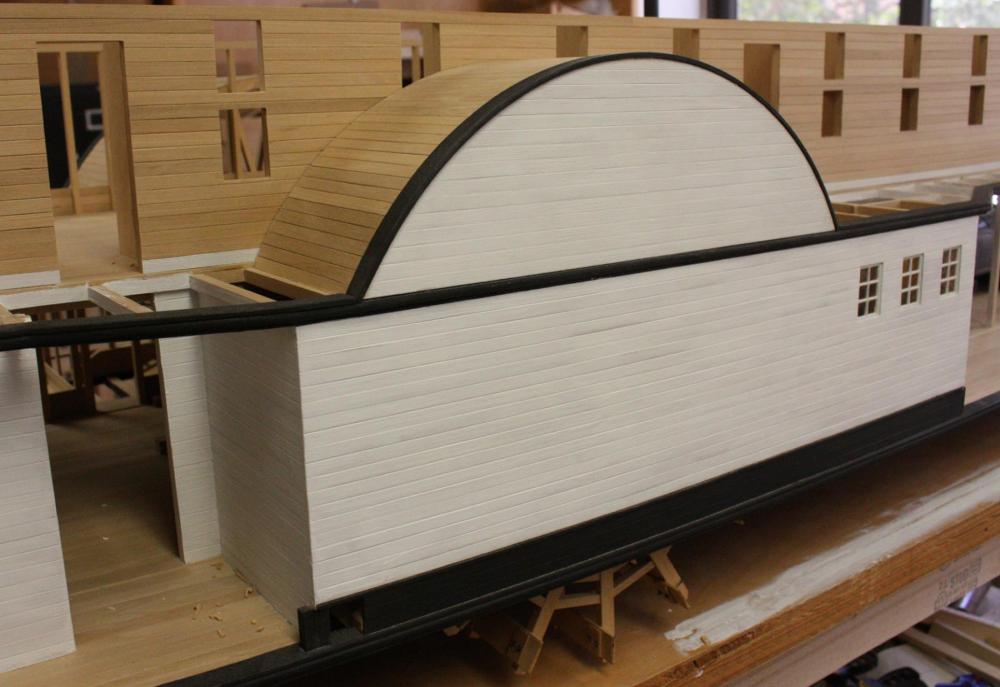
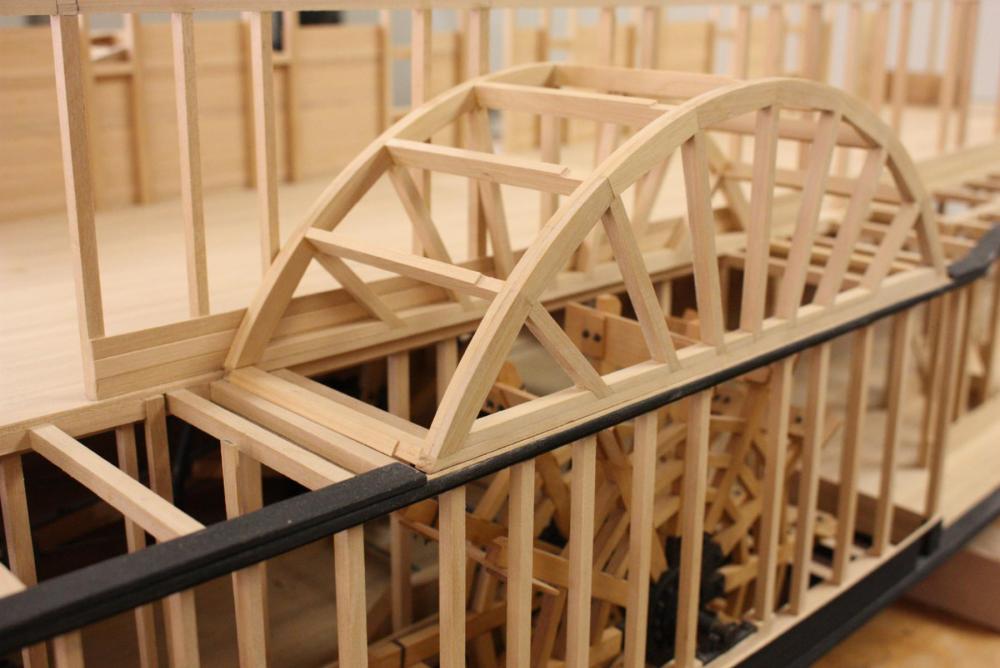
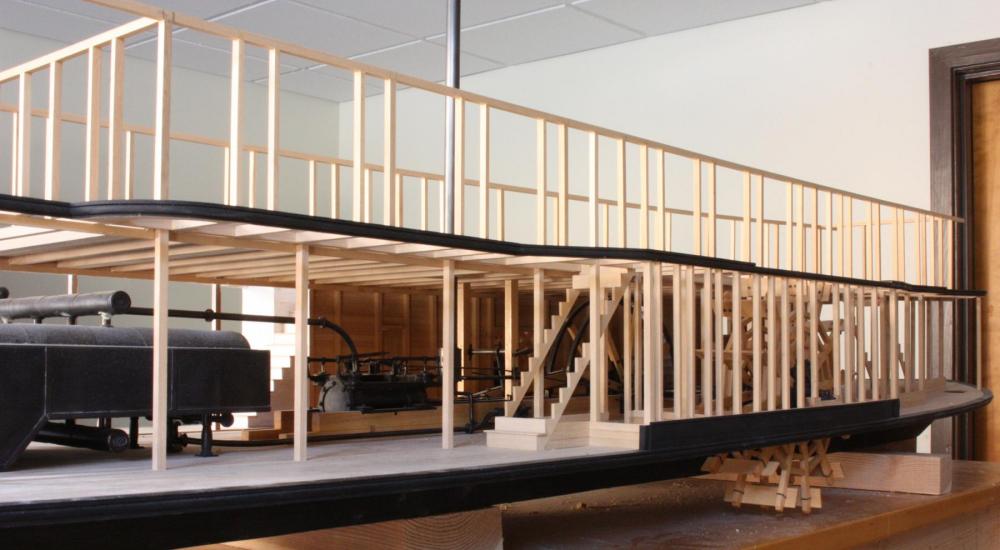
I've been busy laying out the internal structure on the boiler deck so I haven't had the opportunity to get many photos. Just a few here to show progress. The internal walls would have been planked and then the bulkheads added. I'm putting the bulkheads in first and will then plank between them. This will allow me to economize on wood by using shorter pieces. It's amazing how much planking this model requires and I'm running out of the long lengths. The arches over the paddle box are just about complete. I still need to add the steps up over the arch and the exposed planking will be painted white on the starboard side.


- 701 replies
-
- 35
-
-
That does sound like a definite possibility. Getting a large branch caught between the wheel and the top of the box would certainly put a wheel out of commission. Thanks Cathead.
-
Looking beautiful Patrick. I'll soon be fitting out my model and I wish I had half your ability to make it come alive!
-
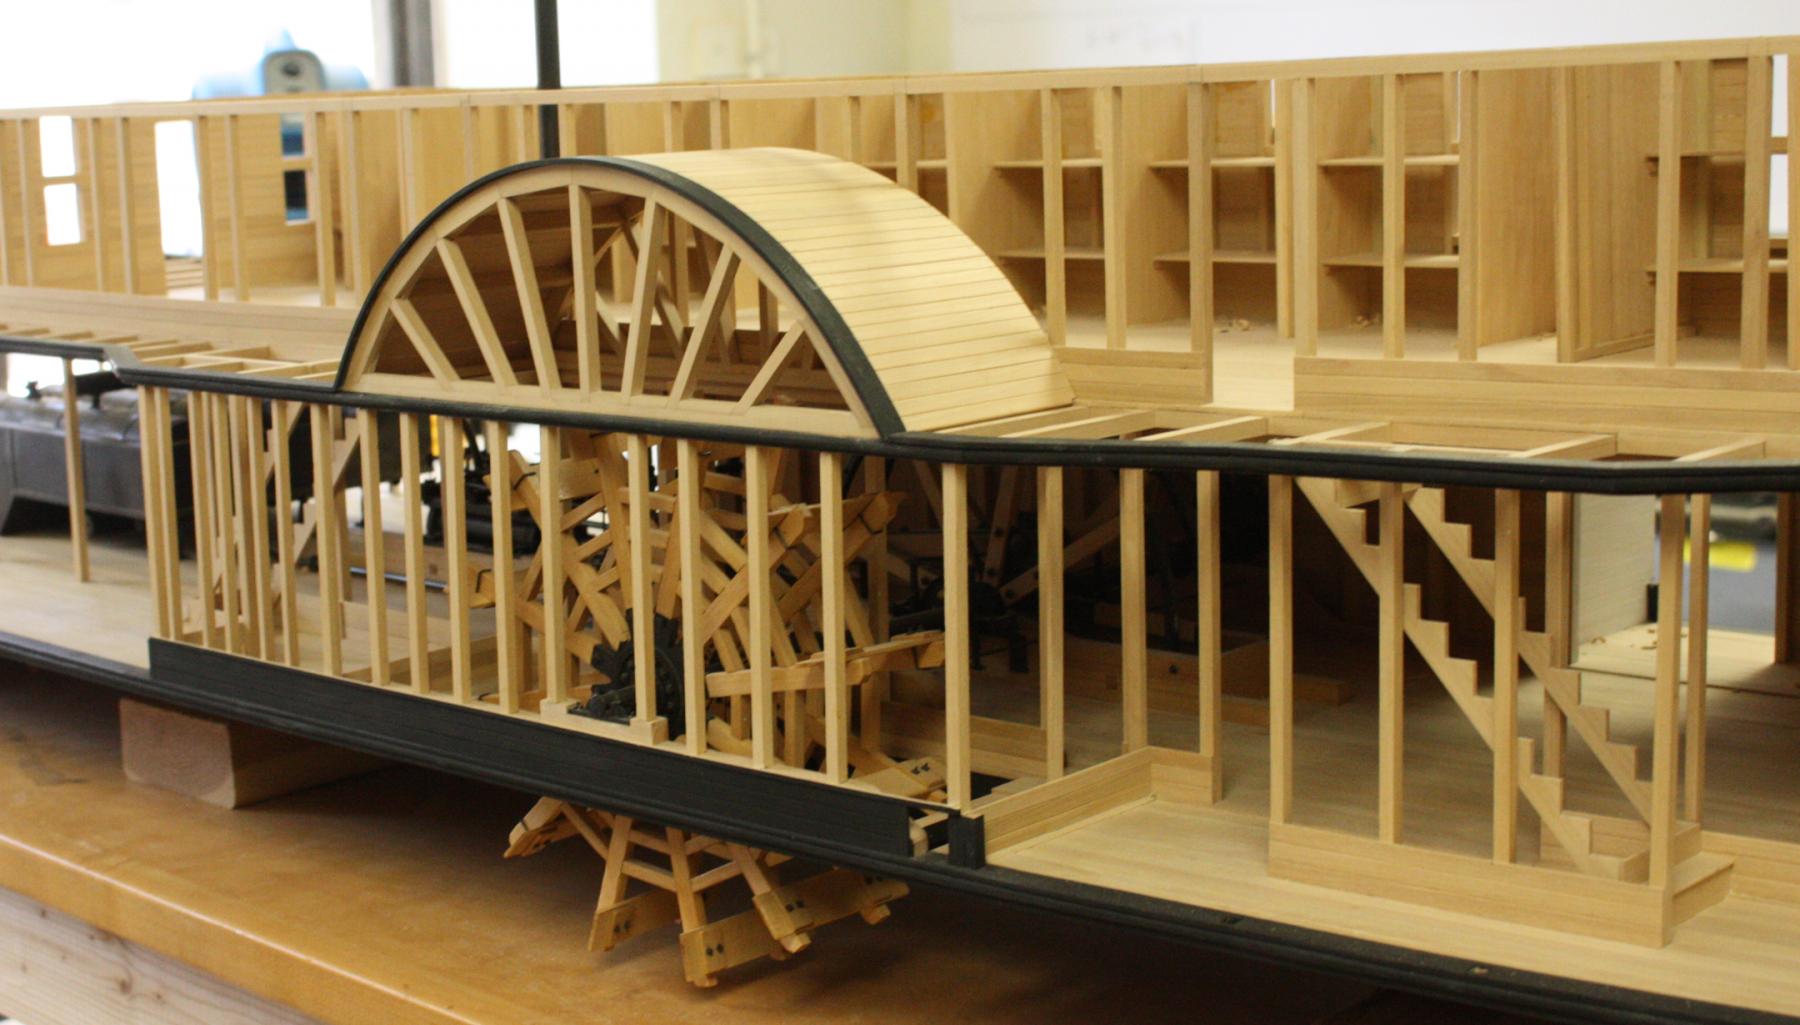
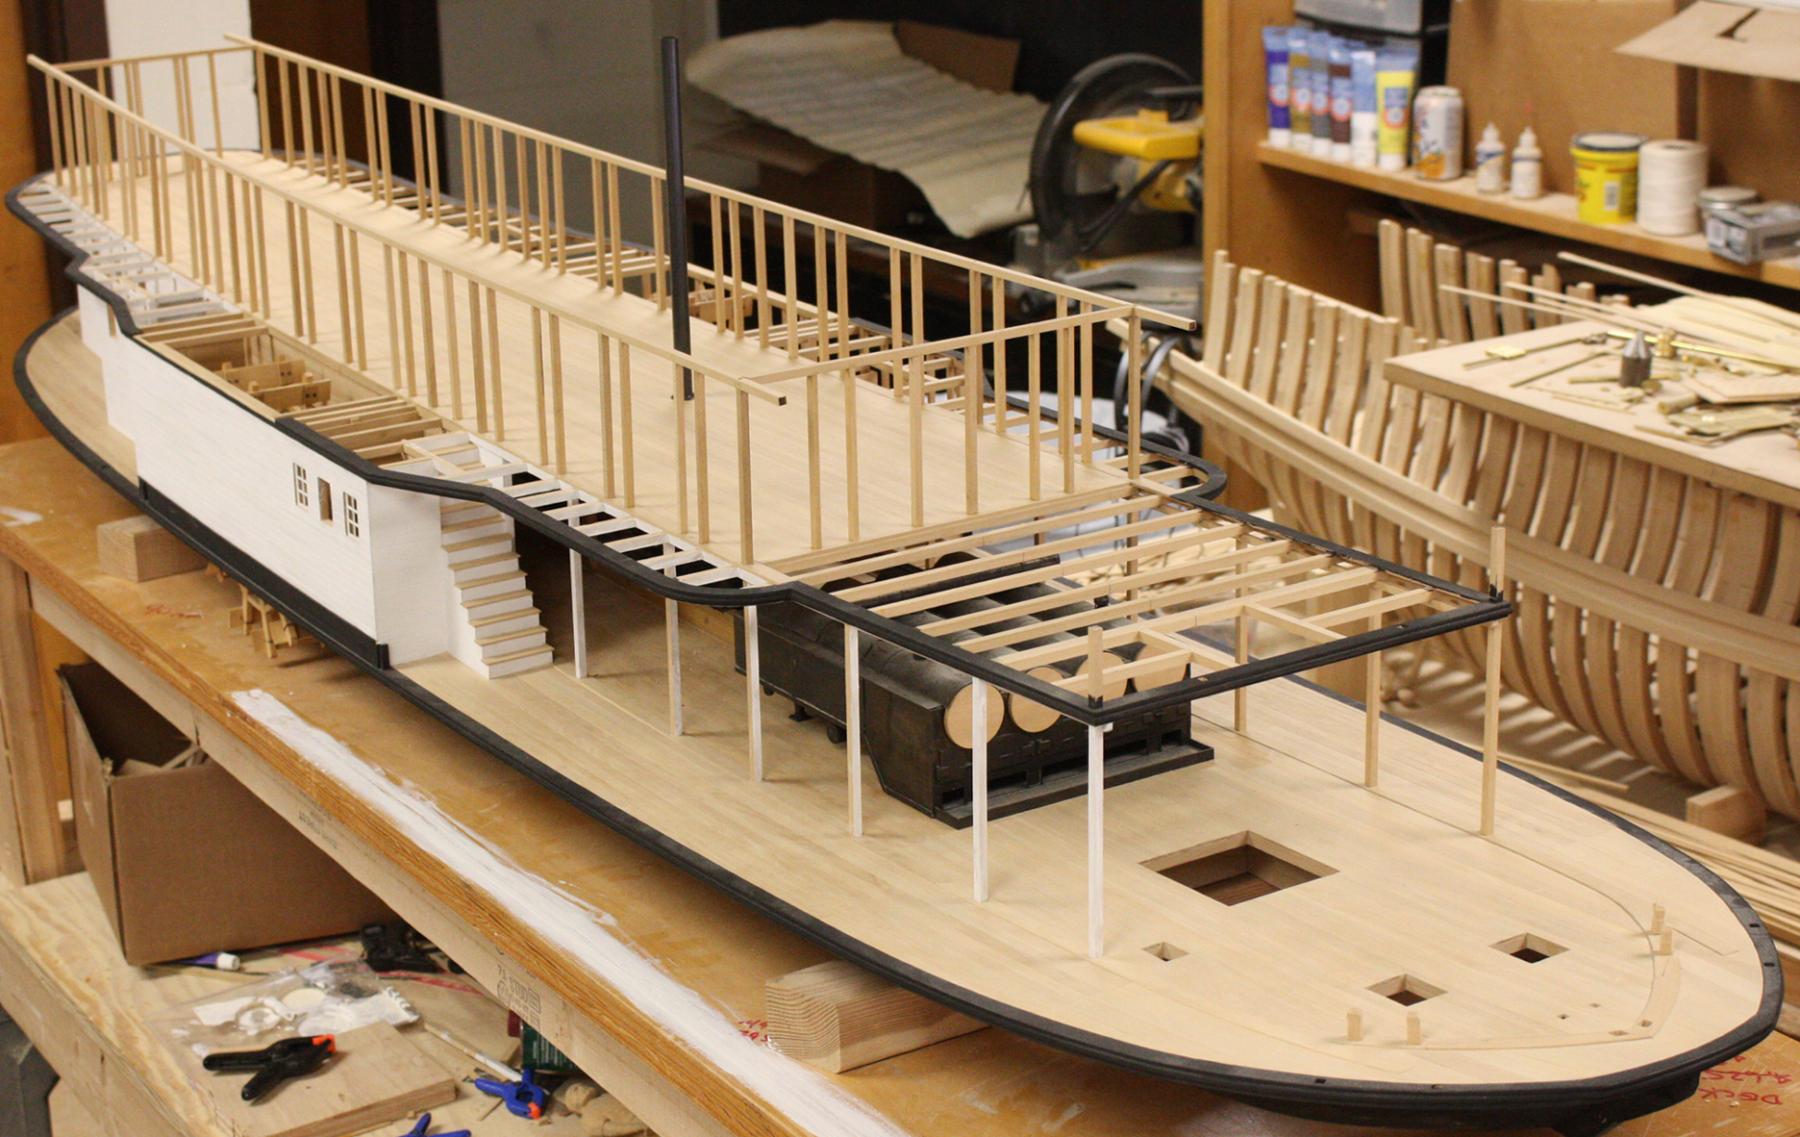
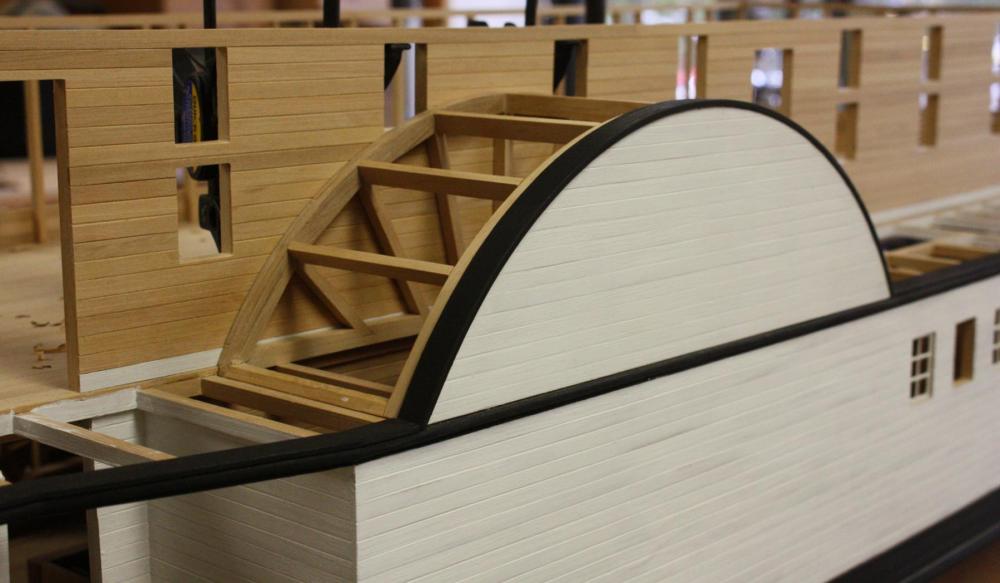
Thanks everybody, I really appreciate the kind words and comments. I thank all of you for making me feel so welcome here in such good company! I decided not to crop out my friends from Easter Island. A student in one of our conservation classes made them for me over 10 years ago. They've been watching over the room ever since. Carl, the indent is for a thin plank that will support the outboard end of the lateral planking that will cover the arch. The cap that runs along the circumference of the boiler deck will continue over the arch. It is wide enough to cover the outboard timbers of the arch eliminating a surface for the planking to sit on. The thin plank just provides a shelf for the ends of the planking. Your second question is a good one. The arch does look odd and even unnecessary considering the size of the paddlewheels. In the past I've looked at representations of side wheelers and have always wondered why this arc is so pronounced as compared to the radius of the paddlewheels. We know the the diameter of the paddle wheel and the forward and aft extents of the paddle box. Some clearance was necessary above the boiler deck. I'm wondering if they just picked a radius that was aesthetically pleasing to bridge the ends of the box. When I get a chance to speak to Kevin I'll get his ideas on the question.
-
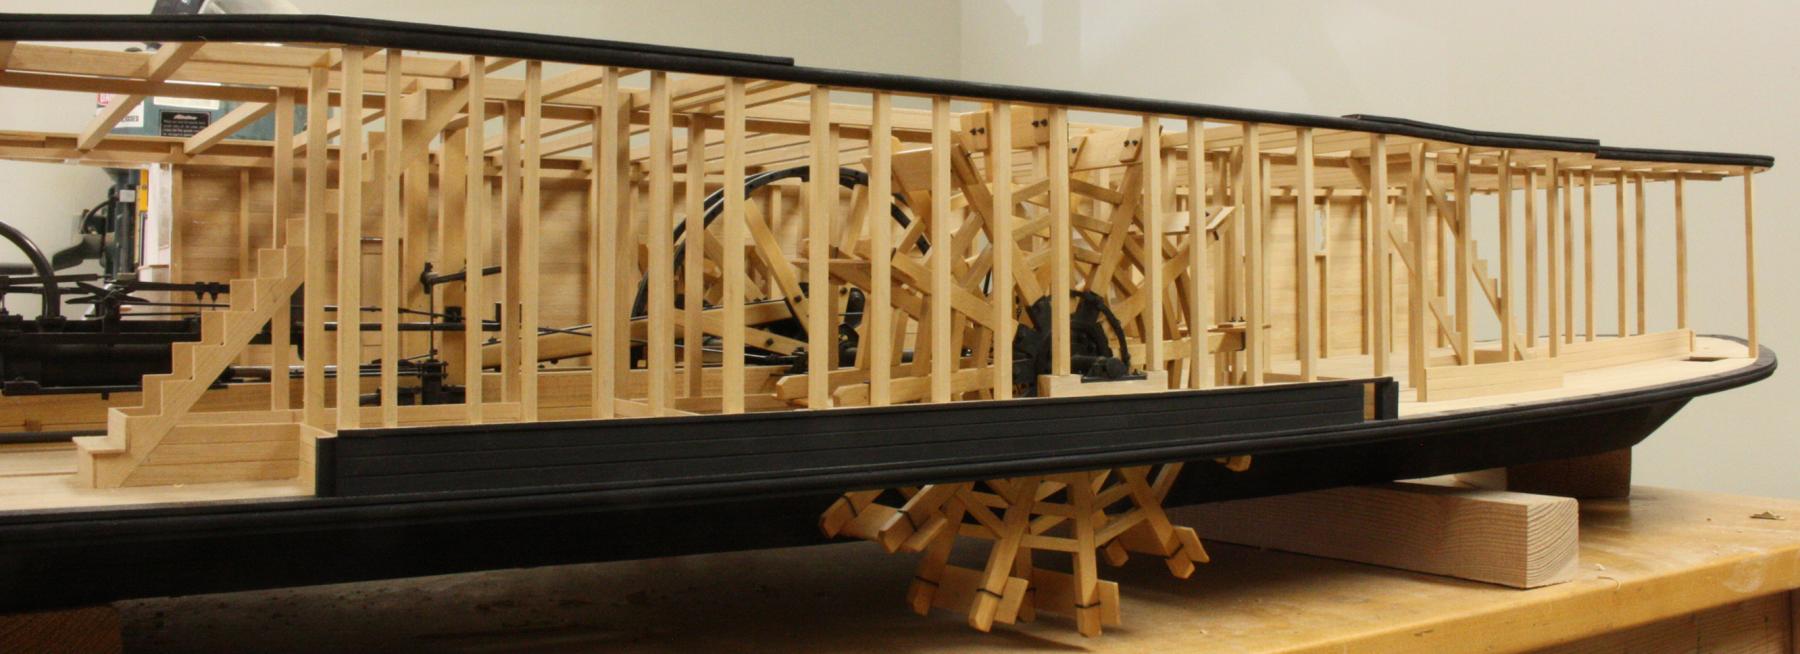
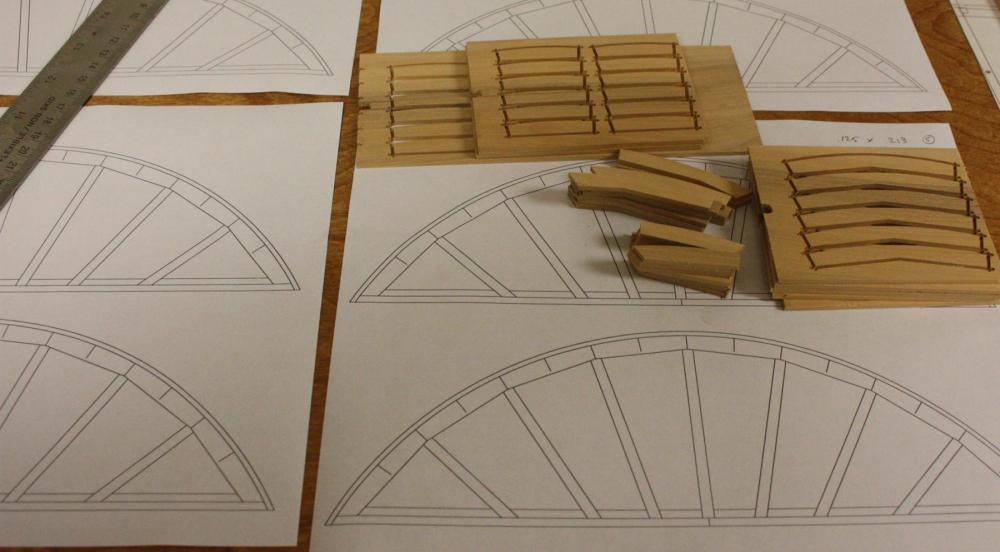
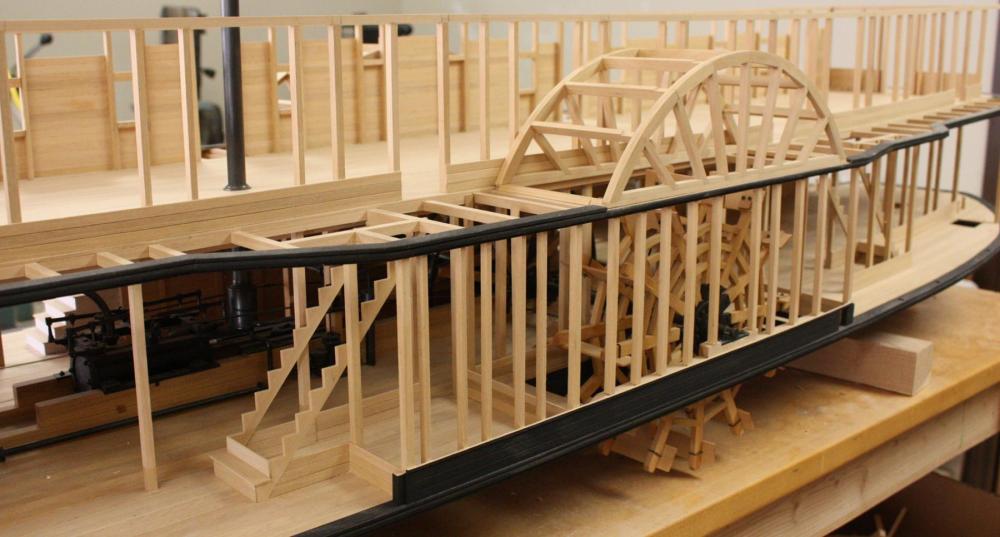
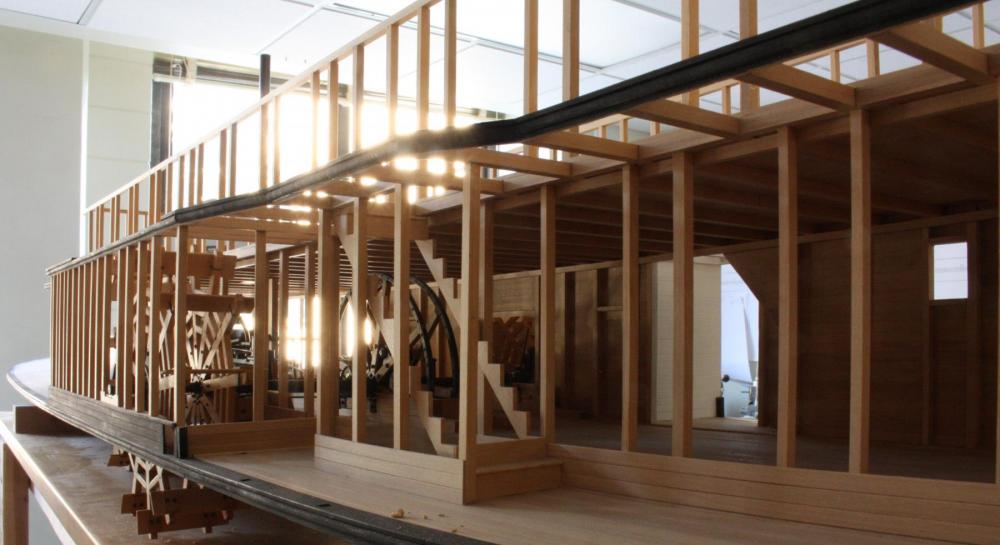
Thanks Patrick, albert, Keith and Pat, Keith, I look forward to seeing the sternwheeler! This week I was finally able to get around to the top of the paddle box. It's starting to look like a sidewheeler. I was able to cut all the pieces for the arches in about 2 hours with the mill. I don't know how long it would have taken by hand. I milled some of the segments double. These will be used on the planked side. It saves a little time and adds a little strength. Trying to keep everything square. The notches in the cross pieces are for a thin plank that will be used to support the ends of the lateral planking. Port side. Starboard side.


- 701 replies
-
- 32
-
-
I've always loved dioramas and your miniature take on it is wonderful. Ivanna is beautiful. I have four cats of various colors -- you've got me wondering if I could put their fur to good use. Nice work!
-
Wow! Your miniature joinery is just incredible. Your posts are always inspiring!
- 649 replies
-
- 5
-
-
- dunbrody
- famine ship
- (and 2 more)
-
Thanks druxey, Carl, Greg, Nils and Cathead, Greg, you are correct. That is La Belle #3. Much has been added to what we know about her since the last model and I'm hoping to incorporate it into the new model. It is being built for the department so it will have to wait until the contract stuff is completed. Cathead, I can't wait to see either. To tell you the truth, I'm really stumped. If I could go back in time and look at just one feature it would be the manifold that ties it all together. In later boilers, you have squared corners that transition into smooth curves. I have a feeling that these early boilers weren't so graceful. I'd like to find a solution that is simple but believable. Why couldn't this end of the boiler been surrounded by a bulkhead?
- 701 replies
-
- 10
-
-
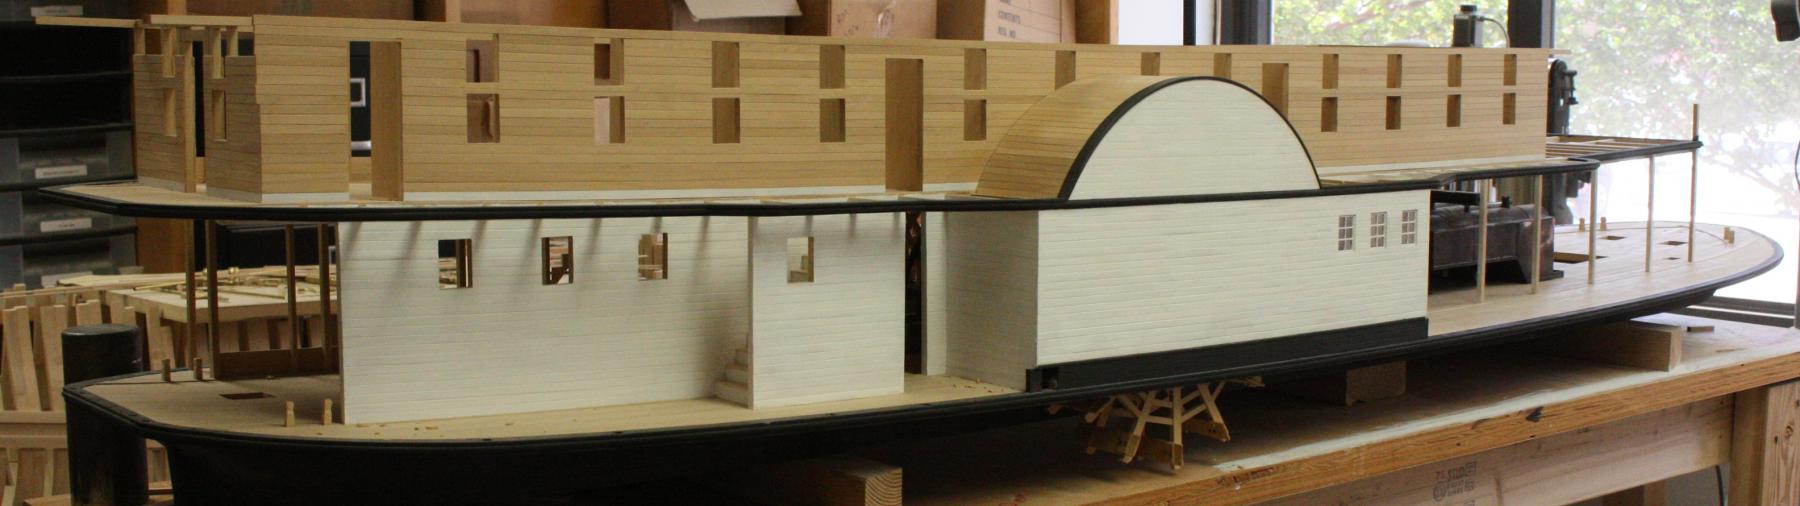
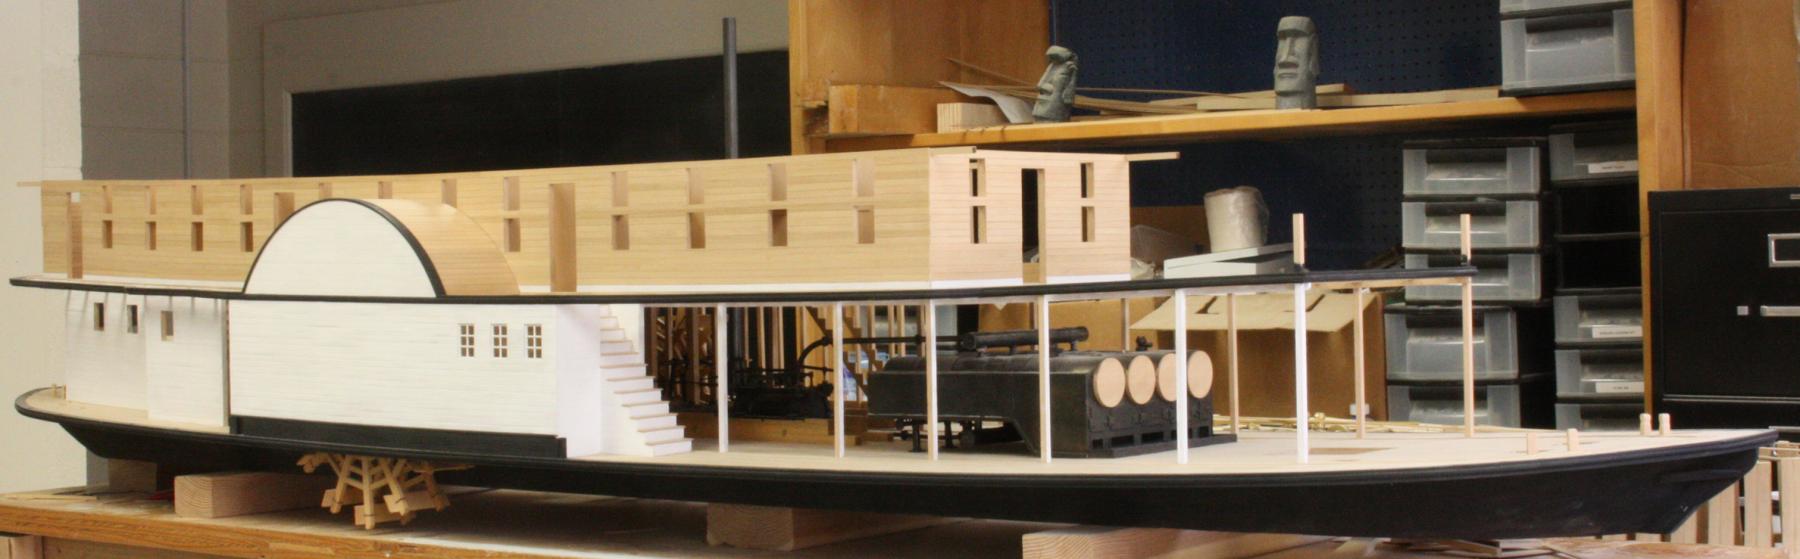
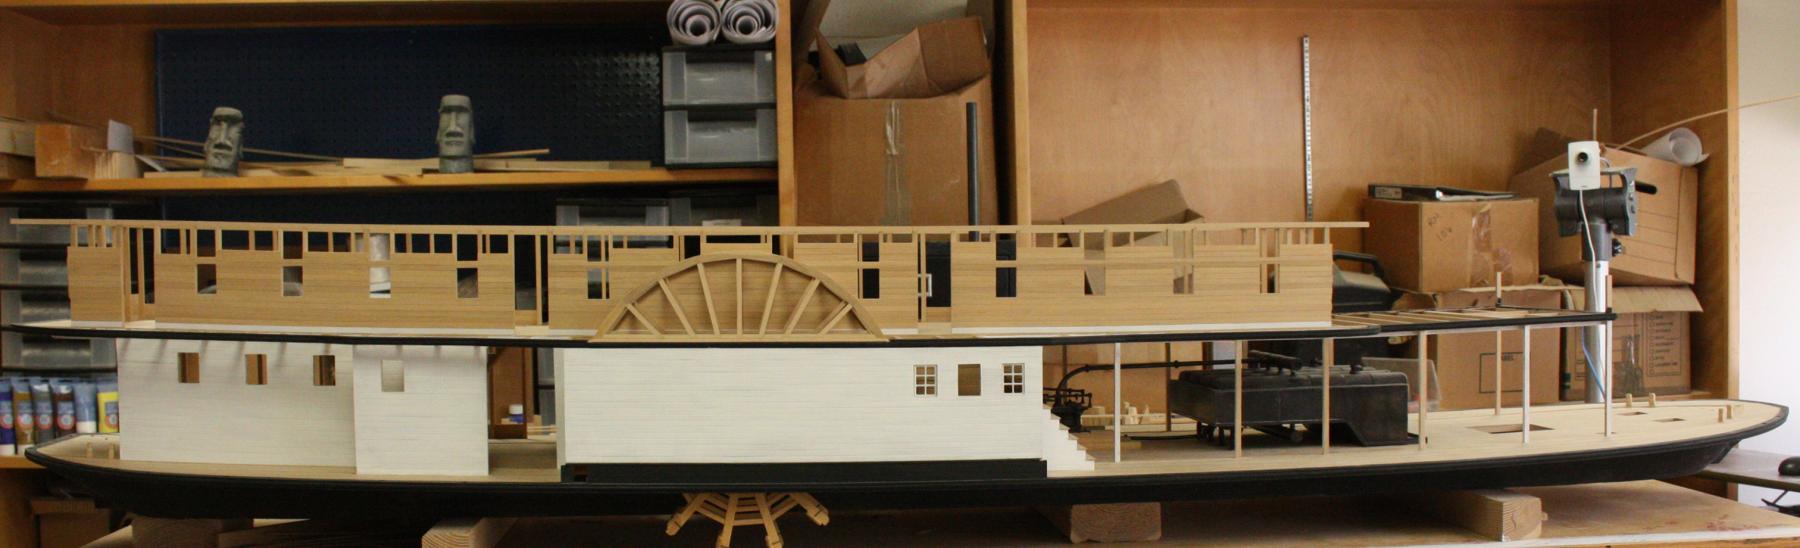
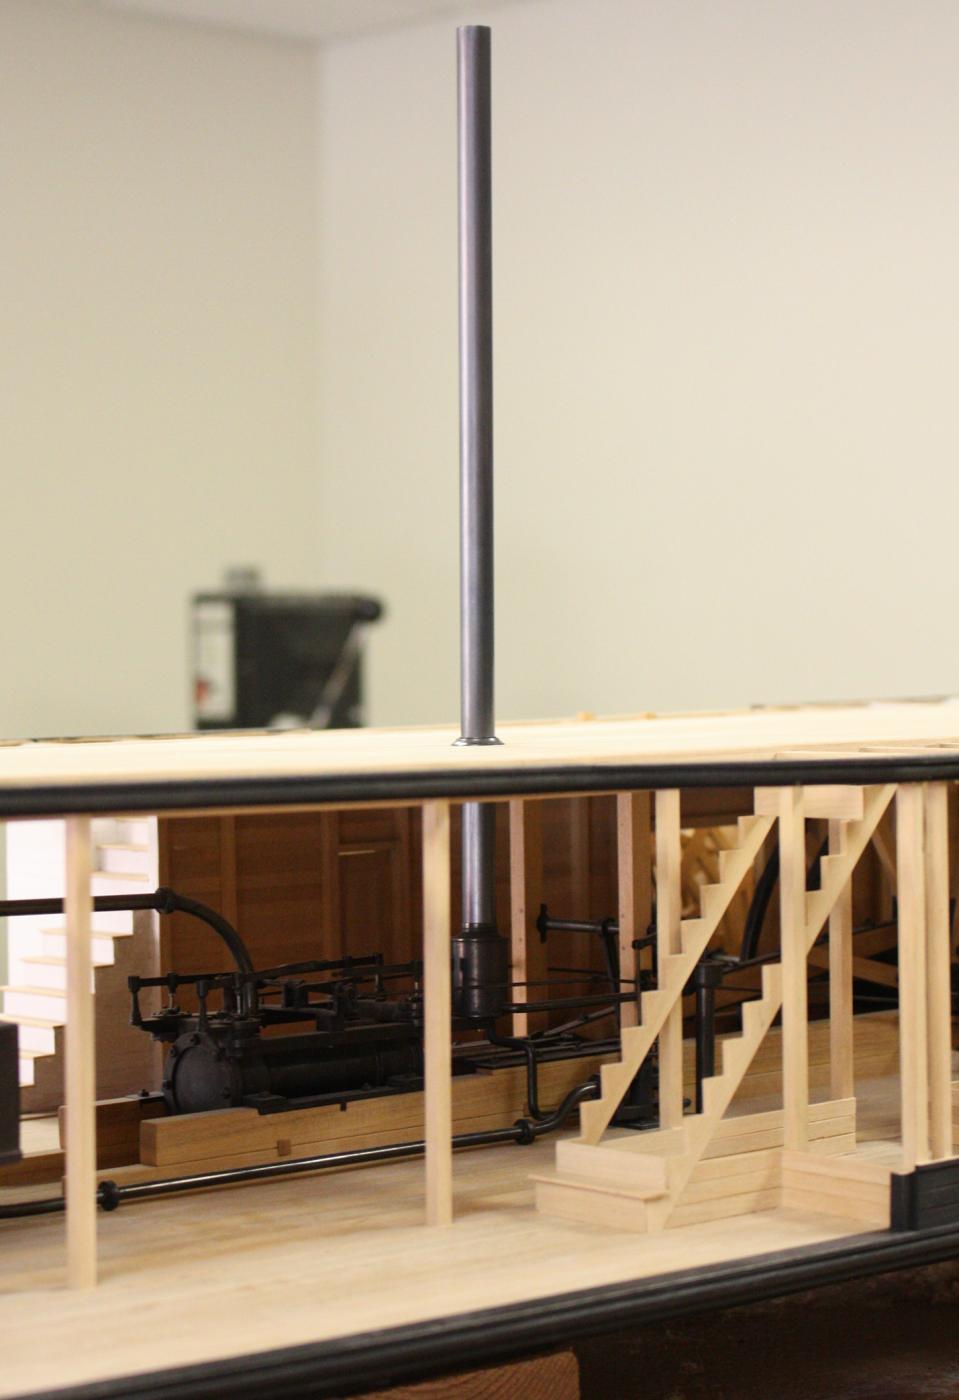
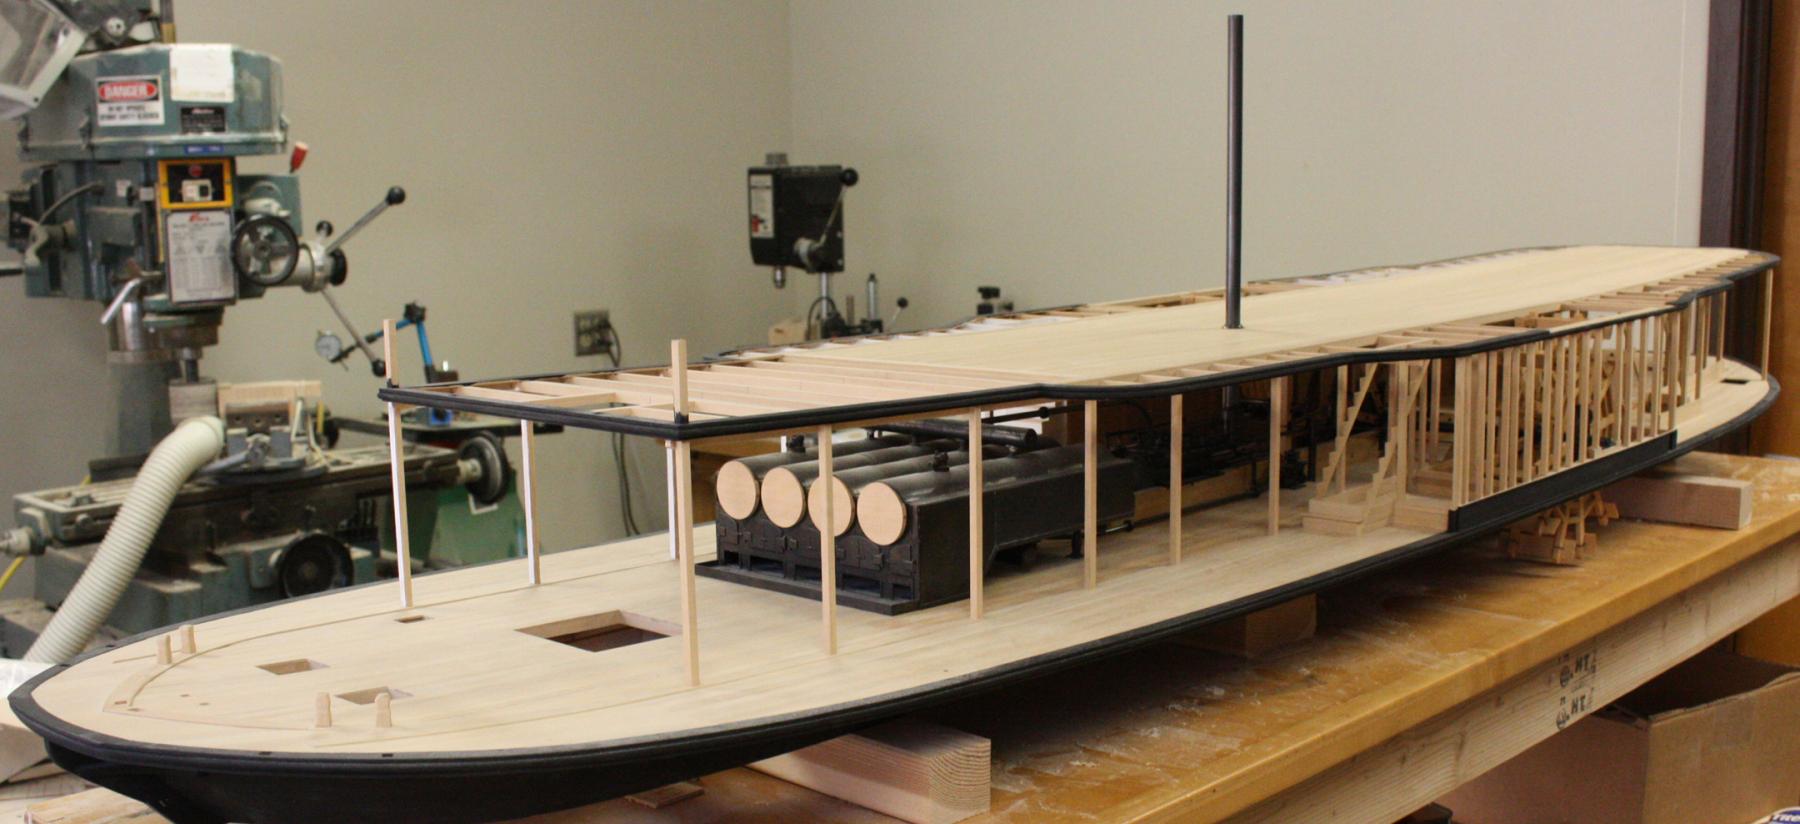
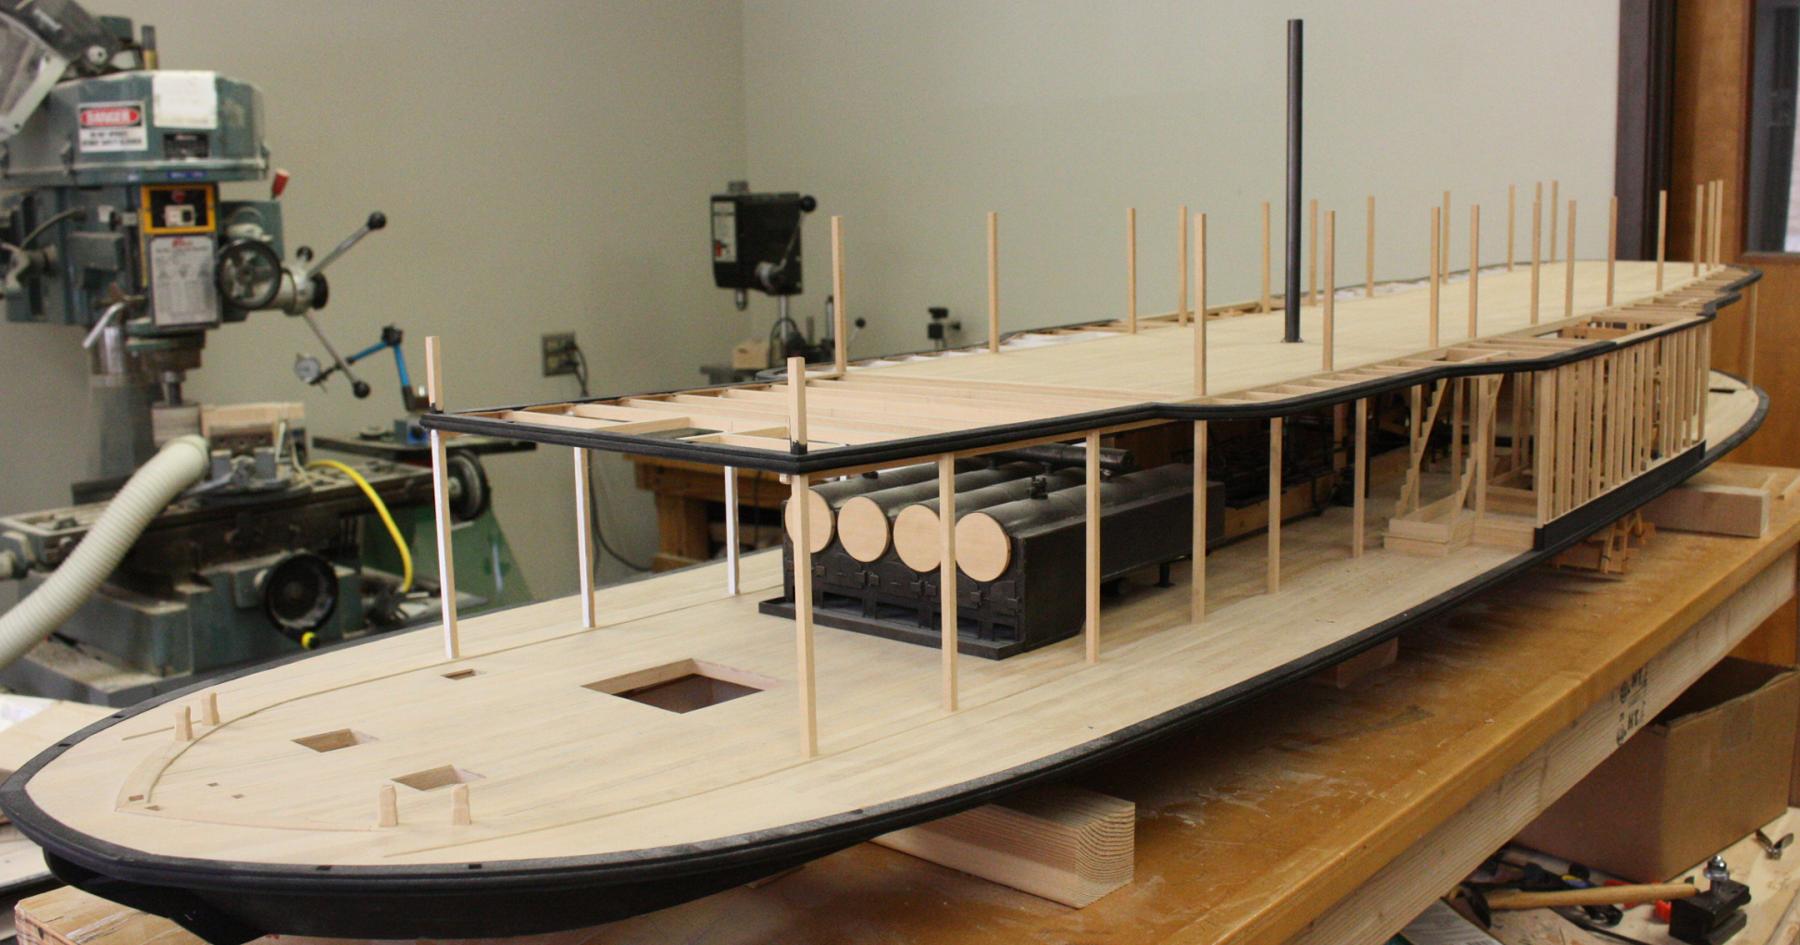
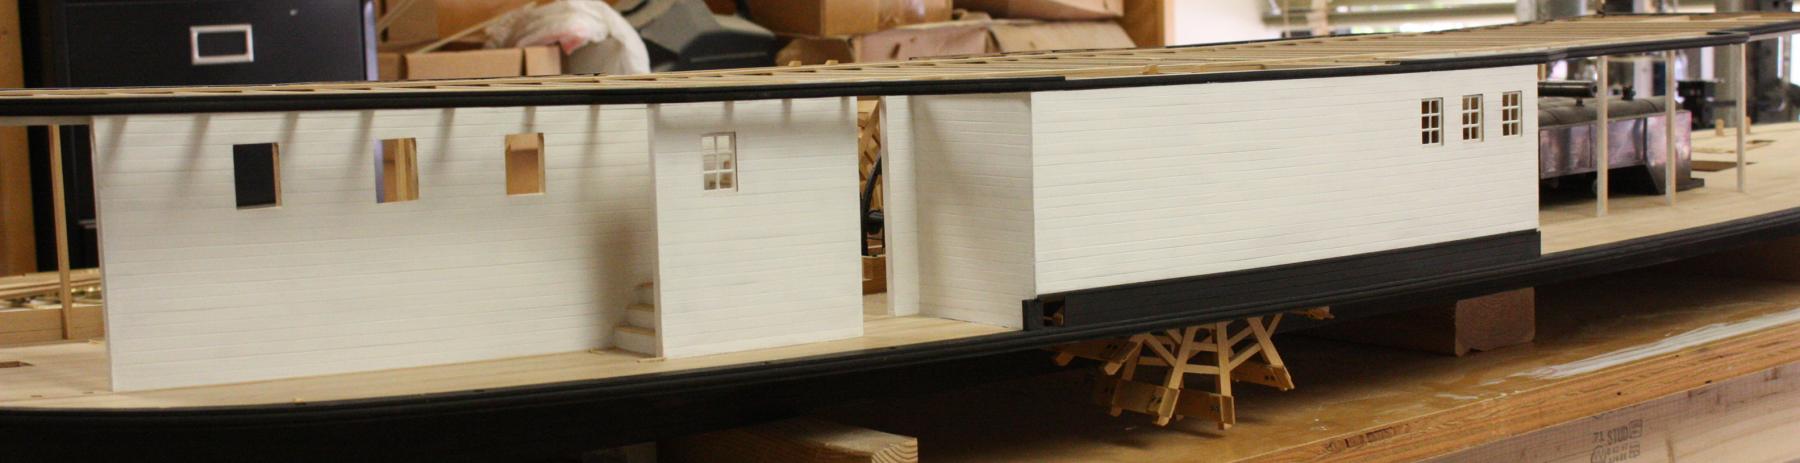
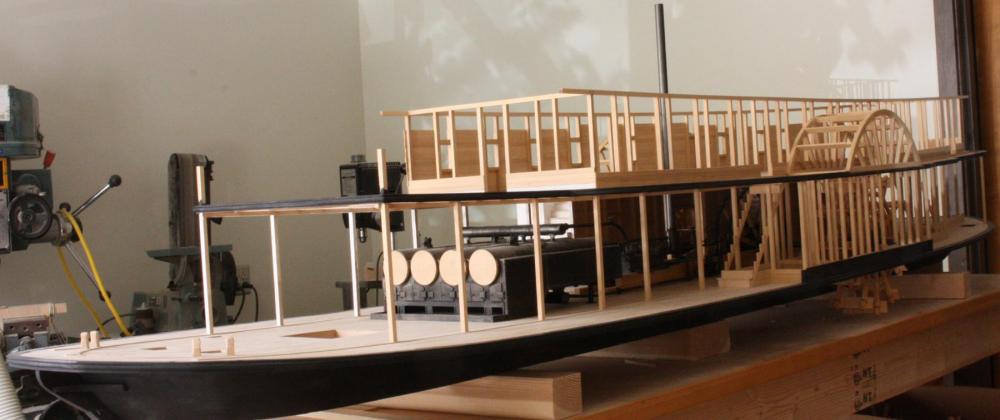
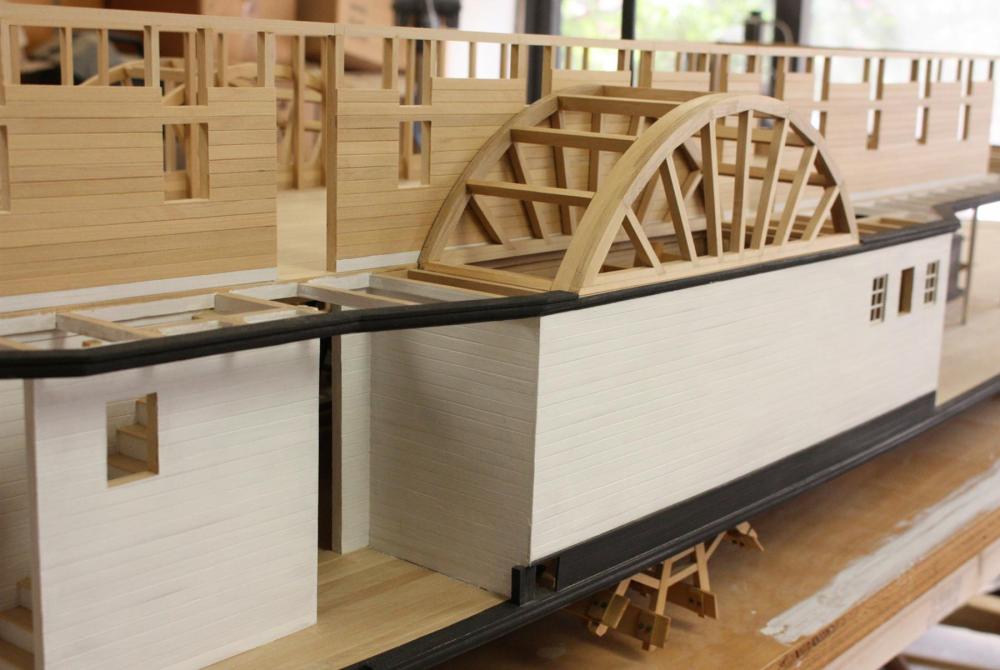
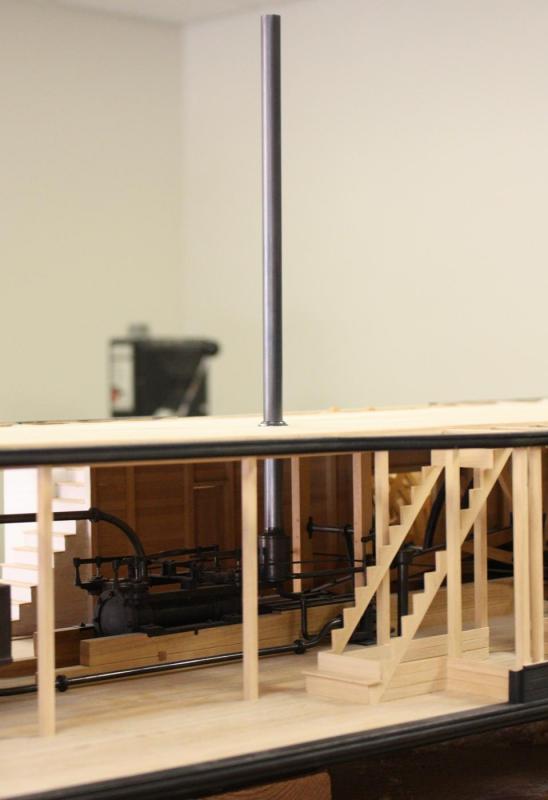
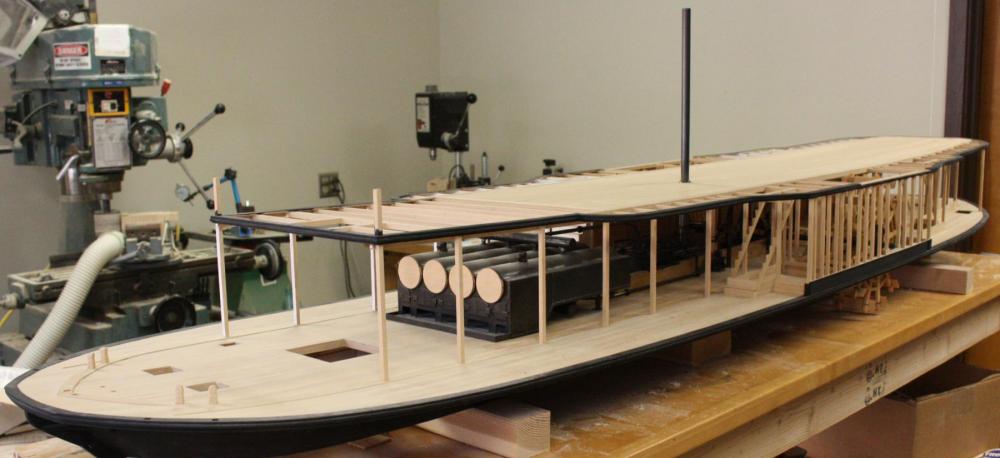
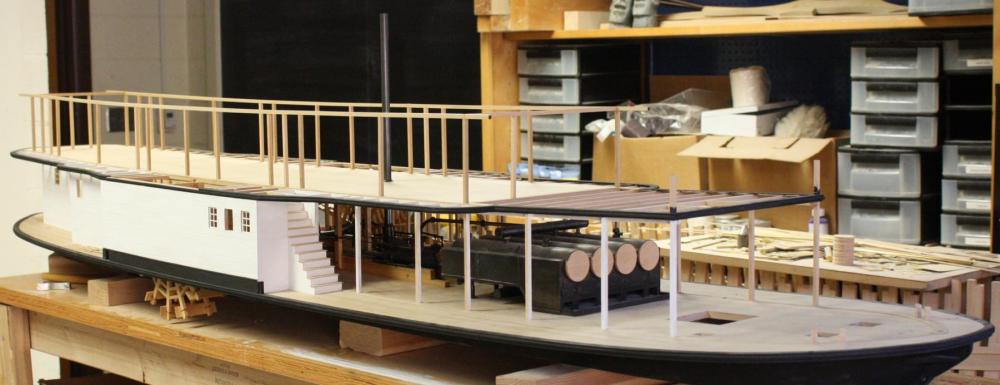
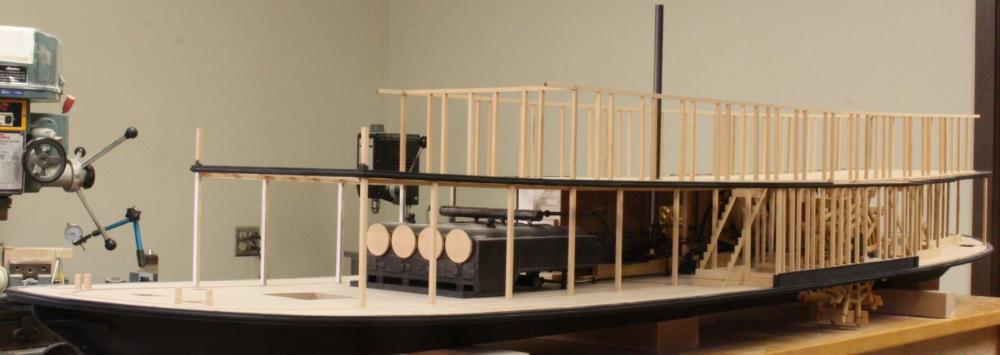
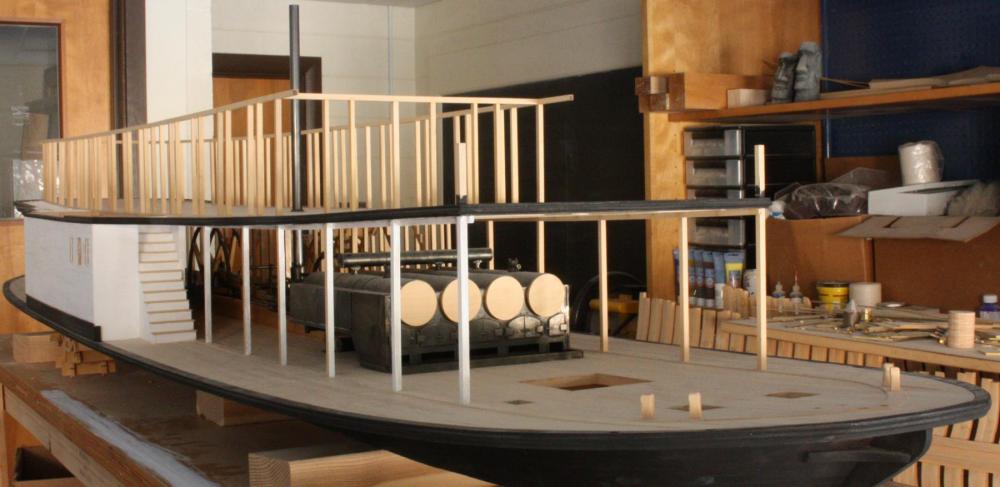
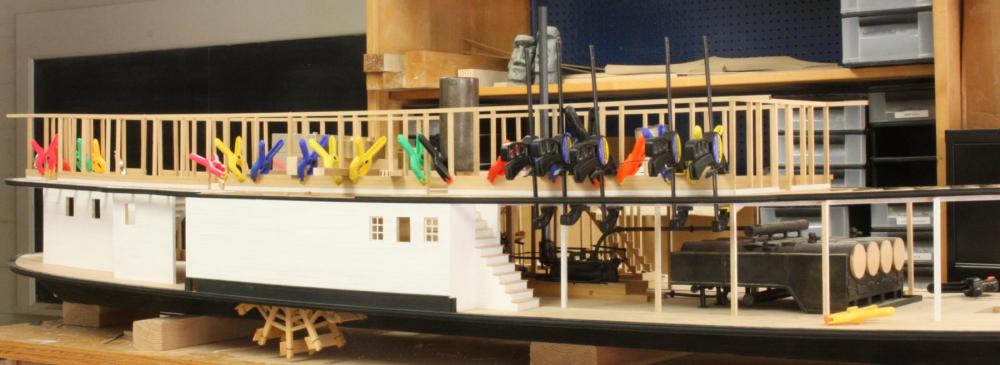
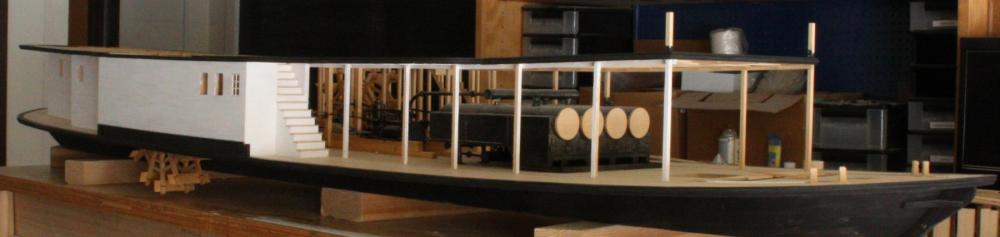
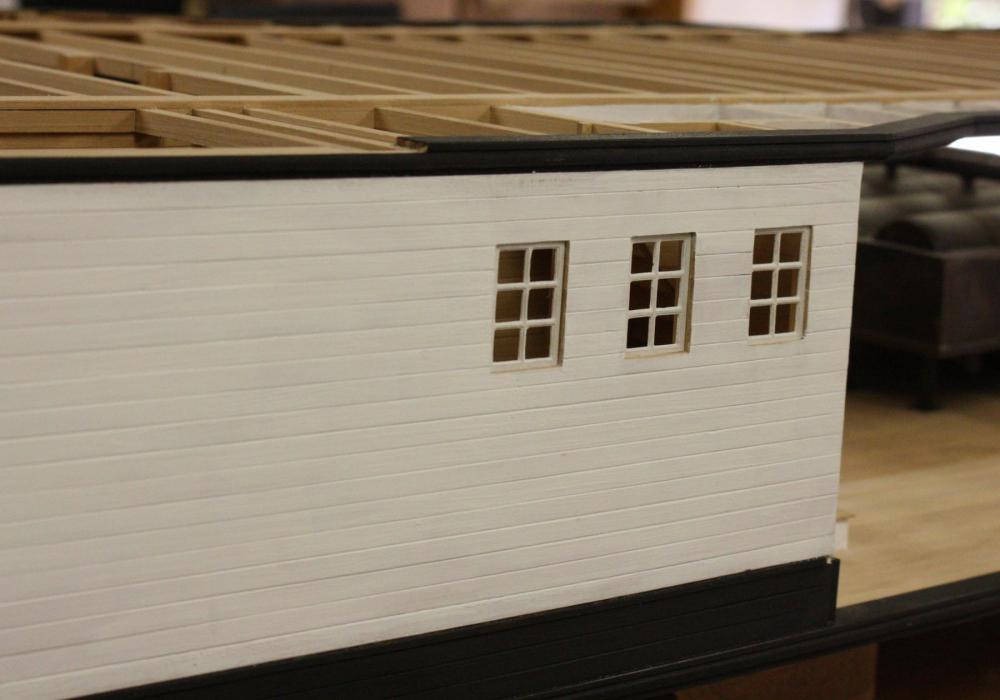
Hello, Sorry for the lapse in updating the build. The last two weeks have been plagued by a series of minor emergencies that have been keeping me pretty busy. On top of everything, the motherboard on my 12 year old computer finally gave out. With no CAM program, the mill has been sitting idle for two weeks. I now have a "new" 6 year old computer and I think I've finally tracked down all the software I had before. Back in business! I've finished most of the planking of the boiler deck and have started on the construction of the deckhouse. Steam scapepipe in place. Posts going in. These were the only posts notched over the deck beams. The rest will be lightly notched into the cap. Top plate installed. Intermediate posts to frame the windows. I decided not to run the deck planking all the way forward at this time. Instead I placed a lateral cap across the deck. This brings the deck up to the same height around the entire circumference of the structure making the side planking a little neater. It also allows me to hold off on installing the chimneys. I'm still trying to figure out the transition. I have to hold off on planking the side walkways as well. The curved tops of the paddleboxes will have to go in first but, these can't be added until the sides of the deckhouse are planked. I'll complete all this next week. Final photo of Fridays progress. Lowest four strakes of side planking in place.


- 701 replies
-
- 34
-
-
Beautiful druxey! It was a pleasure watching her go together! I look forward to the book and your next build!!
- 641 replies
-
- 2
-
-
- greenwich hospital
- barge
- (and 1 more)
-
Looking good Grant, You and Gerhard and definitely getting me interested in RC!!
- 339 replies
-
- 6
-
-
- dumas
- Chris-Craft
- (and 3 more)
-
Thanks everybody! Cathead, I'm still not sure how to handle the chimneys. It isn't very well represented any any of the contemporary drawings and paintings that I've seen. The best that I've been able to come up with is two options. The first is just a simple flat metal ring around the tube at deck level and the second is an angled skirt around the tube a few inches above the deck. The second method I've only seen in later vessels. It seems like the builders of Heroine always opted for the simplest arrangements so I'm leaning towards the first idea. I'd love to know if you have any ideas on how it was done. Luckily, the forward end of the boiler deck will be the last to be planked so I still have some time to consider other ideas and opinions. Kurt, I'm having a lot of fun seeing what the cnc mill can do with the millwork. I wasn't sure how the horizontal (cross grain) areas of the frame were going to hold up. The boxwood cut very nicely. The next step will be cutting all the external doors. Hopefully, I'll get to them in the next week or two. Thanks druxey, Tom, Mark, and Grant for your comments and everyone else for your likes. Finally, the kids are in bed and I can settle down with a glass of wine and enjoy everyone else's work.
- 701 replies
-
- 13
-
-
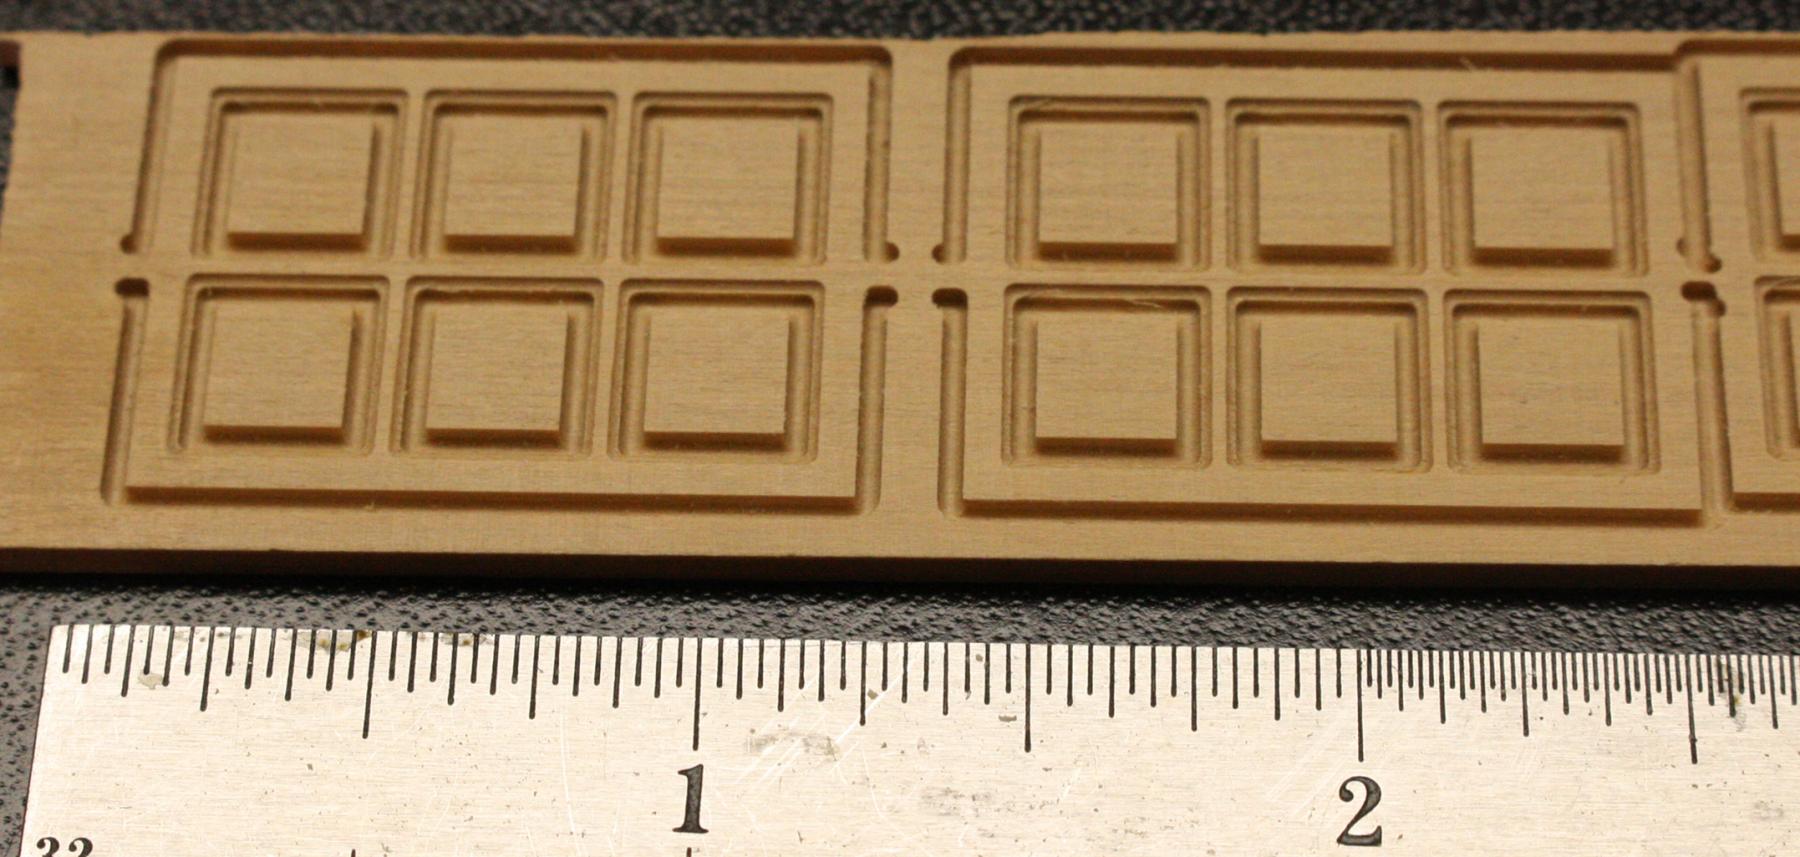
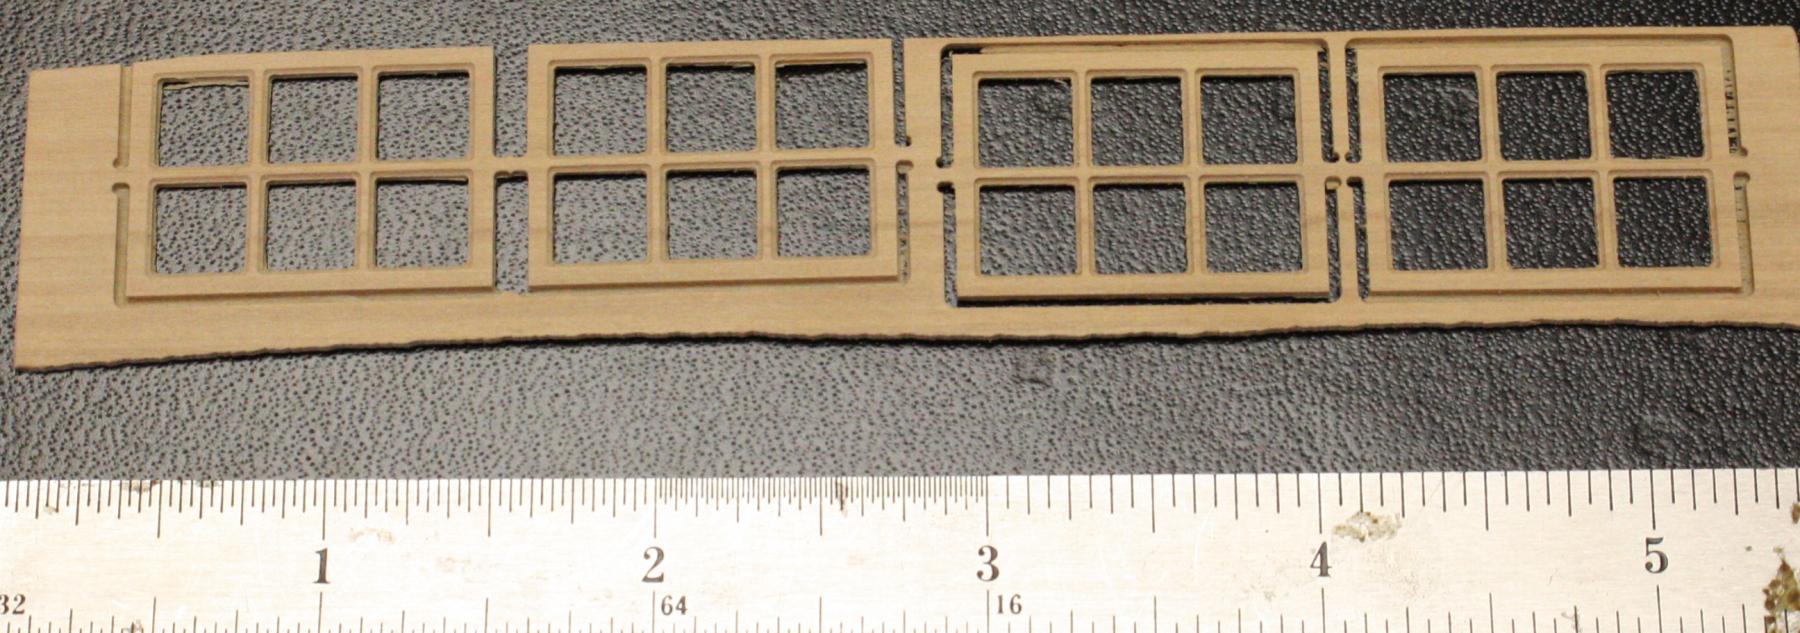
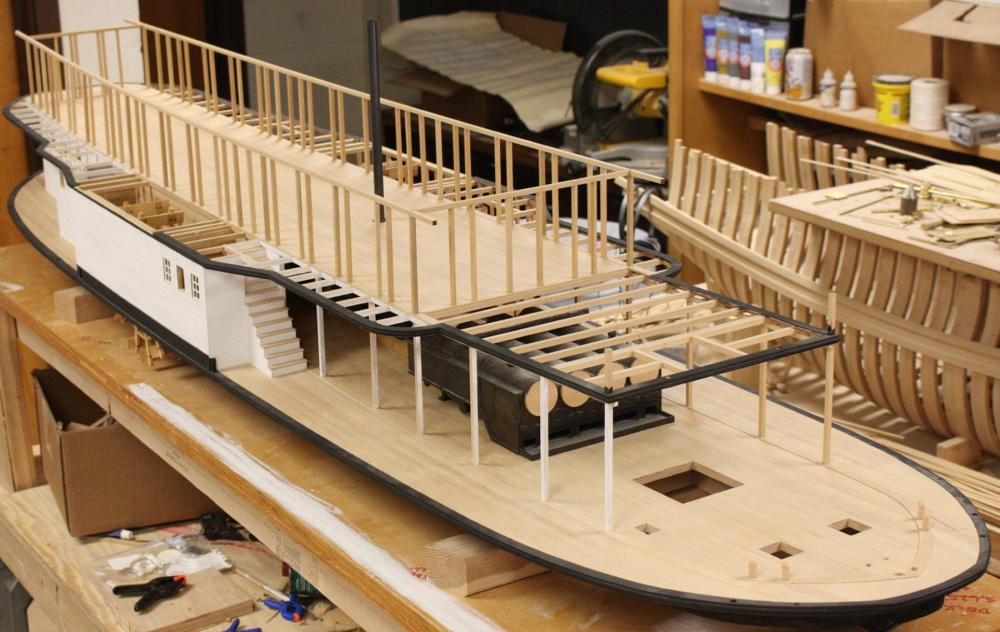
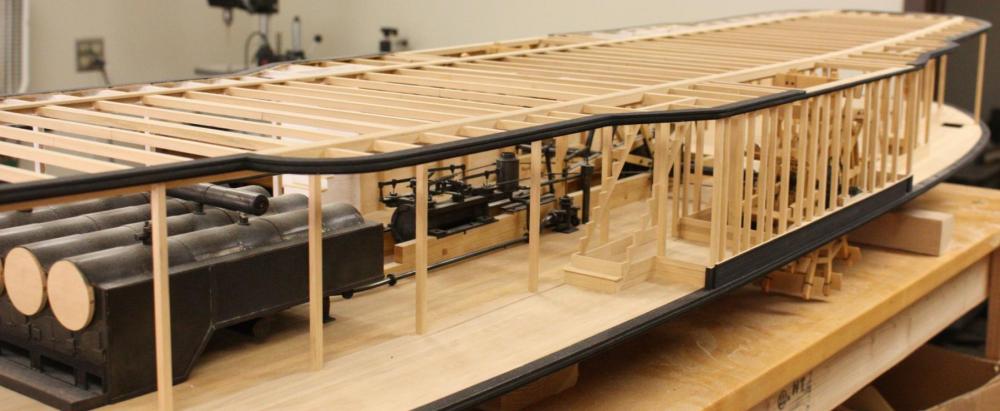
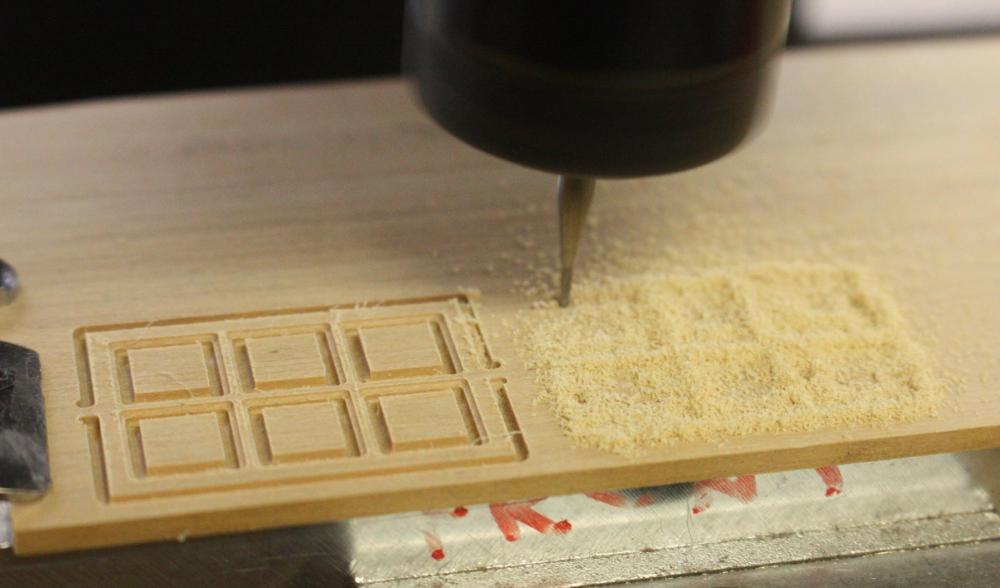
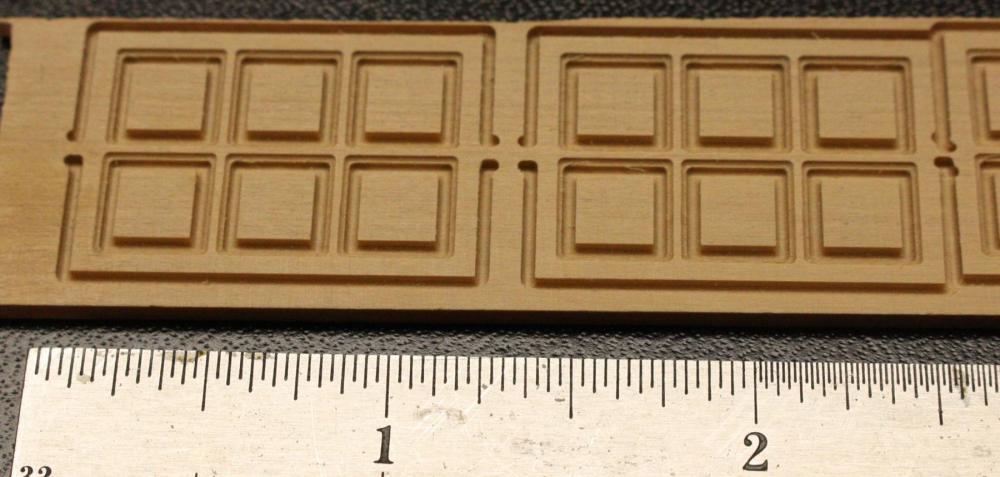
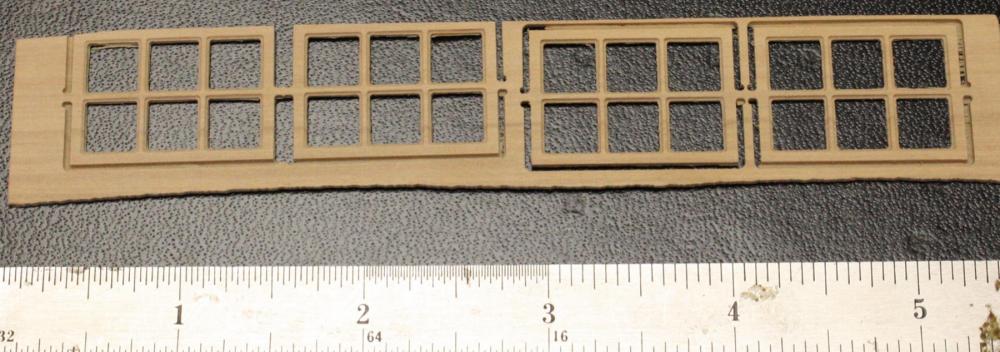
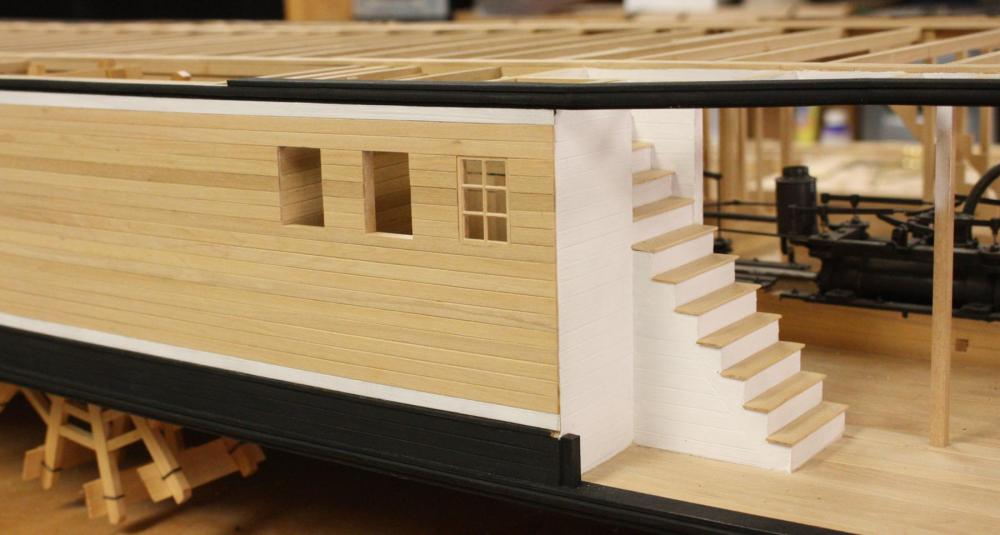
Finally, the main deck structure is framed and planked. Just a few more details before moving to the boiler deck. Port side framing. I just noticed that I haven't finished the framing of the outhouse at the stern. Milling the window frames. The mill is a 1 mm ball nosed mill. After milling, I took the back side off with the thickness planer. I'll clean it up and square the corners with a file. Test fit of the first frame. The windows will ge glazed with mica as per druxey's tip. The mica will be sandwiched between a pair of window frames. Starboard side painted -- still need a few touch-ups. Test fitting a couple more windows.


- 701 replies
-
- 36
-
-
Your right, my son is really into Lego and Minecraft but I can't wait to get him involved with AutoCAD. Just so few still interested in model kits anymore. Our Hobbytown closed down about a year ago - not enough business to keep them going. I have to admit that I probably would have gone in a different direction if I had had 3D printing at his age but I'm determined to get my son involved with woodworking and metalworking.
- 701 replies
-
- 12
-
-
Thanks Pat, I remember the good old days when I had a real hobby store down the street that carried just about everything I needed. i know admiralty is imported so it is a little more difficult to get but, anytime I need anything, I have to order it and wait a few days. Makes it difficult to experiment with different products. I can't believe the college town I live it doesn't have a proper hobby store.
-
Always amazed by your precision!! She's coming along quickly! Beautiful Frank!
- 649 replies
-
- 5
-
-
- dunbrody
- famine ship
- (and 2 more)
-
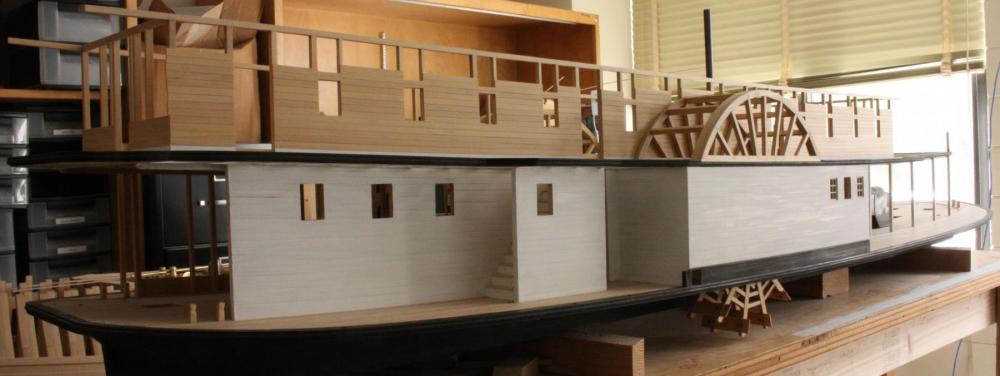
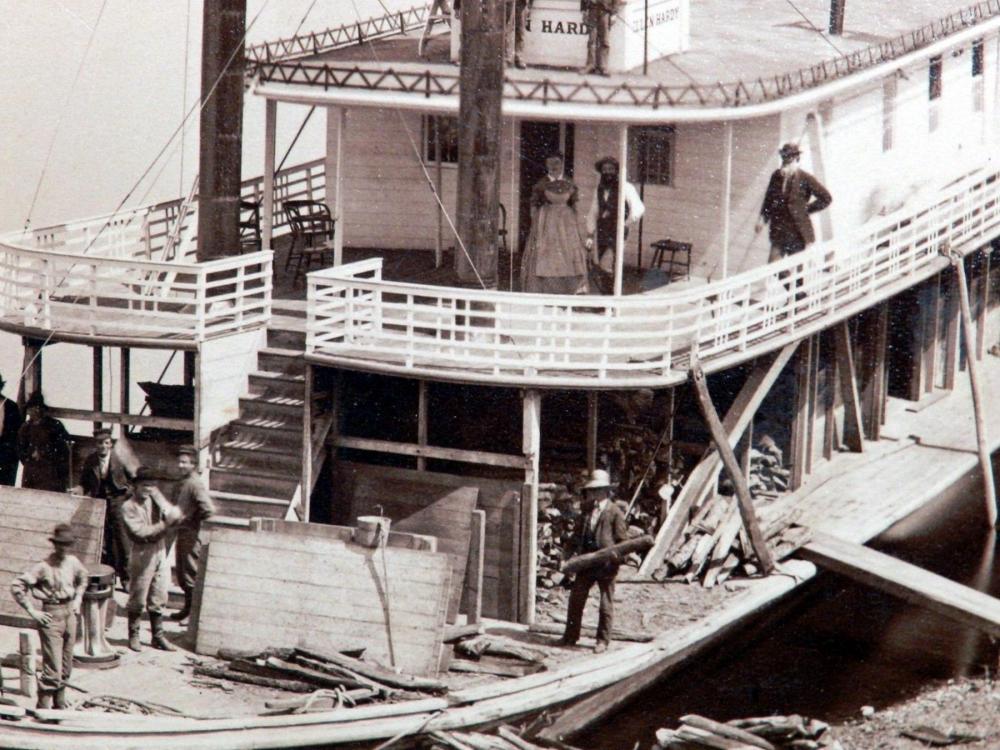
Thanks everybody, I'm sorry that I didn't get a chance to respond sooner. The family spent the day swimming with at the inlaws house. It was nice to come back to your encouraging comments. Bob, I finally decided on the Ronan flake white. I wanted to try Admiralty but, it only came in sets of colors and I would have needed a couple sets to get enough white. I bought a bottle of Tamiya and it gave nice coverage but the water base penetrated the wood and with the long strakes of unsupported planking I was afraid there might be some flexing. The ronan is semi paste but with a little mineral spirits and a soft brush it covered well with two coats but still gives a whitewashed look. I used the photos below of the Ellen Hardy as an example of the effect I wanted. I think I will still use the pastels to give it a weathered look. Greg, Yes the edges of the planks are chamfered. The original planks were 5 inches wide including a 1/4 to 5/16 inch tongue leaving about a 4 3/4 inch face with about a 1/4 inch bevel on each side. The inner face had no bevel.

- 701 replies
-
- 19
-