

CDW
-
Posts
7,719 -
Joined
-
Last visited
Content Type
Profiles
Forums
Gallery
Events
Posts posted by CDW
-
-
2 hours ago, king derelict said:
Beautiful work Craig. The detail is exquisite.
Alan
Thanks, Alan!
- mtaylor, Canute and Old Collingwood
-
 3
3
-
1 hour ago, Javlin said:
Craig I am not that big into cars these days been involved with them for over 40years between machinist/parts but that CF you pulled off is cool as heck.Now lets go the issue of the Hawk ...how did you get him to sit still for three shots? offer a free squirrel?steak?

😅
My wife took the photos. He was staring at her. She had him hypnotized, I guess.
- mtaylor, Old Collingwood, Jack12477 and 1 other
-
4
-
-
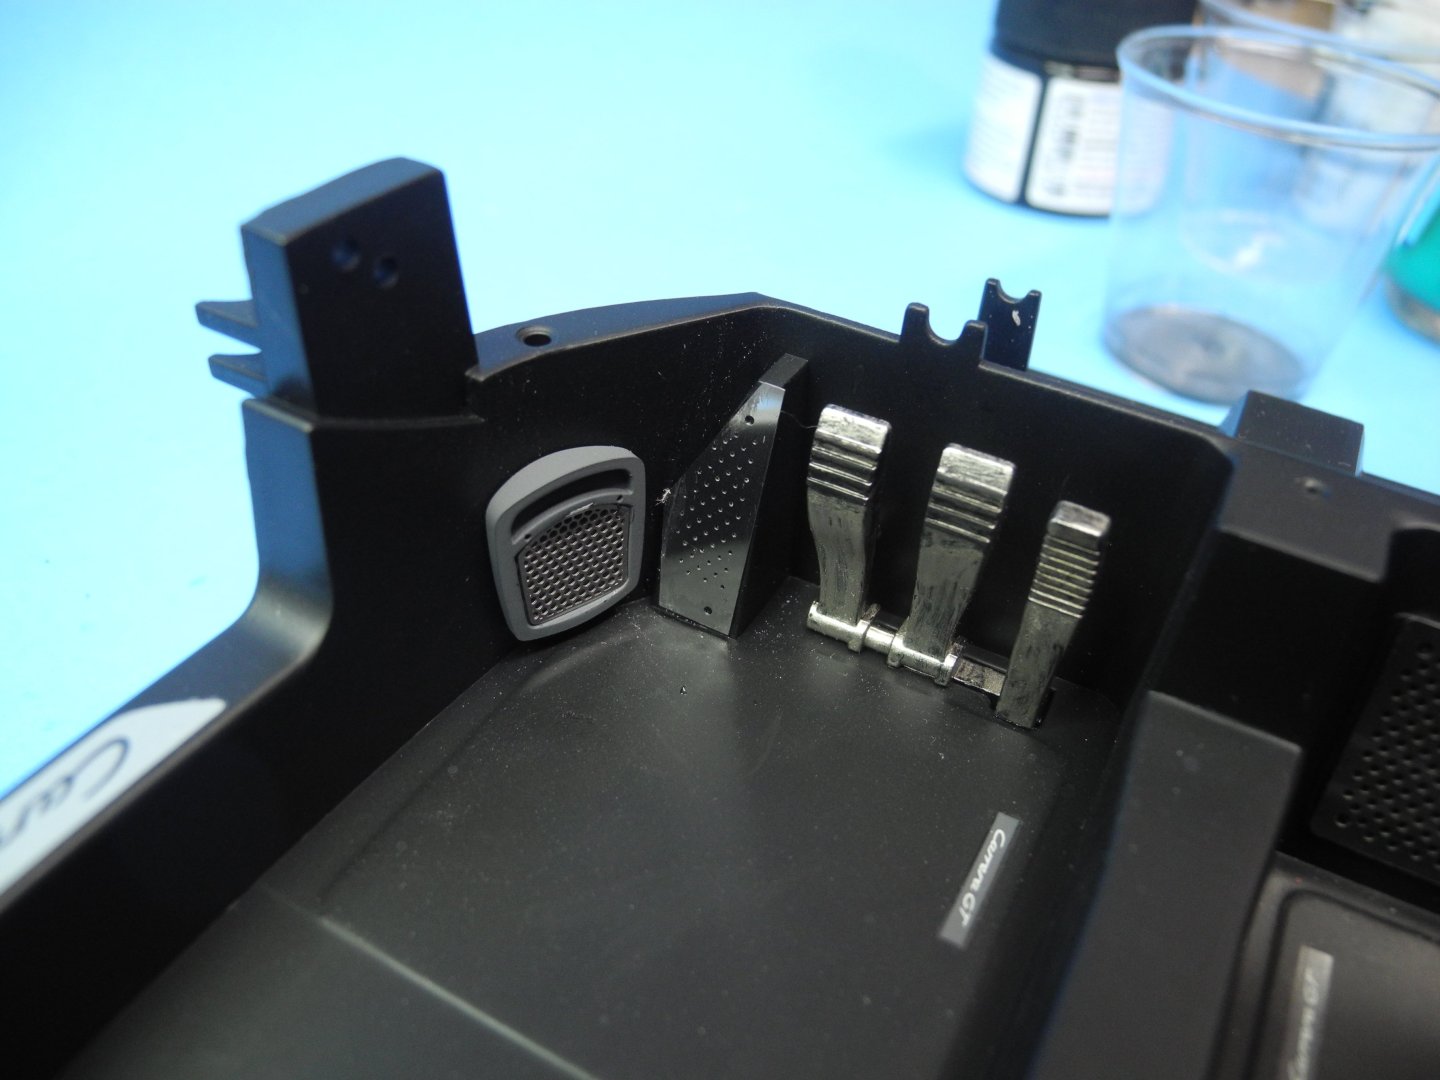
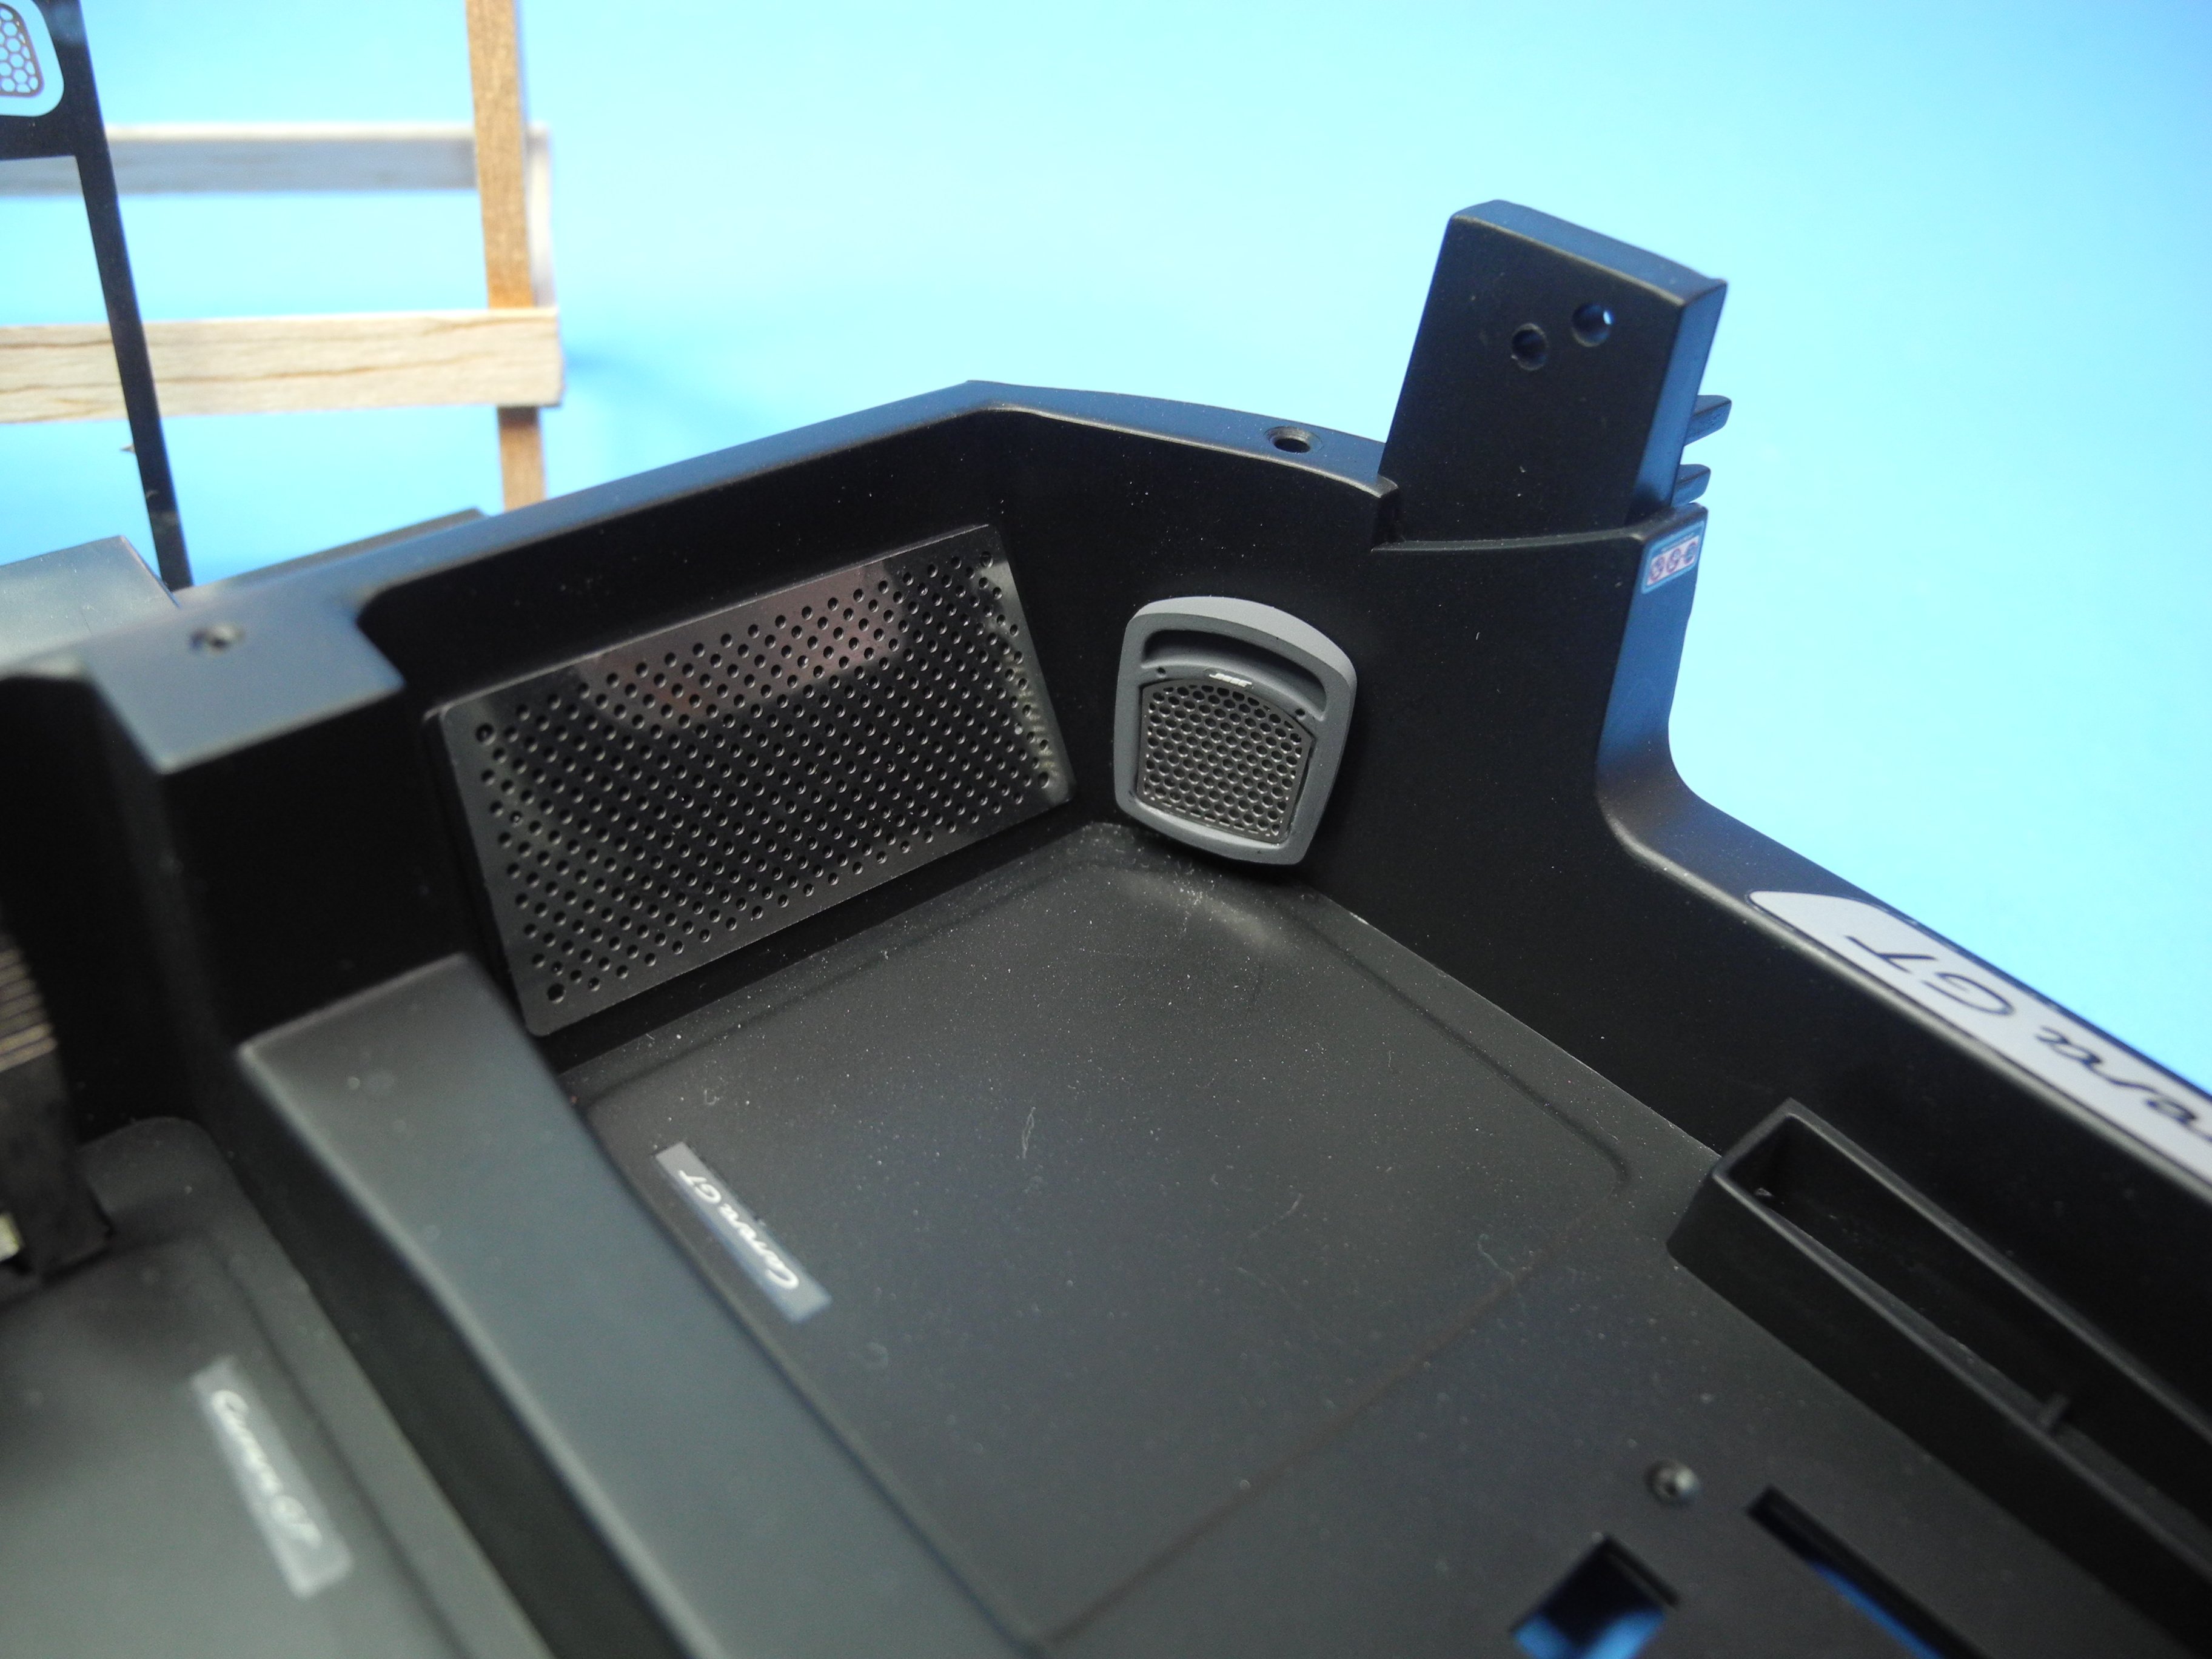
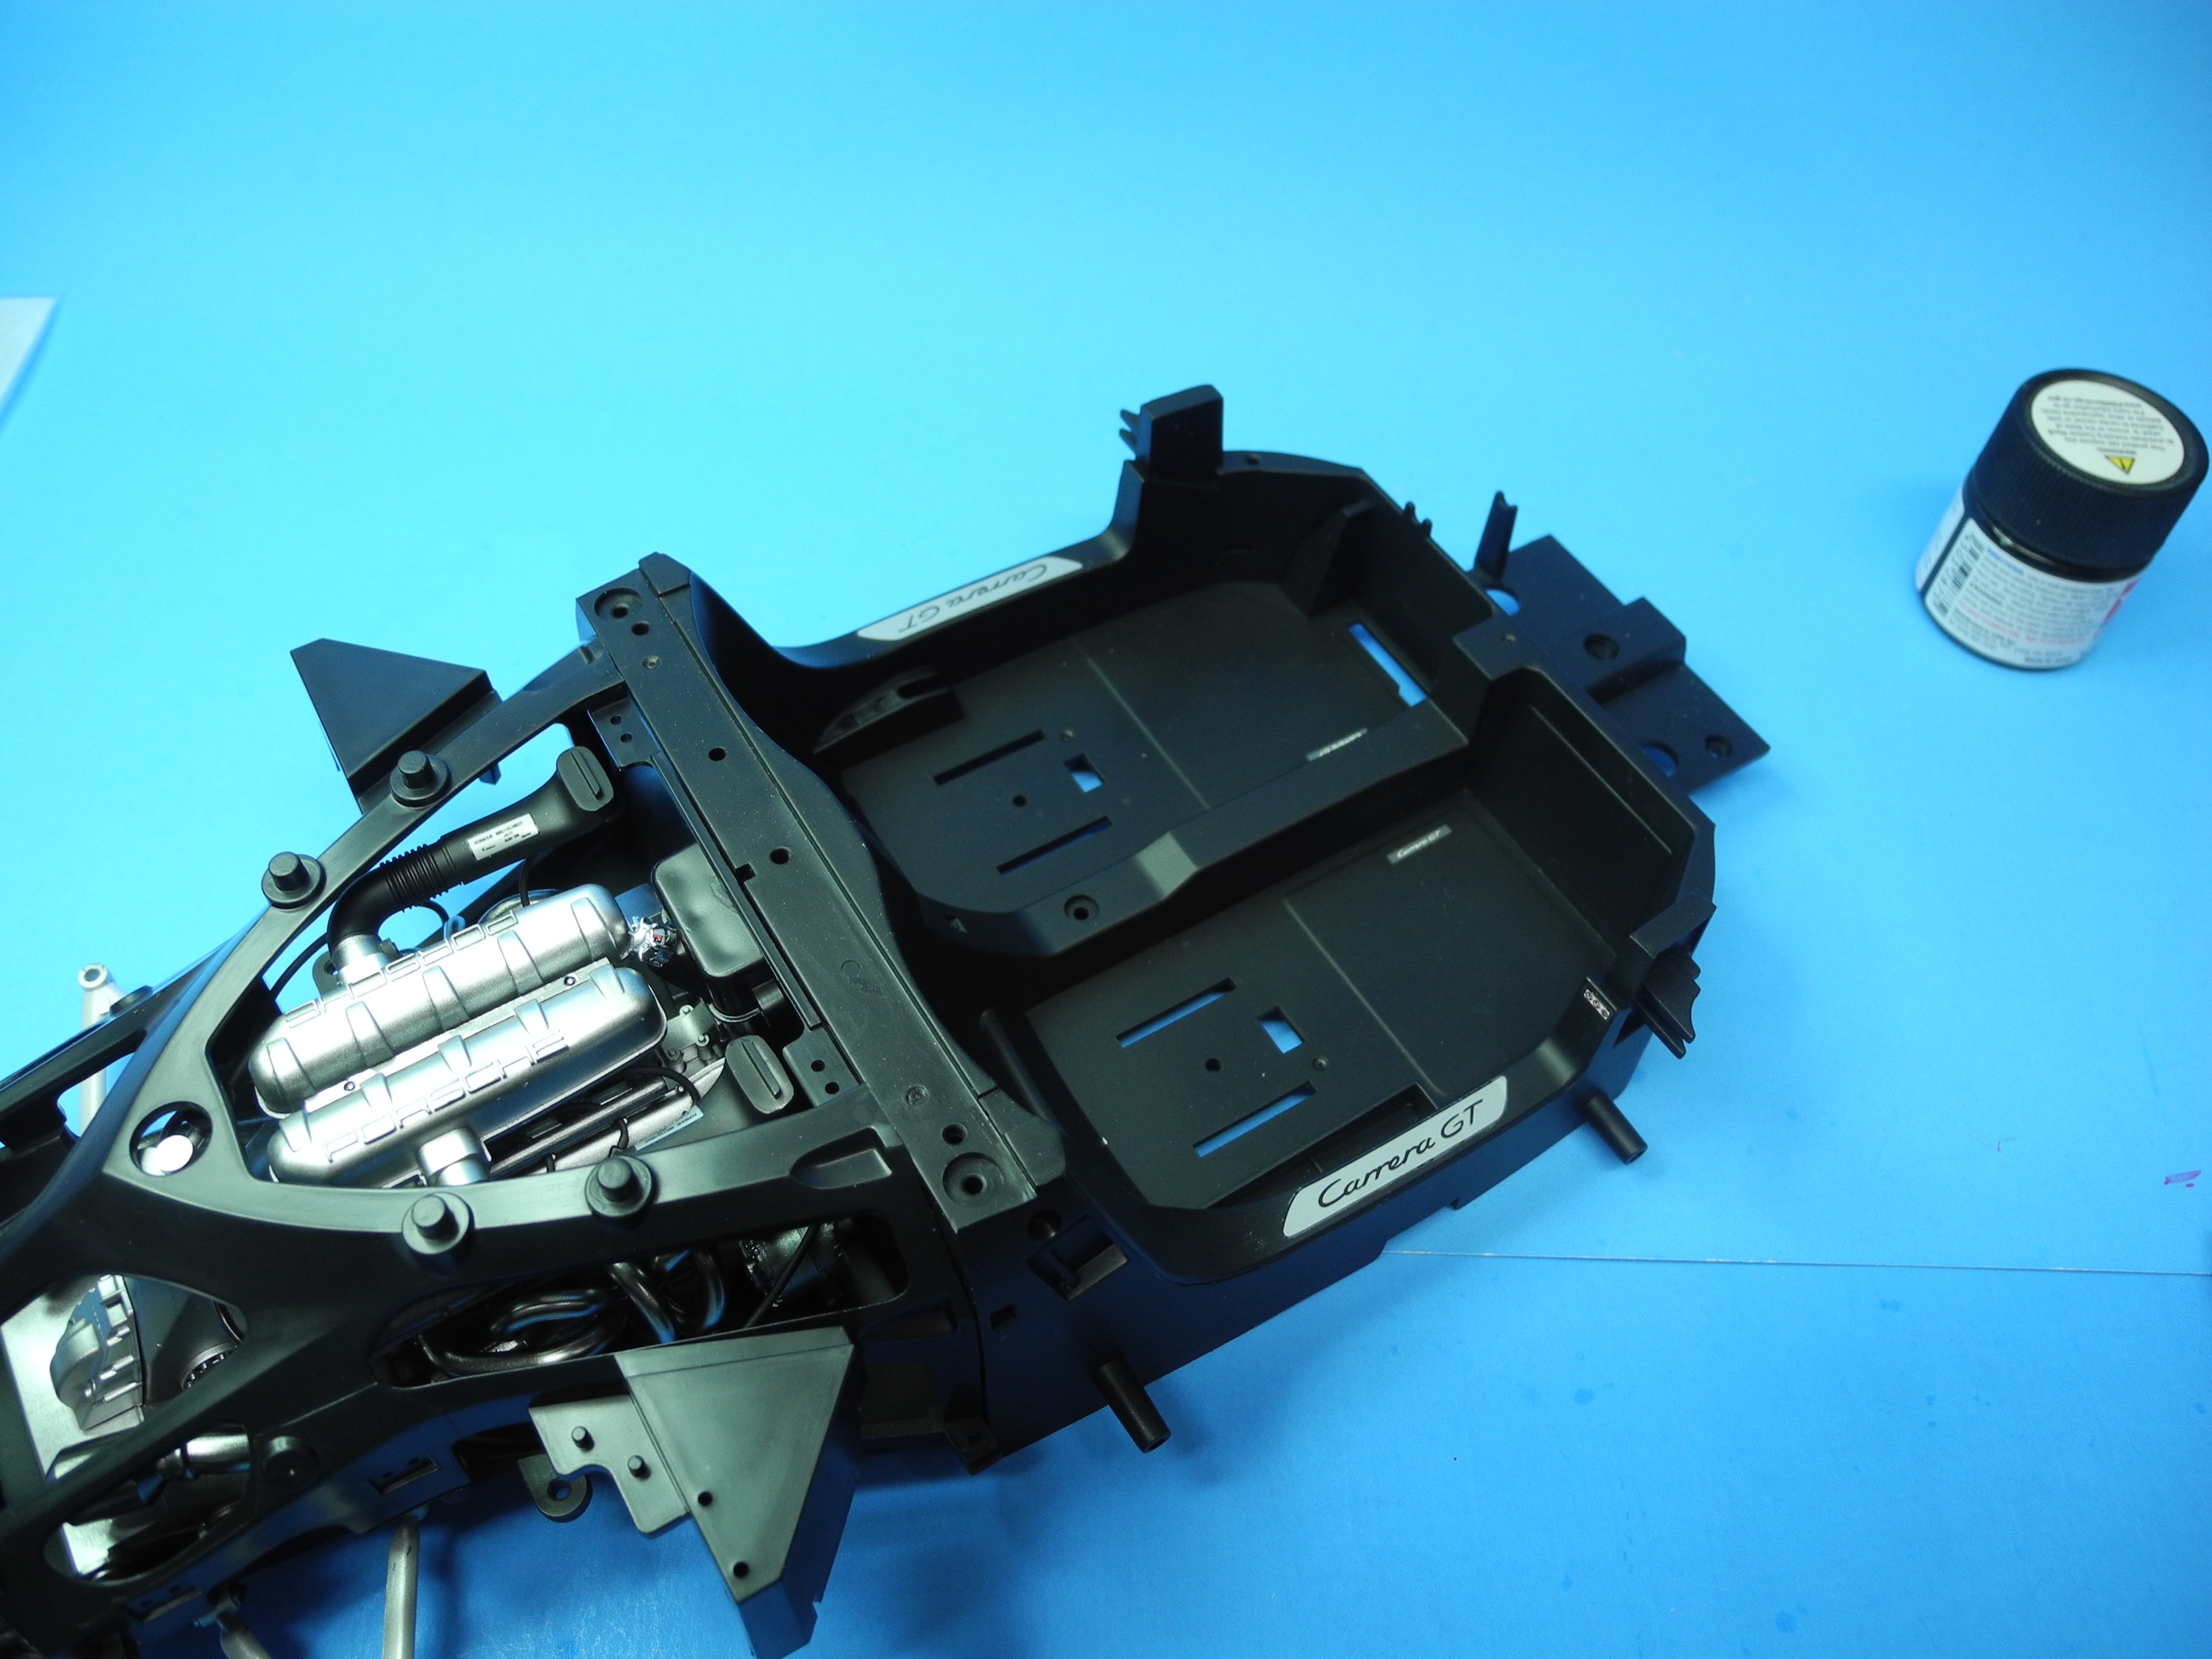
At this stage of the build, only a few parts are added to the interior: a pair of Bose speakers, brake, clutch, and accelerator pedals, and a couple of polished kick plates. At this scale, even "small details" are large enough to be noticed, i.e.: the Bose placard decals.
From here, will move on to the front suspension build sequence.

- gsdpic, Ryland Craze, davec and 9 others
-
12
-
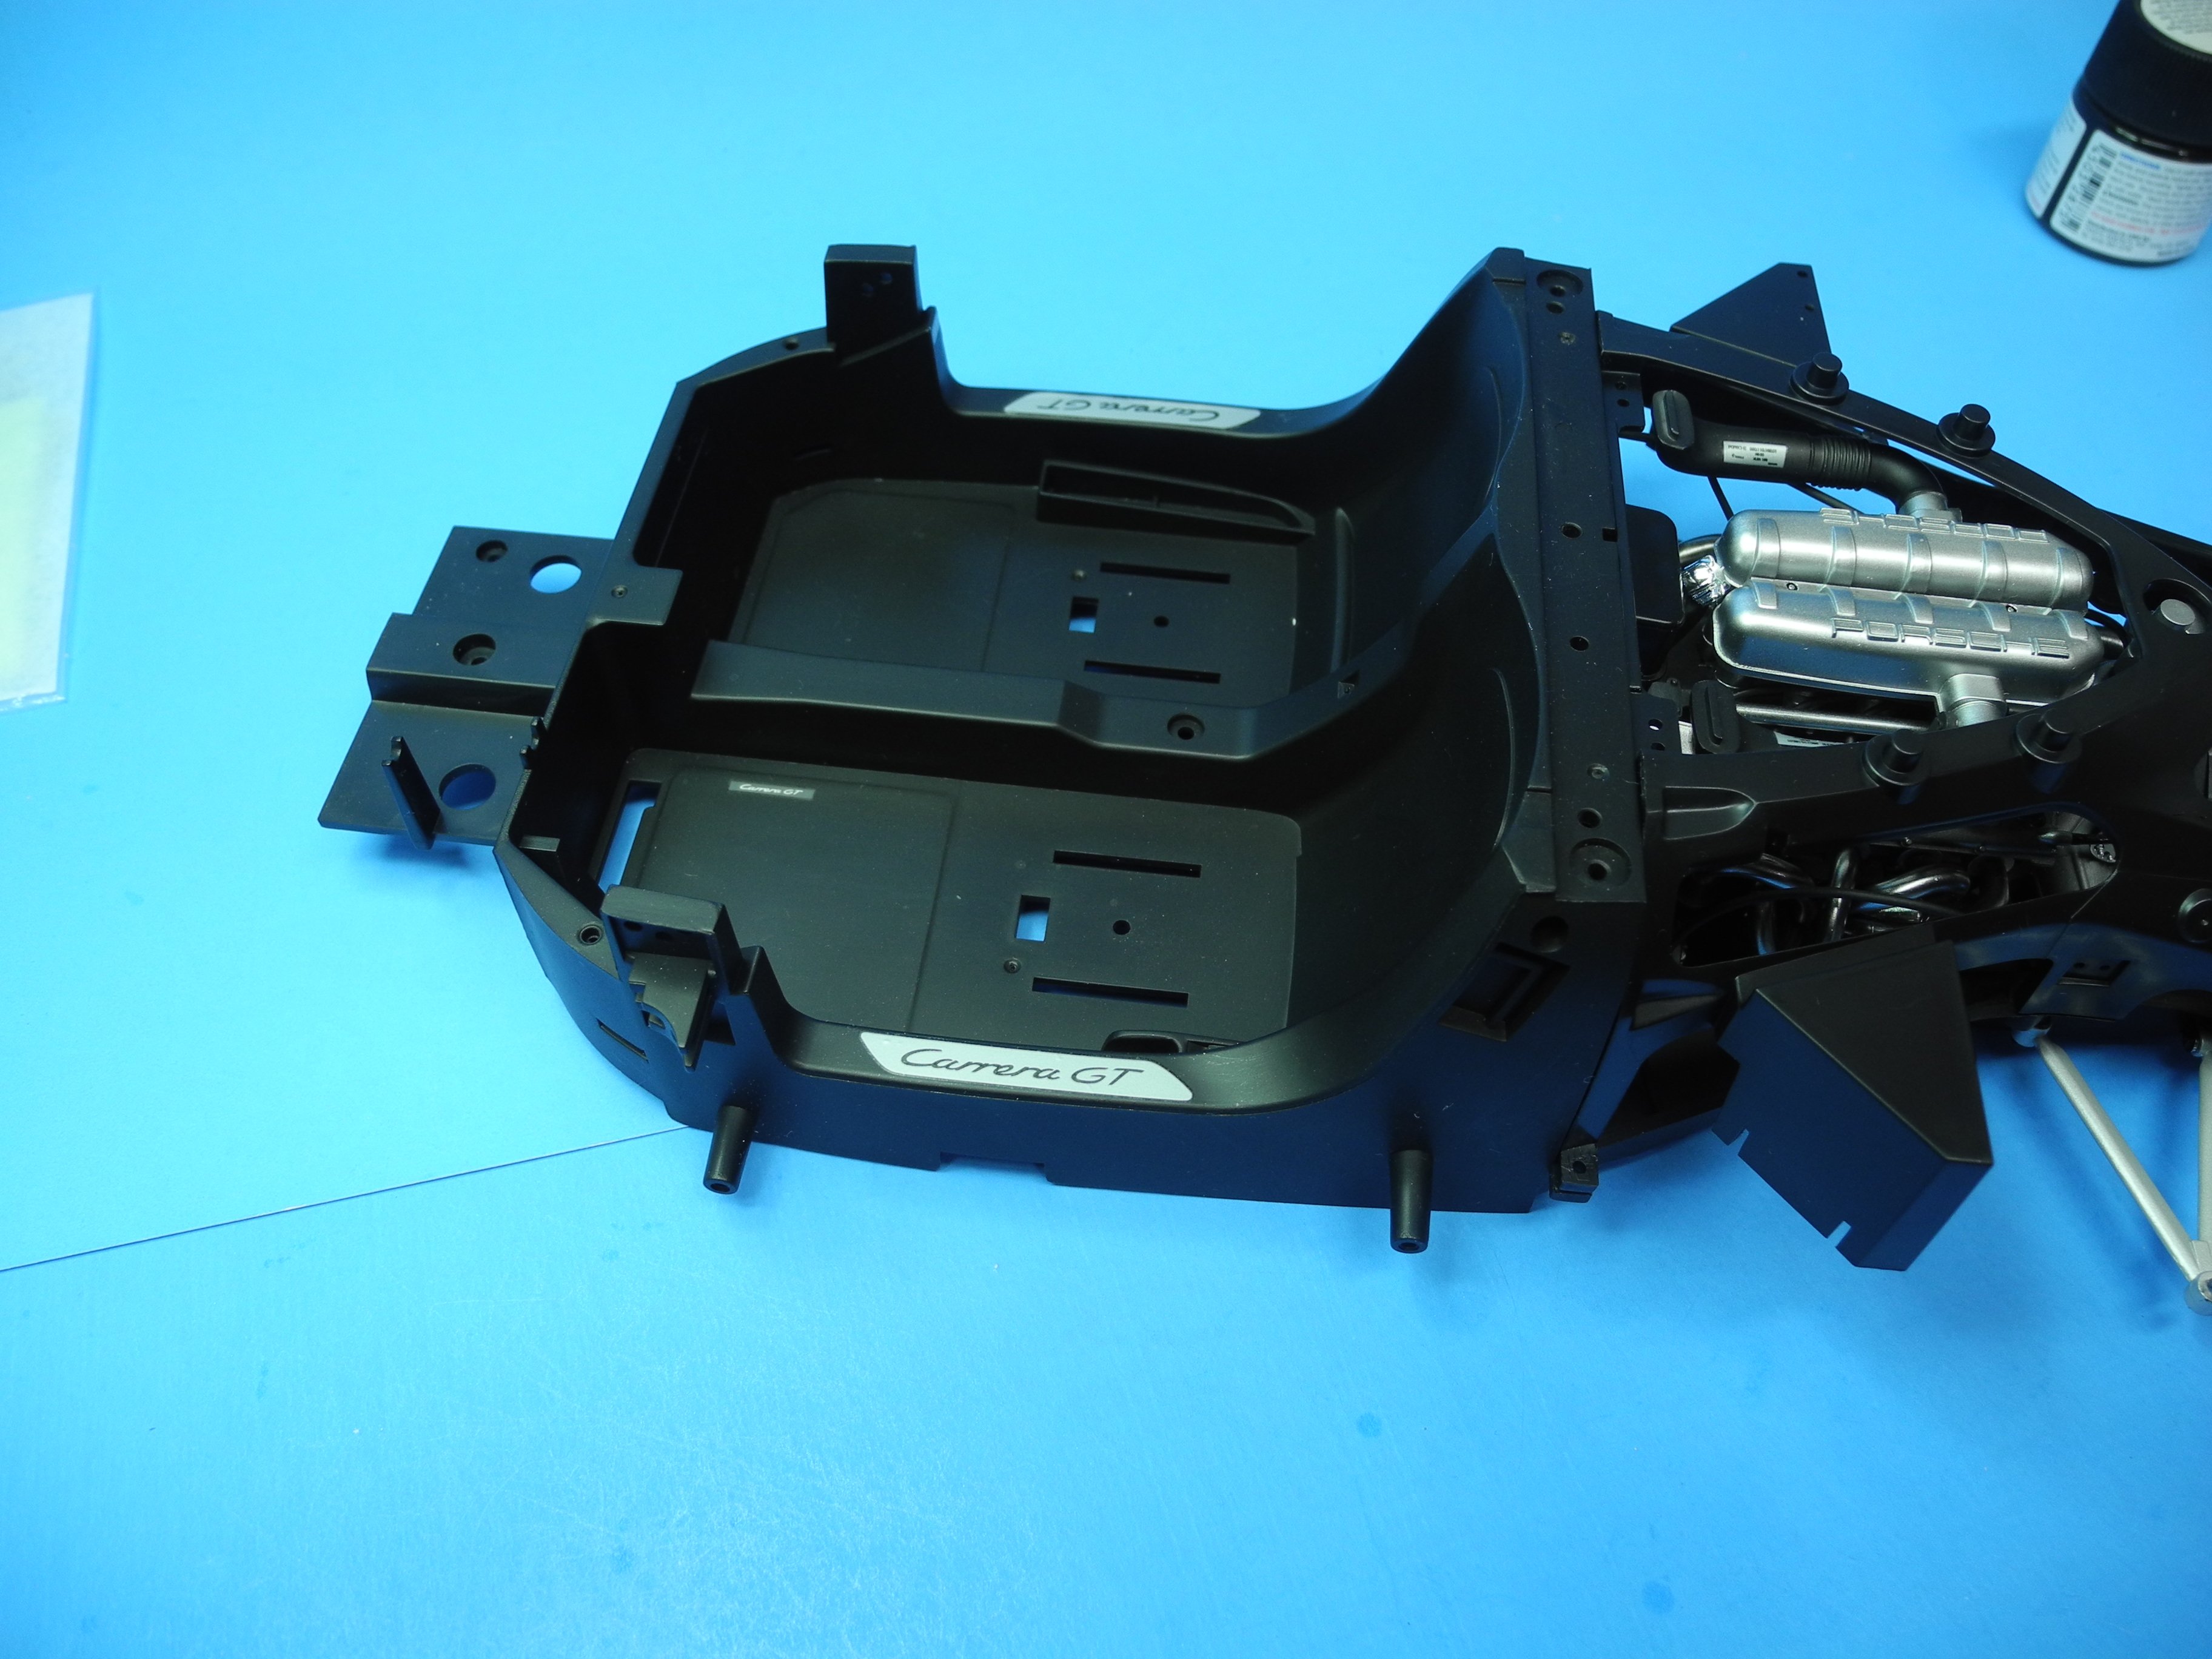
With just a few minor details left to add here, will move on next to the interior area of the Porsche Carrera GT.
I am happy with the faux carbon fiber painted areas. Not perfect, but decals probably would not be perfect either. Not at least if placed by me.


-
22 minutes ago, yvesvidal said:
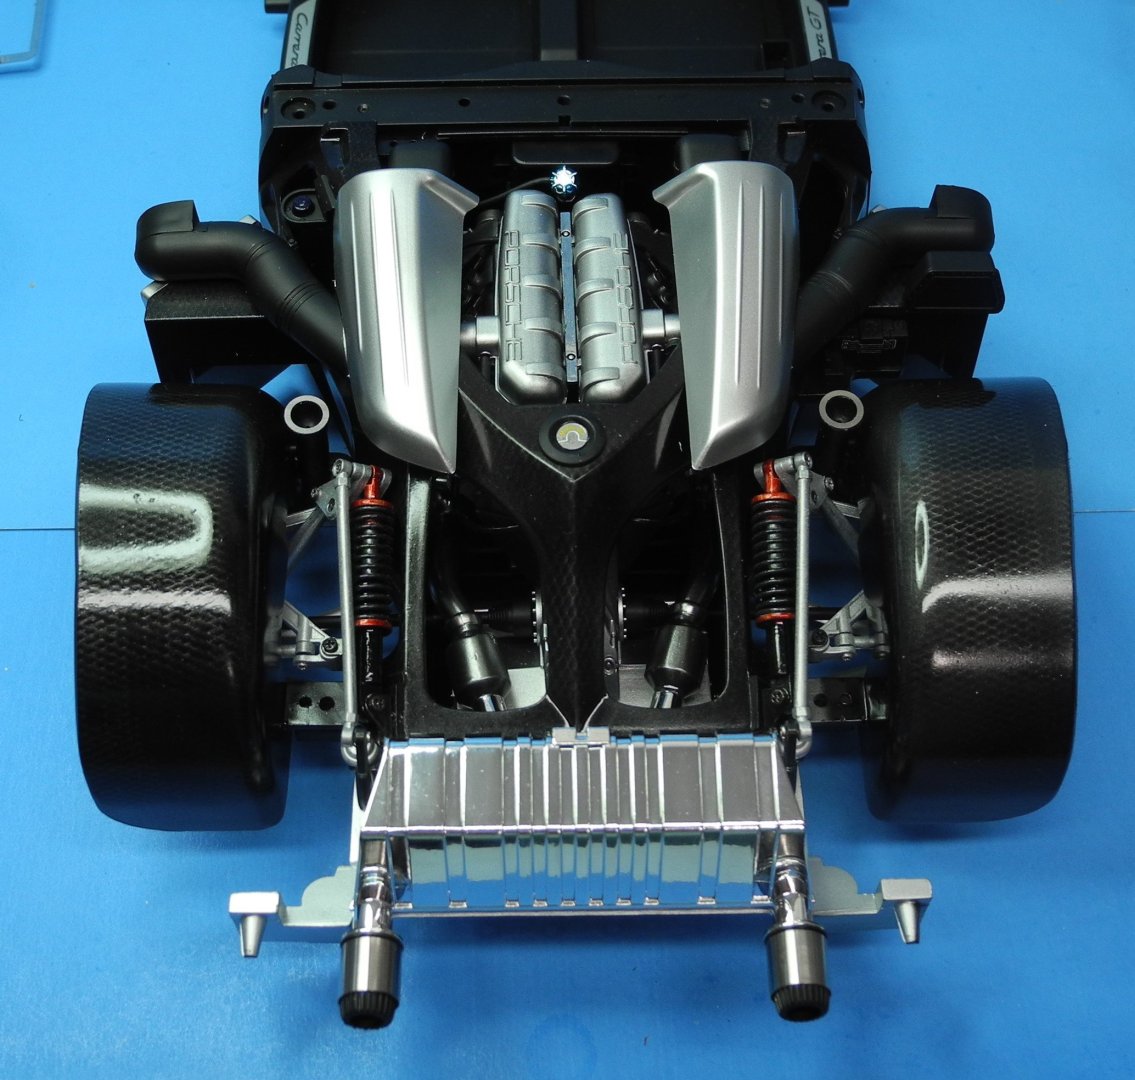
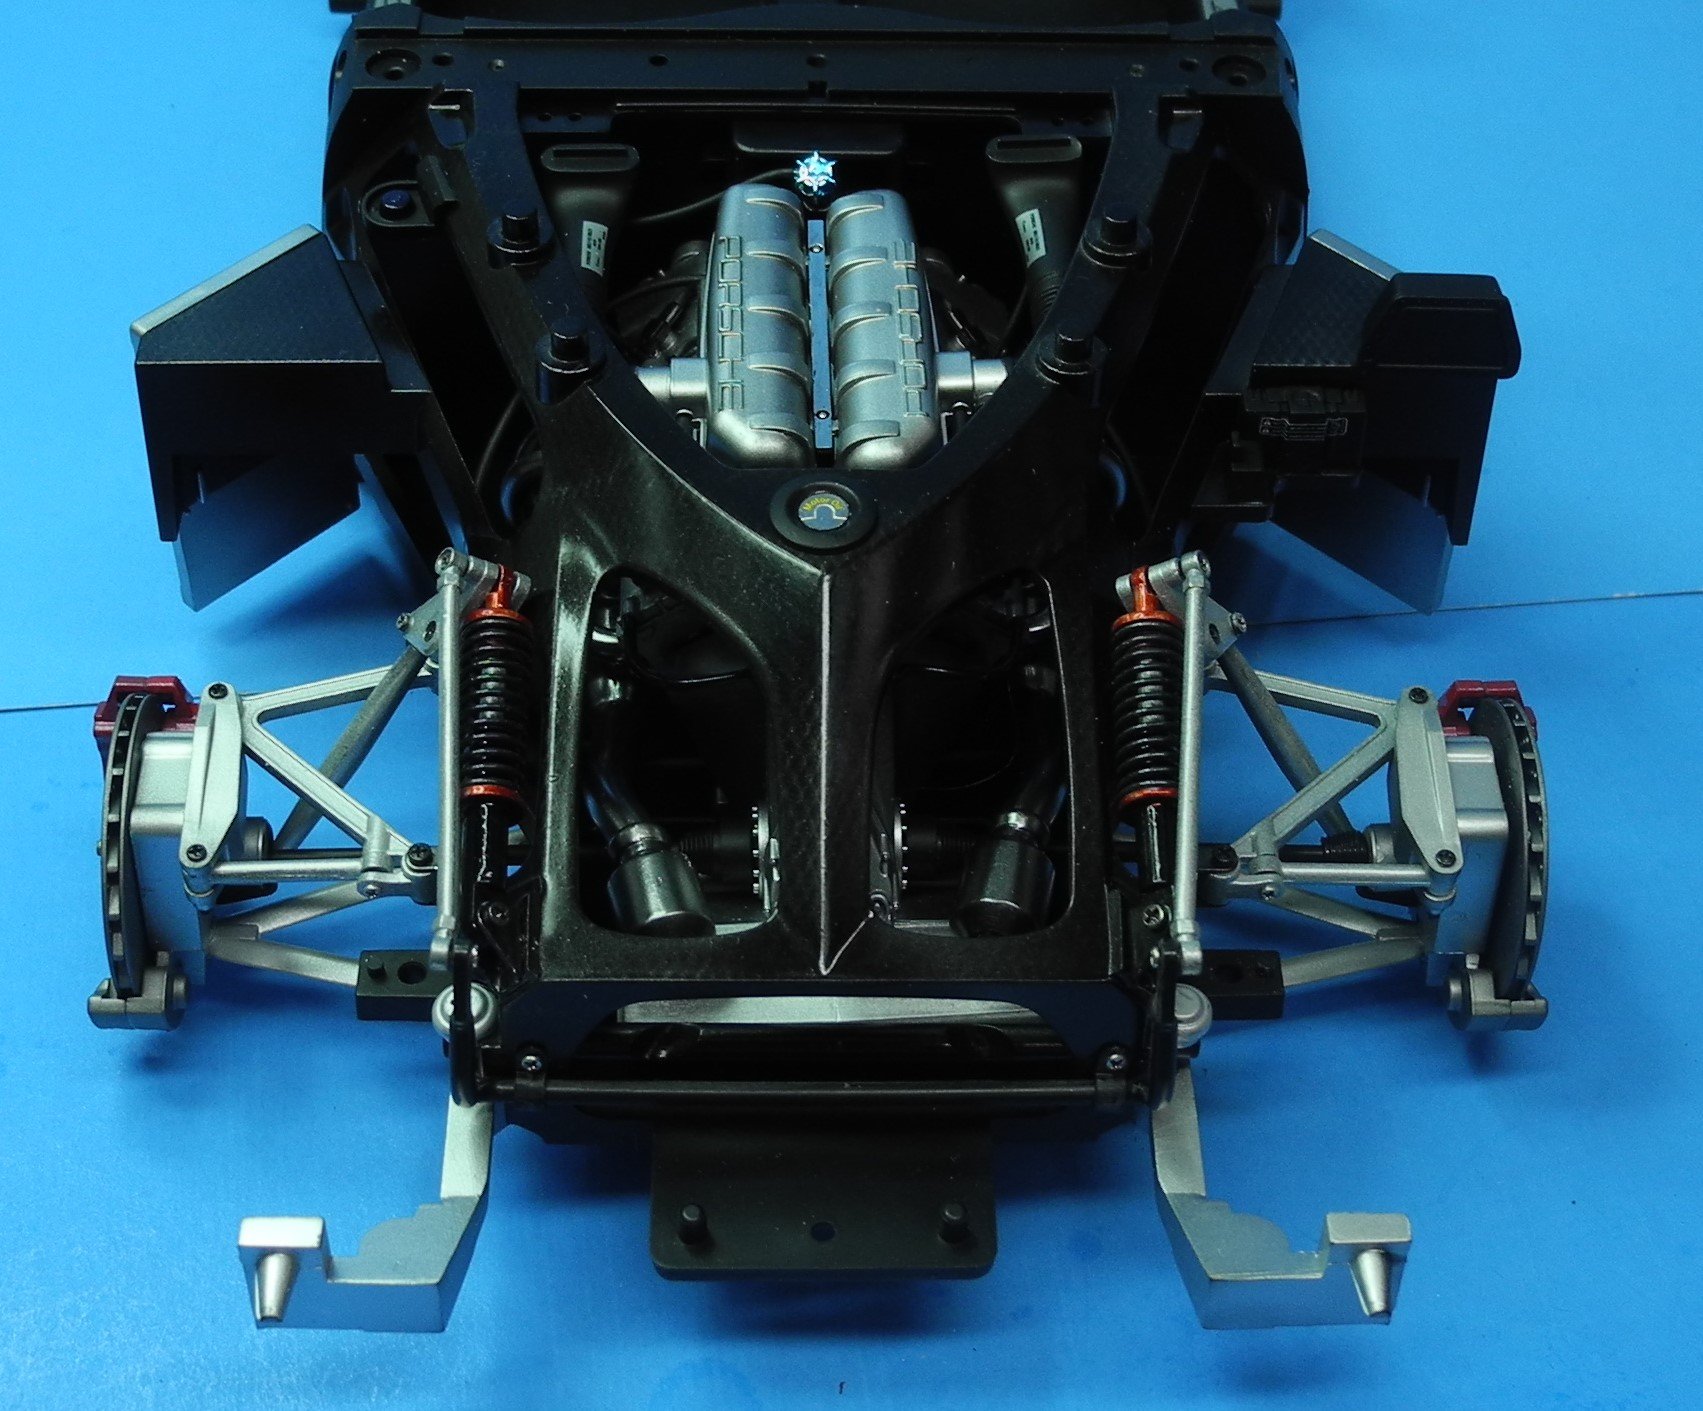
Are the rear wheels articulated? It looks like this suspension system could work very well.
Yves
Yes, it is articulated. A bit on the stiff side, though. Probably the real one has a rather stiff ride as well, but things are designed and built for traction rather than a comfort ride.
I presented those photos now because in the next steps, most of the rear suspension will be hidden by the carbon fiber fender well tubs.
-
-
-
-
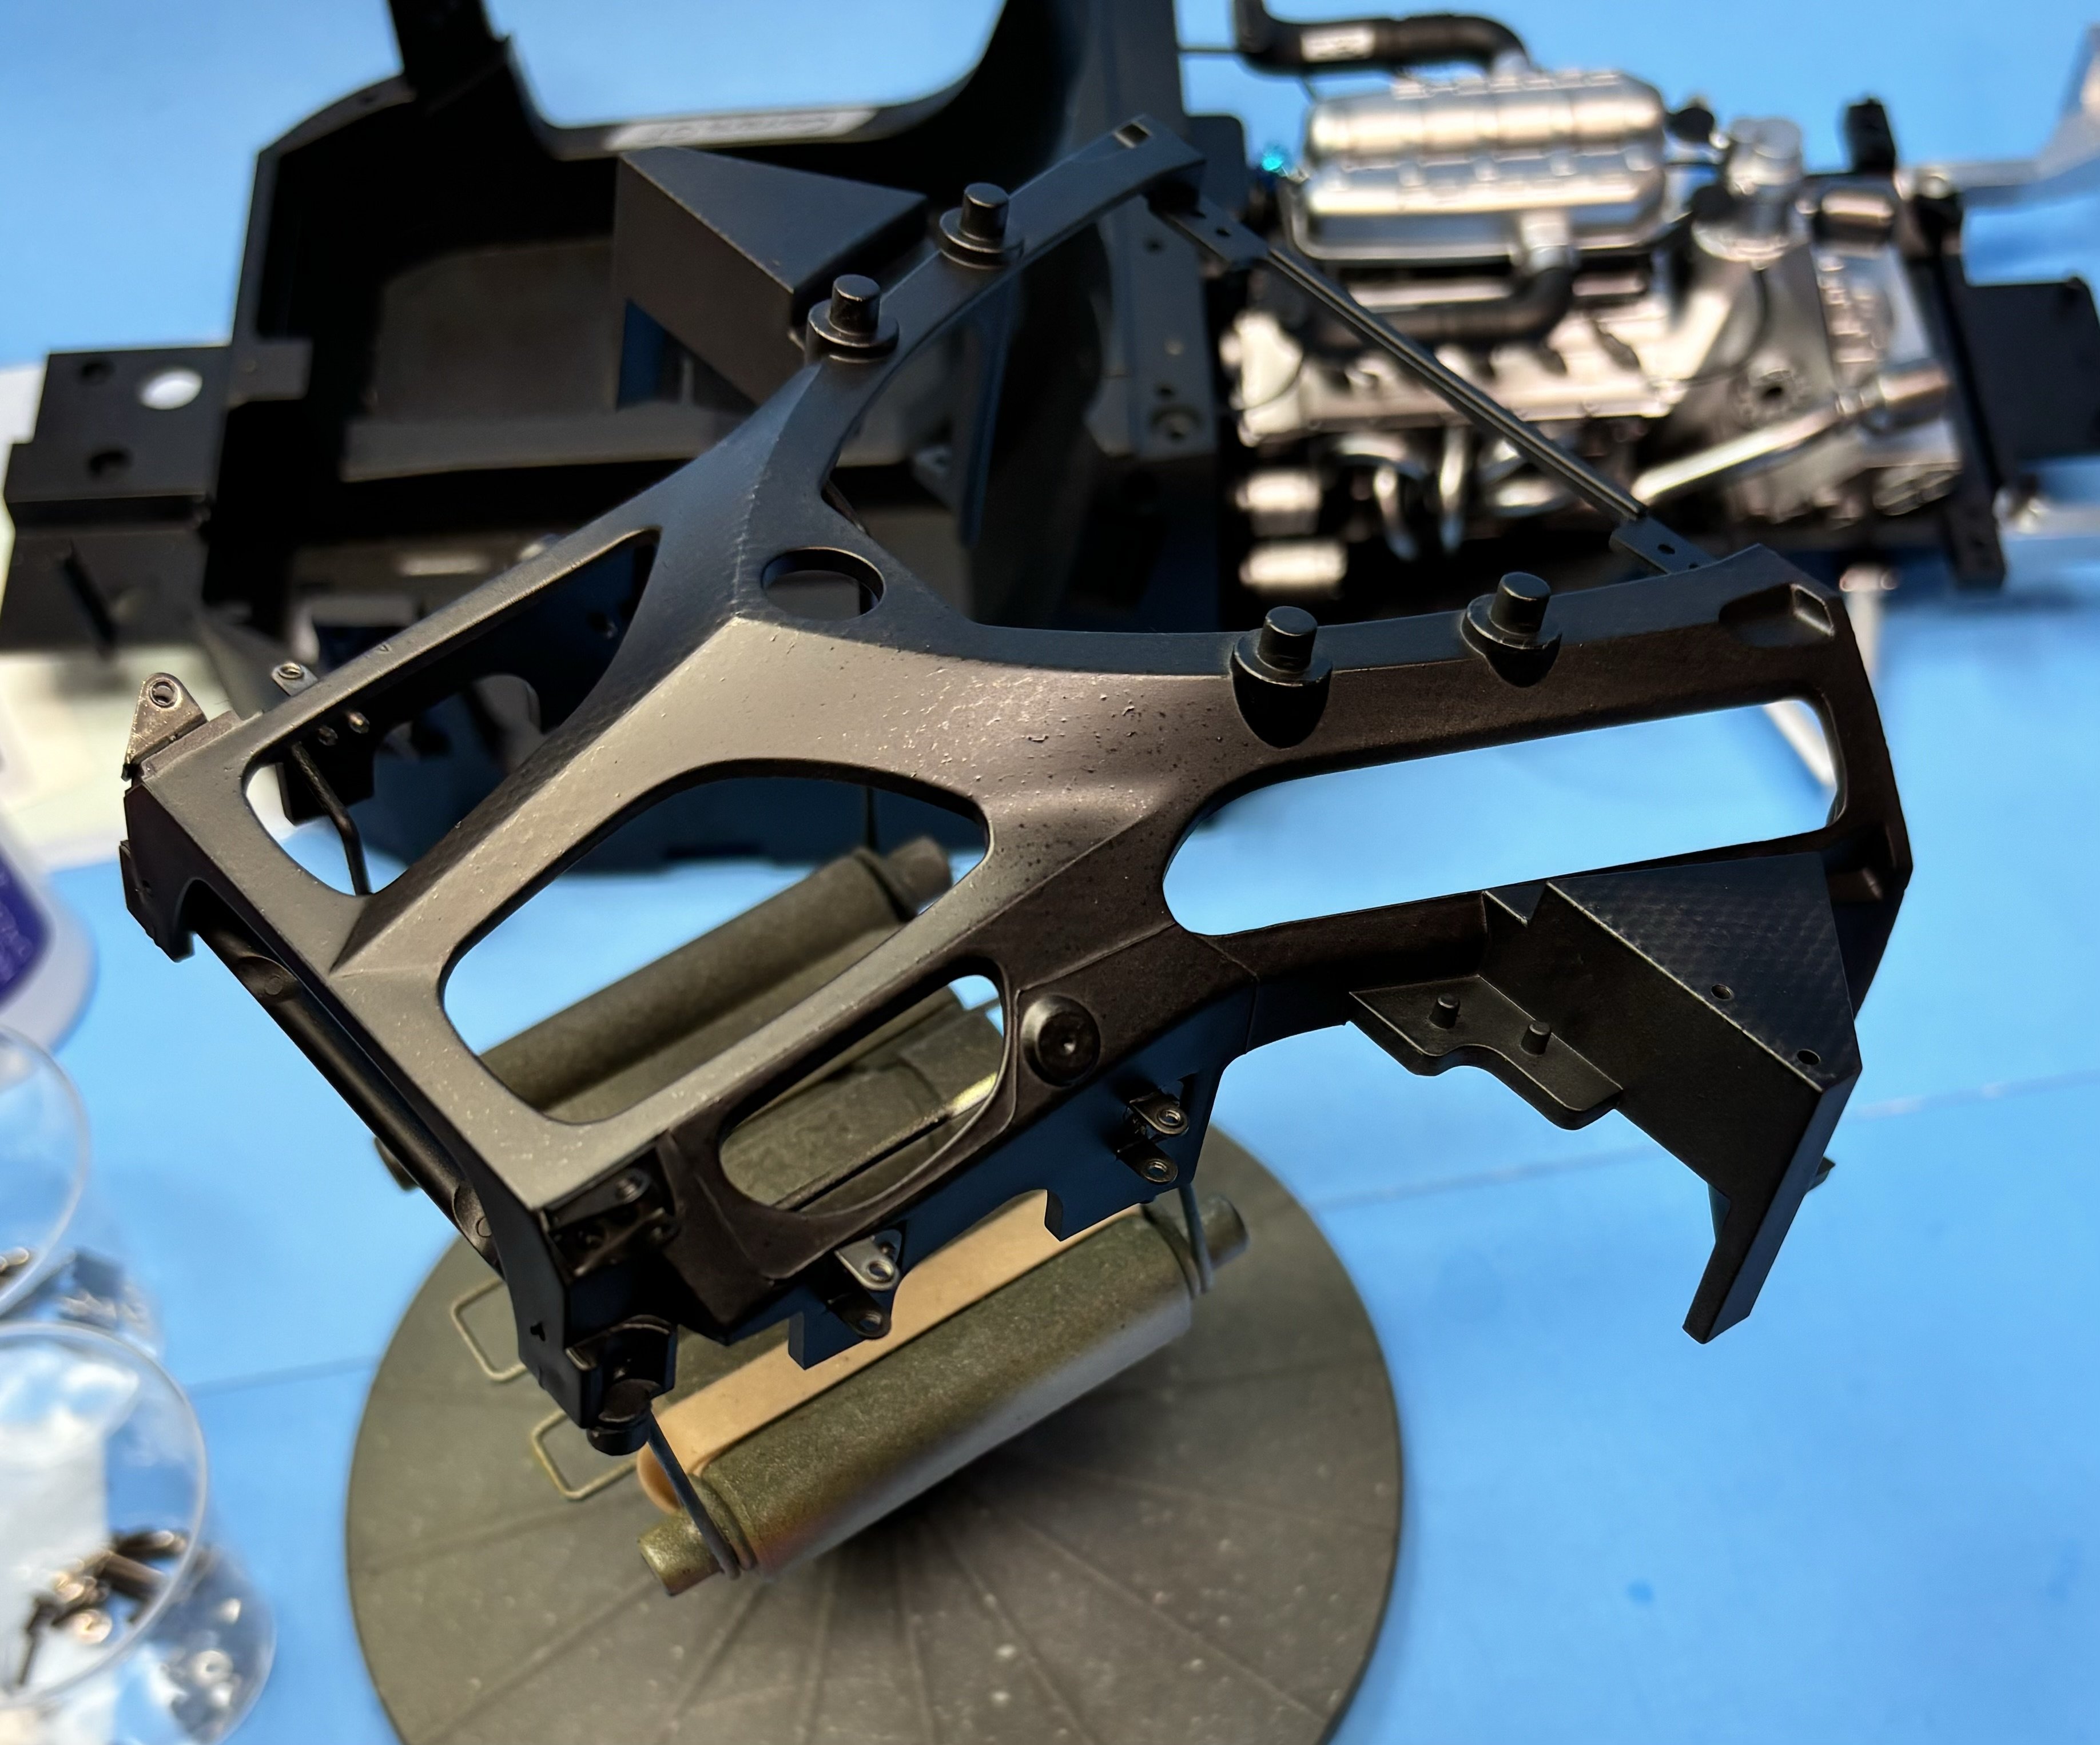
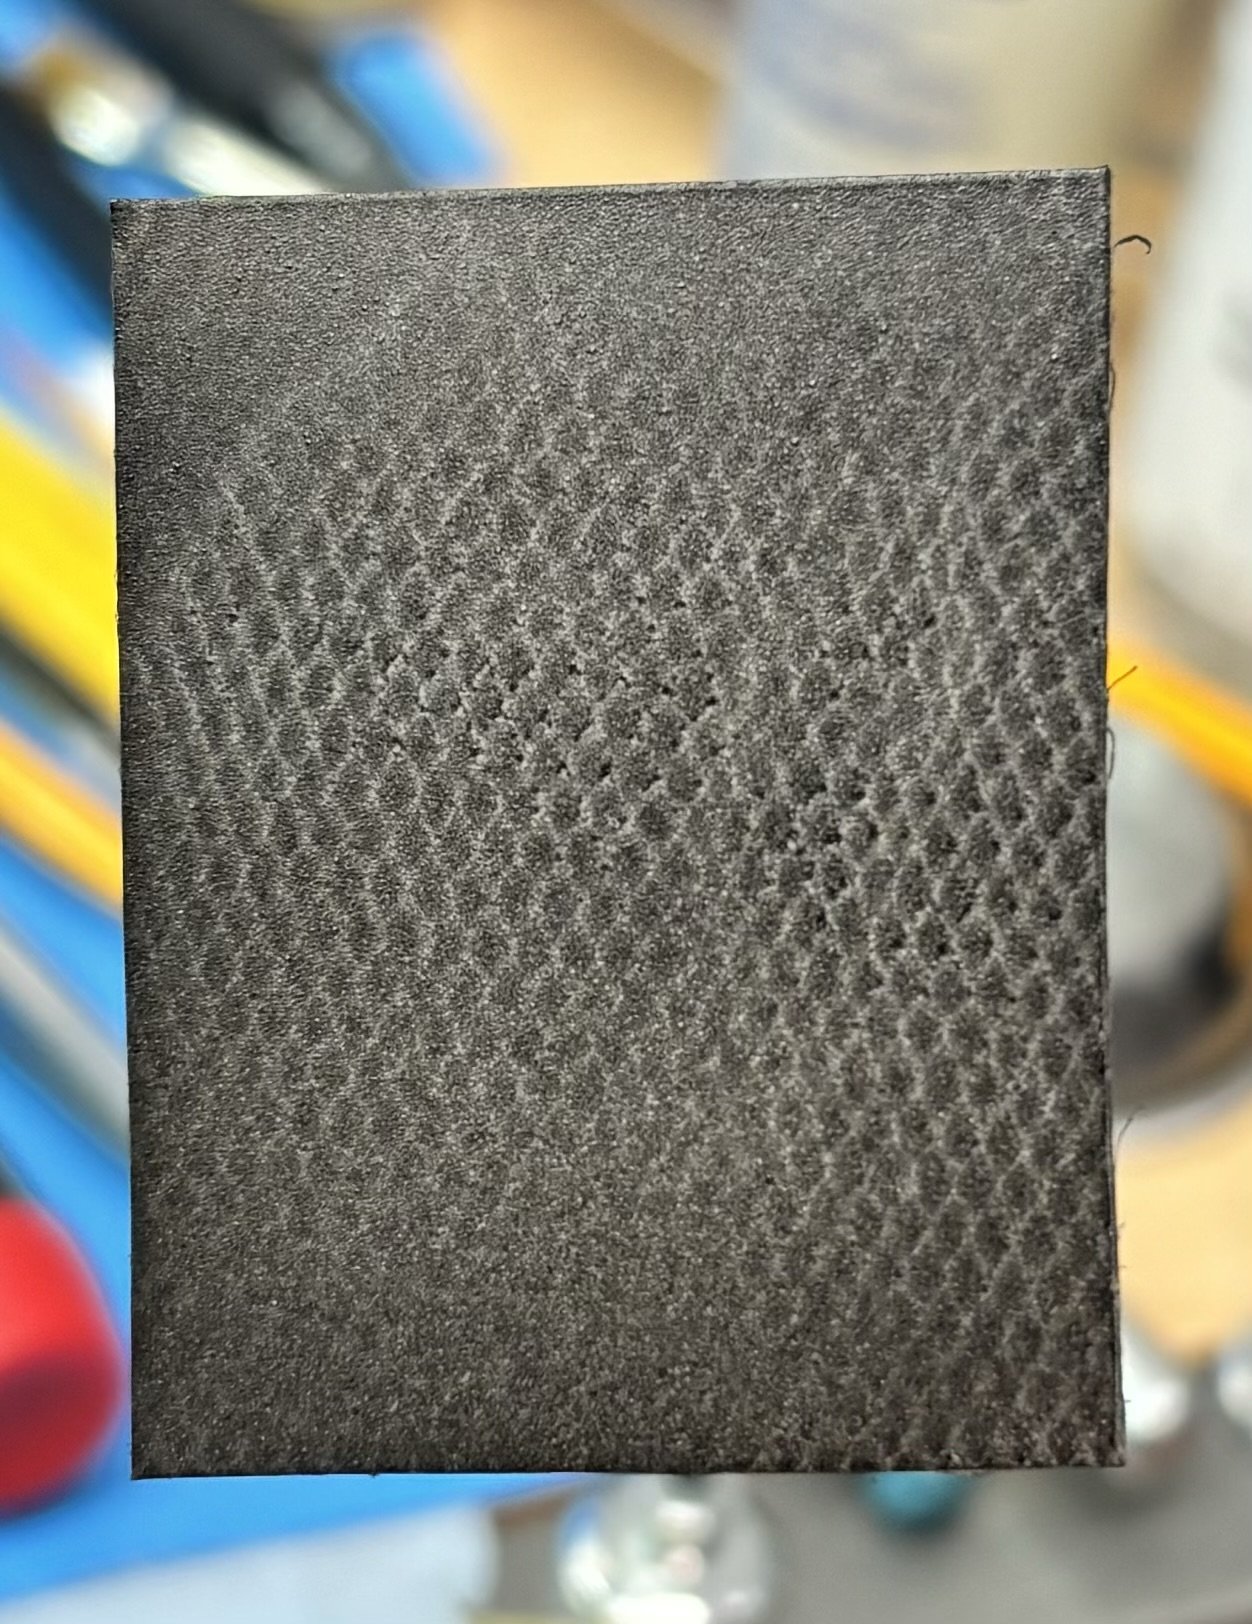
A preliminary look at the fresh paint, as I just now stripped off the tulle mask. There is a faint look of CF but it should look better as the paint dries and settles, then a clear gloss coat is applied. Will come back to it tomorrow.


-
25 minutes ago, gsdpic said:
I think your sprayed on carbon fiber effect looks good and will look even better with a nice gloss coat. It is a little hard to tell the scale from the picture but I assume the little diamonds are pretty small. Certainly spraying it is likely to be much easier than decals, especially if there are no pre-cut decals available.
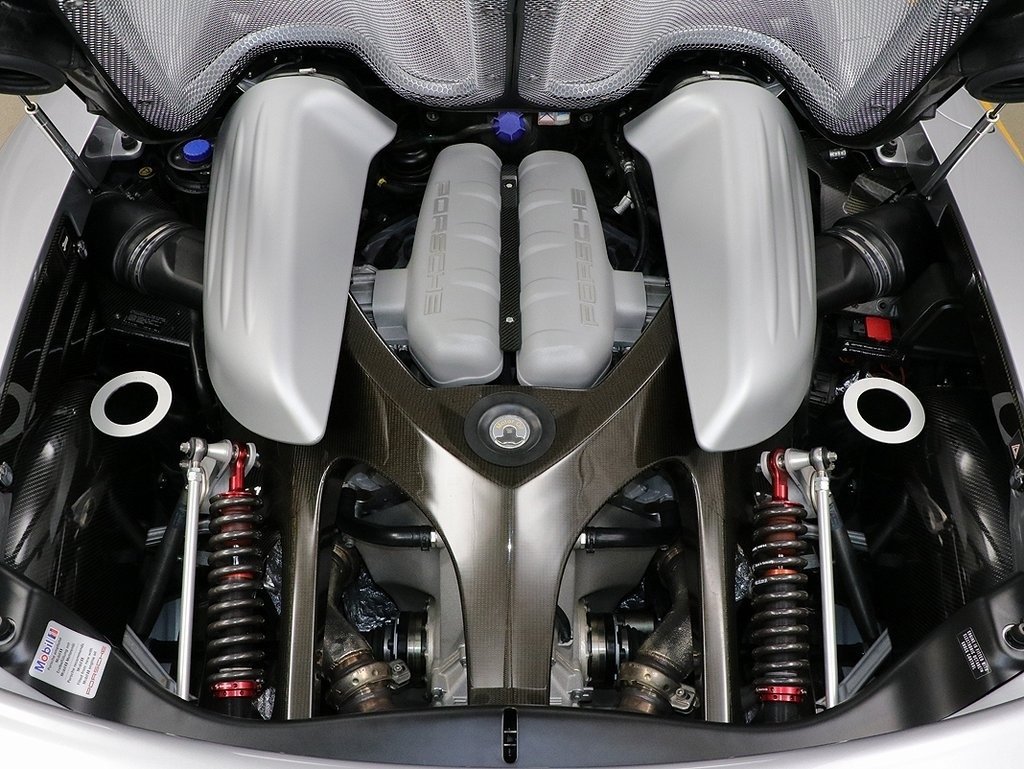
It is interesting in the picture of the full size car that the carbon fiber on the main chassis pieces around the engine look quite different from the two carbon fiber pieces in the lower left and lower right corners of the picture. I wonder if the chassis CF is real and the other two pieces are more decorative instead of real carbon fiber.
The scrap shown is only about 1 sq inch in size.
I noticed that difference in CF as well but thought it was probably due to lighting.
- Old Collingwood, Canute, gsdpic and 2 others
-
5
-
-
I painted a piece of sheet styrene with metallic gray and let it dry. Then a piece of tulle fabric was sprayed with Pixie Spray, a positionable adhesive for stencils. The tulle fabric was applied on the painted surface, then painted with semi gloss black. After removing the fabric, this is the result.
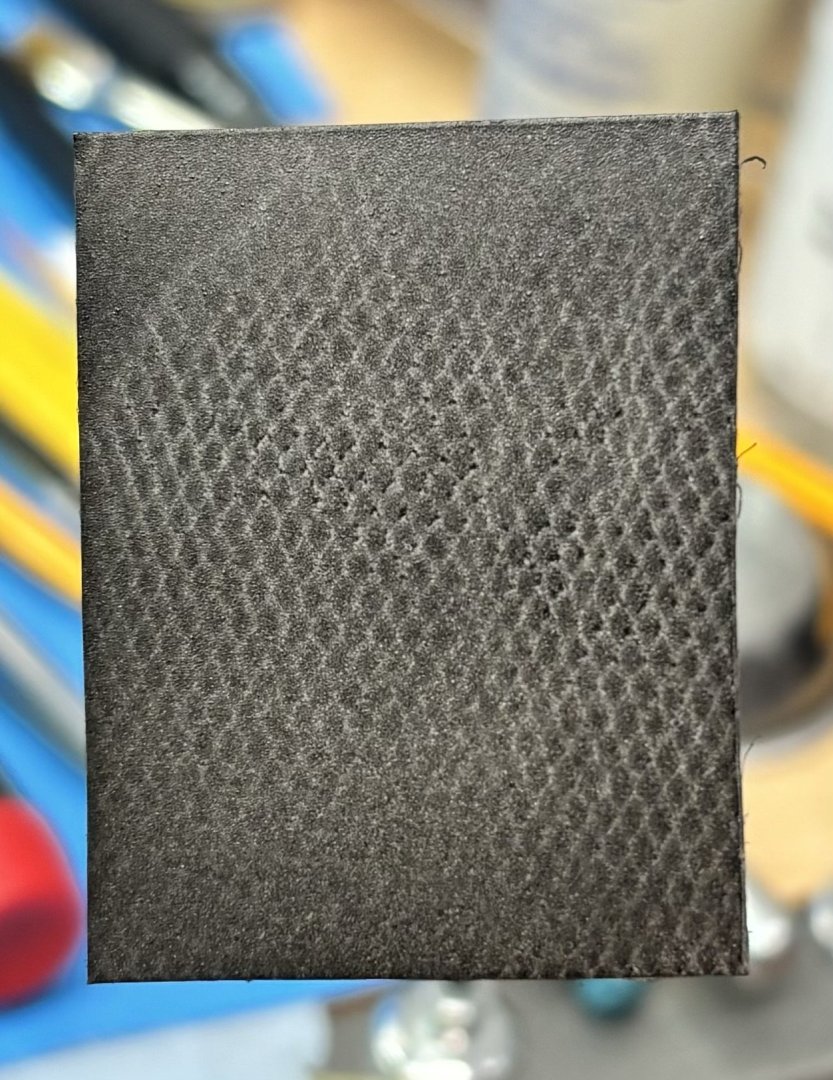
I think I can live with that instead of decals. After it’s dry, will apply a gloss clear to seal it all in and unify the colors.
Any thoughts?
- mtaylor, Jack12477, GrandpaPhil and 6 others
-
9
-
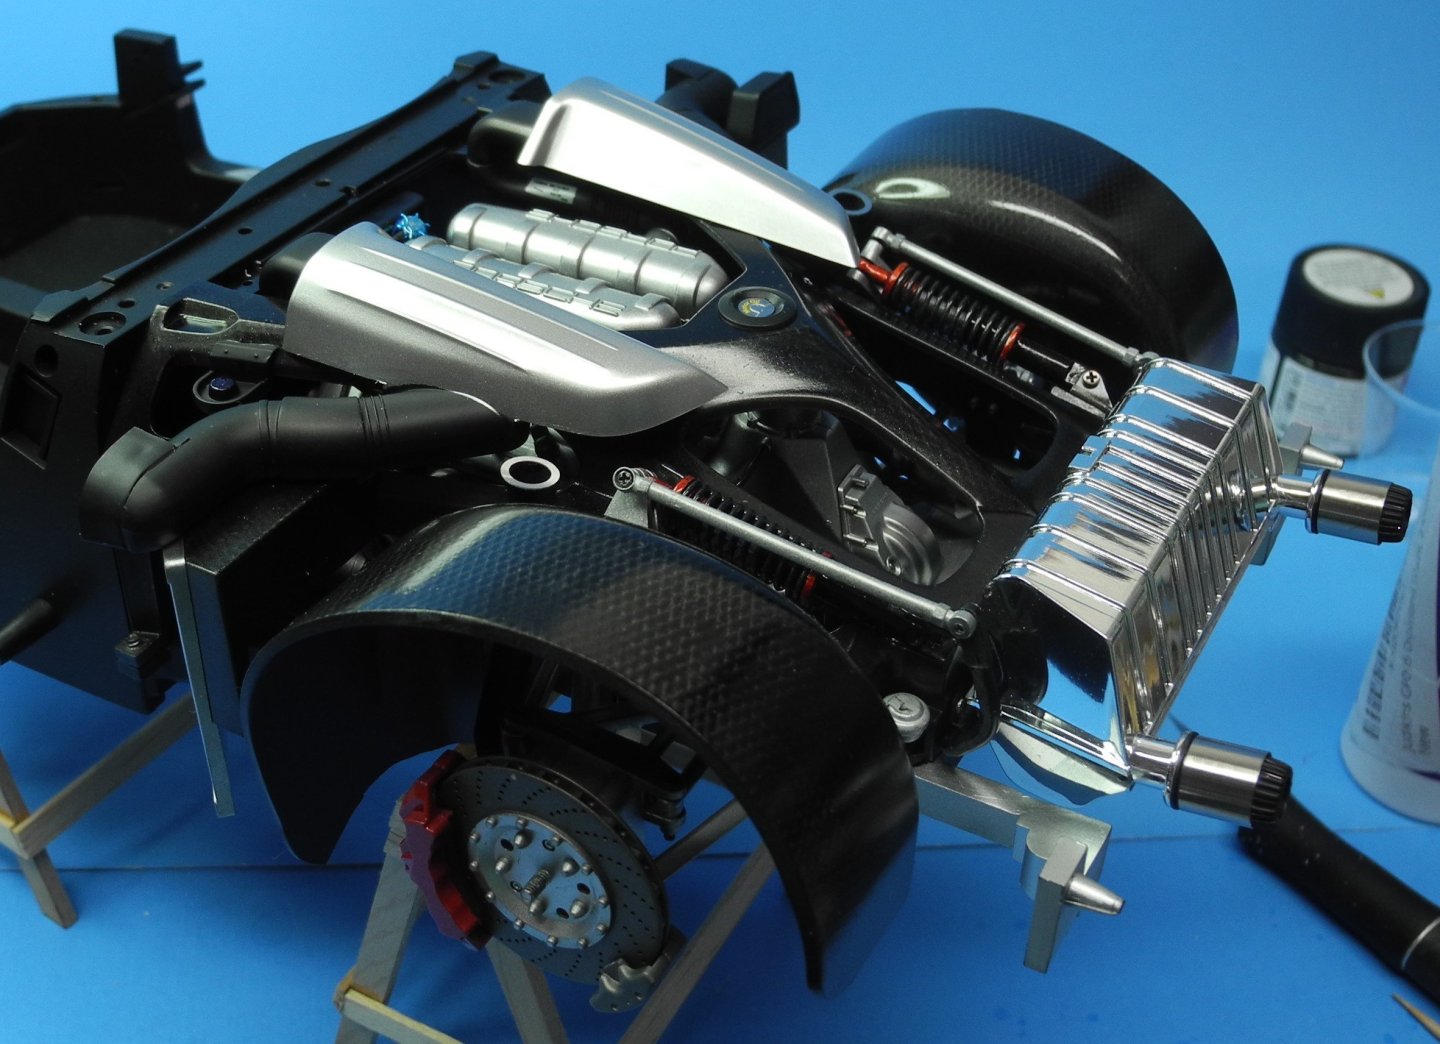
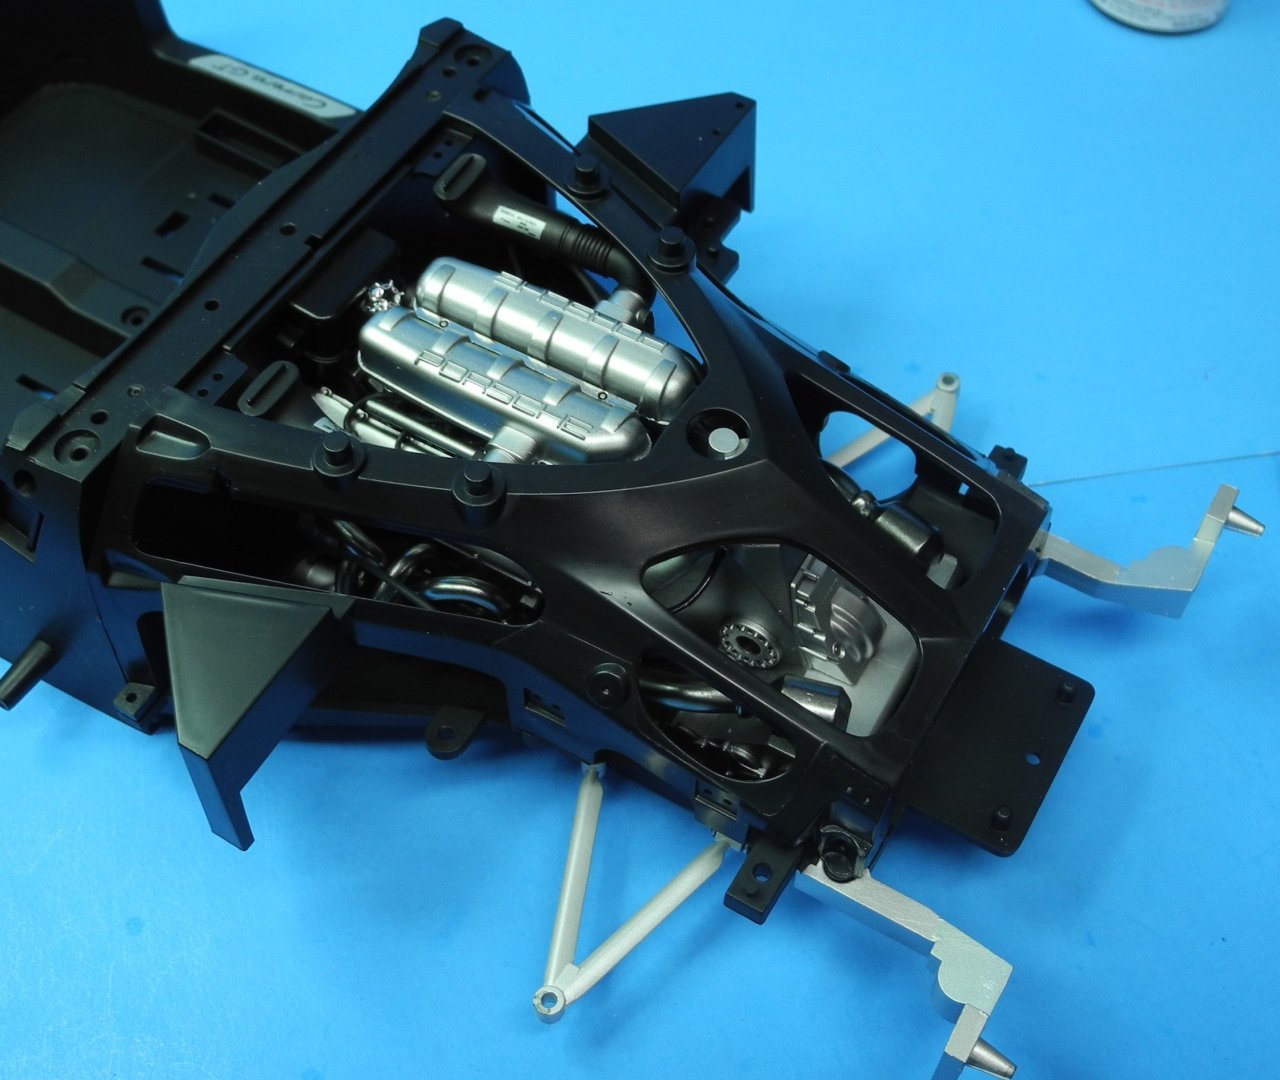
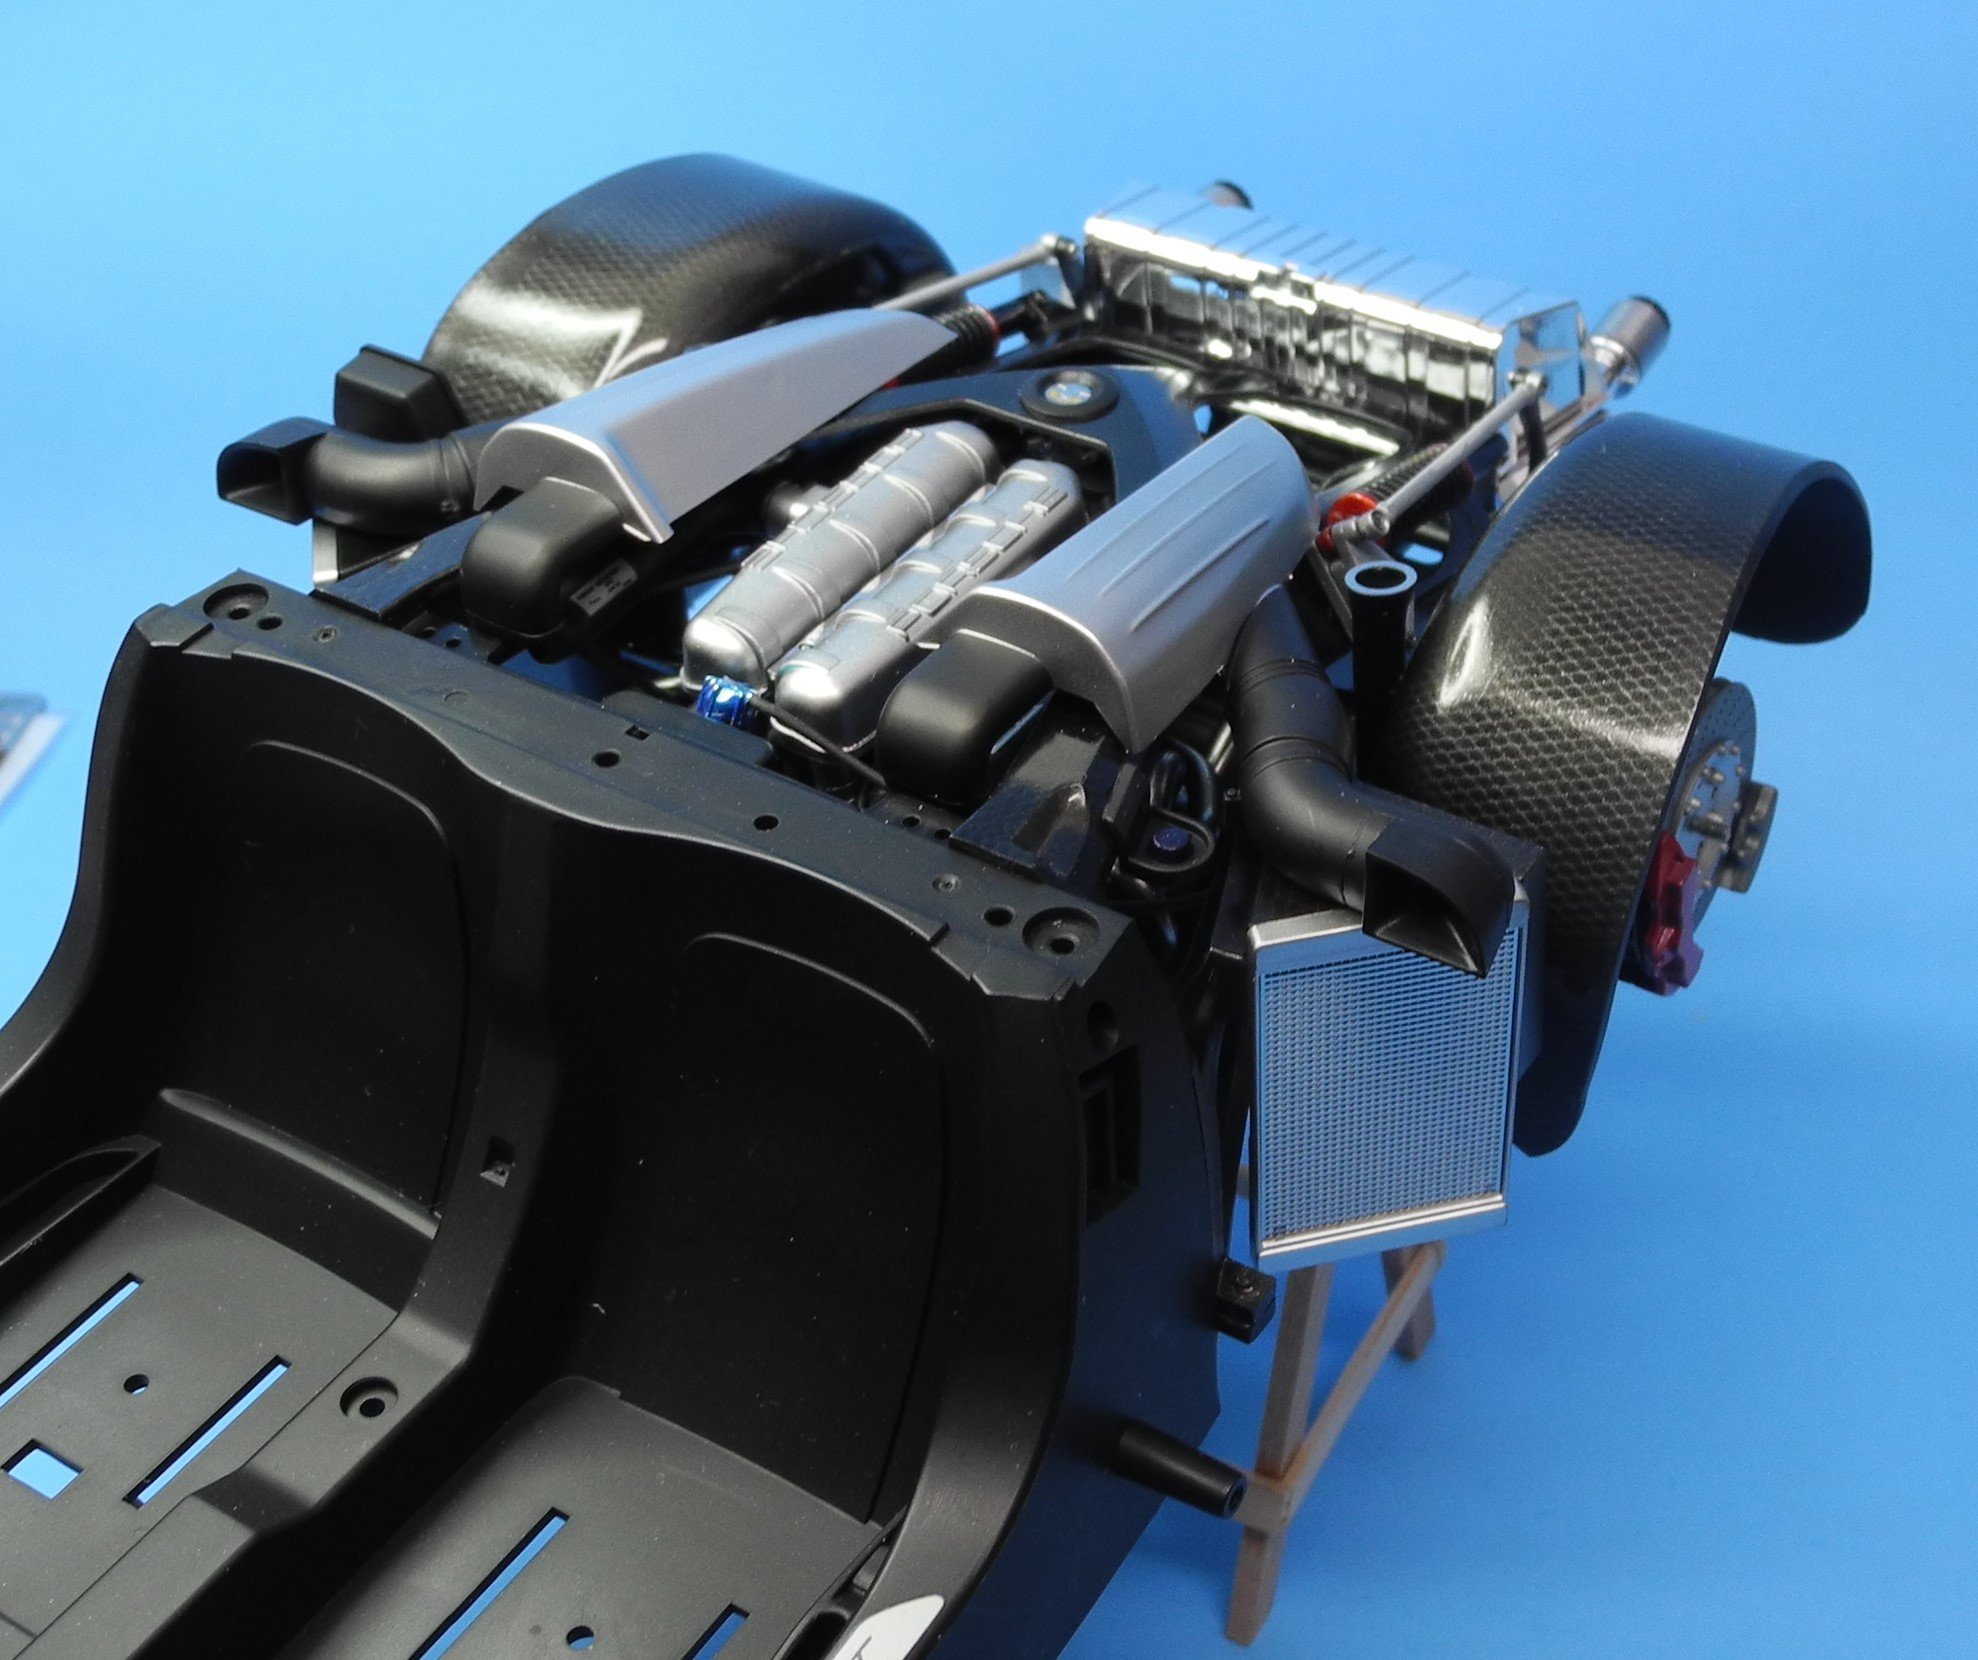
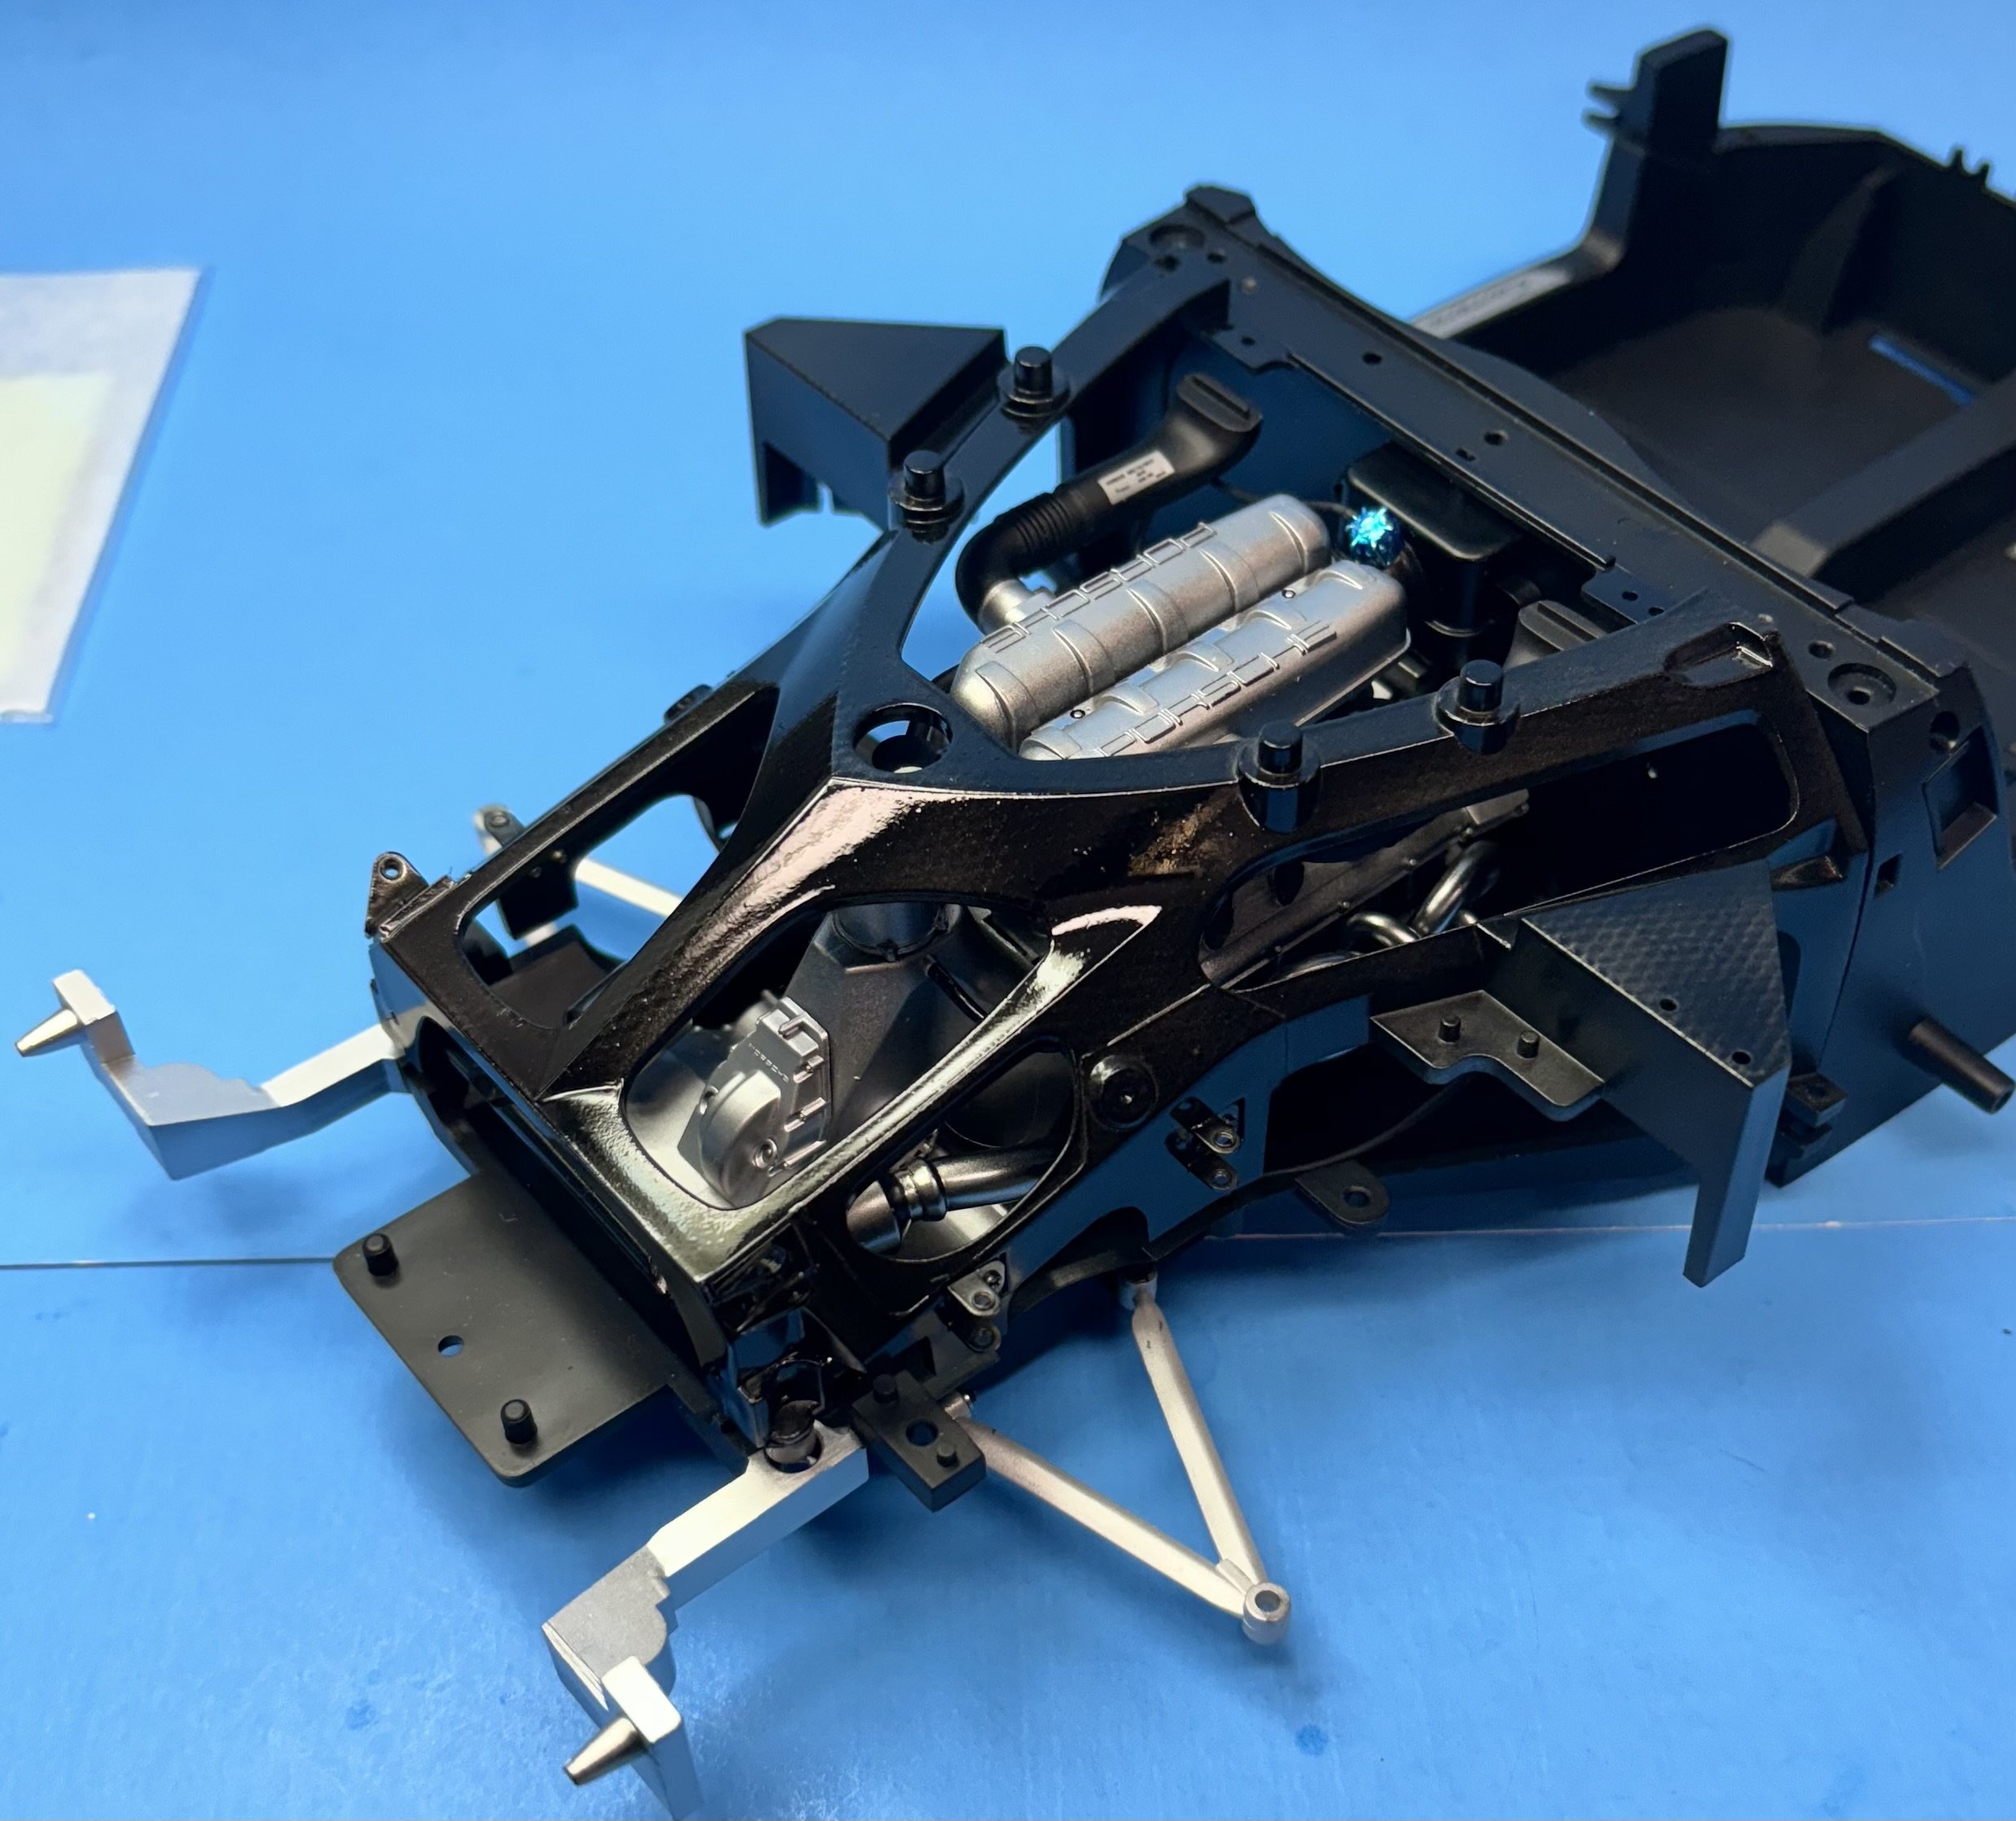
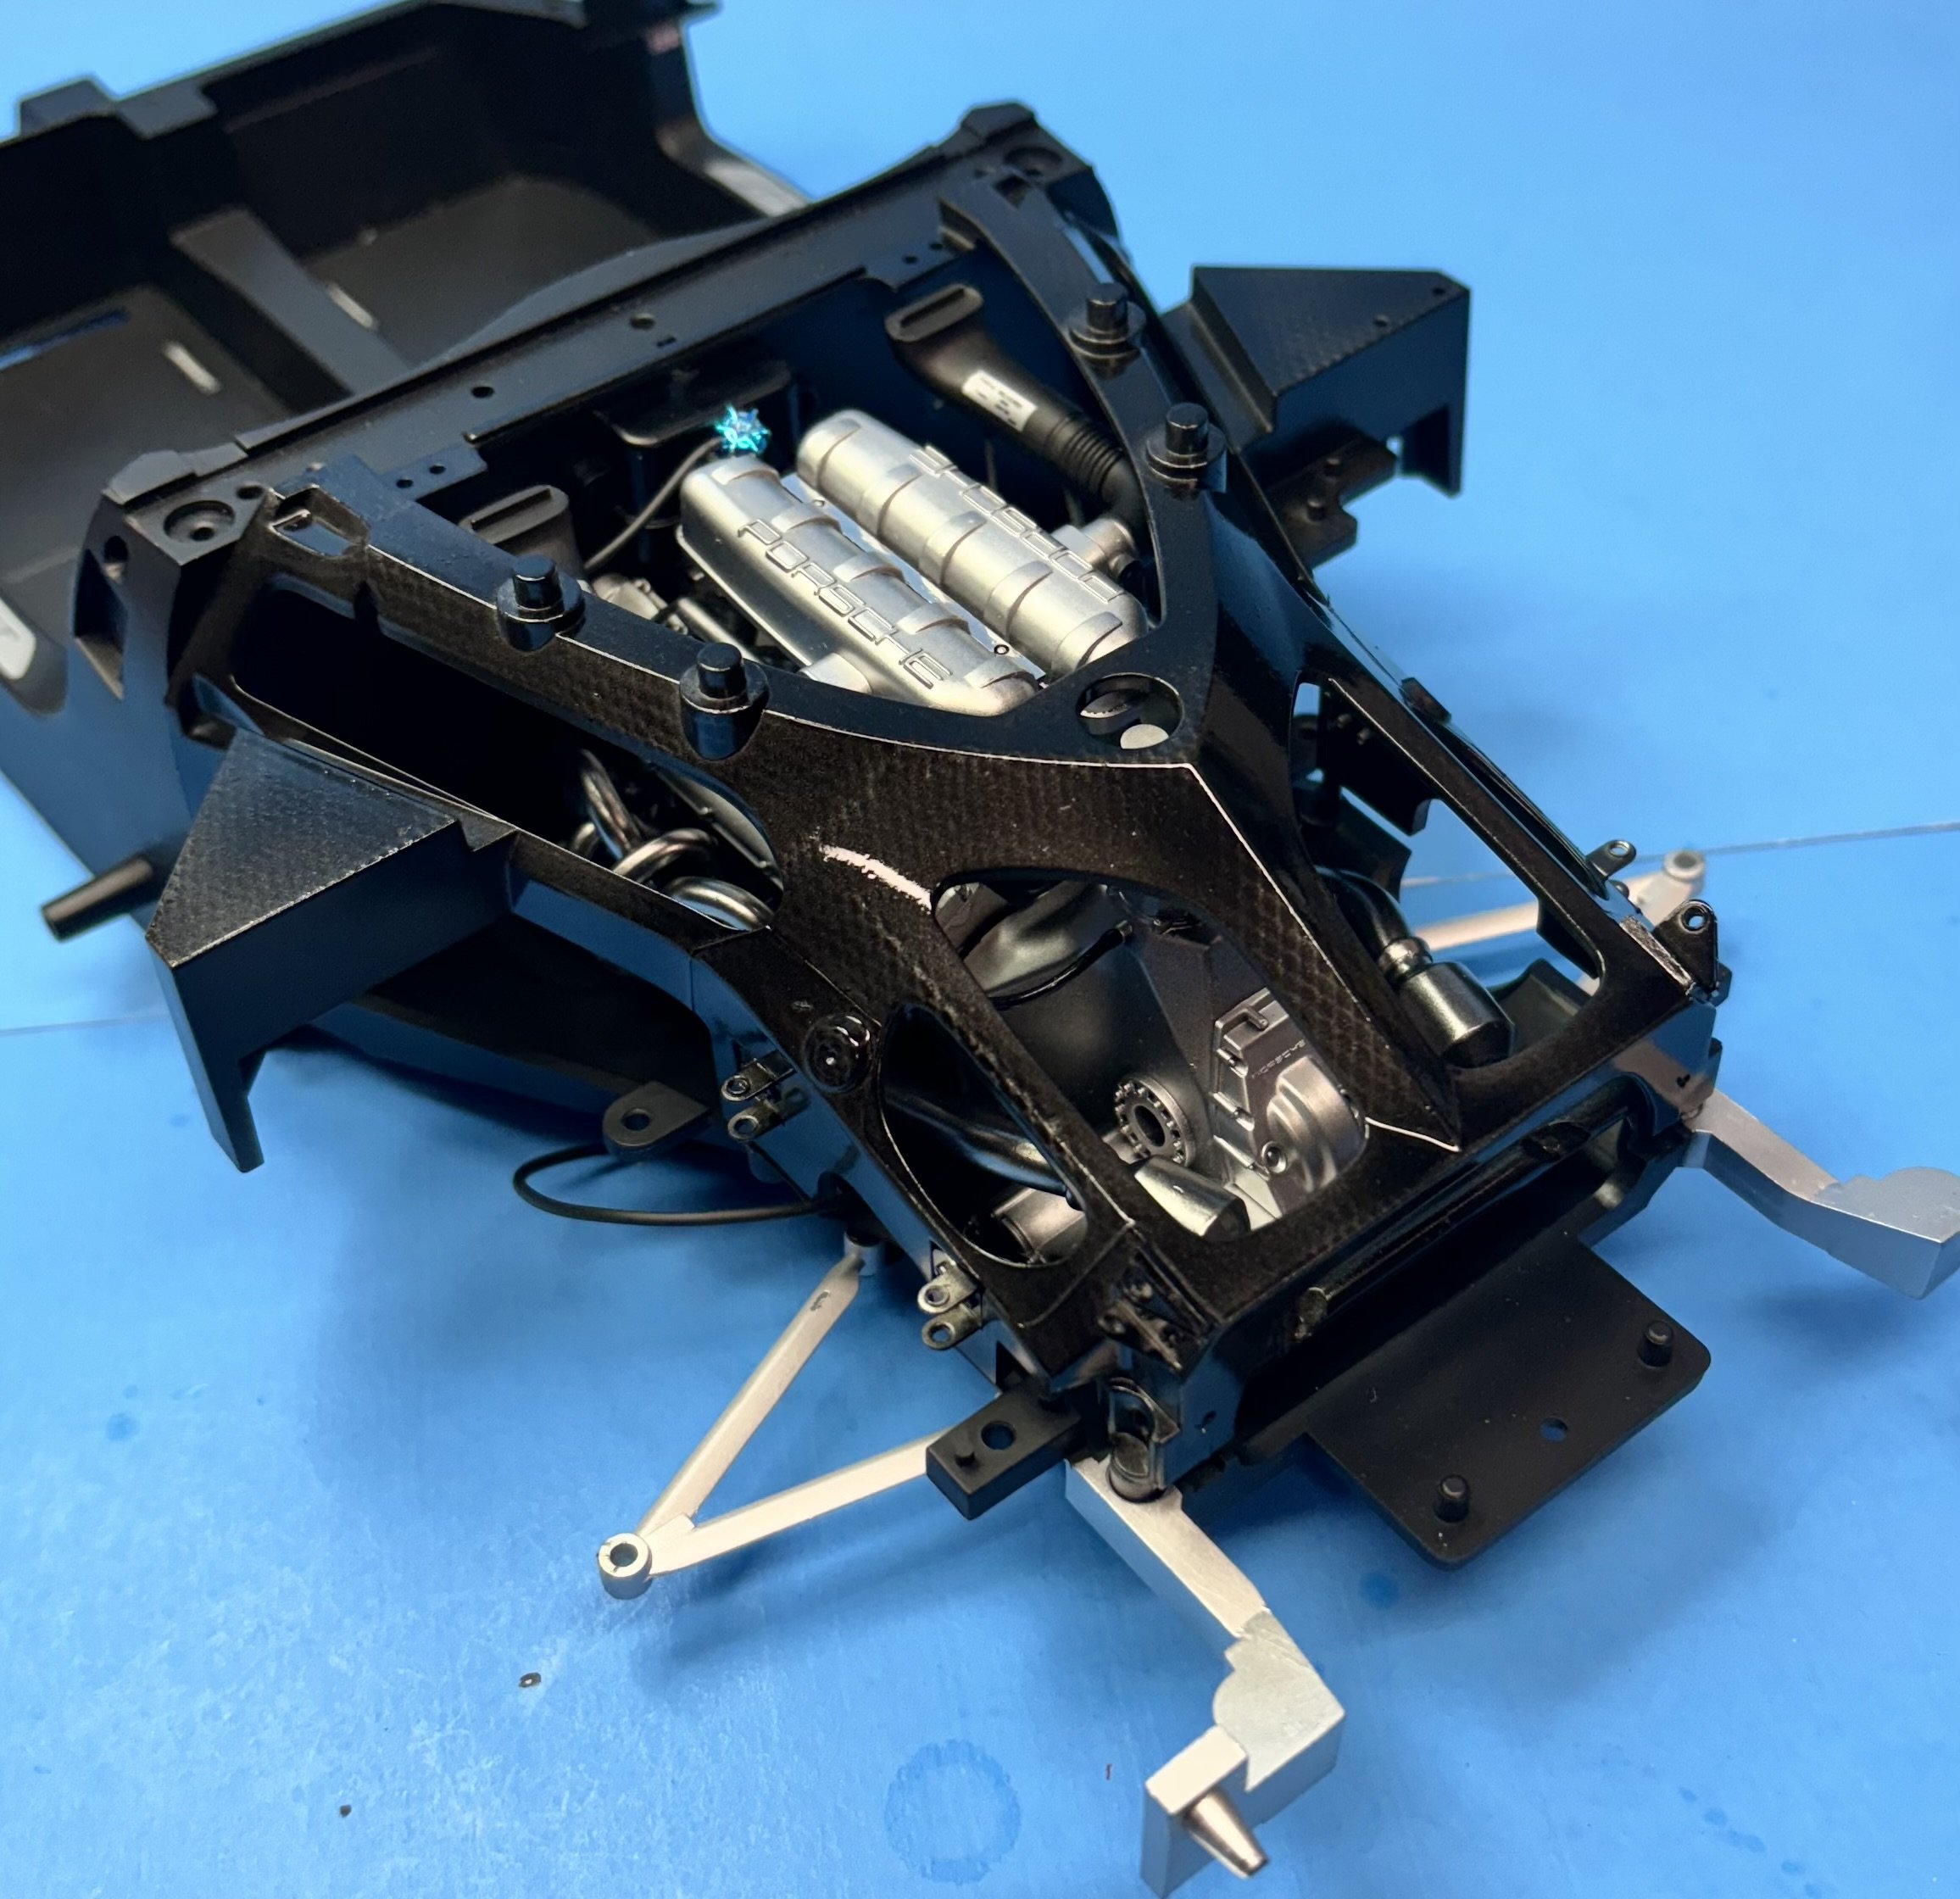
Looking at photos of the real machine, it's clear that only a small portion of the CF chassis will be in view. It won't be necessary to try and do and CF treatment to the entire chassis, only the parts that will be seen.
- Canute, GrandpaPhil, Jack12477 and 5 others
-
8
-
4 hours ago, yvesvidal said:
Yes, I used Tamiya Carbon Fiber decals on my MacLaren F1 and I was very pleased with the results.
Yves
Before I commit to CF decals, I'm going to experiment with spray painting a CF effect on scrap plastic. I've seen other modelers use tulle fabric as a mask to achieve a credible-looking CF finish. I think it's worth a try. I'll post the test results here so everyone can see. I have not found anyone who markets precut CF masks or decals, so either way, it's going to take a little time and experimentation to get it close to being right.
- Old Collingwood, mtaylor, Canute and 2 others
-
5
-
26 minutes ago, CDW said:
I’ll do some digging, but I am wondering how much if any of the chassis is carbon fiber. Now’s the time to make that happen if it is carbon fiber.
Didn't take long to learn the answer to that question. The chassis is carbon fiber. I guess I better acquire some CF decal sheets.
-
1 hour ago, gsdpic said:
Looking good. But yes, that is one of the disadvantages of building models of newer supercars.....the engine is mostly hidden and the underside will just be one big, mostly flat panel hiding most of the suspension, in addition to hiding the engine.
I’ll do some digging, but I am wondering how much if any of the chassis is carbon fiber. Now’s the time to make that happen if it is carbon fiber.
-
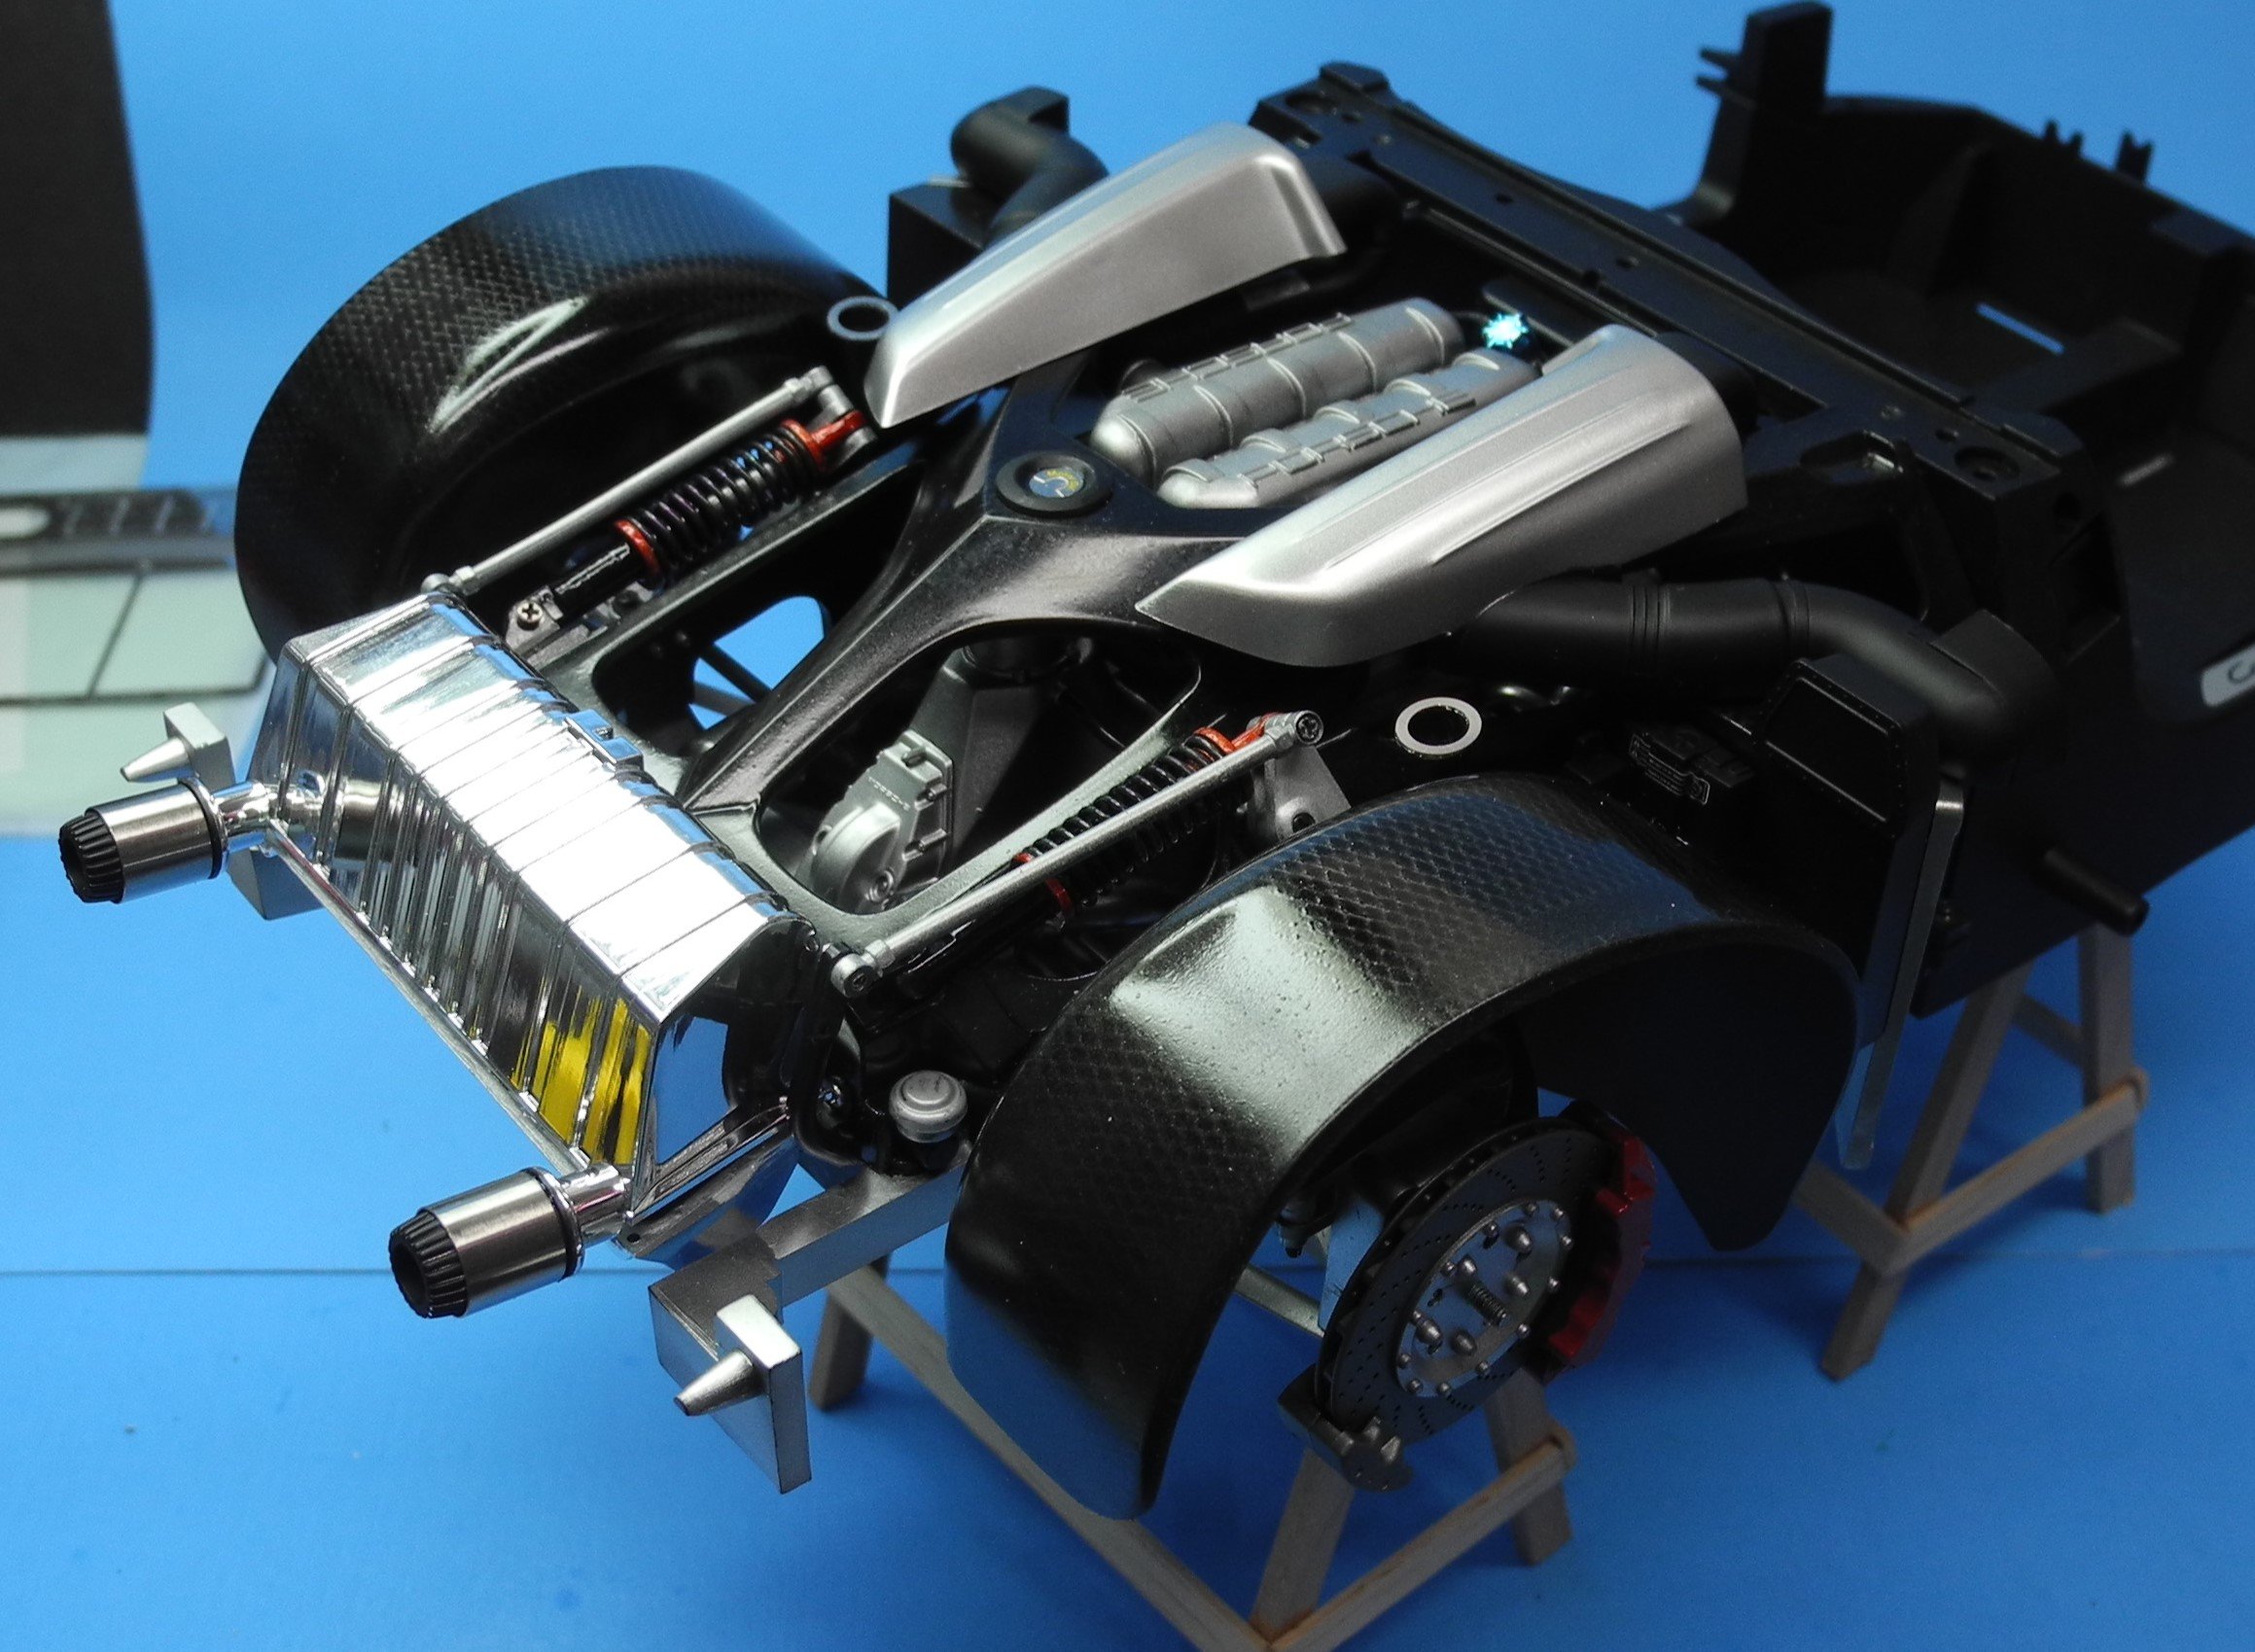
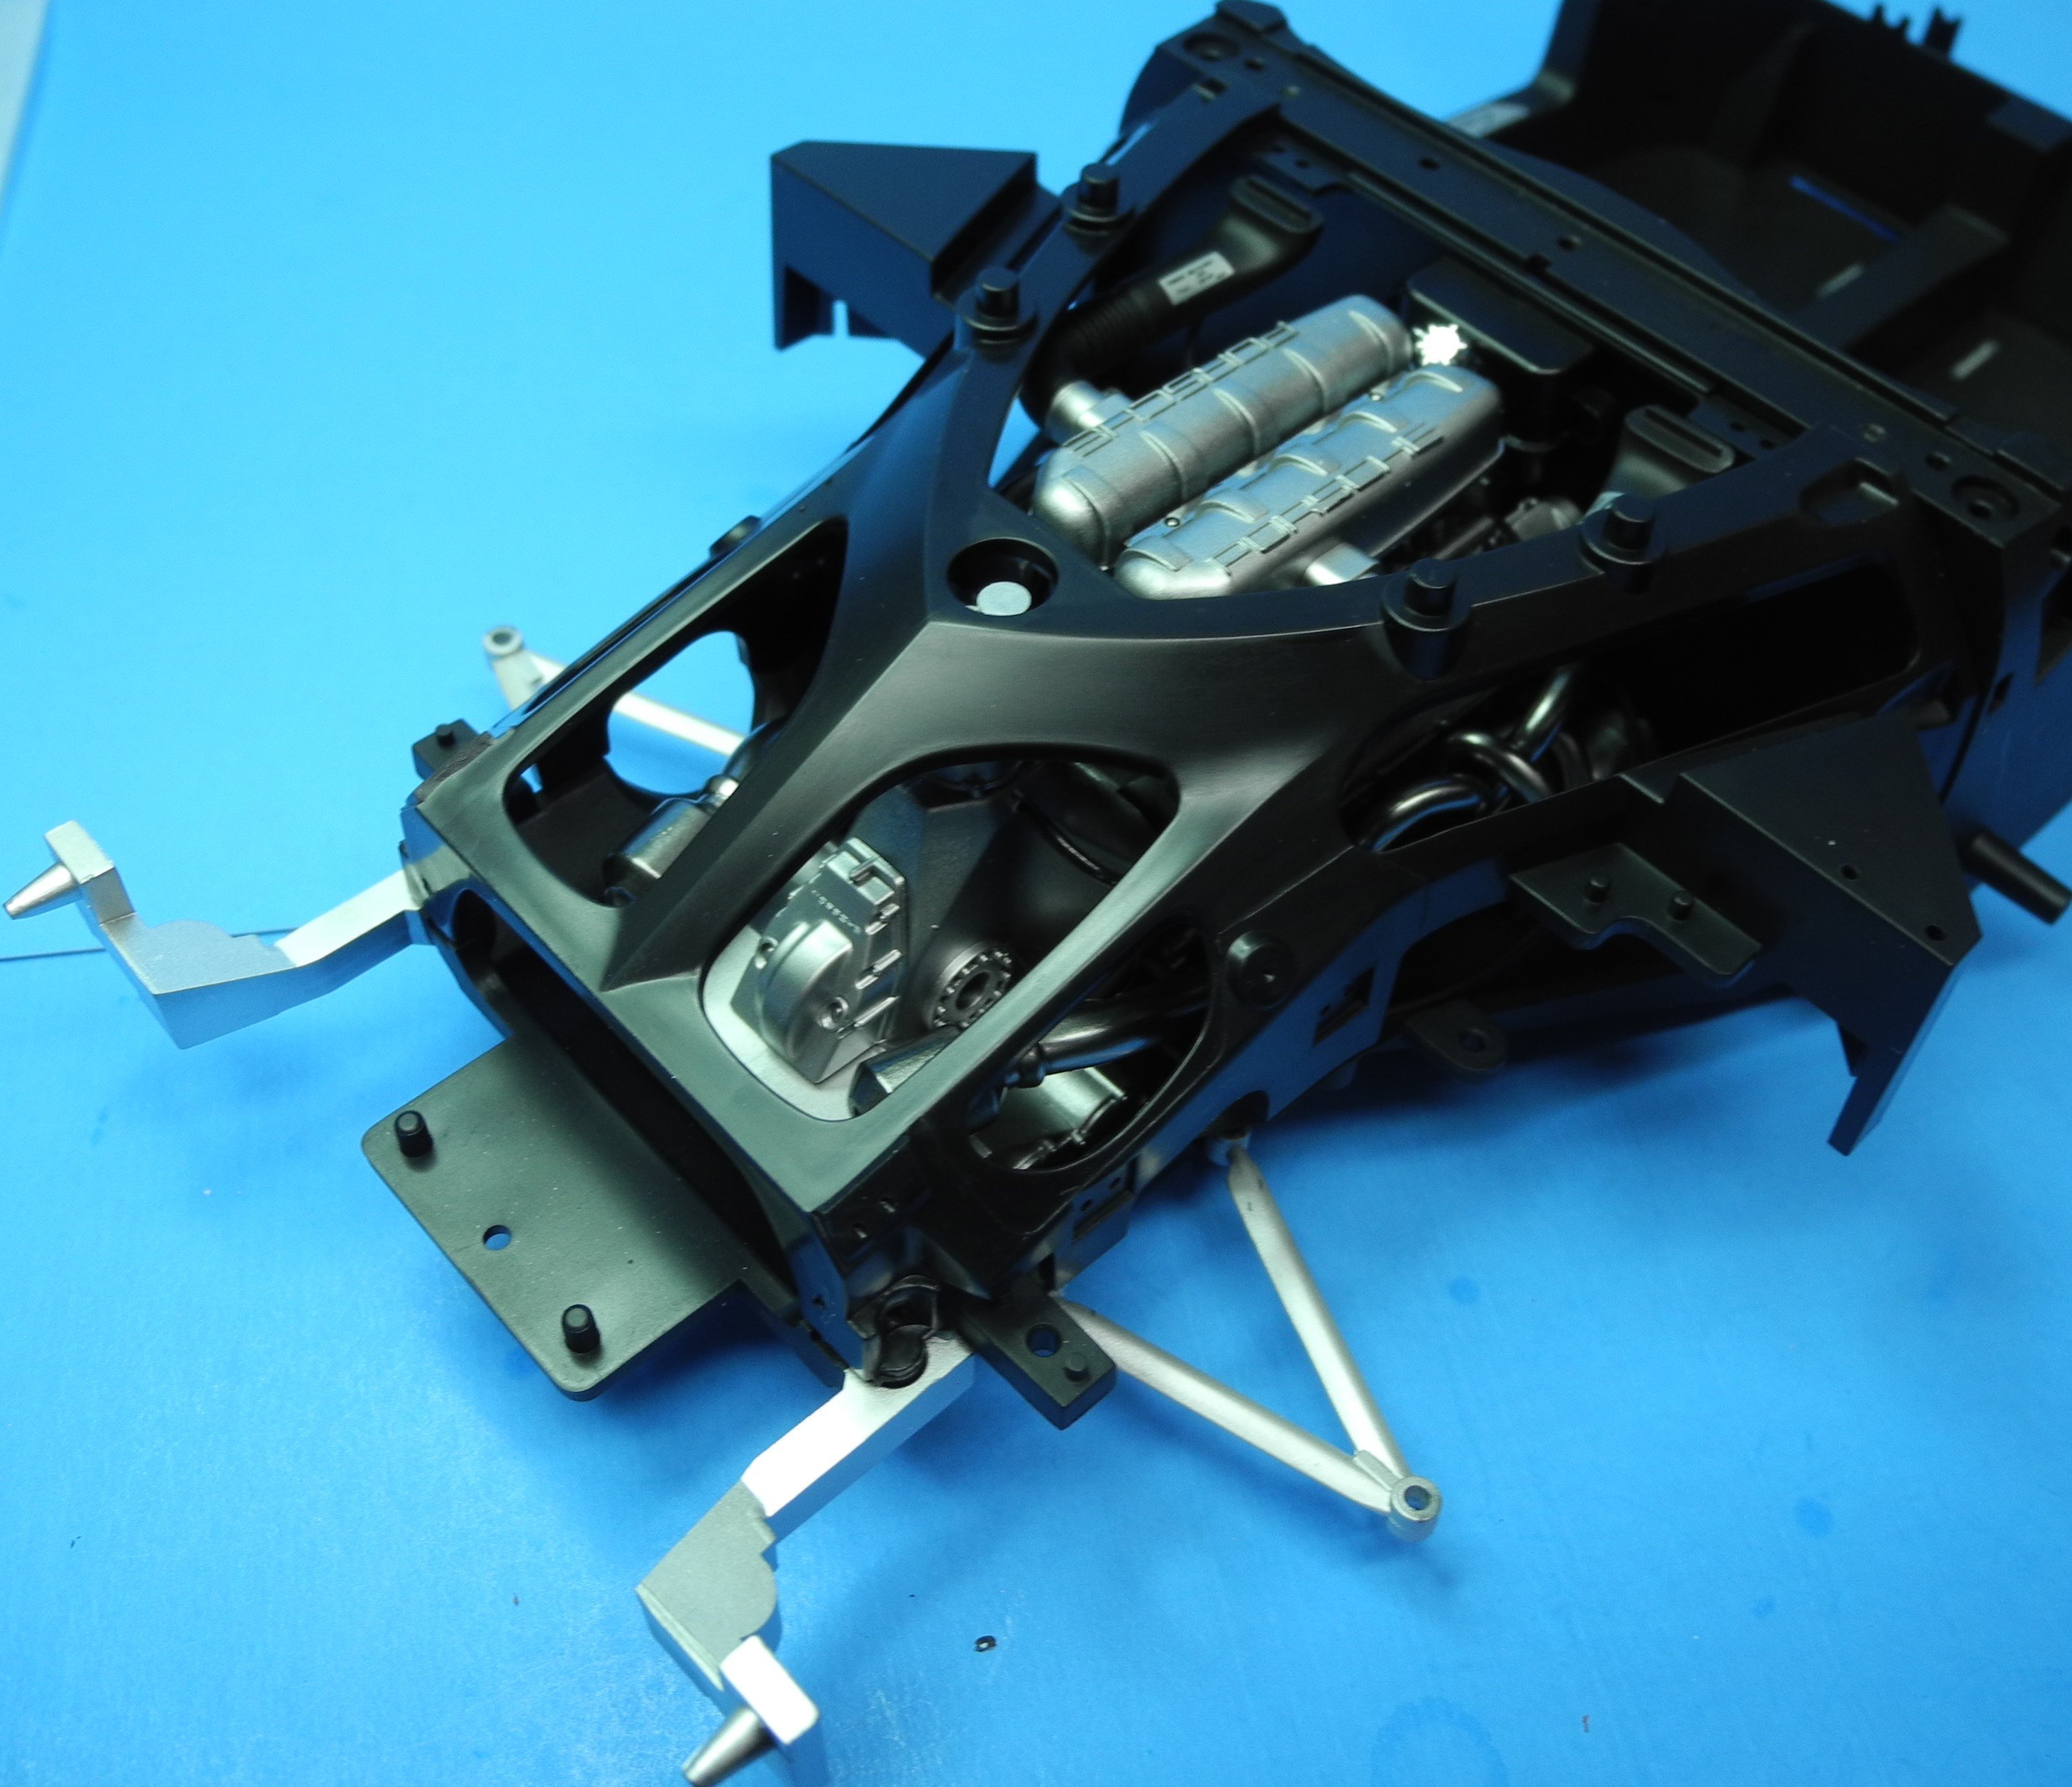
Dry-fitting the rear, upper monocoque chassis part reveals how little of the engine will be seen once the model is all together.


- druxey, king derelict, GrandpaPhil and 7 others
-
10
-
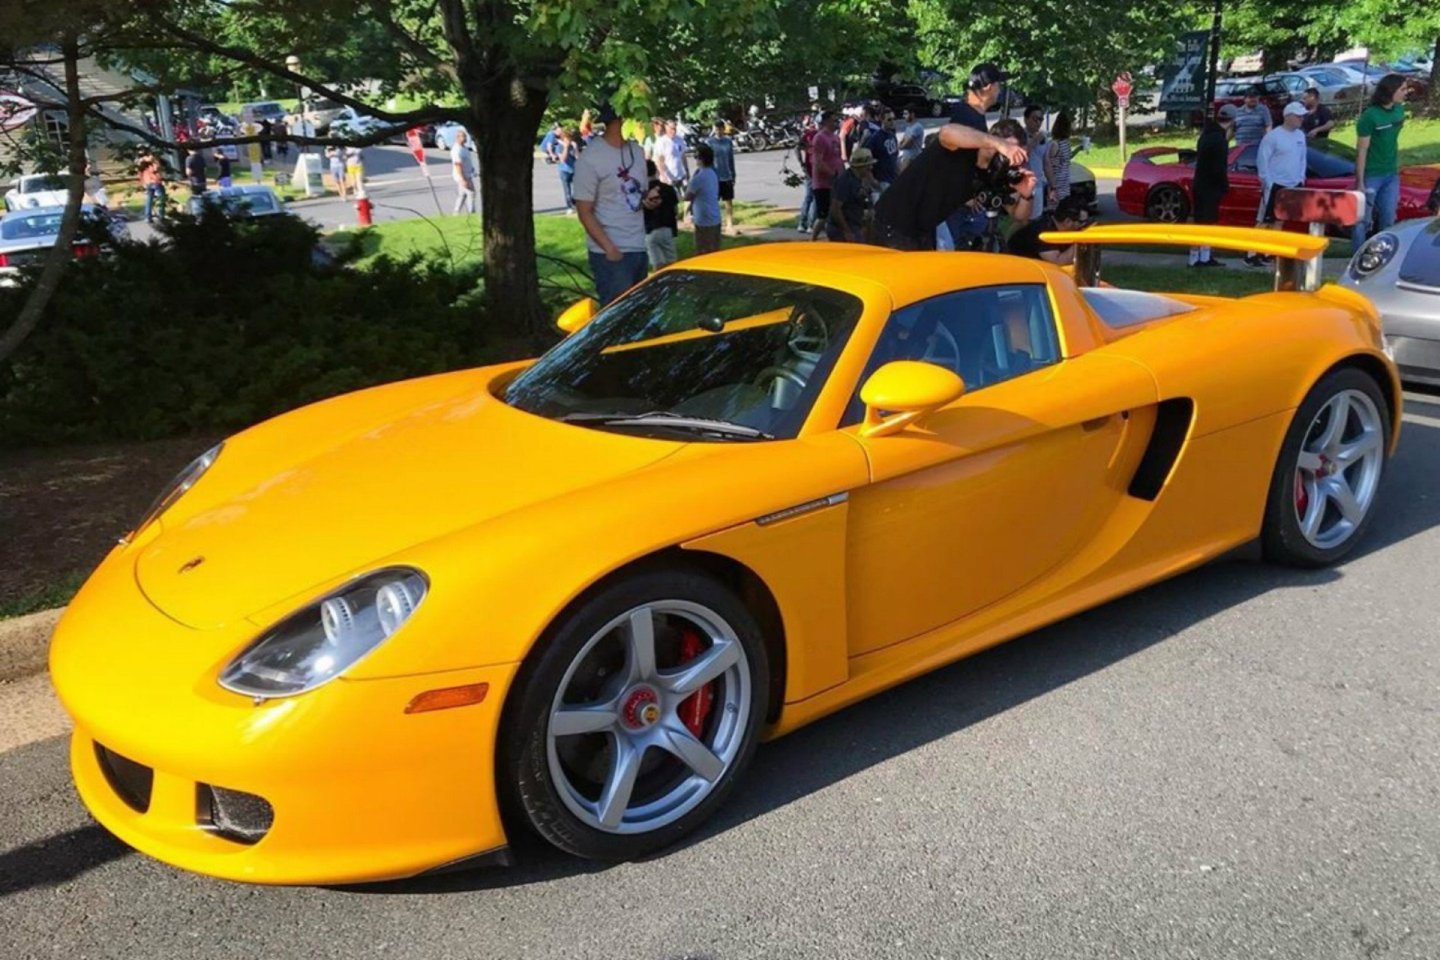
I am working to secure a custom mix of DuPont Axalta paint to replicate this "Signal Yellow" 2010 Carrera GT. This particular color was not one of the 5 colors offered by Porsche but was a special order from the factory, so this particular Porsche is a one-of-a-kind factory car because of the color.
-
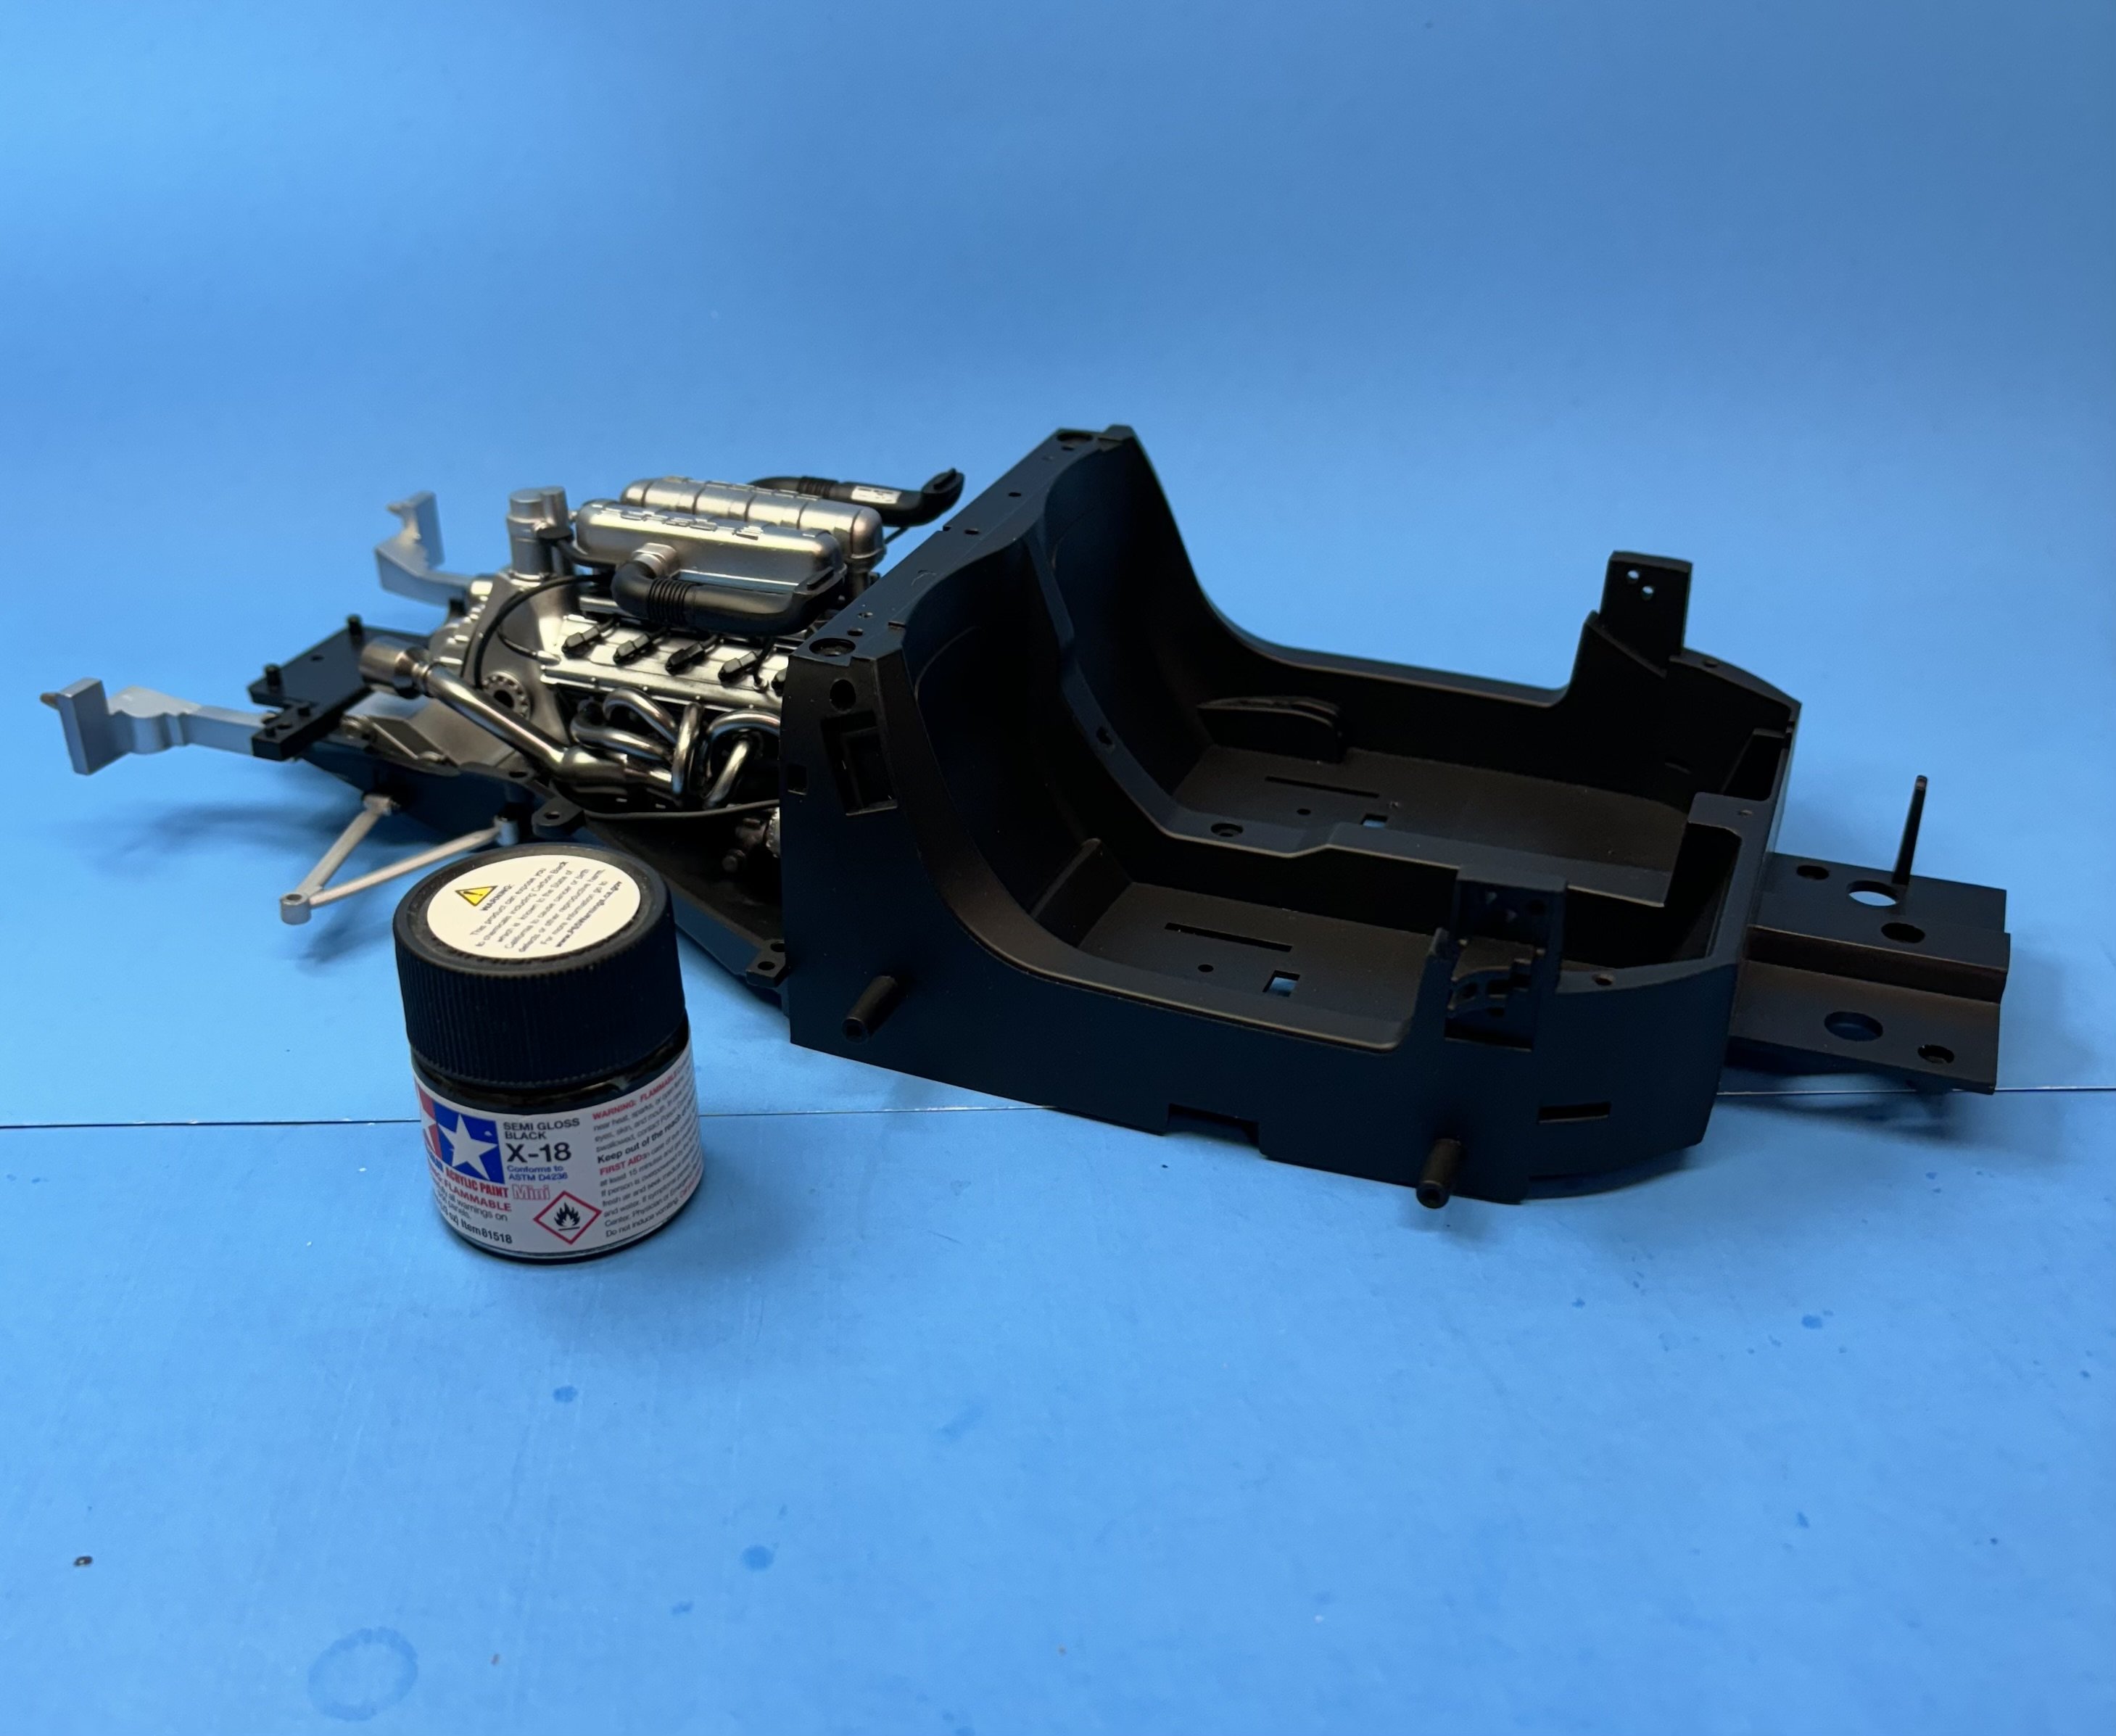
A quick update on where I’m at with construction of the Porsche Carrera GT. A Tamiya paint jar is in the photo to give a sense of scale. Most of the suspension parts now being added to the build are made of cast metal. Minimal amounts of cleanup are needed before priming and painting.


- Javlin, mtaylor, GrandpaPhil and 6 others
-
9
-
Time well spent. Outstanding work on those LG legs, Mike.
- Dave_E, PvG Aussie, FriedClams and 8 others
-
10
-
 1
1
-
-
1 hour ago, Jack12477 said:
Did you change the paint color on the lower half from silver to black ? Or is that the blue mat under the model messing with the color ?
Either way still a beautiful model. Nice work Craig !
It's a reflection from the blue paper as well as a result of no flash being used for the photo.
-
1 hour ago, king derelict said:
Beautiful work Craig. Immaculate paint finish and great photos
alan
41 minutes ago, yvesvidal said:Craig, another winner for your next competition.
Yves
Thanks gentlemen. Looking at the photos, I just realized I forgot to attach the windshield wipers!


Porsche Carrera GT by CDW - FINISHED - Tamiya - 1:12 Scale - PLASTIC
in Non-ship/categorised builds
Posted
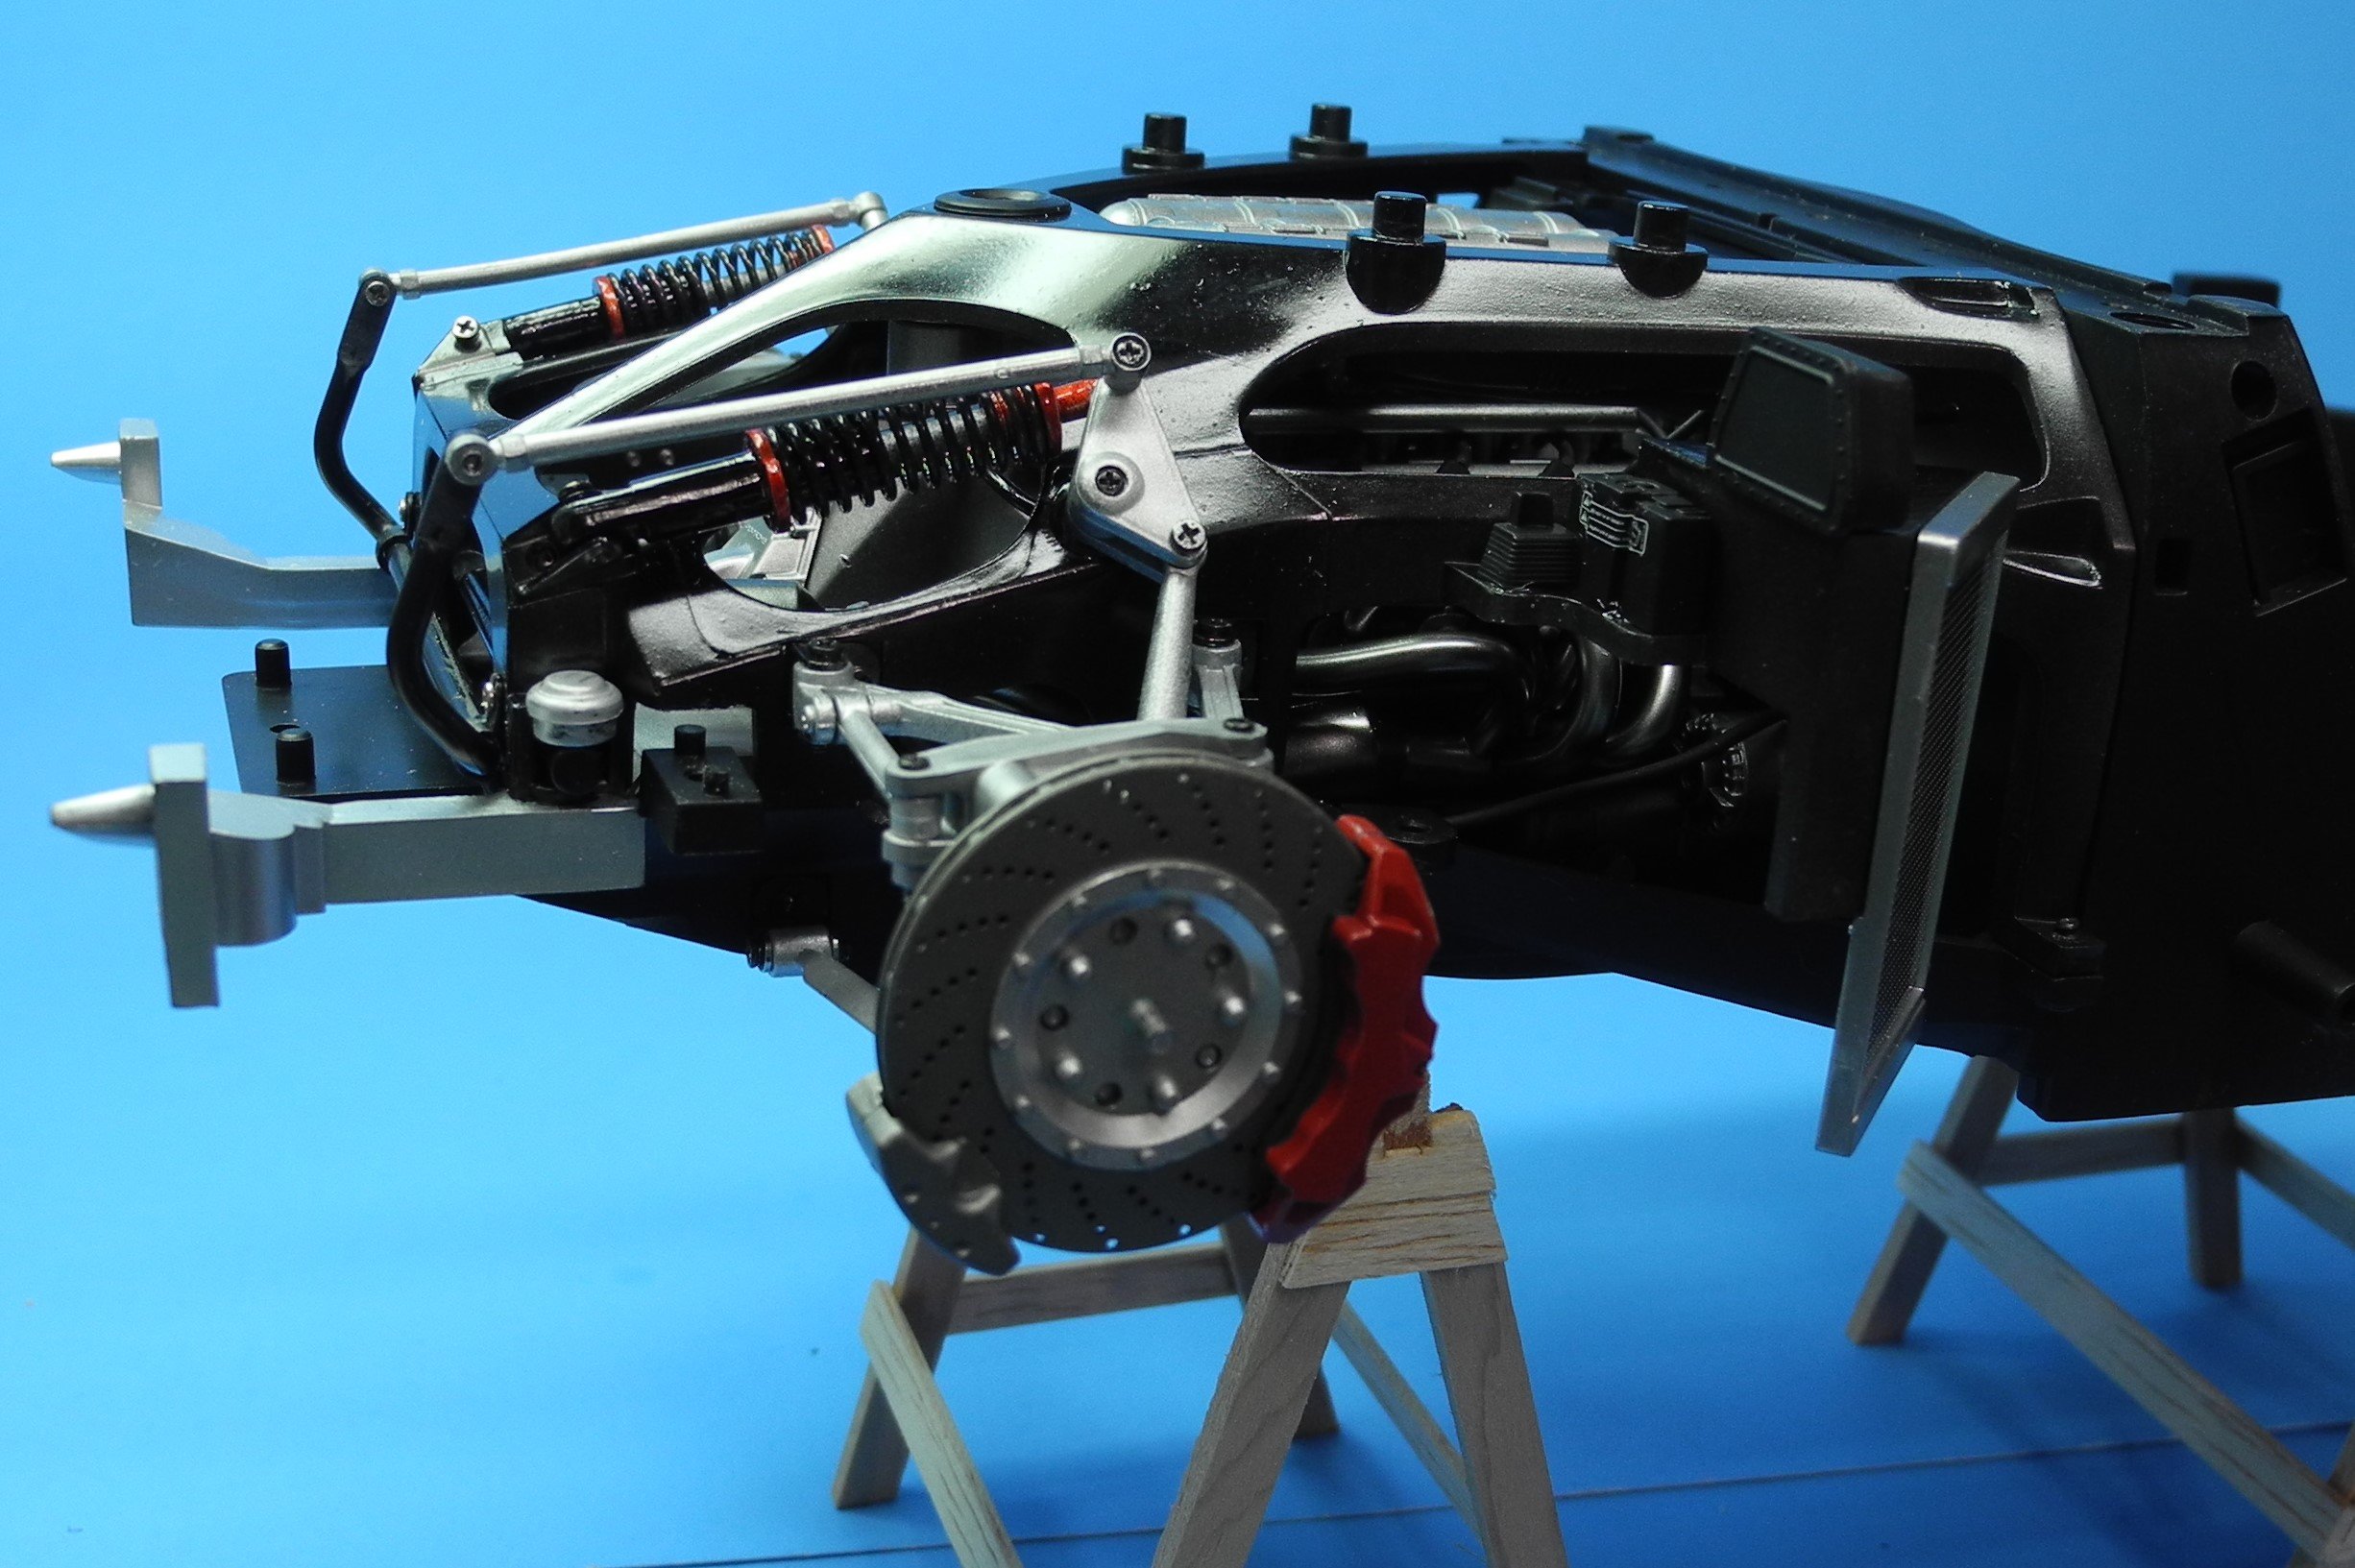
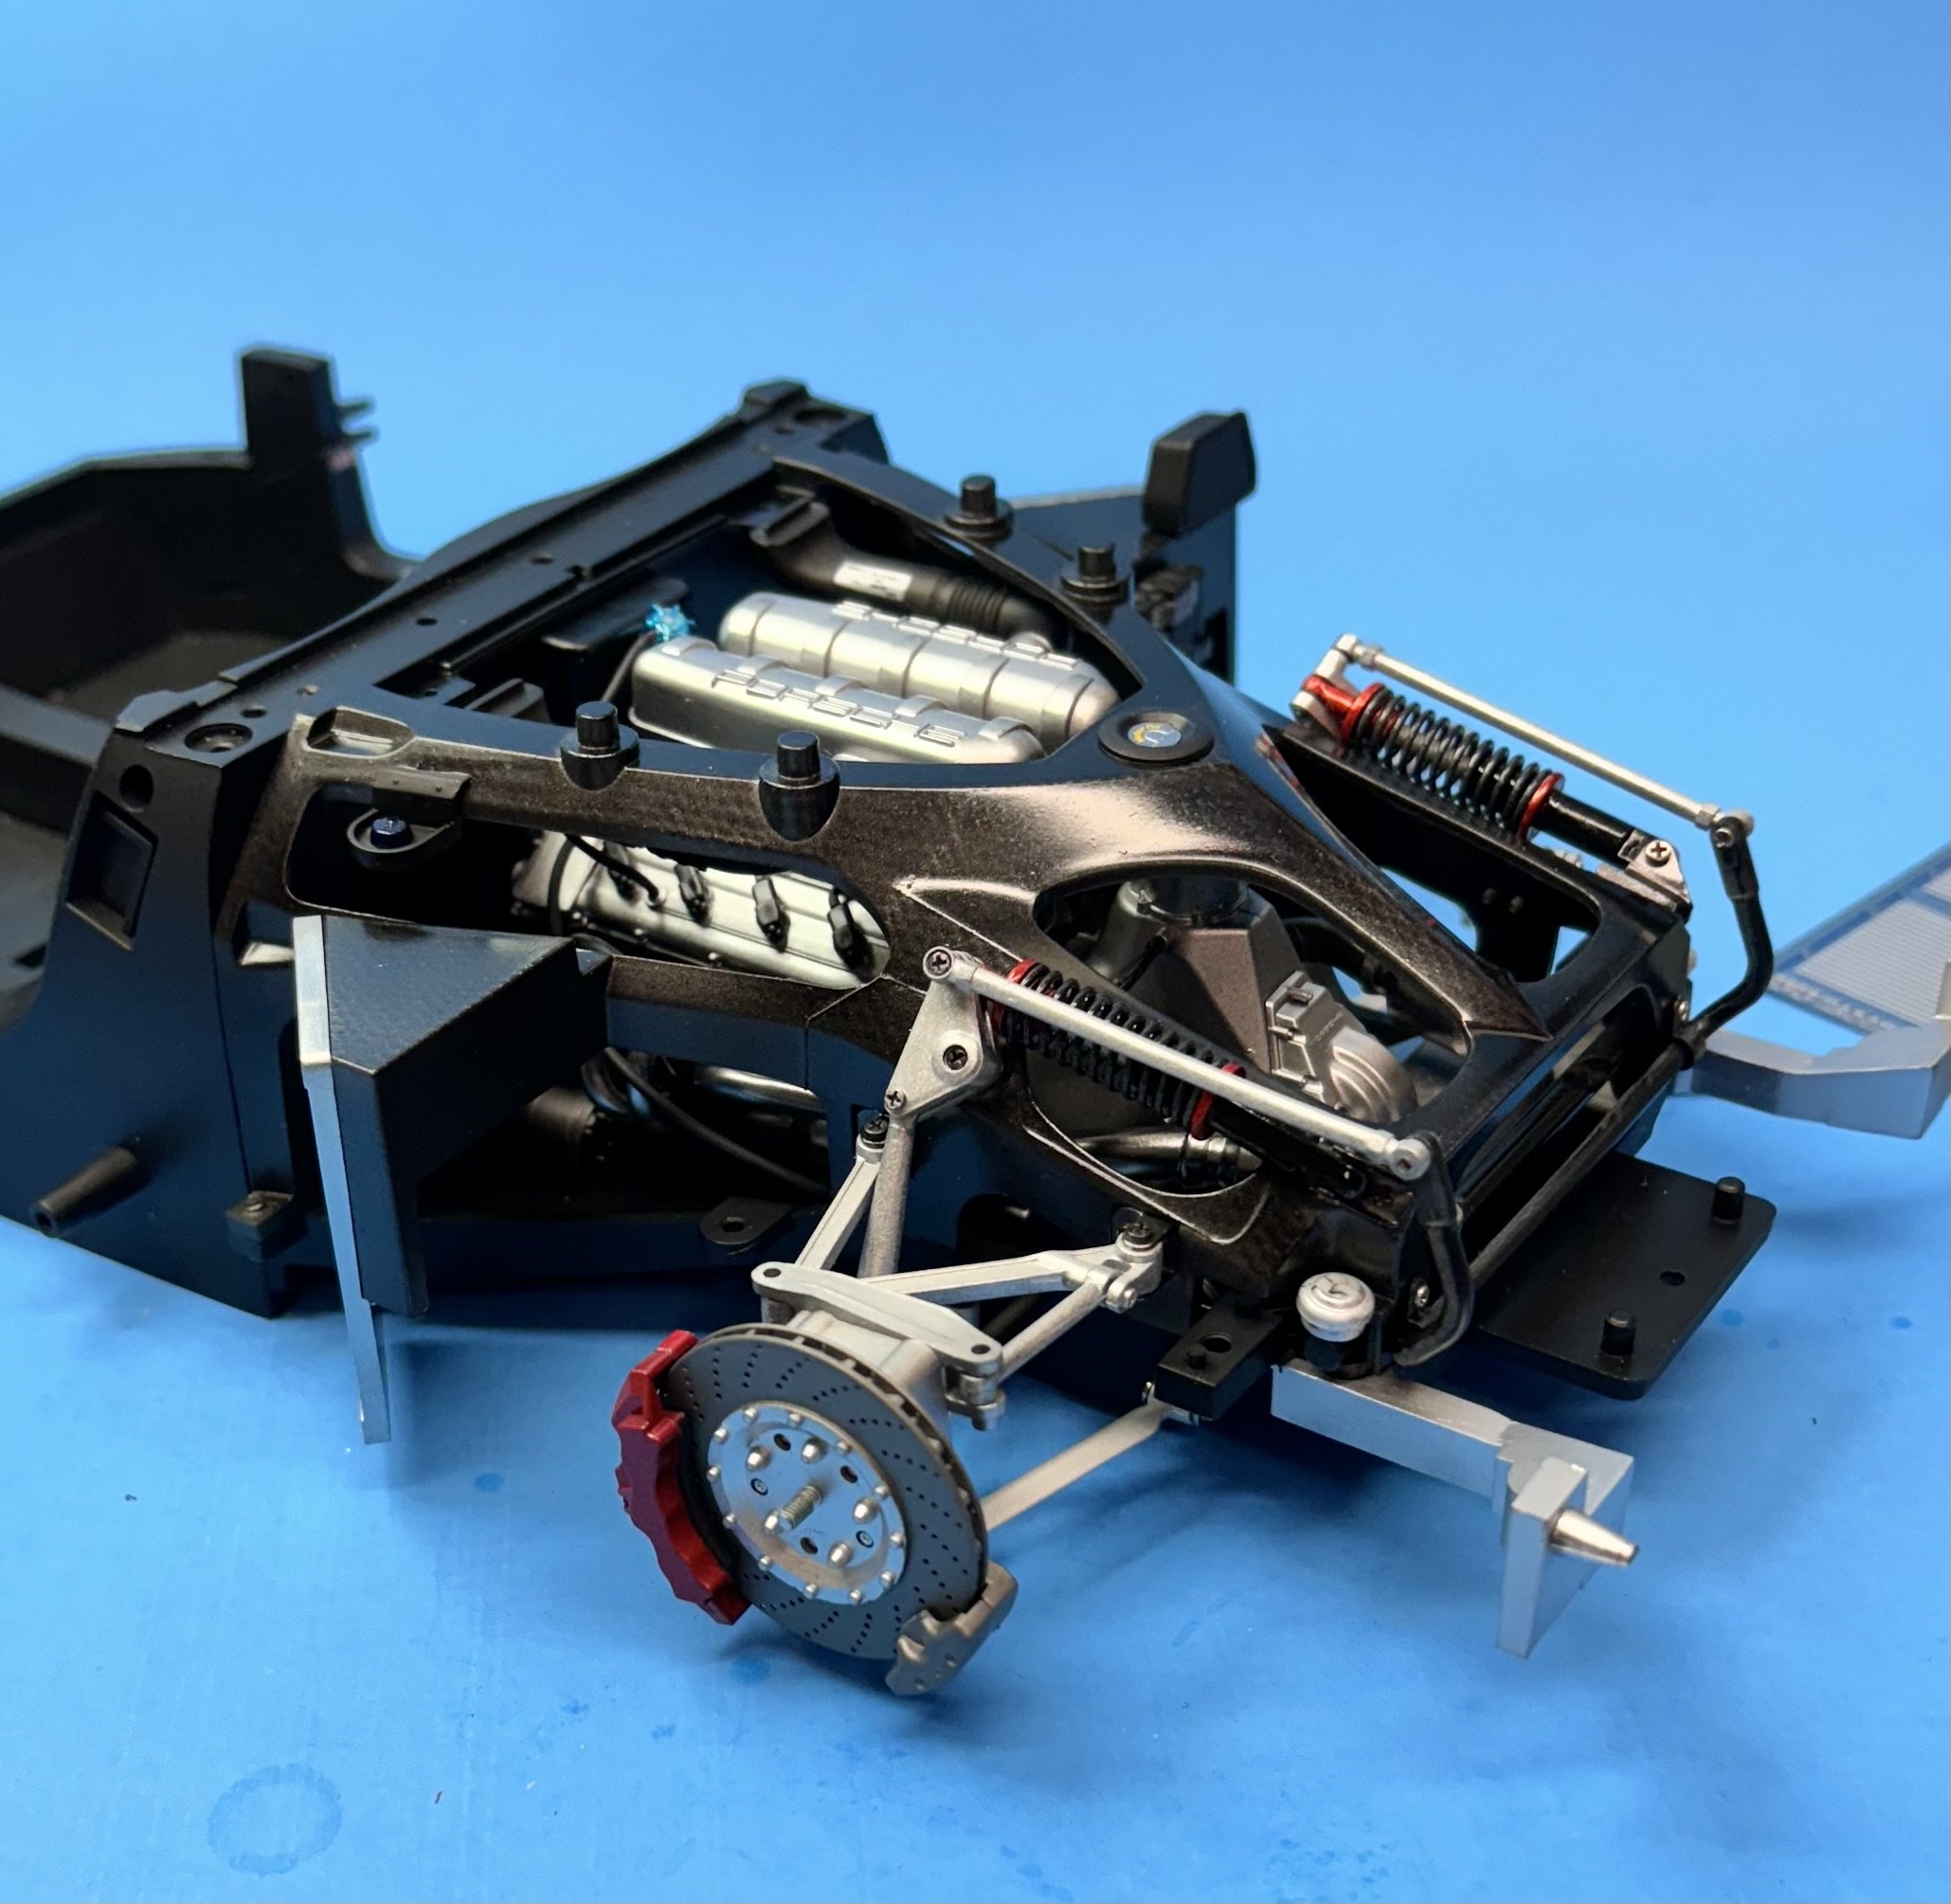
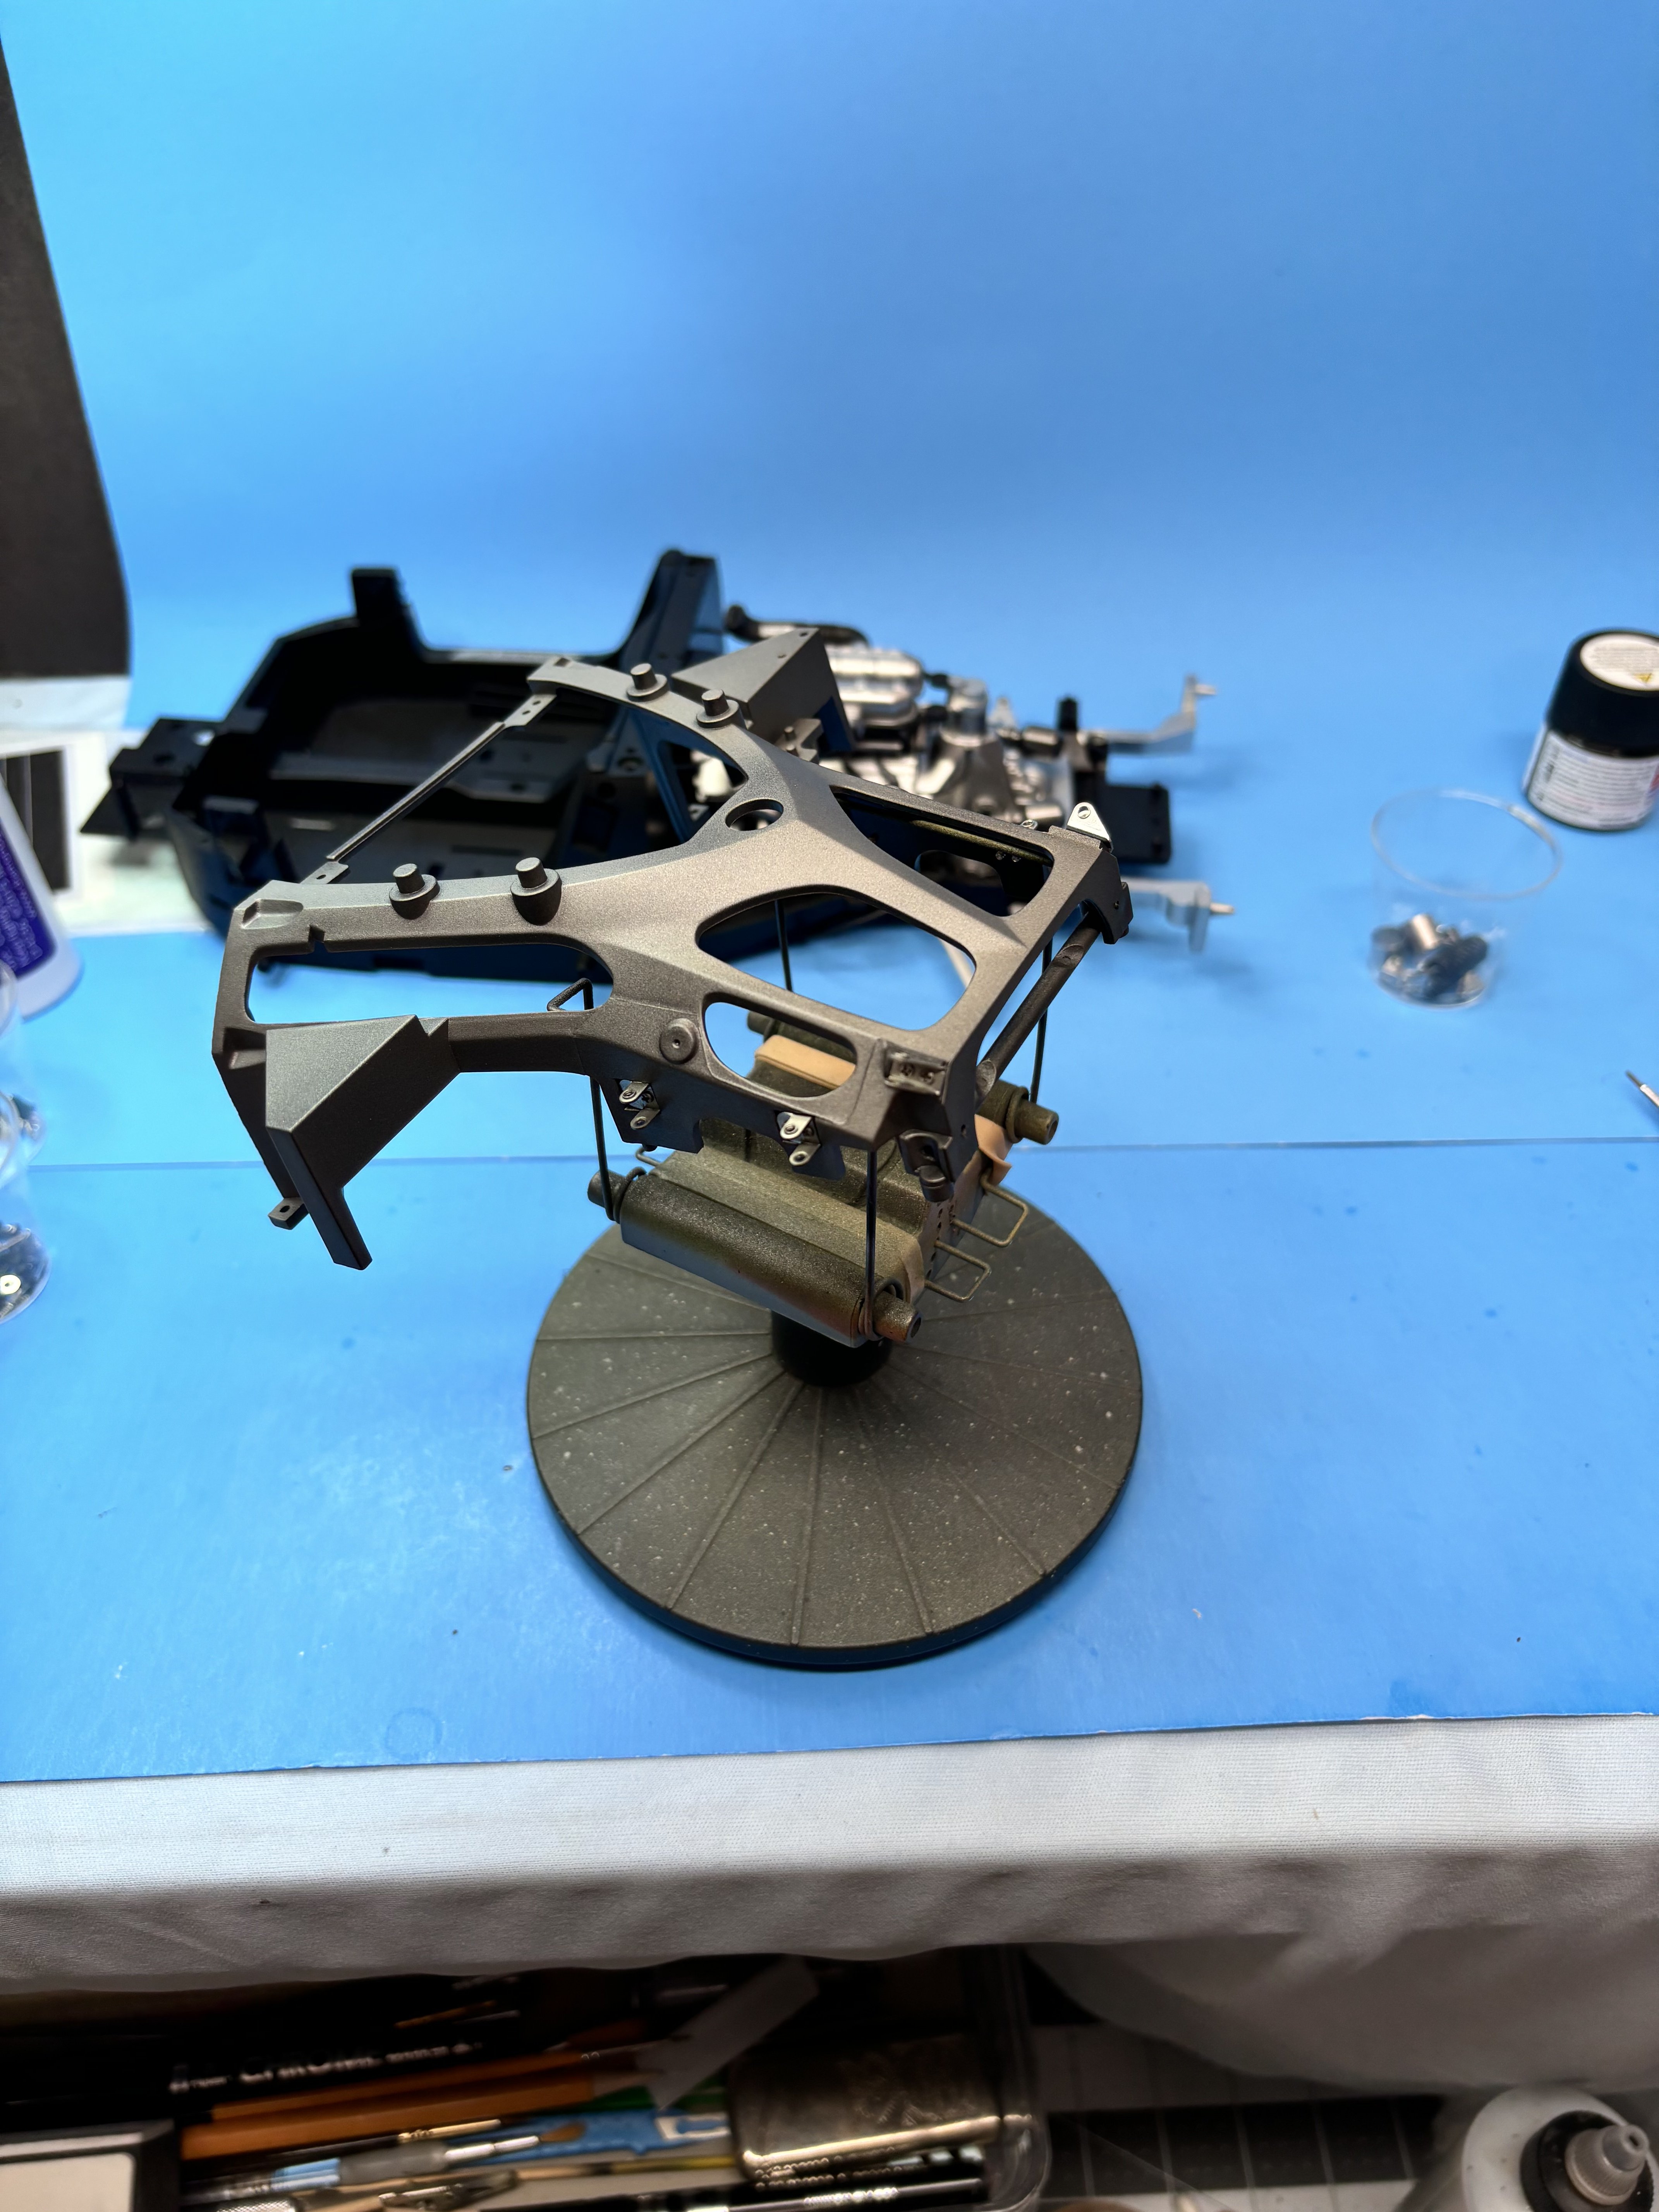
What you see here of the front suspension will mostly be hidden from view when the model is completed. Photos are for posterity. It will be hidden but not forgotten. A small amount will possibly be seen through the wheel spokes perhaps but that’s about all.
I can see why one might invest in a tumbler/polisher. There is a lot of time and effort required to clean up the cast metal parts just to prepare them for painting. While the castings are Tamiya quality, there are still mold lines to contend with.
Right now I am considering whether or not to install LED head and tail lamps. If I’m going to do that, now is the time to figure out the wire routing. I’ve been studying Arduino boards by watching videos and reading up on them. Ever heard of Arduino boards? You can do some very interesting light programming with these little marvels of modern technology.