HOLIDAY DONATION DRIVE - SUPPORT MSW - DO YOUR PART TO KEEP THIS GREAT FORUM GOING! (Only 24 donations so far out of 49,000 members - C'mon guys!)
×

CDW
-
Posts
7,747 -
Joined
-
Last visited
Content Type
Profiles
Forums
Gallery
Events
Everything posted by CDW
-

Green Elephant funny car by jct - FINISHED - 1/24 - PLASTIC
CDW replied to jct's topic in Non-ship/categorised builds
JCT The Vega is BEE U TEE FUL! I always loved that body style back then...it looked like a mini Z28 Camaro. Too bad the stock ones had such a crappy engine. Everyone I knew who bought one had terrible service life out of that power train. But man, they made one helluva sharp looking race car in my opinion. -
Orient Express Sleeping Car 1929 by James H - Amati - 1/32
CDW replied to James H's topic in Non-ship/categorised builds
Beautiful Lancaster. I assume the bomb bay is fully detailed as is the cockpit and gunner's stations? Wheel wells? -
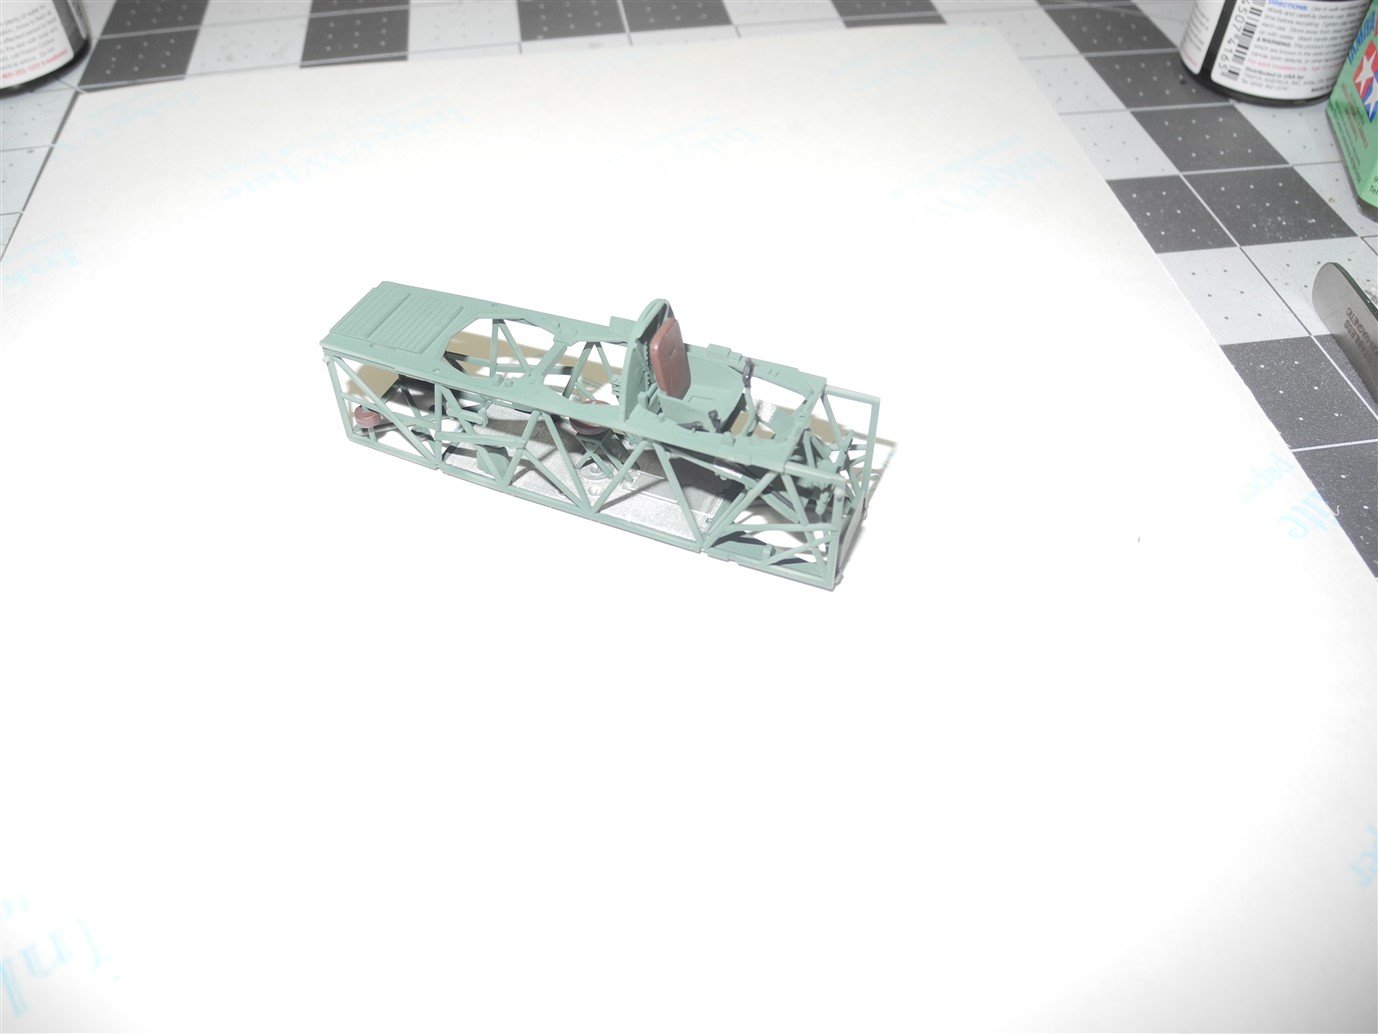
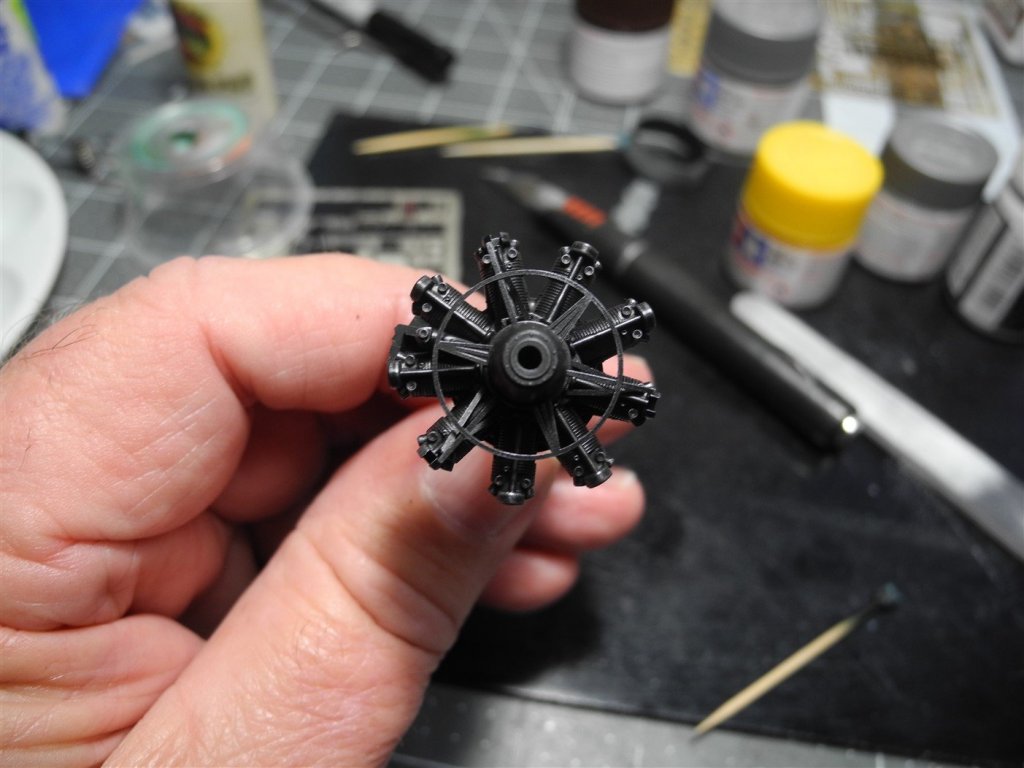
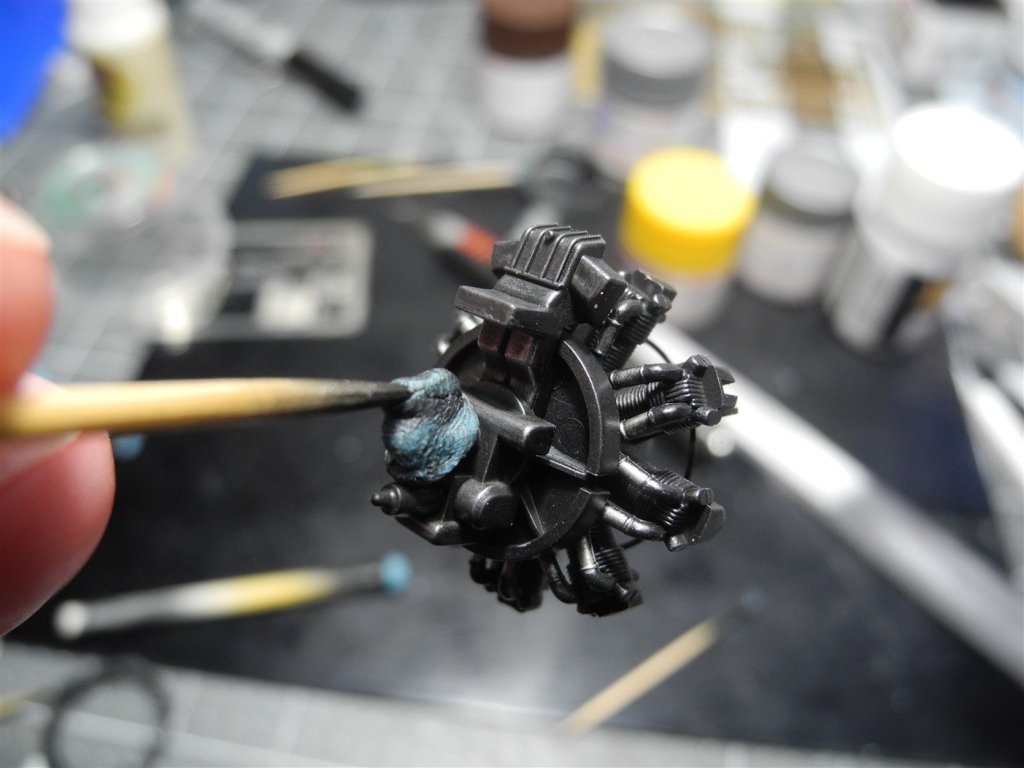
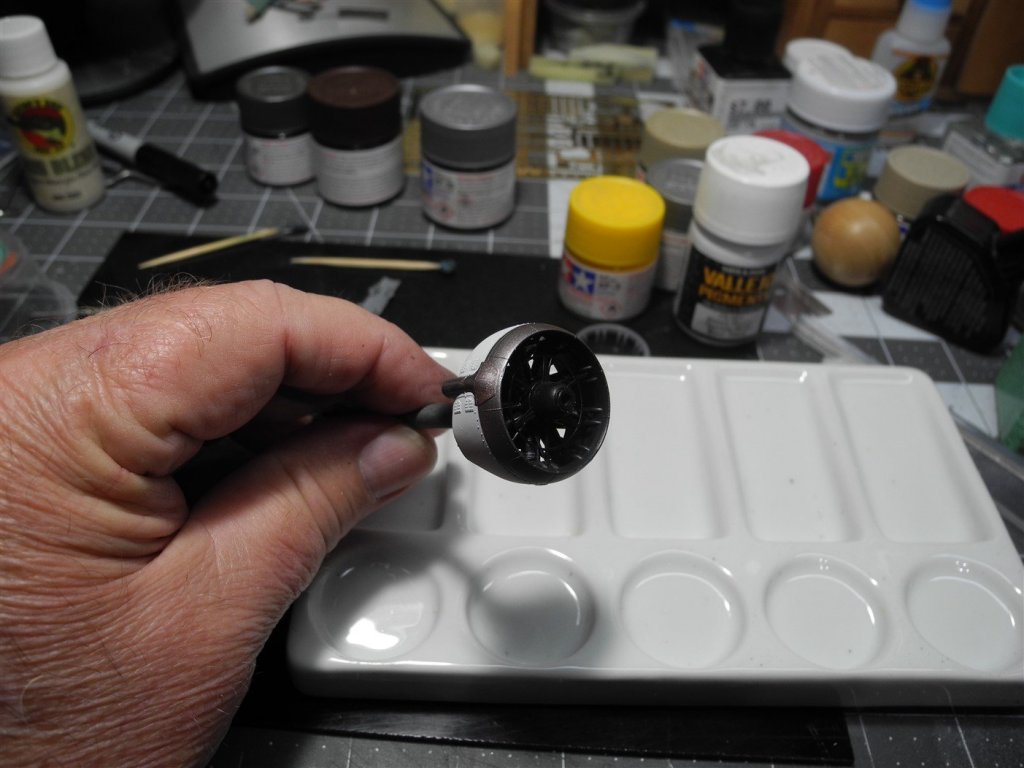
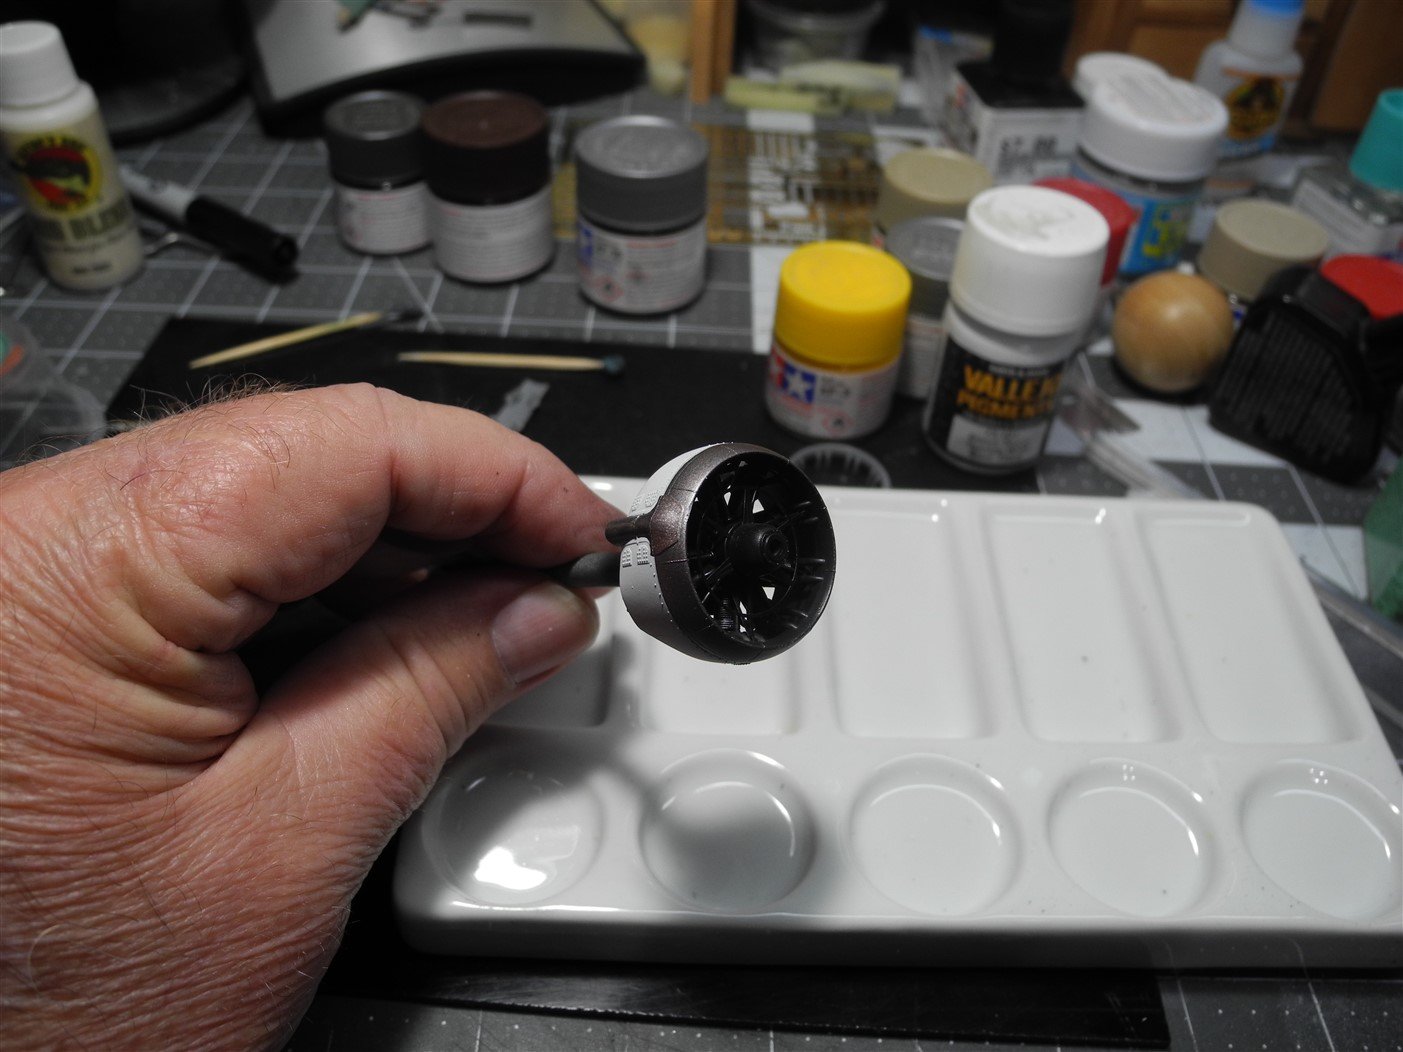
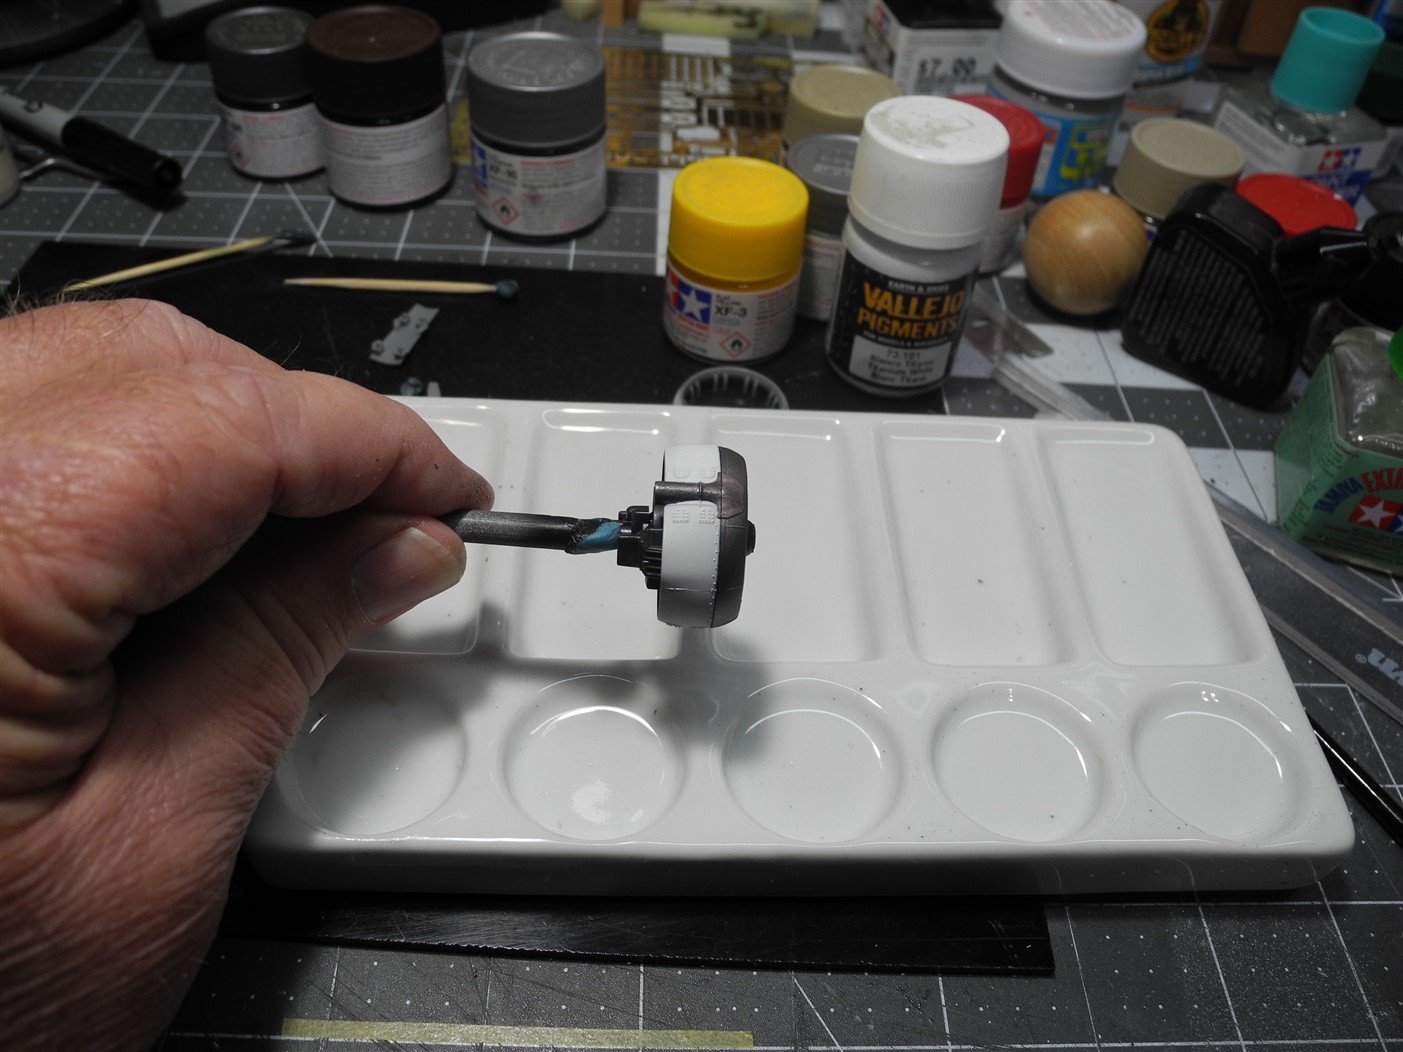
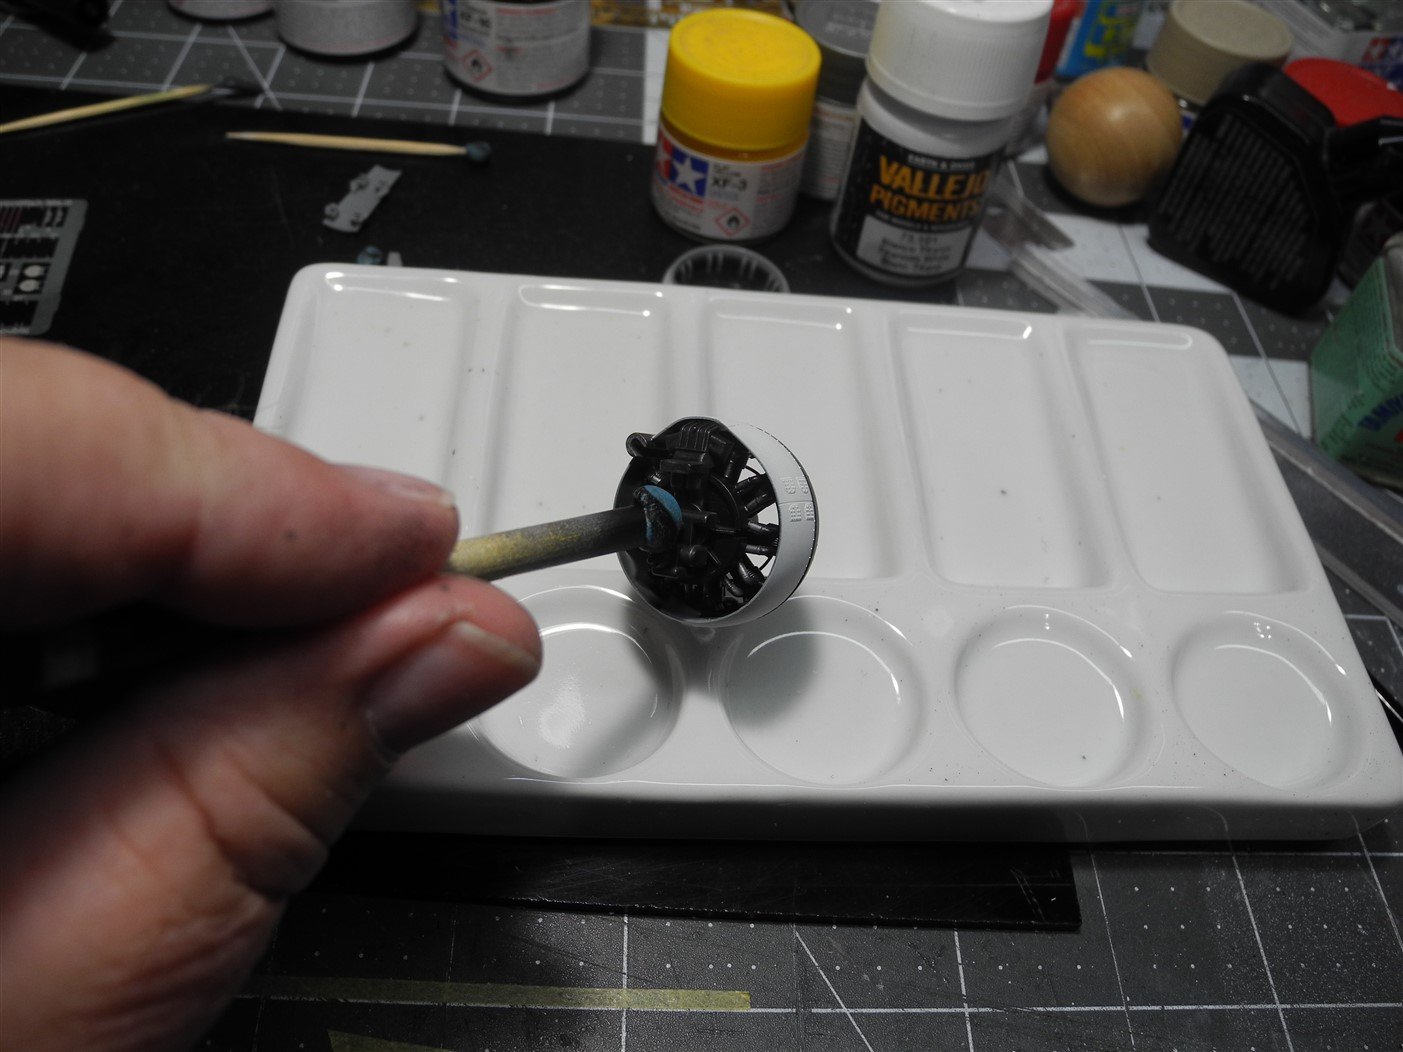
The 750 HP Pegasus radial engine. Paint used: Tamiya semi gloss black for engine and attached parts, Mr Metal Color Iron for dry brushing engine, Mr Metal Color Chrome on intake manifold. Completed cowling with radial engine attached inside Paint used: Tamiya Flat White for main cowl ring; a mix of Tamiya Metallic Gray + Red on the forward cowl ring; Tamiya Titan Gold for the exhaust shroud on forward cowl ring; Tamiya semi gloss black on insides of both cowl pieces/rings


- 79 replies
-
- 13
-

-
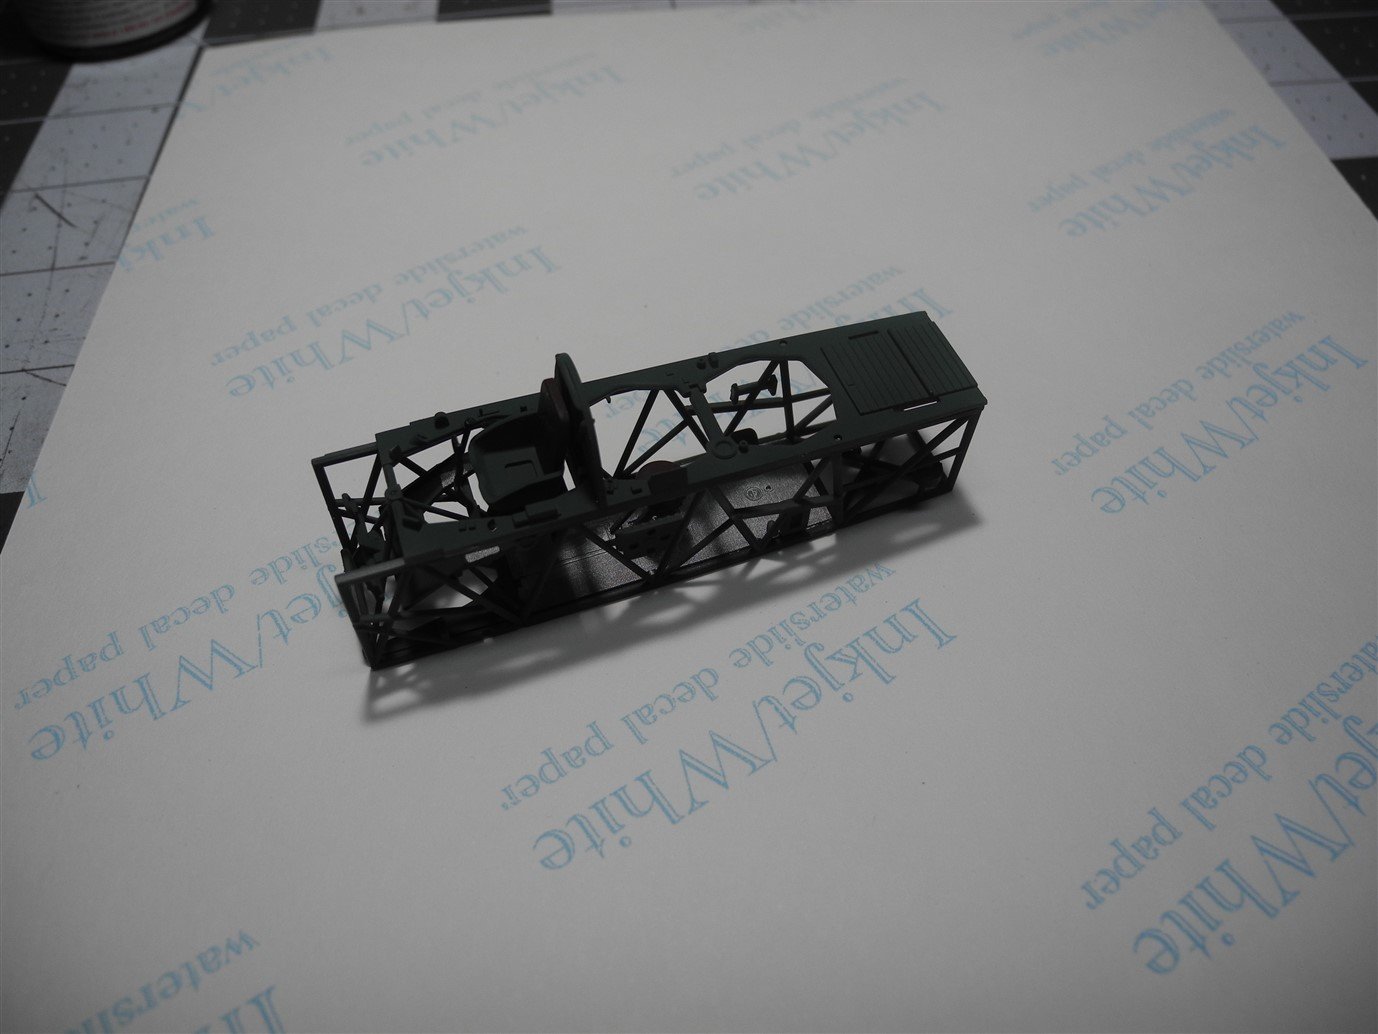
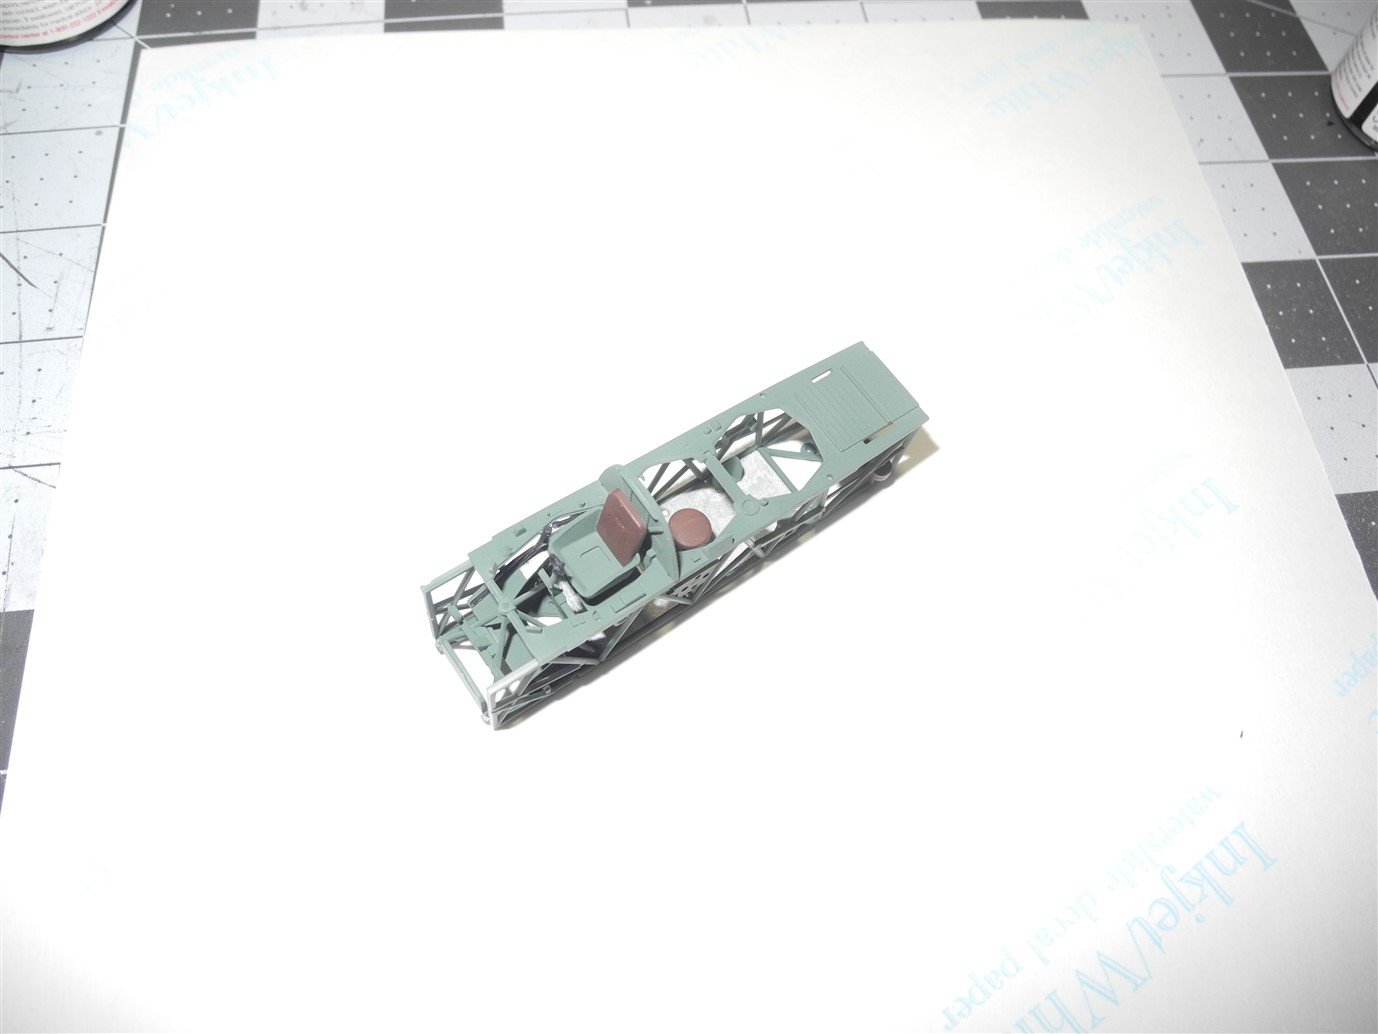
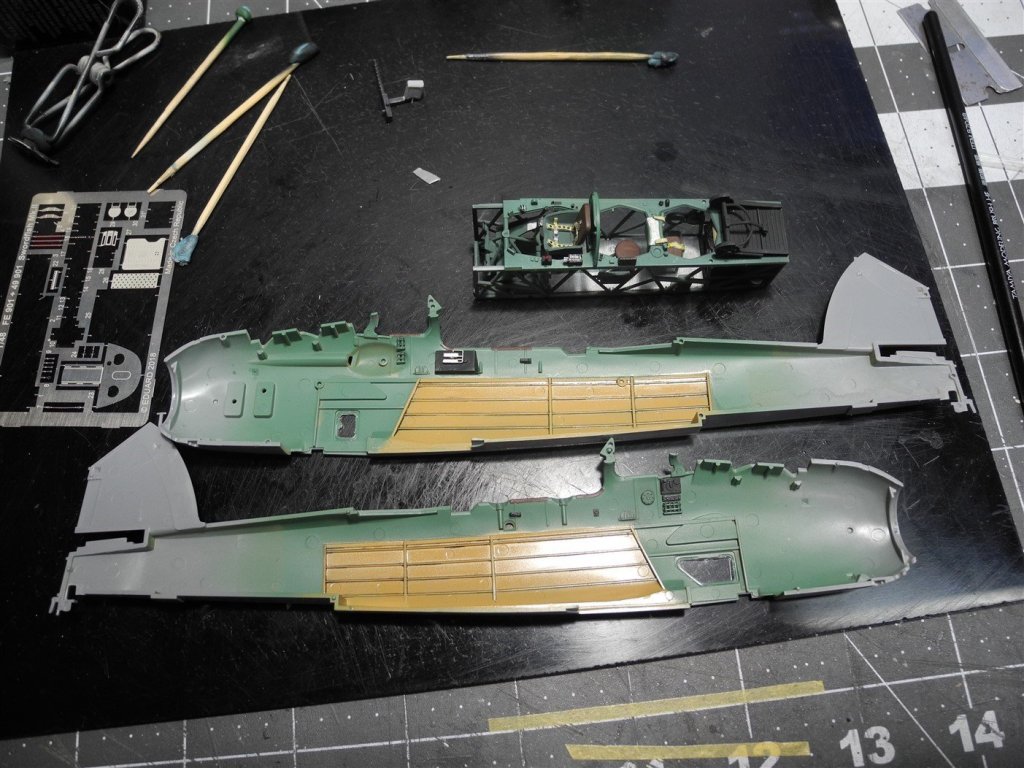
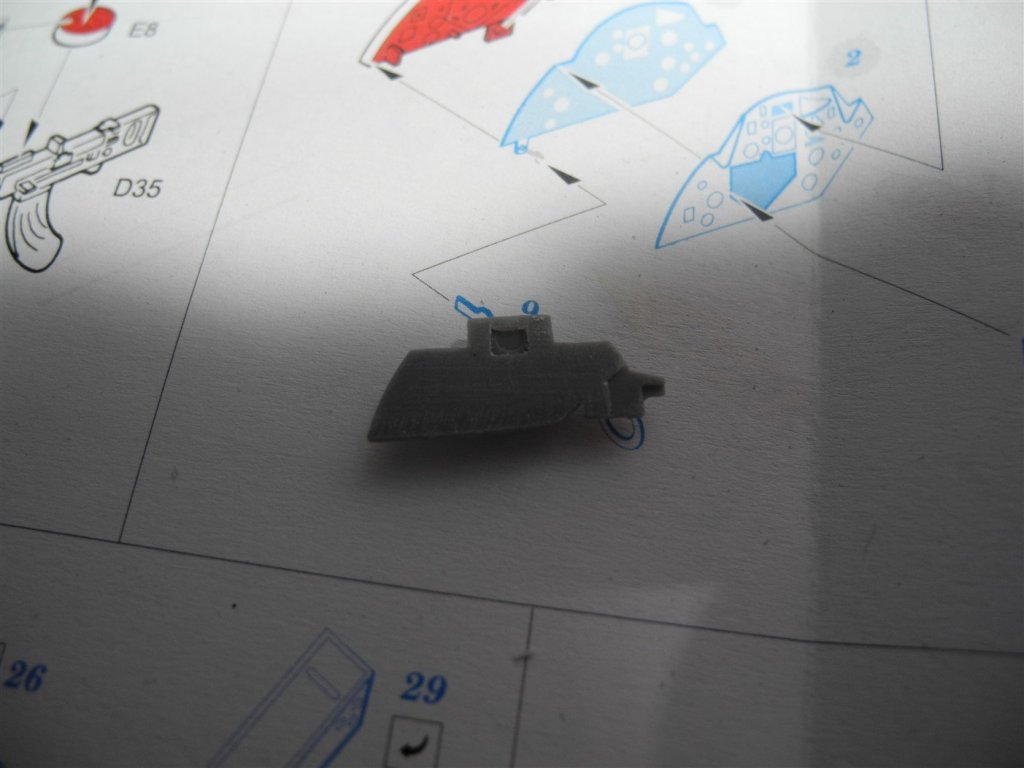
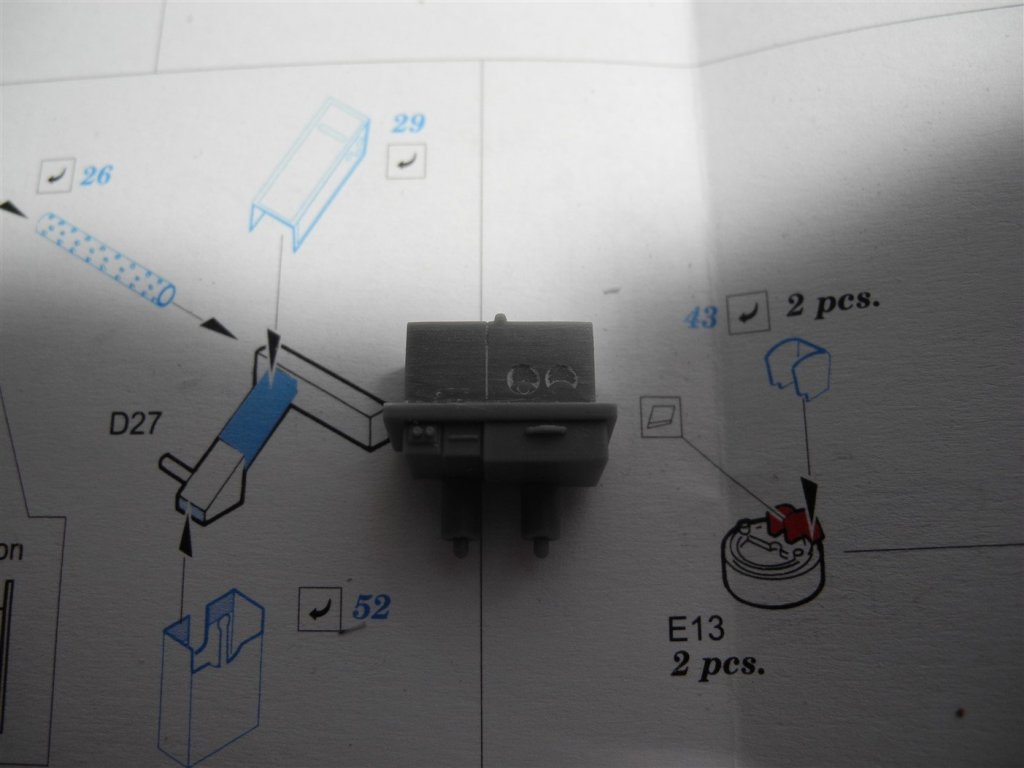
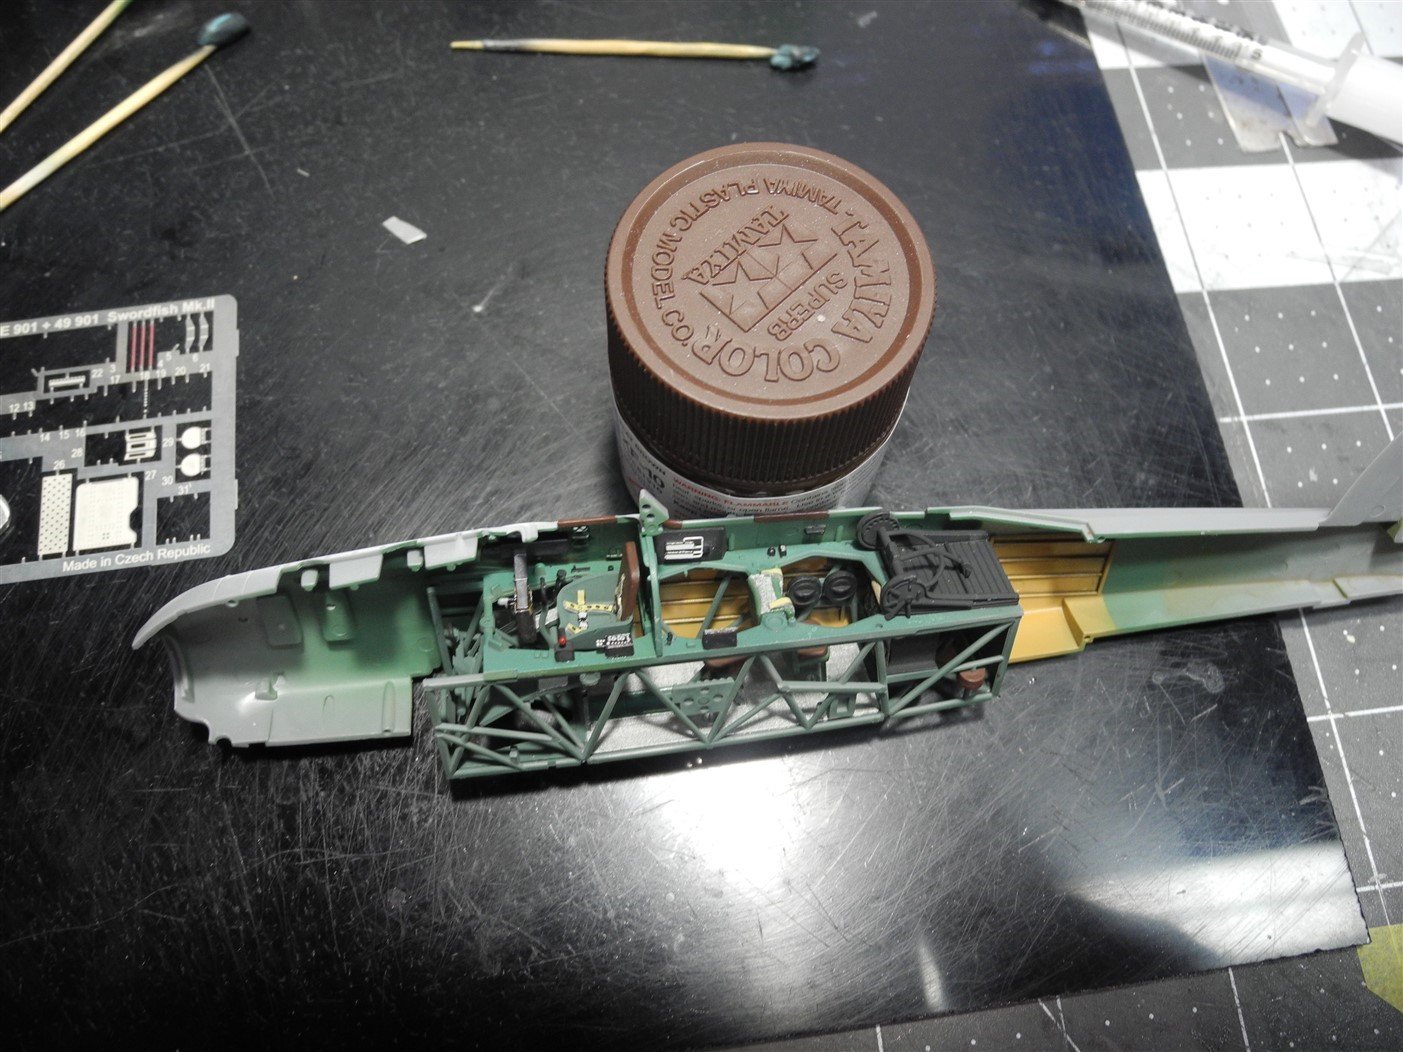
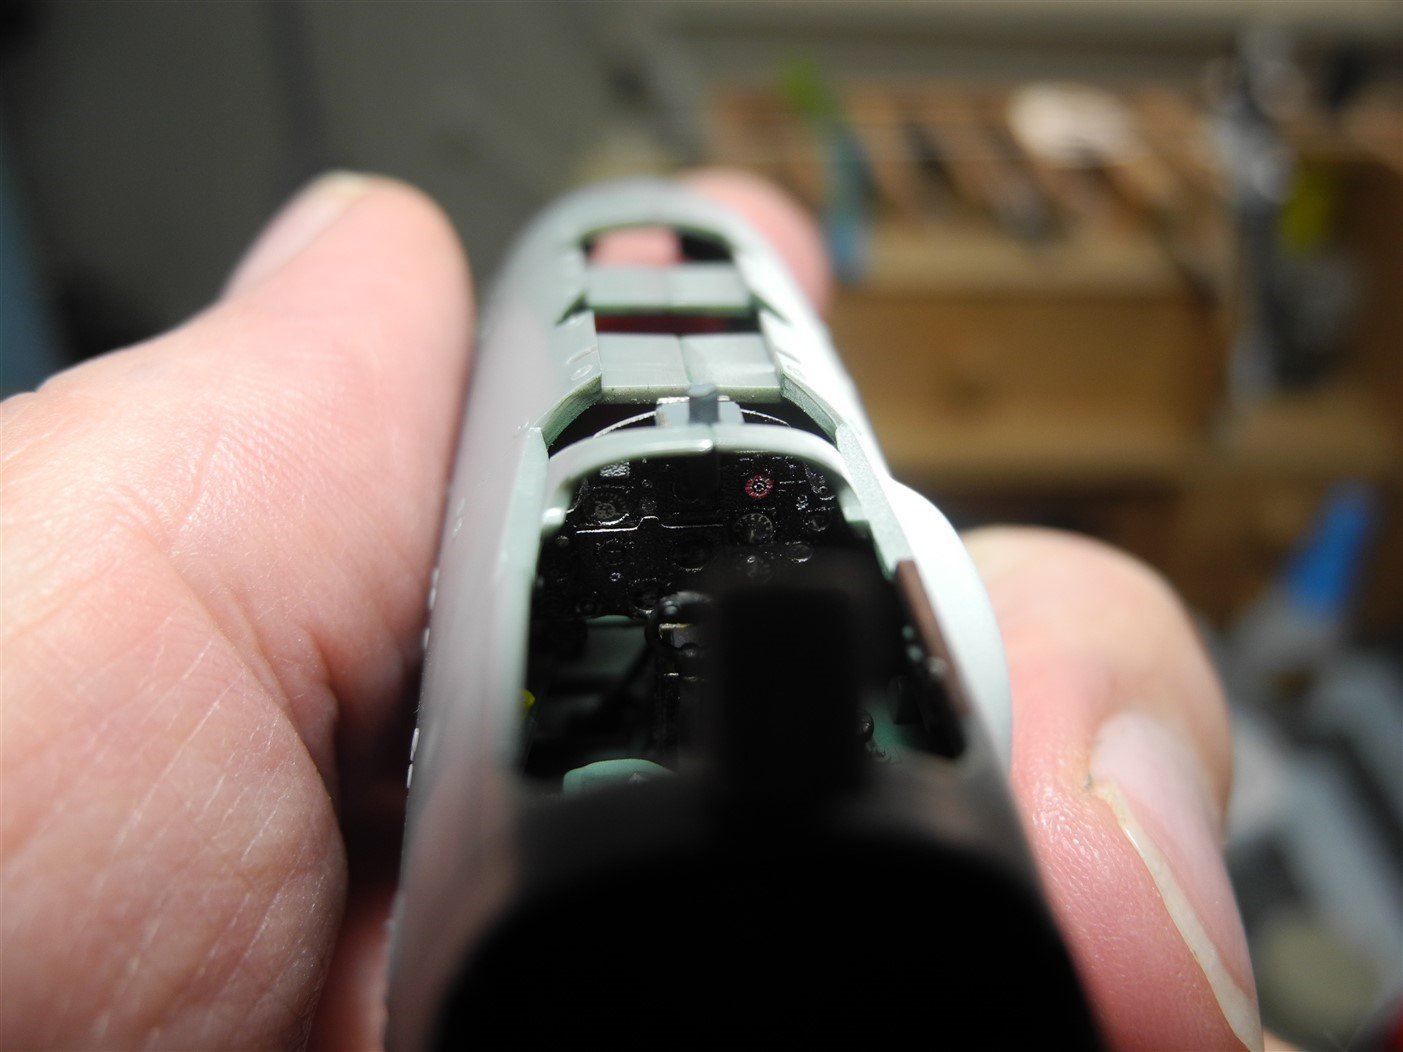
This one took a little shaving and sanding for a good fuselage halves fit. There is a cross member on each side of the cockpit tub/tubing that sticks out a bit too far for the halves to close properly. No big deal, just a part of the dry-fit and adjustment process.
-
Thanks for all your likes, comments, and encouragement. if it seems like I am rushing through this just a bit, I am. There is an IPMS regional event locally within the next two months and I am trying to get a few things ready to take along. The finished models will all be for sale at the show by the way. I enjoy the build much more than I do collecting finished models. Typically, they sell rather quickly and that helps keep my kit build supply funded.
-
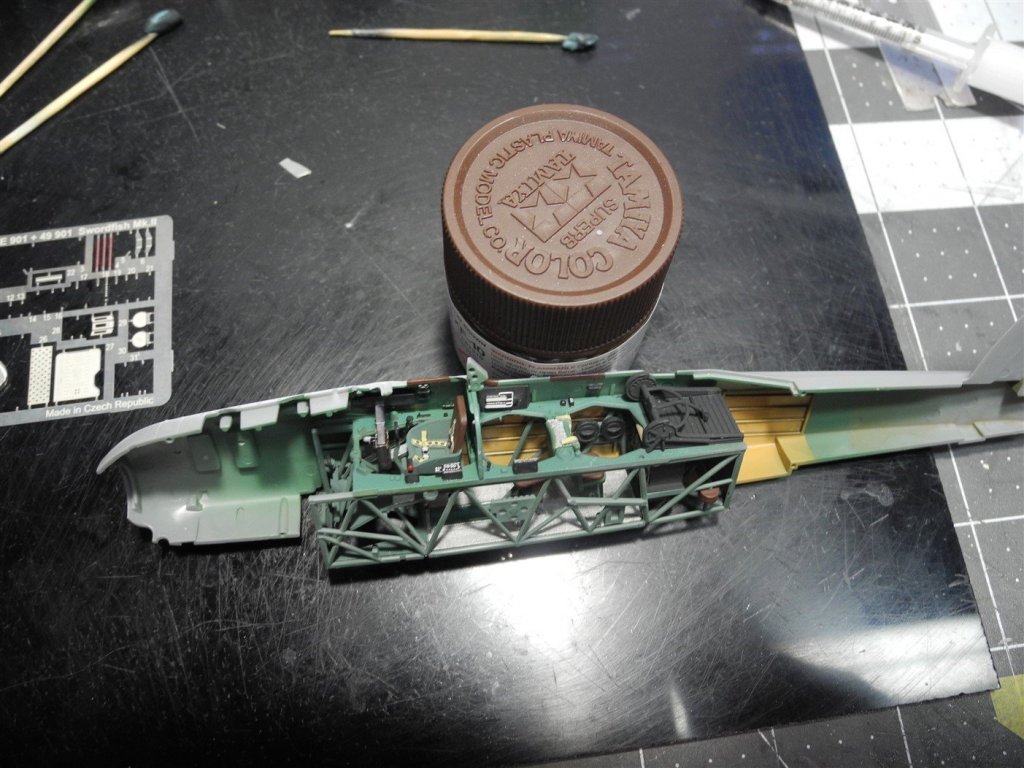
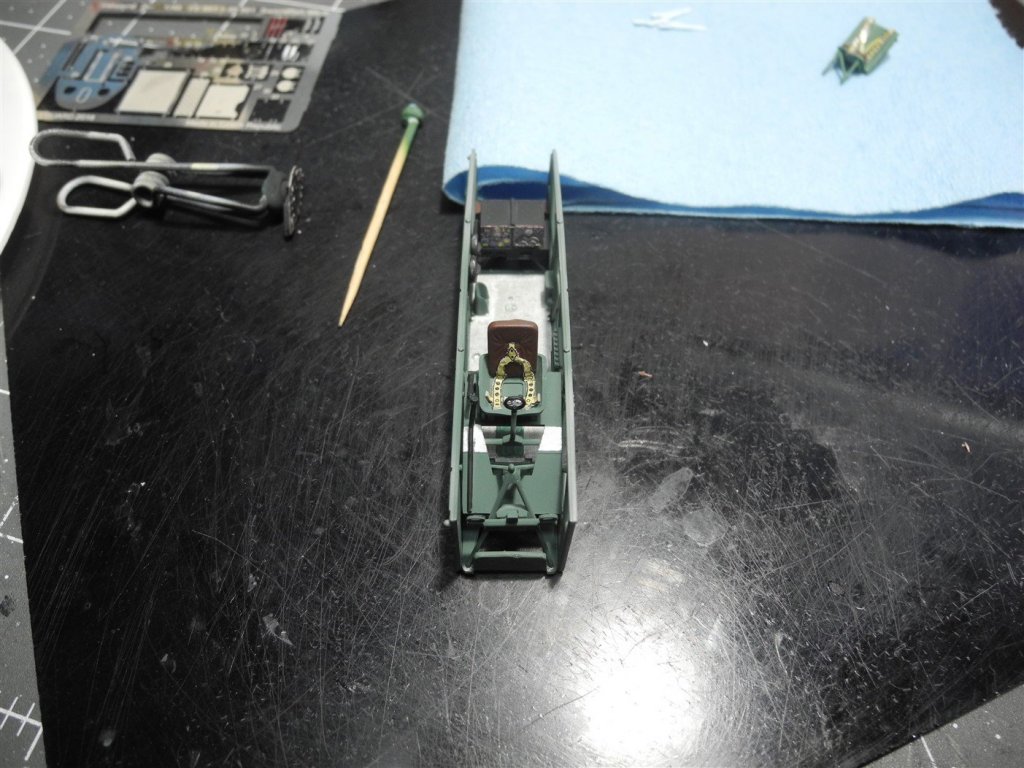
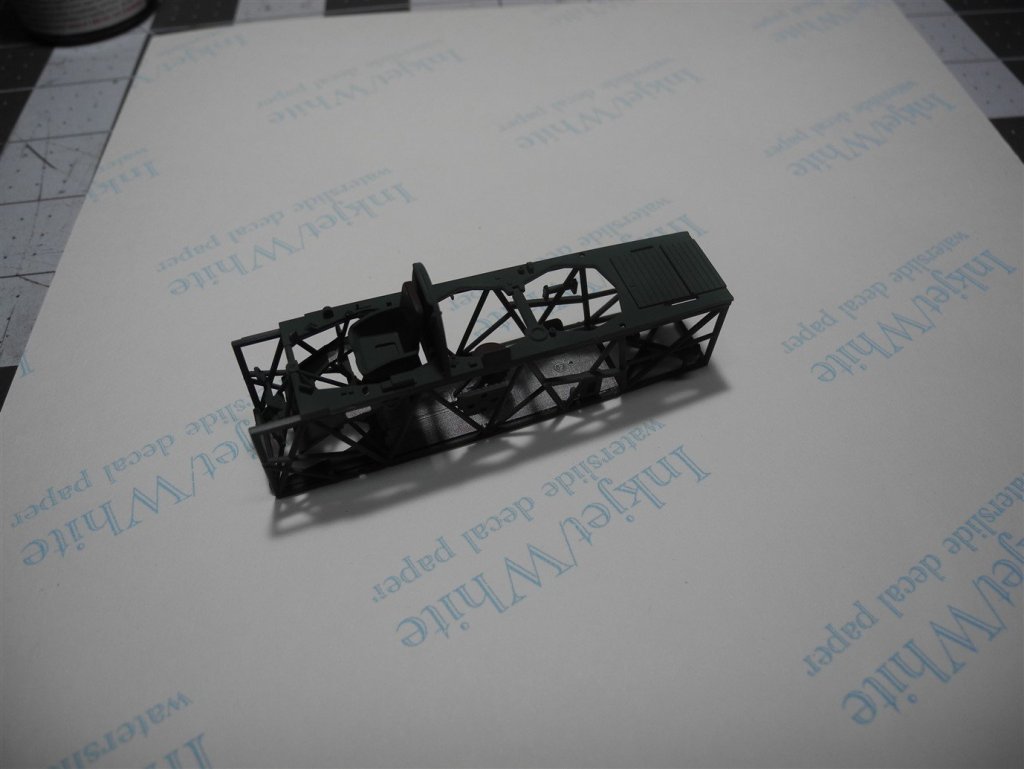
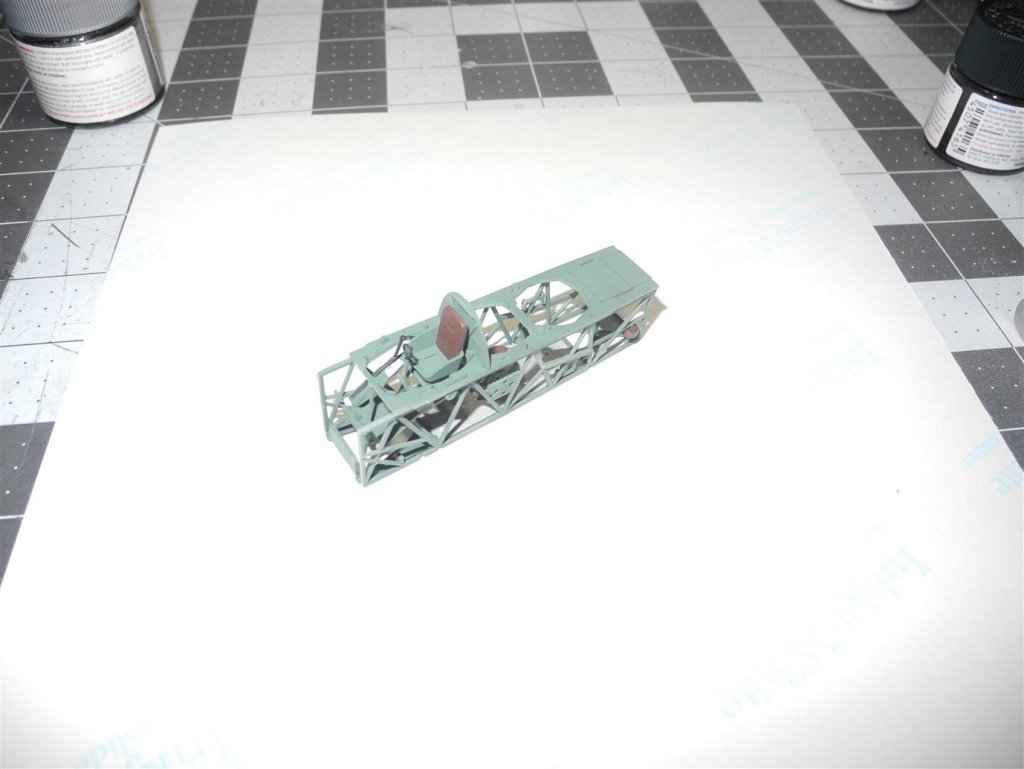
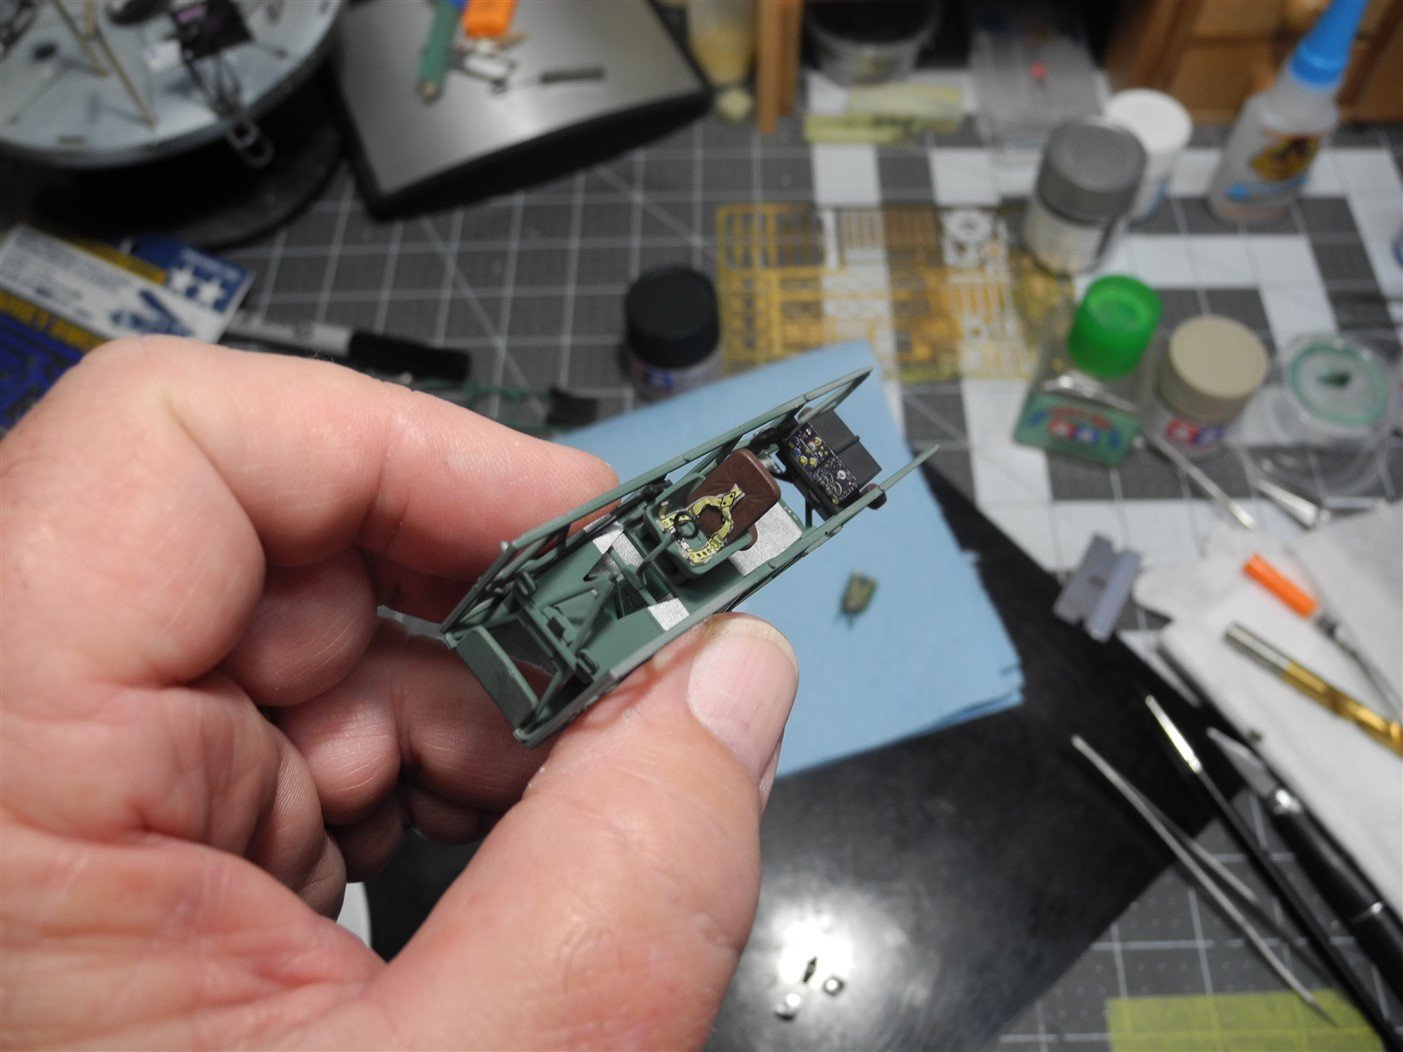
Cockpit assembly and painting is done. Cockpit area inside fuselage is done. Added observation windows and forward firing machine gun inside fuselage, then joined fuselage halves. Going to try to have the basic aircraft assembly done by the end of the weekend , then begin finish painting. Paint colors used inside fuselage halves was the Sky, Green, and Gray mix; then Sand Yellow. All paints are Tamiya. Used Tamiya and Mr Color washes (brown and black)


- 79 replies
-
- 10
-
-
Pretty sure that the Revell Black Pearl is a rebox of the Zvezda Black Swan kit. I am guessing Revell paid for the license to name it the Black Pearl and include the Pearl figurehead rather than the black swan.
-
If you're going to get back into aircraft modeling or just give it another try after a long time since you last built one, just about any aircraft model made by Tamiya I can highly recommend. Their models are very well engineered and one will have very few if any fit issues at all. Tamiya covers many WW2 and some modern aircraft. If you want to get into WW1 models, Wingnut Wings have a large range of 1:32 scale WW1 offerings. Theirs are also very well engineered. There are many Youtube build videos to reference for the Wingnut Wings kits.
-
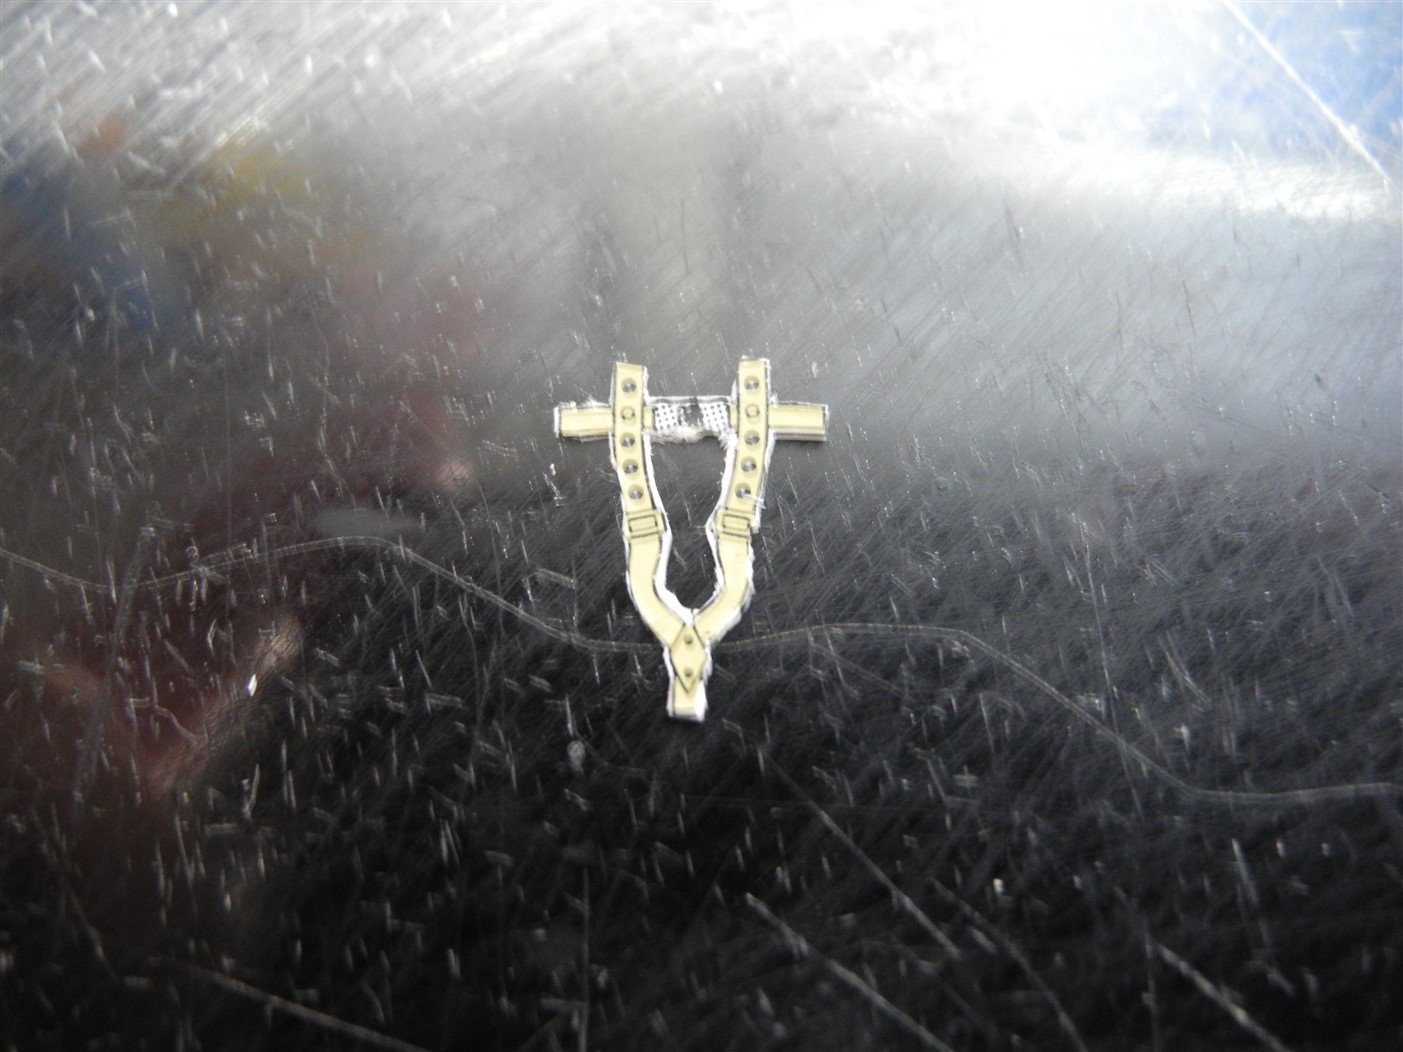
I learned it from others, Denis. Not an original idea I came up with all on my own, but I tried it and liked it and continued using the method. One can also quite easily make their own seatbelts with it and paint them rather than using decals.
-
Very nice rigging work OC. The plastic molded parts of this kit are very impressive. This is a Zvezda kit, correct? That company has come a long way since they were new. I remember some less than stellar products but now they are right up there with the very best of the plastic molded kit makers.
-
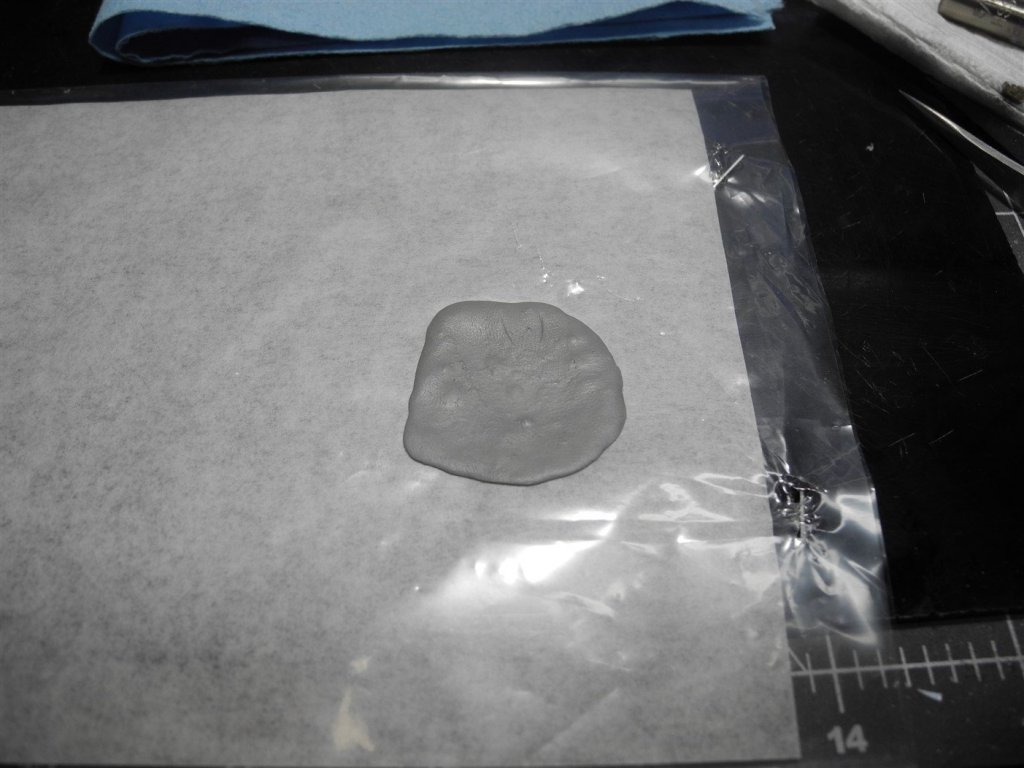
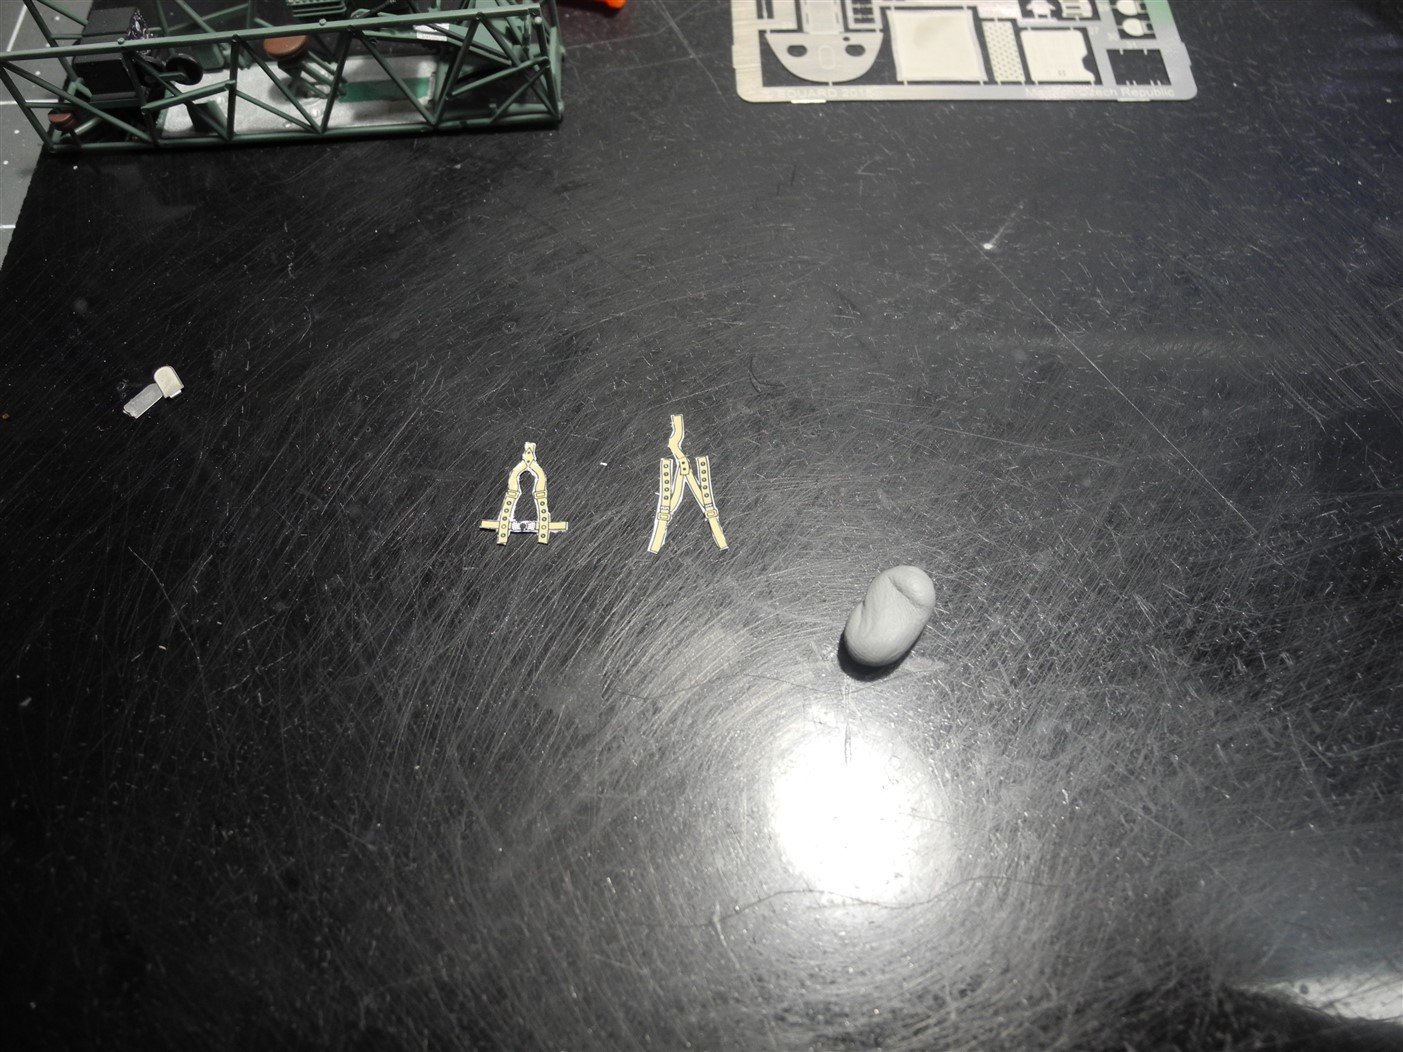
The thing about the modeling clay: it stays soft and pliable/workable for 3 hours. It easily bends and conforms to whatever shape you want to put it in...and after the decals have been applied to it. It does not try to go back to it's original shape like "blister pack plastic" would try to do because of its memory. In other modeling scenarios where you might want to form a fold or other position, it does so readily with no problem, no resistance. In future build threads I do, you'll get a much better view of why I prefer this method.
-
No, it's not easier or better. Just my opinion and preference of course. Your mileage may vary. 🙂
-
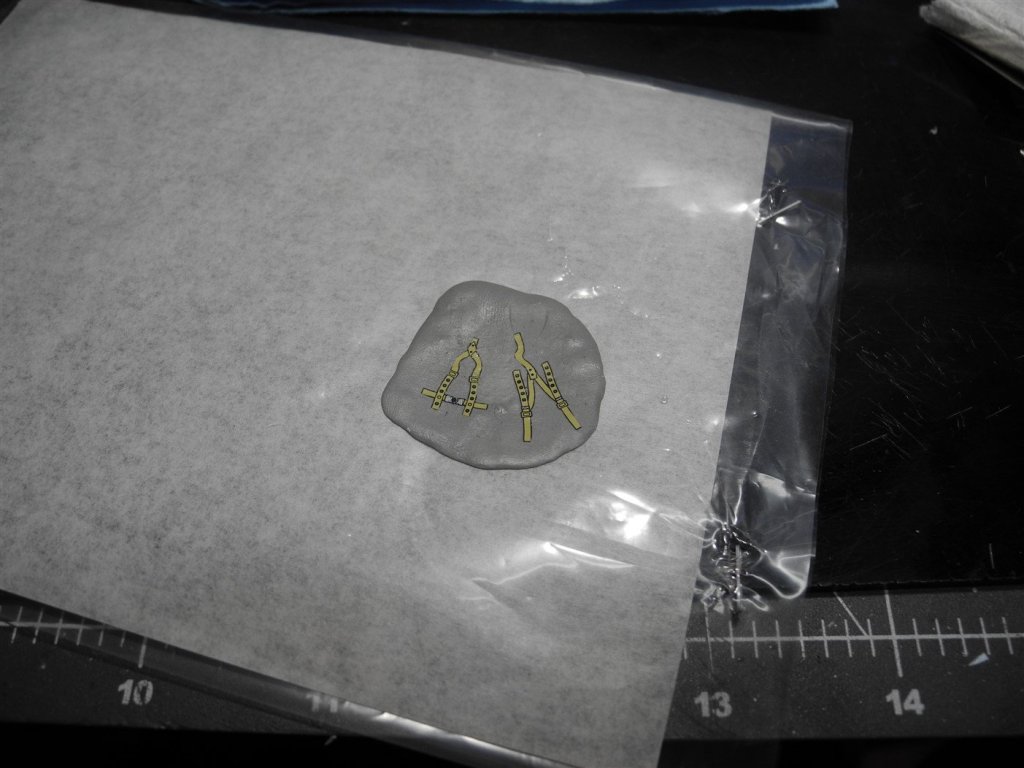
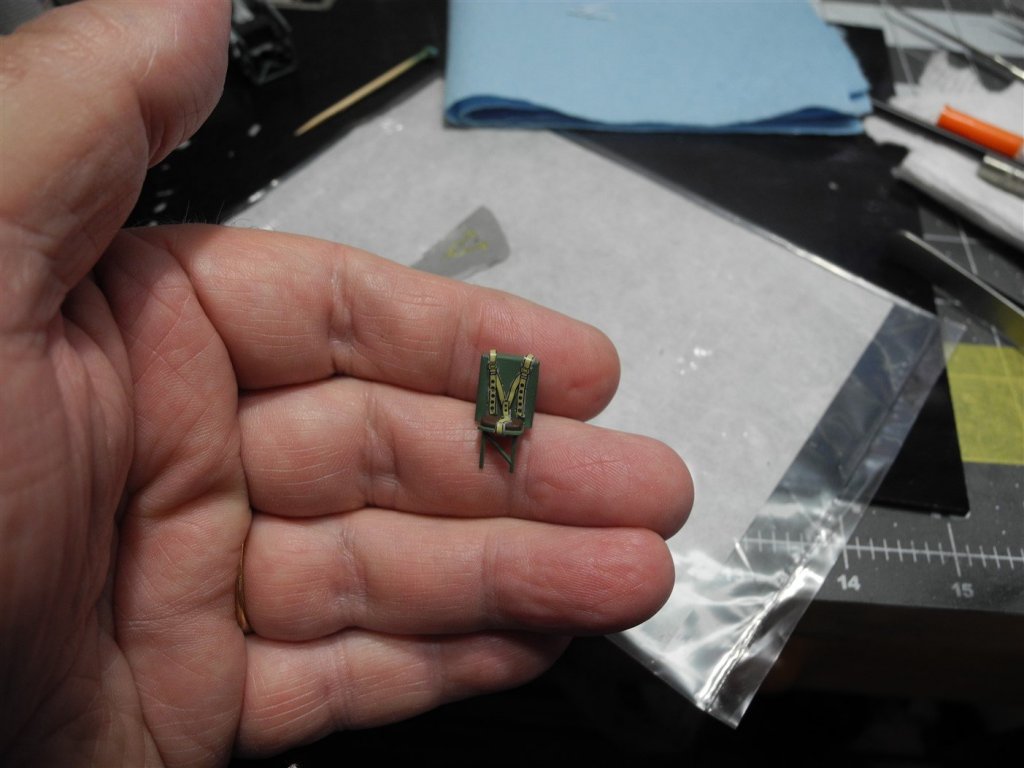
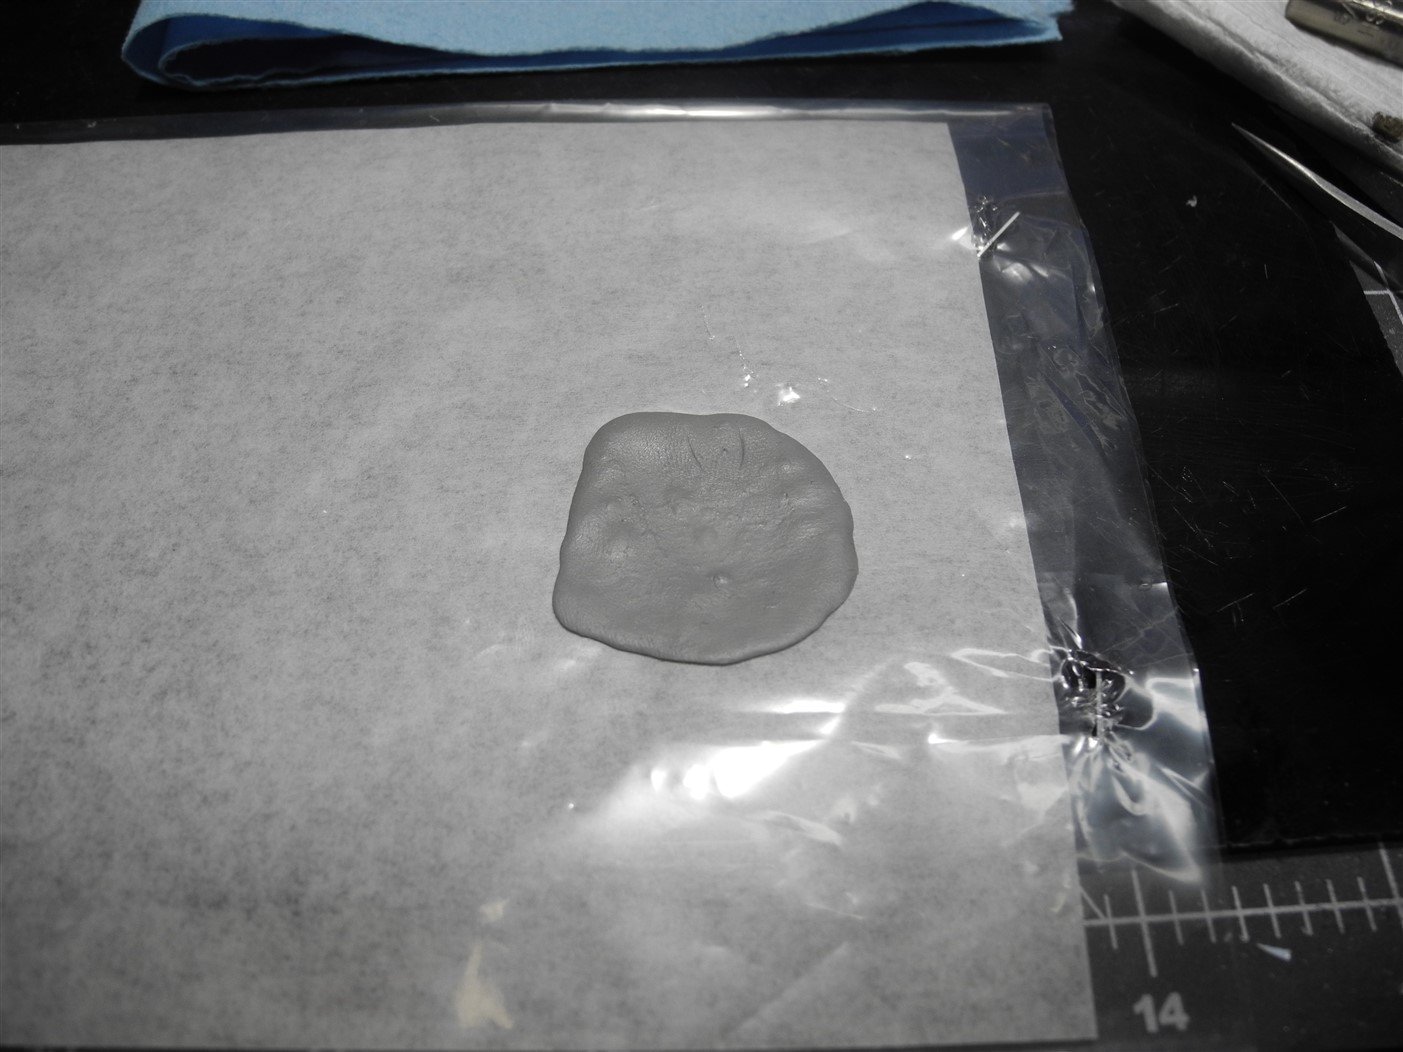
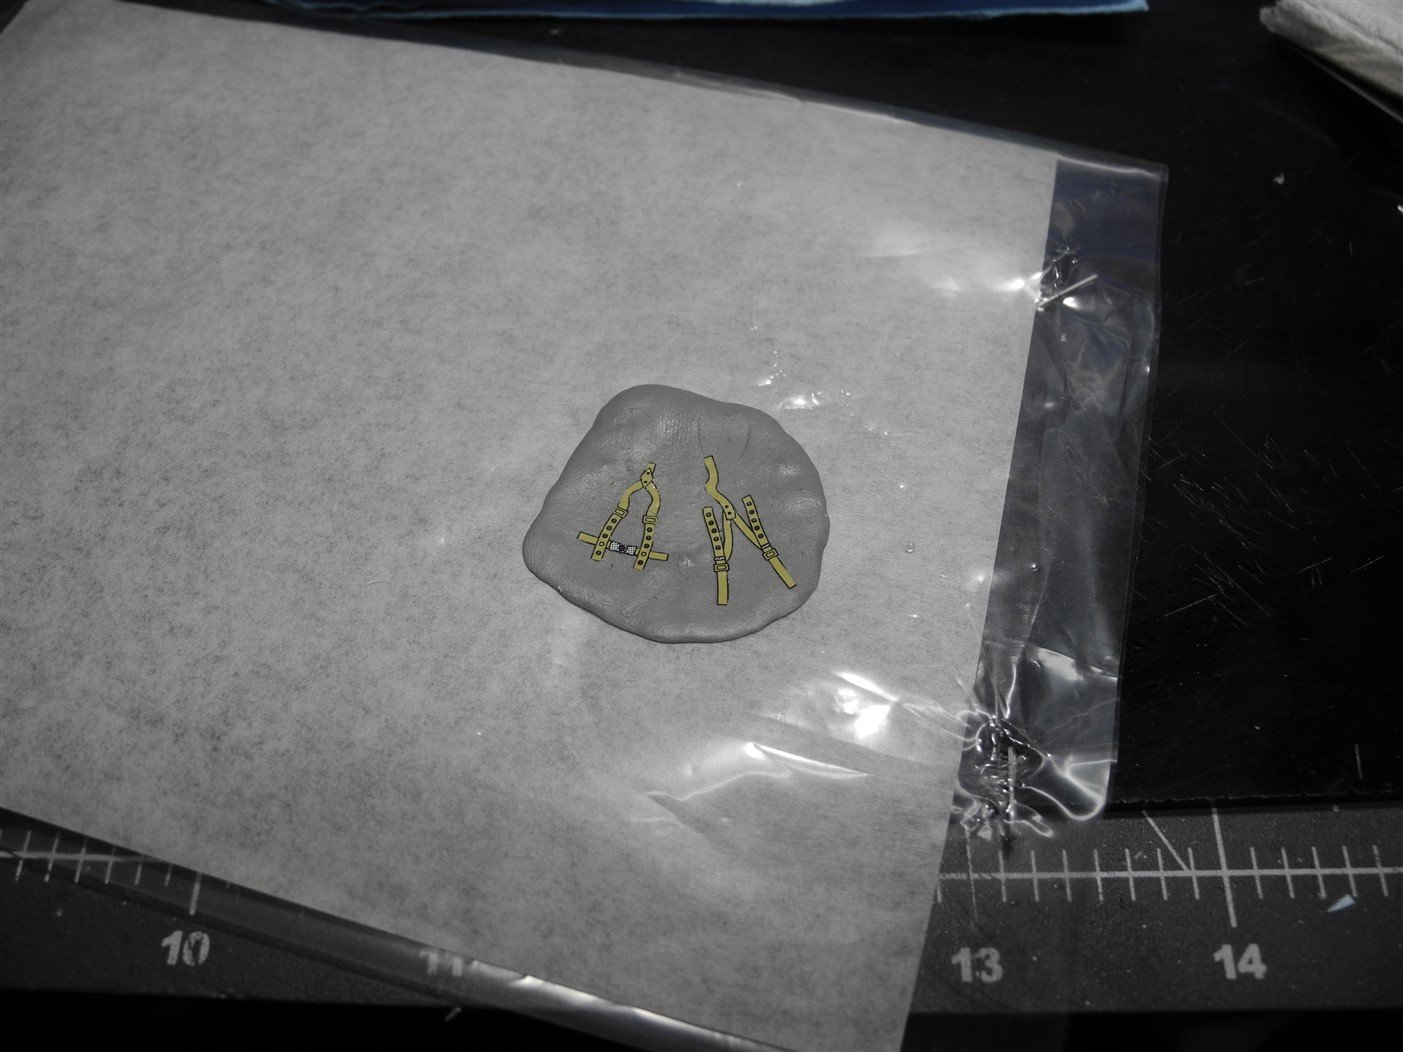
My Eduard detail sets did not come with seat belts/shoulder harnesses. I used the kit supplied decals for these. I don't like using the decals alone as they lack depth and don't respond well for me trying to place them. I use a two-part sculpting putty called Pro Create and fashion it into a very thin layer, almost paper thin. Then I cut out my kit decals from the water slide paper after carefully trimming around them with my scalpel. The decals are then placed on the thin layer of putty. After allowing an hour or so for the putty to begin setting (but still pliable) and the decals to set, I carefully trim the putty all around the decal. Then I place these onto the seats. At this point, the putty is still pliable and can easily be conformed to the shape of the seat. When completely set (about 3 hours), the seat belts have become part of the seat itself. I should add...if you try this method, be sure to moisten a glass surface with water on which you will place your thin layer of sculpting putty. This will prevent your putty from sticking to the glass.


- 79 replies
-
- 10
-
-
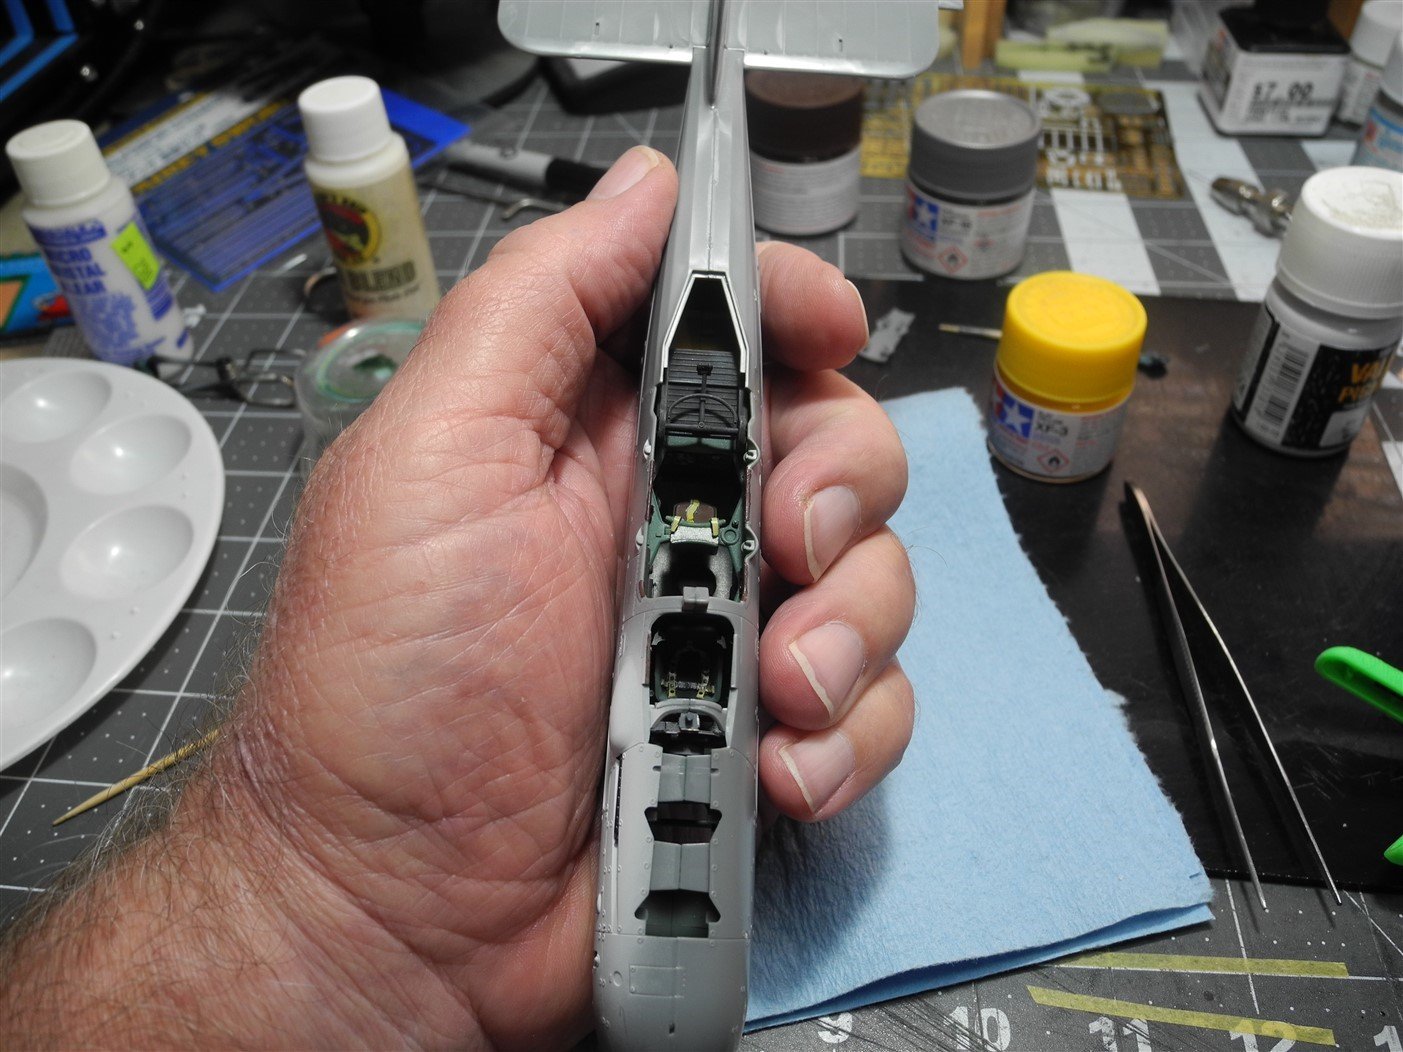
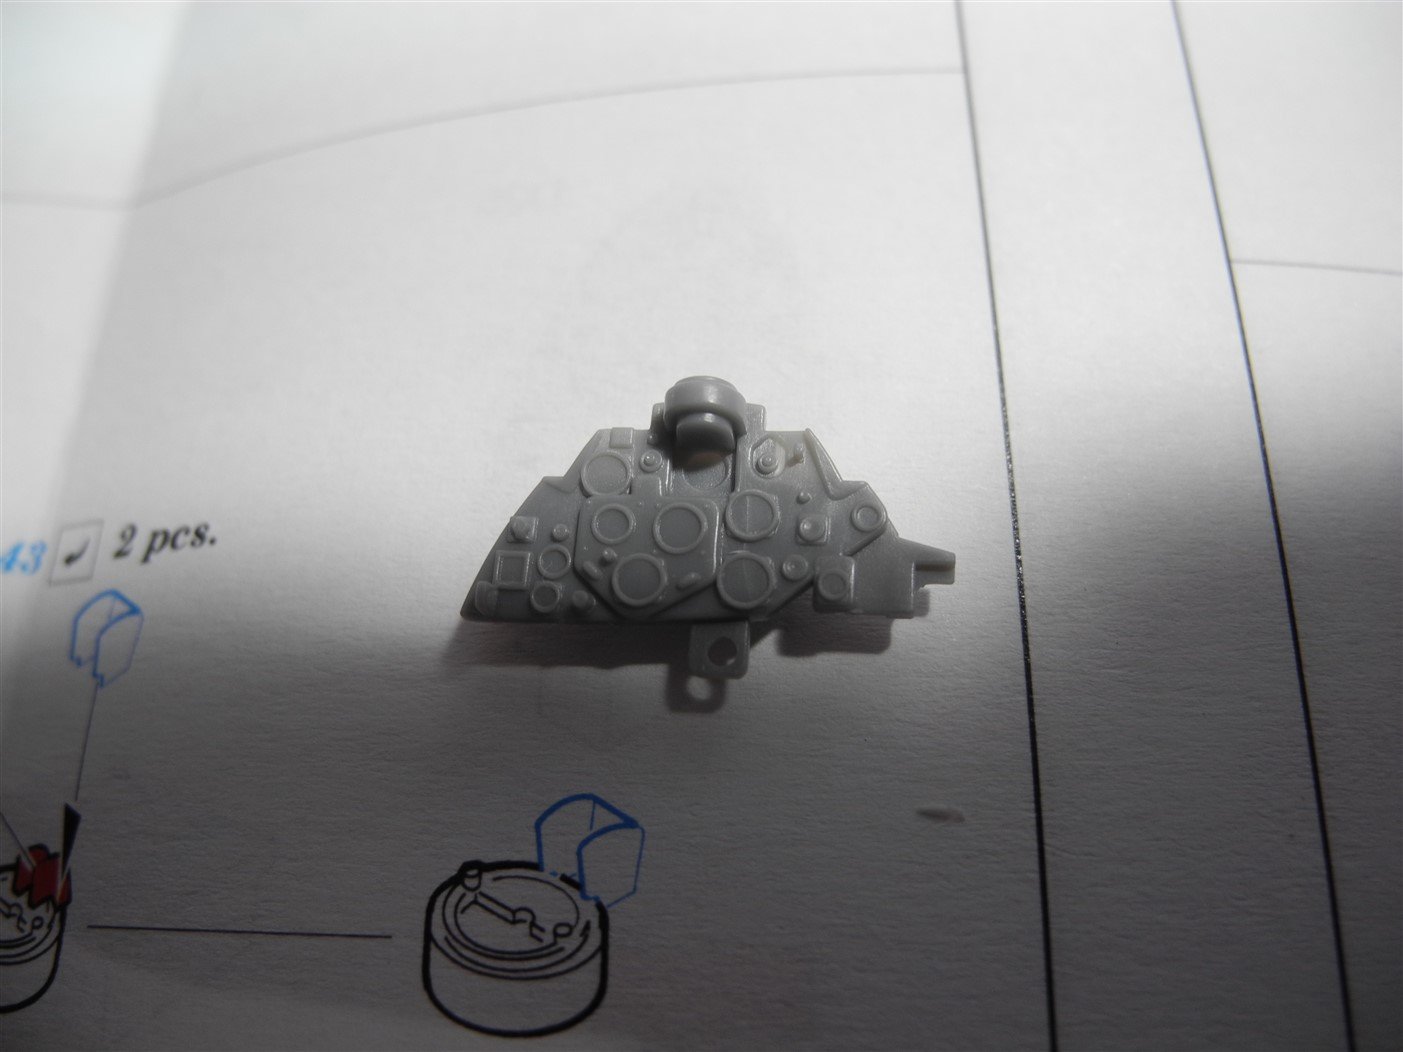
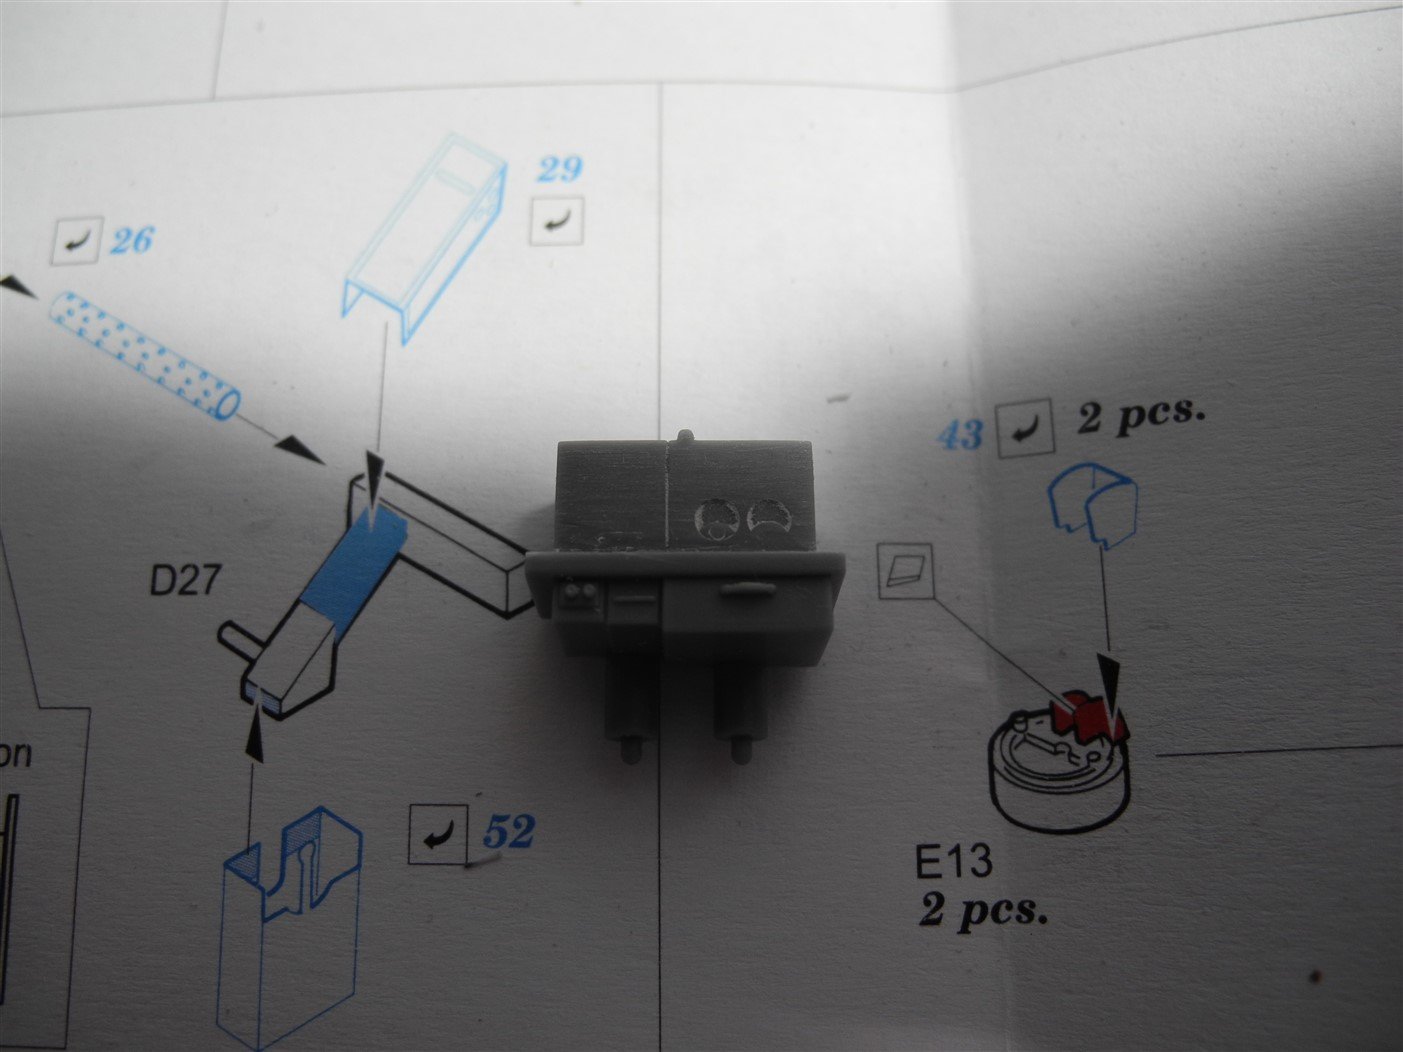
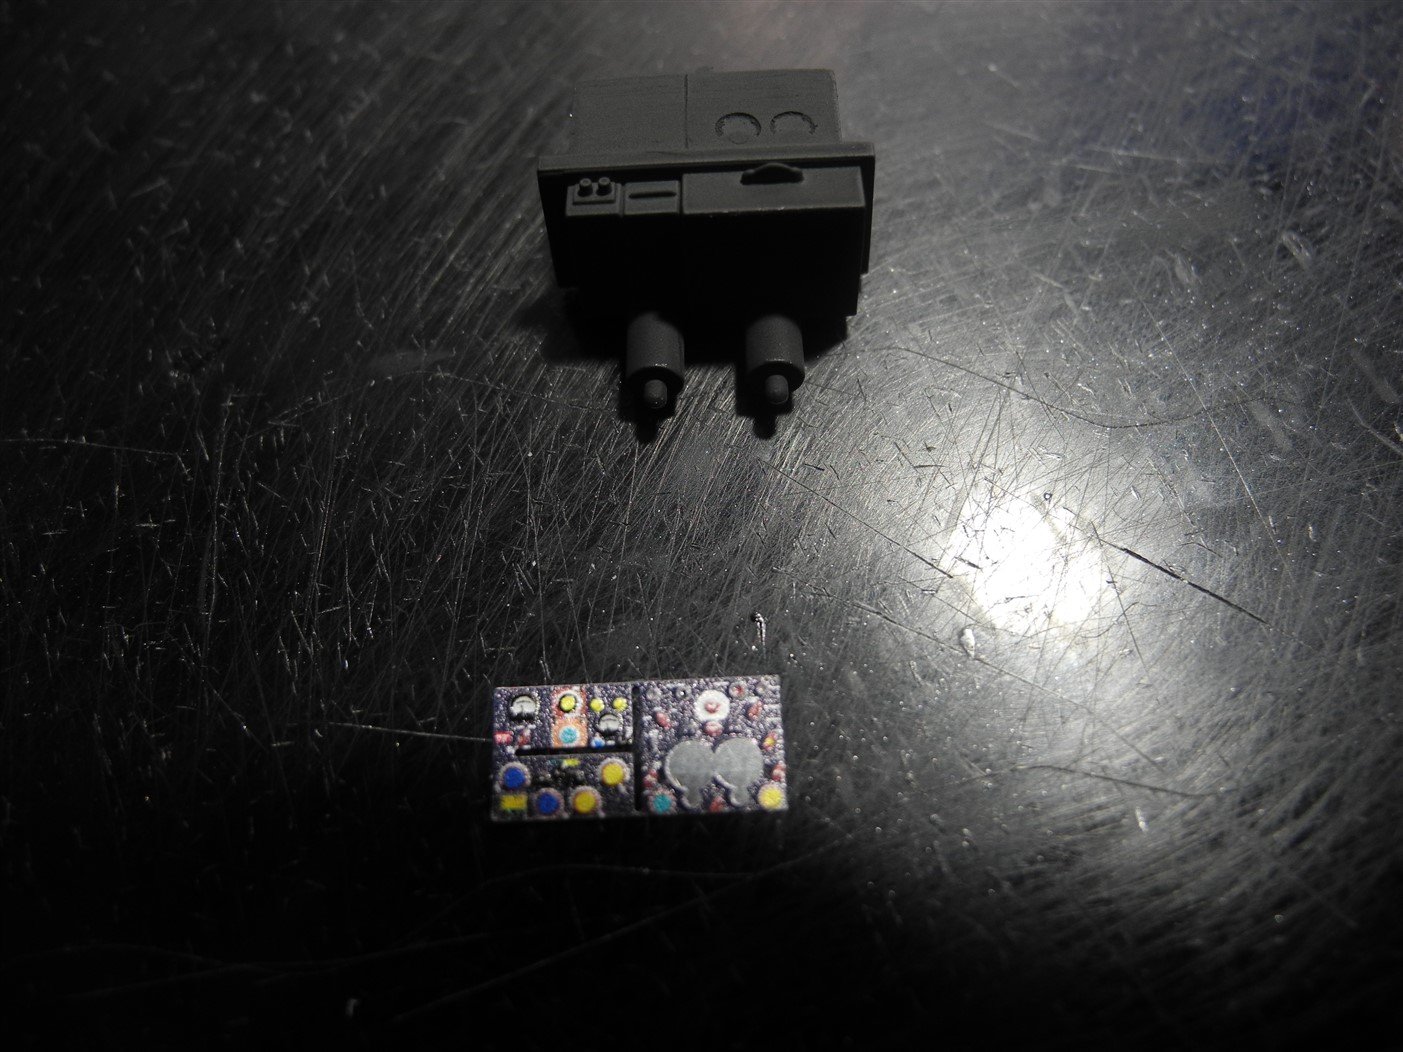
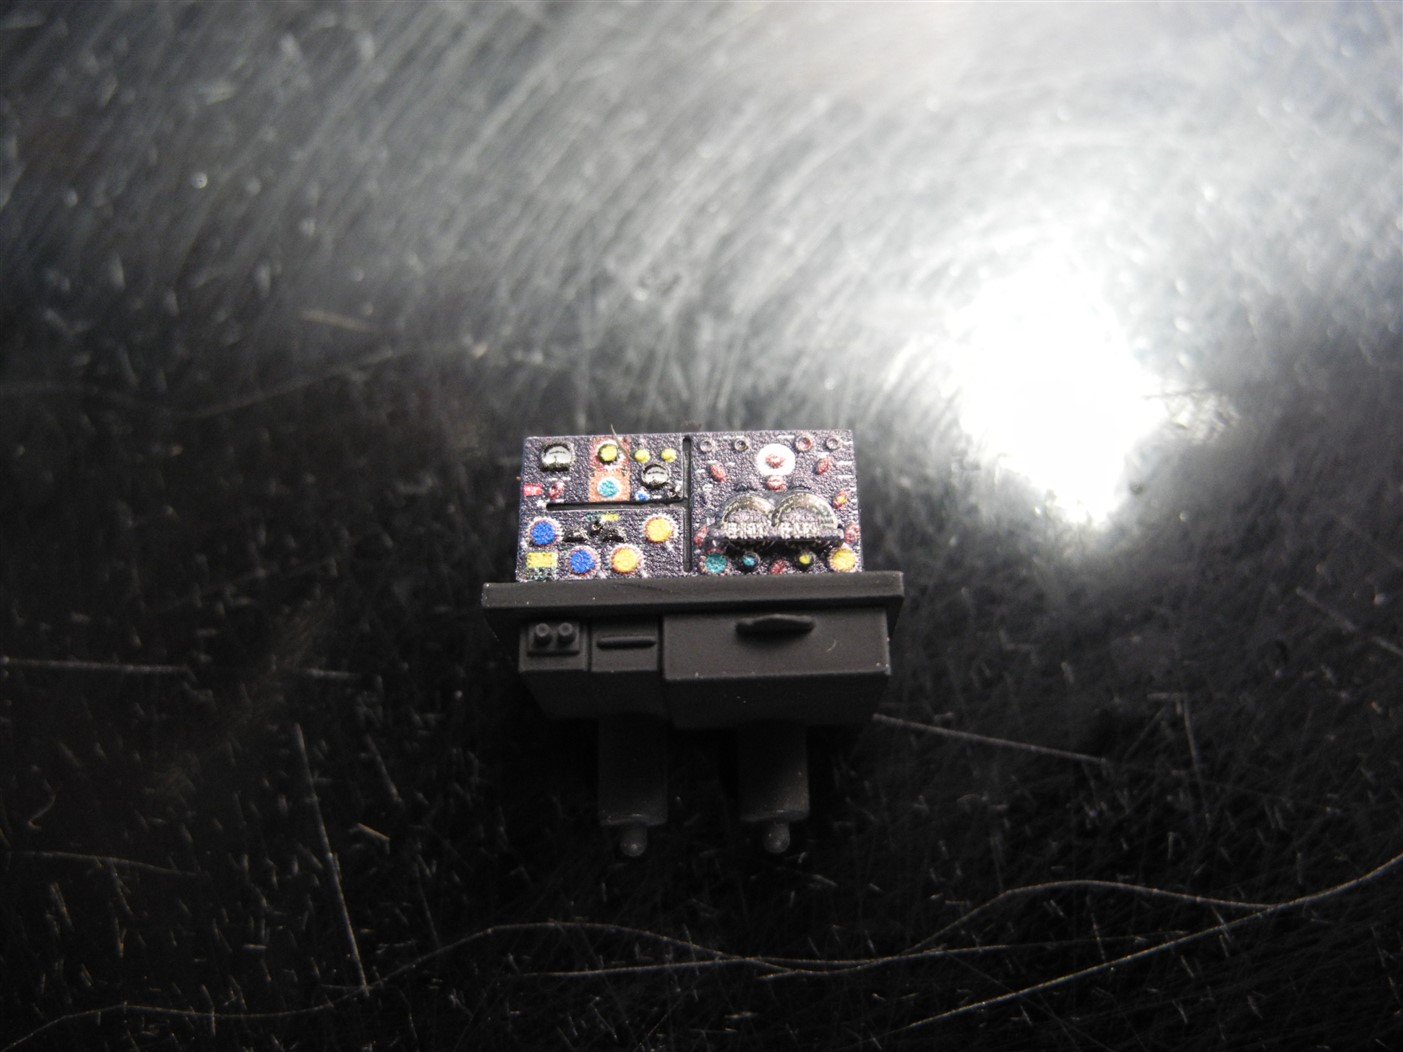
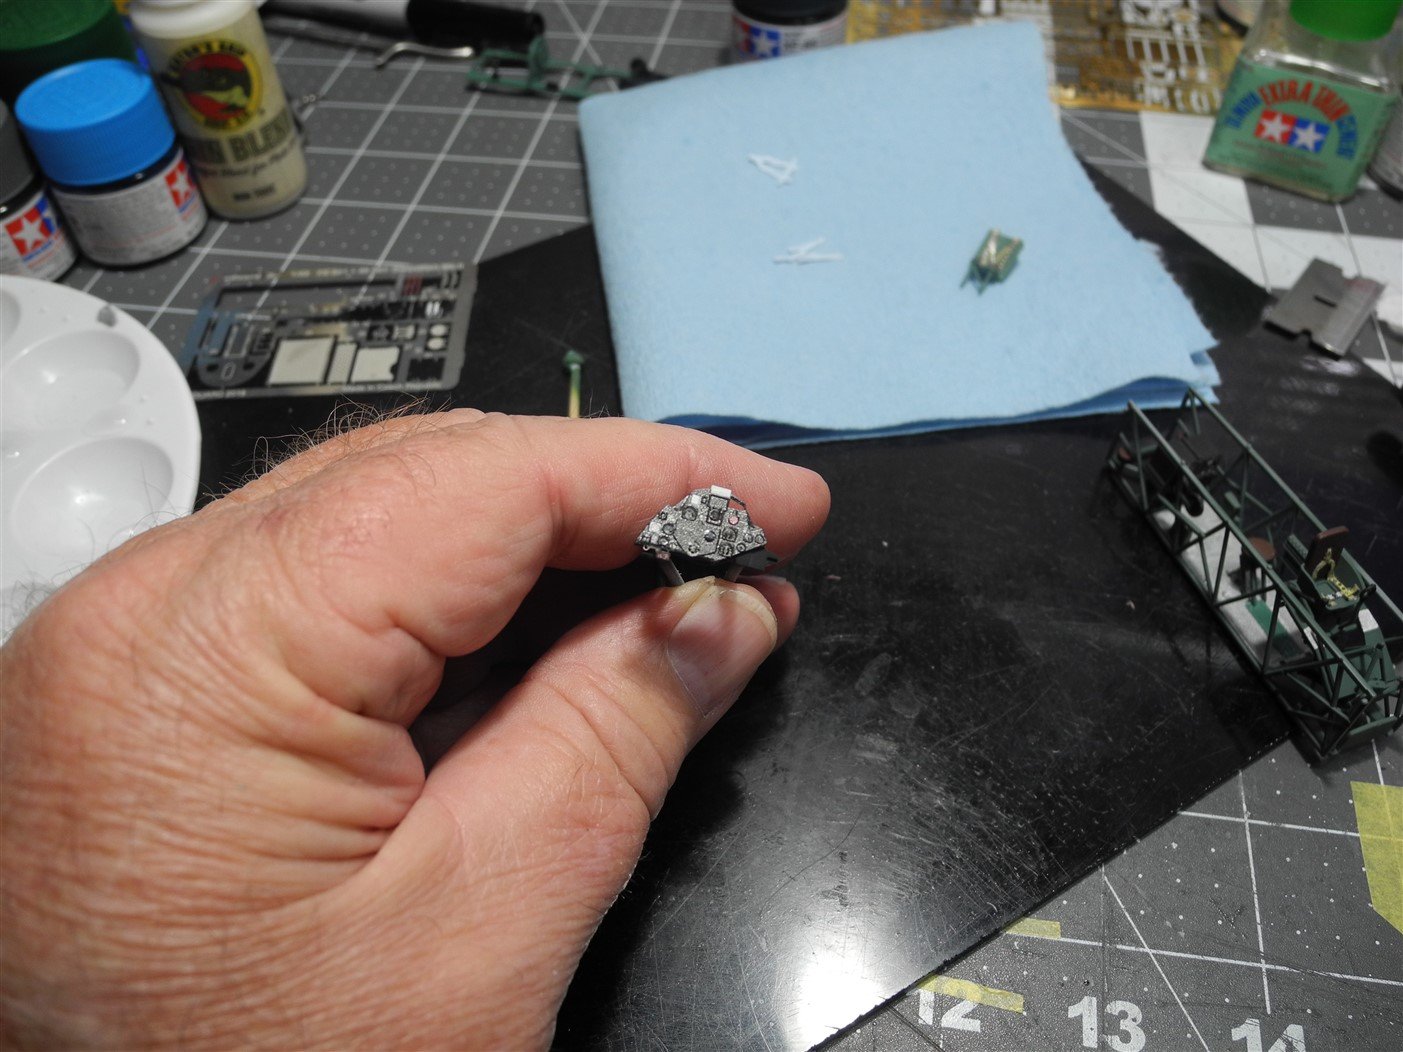
The Tamiya instrument panel is a very decently molded item. The kit supplies instrument decals that will greatly enhance the panel and looks great that way, but in this case I have the Eduard pre-painted panel face I'll be using instead. To prepare the kit instrument panel for the Eduard photo etch, all the raised detail must be filed and sanded away from the kit supplied panel. Other cockpit items must be prepared in the same way But the end result is worth the time and effort.


-
Traded it away long ago. Cars like that were too easy-come-easy-go back then and we didn't realize what we had. I had a good run of sweet old cars up until our youngest daughter was born in 1997. That's about the time I got out of it and prices sky-rocketed after that.
-
I was more interested in getting a picture of the fish I caught in the '80's than I was my '57 Chevy. 😕
.thumb.jpg.4e22a5cb205c9d1f43350a8751a83652.jpg)
-
When I was growing up here in Tampa, there was a barge converted to living quarters that was anchored at the mouth of the Hillsborough River in Tampa Bay. The owner was known as "the Cat Man", because he had dozens of cats running around his boat. A really weird guy, he was a hermit of sorts and rarely would one see him off the boat and on shore. He lived there for many years and finally died. Rumor had it the guy died on the boat and the cats feasted on his carcass. Don't know if there was any truth to the disposition of his dead body, but I saw him many times over the years on his boat with all the cats running around.
-
A Tamiya hull red color with a black wash would get you well on your way to recreating the color of RR ties. Lots of creosote on those things and they almost look black in color, only a tinge of brown. When I was a young man, a fellow had what looked like a mountain of railroad trestle timbers all piled up on his property. They were pinned together with 1" diameter steel threaded bolts, nuts, and washers. He gave me the job of sorting out all the timbers and building him a floor in his barn where he stabled his Belgian Work Horses. What a job. I handled those creosote timbers so much I don't even like looking at them anymore. Nasty job that was, but hey...it helped pay the bills.
-
🤯🤯
-
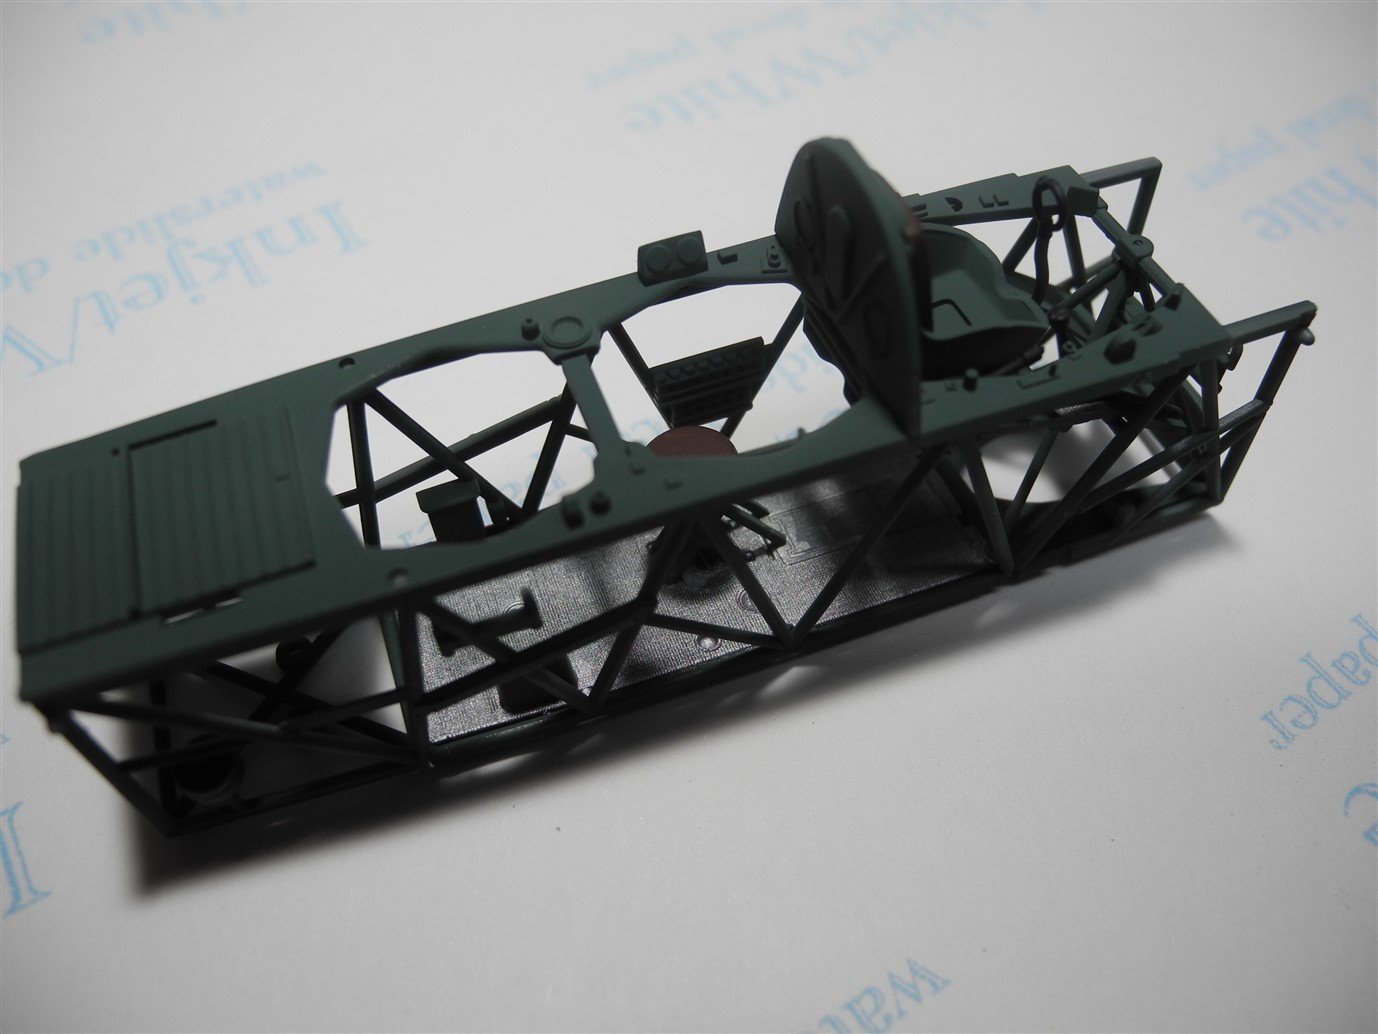
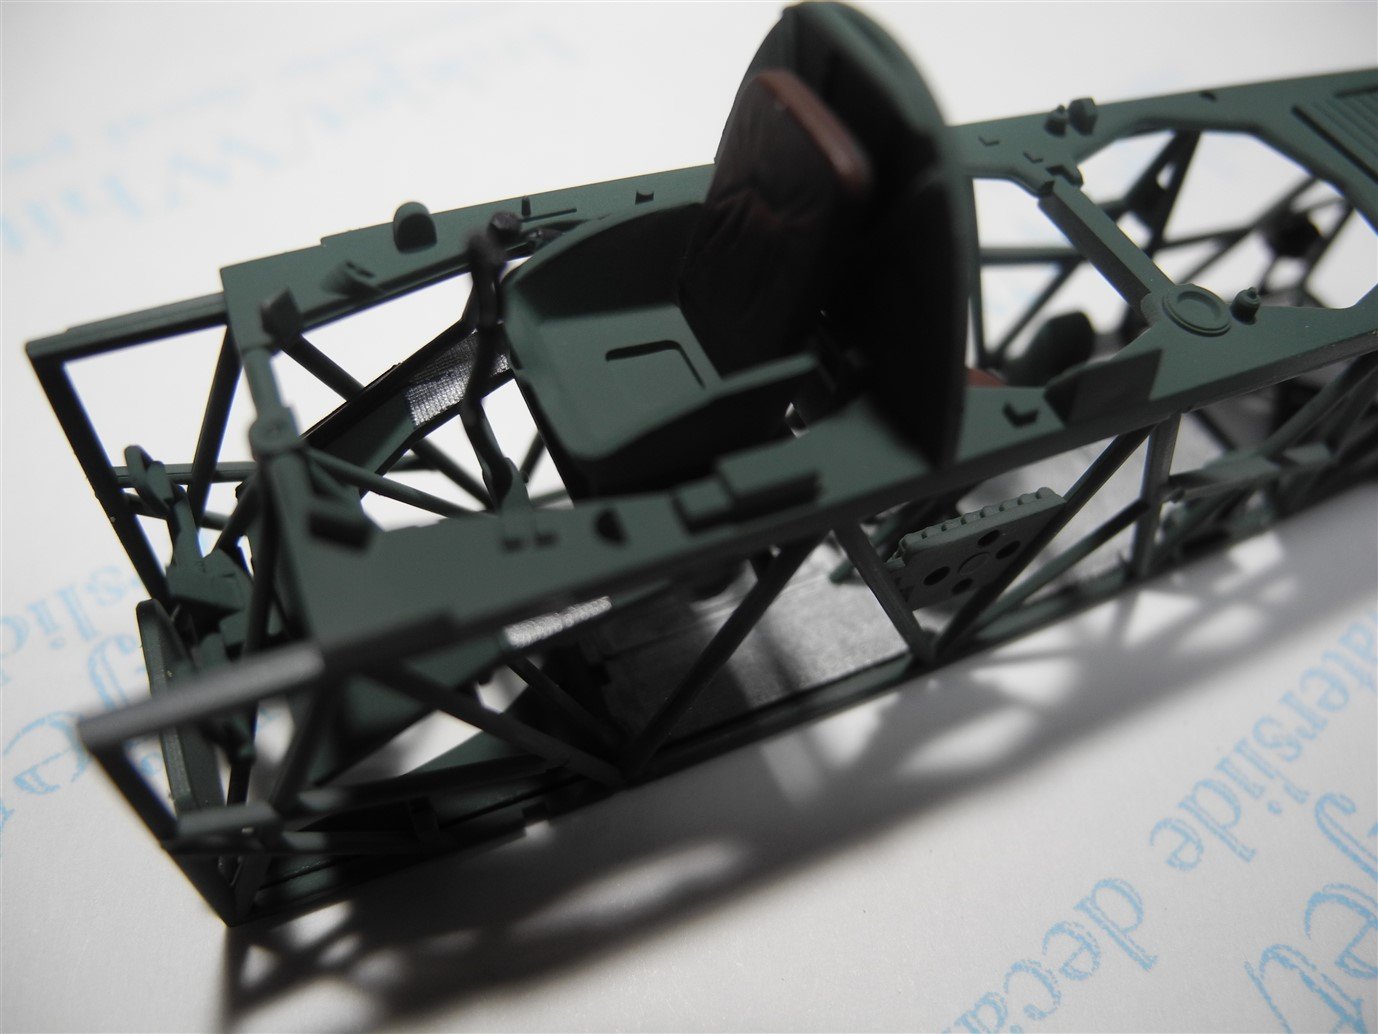
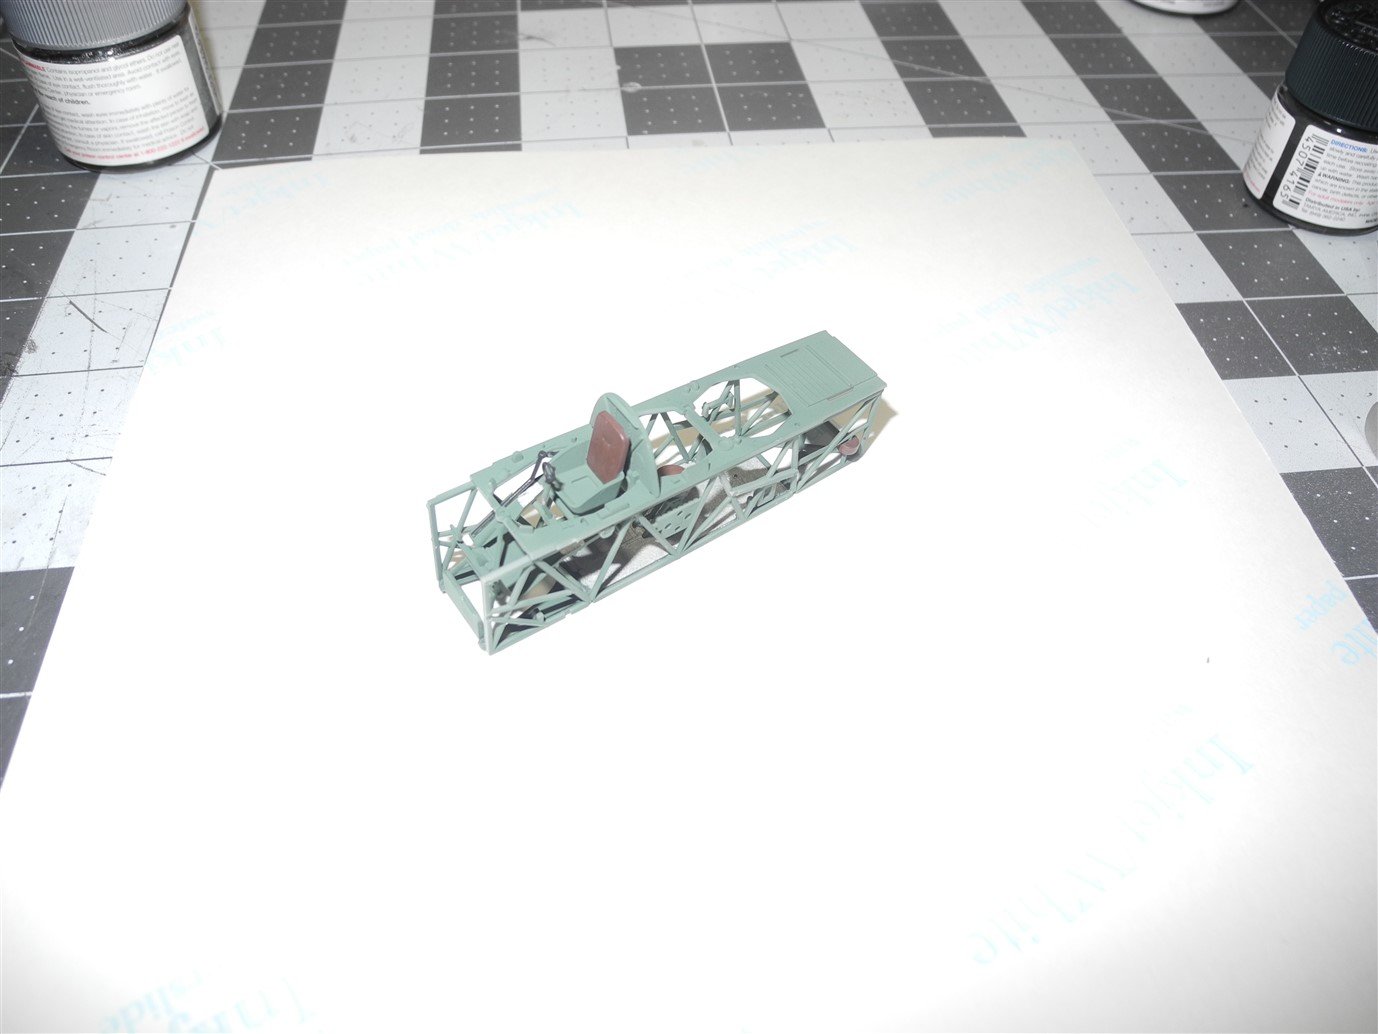
They were fabricated from tubing and covered with fabric, much like their WW1 ancestors.
-
Glad you're aboard, Ken.
-
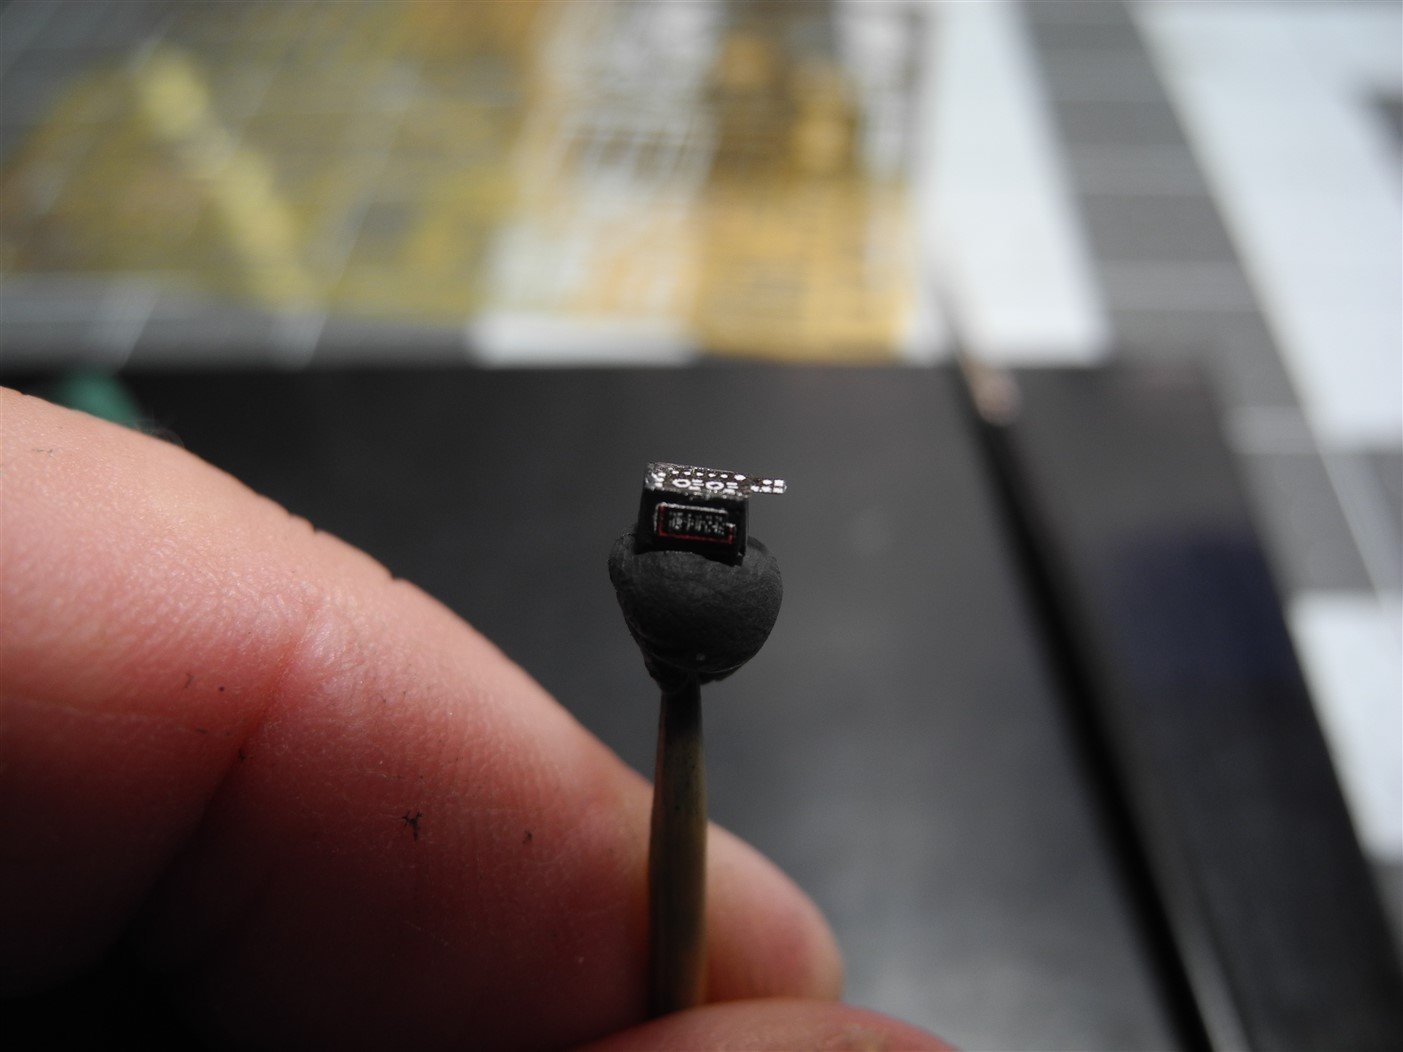
Yes they are...that's their selling feature. Even when my eyes were 40 years younger, I could not have achieved that level of detail. Pretty amazing, isn't it?
-
Here is the beginning of the cockpit construction and painting. Paint colors are Tamiya RAF Cockpit Green (made by mixing Sky 3x, Green 1x, and Field Gray 1x), Flat Brown, Flat Rubber Black, and Flat Aluminum. I tried my flash on the last 3 photos and they came out rather weird looking.


- 79 replies
-
- 11
-
-
Thanks OC! You will be my go-to guy when I need specific info on the Swordfish. I figured you might have an interest in a model of the stringbag.


.jpg.ffdd3f5fd0a898274a8c02faee83c758.jpg)