-
Posts
7,726 -
Joined
-
Last visited
Content Type
Profiles
Forums
Gallery
Events
Everything posted by CDW
-
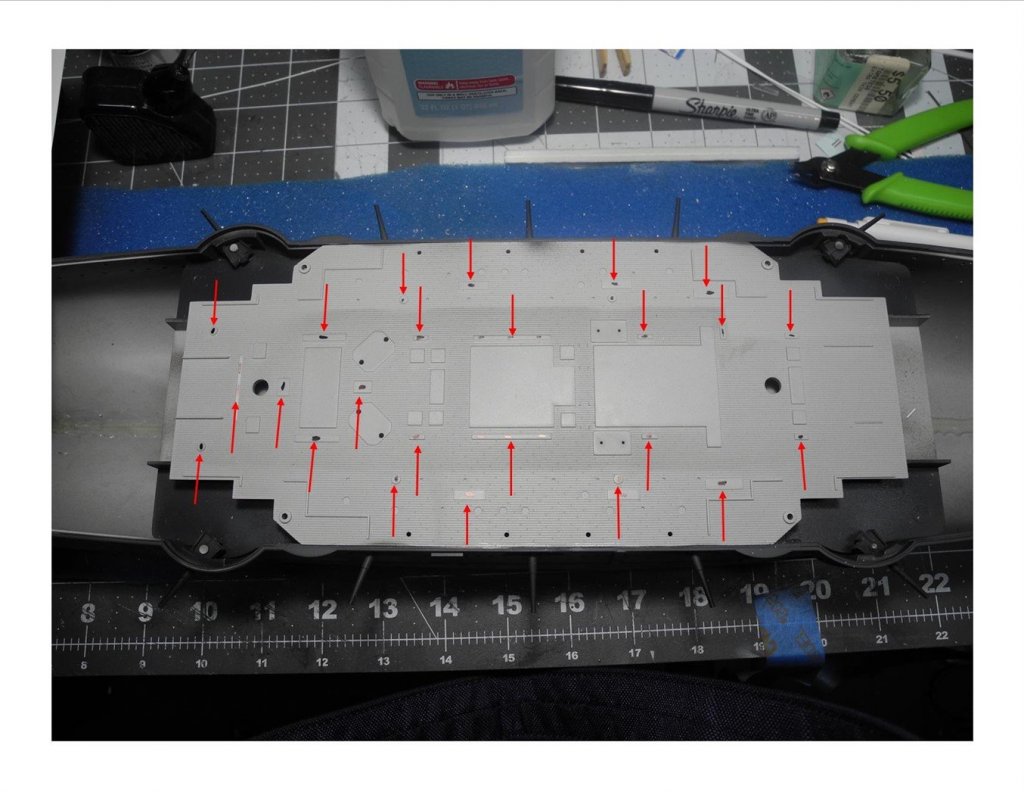
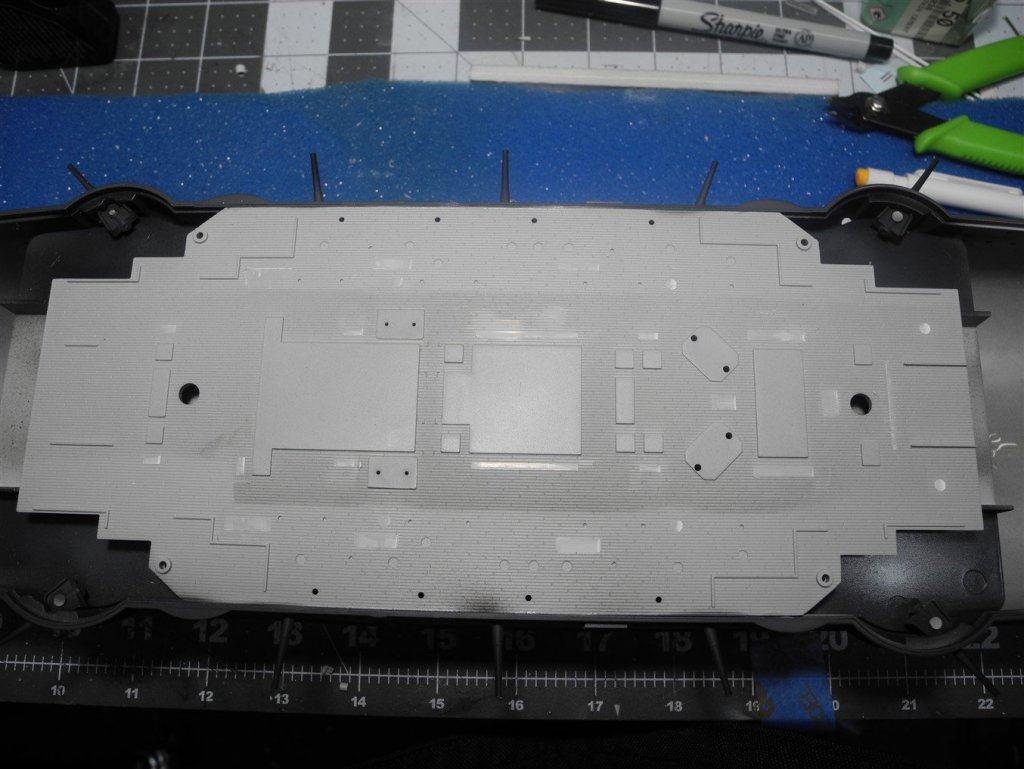
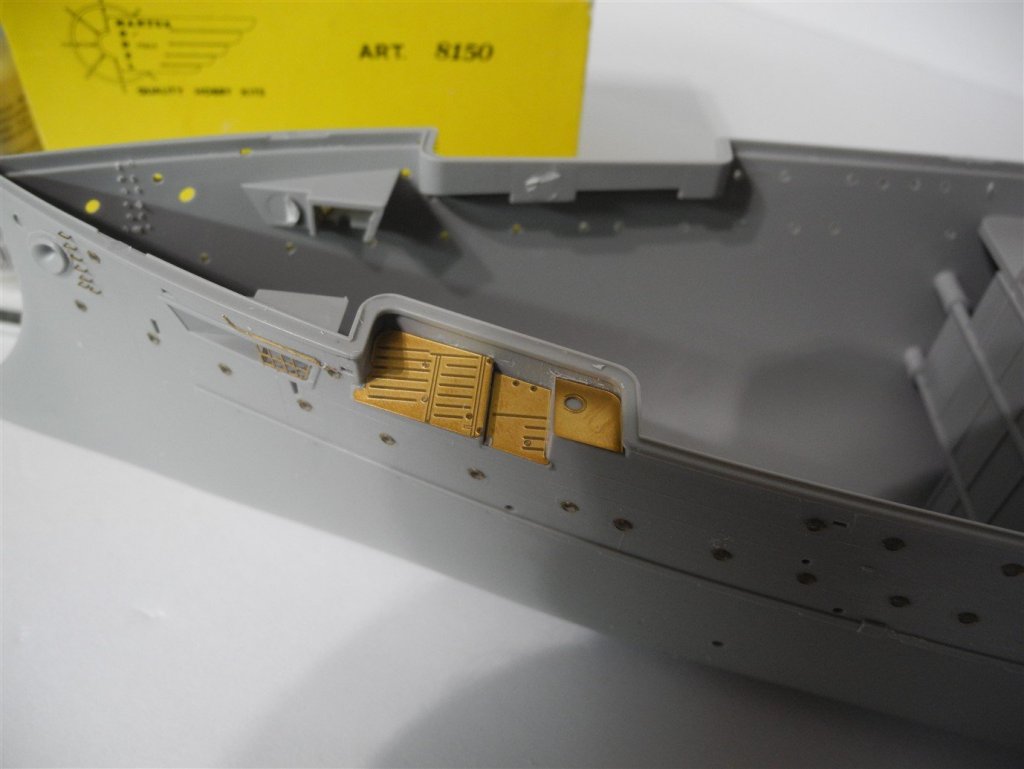
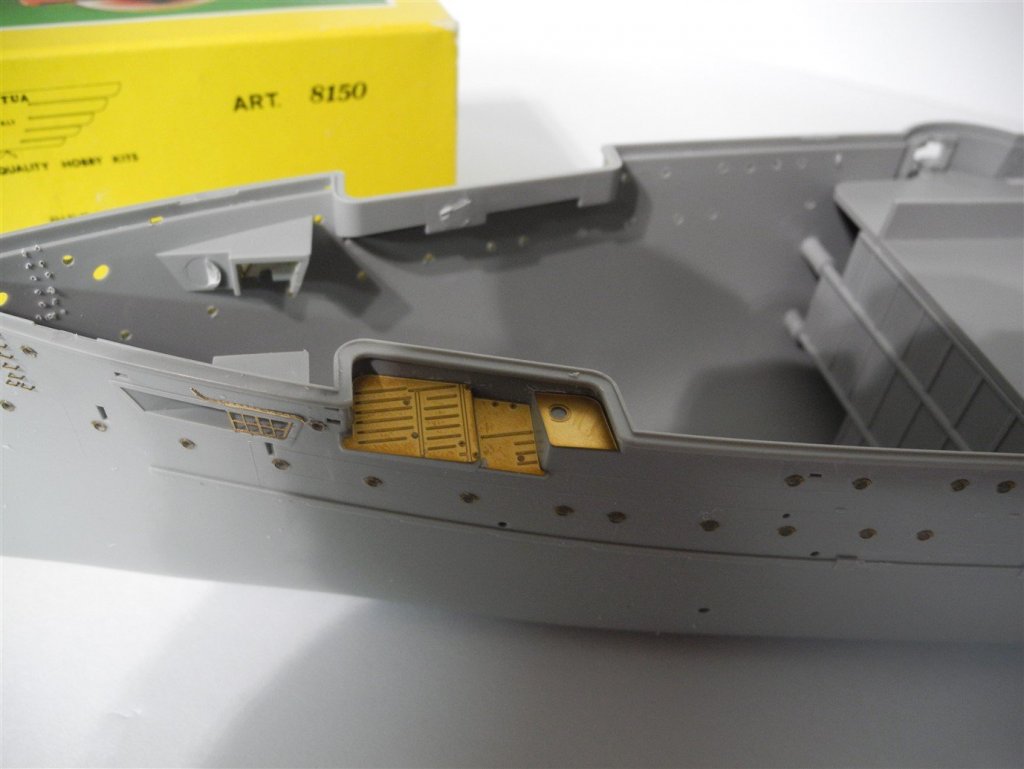
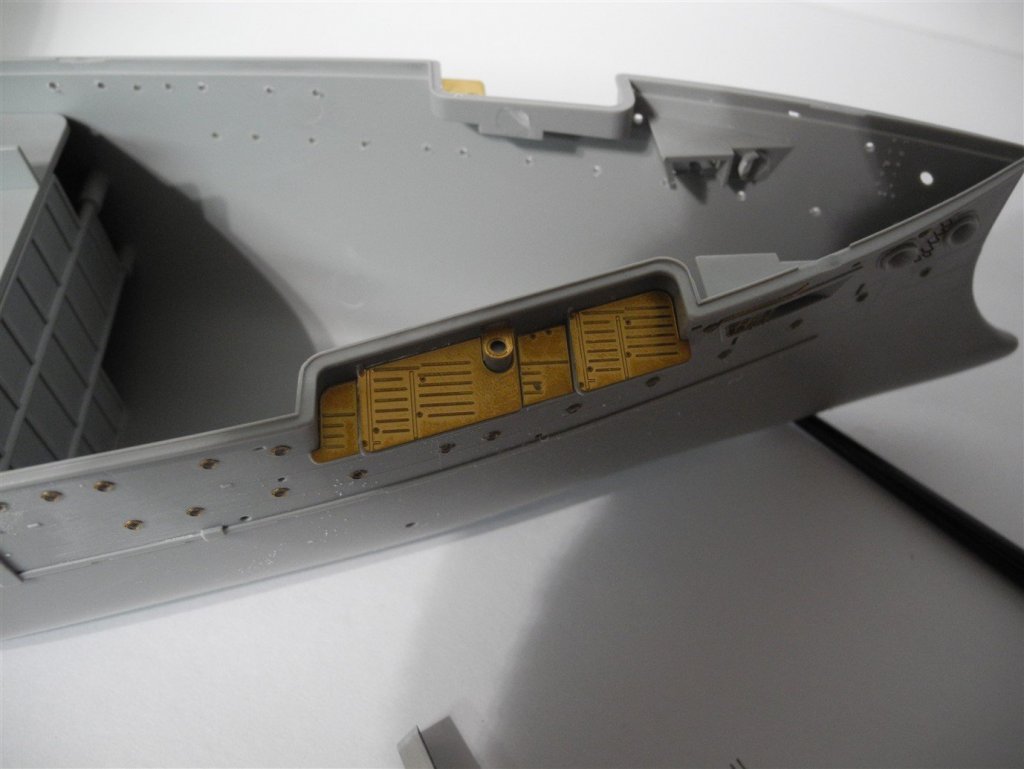
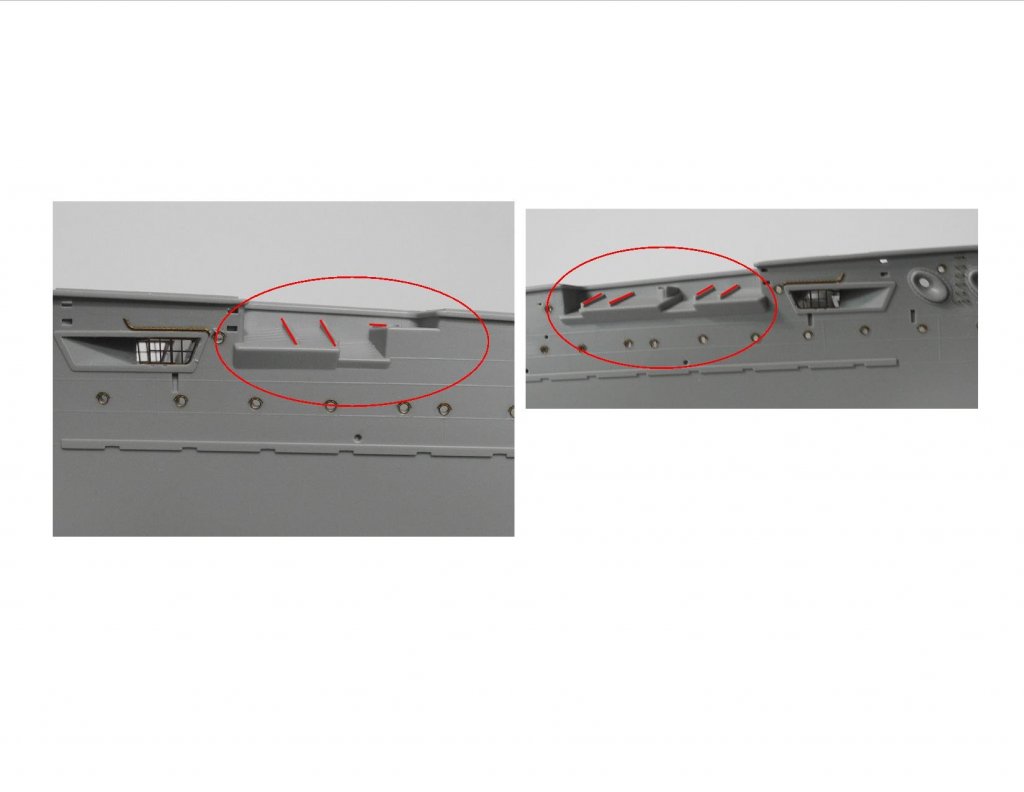
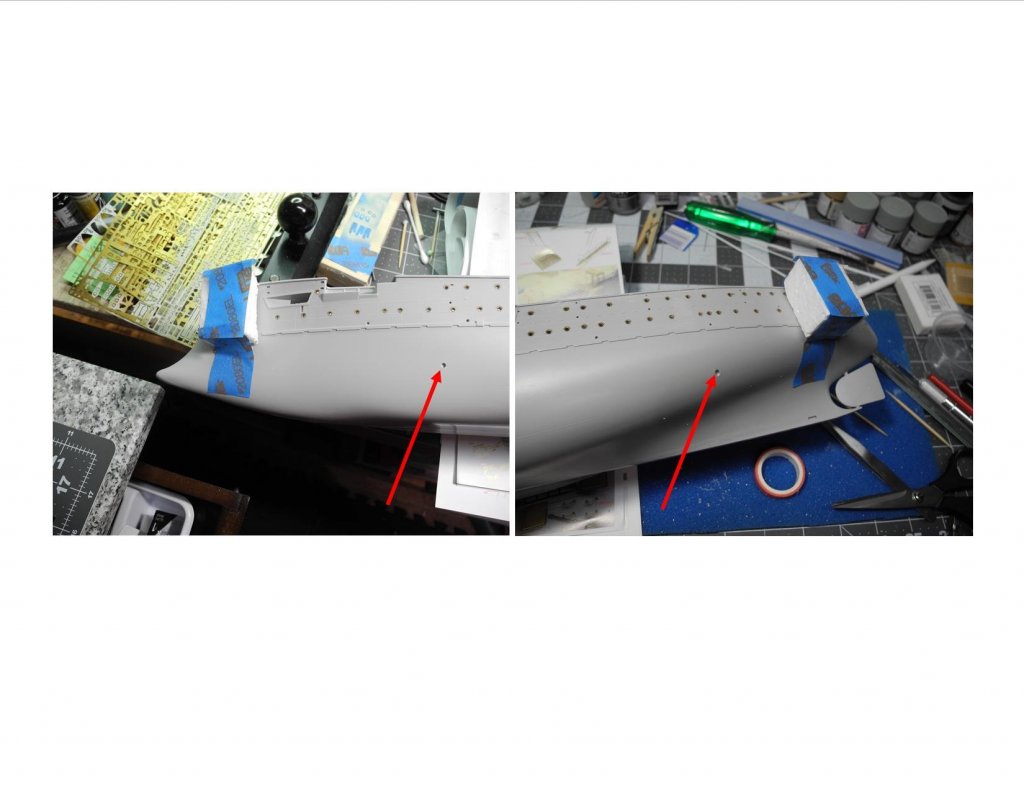
All the raised detail (marked with arrows) had to be removed from the Mikasa main deck to accommodate the wooden deck and details provided in the Pontos detail set. With the new electric chisel, it took literally 10 minutes to complete the task. Doing this with a conventional X-Acto with chisel blade would have taken much, much longer. An hour or more.
- 467 replies
-
- mikasa
- wave models
-
(and 1 more)
Tagged with:
-
Kevin What shade of "yellow" did you use on your Victory? Looks very nice and authentic. I want to do mine the same, but haven't figured out the right color, yet.
- 56 replies
-
- sd-14 cargo ship
- card
-
(and 1 more)
Tagged with:
-
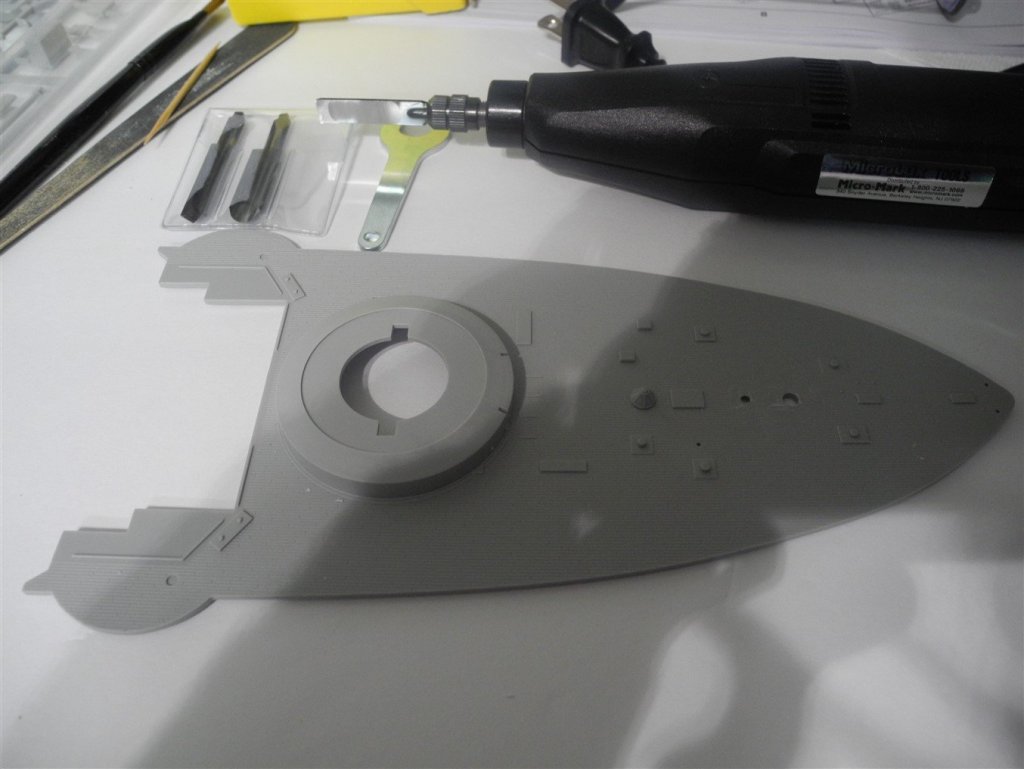
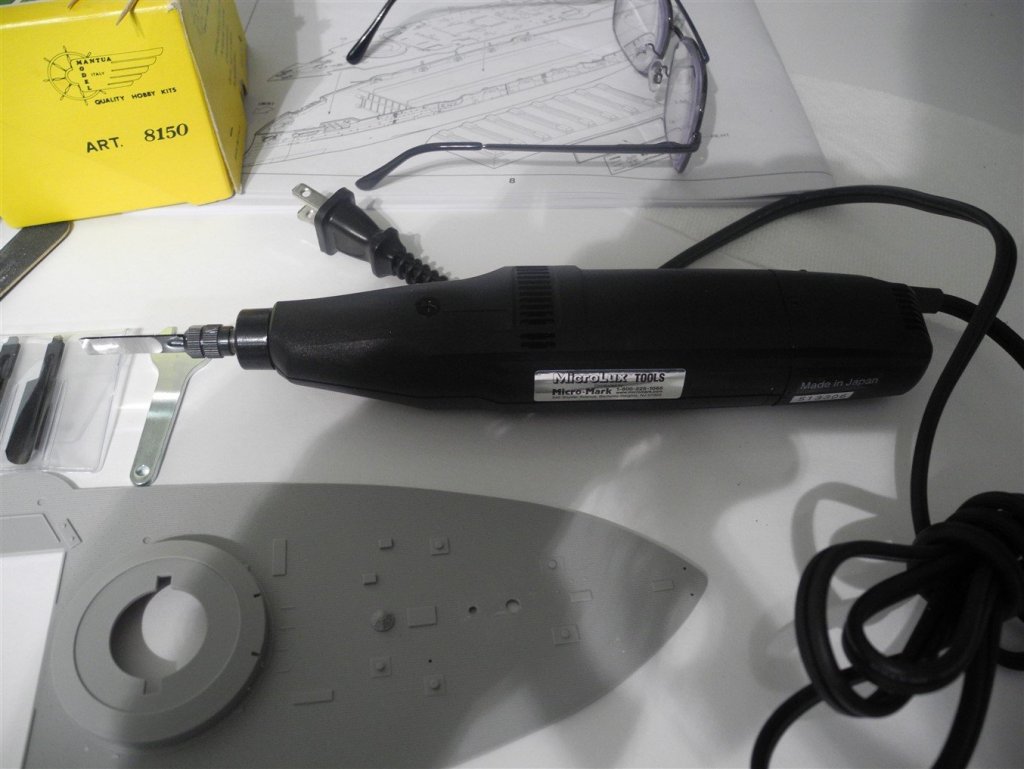
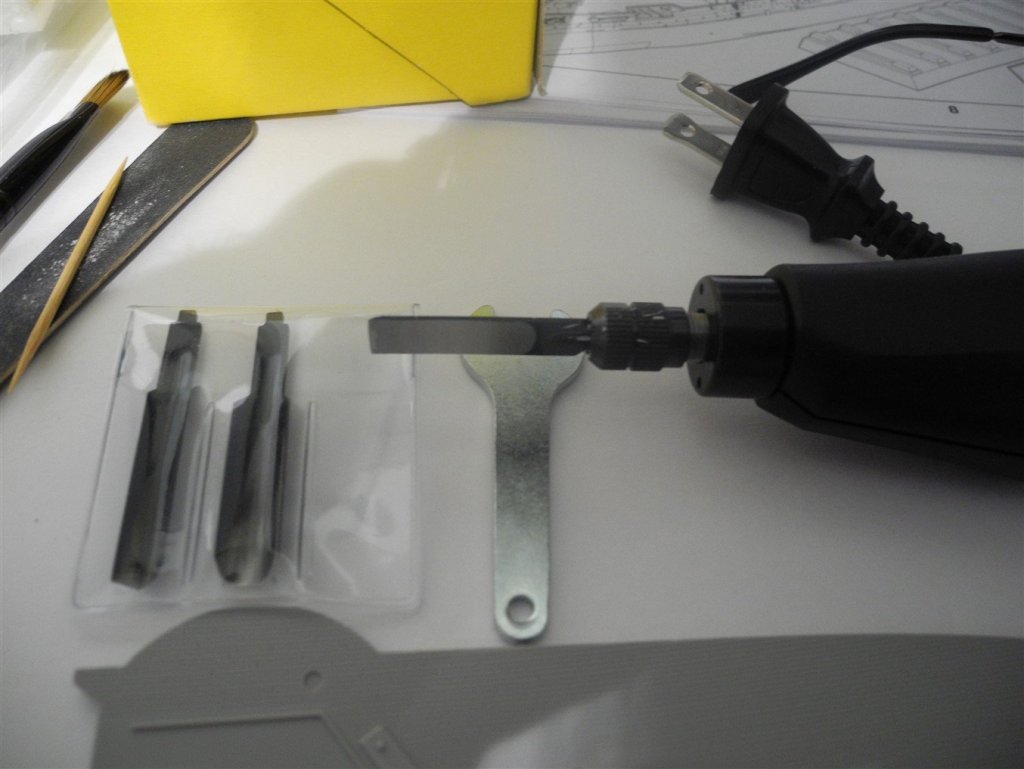
One of the tasks I least liked to do, was removing raised details from decks and other surfaces on models I'm building. When I saw that Micro Mark was having a summer sale on certain tools in their catalog, and noticed this electric powered chisel was one of them, I had to acquire one and try it out. I'm not sure how long Micro Mark has been carrying this tool in their inventory, but it was the first time I had seen it advertised. It seems to be a high quality tool, made in Japan. When you turn it on, a rotary motor begins to turn inside the tool. Once the blade comes in contact with an object to be cut, a vibratory action begins and the razor sharp blade cuts through the plastic like a hot knife through butter. Once you remove pressure from the blade, the vibratory action stops. As the blade is very sharp, it will be important to make sure to keep the free hand and other objects clear of the potential path of the blade. I tried the tool one one area of the Mikasa deck, and it made short work of a job that would have taken much much longer to do with just an X-Acto w/chisel blade. Now, maybe I won't dread removing those raised details so much as before.
- 467 replies
-
- mikasa
- wave models
-
(and 1 more)
Tagged with:
-
I need to try that dutchman trick of sharpening the tips of my broken bits. Never even tried to do it before. It must take a very fine file for that work, or maybe a fine sanding stick. What do you use?
- 467 replies
-
- mikasa
- wave models
-
(and 1 more)
Tagged with:
-
Don't laugh, that version of the Yamato is probably the biggest seller in the Asian market, maybe in the Western market as well. The young crowd are crazy about that stuff.
-
Ha - three different labels selling the same model. That's funny. A good friend of mine does a lot of business in China. He takes his designs to their factories and they produce what he wants. It's not uncommon at all for the same factory to produce the same or very similar product for a number of different sellers. Many years ago here in the USA, I worked in a factory where we made car and industrial acid, wet cell batteries. We produced a huge number of batteries for different brand names, such as Sears Die Hard, Shell premium batteries, Caterpillar batteries, etc. All these were produced to their own exacting standards and had their own quality control standards. With plastic models, it just seems weird because there seems to be no difference except for maybe what language the instructions are printed. All the plastic and photo etch is the same.
- 467 replies
-
- mikasa
- wave models
-
(and 1 more)
Tagged with:
-
Beautiful work on the buckets and sails. I particularly like the sails, your wife did a wonderful job stitching them.
- 174 replies
-
- gaeta falcata
- marisstella
-
(and 1 more)
Tagged with:
-
As you may know, this 1:200 Mikasa kit is produced and sold under at least two labels, Merit, and Wave Models. Today, I was talking to a hobby shop owner, asking if he could acquire a couple of different items for me. One of those items is the 1:200 Merit USS Hornet aircraft carrier kit. Sad to say, but he advised his sources tell him that Merit is discontinuing all their warship line, all scales. As you may know, Merit, Wave, and Trumpeter are all the same thing, just in different boxes. But most ships are sold exclusively under one label. This Mikasa is the only exception I know, being boxed and sold both under the Wave Models label as well as the Merit label. I'm only saying all this to give you a heads-up just in case you've been contemplating buying the 1:200 Mikasa model. Better get off the fence and do it now, or perhaps it won't be available later. Maybe it will come out (as the rest of the line) under a different label, I don't know. Sometimes better to be safe than sorry. Been there and done that.
- 467 replies
-
- mikasa
- wave models
-
(and 1 more)
Tagged with:
-

Fokker Dr.I by Torbogdan - FINISHED - Model Airways
CDW replied to Torbogdan's topic in Non-ship/categorised builds
She's coming along beautifully. Take your time and keep doing things the way you're doing it. -
Scott I've never tried it myself, but my guess is that most all the Warspite photo etch sets will work with the Trumpeter kit. There may be certain pieces included with the various sets that won't work without some modification, but most parts are generic enough you should not have a problem, like ladders, armament, railings, etc. If you buy a wooden deck, make sure that it is specific to your Trumpeter kit as those are designed specifically for the particular kit.
-
Very nice. I really like this model, and it will fit very well in a display alongside the Mikasa.
- 244 replies
-
- borodino
- dom bumagi
-
(and 1 more)
Tagged with:
-
Popeye's analogy is an saying I used to hear my old boss, a US Army Major General, say all the time when we had big, complicated tasks to take on - "just eat this elephant one bite at a time."
- 961 replies
-
Who or what company actually produces the Scharnhorst model? It looks like a Woody Joe kit to me. The 1:250 Yamato and Akagi kits sold by DeAgostini, which sells in installments, are actually Woody Joe kits. But I have not seen the 1:200 Scharnhorst model in any other form except Partsworks. Maybe it's an exclusive done for Partsworks?
-
Yes, the gray scheme just wouldn't do justice to the Mikasa, even though it is authentic for the major combat actions the Mikasa participated.
- 467 replies
-
- mikasa
- wave models
-
(and 1 more)
Tagged with:
-
I thought I would use the Tamiya color, NATO Black, to paint the hull. I like it because it has a hint of white in it that tones it down. However, once I tested the paint on some scrap, found it dries looking very "chalky" and I don't like it. I guess I will end up using Tamiya gloss black and mix in some white to get the tone I want. Everything will end up getting dull coat clear once all hull painting is done.
- 467 replies
-
- mikasa
- wave models
-
(and 1 more)
Tagged with:
-
Wow, that tower takes the cake. Never seen anything else like it on any warship model I've built. Almost a skyscraper of sorts. The sailors must have gotten a good workout climbing all the steps and ladders to go from top to bottom.
-
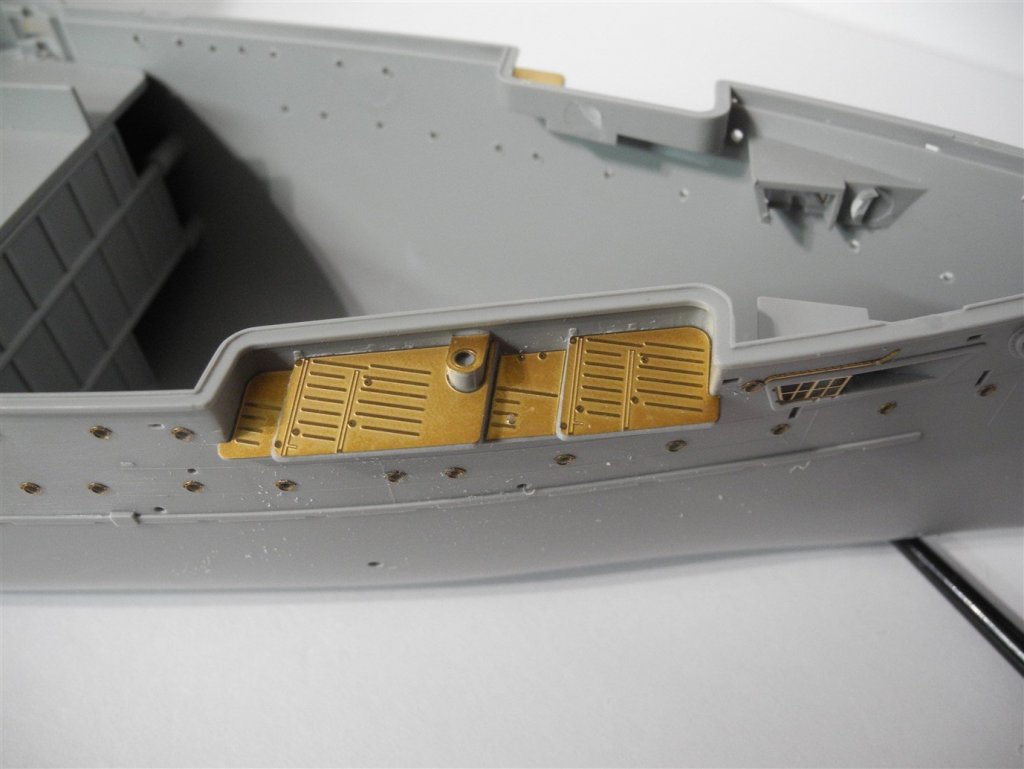
The Pontos photo etch is quite remarkable and arguably the best in the business. If there is anything else out there (photo etch) that's better, I would like to know what it is and where to buy it so I can get me some. Here, the otherwise barren stock plastic pieces are transformed by the Pontos photo etch magic.
- 467 replies
-
- mikasa
- wave models
-
(and 1 more)
Tagged with:
-
- 467 replies
-
- mikasa
- wave models
-
(and 1 more)
Tagged with:
-
I had an almost identical problem as RMC described using Opera, just after the recent site update. I could not add any text to a post. In Opera settings, I found a box unchecked that was evidently the cause of the problem. Once I "checked" that box, everything went back to normal. How or why the box got unchecked after the site update, I cannot explain. Everything was working fine, then all of a sudden it wasn't. Anyway, in Opera, the box that needs to be checked is: "Enable auto-filling of webpages". If that box is not checked (in Opera), you will not be able to add text.
-
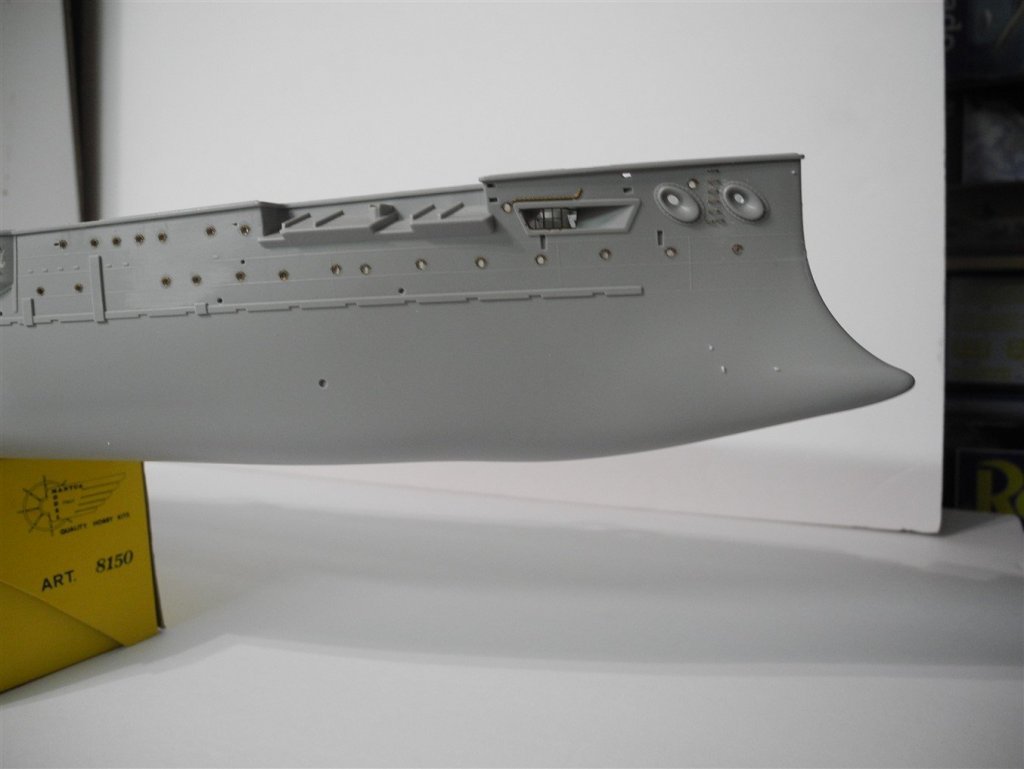
Just as an FYI... The red arrows point to fore and aft 18" torpedo tubes in the hull of the Mikasa. Not sure how practical those would be in a combat situation, but I suppose they could discourage another ship lining up along side for a broadside shot.
- 467 replies
-
- mikasa
- wave models
-
(and 1 more)
Tagged with:
-
I mis spoke saying, all gray. It's (the alternative color) actually as you said, gray topside and oxide red below WL. There is a lot of detail that must be attached to the hull. I am thinking it may be easier and more practical to paint a lot of those details before attaching to the hull, such as the doors on the gun ports.
- 467 replies
-
- mikasa
- wave models
-
(and 1 more)
Tagged with:
-
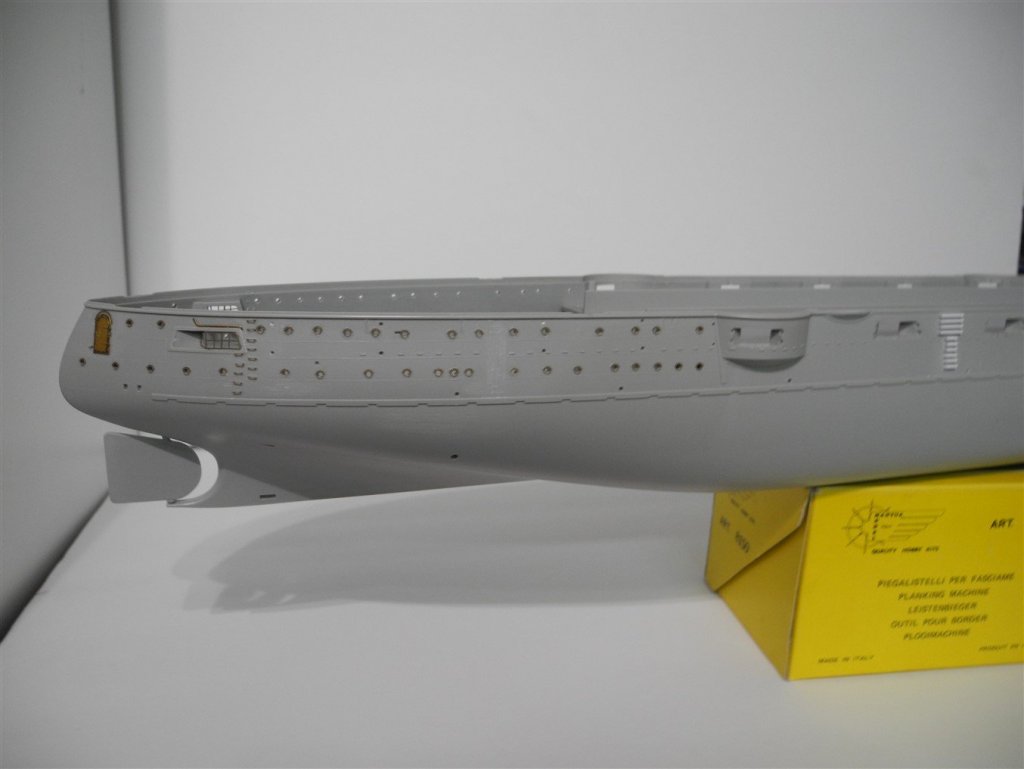
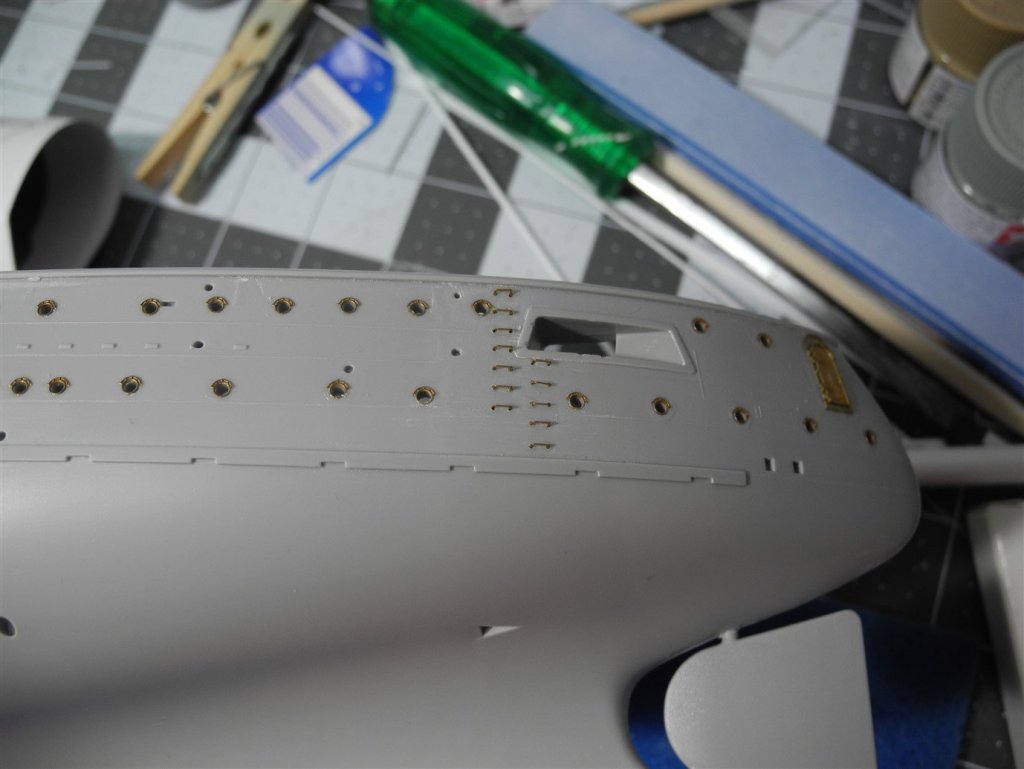
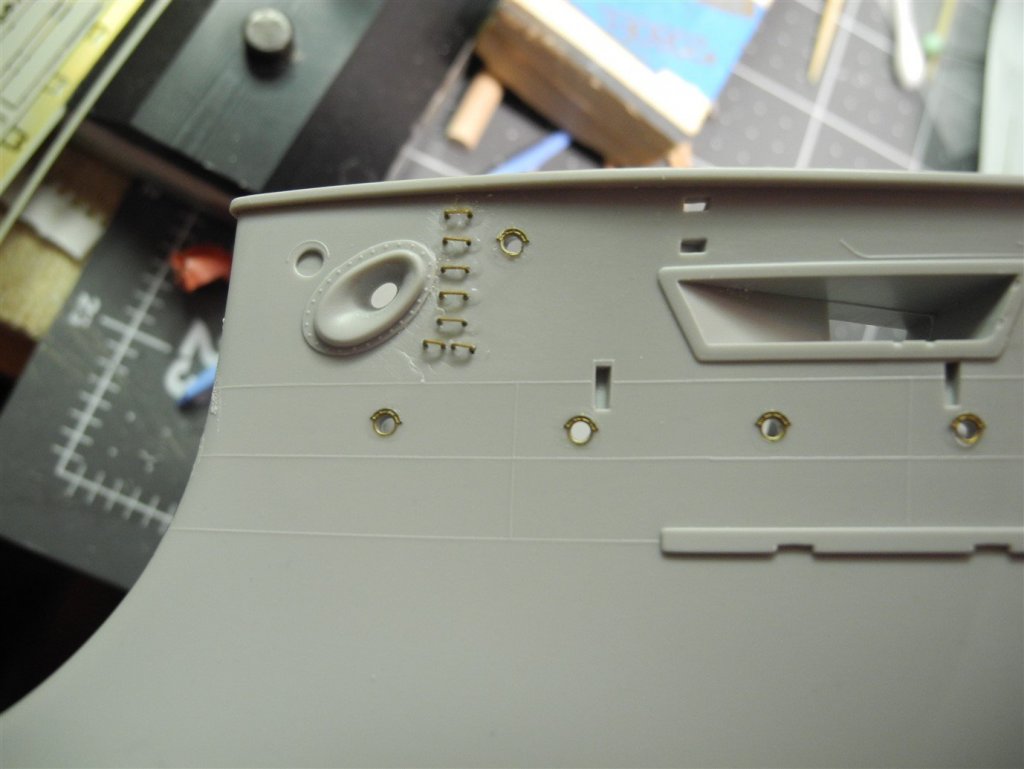
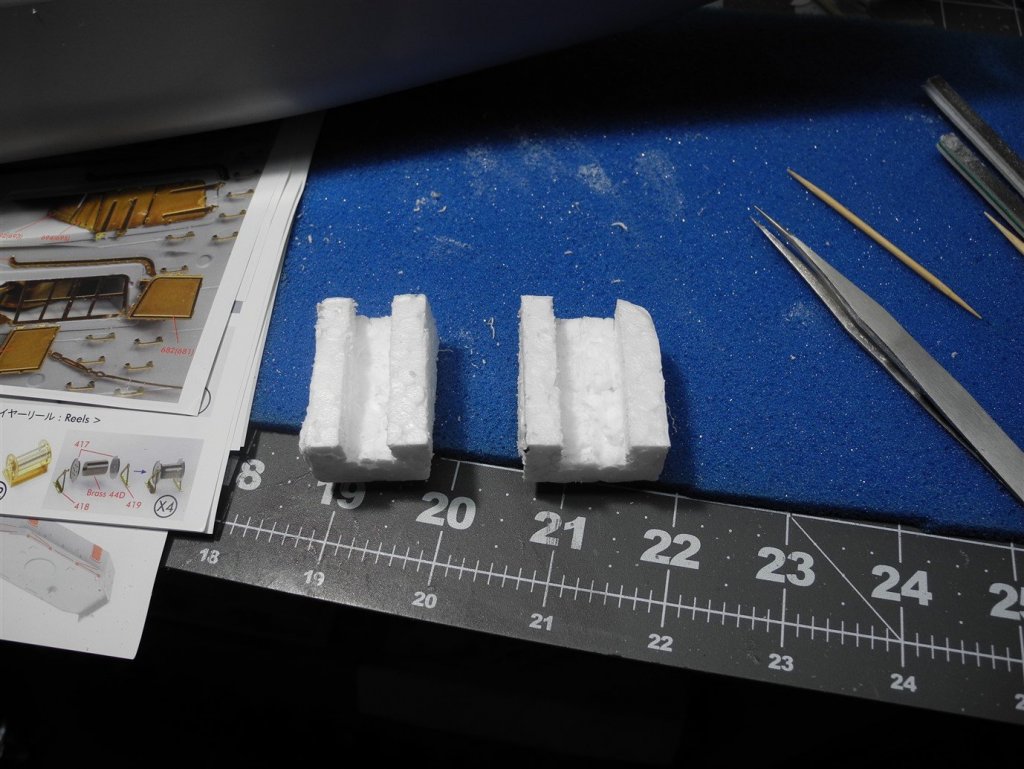
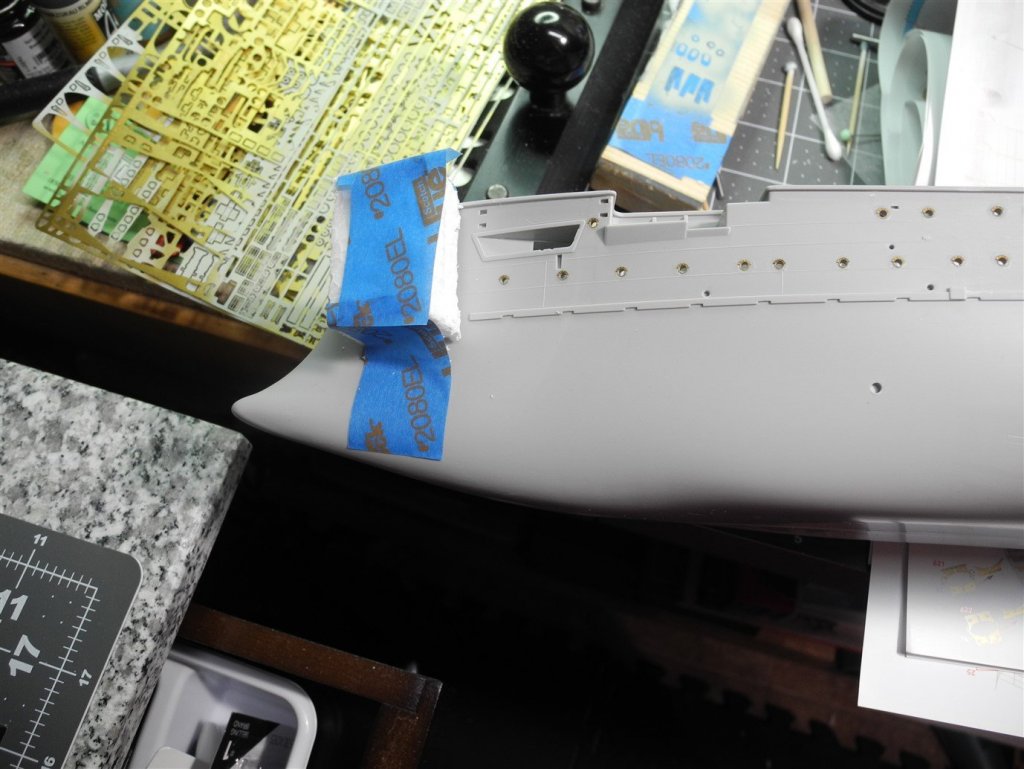
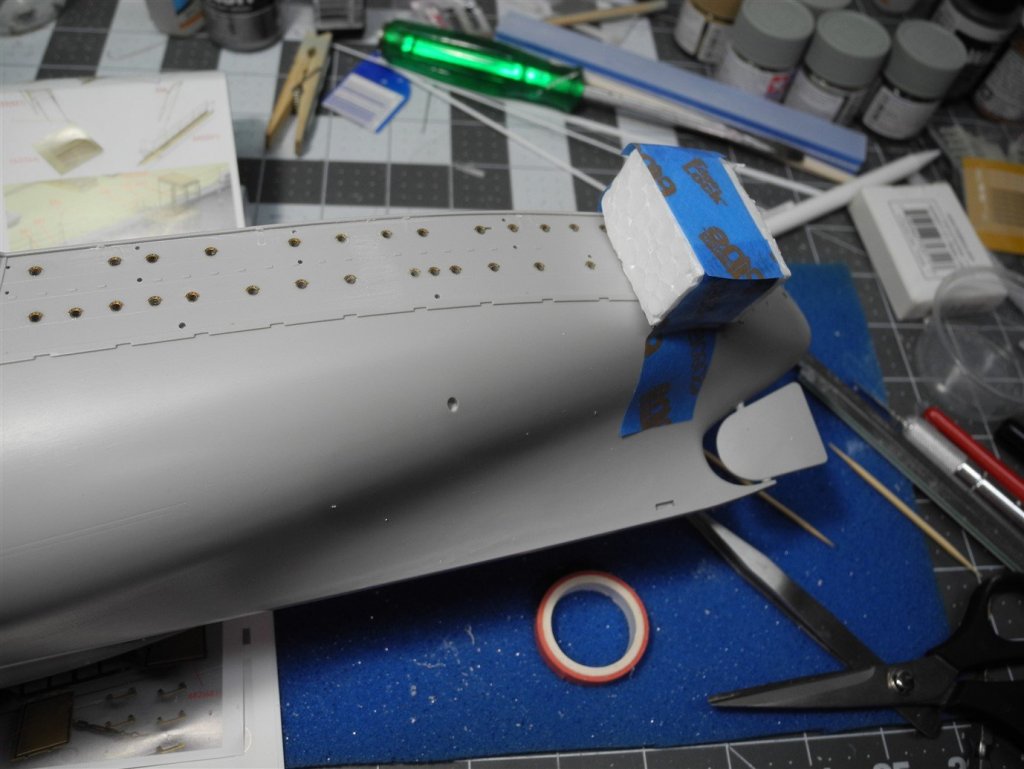
These little hand hold pieces could easily be knocked off and lost during the construction, painting, and detailing of the hull. To help prevent that, used some scrap styrofoam and cut a small channel in it, then taped it in place over the small details. That should keep everything in place while the rest of the photo etch details are added before painting. Then, I need to decide how I am going to paint this model. It seems the Mikasa hull was originally painted black above the water line, red oxide below the WL, light gray superstructure, black funnels with light gray stripes. In other renditions of the model, I have seen it painted all gray. My only reference book states the colors formerly mentioned, so I think I will go with that VS the all gray. All gray seems rather dull to me and as long as there is a more colorful option that's authentic, I would rather go with that.
- 467 replies
-
- mikasa
- wave models
-
(and 1 more)
Tagged with:
About us
Modelshipworld - Advancing Ship Modeling through Research
SSL Secured
Your security is important for us so this Website is SSL-Secured
NRG Mailing Address
Nautical Research Guild
237 South Lincoln Street
Westmont IL, 60559-1917
Model Ship World ® and the MSW logo are Registered Trademarks, and belong to the Nautical Research Guild (United States Patent and Trademark Office: No. 6,929,264 & No. 6,929,274, registered Dec. 20, 2022)
Helpful Links
About the NRG
If you enjoy building ship models that are historically accurate as well as beautiful, then The Nautical Research Guild (NRG) is just right for you.
The Guild is a non-profit educational organization whose mission is to “Advance Ship Modeling Through Research”. We provide support to our members in their efforts to raise the quality of their model ships.
The Nautical Research Guild has published our world-renowned quarterly magazine, The Nautical Research Journal, since 1955. The pages of the Journal are full of articles by accomplished ship modelers who show you how they create those exquisite details on their models, and by maritime historians who show you the correct details to build. The Journal is available in both print and digital editions. Go to the NRG web site (www.thenrg.org) to download a complimentary digital copy of the Journal. The NRG also publishes plan sets, books and compilations of back issues of the Journal and the former Ships in Scale and Model Ship Builder magazines.

.jpg.7e80607770d9078b2f0b470e8c9c33ac.jpg)
