HOLIDAY DONATION DRIVE - SUPPORT MSW - DO YOUR PART TO KEEP THIS GREAT FORUM GOING! (Only 36 donations so far out of 49,000 members - C'mon guys!)
×

CDW
-
Posts
7,747 -
Joined
-
Last visited
Content Type
Profiles
Forums
Gallery
Events
Everything posted by CDW
-
 I think they are supposed to represent binoculars, but not a very convincing replica IMHO. Will probably order some 3 dimensional ones rather than fool around with these.
- 151 replies
-
- 7
-

-
- duke of york
- tamiya
- (and 2 more)
-
I'm pretty sure I bought something that will be quite a challenge for a first card model. Maybe over extended myself? It's the 1:200 USS Oakland, a WW2 light cruiser with a lot of twin 5" gun turrets. An anti aircraft platform to be sure.
- 151 replies
-
- 8
-
-
- duke of york
- tamiya
- (and 2 more)
-
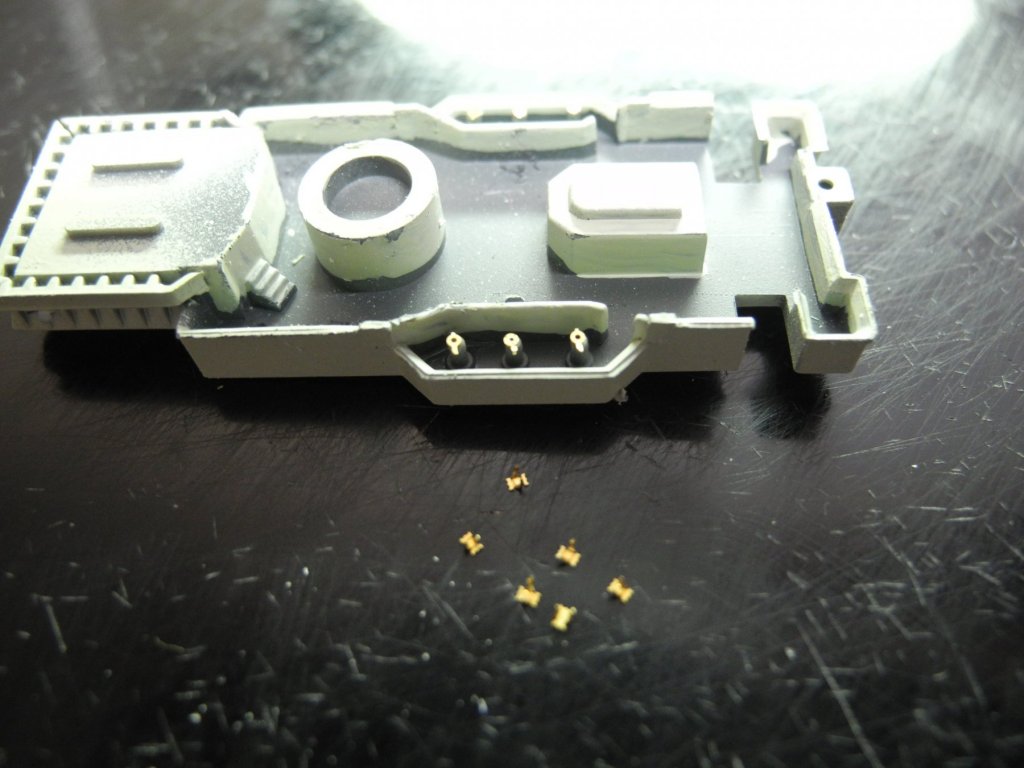
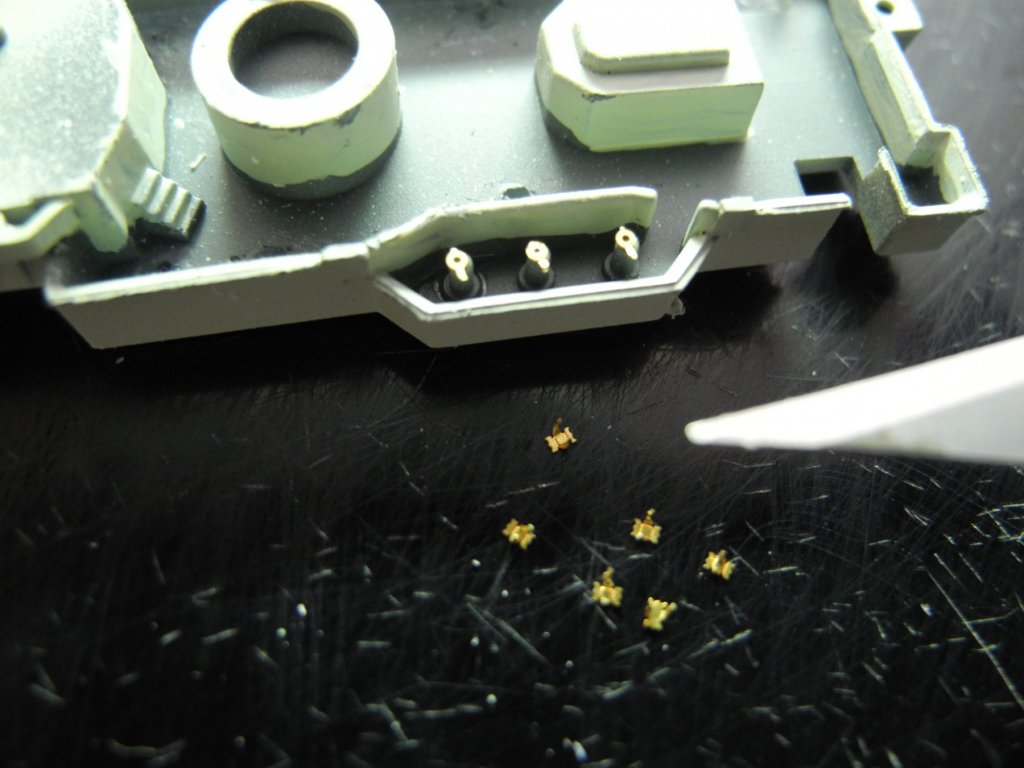
I think these photo etch parts represent some type of sight devices, but no books I have give reference to what exactly they are. Anyone know for sure? One thing I do know, the parts represent the extreme edge of what I can see to work with. Using magnification, begin to lose my depth perception making the pieces difficult to position. I believe these are perhaps the smallest parts on the photo etch sheets. Any smaller and I will not attempt it. No point really, as I would not be able to see it after the model is finished even if I could.
- 151 replies
-
- 7
-
-
- duke of york
- tamiya
- (and 2 more)
-
Those jigs were a great idea for shaping your railings.
- 83 replies
-
- 5
-
-
- o16
- pacific crossroads
- (and 2 more)
-
Thank you for the kind words. The pigment used in this particular instance is made by Vallejo, product 73.117, rust oxide. The Vallejo line of pigments are stocked at my local hobby shop, but you can easily find it on line as well. http://www.ebay.com/itm/Vallejo-Pigments-Pigment-73-117-RUST-30ml-Bottle-Weather-Armor-/321583741959 It adheres well to a painted surface but I cover the model with a clear matt varnish once everything is finished. Repeated handling could potentially smear the pigment to places unintended without a clear coat afterward. Is the Java a resin kit?
- 151 replies
-
- 4
-
-
- duke of york
- tamiya
- (and 2 more)
-
I love that ocean base and want to try one of those for myself, but it is something I've never done before. Your work is encouraging and makes it look easier than I thought it might be. Was always under the impression those ocean bases were created using the artificial water product you see for sale in the model rail road shops. On another note, I've been looking at various paper model ship sources and found this model shop from Germany on Ebay. His prices are very reasonable and his models can be bought with or without laser cut frames. Best of all, he uses a flat rate international shipping service that is very reasonable in cost and faster than I would have anticipated. I put in my first paper ship model order last night and will provide some feedback on the quality of the item once I've received it. If you want to check it out, here is the link to his Ebay model shop: http://stores.ebay.com/PAPIERMODELLE?_trksid=p2047675.l2563
- 193 replies
-
- 5
-
-
- cerberus
- paper shipwright
- (and 1 more)
-
Once upon a time, there was a WW2 US submarine on display here in Tampa. I climbed aboard to see it and was shocked how small and tight the quarters. I think it would take a special person to serve aboard a sub for a long period of time and keep their sanity. I wonder, did they have maximum size requirements (height and weight) for submarine duty, similar to the limits placed on pilots? We had some aircraft in our fleet of equipment before I retired. One was a Beech King Air Commander. Our pilot invited me to sit in the co-pilots seat and take the controls when we got airborne. The fit was so tight and cramped for me, I had to pass as it was far too uncomfortable and closed in.
- 83 replies
-
- 5
-
-
- o16
- pacific crossroads
- (and 2 more)
-
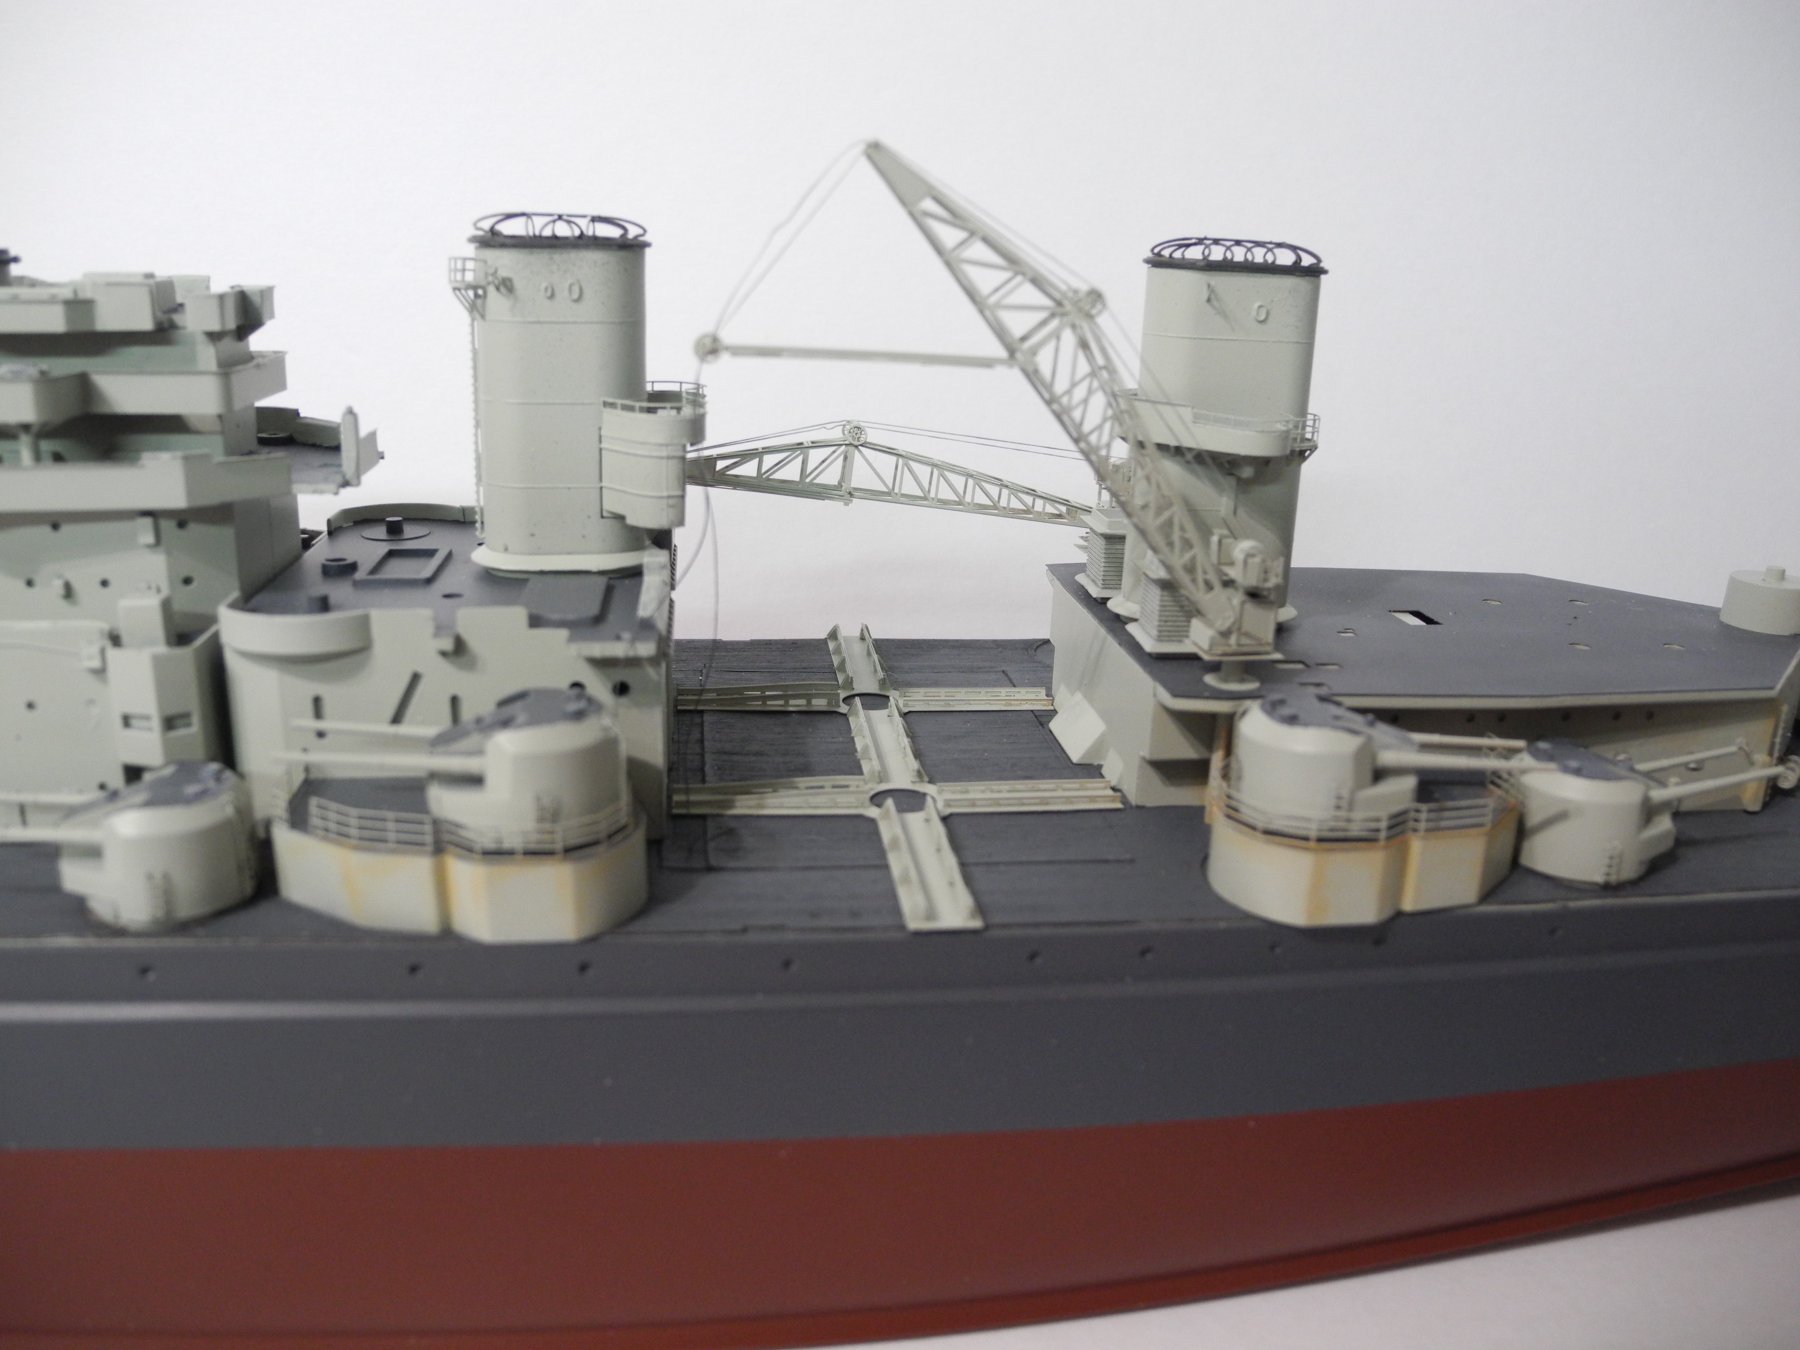
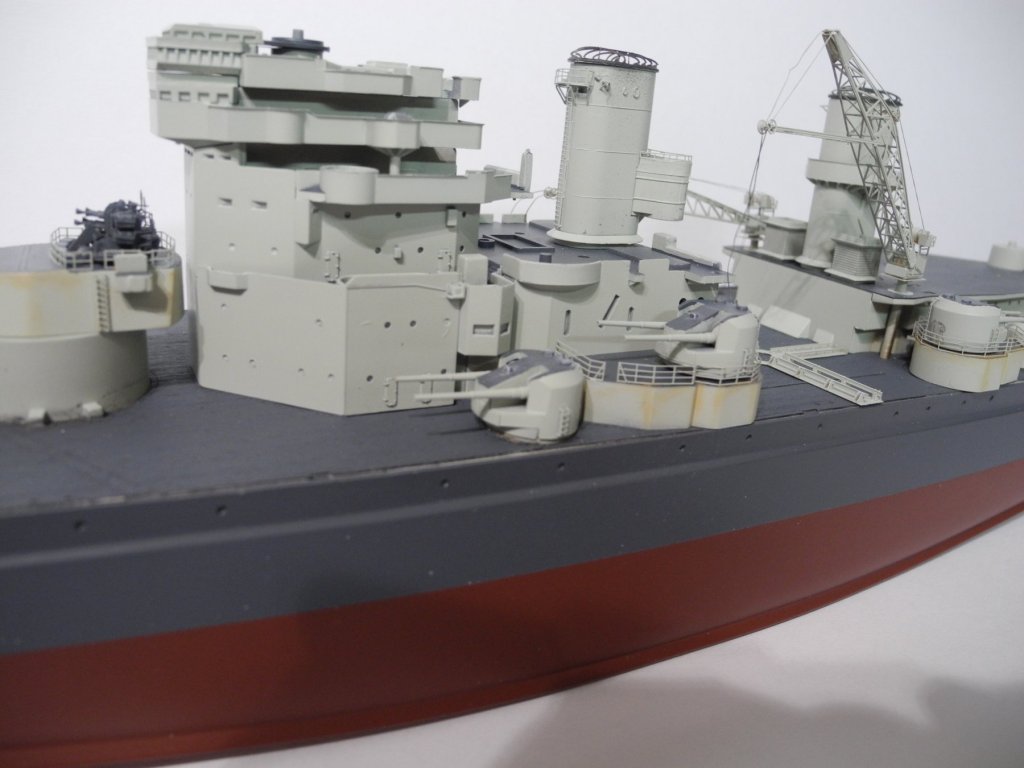
Thank you, sir. Finely ground dry pigment lightly dusted on with a dry brush. Will do some more here and there along with some light salt and sun weathering. I'm surprised the Pontos set didn't supply a couple of hooks for the cranes...or maybe they did and I just haven't found them on the photo etch sheets yet. If none, will source them somewhere or maybe just make a couple of them. I think I might have some that were included with a Tom's PE set for a Liberty Ship.
- 151 replies
-
- 5
-
-
- duke of york
- tamiya
- (and 2 more)
-
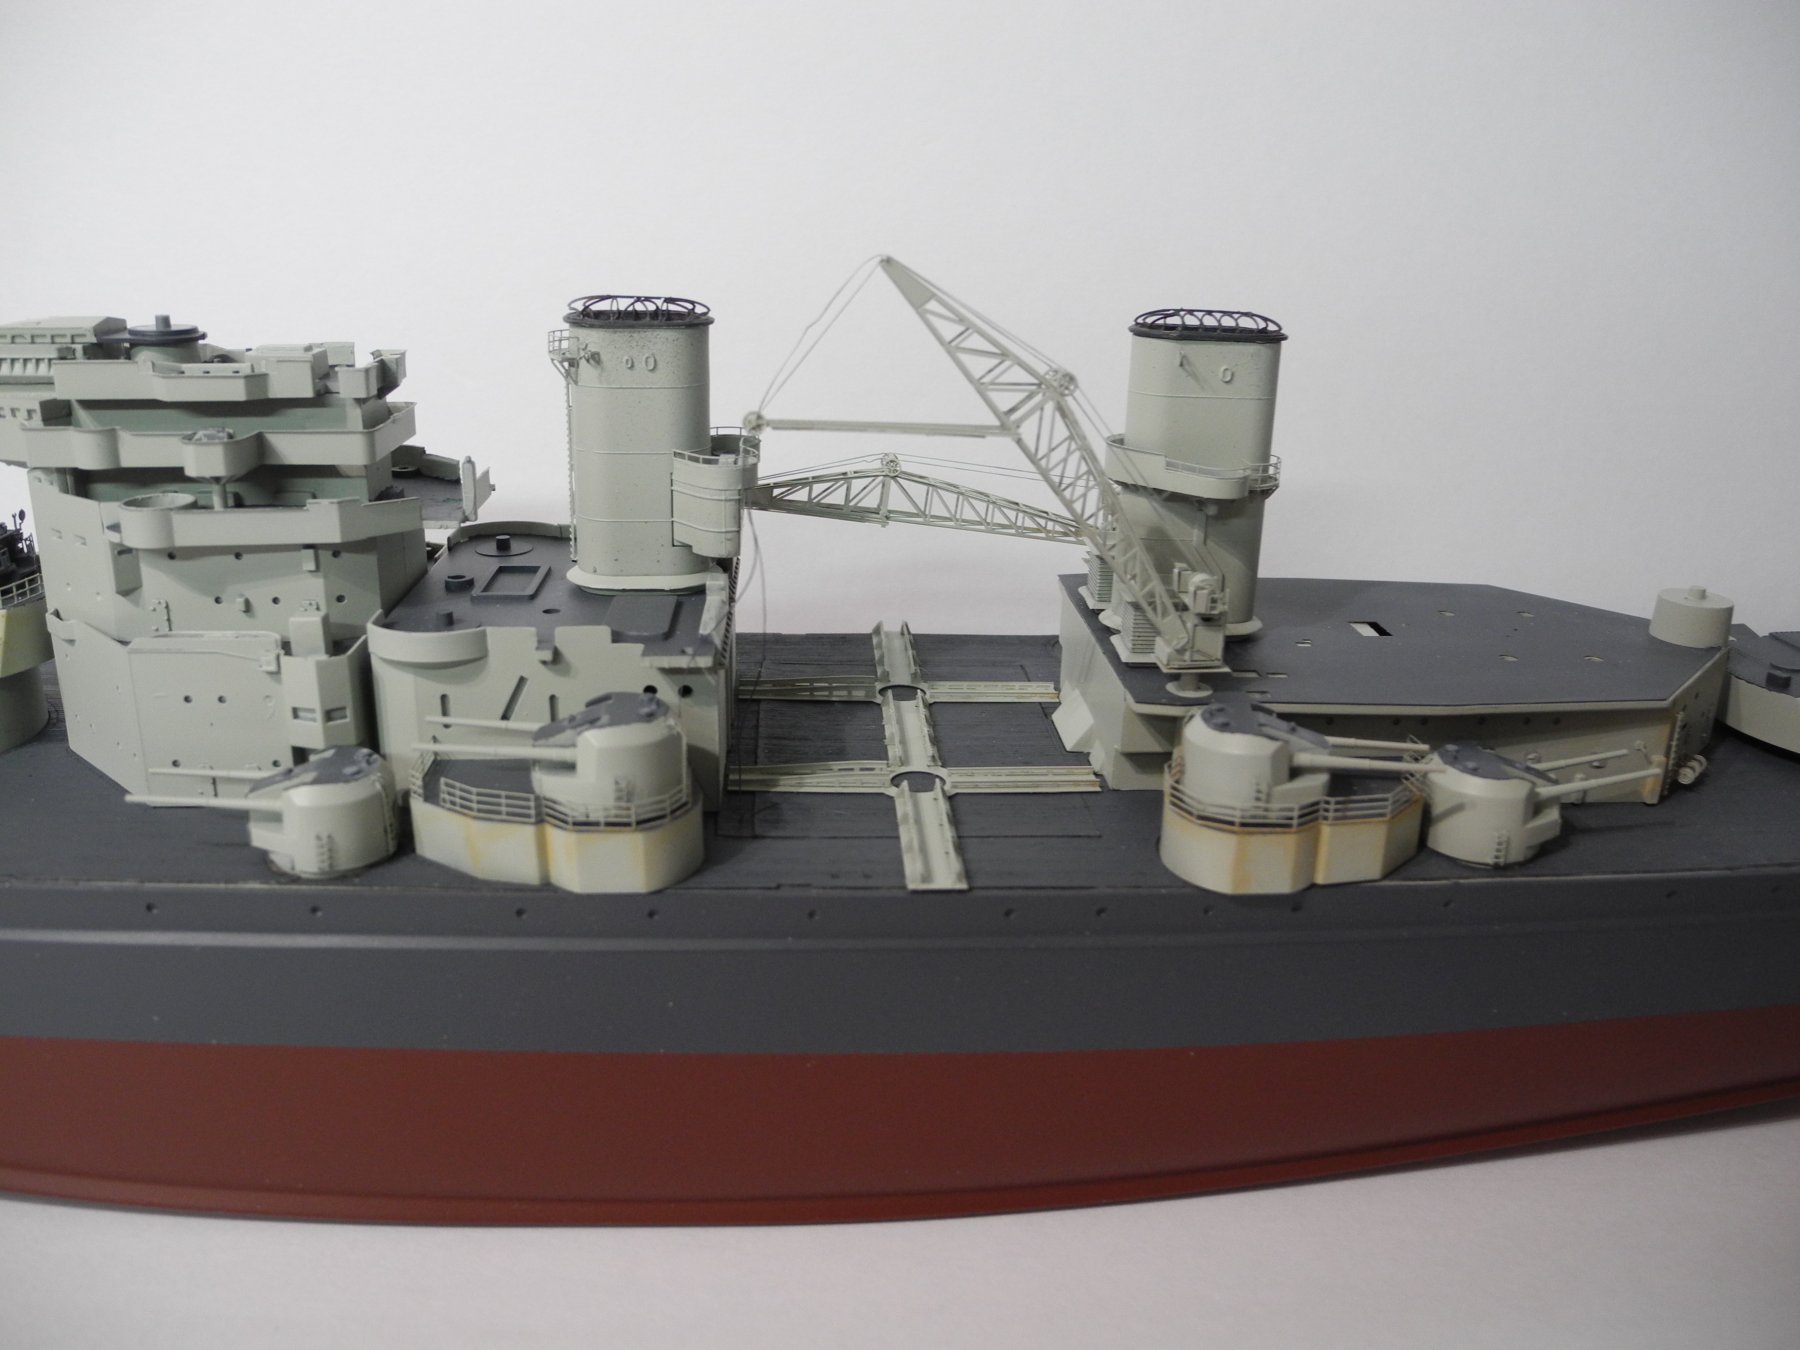
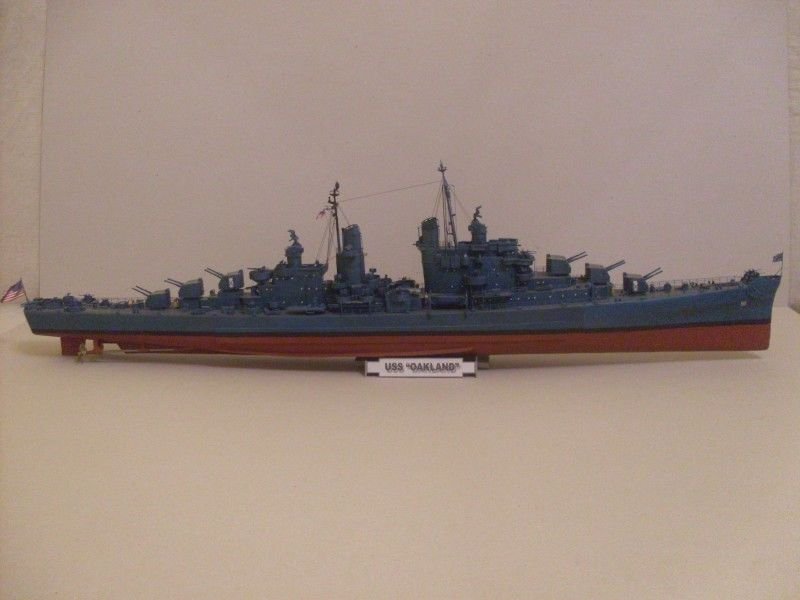
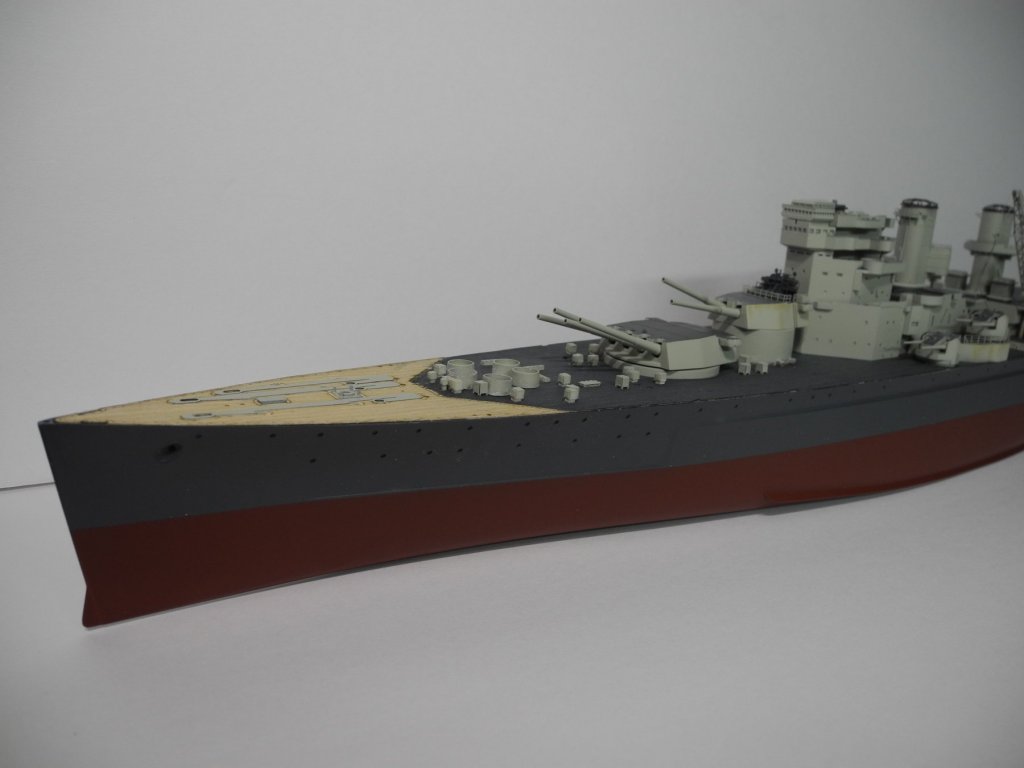
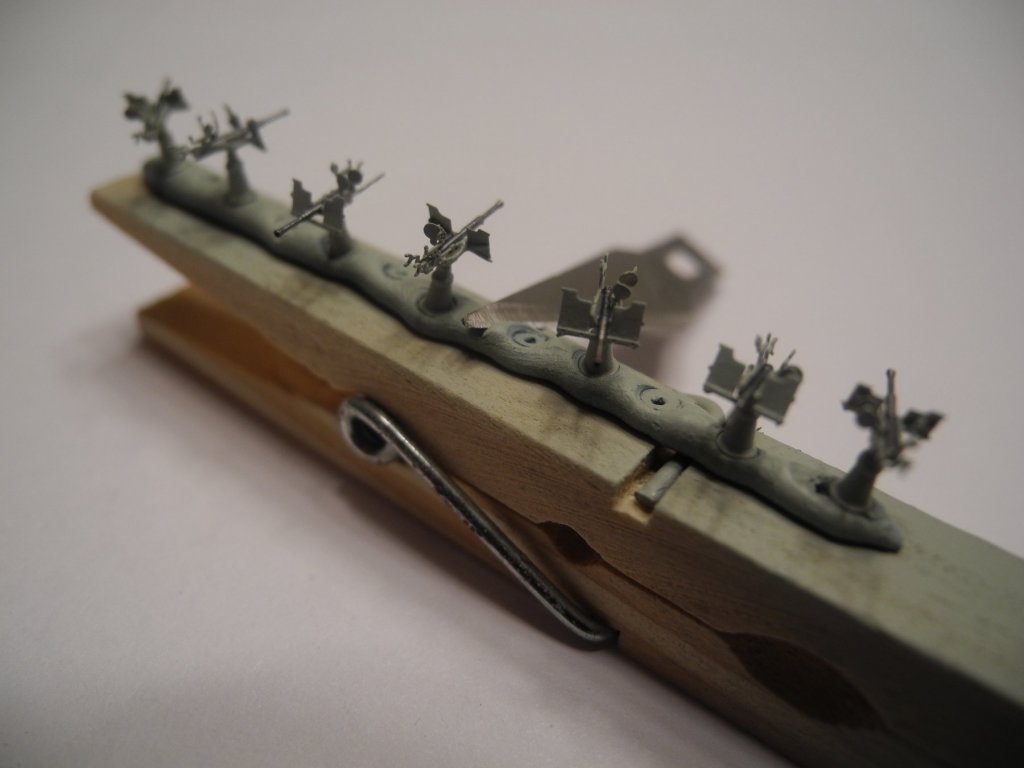
Dry fitting some parts as they are completed. Lots remaining to be done. Lots of details and touchups, painting and weathering.


- 151 replies
-
- 10
-
-
- duke of york
- tamiya
- (and 2 more)
-
Fokker Dr.I by Torbogdan - FINISHED - Model Airways
CDW replied to Torbogdan's topic in Non-ship/categorised builds
A friend bought a 3D printer and has slowly been learning to tweak it, use it, and learn it's limitations. He was telling me something similar to what Ron said when he told me the difficulty in 3D printing a pilot bust figure. He said the problem comes when the printer goes to do (for example) a nose. The bottom of the nose has nothing to rest upon and becomes as Ron said, "an unsupported wall". As a result, it sags and turns out to be a blob rather than a nose. Now, there are ways around that problem, but it's advanced stuff and that's probably not something worth the time and effort for Shapeways to do. But it can be done. -
There is something about the paper models that seem very appealing to me, not sure what exactly or why. Maybe because I've never built one? I only wish they were more available locally rather than the need to order them from afar. The postage rate was approx 25% of the total cost of a large paper model with accessories when I checked, which seems rather steep.
- 193 replies
-
- 3
-
-
- cerberus
- paper shipwright
- (and 1 more)
-
What's the idea with those paper "glasses" along side the 3D Bismarck book? I just ordered the book, so I guess I'll find out soon enough. The glasses remind me of an item they issued at the movie theater when I was a kid as we watched a 3D movie. Is that what these are for, looking at the book in 3D? Strange.
- 193 replies
-
- 2
-
-
- cerberus
- paper shipwright
- (and 1 more)
-
There's going to be a night and day difference between the stock kit and what you're building.
-
Very nice progress. The display board is beautifully done, and the beads give it a great finished look. Will try to remember and incorporate that idea in the future. Speaking of weather, we've had about five straight days of rain here in Tampa and some thunder storms as well. Not real heavy rains, but much needed and enough to give the ground a good soaking, helping to replenish the aquifer.
- 83 replies
-
- 6
-
-
- o16
- pacific crossroads
- (and 2 more)
-
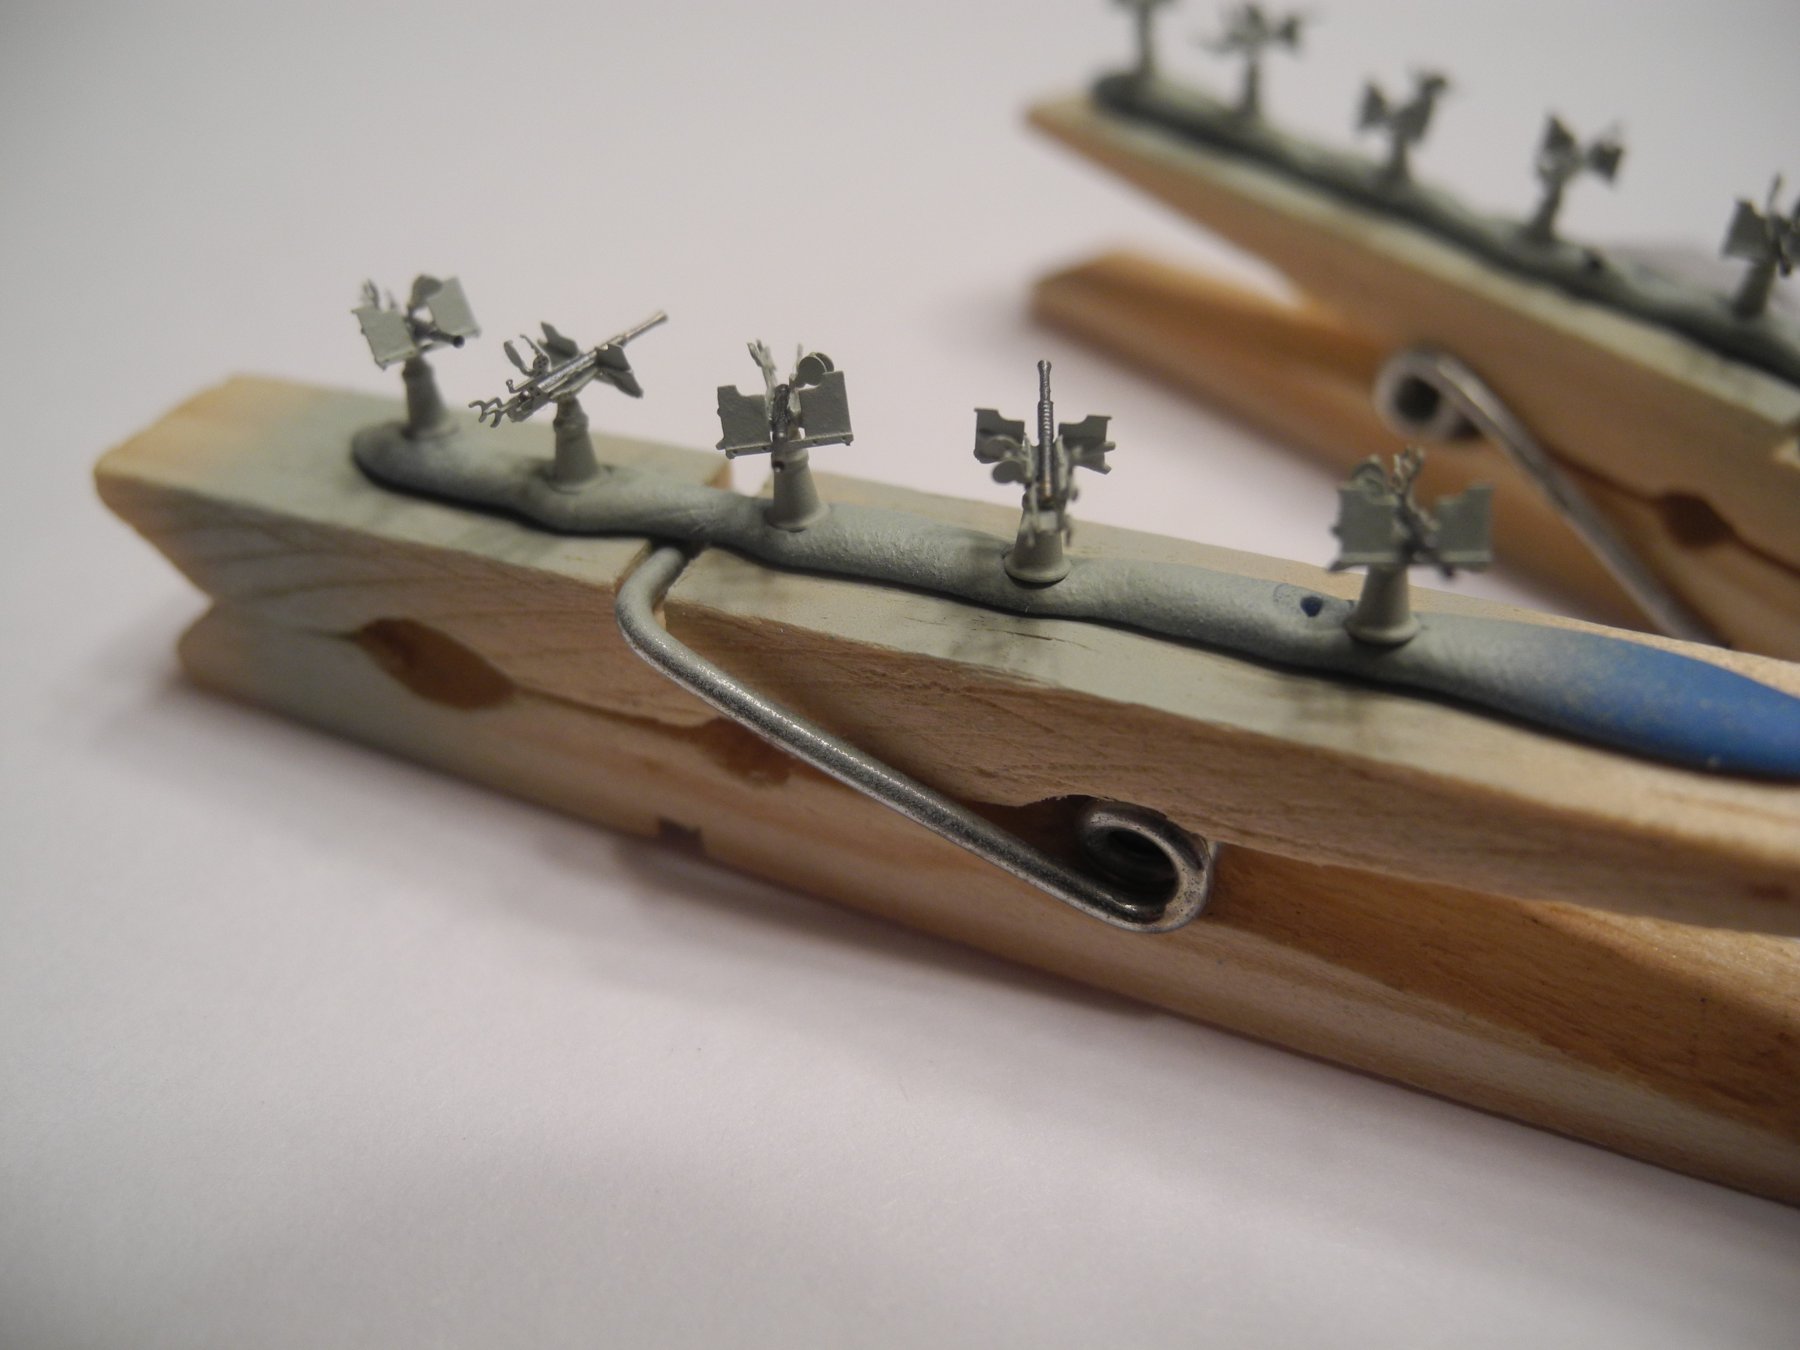
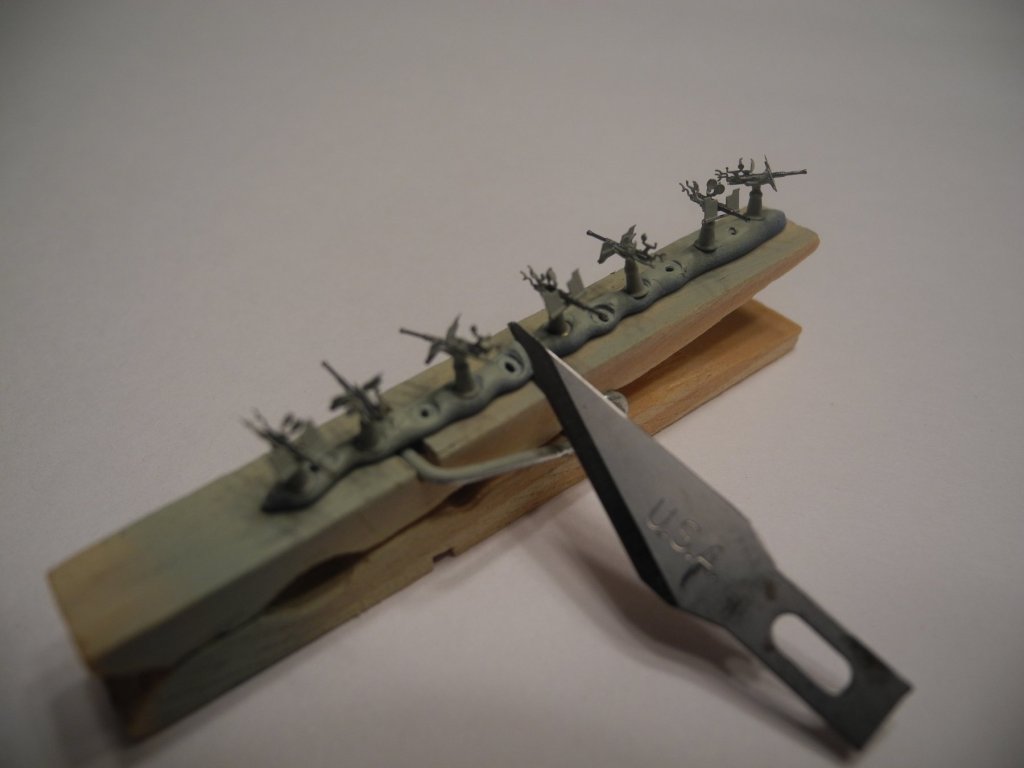
All the parts are brass. Either photo etch or machined. I've been cutting off the locator pins and filing it down flat rather than try to drill and install another pin into the machined brass gun base. These pictures give a good reference for how small we're working with here. I doubt I could drill holes in the tops of these gun bases, even on my best day. This is the stuff fly specks are made of.
- 151 replies
-
- 10
-
-
- duke of york
- tamiya
- (and 2 more)
-
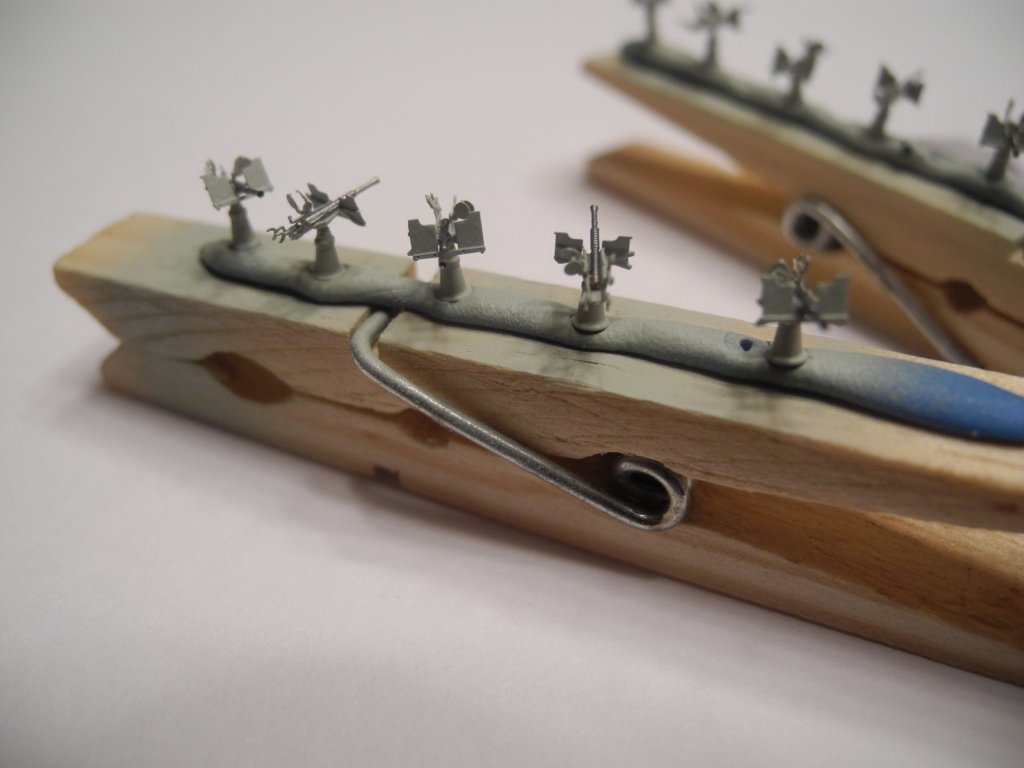
Piet Thanks for the kind words. When I was a young lad, would have been hard pressed to buy a detail set, that's for sure. But there was no such thing back then, only magazines/periodicals where we could learn from the masters how to scratch build and add detail. Some were very very good. OC I have bought some pre-built and painted limited production model cars whose detail and finish is just incredible. Price was very reasonable for what I got, in the $300-$400 range. So I do think pre assembled photo etch and resin parts could be done, I just don't know if there would be enough of a market for it to make it worthwhile to a business investor. Tonight I have been working on the 30 or so little single 20mm Oerlikon gun mounts. I find these to be the most trying of all the gun mounts I've built so far. Part of the problem is an undersized hole in one of the very delicate photo etch parts and it needs to be enlarged to fit properly on a pin that projects from the gun base mount. Have not found an effective way to drill and enlarge the hole without destroying the part, so it makes that step of things exhaustive for each and every one of the guns. I probably should buy some other similar oerlikon guns from another manufacturer to see if theirs are not more user friendly.
- 151 replies
-
- 5
-
-
- duke of york
- tamiya
- (and 2 more)
-
Your work continues to be superior, Slog. Simply beautiful. There are several (or more) 1:200 card models I have my eye on and may buy them. However, unless there are some 1:200 photo etch and/or other brass details available, I may pass as I just can't see myself rolling up paper/card gun barrels and stuff like that. So my question is, where are some of your favorite places to source details for your card models? I assume a lot of these are eastern european or Russia as that's where a lot of the card models seem to come from.
- 244 replies
-
- 2
-
-
- borodino
- dom bumagi
- (and 1 more)
-
Me and you both, Greg. Have been eyeballing this model in plastic for a while now.
- 244 replies
-
- 2
-
-
- borodino
- dom bumagi
- (and 1 more)
-
I almost always look to see if detail sets are available for models before I buy them, and when I don't, usually end up regretting it.
- 151 replies
-
- 5
-
-
- duke of york
- tamiya
- (and 2 more)
-
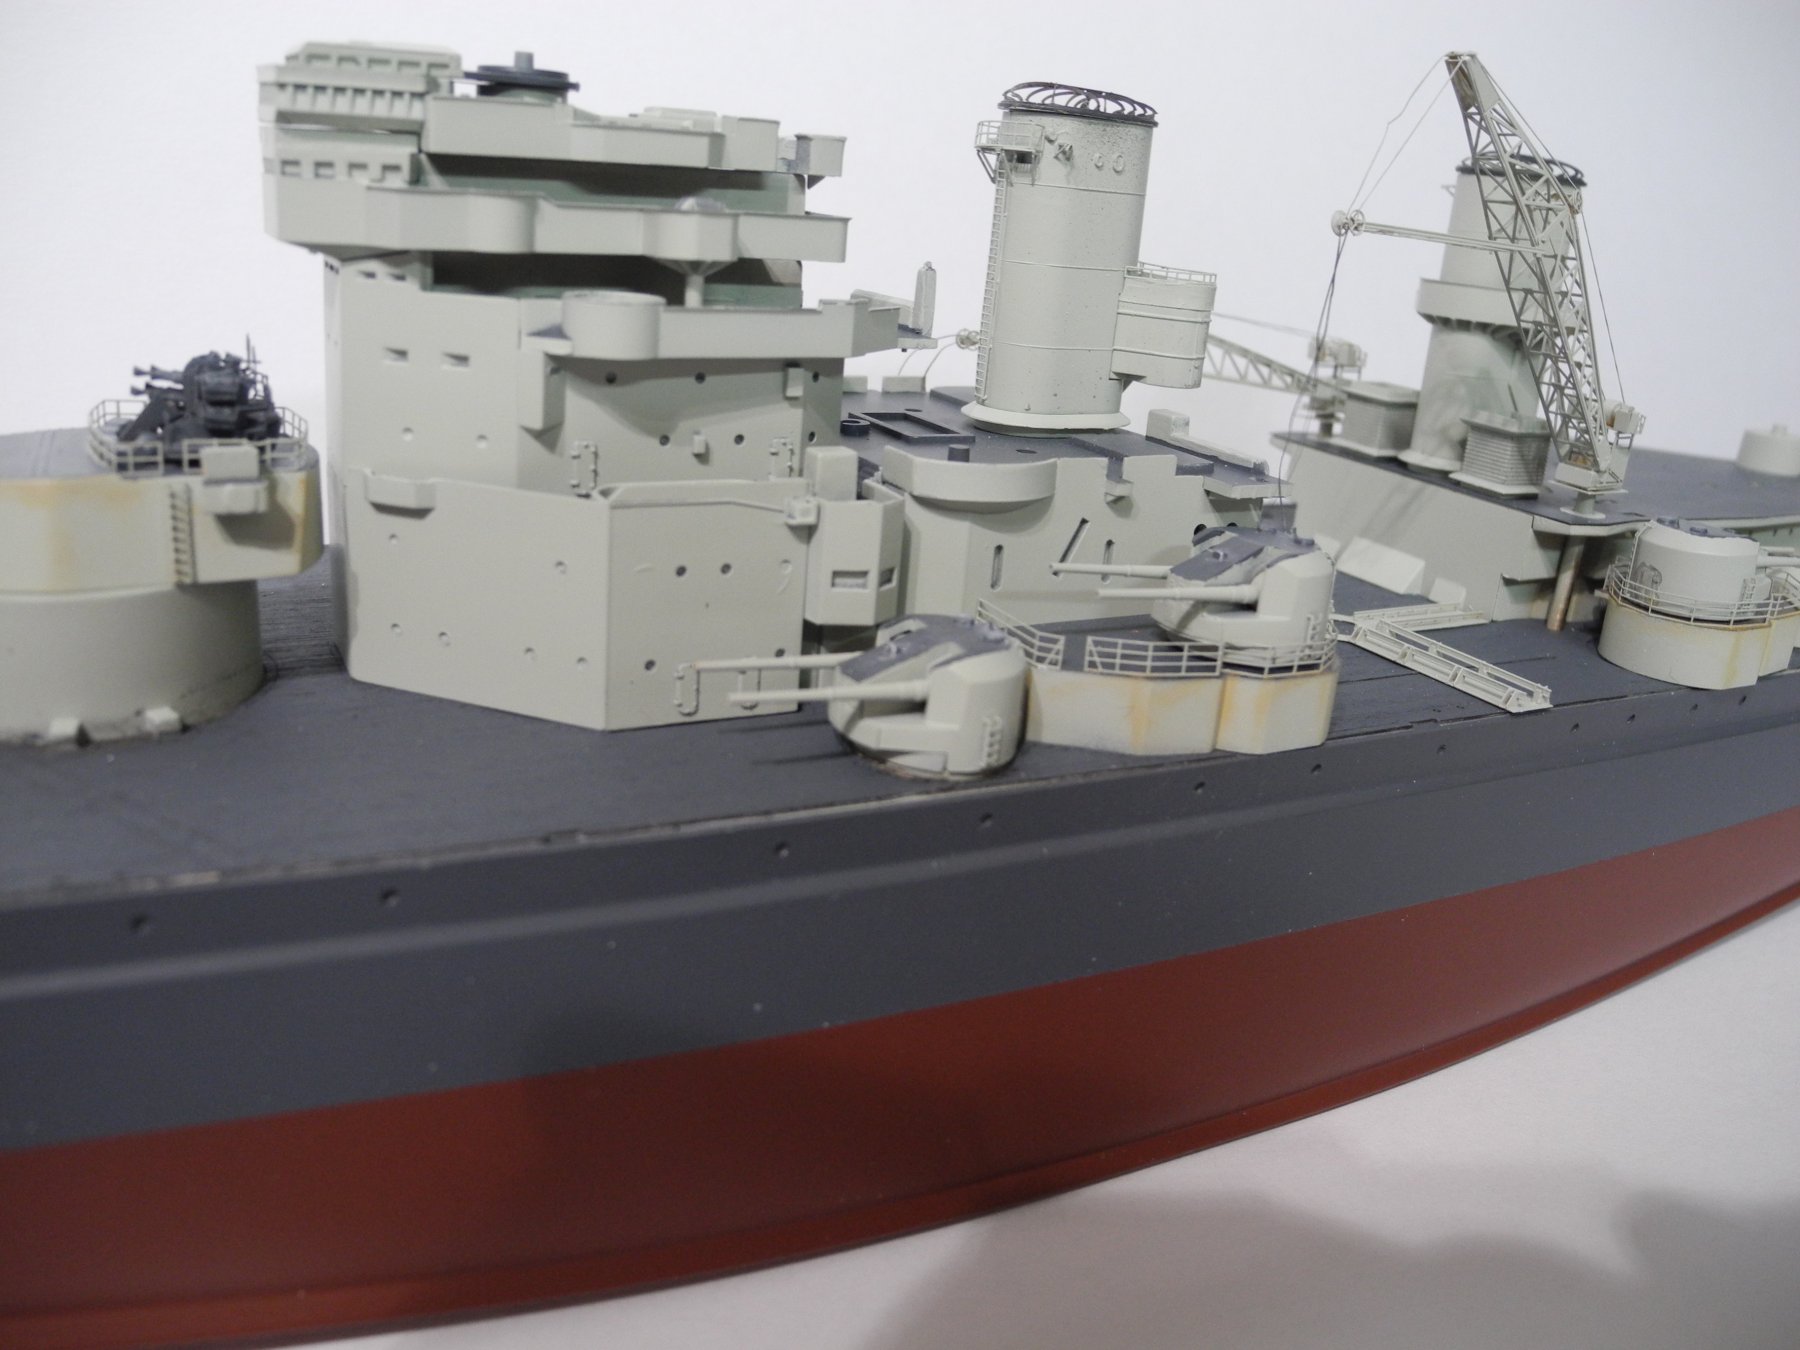
They are a big step up from the plastic blobs provided in the kit, but on the other hand, the Pontos detail set sells for more than twice the price of the plastic kit itself. I think that once a modeler has experienced the added level of detail and clarity that's almost impossible with plastic alone, we're hooked on the detail sets and don't want to do a model without them. AMS is the disease (advanced modeler's syndrome). No known cure.
- 151 replies
-
- 9
-
-
- duke of york
- tamiya
- (and 2 more)
-
Hi Captain I've been looking at some photos and color art of various British ships and have noted the similarity in design of cruisers all the way up to capital ships like the Duke of York. The cranes, observation aircraft, catapult rails, life boats, and hangars are very familiar between them. Also noted the Hood carried a camouflage combination of dark and light gray very similar to the way I've painted the DoY in the later war years. I'm anxious to see your 1:200 Hood get started. Any idea yet when you might start it?
- 151 replies
-
- 4
-
-
- duke of york
- tamiya
- (and 2 more)
-
I know what I would do, but that doesn't mean it's the only correct answer. I would stick with the girl I brung to the dance.
-
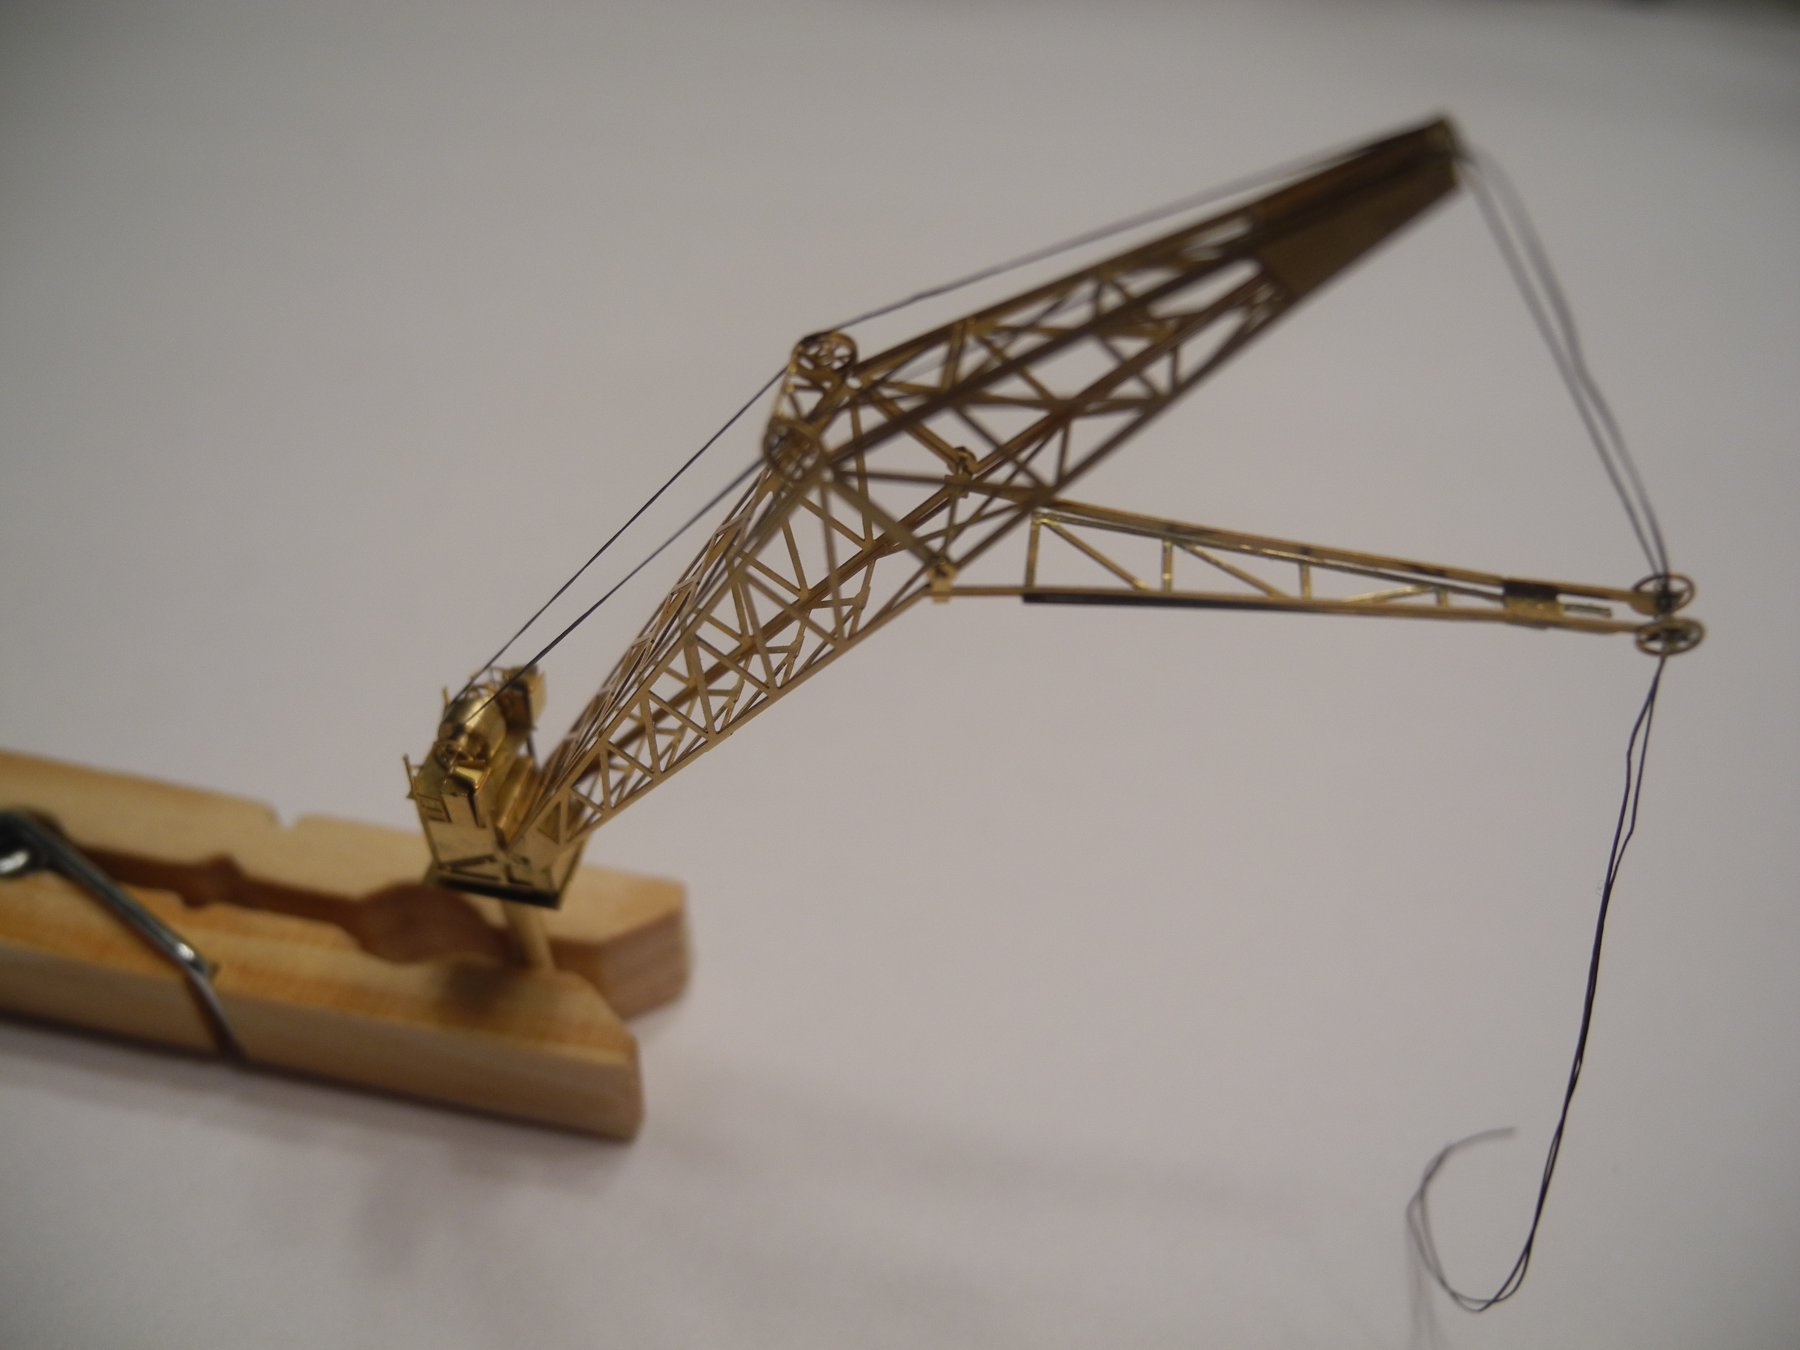
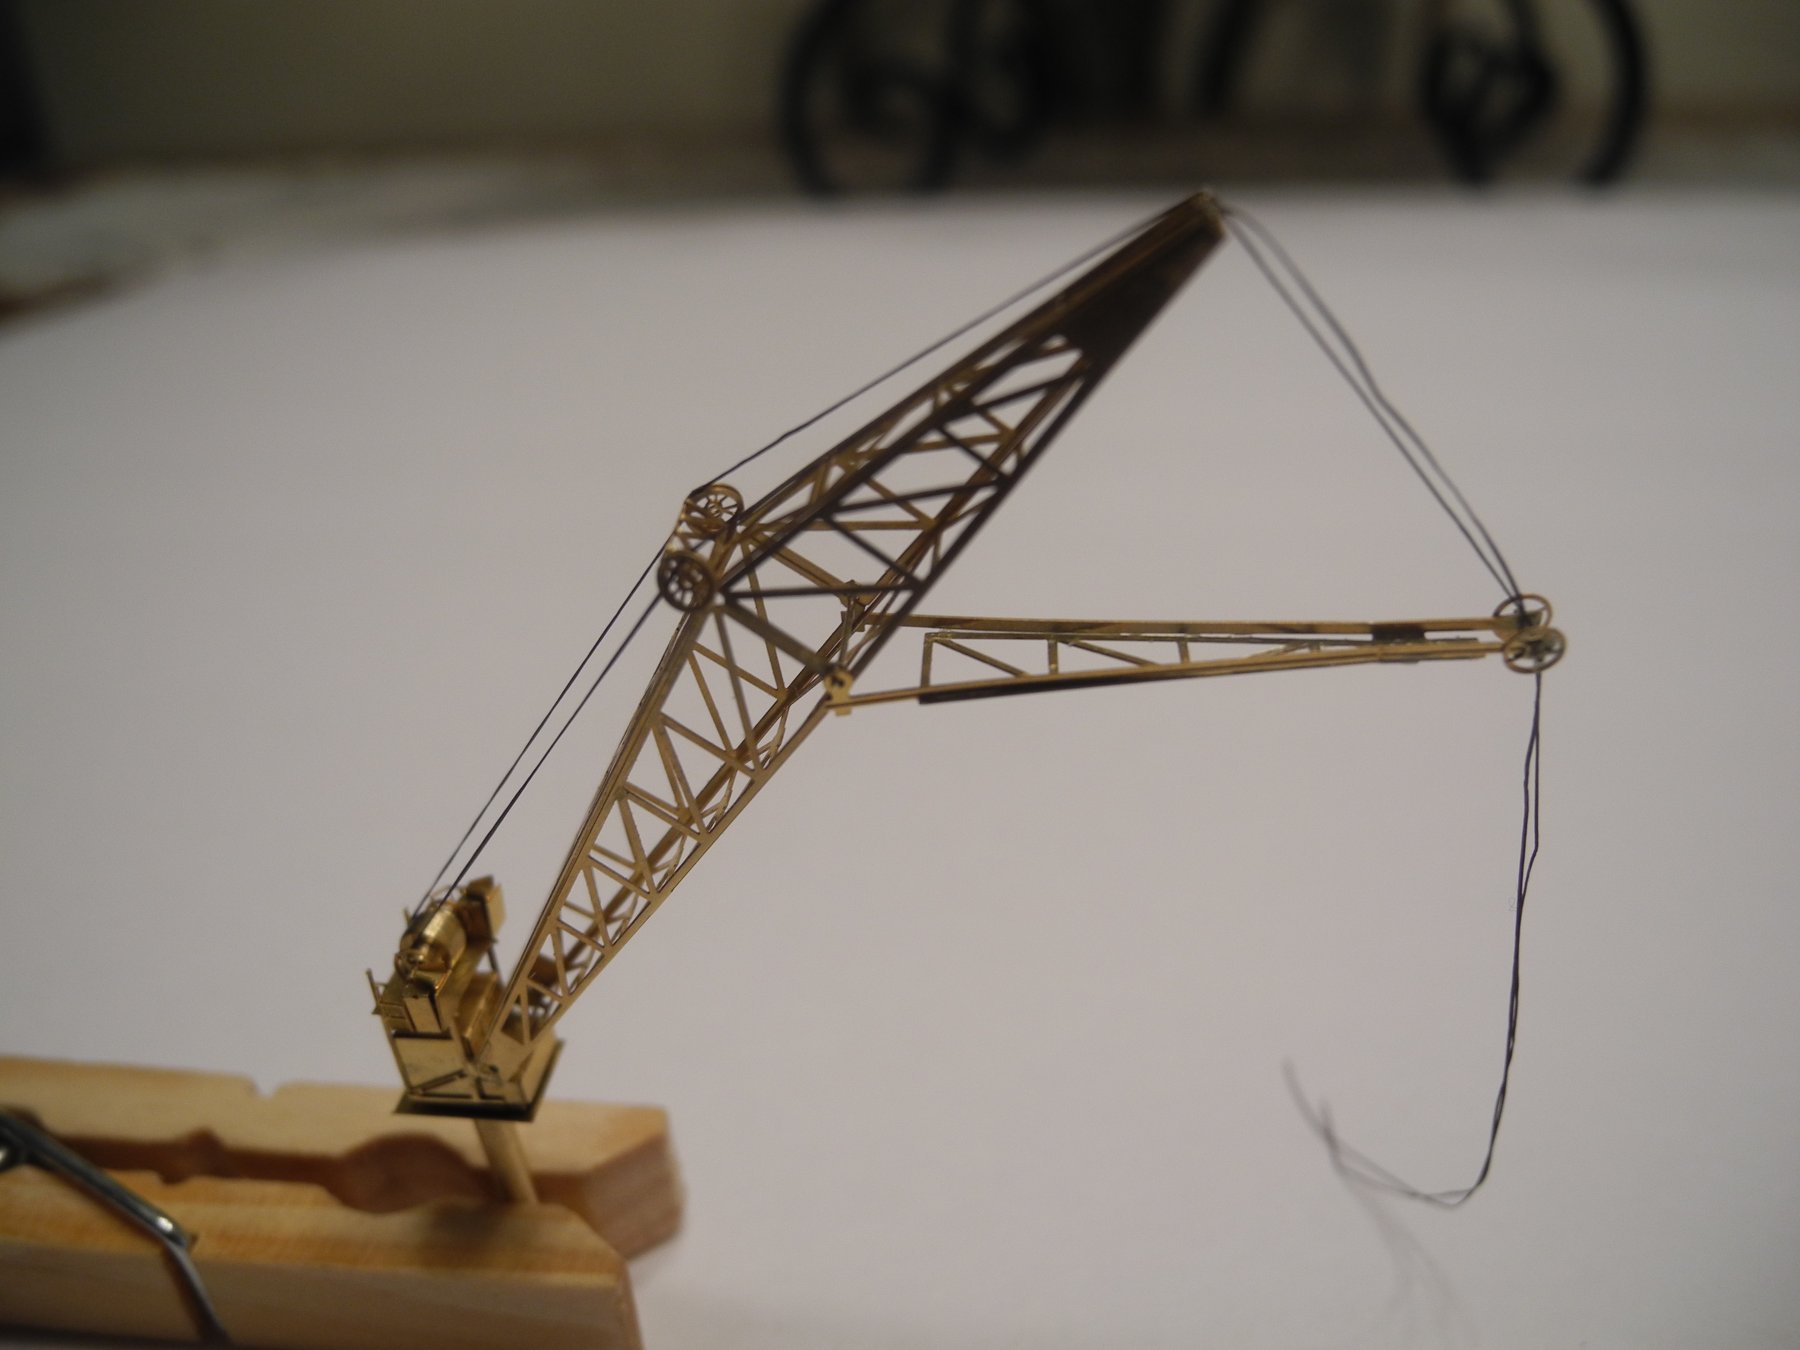
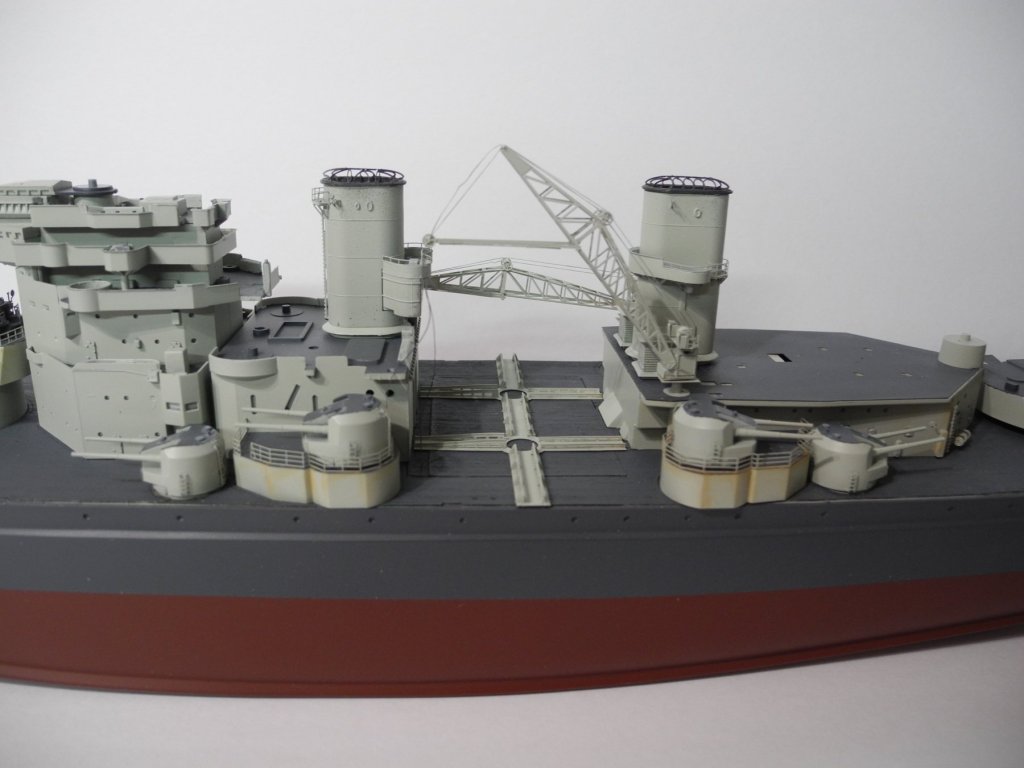
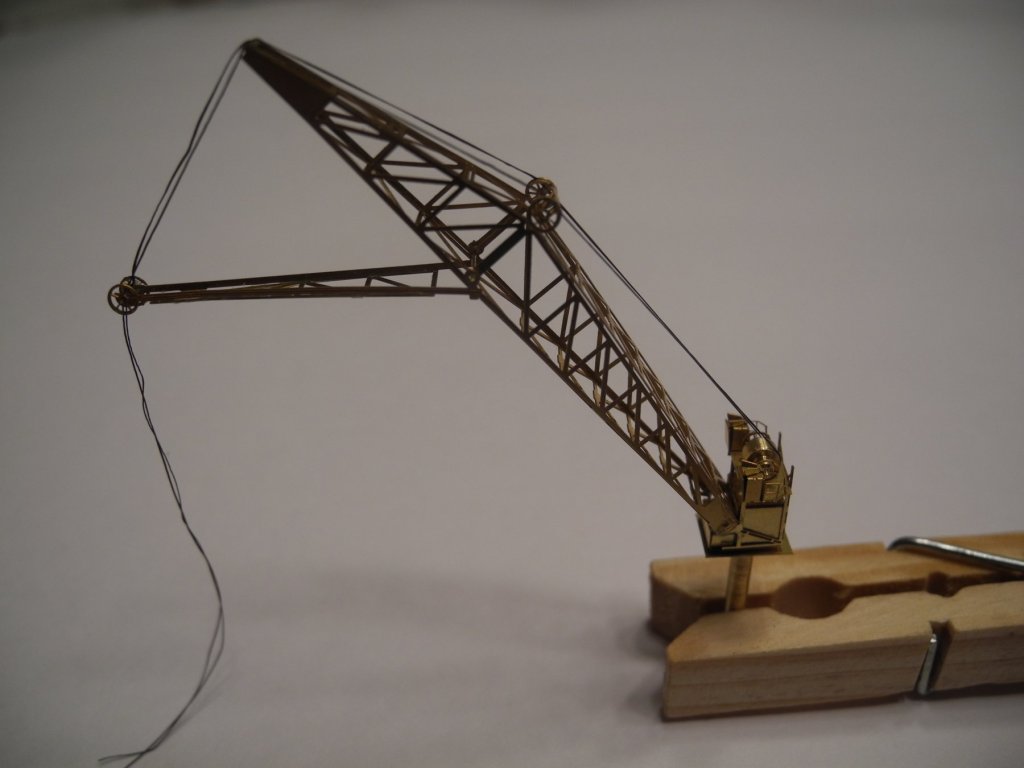
Pontos provides a nicely detailed set of cranes in their update set for this model.


- 151 replies
-
- 15
-
-

-
- duke of york
- tamiya
- (and 2 more)
-
Well Gibbs is a handsome little fellow, that's for sure. We have 2 little Bichons. Both have very unique personalities and our youngest daughter adores them. I have intentionally kept my distance so my daughter can have her time as the dog's best friend. One day when she gets older and gets out on her own, will probably get myself a pup of my own to raise up as my next best buddy.