

CDW
-
Posts
7,217 -
Joined
-
Last visited
Content Type
Profiles
Forums
Gallery
Events
Posts posted by CDW
-
-
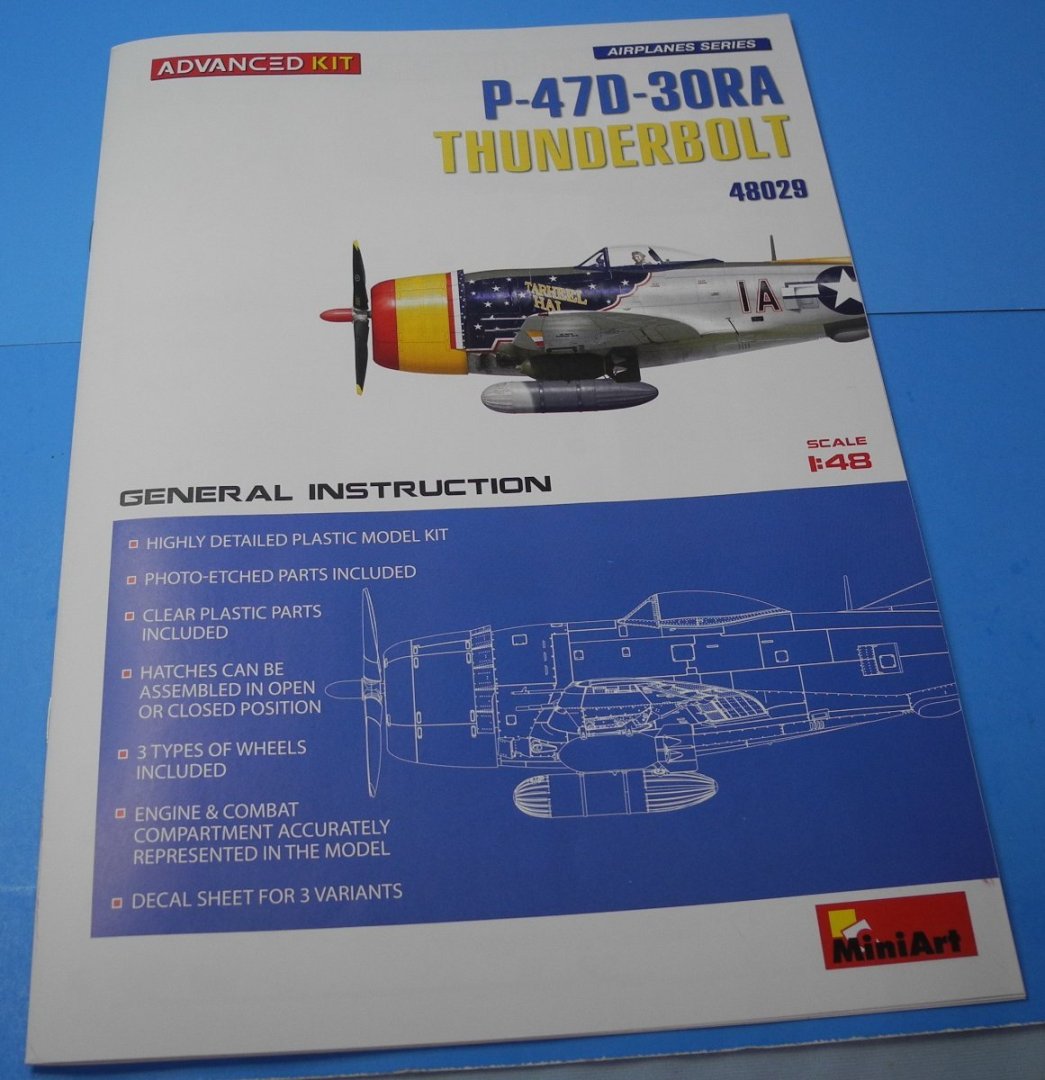
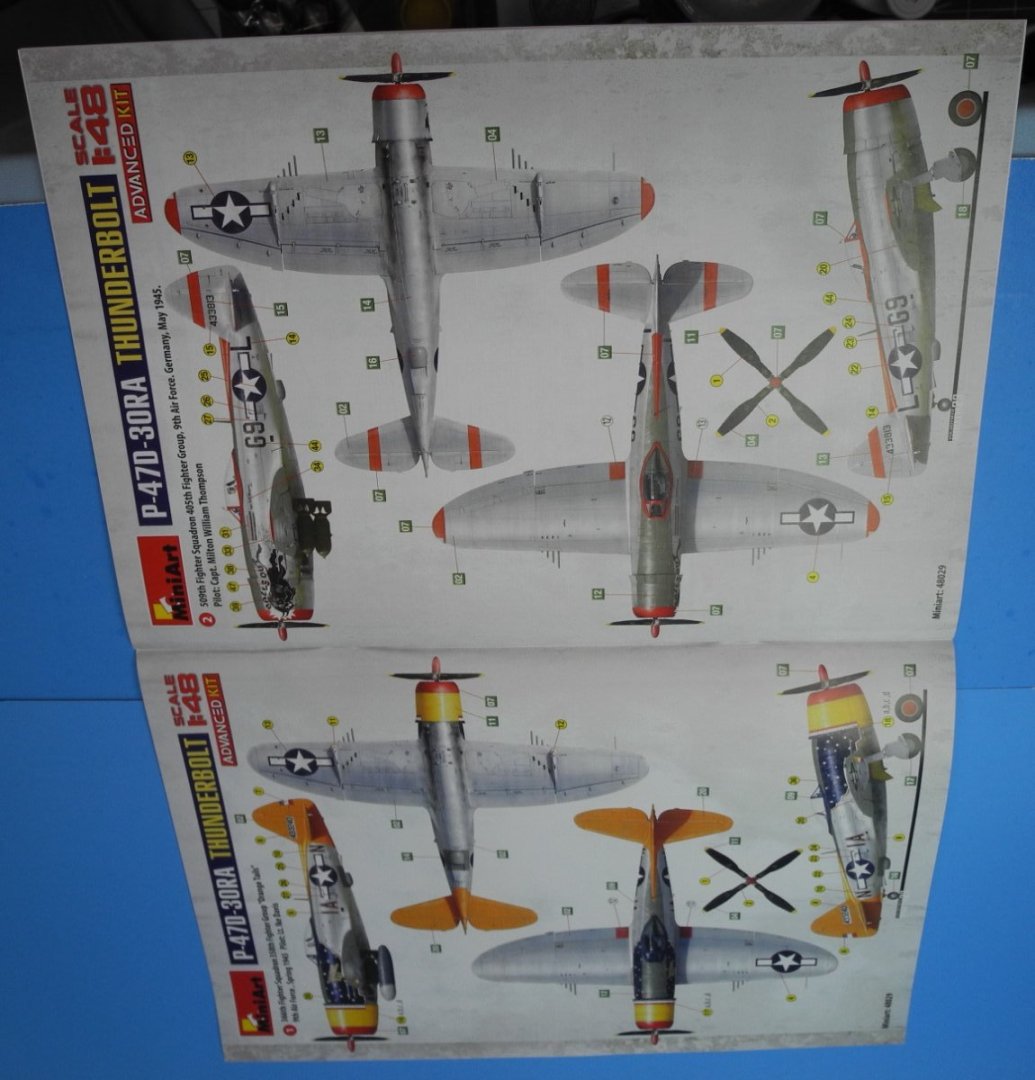
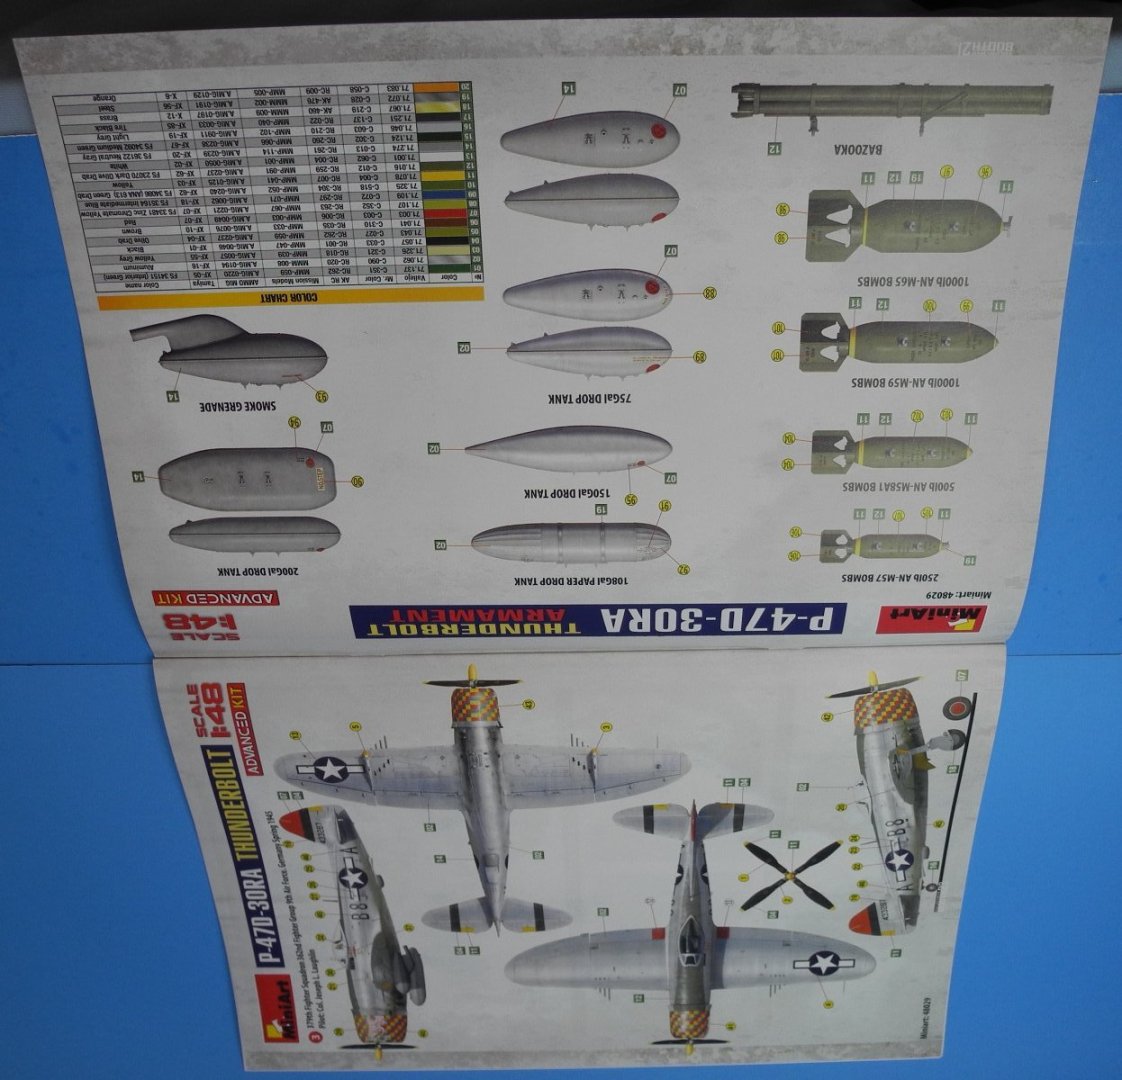
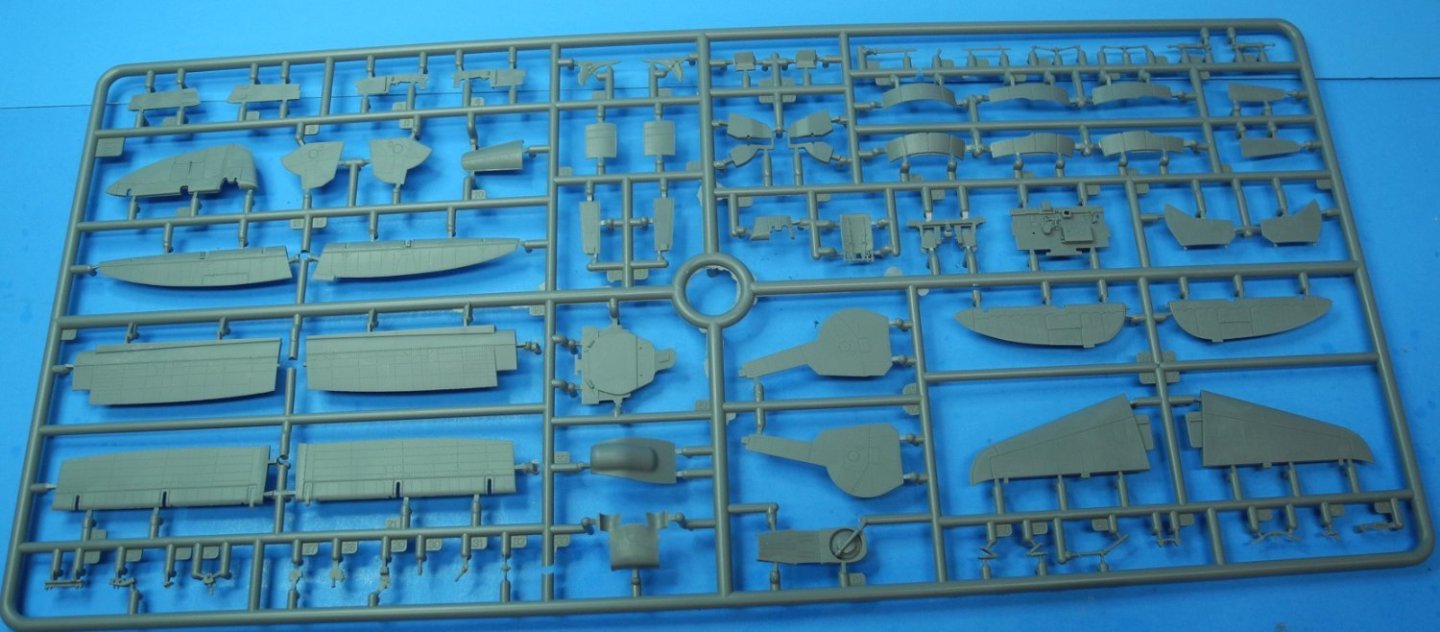
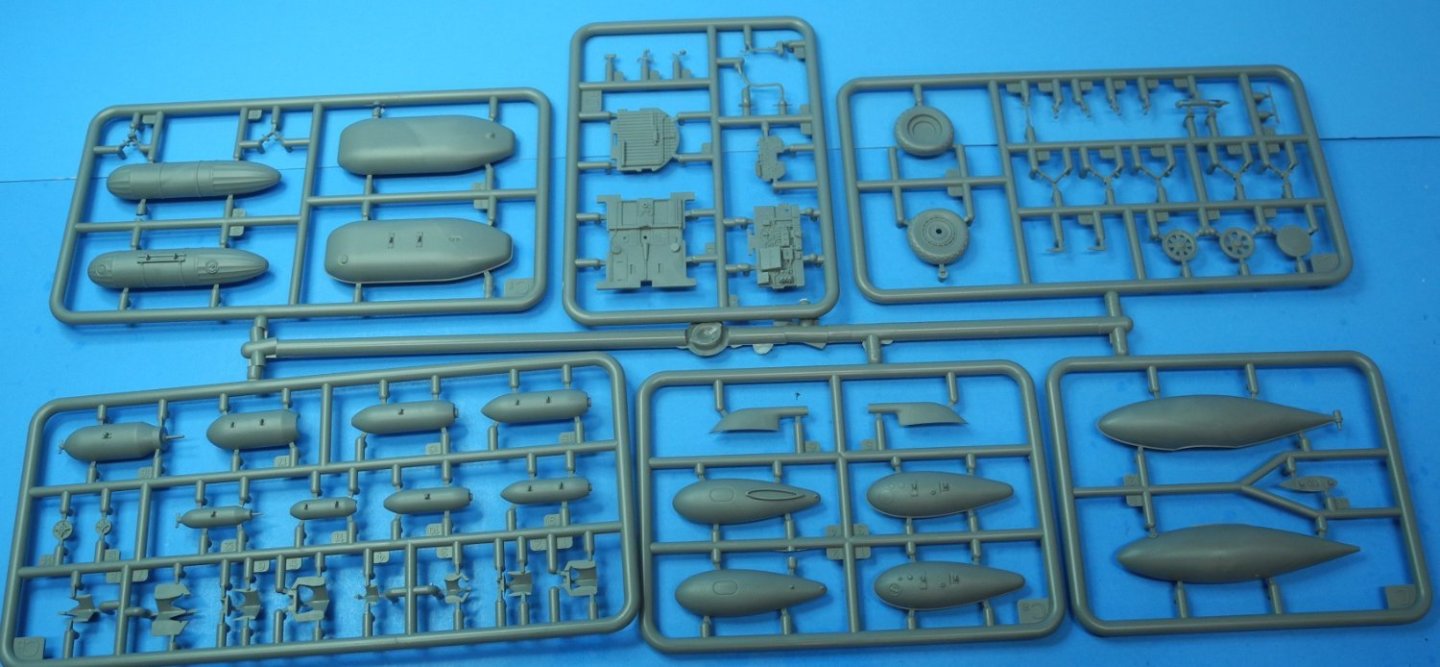
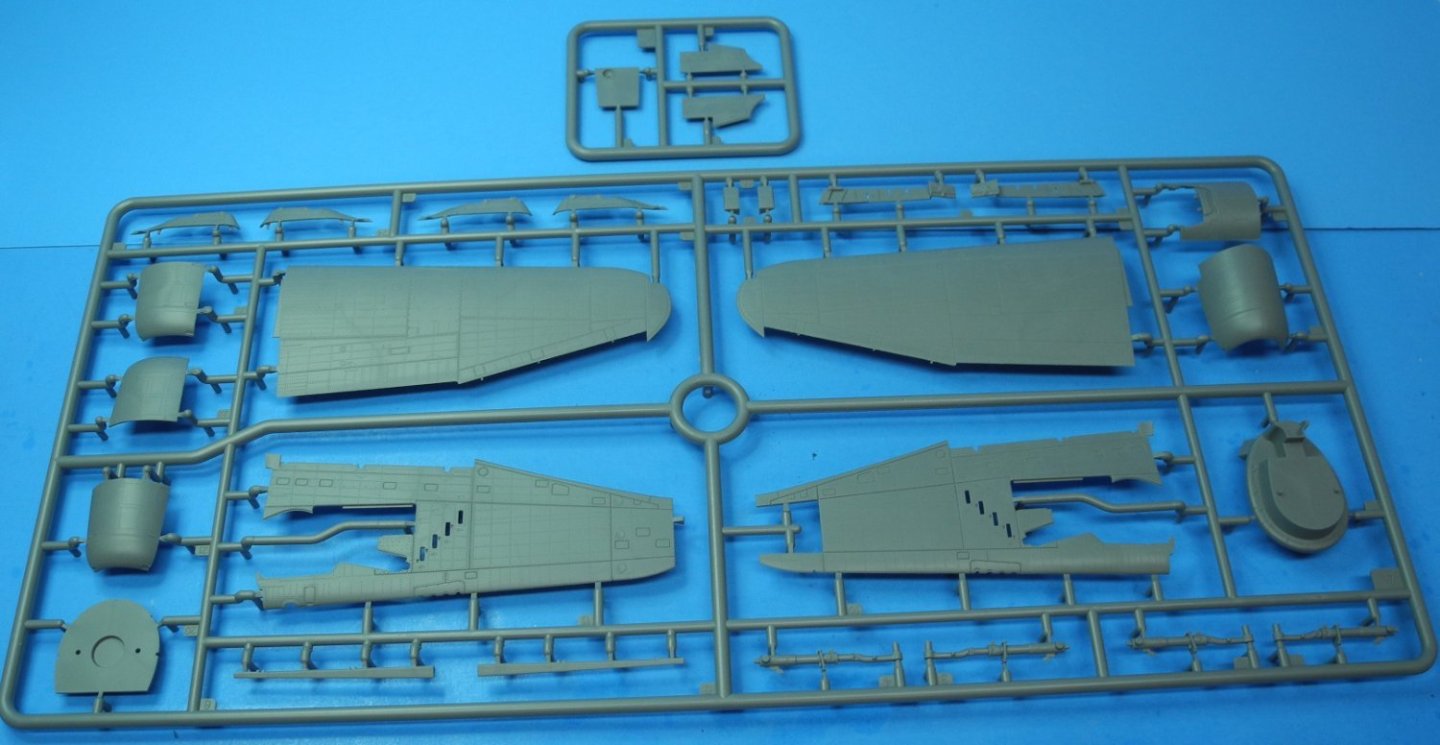
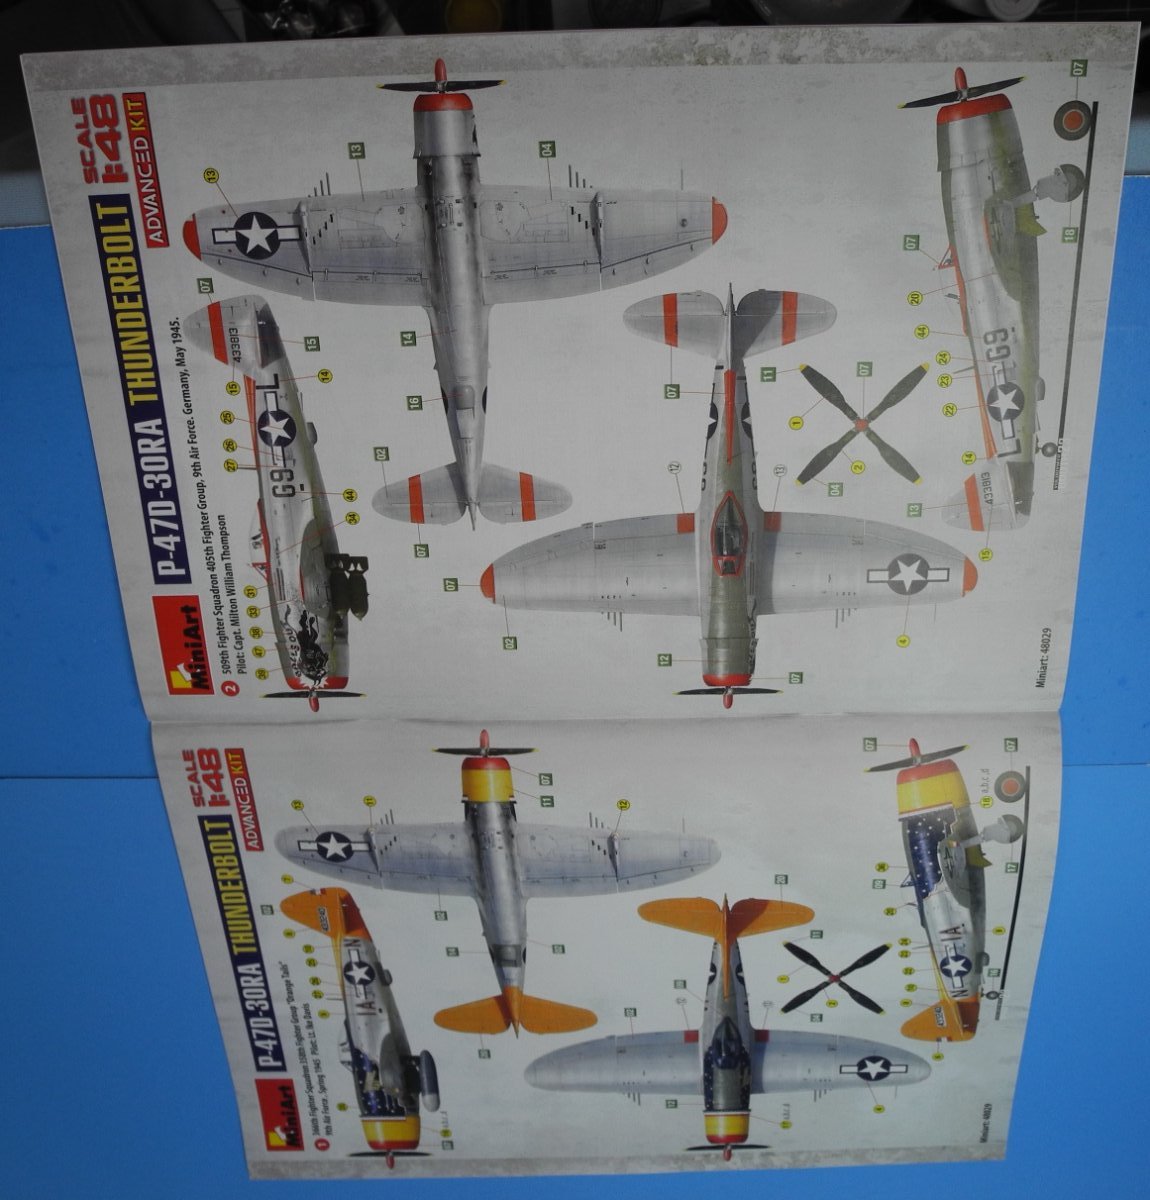
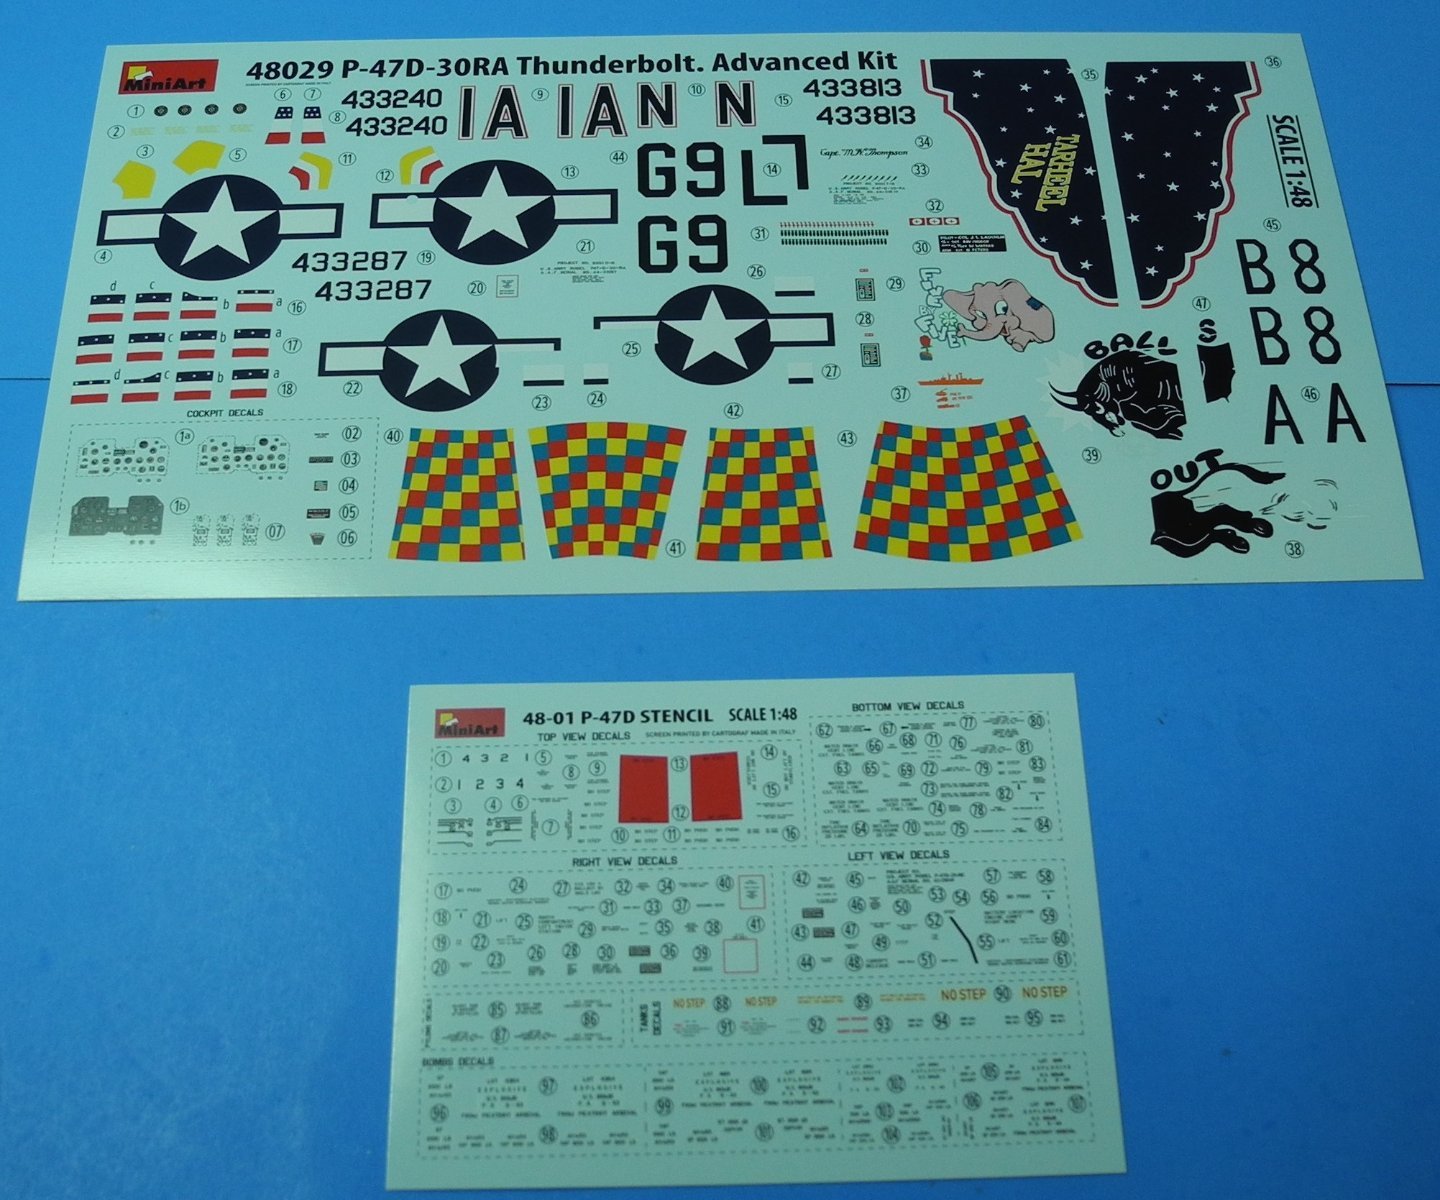
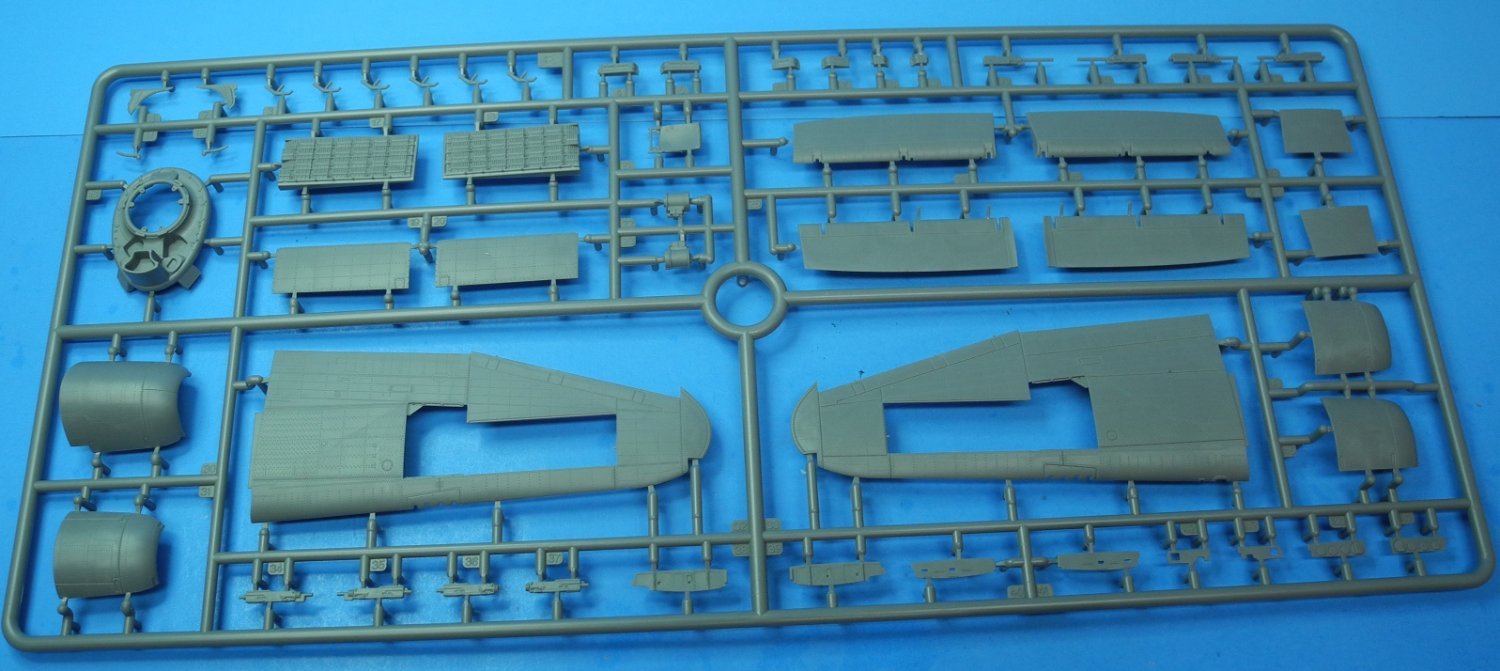
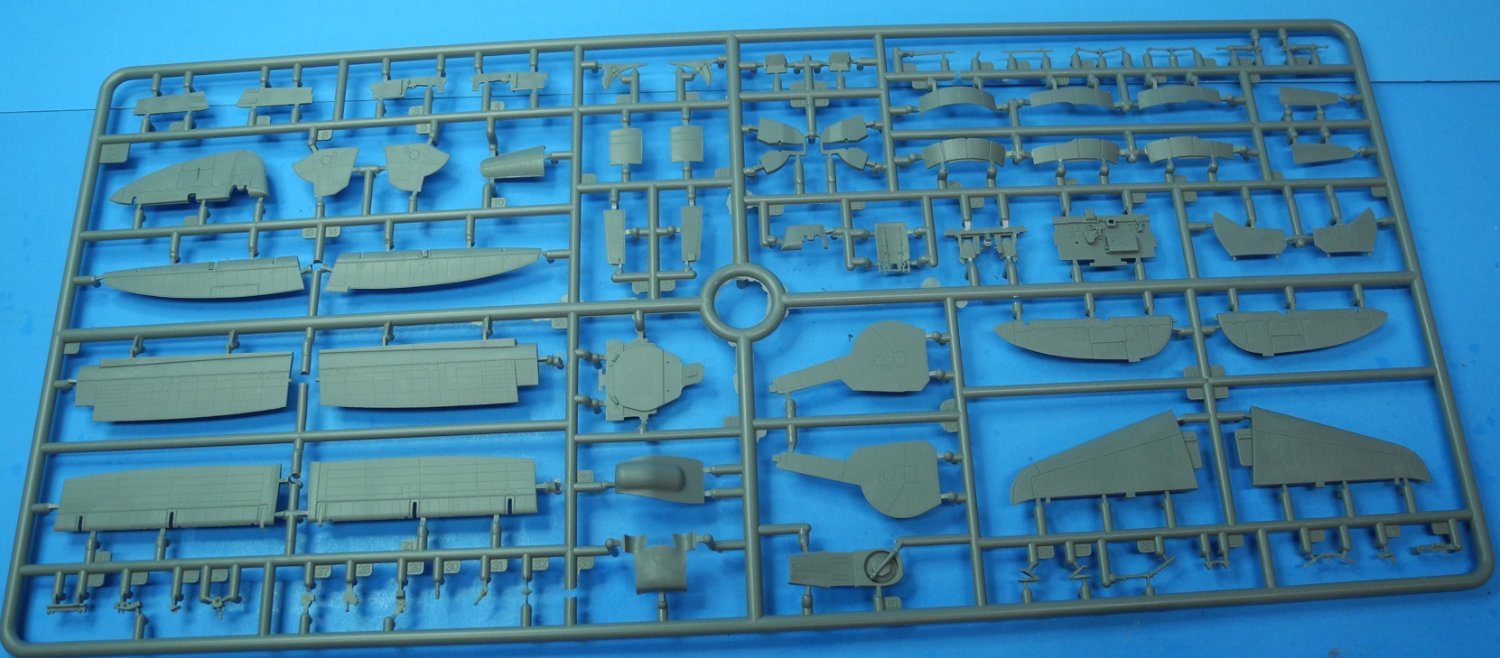
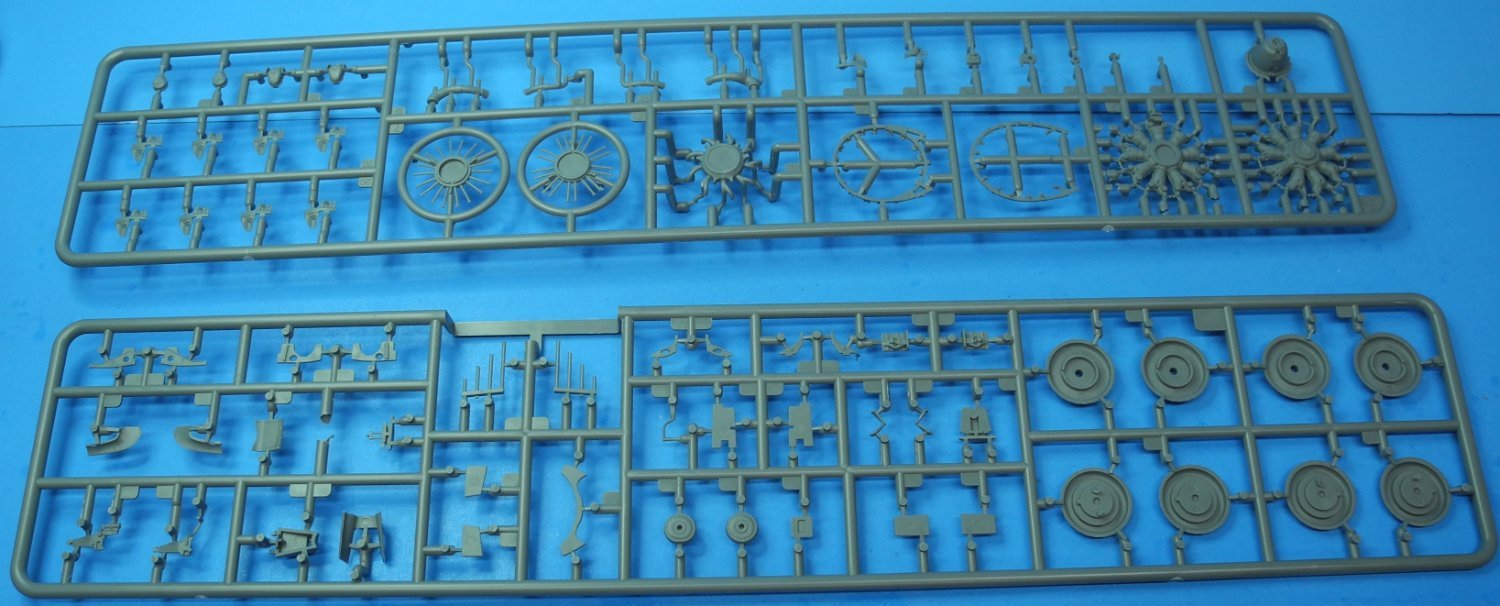
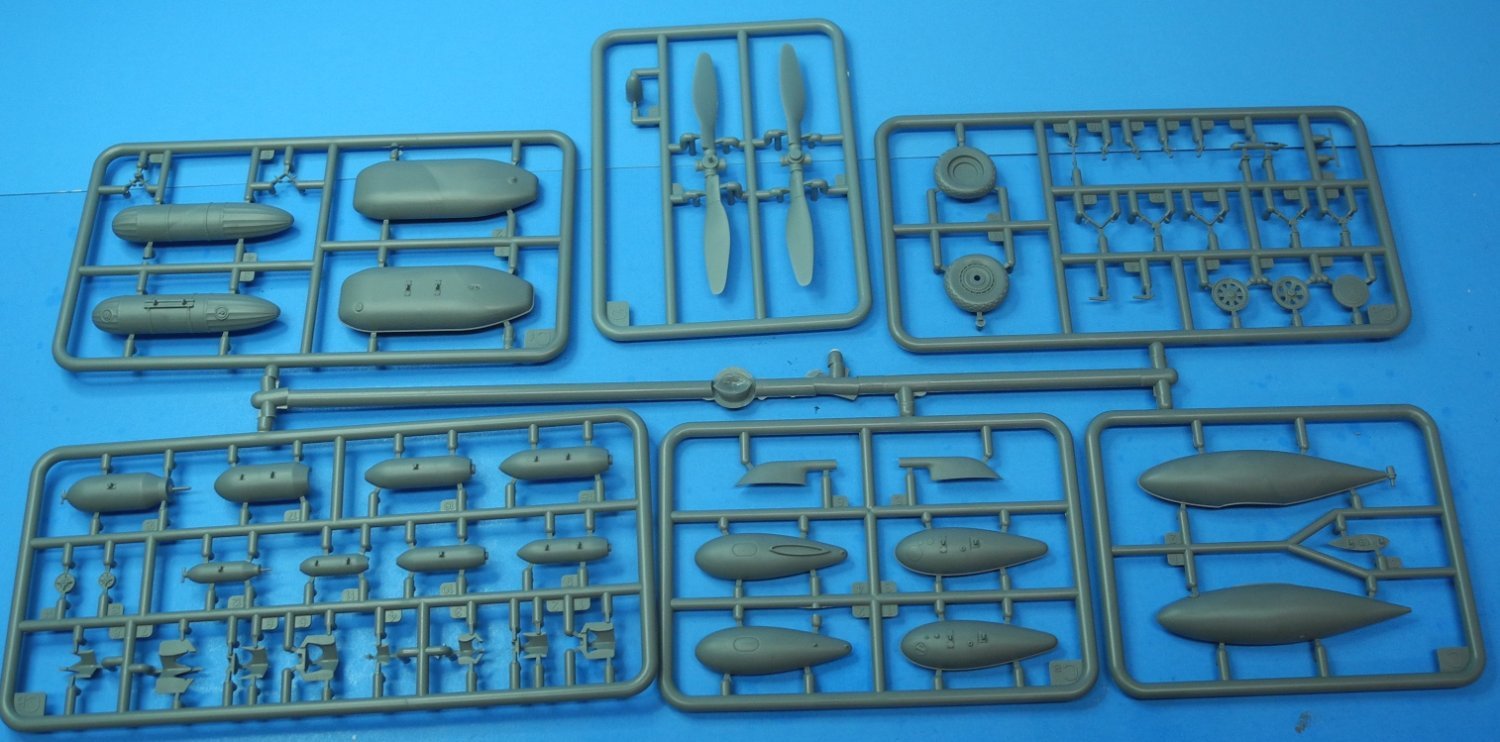
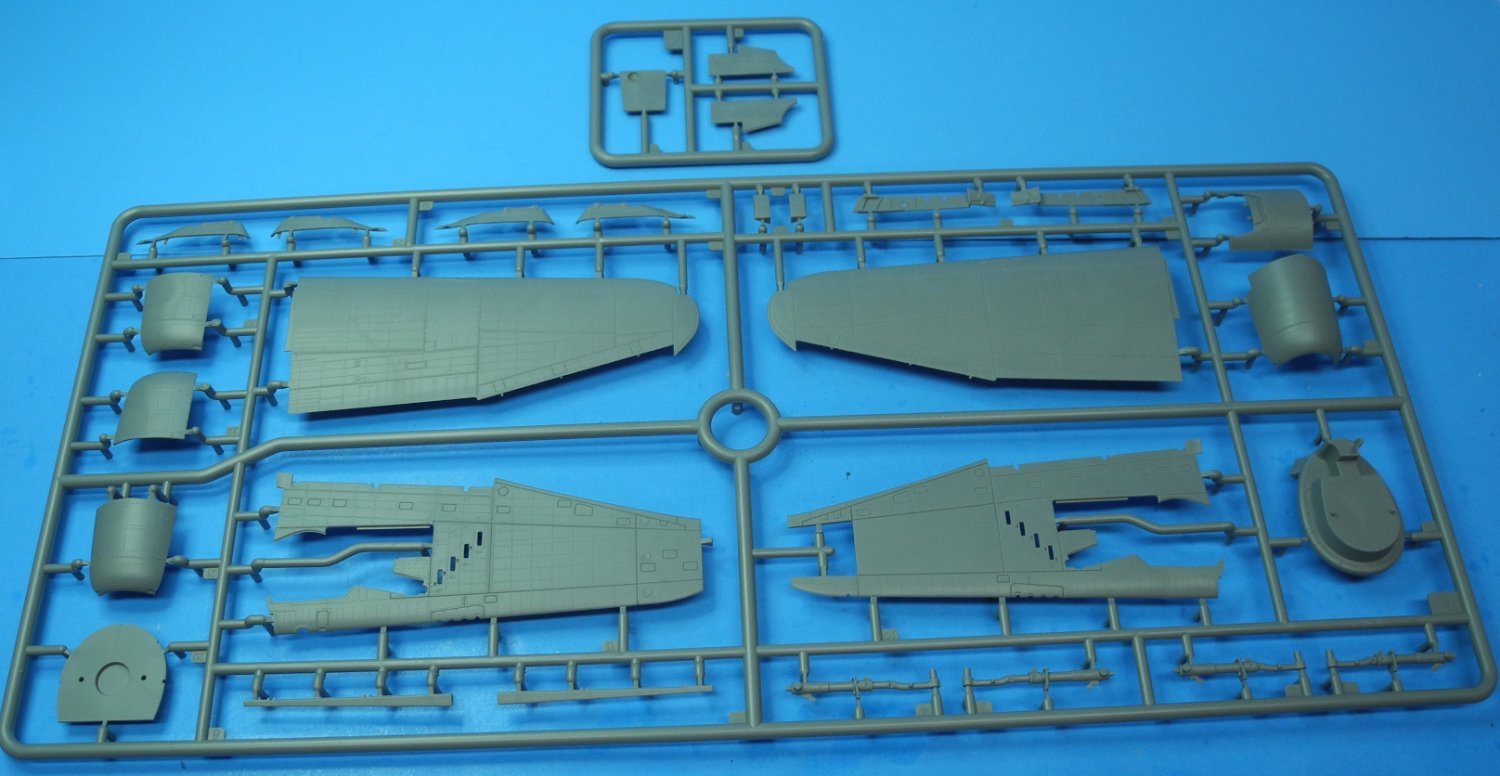
When I first saw this model was coming out, I thought I could do without it. The price tag was north of $50 and the venerable (though long in the tooth, fabulous, 1:48 scale Tamiya Thunderbolt kit was already in my stash. But then I saw one of these MiniArt kits built and I knew I wanted one. MiniArt have produced some nice kits, but this may be their best offering yet. I found this one on sale at an online hobby shop and ordered it up. While I won't be starting the build for a while, I thought you might want to see what's inside the box. Two very nice decal sheets with markings for three different aircraft, a photo etch sheet, a beautiful instruction booklet and a ton of styrene plastic sprues/parts. Every ordnance used by the 'bolt is included to choose from for your specific build. I'm looking forward to building and detailing mine with all the panels open to expose the fine details. The big radial engine is a kit all by itself and rivals any aftermarket resin engine kit. About the only thing I may add will be fabric belts and harness in the cockpit and some lead wire for details.


-
-
-
-
1 hour ago, Egilman said:
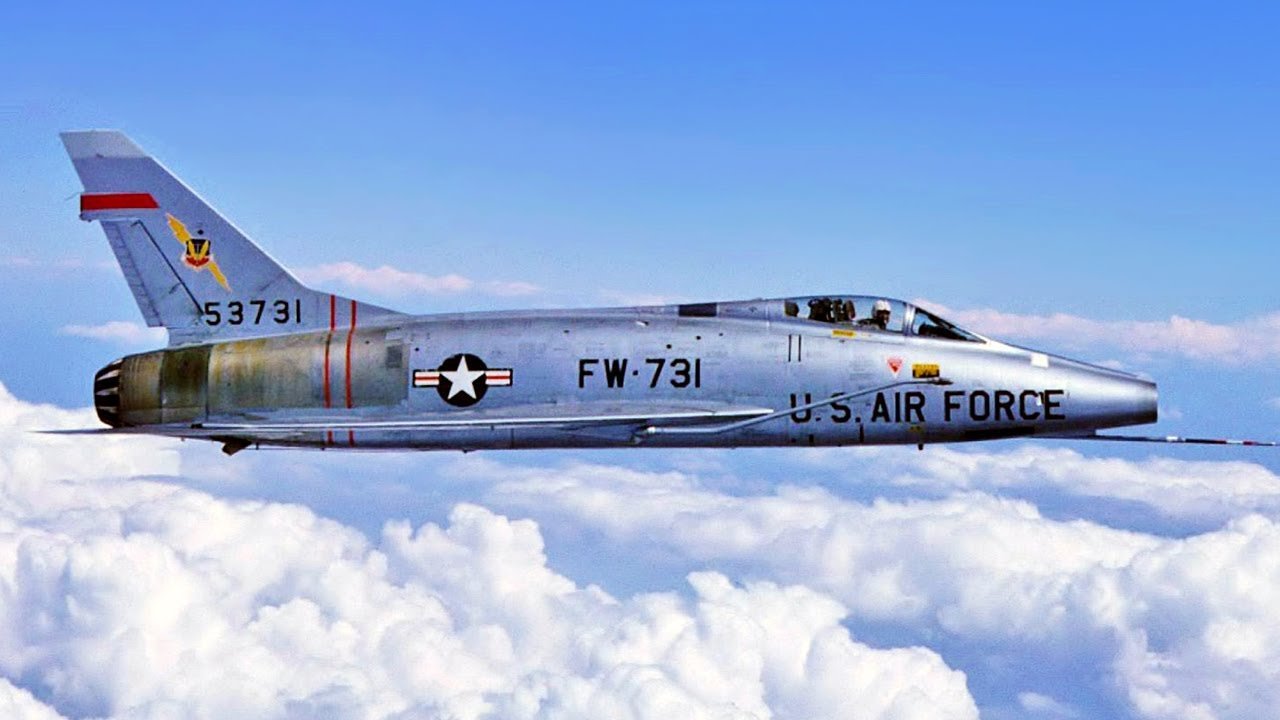
Afterburner Heat... would discolor the Titanium skin and got hot enough to burn off the paint.... and BTW- All F-100's were aluminum/silver painted from the 100th aircraft on... YES, All of them, it was to deal with severe corrosion issues the airframe developed during testing at Edwards.... The paint was retro applied to those first 100 that survived... Bare metal is not appropriate for this aircraft, except the titanium sections of the tail skin... So the reflectiveness comes from the shinyness of the paint not the surface condition/fineness of the metal...
Yes it did, NA used 80% of all the Ti used in the aircraft industry until 1954... It didn't matter if they had the original J-57 petal type afterburner installed or the Later F-102 type.... the paint still burned off and the Ti discolored on all of them in direct proportion to AB use..
The reason for it was most of the Aircraft parts were machined from billet stock instead of riveted formers and panels, it was thought that by using solid parts to build the airframe they would act a heatsinks and keep the heat off the skin panels... (see, even great engineers can sometime be real dense) what they thought would serve to protect the panels actually served to concentrate heat in the AB areas....
It was, I don't see it, it was a completely redesigned aircraft using completely different materials and machining processes... All resemblance to the F-86 is purely coincidental...
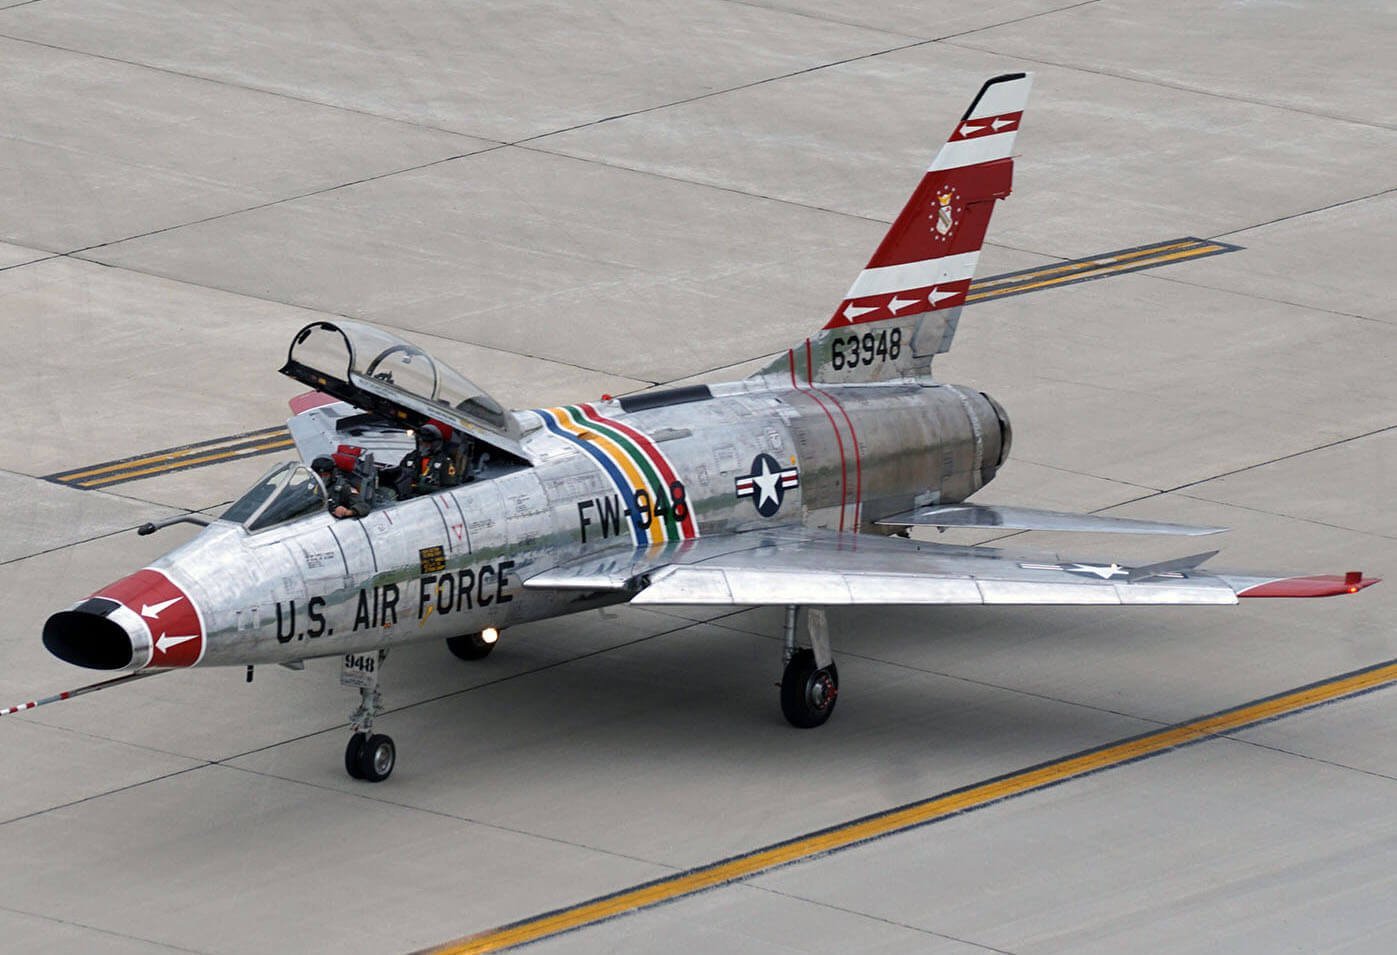
As far as the Tail heat/paint, burn/discoloration issue, here are some pics I've been holding on to for my 1/32 trumpy version...
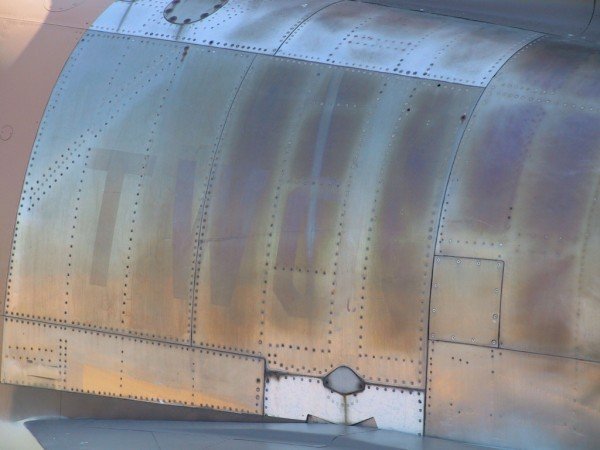
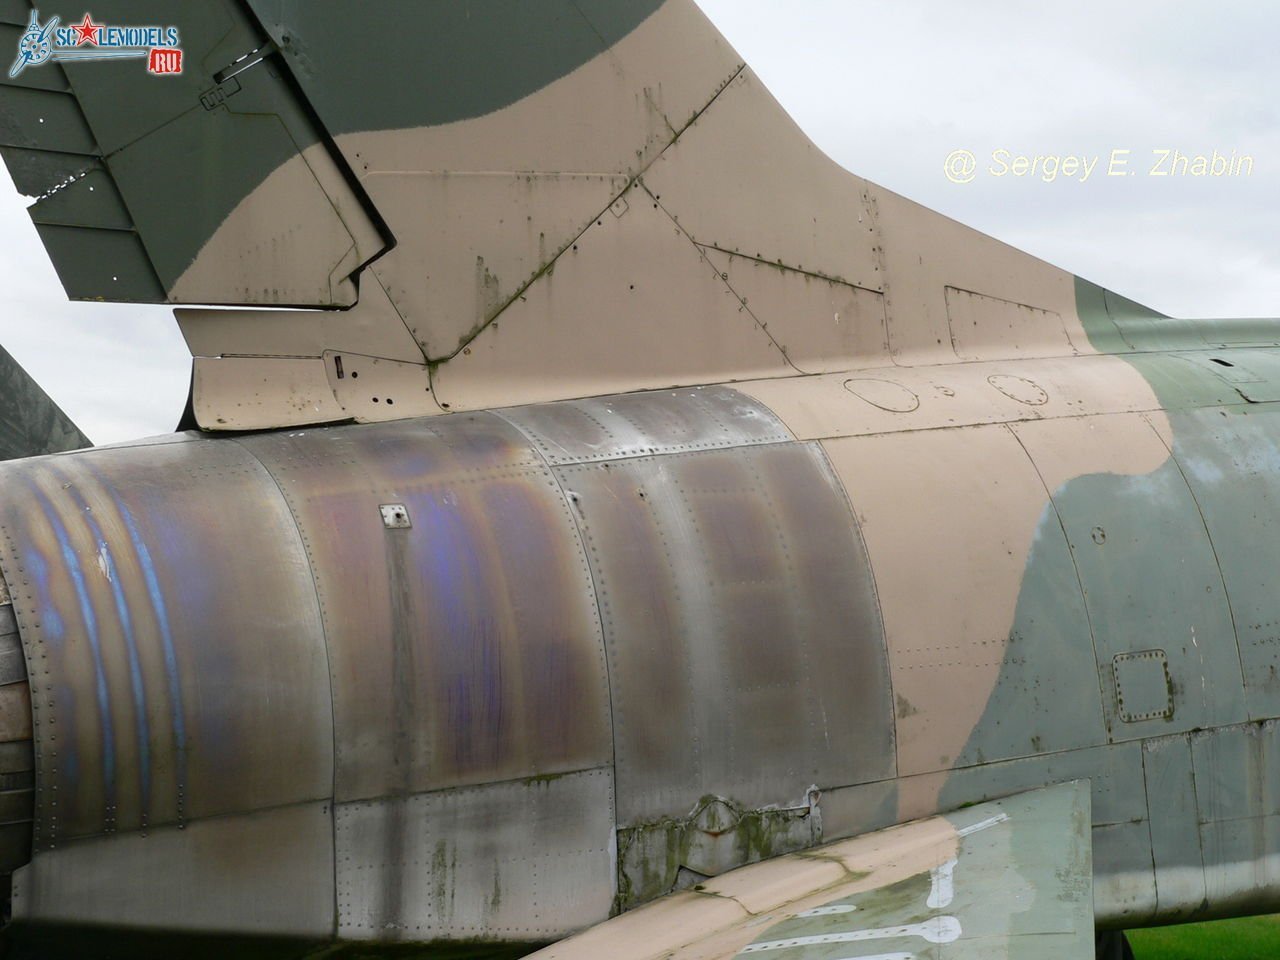
There are any number of explanations of how to get that color effect on the net... Which I'm sure you have seen... Several things to note, USAF birds flying over the USA did not have discolored tails... this was simply because the banning of sustained supersonic flight over most areas of the USA proper... Over seas and in aircraft in foreign service, all have this discoloration....
Most of the Birds that flew in Vietnam were "D" models with some "F" models, the "D" model was the fastest of the Super Sabres with a top speed of 925mph at 35K feet... In standard combat load as well, Yes it was the first production supersonic aircraft in the Airforce inventory, (closely followed by the F-102) It's maiden supersonic flight was flown by none other that George Welch CMH the fighter ace of Pearl Harbor, two weeks later that first production aircraft killed him...
For a brief time the Super Sabre held the world's Absolute Speed Record as the fastest thing in the sky quickly surpassed by the F-101, F-104 and the F-110 (F-4 Phantom) Known as the "Hun" in SEA service it was the primary fighter bomber of the US military until gradually replaced by the F-105 around 1969... As such, (during it's time in Vietnam) it carried and dropped more ordinance than the entire force of 15,000 some odd P-47's that flew in the entirety of WWII...
It was a remarkable plane... Bit of a widowmaker, (when it first was adopted) but loved by the pilots that flew it and even more loved by the troops it covered and supported on the ground....
Hope this helps brother...
When I was a kid in the early 1960's, I was playing in my grandparent's yard when I threw a 9-volt transistor radio battery, pretending it was a hand grenade. By mere coincidence, just as my pretend grenade hit the ground, jets flying to/from the Avon Park bombing range broke the sound barrier causing a thunderous and ground shaking BOOM! I was almost paralyzed in fear, thinking I had caused that sound by throwing that stupid little battery. My grandpa got a laugh out of it. It wasn't the last time I heard those sonic booms from the jets flying in and out of Avon Park.
-
38 minutes ago, Egilman said:
You have a Private Note Brother...
Got it. Thanks!
I think that Mr Color super silver 2 will be perfect for the painted silver surface of my model.
- Canute, Jack12477, Old Collingwood and 4 others
-
 7
7
-
31 minutes ago, yvesvidal said:
One of my favorite Centennial planes. Count me in.
Yves
I think it may have been our first supersonic combat aircraft. Also, its shape and resemblance to its predecessor, the F-86 Sabre, is remarkable to me.
-
26 minutes ago, gsdpic said:
I'll follow along too, though I was really hoping you'd get back to that yellow Ferrari next
")
Maybe I can work on both at the same time. I do feel like I am neglecting her.
- gsdpic, Jack12477, Old Collingwood and 4 others
-
7
-
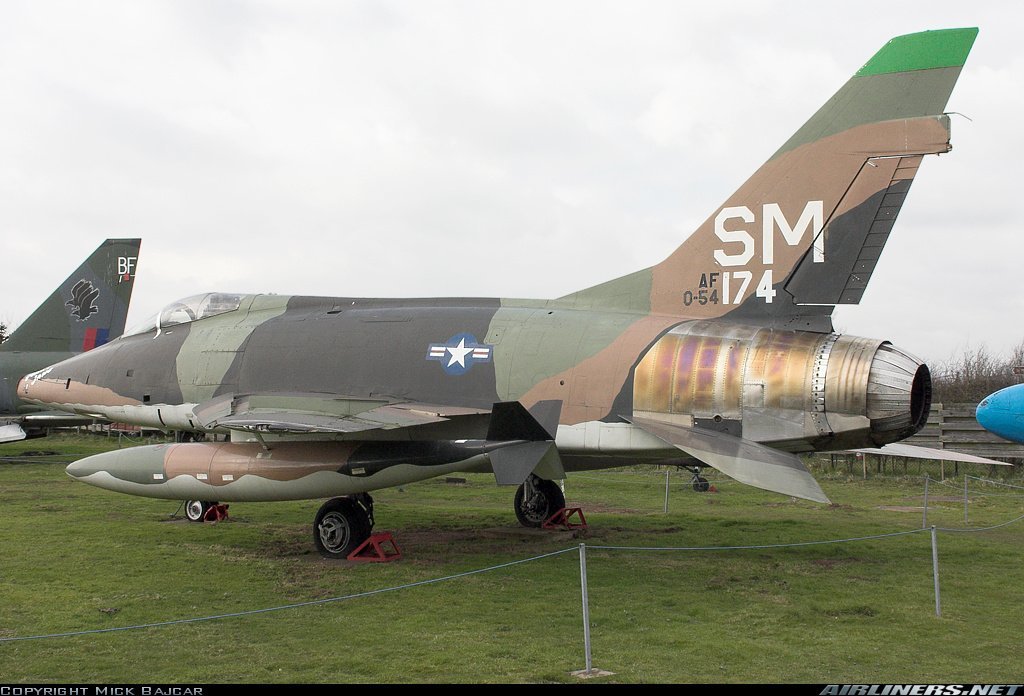
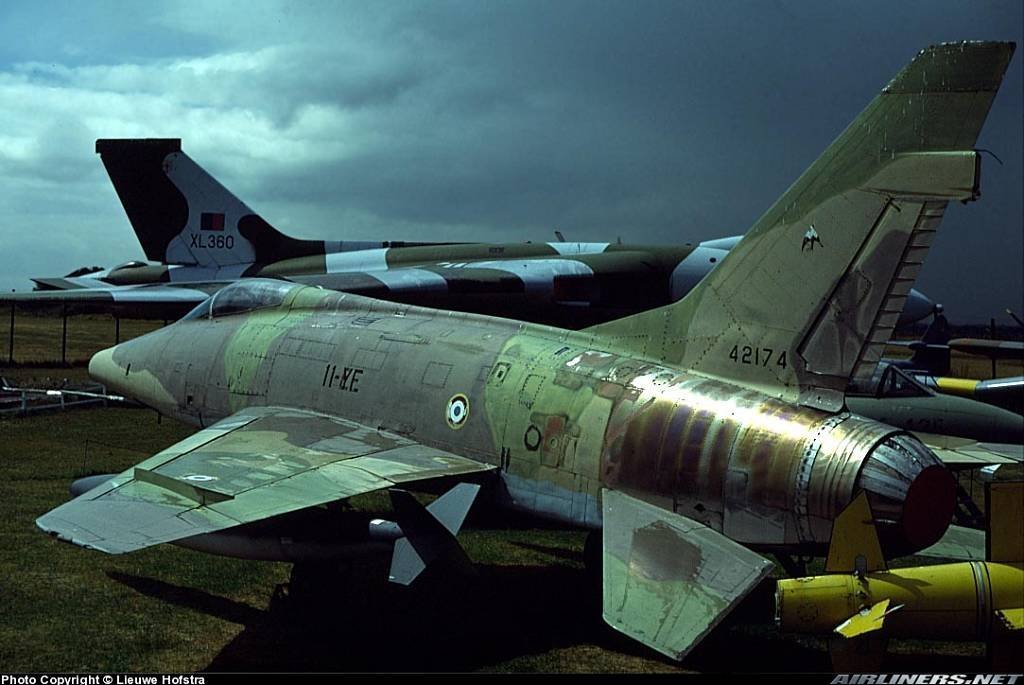
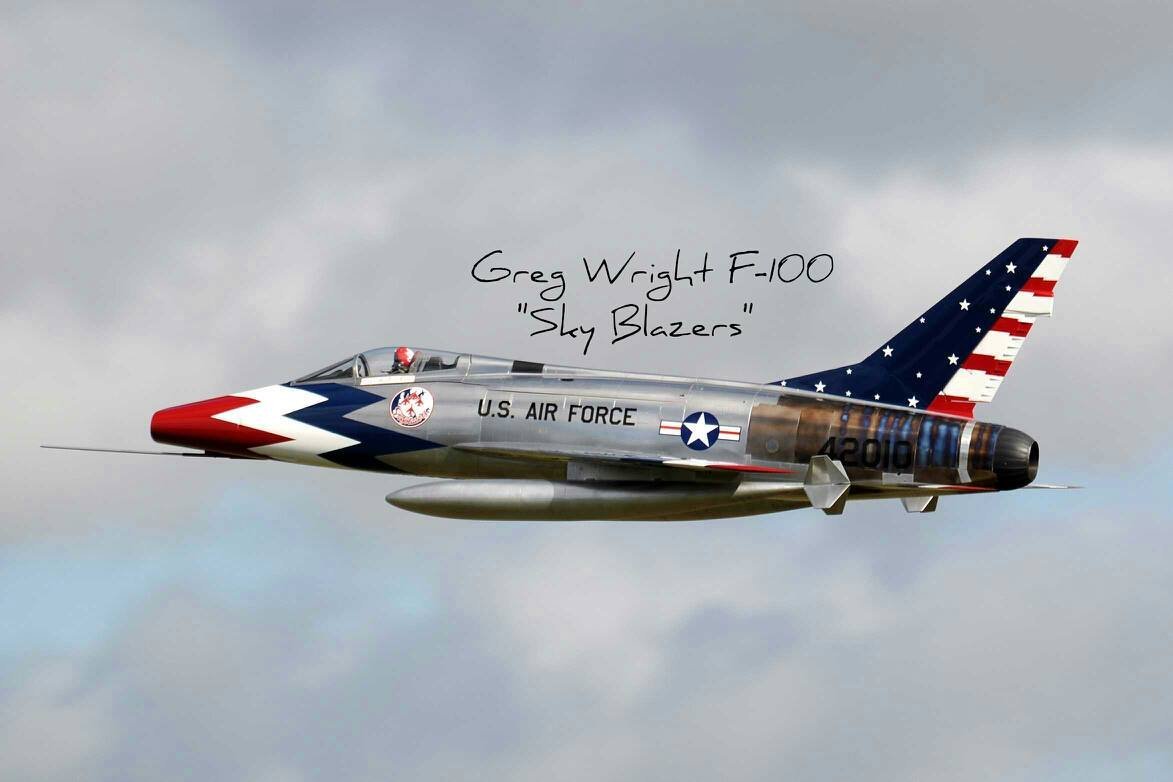
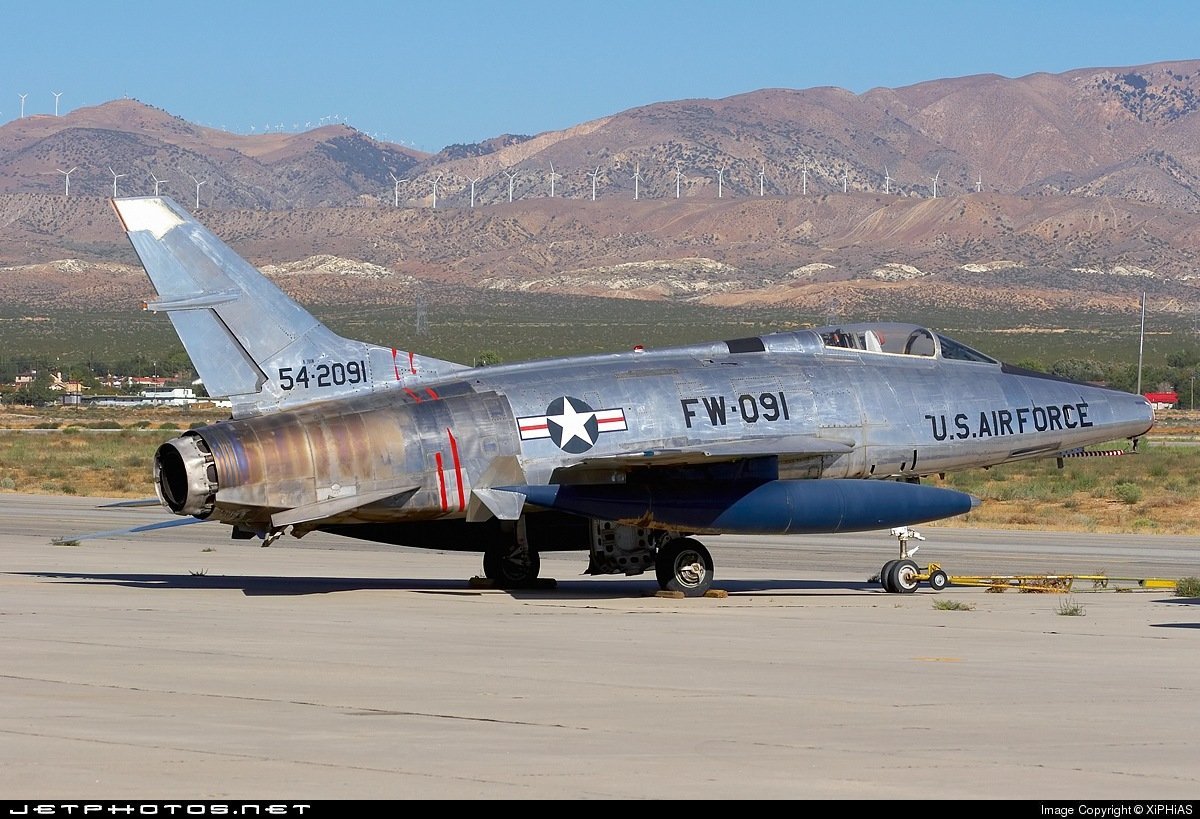
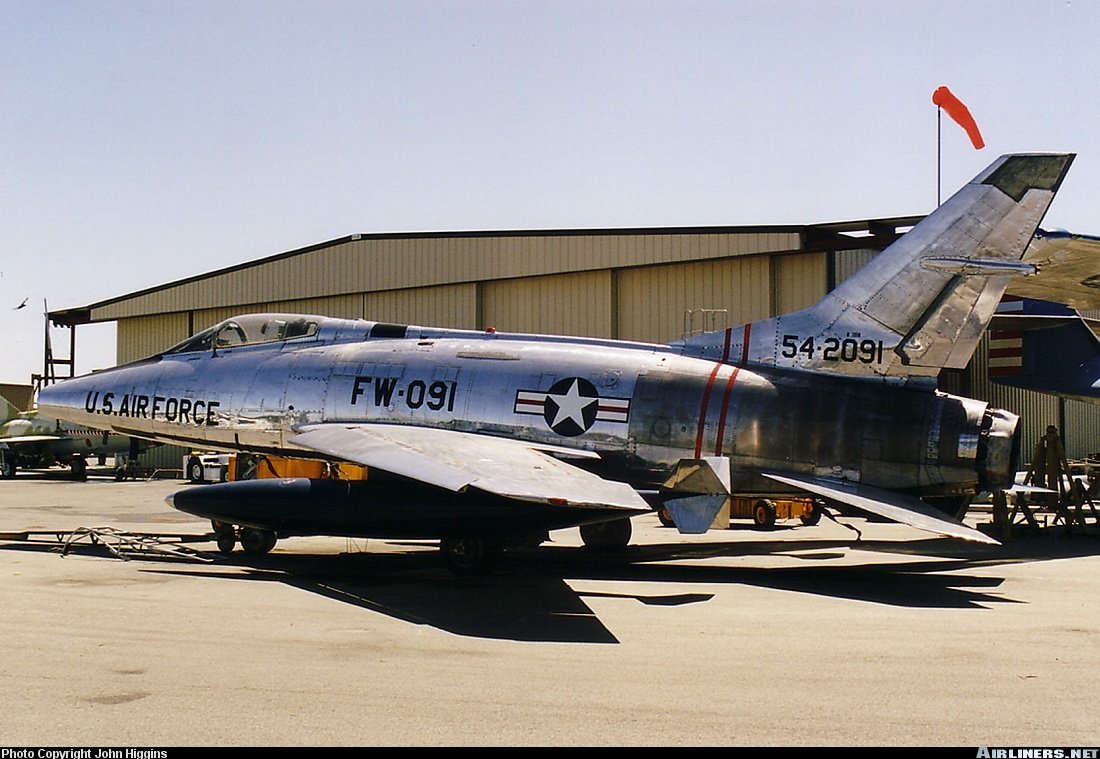
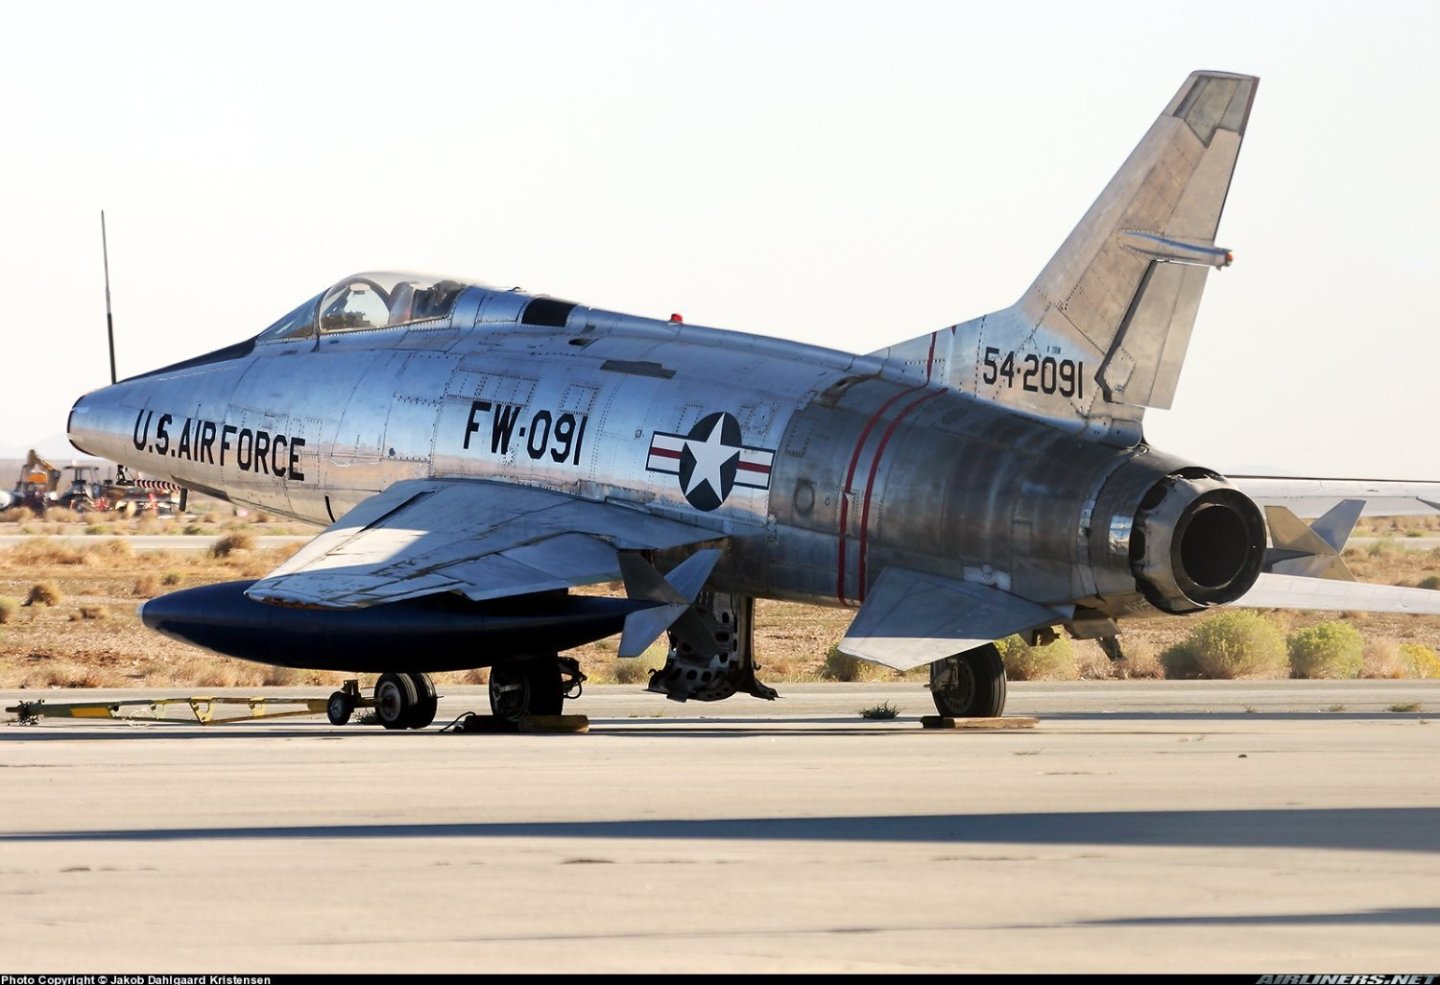
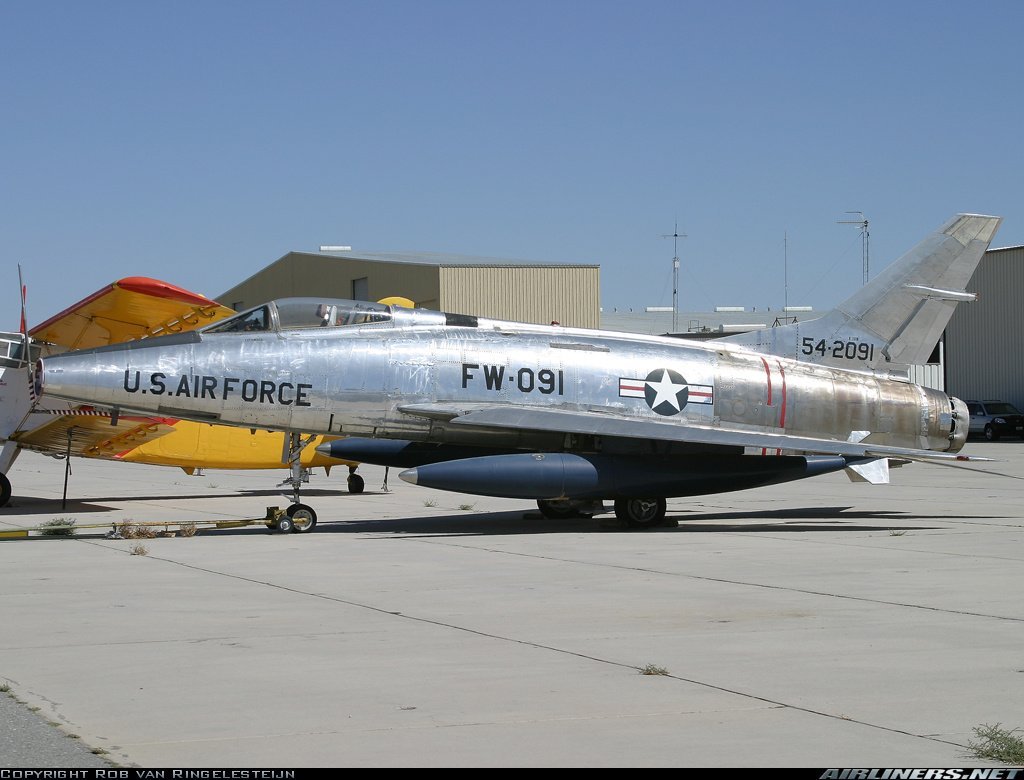
Just some interesting photos of the subject aircraft found on the net. These help me get revved up and show me the way to go to simulate the real aircraft finish.
Can someone here please explain why this particular aircraft has those distinctive color striations at/near the afterburner? I've often wondered but never read an explanation of why they all seem to have this look.
-
7 minutes ago, Canute said:
You've definitely turned that sow's ear into a silk purse, Craig. The finish is outstanding. 👍
Scale perfection is over rated and it can become a disease that will prevent an average modeler from getting anything done in the model building department. I know because it impacted me that way for a time some years ago. An interesting finish and not over stressing on minute details is most relaxing and fun for me. It’s the thing that allowed me to open the box and finish a kit I started almost 20 years ago, put on hold, and finish it in less than a month. It’s not perfect by a long shot but it was fun and looks good on the shelf.
Thanks for following and for your support along the way.
-
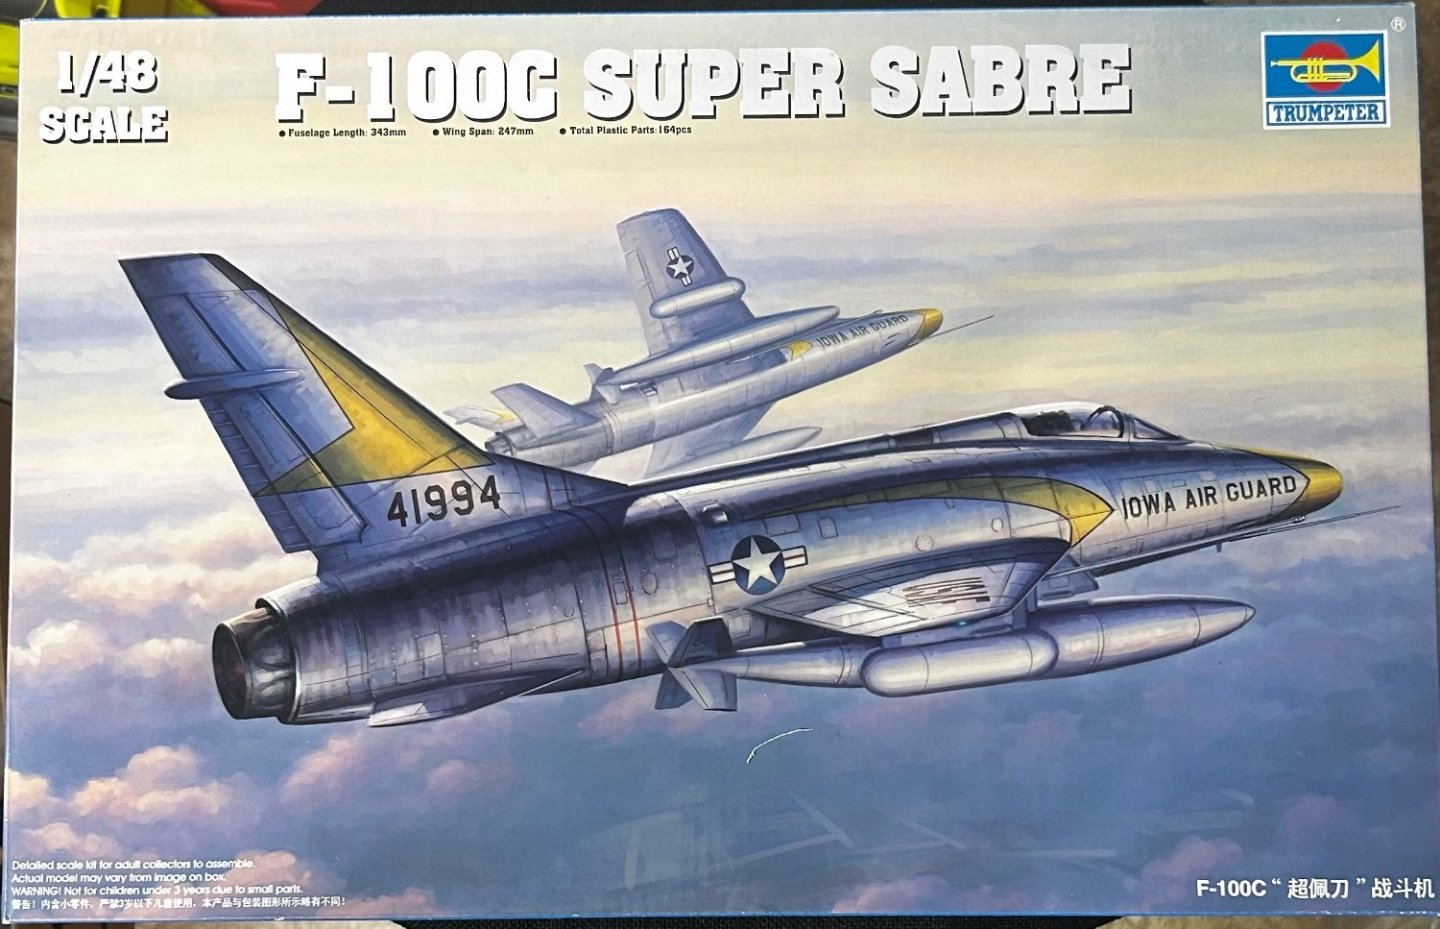
On a roll now with natural metal finish. Will build the 1:48 scale Trumpeter F-100C Super Sabre.
i have no plans for aftermarket pieces at this time but I may reevaluate and adjust along the build process.
-
1 hour ago, ccoyle said:
Very nice, Craig!
37 minutes ago, gsdpic said:Wow, stunning result, well done! I'm not a warplane guy but seeing this makes me want to give it a try.
32 minutes ago, Egilman said:Simply beautiful!!
Bet she's a stunner in the sunlight...
Very well done, best I've seen... (including my own)
7 minutes ago, DocRob said:Fantastic Craig, you built an absolute beauty out of this error prone old kit, congratulations.
Cheers Rob
Thanks, gentlemen.
-
-
1 hour ago, DocRob said:
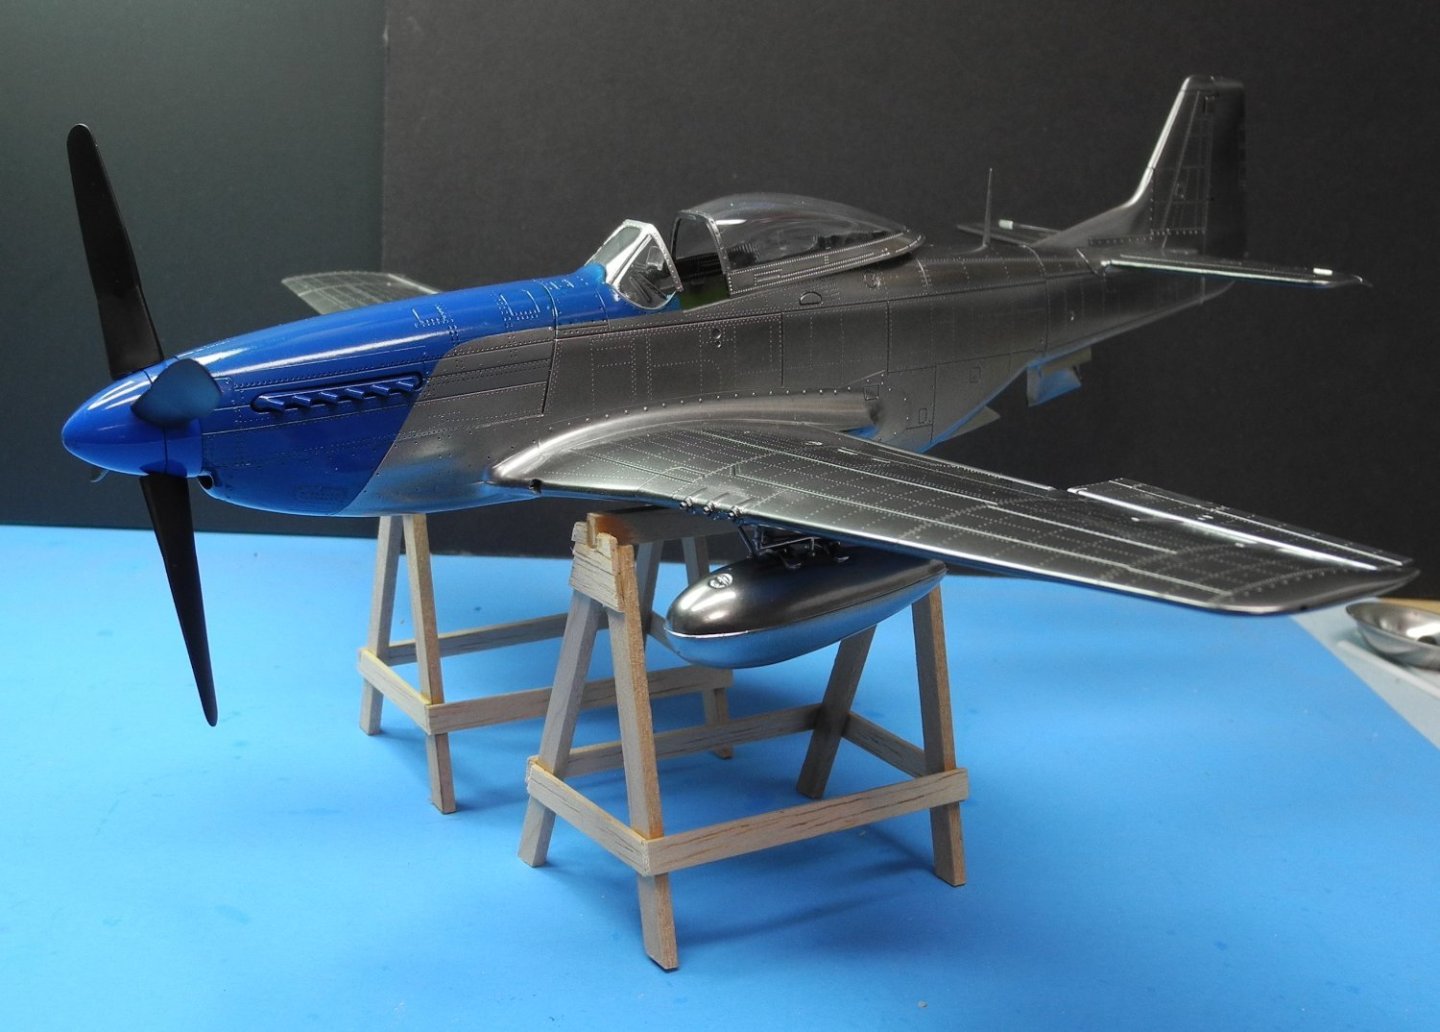
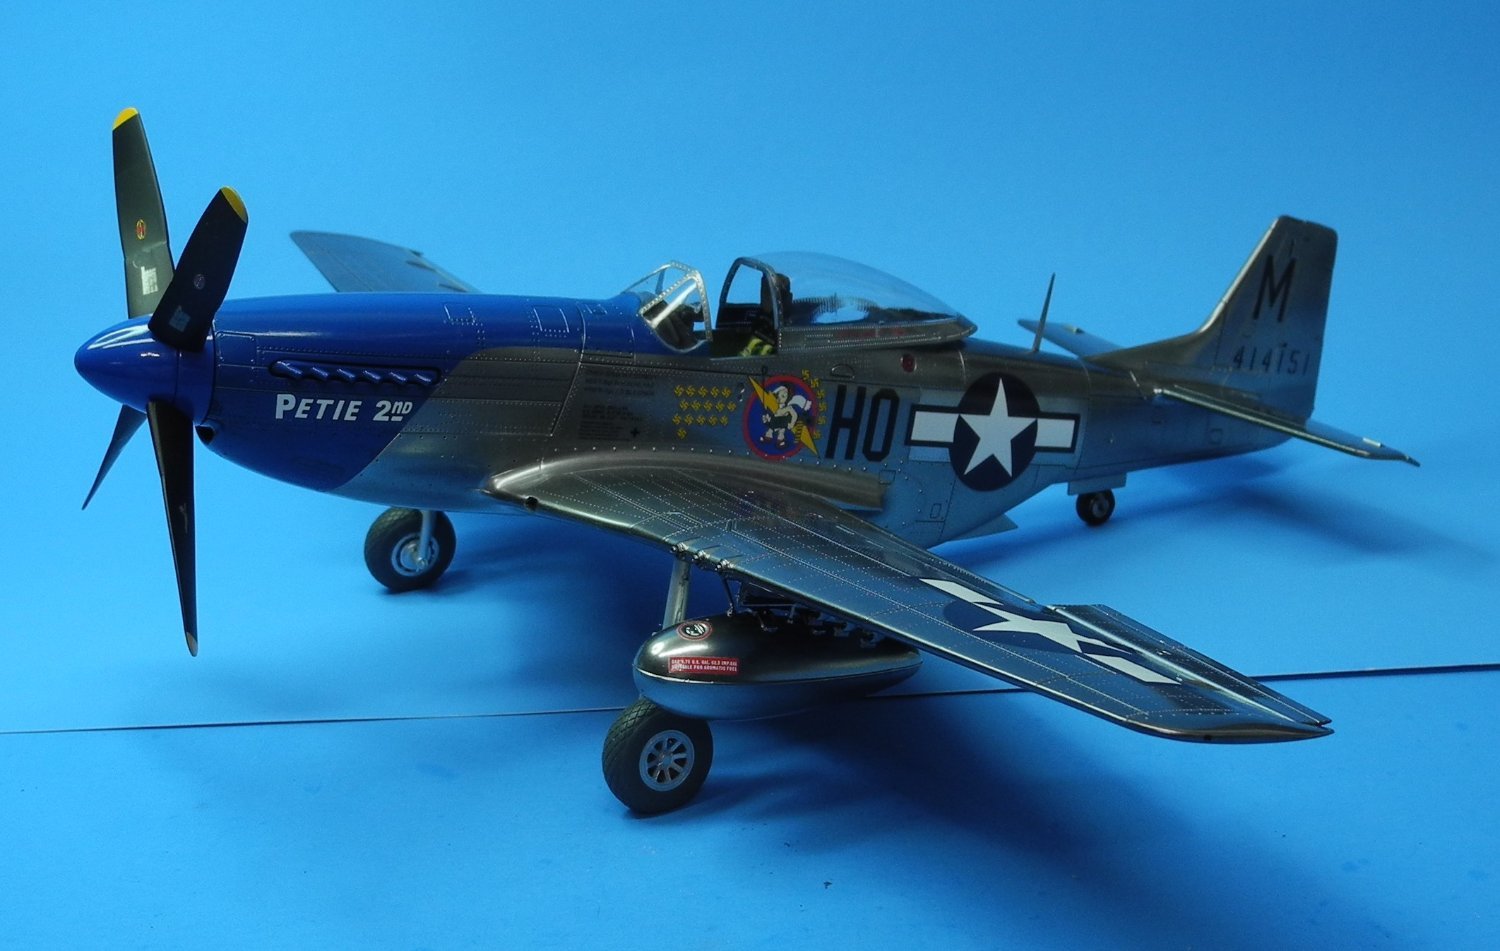
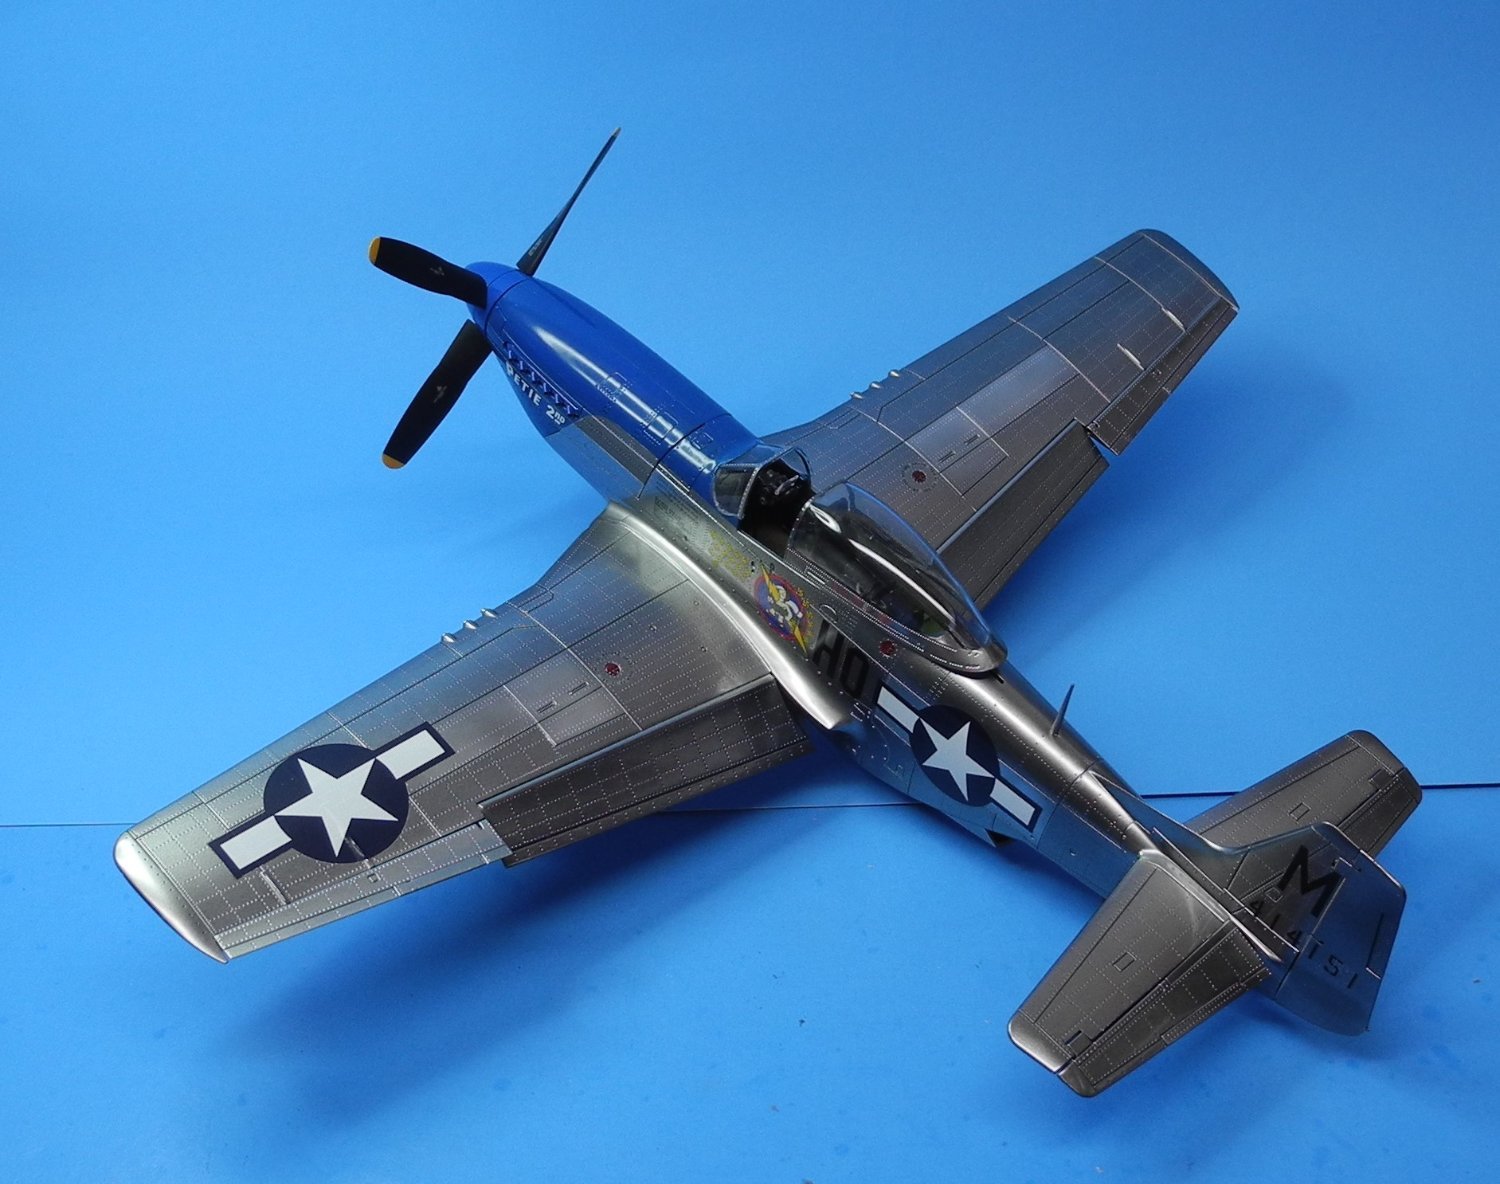
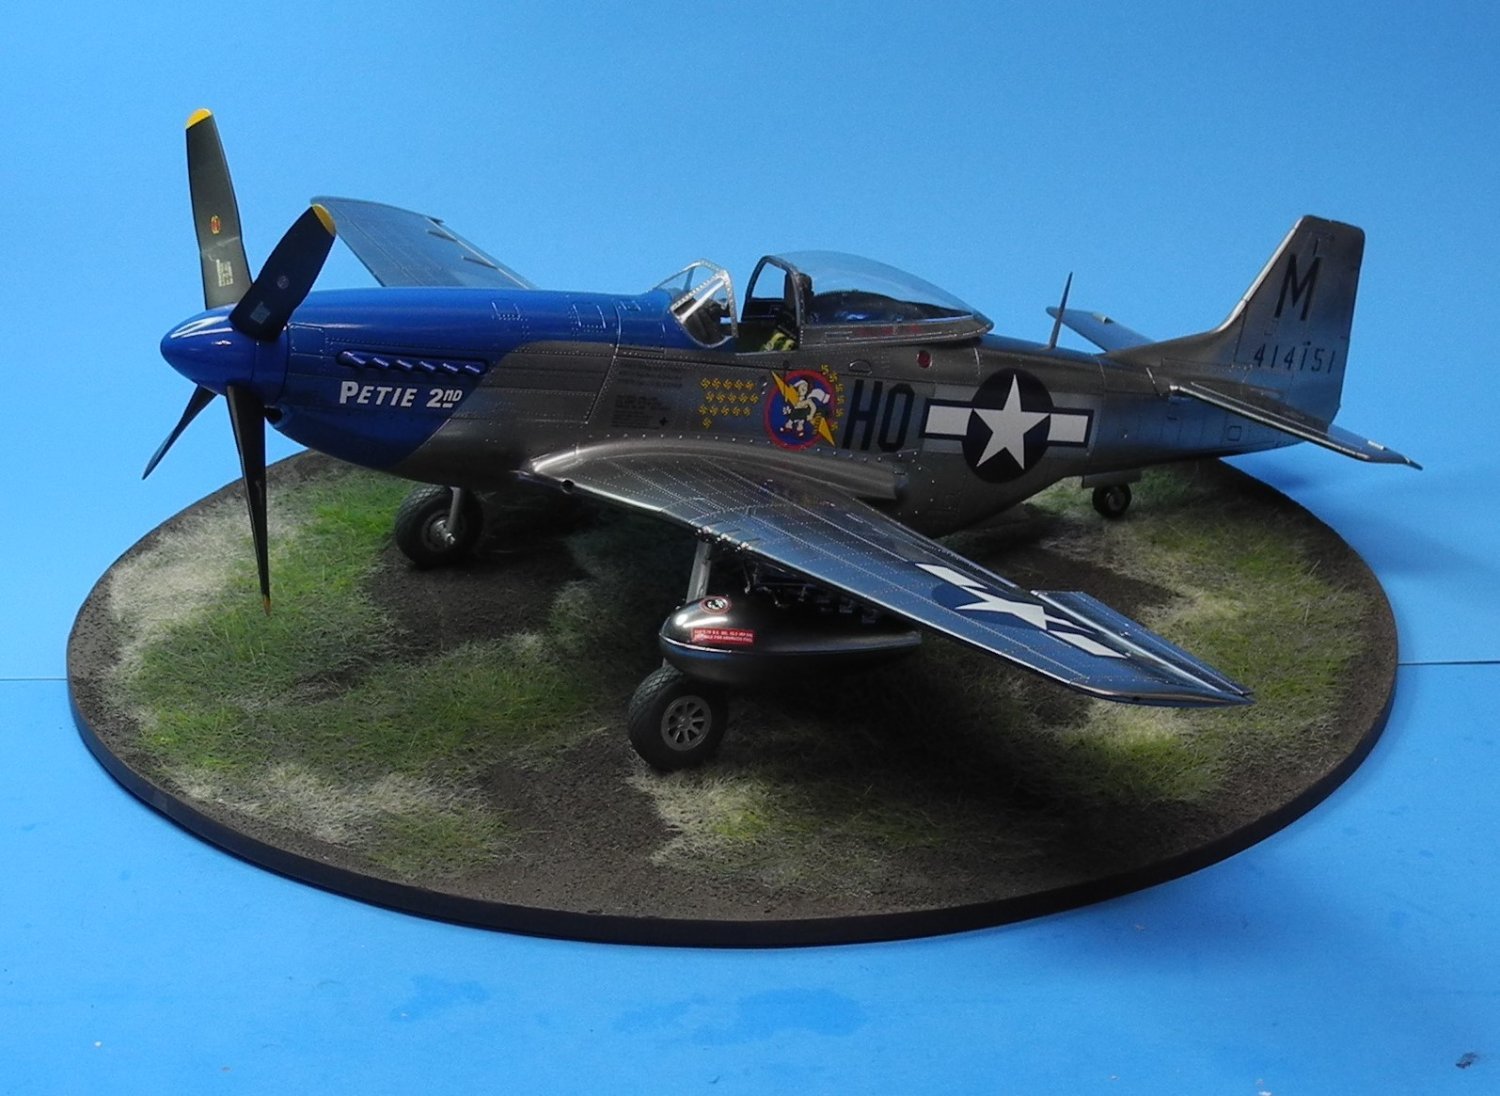
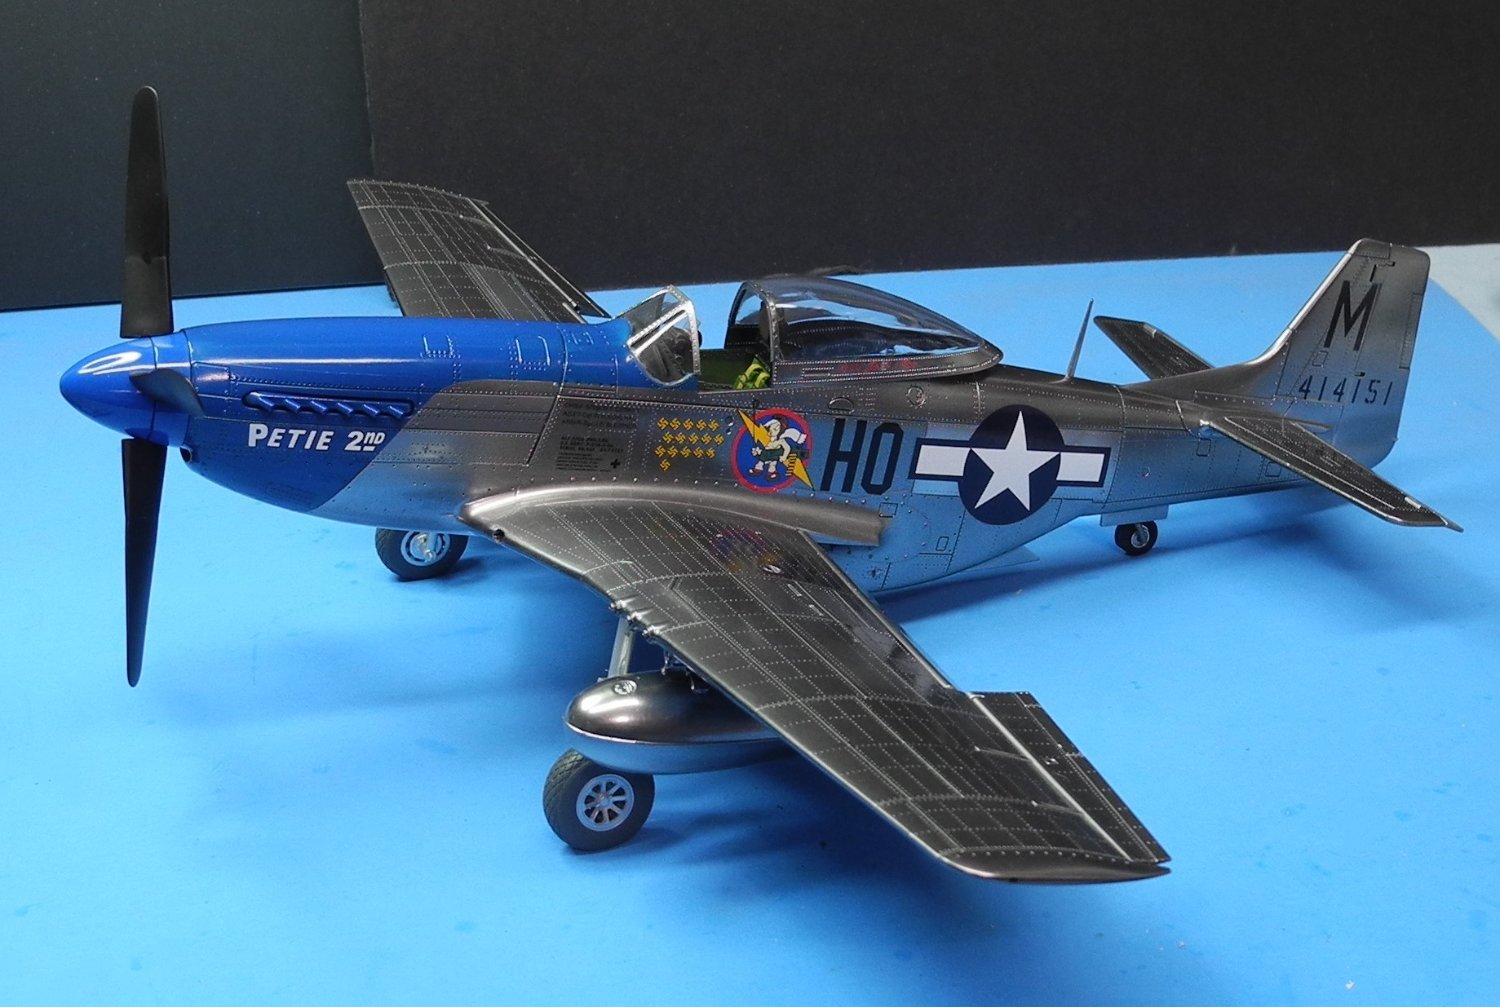
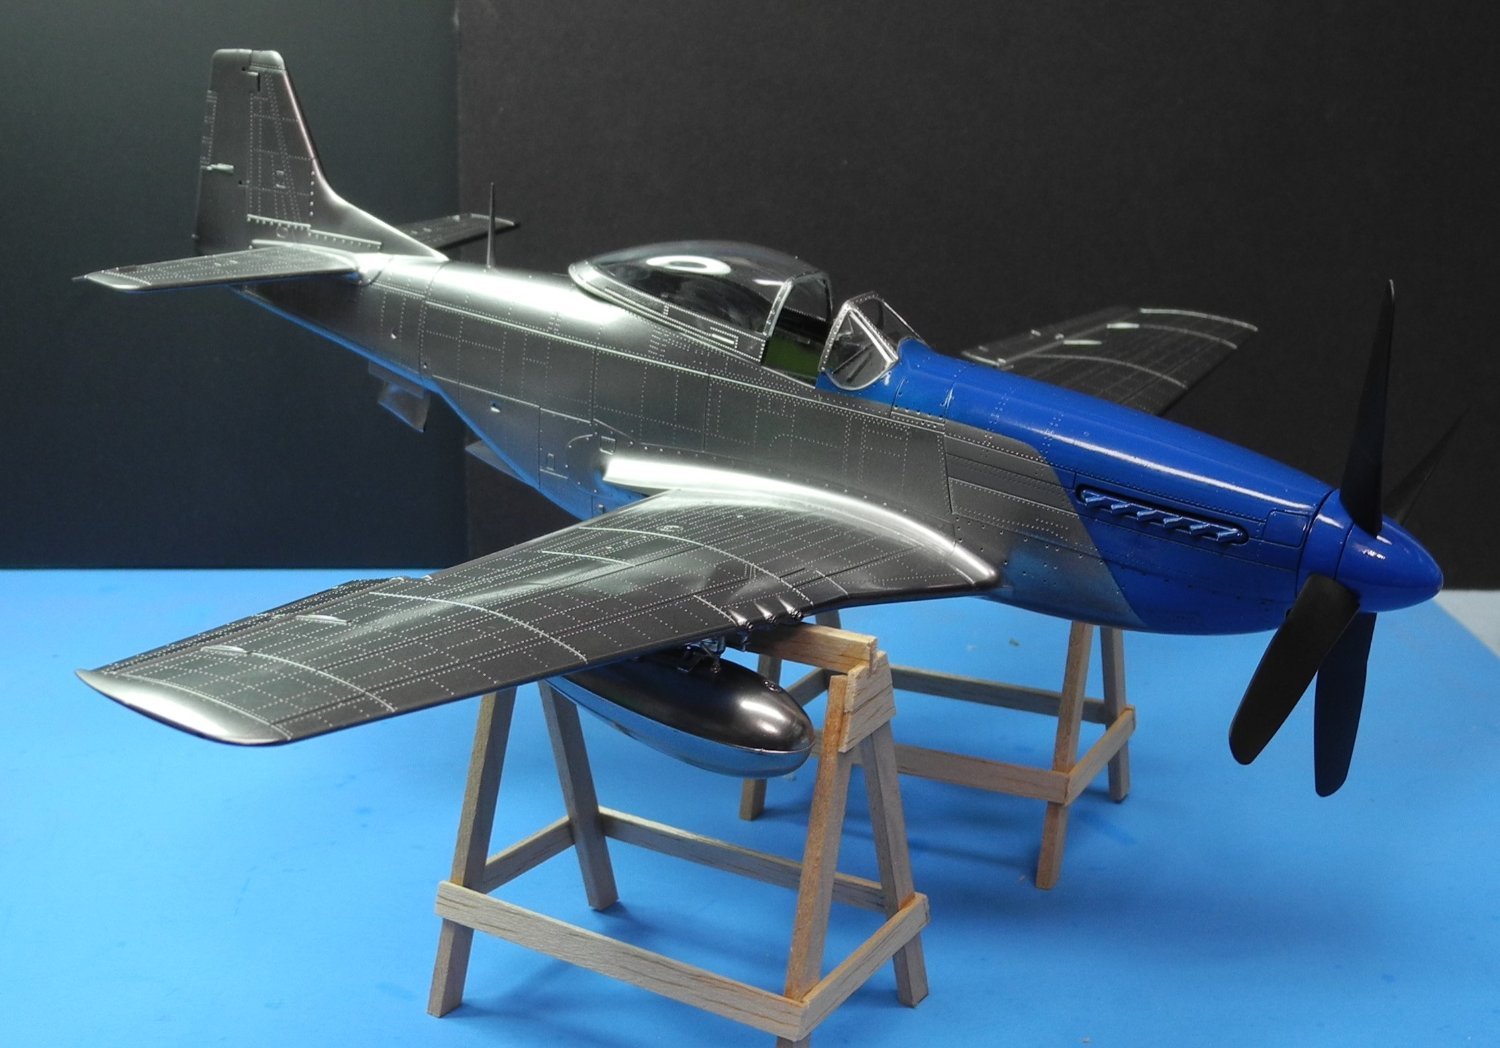
Your Mustang looks fantastic, Craig, I love the shiny finish with the panel accentuation.
Good that the original decals worked, I had very mixed results with HGW wet transfers on different builds. If everything works out, they loook perfectly, but that´s only the case with perfect surface preparation, concentration and sheer luck. I liked the little worn effect on the stencils from a MIG-31 I once build, but would be carefully with a relatively new looking plane.
How did you get the AK Extreme Metal black base to really cure. I used it twice as a base for chrome and polished aluminum, like you, straight from the jar and it never dried, staying tacky even after weeks. I threw my bottles away and use Tamiya LP gloss black instead. Works perfectly, is durable and dries fast.Cheers Rob
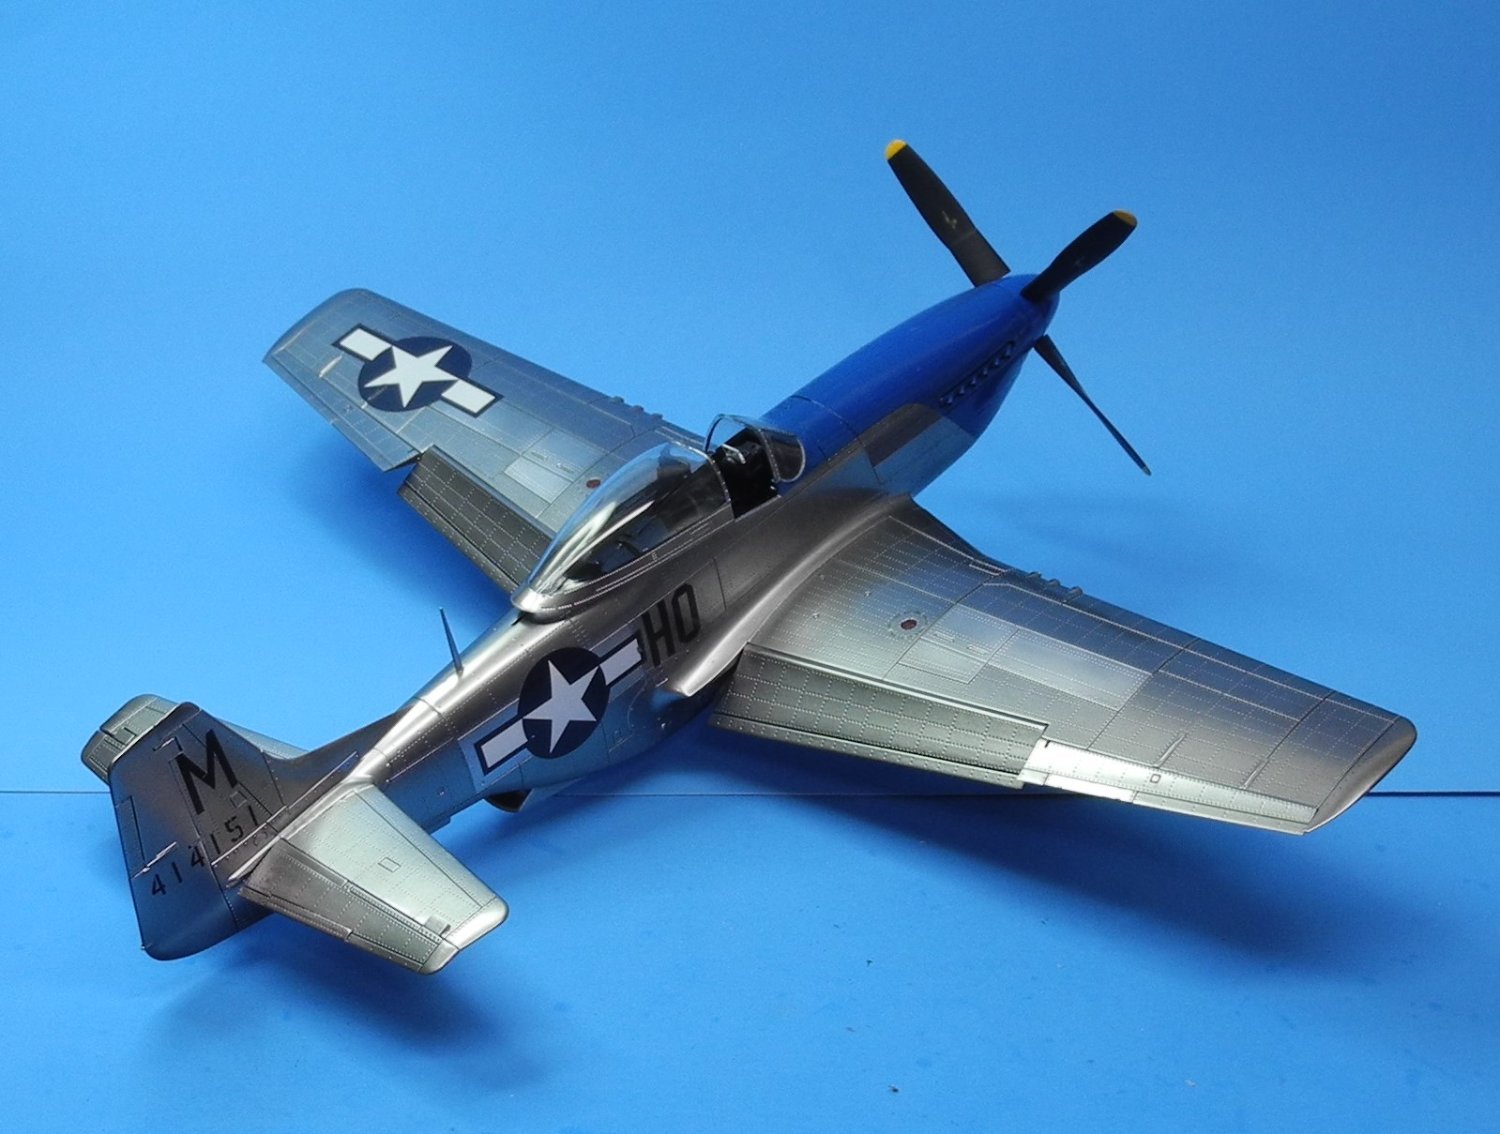
Thanks, Rob. I used Tamiya X1, reduced at a ratio of 4 parts paint to 6 parts leveling thinner as a base for the Alclad. For the drop tanks and weapons mounts, I used the Extreme Metal black primer as a base, then sprayed Mr Color Super Silver 2, mixed at a ratio of 1 part paint to 10 parts leveling thinner. I had read reports the super silver applied in this heavily reduced fashion, sprayed on at low psi and light misting coats gave a finish that would rival Alclad. it does, in my opinion. At a much lower cost. As for the AK black base, I just sprayed it in very light coats allowing each coat to flash before applying another coat. It was dry to the touch in minutes, although I allowed it to dry about 4 hours before applying the super silver. Did you apply it over primer or bare plastic? I applied mine over bare plastic,
- DocRob, Haliburton, Jack12477 and 5 others
-
8
-
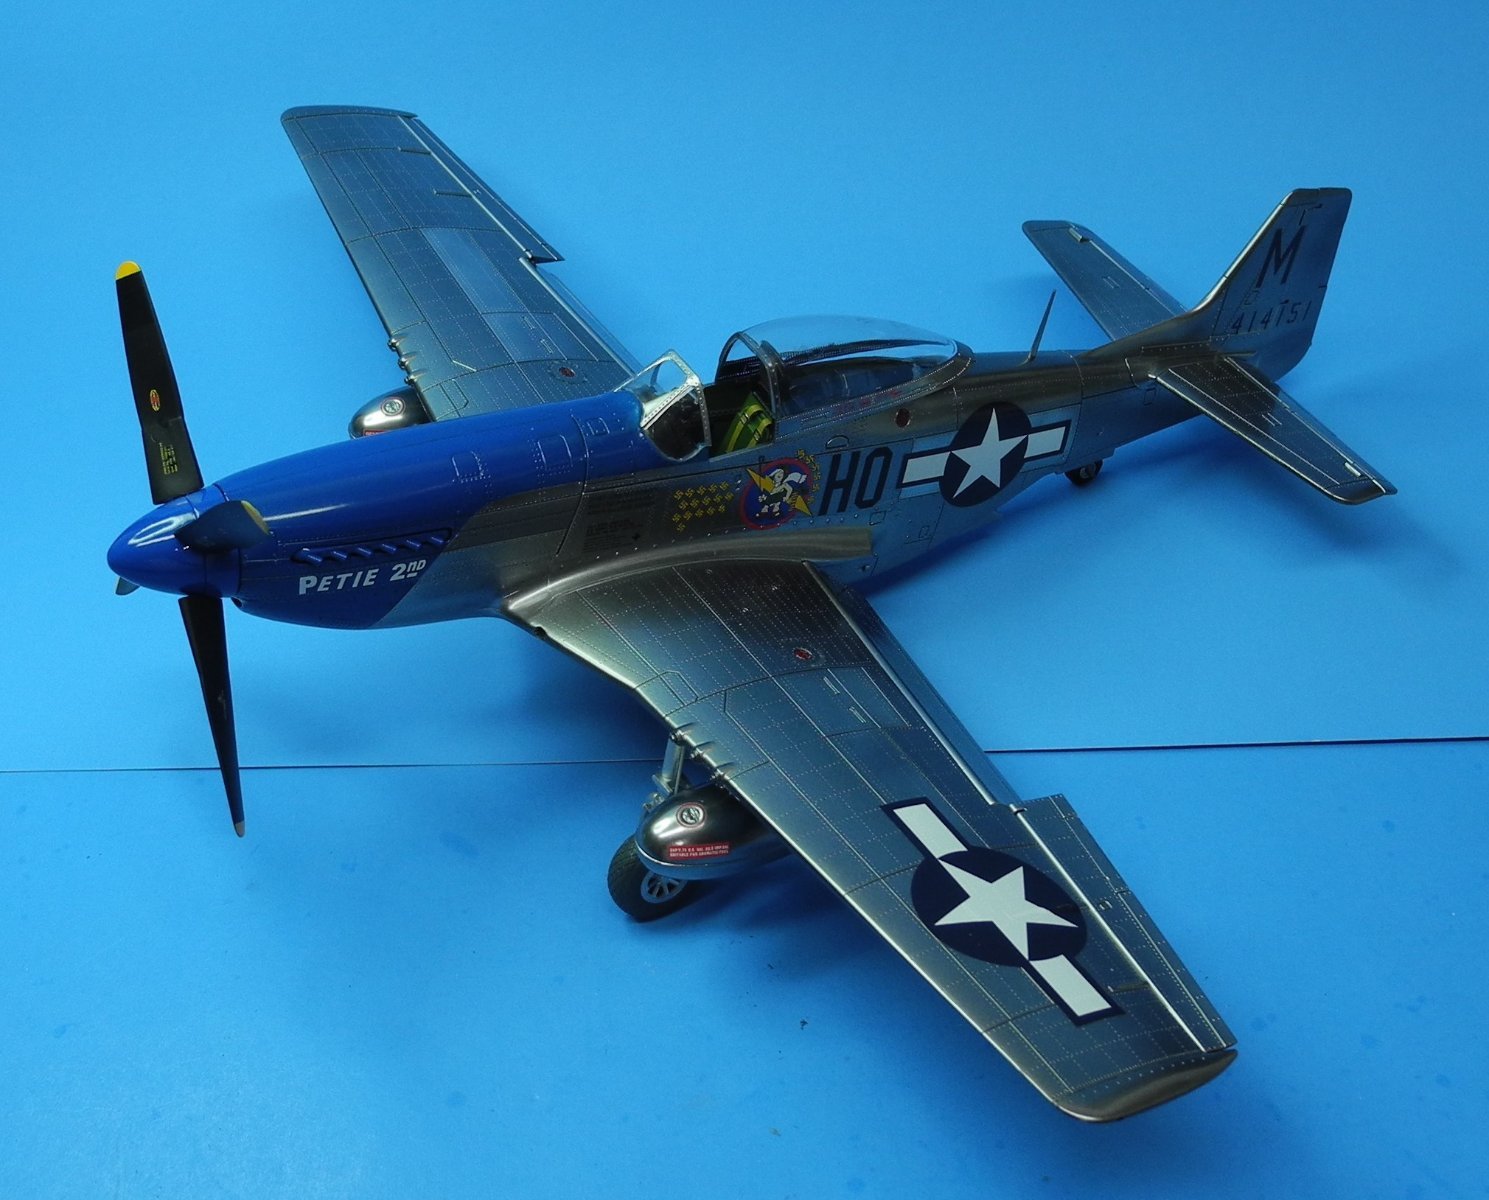
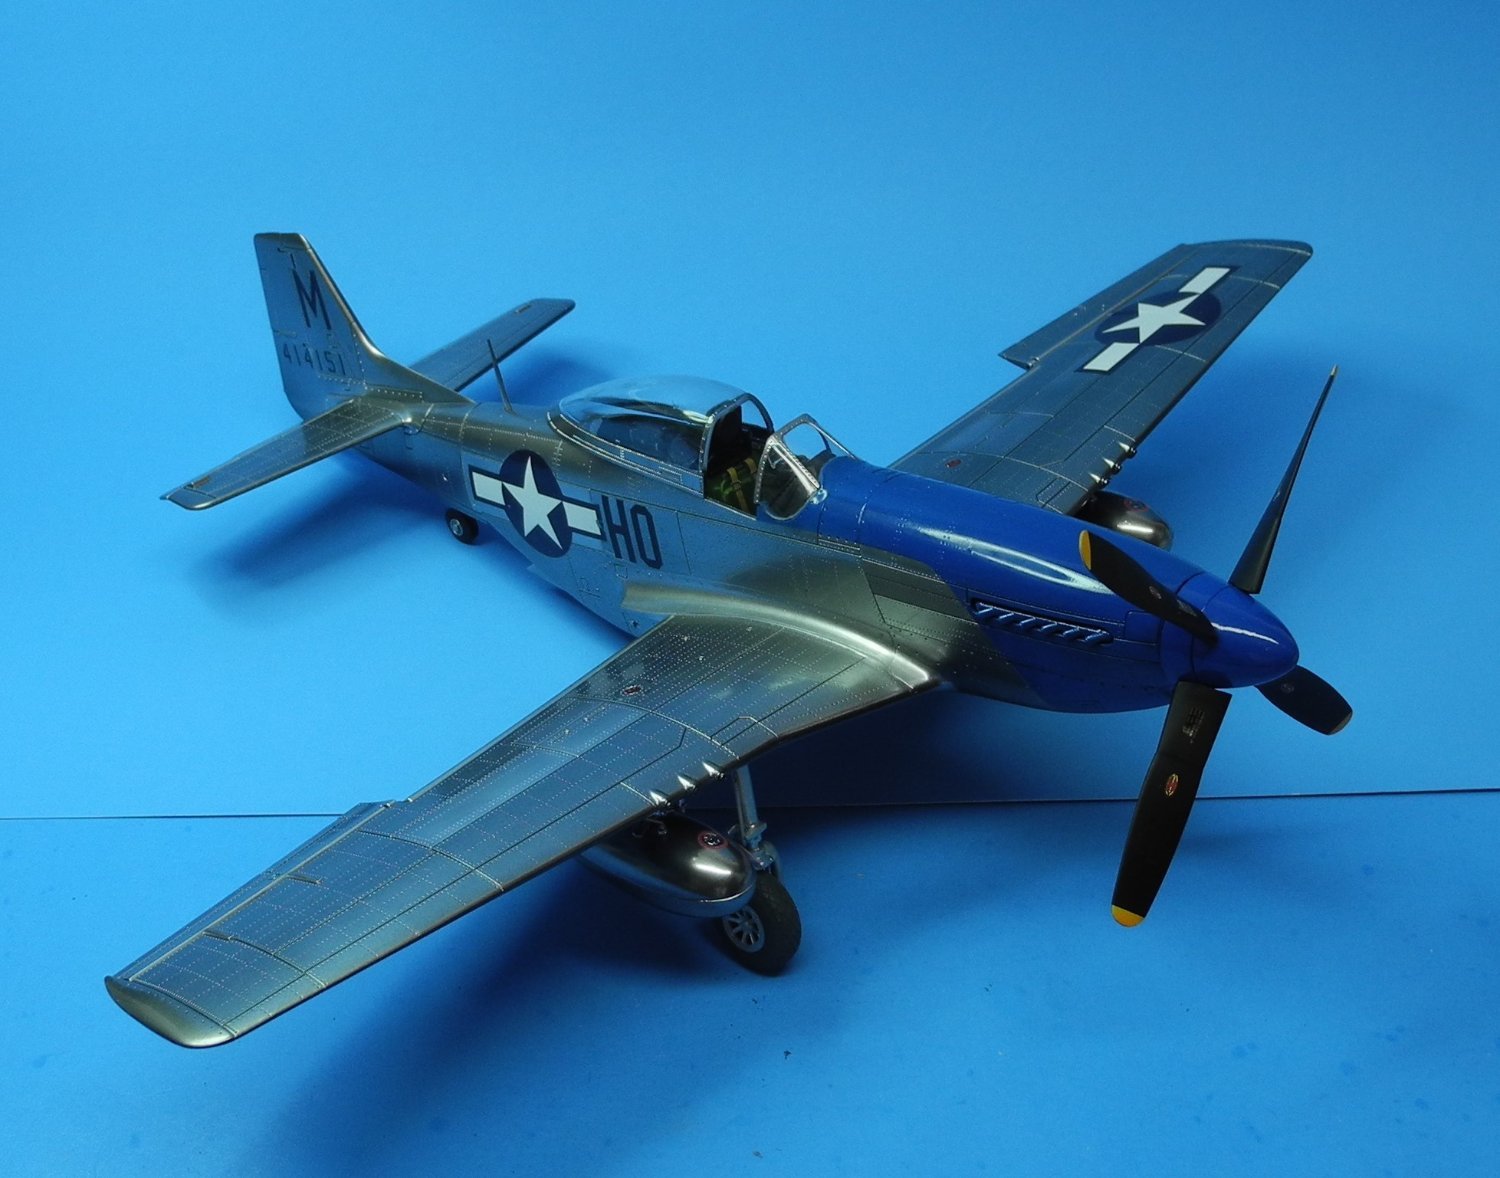
The original kit decals are Cartograf and as such, high quality as new. However, since the kit is now some 18 years old, and the decals stored inside the kit having seen some less than favorable storage conditions over the past couple of decades, decided it might be prudent to use a new, fresh set of decals rather than fight with the old set. Yesterday at the last minute, decided I would go ahead and try using the original decals, know I had a backup plan if the first couple of small decals used as a test went wrong. As it turned out, I was happy to learn the old decal sheet was in better condition than I thought it might be. They are going down just fine.
There remain more decals to place, but this is the start, and I am happy with it.

-
38 minutes ago, AJohnson said:
That is looking sooo nice Craig!
 38 minutes ago, Old Collingwood said:
Looking excellent Craig.
OC.
21 minutes ago, Jack12477 said:I really like the color scheme. Nice painting!
Thank you, gentlemen.
Later I'll be experimenting with HGW wet transfer decals. Once they are positioned and given overnight to dry, the clear transfer film is peeled off the top of the decal and they are supposed to look like they were painted on. We'll see what happens together. Never used this type of decal before now.
-
8 minutes ago, Dave_E said:
Will look like a new bird off the line once you get the decals on! 👍😀
I may yet decide to dirty her up a bit but that won't happen, or a decision made until after the decals have been applied. From all I can see, the crews maintained these planes very well for the most part.
-
-
Turning out to be a very impressive model. I like Airfix kits, particularly the newer releases.
I agree with you, James, about photo etch to a certain extent. There are times when it's helpful and adds detail not available with the kit parts, but more often than not, I end up not using much of the set parts because they specifically do not add detail or realism to the kit. It's as if the parts are there simply as a "parts count", to make it appear the set is a bigger value for the money spent than it actually is. Many partially used photo etch sets sit idly in my spares box. I do admit however, sometimes the parts became useful in some other build the set was never intended for. For the most part, I try to stay away from buying photo etch sets unless I think it's something too important to pass up. Most of the time, it's not.
- Jack12477, king derelict, Egilman and 9 others
-
12
-
-
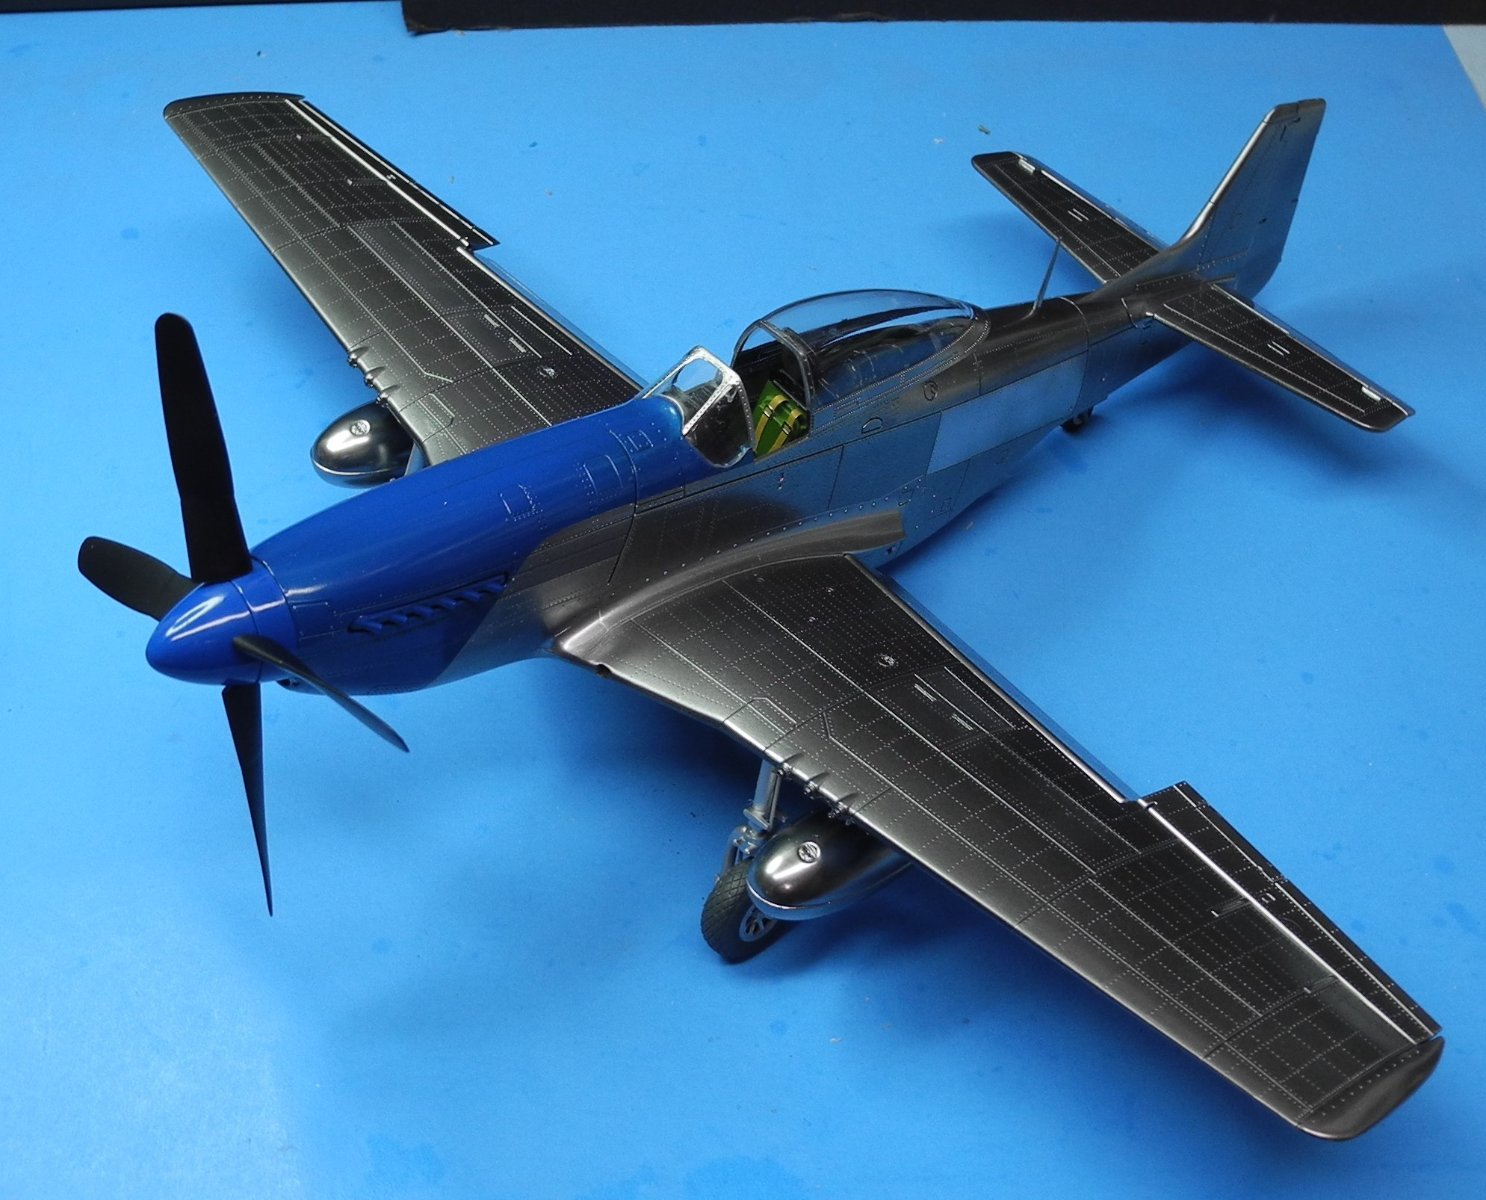
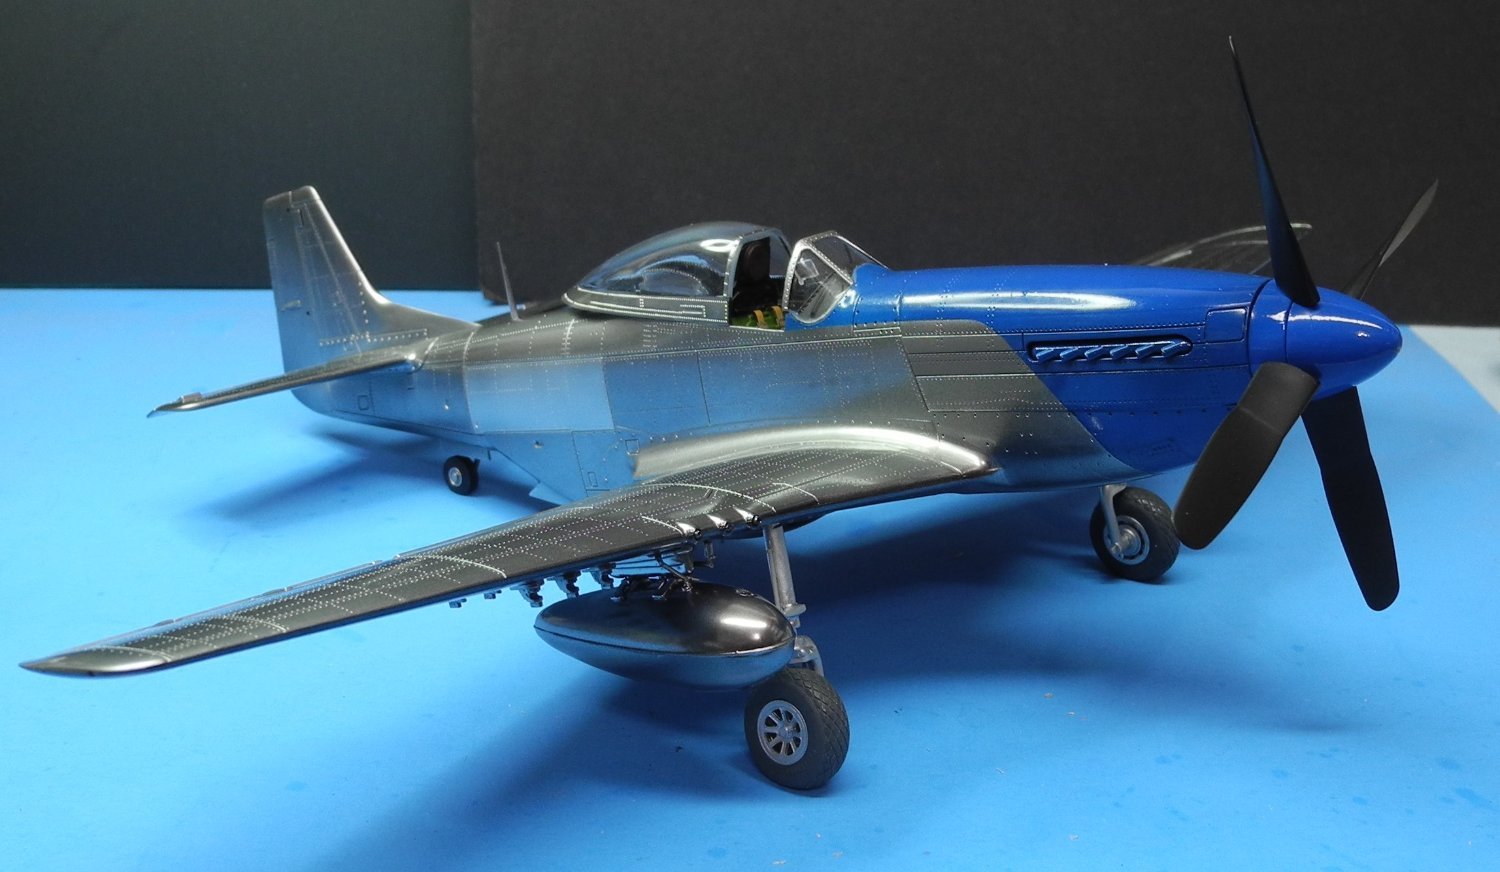
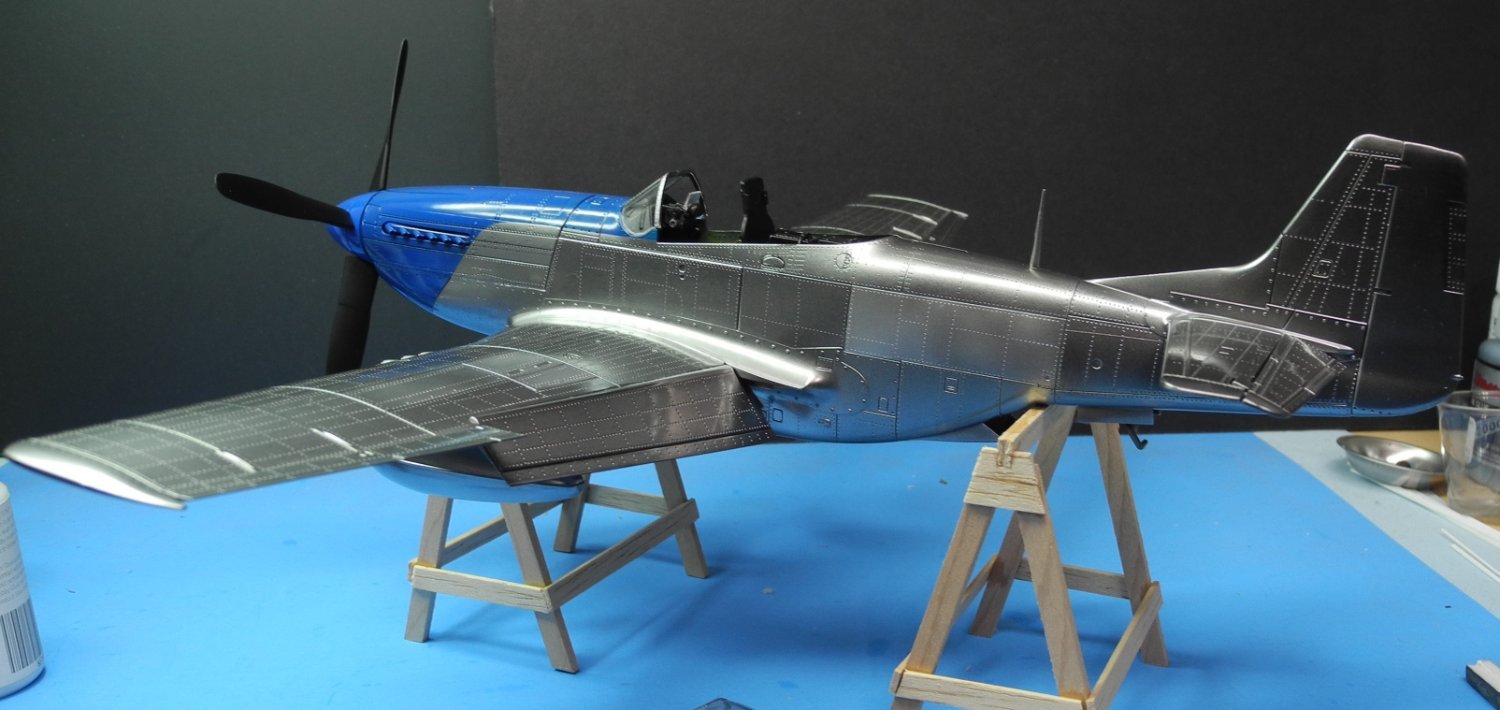
I masked up and painted a few panels in different colors to break up the monotone gloss silver of the airframe, and to make the model more interesting-looking.
Before I move forward with more masking and painting of panels, I wanted to use this photo to proof-test the concept. In the lighting of my work room, it's not easy for me to see if the difference is worth the time and effort of masking. It's time consuming to be sure. In this photo, you can perhaps (you tell me) see the stainless-steel colored panels directly behind the exhaust and the blue nose color. On the wing top, the machine gun/ammo feed cover is painted in dull aluminum. Can you see it, and do you think it makes enough difference to continue. Should I use a different shade of aluminum perhaps?
PS: Maybe I'll try that "post-it note" masking trick Ken wrote about his buddy using. It would be a lot faster I think than the way I mased and painted these first few panels.

- Old Collingwood, mtaylor, yvesvidal and 5 others
-
8
-
Very interesting subject matter. Following along with your build, Rick.
- Canute, Egilman, Rik Thistle and 2 others
-
5
-
-
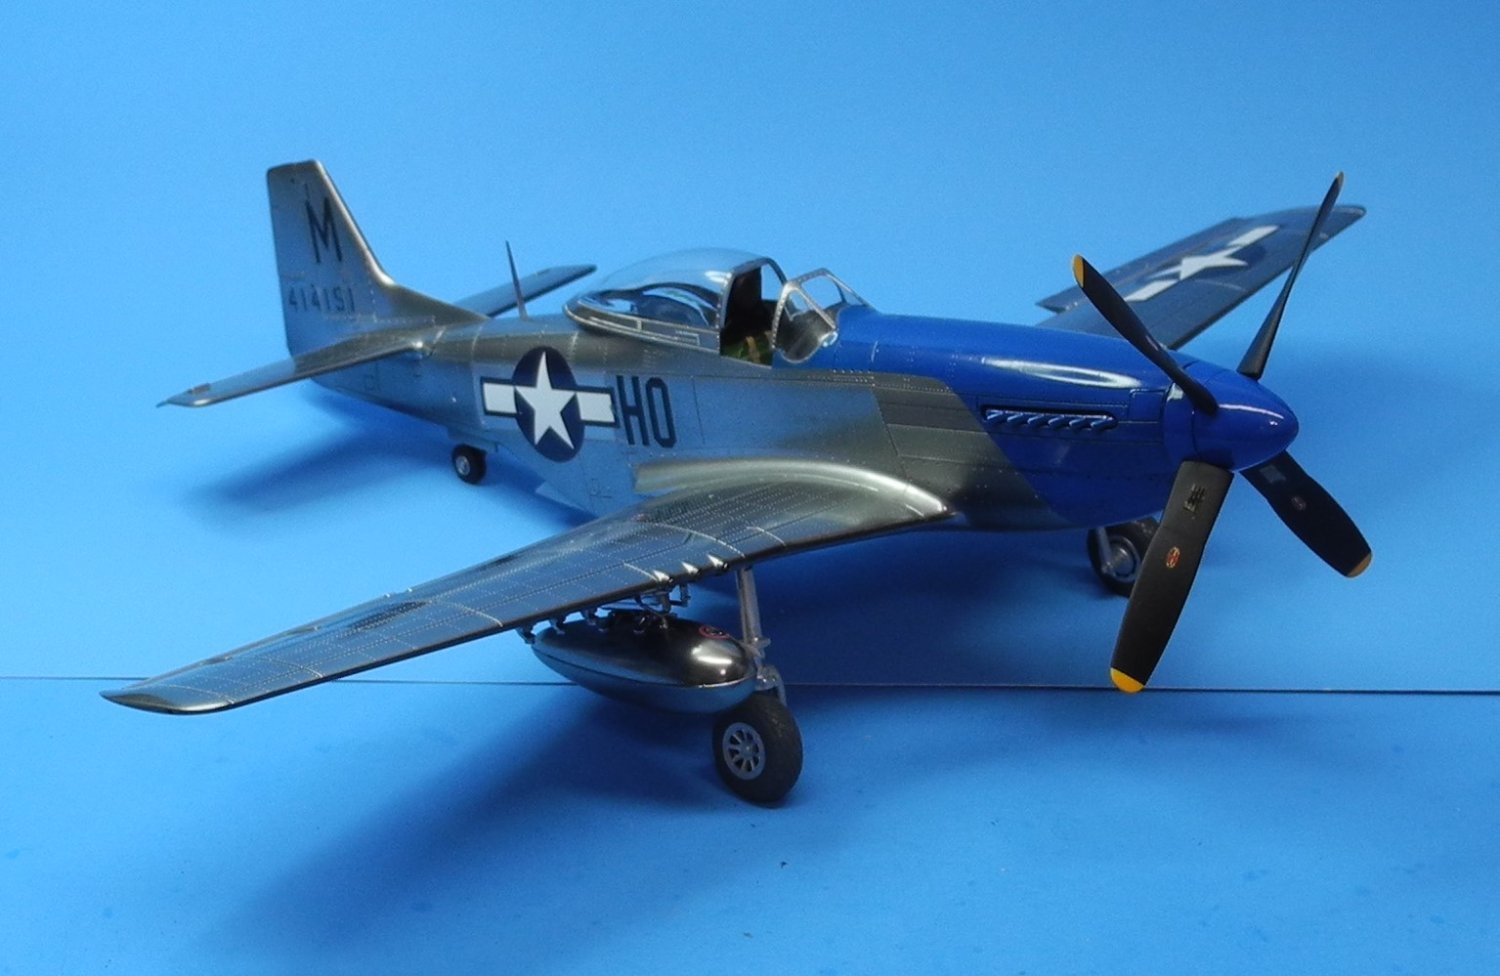
The auxiliary fuel tanks and mounts have been attached to the wings. The prop and spinner have been assembled and attached. The windscreen required some reshaping with sanding sticks to fit on the fuselage. Without reshaping, a nasty gap would have resulted between the windscreen and fuselage. After reshaping, applied a Pledge clear coat on the windscreen and canopy before masking and painting the frames on both. Here in these photos, the windscreen and canopy are dry-fitted to check for a decent fit before cementing in place. I've yet to install the seat and aerial wiring before cementing the canopy in place. Will fix the canopy in an open position.


F-100C Super Sabre by CDW - Trumpeter - 1:48 scale
in Non-ship/categorised builds
Posted
I started off with paining and assembly of the intake trunk and the cockpit. In an attempt to use only the kit parts, placed the decals on the kit cockpit consoles and instrument panel. Not happy with the results. Too toy-like in appearance. I ordered up an Aires cockpit found at an online source for $16, then a resin pilot figure to go inside the cockpit. Will put this build on a short hold until I receive the parts I ordered.
A dry fit of the fuselage halves reveals soft engraved details that will be lost once the halves are glued together and the seams filled/sanded smooth. So, there is some panel line engraving and rivet replacement in my future.
On the decal front, I did not find a suitable replacement set for my C version, so will make do with the kit decals when that time comes. Reports say the stock Trumpeter decals are not very good.