Salty Sea Dog
-
Posts
666 -
Joined
-
Last visited
Content Type
Profiles
Forums
Gallery
Events
Everything posted by Salty Sea Dog
-
 Thanks Michael, Jeff and Wayne! I was planning to do the Mamoli Carraca Atlantica next but am switching and doing a double build of Billing Boats Zeeschouws. I've been in touch with our old friend Keith, aka The Mad Chemist. A while back I had sent Keith my Zeeschouw kit to lift his spirits because Lyme disease had him in a slump. I came across another one on eBay last year and broke down and got it. This 2nd kit was missing parts so I asked Keith to trace them for me. Keith ended up sending the kit back to me because the Lyme has progressed to the point where he can no longer build it. So my plan is to build both and send one back to Keith.
- 515 replies
-
- 9
-

-
- artesania latina
- whaleboat
- (and 1 more)
-
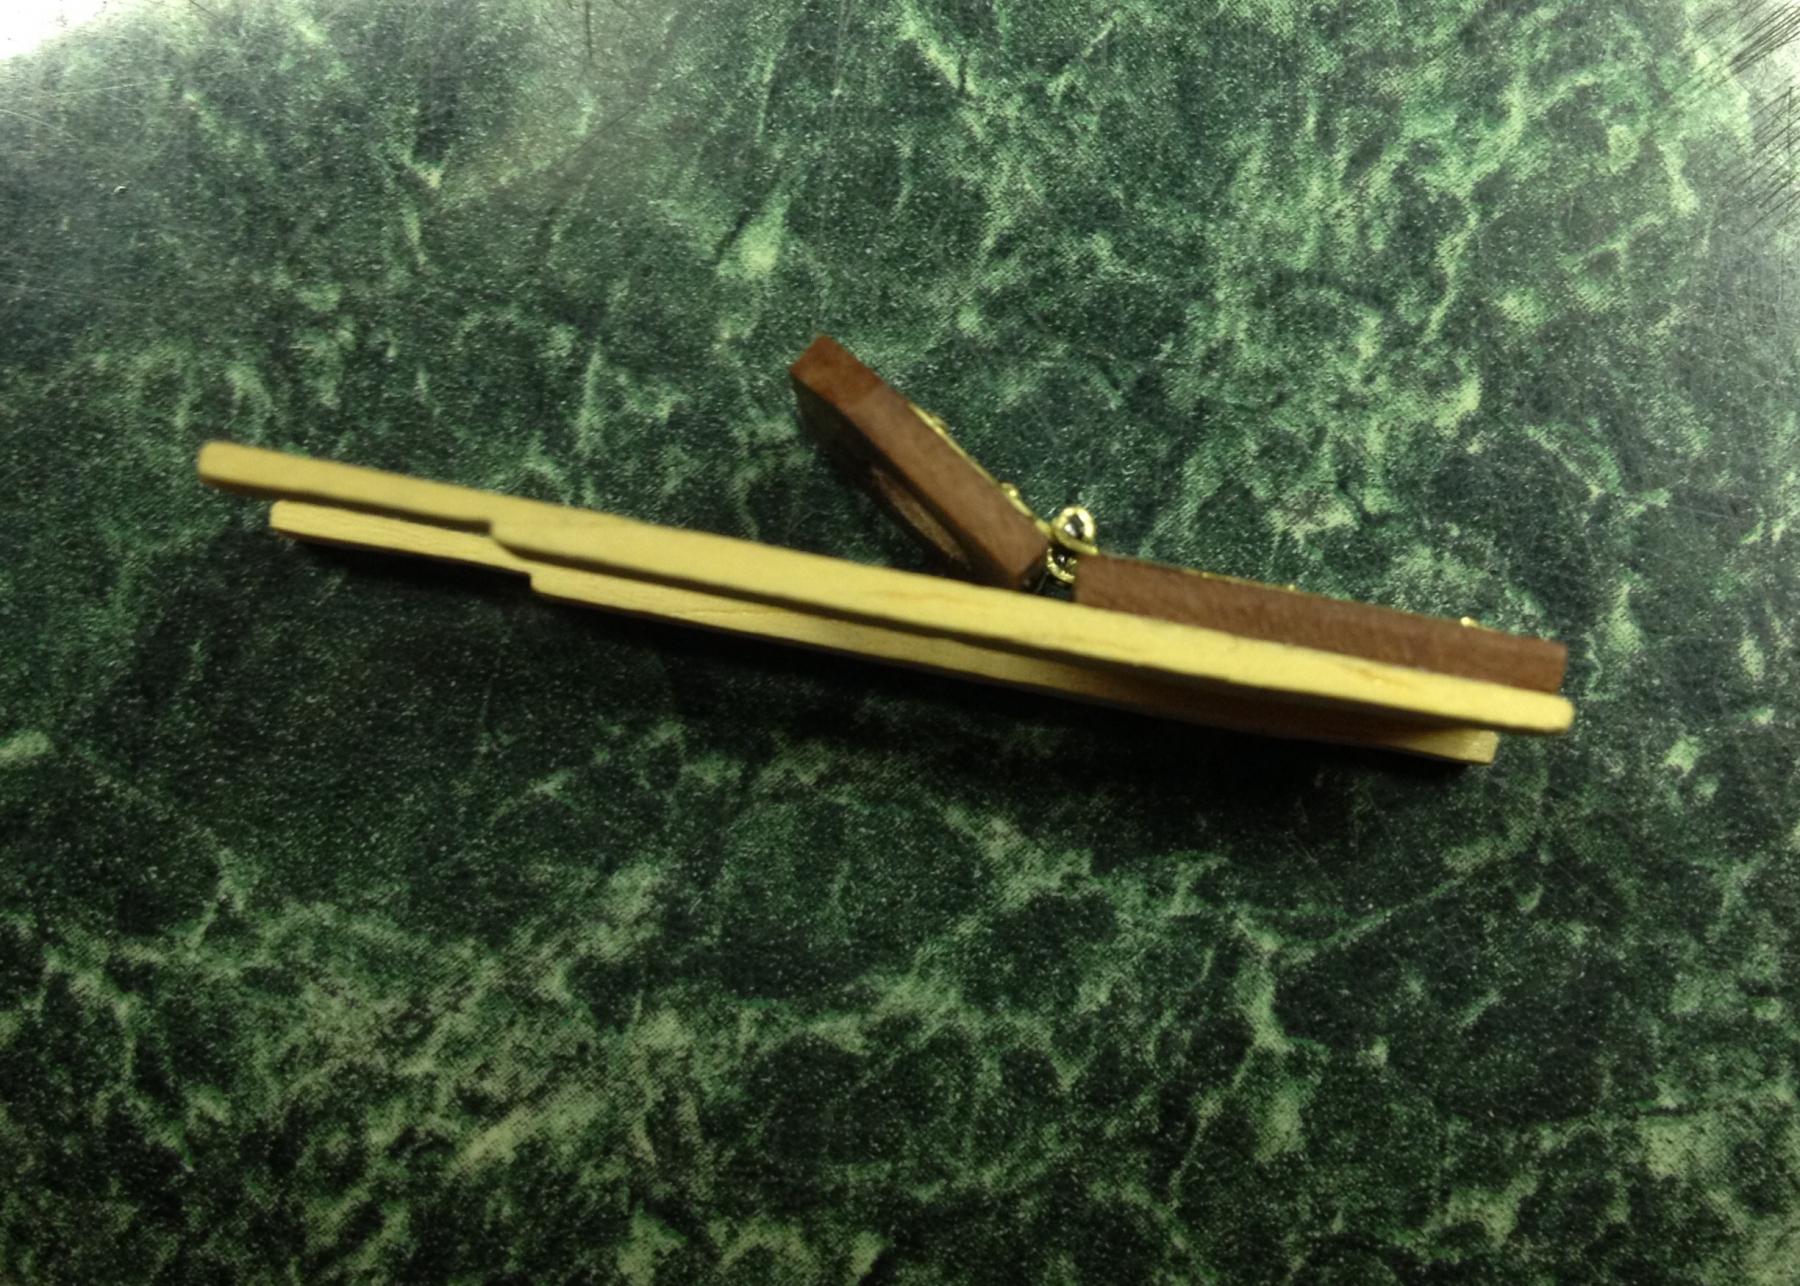
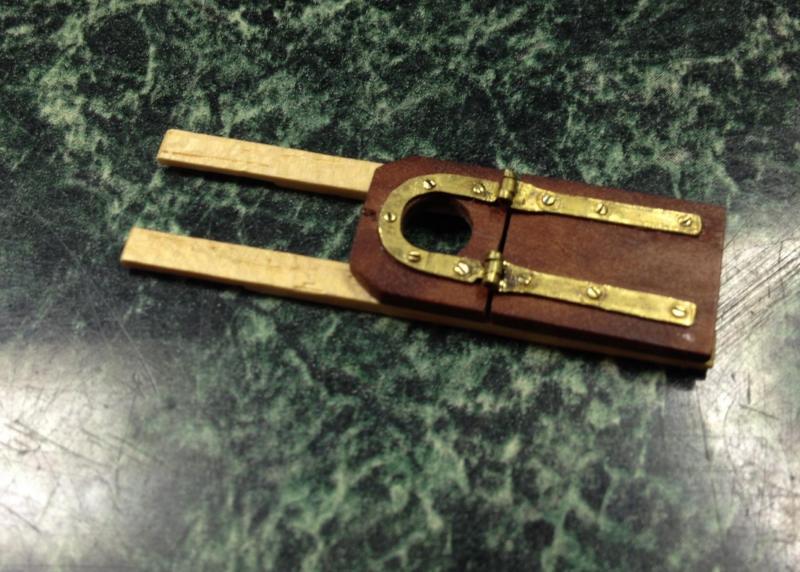
Just a quick update. I finally got the new mast hinge assembly built and just need to finish the parallel boards with some garnet shellac to match the thwarts. The boards are notched at the front ends and beveled at the back and combines ideas from Scoot's 1st and 3rd pics.

- 515 replies
-
- 13
-
-
- artesania latina
- whaleboat
- (and 1 more)
-
Happy Birthday Jesse! Wishing you the best! I'm definitely going to try your CA/solder trick.
- 1,306 replies
-
- 8
-
-
- syren
- model shipways
- (and 1 more)
-
Really nice work! The photos are really nice too. It's almost like standing in the real ship!
-
In Praise Of Lacquer
Salty Sea Dog replied to Julie Mo's topic in Painting, finishing and weathering products and techniques
Besides the sleek yachts, other craft like traditional Dutch boeirs and zeechouws, motor launches and many coastal wooden small craft with a spar varnish finishes will have a high gloss finish. I do respect that historic warships would not look correct with a gloss finish though. For the ones that do need a gloss though, shellac and lacquer are a great choice. As a side note, if you ever have to repair a lacquer sunburst finish Julie Mo, blonde shellac with alcohol based stain in an airbrush works wonders. You can easily have a do-over using an alcohol soaked rag and when it's just right, seal it with a lacquer top coat. Best wishes -
NICE!! Is that more of your tiny drilled holes to simulate trenails? What size is that bit?
-
In Praise Of Lacquer
Salty Sea Dog replied to Julie Mo's topic in Painting, finishing and weathering products and techniques
Hi Julie Mo Nice looking burst on the guitar btw! Have you ever worked with shellac from flakes? No need to mask up unless you spray it, and you get a look similar to your jatoba rudder. I kind of went overboard French polishing my whaleboat, but as a luthier, you probably suffer from the same obsessions with wood finishes! -
Wow that's big! You will need a small boat trailer and a boat ramp to launch that! It looks amazing by the way. Great job!
- 213 replies
-
- 3
-
-
- la couronne
- 74 gun
- (and 2 more)
-
Great job on those blocks! I too prefer working with hand tools vs power tools. It allows me to screw up a good piece of wood at a more controlled rate!
- 1,306 replies
-
- 11
-
-
- syren
- model shipways
- (and 1 more)
-
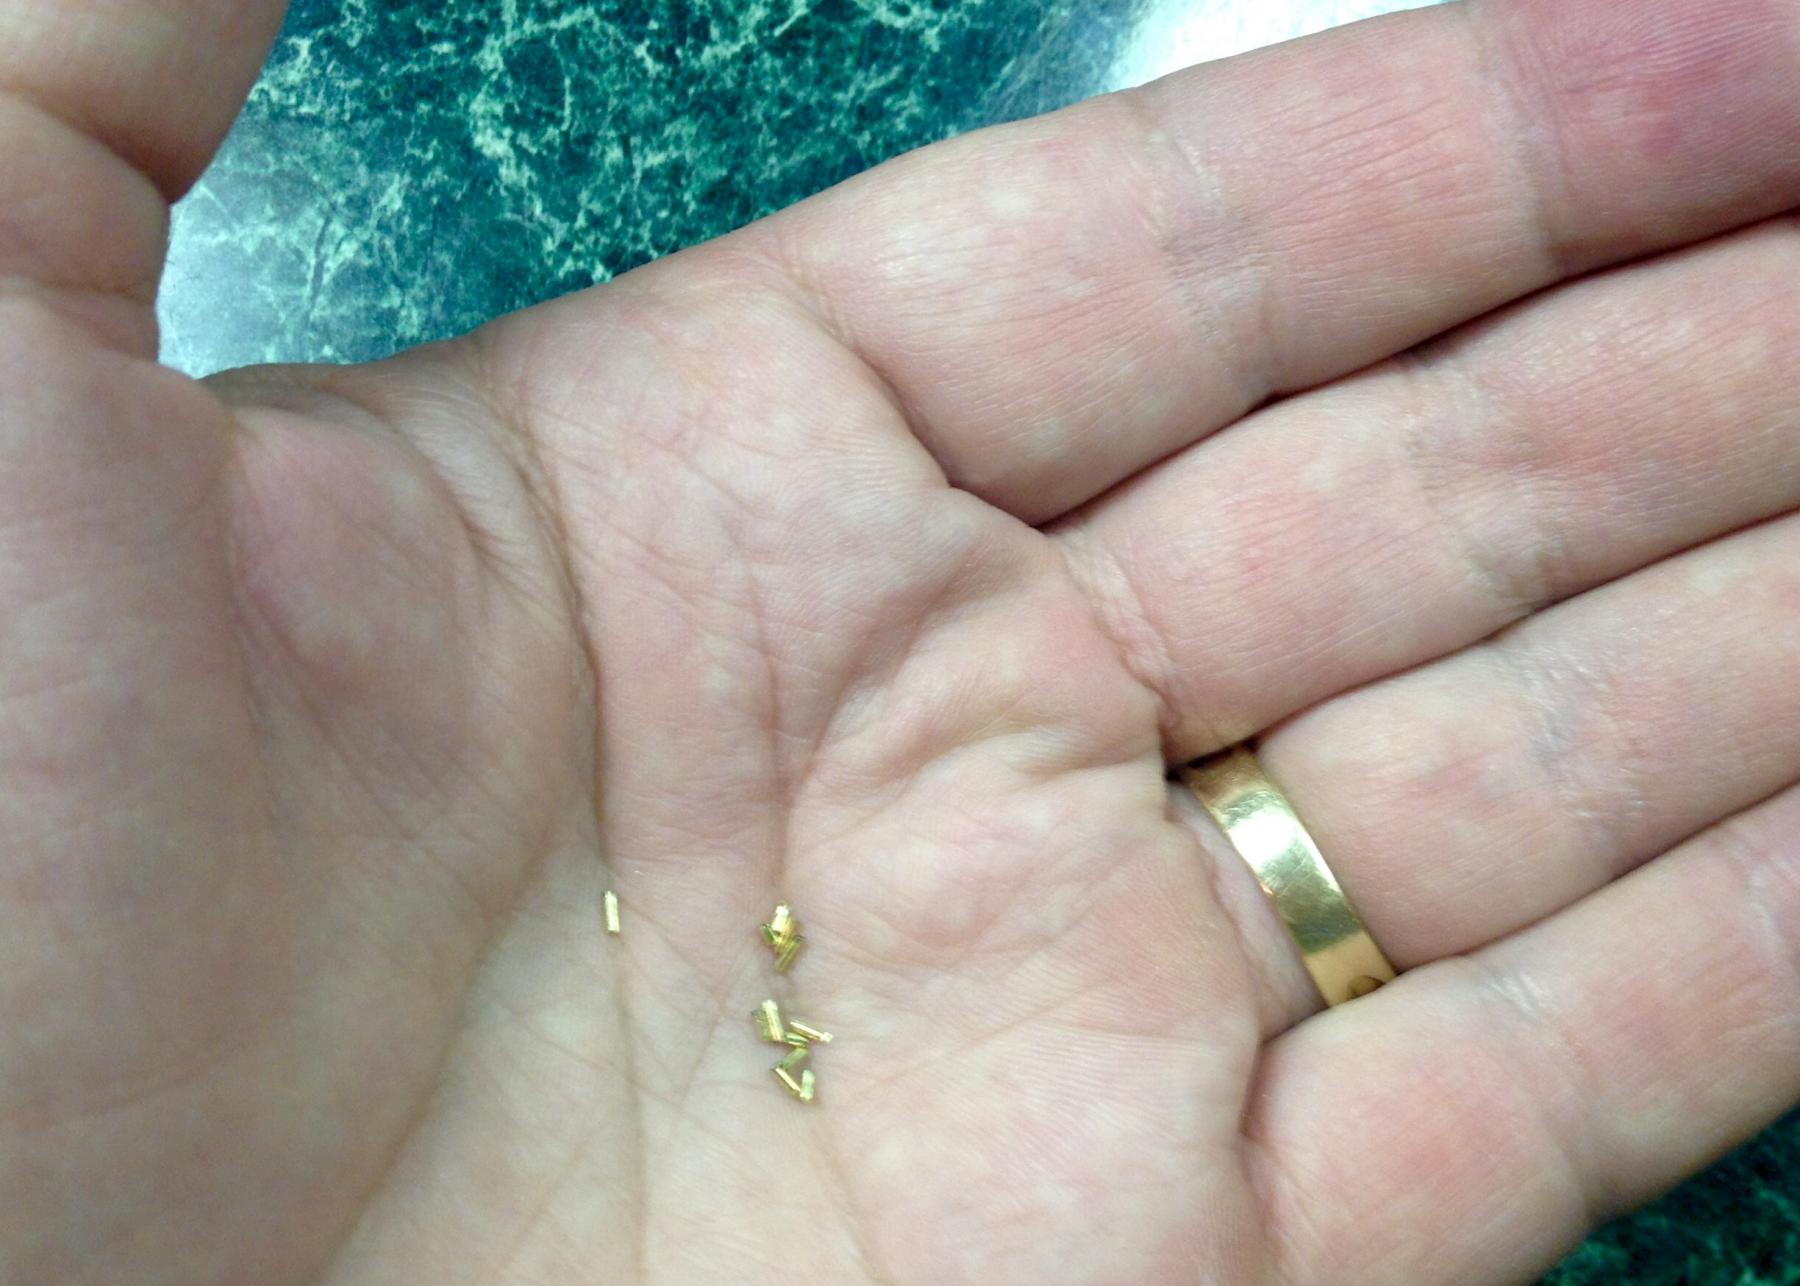
Thanks Carl! I don't know how I got started down the tiny detail trail. Hey look! I have some screws loose!

- 515 replies
-
- 10
-
-
- artesania latina
- whaleboat
- (and 1 more)
-
Thanks Mark & Carl! You probably already know this, but if you click on one of the pictures you can enlarge it with your mouse wheel on a computer or stretch it with your fingers on a smart phone. I can only focus so close with my iPhone camera so it helps to enlarge the pics. Sorry if you already know this, but happy to help if you didn't! EDIT: I forgot to mention that you have to press the control button when using the mouse wheel.
- 515 replies
-
- 5
-
-
- artesania latina
- whaleboat
- (and 1 more)
-
That narrow deck has got to be frustrating after building such amazing cannons. Could the wheels be made smaller like the ones in the 4th pic and the carriages shortened so they only extend a short ways past the cannon barrel? I know that means more work...
-
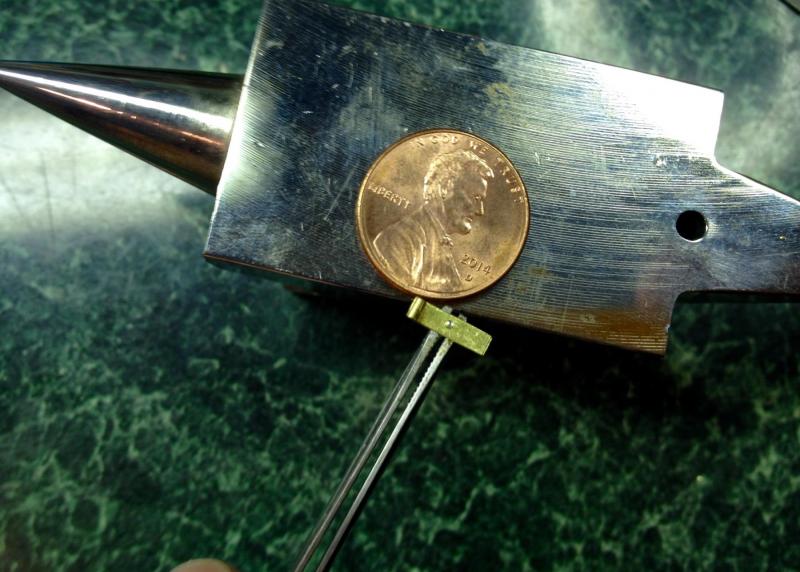
I started working on details and did a little test piece on some scrap brass. I filed a slot to make a screw head in some .032" brass rod. I scored the slot with an exacto blade and then deepened it with a .010 nut slotting file. I then smoothed and shaped the screw head with a file and used a Sharpie felt tip pen to darken the slot a little. The excess ink was filed off. I drilled a .032" hole in a scrap piece of brass and here's how the scew head looks in it. Best wishes
- 515 replies
-
- 12
-
-
- artesania latina
- whaleboat
- (and 1 more)
-
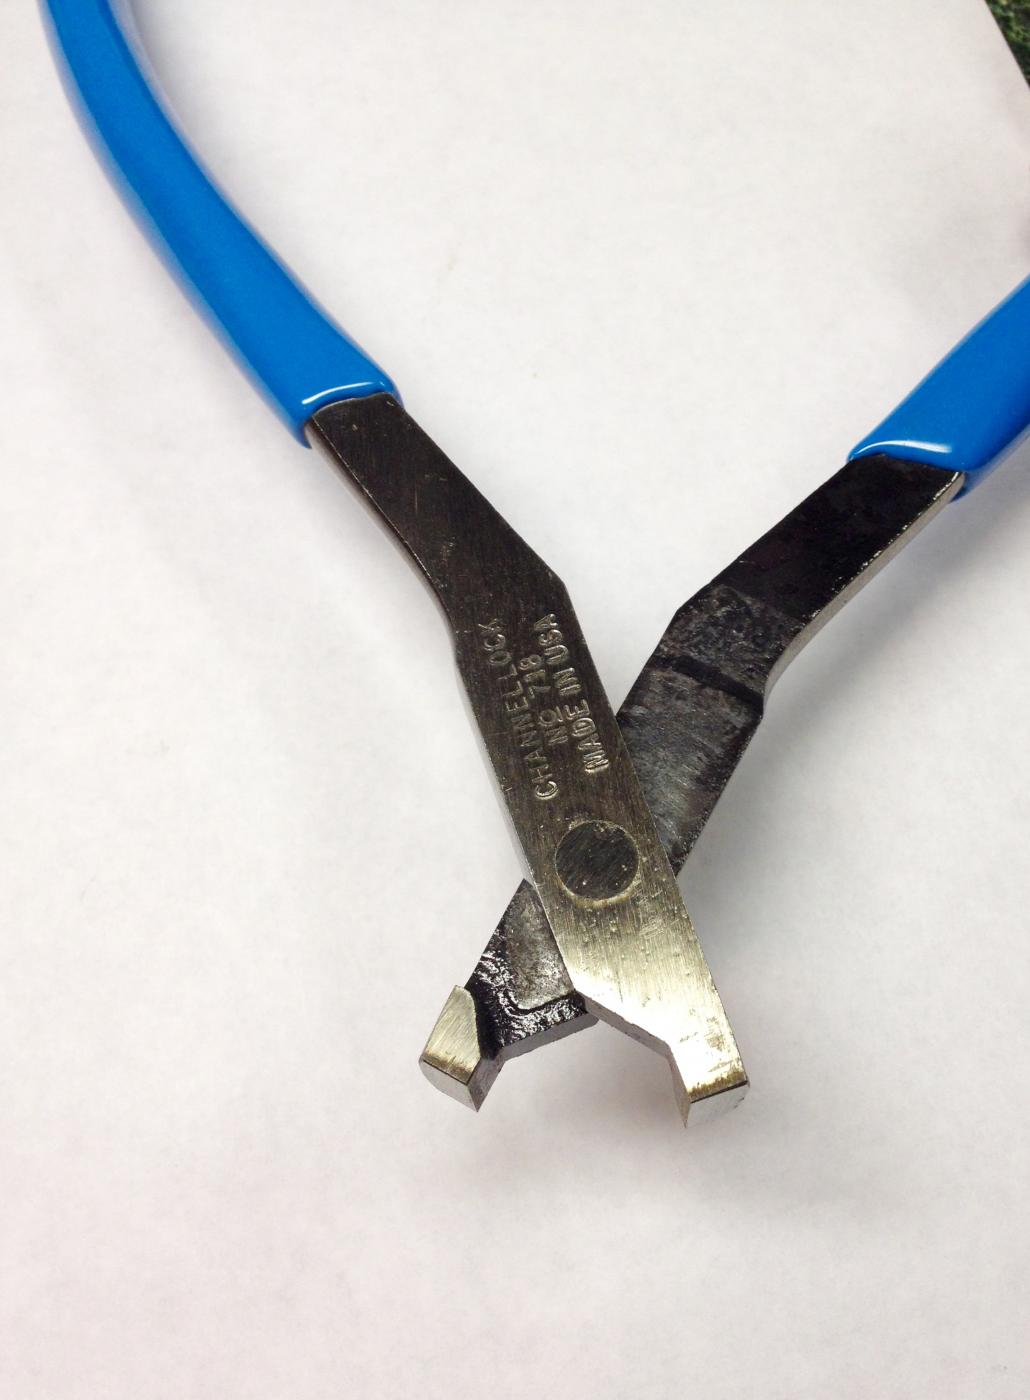
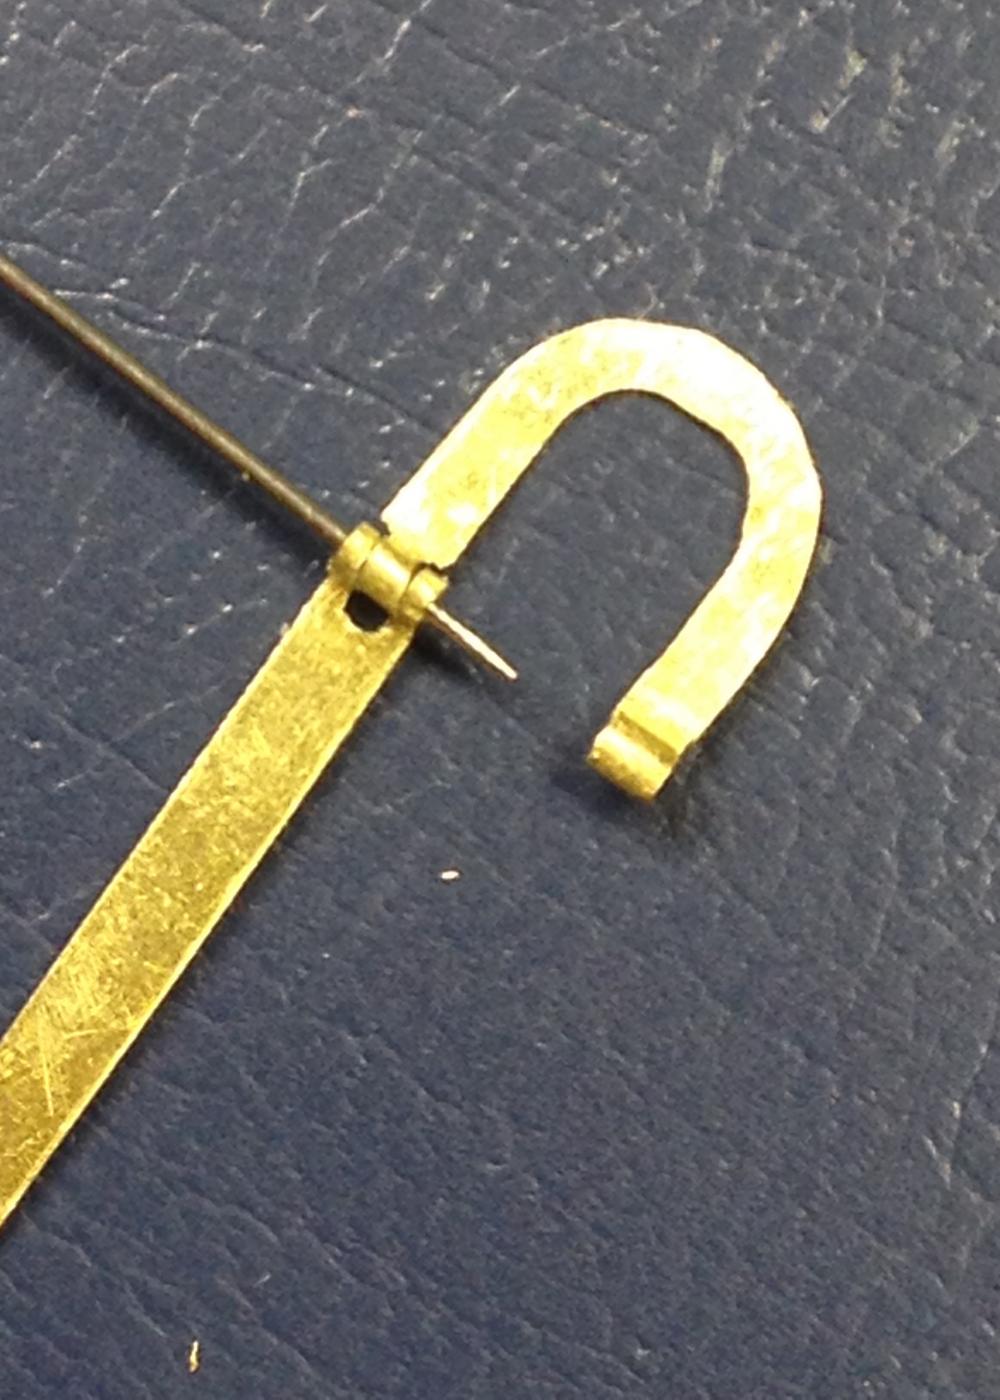
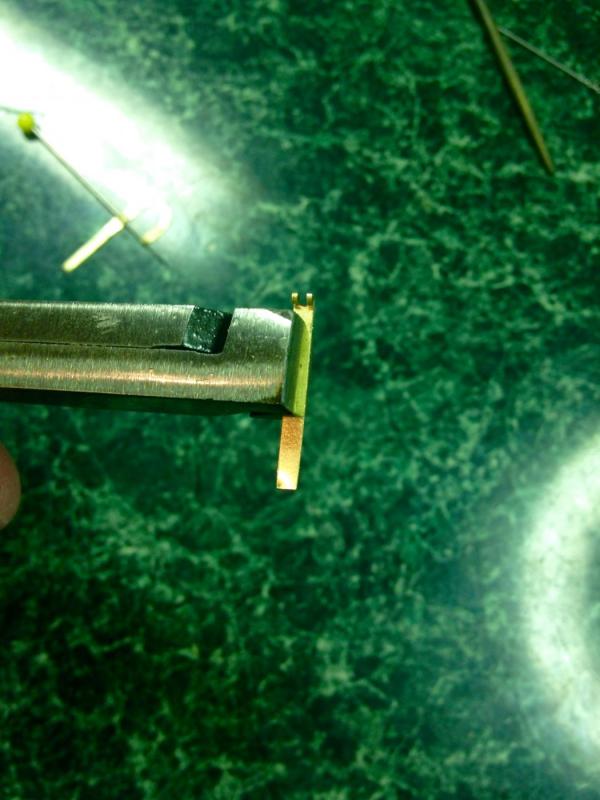
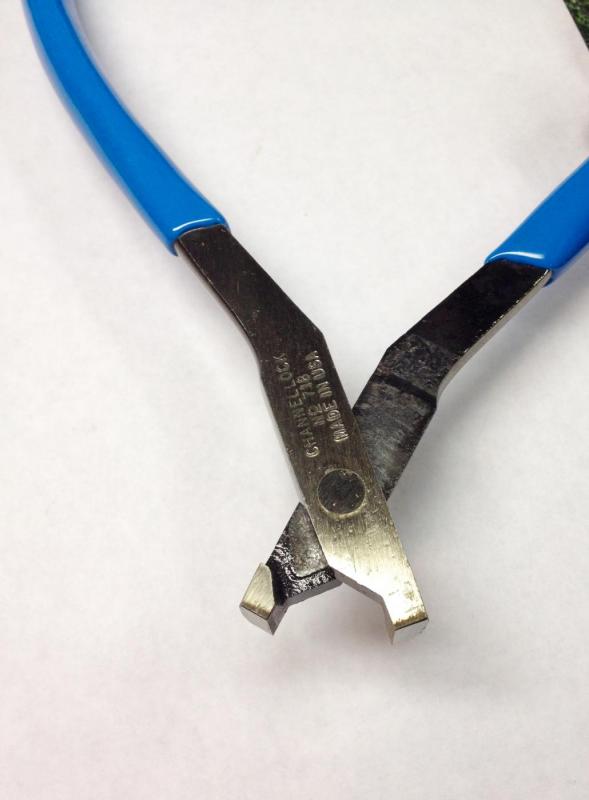
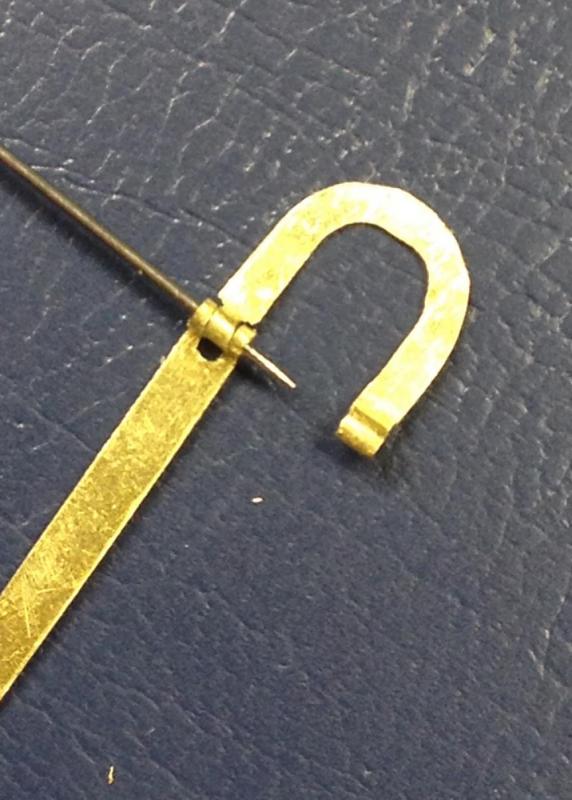
Got a little further with the hinge. After making a hinge joint, the strap halves and horseshoe shaped half were filed and shaped to be about 1/16" wide. After shaping, the straps flare out only at the hinge joint. Hanging on to the little pieces to file and shape them was done using a modified pair of Channelock 718 pliers. Here you can see the groove for the hinge joint which was done with nut slotting files. The final width of the groove is .042". Here's a better look at the pliers. They are ground down from a long nose and have smooth faces to grip with, so they don't mar the parts being gripped. It's nice to be able to simply rotate your wrist to better see what you're doing. Here's the hinge after more shaping. It's almost ready for some detailing.

- 515 replies
-
- 12
-
-
- artesania latina
- whaleboat
- (and 1 more)
-
Great pictures Scoot! I may work in something with the parallel fore and aft bracing like your 1st and 3rd pic. Looks like someone left their clipboard in the 1st pic. By the way, you win the award for the coolest whaleboat stand ever!
- 515 replies
-
- 4
-
-
- artesania latina
- whaleboat
- (and 1 more)
-
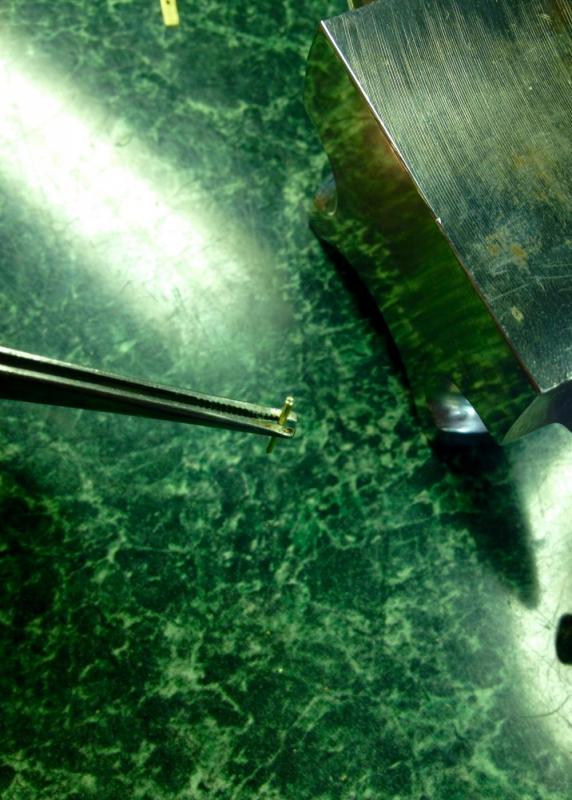
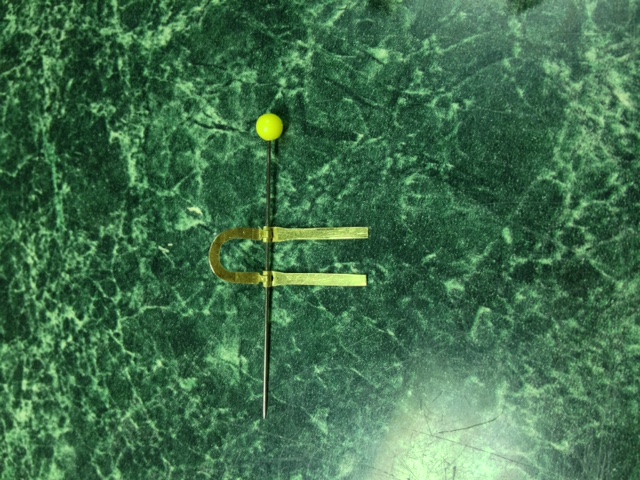
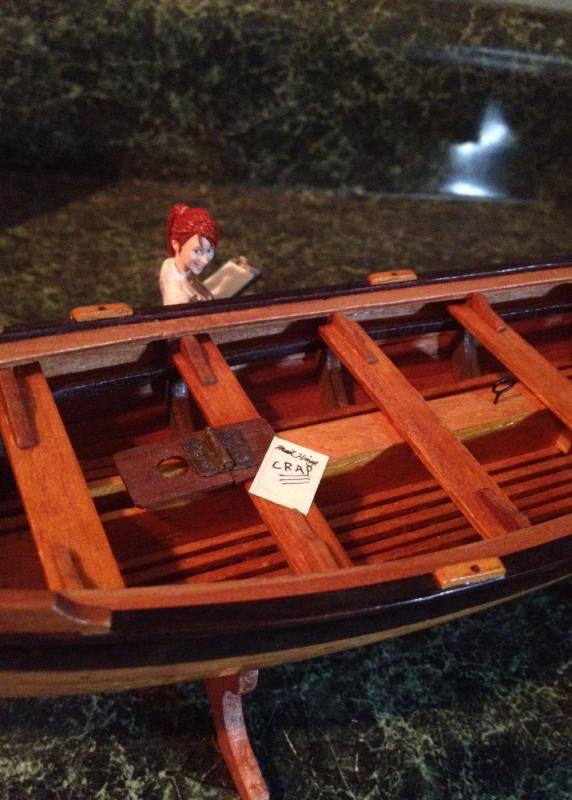
Wow - it's already August. Been away from the dry dock too long. So I go in to have a look at things the other night and am greeted by this. Just how much smirkiness does a guy have to put up with?!! Well I guess the taunting worked. So how many mast hinges will fit on the head of a pin? I still have a ways to go on this but wanted to show some progress. The new hinge is based on a proper one like those used in a New Bedford whaleboat. The assembled hinge joint is a little less than 2mm wide.
- 515 replies
-
- 14
-
-
- artesania latina
- whaleboat
- (and 1 more)
-
It looks pretty symmetrical in the pics but I'm especially impressed with the crispness and fit of all the pieces! Great job Bug!
- 2,191 replies
-
- 8
-
-
- confederacy
- Model Shipways
- (and 1 more)
-
Oh boy! The turrets on the La Couronne are my favorite part!
- 608 replies
-
- 4
-
-
- la couronne
- corel
- (and 1 more)