EJ_L
-
Posts
2,246 -
Joined
-
Last visited
Content Type
Profiles
Forums
Gallery
Events
Everything posted by EJ_L
-
Welcome back to MSW! Hopefully this time around you will be able to fully enjoy the hobby. Best of luck to you on your build of the Bounty. I would recommend checking some of the great build logs of her on here for some ideas and guidance and then start up your own log so we can follow along and be there when you need help. Again, I wish you good luck and I look forward to seeing your build!
-
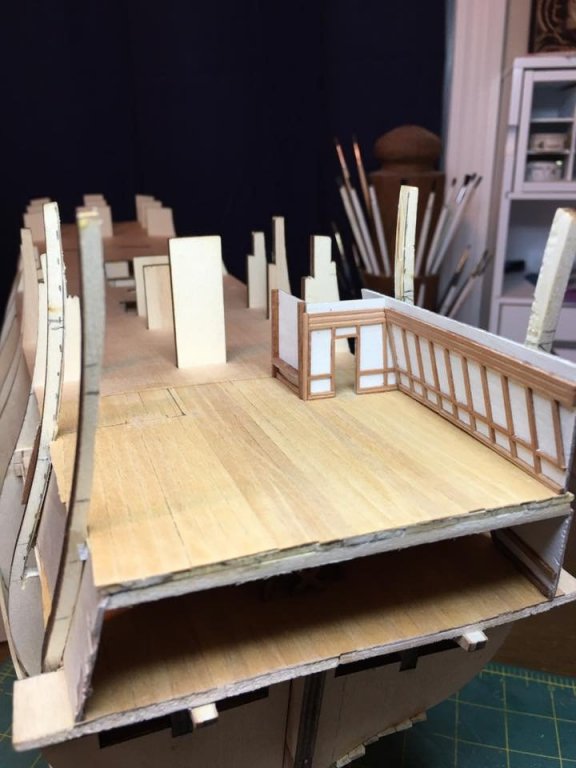
 Back to work on S.R. this weekend and I have started to build the Admiral's Cabin. Obviously this one will be fancier than the Great Cabin and therefore a lot more wood work will be installed. I am hoping to build in some actual furniture such as tables, chairs, a bed and possibly some cabinets. There will of course be another LED lantern to illuminate the interior so all this fancy work doesn't go to waste. Surprisingly, I have found myself really enjoying building these interiors. a large part of that is I think due to the freestyle nature of it. Other than the layout of the bulkheads, there is not much to tell me what kinds of decorations or furnishings would have been in her or where. So, as long as I can keep things looking like they would belong in the early 17th century and are things that would be found on a ship, I can pretty much let my imagination run free. After spending so many hours checking, double checking and repeating those checks again and again while rigging Couronne, this freedom of building is rather refreshing. More to come as I have just gotten started so enjoy the update and I will have more in the near future!
- 961 replies
-
- 11
-

-
Welcome to MSW Adam! Good to have you with us. Anja gave you a great link for the tools and ideas for starting kits. Only things I would add is first with tools, start simple. Buy what you need as you need it and the blow to the wallet won't be as painful. As for ships to start with, stay simple for the first one. Even if it looks like it may be too easy, (solid hull for example) there are going to be challenges that you have not experienced before. Bending wood for planking, shaping the hull, having to build almost all the parts out of rough lumber and of course the rigging are things that most people have not had to do or only at a minimum coming from the plastic side. I speak from experience! In fact, my first wooden ship was the Rattlesnake. I had built plastic ships before but I quickly found out I was not fully prepared for wood ships and should have started smaller. The other thing I tell everyone is to find a ship that speaks to you and peaks your interest. Read up a little on different ships that you find kits for and see if one has a history that catches your attention. Sometimes if the ship has a story that you find fascinating it can help motivate you to build her better and push through those tougher spots. No matter what ship you decide upon we will be here ready and willing to give advice, guidance or just friendly support. Good luck to you and I look forward to seeing what you decide on!
-
Thanks Ken! To answer your question simply, yes, no and lots of guess work! Actually for the outer hull I followed the pattern from the instructions and picture on the box for the most part. The only major change to the pattern is that the kit wanted me to have a golden colored band of planking at the uppermost section at the poop deck. I did not think that would look good and so I replaced that with more blue. Fortunately the kit provided me with plenty of dyed wood so I had extra without having to try to match new paint. (Now I also have a bundle of dyed gold/yellow wood planking for some future project) The lower hull was called to be mahogany planked which I did but, I did not use the wood provided. I purchased new mahogany from Crown Timberyard as the kit wood was not the best in terms of straight cuts and would not have made as nice of planking job. I did use the kit wood for smaller areas such as the turrets and quarter galleys as well as decorations and trim. The walnut wood for the wales and other trim pieces was kit provided and called for. The interior planking is also a combination of woods. The decking was kit provided but the bulkheads I replaced with Pear, (also from Crown). The actual decorations and layout were vague at best on the instructions and even looking at other models revealed no two builds the same in terms of layout and extent of decorations and wood used. Therefore everything inside the ship is mostly my imagination inspired by other builds. I am actually in the process of choosing what I want to use for my S.R. build right now. I'm trying to determine if the kit wood will be fine or if I want to replace it and what color combination will work. After working with the mahogany I got from Crown Timberyard, I am tempted to use it again for S.R. as it has turned out beautiful in my opinion and looks good next to the blue which I will need a lot of for S.R..
- 608 replies
-
- 4
-
-
- la couronne
- corel
- (and 1 more)
-
Anton, great work so far on your ship! I like to that you are taking the time to research and get to know your ship's history. I always find that the more I know about a ship the more I care about how I present her which drives me to do a better job. I will be sure to follow along as I am looking forward to seeing how she progresses. I too have recently watched that movie and found it very well done and really interesting.
- 322 replies
-
- 5
-
-
- sergal
- sovereign of the seas
- (and 5 more)
-
Thank you very much. I am fortunate to have a lot of free time right now which has helped with the building speed although it has still taken a long time. Just the rigging for the stays on the mizzenmast mast took me 8 hours this week! I can usually work in 2-3 hours of build time a night. I only have a few months left of that and then the Admiral finishes her masters program and will be home more in the evenings. While I know it will reduce my build time it will be nice to have her back home more as I have not seen her much in the past 2 years. In all reality, it would benefit me to slow down a little more. There have been many things on this build that had I done so I could have made look even better. Hopefully that lesson will sink in sometime soon! 😜
- 608 replies
-
- 4
-
-
- la couronne
- corel
- (and 1 more)
-
I just finished reading through your log to date and indeed off to a good start. Planning and thinking ahead is always important. Take your time when you fair those frames as it will make a huge difference when you plank. Looking forward to seeing more as you progress.
-
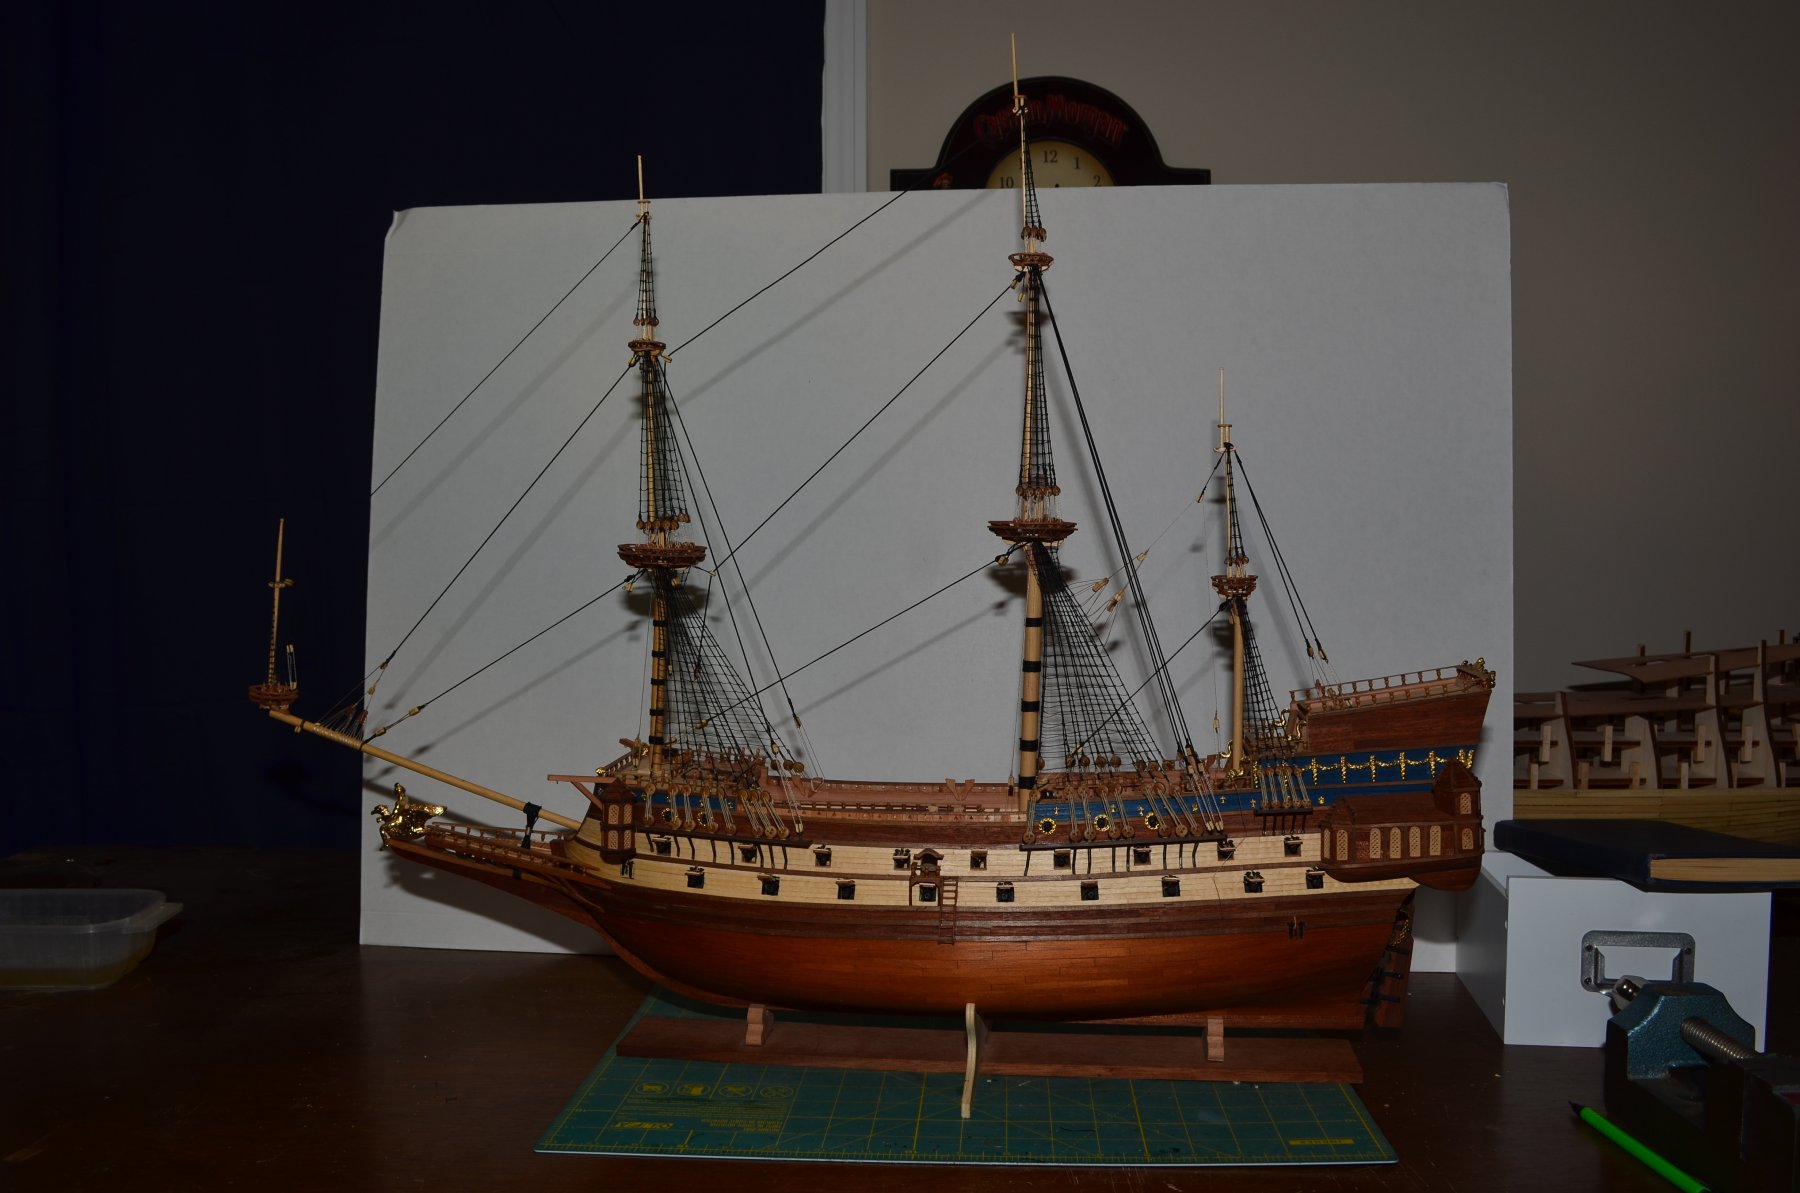
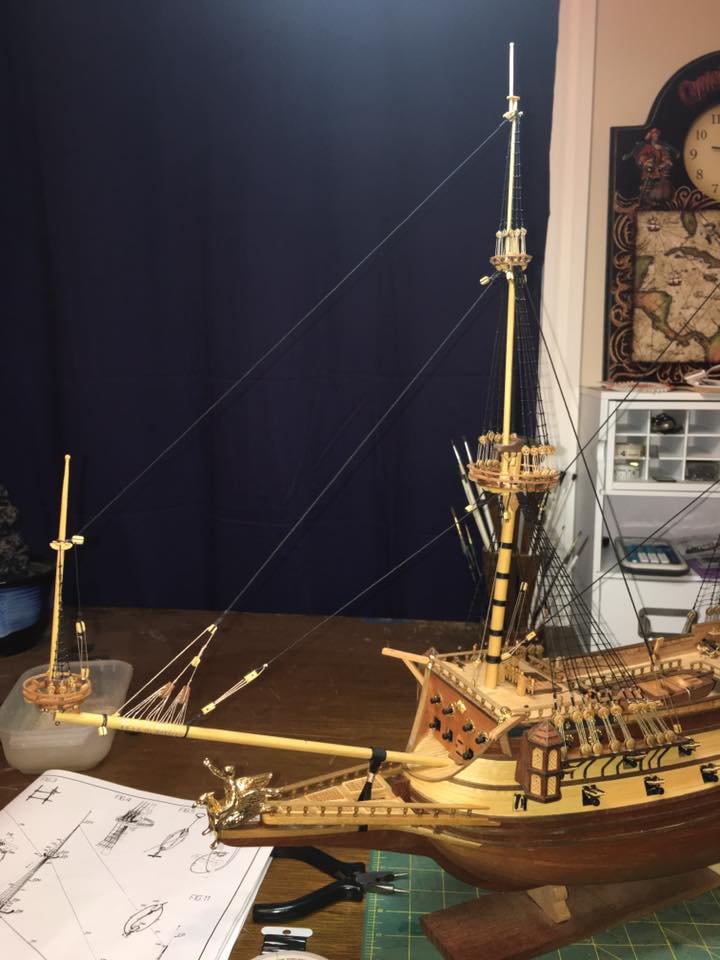
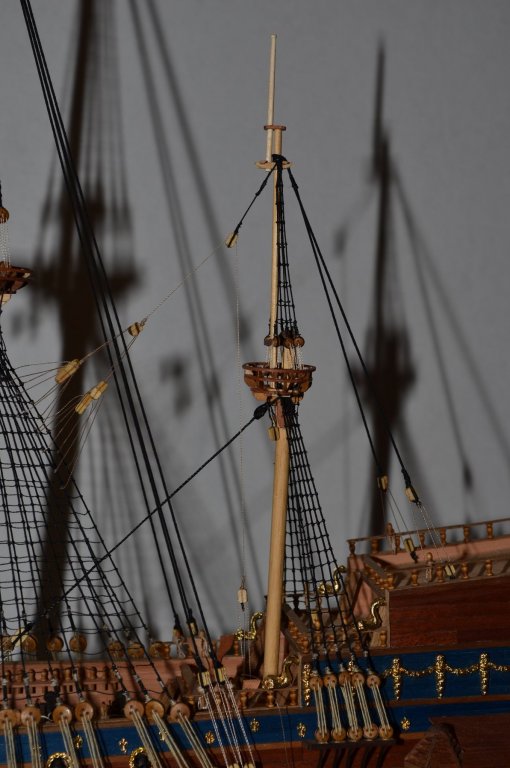
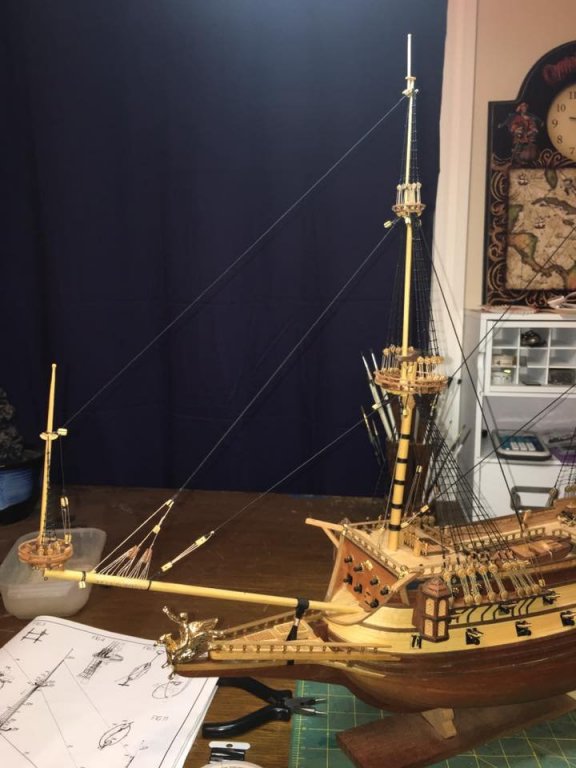
Here she is fully masted with all of her stays and shrouds in place! Another big milestone was just completed and I am excited! Next up I start building the yards. It is hard to believe that I have come this far with her and that the end is in sight. Still have a bunch of tricky work to do so can't celebrate too much but, maybe a drink or two... I did find a solution to the tension line for the mizzen fore stays. One of the versions of the crows feet rig in Anderson's book showed an additional block with a line that was placed in between the top block of the crows foot and the actual stay. This line lead down to another block on deck that could be used to tighten the rig. While Anderson has it listed as a late 17th century development, the rigging pattern of the crows foot best matched the one on my rigging sheets. Also as Anderson's books typically specialized in English rigging and this was a french ship I took the liberty of giving the French the benefit of the doubt that they made this modification before the English.

- 608 replies
-
- 14
-
-
- la couronne
- corel
- (and 1 more)
-
Whichever set or combination of books, instructions, blogs and imagination you are using to guide you, the results are fantastic!
- 291 replies
-
- 2
-
-
- bounty
- billing boats
- (and 1 more)
-
San Martin by augustus
EJ_L replied to augustus's topic in - Build logs for subjects built 1501 - 1750
Excellent job cutting out all of those dead eyes! That takes a lot of time and effort but it has paid off as they look great! -
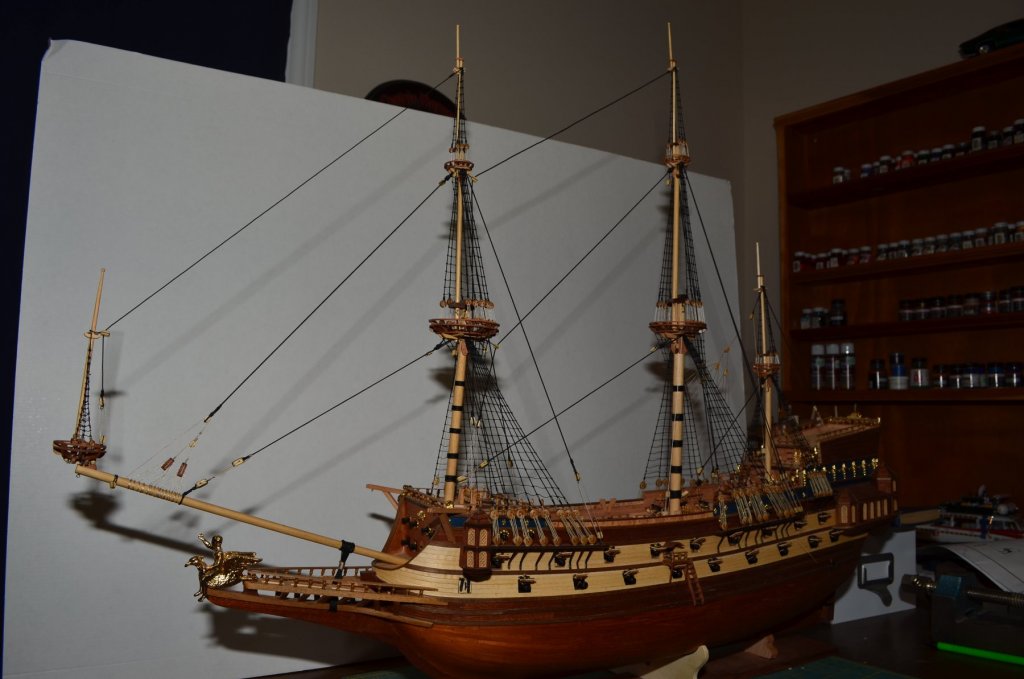
Quick update although these pics are a few days old now as I am further along. All the masts are now at full height and the stays are complete on the main mast. Mizzen mast only has the shrouds and ratlines rigged at the moment. The fore stays on the mizzen top are a crazy rigging of crows feet that extend out to both aft edges of the main mast lower shrouds. I know how to rig them but, I do not yet know how the crew would have applied tension to them. I have not yet found any leading line that could be hauled in to tension the lines. I suppose it could be done out on the ends of the crows feet where they attach to the shrouds but that does not jive with the way the other crows feet are rigged. To me these would be dead ends and not where adjustments would be made. I'm gonna do some more reading and see if I can find that aha! moment. These pictures do not show the mizzen mast work but you can enjoy the rest of the model.
- 608 replies
-
- 11
-
-
- la couronne
- corel
- (and 1 more)
-
Cockpit looks good Andrew. Many ships have a lot of tight spaces so I wouldn't worry to much about that. I would however avoid hitting that switch as much as possible...
- 74 replies
-
- 2
-
-
- Marine Model Company
- Joe Lane
- (and 2 more)
-
You could almost dock yours in a harbor! As for the ties on the deadeyes I have seen arguments for both. As they are adjustable for the shroud tension they would probably be more natural as they would not be covered in tar but, due to their close proximity to the stays and shrouds which are covered, they would probably be blackened due to rub off. I do not know if there is a completely right or wrong answer to that question....
- 608 replies
-
- 2
-
-
- la couronne
- corel
- (and 1 more)
-
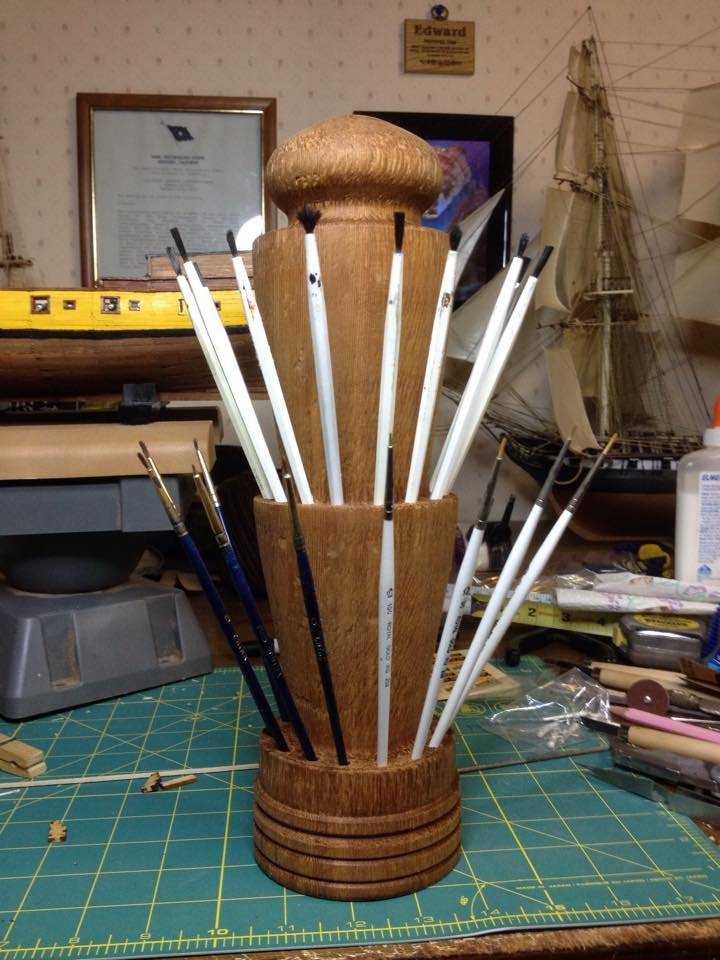
To me what makes the size even more impressive is that it is such a small scale at 1:100! While I would love to build one of these at a 1:48 scale or even large at a 1:10, I think I would need to add another bay onto my garage to house her when done!
- 608 replies
-
- 2
-
-
- la couronne
- corel
- (and 1 more)
-
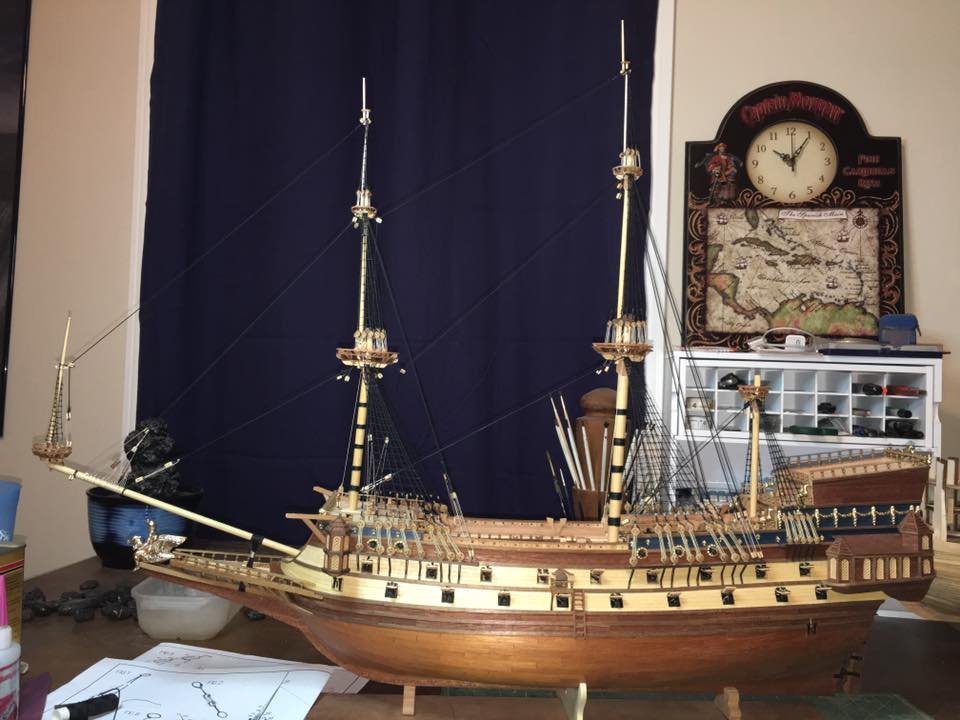
They are 17th century cruise missiles. No, they are paint brushes in their holder. I will take a better photo later of the ship. Here is the brush holder that is causing the illusion.

- 608 replies
-
- 6
-
-
- la couronne
- corel
- (and 1 more)
-
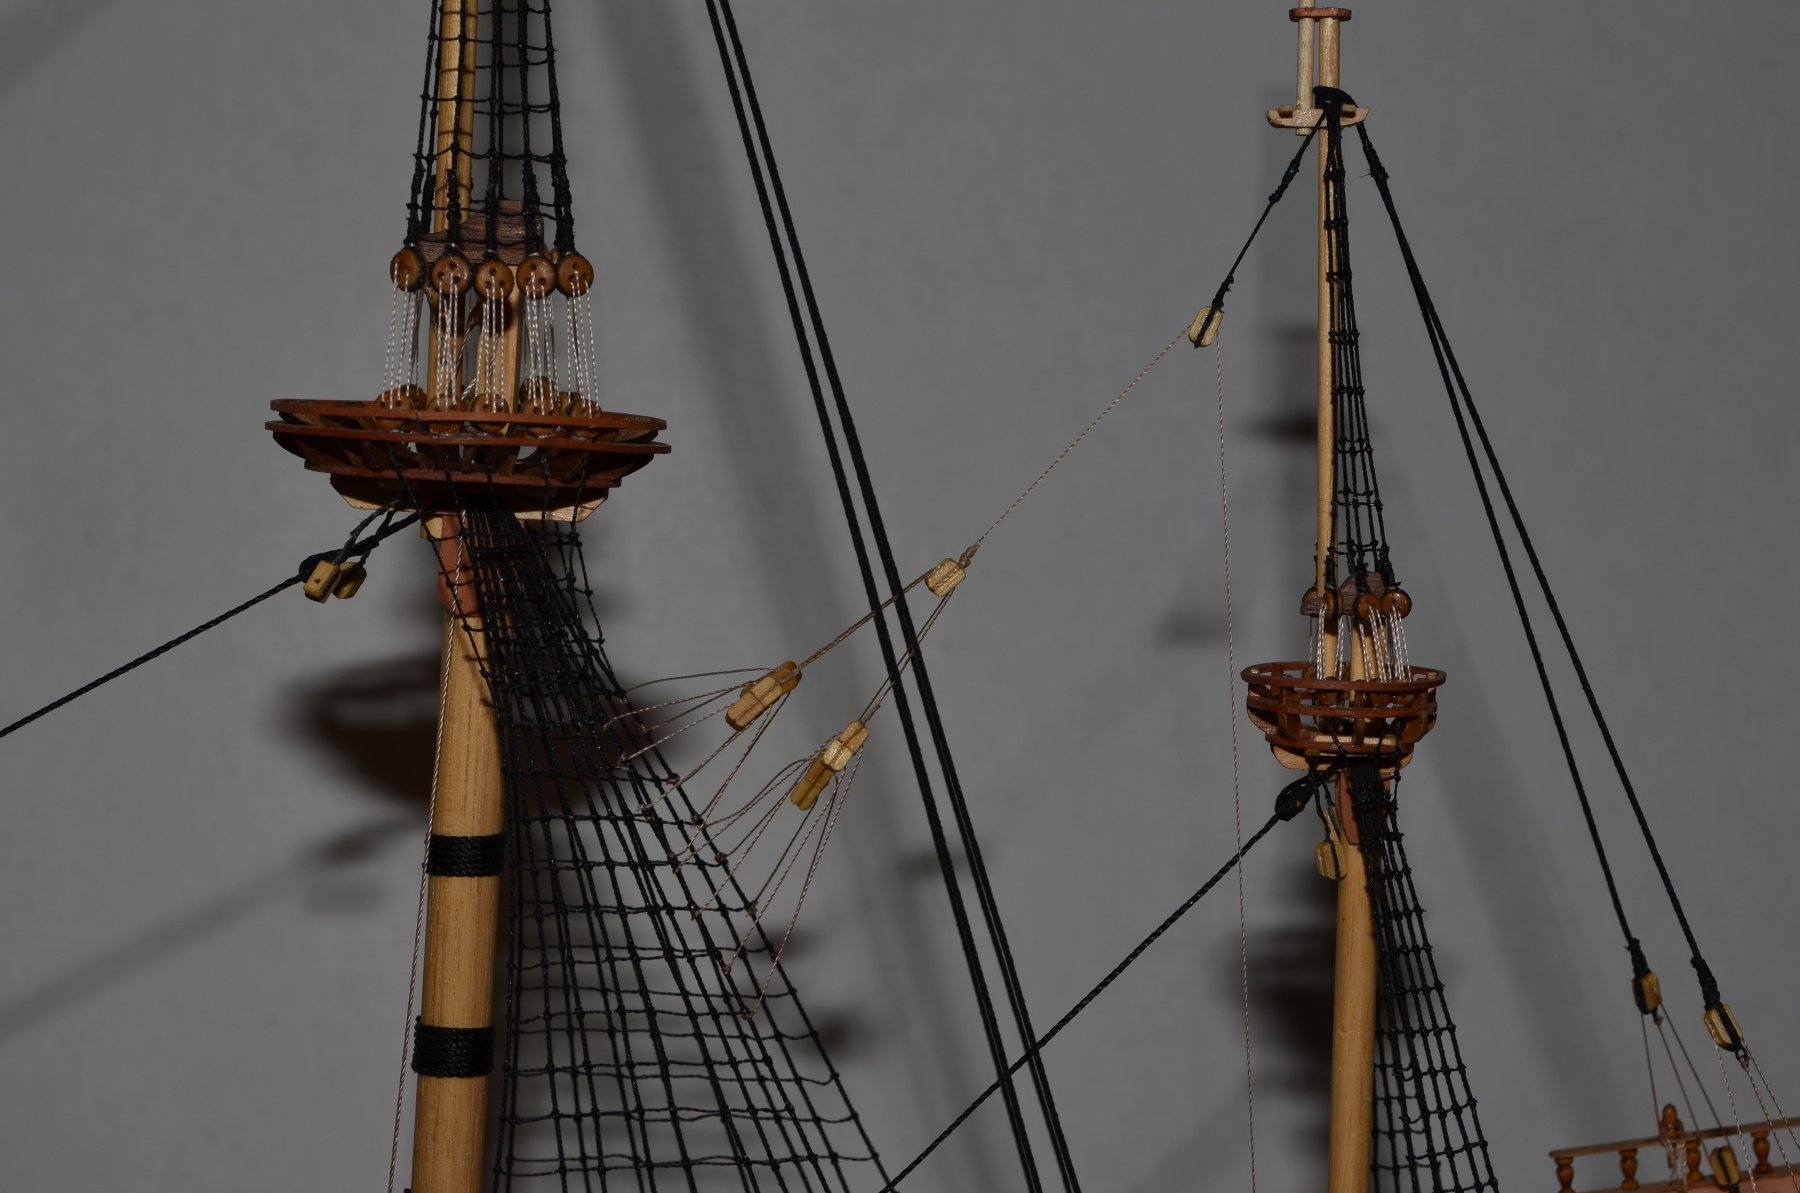
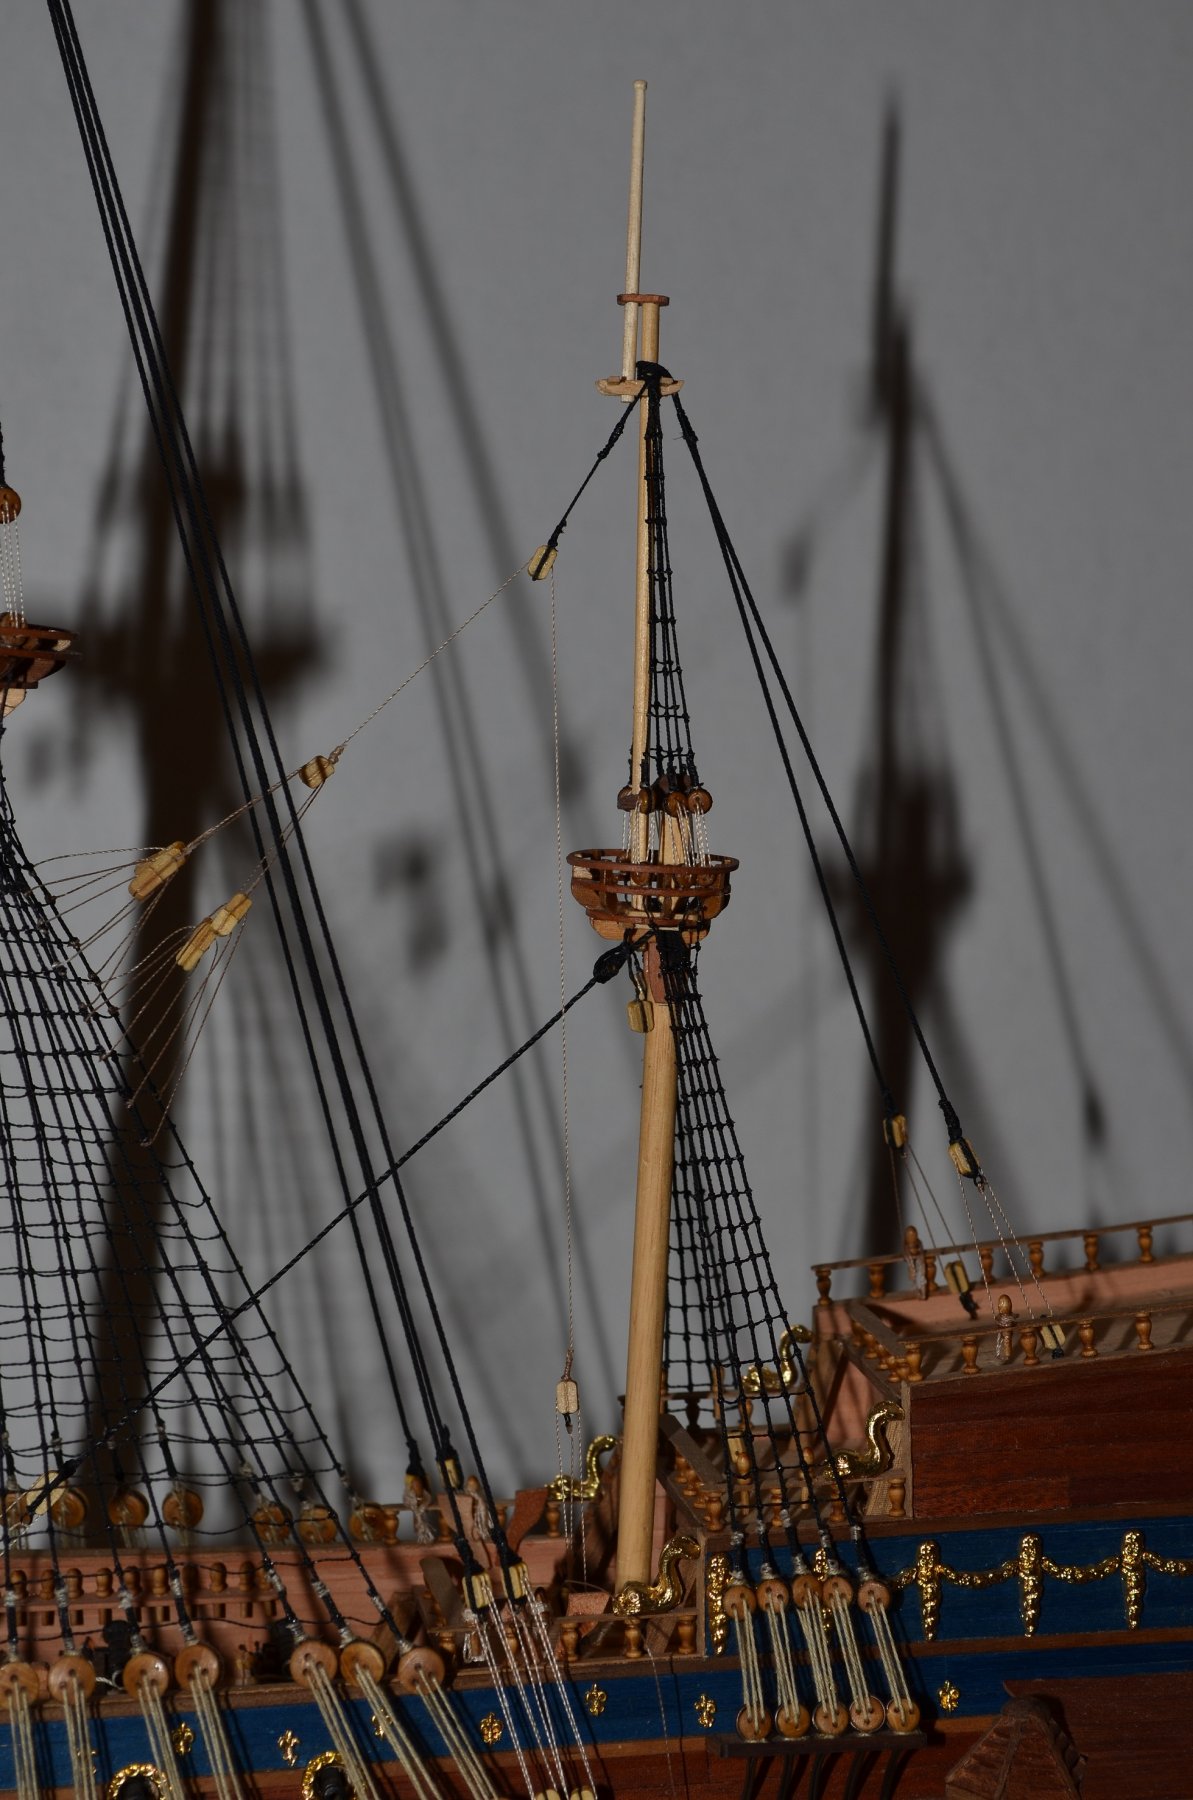
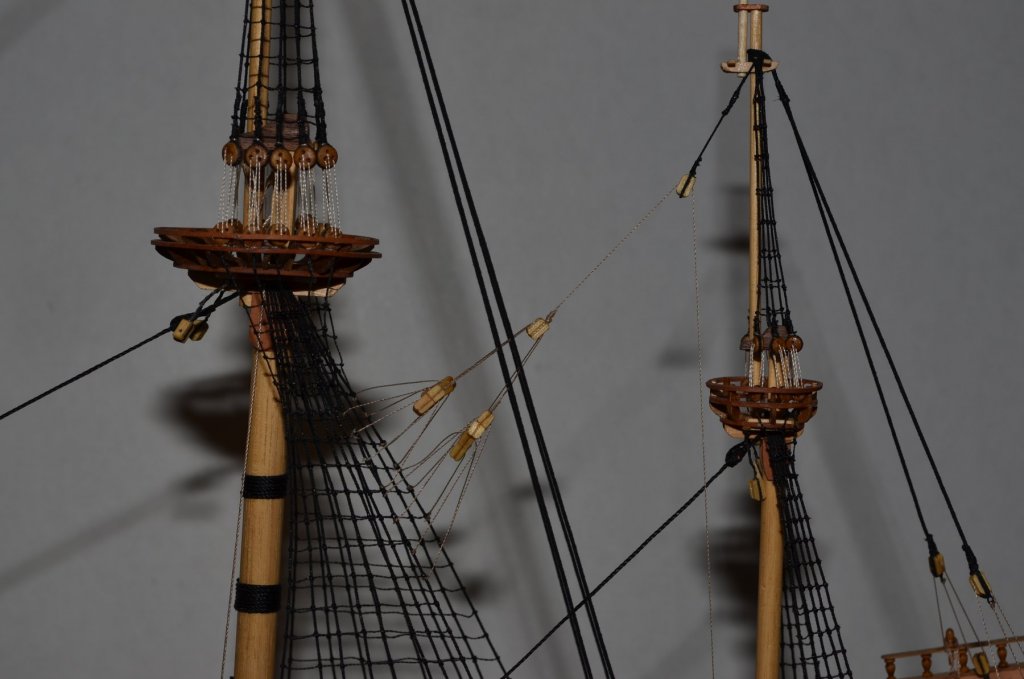
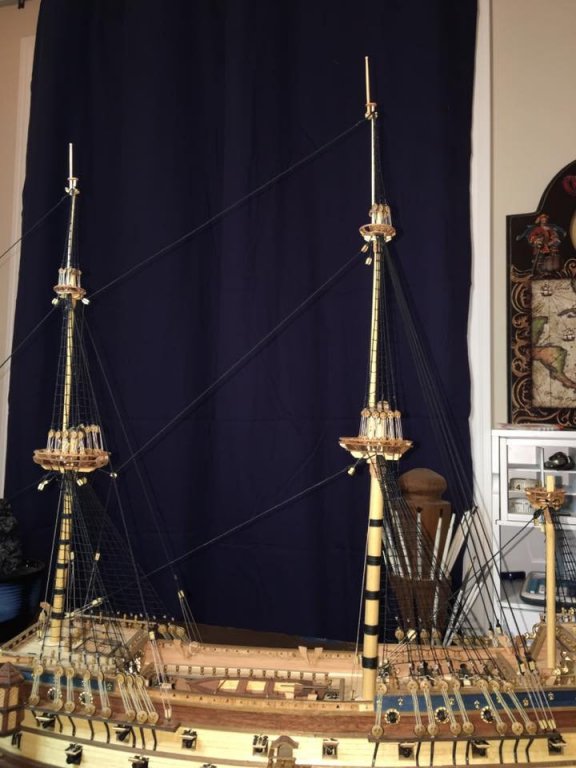
Had a few productive evenings and topped out the fore mast along with stays and shrouds. With the top gallant in place the fore mast is ready for yards. Next I get to repeat this process for the main mast top gallant and then the mizzen top mast. Fortunately these masts are rather simple and the rigging is minimal at this level so they are going relatively fast. I plan on topping out all three masts before switching back to S.R. so more updates soon!! I will also take some better pictures on the next update. Didn't really see that it was kind of fuzzy until I posted. Eyes are getting tired though I cannot imagine why....
- 608 replies
-
- 13
-
-
- la couronne
- corel
- (and 1 more)
-
Welcome to MSW Hal! Good to have you with us. I look forward to seeing your work.
-
la Couronne by francisb - Corel
EJ_L replied to francisb's topic in - Kit build logs for subjects built from 1501 - 1750
You are doing a great job! She is looking very nice and well built. Asfar as sticking to the kit design, there is nothing wrong with that. You will still have yourself a very nice model and can still be proud of your work. As as to the placement of pintails, channels, chain plates, shrouds and rigging, no, the locations did not always make sense at least to us with a more knowledgeable perspective. However, during the early 17th century, large ship construction, especially for war ships, was still in its infancy. It would be another century before they really figure out the science behind it and begin to perfect the designs. At this particular time it is mostly guess work and trial and error. Emphasis on the error. We now have the advantage of looking at successful designs such as the Victory and Constitution but they were just building off what experience and knowledge that particular ship builder had. The mathematics were not yet formulated and there was no way to test out a design until it was built at which point you hoped it worked! I have questioned many things about the design of the ship. So far what I have learned is that many things don't make sense. To make matters worse, there is very little historical information about her and the way she looked seems to vary greatly probably due in large part to refurbishing as her career went on. Dates and records have been lost to time. Do do the best you can and ask questions. I can tell you what I have done so far. As to dimensions, most of mine I have taken from the 1:1 scale drawing that came with the kit. Then tweeked as needed! 😀 -
Welcome to MSW! I share your weather as I'm just North of you in Kansas. In fact, we are having a good thunderstorm as I type this. It's good to have you with us and I wish you all the best on your future builds. There is a lot that can be learned here from some great modelers.
-
The window framing, hatching and casework I will make out of wood piece by piece. Slow, meticulous and a pain in the rear but that is simply model building. As for all the decorative pieces in between the windows, I do not know. The ones provided were cast in metal and as with most kit fittings, they are not the greatest so even my modest carving abilities should be able to produce something at least on par with what I had. I am considering making molds to cast my own resin pieces but with the scale being what it is, I do not think I could really make a mold that would hold good detail. Unless a better idea comes to me, I plan on just carving my own pieces to the best I can. Haha! Yeah Michael you are right I do stay fairly busy. I enjoy way to many things that there is just simply not enough time for all of them! It is a blessing and a curse as I get to enjoy many things and am rarely bored but I have to prioritize and let go of many areas of interest for the sake of sanity! These last two years have really allowed me a lot of free time for models with the Admiral in graduate school and a clinical internship so I am left to fend for myself a lot. Also a few things like the train are on hold till I finish setting up the new room for it. I am reaching the limits though of what I have time and energy for so I am starting to pick just a few of my favorite hobbies and concentrate more on them. Being a jack of all trades is fun but I think I have reached a stage in my life where it is time to start mastering a couple. The puppy is starting to take care of herself though I wish the potty training would hurry up! Those occasional libations just make everything a little less stressing. Speaking of, I think it may be time to pour a glass and settle in to see what the next stage will be.
-
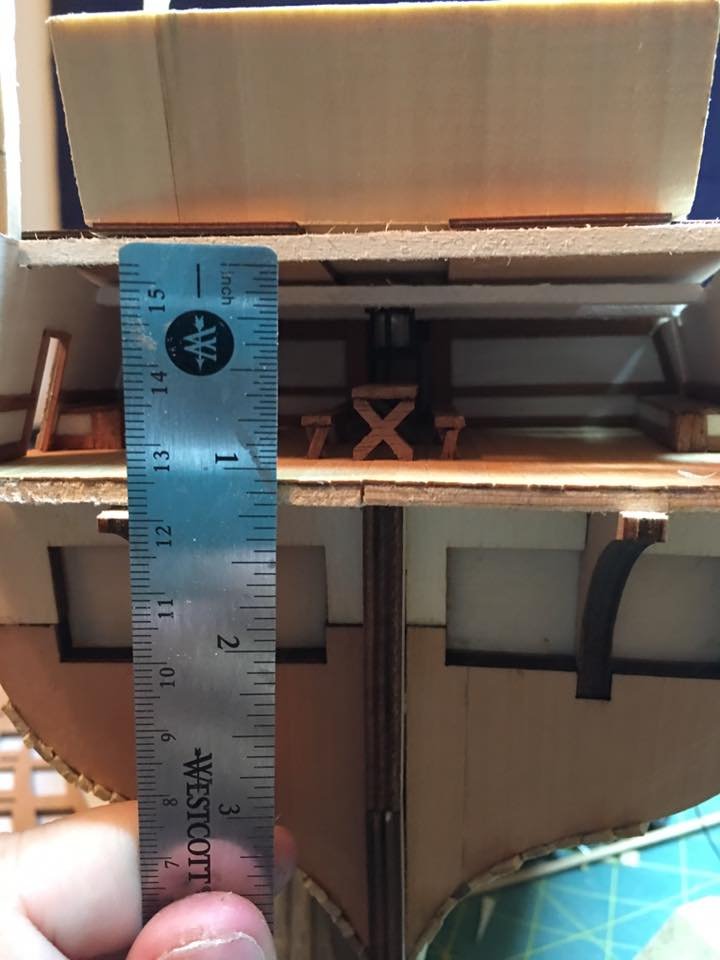
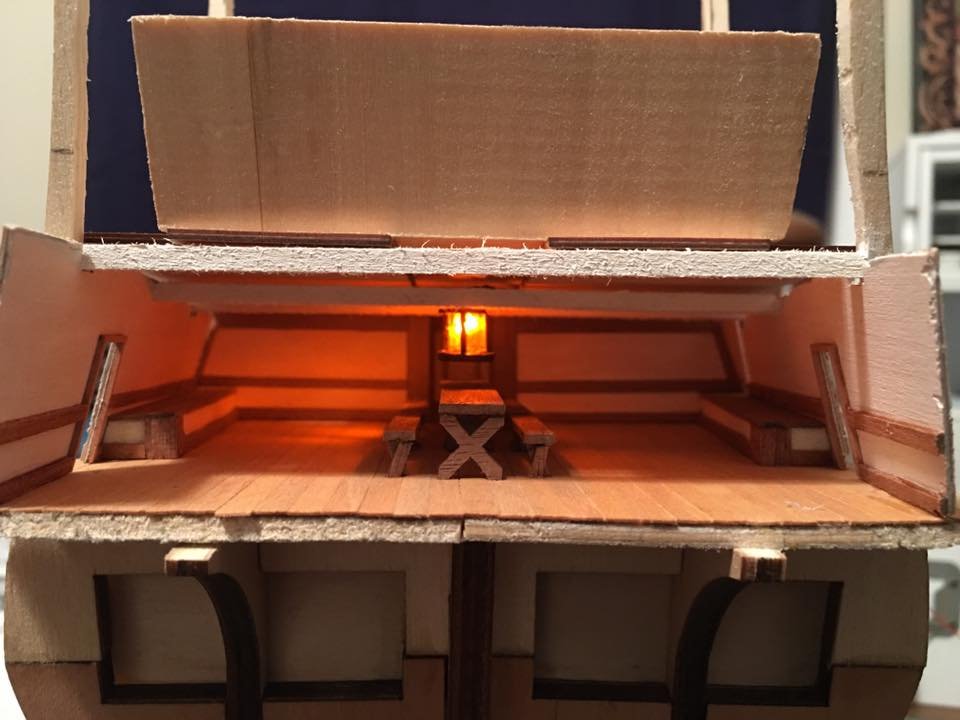
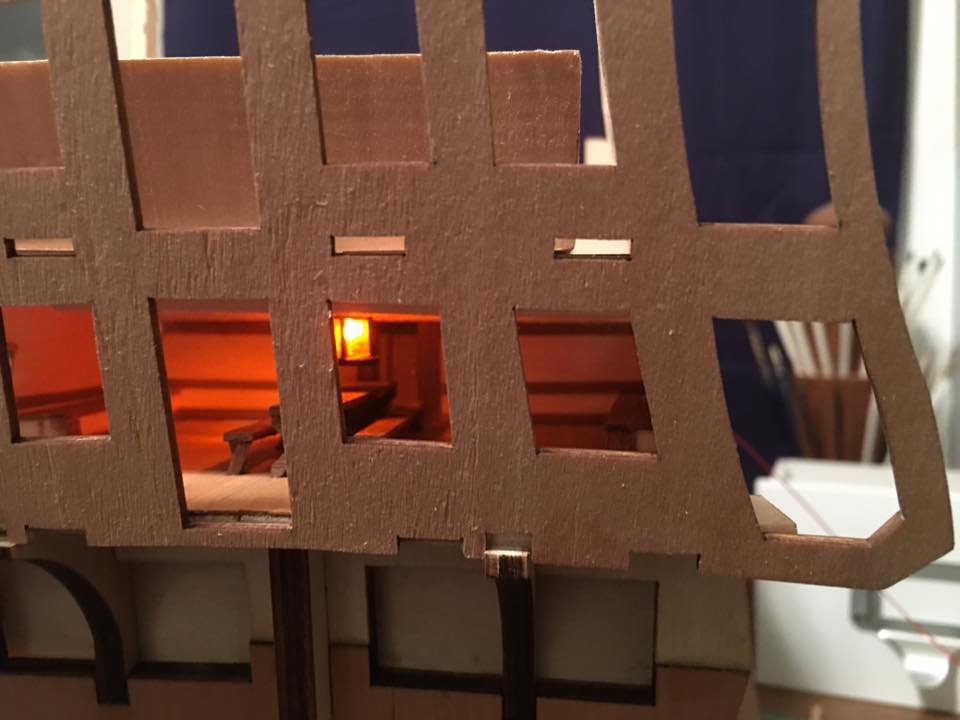
Great Cabin interior is complete! Built the tables and benches this morning and after finding some airline tube for an aquarium while out buying toys and treats for the puppy I managed to finish up the lantern this evening. While it is a little oversized for the scale, I am rather happy with it as I am working in only about an inch of space! In this picture I am holding the stern windows in place. This was the template that came with the kit however, this is not the configuration I will be using. I will modify this to have a 6 window layout with two of those spaces acting as doorways to the balcony. I just wanted to see how much visibility I would have of the interior when it is closed in. I think with the light in there I will be able to see plenty. By the way, the light does flicker to simulate a flame and not just a steady light. Next I am moving upward to the Admiral's Cabin. To do this I need to install the false main deck which covers the entire length of the ship. So before that happens I need to blacken in spaces below gratings or plank them, (yet to be decided), and also install a conduit through all the false decks for the wiring to come out the bottom. This is kind of a crucial step in that once I start planking in this cabin, I do not want to take off this deck again so I need to make sure there is nothing else that needs to be below it. More to follow soon though I may use this as a stopping point to go back and do some more rigging on La Couronne. I will see how quickly the plans for the next steps take shape in my mind.

- 961 replies
-
- 14
-
-
You might try ebay. I have bought bunches or "junk" tires on there before for other projects. Probably best bet too for a lot of inexpensive tires.
- 96 replies
-
- 3
-
-
- tugboat
- Tippecanoe Boats
- (and 2 more)
-
Well now I wonder if I should have them or not on my Couronne build. I think since I already went to the trouble of putting them in I will leave them but that does make me question it now. I wonder also if this will be one of those questions addressed in Vasa II whenever that comes out....
-
Indeed, it is very useful knowledge! While I have not yet started to tackle drawing ship designs on the computer, it is something that I feel I will be doing before long and having all these tips and explanations handy will be very useful then. So thanks from me as well!
- 2,699 replies
-
- 3
-
-
- heller
- soleil royal
- (and 9 more)