EJ_L
-
Posts
2,246 -
Joined
-
Last visited
Content Type
Profiles
Forums
Gallery
Events
Everything posted by EJ_L
-
Welcome to MSW Hugh! Sounds like you have a nice project ahead of you. I will have to keep my eye out for your build log. Best of luck on your build!
-
Welcome to MSW! We are glad to have you with us. Best of luck to you on your builds!
-
 Looks like the wait was worth it as you have done an excellent job! Your rigging looks very clean and neat. I would want to take closeups of it too! Won't be long now and you will get to start all over on the next one with a lot of knowledge and experience gained.
- 701 replies
-
- 2
-

-
- phantom
- model shipways
- (and 1 more)
-
That windlass is fantastic! Thanks for sharing the tip you learned with the squared nail. Might have to use that one myself next time.
- 653 replies
-
- 6
-
-
- trabakul
- marisstella
- (and 1 more)
-
Improvising is a common theme in model ship building. When the improvised parts turn out better than the ones they replaced, well that is a great bonus!
-
Don't stop!! She is looking way to good to stop updating! I'm waiting to see the rest as you are building a beautiful ship.
-
Welcome to MSW Kiran! Glad to have you with us! You will definitely learn a lot here which will make your own building experiences that much more enjoyable. I look forward to seeing some of your work!
-
I think of myself as more of a preservationist. Saving items of interest for future generations to enjoy.
- 453 replies
-
- 7
-
-
- thermopylae
- sergal
- (and 1 more)
-
That is more of what I was thinking. They would have a white or clear film or glass on them and the light would be typical candle/torch light which would be amber. I figured the red glass has probably evolved over the years due to the fact that we now put red lights on the back of any moving object and the designers of kits just think that way.
- 213 replies
-
- 2
-
-
- la couronne
- 74 gun
- (and 2 more)
-
That model was my first ship that I built. It is a great kit with well written instructions and excellent detail. Just building it out of the box will give you a beautiful model and something to be proud of. It is a BIG project though and not just in physical size, which is also considerable. For the first time out it can become over whelming quickly with all the repetitive parts and the amount of rigging. Still, many of us have done this kit and will be glad to keep offering guidance and encouragement to see you through to the end. I wish you the best of luck and I will keep my eye out for your build log.
-
Well done! I really like your figures too. They add even more life to an already "lively" ship. The details and weathering really bring this model together.
-
Royal Louis by fmartins - multi-media
EJ_L replied to fmartins's topic in - Build logs for subjects built 1751 - 1800
I have scribed planks before on a deck but not a hull. The hardest part I had was keeping them straight. It didn't take much for the blade to catch a different grain and wonder off in an unwanted direction. In the end it came out quite nice and I do think it would be a great solution to planking at such a small scale. -
Good thinking, no matter the source of the idea! I think that will look real good. Stretched thin the way it is does resemble a Chinese paper lantern in terms of the texture and framework. Are you going to leave the sock white or color it red? Most of the lanterns I have seen in pictures seem to show them red but I wonder if that would have been accurate or if they would have been white or clear? The ones supplied with mine are red and while I am thinking about building my own lantern frames to make them look better (if I can), I had planned on using the red lens to put back inside. What do you think?
- 213 replies
-
- 2
-
-
- la couronne
- 74 gun
- (and 2 more)
-
If you are wanting to stick with paint, I would recommend getting an airbrush. You can apply the paint more evenly and in thinner layers than with a brush. You can also mix your paints and thin them down to make them look more like a natural wood finish.
- 1 reply
-
- 2
-
-
Very nice looking. I usually only fully rig the canons that are visible myself. The others I might fake a few lines like the breech rope so that when viewed through the port "rigging" can be glimpsed.
-
Welcome to MSW Jesse from another former Navy sailor. Good to have you with us and I look forward to seeing your Eagle scratch build.
-
Now she looks like a proper frigate! Hope all is well and getting better for your Admiral.
-
Don;t worry about rushing to please us. We will be here when you are ready. It is good to hear you taking your time and fitting pieces before gluing to ensure proper fit. Patience is the most valuable skill a modeler can have. I too have found myself drawn deeper and deeper into reading, watching and learning fascinating new things or even revisiting the same picture 100 times over. This place has so much useful information and great people with educational logs, questions and answers that it is easy to to go in looking for one things and when you finally surface realize that you have not found hat you started looking for but have learned 20 new things instead! Great update, looking forward to the next!
-
Welcome to MSW George! I hope you find this hobby as fun and interesting as your other ones. We will be more than happy to help you out to get you through the build and teach you the new skills you will need. Best of luck to you and I look forward to seeing your work!
-
Welcome to MSW! Best of luck with your build. I hope you can get a new copy of the instructions so you can continue. Great to have you with us and I look forward to seeing some of your work!
-
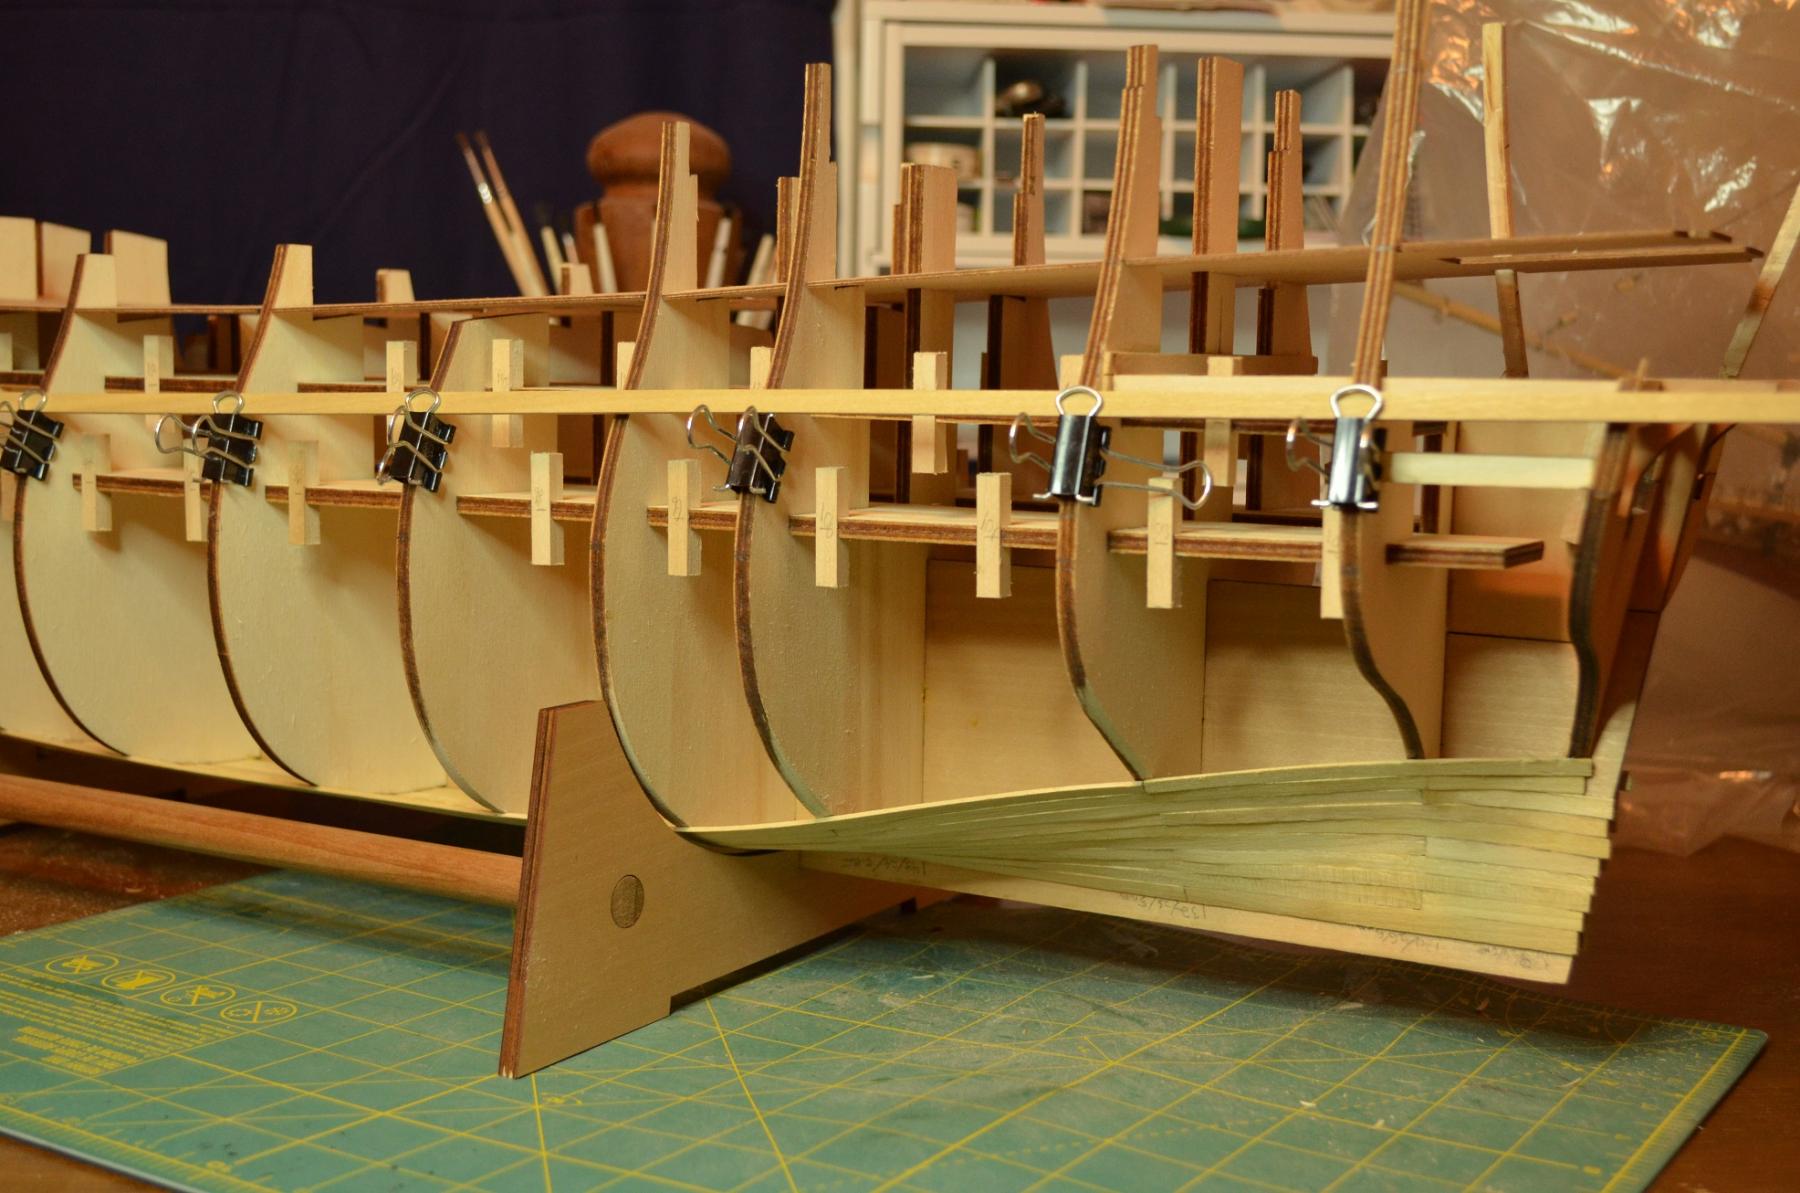
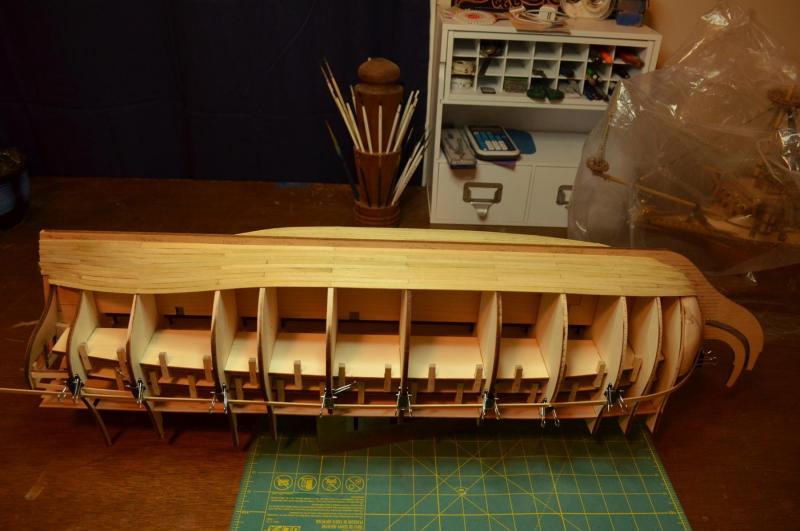
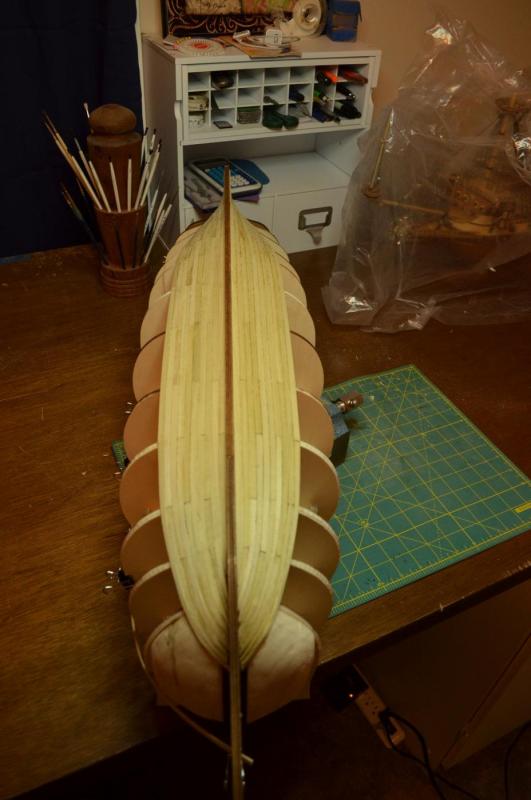
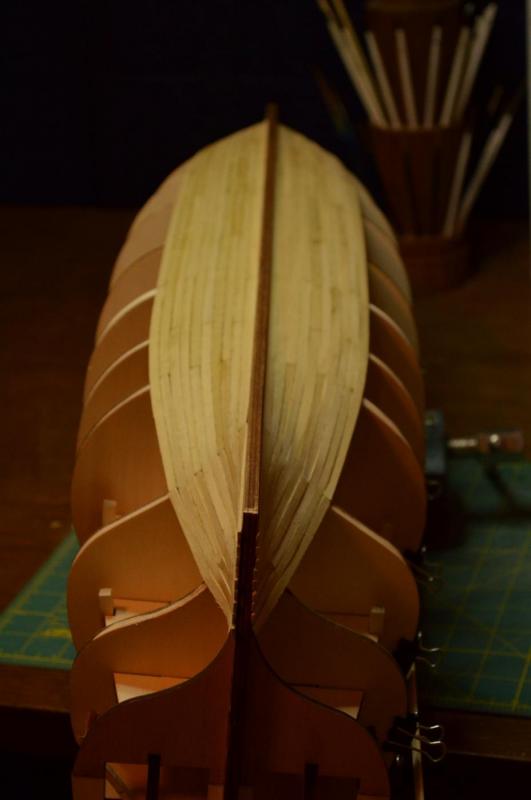
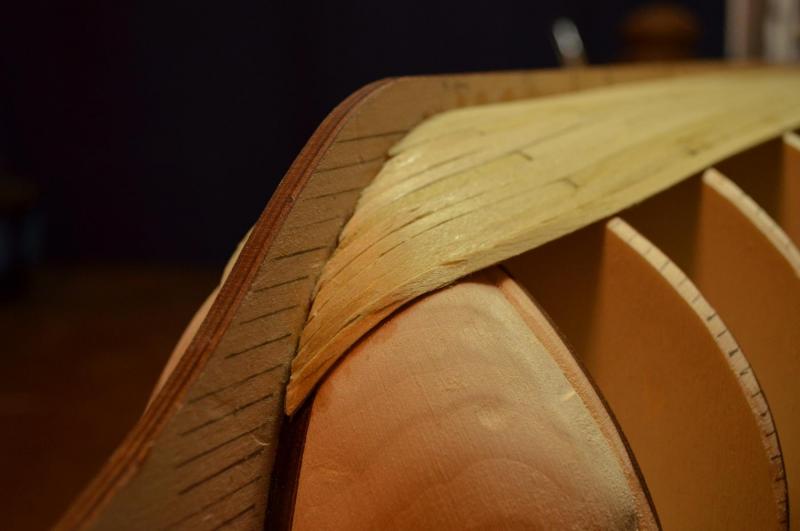
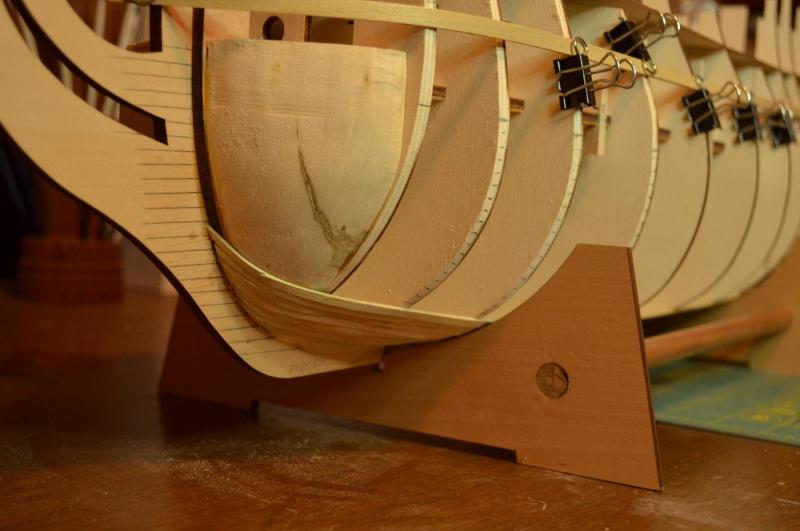
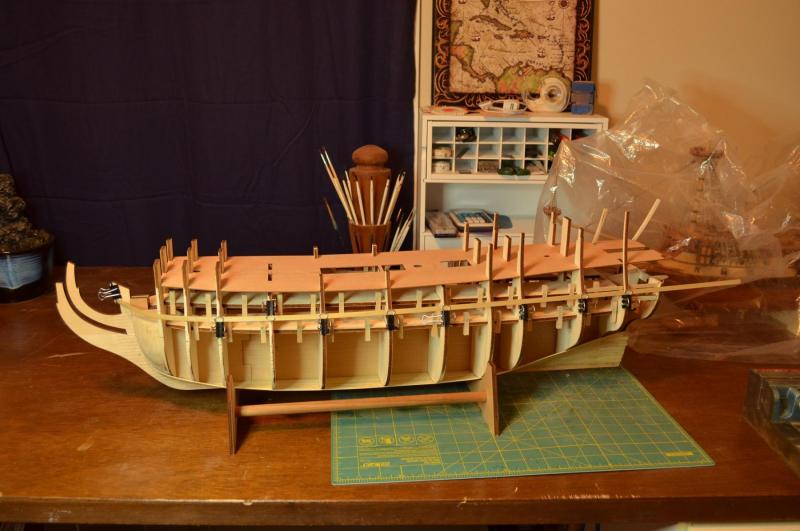
My first planking goal has been reached. I now have 20 strakes, 10 on each side of the keel complete. You can start to see how much it takes to plank these large ships of the line when you realize that although I have already gone up 10 strakes on a side, I still have not gotten out from under the bottom of the ship! Something to think about if you are new, watching this build and considering a large build. I have spent 25 hours planking and still have very little to show for it and remember, this is a double planked hull so I get to do it twice! As you can see my planking can still has room for improvement which is a why I like double planked hulls. Gives the extra practice and allows the 2nd layer to cover the bad spots. Still, I want people that are learning to take note of a few things that may help them. Remember, these are my tips and methods not rules and certainly not the only way. I am constantly learning new ways to improve myself. One thing that I see that gets asked all the time is how to measure the widths of the planks at the stem? Since you do not have a bulkhead there that runs all the way from the keel up like you have for the other locations you have to measure this differently. What I do take a long piece of plank and draw the known taper angle across the face from about 4 to 5 bulkheads back. Start by measuring the distance from the stem to the first bulkhead, then 1-2, 2-3, 3-4 etc. and mark those spots on your plank. Then mark the width of the plank at those locations. This will give you a line of dots that you can then connect with a straight line. Extend that line past the first frame to the end of the board and this will give you the width at the end of the plank where it butts to the stem. Now draw a straight line across the bottoms of the frames where they meet the keel and extend that line straight out to the end of the stem. This is the line for your garboard plank. To make life easy, I cut a small scrap board to the width if the plank at the stem and laying it against the line from the garboard, I trace out the next line and repeat until I have the same number of marks down my stem as I have on the edges of my bulkheads. See the below close up of the bow. Then when you plank all that has to be done is to make the plank fit within the space you just marked. Note: My garboard strake is wider than the first space. This is because the garboard is wider than the rest of the planking and this is where it tucks into the rabbet or in my case just tapers into a fake rabbet. Something else to look at is the fairing on the bulkhead edges. Planking should lay flat and even across the edges with no sharp corners showing or gaps between the plank and the frame. Mine mostly do but I know there is a gap at the first frame. This will need to be shimmed up. By making sure the edges are properly faired you can make planking lot easier as the wood will lay down smoother and have a stronger connection. I also went ahead and built a cradle for her to sit in. My normal vise that I use for this stage of building is too small for her. I need to build an adjustable build board just have not gotten around to it. So since I have reached my goal, it is time to take a break from S.R. and return to La Couronne to build her fore top mast and continue on with rigging. When I return in a week or two I will plank the next 20 strakes which will bring me up to just below the lower gun deck on both sides. Before that I will need to establish the wiring pathways I need for the L.E.D.s. Seeing her up on the cradle has given me a clearer picture of where and how I want to run them, just need to test and see. No idea why the pictures did not stay in order but they are all there!


- 961 replies
-
- 11
-
-
I am assuming that you are using CA glue since time is of the essence. What I do when I need to get a thin line with CA is I use a sewing pin to spread the glue across the surface. Just quickly place small drops on the edge then swipe the pin through it to evenly spread it. The nice thing about the metal pin is that you can wipe it off and even if the glue sets up it can be scraped off easily so the pin can be reused. Same thing would work with wood glue or similar. Spreading the glue thin across the surface helps to keep it from pushing out along the seams when installing and gives a better coverage than trying to cover with a small bead.
-
Welcome to MSW Bruce! A lot of picking the best first kit comes down to is your personal skill level not just with model ship building but also models in general. What kind of tools do you have and what types of things have you made in the past? That being said, you are thinking along the right paths. Typically, plastic is more straight forward in that the instructions are more step-by-step compared to wood which are more like reading blueprints to see the final design but having to figure out how to achieve it yourself. You always run the risk of missing or faulty parts in any kit, wood or plastic. Replacements for either are usually fairly easy from most of the reputable hobby shops and manufacturers. The difficulty of any detail work, be it rigging, planking deck furniture etc., always increases the smaller you go. However, the larger a model becomes, the more room it takes and more work is created due to the sheer size. It is a balancing act to find what you are comfortable with. A smaller model is typically better for learning though as there is less work to be done. A solid hull is simpler than planking on a frame simply because there is a lot less involved and you now have a solid surface to plank over which provides better support in the difficult areas. There are way to many kits out there both wood and plastic to really give suggestions. I recommend looking for something that is simple however, as you already said, a lot of those do not appeal to you. Finding a ship that inspires you is very important but you do not want to become overwhelmed. Whichever you decide, we will be more than happy to help you through the learning process so you will have a model to be proud of and hopefully discover a hobby which will provide you many great hours of happiness in your retirement. Good luck to you and I will look forward to seeing what you decide to start with!
-
Welcome to MSW Ted! Good to have you with us. There are lots of great ships out there for you to choose from and while I always recommend starting with something simple to get your feet wet and learn the basics, we will gladly help you through any build you decide to try out. Best of luck to you on your first build and happy modeling!
-
Yards are secured with parrel beads that attach to the yard, wrap around the mast and connect to the yard again. Depending upon the ship, era and yard defines how these are actually rigged. Look up "parrel beads" in the search bar and you will see many builds with them. If you are looking for a "dummy" attachment to hold the yard in place while you rig, then I recommend drilling a small hole in both the mast and yard and inserting a tiny pin, wood or metal doesn't matter, then gluing them together. This will help add strength and hopefully help to prevent accidental knock off.