AntonyUK
-
Posts
1,190 -
Joined
-
Last visited
Content Type
Profiles
Forums
Gallery
Events
Everything posted by AntonyUK
-

Gondola by AntonyUK
AntonyUK replied to AntonyUK's topic in - Build logs for subjects built 1901 - Present Day
Hi. Thanks for the comments... Yes this is going to be a large model. . I have a friend that makes dolls and she makes wonderful costumes for them. Will be asking her to facilitate the the dolls. So No Barbie and Ken...... The floor is in 5 parts But every piece has complex curves in them. Thanks for looking in. Regards Antony. -
Gondola by AntonyUK
AntonyUK replied to AntonyUK's topic in - Build logs for subjects built 1901 - Present Day
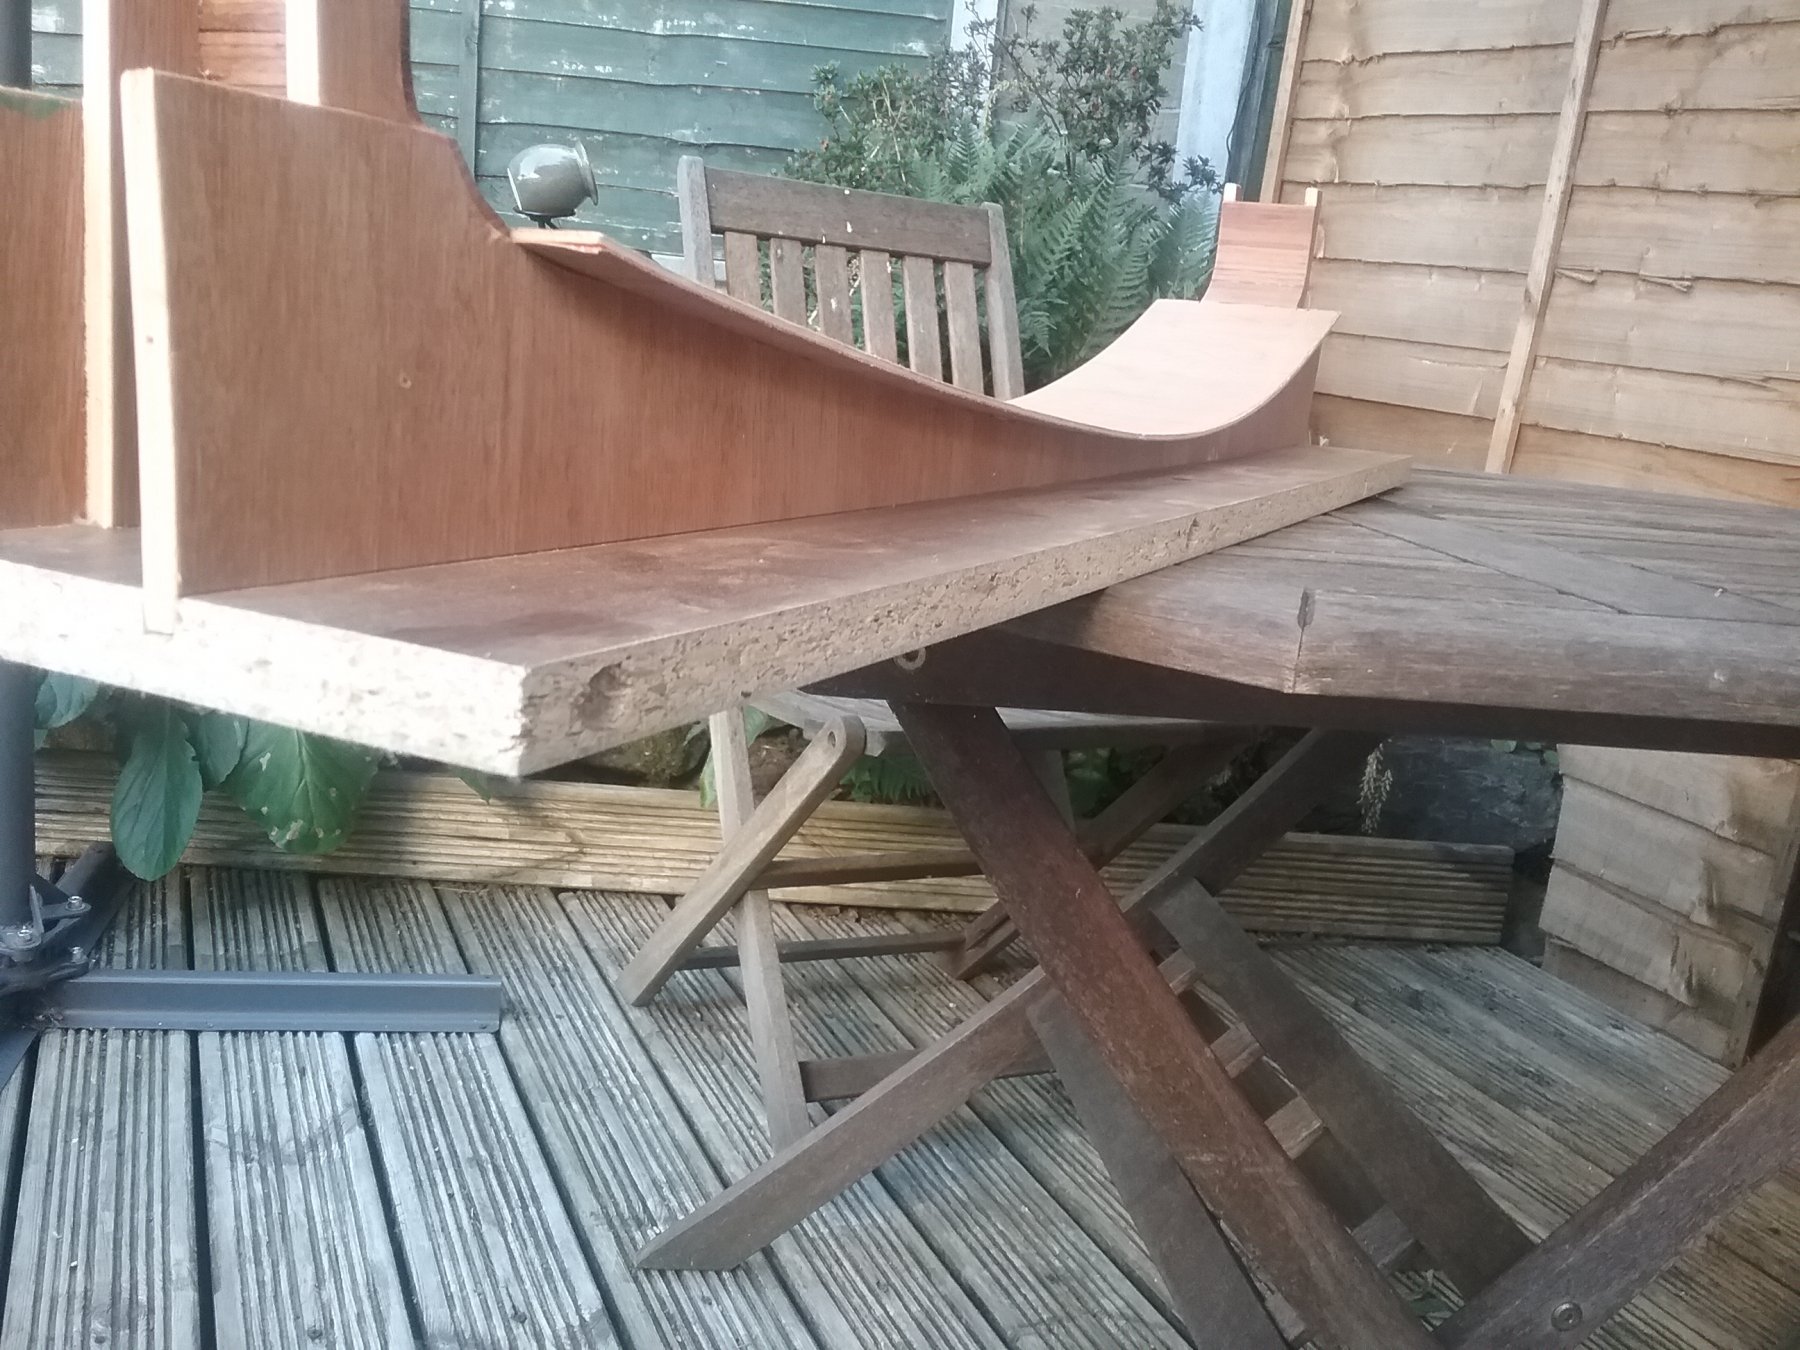
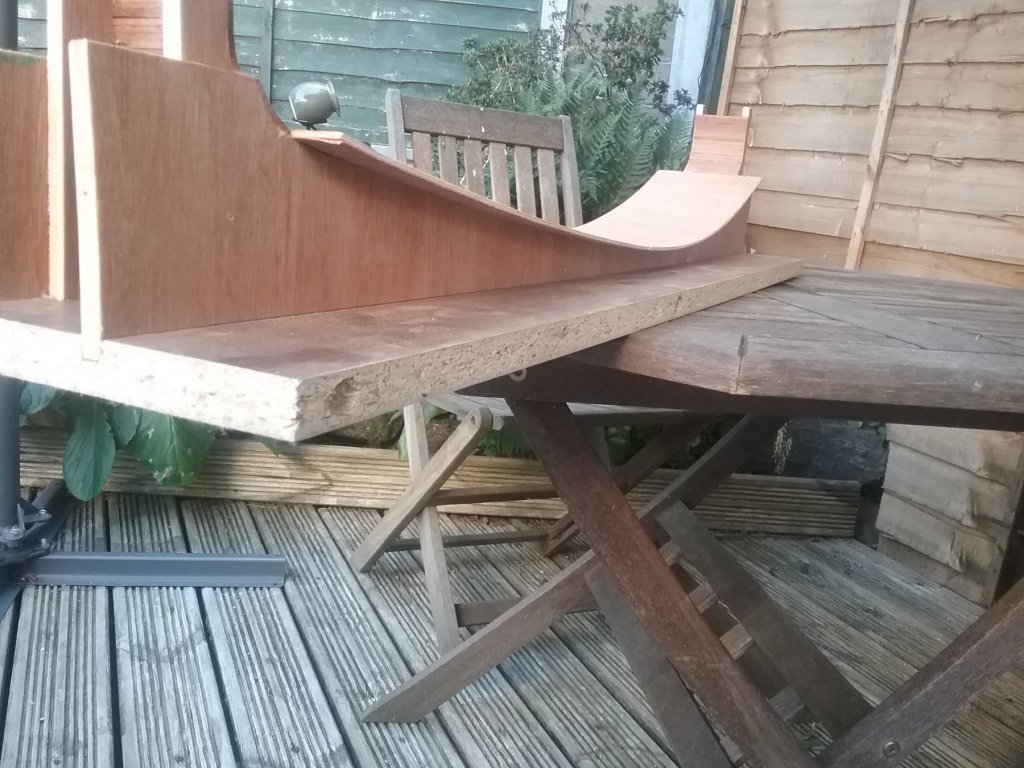
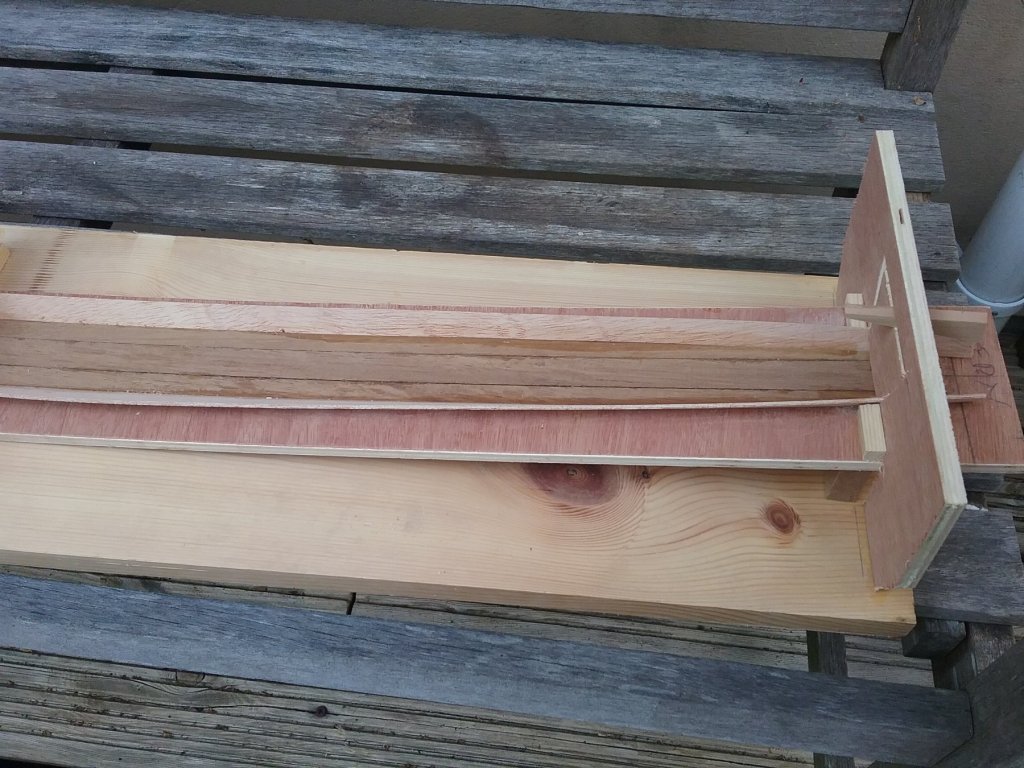
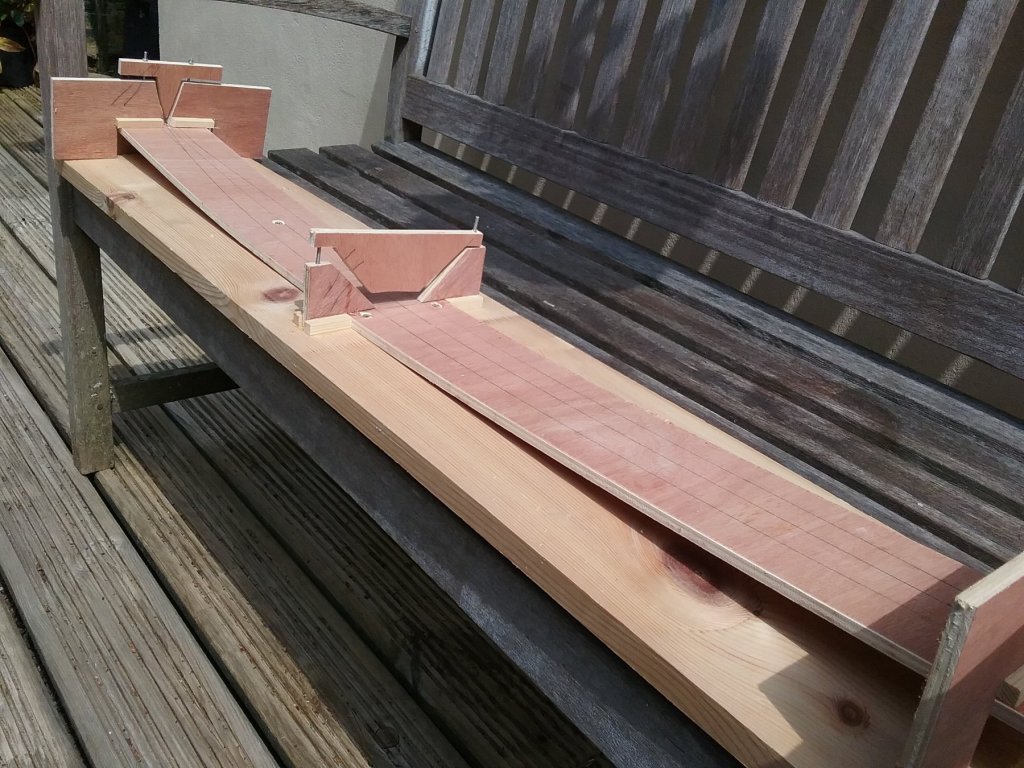
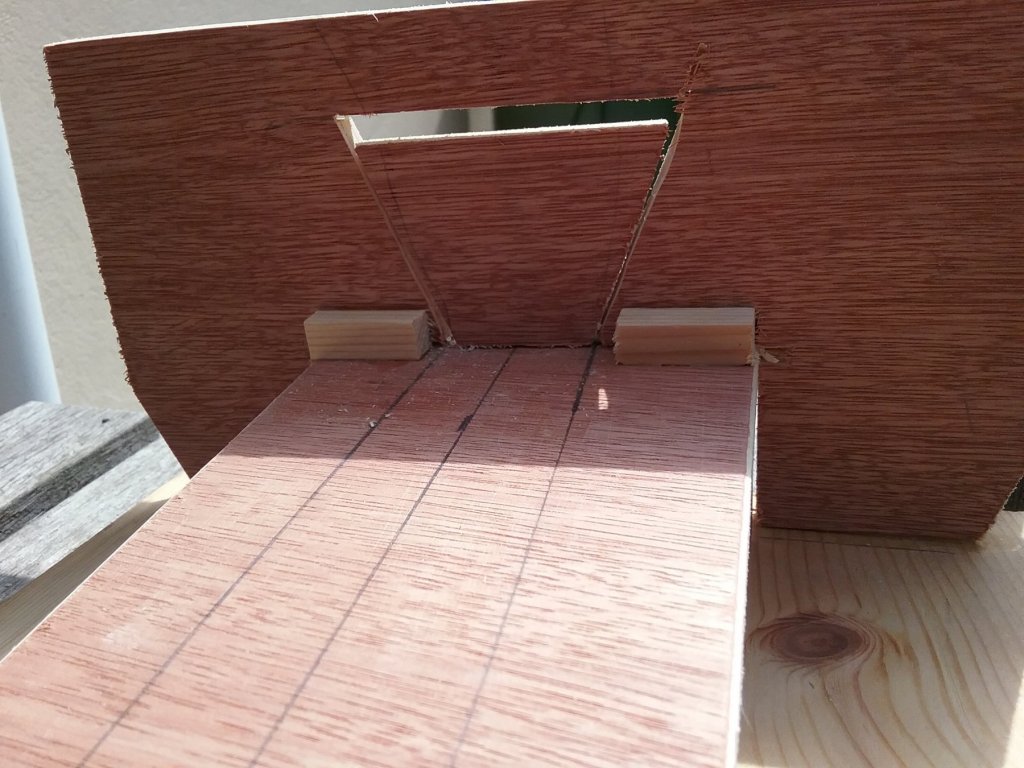
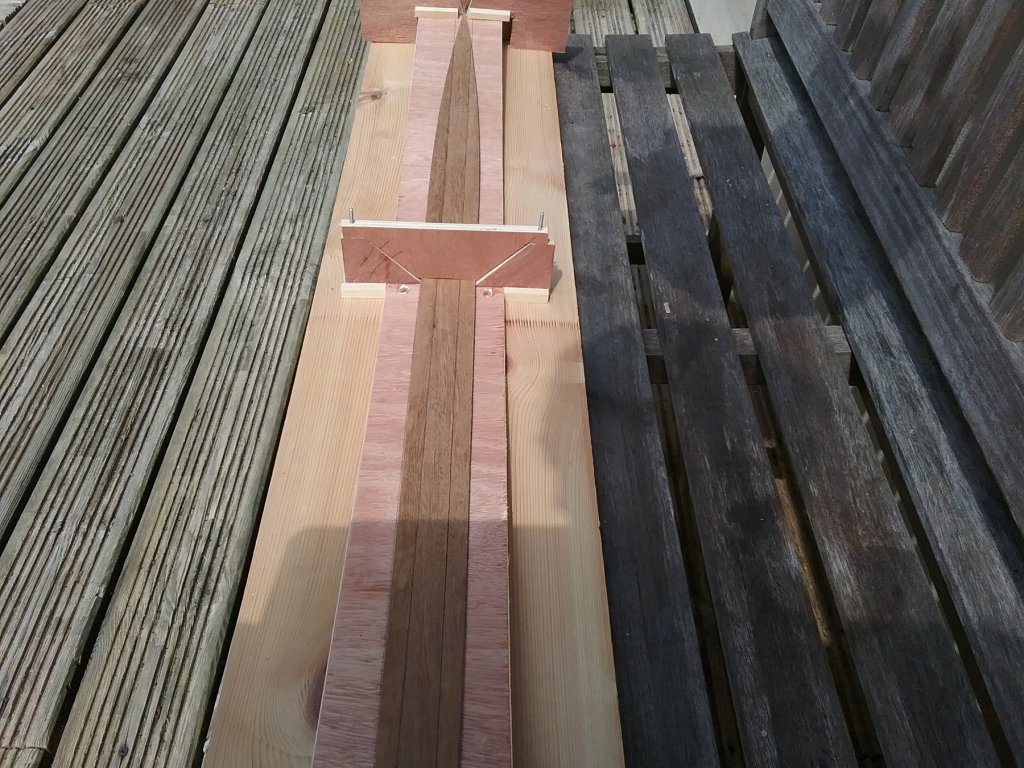
Hi. First update for a while. Been looking at the best method of constructing the Gondola. So the plan is :- build a base building board with the curve and twist built in... The building board is just offsets of 9mm plywood 4mm plywood and a shelf that was the right length and perfectly flat. The base board.. And view And the other end.. The curves at each end will have 2 guides attached to then to hold the Bow and Stern at the correct angles. Will start milling the floor in the next few days. Very wide planks are used on the original. Not sure a can cut that depth of cut. The frames have all been drawn out and are in process of laser cutting. Theas will have extra batten on each side. That's it for now. Thanks for looking in. Regards Antony.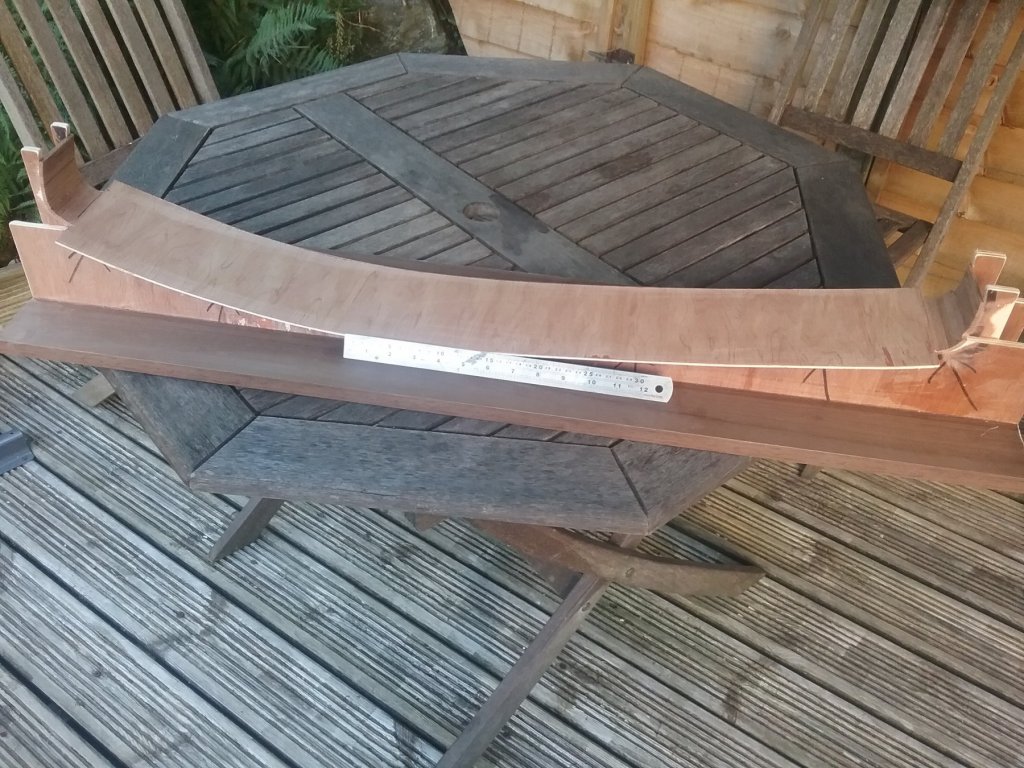
-
Hello Dirk. A nice start to a great build. Looks like you have put a lot of thought into how you are going to build this model. I've not seen anyone use a fly cutter for large curves for some years. Nice Machining of the timbers. Regards Antony. Ciao Dirk. Un buon inizio per una grande build. Sembra che tu abbia riflettuto molto su come costruire questo modello. Non ho visto nessuno usare un cutter per grandi curve per alcuni anni. Bella lavorazione delle travi. Saluti Antonio.
-
Hello Fernando. Stunning work on the Lucia. Love the colour scheme you are using. Really sets the boat off. Regards Antony.
-
Gondola by AntonyUK
AntonyUK replied to AntonyUK's topic in - Build logs for subjects built 1901 - Present Day
Hi. Carl. Just the "disegno gondola singolo" Single Gondola Design . Basic but there is enough details to build a Gondola. Making my design quite different from the plans. Just the basic shape taken from the plans. Again Im'e using Adobe Illustrator to do my drawings. Drawings ATM are 80% done. Overall length of the boat is 940mm. With a Gondola being 10.85 metres long and 1.4 metres wide I think the scale is about 10.6/1 Not sure on this bit... Numbers I cannot do. Again I don't build small. And I will not be painting the model. The Book " An Extraordinary Naval Architecture, by Carlo Donatelli" is excellent and there is a lot of knowledge gone writing of this book. Lots of details and construction. Will be starting to mill the timber in a few weeks all being well. Thanks for looking in. Regards Antony. -
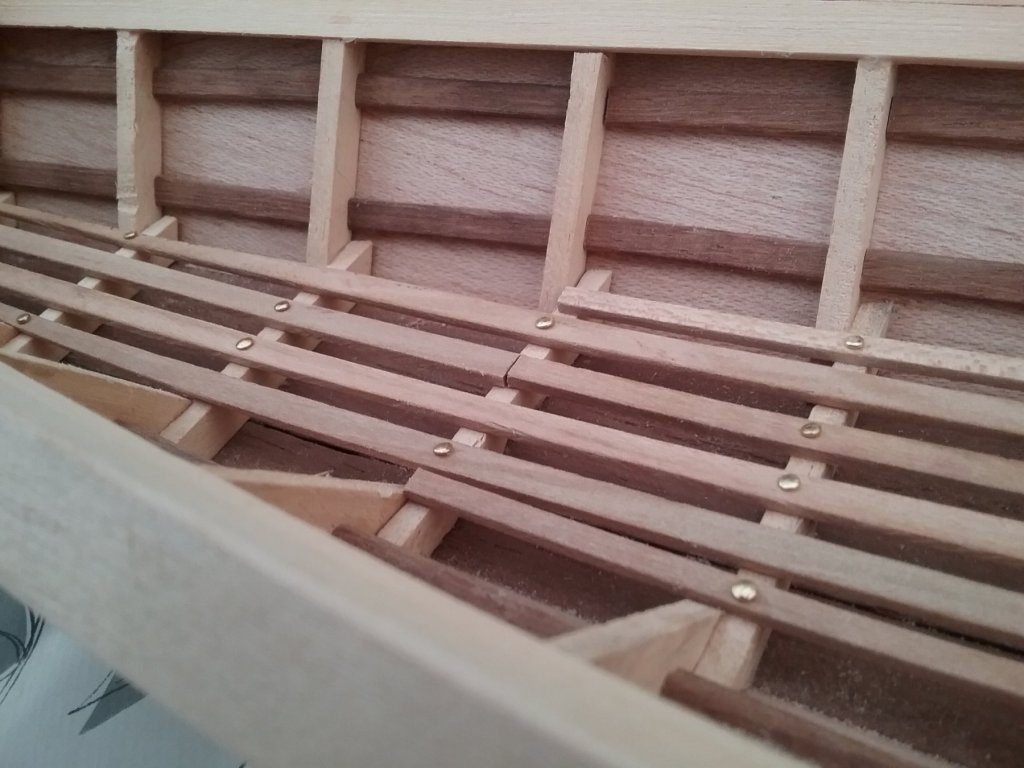
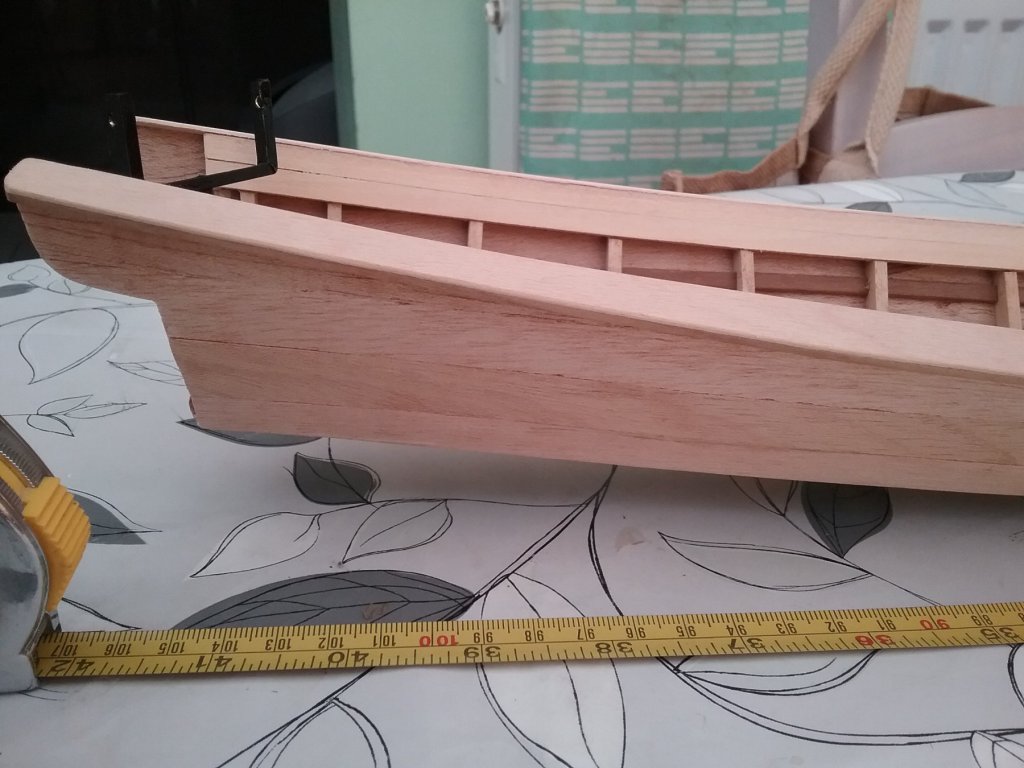
Hi. The tail boat is now complete. Car engine still has not arrived. So no photos with the engine mounted with shaft and prop. The scale works out to be around 1/16. That would make figures for a 6ft person would be 114.3mm high and a 5ft person being 95.25mm high and not forgetting the 4ft person would be 76.2 high. Does not match any figures that I have at this time. Full length of the boat being 1010mm in length and 125 beam. The Bow area And no I don't like the brass pins..But I have excess of then and need to use them away. Not going to paint , varnish or oil this boat. Thanks for the likes and comments. I have put a pdf drawing on the first post. Should anyone be interested. Regards Antony.


-
Hi Michael. That's one super sized ship. I love the shape of the bulkhead you got wrong. But you got it geometrically similar. Nice building board. But with a model that size you need a table like Gaetan uses See link below. https://modelshipworld.com/index.php?/topic/15340-74-guns-ship-by-gaetan-bordeleau-124/&page=4 Will save your back. with all that twisting and trying to get into difficult places. This is a must follow for me. Regards Antony.
-
Hi. A nice start to your build. As Cog said.. There are a a few Red Dragon builds here on MSW. I like Chinese Junk's. They have a character of there own. Regards Antony.
-
Hi. Welcome to MSW. Nice little boat to start with. Good idea to veneer the parts that will be on show if you are not painting the model. Getting them into modelling at a young age is good But don't push them too hard. Basic expansions of what.why.when and where. Helps. Give them the offcuts to mess with. And watch the creative mind at work. Will follow along on your build. Regards Antony.
-
Hi. This is another nice boat to add to your collection. And ours... A question :- the drawings show it planked on the top half of the hull. Will you be completing the planking or leaving it as the drawings show.? Regards Antony.
- 421 replies
-
- 3
-

-
- medway longboat
- Syren Ship Model Company
- (and 1 more)
-
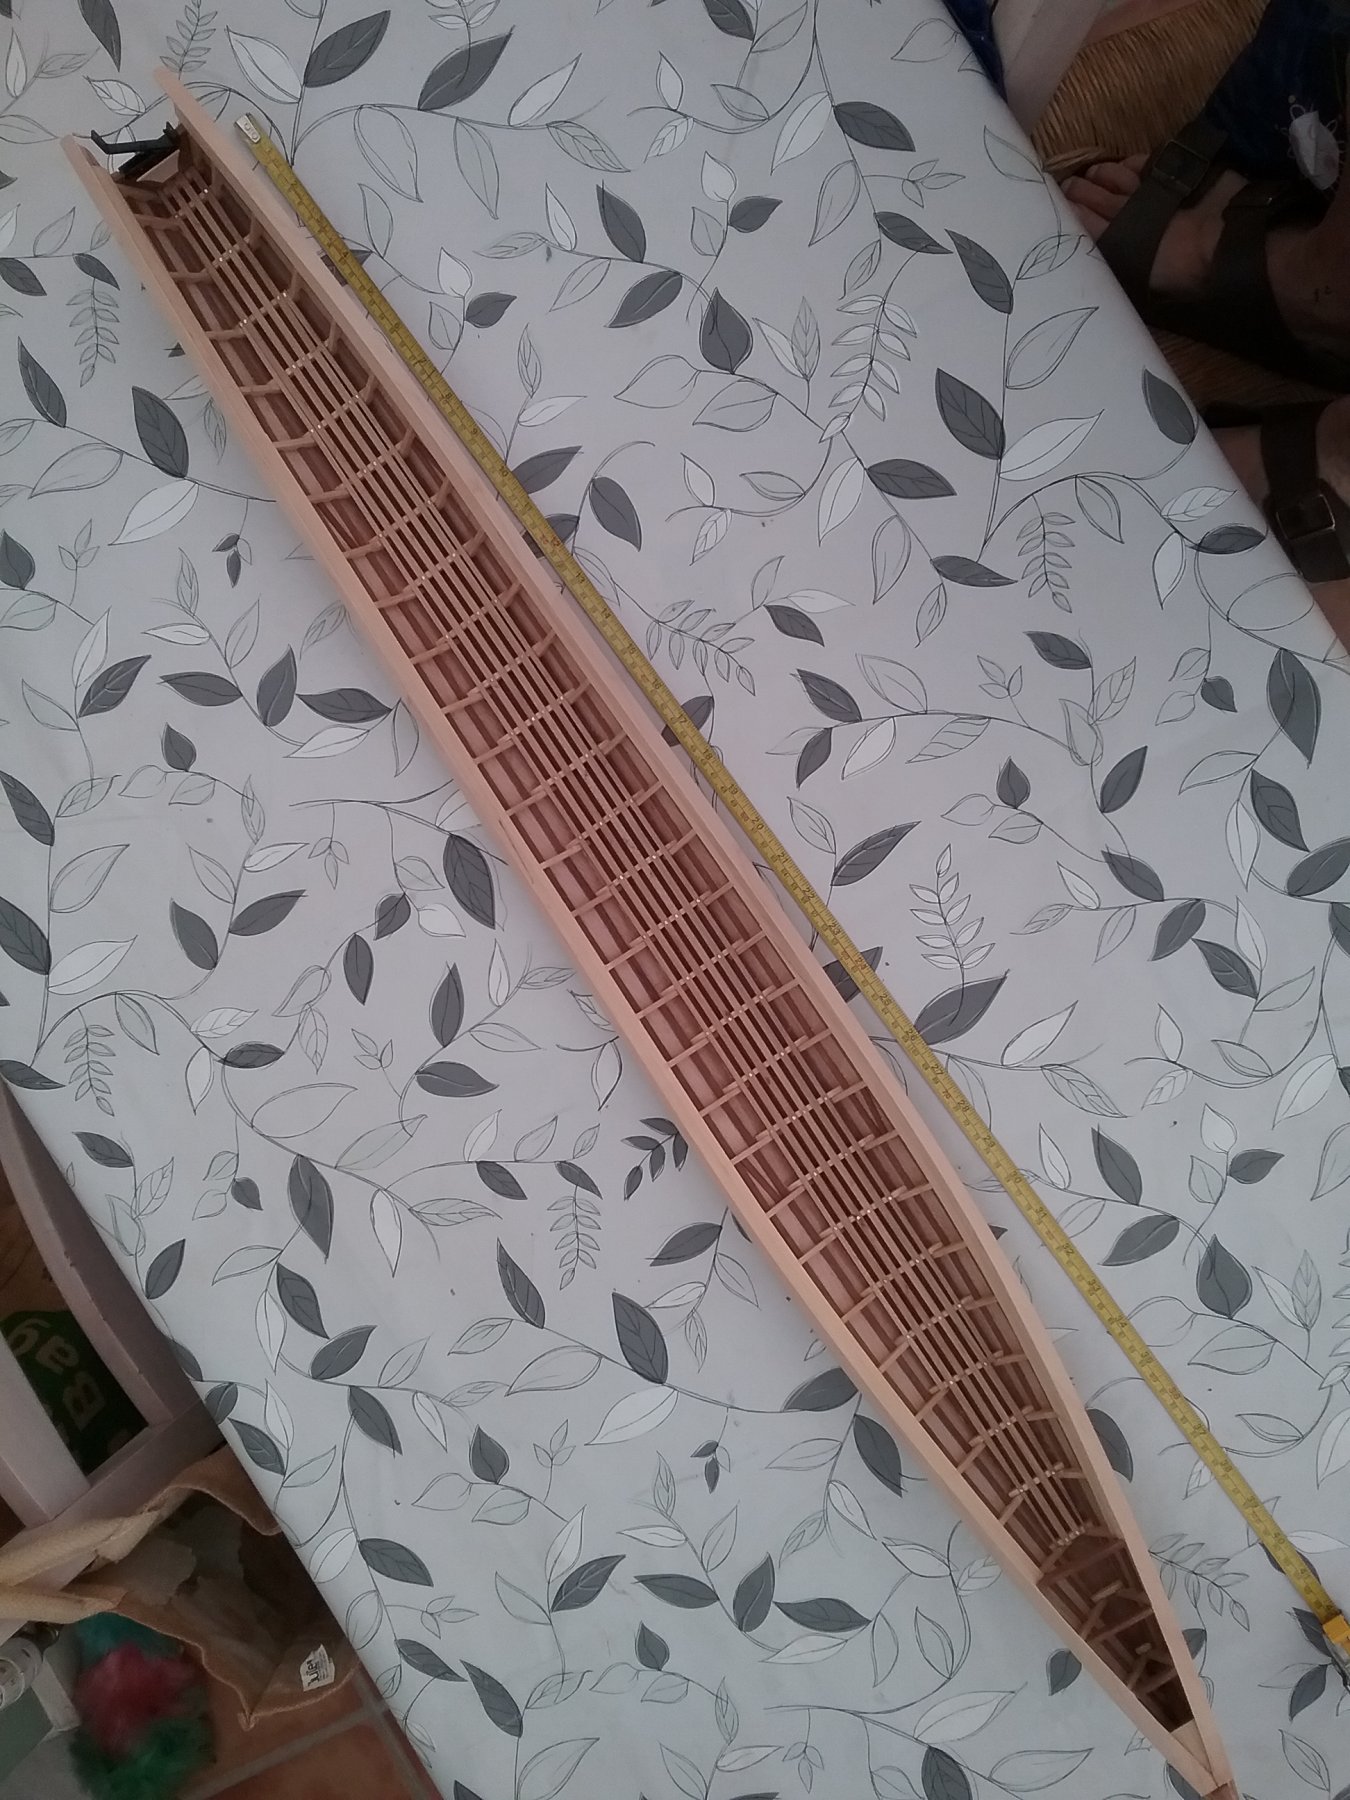
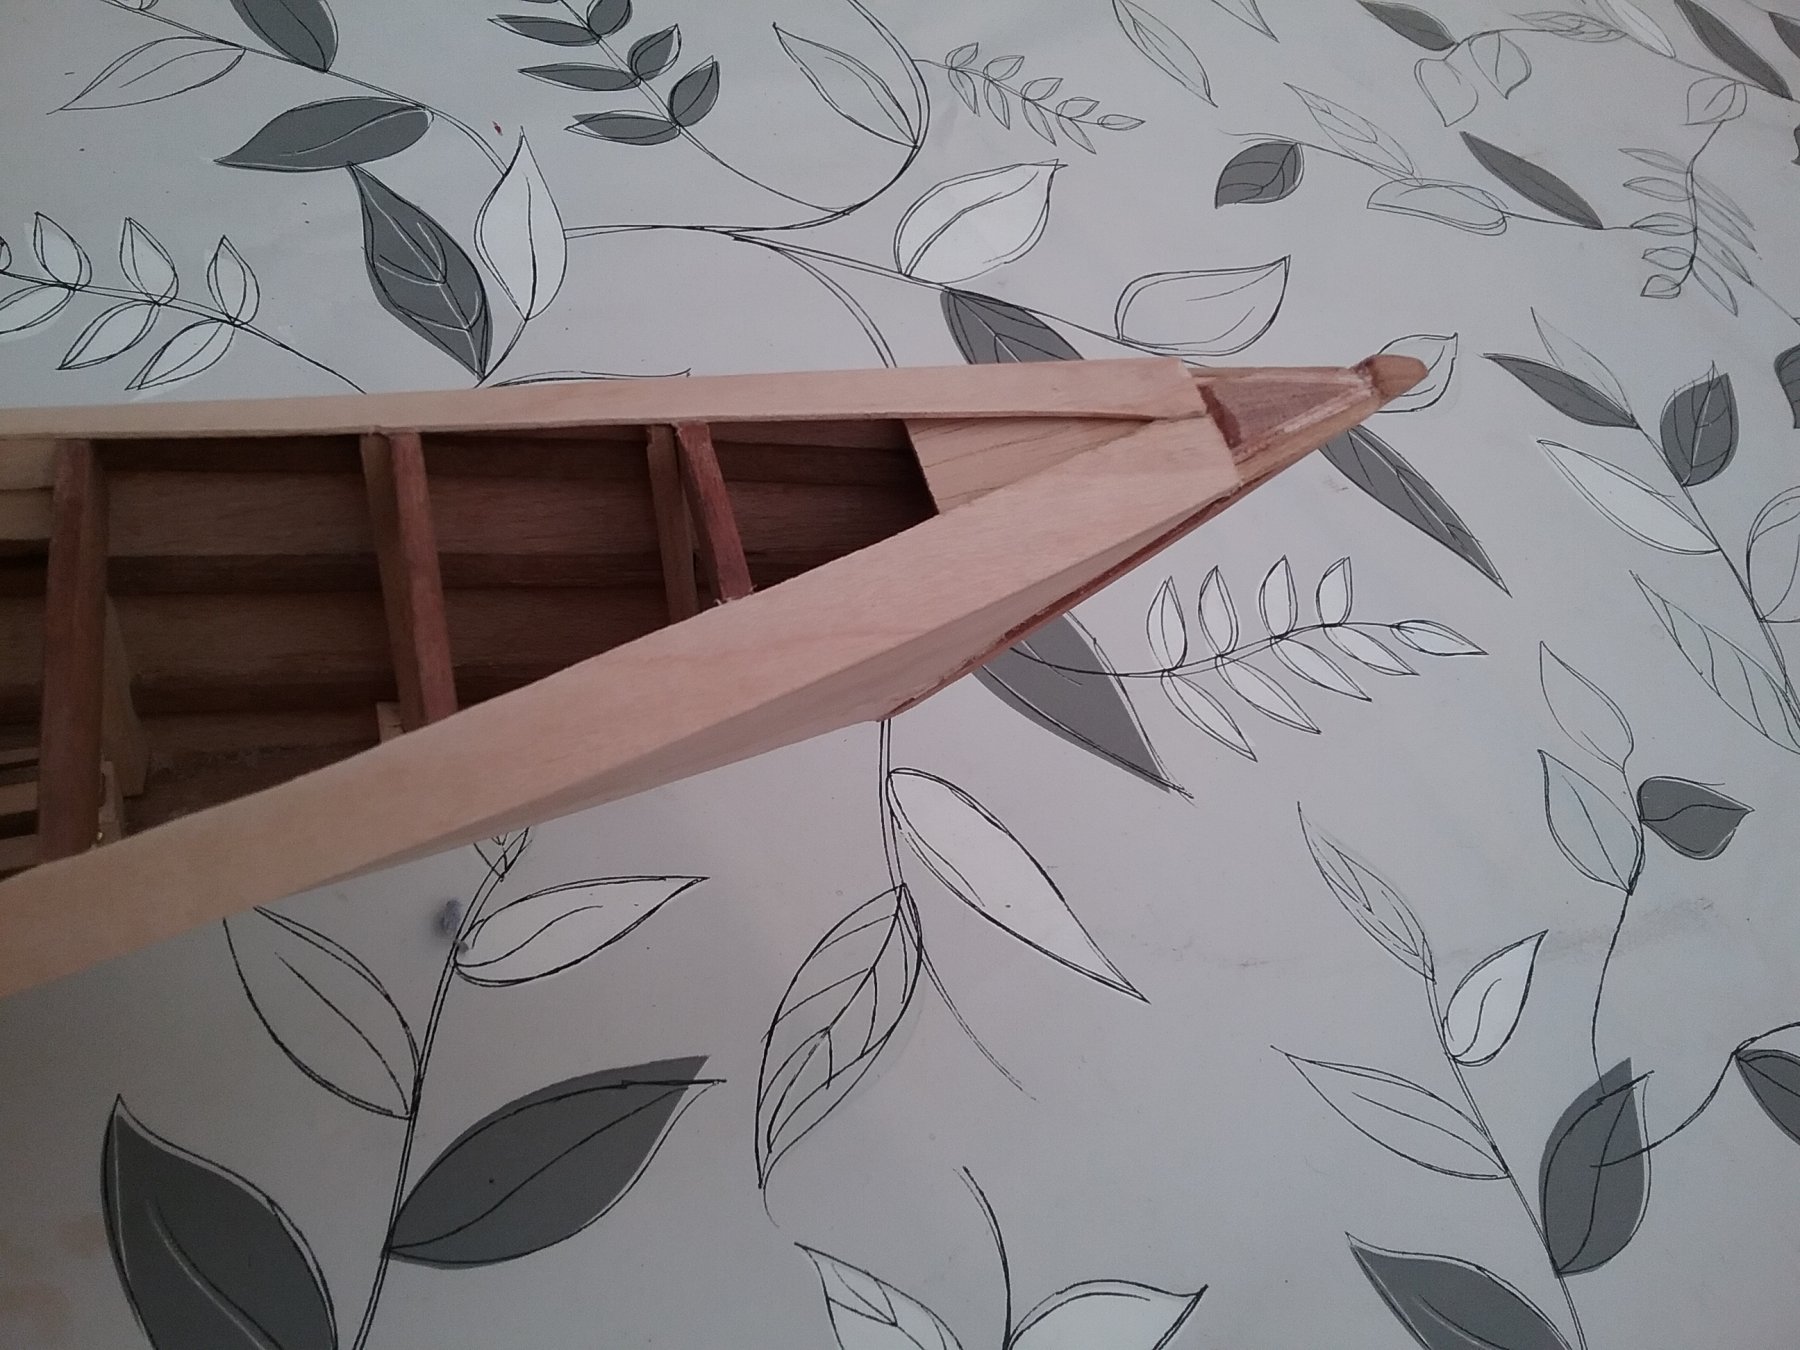
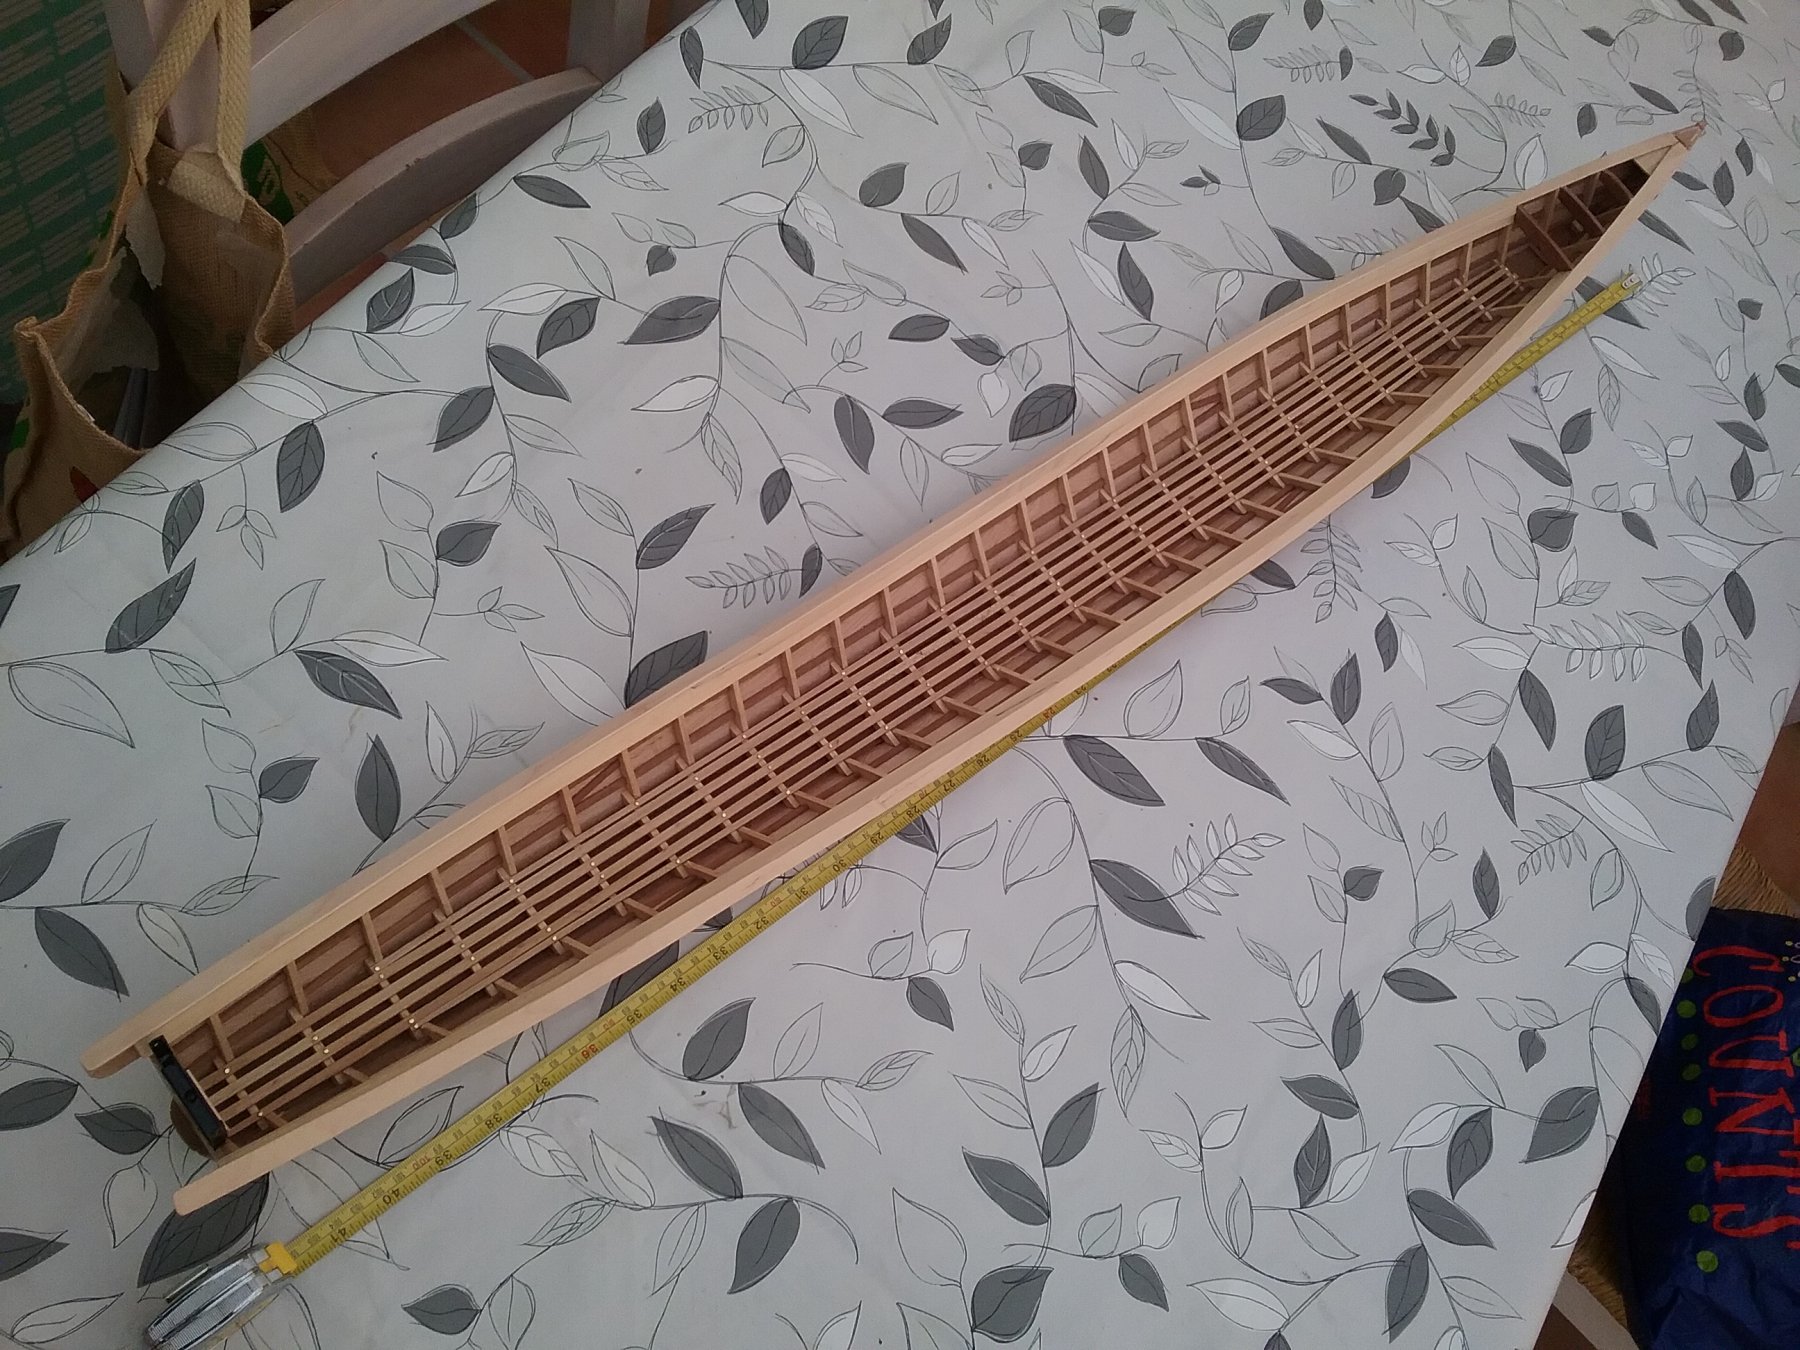
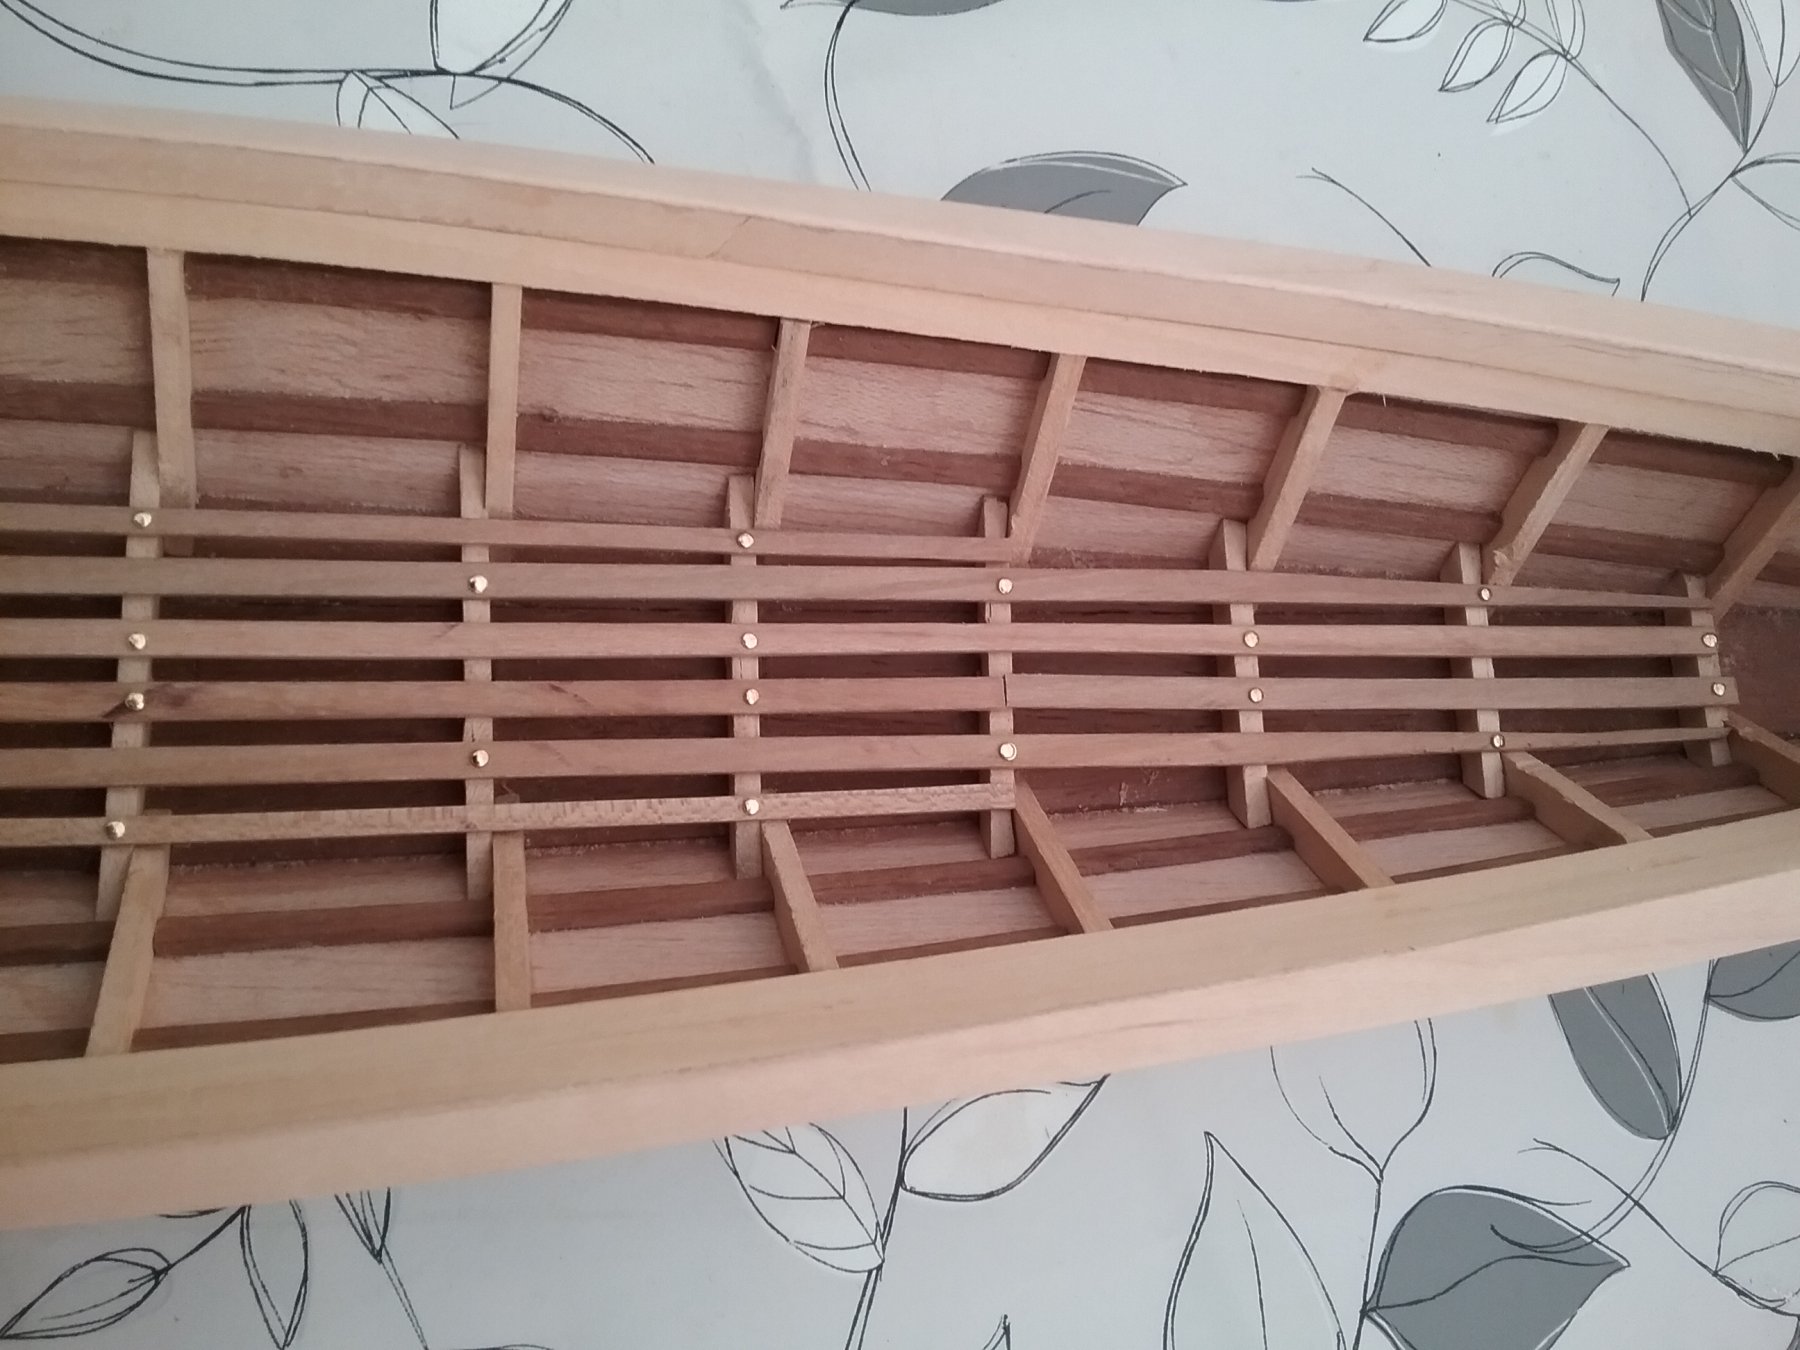
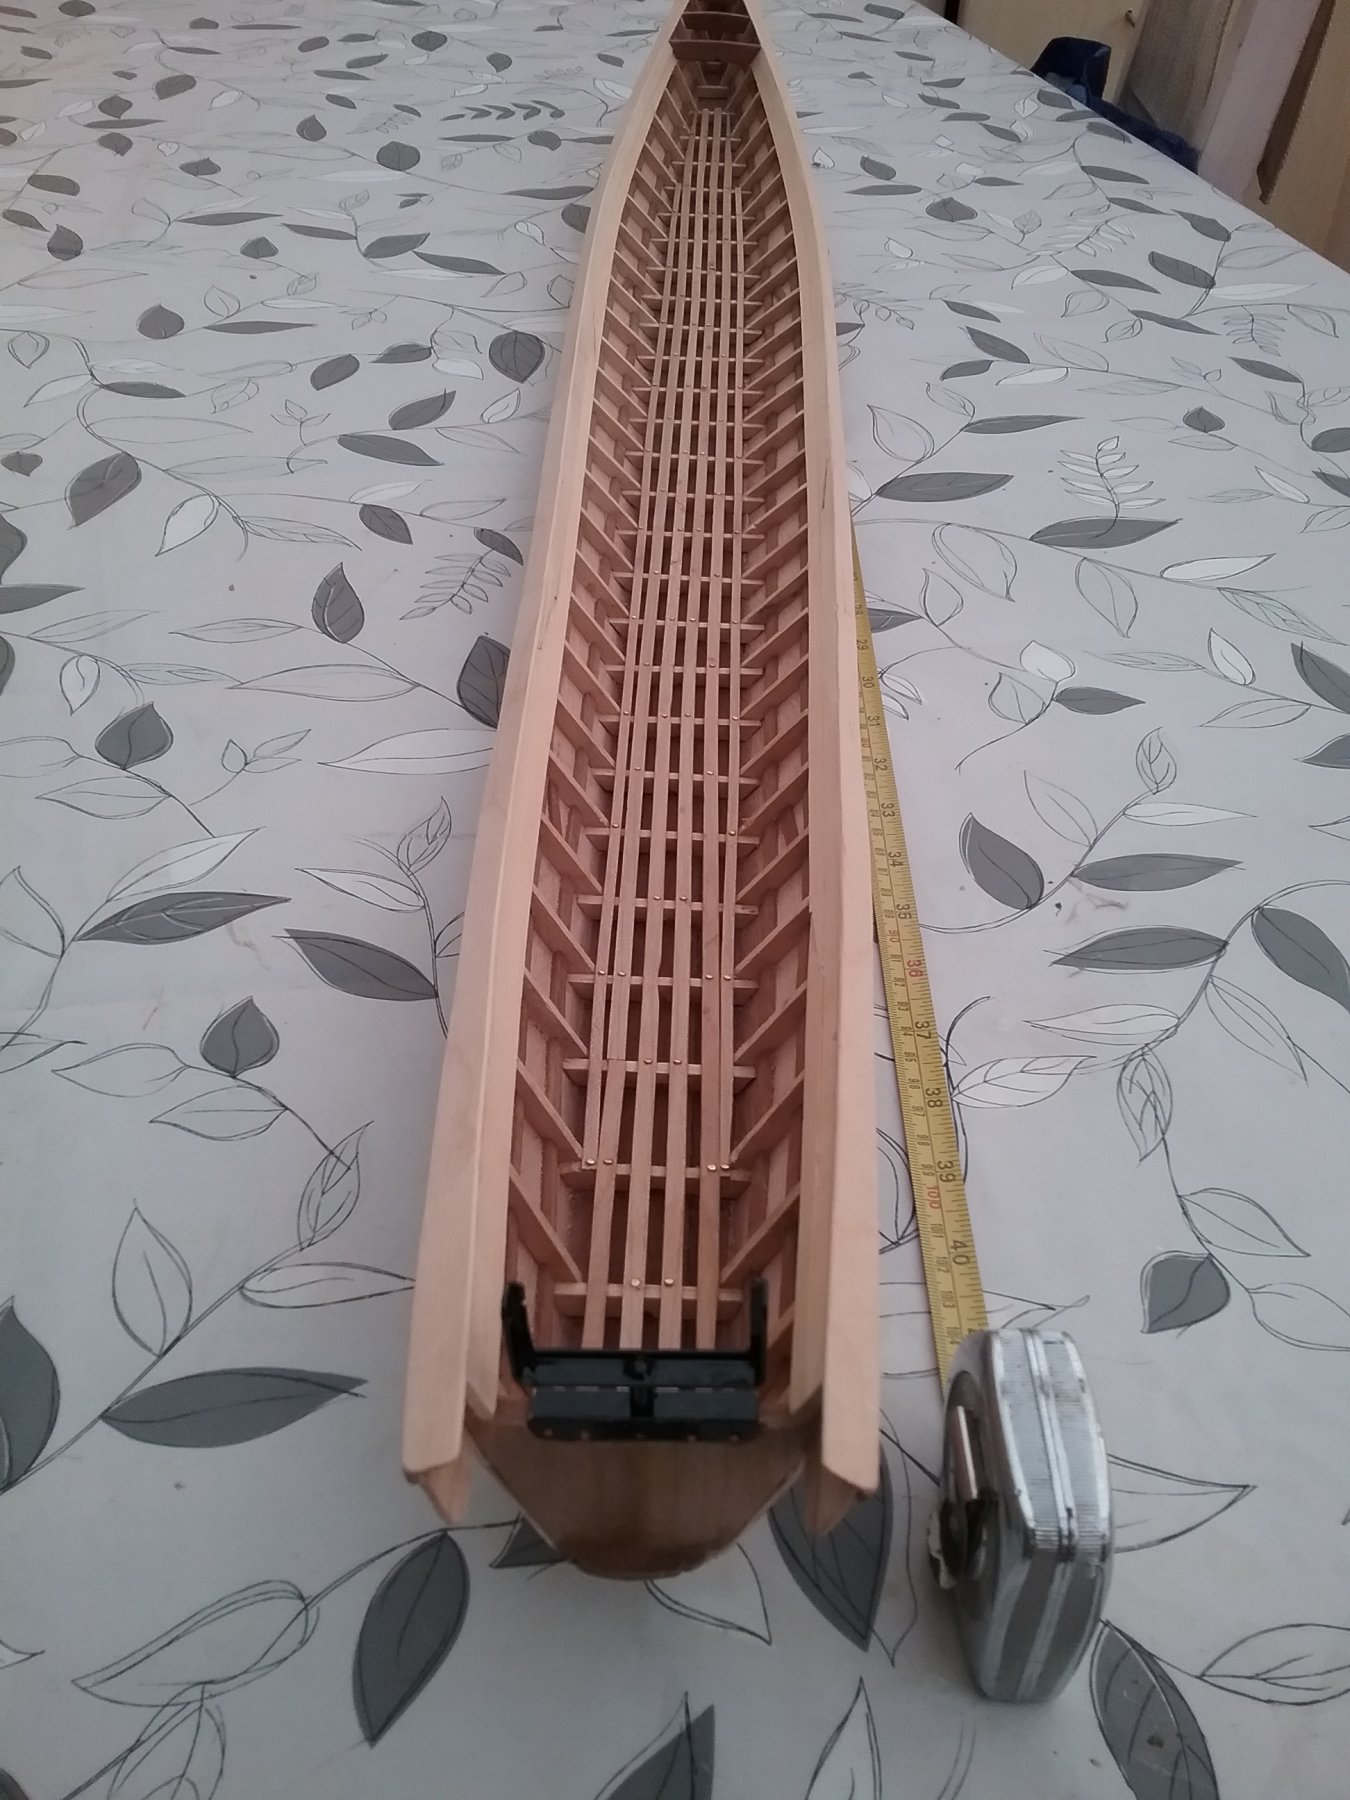
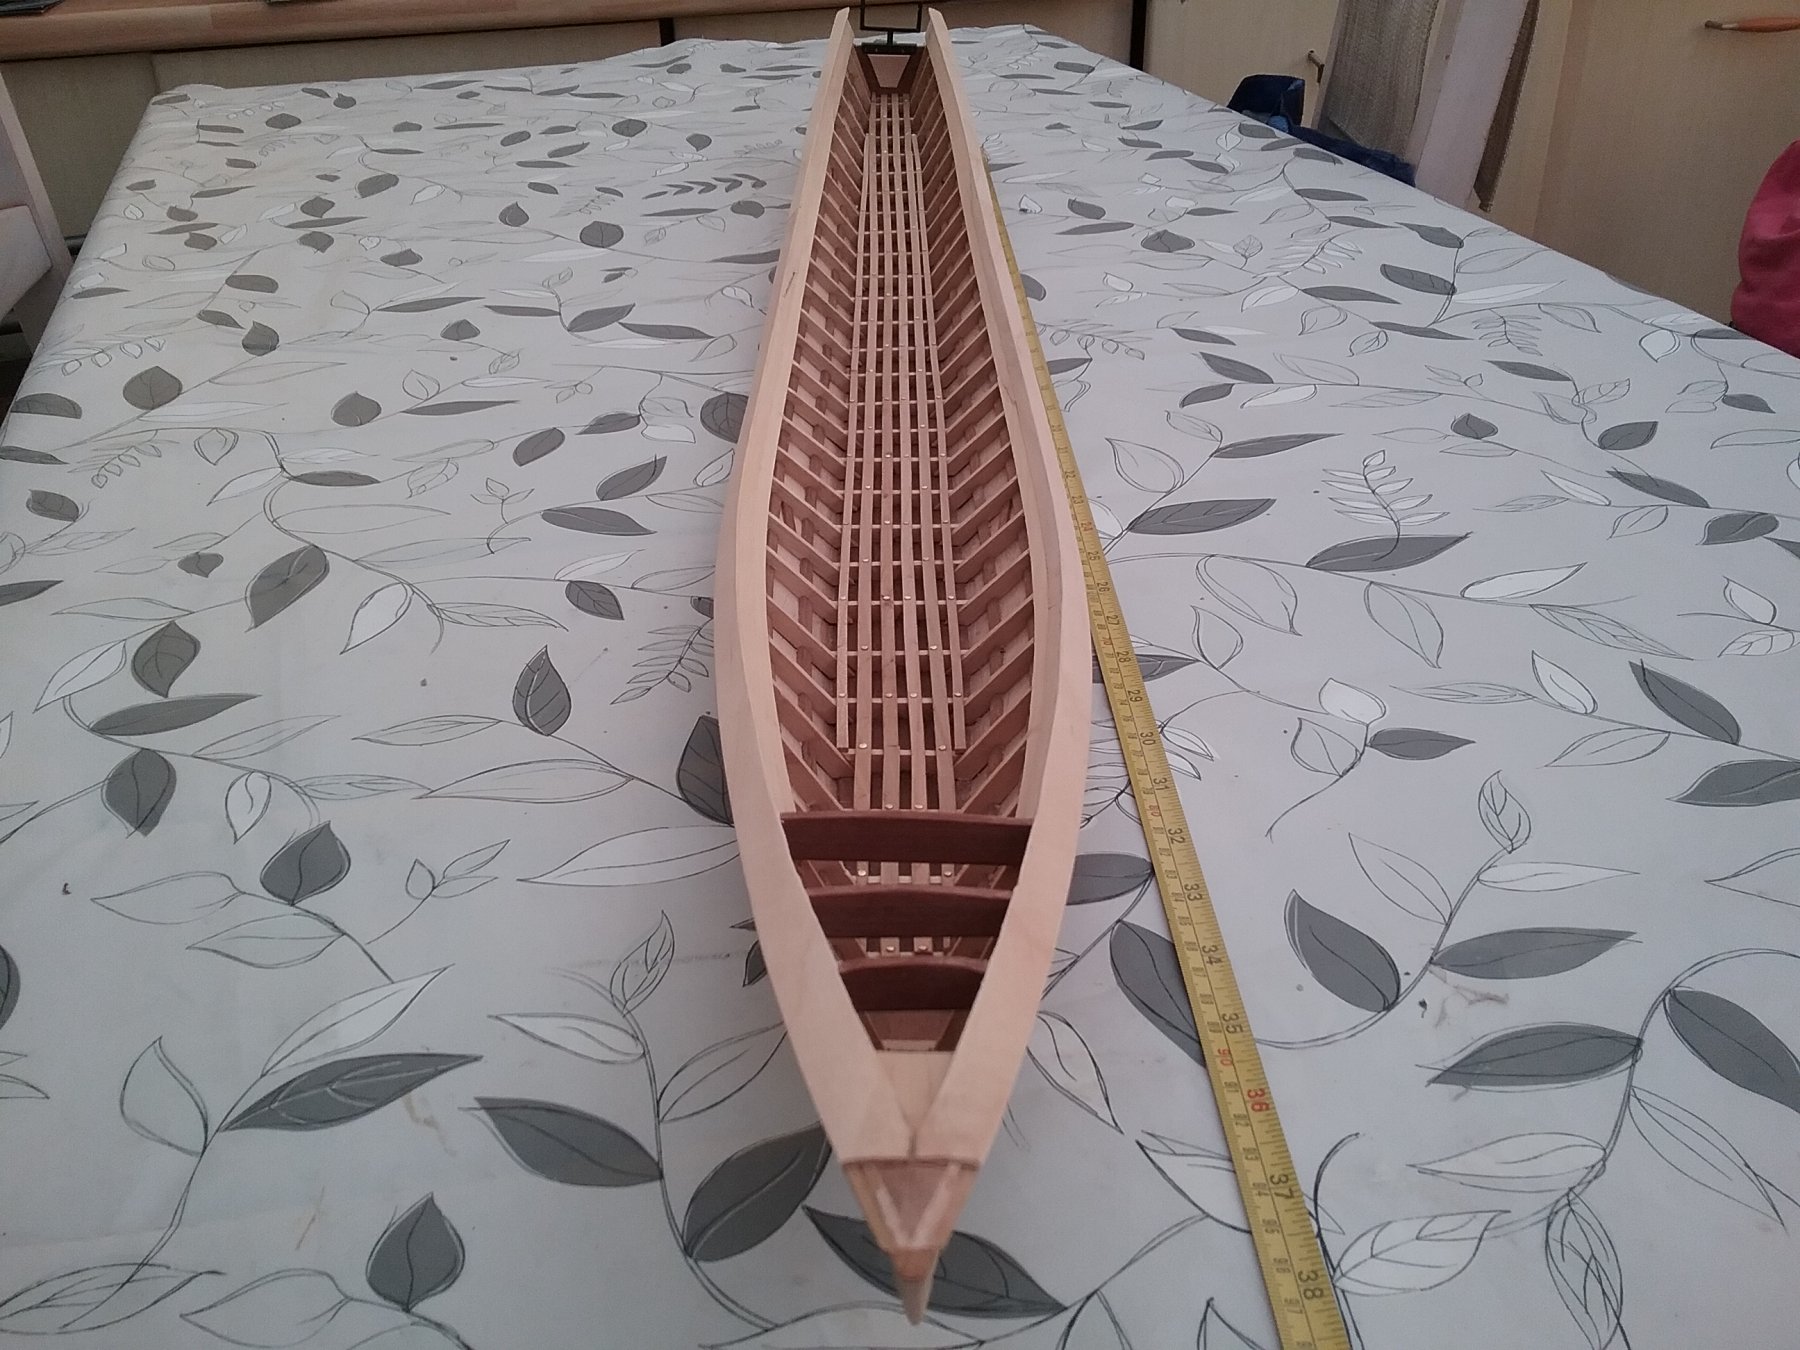
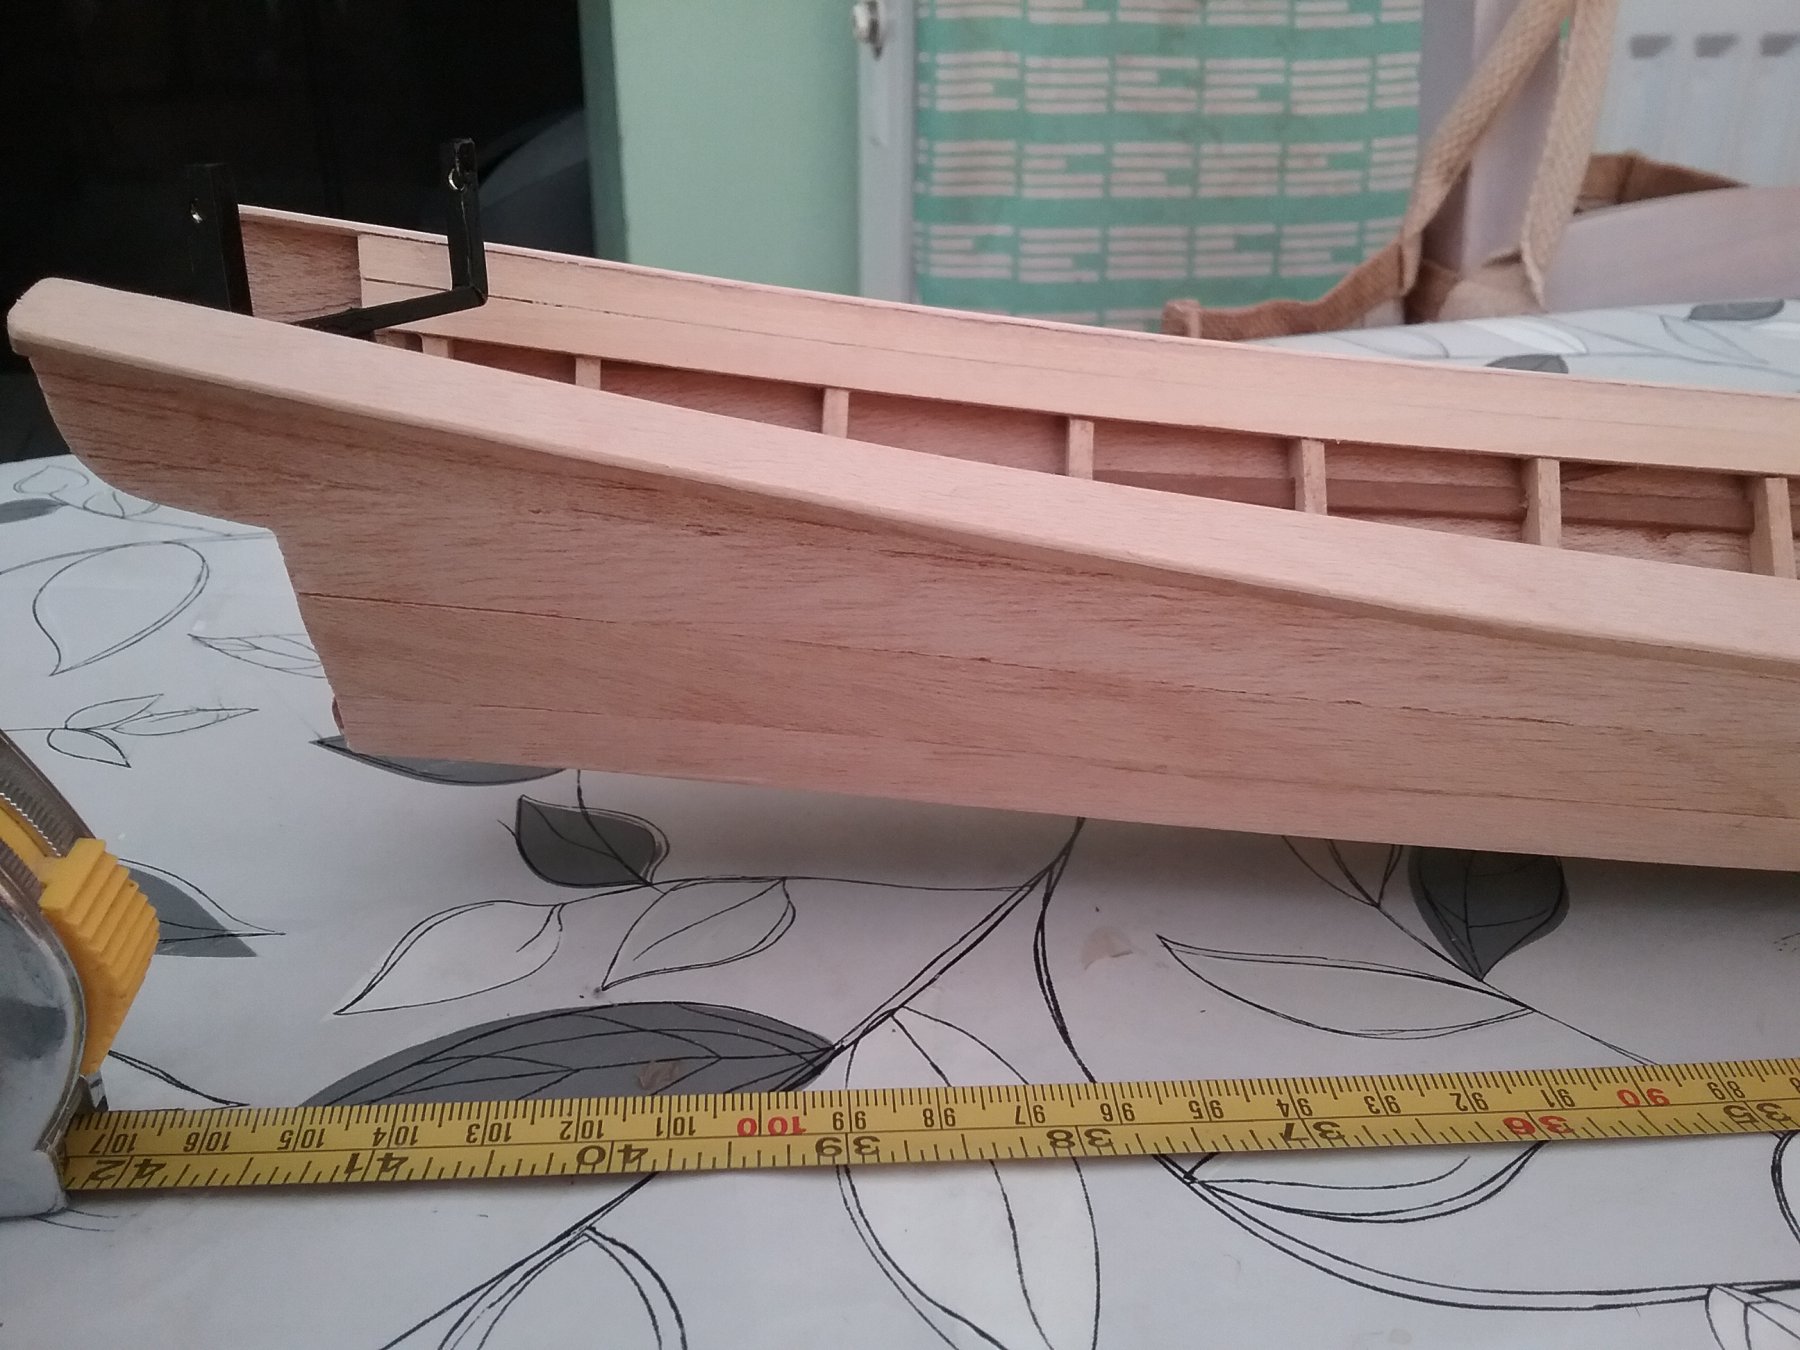
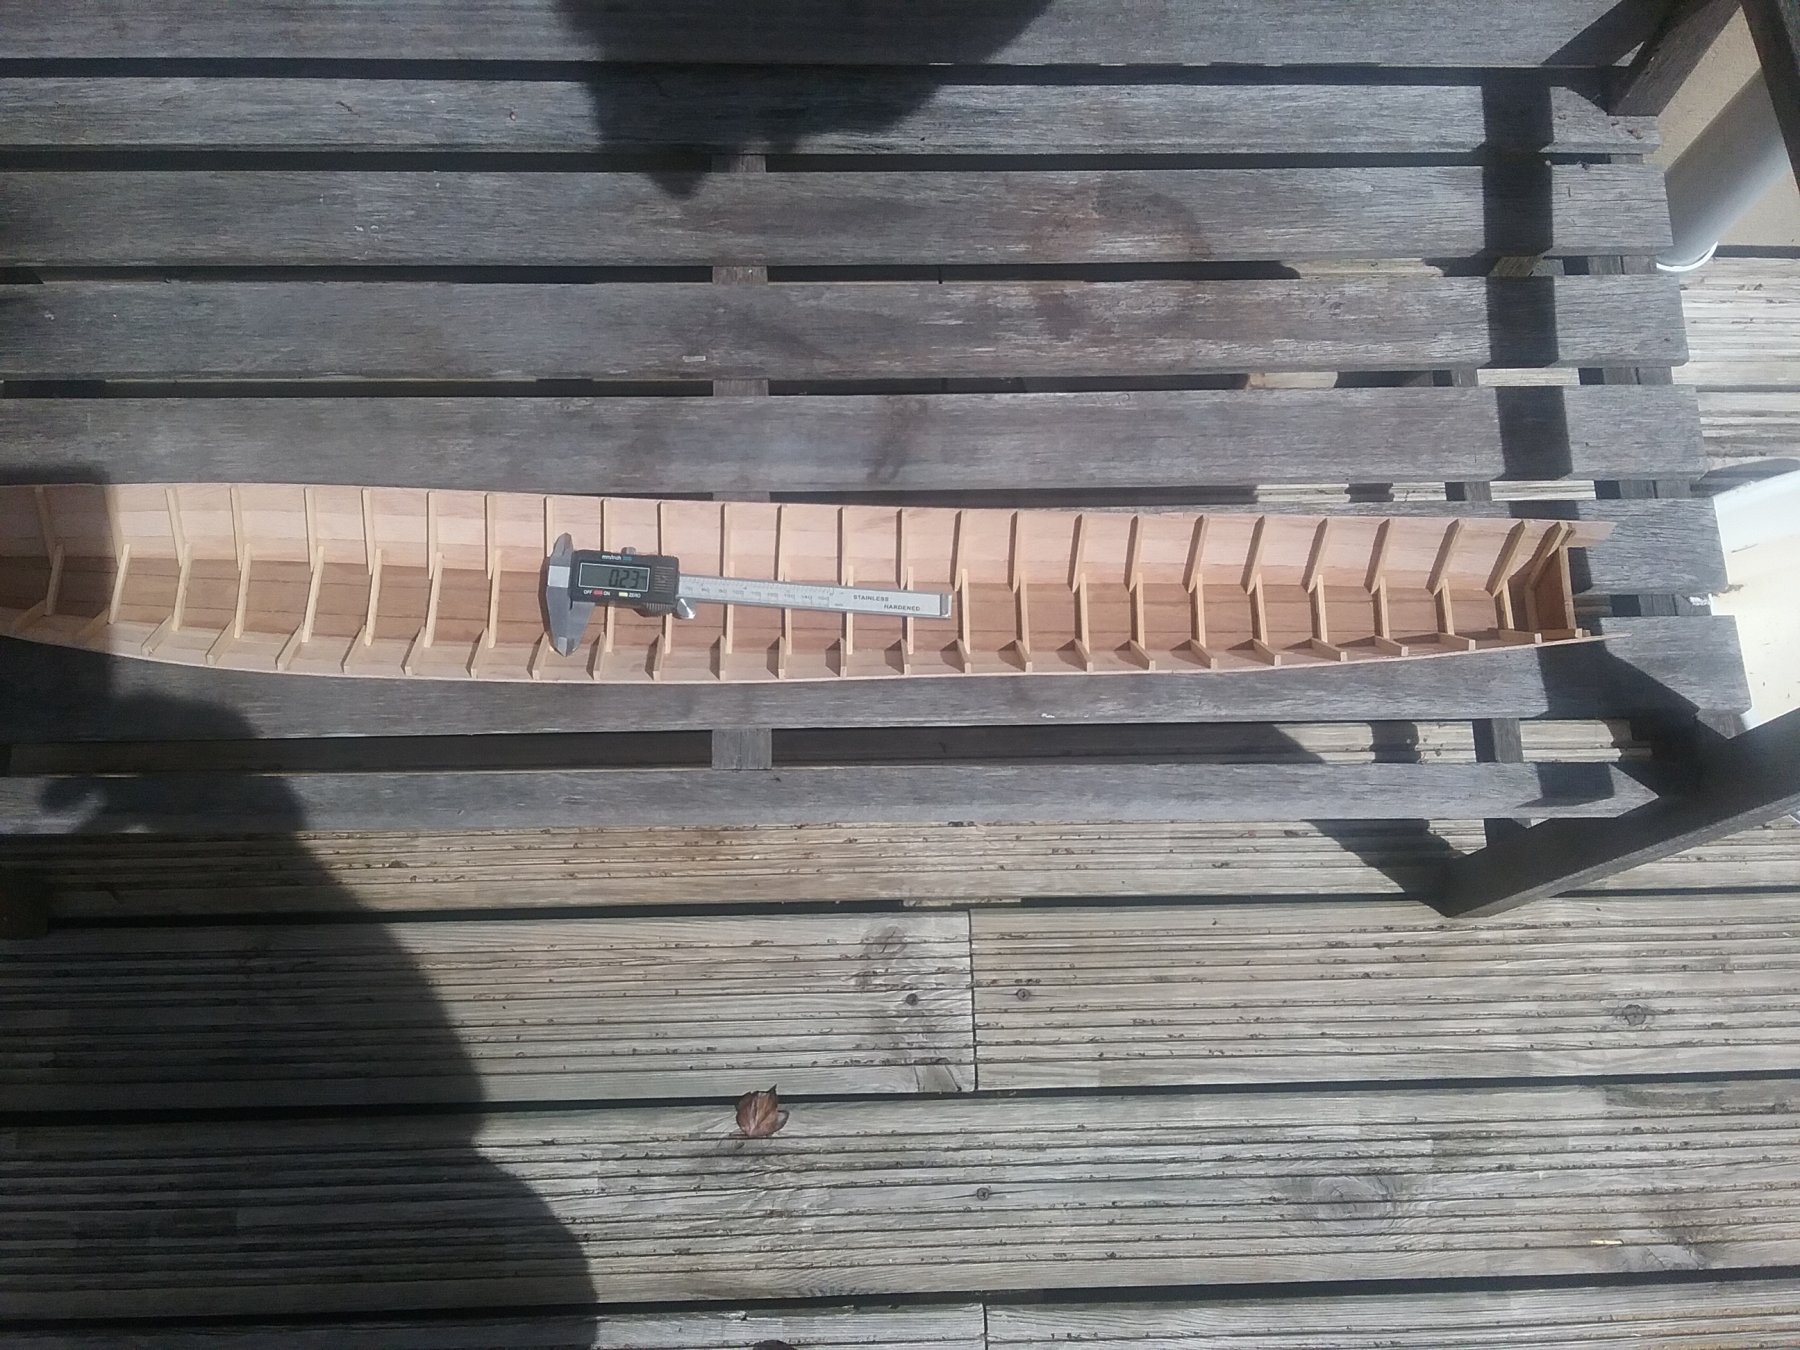
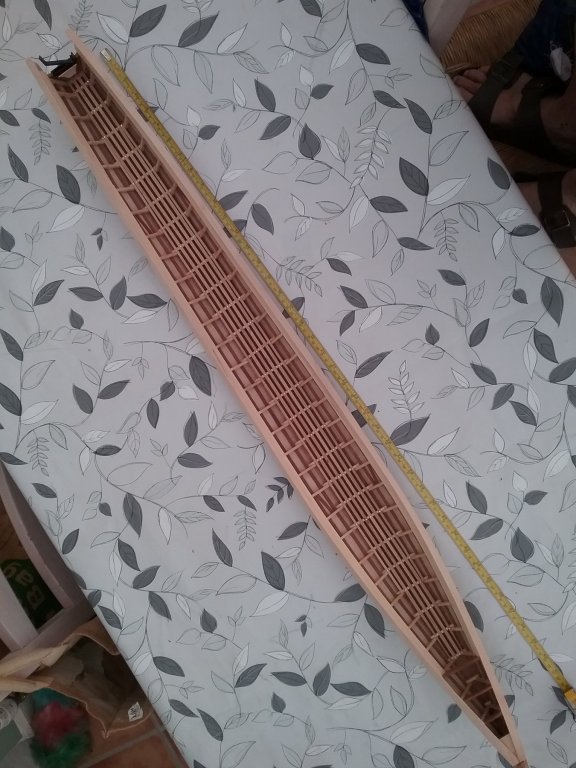
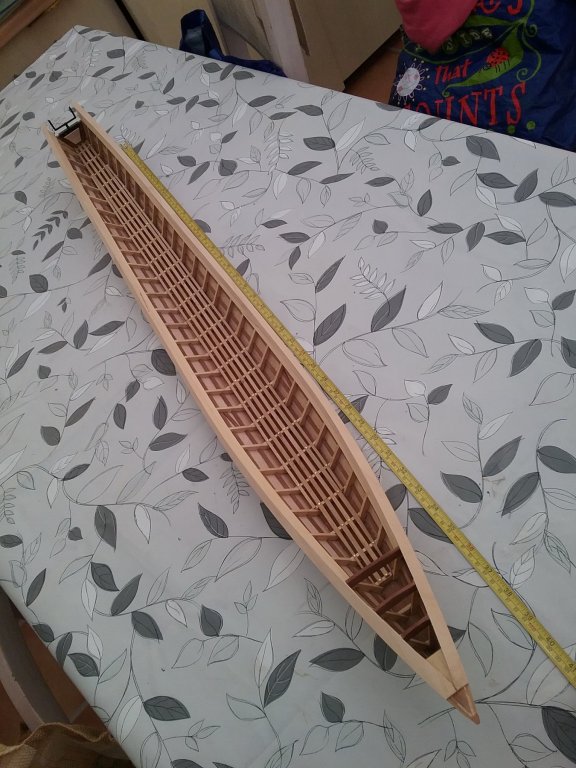
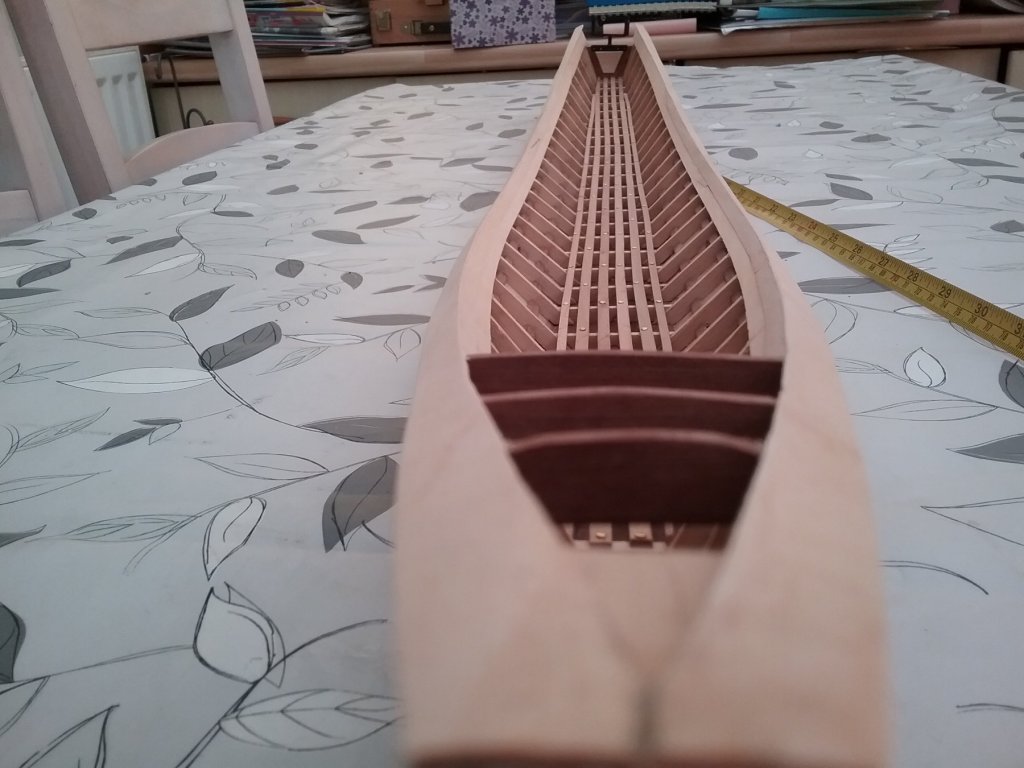
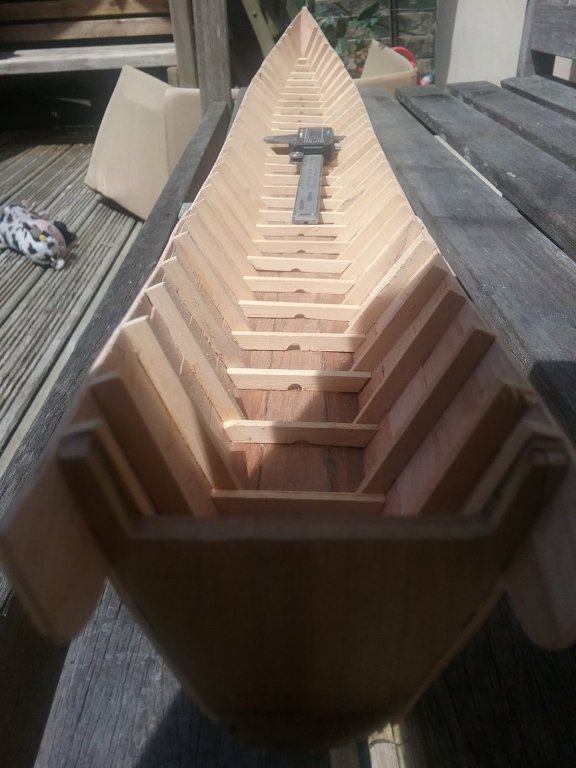
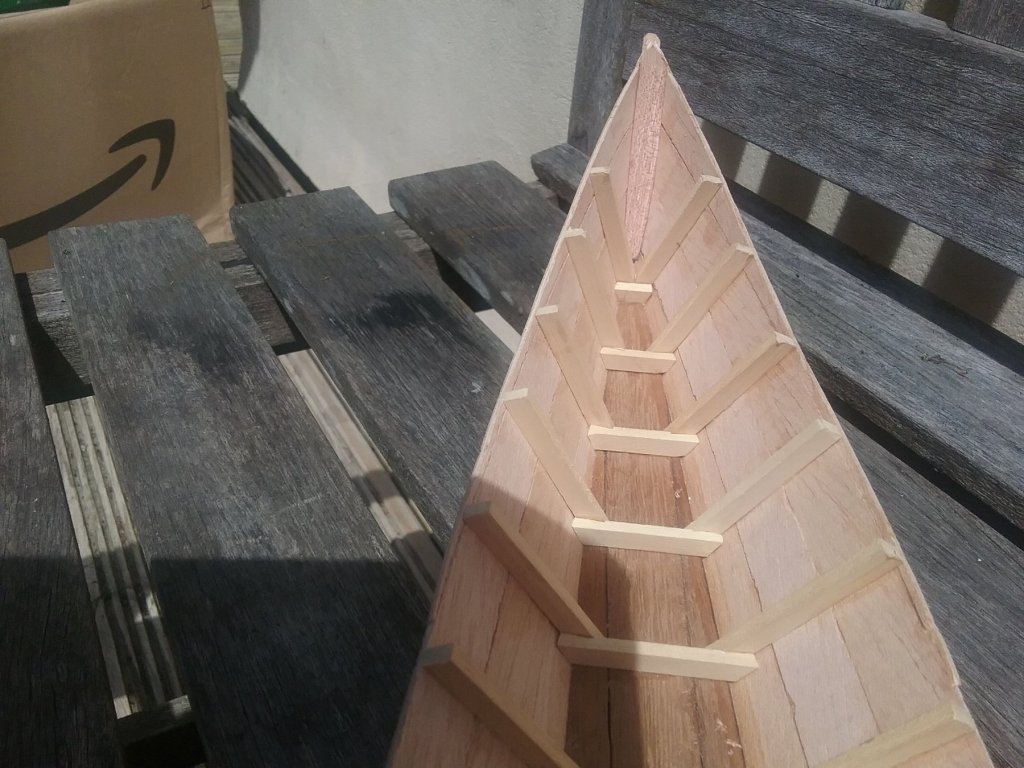
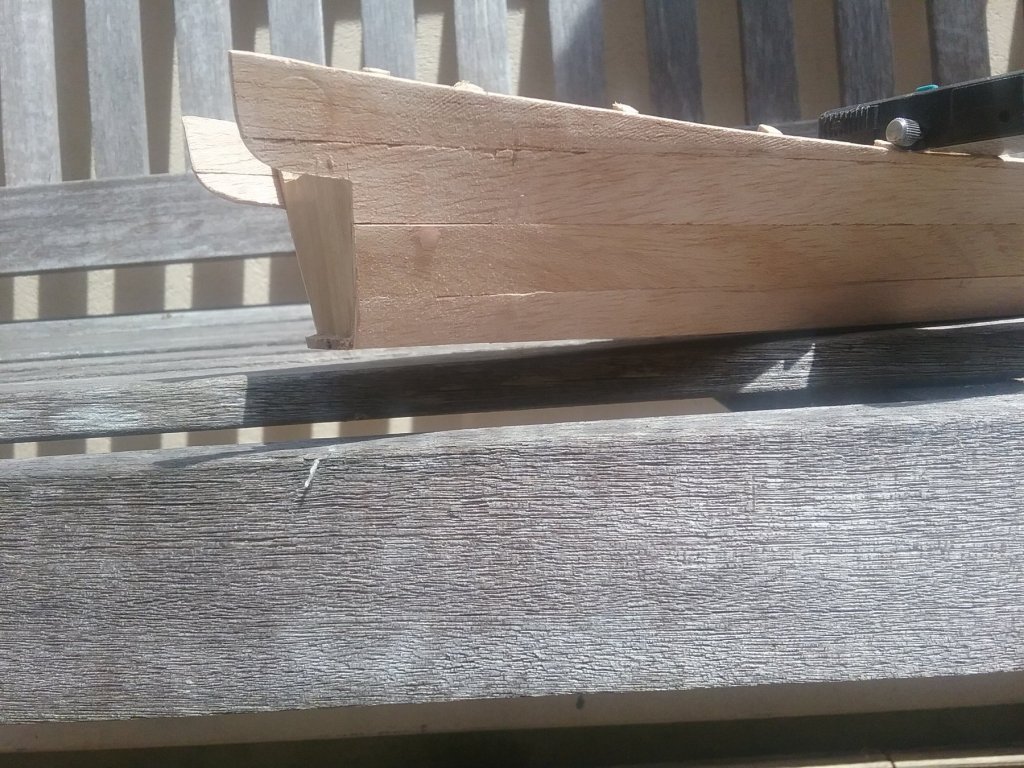
Hi. A few more pictures on the progress. Have put in all the ribs and bow nose. First the centre section looking towards the bow area. The hull with vernier to give some idea of its length. The bow area. And the stern area. I will post the drawings that I have made for the tail boat when all's finished. Regards Antony.

-
Hi Greenstone. Nice looking rigging blocks. Bookmarked for the next rigging project. Thanks Antony.
- 216 replies
-
- 4
-
-
- masterkorabel
- ships
- (and 3 more)
-
Gondola by AntonyUK
AntonyUK replied to AntonyUK's topic in - Build logs for subjects built 1901 - Present Day
Hi. Well the drawings arrived today. Probably the best drawings I have come cross while ship modellng. And I was concerned that they could be trash like the last set of drawings I bought. Thanks for the heads up Carl. Glad you did.😁 Will take a good look at the tomorrow and decide my next move. Also awaiting the books arrived. Thanks for the likes and comments. Regards Antony. -
Gondola by AntonyUK
AntonyUK replied to AntonyUK's topic in - Build logs for subjects built 1901 - Present Day
Hi Thanks for the pointer.. and recommendation . I have ordered one today. Fathers day gift.. The kids were kind to me this year. Regards Antony. -
Hi. Thanks for the likes. Yves.. yes I have a few figures that fit the scale. Also have a model engine that will fit onto a frame that will sit on the transom. Regards Antony.
-
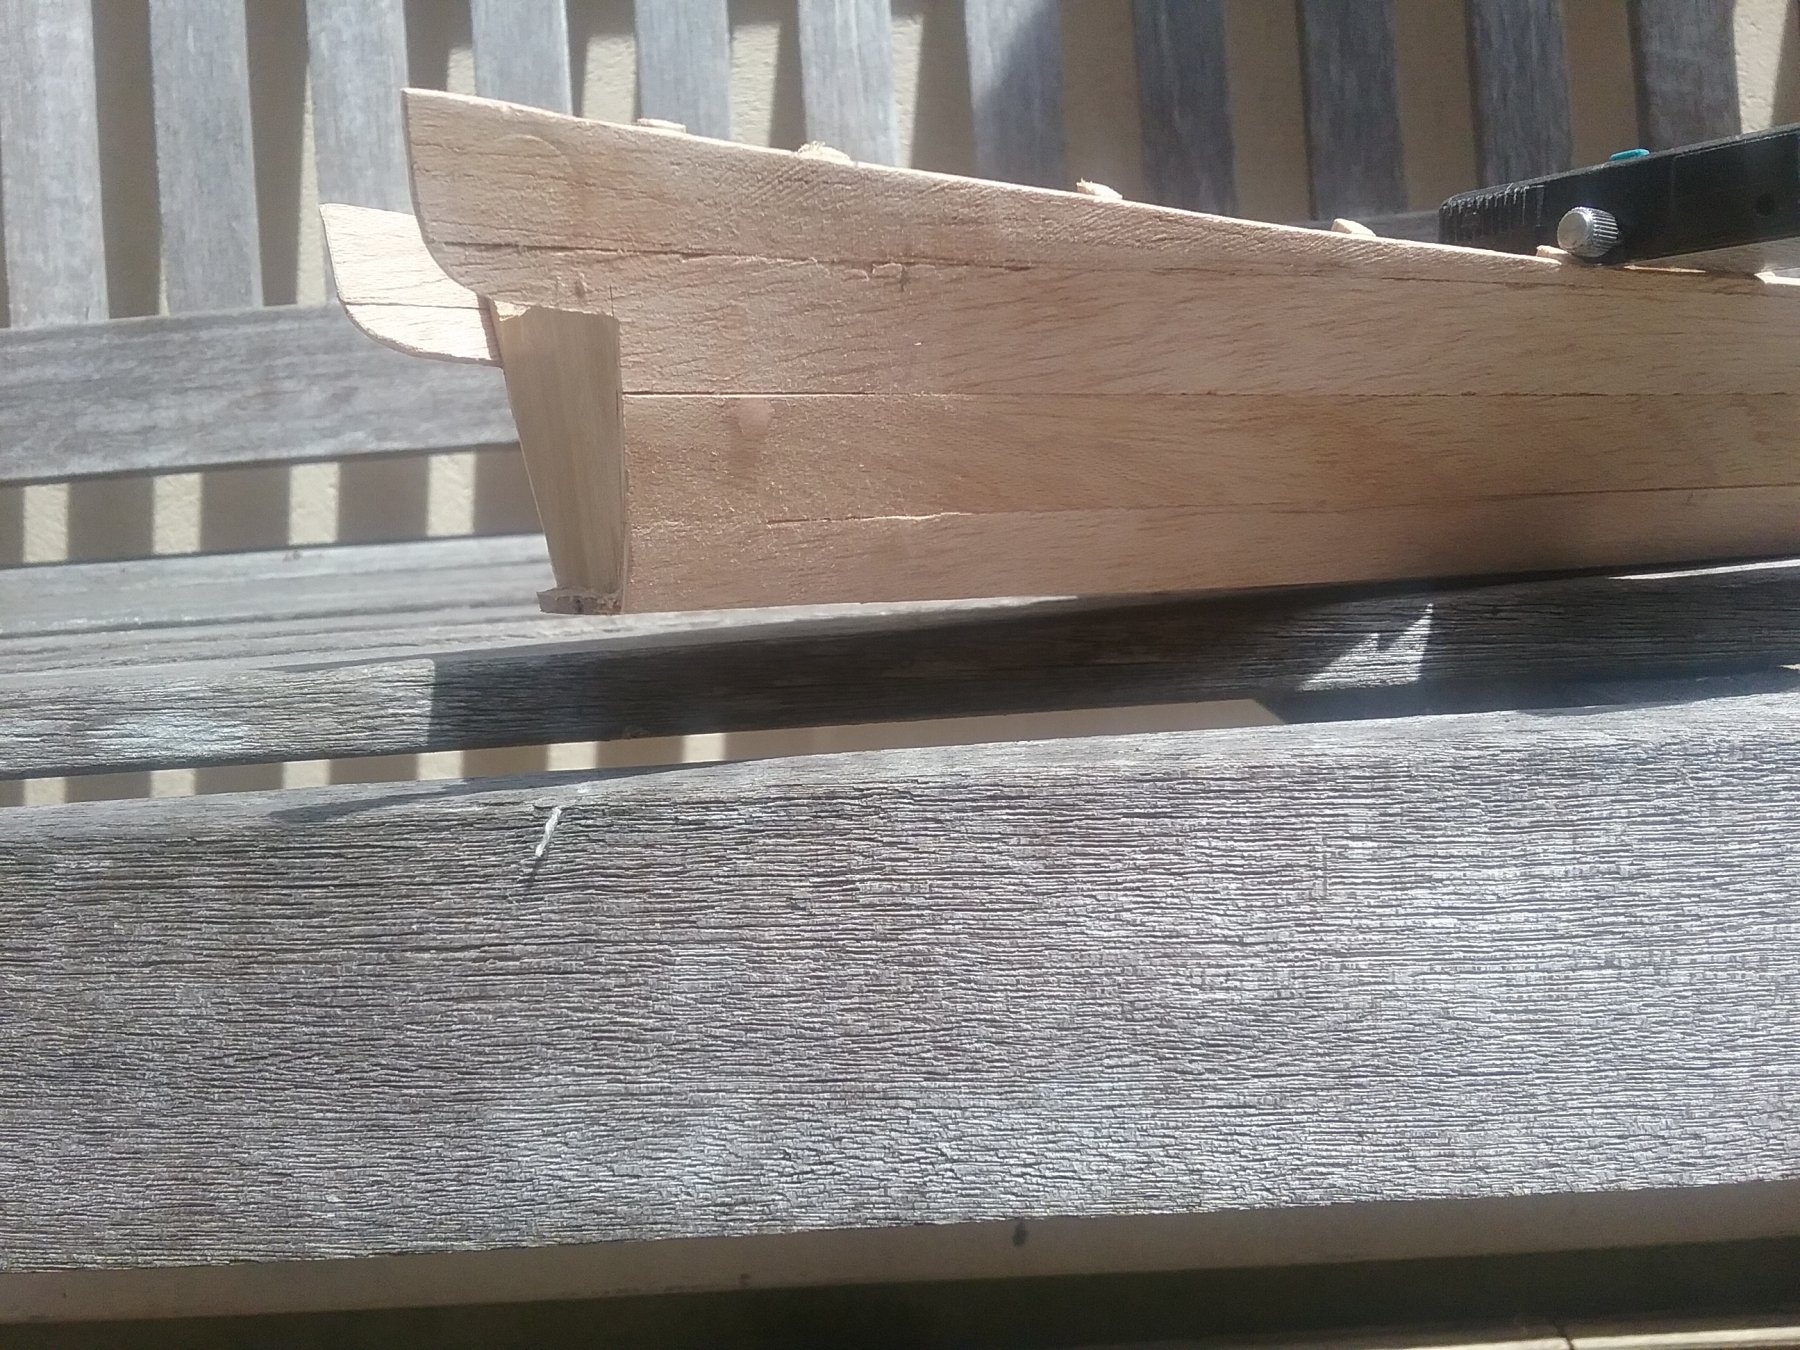
Another update Just the half planks to fit on the Bow and Stern. And the planking is finished. Then it's the ribs to be added. 30 of them. And transom. Photo as it is now. Stern first. Then the Bow area. And one looking from Bow to Stern. Another update mid week. Regards Antony.
-
Hi Nils.. What a splendid model. It has a feel to it on how it should be. The cutaway makes it so inteesting and unique model of a Chebec. Well done you. Regards Antony.
- 692 replies
-
- 7
-
-
- eagle of algier
- chebec
- (and 2 more)
-
Hi. Another couple of photos. First side planks in position and glued. The supports are working a treat as the angles of the bulwark's are spot on. The shape of the boat is such that the planks just lie without forcing them into place. Floor frames and side frames will be added after transom has been fixed. Regards Antony. Extra supports will now be added to support the upper planks when I attach them.

-
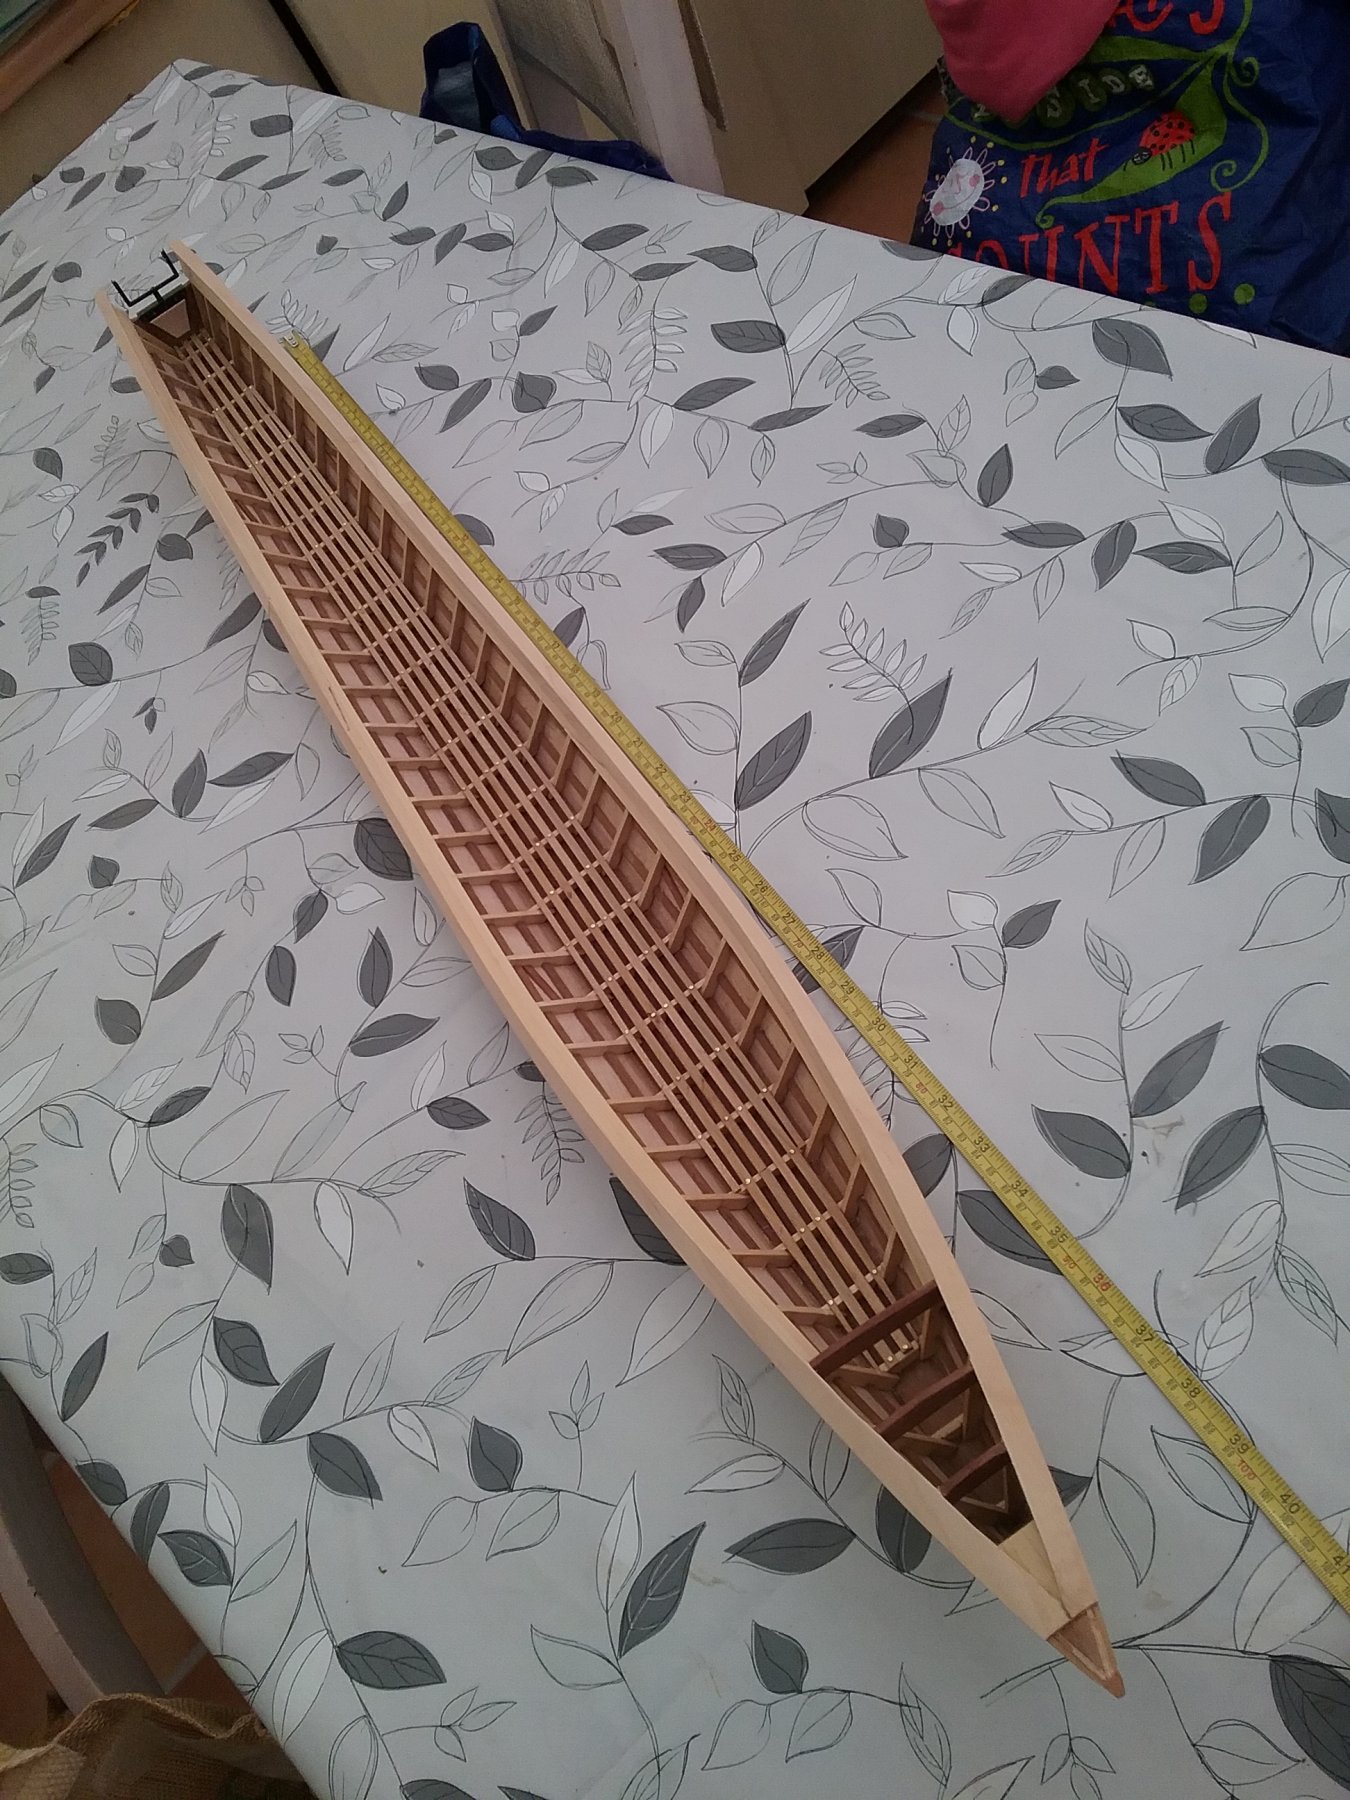
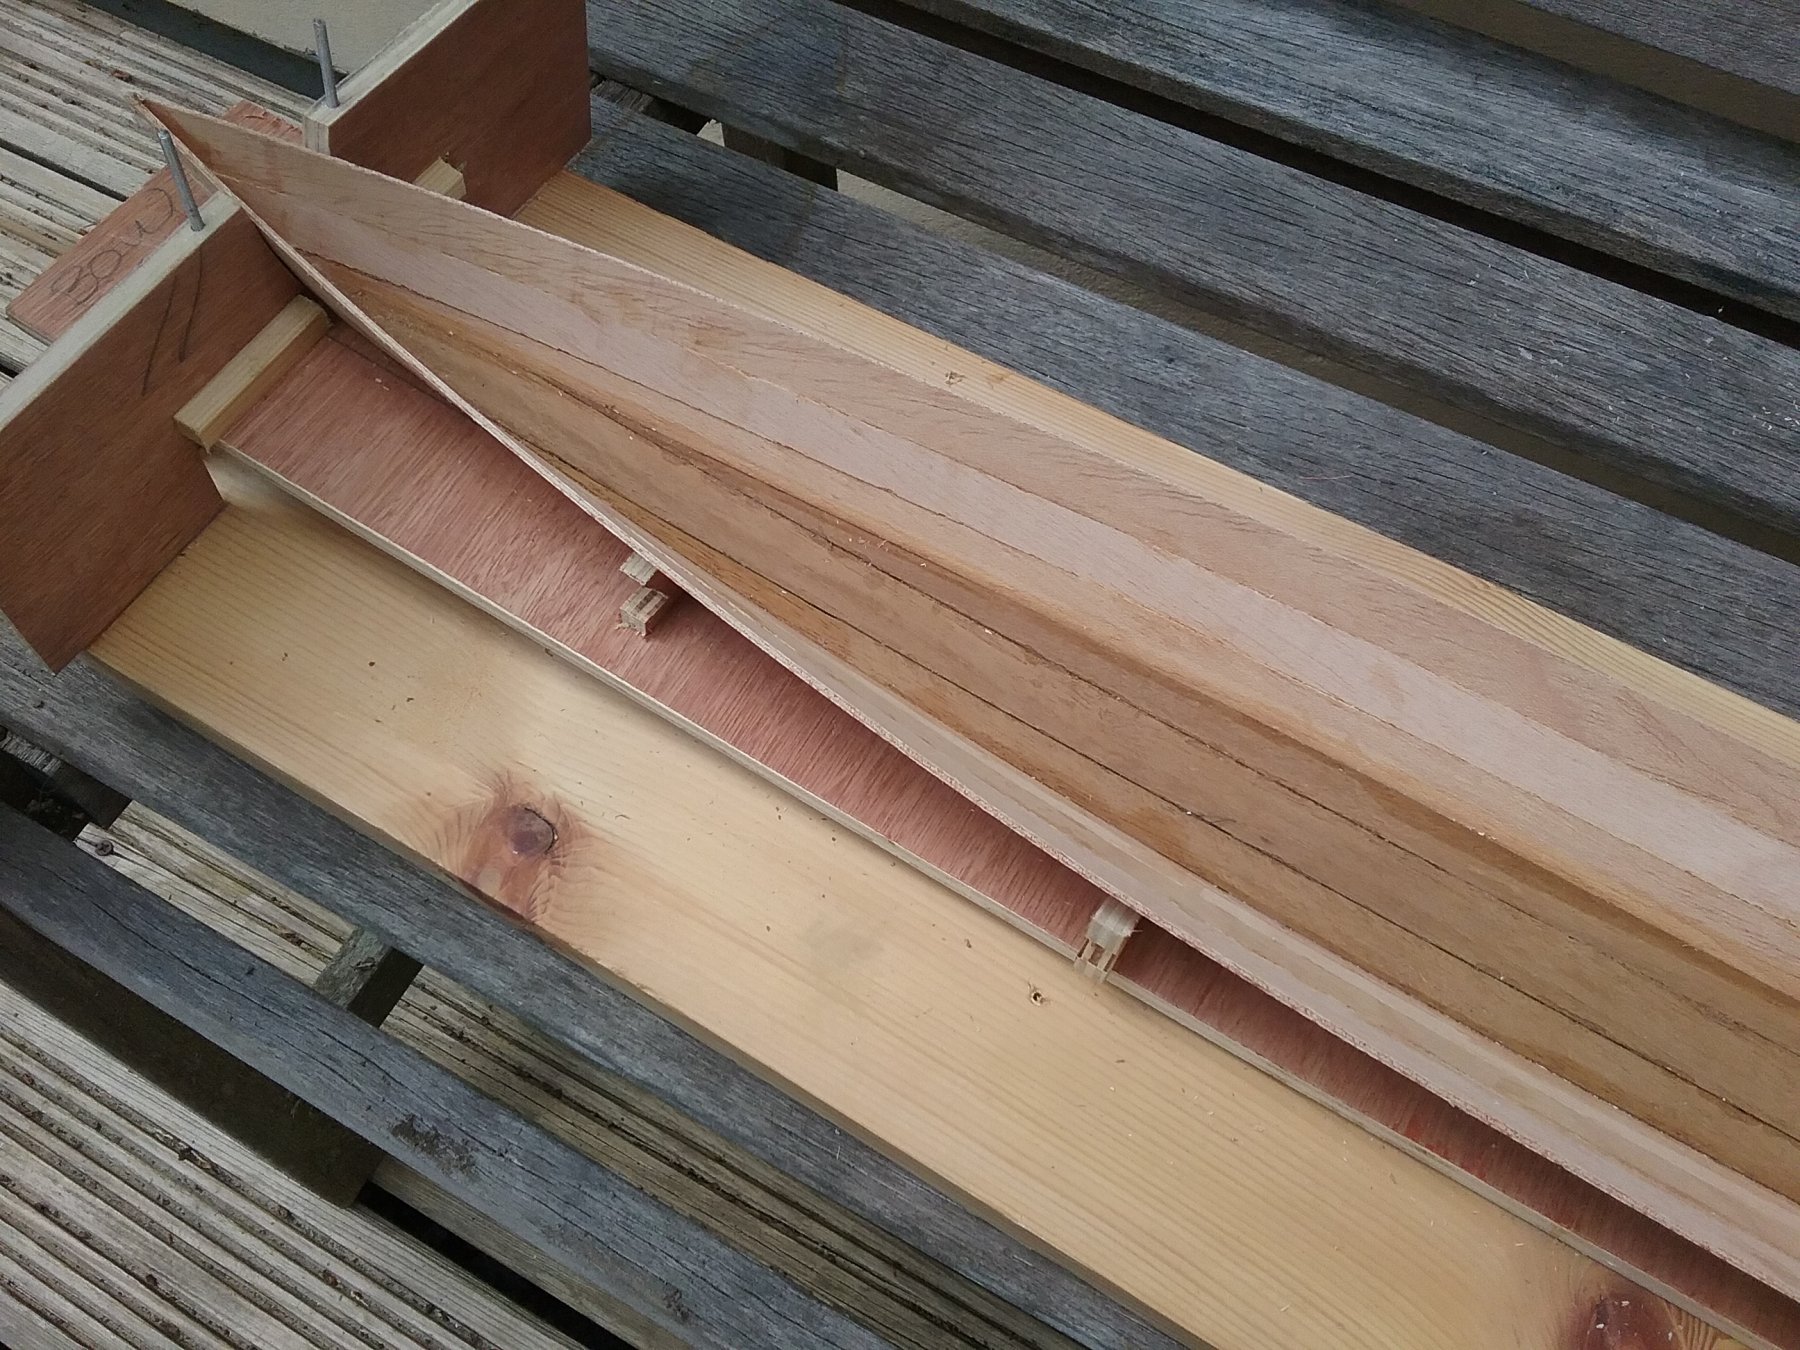
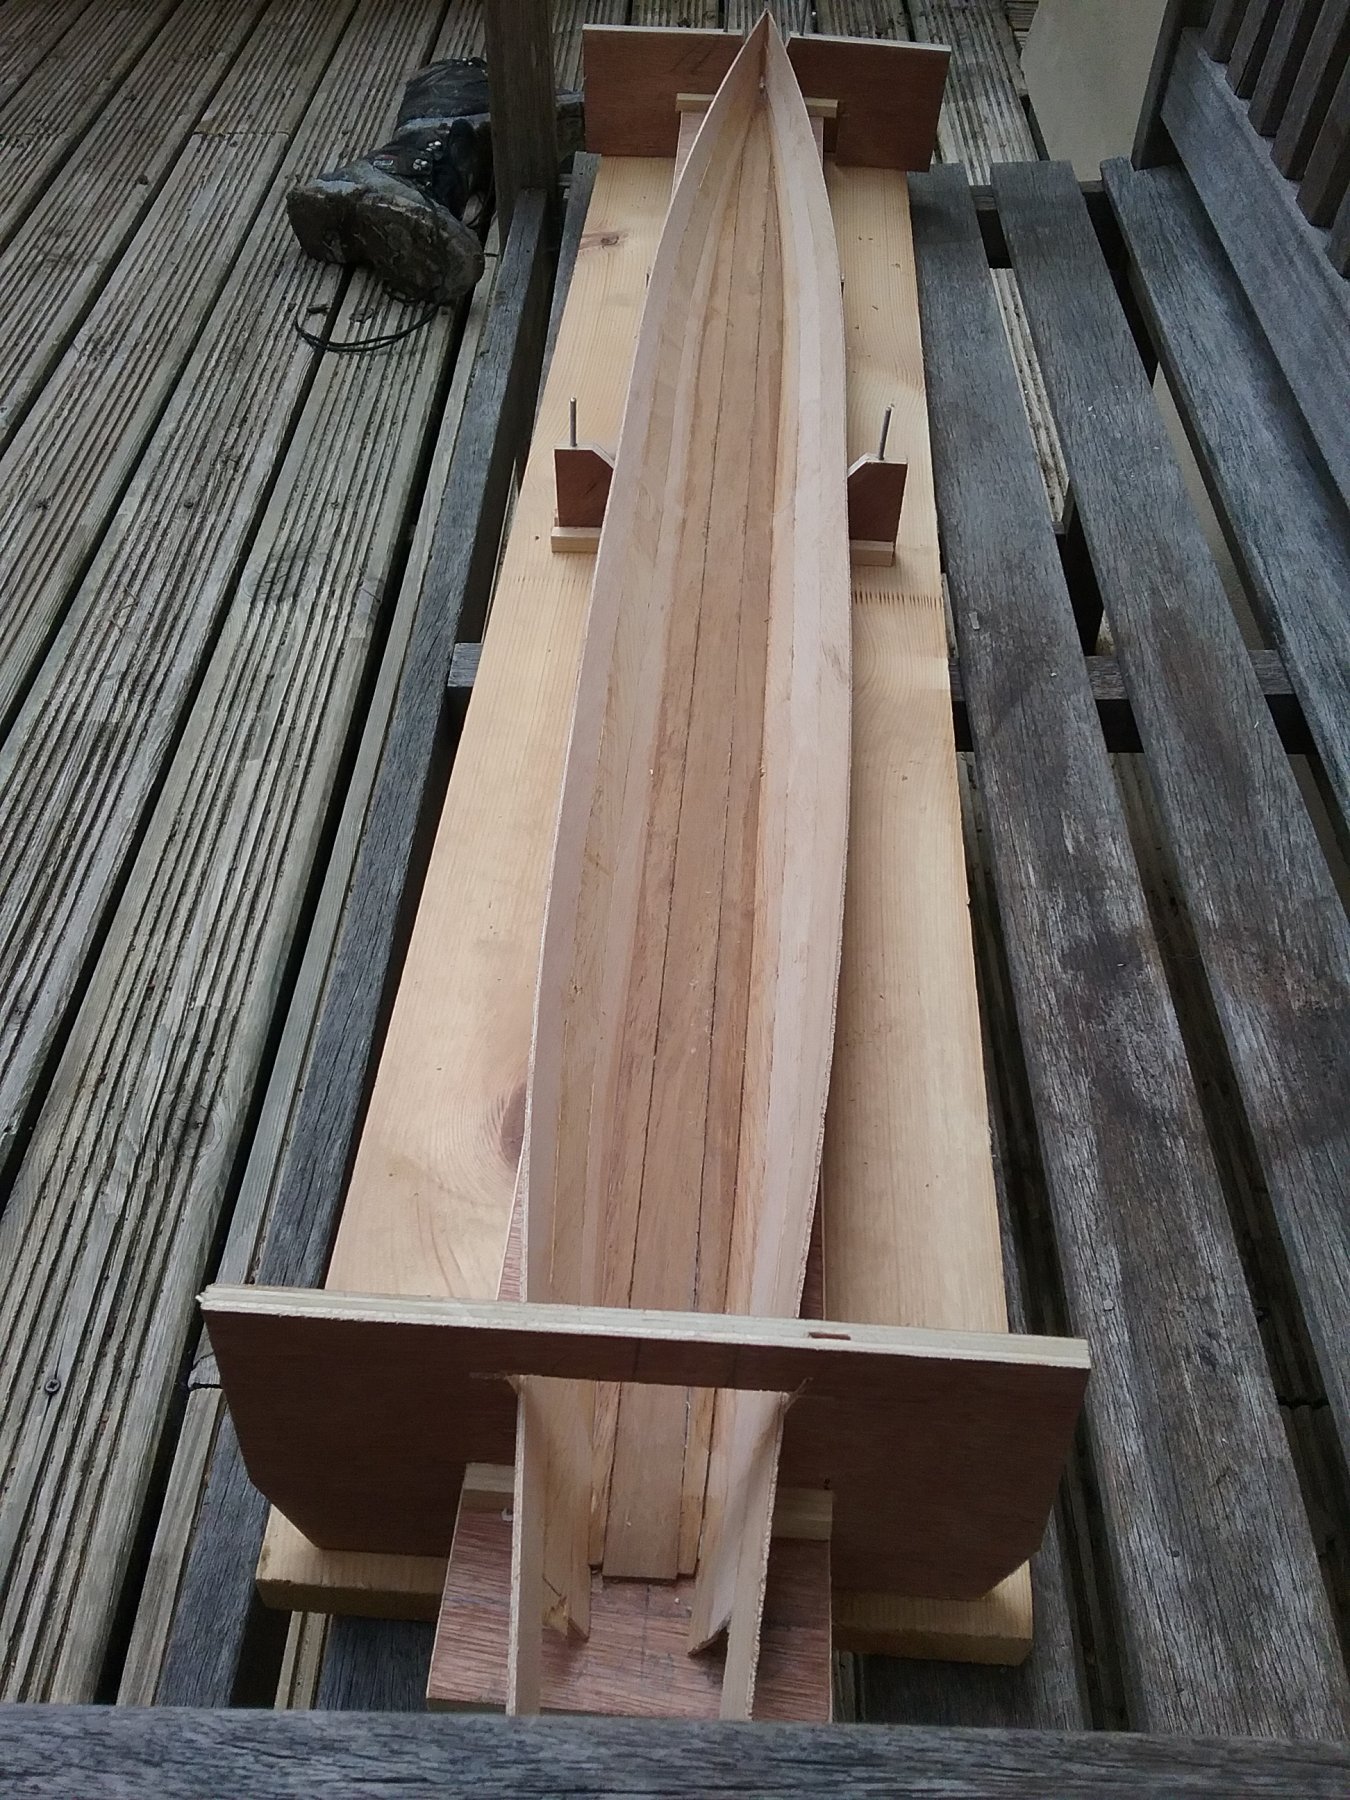
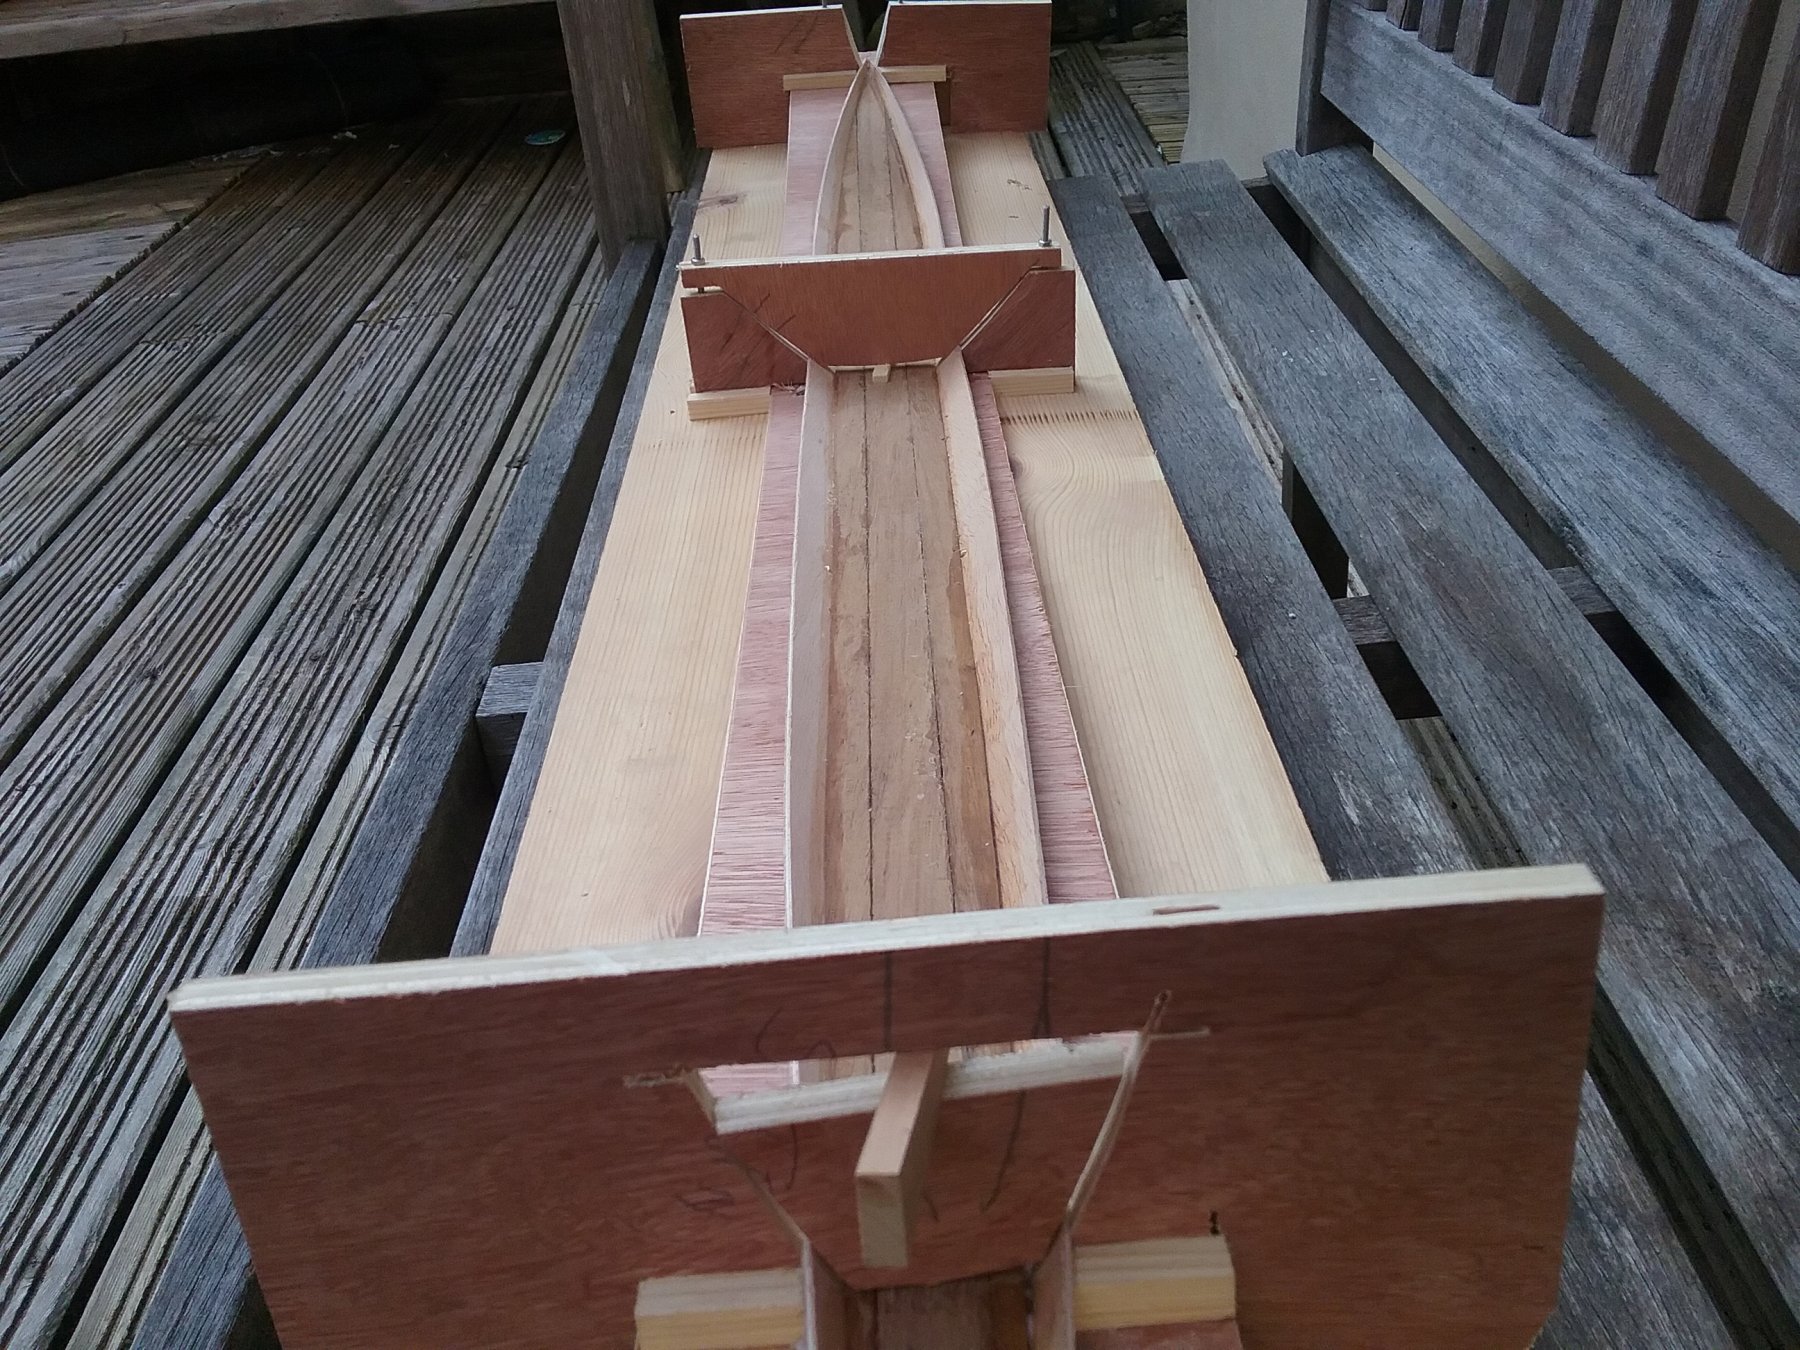
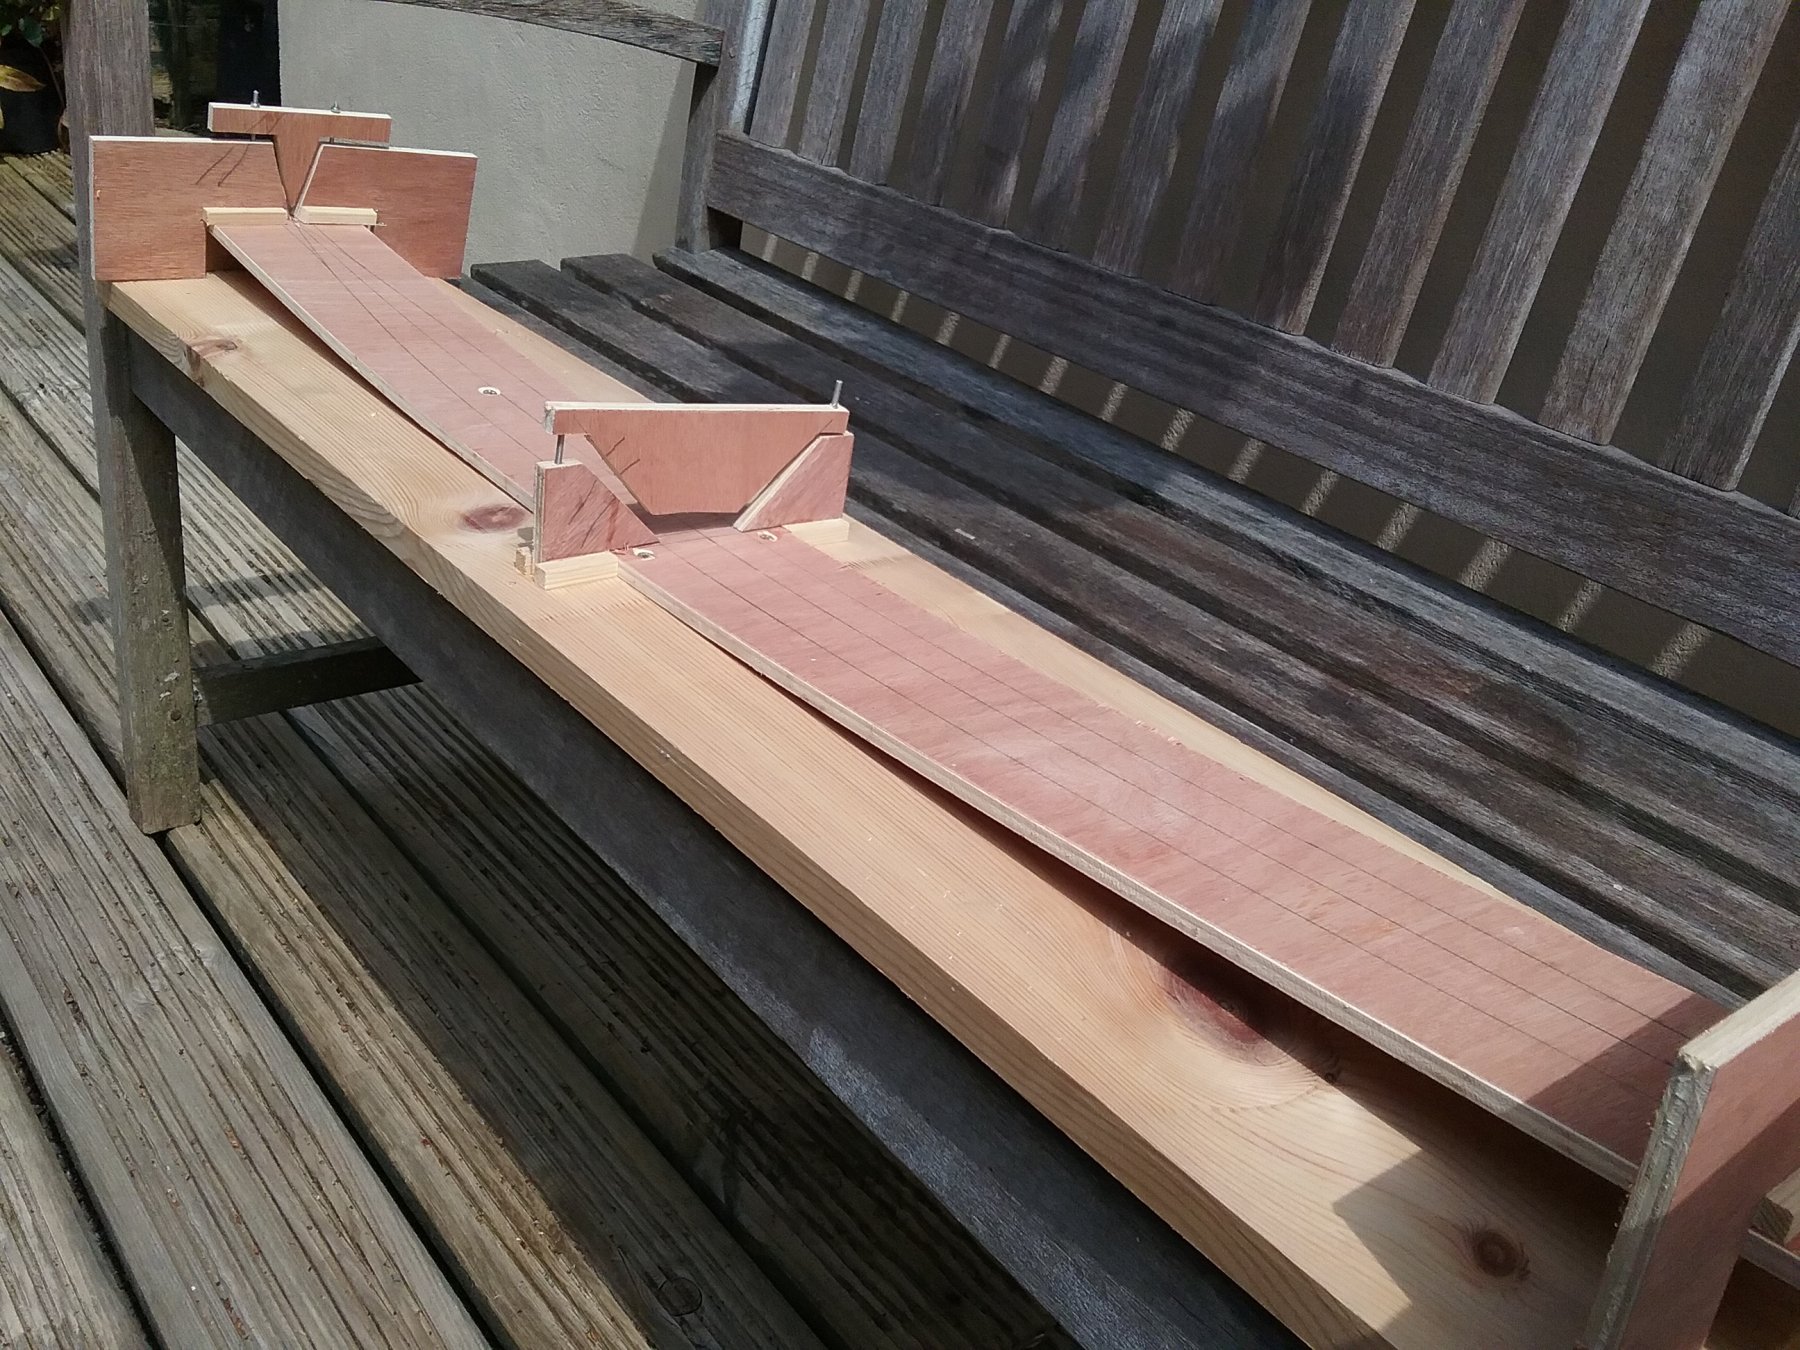
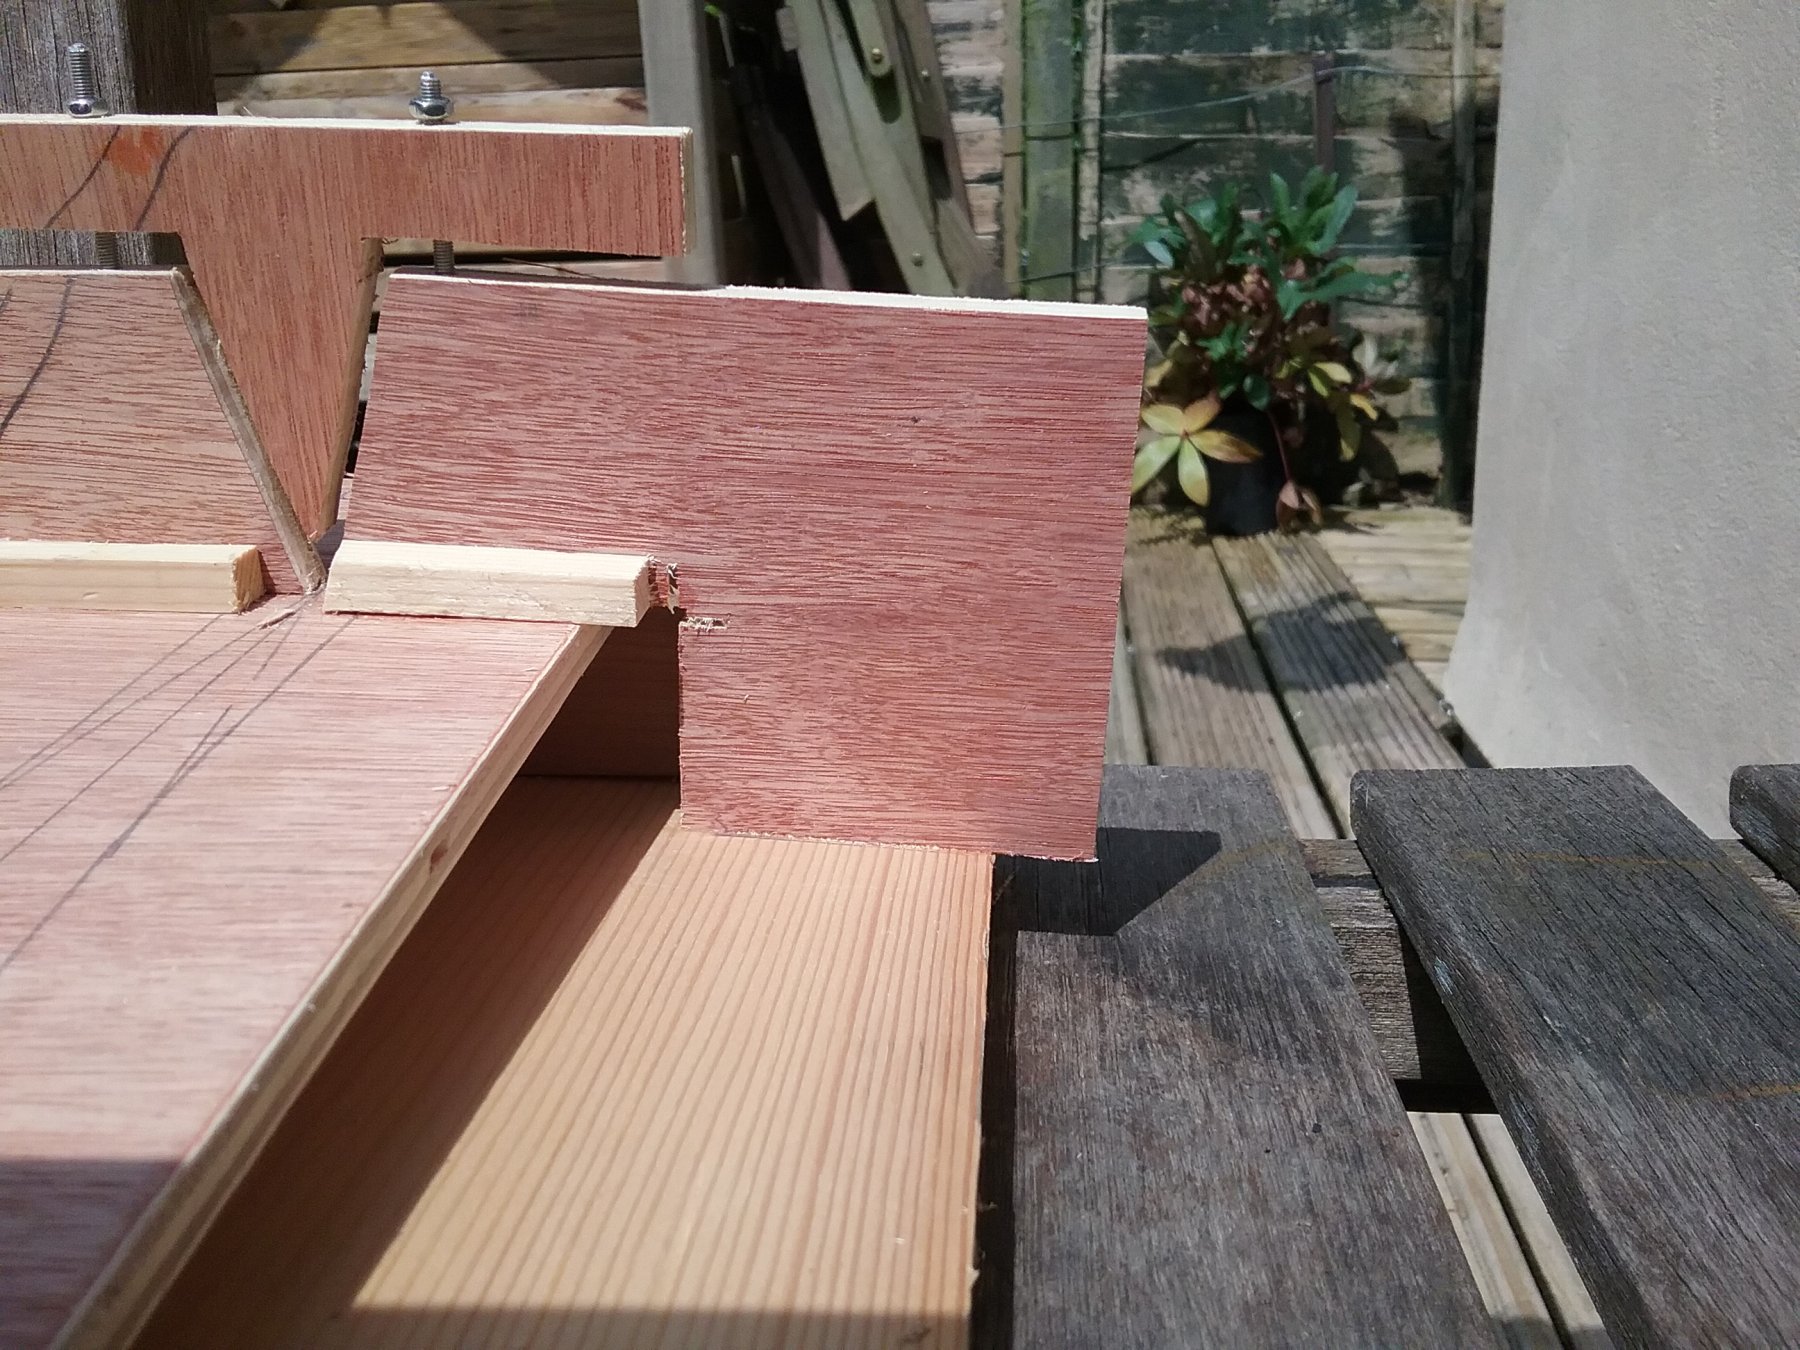
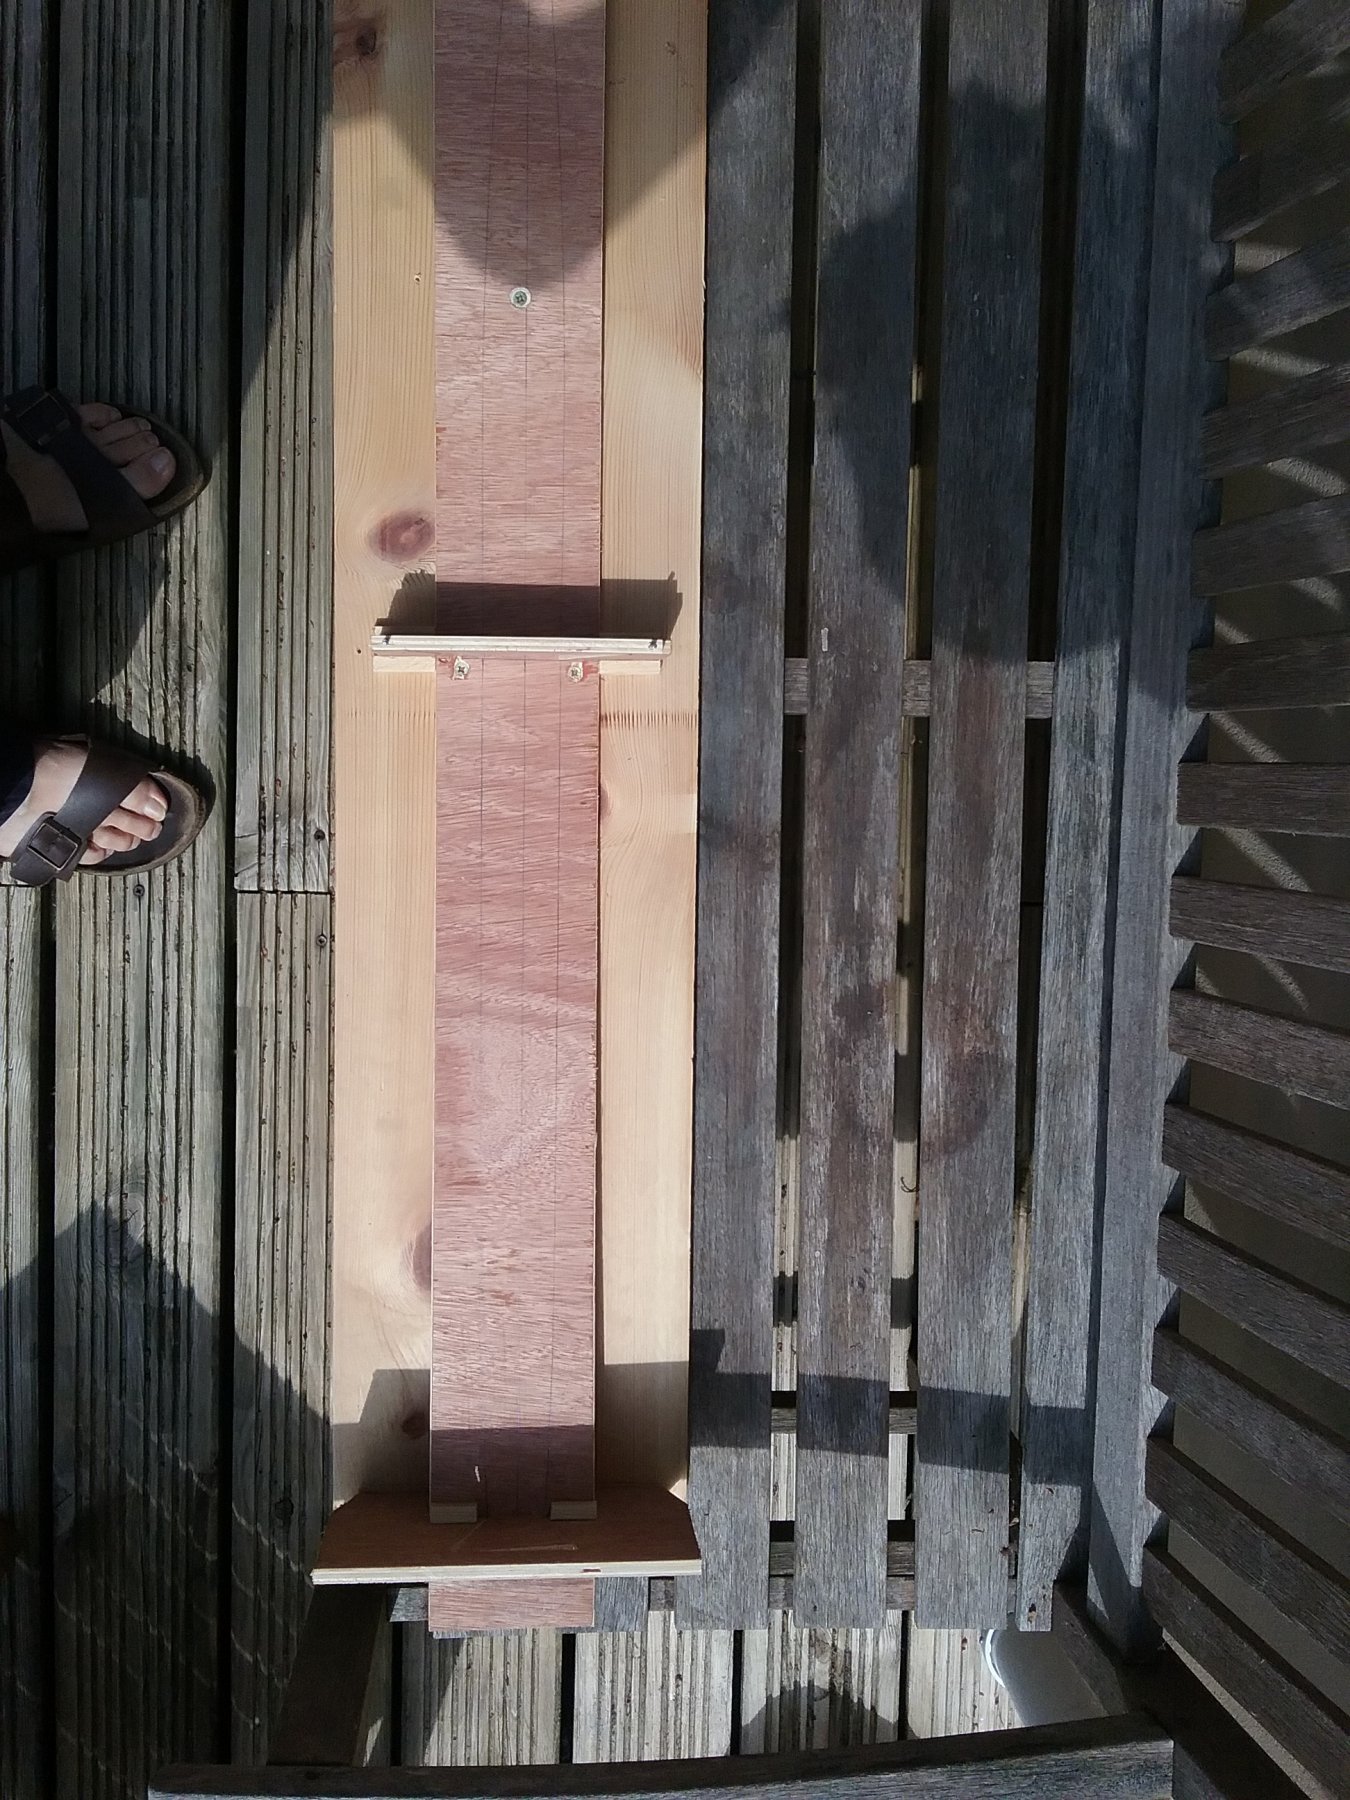
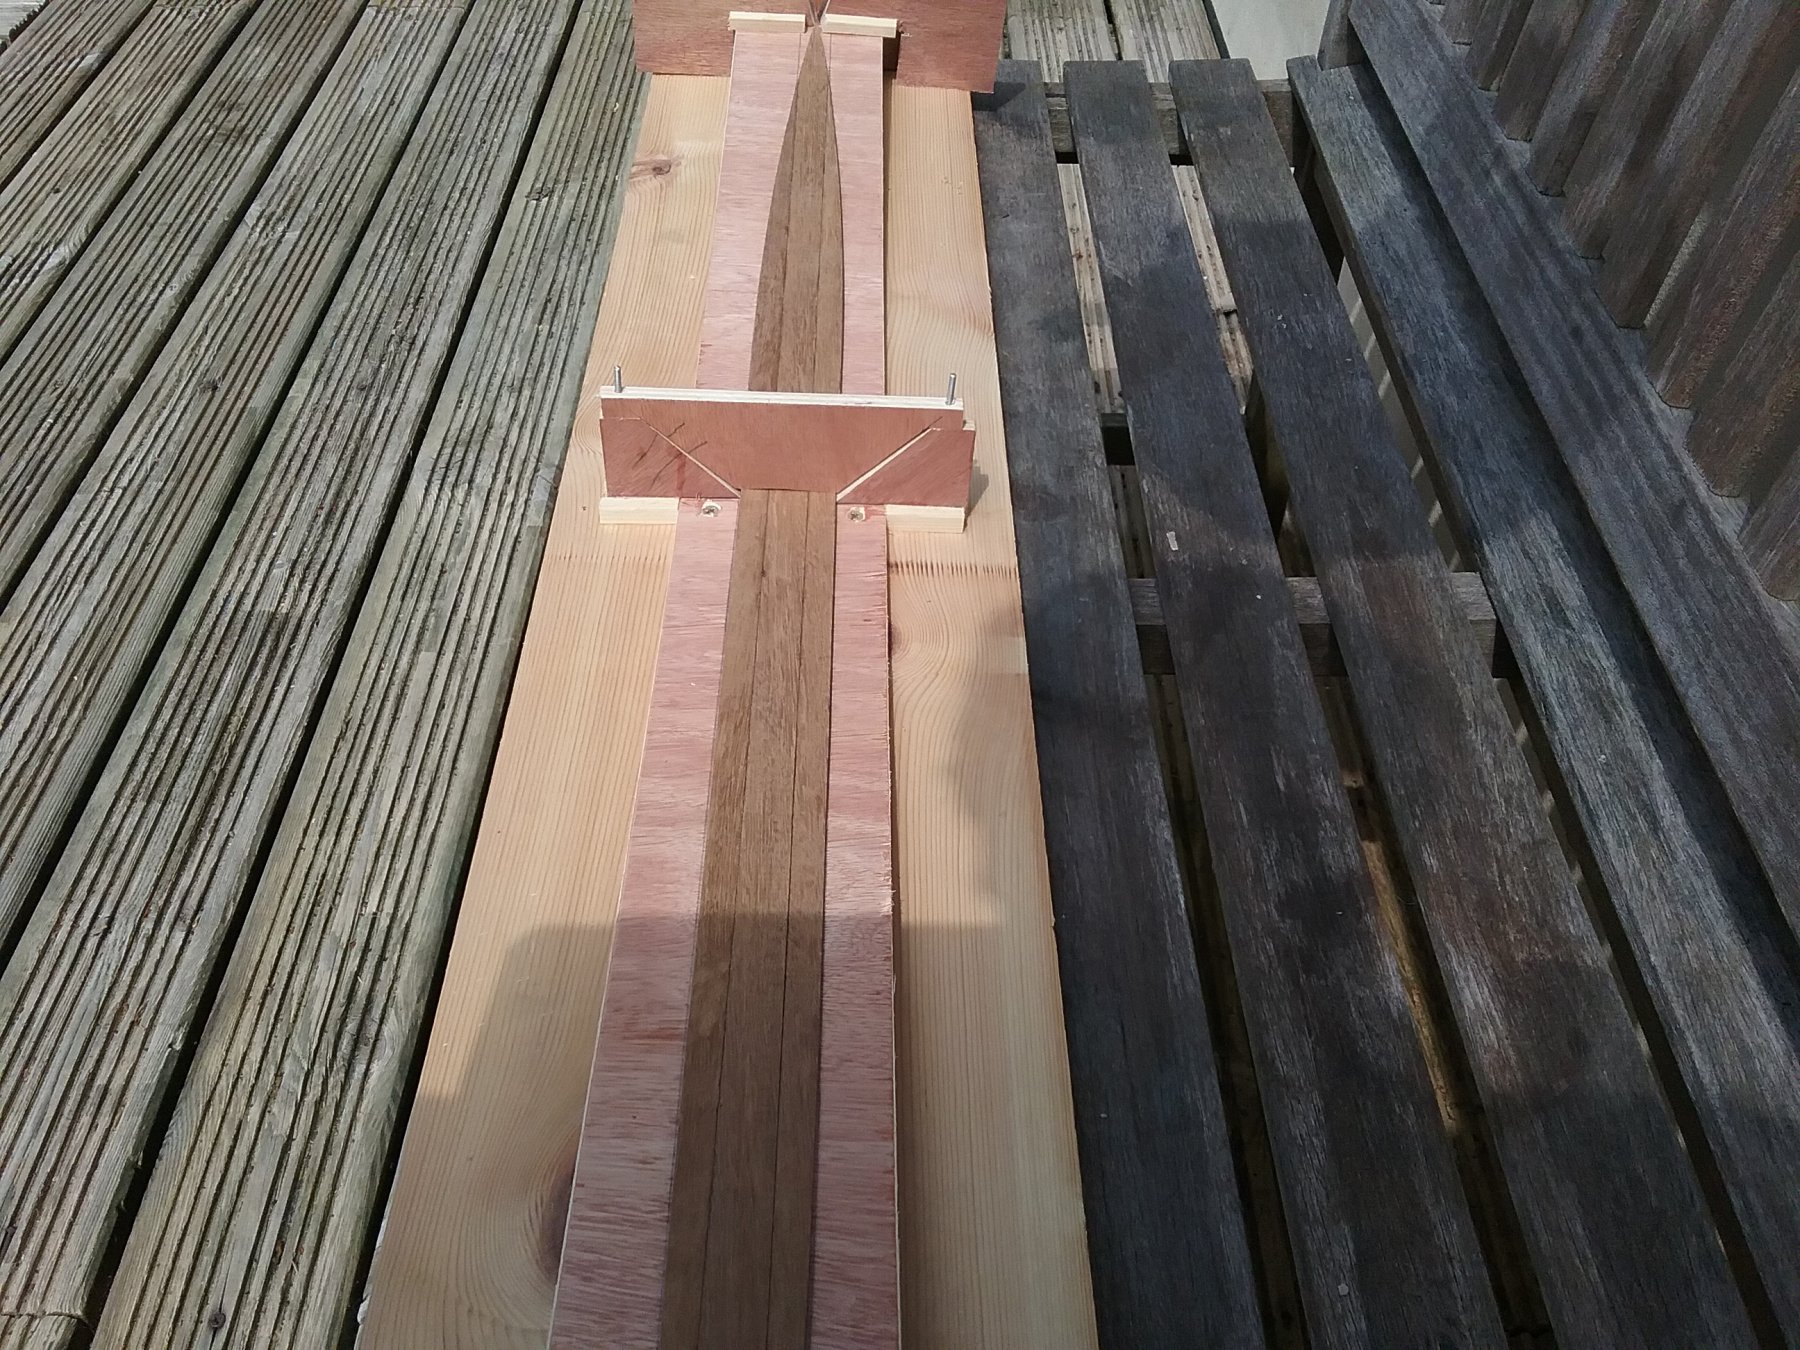
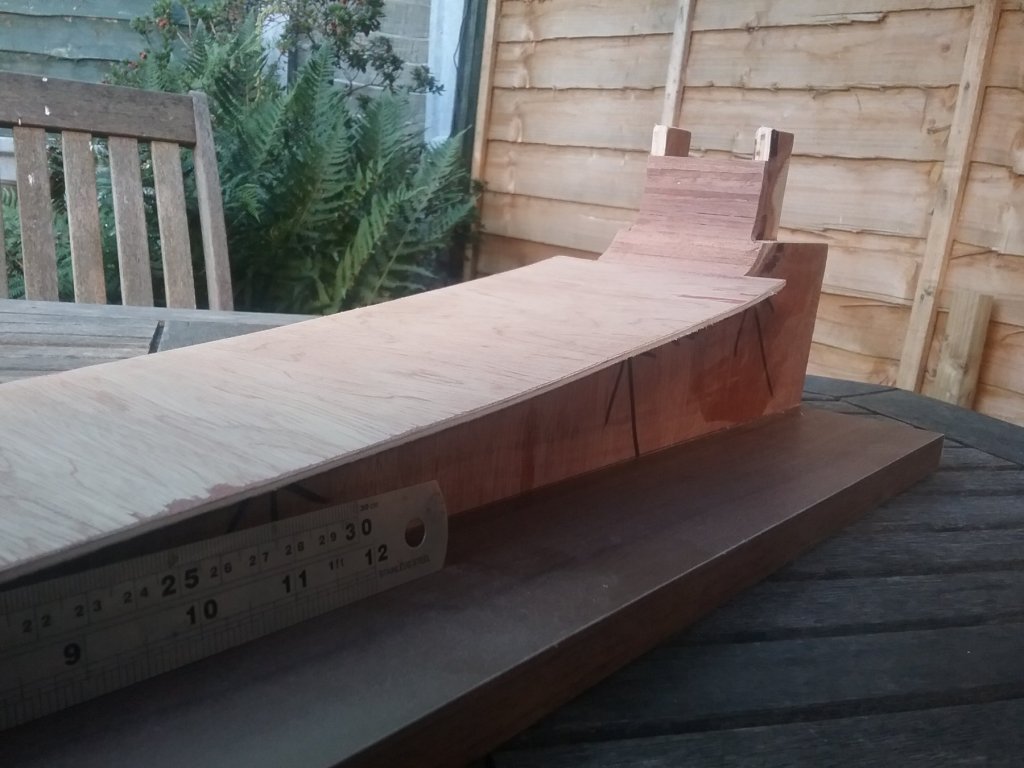
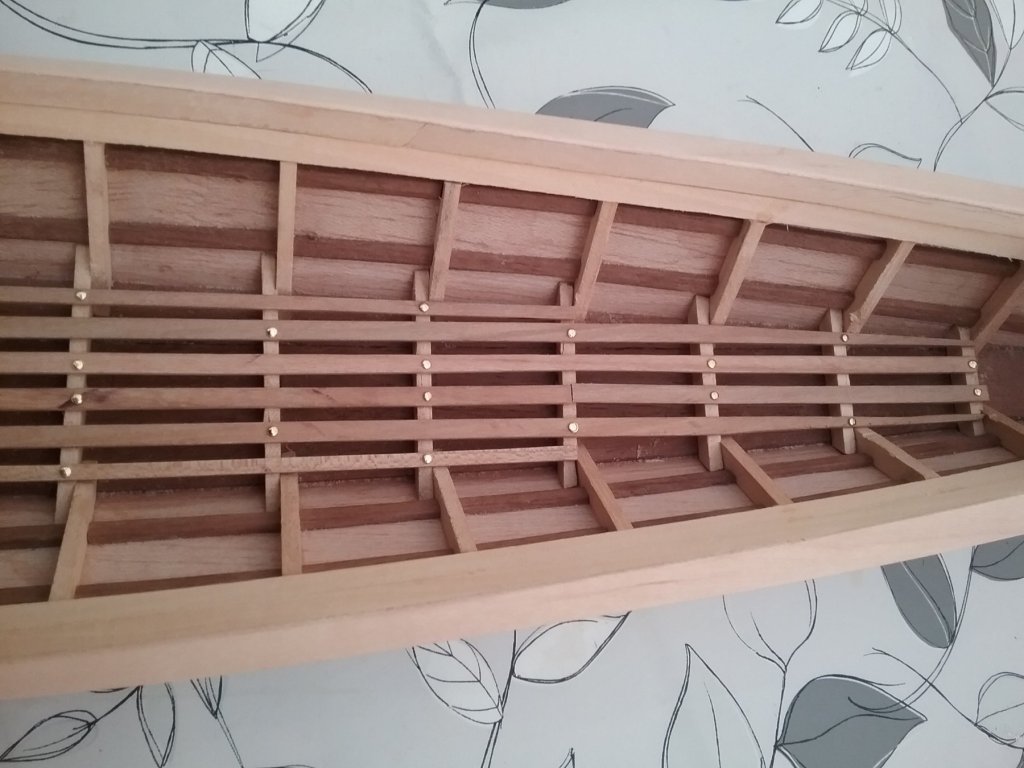
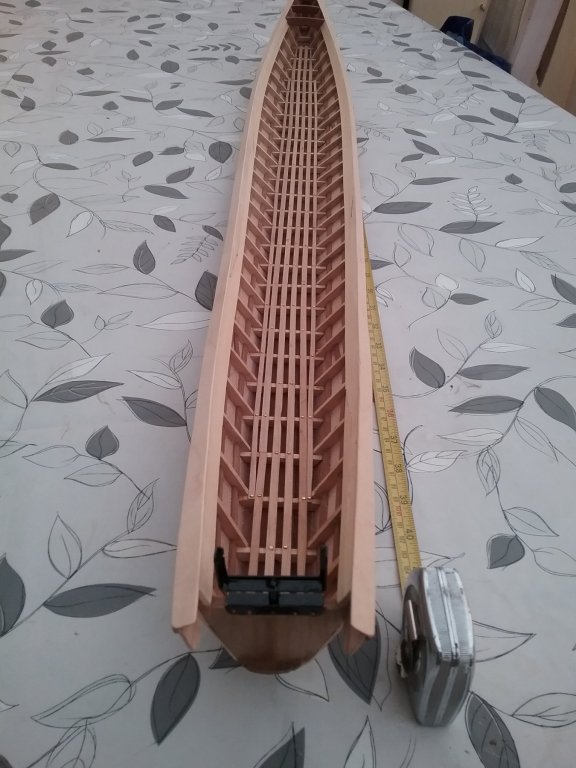
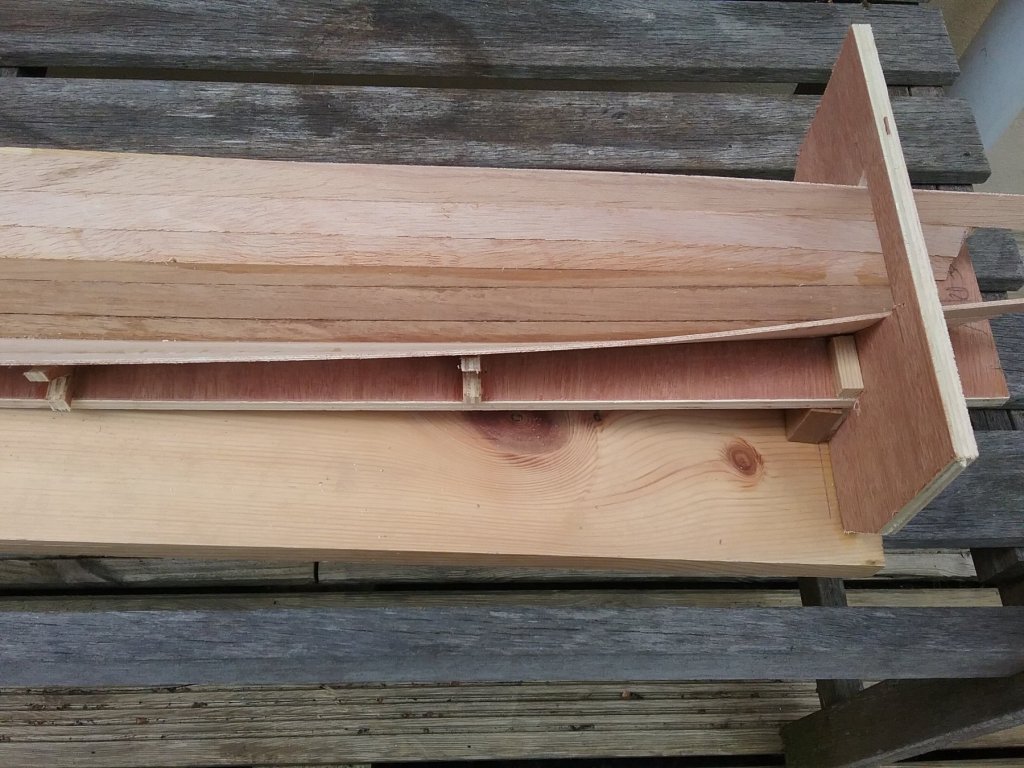
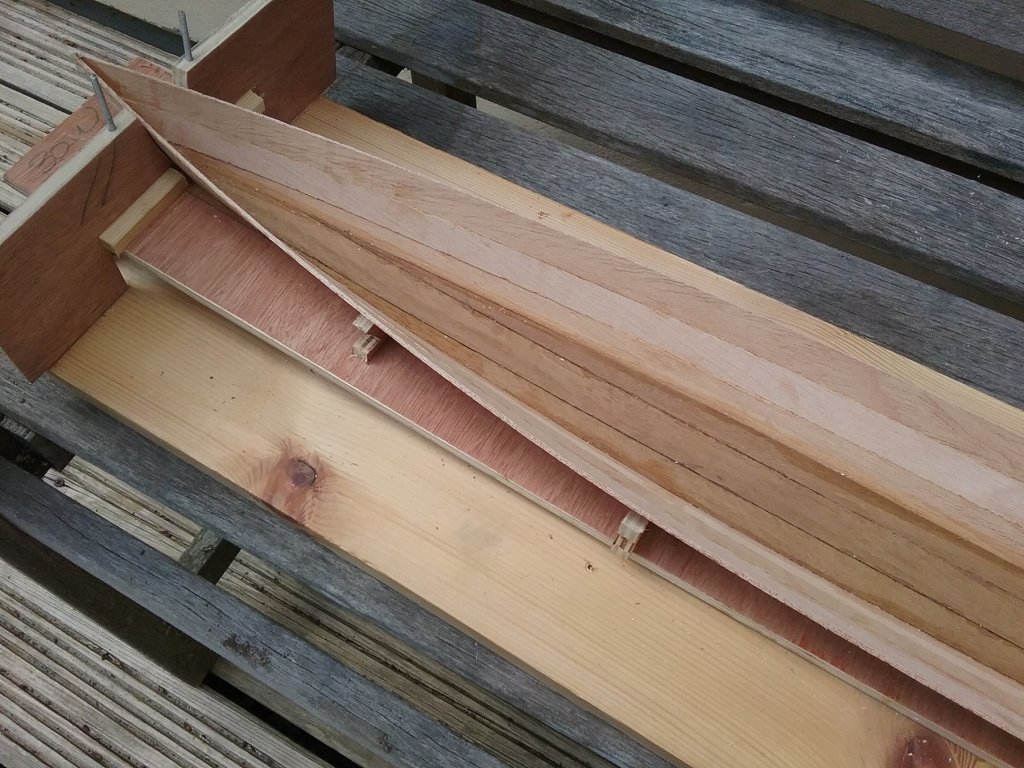
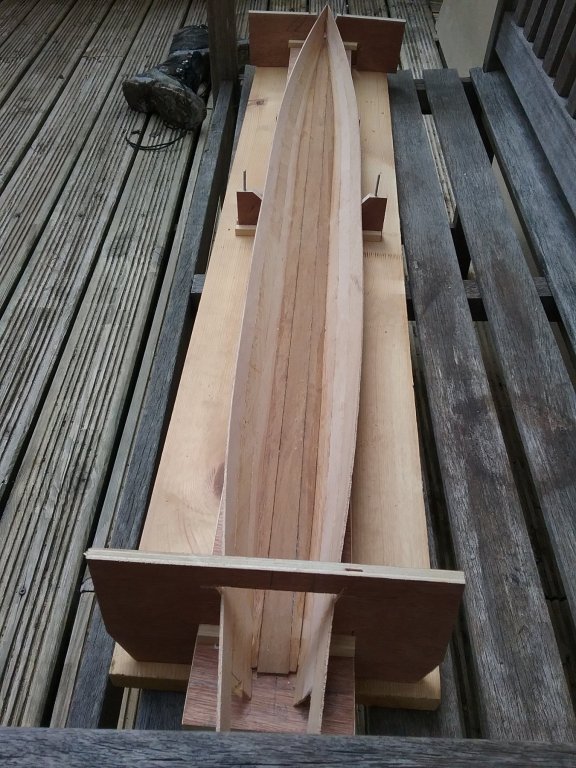
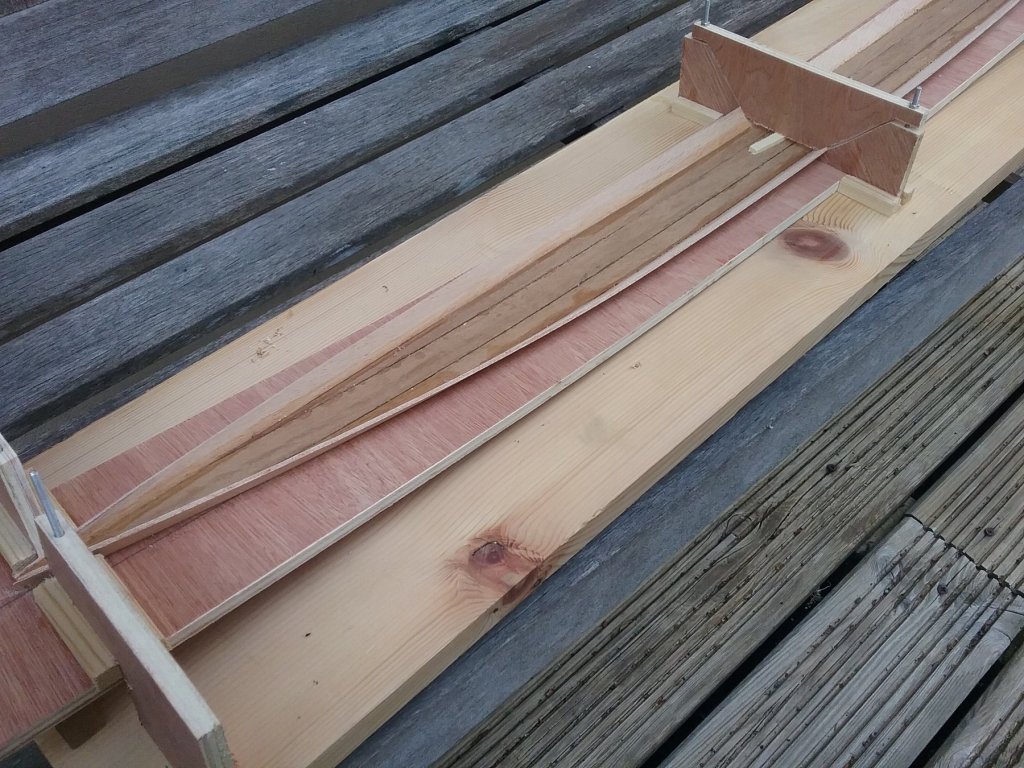
Hi. This is just going to be a fun build while getting the drawings for the Gondola done. The design comes from a district called Mandalay. In centra Burma. The only thing I have is the video. As you can see by the video it's a very long boat that is quite simple. The model will be 100cm in length and made from anything wooden I can lay my hands on. https://m.youtube.com/watch?v=_9oJErubzfY I have made a building frame as the boat has a curved base from bow to stern and also a curve across the section. Have just put a Pdf file of my drawings. Myitkyina.pdf Jig above is cheap plywood. Bow support and clamping above. Stern support and clamp above. Shot from above to show the length of the boat. The floor just laid on the jig. I will try and build this as the video shows with internal supports and joint covers. The reason why the scale... I can purchase a plastic model car engine and mount it on rear bulkhead. With the extended shaft and propeller. As I have said... It's a fun build... Regards Antony.


-
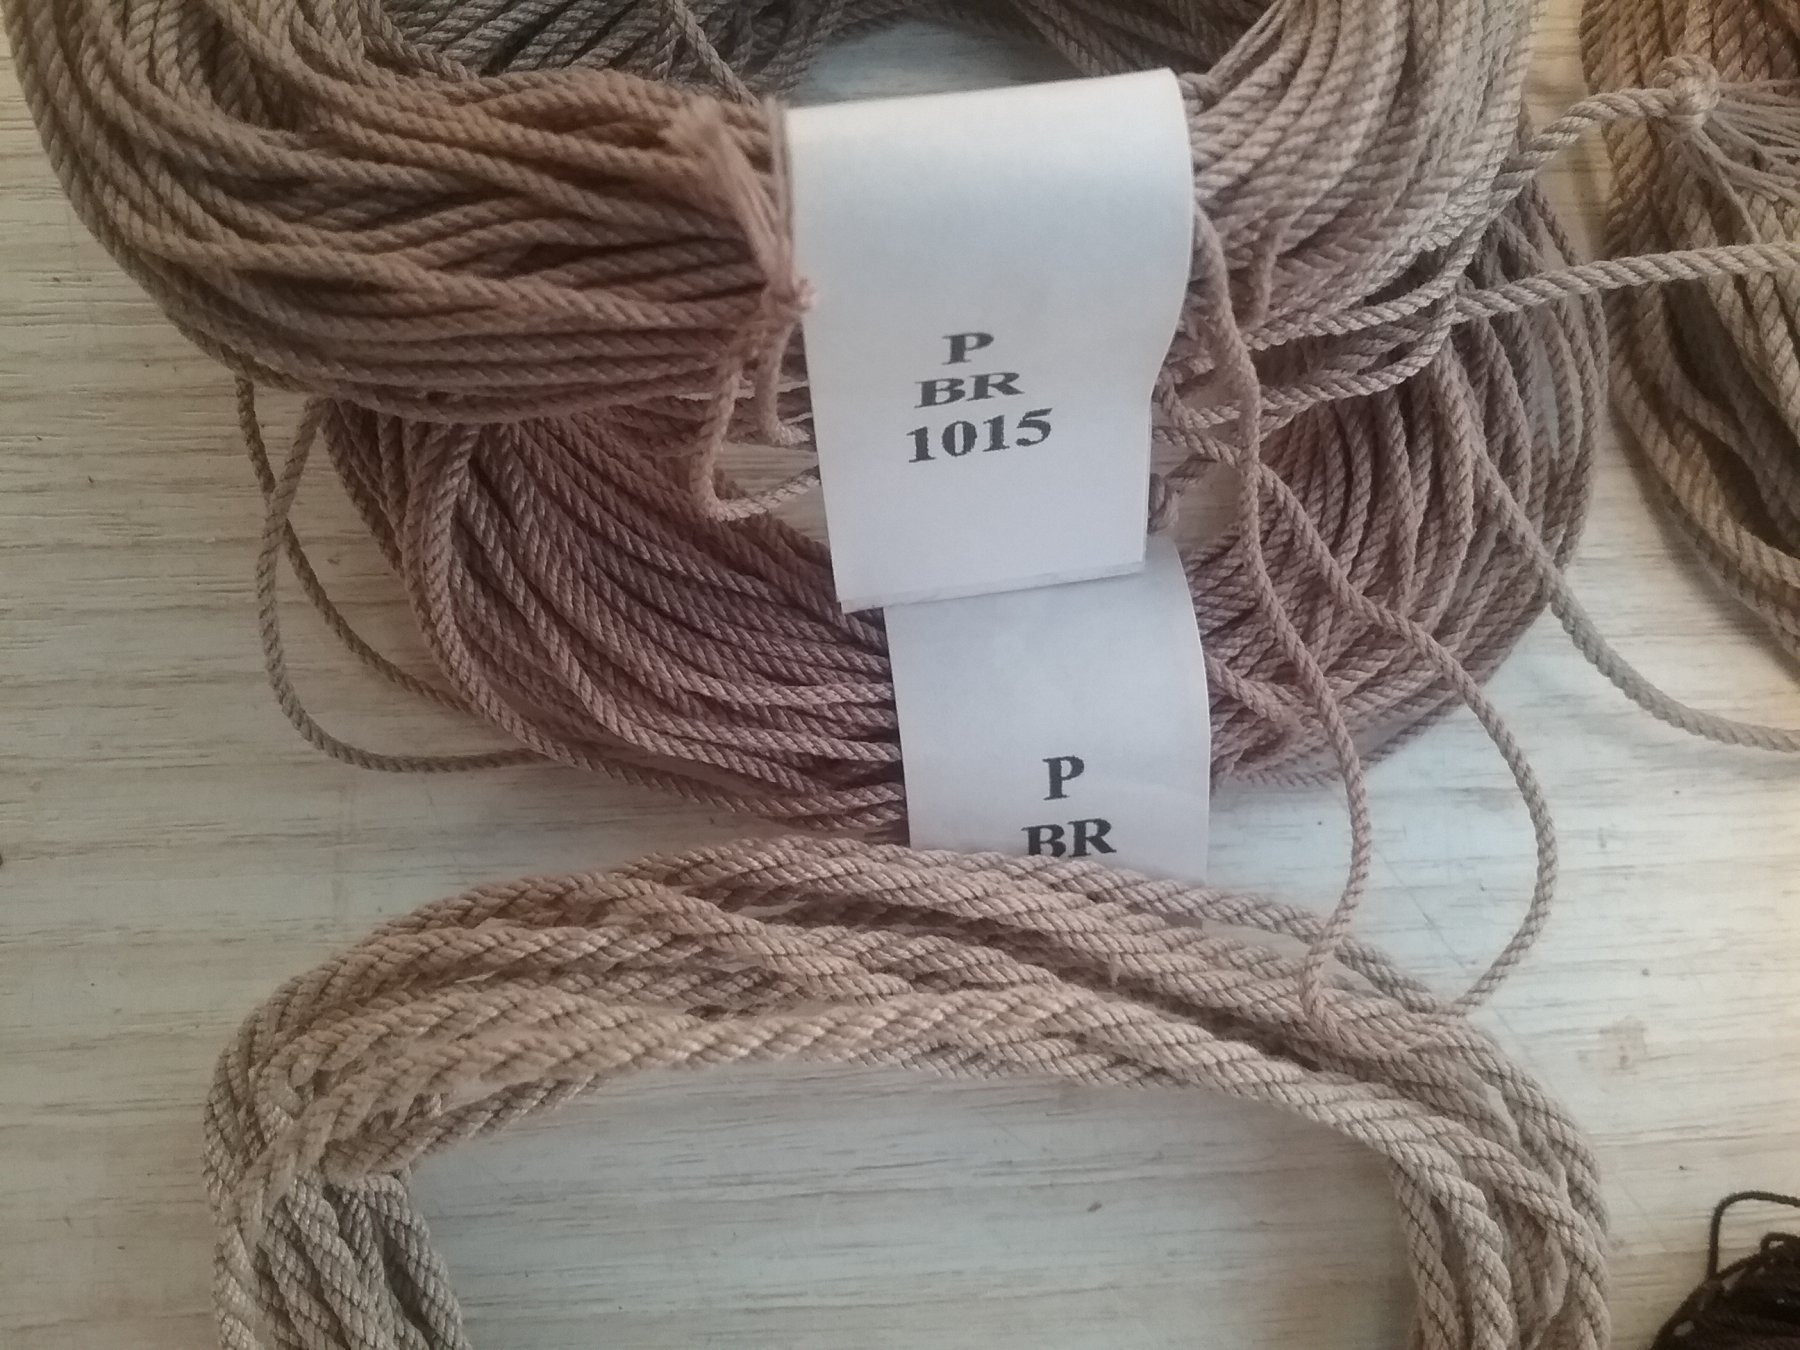
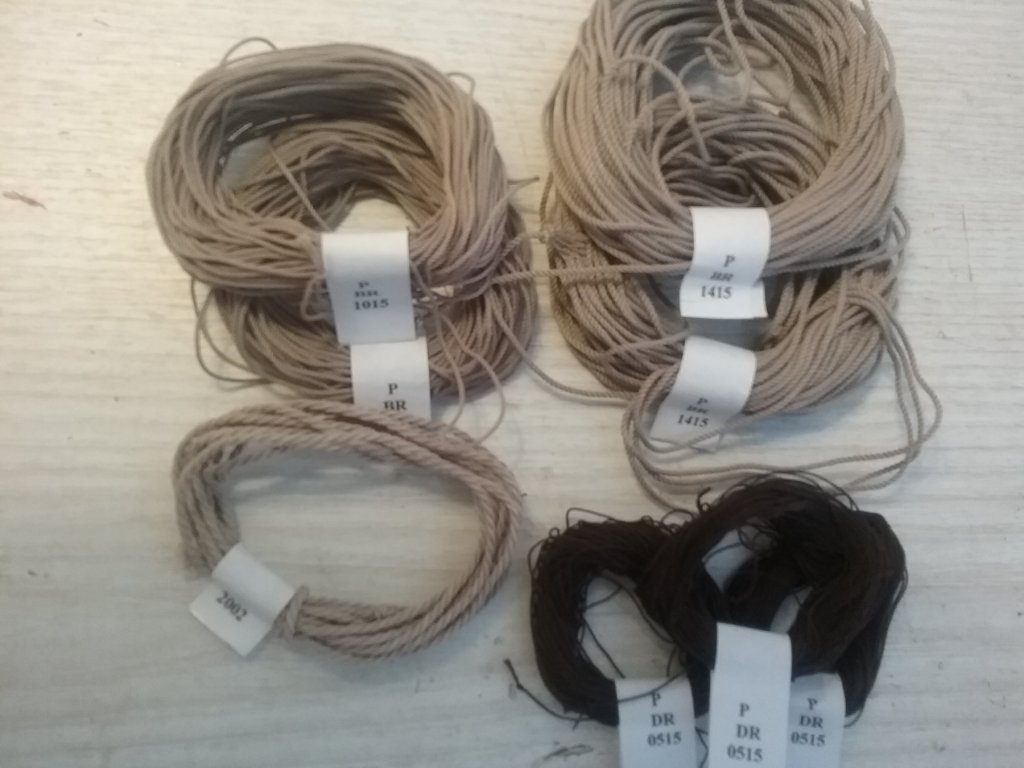
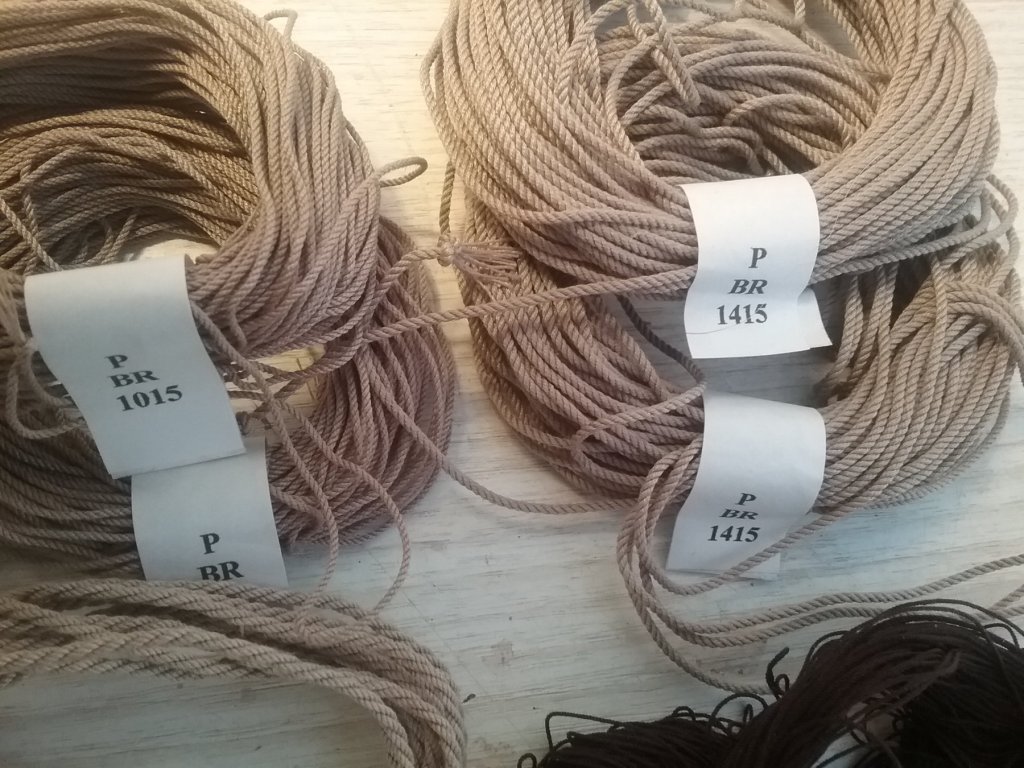
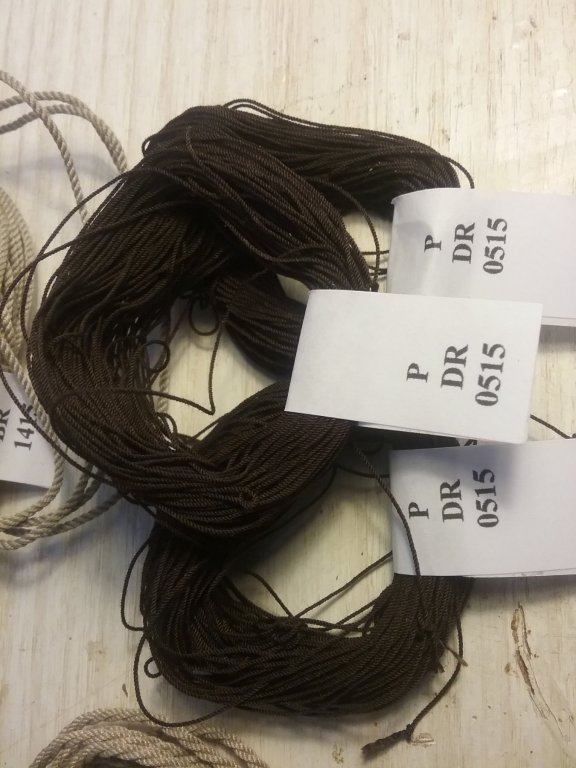
Hi. I have just receved my order of modellng rope. Pleased with the products and service. A few photos says more then a string of text so here are the photos. That' the best with the focus I can get on the camera. www.modellbau-takelgarn.de is the trader I got it from. I have no connection with the above business/Trader. Just someone selling a quality product. It's A lot better than I can made it 🙄 Regards Antony.

-
Gondola by AntonyUK
AntonyUK replied to AntonyUK's topic in - Build logs for subjects built 1901 - Present Day
Hi. Thanks for the well wishes. I have been informed that the plans from http://www.veniceboats.com/eng-models-gondolas.htm And http://www.veniceboats.com/eng-designs-boats-gondola.htm They are of good quality and I will not be disappointed. So I will be ordering a set today. There is also a copyright issue with the download photos. I will remove the drawings after I receve the purchased plans. Regards Antony. -
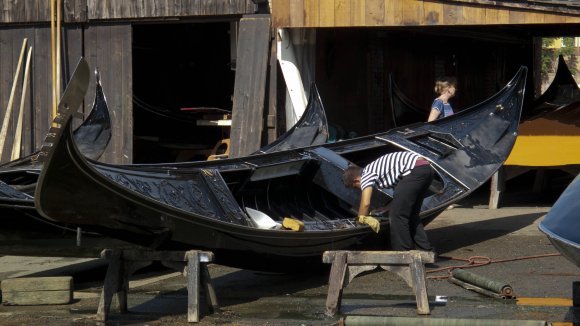
Hi. This is a build with a big difference. The boat is NOT symmetrical. http://myrarobinson.info/venice/ten-things-you-never-knew-about-gondolas Text below from this web page. Gondolas are asymmetrical. If you stand in front and look down the length of the boat, you’ll see that there’s a distinct curve. This is to allow for the weight and balance of a single oarsman standing at the back, helping to make it more manoeuvrable. The boat is 11 metres long, and often has to be helped around corners by the gondolier putting his foot against the wall of a building to push. “Traffic jams” are not uncommon on some of the narrower secondary canals. More info on Wiki. https://en.wikipedia.org/wiki/Gondola The picture bellow is from https://www.luxrest-venice.com/en/blog/201610/venetian_gondola_meaning_its_iron_prow There are places to purchase plans from.. But I have not had much luck with purchasing plans online.. So have found some very poor drawings and will take it from there.. The Model is to be approx. 1 meter in length and the main timber will be Cherry. I will be using other woods ad decoration as I have no intention of painting the Gondola. I have started making my own drawings in Illustrator and its a nightmare with no centrelines and bulwarks are all different heights and shapes. Will post my drawings here in Pdf format when I get on my main PC. There are a few area's that I cannot figure out at the moment. Like the hole next to where the gondolier stands. its use or purpose. Thanks for looking in. Regards Antony. EDIT: DRAWING REMOVED TO PROTECT COPYRIGHT - ADMIN
-
Hi Ian. That one nice looking build you have going on there. Very clean workmanship. Planking is first class and no exceptions. Repair work looks ... I cannot see the repair.. Well done. Regards Antony.
- 51 replies
-
- 2
-
-
- cheerful
- Syren Ship Model Company
- (and 1 more)
-
Hi Jim and David. Thank you for your kind words. Hello Nils. Egyptian cotton 400 mesh. The spars are bamboo skewers with half cut away. And one applied each side of the sails. And no crew for this ship. All on holiday in USA. Most of the ship is out of my head.. with what I think it should look like. And thanks for all the likes. Regards Antony.