AntonyUK
-
Posts
1,190 -
Joined
-
Last visited
Content Type
Profiles
Forums
Gallery
Events
Everything posted by AntonyUK
-
 Good morning Nils. Nice work on the stove and cooking pot. A question... Will you be covering the plywood frames ? Sorry if you have already covered this topic. As I said before.. outstanding photos. Regards Antony.
- 692 replies
-
- 3
-

-
- eagle of algier
- chebec
- (and 2 more)
-
ancre Chebece 1750 by Jeronimo - FINISHED
AntonyUK replied to Jeronimo's topic in - Build logs for subjects built 1501 - 1750
Hi Karl. As always... stunning workmanship. What more can I say. Regards Antony. -
Hi Moxis. Nice build. Use spray on contact adhesive. Many different brands out there. Gives a fine coat on each surface. Regards Antony.
-
Hi Tim. Very nice work with some brilliant scratch bits being put in. Your dog is such a cuitie. Do you have your own laser cutter ?. Gonna follow along with this build...seat booked. Regards Antony. Edited :- I've just read your introduction log.. Yes you do have a laser cutter.
-
Hi Jeff. Well done for spotting that error. And nicely fixed as well. Coming along nicely with the build. Regards Antony.
-
Hi Kevin. Fantastic build. The use of so many different building materials makes this a intresting build for me. Lots of real nice details you have added and the shear size makes this a real display model. With your skill's building the launcher will not be too much of a challenge. Make a jig for the frame work as you will need 6 off the same if I remember correctly. With slight modes to each frame. Go for it.. Will you keep her ? You might need a extension built. Late I know But I gonna follow along with your excellent build. Regards Antony.
-
Hi Nils. Very nice work on the planking. Now I can see those beautiful lines of this boat. That is one stunning photo of the bow area. Consider using Gold leaf on your castings. Looks so much better than paint... assuming you will be going for gold. Regards Antony.
- 692 replies
-
- 6
-
-
- eagle of algier
- chebec
- (and 2 more)
-
Hi Jeff. The instructions look good for Amati. Check and double check everything. And anything. I will be following this build as it's the first time I'e seen this kit. Regards Antony.
-
Hi Jack. Stunning work. I never really looked at the lines of this ship till now. WOW I like this beautiful ship. Why is it my photos are rubbish compared to you people. Yours are outstanding. Looking forward to your next progress post. Regards Antony.
-
WOW Nils. What excellent work. She is looking real good. Nice photographic pictures as well.... is there anything you cannot do ?. Regards Antony.
- 692 replies
-
- 5
-
-
- eagle of algier
- chebec
- (and 2 more)
-
Hi David. Yeah they look just fine. A lick of black on the bars will finish it. To straighten wire that is bent. Not spring wire. Cut the wire to length. Place it on a hard surface. Use another hard surface on top and roll the wire. You can tell then it has been straightened. Regards Antony.
- 104 replies
-
- 2
-
-
- king of the mississippi
- artesania latina
- (and 1 more)
-
Hi David. Looking very nice. It's amazing how high these boats were with such a shallow draft. But that's the Mississippi. It's a good job that you are Dry fitting the parts together before glueing. Nice fix. Regards Antony.
- 104 replies
-
- 2
-
-
- king of the mississippi
- artesania latina
- (and 1 more)
-
Hi Morgan. Nice progress with the build. Adding the treeenails as Cedric suggests would make the deck look so much more better. BUT it is a lot of extra work. Sometimes when there is so much deck furniture you cannot notice lack of treenails. Regards Antony.
- 50 replies
-
- 3
-
-
- soleil royal
- first build
- (and 1 more)
-
Hi David. Not seen this kit being built before.. Looks a intresting build. Simple mistakes but it's the way we learn. Looking ahead at your next step... we do it every day. Check then double check before you apply and sort of glue. Regards Antony.
- 104 replies
-
- 2
-
-
- king of the mississippi
- artesania latina
- (and 1 more)
-
Hi Morgan. Looking good so far.. That ship is quite some size looking at the photos. You can walk from one end to the other. Regards Antony.
- 50 replies
-
- 2
-
-
- soleil royal
- first build
- (and 1 more)
-
Hi Jack. Nice start to your build. I like the support frame. Nicely built and looks strong. Will follow along as you build your carrack. Regards Antony.
- 190 replies
-
- 2
-
-
- ragusian
- marisstella
- (and 1 more)
-
Hi Nils. Excellent progress and stunning workmanship. I have a few badges with this eagle pose. Never thought to use them as decoration till now. Look forward to your next posting. Regards Antony.
- 692 replies
-
- 4
-
-
- eagle of algier
- chebec
- (and 2 more)
-
Hi. Nils... Yes I wanted till the house was empty and no one could hear my torment. I checked and tripple checked before cutting. Zappto. I am building this for a family member as a display piece. And the planking if of mixed timbers. Kier. Yes the shape of the boat is rather nice and the camber in the deck is what makes this boat special. All the metal work is now made and (painted) The brass rod in the kit would not blacken and yes I cleaned it as I have always done. But this would not take. The copper was no problems at all. Need to seal the sea with a sealer so the silicon will adhere to it. One more coat of Danish oil to the hull and I will place the boat into its final position. Then the rigging will be added. This is already made but not yet added as it's easer to add it later on. Will take a few photos later on today. Weather has been very dark here due to stormed weather. Regards Antony.
- 32 replies
-
- 4
-
-
- santa lucia
- panart
- (and 1 more)
-
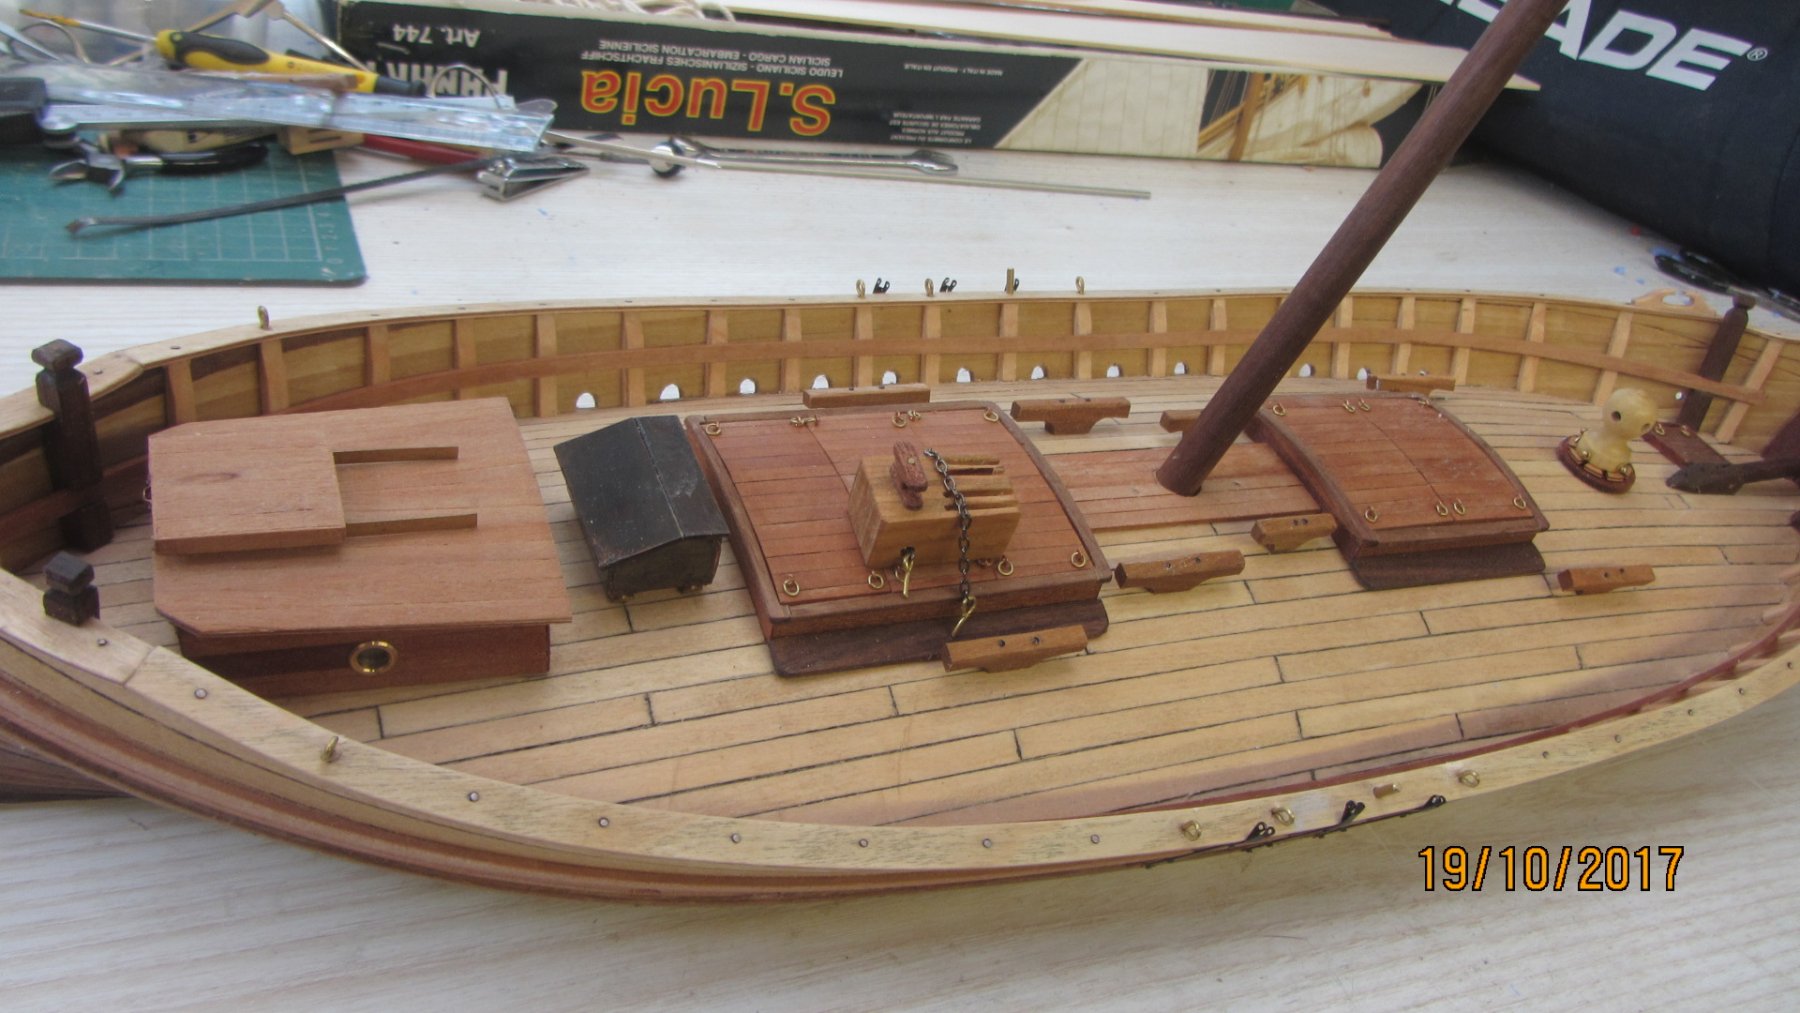
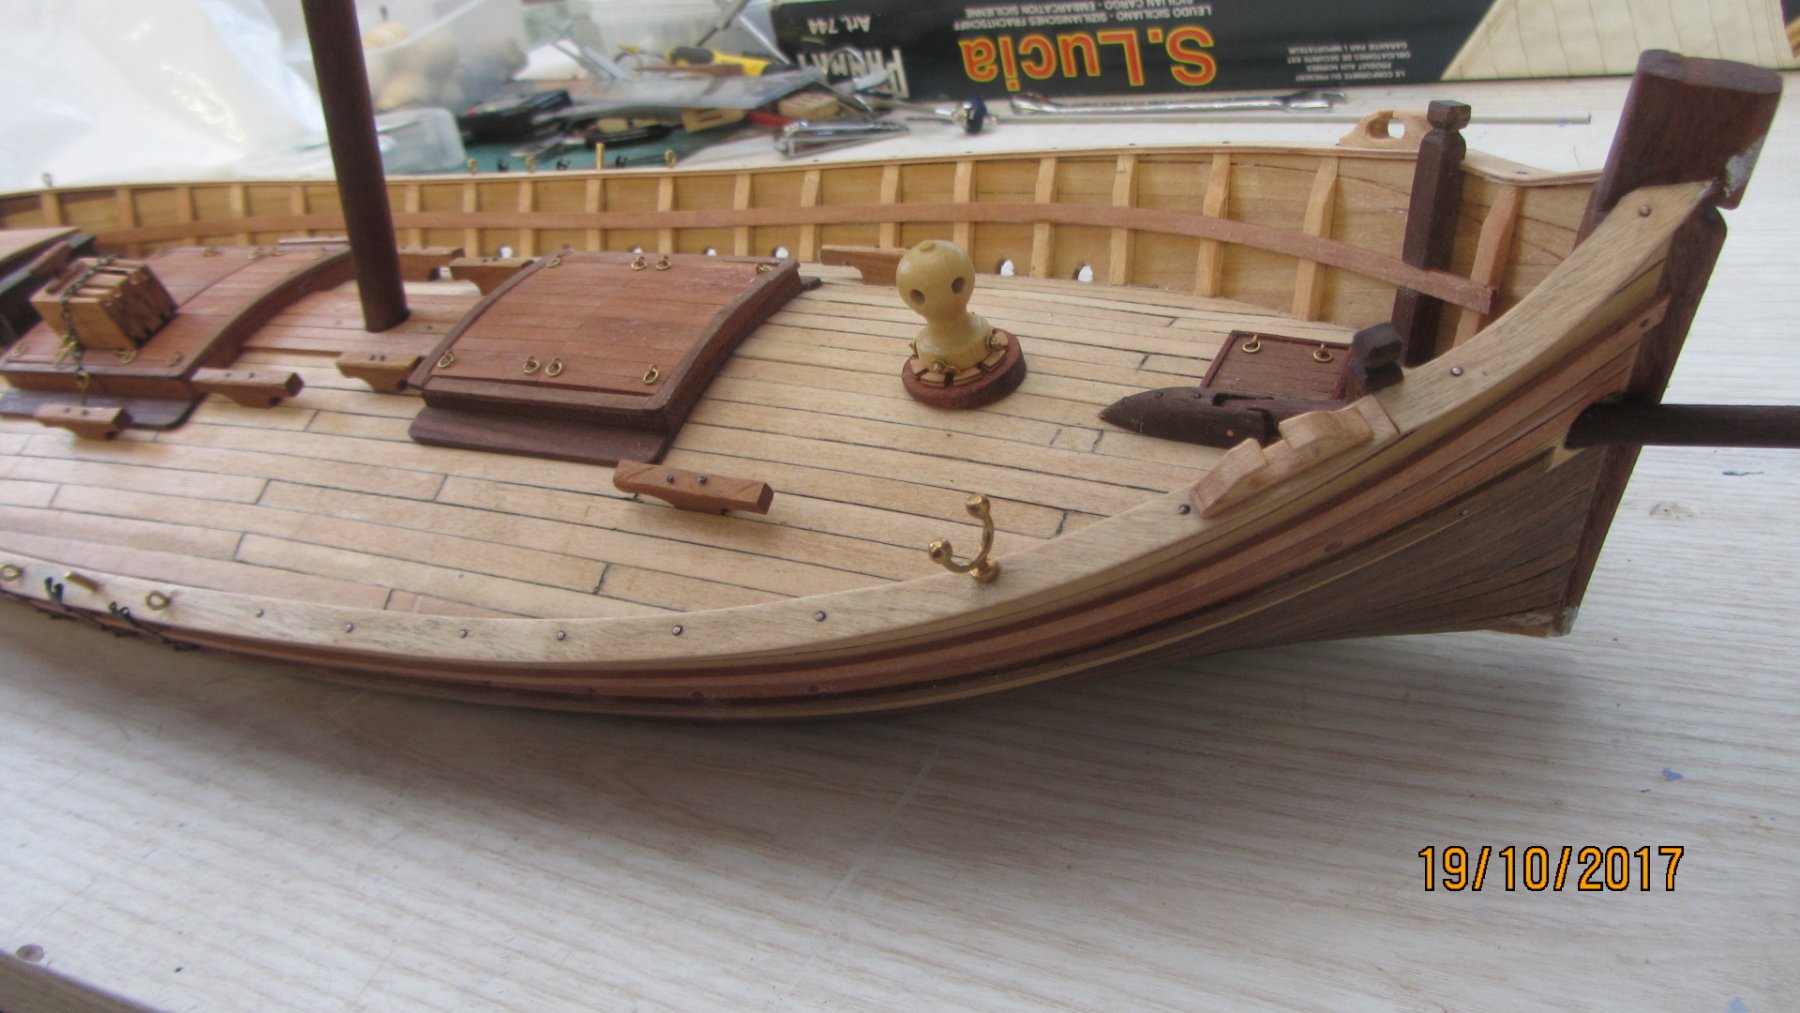
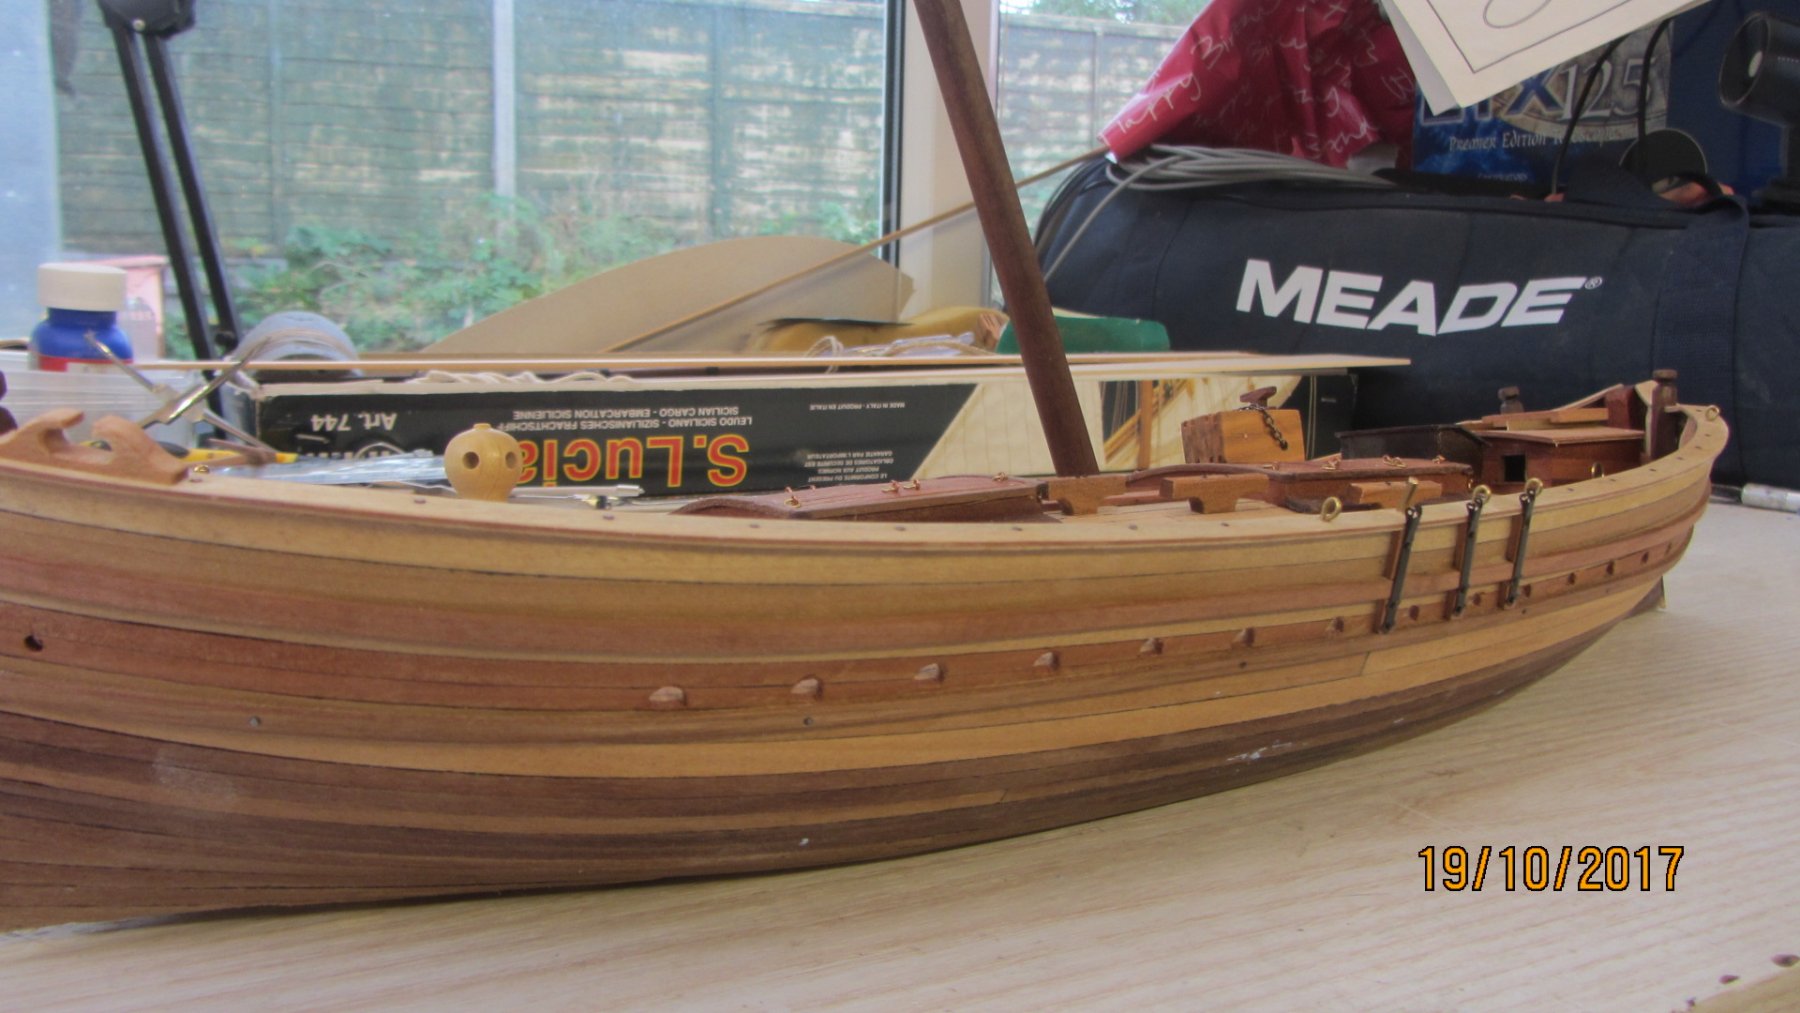
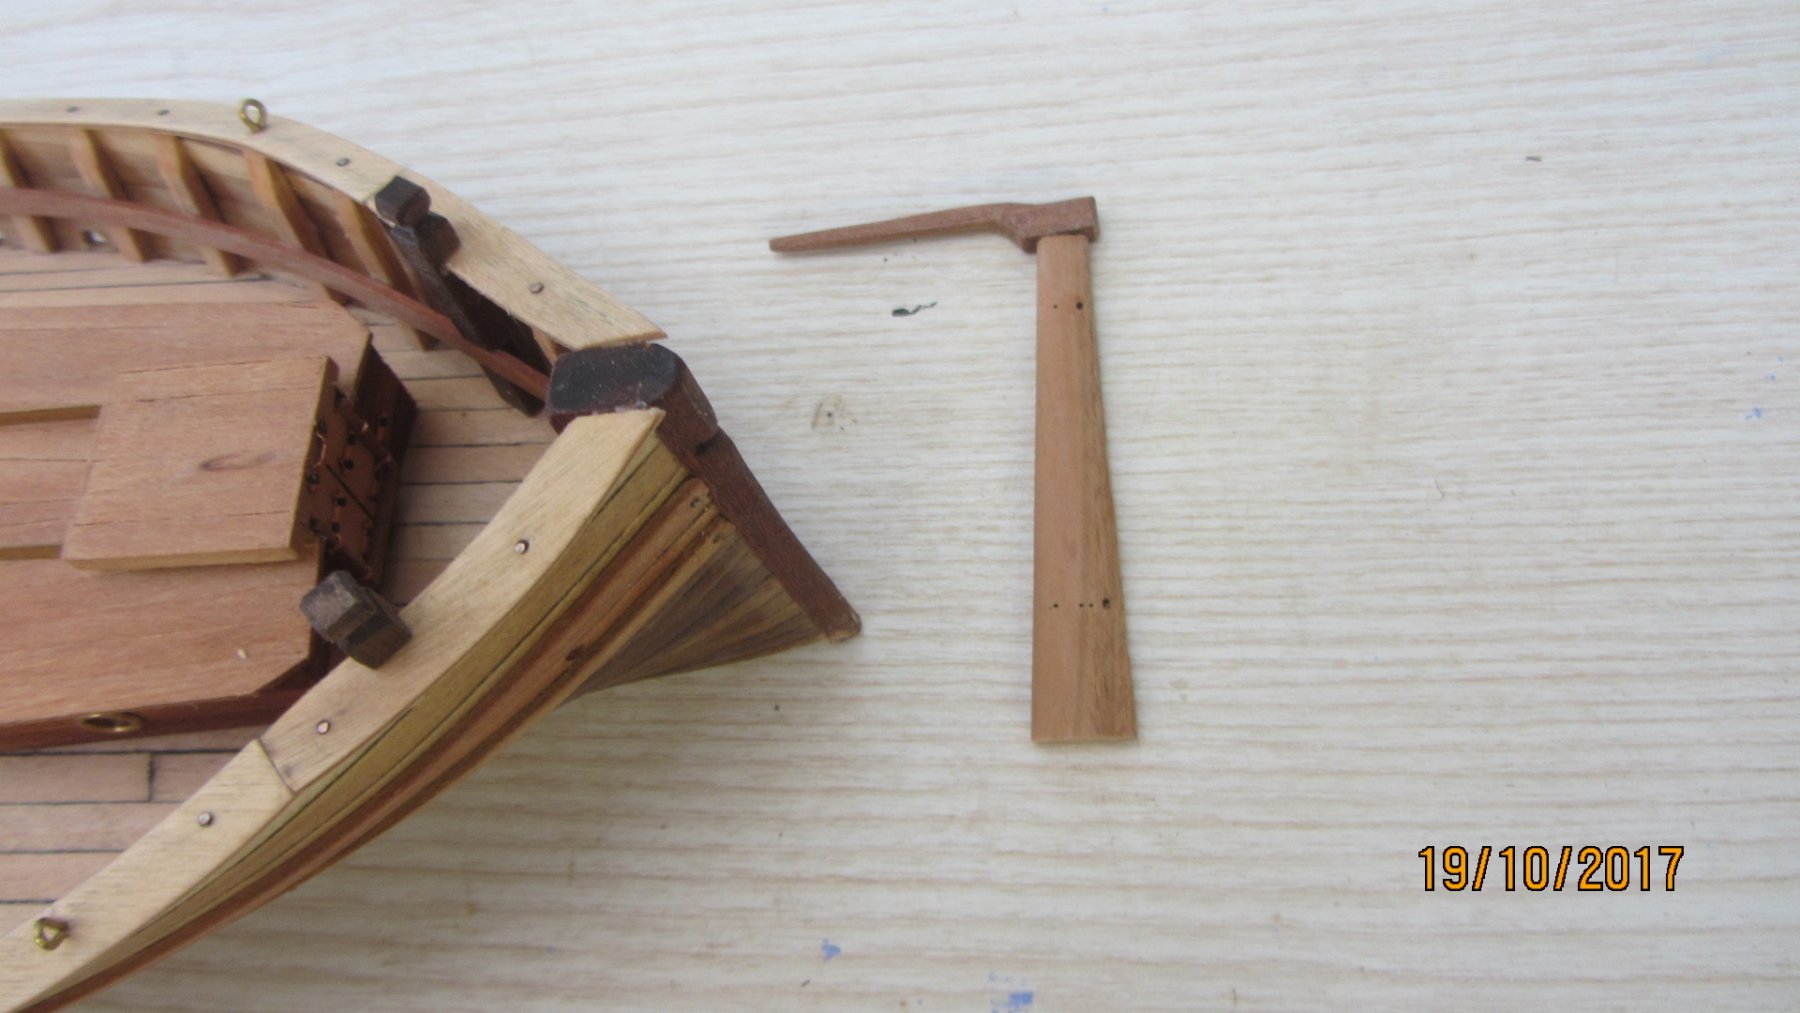
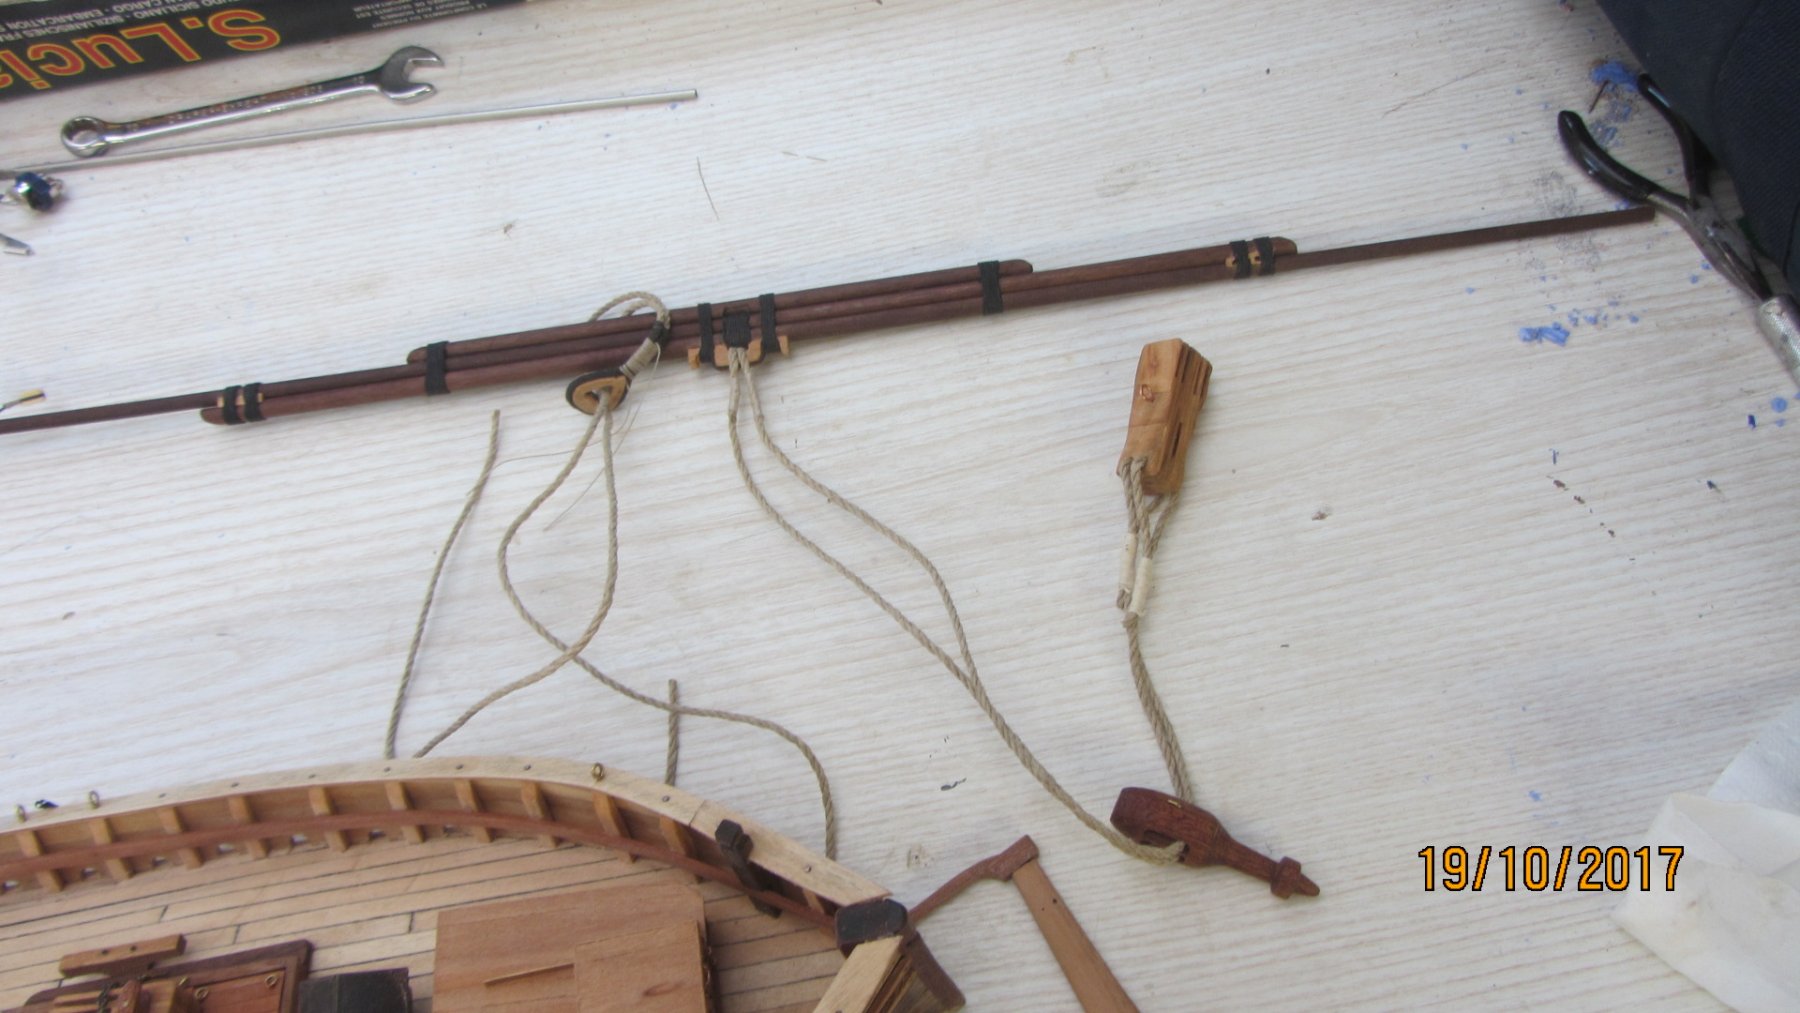
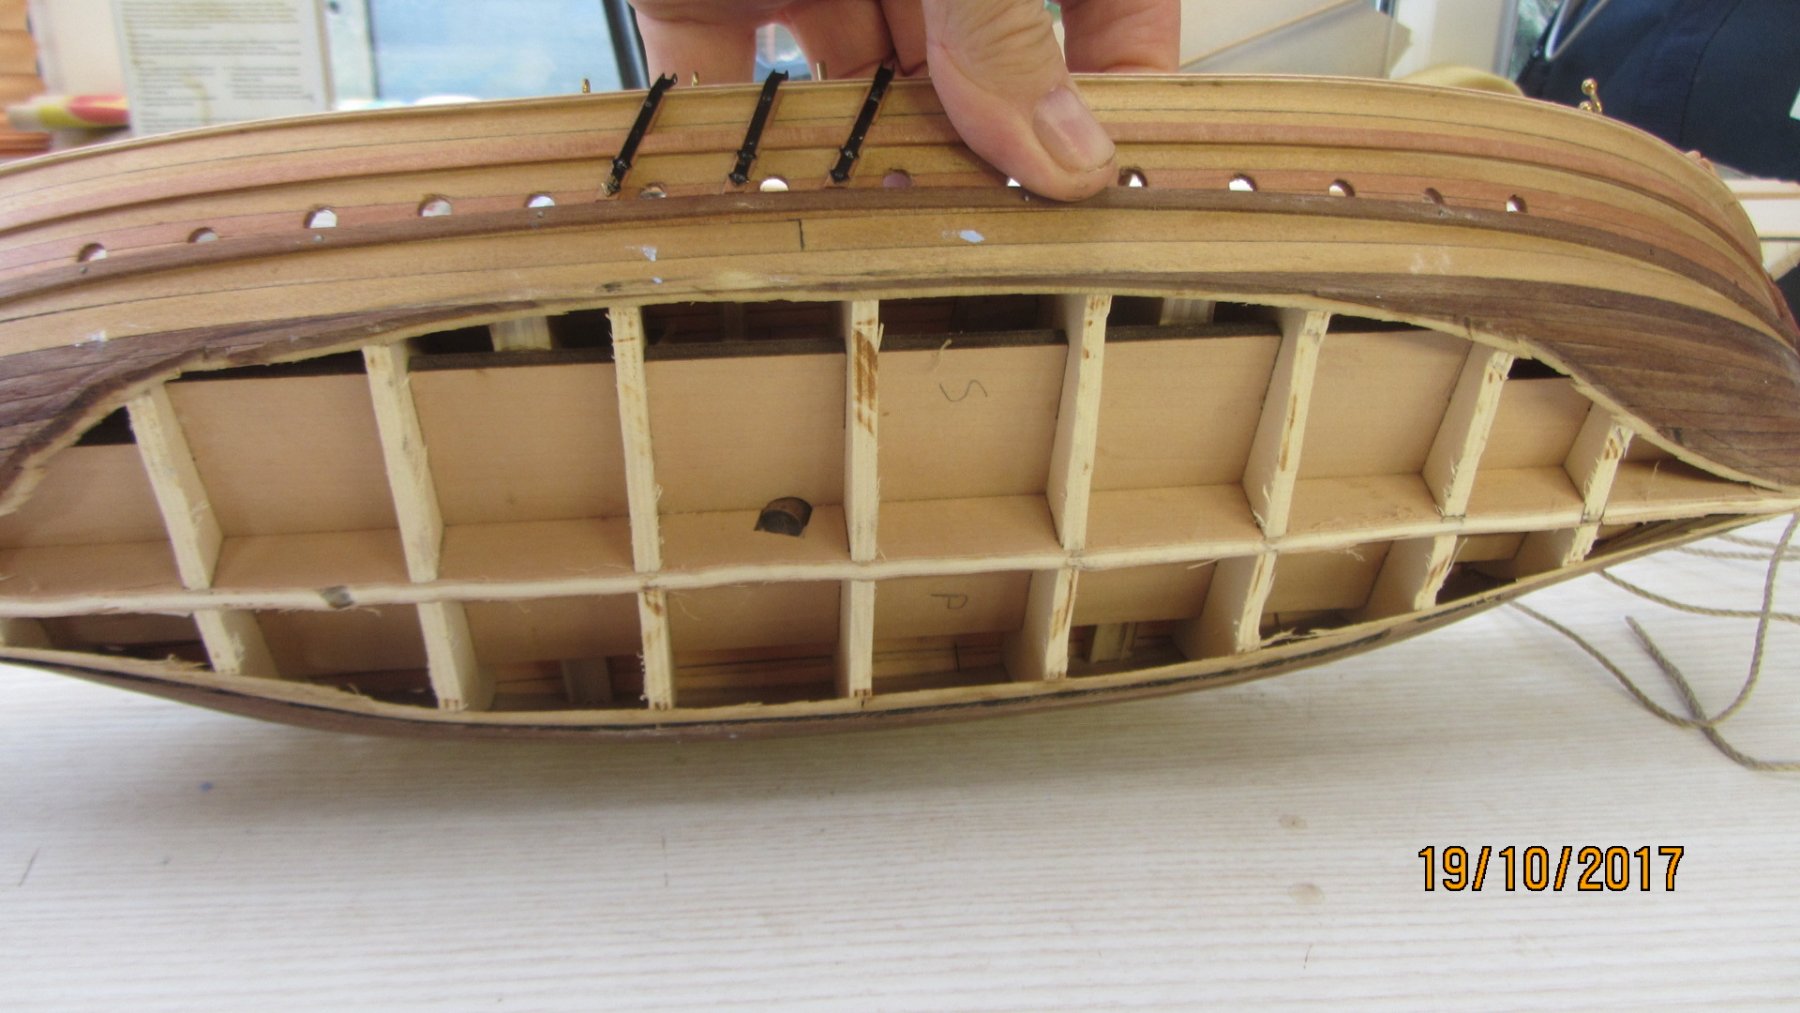
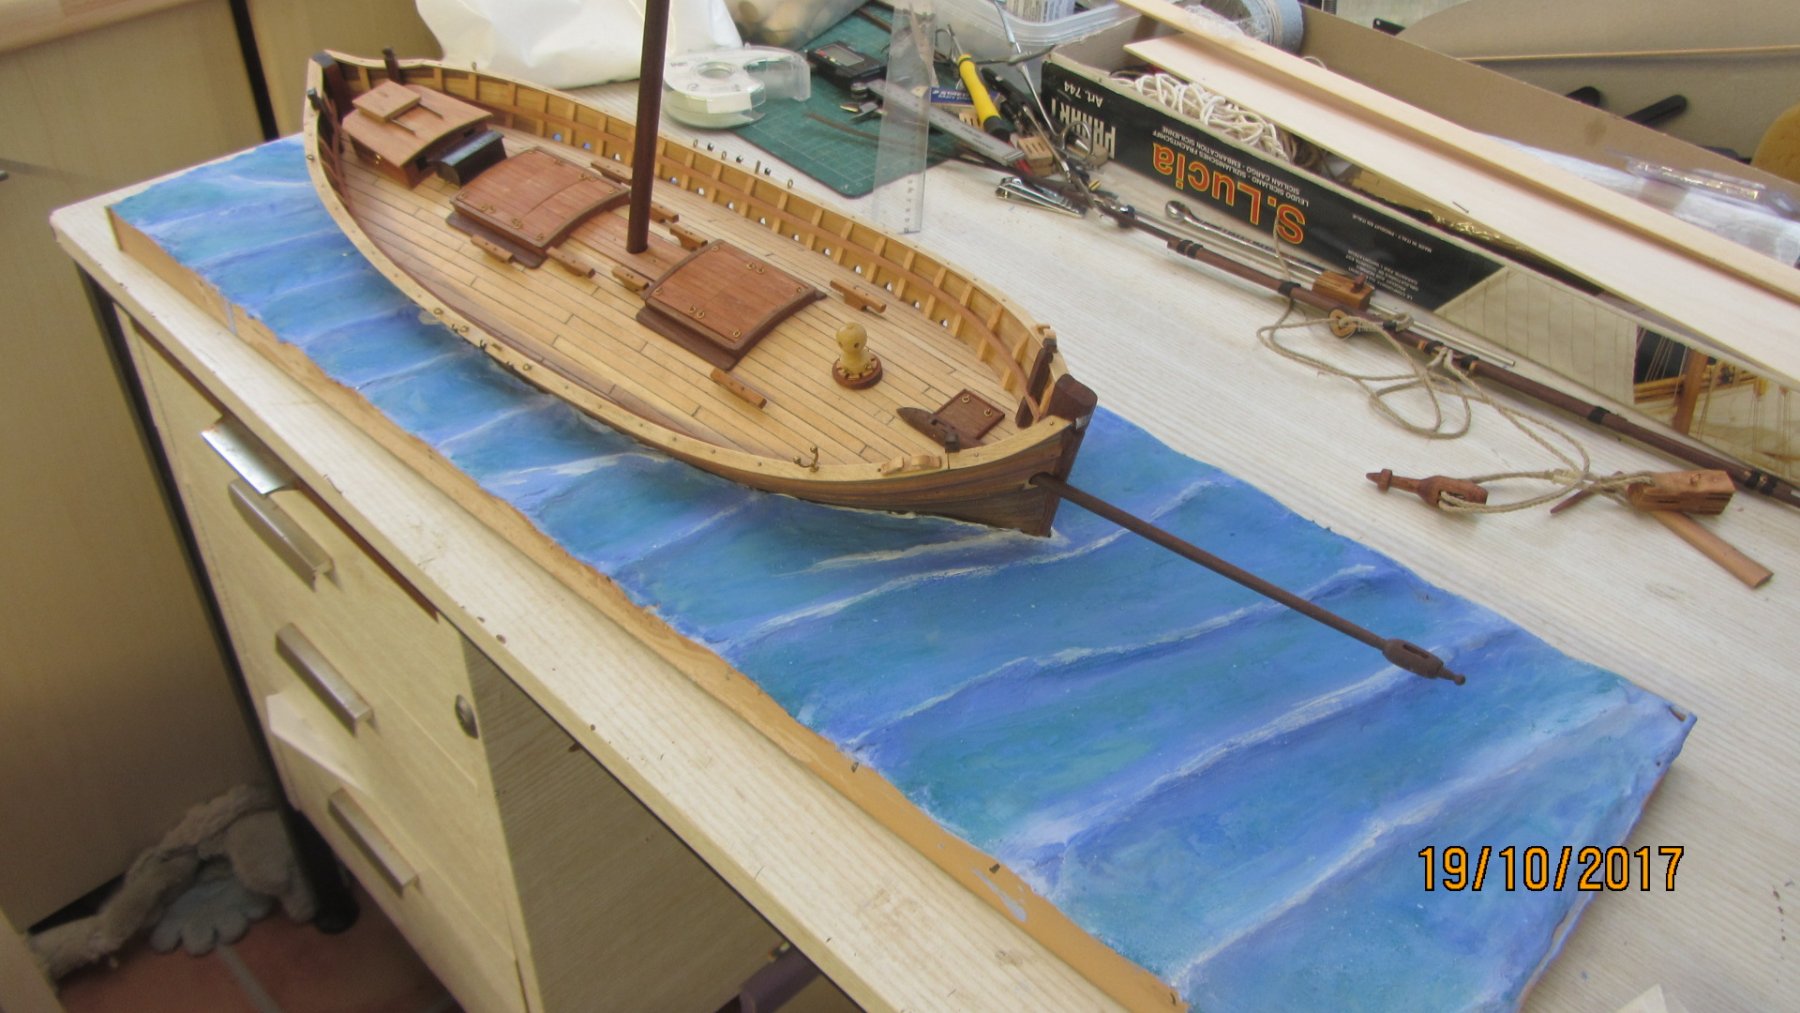
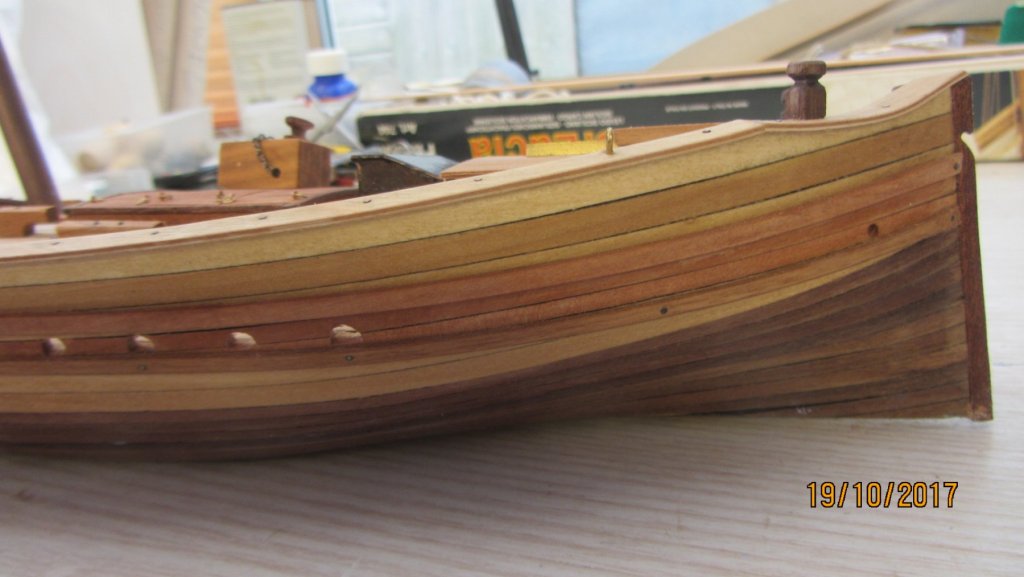
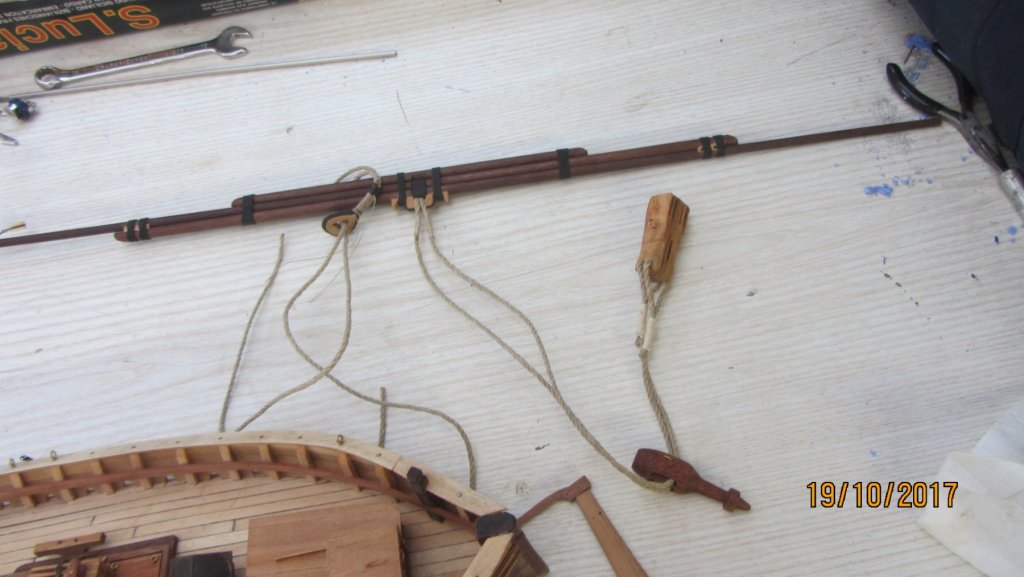
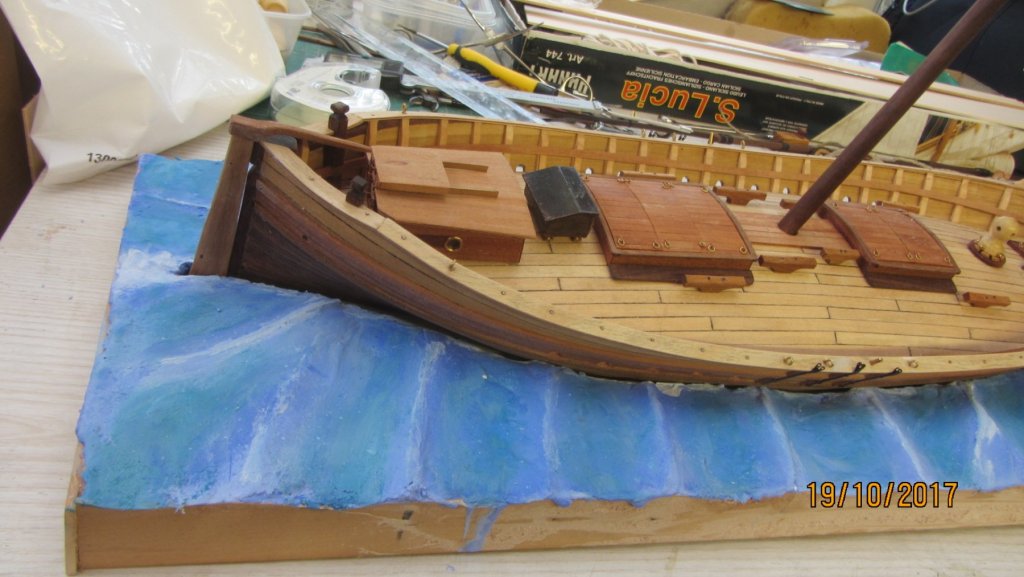
HI. This is a long overdue update.. No Excuses... .The Deck was planked with ease .. the only thing I would have done of to put reinforcing blocks under the deck where the cleats are. The deck hatches and cabin went together with ease. I planked the hatches and cabin in various wood. The BBQ ... well I think it is was covered with copper tape. and semi blackened. I did NOT want to put any paint on the boat. First picture is stern view. View from Starboard side. View from Bow/Starboard side. View of Port side. More planking on this side. View from Stern/Port side. Stern with 50% of rudder cut off. View of main yard and very large blocks. The next view says it all. Base of boat cut off to allow a shallower display base. This is my first sea scene. made from plaster of Paris with blue paint and water to mix. Looks better with boat in place. And one more of the stern area. When the boat is complete it will be screwed to the base. Then clear silicon will be placed on the water area and be given a ripple texture finish. Never tried this before so fingers crossed and luck on my side. The batten around the base will be removed and some nice timber used to smarten it up a bit. Quite a lot of work on the metal work still to be done and blackened before fitting. Thanks for looking in. Regards Antony.


- 32 replies
-
- 8
-
-
- santa lucia
- panart
- (and 1 more)
-
Hi Doodler. Welcome to MSW. Smart move with the swift kit. It better to get to grips with and easer to build. Tlloa the best Antony.
-
Hi KM. Yes that is a large amount of clamps.. Nice to see you started the build. Regards Antony.
-
Hi Al. Nice little project. Will follow along on this one as it makes a nice finished model. Was the original timber not usable or did you just want to use Boxwood timber ? "Better wood" as you said. Regards Antony.
-
Hi K. You seem very clear on what you are doing and have done your resurch. Wish you calm sea's with your build. Regards Antony.
-
Hi Nils. What wonderful work. Now the last photo says it all to me on what a very nice ship this is. Love your work and ideas. Regards Antony.
- 692 replies
-
- 5
-
-
- eagle of algier
- chebec
- (and 2 more)
-
Sounds like my skipper. Regards Antony.