HOLIDAY DONATION DRIVE - SUPPORT MSW - DO YOUR PART TO KEEP THIS GREAT FORUM GOING! (89 donations so far out of 49,000 members - C'mon guys!)
×


Trussben
-
Posts
2,005 -
Joined
-
Last visited
Content Type
Profiles
Forums
Gallery
Events
Everything posted by Trussben
-
 Nice to see your planking well under way Mark, I can't wait to get in the workshop, but I have to build one first, damn. Ben
 -
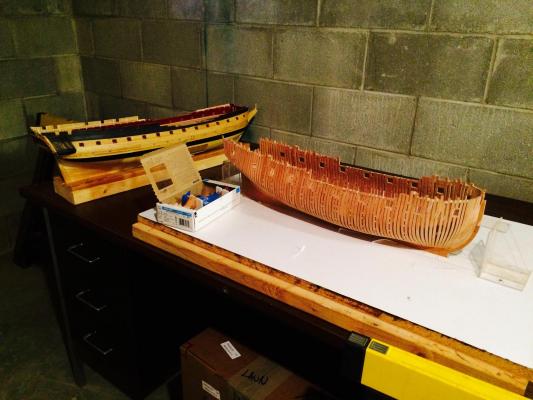
Both Pegasus and Confederacy arrived at the new home without damage, Phew! Movers did a great job of the packing. Now to start building a new workshop. Ben
- 889 replies
-
- 19
-

-
Well all modeling is on a total hold while we move house, both Pegasus and Confederacy are boxed up and I hope they survive the move. Then of course a new workshop needs to be made so I doubt any progress on anything until the end of the year. I will be back Ben
-
Nice to see you around again Chris, I feel your pain, we are moving house at the moment, both Pegasus and my Confed are boxed up, hope they survive the trip and time in storage while we get into our new house. Your Confed is still a beauty! Ben
-
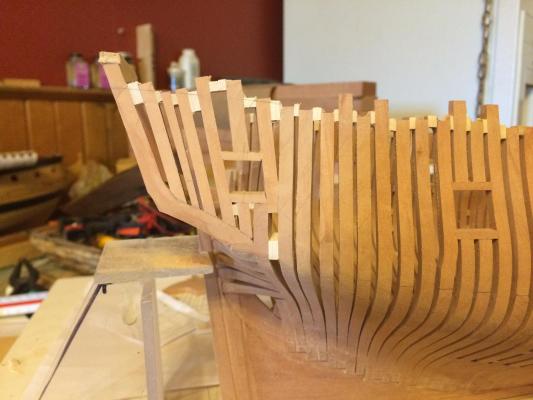
So managed to get a couple of hours in the workshop on the holiday weekend, working on the framing at the stern, I have tried to keep the sizing and spacing of the timbers as close to the layout shown on the Cygnet DOF plan but with the positioning of the port from the Pegasus plan. ben
- 889 replies
-
- 22
-
-
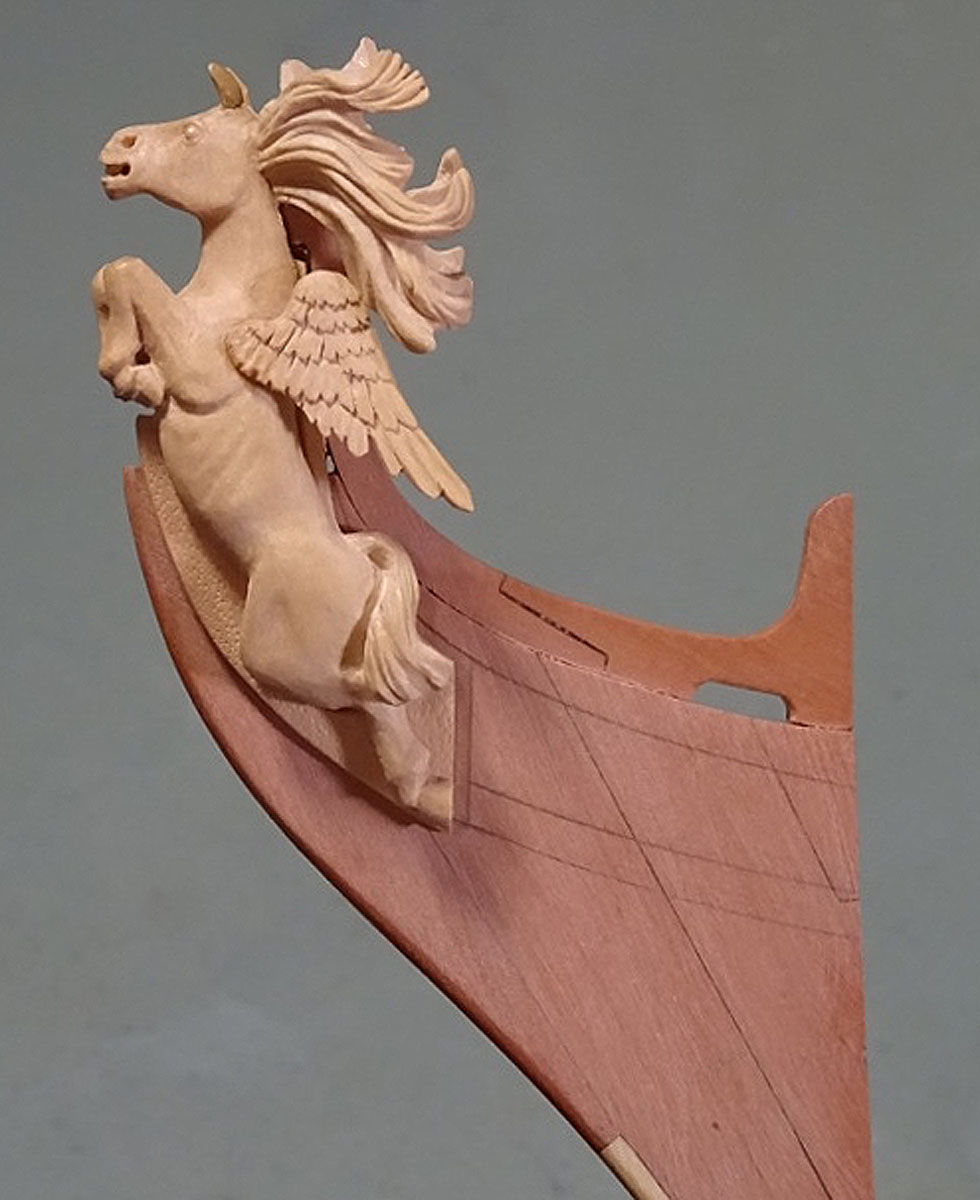
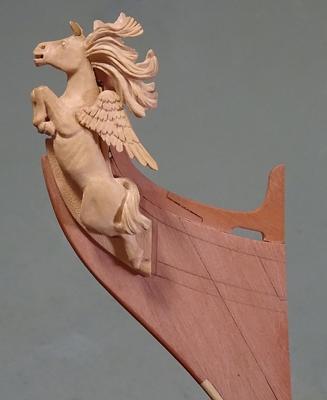
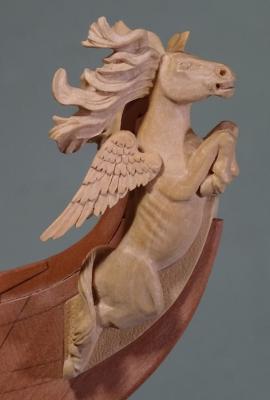
Hey Greg - I'm not so sure about that, my mother always said watch out for the quiet ones! Chris - thanks, maybe I'll try carving on the next model but when you can get somebody of David's talent to make what you see here, well what do I say. Martin - see comment to Greg above. Ben
-
So very busy life has me out of the workshop at the moment, but I did receive the figurehead carving I commisioned from David Antscherl yesterday - As with any of his work it is simply outstanding to say the least. Thank you David for accepting the commision. ben
- 889 replies
-
- 30
-
-
Just catching up on your Confed Vic, I'm still around but working on a full scratch built POF at the moment so my Confed is on the blocks for a while. Ben
-
Always good to have a plan before you start throwing wood at her and hoping for the best, I have learned this Very much on my own Pegasus build. Good luck and I look forward to seeing your progress. Ben
-
Gaetan So you had issues with the dye bleeding into other areas, I was thinking of using fiebigs dye when the time comes, but you have made me think now. Ben
-
Sweet Chris, post some more pics when you get that workshop setup. Ben
-
Thanks Rusty, Mark and Grant for looking in. Ben
-
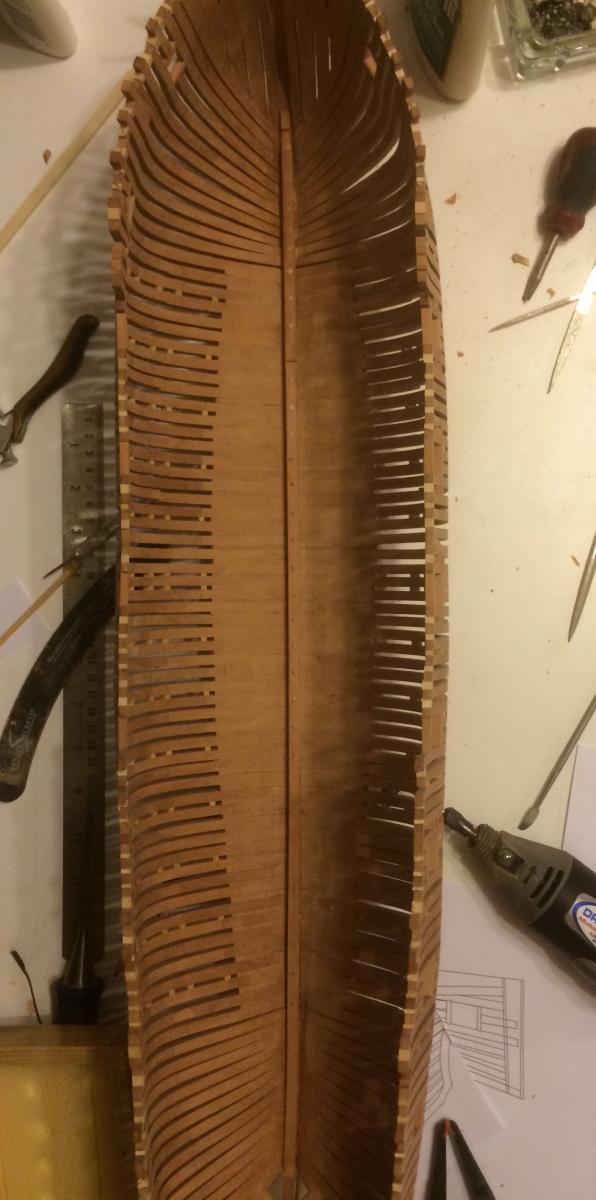
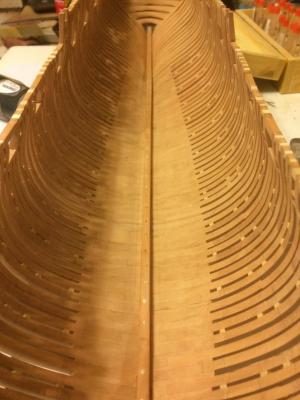
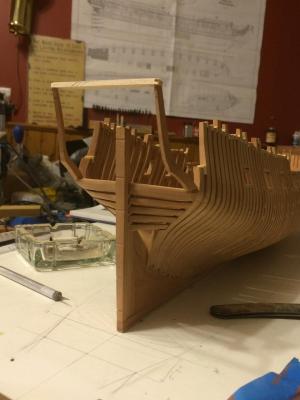
Here is a shot from above for Druxey showing better the run of the floor fillers. Ben
- 889 replies
-
- 14
-
-
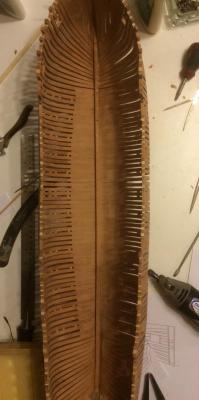
Here are all 5 pieces of the keelson scarphed together and installed. They were also bolted down through every floor timber with 1 1/4" "bamboo" bolts. Now the Stemson needs to be made. Ben
- 889 replies
-
- 22
-
-
Thanks Druxey, I have also started making up the keelson parts, lots of scarph joints! Ben
-
Could you elaborate a little please Druxey. Ben
-
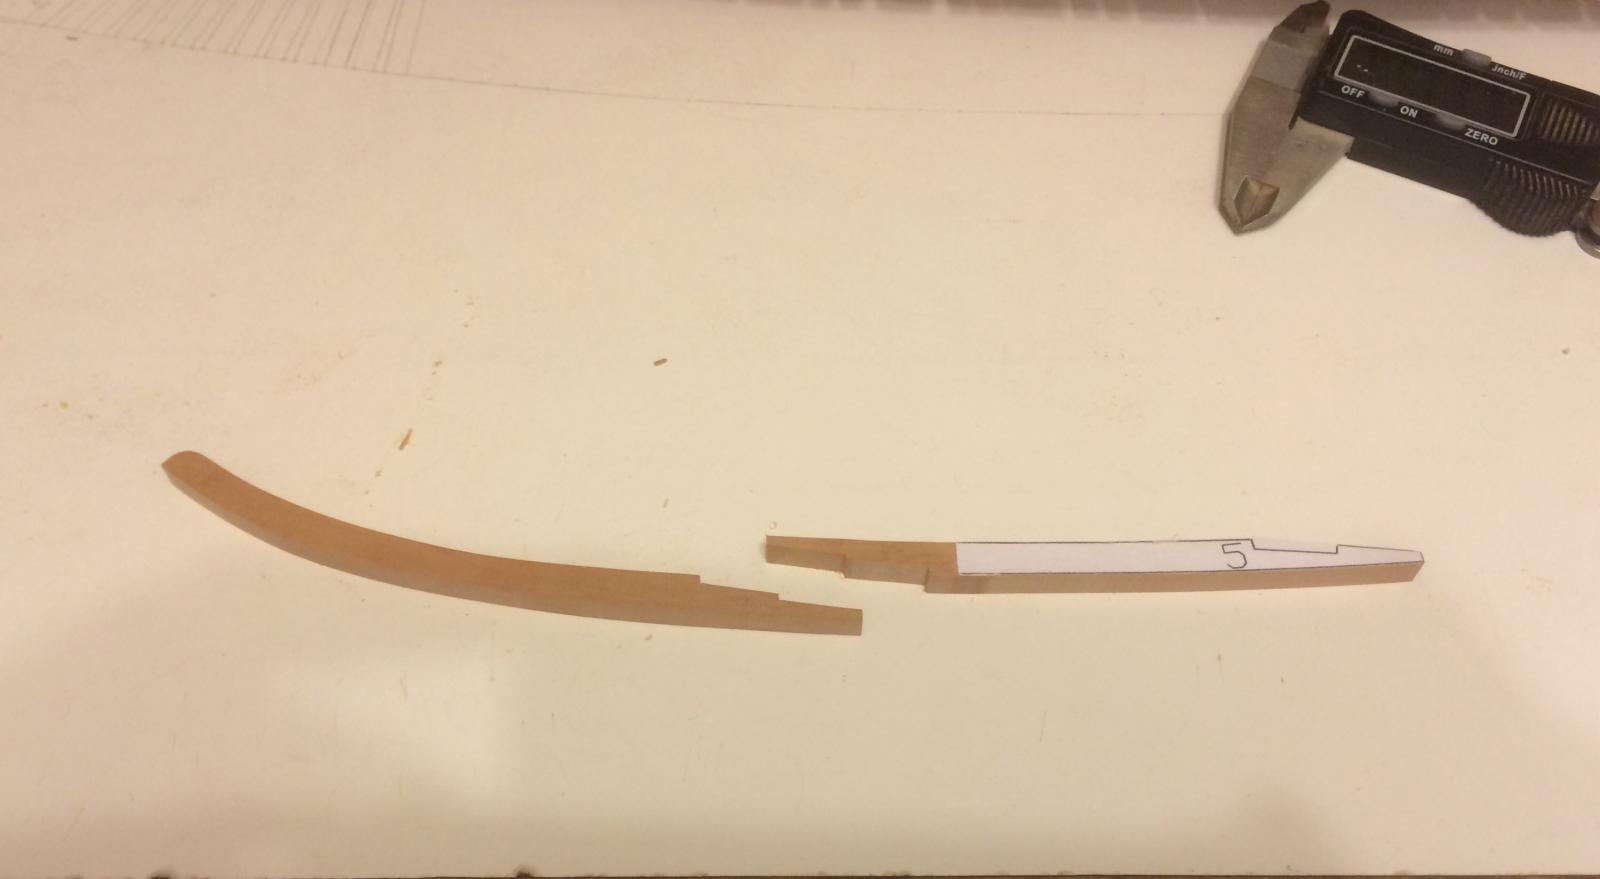
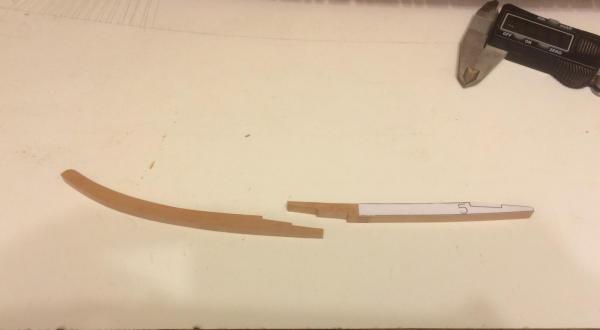
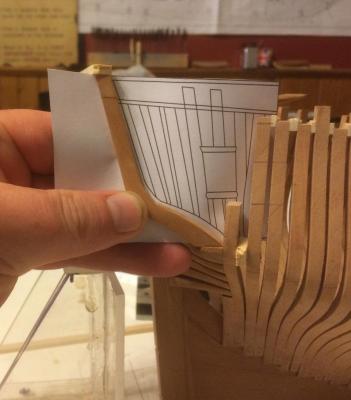
Thanks for all the likes. Patterns for the remaining framing have been made to help with this area, they had to be juxtaposed in ACAD as the DOF plan is from Cygnet and doesn't exactly match the Pegasus plan or the TFFM Mylar.
-
Agree with the above, boxwood - well the castello version is more dense than Swiss pear, so pear should bend a little easier but is a little more prone to damage, but not by much.
-
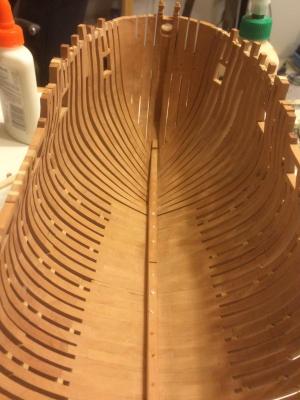
And here are both counter timbers installed and reinforced with a cross spall. I will now start building the framing from the DOF plan to fill in the sides. Ben
- 889 replies
-
- 12
-