MORE HANDBOOKS ARE ON THEIR WAY! We will let you know when they get here.
×


mbp521
-
Posts
996 -
Joined
-
Last visited
Content Type
Profiles
Forums
Gallery
Events
Everything posted by mbp521
-
 Got your test message. -Brian
 -
Wefalck, Simply amazing work. I still have a hard time believing that the deck is painted and not individual planking! -Brian
-
Thank you Roger for the info. I have to tell you, there are fewer things better than a good book. Especially ones that have plethora of useful information. I was able to locate a used copy of the U of M hardcover printing on Amazon for $20. Looking forward to perusing through the pages when it comes in. I have just about made my decision on on how I am going to build the hammock nets, and most likely it will be the wooden box style. In the pictures I posted earlier, you can definitely see that they are raised above the deck surface, but I was thinking this was just for rain water to flow under and help keep the hammocks dry. It never occurred to me that hey could be used for storage, but that makes perfect sense. Keith, I am right there with you when it comes to staring at an old photograph over and over. When I discovered the high-res picture of the Cairo the other day it was like getting a new tool. I was so excited to see certain parts of the ship that I was not able to make out before. I wasn’t even aware that at the time the picture was taken, that they still had the howitzer on the Hurricane deck. In all the previous pictures I had, it was difficult to discern what that section of the picture contained. I even had the Admiral laughing at me due to my excitement of discovering new details. She said I looked happier than a toddler with a lollipop. But after staring at this one for several hours, I started going cross eyed and had to step away for a while. -Brian
-
Johnhoward, In case you would like to download the pictures, I found them at the link below. The high res ones that I used are the .tif files. Sure hope they help. https://www.history.navy.mil/content/history/nhhc/our-collections/photography/numerical-list-of-images/nhhc-series/nh-series/NH-61000/NH-61568.html -Brian
-
Keith, Spacing cards are the way to go! I have never done a build without them and I have found that Bobby-pins work perfectly to hold them in place without getting in the way. Of course I’ve never done a build at that small of scale as you are doing, but I would think they would still work out fine. A test bed with a mock up is also the right way to go. As you said, the number three card is closest to scale and looks the best, while the number two card looks good as well. The attempt is to get the model as close to real as possible, but you also have to take into consideration your limitations. Either way you decide, you still have a fantastic build going on and we support whichever decision you make. You’ve got this! -Brian
-
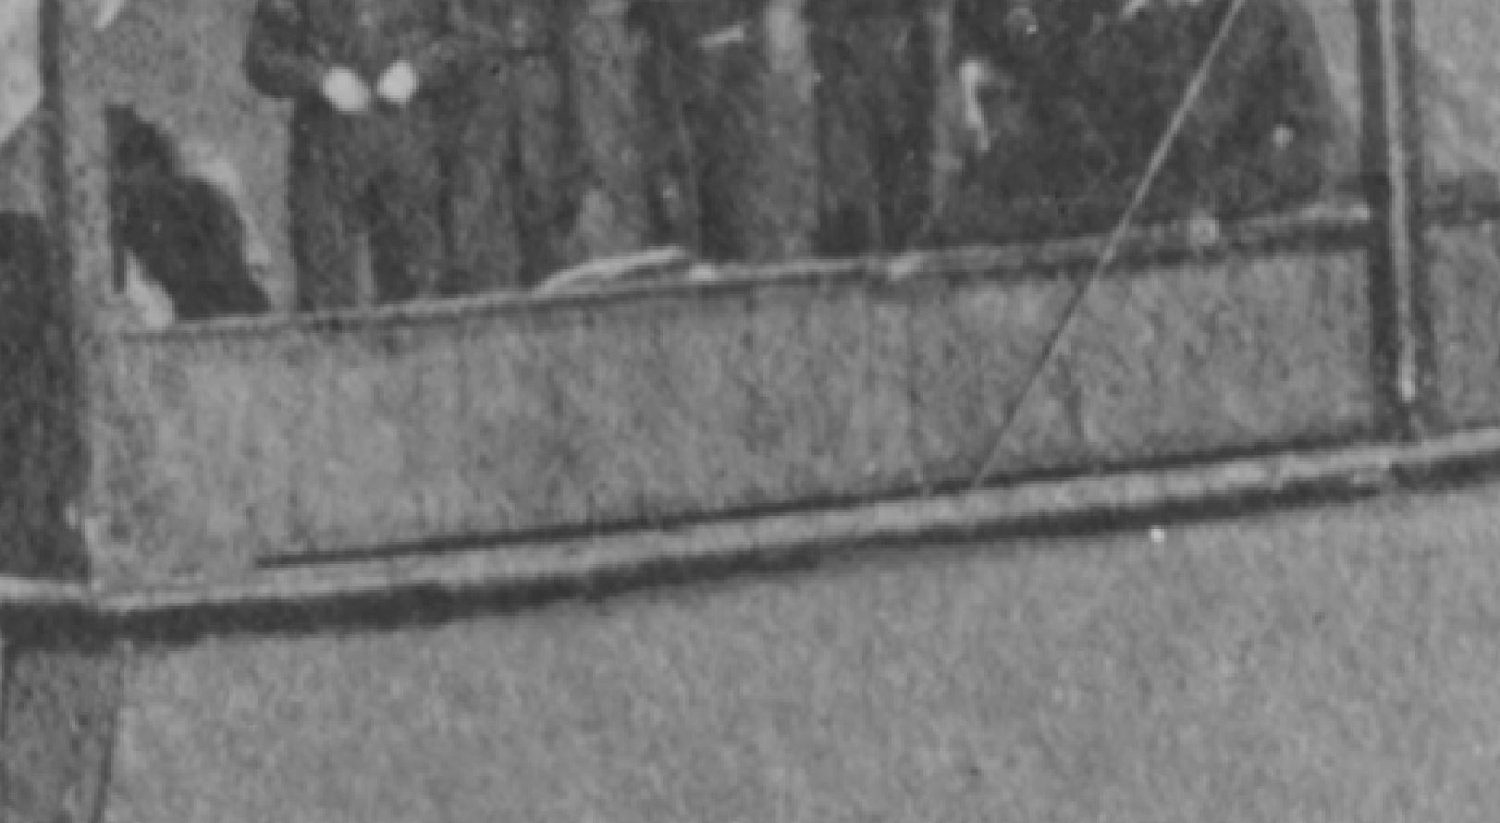
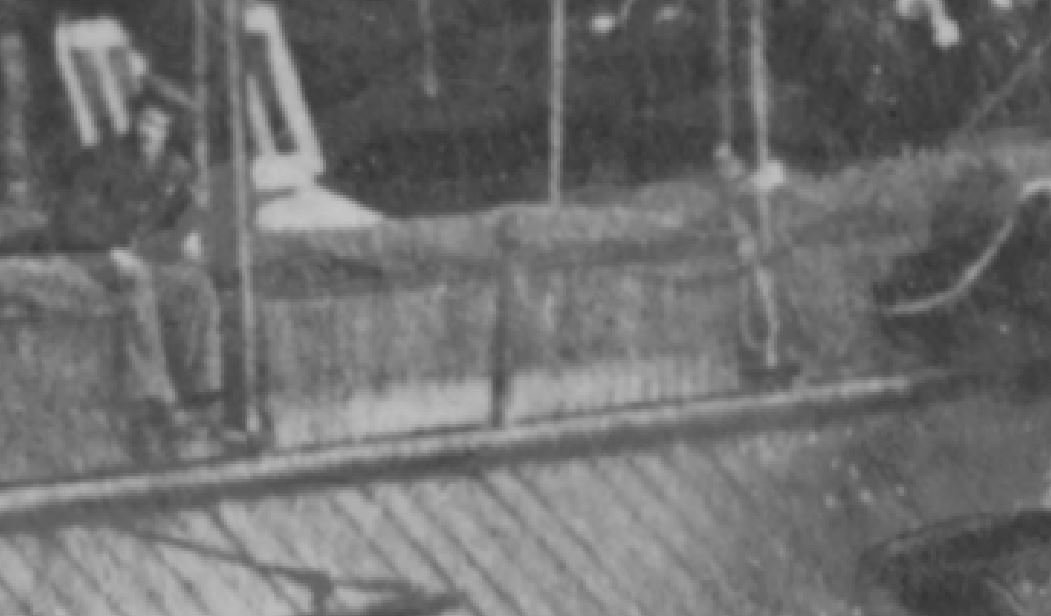
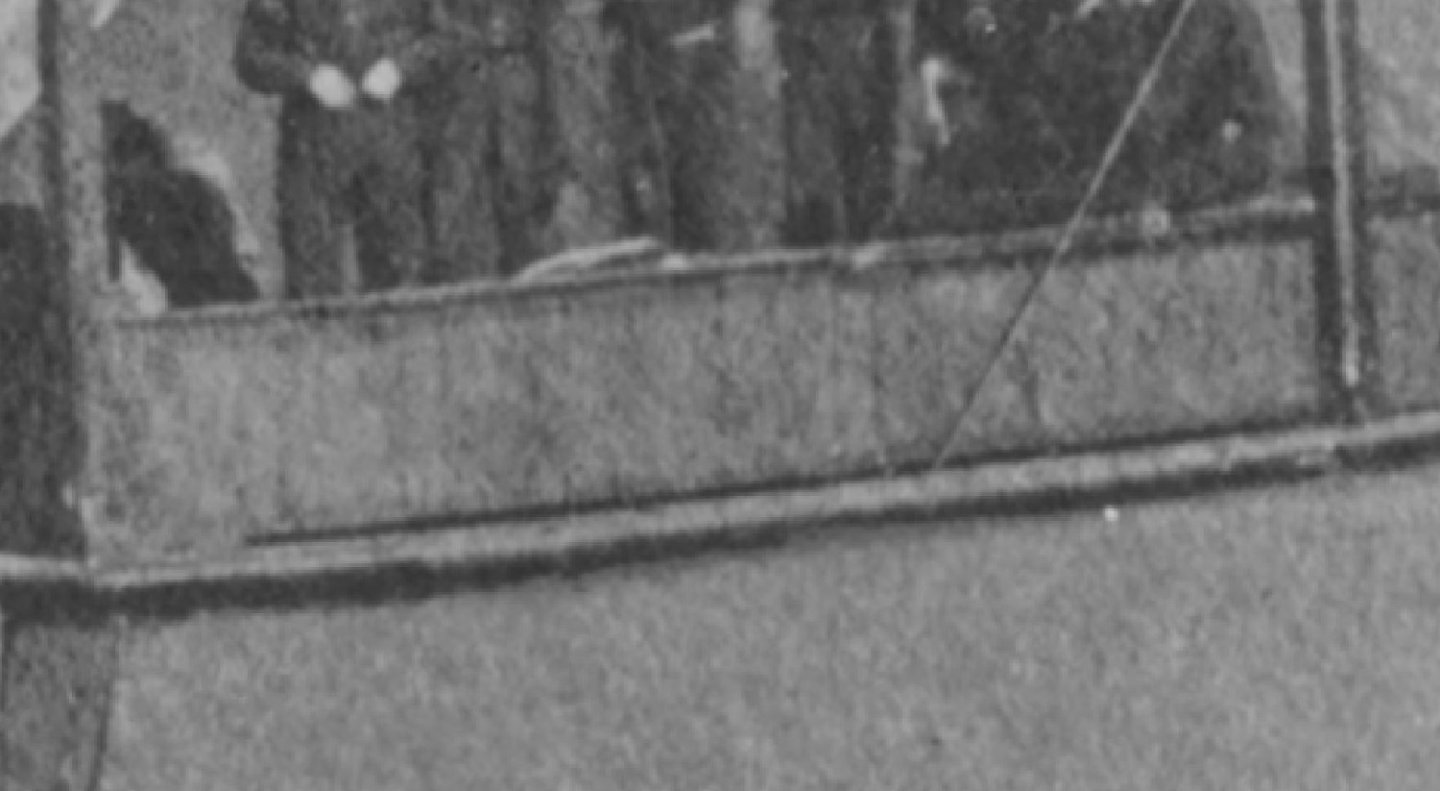
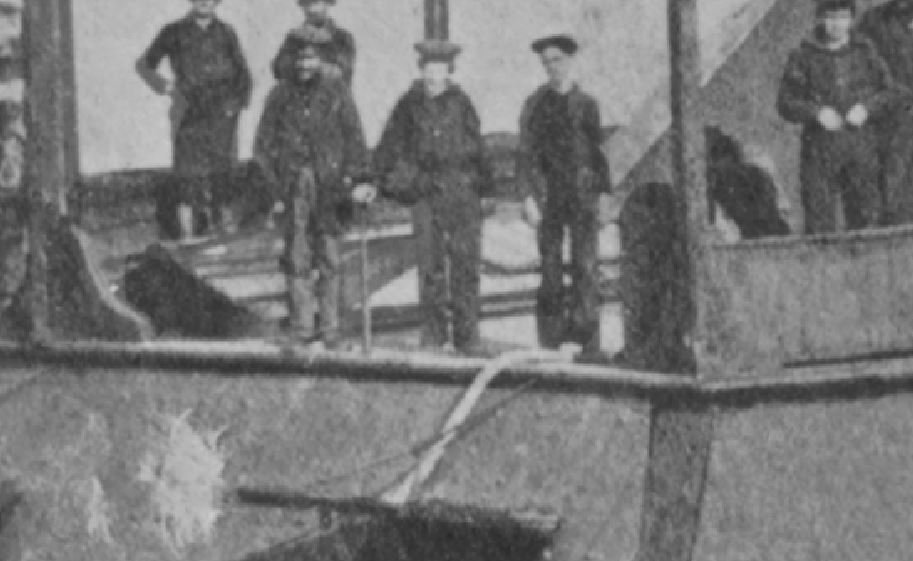
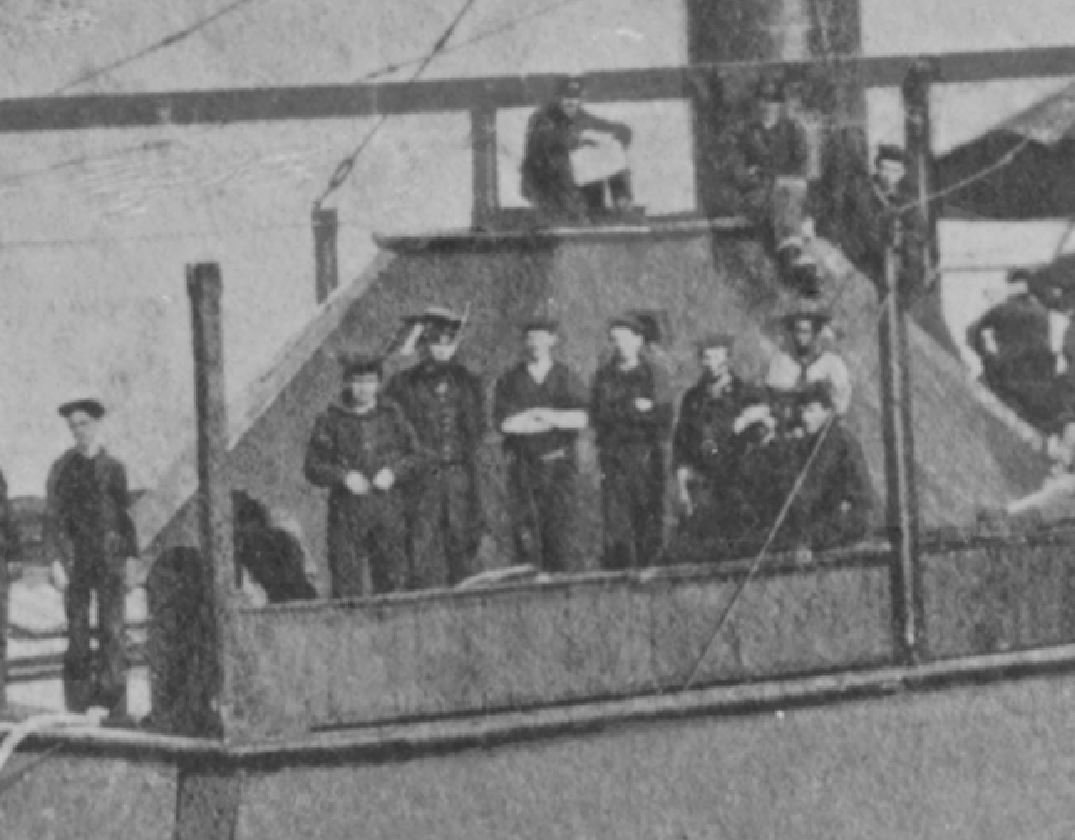
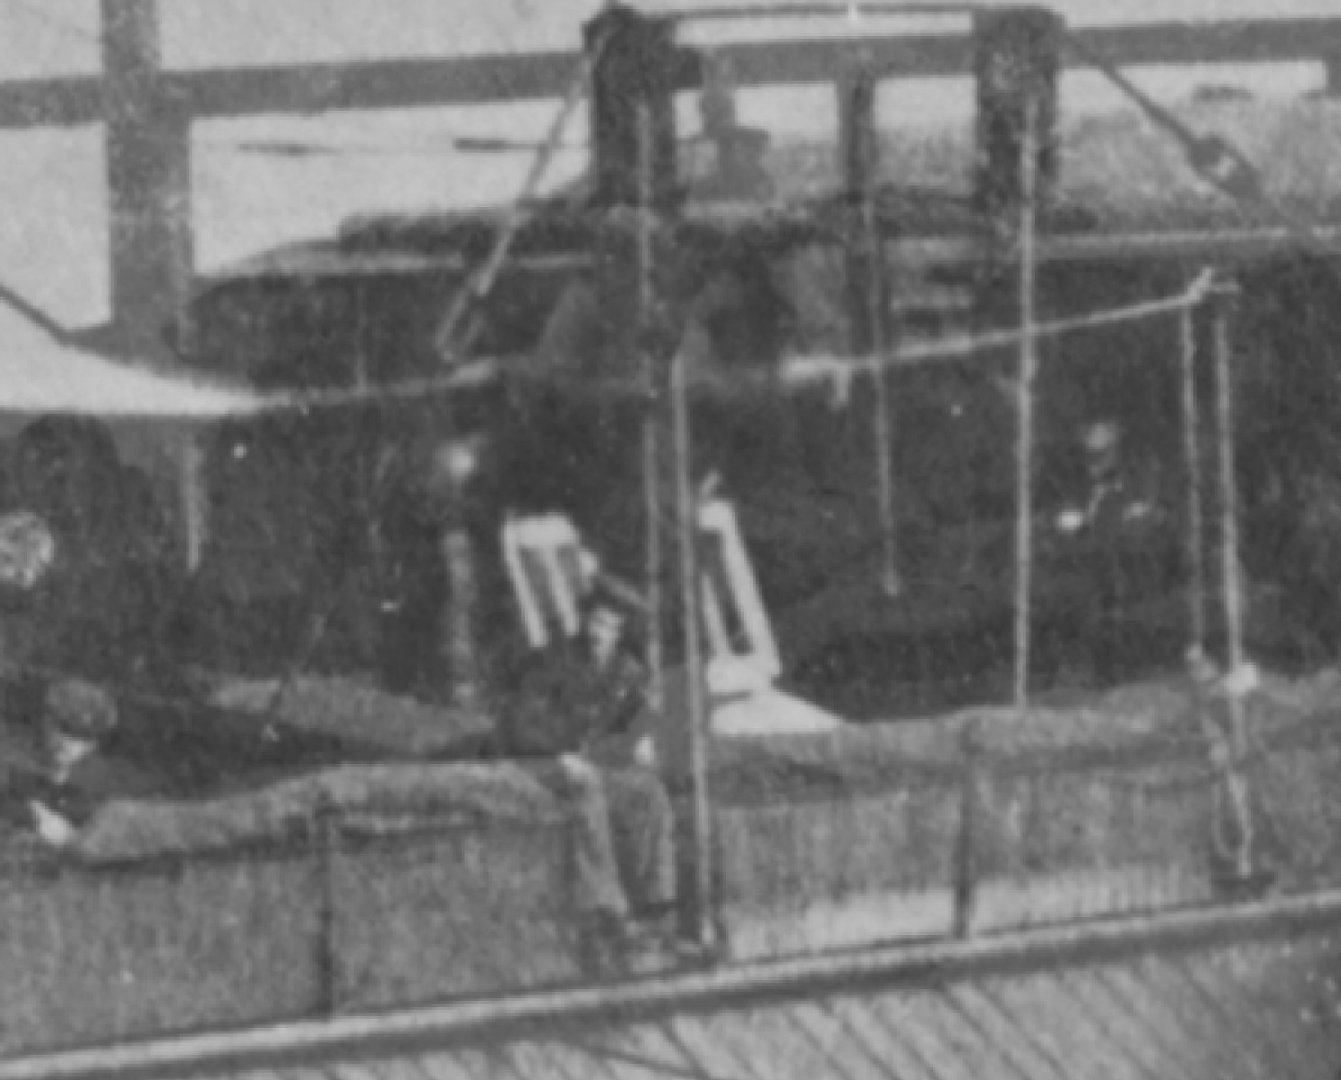
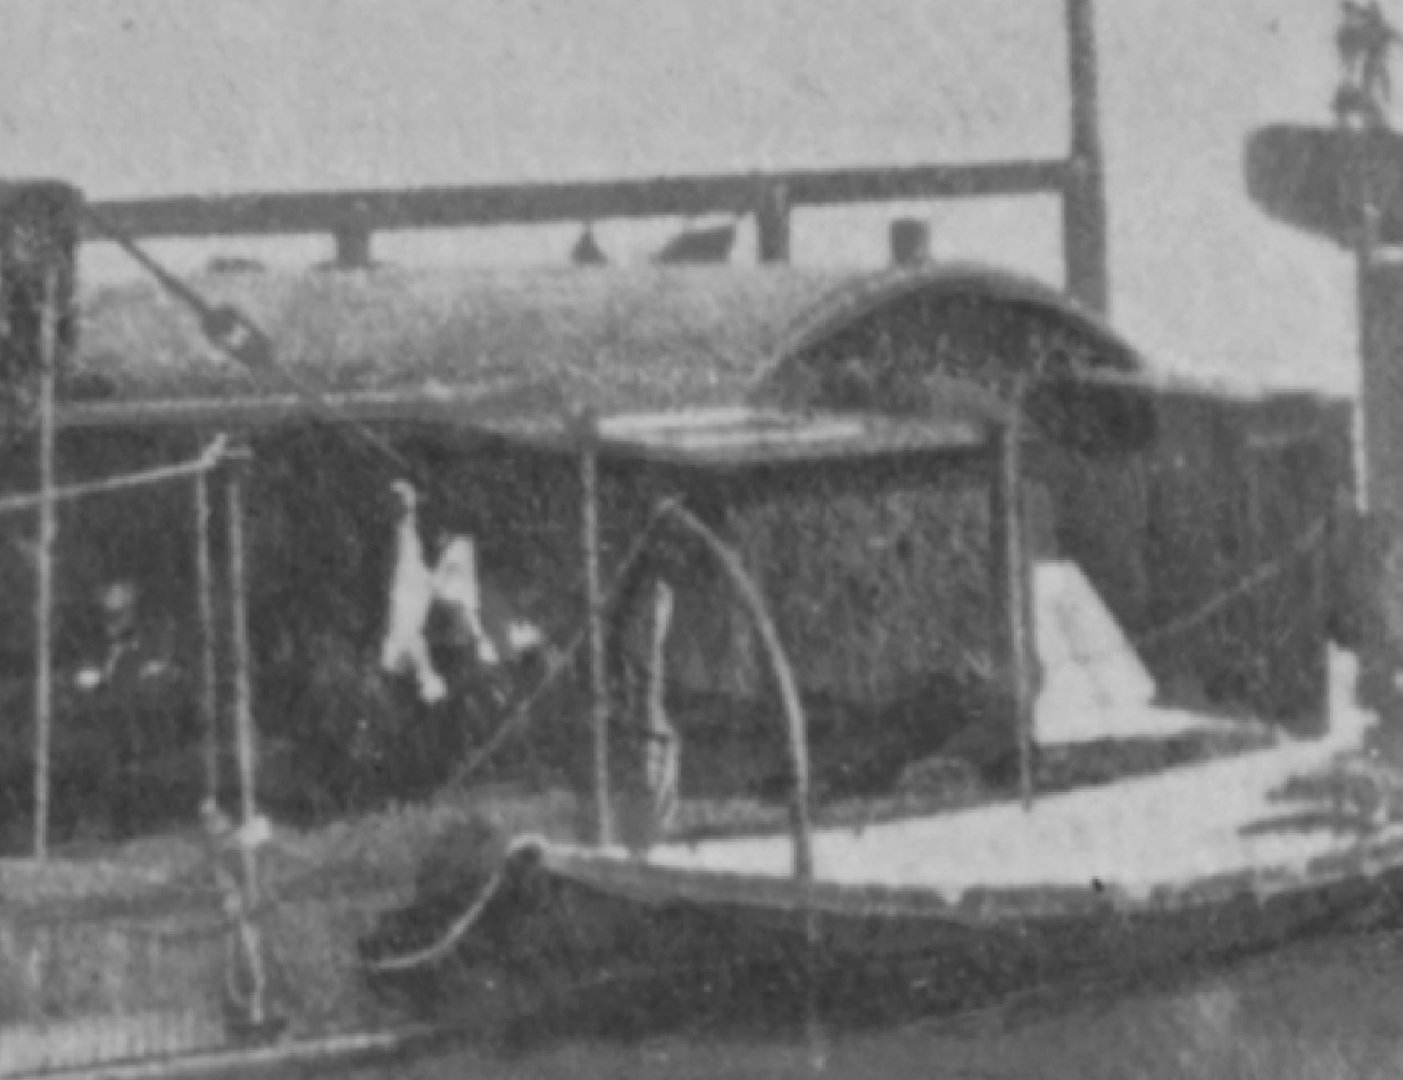
Hello again everyone, I am not ready for an update just yet, the past few weeks have been spent researching and studying photographs of the Cairo and her sister ships to try and get a better understanding of how the Hurricane deck and its structures were built. I do have a few things completed, but nothing substantial enough to post. I have however posted this same information on the Gateway Model Shipcrafter's Guild build of the St. Louis, and I thought I would post it here in my build to see if I could get more feedback from the members that aren't following that build. I have been struggling to figure out how to build the hammock netting on the sides of the Hurricane deck. Johnhoward posted some great info on Civil War era hammock netting in their build log, but I am not sure if the all of the info applies to this type of boat. I was able to locate a high resolution .tif file of the Cairo, and In looking at several areas of this photo, I can see where it looks like one the crewman's legs are visible through the hammock netting in the forwardmost station between the first two stationaries (I'm not sure of the proper terminology for these). However, when I zoom in on them, there appears to me, to be several evenly spaced vertical lines that look to be individual boards along this space. Also, if you look further aft, closer to the workboats (between stationaries 5 & 6), these vertical lines are more defined especially at the bottom where is looks like either the paint is washed out or the sun is reflecting off the shiny surface. The counterpoint I came up with in this area, was that the tarp covering the hammocks was not pulled all the way down to the deck and that the lighter area showing is the hammocks themselves. But I don't see the horizontal lines of the net. The first picture that you have would make sense with the netting running horizontal and vertical, but the spacing of the grid on this net would seem to let a lot more show through if they were indeed empty. There are also two crew members sitting on these hammock nets in both of these areas and neither of the sections they are seated in are bowed. This looks like it would take into account what you stated above, that there could have been a temporary horizontal rail installed to support them or some other solid surface. I wouldn't think that given the size of the stationaries, that they could pull a rope taught enough between them to support a full grown man without bowing just a little bit. I am just struggling with the evenly spaced vertical lines that look like planks, being netting. Another thing that I discovered while going cross-eyed staring at this photograph, is it appears that there may have been a companionway located on the Hurricane deck just aft of the rear funnel and outboard of the forward hog chain support post. In the closeup snippit below, you can see what appears to be an open hatch cover with long windows. The reason I believe that this would be a hatchway is because of the white paint on the hatch itself as well as the inside walls. This seems to match the paint scheme of the open windows on the forward skylight (second picture below). Best I can tell, this companion way would come out just behind the aft most side guns and allow the crew to load supplies to the gun deck and hold without having to move the cannons out of the way and load everything through the gun ports. I truly could be off base with this theory, but it definitely looks like this is some sort of access way to the deck below. One final item that I found is what looks to be a skylight on the roof of the forward side structure built around the paddlewheel house. If you look at the snippit below, there appears to be a white rectangular shape on the roof of this structure. It would make sense that this could be a skylight, since the only other window in this area is located on the forward wall of the same structure, and it is pretty small. I just thought that I would throw this out there to possibly spur more discussion on what it could possibly be. Any thoughts or opinions on this are welcome. I am trying to get a different perspective on these areas to get my details as accurate as possible. Hopefully I'll have an update on the build soon. Thank you for stopping by. -Brian


-
Johnhoward, Thanks so much for the additional photos, they are extremely useful. Over the past few weeks, I have been researching and studying photographs of the Cairo and her sister ships and I was able to locate a high resolution .tif file of the Cairo. In looking at several areas of this photo, I can see where it looks like one the crewman's legs are visible through the hammock netting in the forwardmost station between the first two stationaries (I'm not sure of the proper terminology for these). However, when I zoom in on them, there appears to me, to be several evenly spaced vertical lines that look to be individual boards along this space. Also, if you look further aft, closer to the workboats (between stationaries 5 & 6), these vertical lines are more defined especially at the bottom where is looks like either the paint is washed out or the sun is reflecting off the shiny surface. The counterpoint I came up with in this area, was that the tarp covering the hammocks was not pulled all the way down to the deck and that the lighter area showing is the hammocks themselves. But I don't see the horizontal lines of the net. The first picture that you have would make sense with the netting running horizontal and vertical, but the spacing of the grid on this net would seem to let a lot more show through if they were indeed empty. It's an endless cycle. There are also two crew members sitting on these hammock nets in both of these areas and neither of the sections they are seated in are bowed. This looks like it would take into account what you stated above, that there could have been a temporary horizontal rail installed to support them or some other solid surface. I wouldn't think that given the size of the stationaries, that they could pull a rope taught enough between them to support a full grown man without bowing just a little bit. I am just struggling with the evenly spaced vertical lines that look like planks, being netting. Another thing that I discovered while going cross-eyed staring at this photograph, goes back to a discussion that your group had about how supplies were loaded onto the boats (post #74). In looking closely, it appears that there may have been a companionway located on the Hurricane deck just aft of the rear funnel and outboard of the forward hog chain support post. In the closeup snippit below, you can see what appears to be an open hatch cover with long windows. The reason I believe that this would be a hatchway is because of the white paint on the hatch itself as well as the inside walls. This seems to match the paint scheme of the open windows on the forward skylight (second picture below). Best I can tell, this companion way would come out just behind the aft most side guns and allow the crew to load supplies to the gun deck and hold without having to move the cannons out of the way and load everything through the gun ports. I truly could be off base with this theory, but it definitely looks like this is some sort of access way to the deck below. One final item that I found is what looks to be a skylight on the roof of the forward side structure built around the paddlewheel house. If you look at the snippit below, there appears to be a white rectangular shape on the roof of this structure. It would make sense that this could be a skylight, since the only other window in this area is located on the forward wall of the same structure. I just thought that I would throw this out there to possibly spur more discussion on what it could possibly be. I will also post these last two questions on my build as well to see what other feedback I can get. Please don't think that I am trying to debunk you and your teams extensive research on the hammock nets, and I do realize that we are building two different boats, I just want to offer up some thoughts of mine and give a different perspective of these boats. All of the research that you and your group have done has been a tremendous help in getting me to where I am now with my build, and is greatly appreciated. I just hope that some of my suggestions will help in some way with your build as well. -Brian


-
Looking good Keith! I must admit that what you call your “fresh hell” is one of my favorite things to do. For some reason ratlines provide me with sublime therapy. Actually, rigging in general is one of my favorite tasks in model ship building. I can get lost for hours in it. Not sure why, it’s just one of the ways my demented mind works. But getting back to your build, looks like a beautiful day to be inside working on your ship, from the looks of it there seems to be quite a bit of white stuff on the ground outside. -Brian
-
Beautiful job Keith! Never had any doubt whatsoever that you couldn’t pull it off. They are definitely tiny little buggers though. -Brian
-
Keith, there is no doubt that you prevail in this task. At times like this, it’s always good to leave the bench for a bit, take a nice walk to clear the noggin, then get back to it. We’re all here to cheer you on and can’t wait to see the results of dead eyes 3.0. Keep your head up my friend, victory is in sight. -Brian
-
Amazing work as always Eberhard! As a curiosity, how many of those tiny belaying pins were lost to the floor gods? I would guess it is a good thing they were made from steel instead of brass so they could be rescued with a magnet. As for your mast, if you wouldn’t have told us they were painted, I would have put a weeks wages on them being stained wood. Simply beautiful. -Brian
-
Very nice job Eric. Excellent way to adapt and overcome those obstacles. For some reason I was thinking that 1:24 scale was bigger than that, and I can now truly understand the struggles of the small bits. I’m thinking that I may go with 1:16 when I get to building this one. -Brian
-
That is excellent news! Glad to hear that it’s not serious enough to require surgery. -Brian
-
So sorry to hear Johann. Best wishes for a speedy recovery. We will patiently stand by while you get yourself better. -Brian
-
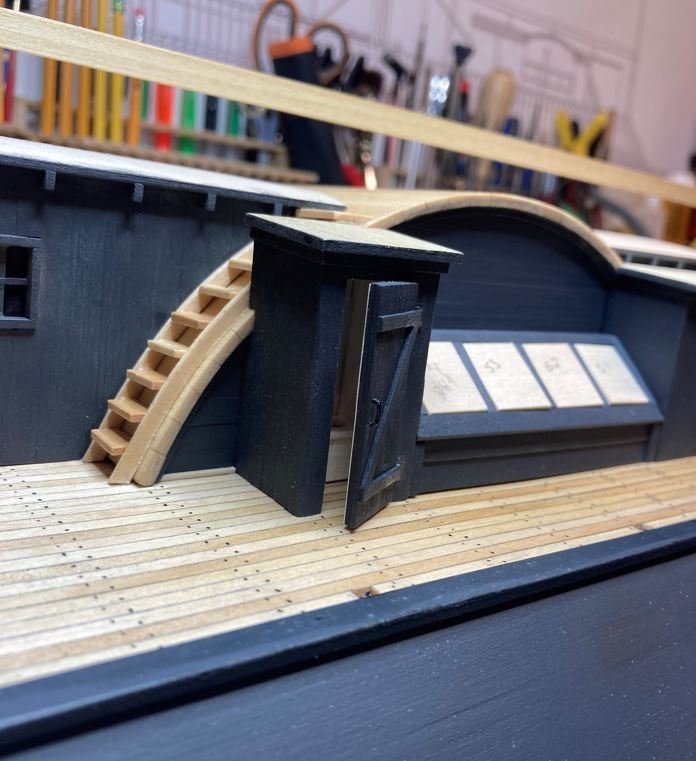
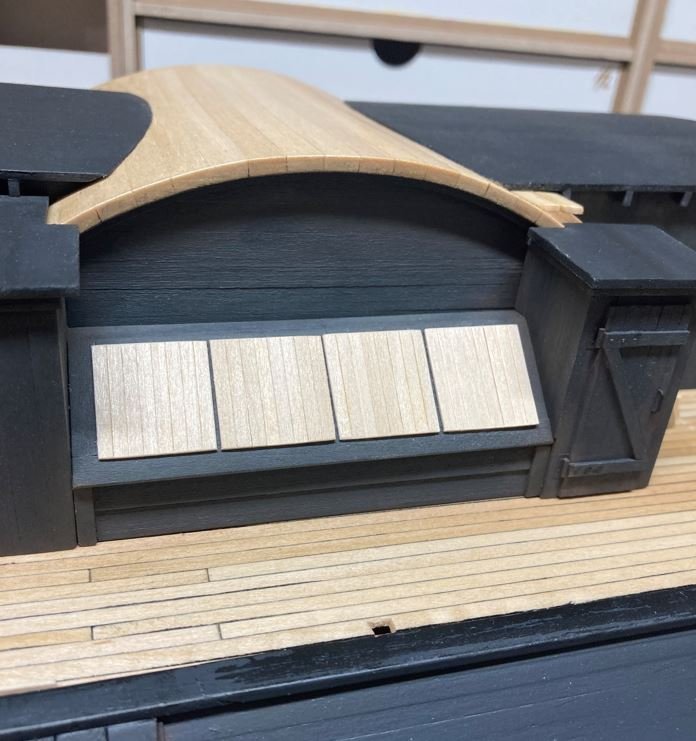
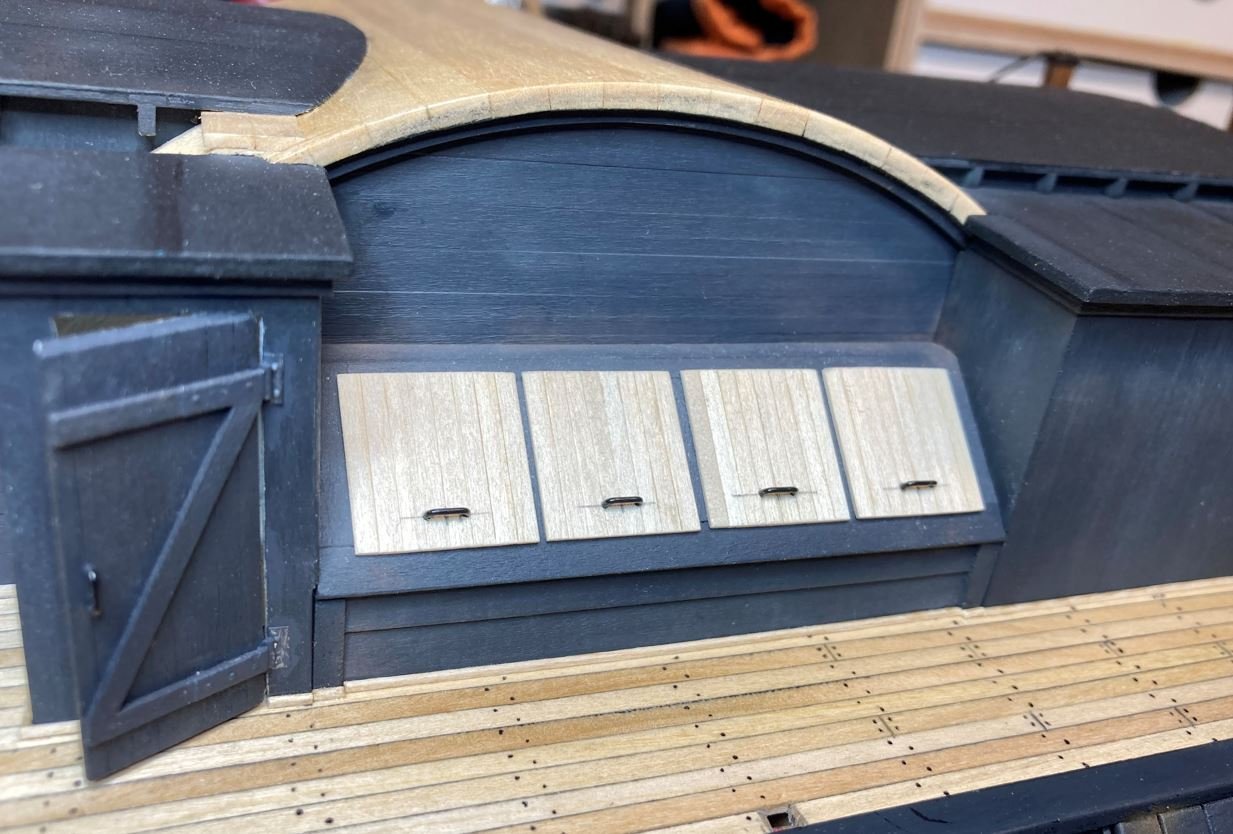
Eric, From what I can tell so far these hatches were just leaned up against the side wall of the wheel house, but I have considered adding a prop stick to them just for aesthetics. I still need to do a little more looking into these since I am not sure if they were one long cover or four individual ones. The skylights over the boilers are what is really troubling me. I am having a hard time finding any info on them to determine if they had glass panes in them or were solid covers. Since the HSR shows what looks to be window dividers on it I am seriously thinking of going with glass and propping a few of them open. All this research has seriously slowed me down a bit. -Brian
-
Keith, that would be a hilarious addition to this if I were to put figures on it. Maybe the door being opened was from all the pipe smoke. 😁 -Brian
-
Most definitely country-side carpenters. There were seven of the boats built in 100 days by the cheapest labor they could find in the area. -Brian
-
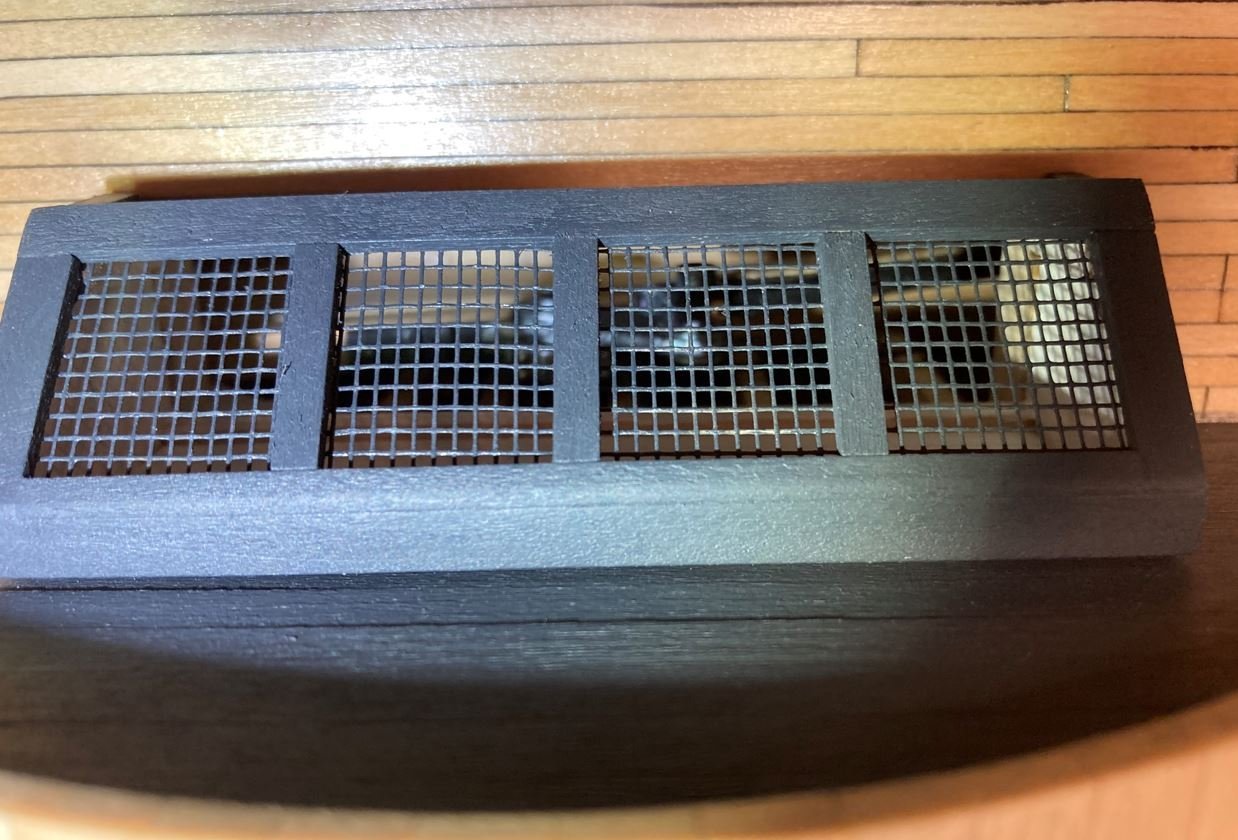
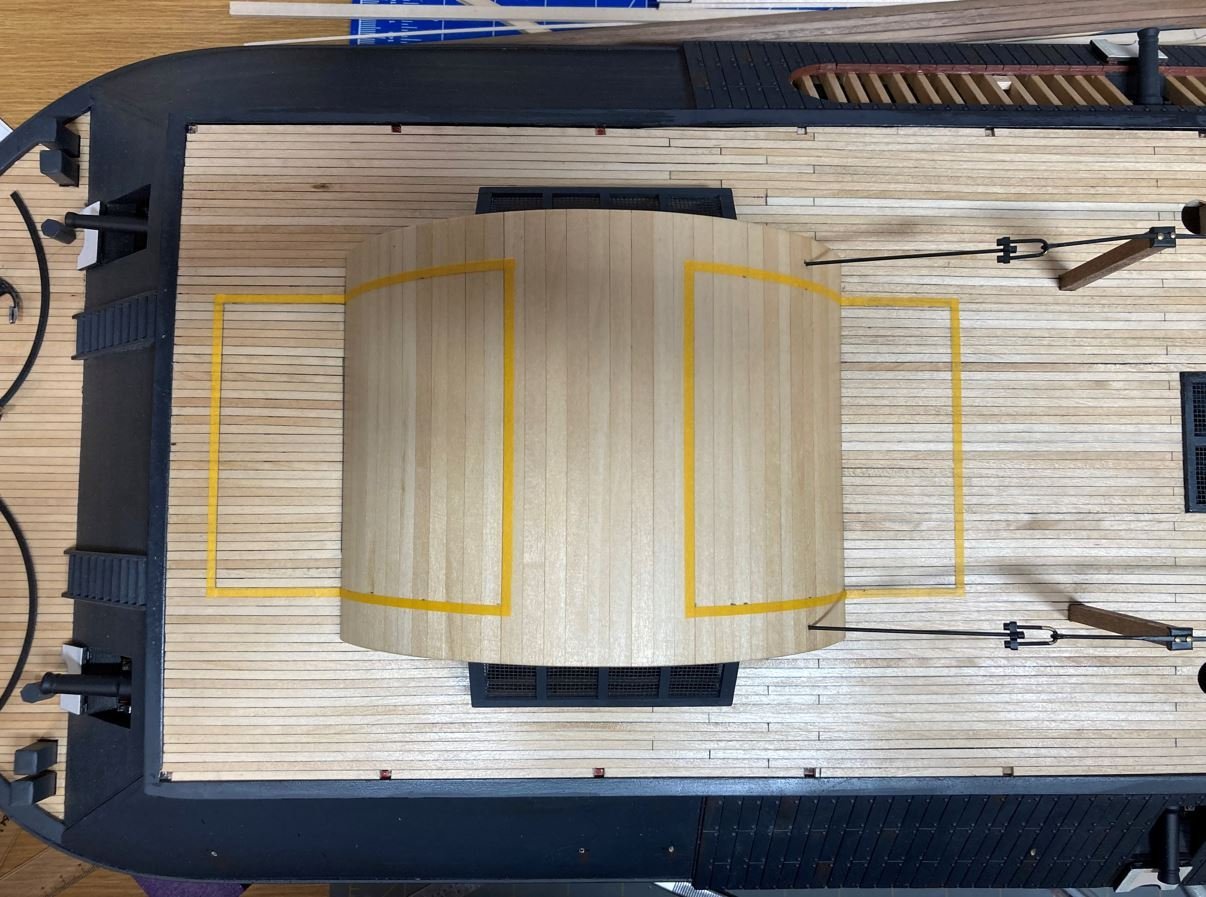
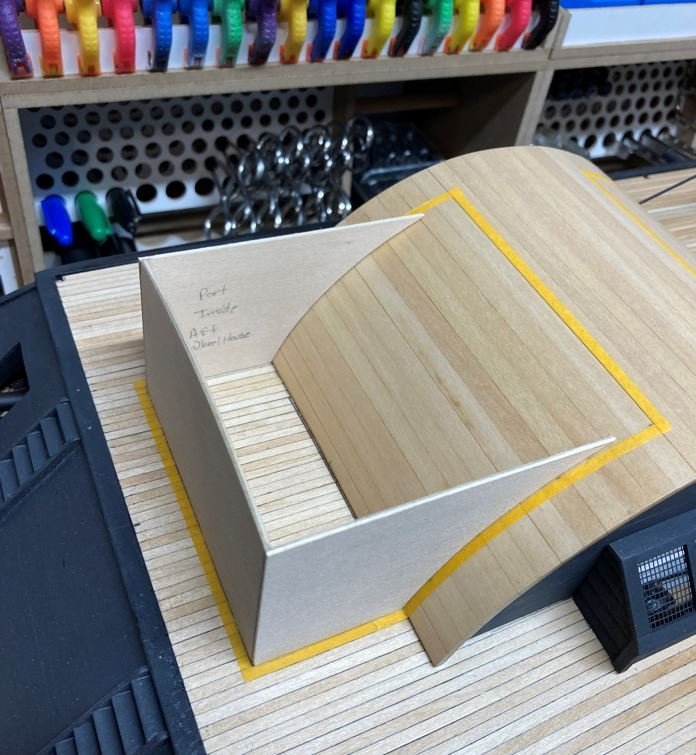
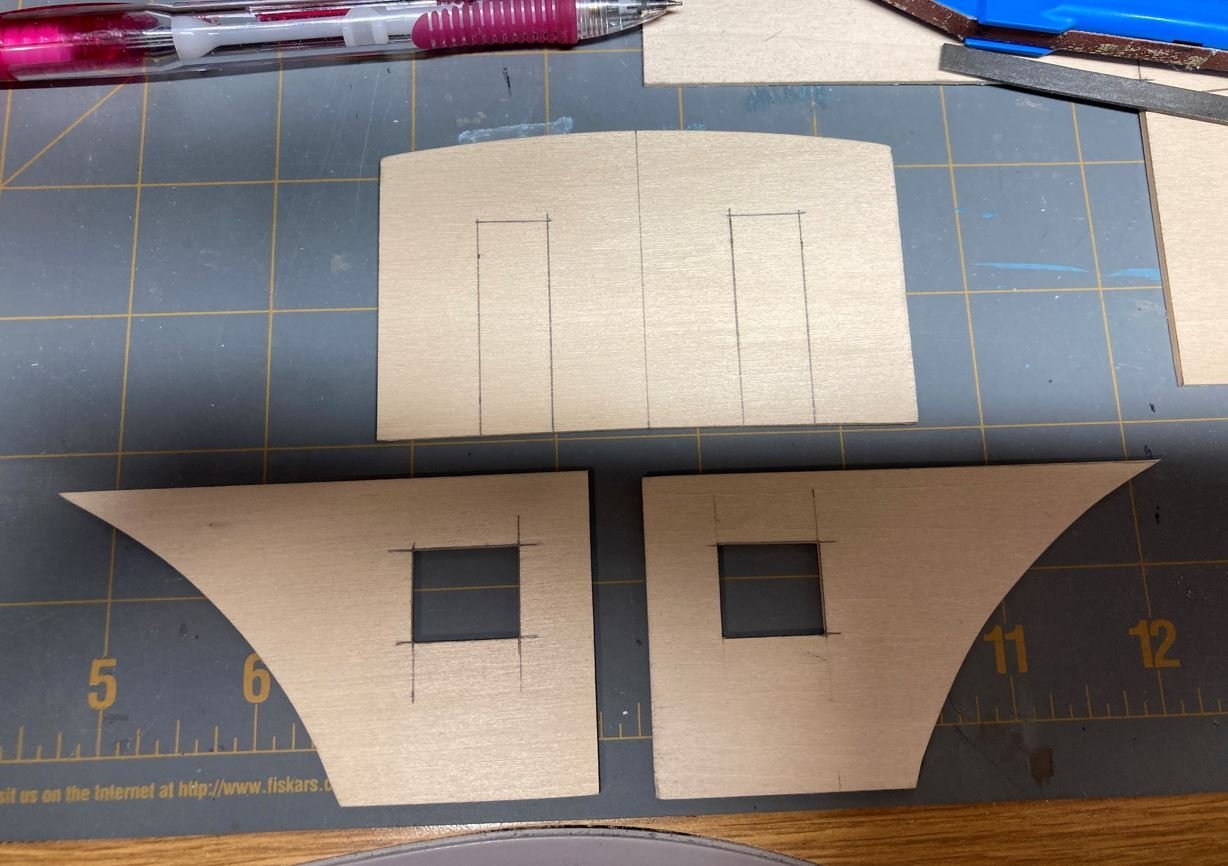
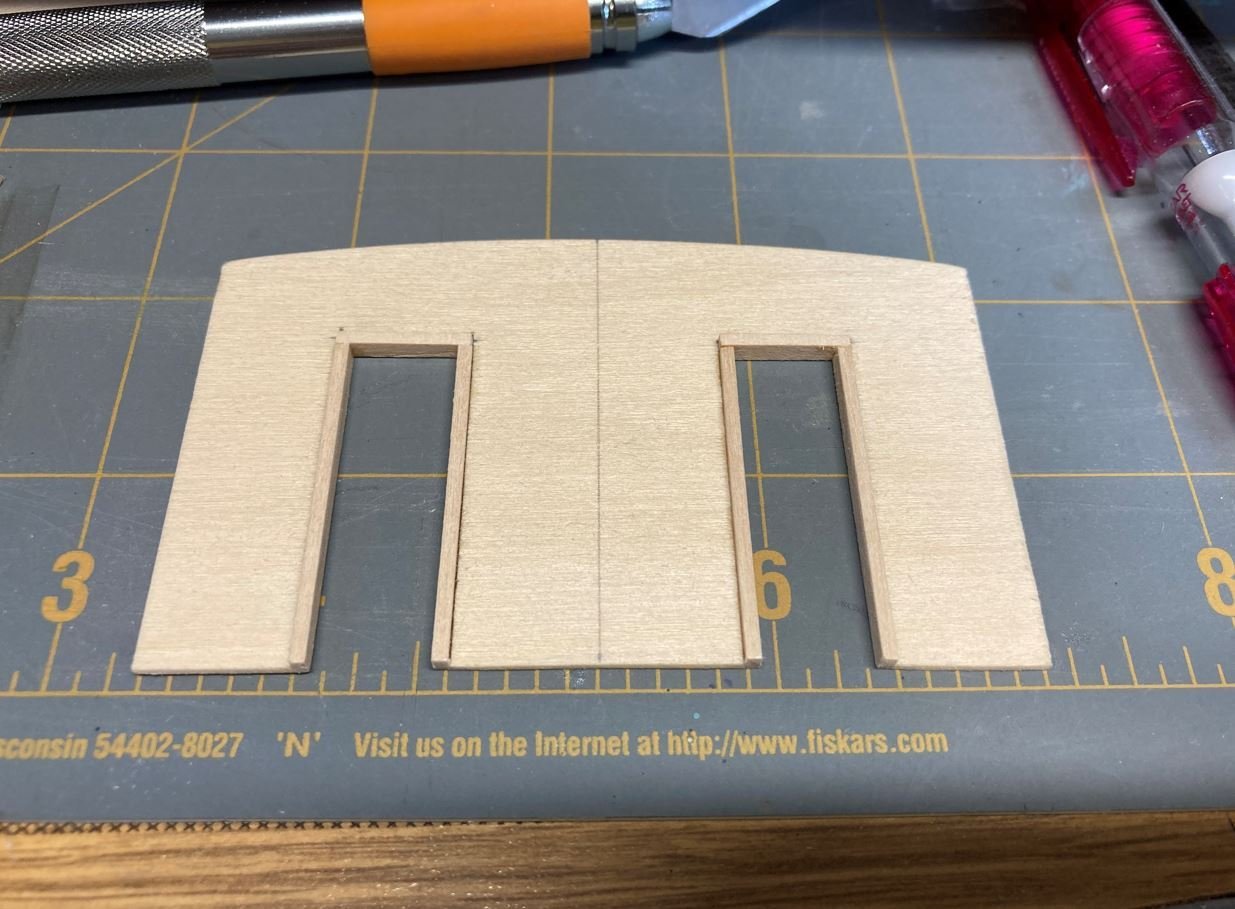
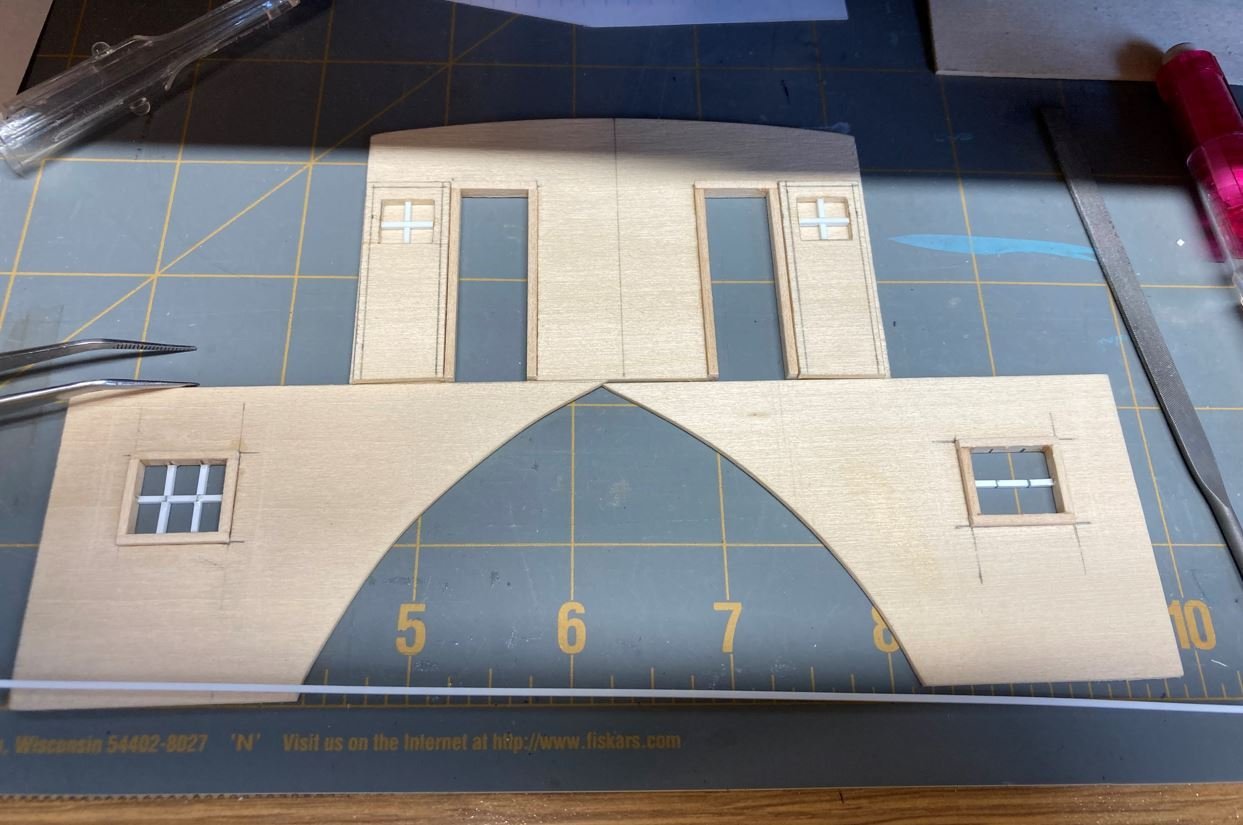
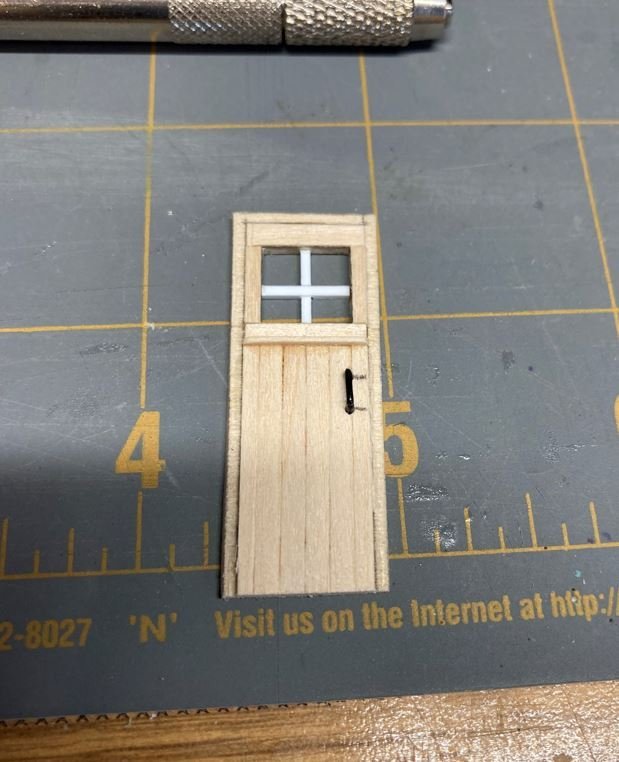
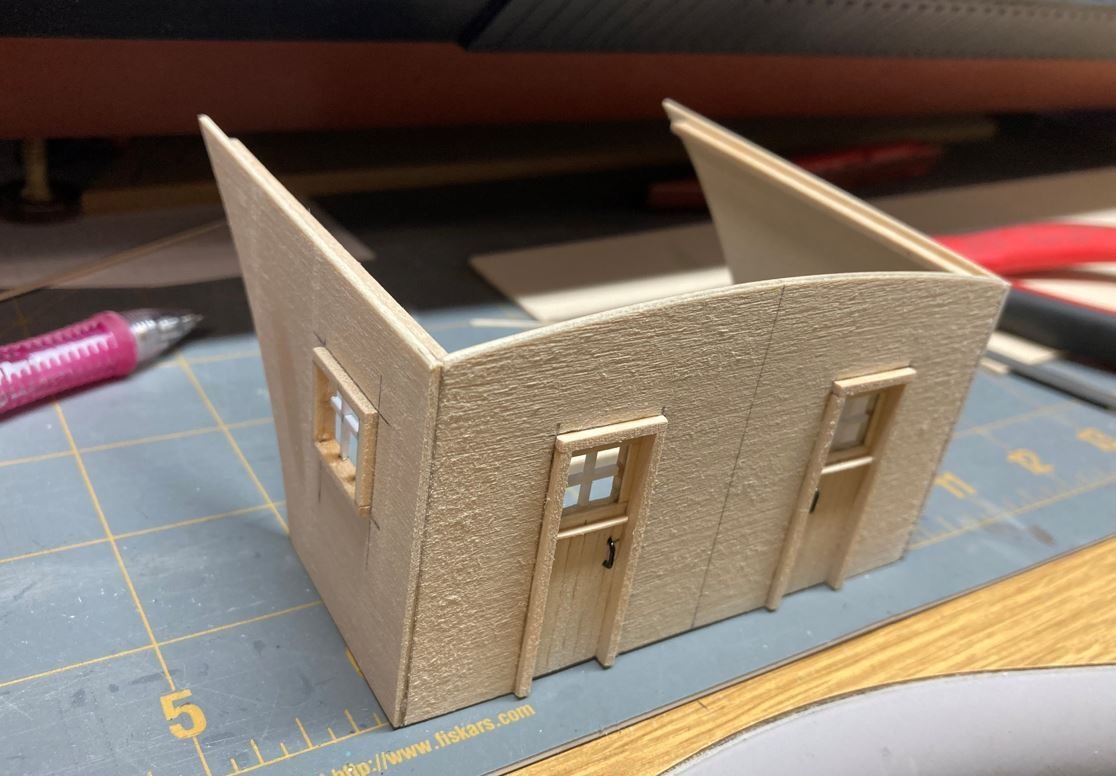
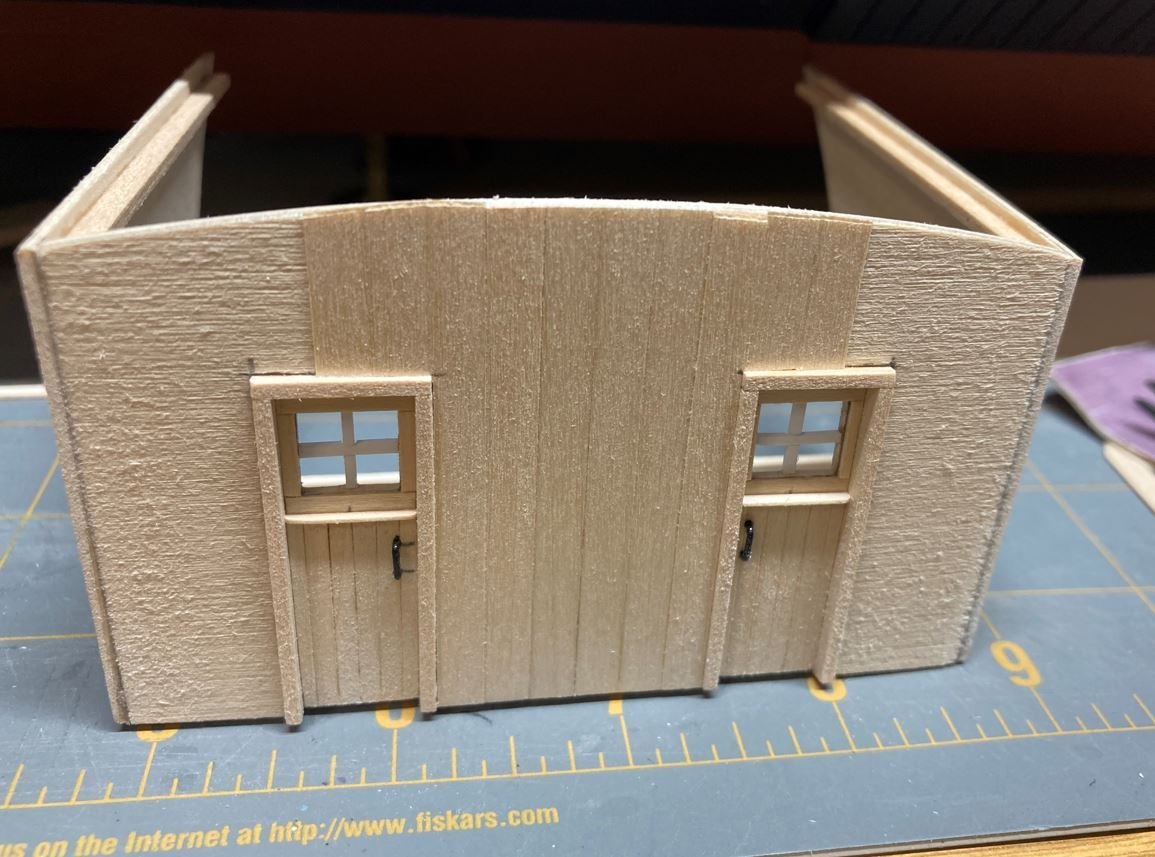
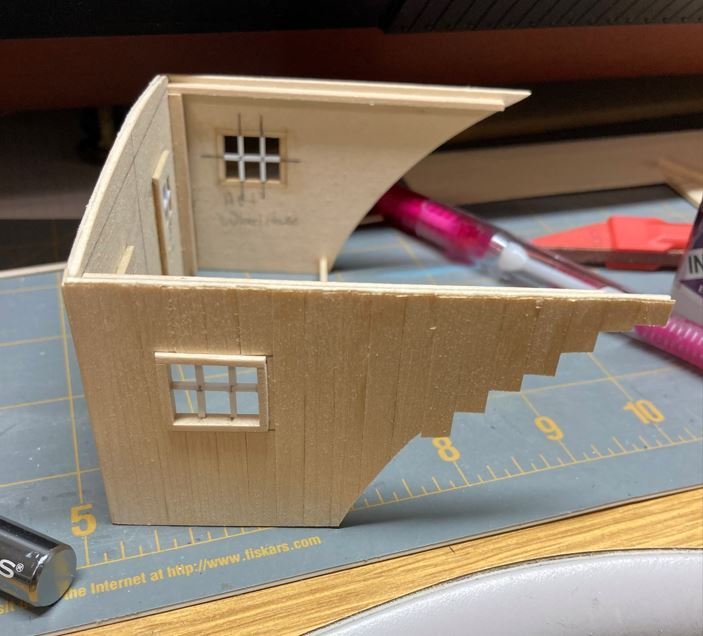
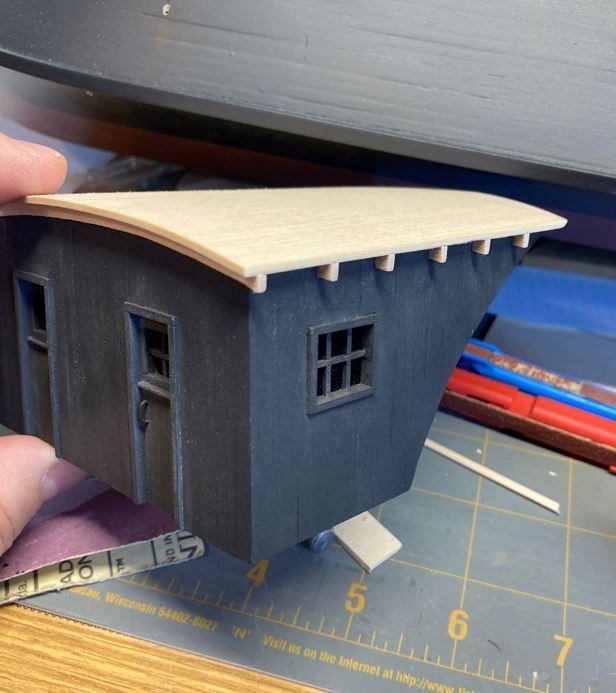
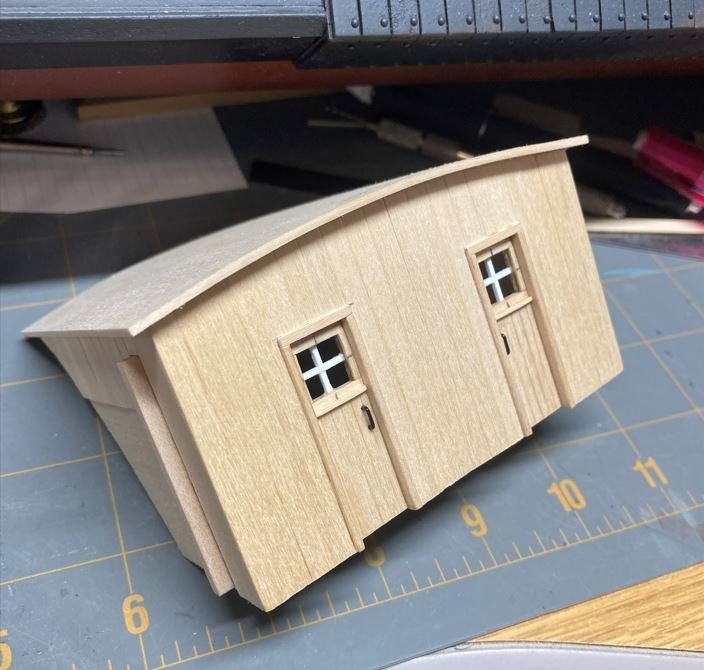
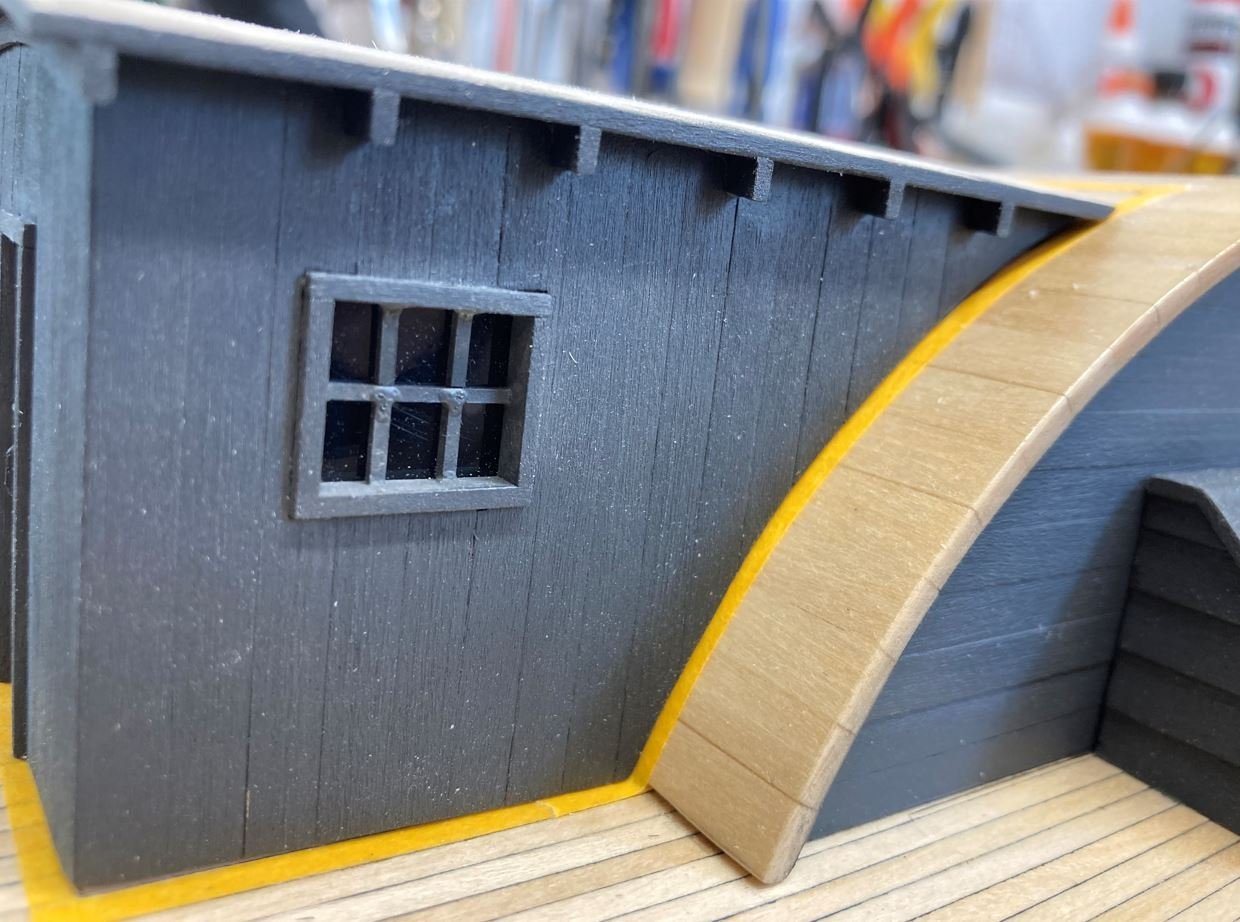
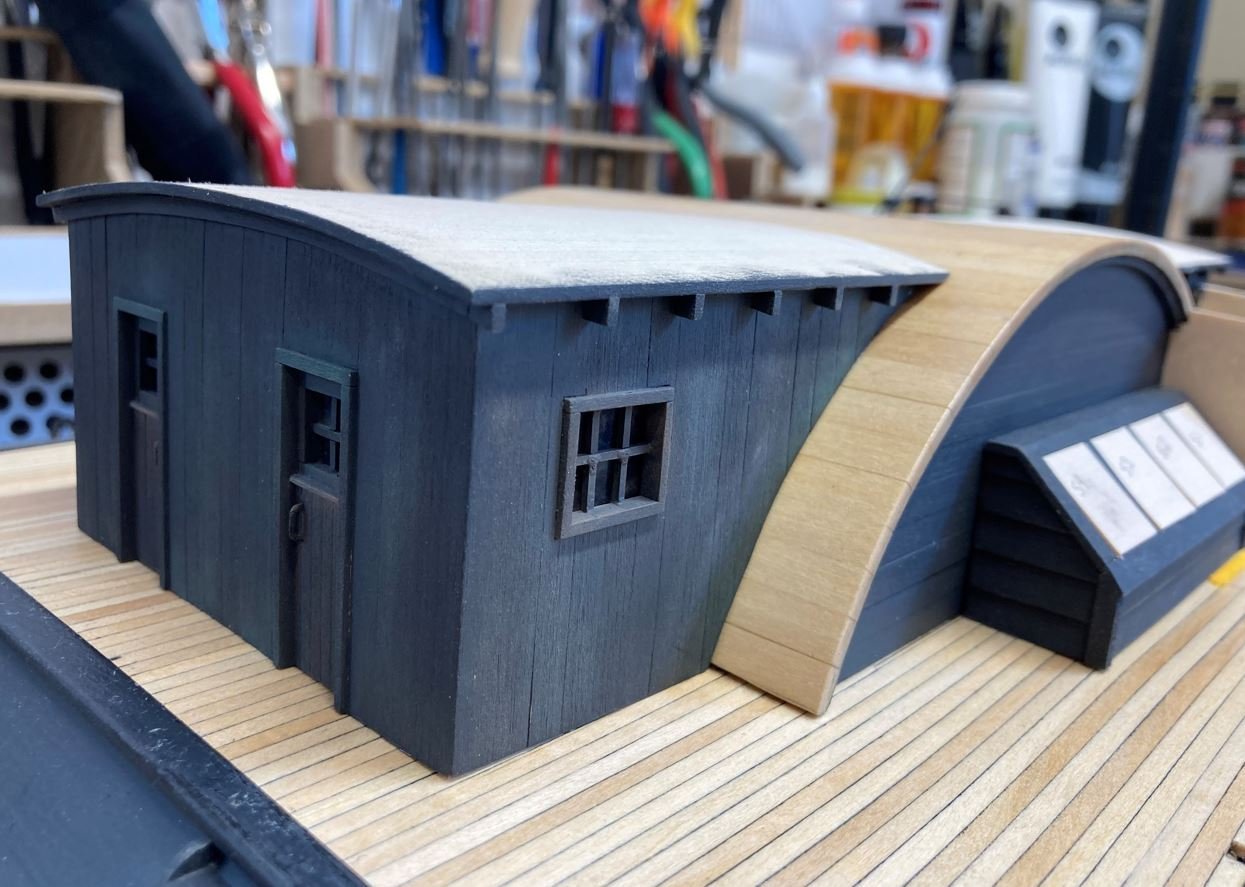
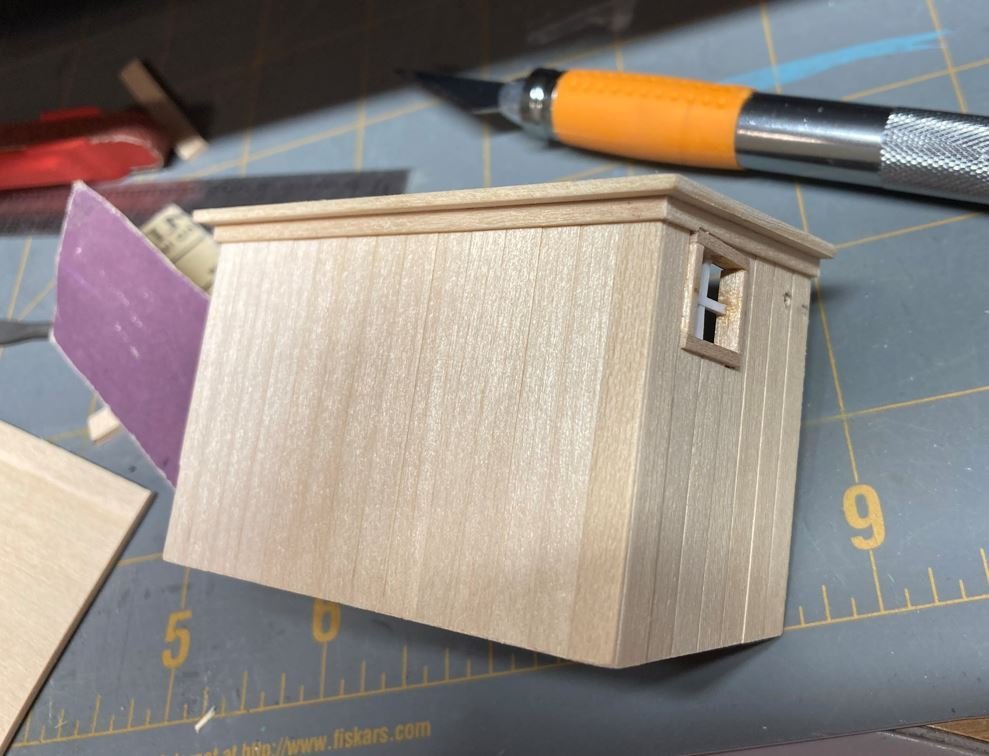
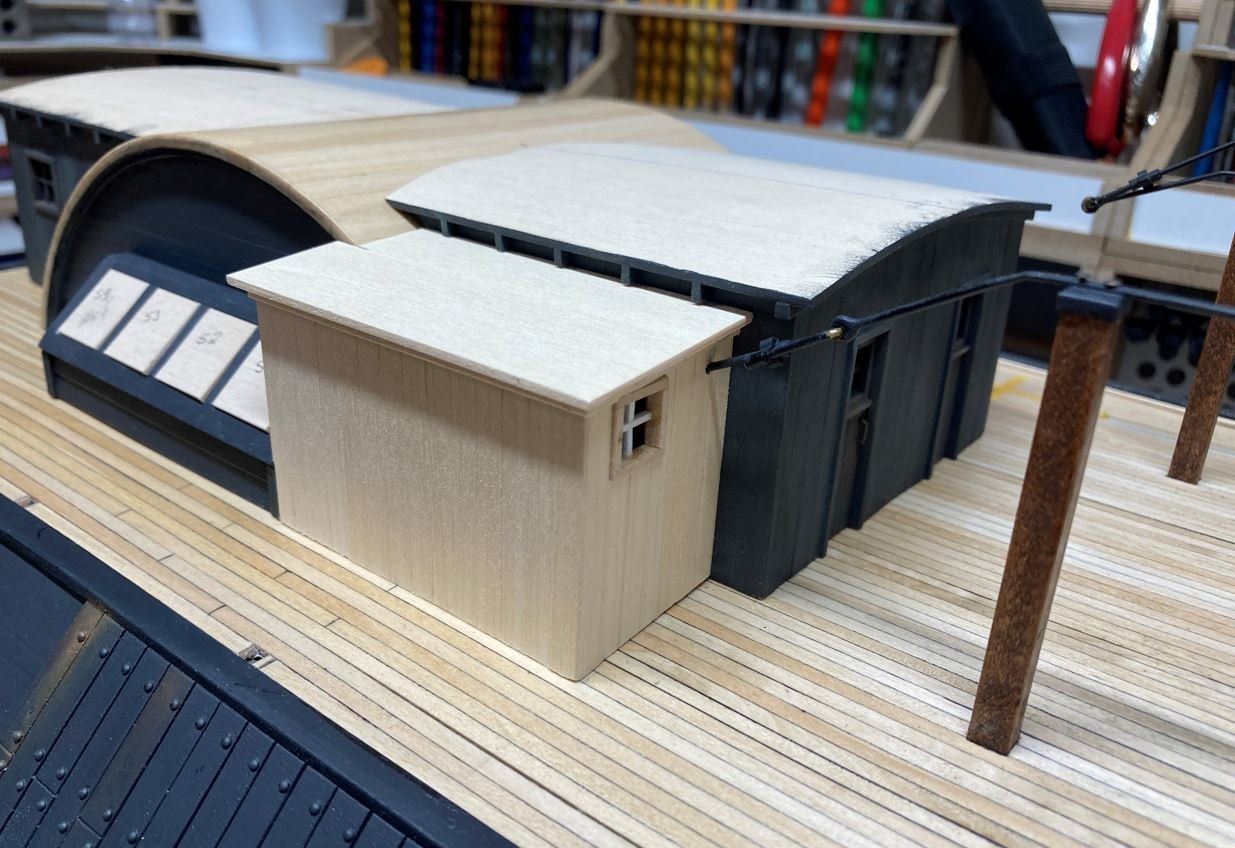
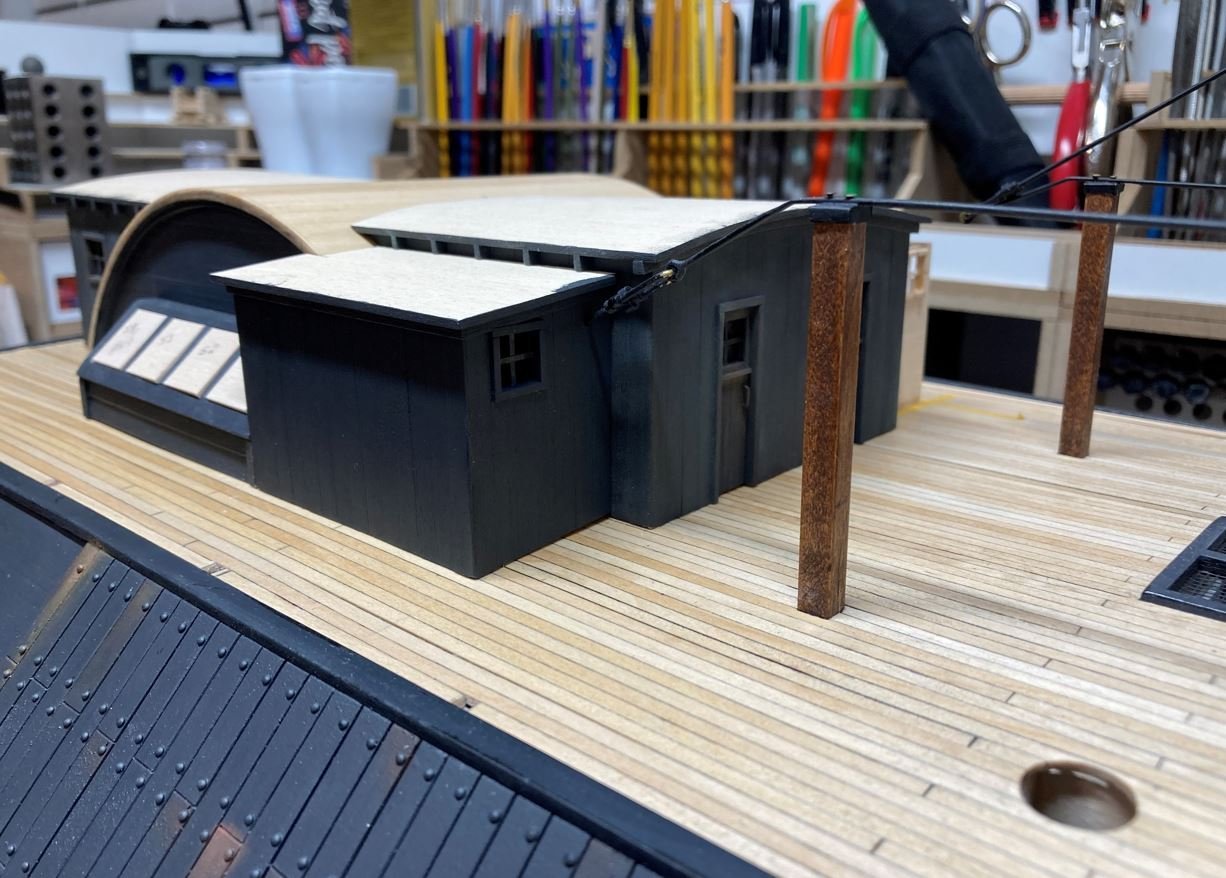
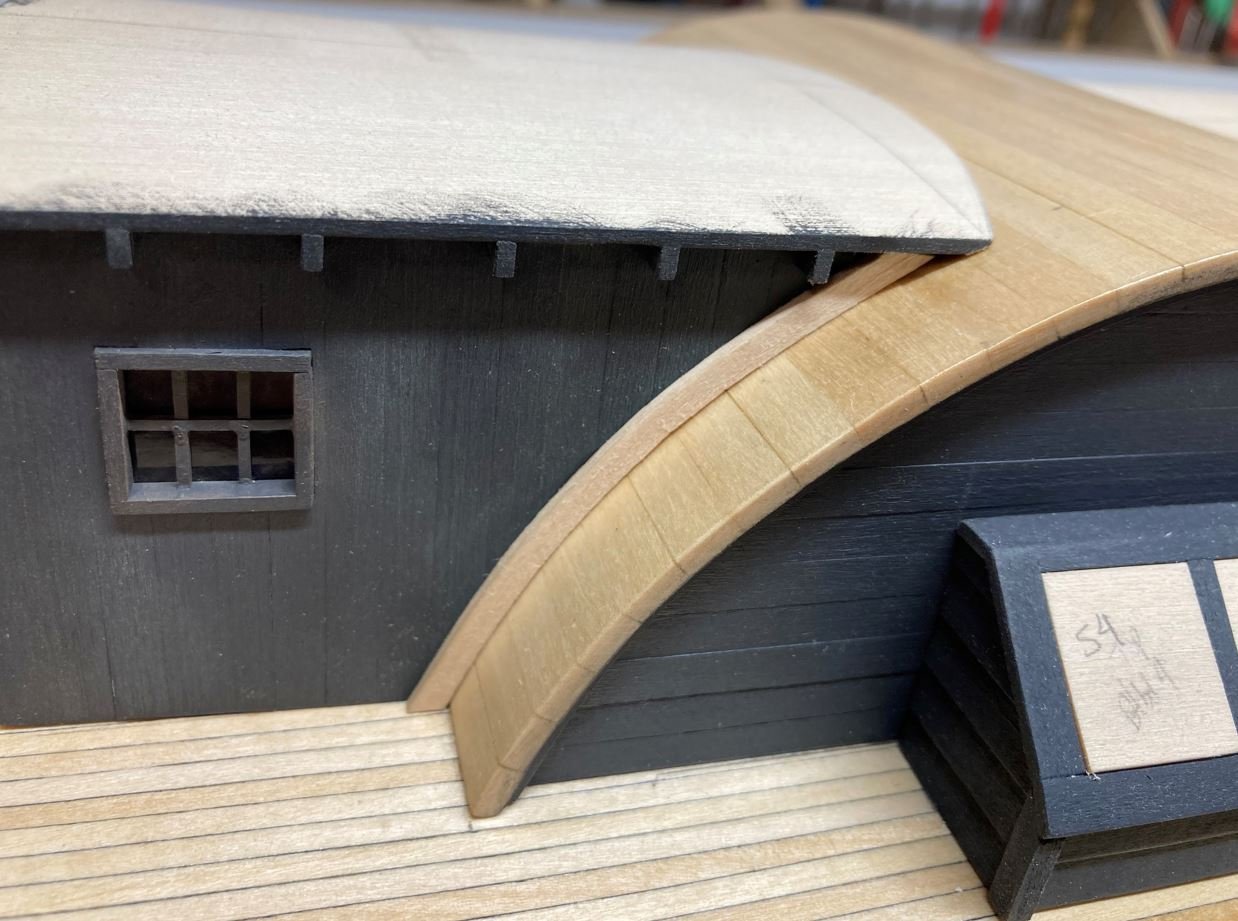
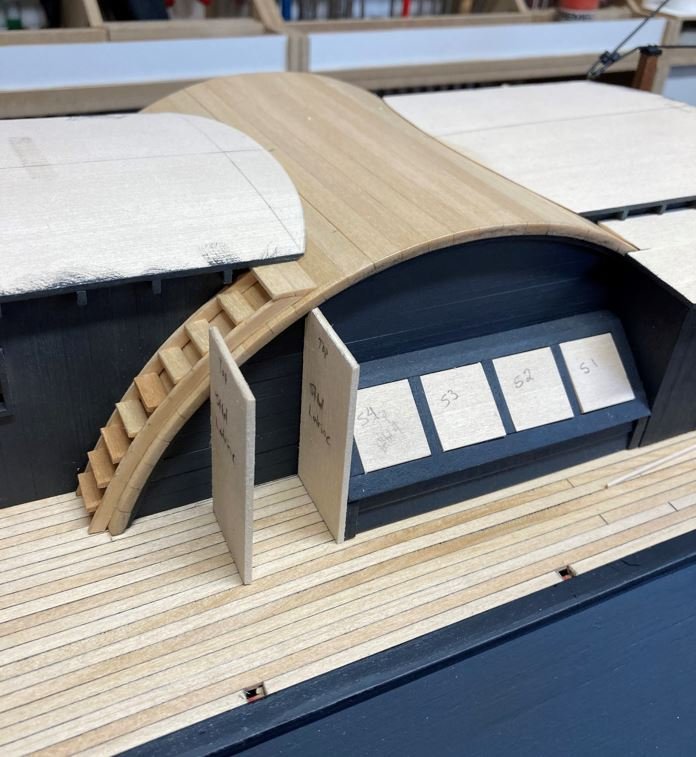
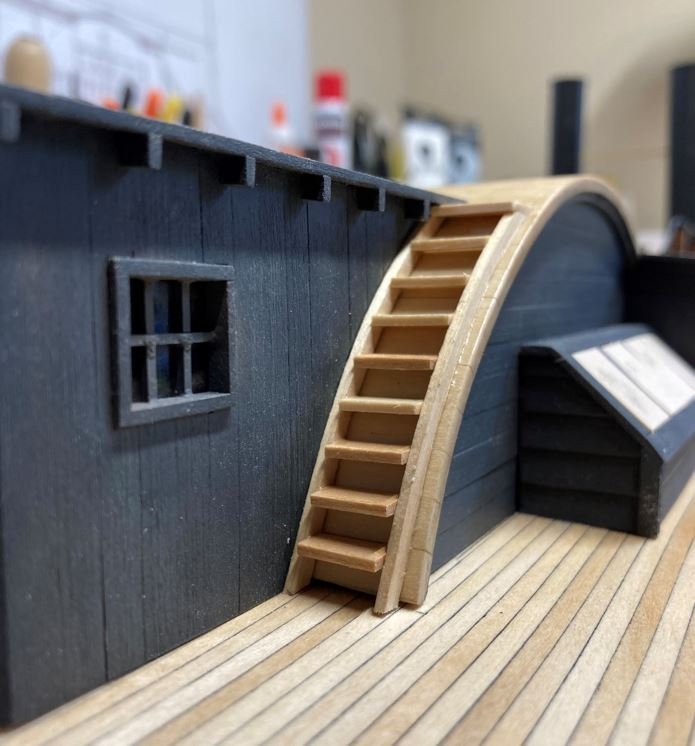
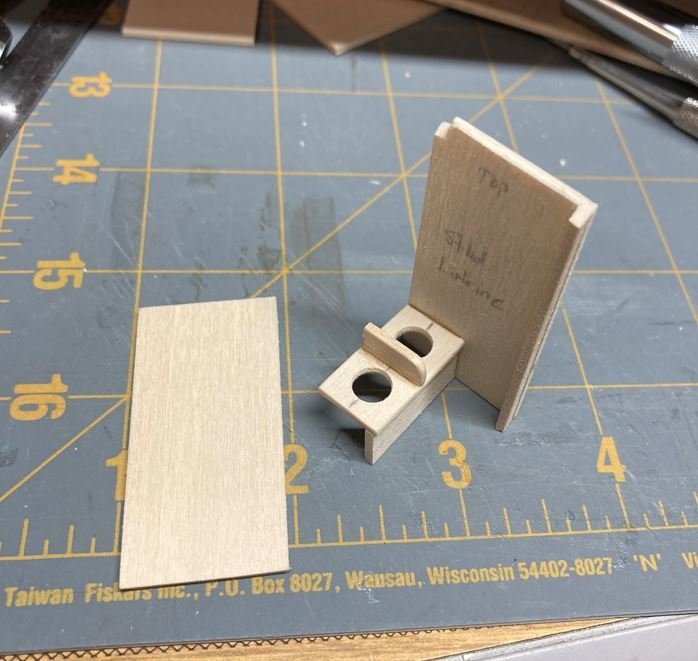
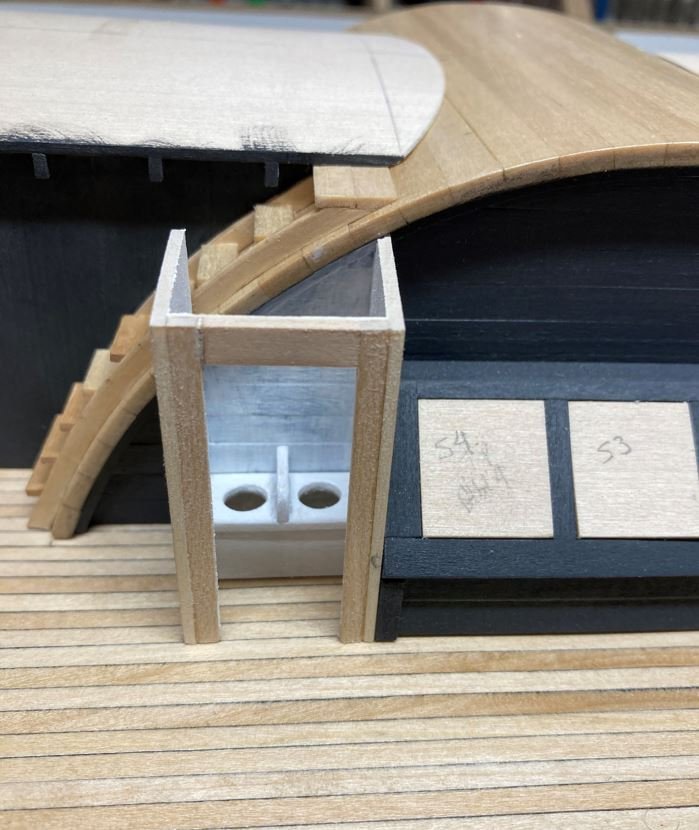
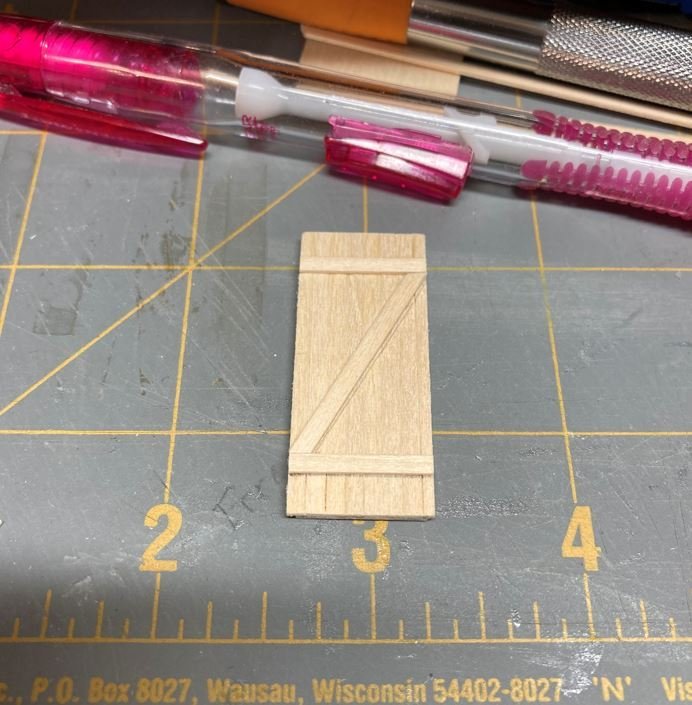
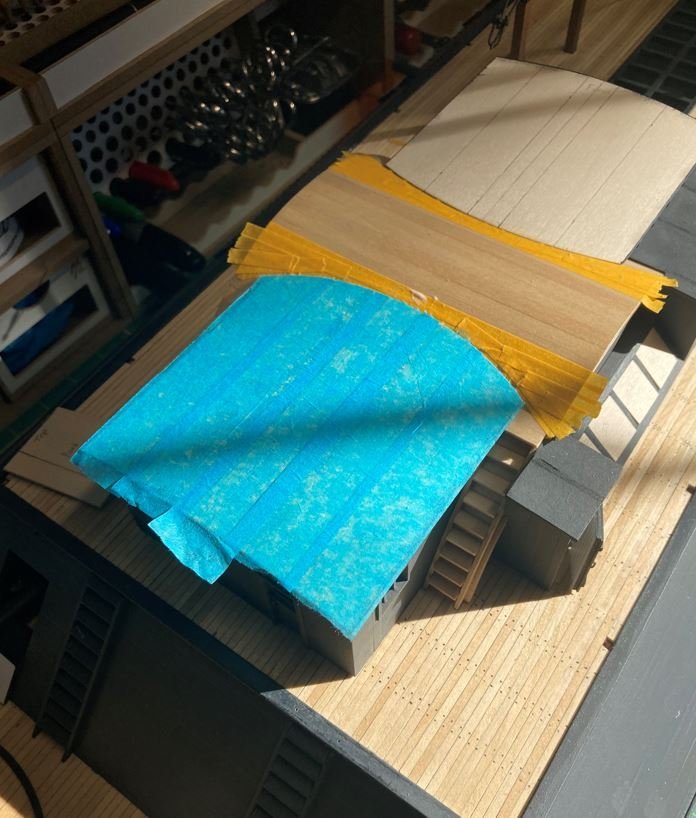
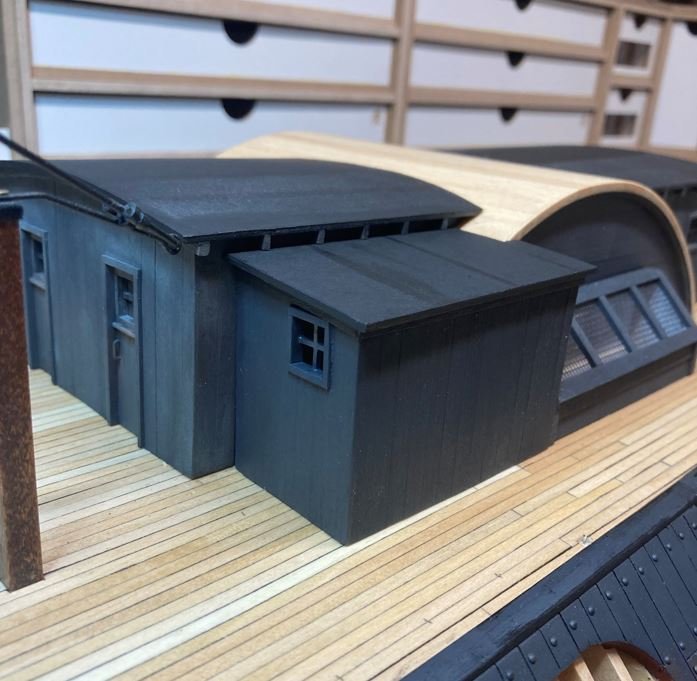
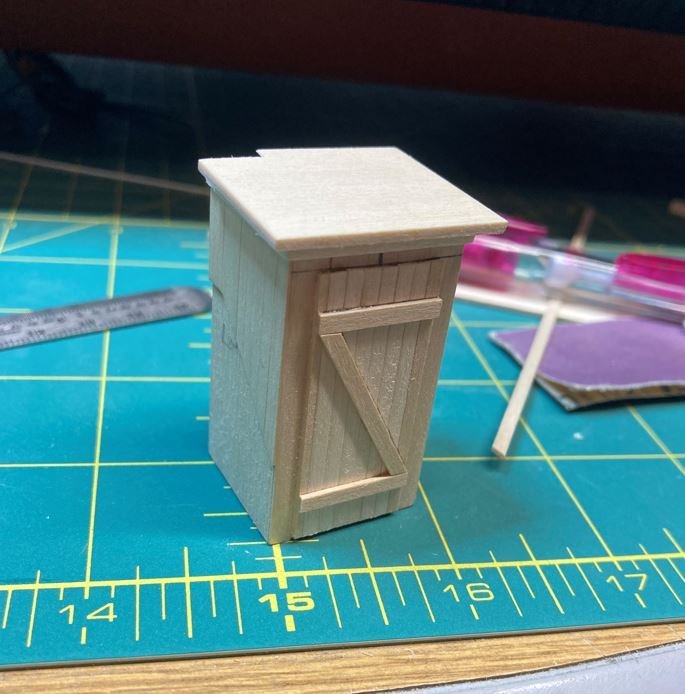
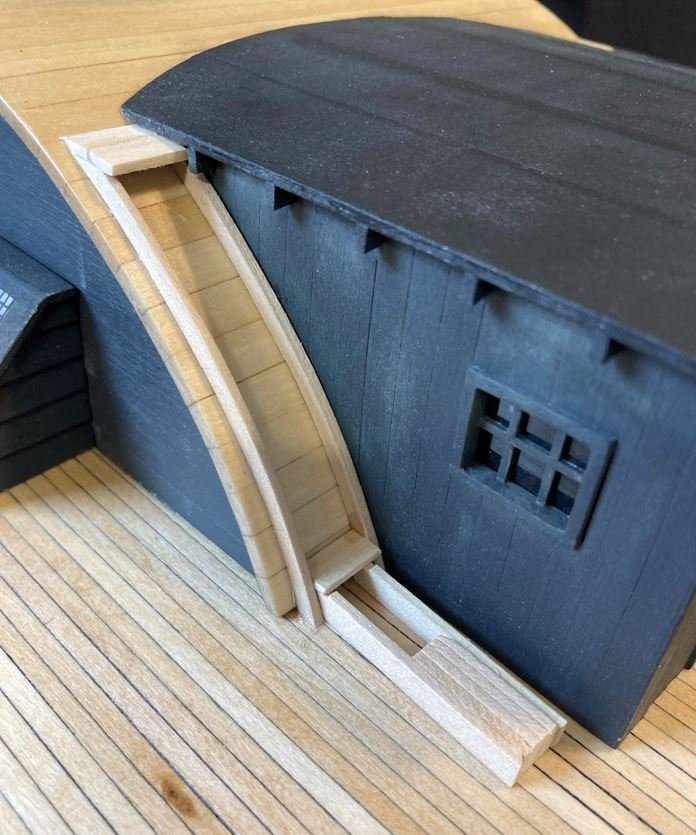
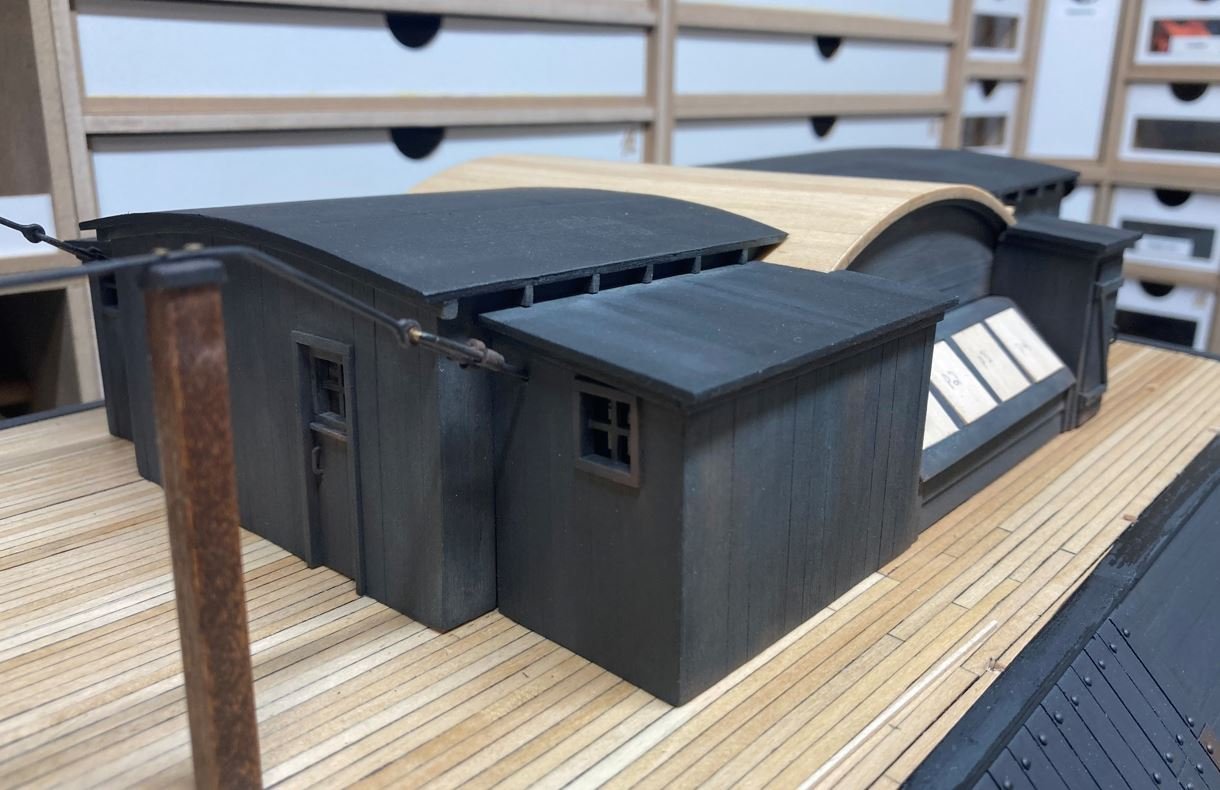
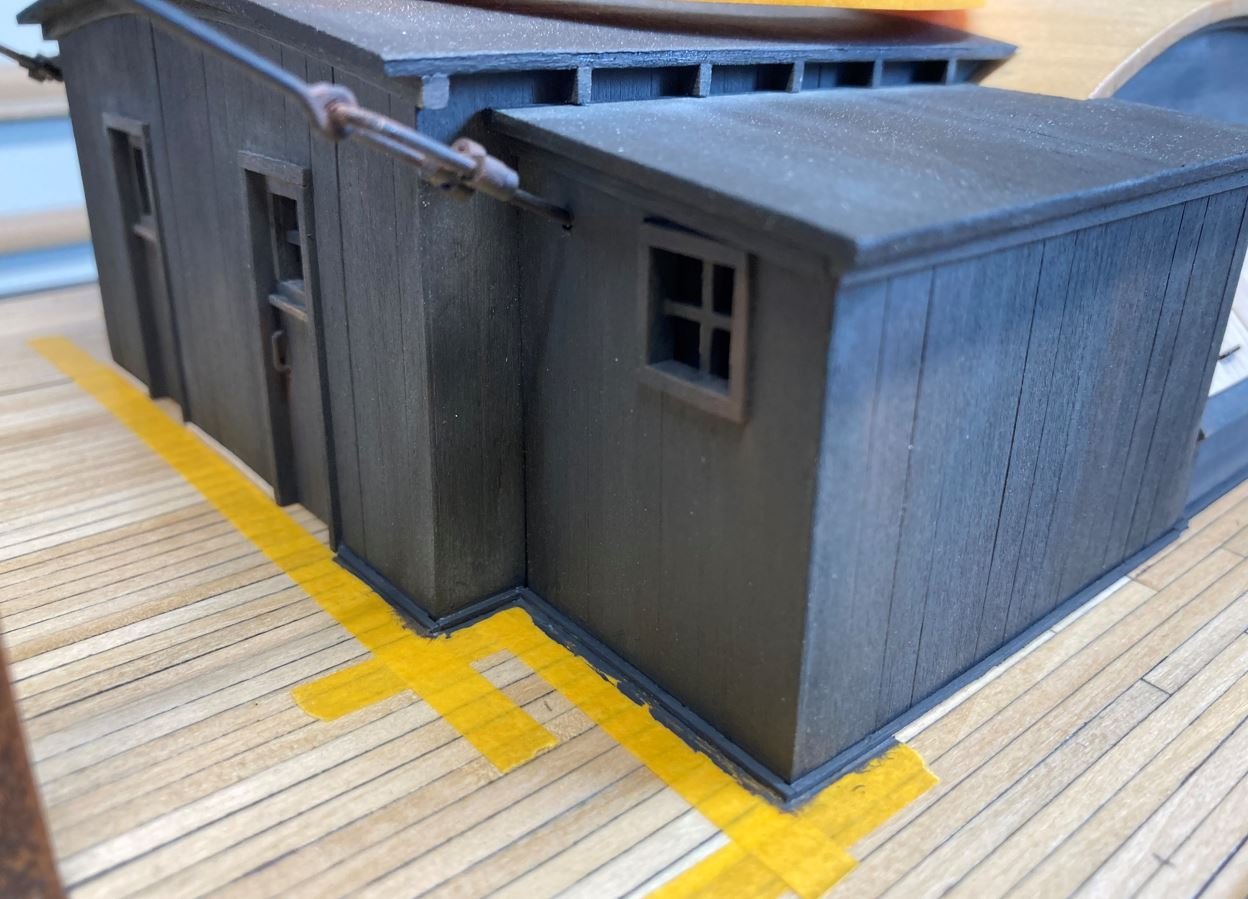
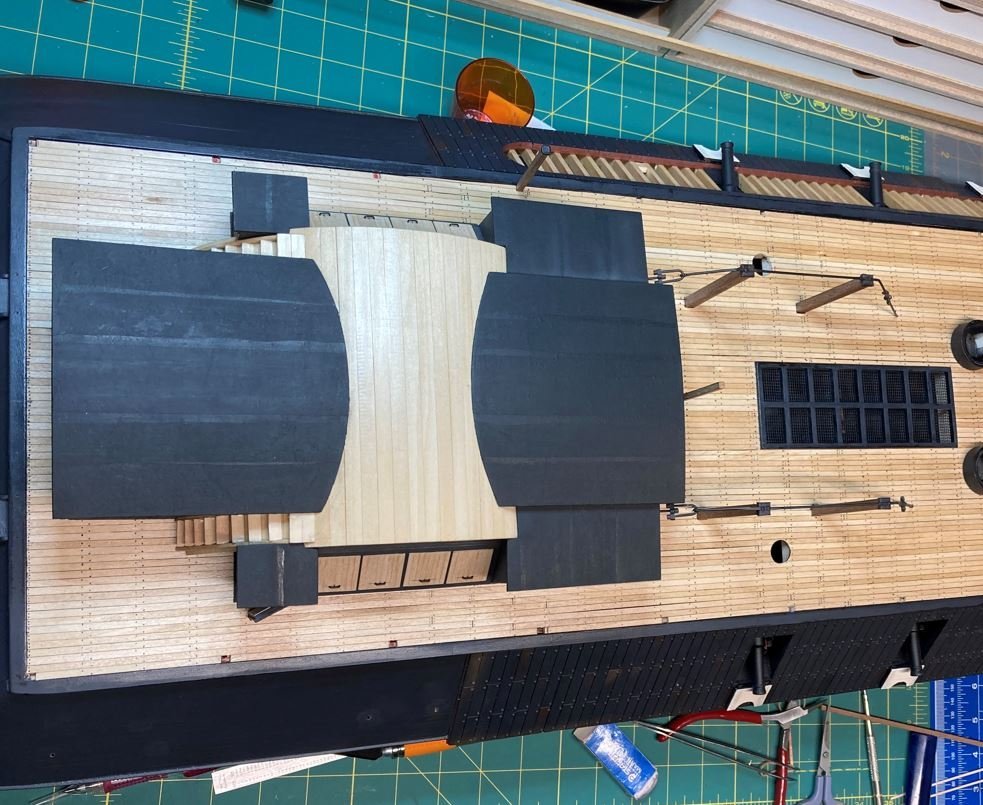
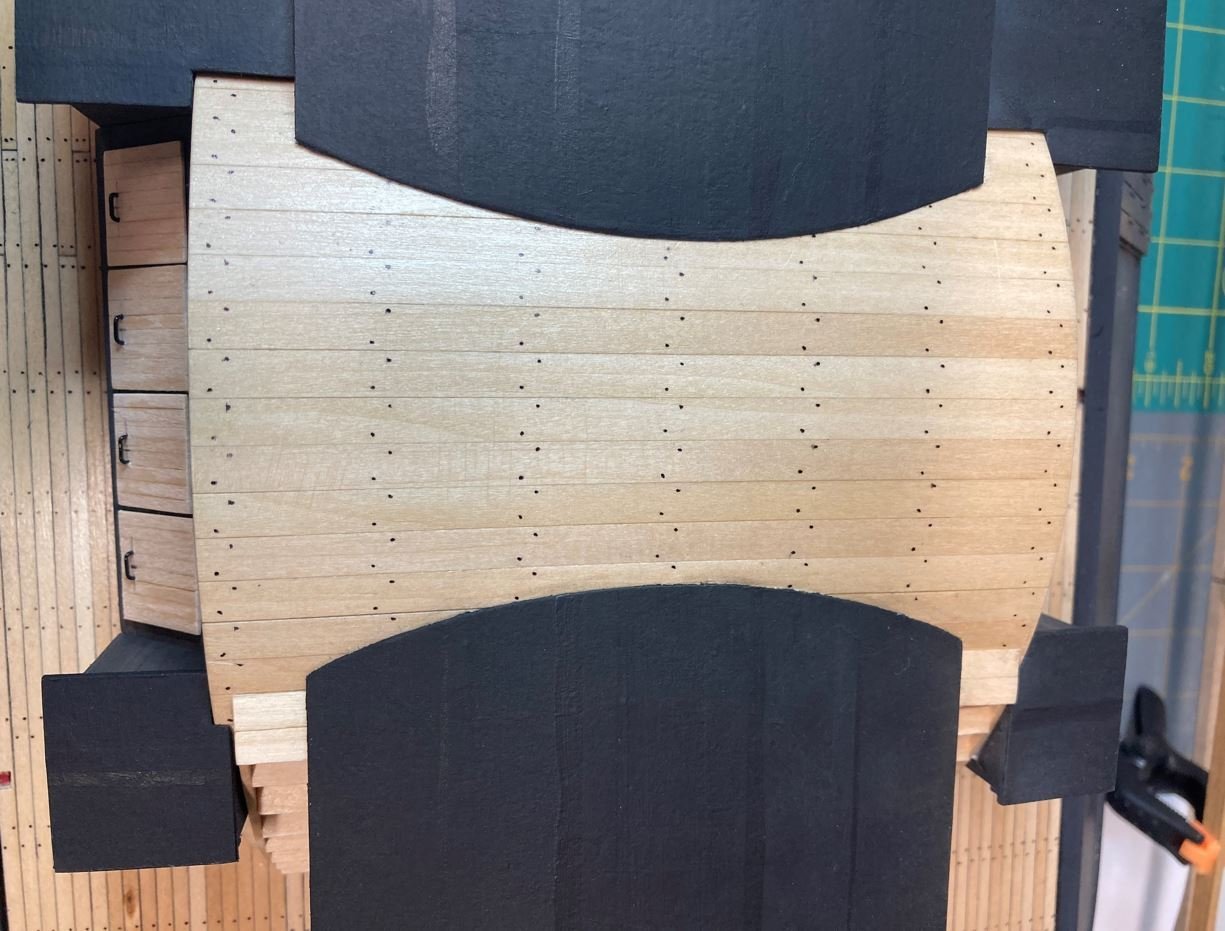
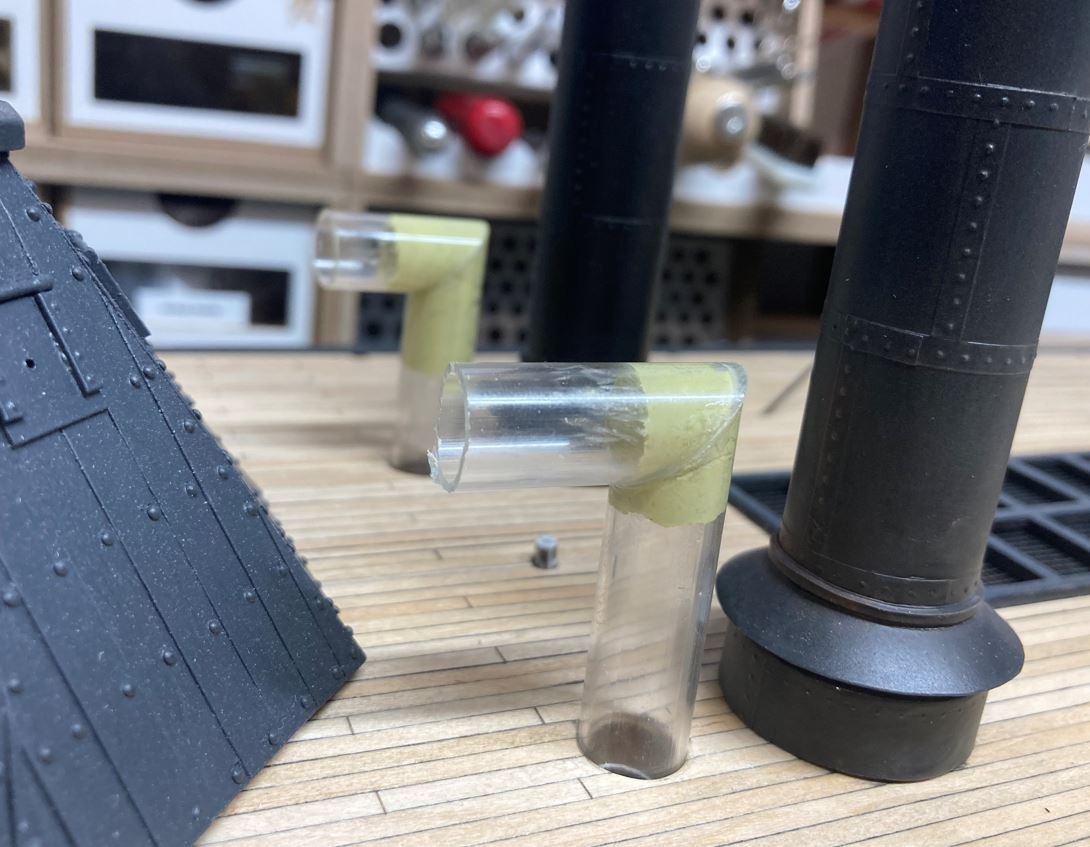
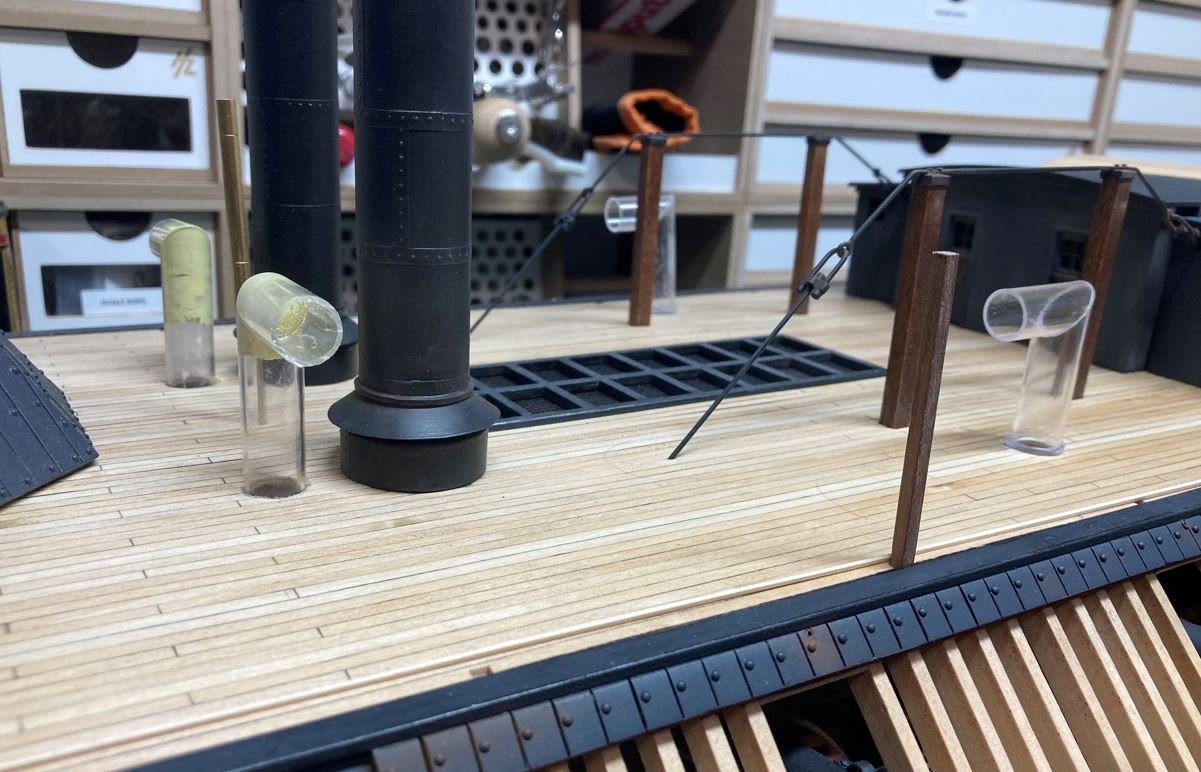
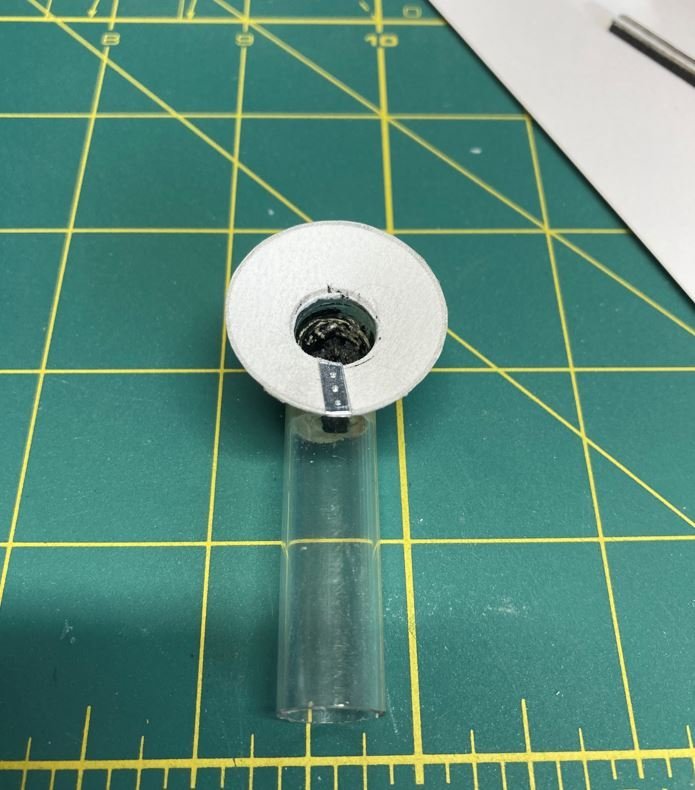
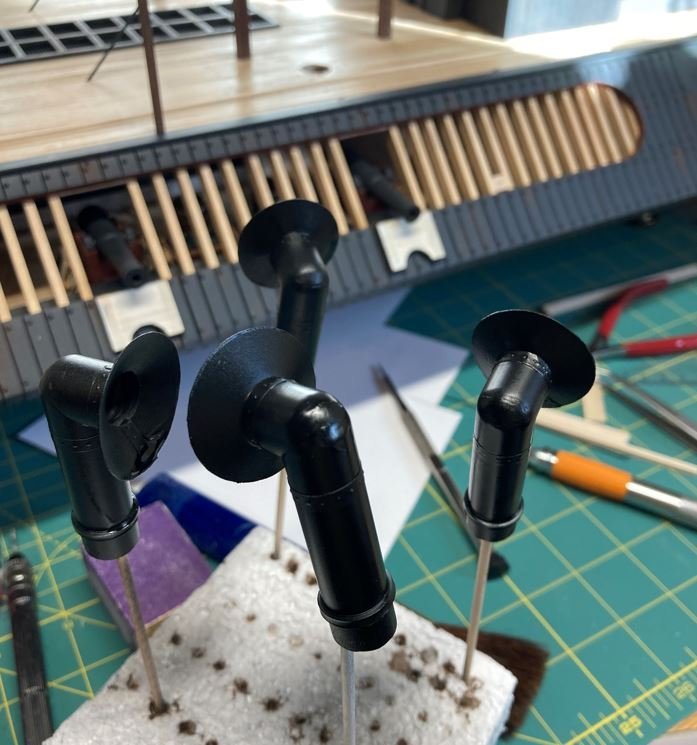
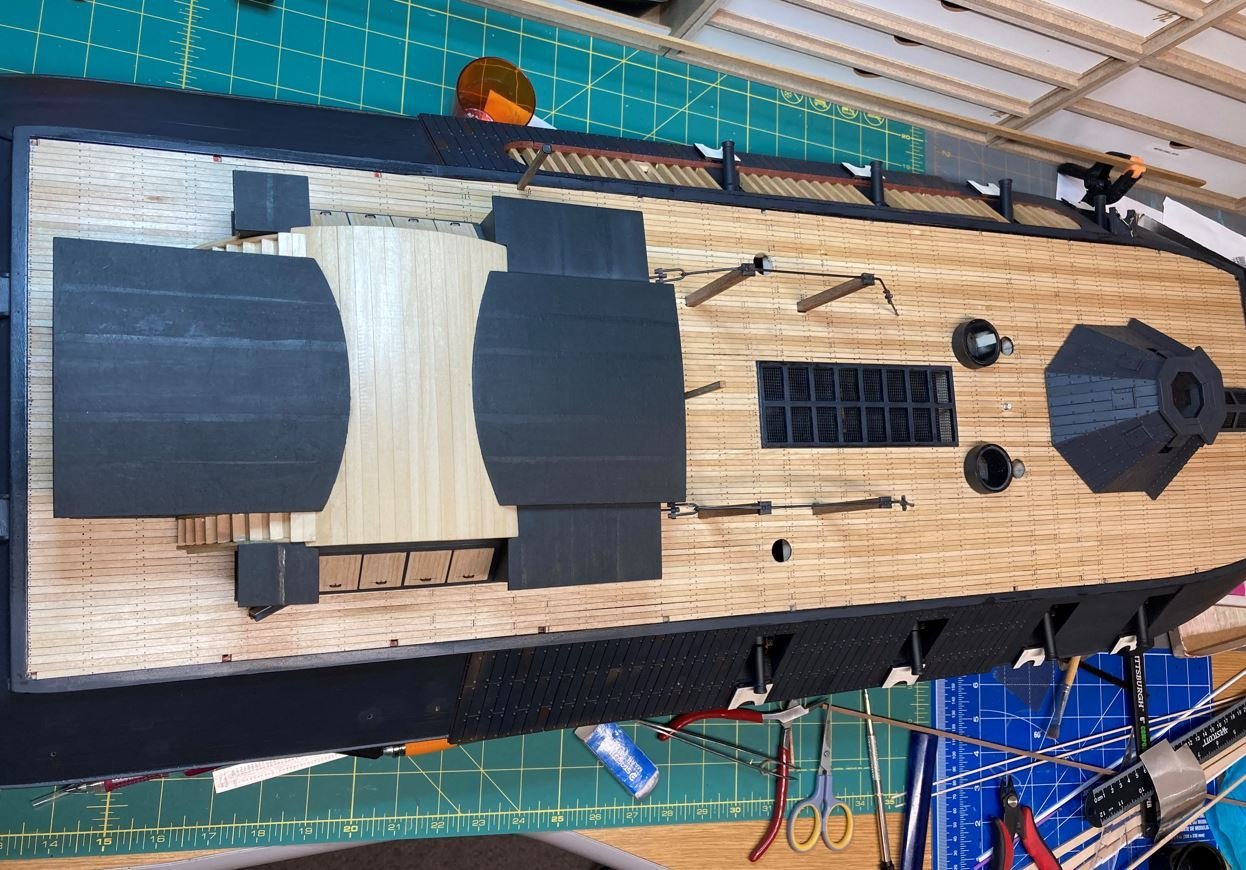
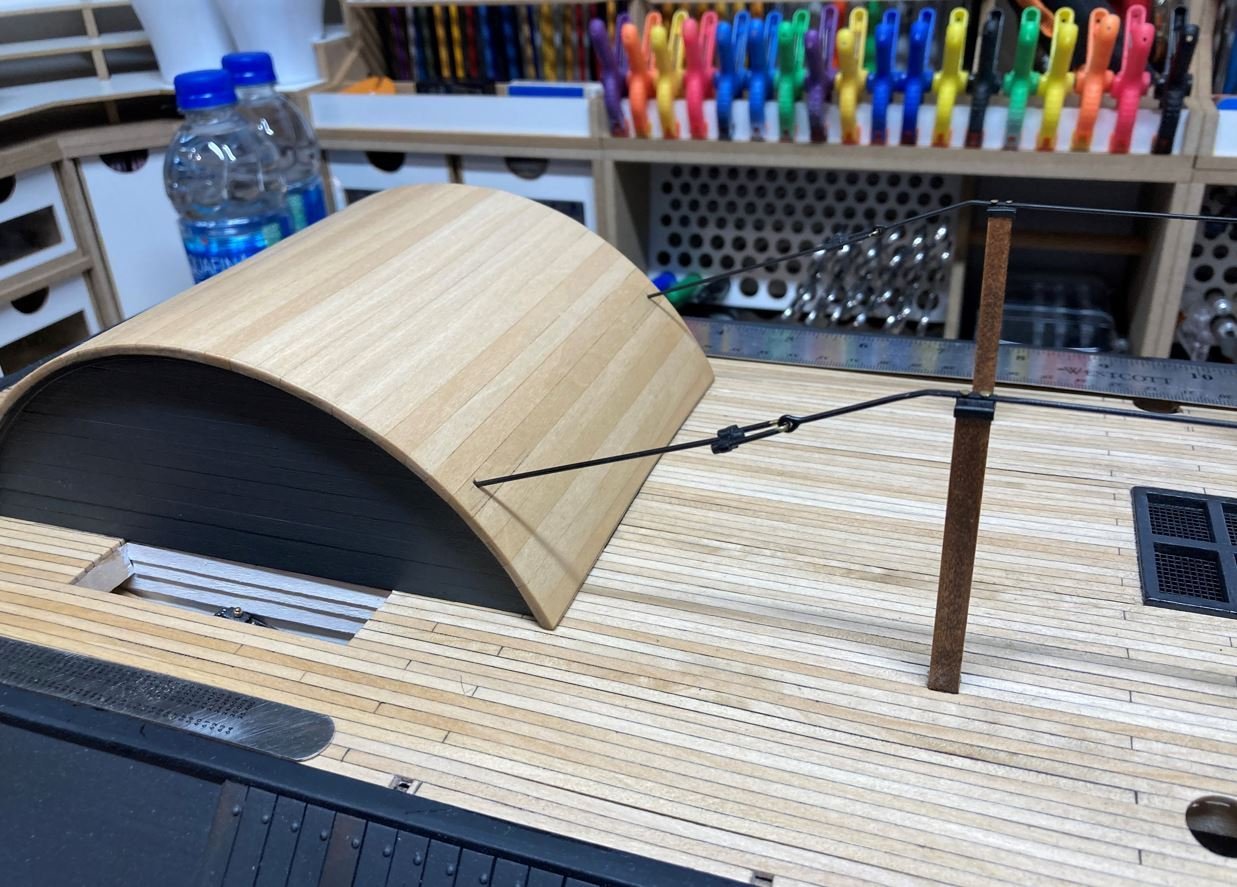
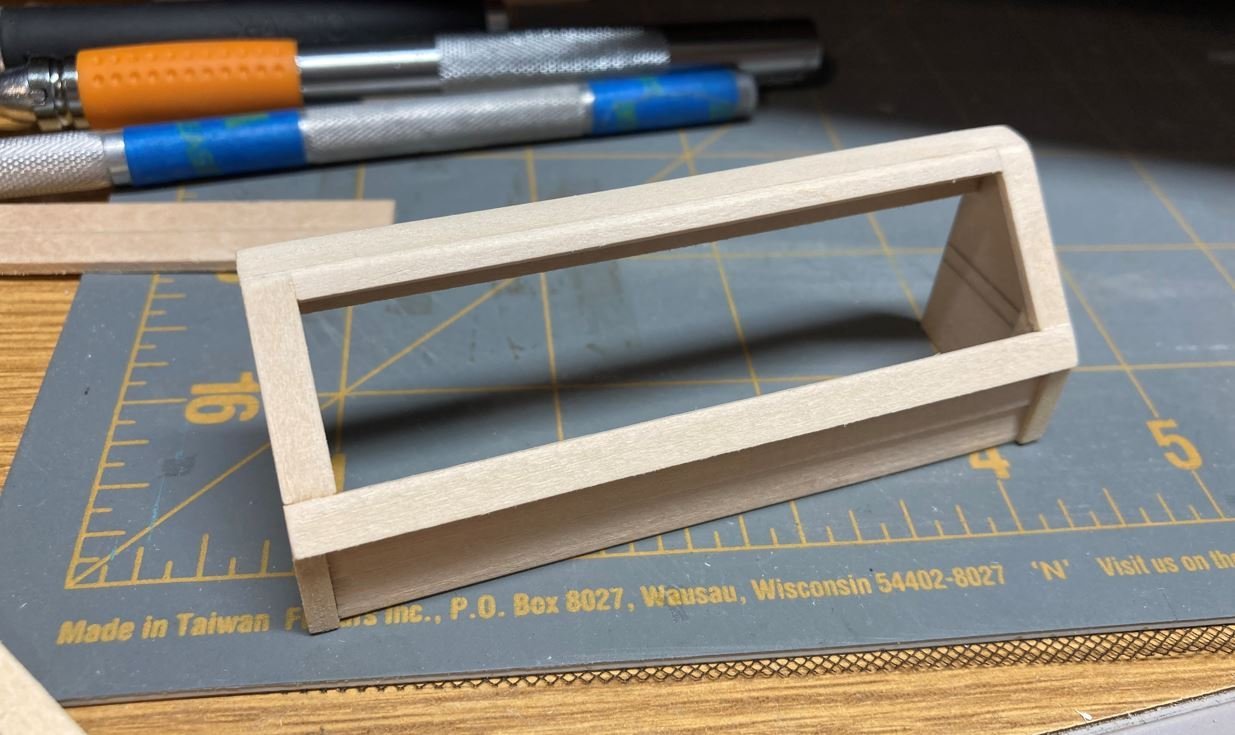
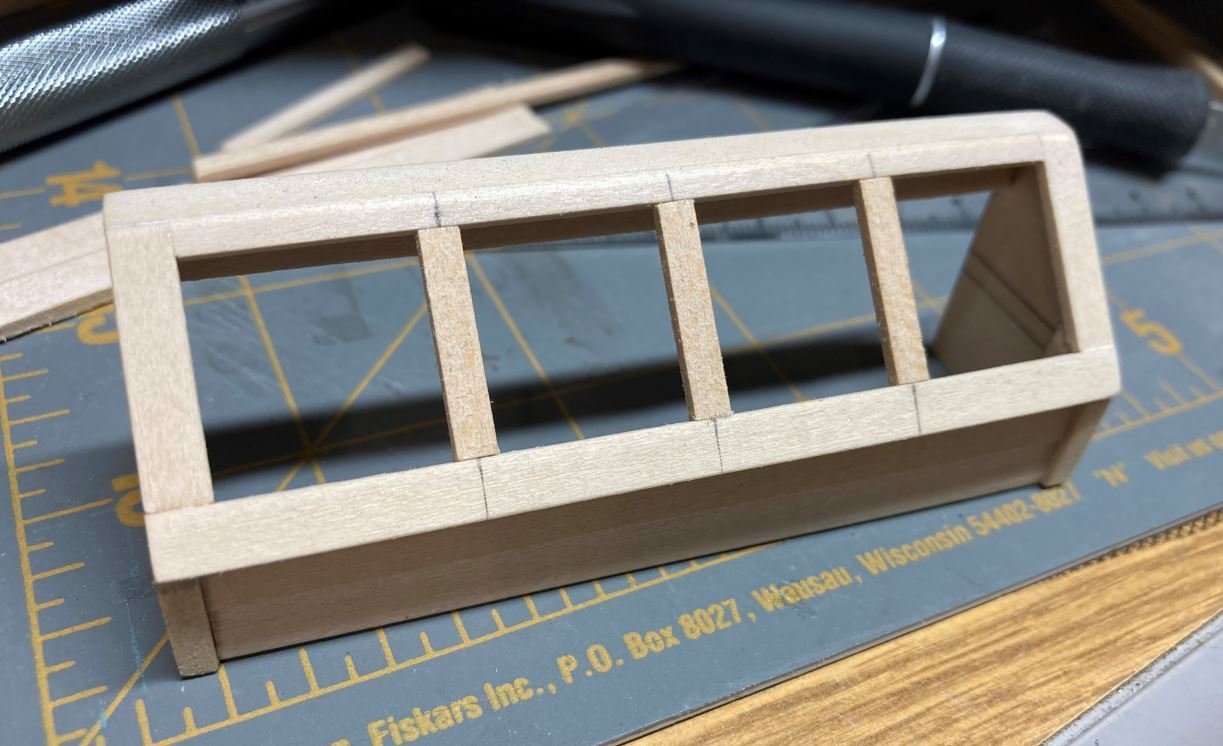
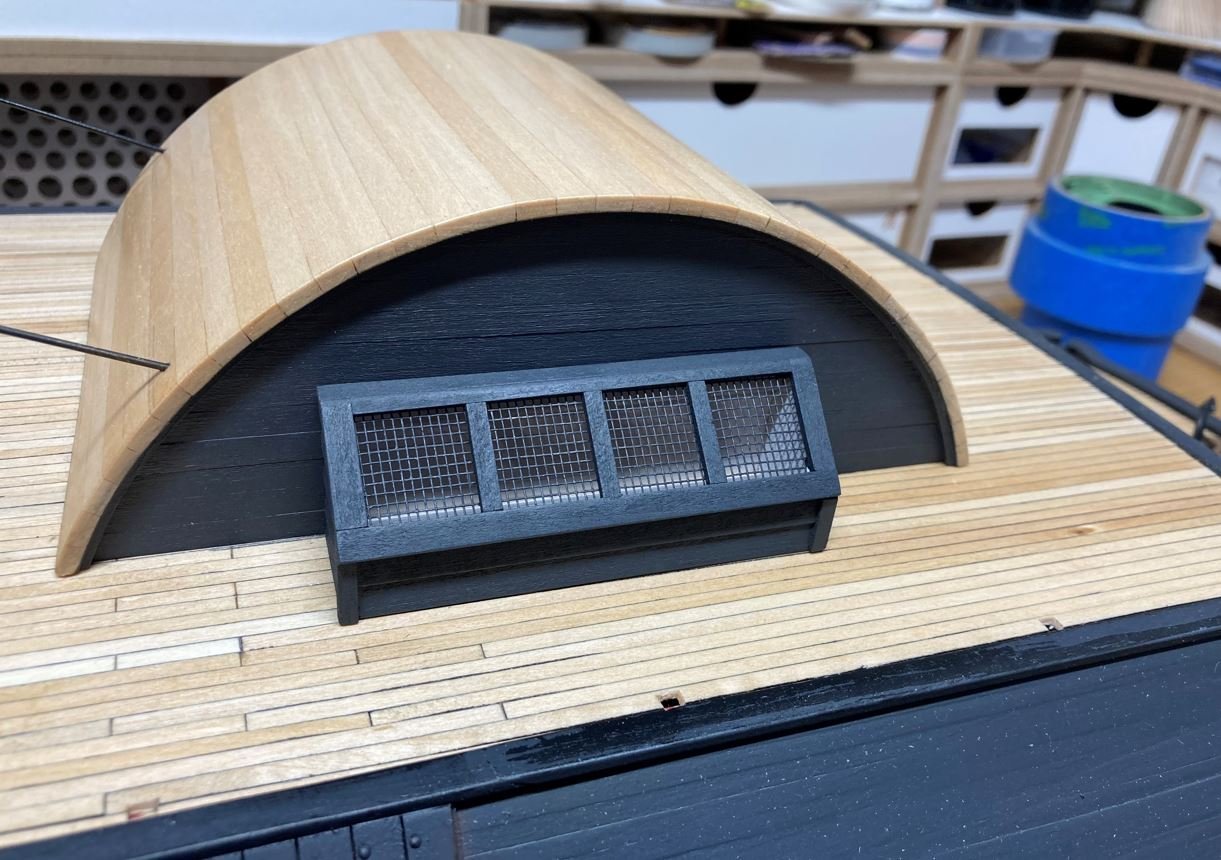
Hello again everyone, I just realized that I have not posted any updates on my build this month. Time just got away from me and I have been concentrating more on building than the build log. So here is what has happened since last time. I have finally started work on the Hurricane Deck features, mainly the wheel house and its additional attachments, such as the store rooms, showers and latrines. First in, was mounting the main wheel house structure that I had previously built in the last update. All of the remaining aft structures are built around this one. Next up were the side skylights over the paddlewheel cranks. I think these served a dual purpose. One was for lighting and the other to help cool the officers quarters, given their locations. I started off with a simple framework. Added the dividers. Installed some screen mesh and painted them up. Then the port side was temp installed. Overhead view showing the cranks below. I then completed the starboard side and both were then mounted in place. After they were installed, I marked off the area where the showers and other buildings were going to be located. Next up was the aft building. There is no real documentation on what these structures were used for, with the exception of some references that say there were showers located on the Hurricane Deck and that water from the paddle wheel was somehow collected and plumbed to be heated for crew showers as well as "flush" the latrines. I'm an not sure how all of this was done and I was not able to find any information on how this was plumbed up to work, so no details were put into the internal parts of these building. Another part of this build I struggled with was the curvature of the roof on the two main buildings on the fore and aft of the wheel house. The HSR plans for Cairo show the roof to be flat. I am not sure if these were drawn this way due to lack of information or what. From the only existing picture of the Cairo it is really hard to tell since it gets extremely grainy when you zoom in a good bit. It would stand to make sense that the roof would have a bow to it to shed rainwater. Also, in the pictures of this structure on the Mound City, Baron DeKalb (St. Louis), Pittsburgh, Cincinnati and Carondelet, they all have bowed roofs on them. Majority rules, so this is the style that I went with. The main forms for the walls of the aft building. Temp installed in their location to get the curvature of the wheel house right. Framing of the doors. Rough forms for the doors and widow dividers. Side window dividers going in. Building up the doors. Completed doors and windows. Some of the outside planking going on, to give it a nice finish. Slather a coat of paint on the sides and a bit of weathering. Structure set in place. and a little more weathering. At this point I am just paying around with the weathering to see what technique I like. Once everything is completed, I'll go back and put more effort into it. I just like practicing up as I go along. The fore building was built in the same manner as the aft one, with the exception that there are side buildings that extend from the port and starboard side of this one. Construction of the starboard side building. The port side was built exactly like the starboard side. They were both painted up and glued in place. Next was the installation of the ladders to access the top of the wheel house. Starboard ladder complete. More important features on the starboard side, the latrine. I wanted to show a little detail on this part, since this area was described in documentation as being the latrines. My story goes that there was a sailor that ate something that didn't agree with him so he left the door open afterwards as a courtesy to the next occupant. Then it was time to tarpaper the roof of the structures. I did this in the same method as would have been done on most steamboats of the time. Silk span was cut to a scale 4' wide (scaled down to 1" in 1:48) and secured in place with watered down ModPodge. The overlapping tar seams were simulated as well. All trimmed up and ready for paint. And all painted. Port ladder going in. Building of the port side latrine. Since I detailed the starboard side, I left this one simplified with the door closed. All structures painted up and a bit of weathering. Here is another area that is hard to find info on. Research has turned up zero information detailing these hatch covers over the aft skylights. The HSR as well as the Bob Hill plans show this area as open which would leave everything below exposed to the elements. I have studied some of the pictures that show this area somewhat, but again zooming in makes things very grainy, so it is hard to tell if these covers are one long cover or several hatches. For the time being, I am going to go with separate hatch covers until I can uncover something that proves me wrong. Hatch covers completed and the base trim installed. Painting the trim. Then it was on to one of the more tedious jobs, marking the deck nails. When you look at the actual Cairo in Vicksburg, many of the deck nails are still embedded in the beams of the bow. From what it looks like, the deck boards were nailed to every beam, but at 1:48 scale I thought that this would look a tad bit cluttered and messy, so with my build I went with every-other beam. Simulated nails on the wheel house structure. Lastly, it was on to the funnels. These provided a way to direct fresh air to the gun deck below, to help clear out gun smoke, cooling during the summer months. They also helped remove some of the heat created from the boilers, cook stove as well as removing odors from the occasional smelly sailor. I made these from 12mm clear acrylic tubing. I had originally wanted to heat the tubing to form the bend, but after several failed attempts I decided on my second method. On my first attempts, when I would heat the tubing, I wasn't able to keep the plastic from bunching up on the inside of the turn. This seemed to be a little too tight of a turn so I decided to cut the tubing at a 45 degree angle, fill the bend with Milliput and sand the outer bend to for the curve. Once it was sanded down, I drilled out the center of the Milliput to where only a thin layer was left on the inside, enough to maintain the structure of the funnel, but not enough to block the opening. I used the last bit of copper sheets on the chimneys, so instead of using that material for the funnel flares, I used some heavy card stock. More simulated rivets with aluminum tape. Completed funnels. That is it for this update. I am currently working on the forward and center skylights, but I haven't downloaded those pictures as of yet, so they will be on my next update. Hopefully it won't be as long of a wait. I am still researching these a bit due to the fact that I am having trouble finding out how they were built. Until next time, thank you all for visiting, the likes and the kind words. Be safe and stay well. -Brian


- 739 replies
-
- 26
-

-

-
Johann, I’ve heard that there is always room for improvement, but how do you top perfection? Your shipbuilding skills are masterful. Thank you for posting the video to, it just adds to the enjoyment of this build. -Brian
-
Nice work George. Great technique on building up the mast. This is one of the reasons I shelved my build because I could not figure out how to make these look right. I was all over the place with it, down to even trying to figure out how to carve the longitudinal groves in the round stock and piecing the wedges in their locations. This method seems to work just perfectly. Definitely filing this away for the future. Thanks for the tutorial. -Brian
- 602 replies
-
- 1
-
-
- Flying Fish
- Model Shipways
- (and 2 more)
-
Stunning work Vlad! You are really moving along. -Brian
-
Phil, I’m pulling up a chair and getting ready for the ride. Really looking forward to this build. A transitional era ship is on my list to build, just haven’t figured out which one yet. -Brian
-
I have to agree with Mark, your fix seems to have remedied your off-center capstan hole and looks great. Since I am a creature of habit and tend to go by the pictures when I run into situations like this, and I would have matched the drawings. This is a habit that I need to get out of, given that it has bitten me in the backside more than once. Thanks for pointing it out so that I don’t get bit when I get to this point. -Brian
-
Johnhoward, Thank you for the useful information on the anchors. I had purchased a couple of 19th century anchors with the wooden stocks for my build to modify as needed to get the correct style carried by the City Class ironclads. I haven't yet started any research on them, so this definitely helps a lot. Of the journals that have been made available from the sailors present at the time of the Cairo's sinking, almost all of the make reference of seeing the port anchor going airborne at the time of the torpedo explosion. This would explain the reason for it's absence. It's been about 7.5 years since I last visited Vicksburg NMP and my memory is a little fuzzy, but I want to remember that they had an anchor on display inside the museum. Not sure if this would have been one of the other anchors the Cairo carried or not, but if they were secured to the anchor chains that were recovered during the salvage operation, one would believe that they would have displayed this as well. I still have some digging to do on this one though. I have recently started work on the Hurricane deck structures on my Cairo build I am curious to see the status of your St. Louis build, especially the hammock racks. This is a feature that I am still researching and struggling to find any viable information on. Most of the pictures that I have found show different iterations of them and most likely modified from their original design, if they are even in place at all. I am wanting to do a wooden hard wall on the outboard side with a netting structure on the inboard side, but I want to research a little more to make sure. Thanks again for the info on the anchors. -Brian
-
Thanks Brian for the kind words. I have seen that picture before, it’s actually the one that I used to model my cannon rigging off of somewhat. It does give a good representation of what things might have look like aboard these boats, it’s just unfortunate that there is no way to validate its accuracy. But still, it’s a great drawing. -Brian