
MORE HANDBOOKS ARE ON THEIR WAY! We will let you know when they get here.
×


mbp521
-
Posts
996 -
Joined
-
Last visited
Content Type
Profiles
Forums
Gallery
Events
Everything posted by mbp521
-
 Beautiful job on the mast tops Vlad. I truly enjoy following your work! -Brian
 -
Eric, Good things to watch for. I’ll definitely keep the differences of the model and the plans in mind when I get around to my build. Glad things are working out with the off center hole. By the way, beautiful job on the grating! Everything looks like it fit together perfectly. I guess we were posting at the same time and I missed that update. -Brian
-
Eric, glad that you are feeling better. I have not had a chance to read through the instructions on this project yet, but is the base supposed to completely cover the carlings? If so, you could cut the proposed amount off the left side enough to center the hole and be flush with the outside edge of the carping. Then you could add that same amount to the right side to cover the adjustment and I would think that everything would look symmetrical again. -Brian
-
Johann, beautiful work as always. I am always in awe of you workmanship. You may have mentioned this in a previous post and I have forgotten since then, but what type of material are you using for your rigging line? Not a single speck of fuzz not even on the closest shots. -Brian
-
Eric, hopefully it’s just a winter cold and not the ‘rona. We are a patient bunch and can wait for future updates. Best you can do is to take care of yourself. Get well soon. -Brian
-
Beautiful work as always Keith. I love the details that you are putting into this build. Especially at a small scale. Graduating the blocks smaller as you go up and the preventer chains. It’s always the small details like that, that add that special something to a build. -Brian
-
George, Great job for your first attempt on the mast. This is the point where I put my build on hold due to the lack of tools and experience. I’ll be watching closely as to how you proceed and maybe one day pull my “Fish” out of mothballs and finish her up. I sure hope we don’t have to resort to cannibalism this year. 2021 was bad enough.😁 Happy 2022 -Brian
-
Amazing detail work in miniature! .2mm door knobs, I would have had to make a dozen spares with maybe one or two left over. Sacrifices to the floor gods. Beautiful work as always Eberhard. -Brian
-
Looking great Eric. Love the assembly jig tray, I have had need for one more times that I can think of, I’ve just never bit the bullet and purchased one. Maybe some day. I’m liking this project more and more given the fact that you get to use more of the actual shipbuilding techniques than with a smaller scale build where it’s next to impossible to replicate the mortise and tenon joinery. -Brian
-
Thank you Keith, I am finding that this is the case with my bench as well. I am going to have to work on a little self discipline and put my tools back after I am done with them. I mainly wanted them for the parts storage which has more than made them worth the while. It’s nice to have the pieces within arms reach instead of having to hunt for them in boxes on the floor or the shelf. -Brian
-
Happy New Year George, That’s a lot of holes to drill. Nice work on the pinrails. I’ll have to file away that technique to drill them out equidistant apart. Good progress over the past year. Funny how it sometimes seems that progress seems that it slows to a crawl until you go back and look at past photos. Excellent work so far, can’t wait to see more next year. -Brian
- 602 replies
-
- 1
-

-
- Flying Fish
- Model Shipways
- (and 2 more)
-
Beautiful job so far. The trick is to get the planks on each side to line up with each other perfectly, and you seem to have mastered that. Have a Happy New Year. -Brian
-
Yes sir. That as well as anchor points for the chimney and jackstaff guys. By the way, what is the name of the book that you have in the picture. It looks like it has a lot of useful info in it, -Brian
-
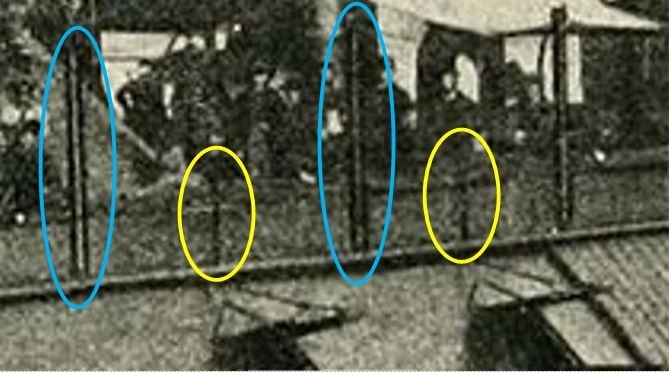
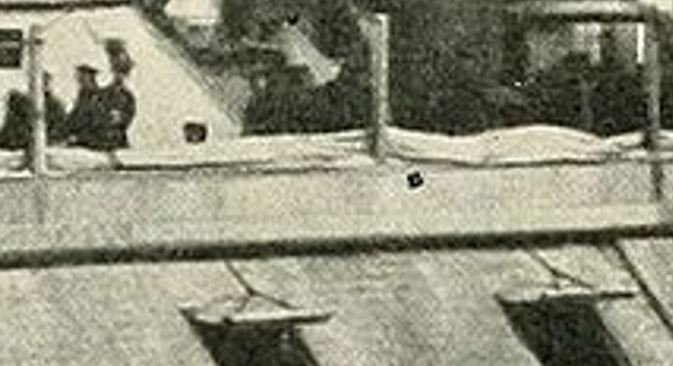
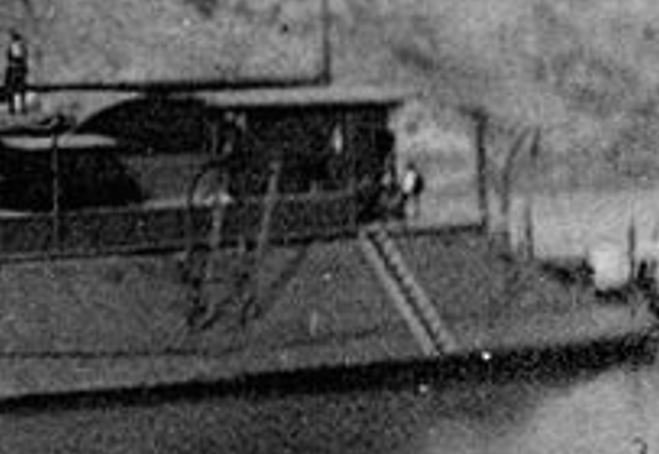
Roger, Thanks for the picture, I do believe that this looks to be the way these are somewhat constructed. From the picture of the Cairo below, the main construction of the hammock rack sides looks to be made of wood with the stanchions placed every so often to provide lateral support. In the picture the areas circled in yellow look like they would be the stanchions with the wood on either side and then another stanchion placed at the posts circled in blue. This picture is of the St. Louis and it looks similar to the Cairo. While the stanchions are not as defined in this picture, but you can see a slight shadow of one over the left gun port door. I think what I am going to do is build it up similar to the drawing you sent with the wooden walls and make it look like the picture of the Cairo. I think I will also leave an opening in between the lasts two posts to allow access to the ships boats. Similar to the way the Mound City was configured here. Since this area of the Cairo is covered in the picture by the boats, I think it would be safe to say that they had to be able to access the boats somehow. This would seem to be the most feasible option. We'll see how it comes out. -Brian
-
Roger, Thanks for the kind comments. From what I have been able to find, and my interpretation, these hammock nets seem to be a sort of hybrid makeup. They have a wooden outboard wall and netted interior wall. The group building the St. Louis made the hammock stationaries from aluminum rectangular tubing, I assume to make them look like some of the earlier period ships hammock netting, but they haven't gone into detail as to how they were going to construct them. Again, my best guess was that they were going to use these stationaries as supports between the wooden outer wall and the netted inner wall. I am right there with you on the Form Follows Function idea. I will anxiously await your uploaded picture to see if my assumption is anywhere in the ballpark. -Brian
-
Pat, Thanks for the nomenclature on the rudder parts. Some of the part names are easy to name because they are similar to typical steamboat parts, then there are those parts that are more specific to the gunboats and harder to define. The typical parts are easy enough to look up in some of the books that I have, but since there was little documentation on the construction of these boats some of the more obscure parts are a little more difficult to place a name to. As for the organization modules, it’s crazy to think how I got along without them for so long. they sure help with the clutter. -Brian
-
Oooh Keith, that is asking a lot. I've killed off a lot of brain cells since then, but if I had to take a stab at it... Let's see in 1984 I was making minimum wage, about $3.35/hour so it wouldn't have been that much. And, since I worked in a hardware store at the time, where I believe I purchased it. Best guess would put it at less than $20. I do remember that it came with and Xacto set that I still use as well. -Brian
-
Keith, I have one of those Workmates that I have been using for years. If memory serves me right, it was around 1984 when I got mine. It still gets plenty of use, especially as a hull clamp. It fits nicely around the keel and allows you to lean the ship in all different directions. Good find! -Brian
-
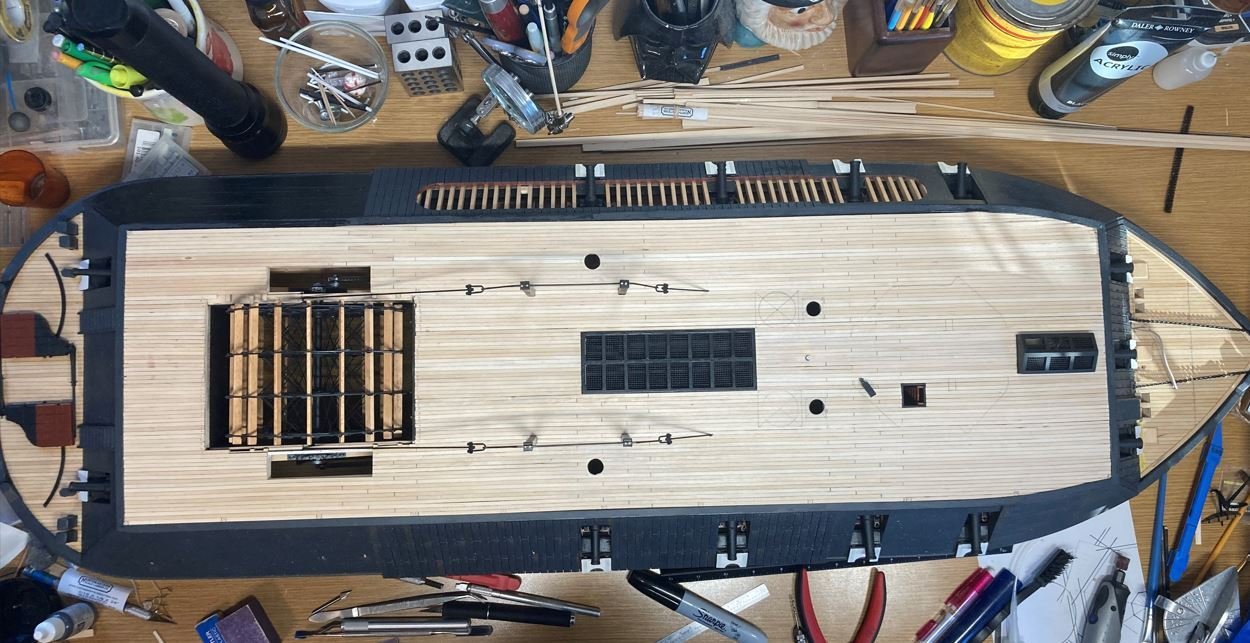
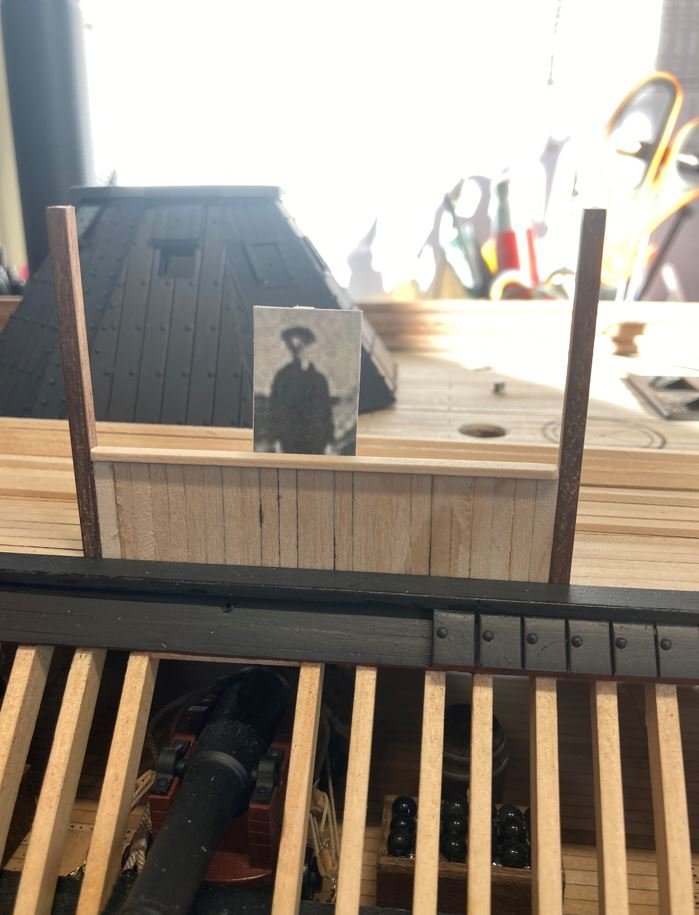
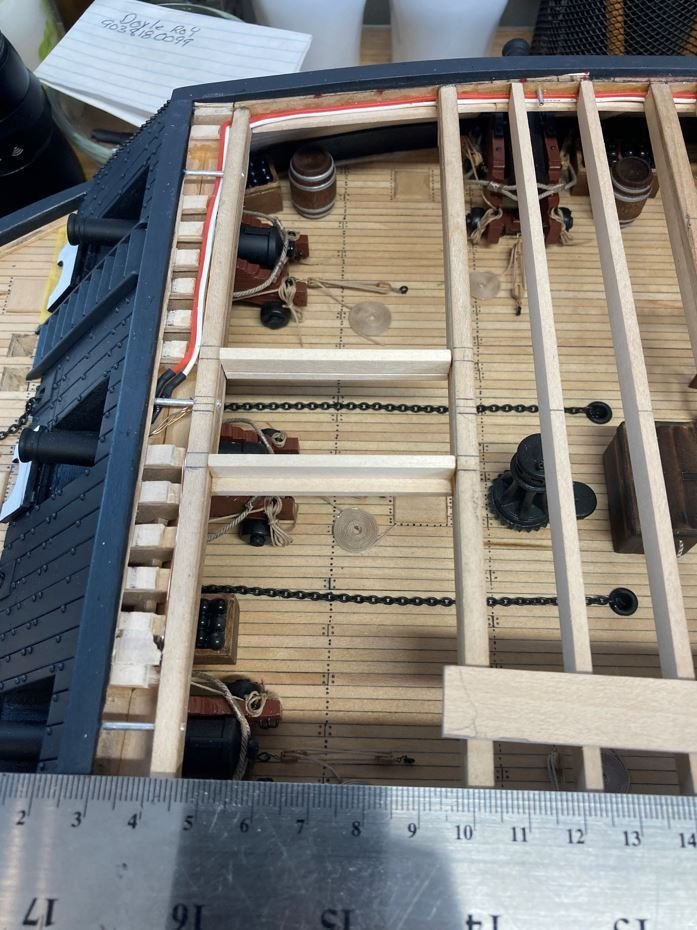
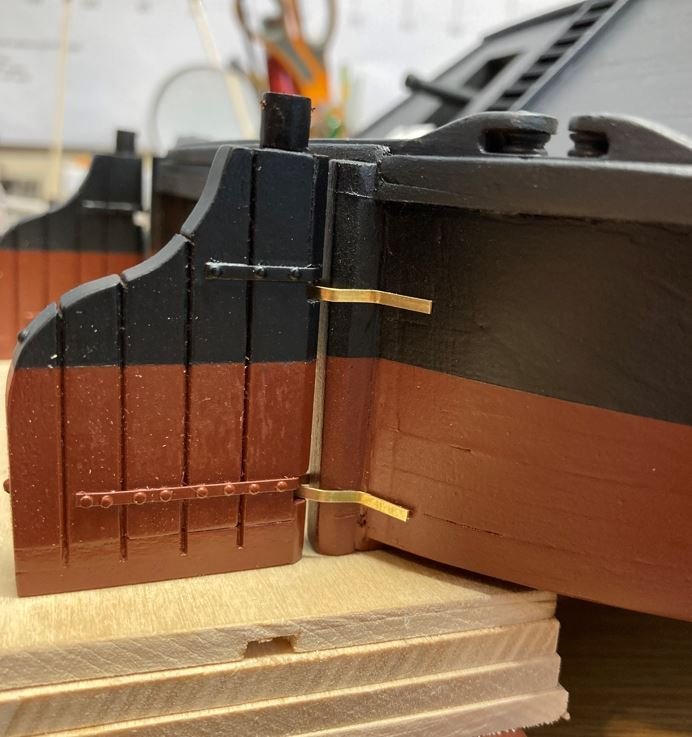
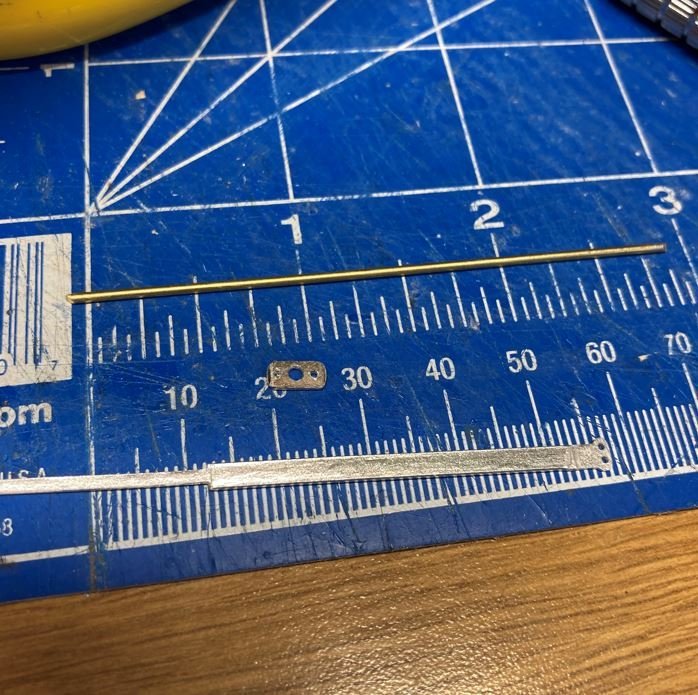
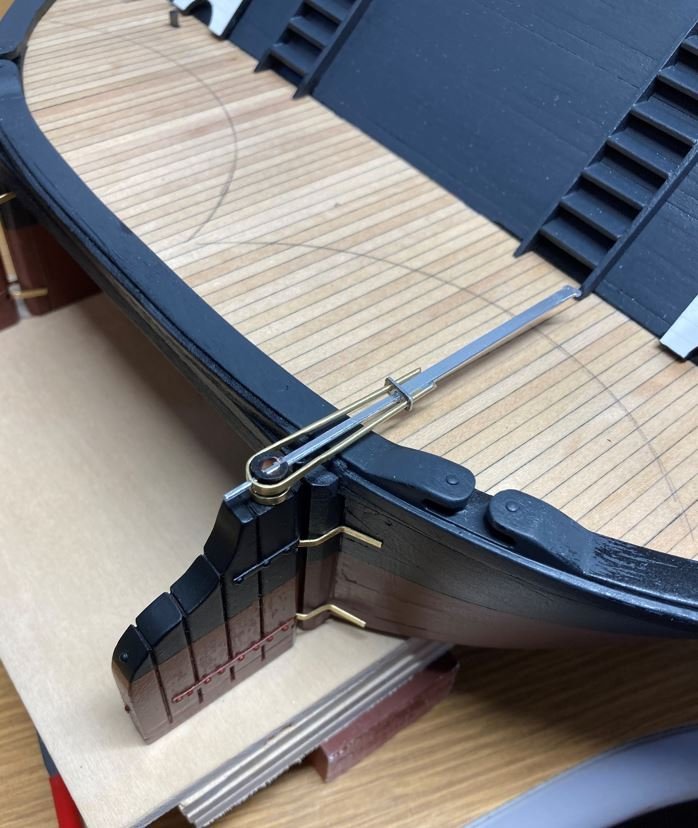
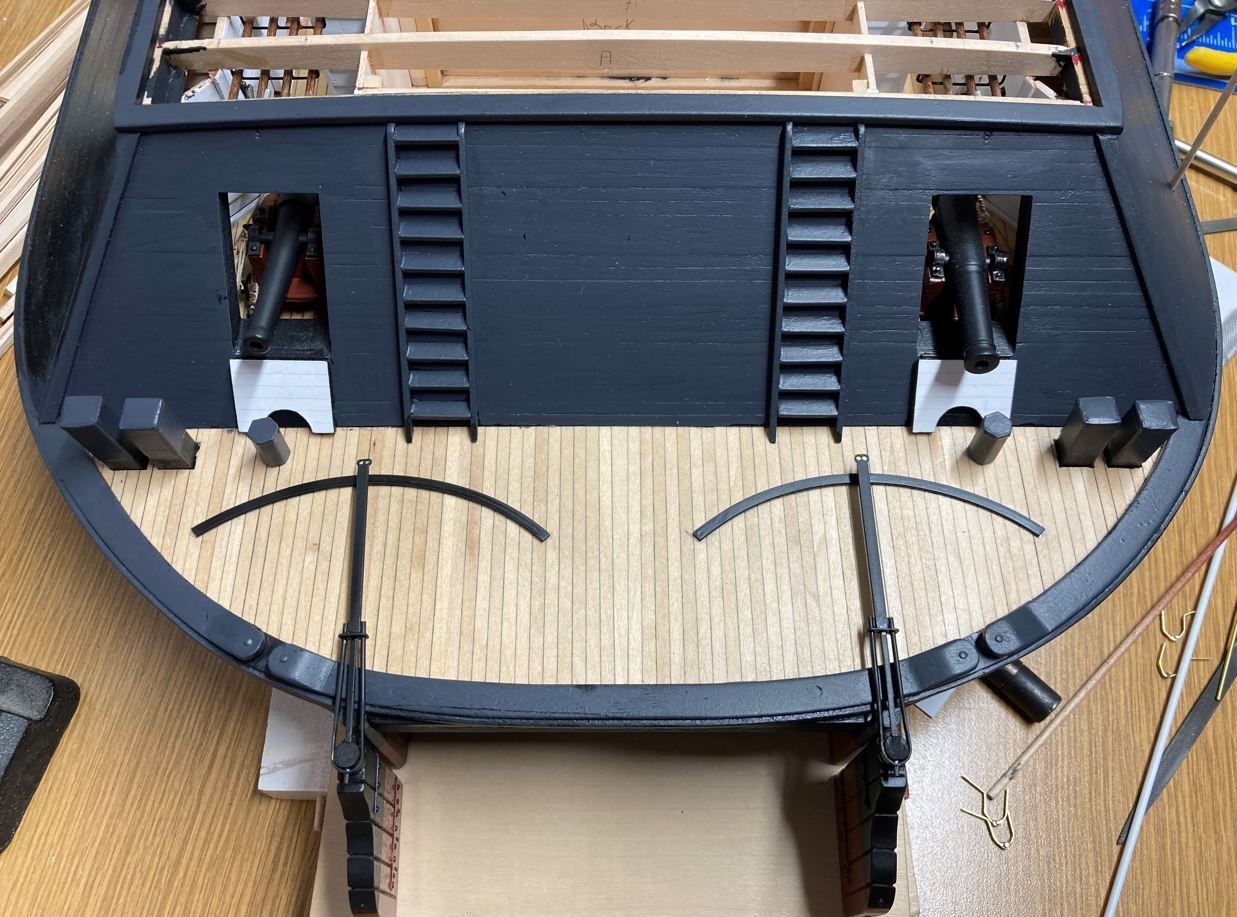
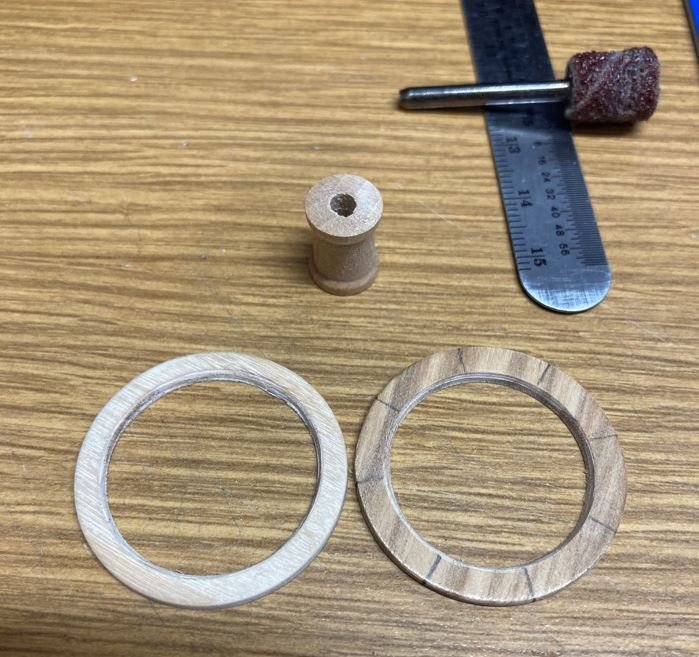
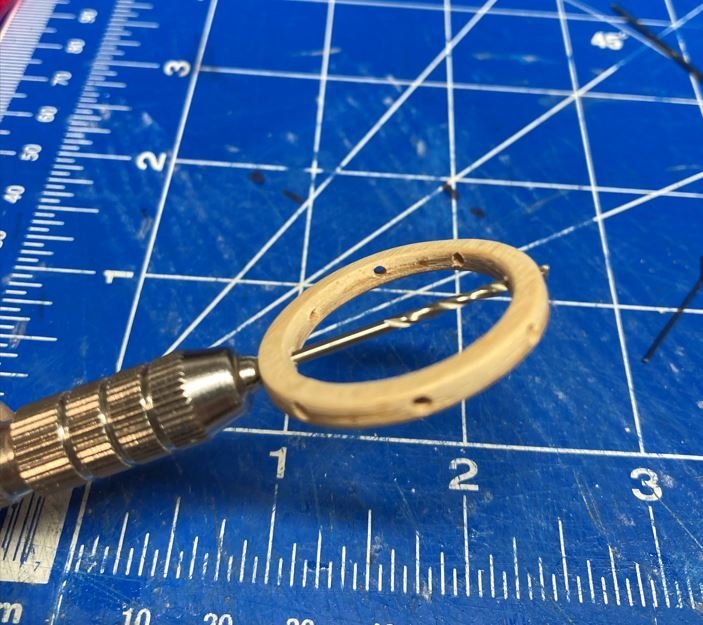
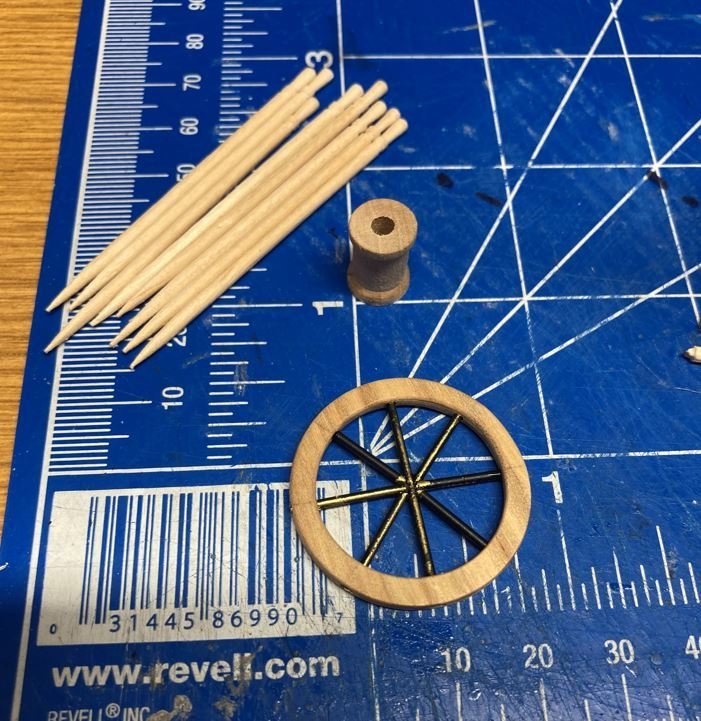
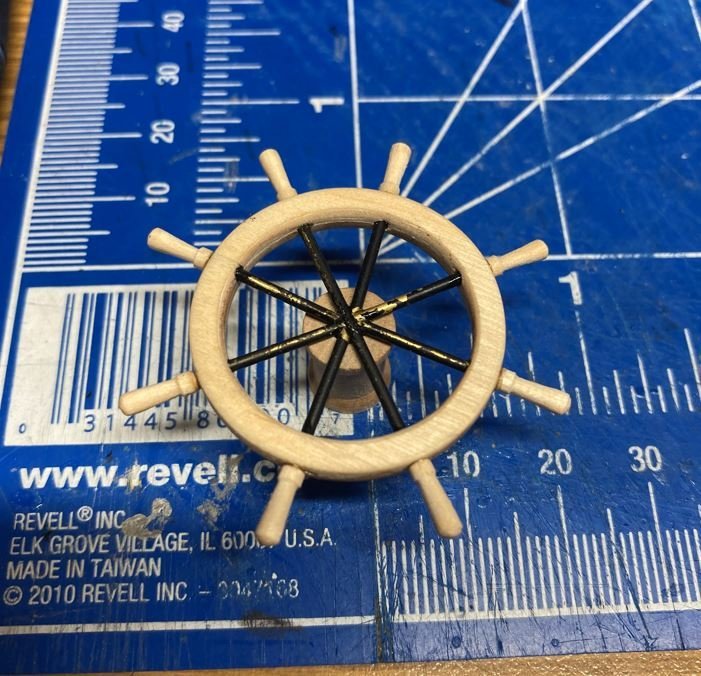
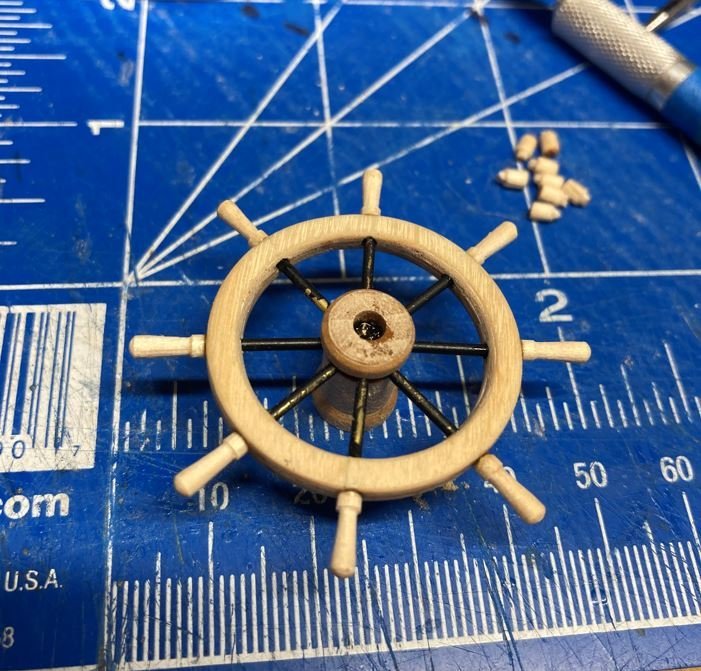
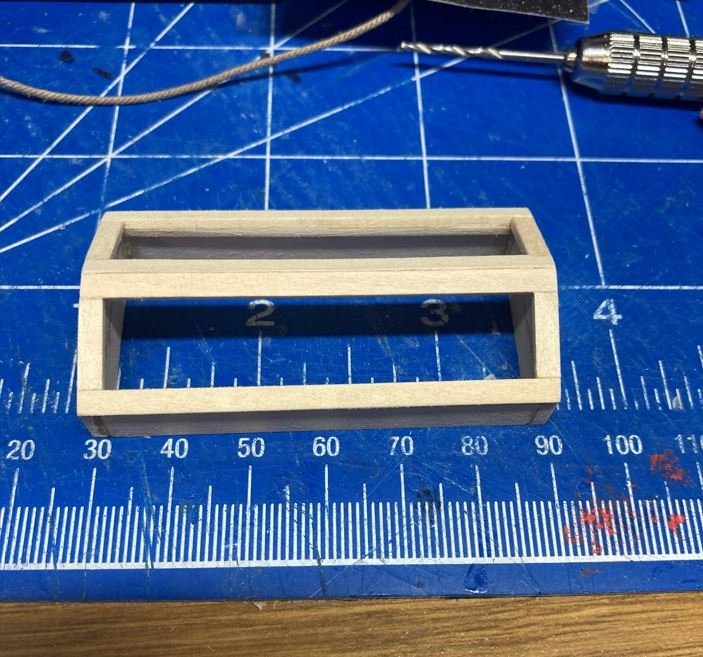
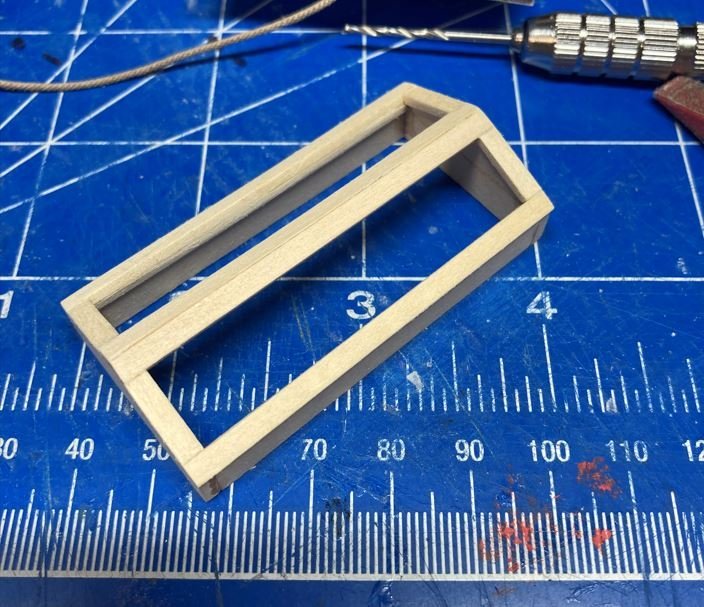
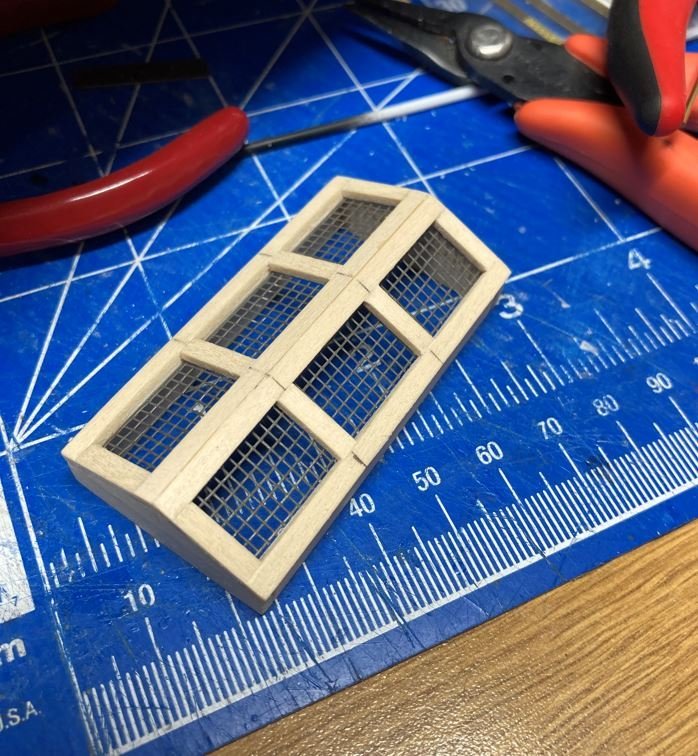
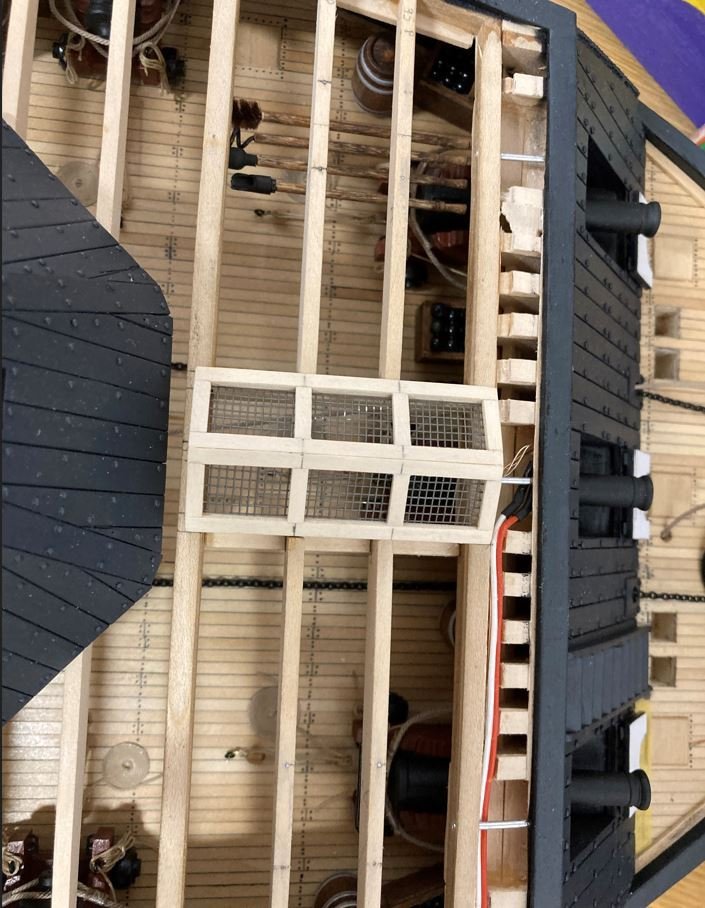
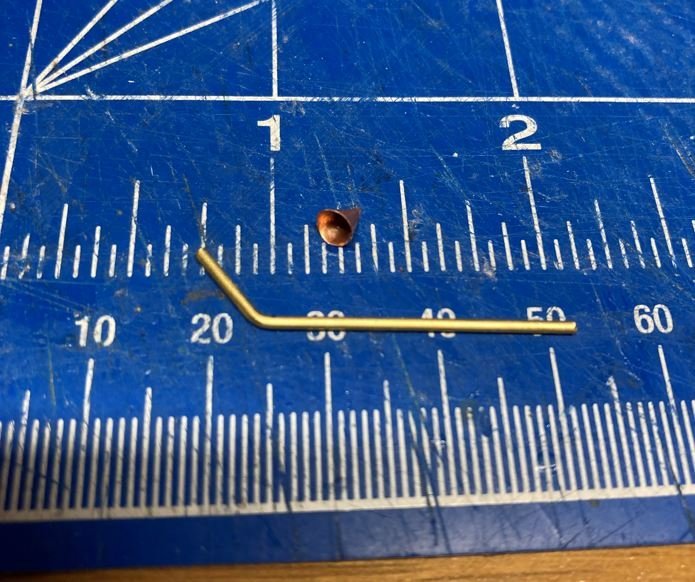
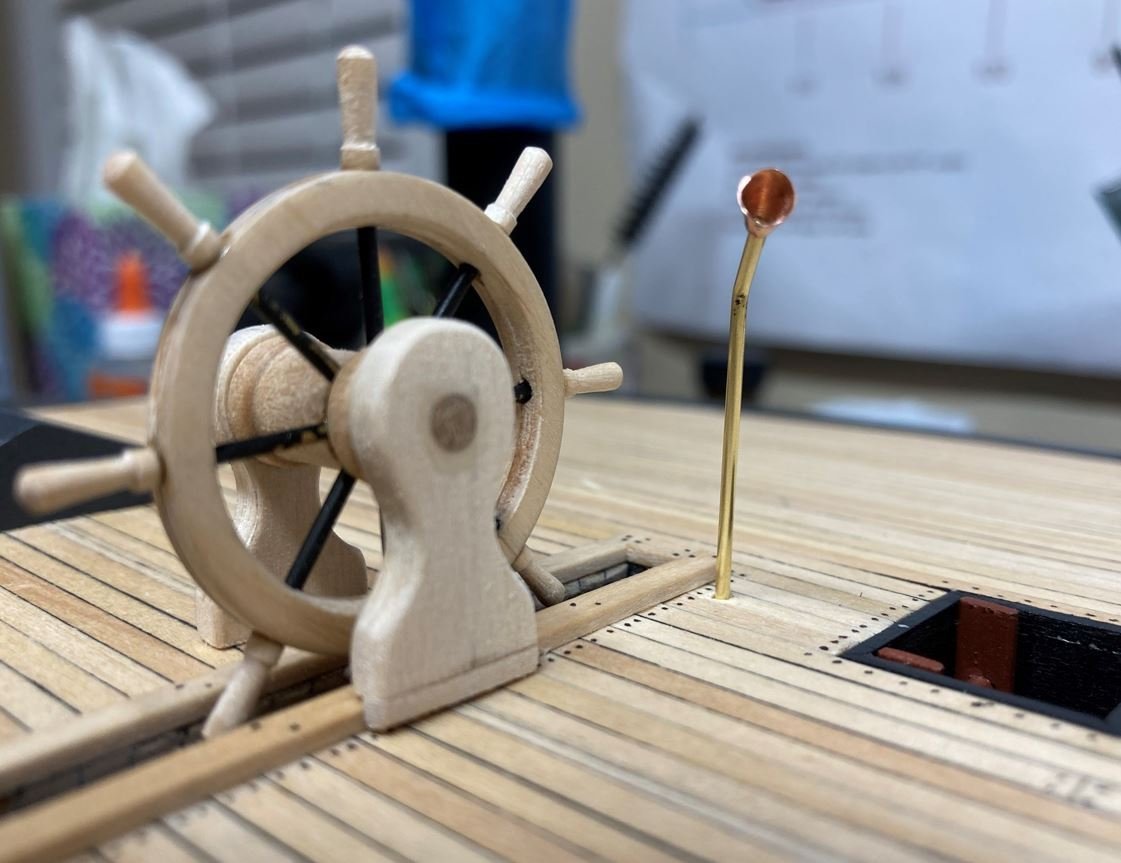
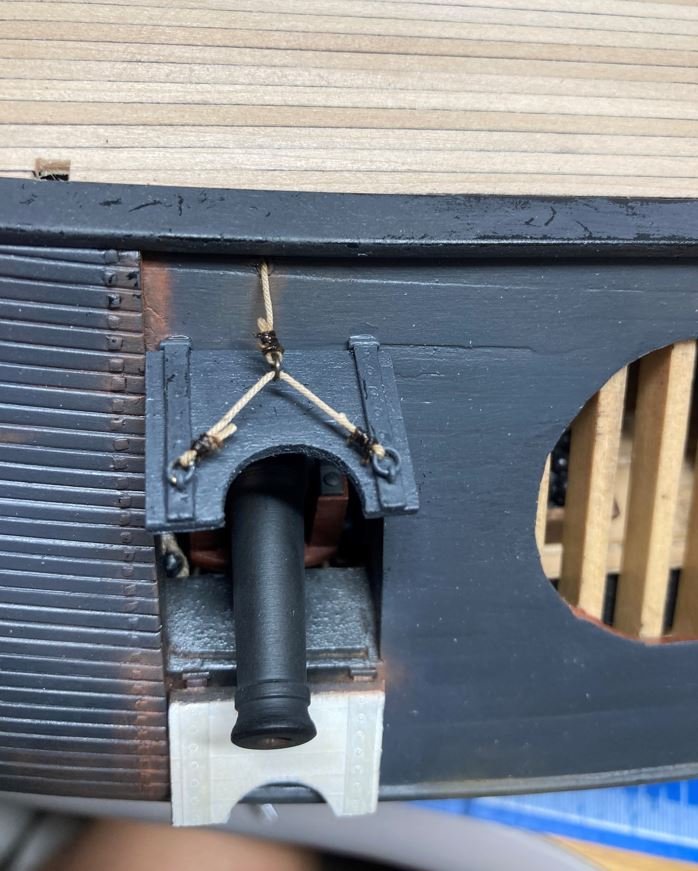
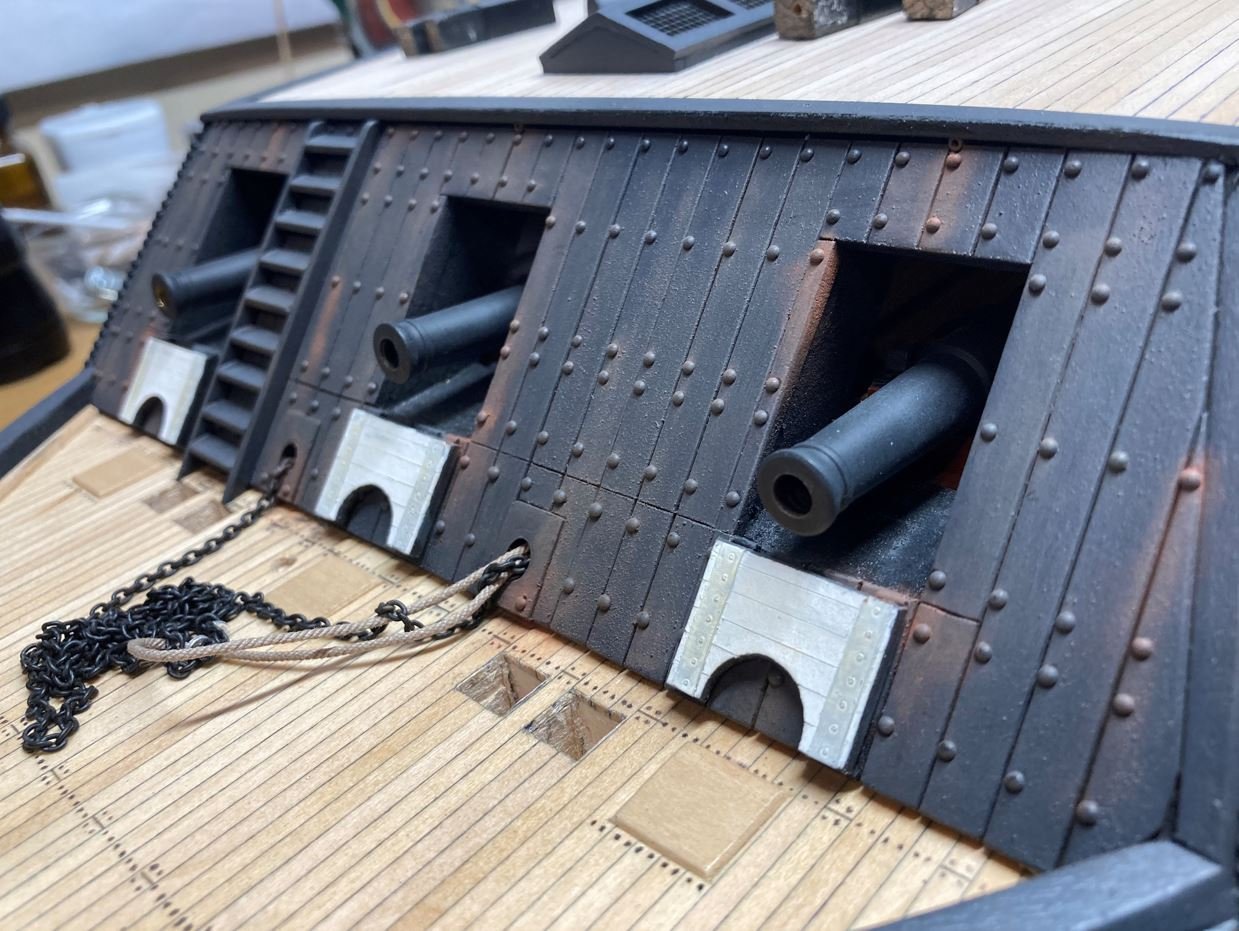
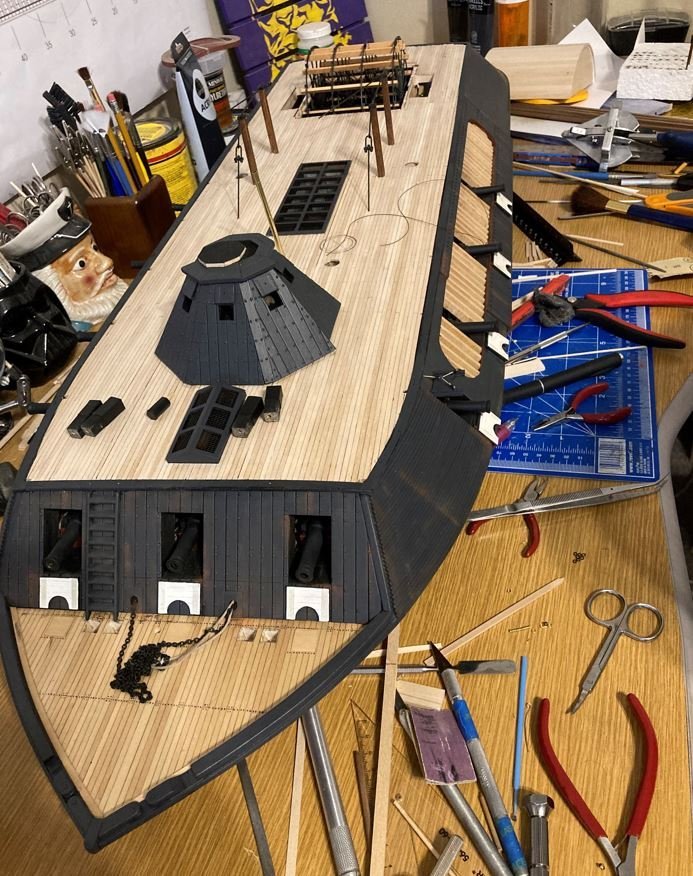
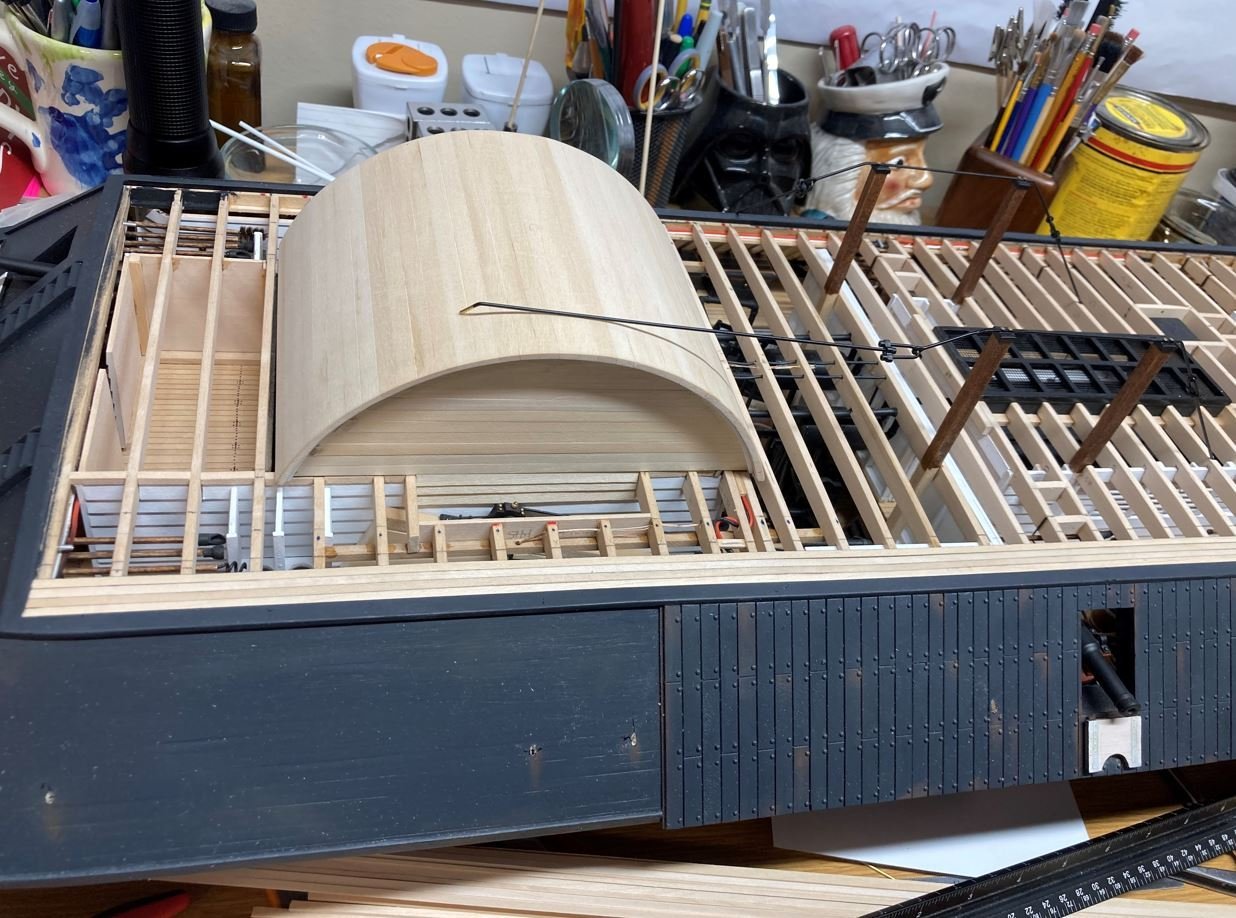
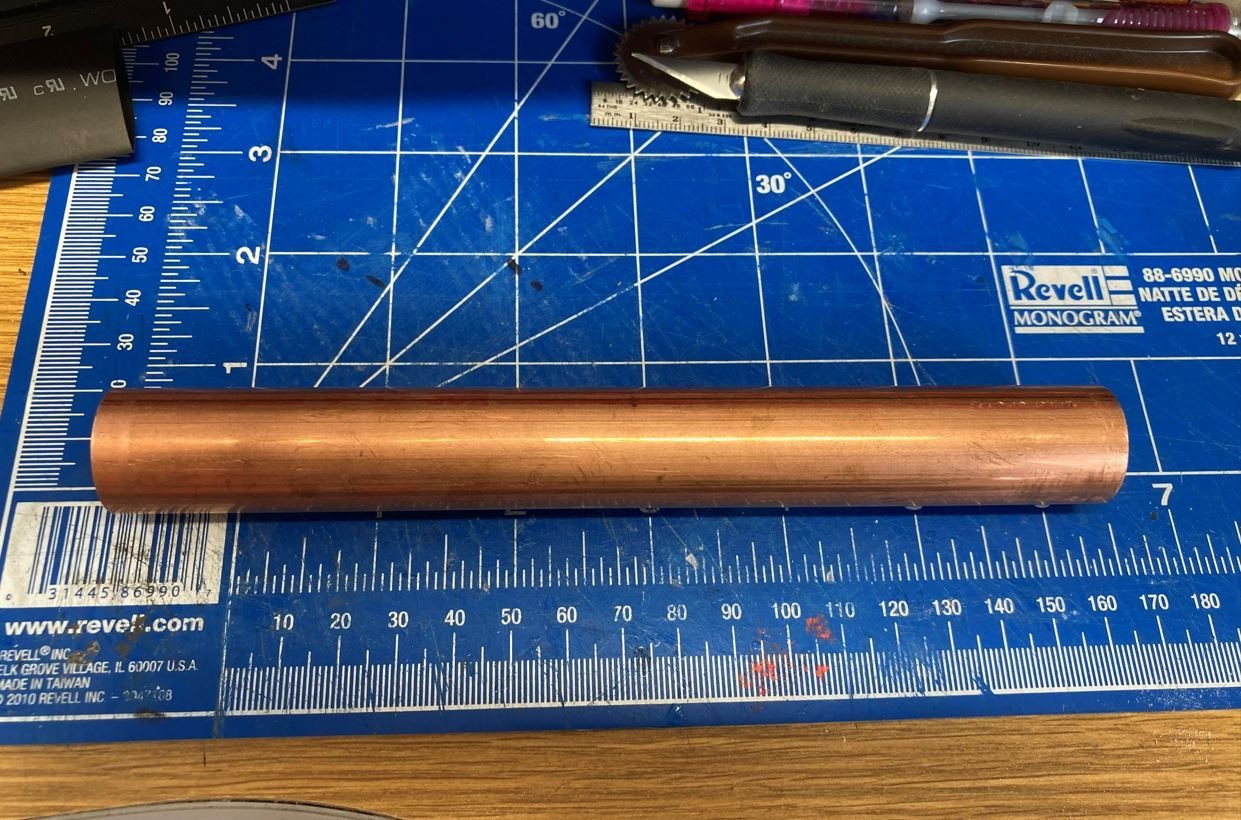
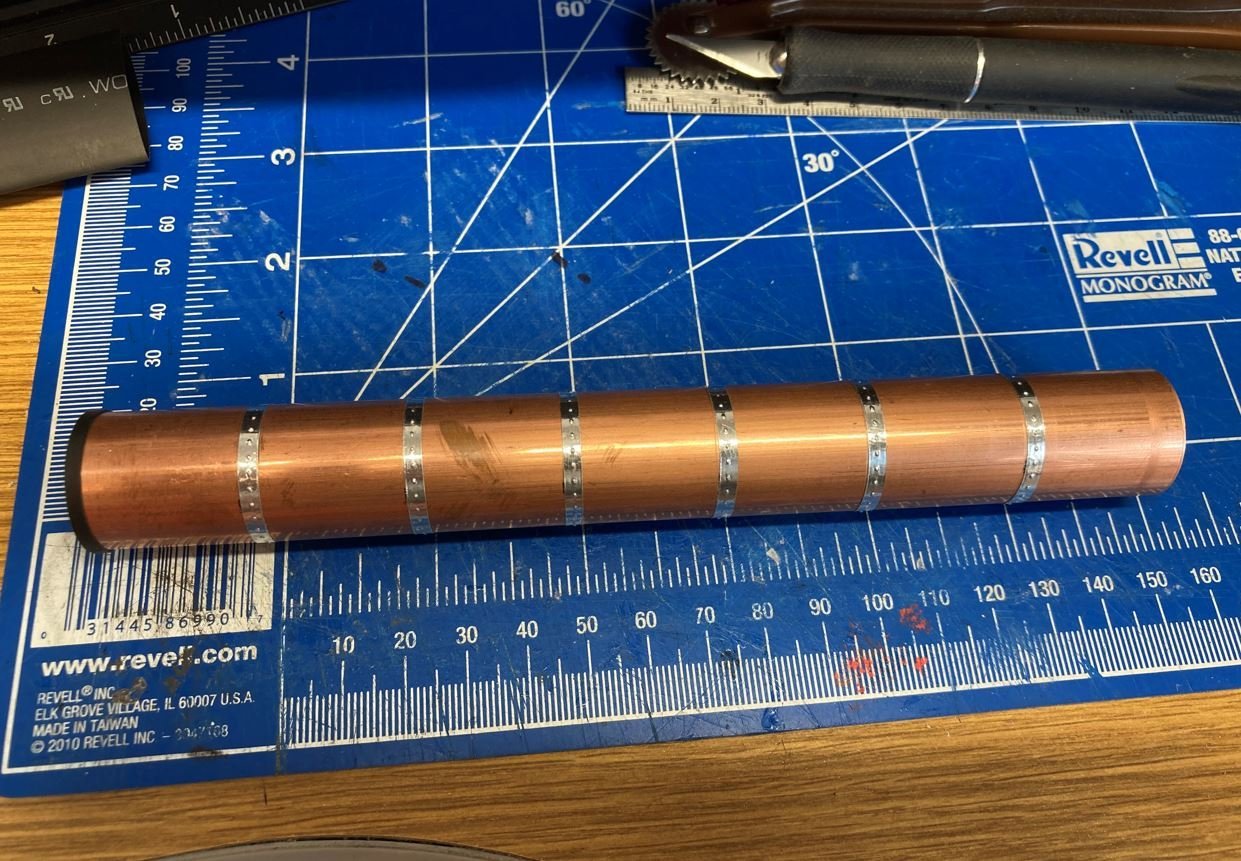
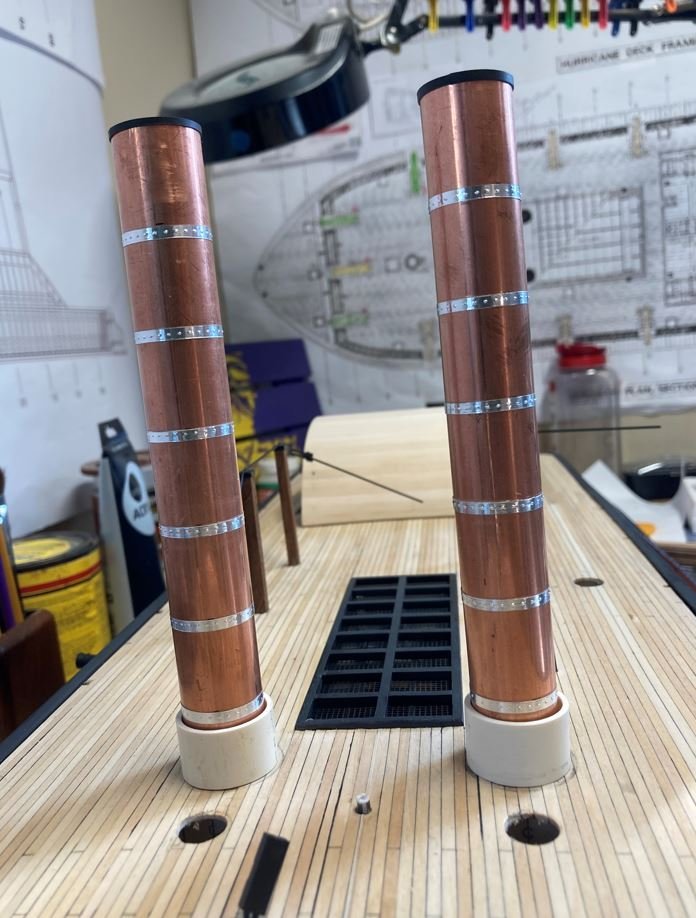
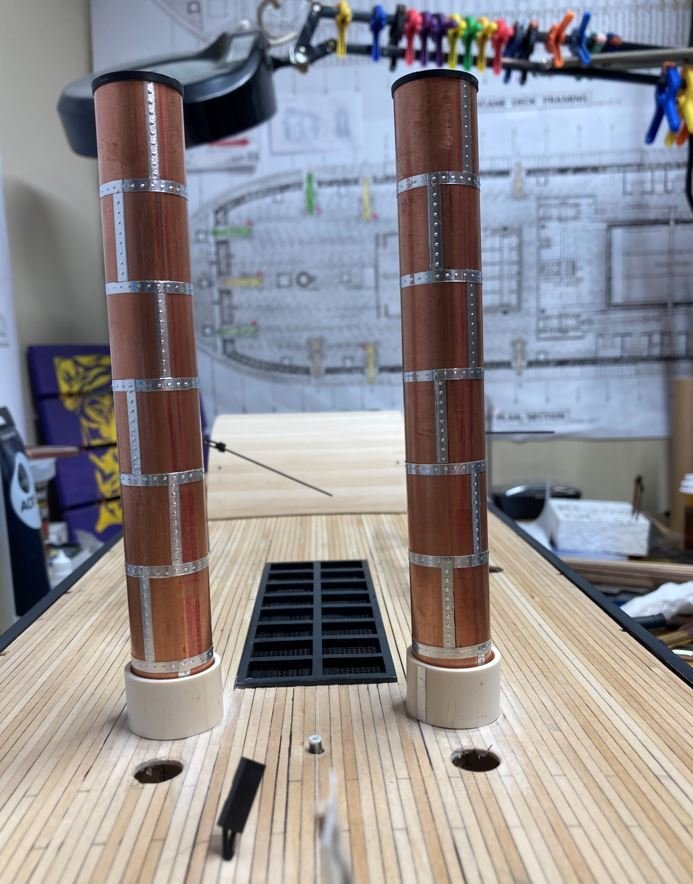
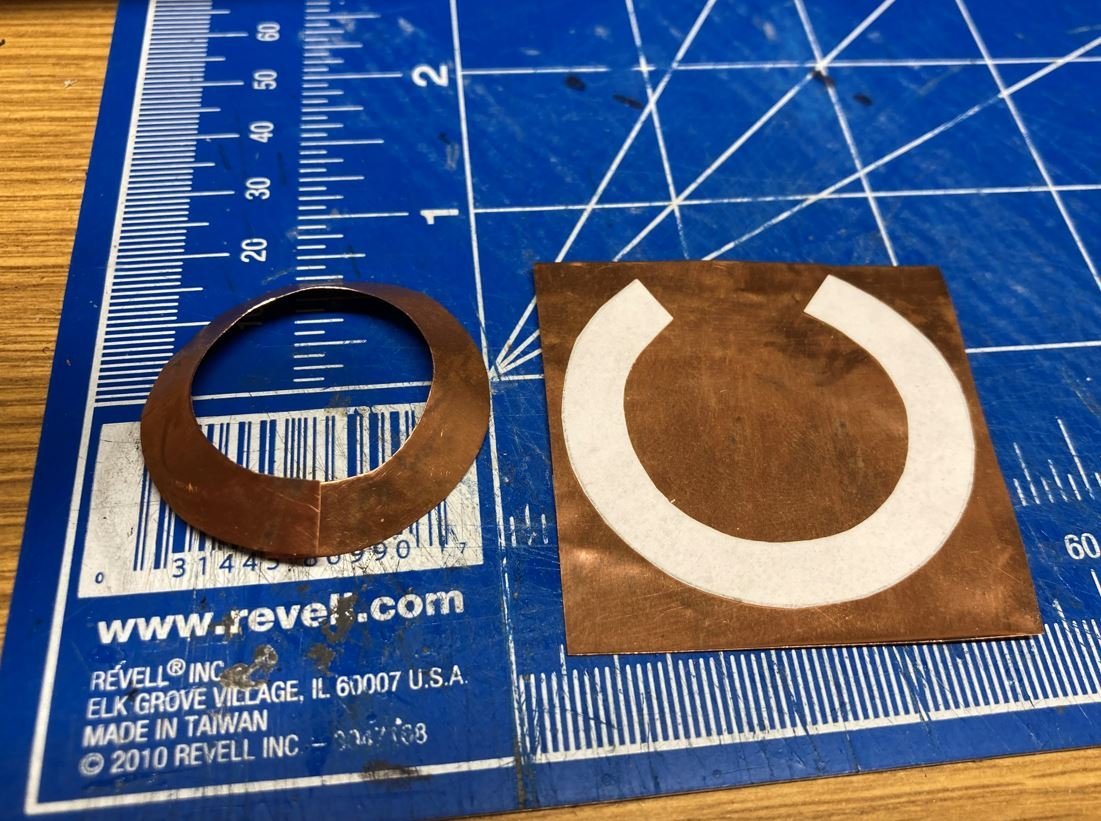
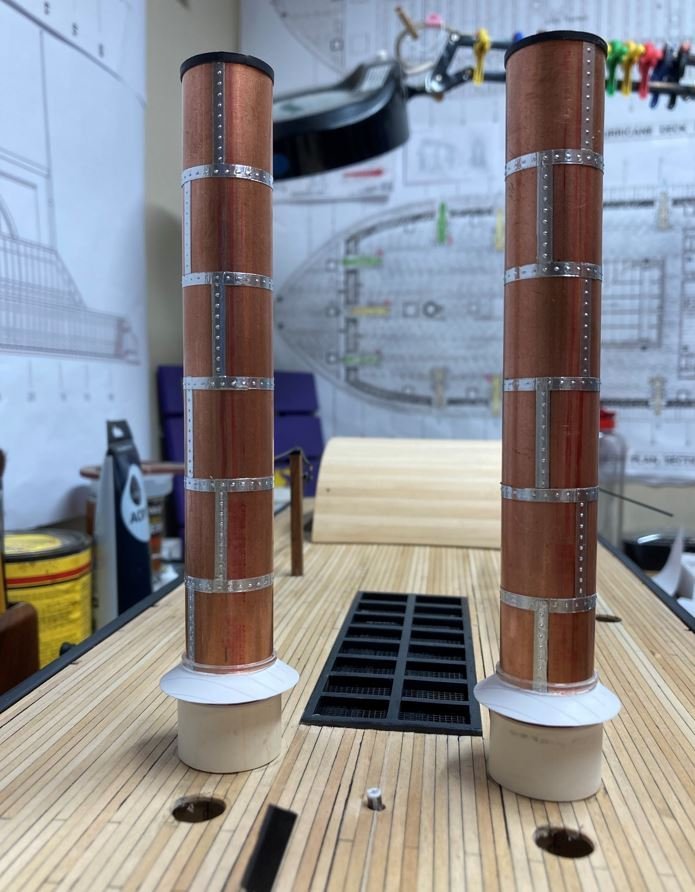
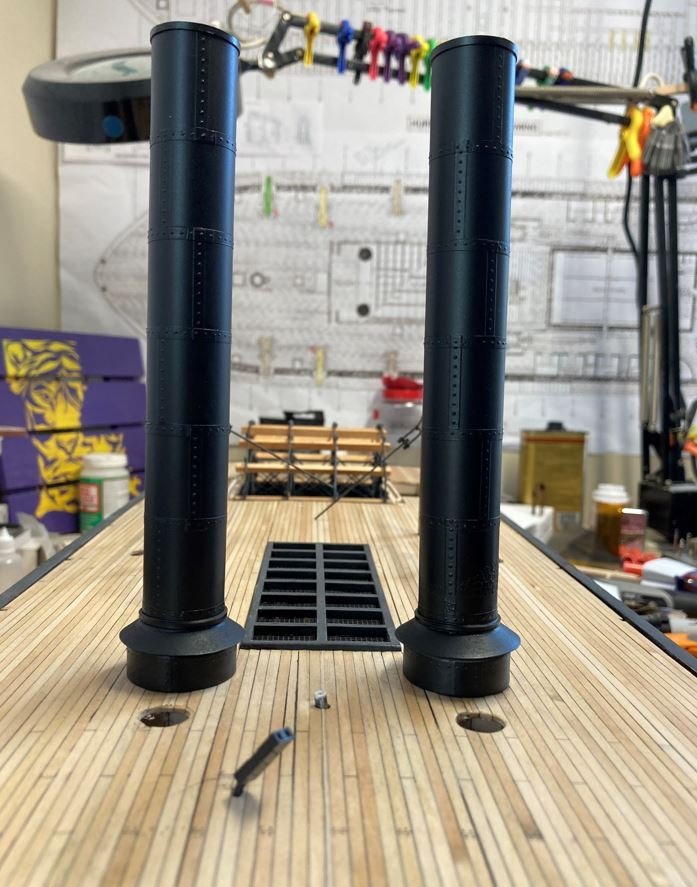
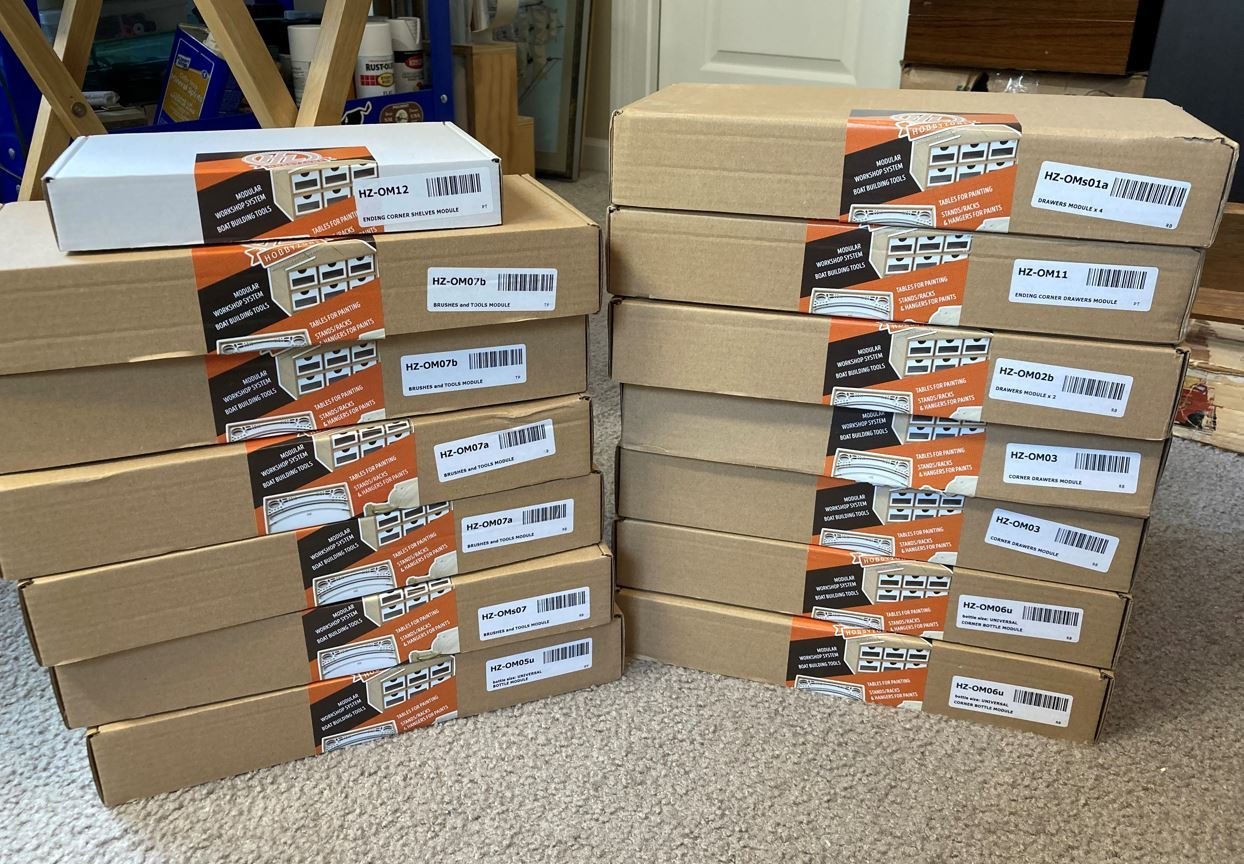
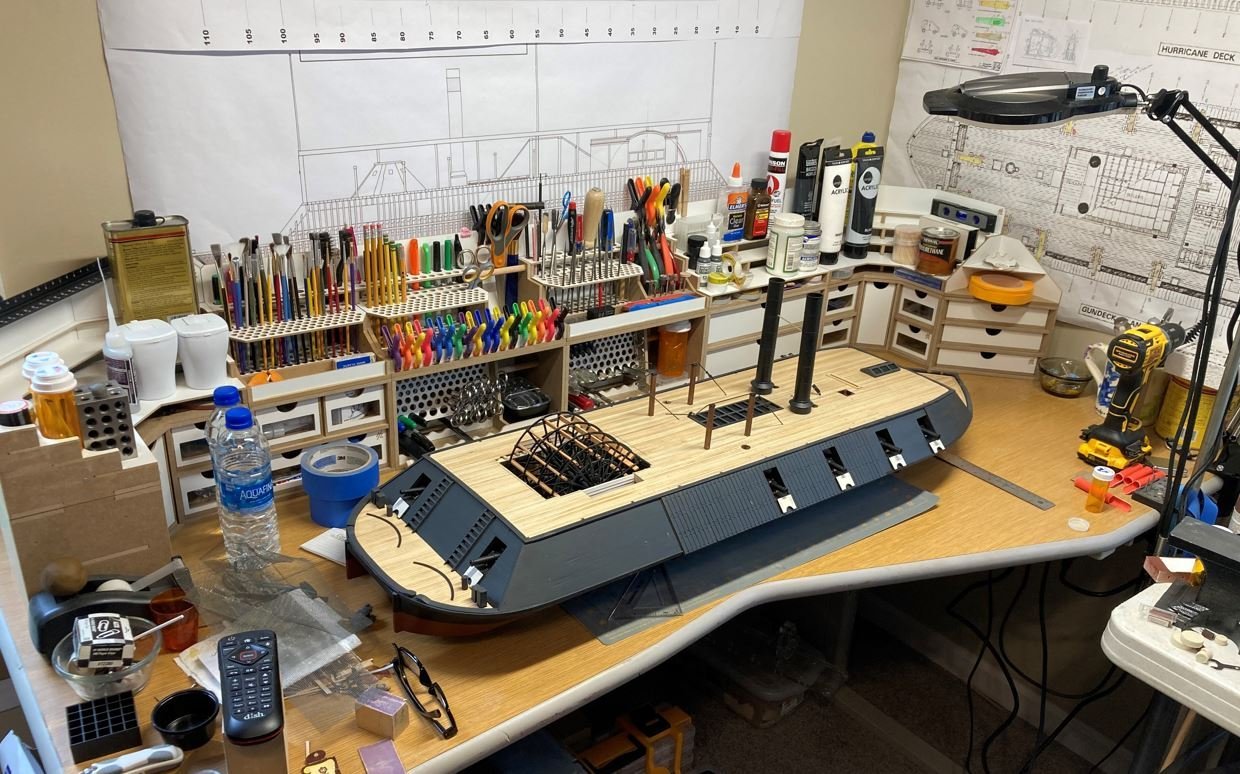
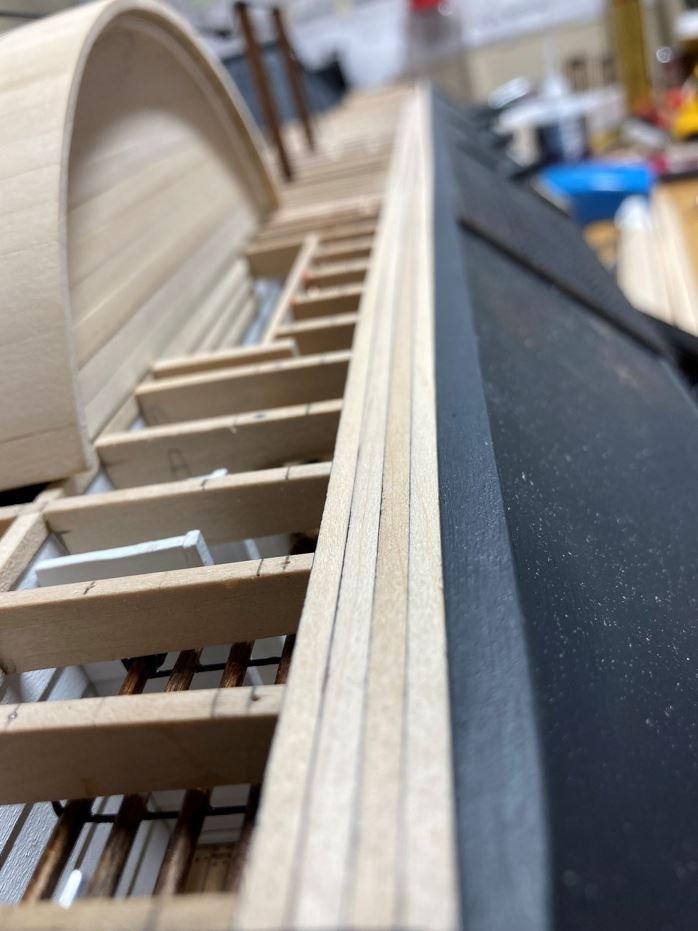
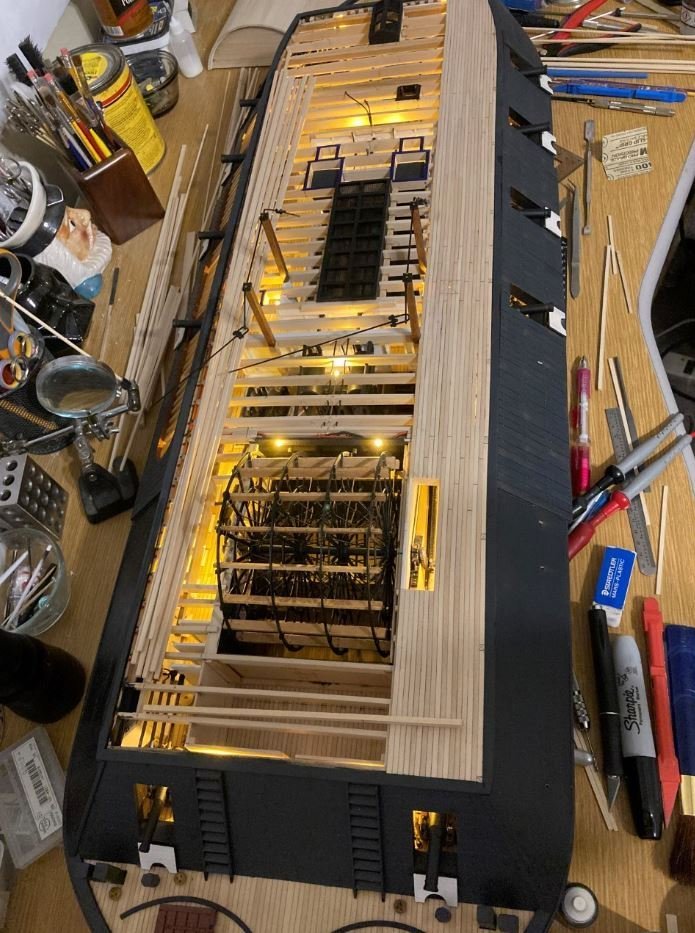
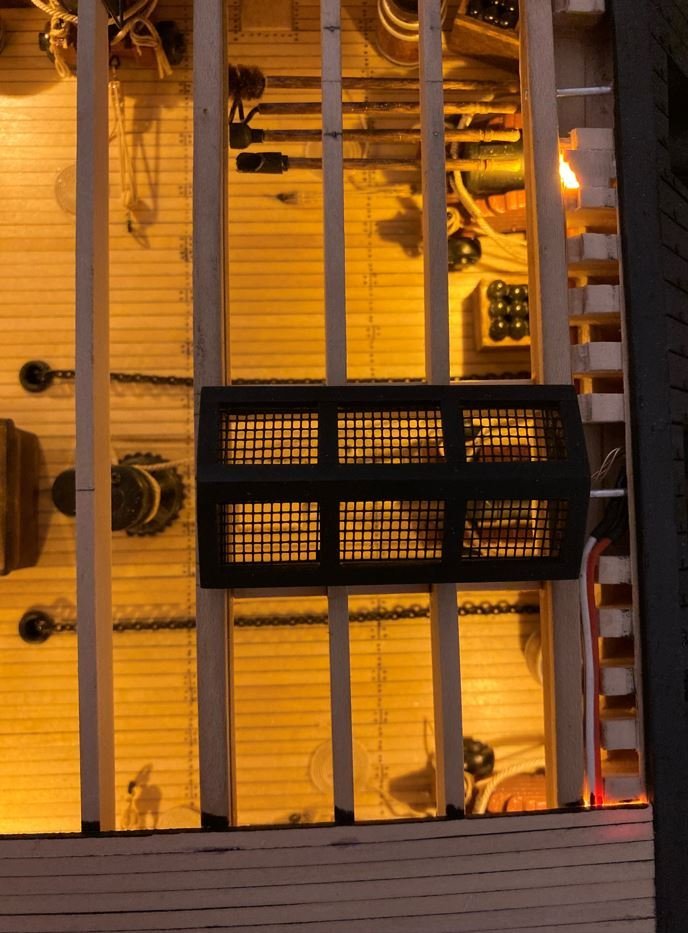
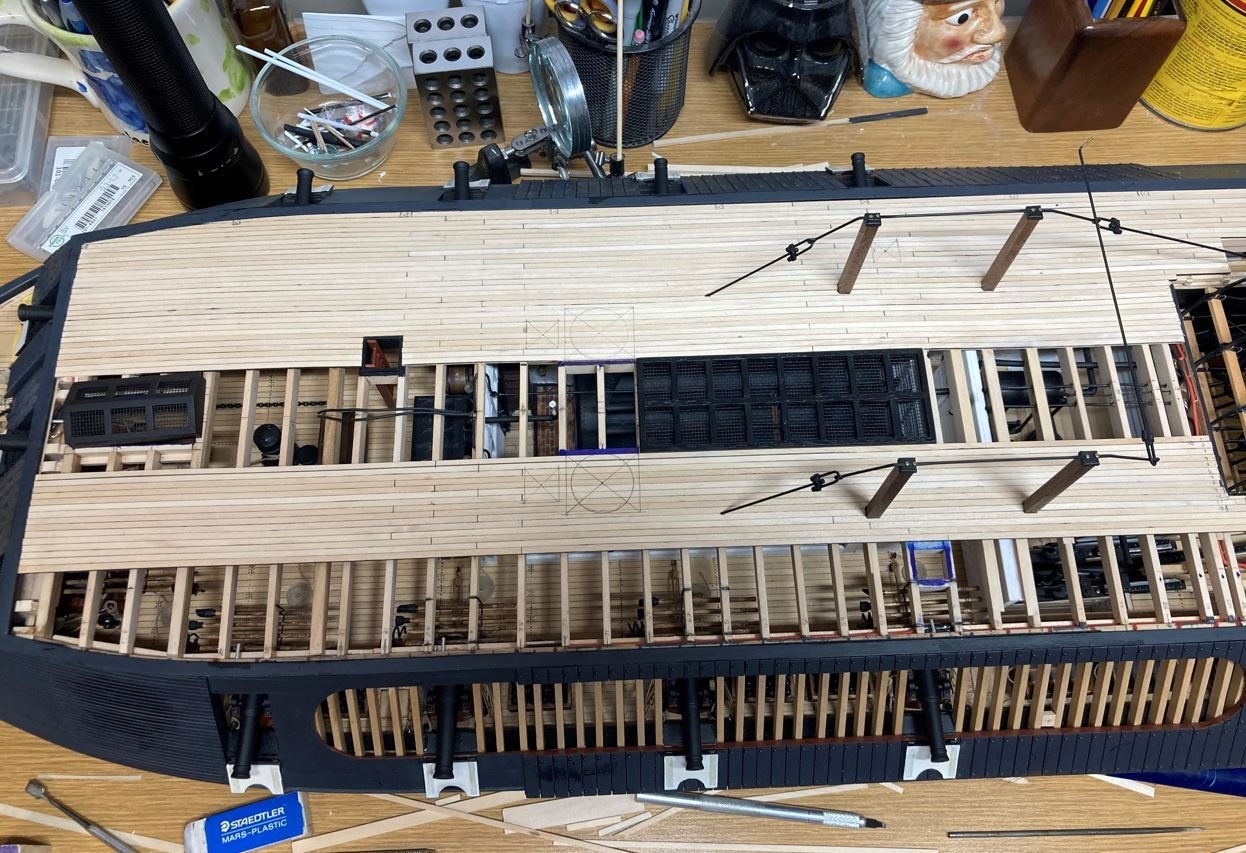
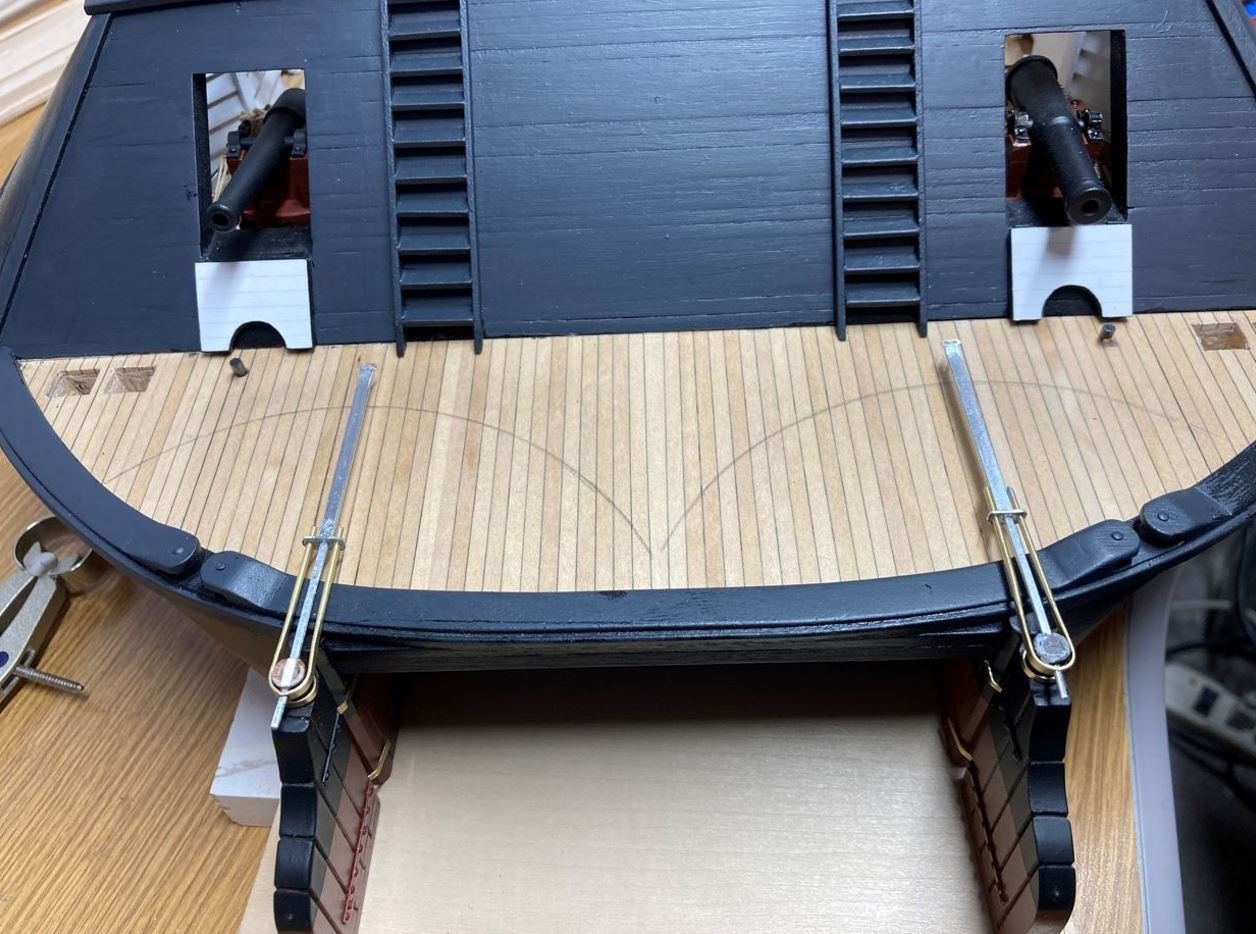
Happy Holidays everyone, I wanted to get one more update in before the new year, so here goes. Picking up where I left off on the last post. I finished up on the roof beams. From there I built up the forward skylight. Here is the basic frame. With the remainder of the frames and the mesh installed. Temp installed on the Hurricane Deck. And finally all painted and temp installed. Once the skylight was completed I started finishing up the rudders. The will not be mounted until I am almost done with the build. Knowing my luck I'll knock them off while moving this beast around and spend a couple of days sulking about it. I started by making the tillers from strips of aluminum, the same material that I made the paddle wheel from, and brass rods. Then I shaped the pintles and soldered the pins in place. Next I installed the tiller on the starboard rudder to get the correct tiller arc. The arc was then drawn on the deck for the metal pieces that define the arc. Forgive my lack of knowledge of these parts, I did a little research on them, but couldn't seem to come up with a name for them. Both tillers constructed and in place. I then set the pintles aside for painting since they will not be needed until I place the rudders and then installed the metal tiller arc guides. And the rudders are all done. They will now be put aside with the pintles for installation later. Next up was construction of the paddle wheel house. I kept this build as simple as possible since the insides would not be seen at all. Just a basic piece of 1/4" poplar cut to follow the paddle wheel arc, a few scrap pieces to hold the width of the wheel house (the will be removed once the top pieces have been added) and then decking planks. I added some thin basswood veneer strips to the sides to simulate the shiplap boards that were used for the walls. Here it is temp installed in place to see how it looks and to make sure that I got my measurements right where everything lines up. I think it will work. Then it was time to move on to closing this thing up by adding the deck planks on the Hurricane Deck. I wanted to make sure that the LED's that I had installed didn't bleed through the deck planks. This is the reason for the lights being on. For those areas that did tend to show through the boards, I took small pieces of aluminum tape and stuck them across the beams over each light to block it out. Unfortunately I didn't take any pictures of these. All decking in place. After the decking was installed I started work on the hammock racks. I needed to make sure that I got these properly scaled so I scaled me down a sailor from the original picture of the Cairo. I estimated him to be about 5' 10" (according my readings the average height of sailors in the 19th century) which placed him at about 3.7cm in 1:48 scale. This gave me a decent guide to go off of to get the height of the hammock rack walls. As I started building these, I kept going back to the old pictures of the City Class boats for reference. From the numerous pictures that are out there it is hard to tell which would be correct since over their short lifespan there were so many modifications done to them. Some pictures of the different boats show the hammock rack walls at different heights, some show them completely removed and others match the same makeup of Cairo. The one thing that I could not make out is what their construction was on Cairo itself. From what I can determine is that the outboard walls were made from planks with a top rail, but it is hard to tell how the insides were built. The other thing that I was having trouble determining was the presence of an opening between the ships boats to allow access to them. Since this part was going to require a little more research, I decided t place the hammock racks on hold for a while. While I pondered my hammock rack quandary, I decided to move on to the pilot house interior features. The ships wheel was another item that was either lost during the salvage, or had rotted away over time, so what it looked like will be really hard to tell. I just used my builders liberties to make up my own version. I started out by cutting two basswood rings and a small spool for the hub. I cut slots in the rings for the spokes to go through and then glued the two pieces together. Next I added the spokes. These were just made from brass wire I had leftover from the hog chains. Then I used some more of my decorative toothpicks to make the handles. The wheel was then glued to the hubs. I also made up a simple speaking tube from brass wire and a small piece of copper sheet. Then finished up the ships wheel with the bell stand and temp installed on the deck. I'll get these painted up and installed once I have the rest of the deck furniture in place. They'll go in, along with the tiller rope, just before I mount the pilot house. I am trying to decide what other details I want to add to this area. Since there are no details of the pilot houses, I'm not real sure of what to add. I had though about just using a standard steamboat setup with a bridle, foot controls and other features, but I am still not sure how far to take the details. I still have time to think on it though. Next it was on to the chimneys. These I made from 3/4" rigid copper pipe and aluminum tape to simulate the rivets. The pipe was cut to just under 7" to allow for the proper height above deck and the remainder to sit on top of the flume just below the Hurricane Deck surface. I then added the horizontal rivets to simulate the individual joints. I estimated these to be about 4.5' for each section to give the chimney height of 27.5'. Per the picture of the Cairo, there looks to be a ring at the top of the stack that would most likely add some rigidity to the end. I simulated this with a thin piece of heat shrink tubing. The lower heat shields were made from some thin walled 3/4" pvc pipe and then added at the bottom of the stacks. The vertical rivets were added. The rain cap I made from copper sheets. I first made the templates from cardstock, then glued these to the copper sheet and cut them out. Then they were shaped around the stacks and then glued into place. Finally everything painted up and temp installed. I will eventually paint these up with my gray paint, I just wanted to get a good basecoat with an enamel paint to adhere to the copper a little better. Finally, while I played around some more with the weathering, I decided to install one of the upper gun port doors. I am not quite ready to install all of these, I just got impatient and wanted to see how they were going to look. And some additional weathering pictures. Before I go, I wanted to share one of my Christmas presents from the Admiral. I'm guessing that she felt sorry for me since I have not been able to get my shipyard built out in the barn for the past two years. I have been tying up one of the spare bedrooms (which also doubles as my work from home office thanks to COVID) and have never really gotten things organized the way that I would like to. I found these little gems on one of the Facebook groups that I am a member of, so the Admiral said to go ahead and get what I needed to help organize my workbench a little. These desktop organizers from HobbyZone USA (they also have a dealer in Poland for our European builders) were a great addition to help organize my parts and tools. The polish website actually has a designer site where you can place the modules into whatever configuration you want and gives you a parts list. If you are in the US, you can then take that parts list over to the USA site and add the pieces to your cart from there. They can get a bit pricey (especially the shipping), depending on the modules you get, but imho they are money well spent. The only downside to them (if you want to call it that) is that you have to assemble them, but It's like building a side project. So the for the past few days I have been converting this: into this: I am not done with these yet, there are still several modules that I want to get, but it's a good start, It also gave me a good excuse to clean up my workbench. Well that is all I have for now. Thank you all for stopping by, the likes and the kind comments. Everyone have a safe and Happy New Year and we'll see you next time. -Brian


- 739 replies
-
- 22
-
-

-
Impressive details at such a small scale. It makes my eyes hurt just thinking of working on something that small. Great work on the skylight! -Brian
-
Glad to see you finally getting started on this one Eric. I’ll follow along as you go for tips and tricks since this will be by next build. -Brian
-
Johann, Merry Christmas to you and your family as well! -Brian
-
Thank you Keith. You and you family have a wonderful Christmas and Happy New Year as well my friend! -Brian
-
Gaetan, This is a beautiful masterpiece no matter what angle the photos are taken from. I am just in awe at your work. -Brian
