


Overworked724
-
Posts
1,263 -
Joined
-
Last visited
Content Type
Profiles
Forums
Gallery
Events
Everything posted by Overworked724
-
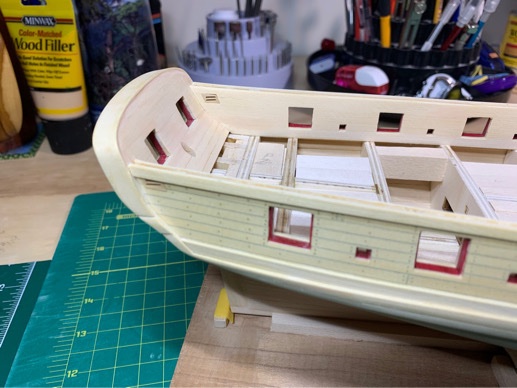
 Well...onto each ship a little rain must fall... I made a big mistake. I am using Tamiya paint (Red X-7) spiked with a few drops of German Grey (XF-63) and Desert Yellow (XF-59) (about 10 drops each in the red pot) to darken it to a deeper hue. I had noticed when I painted to sills before bulkhead planking that there was a slight 'sheen' but thought it might have been because I painted over some errant glue or thought it was just my eyes. Wrong... After painting the transom and up to the first couple of gun ports on either side, there was an obvious sheen. I had thought it might have been due to painting over the wood filler, so sanded and added another coat (I dilute 1:1 using the Tamiya paint thinner for brush painting). Nope...sheen just got worse. And then I became aware after talking to a fellow modeler I had selected the wrong red pot. The 'FLAT' red pot is what I had intended to use (Tamiya Flat Red XF-7) but had used the gloss red (X-7) instead. To say that I'm pissed is an understatement. It's just such a stupid mistake. I spent the better part of the day trying to sand out the layers of glossy red paint from the model without doing any (or too much) damage by additional sanding - especially to the transom cap. I'll do some additional touch up sanding and try some swatch experiments to ensure I don't repeat this fiasco...I'd post a pic but I'm too upset. Besides, the pics are gruesome....
 -
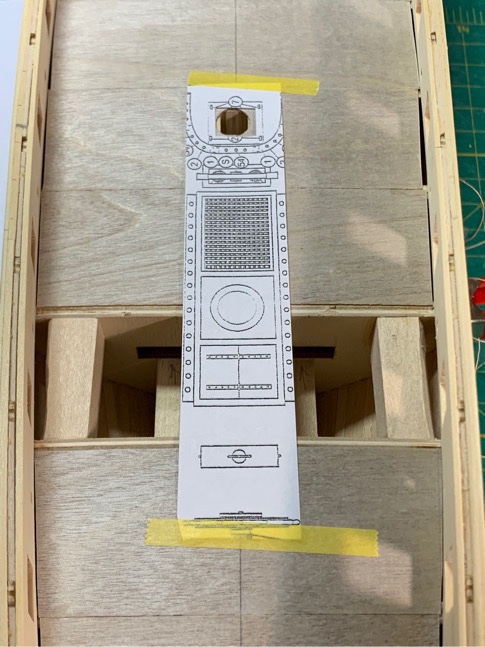
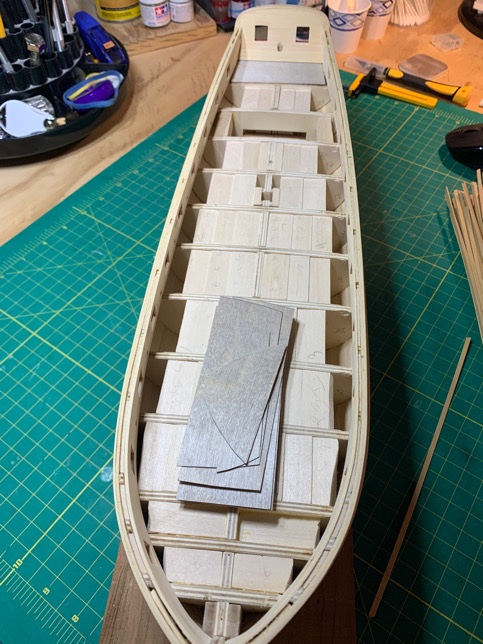
Got my cap rails ready. I decided to add the molding in the large pieces themselves rather than add a 1/16” strip later. Chose boxwood for the cap which made it a bit easier to scrape in the molding. Scarf joint wasn’t as hard to form as I thought. Got a slight overhang outboard and a healthier one inboard which I plan to sand down a bit. Should take the width to only slightly less than 1/4” (which is what it is now.) So I’m right where I should be per the width specified in the practicum. 👍🏽 Bonus pics.... The sheet is simply a template sheet so I can gauge spacing/decking furniture/etc. Moving on...
-
As with most...my Thanksgiving over, myjobis getting in the way of my shipyard. Got my rough cap rails formed and a deck plan sheet fitted to the deck to help me make my margin planks and whatnot.... Slowwwwww....😣
-
Outstanding! Nice job planking, Red. Looks very clean.
- 436 replies
-
- 1
-

-
- Syren
- Model Shipways
- (and 1 more)
-
Looks stellar, Justin!
-
I have the same 'minor' problem. I blame it on fear of accidentally shredding my bulkhead walls during sanding...so mine are a touch wide as well. I think your first cap looks stellar!
-
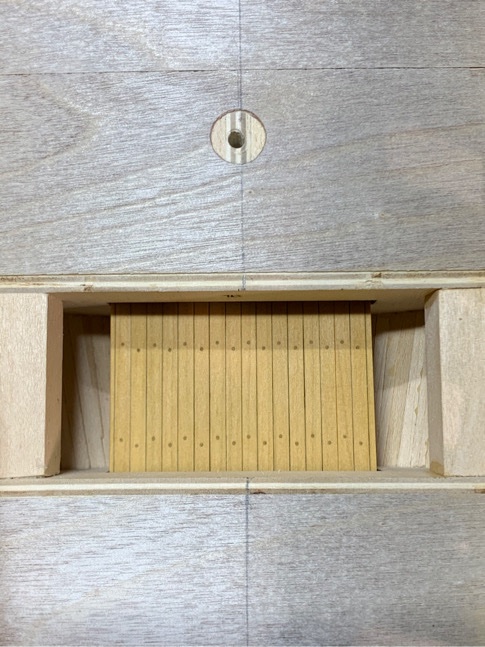
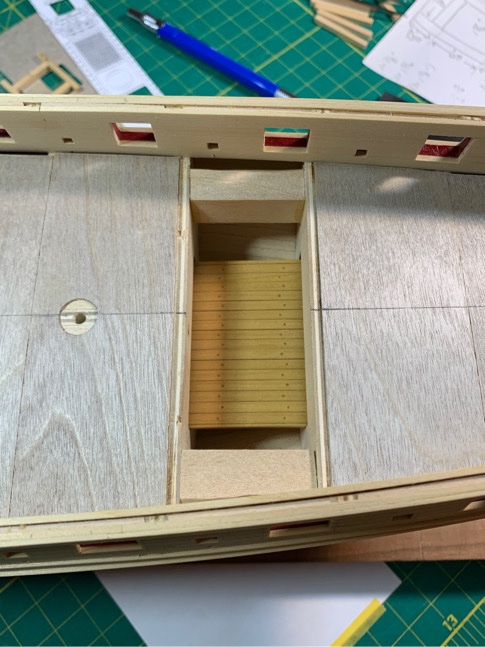
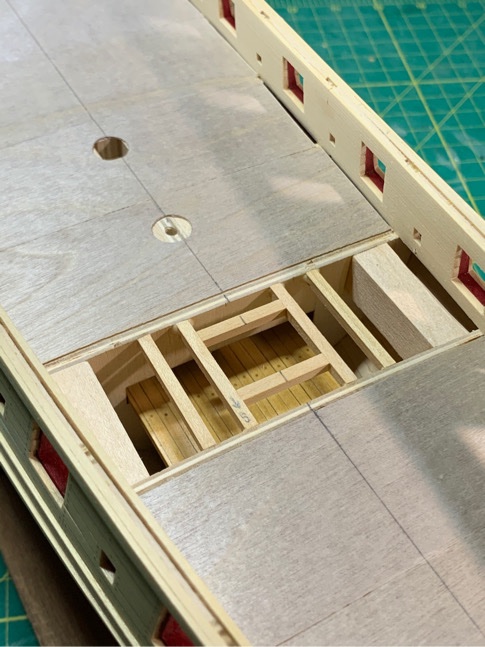
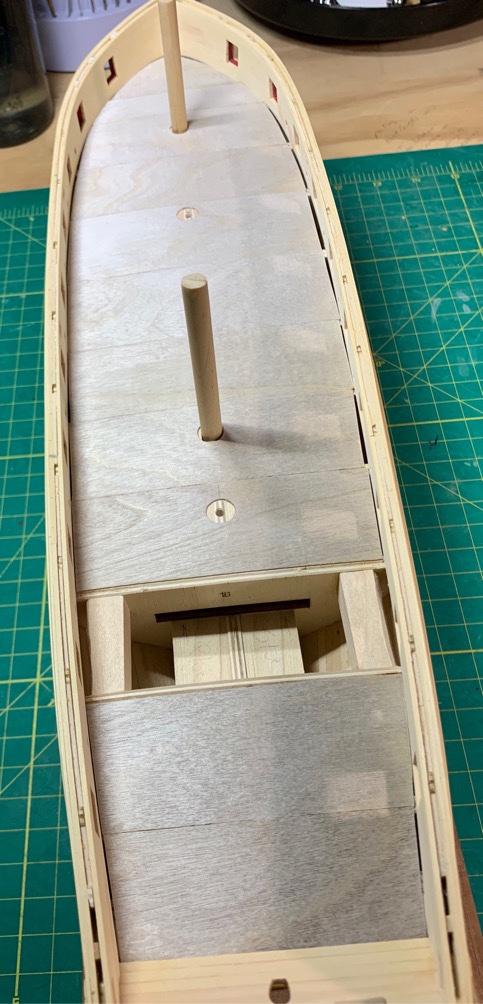
Companionway done! In my eagerness to get it installed I almost forgot to put in my second deck. 😳 Since I am adding the fake deck, I bolstered with additional supports on either side of the companionway. (Never thought I’d be so happy to lay in the piece...!!!) And here are some courtesy pics! And the nice thing is...I’ve taped up the hole for the companionway...so no dust or little bits get in there. 😊 Onwards...

-
Hi Robin...I was talking to a fellow modeler and he said false decks are common to create an even surface if one doesn't exist. But frankly, I wanted it more as a security blanket. I had those ridiculously large gaps between the filler blocks and the bulkhead, and just wasn't too keen on trying to use filler to create an even deck. (There's an argument for plank on frame if I've ever heard one...). I expected I was going to have problems, especially in the bow where you have the joggle the planks in the margin planks...and cutting those little bits with some added support beneath the margin plank would ensure the seams between the margin and plank fit level (if not perfect - at least in the same plane...since I have no faith in my unformed skill in this regard). We'll see...that's about all I can say. Haven't seen anyone try this, and figured it was worth a do!
-
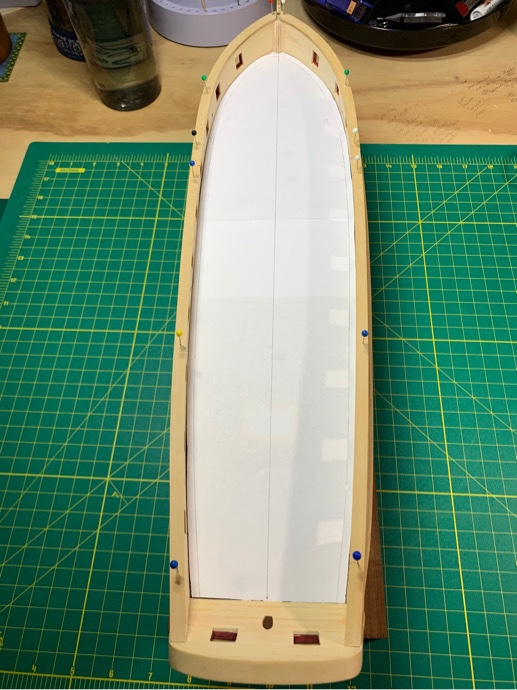
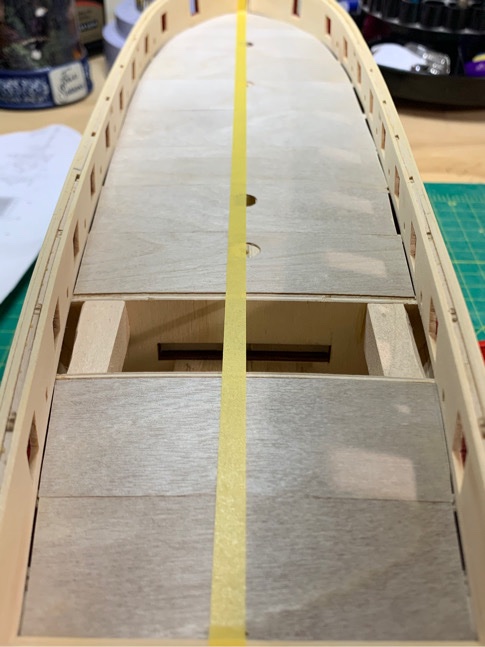
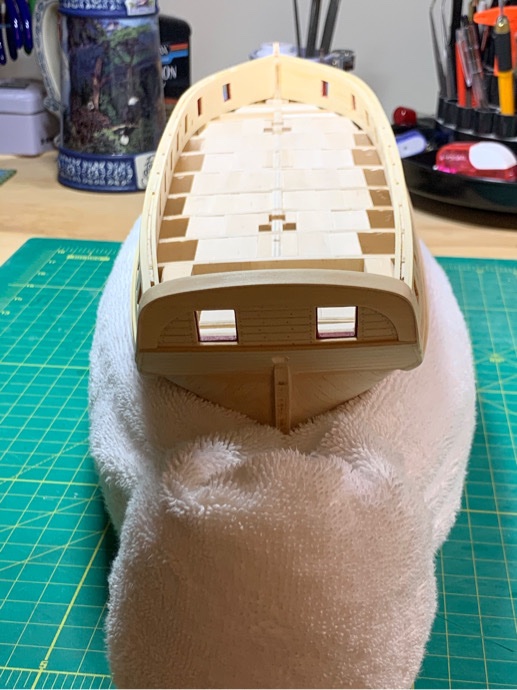
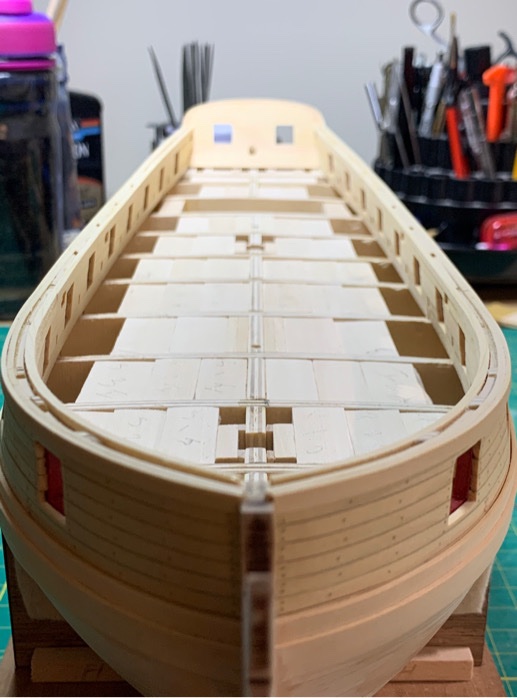
Hi Jamie! Thanks for the vote of confidence. 🤞 Fingers crossed! Answer to your question @Jamie Coleman, there are a few reasons I chose multiple sections. First, setting them up as ‘bands’ stretched between each bulkhead gives a visual marker of where the bulkheads are...which will (hopefully) make it a bit easier to keep the butt joints consistent when they occur across the width of the ship. Second, a solid piece fake deck would be more difficult to cut and set in place...whereas I can make each section and cut in the mast holes and companionway hole without issue. If I mess up, I’m just remaking a small section. Third is that the deck has a 3D curvature. There is a slight ‘bow’ in the deck from stem to stern as well as a camber in the deck from port to starboard. Breaking it up into bands ensures I am keeping the camber. The bow from stem to stern would obviously be ‘flat’ between each adjacent section. The 0.5mm plywood is pretty stiff...but the overall curvature would be maintained (🤔 I think...) In the pic below you can see the dip in the deck when I put in the center line (thread/tape) on two pins...the thread was deck level at bow and stern...think it dips about 4mm in total. Update...got my center line in and planning to finish up companionway and final fake deck section...then it’s on to painting. Moving on...


-
Excellent!!!
-
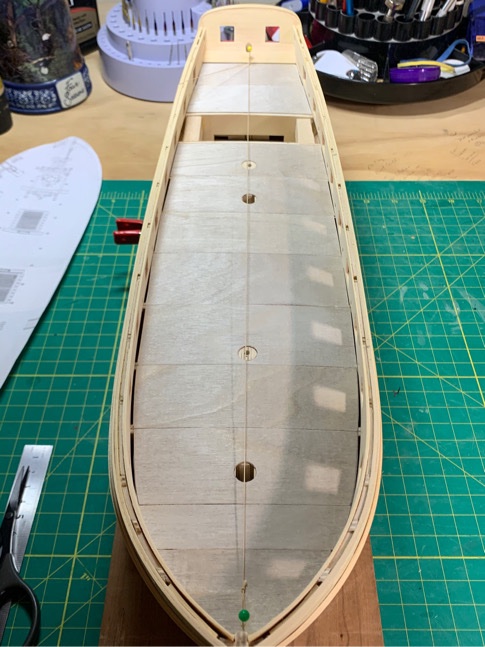
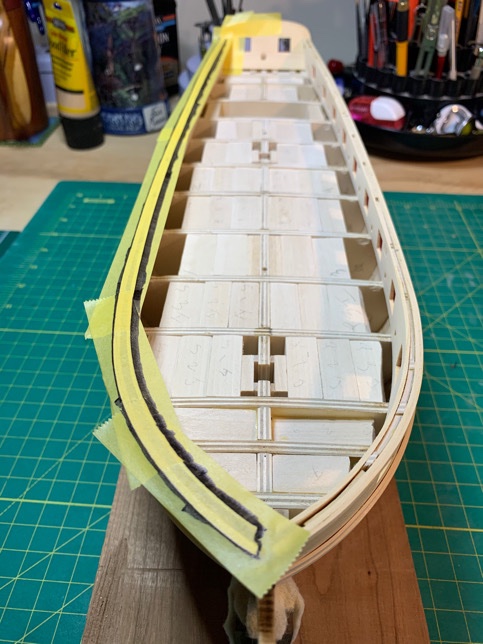
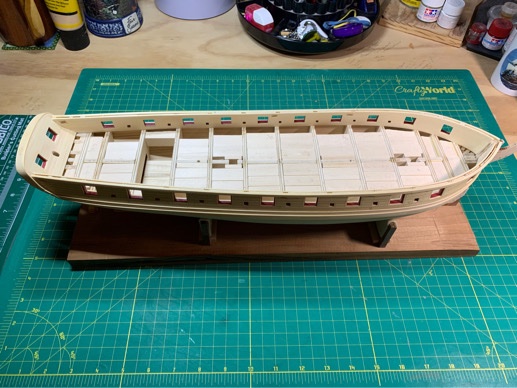
Just a few pics... Used Tamiya tape and a sharpie to get an accurate impression of the cap rails at the bow. I transferred the tape to a piece of paper, cut out the impression, then traced the figure (with extra 0.5mm on each side for the slight overhang) on the 1/16” cedar. Time will tell if my efforts bear fruit. 😳 Also installed my fake deck using the 0.4mm birch plywood. Installed the sections between the bulkhead frames themselves. I’ll lay down the last section after I put in the faux second deck and walkway frame. But it feels good to finally have a clean looking deck. It actually turned out straight and even. It is nice and rigid near the bow, so I hope this will make the nibbing and joggling a bit easier. Again...time will tell if I chose wisely! 😳 Happy Thanksgiving!!!

-
Well, my lack of experience is showing. Spent way to much time overthinking the cap rails and order of attack. Decided to stay with cedar for the caps. The bow requires finesse and some hand shaping. Went straight with Chuck’s practicum and made the long run portions just back from the bow curvature out of a straight piece of cedar stripping. Wetted and am force bending those to make installation easier. One area I’m deviating from the practicum is installing the molding after install. I’d rather not mess with that so plan to precarve the molding shape in the outer edge of the rails then sand/clean them up before installing. ...that’s my plan anyway...😂
-
Cedar cuts easy but if you have any cross grain it makes it difficult. I’m trying to use a #11 blade. Good grief. 🤣
-
Well, making cap rails are easy in principal....not in practice. The grain of the cedar is problematic in making a clean edge on the curved part near the bow. Considering I have a cheapie scroll saw that bounces all over the counter under high revs, my options for tools in making these are limited...😤 Moving on to an evening glass of wine. 🍺
-
Ah!!! I have a plan for my cap rail. I'll share some pics on my build log tonight. Thought occurred to me how to make the cap rail template for each side to accurately reflect the entire dimension without too much hassle. With regards to the scuppers - don't sweat it. I tried to go too complicated. Simple is best. You just don't need to puncture the hull...you can got part way through with a 1/16" drill bit and call it good. 😃
-
I went all the way through. My original (finger quote) "plan" was to use copper tubing to fit into the scuppers but it was just too difficult to gauge accurately. This was why I was doing this now versus after painting and planking the deck. But...best laid plans so to speak....The scuppers will be as they are...dark holes! LOL The holes which popped through the other side will be below deck level or covered by the triangular piece which makes up the waterways.
-
Thanks, Robin! 🤫. But it’s going to be glaring at me every time I look at it! The admiral looks at my Sultana and says, “It’s perfect!” ...and I see so many things I messed up or covered up! 🤣 I can see now...my Syren will be no different. But that’s our hobby! Gotta love it. 👍🏽
-
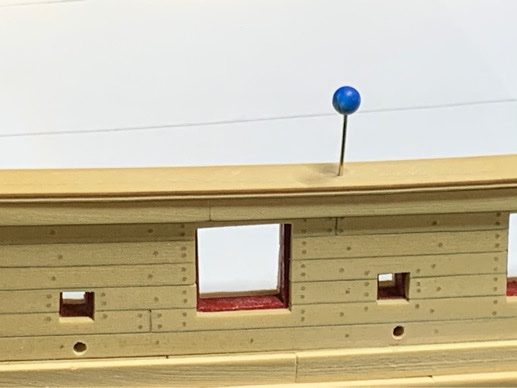
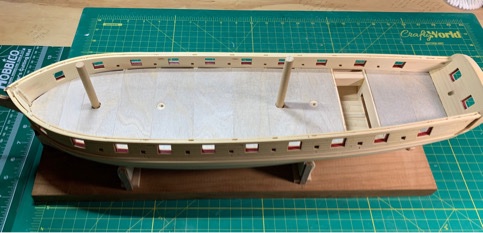
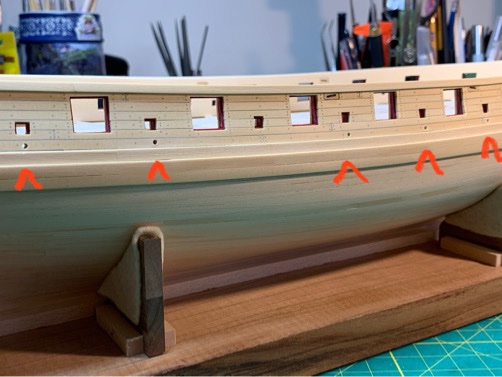
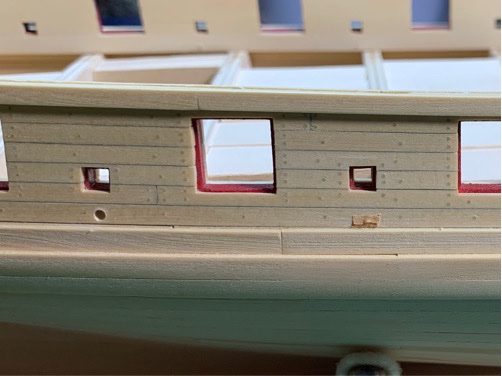
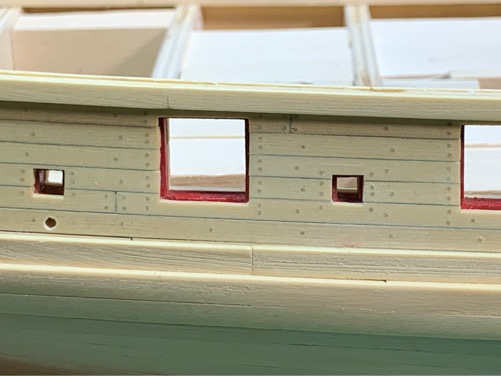
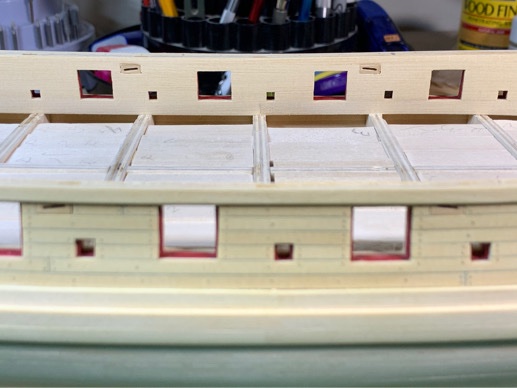
Ok. Wood ‘filler’ is forgiving. Wood not so much. 🤨 Redrilled the errant scupper on starboard side. It’s passable but not perfect...but the chainplates will obscure any imperfections. I’ll note a deviation here from the plans. There should be 5 scuppers in a row on each side starting back from the second sweep hole near the bow. I skipped the hole adjacent to the main mast because I put a butt joint directly beneath that sweep hole on both sides. Symmetry for the win...not. It would have looked like crap if I drilled the scupper in the middle of a butt joint...and the steps/rails near that sweep made putting it in off center a non-starter. Head Bang #1!!! Note to future self...read the bloody plans. Ah, well...artistic license for the win!!! Moving on...
-
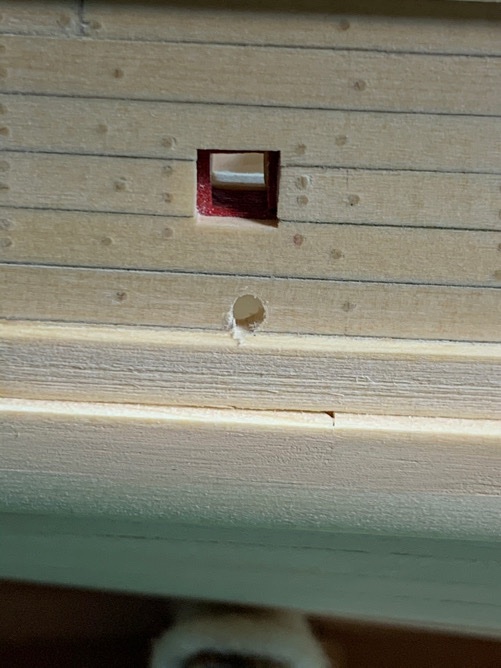
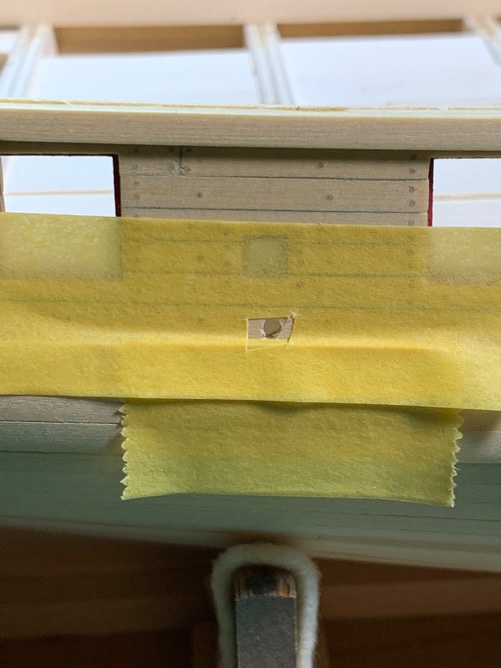
Well...was bound to happen.... Was drilling the holes on the exterior bulkhead for the scuppers. Slipped and gouged one of the holes pretty badly. I could have clean it up best I could and lived with it...but since I screwed up I thought I would test the old adage “Wood is forgiving!”...a phrase so many of my fellow modelers are fond of saying. Surgery for the mulligan attempt went like this... ...we’ll see how my repeat attempt to drill out that scupper works before I say the adage is true. 😣 ...Going to bed.
-
Hi Red. You can also go down in size to a smaller gauge needle if those holes are too overwhelming. How are you making your holes? Seems like the grain is being stretched a bit when looking at your stain swatches. Could be the angle of the photo too.
-
Hi Red As a treenail advocate (😆) I tend to go for broke and say "Do your thang!" In truth, the use of putty filler makes me nervous. I've seen putty not press in deep enough, and upon sanding, can end up giving you gaps/pop outs/empty holes, especially after sanding. Also - it's a mess. I like the cleanness of a simply nail, once trimmed and sanded, it will not come out, and will give a warm look. It could also be I just suck as using putty for nails...I've tried, but it didn't look very good. I think a softer look is better as it keep the model from looking like it has freckles. You can accomplish this in a number of ways, but as you are using a light wood, a light stain on the nails/wood will makes the nails clearly visible but not overwhelming. Also, over time as the stain dries, the effect of the nails standing out will soften. So I lean towards #3. Whatever your choice, I find doing treenails as both monotonous and relaxing. Do a bit at a time and you get great pleasure out of the slow progression. It's almost like tying the half hitches to make the ratlins on the shrouds...they never seem to end...but each one is progress.
-
Absolutely wonderful job, Justin. I am not too sure if you are right about your doing the cap rails out of order. I’m actually planning to do the same...saving the cap rails for last. My intention was to prep and paint the cap rails off the ship. Once on, there would be some minor touch up work. Enjoy your Thanksgiving!!! Patrick
-
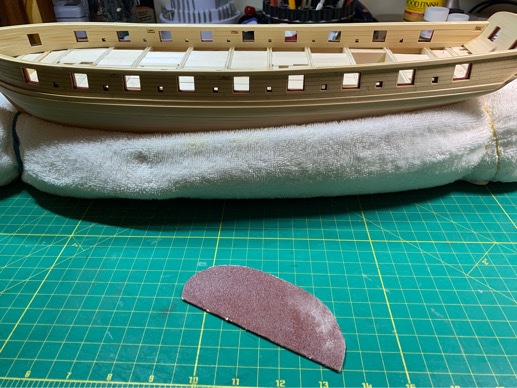
A dusty Sunday! Got the bulkhead tops roughly sanded and squared up. ...and finally attacked the sanding of the interior bulkheads. I find that using a rolled up fluffy bath towel twisted double and held with a couple rubber bands makes the perfect sanding cradle. My main weapon of choice in sanding is an adhesive backed 120 grit rotary sanding pad doubled up on itself. I trimmed it to shape to allow me easy access across the entire inner bulkhead. Nice thing is it’s thick and holds its shape if you bend it to give it good curvature to reach those curvy areas near the bow. ...and...more bonus pics... Moving on!!!!

-
Robin, your deck really sets the bar! Beautiful work.
-
Gotta save up for one...been eyeballing a mini lathe for months. 😣


