


Overworked724
-
Posts
1,263 -
Joined
-
Last visited
Content Type
Profiles
Forums
Gallery
Events
Everything posted by Overworked724
-
 Totally true. If not for the poor planking job and tons of obvious wood filler, I would forego the coppering. But, as I’ve never done it before, I figure it’s a great learning opportunity. 👍🏽😊
 -
Right!? Too bad I’m going to stick copper all over it. 😂 I just wanted to ensure I had the smoothest foundation before putting on the plates.
-
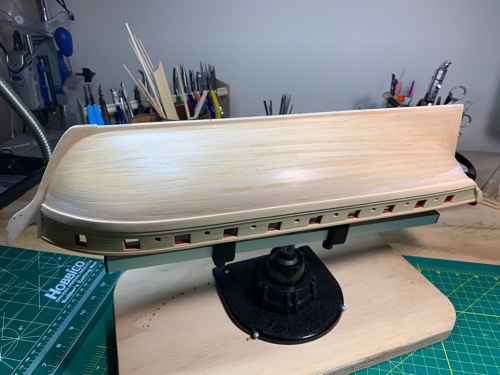
Well, some slow progress between meetings. I did manage to put a couple coats of wipe on poly on the ship. I mean I know the surface isn’t perfectly smooth, but a couple light coats of poly with sanding in between really smoothed out the surface. 👍🏽 Moving on....slowly...
-
Beautiful work! I’m amazed you were able to sand the shell so thin. I was terrified of going through!
- 950 replies
-
- 1
-

-
- syren
- model shipways
- (and 1 more)
-
Hmmm. That sounds simpler. Will give it a go!!!
-
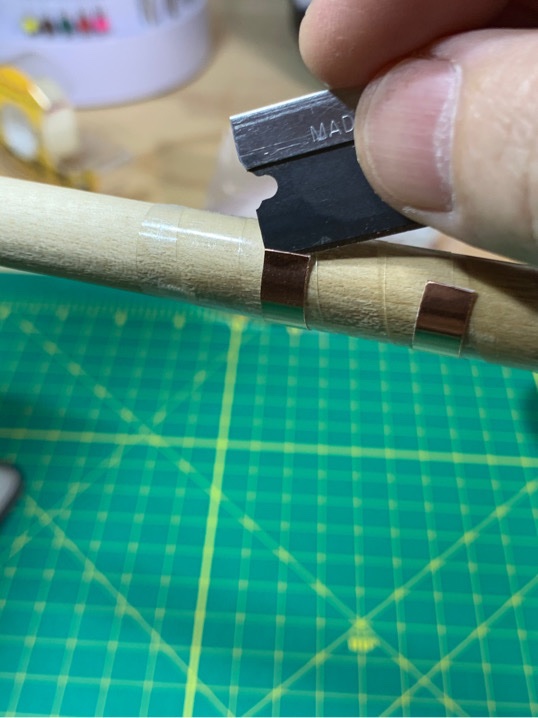
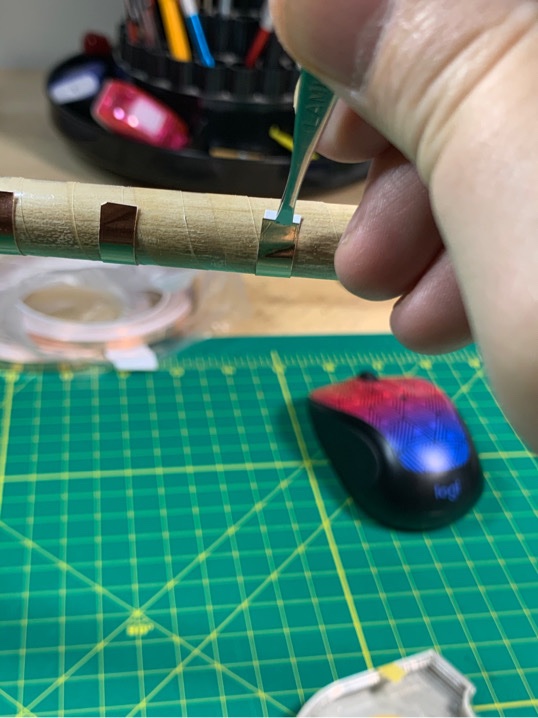
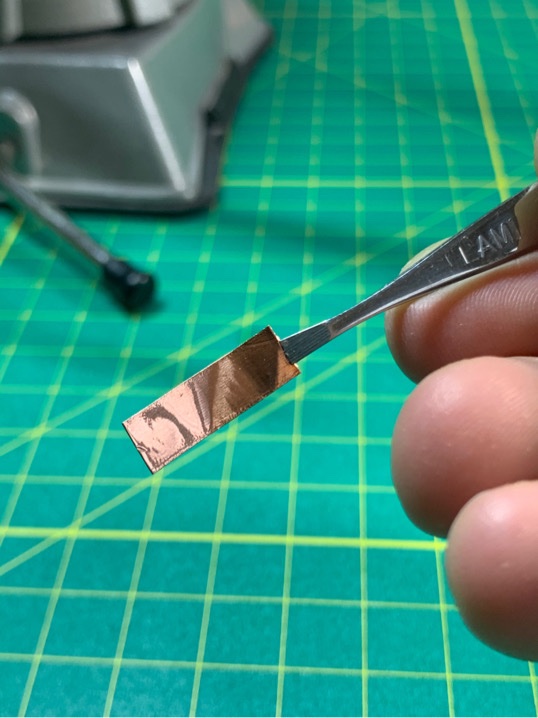
Well, I tried that but couldn’t find a clean way of doing it without crimping the foil. I saw the video a few times which I posted earlier and tried it that way. But I always ended up crimping the trailing corner as I peeled the paper. Guess it’s all in the technique. 🤔
-
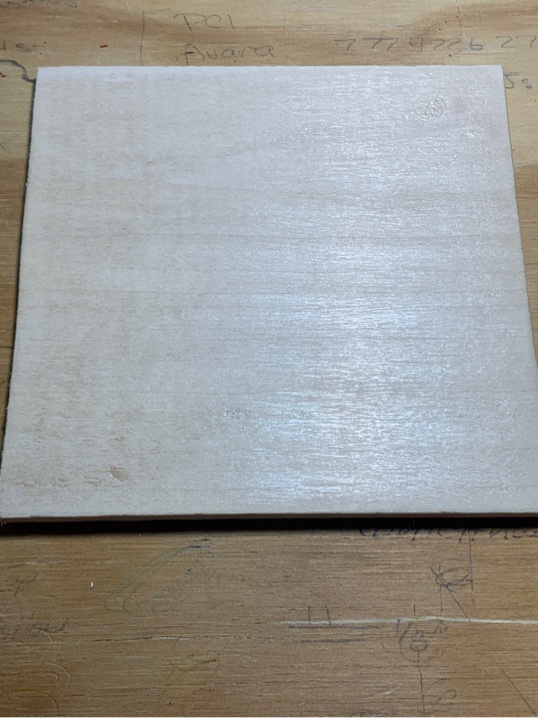
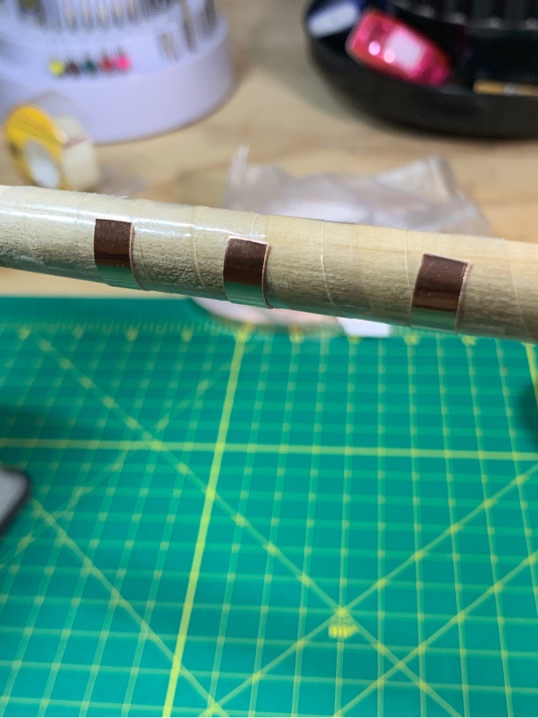
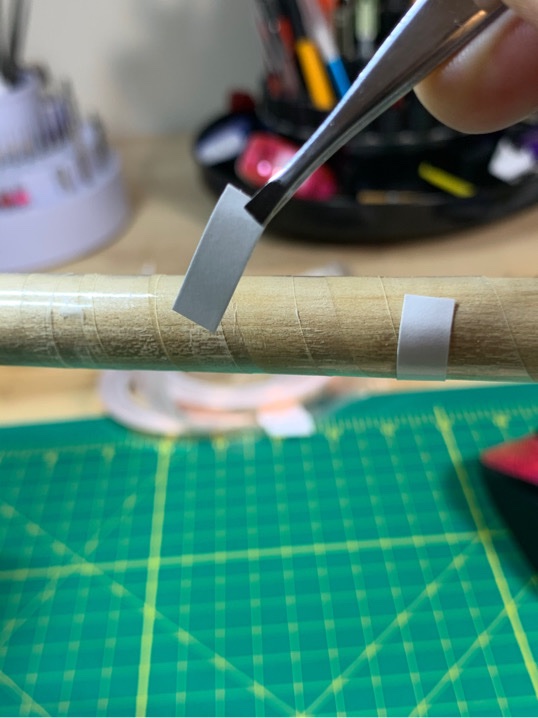
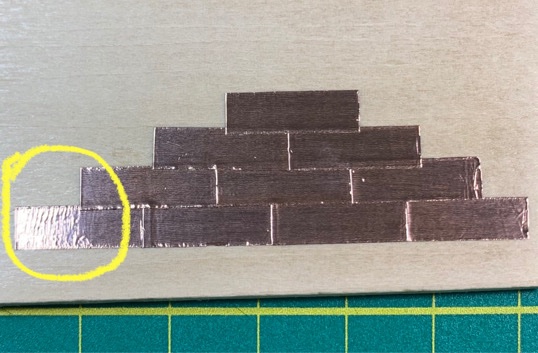
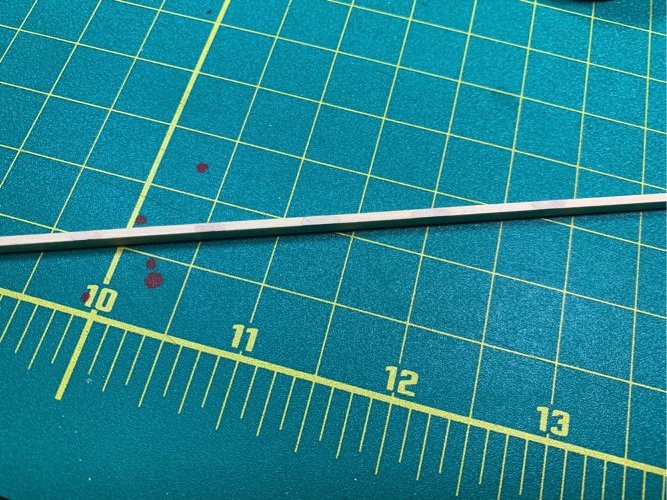
Tried applying and sanding some wipe on poly (sanding between 3 coats) to assess how well the self adhesive copper plates adhere to the wood. Works really well. Very smooth surface. Like a baby’s butt. 🤣 Used a 1/2” dowel with double sided adhesive scotch tap as my ‘peeling’ foundation. Comes of fairly clean and uncurled. Tried a simple swatch with blank plates. You can see the plate where I sort of ‘peeled’ the plate away From the backing by hand (circled in yellow). The crimping of the foil happens quick and can’t be undone. Nice thing is you can remove the paper backing and reuse.
-
I see. Thanks for clarifying. I have some painters drop cloths I can use.
-
Not certain what you mean, Kurt? You mean to put on the floor? Again - I am NOT a airbrusher or a painter in general. (But I think I did a pretty good job on my makeshift airbrush hood...)
-
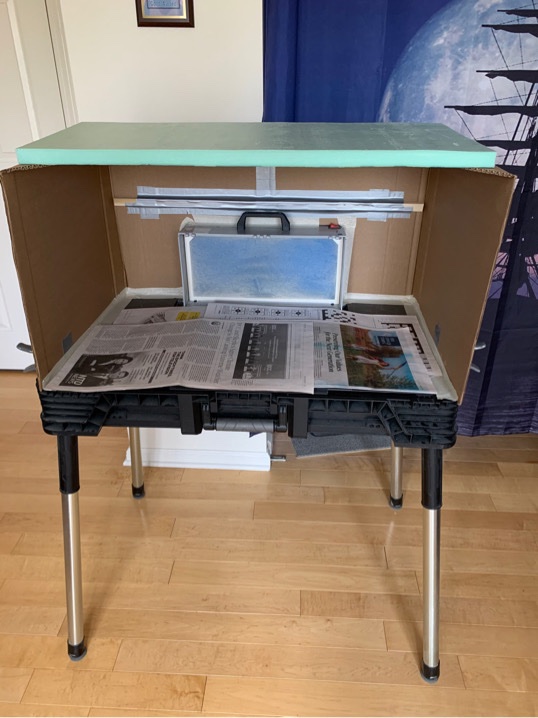
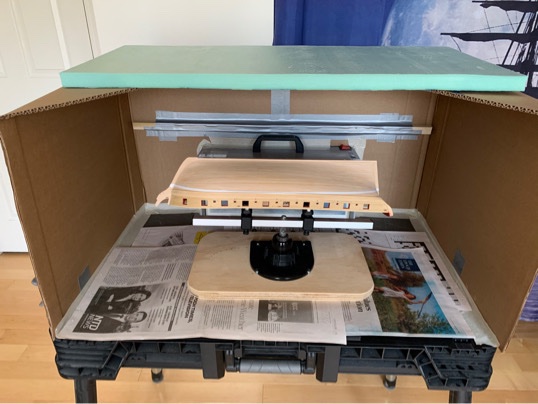
Finally created my make-shift fume hood! Not a modeling pic but was fun to make. 🤣 My wife made some draught snakes to seal up the window gaps for when I actually get it set up for external exhaust. 😊More pics to follow. Moving on...👍🏽
-
Beautiful detail, Dave! Crisp work. Hope I can come close once I get to my own fittings and deck furniture!!!
- 389 replies
-
- 1
-
-
- bluenose
- model shipways
- (and 1 more)
-
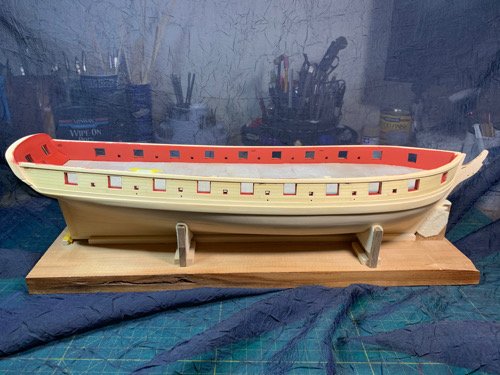
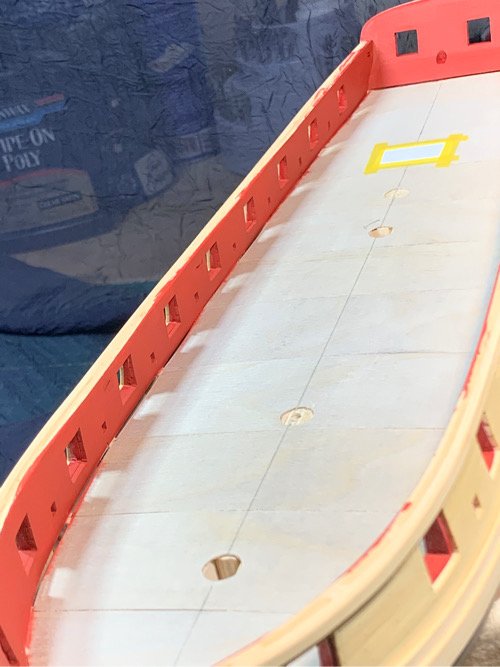
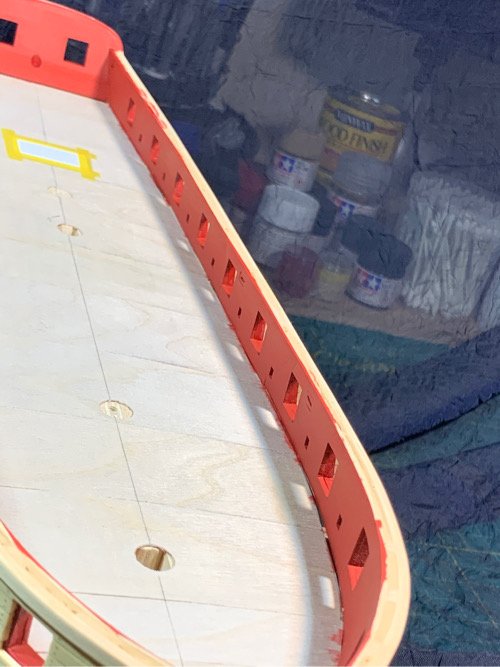
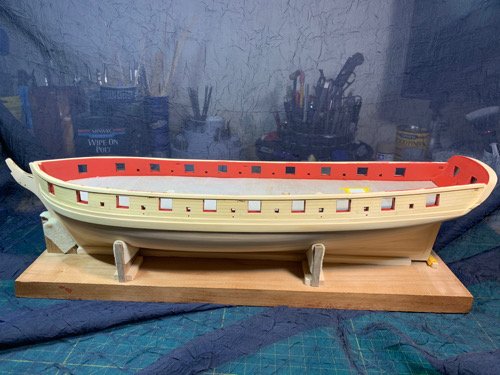
Been working trying to setup a safe painting hood...been fun. The windows don't open vertically, they open horizontally, so trying to put in an exhaust outlet is a bit of a bugbear. Think I have a workaround though. In the interim, I've decided to try to get my airbrushes working...which will take time. I'm going to try and be a bit more careful on the trim work here...as I simply don't trust myself with black paint. Took a break and cut the remaining deck planks, false keel, and waterways sections (1/16" square strips - need to file them still) from boxwood. I still need to make my margin planks as well, but I have a nice paper template to aid me in my endeavors on that arena..might attack them this week. The laser cut basswood margin planks (bow sections) that came with the kit don't fit cleanly and even if they did I couldn't use them as they would not match the deck planking. I am thinking to coat the underside (up to the water line) with a few coats of wipe on poly to seal the wood and give good purchase for the adhesive copper plates. After some fine sanding, the underside should be ready for the coppering - and I'd prefer do that than paint anything more than I absolutely have to!!!! I'll try this off the ship with some test basswood first - but have a pretty good feeling this will work ok. So that will be next on the agenda while I experiment with the painting hood and some airbrush techniques. Once the poly is on, I'll be ready to start painting the exterior areas black - including the cap rails which I will install last. I'll need to do some wood filling/sanding and touch up painting to clean up the caps after the install. Then the deck.... I've decided that I will put my deck in before the coppering. I'm not certain it matters - but I can take breaks during the deck to bang out (literally) my plates over the holiday break and will hopefully be ready to start coppering shortly after I've completed tree nailing the deck....which at the rate I'm going should be sometime in 2022... That's the plan anyway!
-
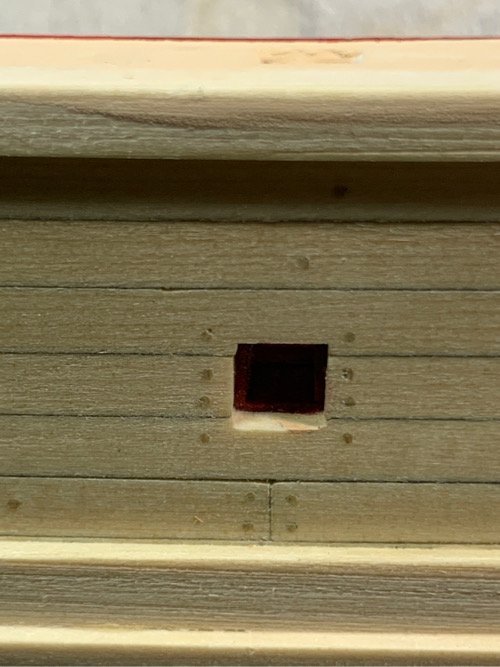
No real reason other than I wanted to challenge myself a bit. It's not fully historically accurate as I did double on the butt joints only - and did single every where else! It's a bit more work...but I liked the effect. 😃
- 436 replies
-
- 2
-
-

-
- Syren
- Model Shipways
- (and 1 more)
-
I actually liked doing the nails. Once you have all the holes drilled, it’s sort of a mindless repetitive task that’s oddly relaxing. I recently discovered audio books and I just camped in my shipyard and listened to books. Hours passed...felt like minutes. 🤣
-
Still looking pretty good. Remember that when you have the door on the outside and all the fittings and cannon set in on the interior, the minor asymmetry probably won’t be that noticeable. You are moving right along!!! You’ll pass me soon!
-
That looks familiar! 😃 It gets quicker. I ended up pressing like 7 or 8 blocks then cutting off the ends for the nails. It went quick. I also found tapping them dislodged many of the nails and they just fell out. Make sure you 'flatten' the end of the push pin so you don't fray one end of the nail. You can just sand down the point. For glue I diluted white Elmer's PVA glue with water (1 glue : 2 water)...then I just gripped the nail with a flat tweezers, dipped in the end into the glue, and slid it into the hole...used cuticle trimmers to get a nice flush cut when I went to trim the nails off. Looking good! Works well with basswood too. But I can't take credit...this was another modeler's idea...I just used it. I'm sure your results will be fantastic!
- 436 replies
-
- 2
-
-
- Syren
- Model Shipways
- (and 1 more)
-
Good question @Justin P.! If you look at my build log post #131 I describe what I did to make a fine scraper. The Dodeco carbon discs are perfect for cutting metal. You can trim up a thousand scrapers of various patterns and sizes and it take a few seconds. You can use steel scraper edges or a flat razor blade to make one. Hope that helps!
-
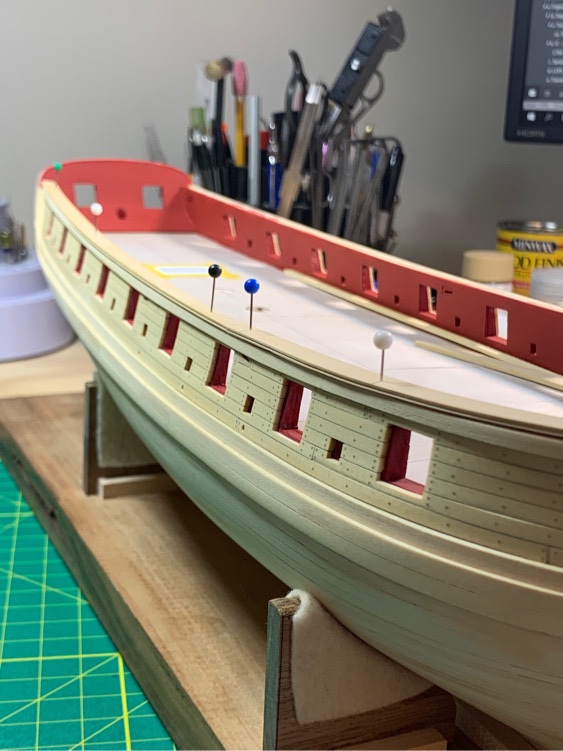
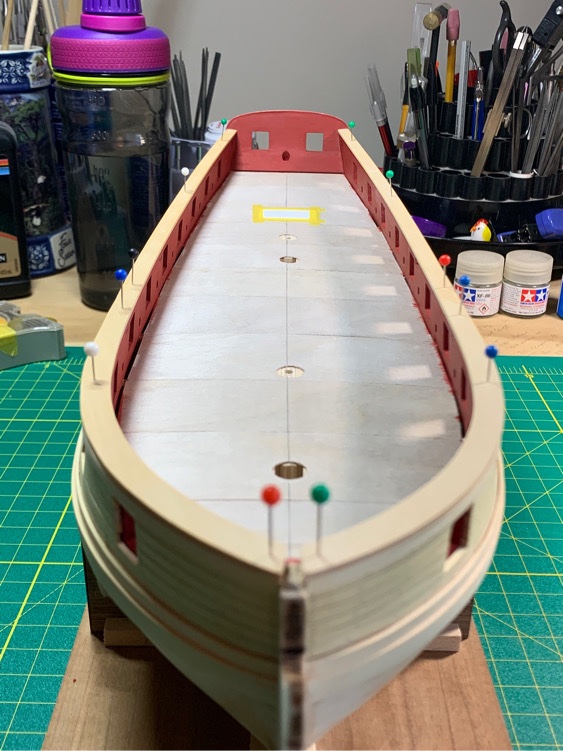
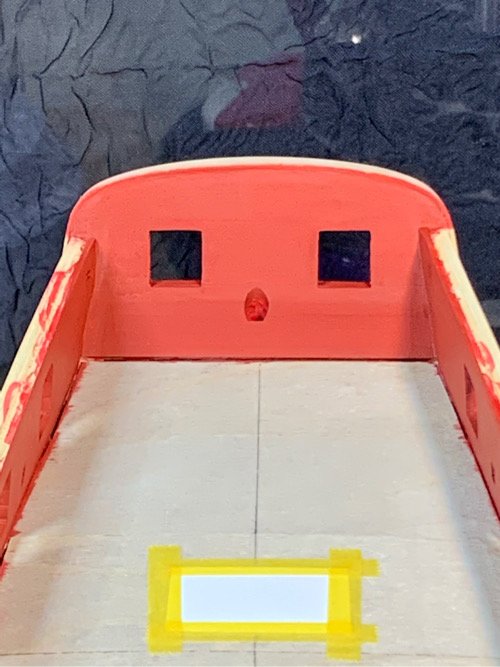
Many thanks ALL for the kind likes and comments guys! It truly helps keep the wind in my sails!!! Just getting ready for exterior painting (fingers crossed 🤞) and wanted to dry fit the cap rails one more time. Glad I did as the transom paint added a slight amount of width which required the cap rail at the point to be slightly adjusted. Rather do it now than after I’ve painted them... The caps were made in two sections per side. I used boxwood to get me the cleanest scarf joint...and more importantly, I included the molding simulation so I wouldn’t need to add that small strip to the outside. Not sure if that’s the best way, but it makes painting and install easier...and that can all be done off the ship. Going to take my dear sweet time with the black paint. 😎 Moving on...
-
Looking good, Jamie!
-
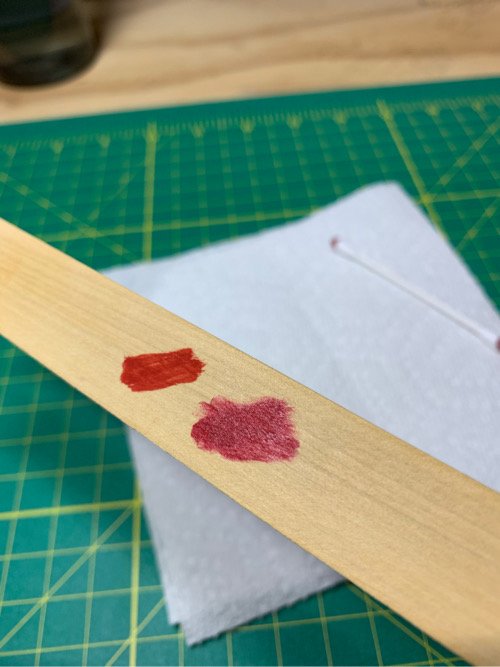
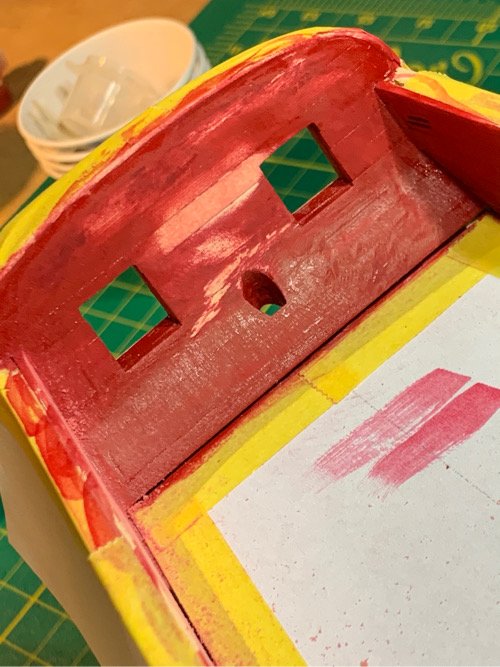
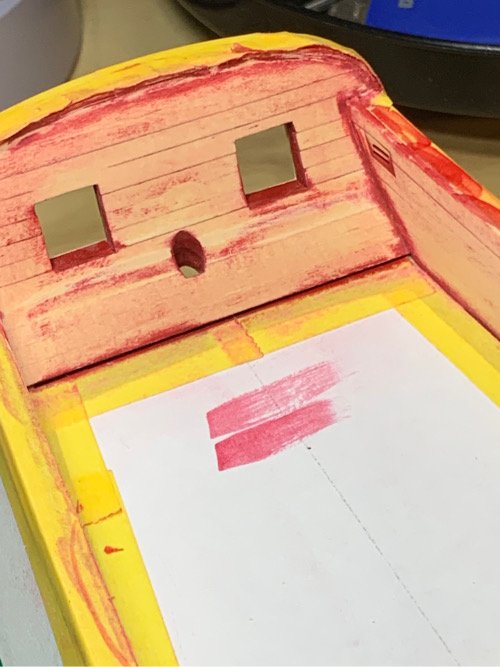
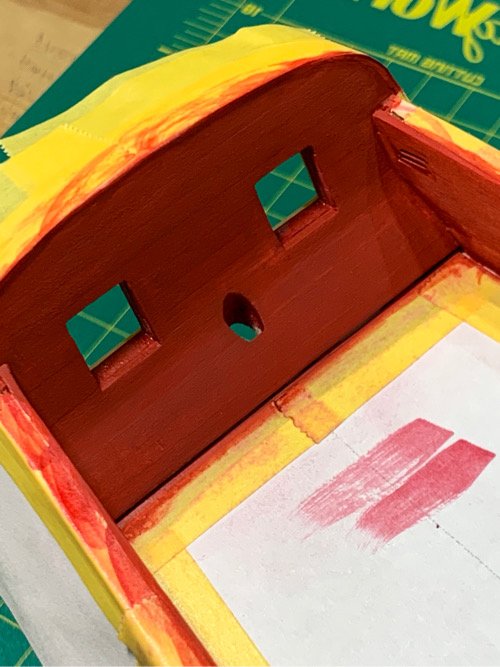
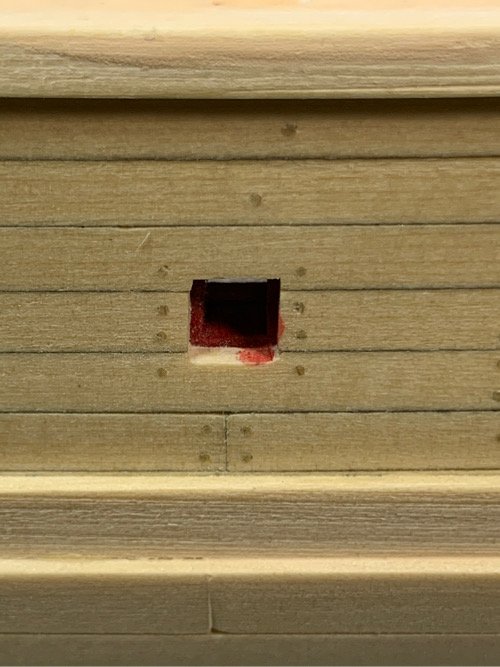
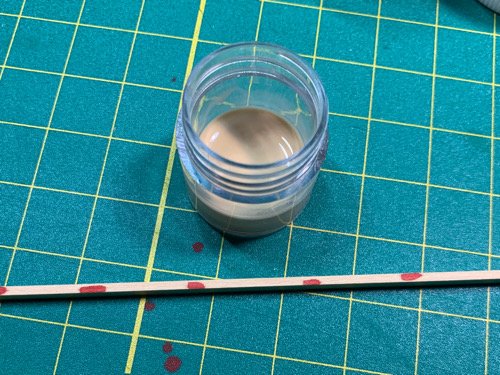
So....painting. Yeeeahhhh.... NOT my favorite thing. As I said earlier, I was all set, prepped and ready to roll on my bulkheads. Got my paint thinned and my brushes ready...and had taped off the hull to minimize major oopsie's when I made a major oopsie! I started with the transom and was putting on coats on both port and starboard bulkheads...(NOTE to future Patrick....NEVER start on the transom...start on a bulkhead. It's easier to sand!!!)...when I realized there was a slight 'sheen'. After trying to 'sand out' the sheen and making it worse, I realized after talking to a modeling buddy that I had used the wrong fricking paint (see post above - I don't want to relive it.). I slapped some 'glossy' and 'flat' red paint on some wood to make sure I wasn't going crazy...and I wasn't. The glossy paint I had used is on the lower right of the two swatches in the pic below. My transom at this point looked like an absolute train wreck...and the model was put away for the night while the Admiral fed me medicinal scotch. I spent the next 2 to 3 days gently sanding out the crappy glossy paint (Tamiya really needs to more clearly label the gloss vs flat paint on their paint pots). After I was satisfied I had done all I could to remove the old gloss paint layers, I prepared the same mix of FLAT red paint with desert yellow/german grey and thinned down 1:1 with Tamiya thinner. I must have put on about 10 coats to blend in the blotchy after affects from the first try...but the results were passable. So...at this point I enjoyed a marathon painting session of carefully laying down coat after coat of the bulkhead flat red paint mixture until I was satisfied I couldn't possibly do any better... And of course....after tearing off my paper and tape shielding, I noticed I made a couple small oopsie's when painting the sweep ports. It looked like smeared lipstick!!! And I can't figure out how the hell I did that!! But at this point, I simply wasn't surprised. But my choices to correct the smears were few... 1) sand out the blemish (impossible without making it worse), 2) try to soak out the blemish with thinner (same thing...I could see catastrophe written all over that idea), or 3) put some makeup on the model! So I went with 3) and mixed up a small pot of 'makeup' paint to match the hue of the cedar (3 parts Tamiya flat white to 1 part Tamiya desert yellow - no thinner since I wanted it relatively thick). I tried my cedar colored makeup paint on a cedar plank which I had dabbed with the bulkhead red paint to see how it looked after I covered it (bottom pic)... I'm not an artist....but the result wasn't too bad. So I used a detail brush and tried it on the blemished sweep port...Voila'...no more smeared lipstick. At the scale of the sweep ports, you would really need to know what you're looking for to find it... Ok...I'm done painting the interior bulkheads, and am hesitant to move on to painting the exterior because it's BLACK. I mean, that is the most unforgiving color!! 😳 So, I'll bask in the glory of one thing accomplished before I move on the my next painting trial.... Moving on....to a beer!
-
Painting continues. Sanding and repainting was a good idea. I’m slowly pulling away from the original ooopsie. Pics will come later, but the results so far are promising. 👍🏽
-
Thanks, Kurt. Been experimenting with some plank swatches...not very skilled at painting...so wanted to make sure. I went ahead and sanded anyway since I'd added quite a few coats. But I've got the correct paint now, and confirmed the match of the color.