HOLIDAY DONATION DRIVE - SUPPORT MSW - DO YOUR PART TO KEEP THIS GREAT FORUM GOING! (89 donations so far out of 49,000 members - C'mon guys!)
×


Overworked724
-
Posts
1,260 -
Joined
-
Last visited
Content Type
Profiles
Forums
Gallery
Events
Everything posted by Overworked724
-
 Thanks, Justin! Actually, I feel like I have a slow motion build! But I am really enjoying the Syren so far!
 -
Hehe. Just kidding! 😂 Those microblades worked well for me. They take about 200 passes but it gives you a clean cut!
- 436 replies
-
- 1
-

-
- Syren
- Model Shipways
- (and 1 more)
-
Oh wow...no. Do not use a powered Jig Saw!!! 😊 There are fine toothed saw blades which you can get from MicroMark and other sites which you can clamp into an exacto blade handle. Removing these sections is actually very easy if you have the smaller blades. Then finish off with fine sanding. At least that’s how I approached it. 👍🏽 https://www.micromark.com/Saw-Blade-010x40-TPI-Package-of-4
-
@Justin P. Outstanding! As @NovaStorm Robin said...one tricky piece done! If you have any tips or tricks you used then please post them. I’d be interested as well. We are always learning from each other. Your build looks beautiful thus far!
-
Nice job, Will! Those itty bitty parts can be really difficult. You really did a nice job with the detailed carving.
-
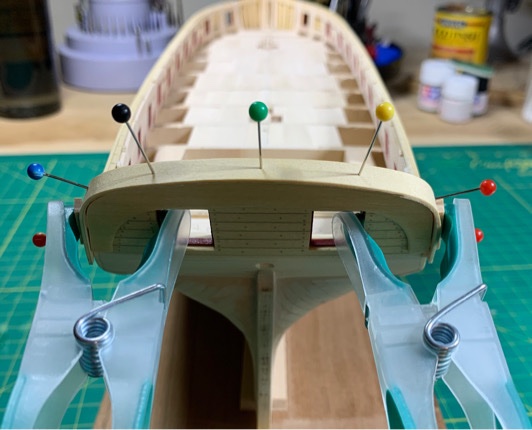
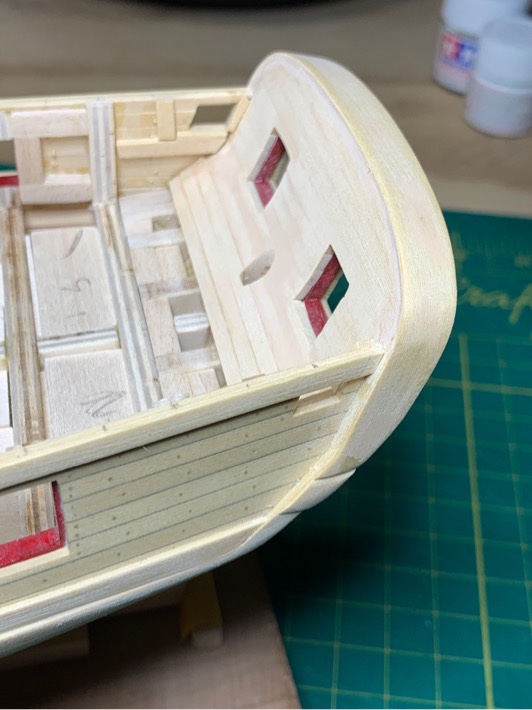
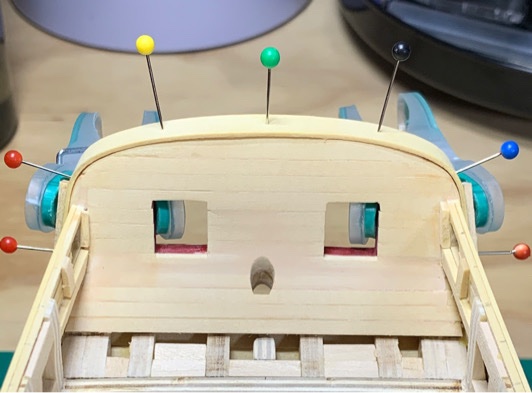
@Matt D Thank you! I was very happy with the end result. Four key things I learned on the transom cap rail adventure. 1. Using a ‘bending block’ to shape the cap made the job much less stressful. After I got the shape (those sharp bends are troublesome), I let it sit on my ‘transom shaping block’ for a day. Then rewet the entire strip in hot water before putting on the transom for final shaping...This step was cake as it molded to the transom shape easily, then let it dry there for a couple days. 2. 1/16” strip was just too thick. I think thinning down is almost a must (3/64” was a pretty good fit...) 3. Pins...gotta use em. Trying to align and glue the cap rail on your transom (especially a single piece cap) is simply impossible without a guide which the pins provide! A touch of filler in the tiny holes is all that’s needed after setting it in place. Pins for the win. 4. Basswood for the transom cap rail is really difficult. I tried 4x using basswood strips and each one snapped. I then switched to cedar and made 4x caps of varying thicknesses and not one snapped. Take that at face value as it’s only my experience. 😆 Notice that I’ve not painted anything yet. I figure I would attack it all at once after the inner bulkheads are finished. I’ll probably make but not install my cap rails until after I’ve put in the deck...jury is out on that decision. Moving on to inner bulkheads.....😎
-
I really had a tough time getting 1/16” cap rail to fit snugly around the transom. Finally decided to trim it a bit...think my cap rail was about 3/64” thick but it still looked like a good dimension for the rail. Again, using the cedar makes bending those sharper corners a bit easier. Not certain if I’ll use the same thickness for the bulkhead cap rails...we shall see. I did a single piece. Chuck’s suggestion to do the transom cap rail in sections (2 parts) seemed more difficult to me somehow as I have no background on how that is done. So I used pins in predrilled holes to center the single rail around the transom and had no major issues. I touched up the uneven edges after gluing in...then a touch of wood filler around the edges where there were some gaps, and then sanding again. And....moving on!! 🇺🇸👍🏽
-
Ok...interesting use of duct tape on the sanding sticks! 👍🏽 That’s a keeper idea for future!
-
Nice job so far on the ship’s boat! 👍🏽Really clean!
-
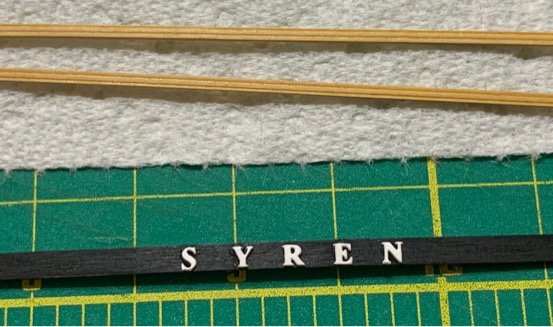
The brass lettering came with the kit. Got the ultra thin birch plywood from Hobby Lobby. The boxwood trim I made myself as I am trying to get away from basswood. 😆
-
Beginner Suggested Ship Model and Brand
Overworked724 replied to ChilliBeanz's topic in New member Introductions
My first was the Sultana. The detailed practicum was invaluable...but this forum was priceless. See my build log in the links below. But remember to have fun!!! Welcome! -
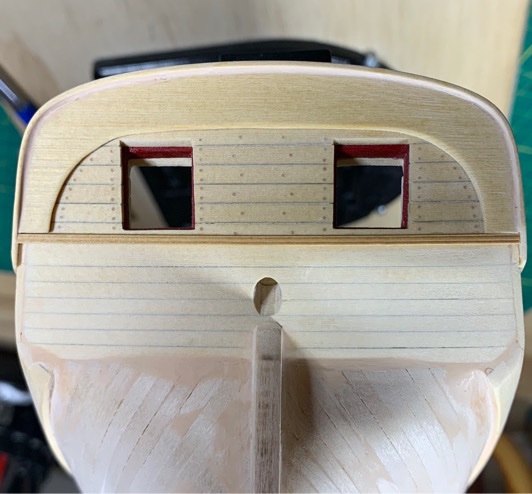
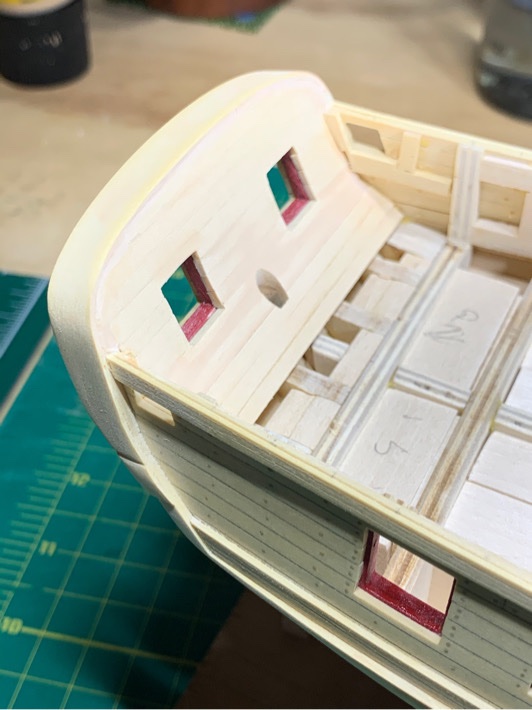
Working on transom cap rail. Before I start painting, wanted to figure out how I’ll mount the name plate. Decided for a simple option. Cut some really thin 0.4mm birch plywood into a strip slightly wider then the brass letter height. Paint it black. Then mounted the letters on the plywood strip. I’ll mount the top trim piece, then the name plate section, followed by the final trim piece. Although the center section is bowed outward somewhat in the pic below, the letters will not sit proud beyond the width of the boxwood trim pieces. It should look something like below... Nice thing here...once the transom is painted, mounting the trim pieces and wood strip with the name will be infinitely easier than trying to stick those tiny letters directly on the transom. 👍🏽

-
Not gone....just distracted by my Syren!
-
Uh Oh....I see a slight scratch on the 3rd board starboard of the main mast hole! I think you might need redo the entire deck! (kidding) Remind me again - is your deck made of pear or boxwood? And did you prestain it? It looks fantastic!
-
Exactly! I still go back and forth between my building board and keel clamp...its good to have options.
-
Love my keel clamp. I actually attached it to a rectangular base of 3/4" plywood. It's as solid as a rock...and I can move the entire assembly with ship attached with confidence rather than leave it clamped on the edge of the desk. Great investment.
- 436 replies
-
- 1
-
-
- Syren
- Model Shipways
- (and 1 more)
-
I truly hope they give you some great pics of it standing in it's final resting place!
- 1,135 replies
-
- 2
-
-
- model shipways
- syren
- (and 2 more)
-
Howdy, Bill. Actually, my ports aren’t perfect squares 😣. I installed my lintels in the manner of a plank, following the sweep of the ship bow to stern. When I installed the uprights to form the ports, it obviously yielded a slight trapezoid effects in the bow and stern. However, it’s a small imperfection I’ll learn from!👍🏽 See my blog. Like others, I focused on simply taking out the meat of the lintels/sills and installing the sections to form the ports. After that, I faired the exterior and interior evenly (as best I could). For the exterior, my primary weapon for fairing the bulkheads evenly was a paint stirrer with 180grit sand paper glued to it....it worked quickly and was long enough to give even coverage. I think you make have over faired (rounded) your stanchions. You might be able to rebuild them by using additional uprights where you can right next to them to create kind of a support stanchion....this would give you a surface which your planks would sit on...or you could add some shims to the overfaired parts and sand down. It looks like you may have used a dremel or a rounded sanding stick or dowel. I’d try using a flat surface to keep the run of you exterior flat and even. Hope that helps.
-
Wow! She turned out nice. Hey...stain away! I'm sure it was worth it to see a nice planking job completed and clean. Nice work!
-
Dave, I’ve got nothing on you. Your work shows both patience and skill. Not sure I could repeat what you are doing to the same effect. Bloody nice work!
-
I feel your pain! 😳 I’m still coughing up sawdust. 😜
-
Really clean work, Dave. Your brass and metal work really sparkle!
-
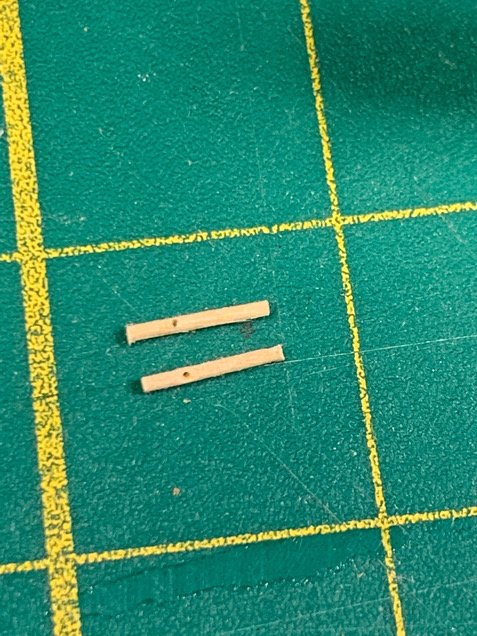
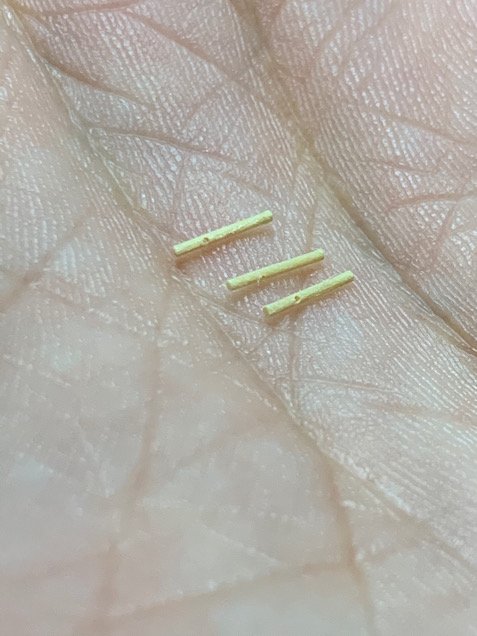
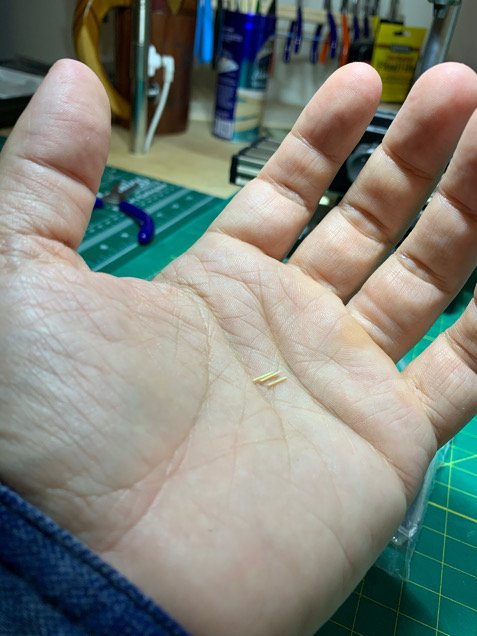
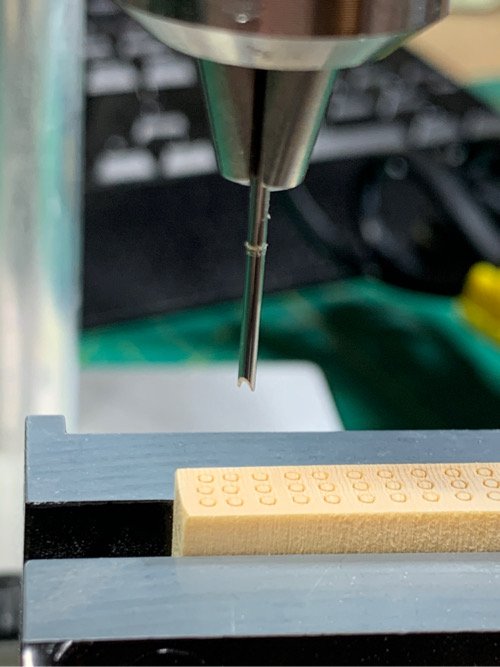
Well...I couldn't help myself. Had to continue on with my train of thought on the elevations screws and elevation handle of the carronades to see if my idea worked and it did. Took an 18G dispensing needle and made a 'tree nail' corer like I did before. Put it in my drill press (with the drill OFF) and pressed out some larger gauge wooden tree nails. The cedar wood is pretty nice for this...the nails come out very clean! After cutting the bottom off the wooden nails stack and poking them out, I found the hole for the elevation screw on the 3D printed cannon was slightly small. So I opened them up a bit wider with a #64 drill bit and they slide in perfectly with a small bit of 'wiggle'. Used my little 90 degree cross drill jig to make a hole of the side of the wooden dowel I'll use for the elevation screw. In this case, the wooden dowel size was a #64 drill bit, and the cross hole which will hold the wire simulating the elevation handle is a #77 bit. Drill my hole in the dowel... And then slid in a little chunk of 0.4mm black wire as a handle...seized it in with a tiny spot of CA and added to each end of the handle. I think it's worth noting that the 3D printed carronade with sled did not have any detail related to an elevation handle on the elevation screw. So...I'm going to call this a win...and move on!
-
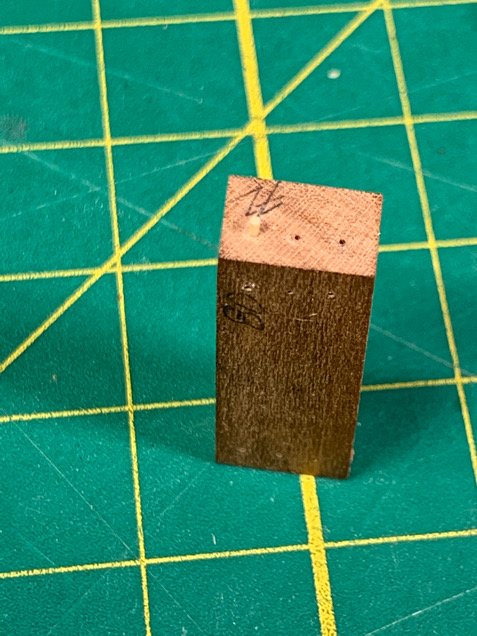
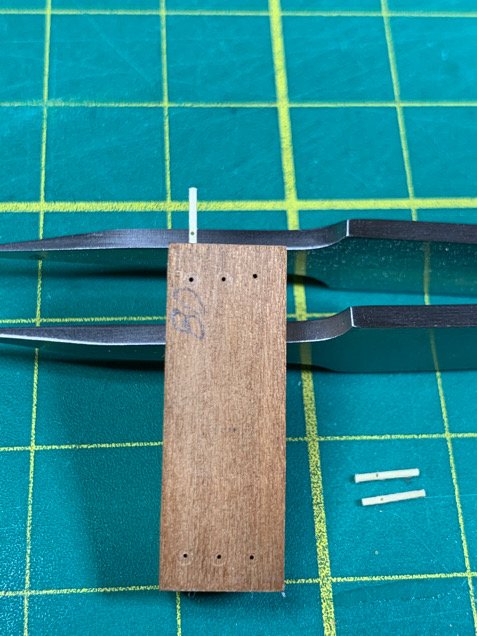
And now for something fun but ridiculous. I finished my interior bulkhead sanding (at least as best I can possibly do...) but took a slight detour back to the carronades. I was wrestling with how I would create the elevation screw handle on the carronade elevation screws. This would be a piece of wire inserted into the elevation screw (wooden dowel/toothpick/whatever). The probelm - these things are fricking TINY! I'm not handy, nor a carpenter, nor a miniature modeler...so this was a bit outside my realm. It occurred to me I can make the reproducible cedar trunnels/nails of exact width...so why not figure a simple way to drill a hole in the tiny dowel. My solution. Use a small scrap piece of cherry wood (hard wood) as a drilling guide. Make some #80 holes at 90 degree angles to each other so the holes intersect. The smaller holes can be widened easier with larger drill bits as needed. I made a #72 and #80 drill bit size cross angle...and inserted my larger cedar nails (made to fit a #75 drill bit hole). Inserted the cedar trunnel into the guide hole (marked #72) - and then drilled by hand into the guide hole marked '80' with my rotary tool fit with a #80 drill bit. And it worked like a charm...the trunnels don't move, and can be easily drilled at 90 degrees for easy insertion of the wire 'handle'. And just for scale...these things are ridiculous tiny!! Just a fun aside! It's probably been done by others on the forums, but it was a nice problem to solve on my own and see it work!