-
Posts
1,263 -
Joined
-
Last visited
Content Type
Profiles
Forums
Gallery
Events
Everything posted by Overworked724
-
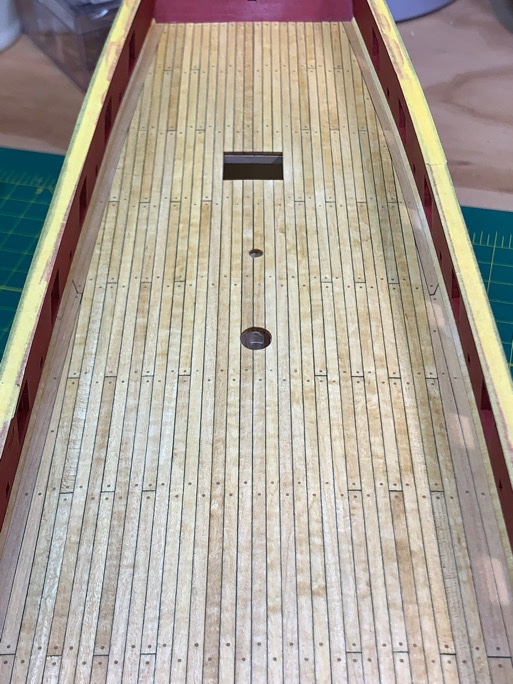
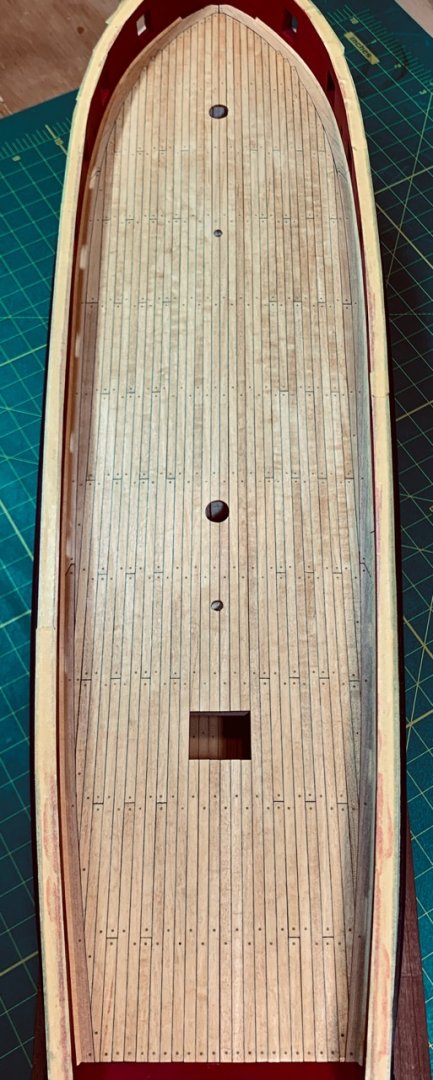
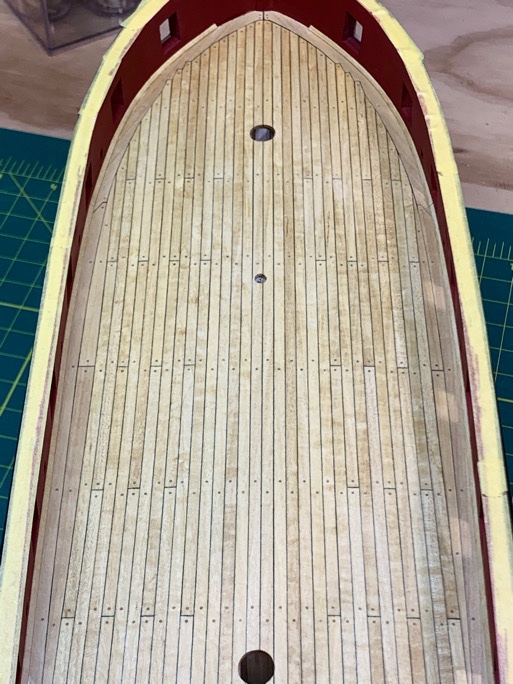
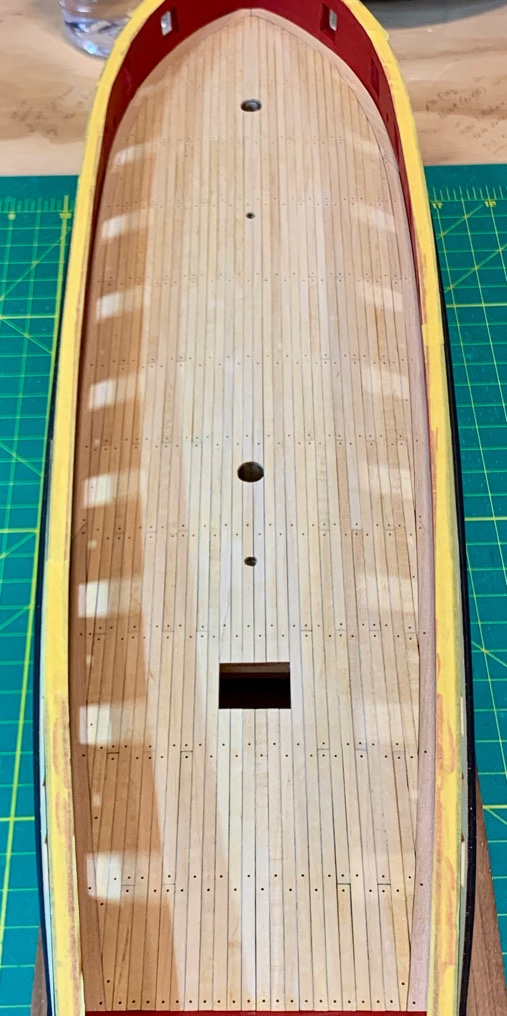
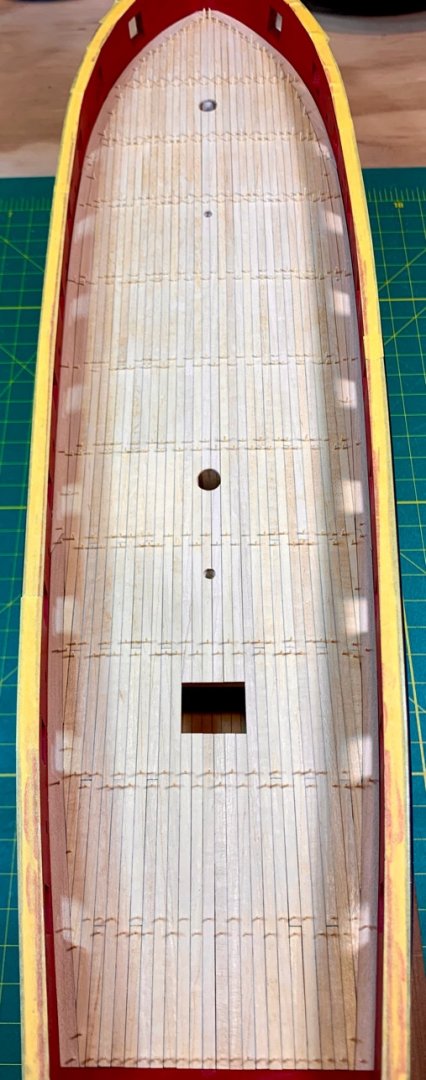
I couldn’t help myself. Decided to see the afterglow of all that work after a coat of natural stain. You can see I stayed with one trunnel at the butt joints and on the adjacent boards. Frankly, I could have easily done 2 per board but think it would simply have been overkill. I’m not unhappy with my efforts! Not bad for the slowest Syren build in town. Moving on....
-
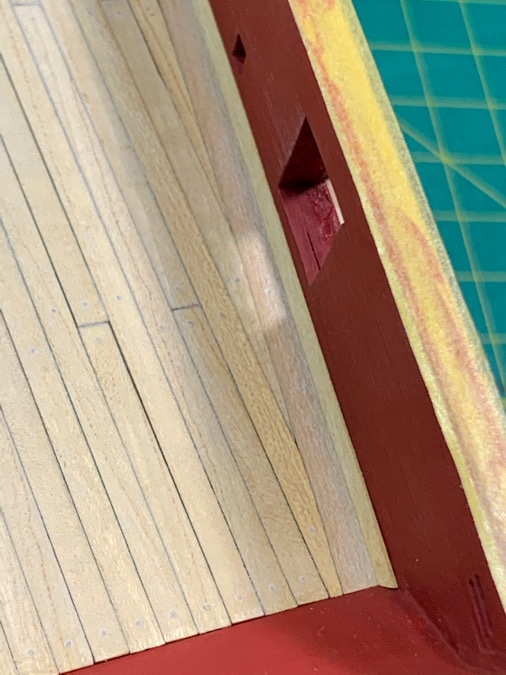
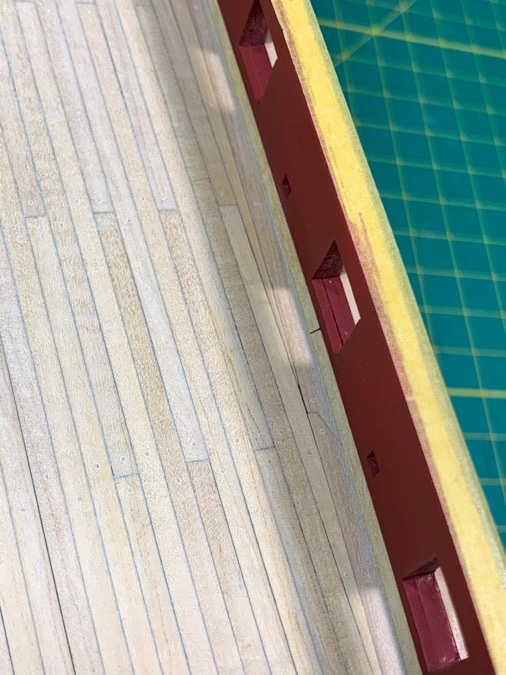
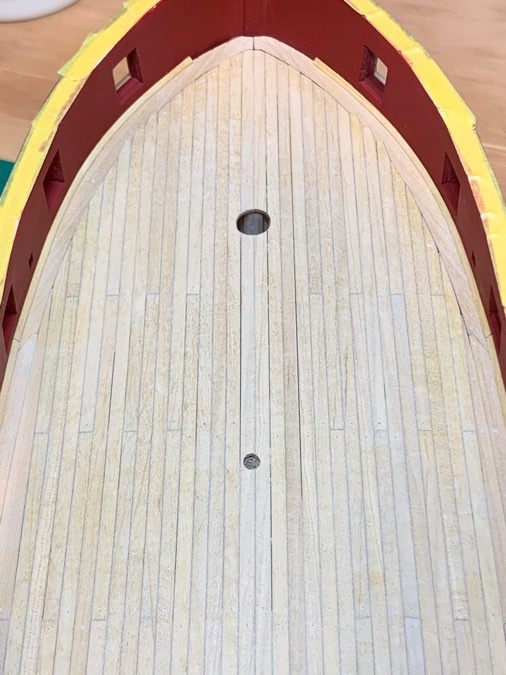
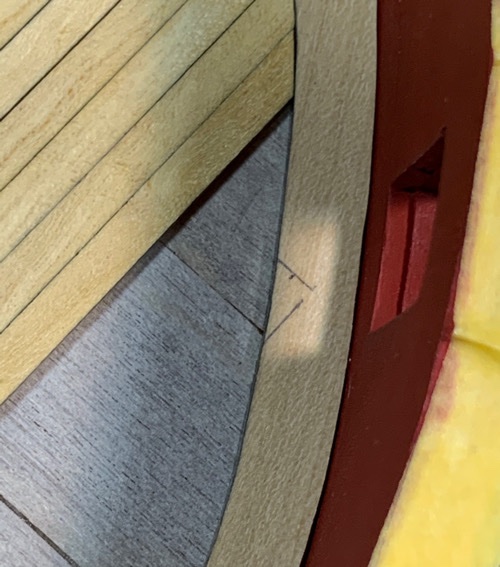
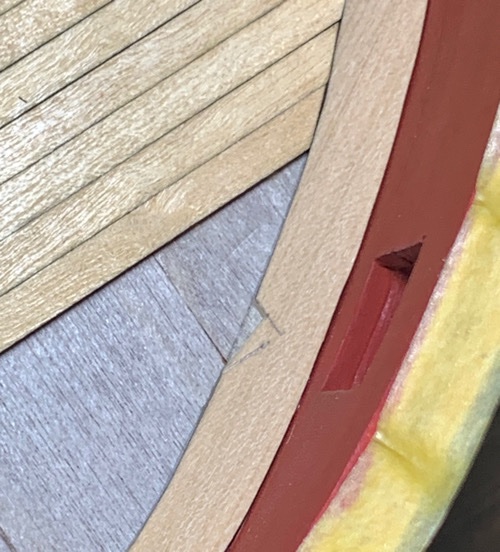
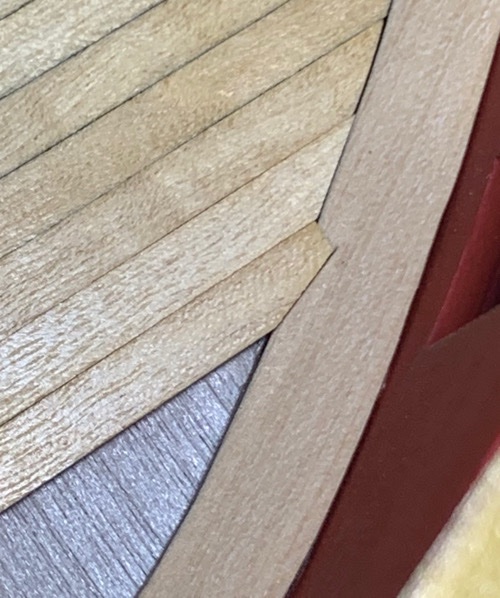
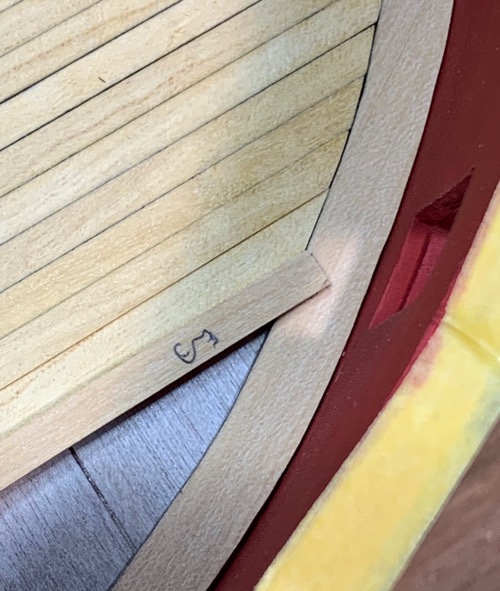
I broke up the waterways into three parts. Stern, midships and bow. I put the butt joints where the sections meet directly beneath the gun ports so they’ll be hidden by the carronade sled swivel brackets. The bow section of the waterways needed some shaping and a slight twist to get it to fit comfortably. I didn’t go all the way to the stem since I plan to put in a wooden hawshole guide (he said to himself hopefully). One bonus is that my measurements were good this time...the carronade swivel brackets all fit (although some by only a hair) as they should and the waterways do not impinge on their alignment level with the gunport sills! 👍🏽 Will save my staining the deck for tomorrow as a nice ‘attaboy’ gift. Pics below... Moving on...
-
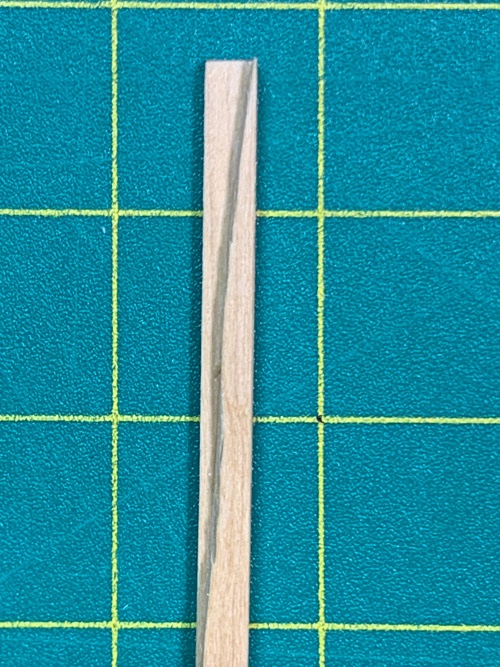
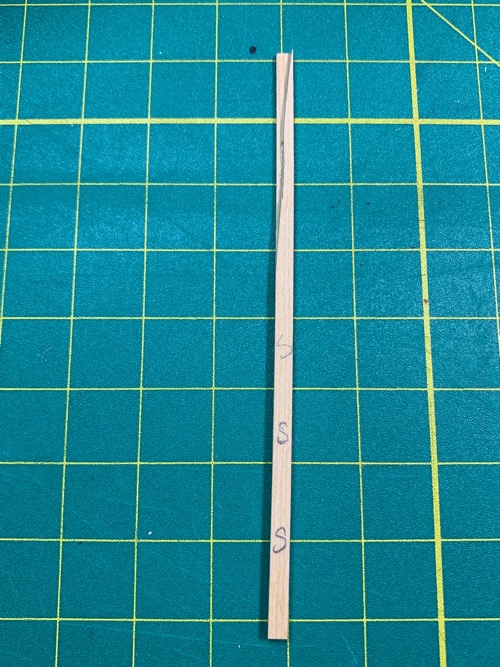
@CPDDET @Keithbrad80 @WalrusGuy Thanks, guys! Much appreciated! It’s not ‘perfect’ and as you can see the hypotenuse (facing edge) is not perfectly edge to edge as there is still some bevel left after sanding...but it’s the closest I could come. The jig only took like 5 min to make. 😎 And I can say it works like a charm...about 5 min to make one 24” triangular strip. 👍🏽
-
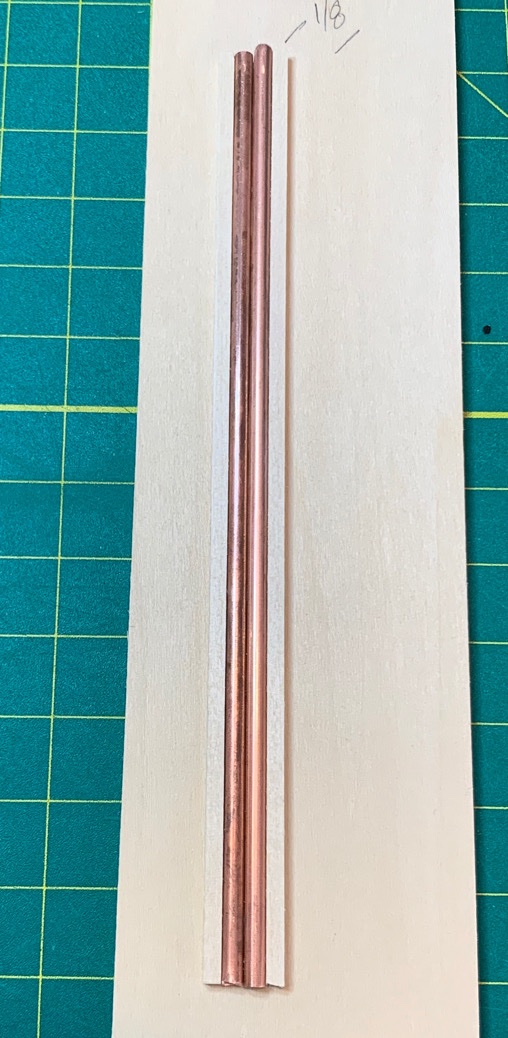
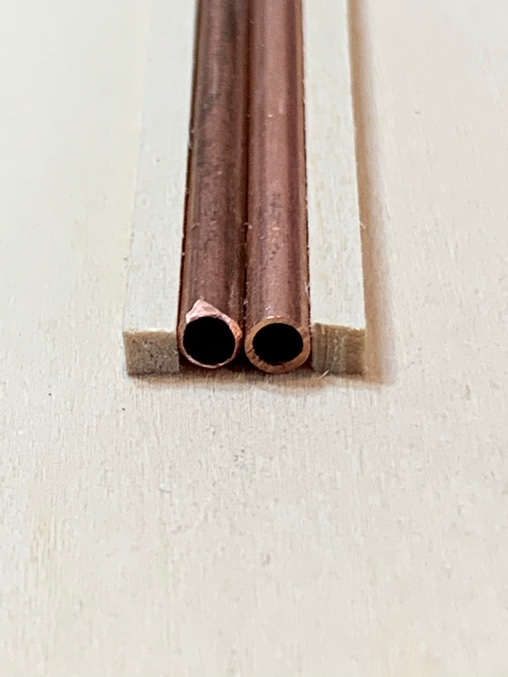
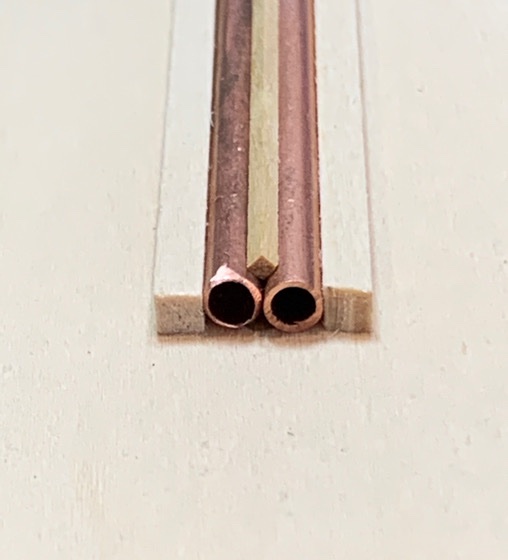
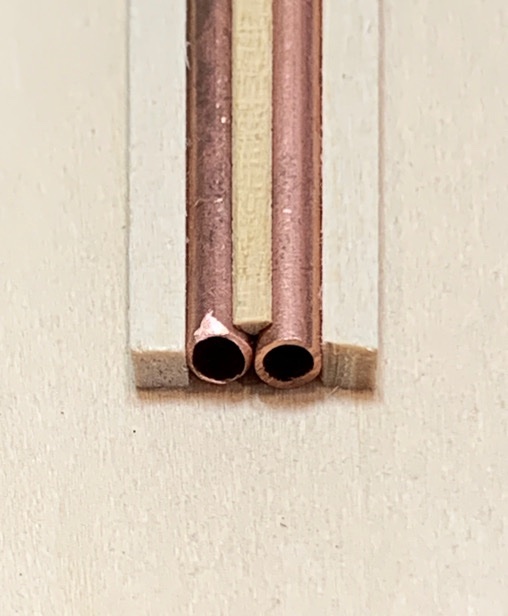
Waterways...was a bugbear for me on the Sultana since I couldn’t figure out how to make them. Well, I’ve seen a couple folks show their method (kind of)...and frankly, I didn’t want to over think this on the Syren this time. So here is my method...and it works for me, and very very simple. The waterway strips are 1/16” square. I cut about 6 of them (24” long) from boxwood so I would have spares...and just for giggles. I made a simple jig using some 1/8” copper rods (6” long sections) ... but 1/8” wooden dowels would work just fine, too. Then I used some CA gel to attach them to a support base (1/8” basswood scrap about 8” x 2”). Then I bordered both sides of the copper rods with 1/8” square basswood dowels...since sanding will stress the glue joint and I wasn’t sure how much I could trust a metal-wood CA joint. Here is the jig... Here is the jig with a square dowel sitting in the seam between the two rods... And then I simply used a 180gr emery board to shave off the exposed 1/2 of the square dowel. The dowel remains tightly locked I place and the sanding is easy. You can see by eye where you need to sand more...but you can’t over sand (provided your dowel is close to square). Ok...that’s how I’m making my waterways sections...which is like 90% of the challenge...trying to make a good triangular section can be a real head scratcher. Moving on...
-
I think you'll find that having your own 'center for your build' will be invaluable. I find myself going back through my build looking at the input of those modelers who 'follow' my build and offer advice when I have questions. It's like a treasure trove. Also, it has the advantage of keeping all the feedback in one place which you 'own', rather than have the feedback spread through a number of build logs. Really looking forward to seeing your build log. Lots of folks here building the same ship really gives you some wonderful team feedback!!
- 950 replies
-
- syren
- model shipways
-
(and 1 more)
Tagged with:
-
My extremely slow motion build continues! I've learned a lot about wood, using a table saw, margin planks, nibbing/joggling, and beer - since I started this portion of the build on New Year's Day. Wood: I had originally cut Castello boxwood planks for the deck (and had made the faux deck from this) as it was clean and uniform. However, a buddy had offered to sell me some old boxwood he had in stock. He had some aged English boxwood which had been sitting in his basement for 16 years and I could not help but mill it and use it for the deck. It has some figuring, but the warm yellowish tinge is beautiful. The problem was that I failed to consider the fact I had no way to mill pieces wider than 1/8" (which I found I needed when planking near the bulkheads). So I ended up having to use the same Castello boxwood I used for the margin planks for these last couple of planks near the bulkhead...no biggy, but it does stick out to my eye. I hope when I stain/tung oil that the different woods don't contrast too harshly. Margin plank: The symmetry and alignment of the margin plank in relation to the center line is critical to ensuring the joggling pattern is symmetrical (aligned bow to stern) as you joggle/nib port and starboard. Mine was not...whether this is due to asymmetry in the bulkheads between each side, or whether the margin was slightly thicker on one side vs. the other...the fact was I could see after I completed my third joggle that the two sides were started to drift...had I continued, the joggling would not have been even (aligned) between the two sides and it would have driven me crazy. The pic above shows the disparity between the two sides - the last plank at the bulkheads was 4mm thick on starboard, and 5.5m on the port side...so you can imagine the joggle 'creep' as the joggling progressed down the margin plank. My solution was a (nautically inaccurate) compromise...I simply stopped after 3 joggles on both sides and shaped the remaining planks to fit against the margin plank - which is not easy. It's funny - I started this part of the build terrified of cutting the margin and messing up - and the procedure I described in the earlier post really gave me confidence...good procedures instill a sure hand - but in the end, I found my joggling curtailed by my lack of symmetry of my margin...live and learn. The same reasons I stopped joggling the bow were why I avoided joggling the stern portion of the margin. Pic below... I still have sanding and trunneling to do before I can put on a layer of tung oil...and that will take some time. Here are the remaining pics of the deck, such as it is - unfinished, but not a bad result. So now I have some considerations. The waterway is easy - but I think I might want to drill in the haws holes for the anchor cables before I do that...but I have not seen any real good descriptions on how those are done - even in the practicum. I've looked on other ship blogs but no one really goes in detail. If I can't find a reference - I'm problem solving again. Waterways themselves are easy - and I already have the boxwood strips ready for install - but I want to make sure I don't make things hard on myself later.... While I'm doing work on the trunnels/sanding the deck, I will start banging out my copper plates and thinking about how to attack my pintles and gudgeons. I might also start finishing up the basic work on the carronade sleds to get them ready. So...that's my update! Moving on.....
-
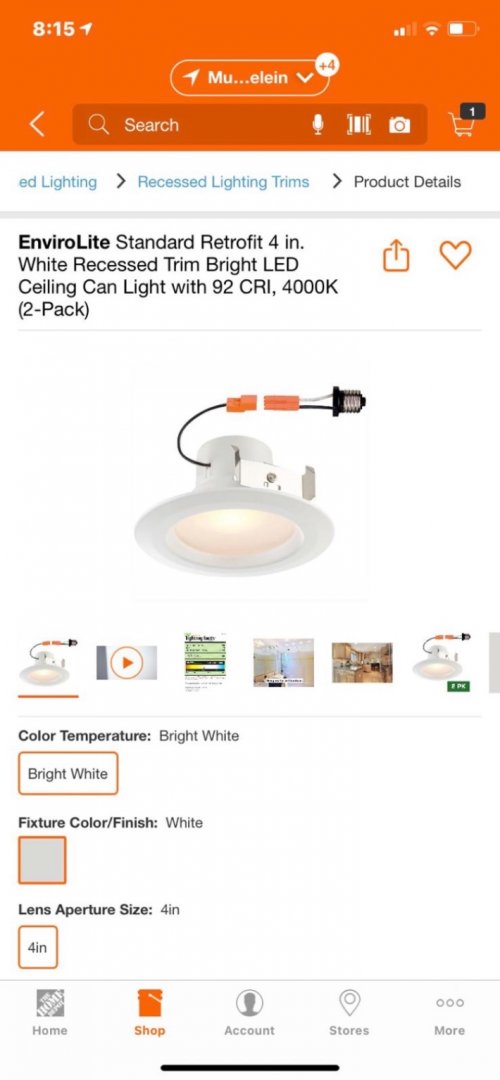
Well...my deck planking will be done this weekend. Thank GOD!!! Work and family stuff really got in the way these past couple months...and work is stressing me out so bad I’m taking muscle relaxants prescribed by my doc! 😴. But these days, every day is something new, but yesterday my shipyard had 4 new LED spots installed! Oooooh...yeeeeah!!! Light!!! 😎 Pics of my imperfect yet completed deck planking to come.
-
Yep....makes me want to quit work and start working on my model again! 😃 Marvelous job on the longboat!
- 157 replies
-
- model shipways
- syren
-
(and 1 more)
Tagged with:
-
Thought I’d post the obvious thing. Nibbing and joggling is actually pretty fun if you have a good method. But the two sides are only as good as the symmetrical alignment of your margin plank. Which is why I decided to stop after 3 joggles. I knew I couldn’t keep the port and starboard sides evenly aligned as I proceeded down the margin plank. Next time I do this I won’t be so nervous...but I will take additional care in laying down the margin. But...it’s not to say I didn’t learn something. I got a good reference from a shipmate...so here’s how I attacked the whole process. 1. Made a stencil using 2 planks. Trimmed down one edge to a needle point and glued them together. This allows to slide one edge as close as possible to the edge of the margin to be cut. Made one for port and one for starboard. 2. Make but don’t glue the two planks adjacent to the joggle to be cut. It will ensure when you cut your joggle you won’t end up bruising/cutting the adjacent plank. Slide the template up against the unglued plank until it meets the edge of the margin. The proud side of the template will slide over the margin Where it meets and will form a squared edge. Trace the top and side of the edge with a sharp pencil. 3. Remove the stencil and the unglued adjacent planks. Then mark the exact center of the top line. This is the 1/2 plank width. 4. Using a square Exacto chisel blade, slowly cut from the 1/2 plank mark to the bottom edge of the stencil mark. After the cut, simply use a fine eraser to remove the pencil lines. 5. Cut/sand the top end of the plank (nibbing) to fit the joggled cut. So...it’s a bit easier than I’d thought. But my margin plank kind of screwed me. If I were retired and could spend more time, I’d have gone back and repeated the margin..but as I want to build my ship (it’s my release) I’m not really looking for perfection. I can keep the lesson learned in a box in my head and can use this for my next build. Moving on...slowly.
-
Your build is looking fantastic! I find myself sometimes comparing my work to other builders whose work I could only dream of...it doesn’t stop me from loving this hobby or the modelers on this site! Everyone is so supportive and the feedback always positive and constructive. It’s the community of builders who will always help you progress...and put wind in your sails with a kind word! 👍🏽 I think you are doing great.
-
Those trim pieces turned out very nice, Red! Hope the scraper was easy to make.
- 436 replies
-
- Syren
- Model Shipways
-
(and 1 more)
Tagged with:
-
Still plodding along. Taking my time on the deck due to work conflicts but making steady progress. Thinking ahead to the haws holes and prepping the rudder pintles and gudgeons before I jump into coppering. Also thinking into how I want to make the carronade blocks which hold up the carronade. Those little laser cut pieces are not homogeneous...I think I can do better.
-
Totally agree with you on this one. My job has been pulling me in multiple directions lately, and the time commitment to 'get things done' on my Syren has been a bit of a challenge. Kind of hard to start-stop-start in spurts and sputters. I actually was looking at starting a side project as well to give my confidence a bit of a well needed boost! Take a break and enjoy your hobby!
-
😆 So happy that I could add some support, Dave! Not like you need it. Beautiful work.
- 389 replies
-
- bluenose
- model shipways
-
(and 1 more)
Tagged with:
-
Great tutorial and stellar work. But I’m not certain exactly what you mean at this point. Having a hard time visual what you were doing after you formed these closed served hoops.
- 950 replies
-
- syren
- model shipways
-
(and 1 more)
Tagged with:
About us
Modelshipworld - Advancing Ship Modeling through Research
SSL Secured
Your security is important for us so this Website is SSL-Secured
NRG Mailing Address
Nautical Research Guild
237 South Lincoln Street
Westmont IL, 60559-1917
Model Ship World ® and the MSW logo are Registered Trademarks, and belong to the Nautical Research Guild (United States Patent and Trademark Office: No. 6,929,264 & No. 6,929,274, registered Dec. 20, 2022)
Helpful Links
About the NRG
If you enjoy building ship models that are historically accurate as well as beautiful, then The Nautical Research Guild (NRG) is just right for you.
The Guild is a non-profit educational organization whose mission is to “Advance Ship Modeling Through Research”. We provide support to our members in their efforts to raise the quality of their model ships.
The Nautical Research Guild has published our world-renowned quarterly magazine, The Nautical Research Journal, since 1955. The pages of the Journal are full of articles by accomplished ship modelers who show you how they create those exquisite details on their models, and by maritime historians who show you the correct details to build. The Journal is available in both print and digital editions. Go to the NRG web site (www.thenrg.org) to download a complimentary digital copy of the Journal. The NRG also publishes plan sets, books and compilations of back issues of the Journal and the former Ships in Scale and Model Ship Builder magazines.


