HOLIDAY DONATION DRIVE - SUPPORT MSW - DO YOUR PART TO KEEP THIS GREAT FORUM GOING! (Only 53 donations so far out of 49,000 members - C'mon guys!)
×


Overworked724
-
Posts
1,259 -
Joined
-
Last visited
Content Type
Profiles
Forums
Gallery
Events
Everything posted by Overworked724
-
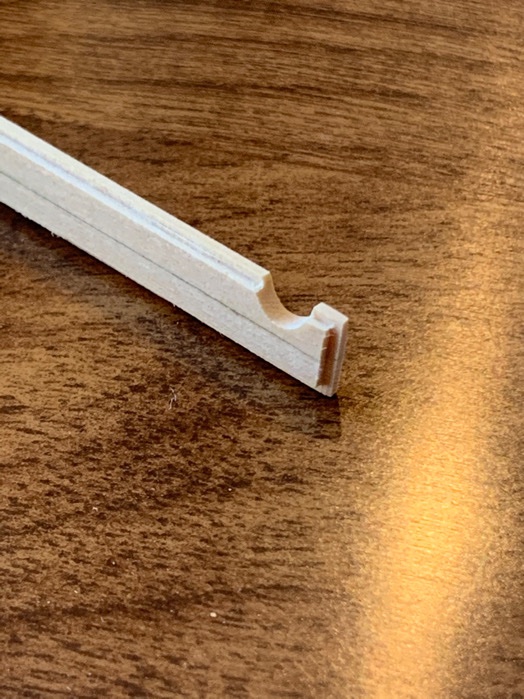
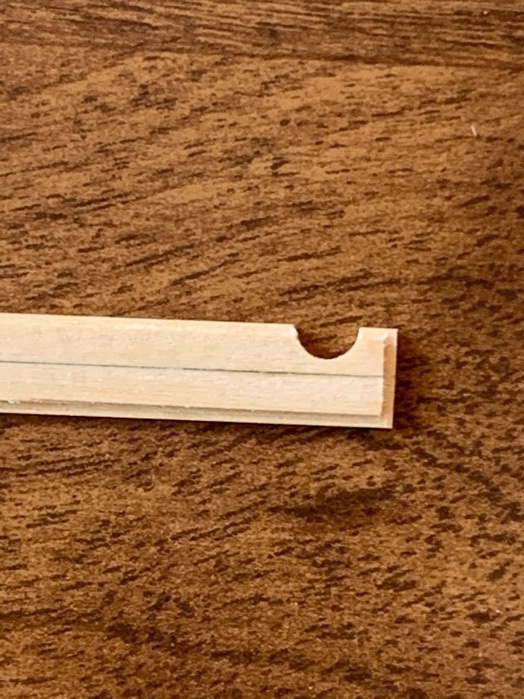
 Ok...so went overboard making my half doors. I softened the edges of the gun slot. Will paint the inner side before cutting them out. The stern and bow doors I’ve decided to make as a single piece and will cut them to fit.
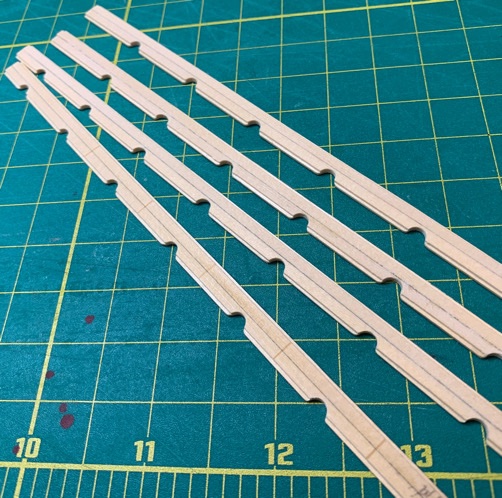
-
I used my mini table saw (Byrnes saw). I just brought the level of the blade down to 1/2 the plank width (1/32') and ran it along the entire edge on both sides. The sections are made from gluing two 1'8" wide x 1/16" thick strips at the edge using some carpenter's glue. I honestly don't know why I penciled the edges...force of habit? Once I cut the doors, I'll just run the same edge along the blade to cut out the edges. The semi-circle take a few seconds with the thin barrel sander (diameter is a shade over 1/8" thick.
-
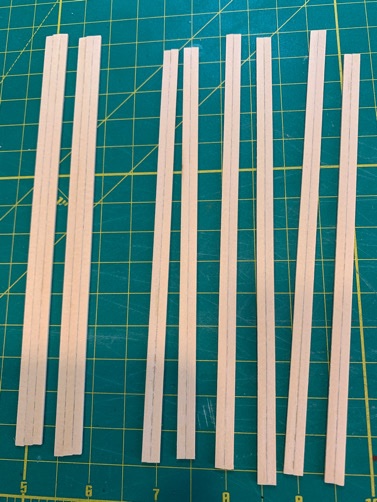
Work is getting in the way again. But the distraction of the gun port doors is kind of fun... I made a bunch of long sections (above). My plan was to carve the edges with my table saw and use a small diameter Dremel sanding barrel to form the rounded cut outs. Then I can paint the long section, cut the doors out, and finish and edge paint the sides to finish them up. Here was my first pass...not bad at some initial trials. Will make the doors en masse now. Some fun pics...
-
Pounding out thousands (hundreds actually) of brass plates while I plan the pintles and gudgeons. I want to have some idea of the ‘how’ I lay them on before I ‘make’ the darn things. 🤔 Actually, this was my problem on the Sultana. This is a finicky part of the build. After coppering, I can’t just slap them on with the expectation that glue or fingerprints won’t get all over my coppering! I’m taking my time here... Meanwhile, I’m taking a page from @Justin P. ‘s log and decided to distract/procrastinate from coppering by building out the lumber for my gun port doors. I have a unique idea I want to try...so I made a bunch of 2x and 3x layered sections of the spare 1/8” wide cedar planks I had handy. Used pencil again to simulate caulking. More to follow... Bang! Bang! (as I hammer out my copper plates)
-
She's a beauty, Justin! I can understand your hesitation on drilling the sheaves at the stern and midships. But I'm sure you'll find a good solution. Really enjoying your build. She's glowing!
-
Thanks Justin! The contrast is an accident...LOL. But I agree with you...it does lend to a subtle difference in tone which I expect is due to the Castello boxwood used for the margin and hawsehole, versus the English boxwood I used for the deck planking. The tape is just for some minor protection - as I have not yet installed the cap rails. They are painted and awaiting install...but I'm hesitant to add them until I'm ready. I have the pins and guide holes drilled in the bulkhead and rails, so install will be painless (he said hopefully). Part of me wants to get the carronades and bulkhead fittings in before I stick on the cap rails. This way I thought I could always adjust if needed - after the little bits are in. Thanks, Dave! The deck did turn out better than I'd hoped. But my painting skills are only average - and that's only when using black paint! 😆
-
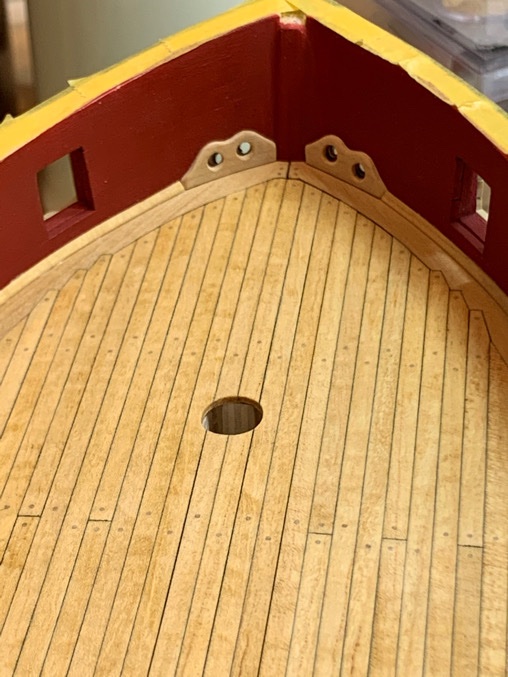
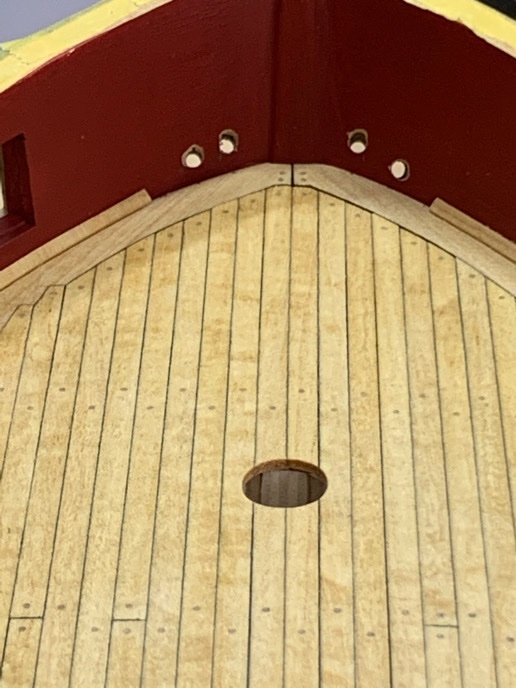
Touch painting done on both sides. Installed and stained (natural) the inboard haweshole guides (not certain what you call them). Also ran the anchor cables through them again after touch ups and the guide install...all good. The deck is done! Took me a while. Moving on...
-
By the way...I think that is a good concept. 👍🏽
-
I love Tamiya paints but XF does have a slight gloss sheen. See my Syren build log for some issues I ran into - and my frustrations in correcting accidentally using an XF. I’m not sure what effect you plan for, but a flat finish (X vs XF) might be worth your investment in time to compare. It’s possible if you are airbrushing an XF would be possible for even finish...but brushing for me meant going with a flat finish to get good consistency. Just my thoughts as Tamiya paints are really nice to work with...just be sure of the finish you are aiming for.
-
Before I painted and touched up the hawseholes, I was trying to figure how best to shore up the garish view of the naked holes inboard. I know this can’t be historically accurate, but I opted to create a couple of fashion pieces from some scrap boxwood to border the entire hawseholes, rather than just the underside of them... Here is what I came up with...not yet stained/glued in...but passable. Interested in other opinions here... Just shooting from the hip on this one...
-
Thanks, Abe. Actually your build was in the back of my mind as I was widening the holes. 👍🏽
-
Stellar work dave...your deck furniture glows!
-
Beautiful work!! I wish you had been posting from the beginning!!! I can’t imagine what methods and techniques are not captured in you log since you started. I’ll be rereading your log for info and inspiration!!! Nicely done. 👍🏽
-
@CPDDET @Justin P. @Keithbrad80 @Matt D @WalrusGuy Guys, thanks for the uplifting words! It always helps to hear after a minor bout of frustration. 🤣
-
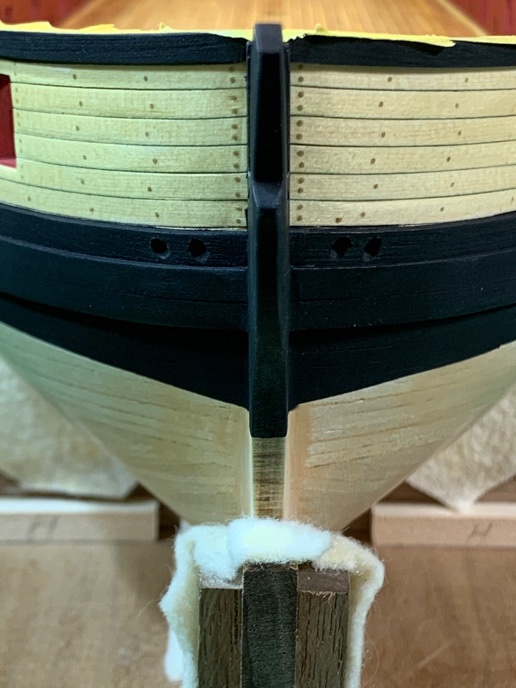
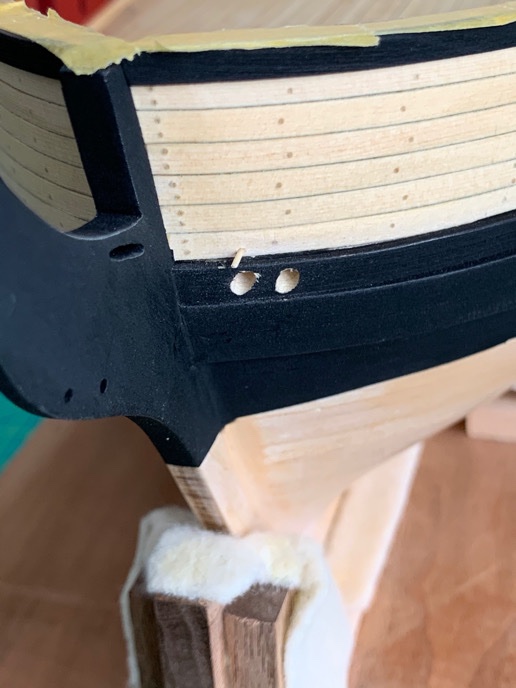
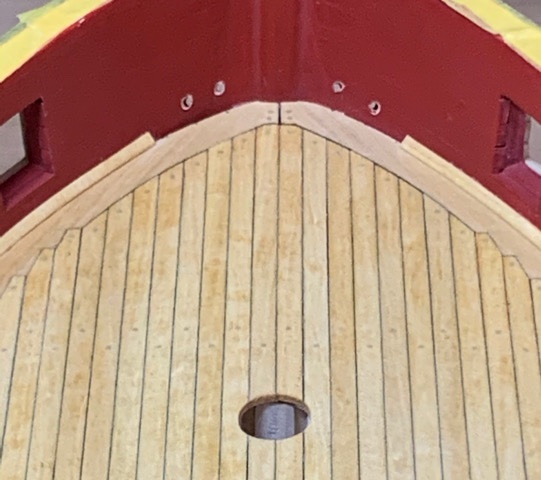
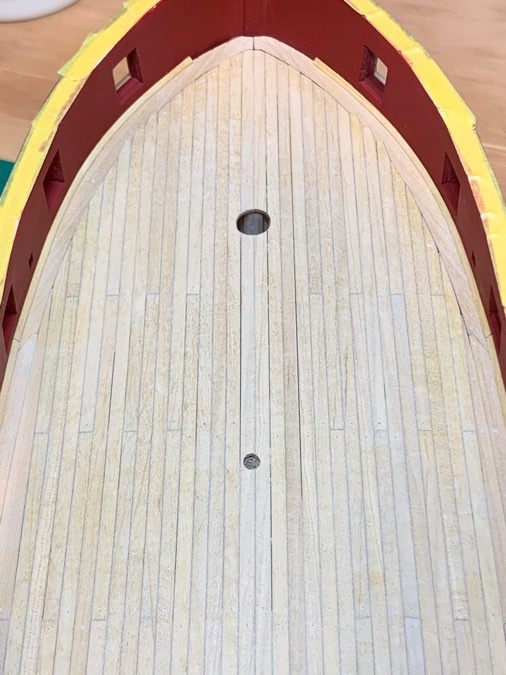
Widening out the hawseholes...used cedar treenails to fill in the ‘oopsie’ guide holes on both sides. Put a touch of filler on the starboard side hole in the wale and sanded...easy touch up later when I paint the holes. Made double certain that the anchor cables (0.062” Syren rope) fits through all 4 holes. With the deck furnishings, bowsprit, etc. I’ll be surprised if the interior hawsehole details will even be noticed...but they turned out ok. I overestimated the height above the deck for sure...I think I was too afraid of scratching or roughing up my newly laid deck! ☺️ Glad to check this chore off the list. 😎 Moving on...
-
🤣 But planking would be SO much easier!!
-
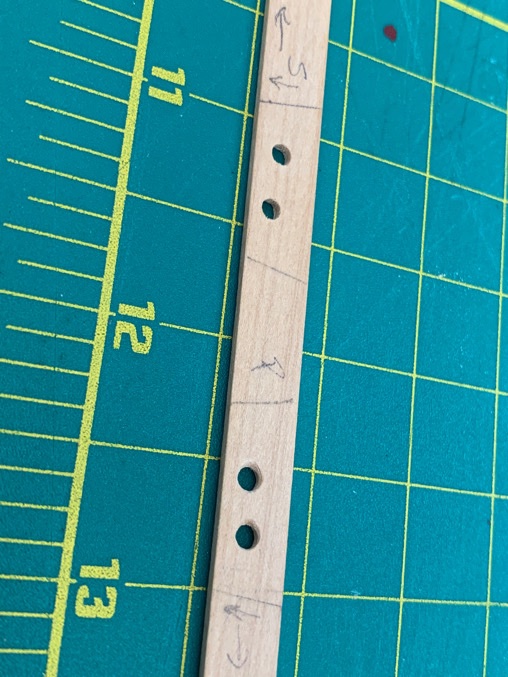
I was using a block as a drilling guide with a hole set at a specific angle. Correction...3 blocks! 2 were wrong angle. 😳
-
RIght!??? I mean...come ON! New modelers need to have some idea of next steps after all the hull and deck planking, painting, etc. Suddenly....here...stop what you’re doing and drill four HUGE holes in the bow of your ship. Oh...and be symmetrical and don’t screw up. Enjoy your hobby. Peace out! ✌️ Really? 😳 When I built my Sultana it was a smaller model and easier to gauge. The Syren is bigger... Nope...I’ll leave my note for posterity. I made my attempts and still screwed up...I’ll repair (hopefully soon), and move on. And here (above) is what I did...so you can learn from my mistakes. Hawseholes should be drilled as you plank the exterior. You can SEE what you are doing. If I knew then what I knew now...as soon as I laid down the wales, I’d drill the exterior holes. Once I laid down the interior bulkhead planks (lower layers at the deck level) I’d take into account the height of the deck/waterways and mark/drill the guide holes for the hawseholes on the interior side. Done. (I know...painting/etc. later can make predrilled holes difficult to work around. So what?...Tape/etc. deal with it. Better than drilling blind after you’ve done all the detail work on your stem!).
-
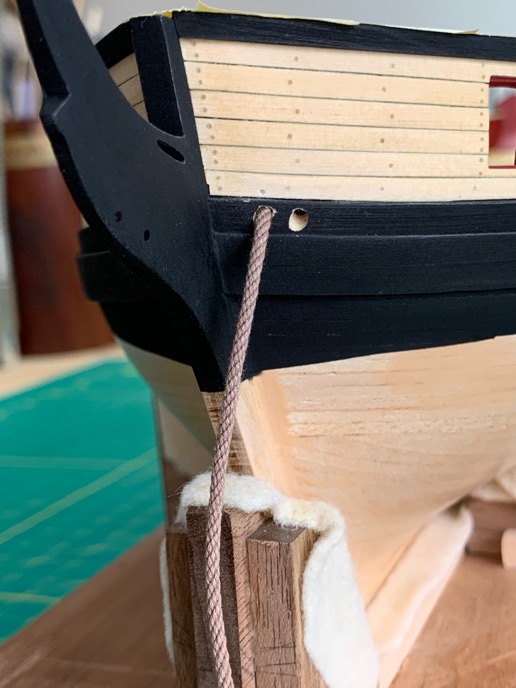
Nope. Following the practicum. Will paint and include the wood veneer once I start building out the stem.
-
I read your log. LOL. Actually, those little oopsies WERE my guideholes. 😞 Im not very good at measuring apparently.
-
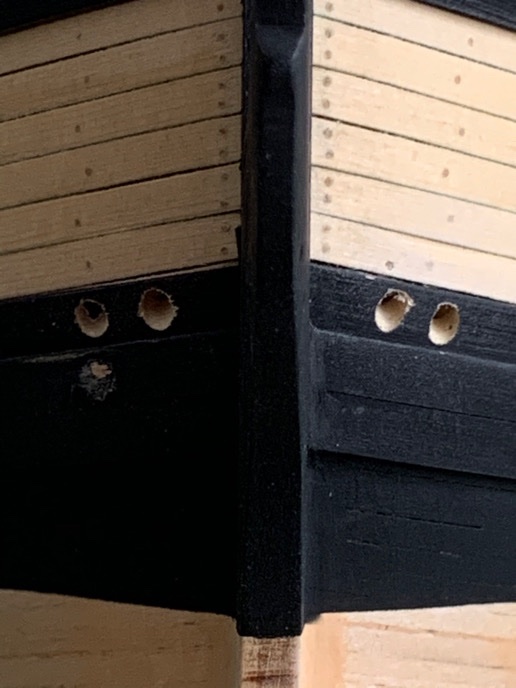
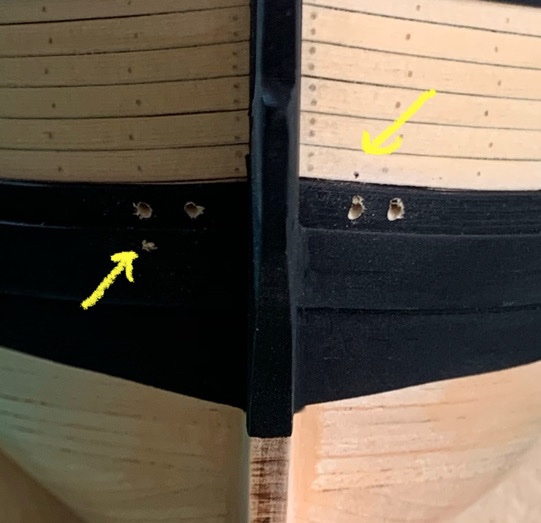
Yeah...hawseholes. They suck. Most of the builds, and the practicum, really don’t go into any detail. The holes just magically appear somewhere in the pics. Well...I call BS. This part was what I was dreading. The idea of getting the knees and detail work in on the stem and realize I need to open up four huuuuuge holes in the bulkheads at the deck level...hoping I can do a decent job of it...ugh. I marked the holes for the anchor cables on the interior side and opened the guide holes...calculating my angle of attack at 15degrees based upon my rough measurement. The problem was the exit holes... Ok. So I got them in...but I got the angles wrong on BOTH sides. &$@!?!! I under and over compensated the angle on both sides. I like symmetry...at least I screwed up once on each side! 🤣 In the end, these two oopsies are easily masked by the knees. Which is why I wanted to open these holes up now.... And I can patch them easy enough once I’ve opened up the holes, painted, etc. Moving on..
-
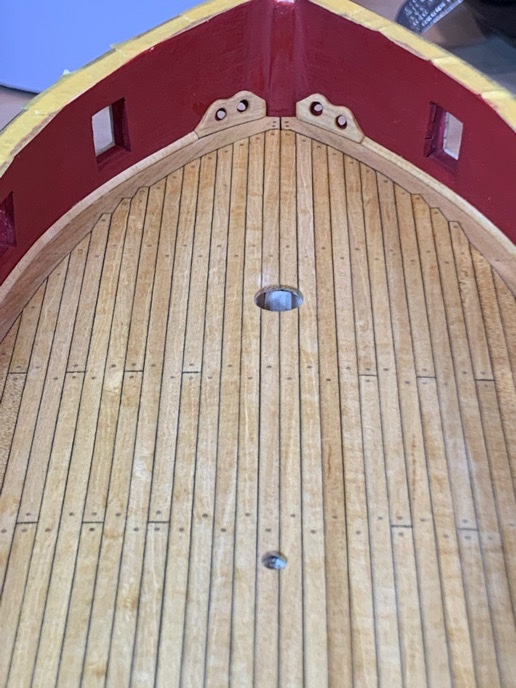
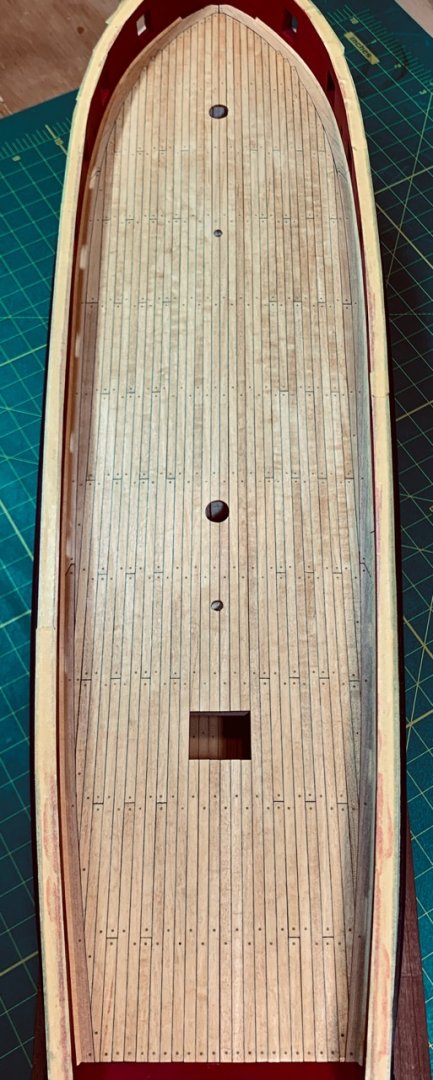
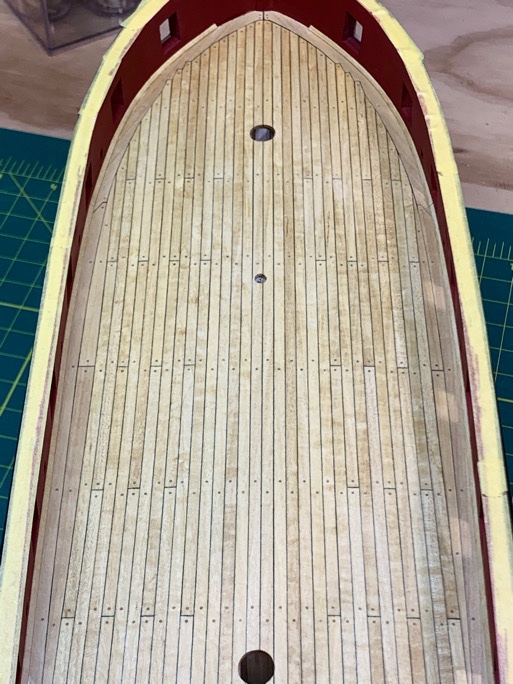
I couldn’t help myself. Decided to see the afterglow of all that work after a coat of natural stain. You can see I stayed with one trunnel at the butt joints and on the adjacent boards. Frankly, I could have easily done 2 per board but think it would simply have been overkill. I’m not unhappy with my efforts! Not bad for the slowest Syren build in town. Moving on....
-
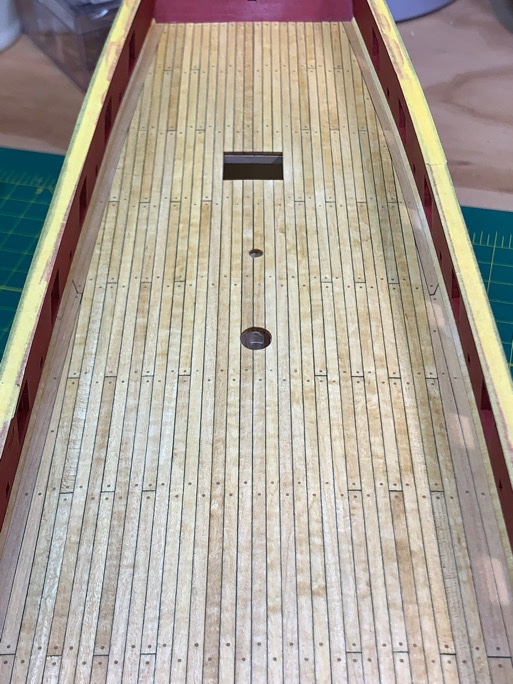
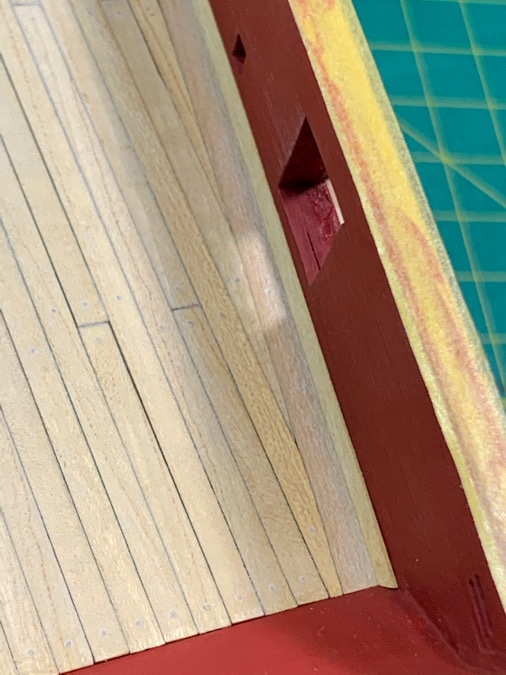
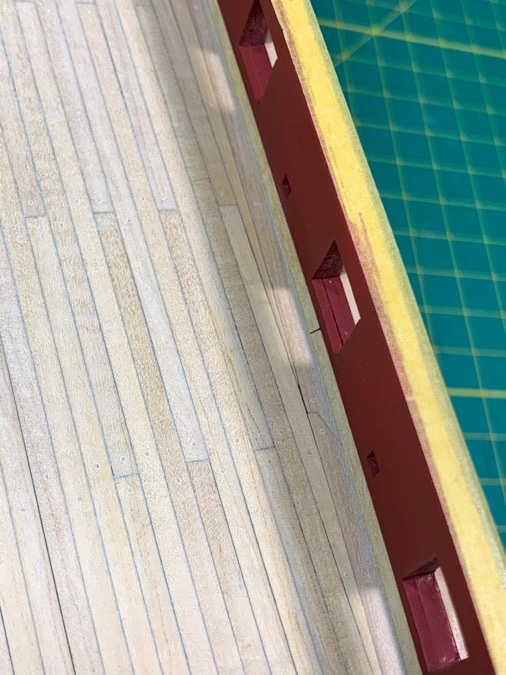
I broke up the waterways into three parts. Stern, midships and bow. I put the butt joints where the sections meet directly beneath the gun ports so they’ll be hidden by the carronade sled swivel brackets. The bow section of the waterways needed some shaping and a slight twist to get it to fit comfortably. I didn’t go all the way to the stem since I plan to put in a wooden hawshole guide (he said to himself hopefully). One bonus is that my measurements were good this time...the carronade swivel brackets all fit (although some by only a hair) as they should and the waterways do not impinge on their alignment level with the gunport sills! 👍🏽 Will save my staining the deck for tomorrow as a nice ‘attaboy’ gift. Pics below... Moving on...
-
@CPDDET @Keithbrad80 @WalrusGuy Thanks, guys! Much appreciated! It’s not ‘perfect’ and as you can see the hypotenuse (facing edge) is not perfectly edge to edge as there is still some bevel left after sanding...but it’s the closest I could come. The jig only took like 5 min to make. 😎 And I can say it works like a charm...about 5 min to make one 24” triangular strip. 👍🏽
-
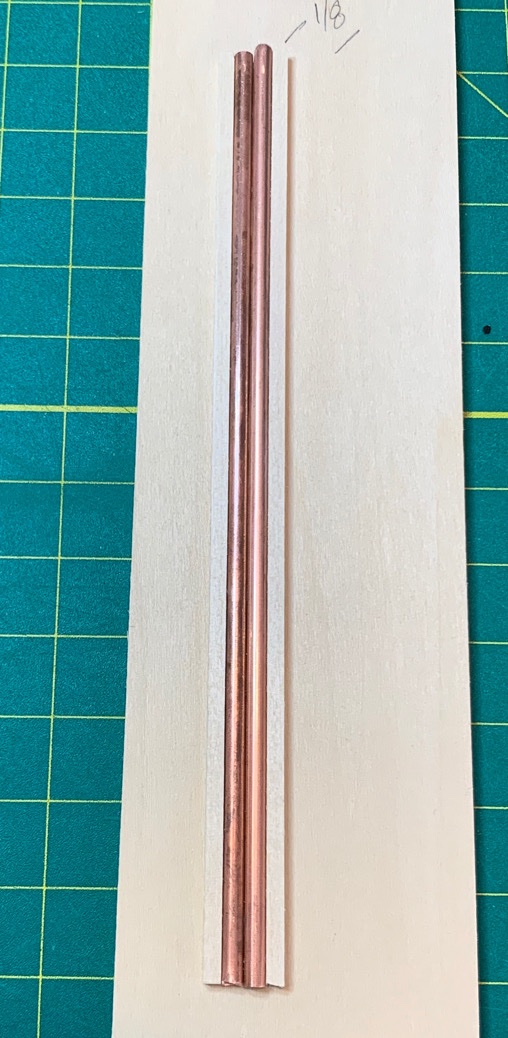
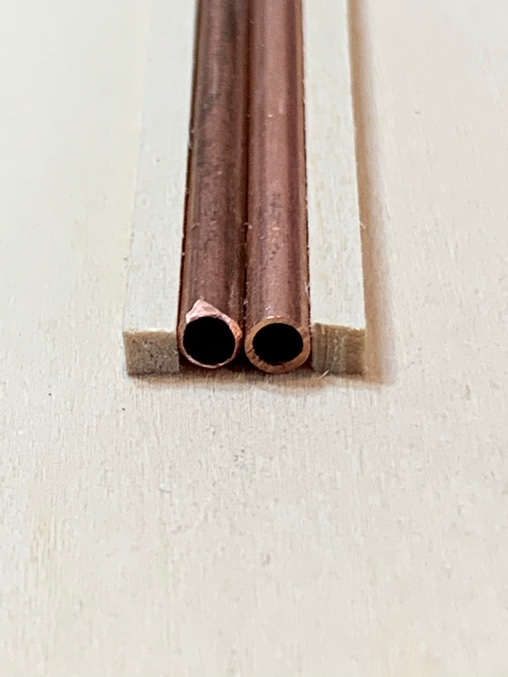
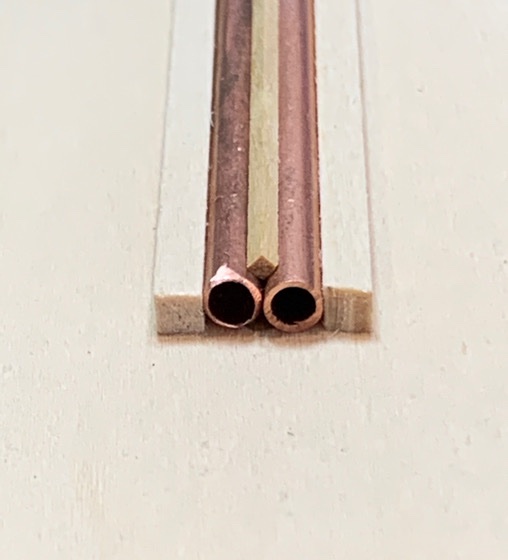
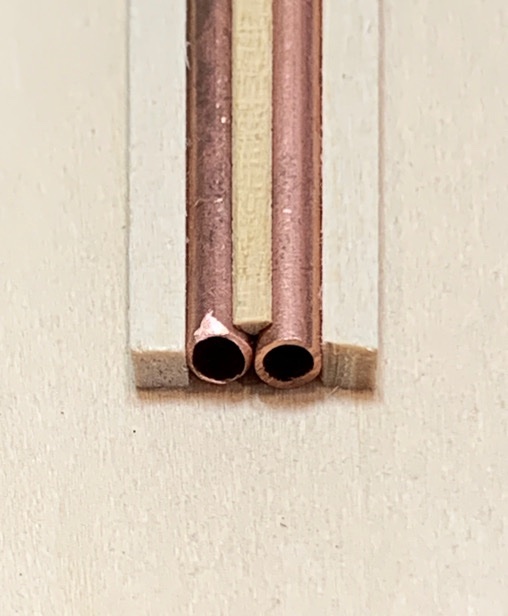
Waterways...was a bugbear for me on the Sultana since I couldn’t figure out how to make them. Well, I’ve seen a couple folks show their method (kind of)...and frankly, I didn’t want to over think this on the Syren this time. So here is my method...and it works for me, and very very simple. The waterway strips are 1/16” square. I cut about 6 of them (24” long) from boxwood so I would have spares...and just for giggles. I made a simple jig using some 1/8” copper rods (6” long sections) ... but 1/8” wooden dowels would work just fine, too. Then I used some CA gel to attach them to a support base (1/8” basswood scrap about 8” x 2”). Then I bordered both sides of the copper rods with 1/8” square basswood dowels...since sanding will stress the glue joint and I wasn’t sure how much I could trust a metal-wood CA joint. Here is the jig... Here is the jig with a square dowel sitting in the seam between the two rods... And then I simply used a 180gr emery board to shave off the exposed 1/2 of the square dowel. The dowel remains tightly locked I place and the sanding is easy. You can see by eye where you need to sand more...but you can’t over sand (provided your dowel is close to square). Ok...that’s how I’m making my waterways sections...which is like 90% of the challenge...trying to make a good triangular section can be a real head scratcher. Moving on...