Overworked724
-
Posts
1,263 -
Joined
-
Last visited
Content Type
Profiles
Forums
Gallery
Events
Everything posted by Overworked724
-
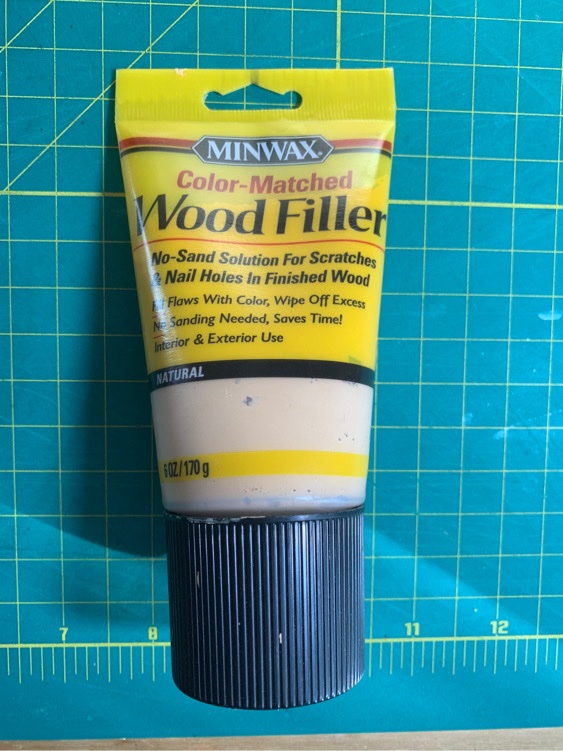
 Putting in the missing trunnel. My ship looks like it has a pimple. 😜 Also thought I’d share my opinion on something. Although I’m inexperienced, the Minwax color matched wood filler in a tube is some awesome stuff. You can use a q-tip or your finger to fill in difficult creases/seams/corners and it sands down smooth without a ton of mess. Find it incredibly simple and easy to use...perfect for a beginner like me who needs filler! Moving on...
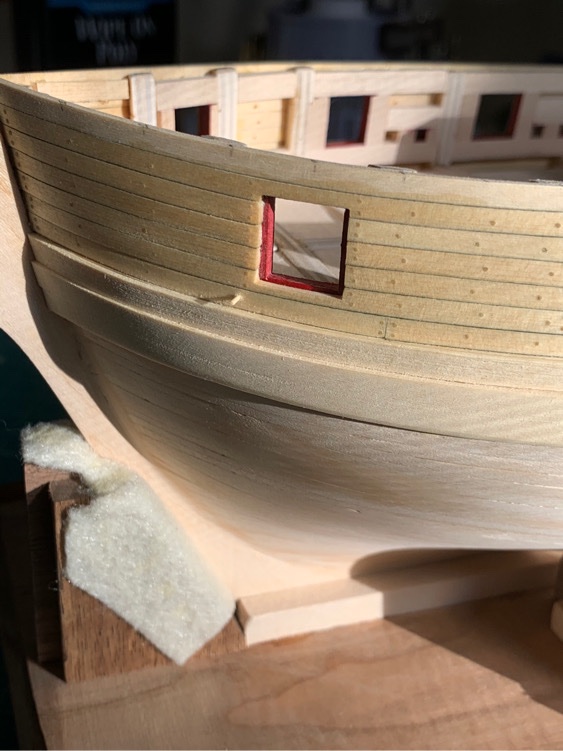
-
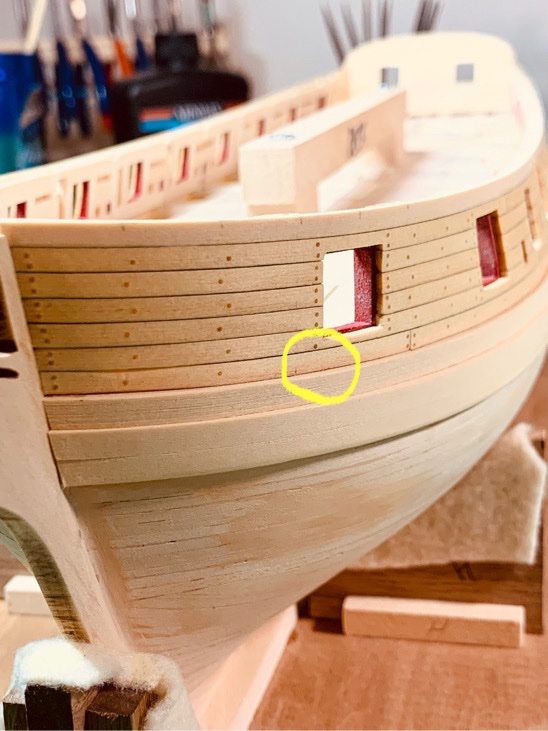
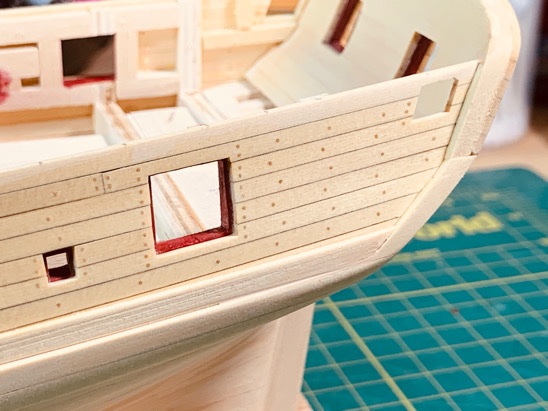
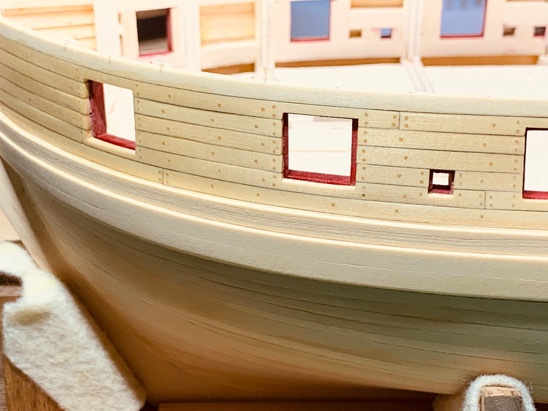
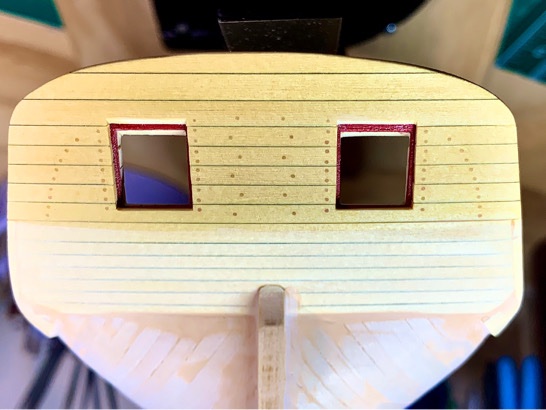
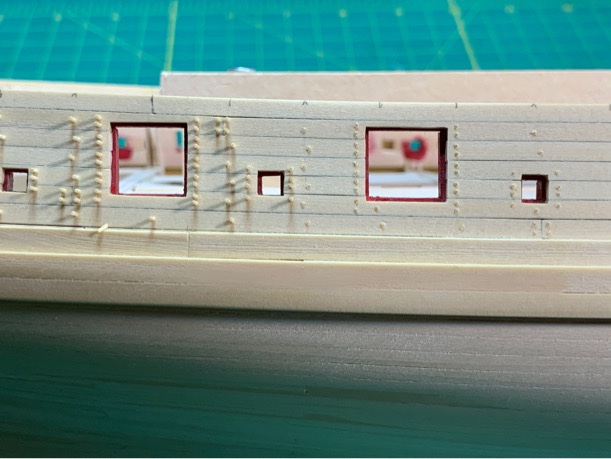
Sanding and a preliminary stain was done (just for visibility sake). Trunnels turned out pretty decent. I’ll do better next time, but not a bad result. Just showing port side since starboard is identical. Well, actually the port side has one error...which miraculously popped out after sanding and a quick stain. I miss one trunnel at the bow beneath the first gun port. 😭 Crapola...I’ll fix tomorrow.
-
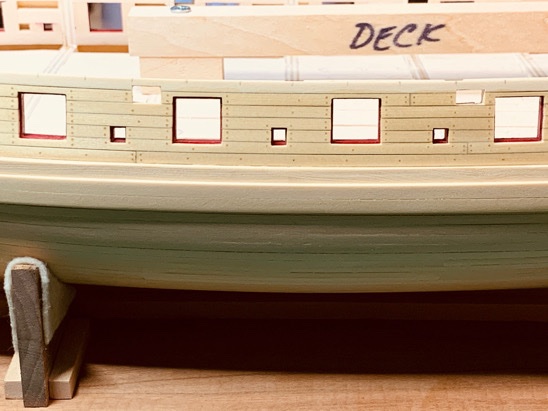
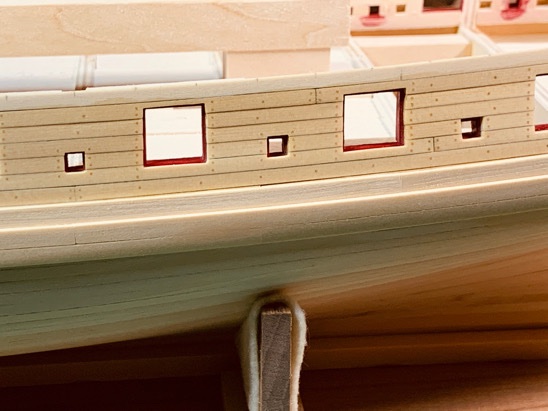
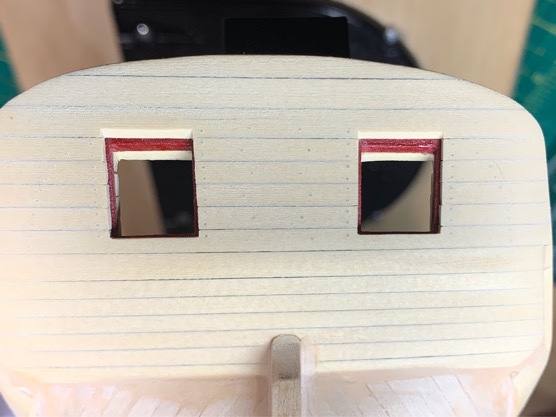
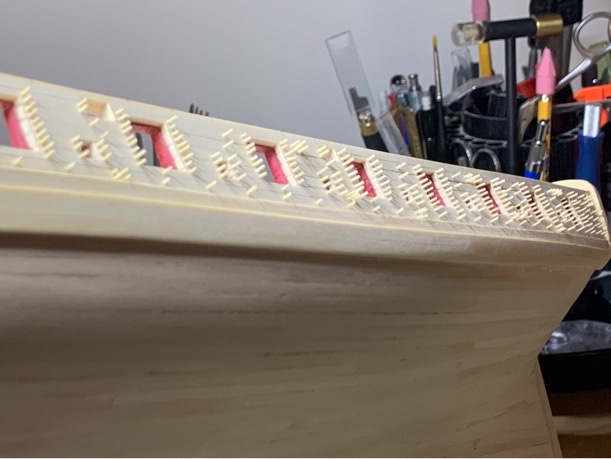
Well...I nearly gave myself a heart attack. I completed the trunnel clipping and decided to sand down the transom first. The original: Then sanded down after trimming: It looked so clean that I had wondered if the cedar nails in the cedar planking would be too invisible. So I couldn’t resists slapping some natural stain on the transom to see the effect. After natural stain (I’ll do a coat of tung oil after the planking is fully completed): And there they are...😅. The trunnels are going to come out nicely but without too much contrast. Moving on....
-
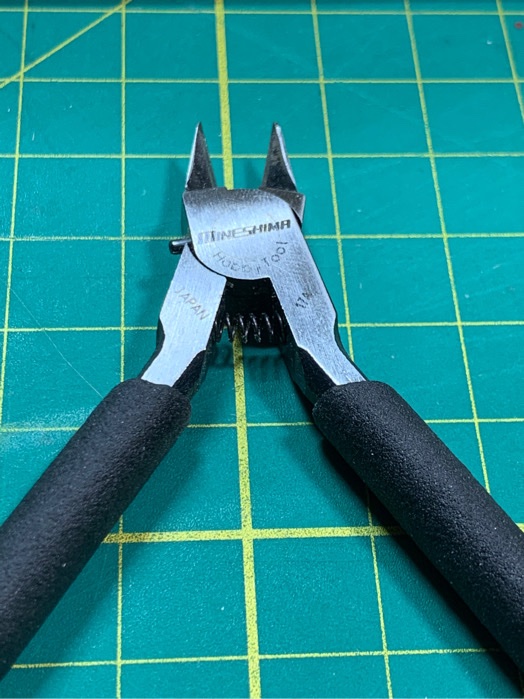
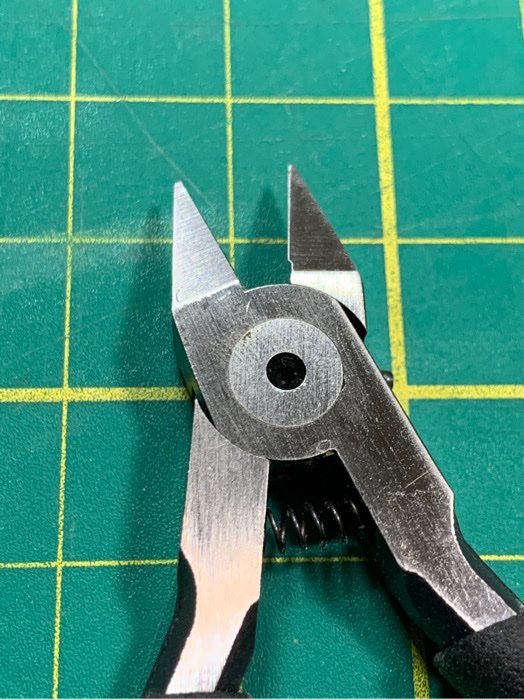
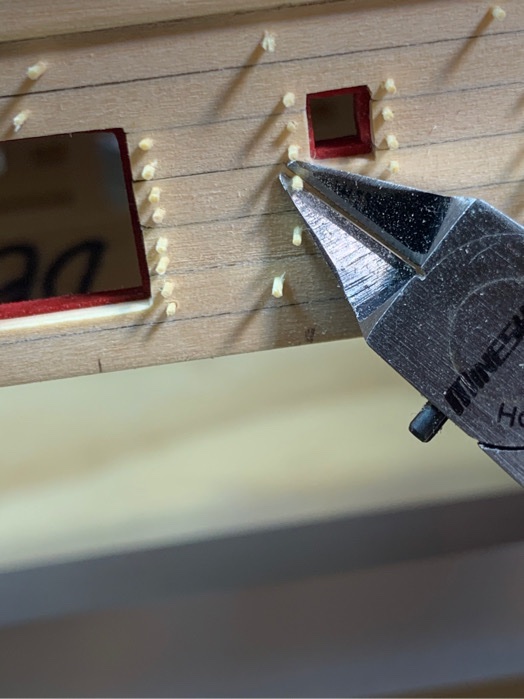
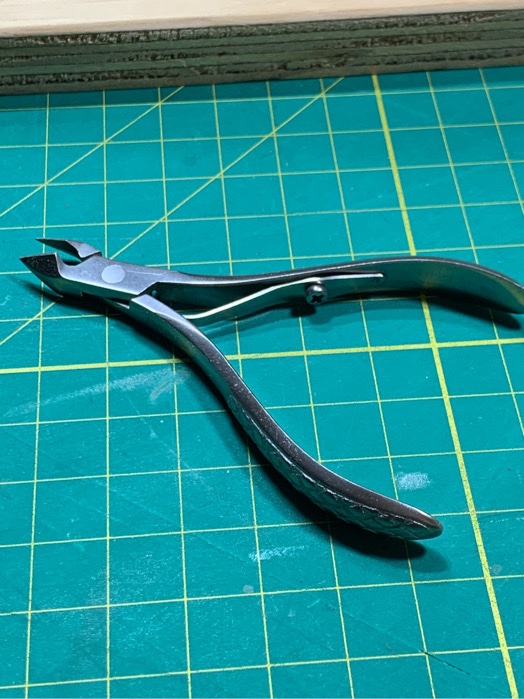
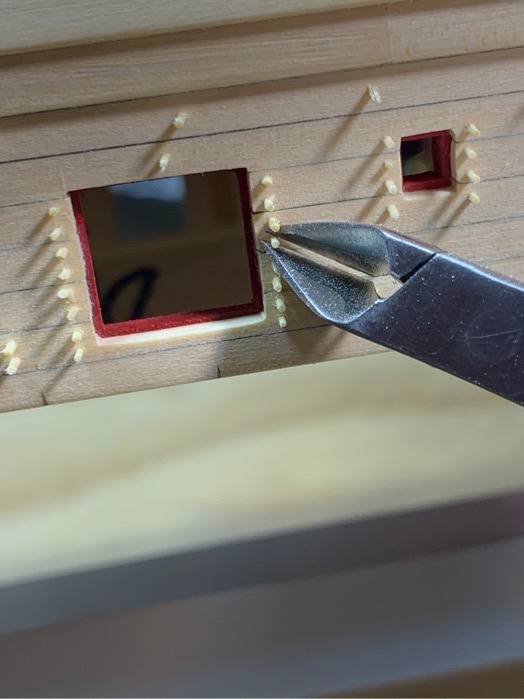
Hi Brad! Thanks for the feedback. Actually, I have some flathead trimmers (End nippers) like the one you showed above, but I didn’t find them very helpful for fine/small parts or angles which you mentioned. The spru cutters I am using are perfect for trimming the trunnels. The ones I use are from Minushima and are excellent for getting a clean surface cut, especially at an angle. They are also incredibly sharp. Here are some pics: The cuticle trimmers work even better at angles and also give a clean surface cut. These are exceedingly sharp and I ended up using these for close cropping knots on the rigging! They still work well for this type of small diameter wood nails. Here are some pics: You can see they get into tough spots very easily. These were the best tools I could find, but like everyone else, I’m always looking for alternatives!!!! ⛵️😊⛵️
-
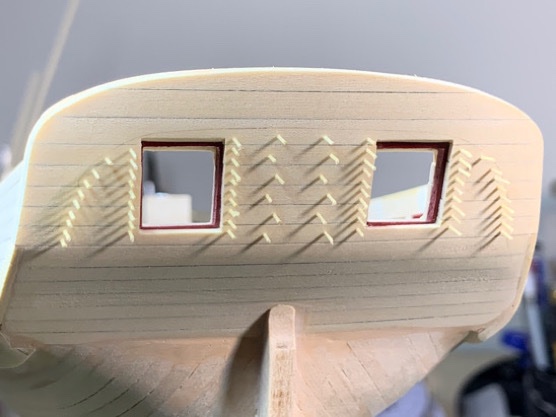
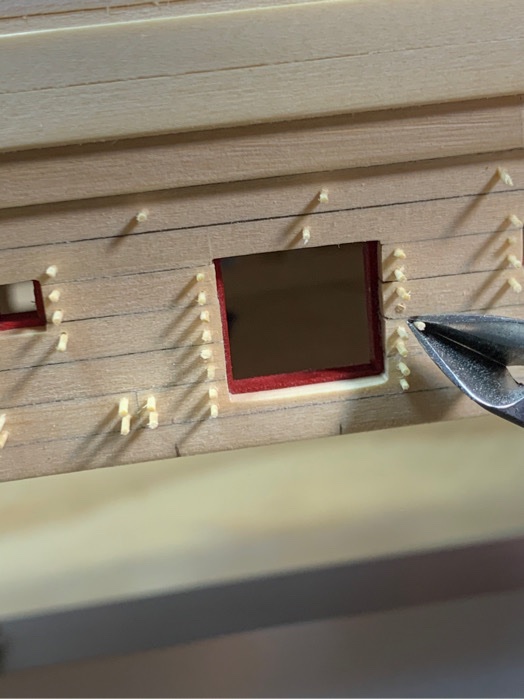
Got the last of my itty bitty trunnels put into the bulkhead. Moved on to giving them a haircut...am currently using a spru cutter but cuticle clippers work perfectly, too...I tried both. Then it’s back to sanding sanding. I consider this process practice for the deck! One bonus pic of haircut in progress. 😊 Moving on....
-
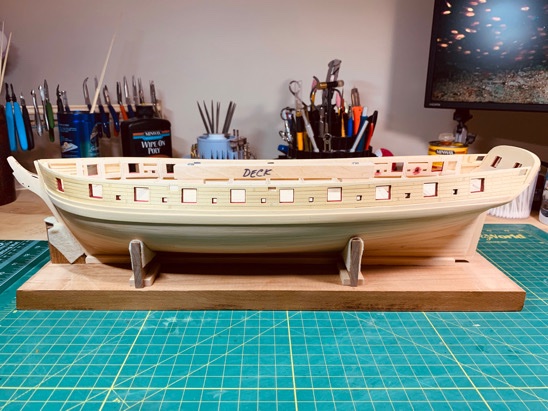
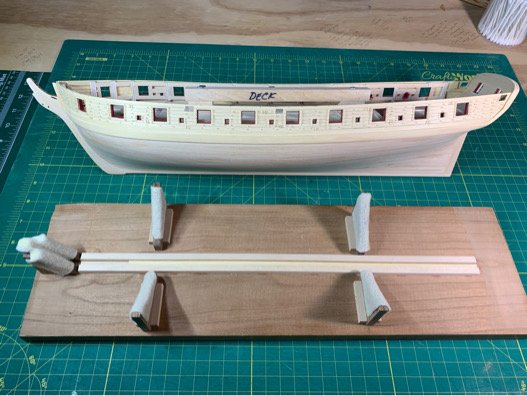
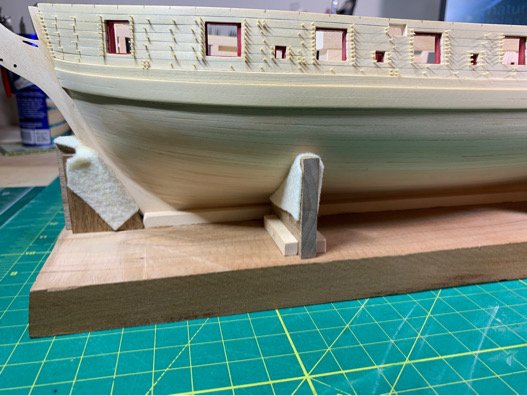
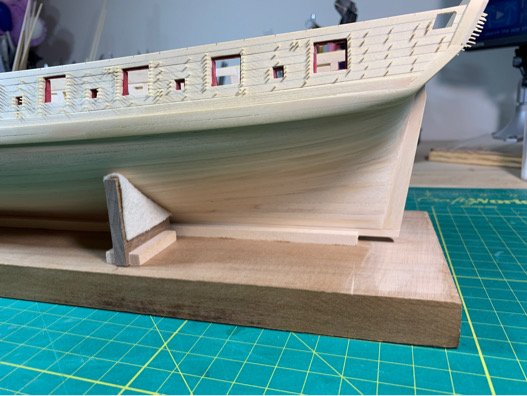
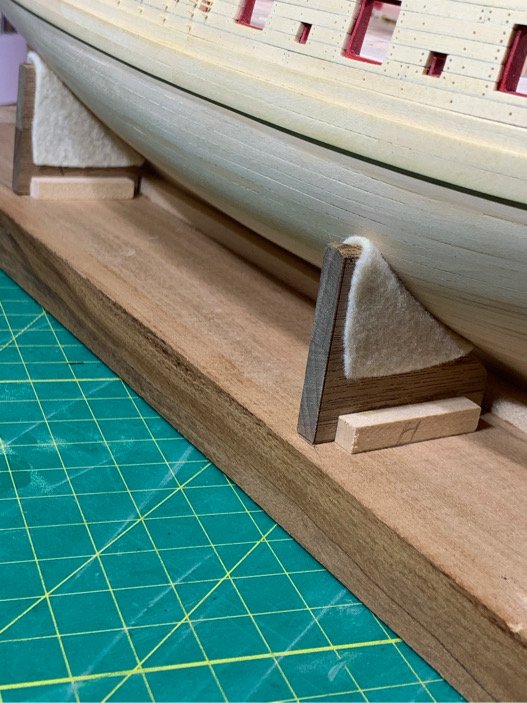
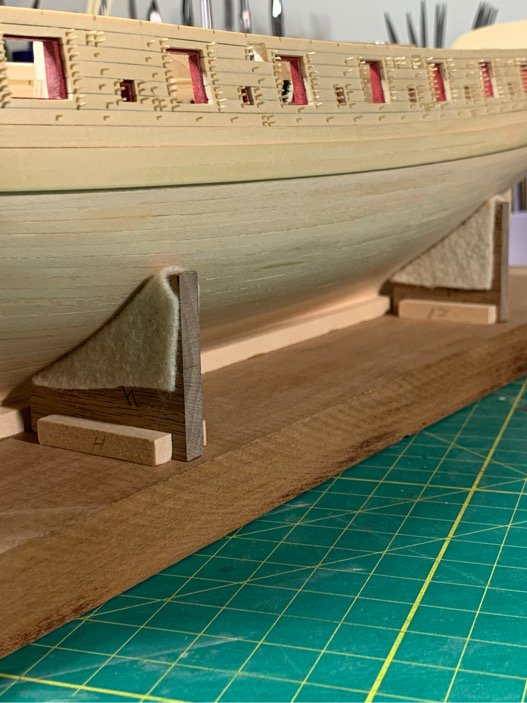
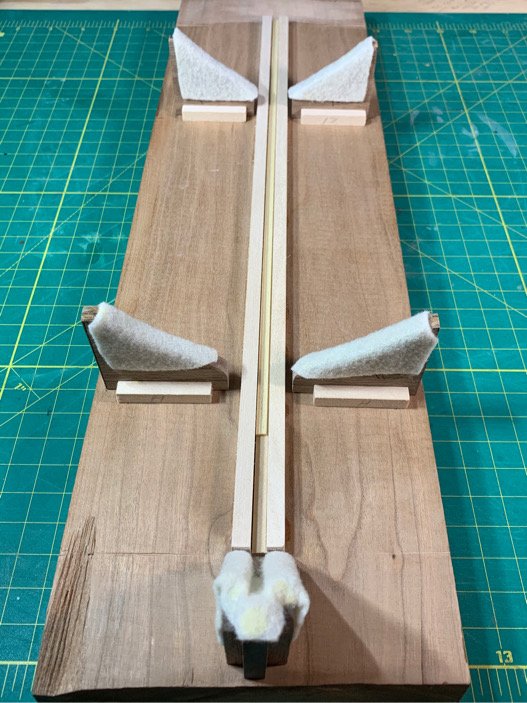
Decided to take a short detour and make a temporary building board. I've been using my keel clamp to good effect and will continue to use it...it's nice to be able to flip it on either side and orient the hull the way I wish...but at some point very soon I'll want a solid base. Thought about it a little bit and decided to make some cut outs of 1/4" walnut scrap for frame H and 12, sanded them down, covered them with felt, and then bolstered the base with a couple sections of 1/4" square wood for added support (which I'm sure it doesn't need - but what the hell). The stem socket I made using 3 separate sections of 1/4" walnut glued together in order to make a simple slot at the same angle as the stem where it meets the socket - then glued felt inside the slot. The felt is more for my sake of mind...I thought the thicker felt (my thanks to the admiral for her donation) would make the fit a bit nicer (it does) and also prevent accidental bruising of the wood. Bonus pic time!!! 😃 And one little tidbit of interest. I added a 1/8" strip of wood between the keelson rails (made from 1/4" square basswood dowels) in order to elevate the ship a bit so the rails don't rub or bruise the wood where the garboard strakes connect to the keelson. Also, I haven't added a temporary false keel to the model because I've been using the keel clamp to attach the wood block connected to the keelson through the mounting holes with nuts/bolts. But for this temporary building base, the lack of a false keel may leave some risk of damage to that little 'edge' on the keelson near the bow where the false keel begins. To prevent this, I put an additional 1/32' strip of wood on top of the 1/8" base strip between the rails...so the ship sits square between the rails, with a comfortable margin of space just below the top of the keelson across the entire length of the ship. Moving on....to finish up the bulkhead trunnels!!
-
That is bloody awesome!!! No greater end to a model story than to see one bringing honor and remembrance to our servicemen and women. Well done!!!! God bless you, sir! And thank you for your service!!! (And um...ahem...Go USAF! 😎)
- 1,135 replies
-
- 4
-

-
- model shipways
- syren
- (and 2 more)
-
That’s an awesome plane! What a great hobby!!!!
-
Yep. The middle bulkhead frames need very little fairing. Keep in mind the char on the frames if left there can lead to less stable glue seals. The char can ‘come off’. Some folks sanded the char to ensure solid glue surface.
-
Hey Bill. Yeah, that’s a tricky setup. Difficult but not impossible. You put the filler blocks high and up near the sills it looks like. You will need to sand down the gun and sweep port blocks anyway...so the technique you use here you will repeat with that step. I found my best sanding tool for this was not my rotary tool. It was a trimmed and folded sheet of the self adhesive sanding pad for my disk sander! I used a 160 grit pad, folded it in half to make it stick to itself so I could use either side. You can shape (cut with scissors) the round edge so you can reach the lower inboard sills. The manual process will actually work pretty good. Failing tha, you could remove them and preshape them before gluing in. Just some thoughts.
-
I really appreciate the compliment, Abe! I enjoy watching your inspiring build as well. I think the fellow builders on this site really push you to achieve your best results as well as enjoy the hobby!
-
Yeah...old horror movie. The main bad guy has nails all over his head! 🤣

-
If you look on my Sultana build log I’ve got some swatches which show that exact effect with darker stains. Staining with a natural stain (which is what I use beside tung oil) isn’t an issue.
-
Still putzing with the bulkhead trunnels. Kind of fun...oddly relaxing. Got transom and port side done. Working on starboard side...then it’s time for the haircut and sanding. Reminds me of the movie Hellraiser... Moving on...
-
I have tried both. Tung oil offers a nice benefit in that if you have some glue blemishes it won’t matter. Stain is always a risk if you have any unwanted glue spread.
- 436 replies
-
- 1
-
-
- Syren
- Model Shipways
- (and 1 more)
-
Will, she’s coming along. Nice work on those fenders! You said those were basswood?
-
I love Lowe’s. 10% Military Discount on everything you buy!
- 436 replies
-
- 1
-
-
- Syren
- Model Shipways
- (and 1 more)
-
Hi Dave I measured with a digital caliper and they are exactly 0.53mm in diameter
-
Hi Red. I kind of 'rough faired' the frames before I glued them in - since as I was sanding (using a sandpaper covered painting stirrer) the frames would slightly shift a bit. After I got the fillers in and the frames glued on - it was like a rock, and the fairing from that point was more 'touch up' than anything else. Just be sure to use a planking strips to verify the lay of the planks across the hull. If you have any high or low spots, they tend to stick out.
- 436 replies
-
- 1
-
-
- Syren
- Model Shipways
- (and 1 more)
-
Looks great! And I love my rotary tool too. 👍🏽
-
The finished diameter fits holes drilled using a #76 drill bit. 😳 Not certain what that equates to.
-
Hi Elijah! I can’t take credit for this process. Another builder on this forum used this and I decided to try. I can’t remember the modeler.
-
Hi Dave. I updated my post. Press only! The drill is not on. 👍🏽
-
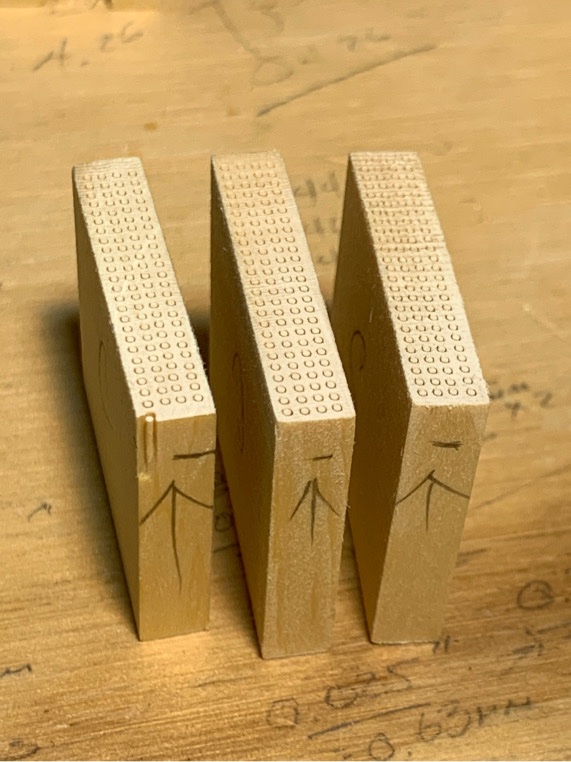
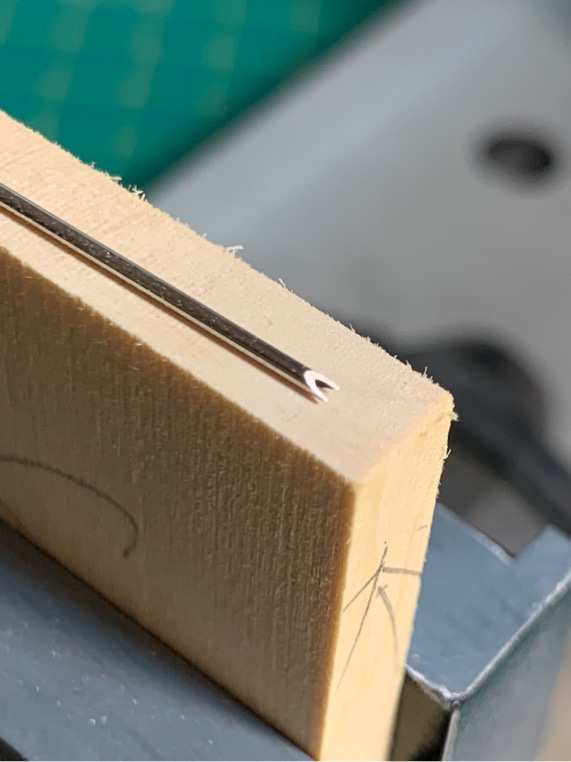
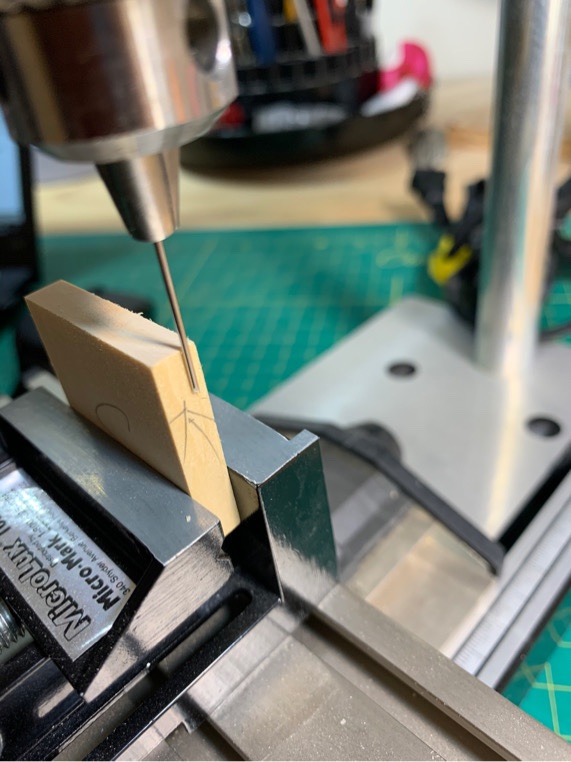
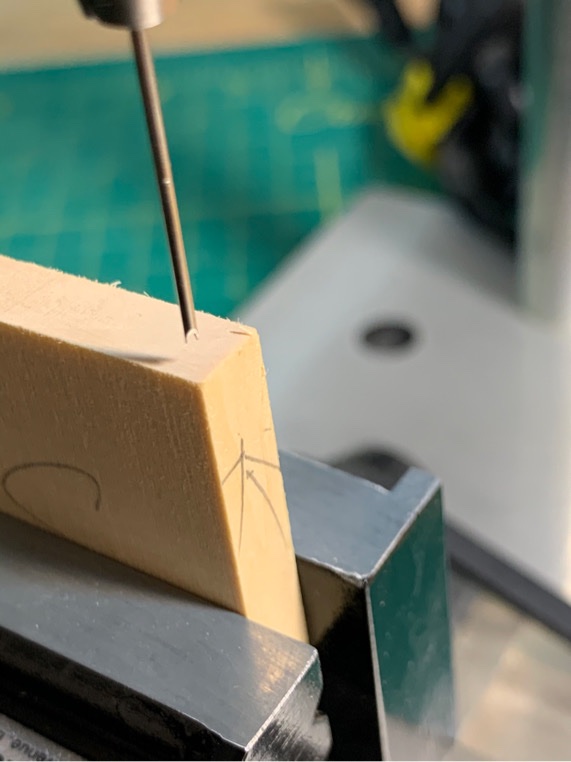
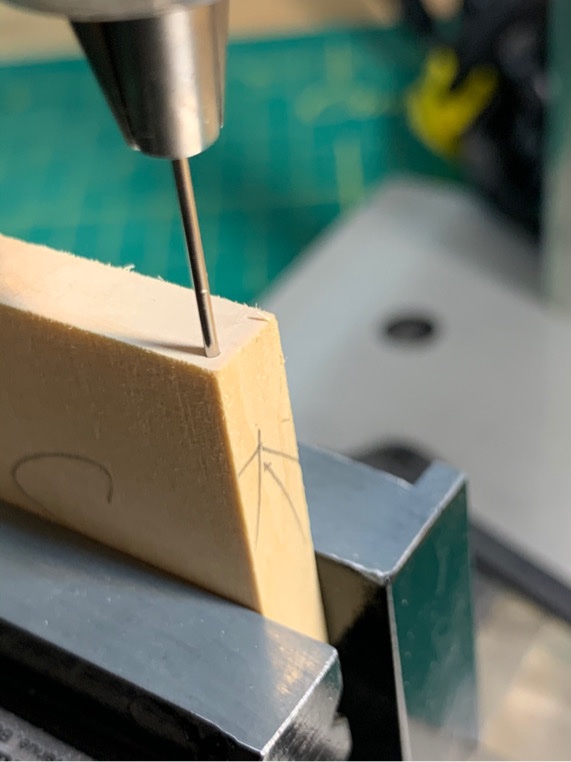
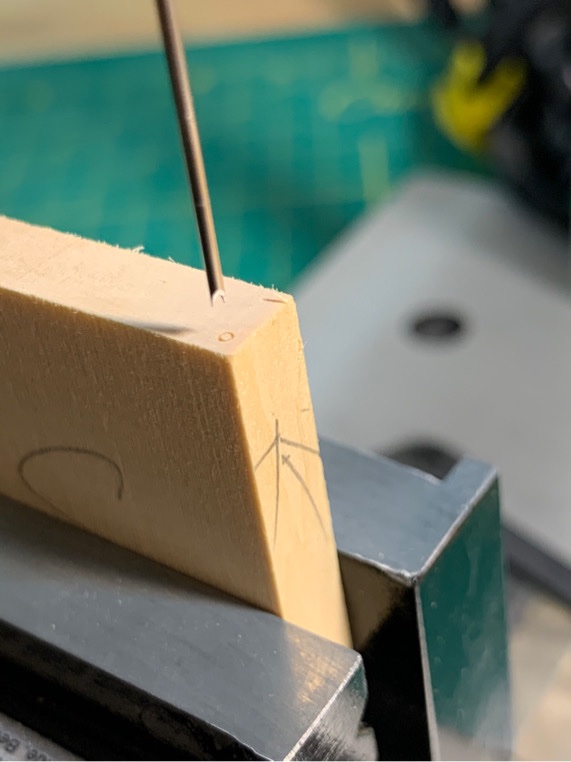
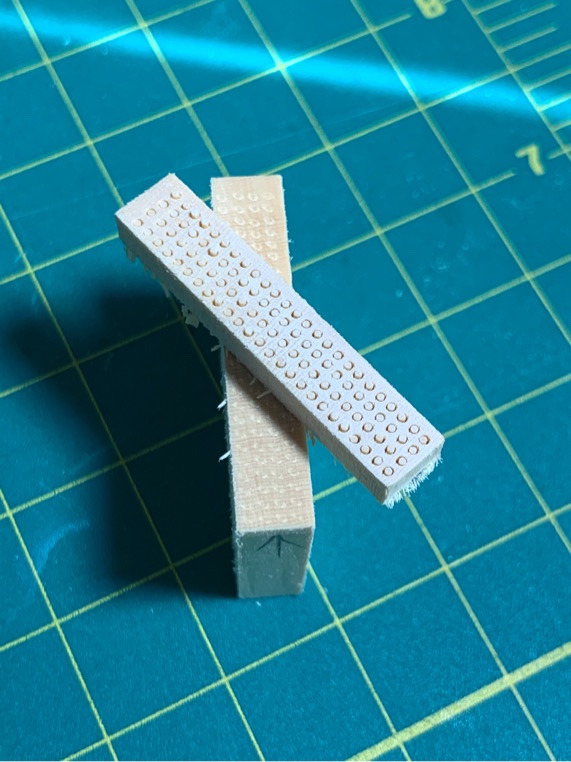
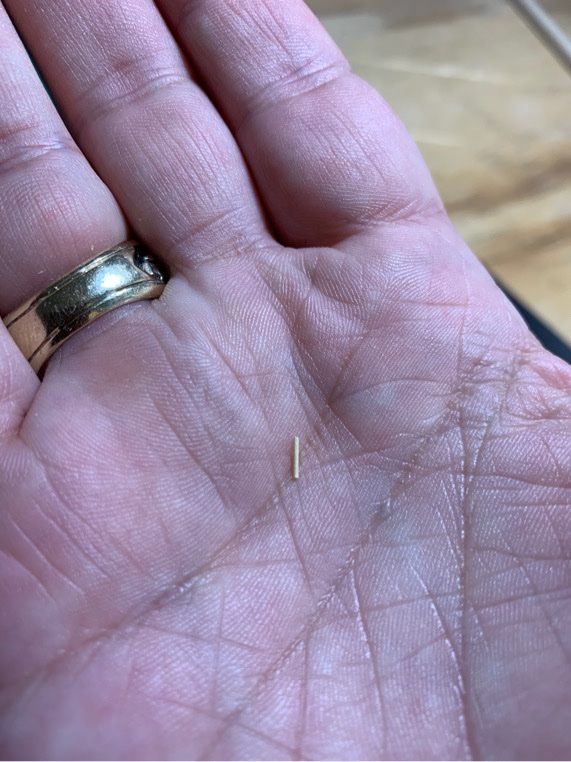
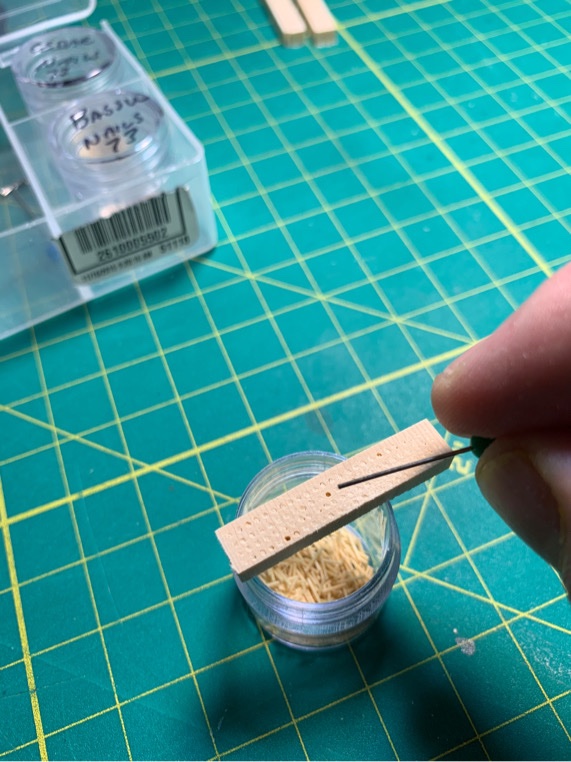
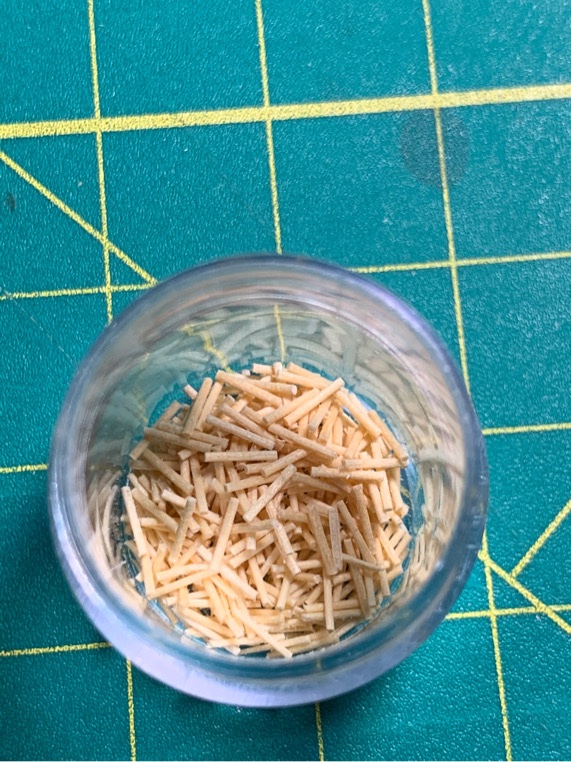
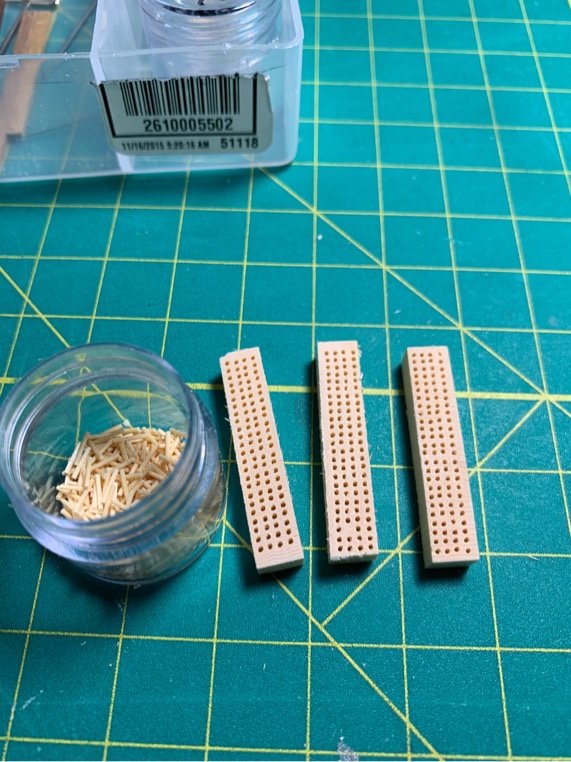
Ok. Just a repeat of how I made my trunnels. I used a 20 gauge dispensing needle (20 pack on Amazon...5$). Clip off the plastic connector on the back of the needle and sanded down both sides of the tip using a Dremel disc sanding head. It makes a "u" shaped head which can core the wood block used to create the trunnels. Put it in my little drill press fitted with an x-y table and mini vise. Put in a blank of cedar wood (grain facing up and down). Pics below. NOTE: I am not using the drill as a drill - only as a PRESS!! The pic below shows the trunnel depth and where it remains connected to the wood block. After making a few trunnel stacks (think these are about 100 Nails per piece), used my table saw with fine tooth blade to trim off the top - above where the nails are still connected to wood. These things are dinky! So used a blunted pin to poke them out into a little jar. Took my about 40 minutes or so to make about 300 nails. Will make more when I run out...which will be soon! Moving on...to the boring yet also stranegly relaxing part of turning my exterior bulkheads into pin cushions.