Ian_Grant
-
Posts
2,156 -
Joined
-
Last visited
Content Type
Profiles
Forums
Gallery
Events
Everything posted by Ian_Grant
-
 That's great, Bill! I like the Atropos book a lot. There are a couple of books, "Lieutenant Hornblower" and "Hornblower and the Hotspur" (as well as the unfinished "Hornblower and the Crisis" which has a promising start but Mr. Forrester died unfortunately) between these two if you want to read the series sequentially, but they can be read individually.
 -
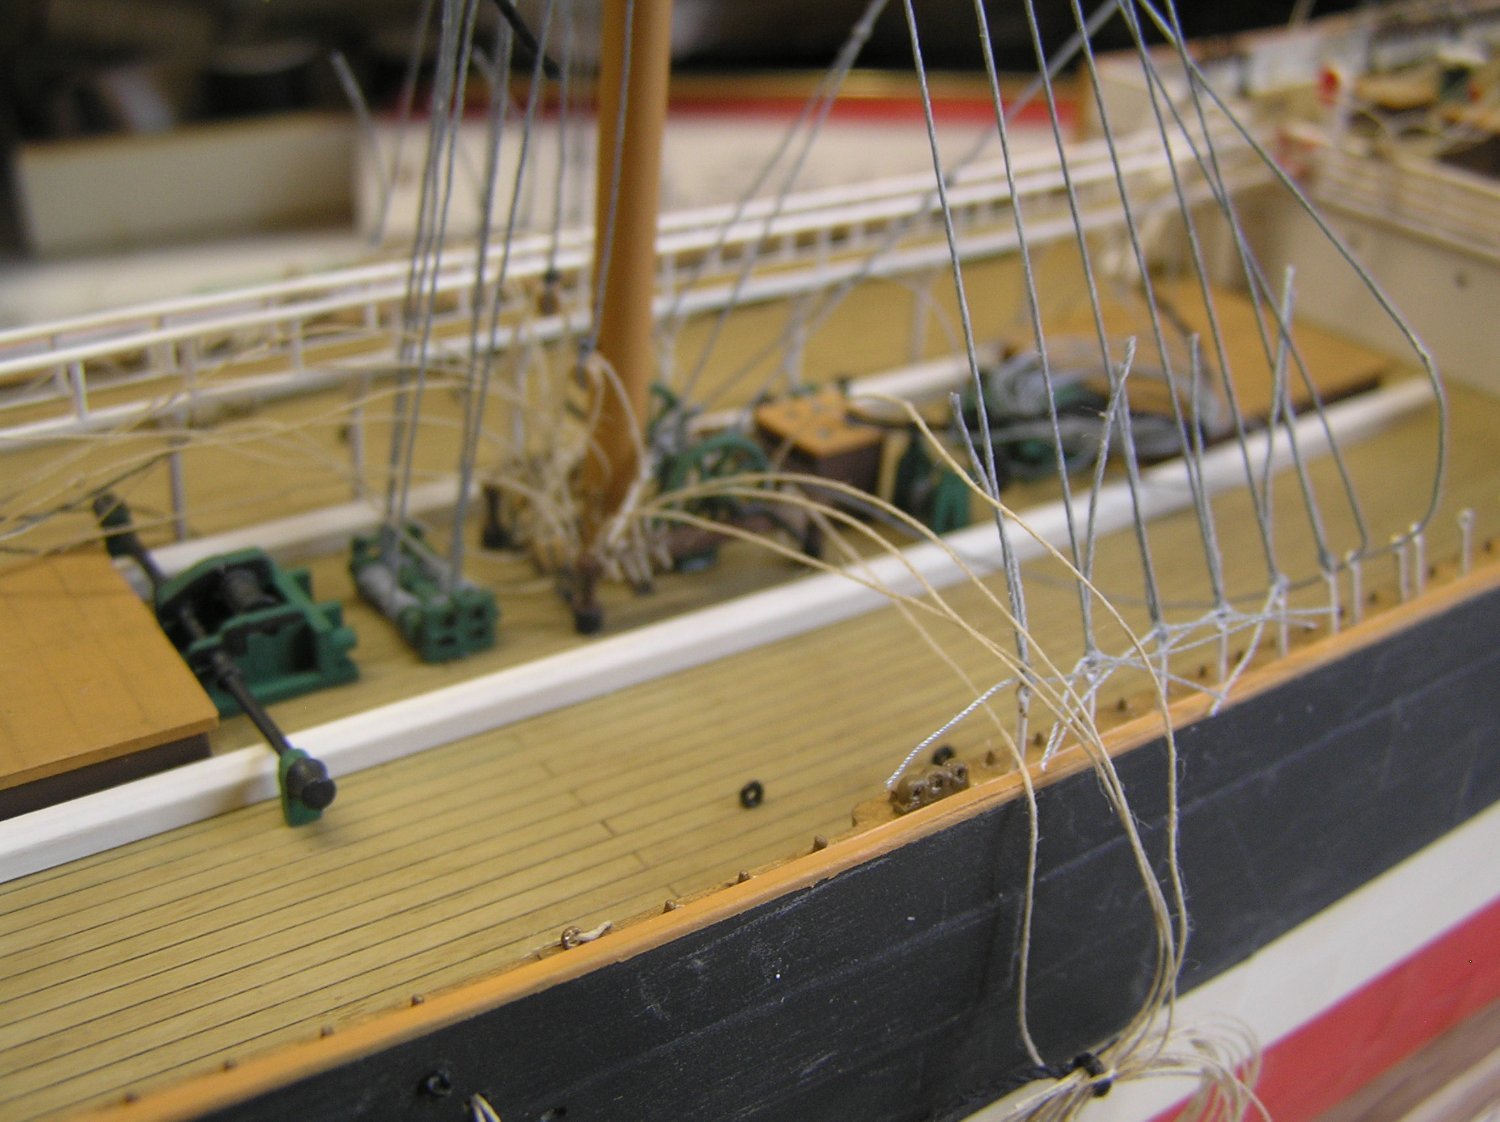
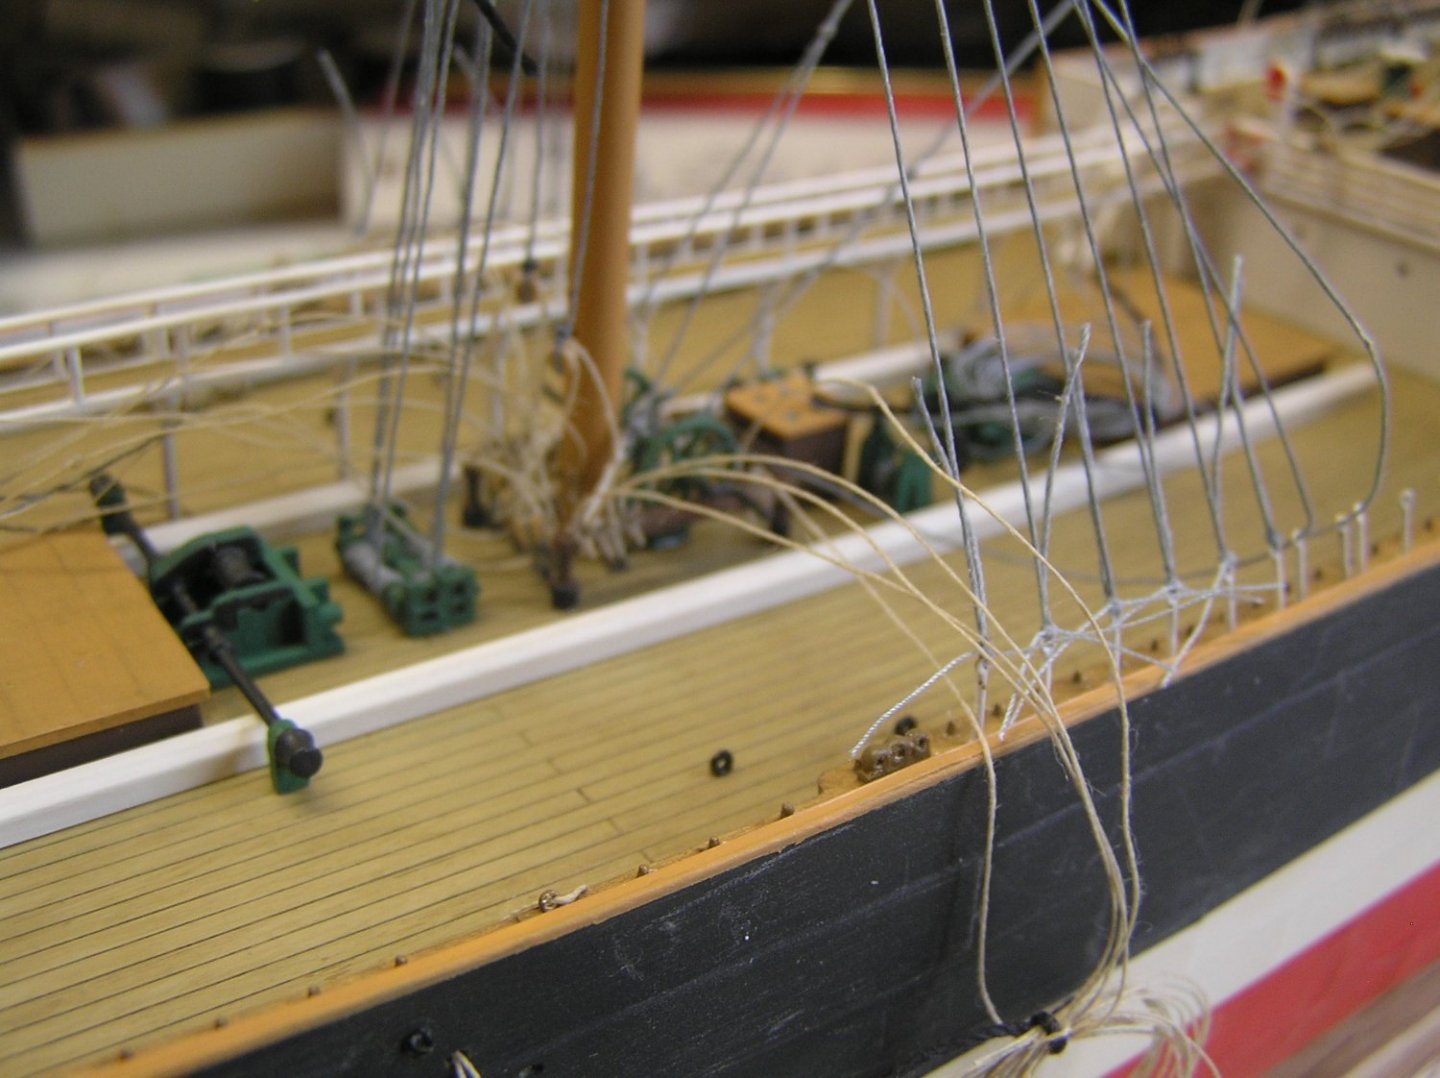
Hi Gregory, pg 49 shows the clew and sheet lines for the fore topsail, not the fore course. The topsail sheet, shown on starboard, passes up to a quarter block on the foreyard, runs out through the larger of the two sistered blocks at the yardarm, and connects to the clew cringle (a little rope loop formed from the sail's boltrope) of the sail. The little circle represents the cringle since the sail is not shown. Lines passing through the sheaves would typically be belayed at the shaped timberhead at the top of the bitt post containing the sheave, as vaguely indicated on pg 51. The topsail clew lines run as shown to port, and also connect to the clew of the sail. Again at the little circle labelled "sail clue". Yes, Americans refer to the clew as the "clue", sort of like how they refer to a "rebate" in a piece of wood as a "rabbet". 😀.
-
"Mr. Midshipman Hornblower", the first of the series, is a very very good book. Each chapter is a story unto itself, showing Hornblower progressing towards being an outstanding sea officer. Lots of action. And futtock shrouds 😃.
-
We took a cruise aboard "Royal Clipper" just before Covid. Her yards are hollow, and the sails roll up like window blinds on cylinders inside the yards. Rotation is provided by a hydraulic winch at the port end of each yard. Two crewmen on deck tend the sheets as each sail is rolled or unrolled. Six crew, all on deck, can make or stow all sail in I would think less than forty minutes. A very modern take on the windjammer.
-
These are incredible. You'd be wasted at IKEA 😃
-
Speaking of Dr. Maturin; Bill have you read any of the classic seafaring series? With your rigging knowledge now, much of what is said will have more meaning for you than for the novice reader. Opinions below are mine only. Hornblower series by CS Forrester: the classic and still my favourite. Aubrey/Maturin series by Patrick Obrien: paints a vivid picture of the 18th century world and people, but a little slow at times. Ramage series by Dudley Pope: Very good. Delancey short series by C Northcote Parkinson: I like the writing style but some don't. Wish there were more. Boiltho series by Alexander Kent: read them as a teenager but got tired of them. Alan Lewrie series by Dewey Lambdin: just came across these a few years ago. Lots of action aboard ship and in bedroom. Likeable protagonist. If you try out all of these, you are in for about 80 books (!). Will keep you busy for a while.
-
Kevin I thought you were doing the Cutty Sark climb this summer! Better steel yourself for her futtock shrouds 😏
-
Bill, it's pretty fiddly to add the futtocks and catharpins without distorting the run of the shrouds. Take it slowly and don't commit the knots until you are satisfied. I remember that there is a recommended order to do them in ie futtocks then catharpins, or vice versa. I did the catharpins first for what it's worth.
-
Yes, that's exactly what they did. Don't forget that at sea the ship would be heeled one way or the other; the crew always went up on the windward side where the futtock angle would be nearer vertical. Also a strong wind would press you into the shrouds, not off the ship! I surmise that as they near the top the shrouds become like a close-packed set of tree branches. It would be impossible to stick your feet between them anyway. Also it would be very slow for the men to funnel through the lubber's hole one at a time and then have to step to the rim of the top before continuing to climb. As a side note I have often wondered about the many times Dr. Maturin entered a top through the lubber's hole, in Patrick O'Brien books......without ratlines? Here is an extract from "Tall Ships - How to Climb the Rigging" Up & Over the Futtock Shrouds The first hurdle for most people is the infamous ‘futtock shrouds’ just below the first platform. All the tall ships we work with have a safety wire here for you to clip to, so if you do slip you won’t go far. This does need a bit of arm strength and commitment as the futtock shrouds lean backwards for about 4-6ft to access the platform. The best tip we can give you is (i) do it with a friend or crew member for support the first time as they can give you an idea where your feet are….especially on the way down. (ii) on the way up (and down) hang back with straight arms as it is less tiring on your arms and your body doesn’t get in the way as your feet and knees move up. Also you are more likely to be able to see where you are placing you feet if you lean your body out.
-
Bill, as far as I know lower shroud ratlines end at the futtock stave; there are none above it.
-
In #948 I only meant it might be easier for you to attach things that attach near the feet of the masts before final shroud tightening. Once you are happy with whatever is left to reach in at, shrouds should be tightened. Definitely before catharpins and futtocks. Good luck! 😉
-
Bill I'm not sure if you're implying that the lower shrouds are not fully tightened yet, but they need to be before you add futtocks and catharpins. She's looking great!
-
You could consider having one gun firing, perhaps as part of a salute on entering harbour 😏
- 177 replies
-
- 2
-

-
- Independence
- bottle
- (and 1 more)
-
Tim, your model is looking magnificent! Interesting-looking ships from that time. I've been eyeing the kit of the "Maine" for years.... I once pedaled from Ottawa to my parents' place in Toronto to use up a couple of vacation days I could not carry over. This was in April and on the 2nd evening I rolled, exhausted, over the causeway to Port Perry and stopped at a hotel. I must have visibly sagged when the desk ladies told me that they were full because fishing season had just opened; they took pity on me and offered to put me up in a cot in the conference room if that was ok. I gratefully accepted and was even able to watch a Leafs playoff game on the room's big screen. Ah, Port Perry memories...😃
-
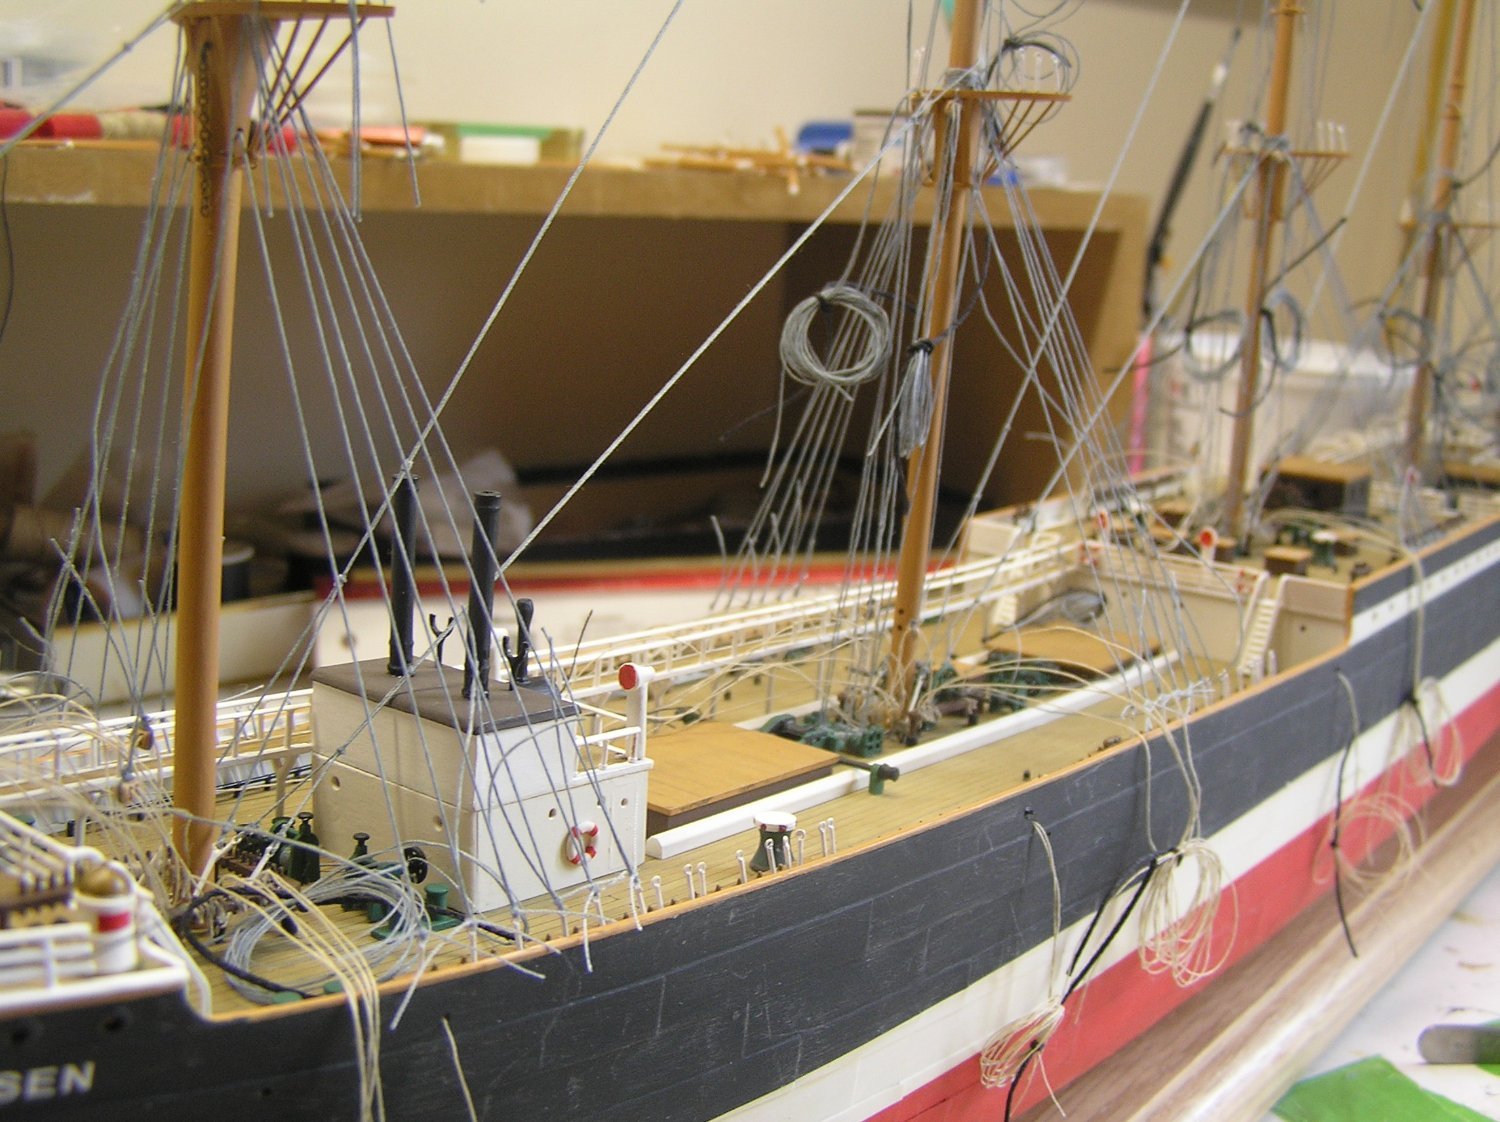
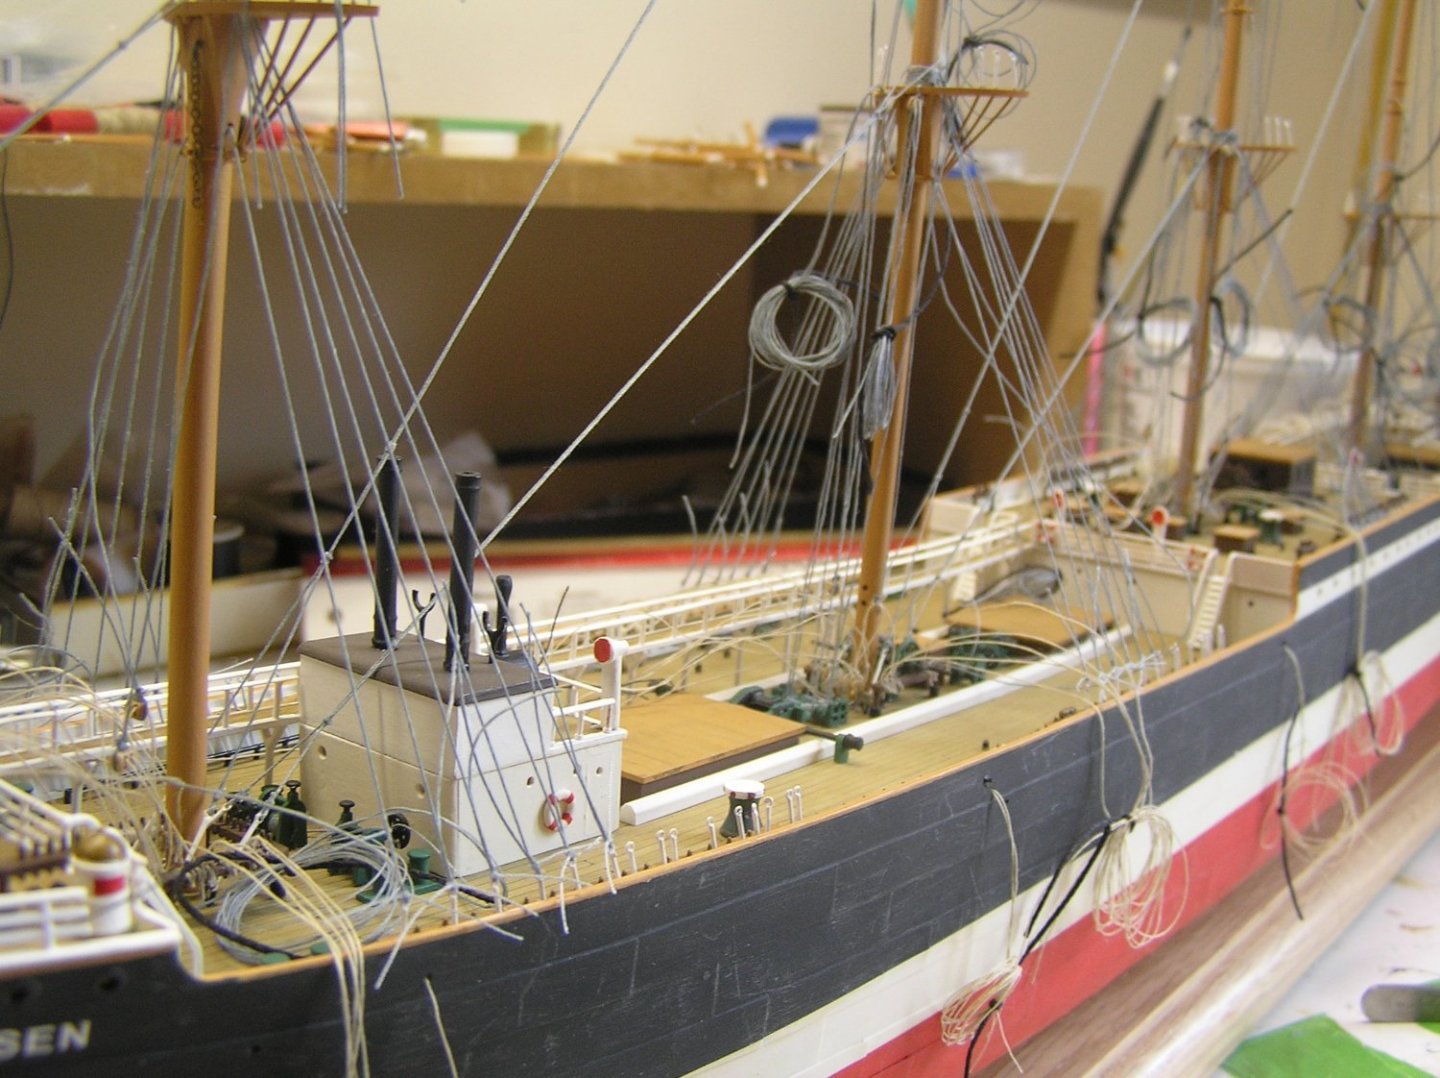
I got tired of tying lines on and just coiling them, so in a fit of madness I fitted all the lower shrouds. They're just tied off with a grey seizing at the rigging screws for now and as yet untrimmed. Later (much later) when I make a guide for ratlines I will add the white seizings on each. I might regret this later when adding upper braces to the bulwark rails behind the shrouds, but they'd just be too long to have hanging in coils in the interim. I also uncoiled the lower braces from the winches and passed them up the masts through the requisite blocks where they now dangle as coils again. This was easier to do now before I add more standing rigging. The decks look better with only the upper halyards still coiled on them. Here we see the shrouds and dangling lower brace coils. The foot of the mainmast with braces from the Jarvis winch going up to to their blocks. Sorry about the focus. In hindsight I wish I had drilled new holes to move this Jarvis winch closer to the mast; for some reason this particular one is about three times as far from its mast as all the others which makes the braces nearer to interfering with the main lower yard. I could have added more blocks to divert them but at this point I will leave it.
-
Not in photos, but if you have rigged the mizzen stay and preventer the only other things I can think of at the moment are the main topmast stays which attach to deck behind foremast. Might be easier to get in there with loose/detachable shrouds.
-
Never heard that before. Interesting! Will keep in mind in future. Thanks!
- 444 replies
-
- 2
-

-
- Cutty Sark
- Revell
- (and 2 more)
-
I used to display my Cutty Sark and Constitution side by side; it is interesting to see one bathtub-like bow and one razor-like bow together.
-
Doesn't sound too slow to me.....you should see the snail's pace on my build progress 😭
-
Wondered where you got to. I used seed beads too, glued to stay then wrapped in thread. Keep up the good work Bill!
-
Ferrus, welcome to MSW! I, along with many members here, built the Revell models at about your age. Fond memories. Good luck and looking forward to reading your build log! Best Regards, Ian
-
You're a CAD whiz! Very nice.
-
I laugh.....HoHo......because I am one of the dinosaurs still carrying around a flip phone. Refuse to get sucked in to "The Matrix" on a smart phone.
- 3,560 replies
-
- 4
-
-
-
- clipper
- hull model
- (and 2 more)