Ian_Grant
-
Posts
2,152 -
Joined
-
Last visited
Content Type
Profiles
Forums
Gallery
Events
Everything posted by Ian_Grant
-
 Fortunately, Revell's rigging instructions are very well drawn and thought out. Which is more than can be said for a certain plastic ship model company whose name begins with "H".
- 481 replies
-
- 1
-

-
- Cutty Sark
- Revell
- (and 2 more)
-
I still like the little Hackney book on "Victory". When all is said and done, Longridge boils down to a couple of chapters on rigging if you are not building a wooden hull, and the Hackney book though lacking the beautiful diagrams is still a fount of information.
- 444 replies
-
- 3
-
-
- Cutty Sark
- Revell
- (and 2 more)
-
Thanks; the shafts would be well above 2mm. My mockup uses 1/4" dowel and doesn't look ridiculous.
- 444 replies
-
- 2
-
-
- Cutty Sark
- Revell
- (and 2 more)
-
Yes I recall using Haynes to work on my '79 Mustang, the last car I felt competent to work on and in which you could get your elbows into the engine compartment 😀.
- 444 replies
-
- 2
-
-
- Cutty Sark
- Revell
- (and 2 more)
-
Kevin, the way I imagine you are picturing the sails is dangling in several arcs below the yard? This could be done by partially clewing up, and partially hauling in the buntlines. I'm not sure if CS clews to the quarters or to the yardarms i.e. straight up but you could look into that. I noticed you mentioned "strong" resin, which my brother also has. He claims that I could use "strong" resin to 3D print 9" oars for my Roman galley and they would be as strong as a CNC'ed part. But I keep seeing references to the "brittleness" of resin parts. What do you think of the strength of these "strong" resins?
- 444 replies
-
- 2
-
-
- Cutty Sark
- Revell
- (and 2 more)
-
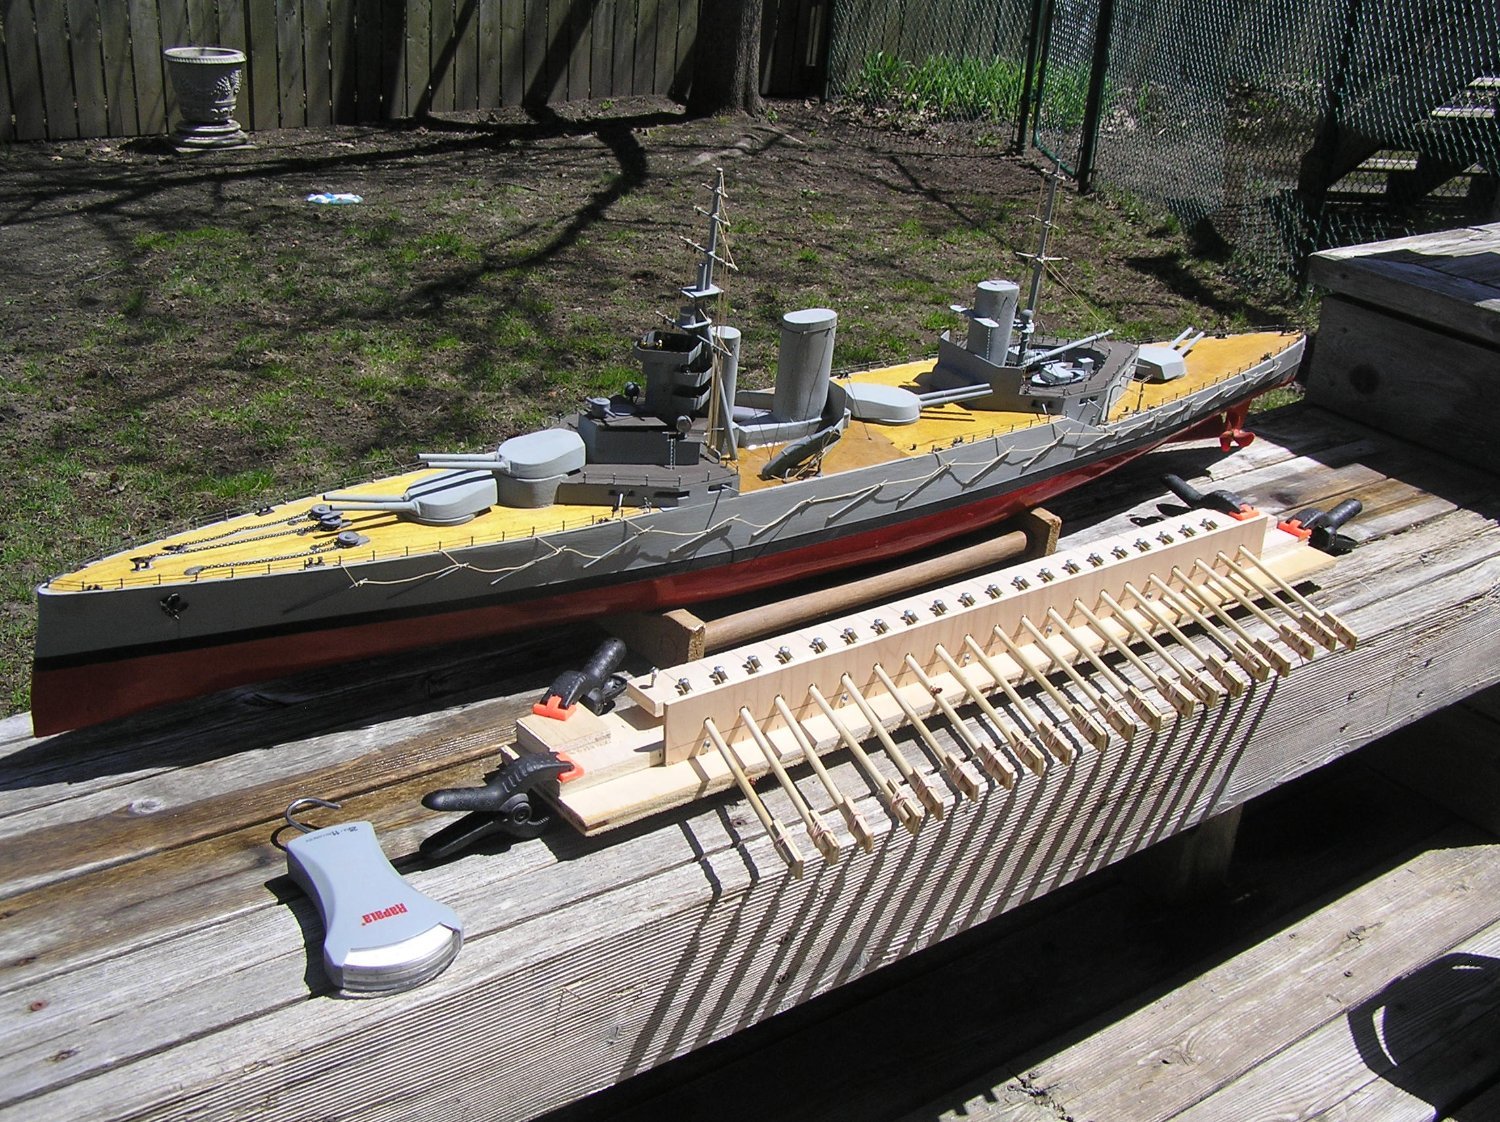
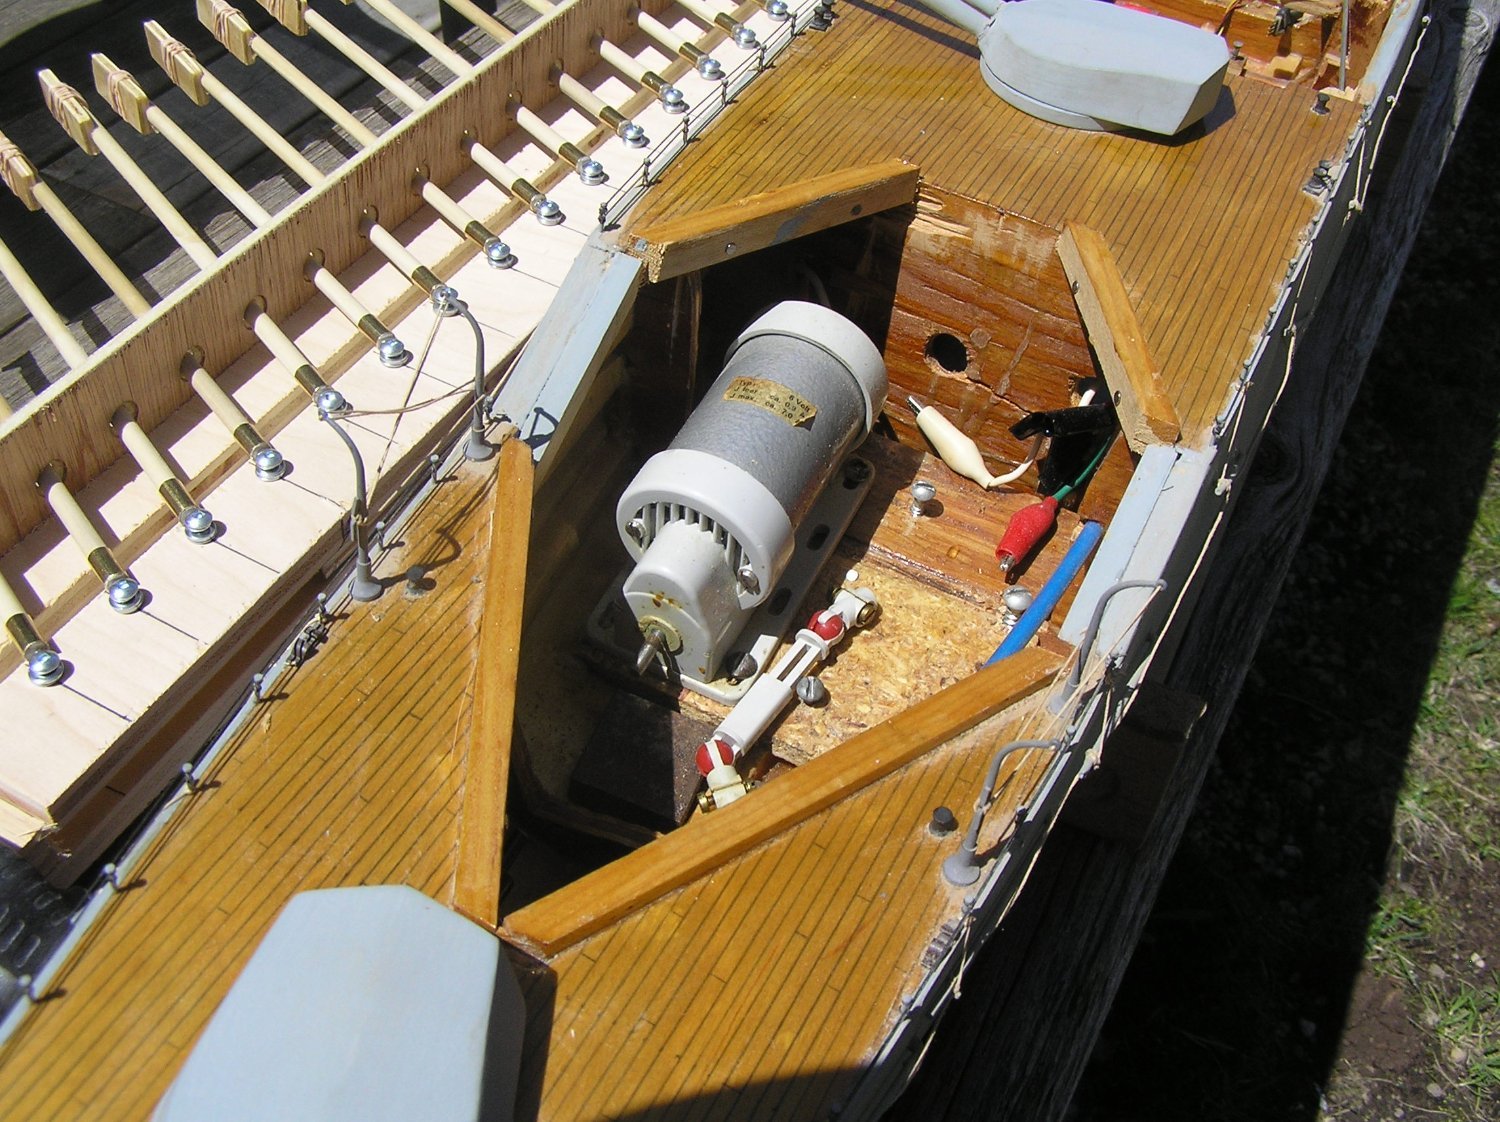
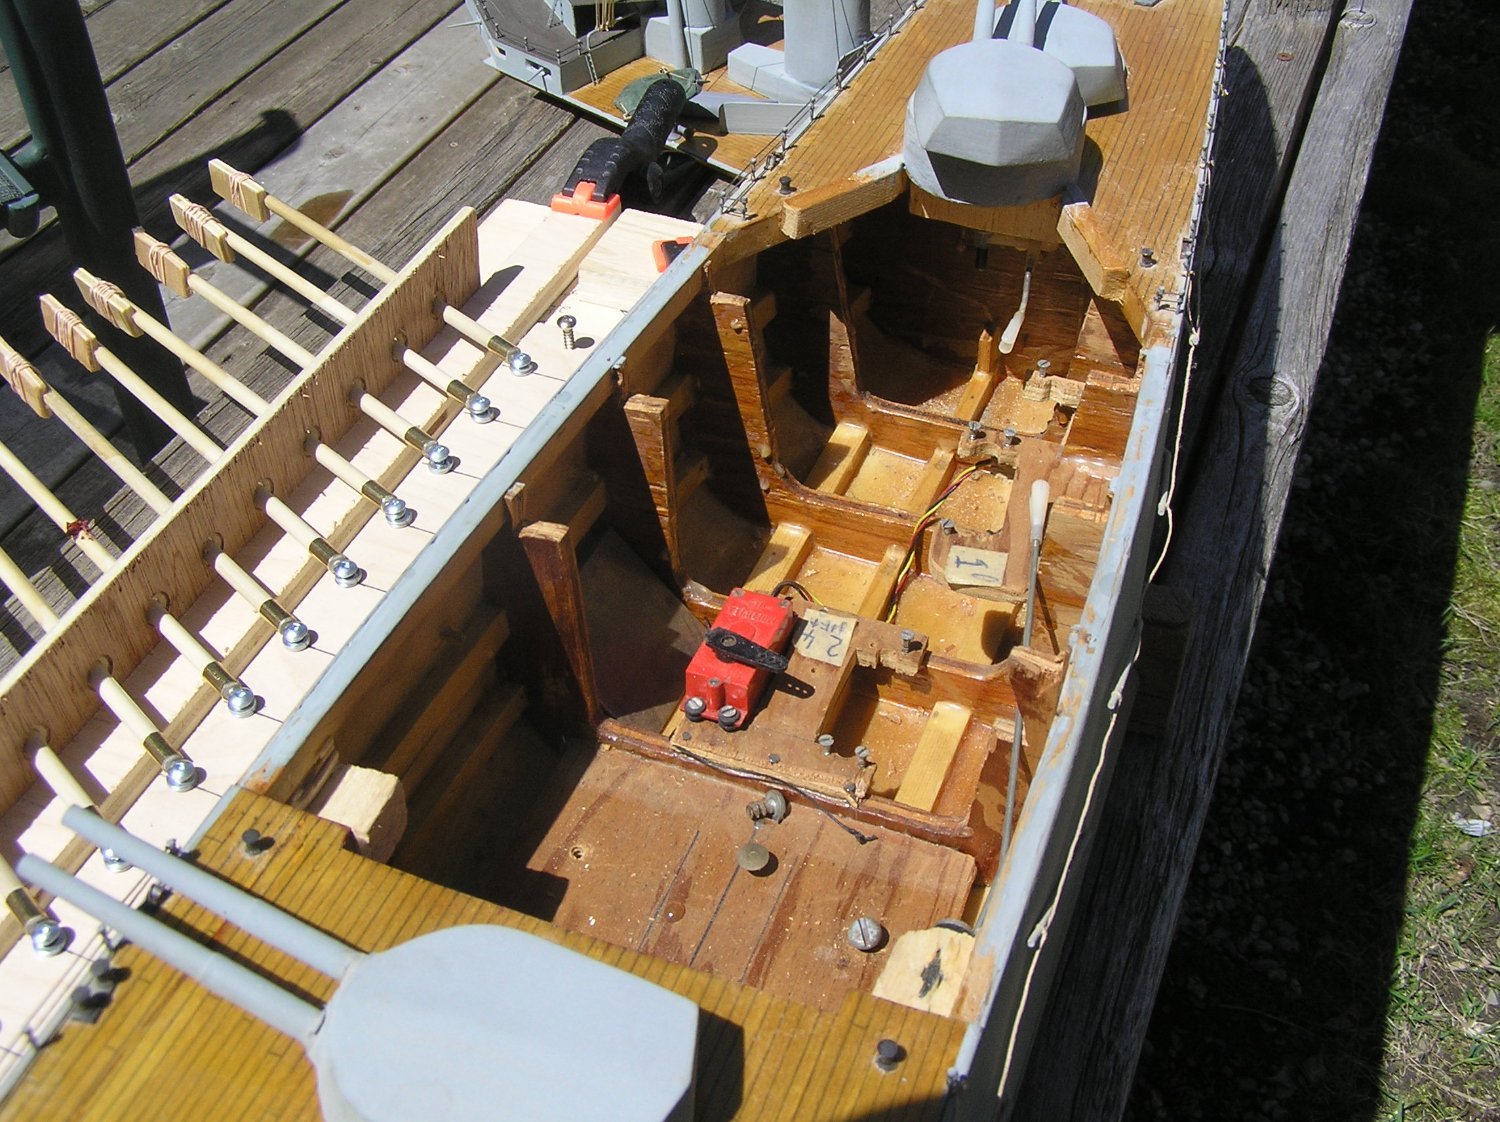
Yes she still floats. I cleaned off years of accumulated dust for the picture. I got to thinking it might be fun to run her again, same decaperm motors but with modern battery and brushed ESC's instead of the old rheostatic speed controllers I used to use in her. Well do I remember cleaning the contact area so the copper wiper arm could touch the coils of the partially-uncovered wire-wound resistor element in the rheostats.... no one under 50 knows what I'm talking about... Haha 😃. I think I will consider refurbishing her and taking her to the cottage for the calm evenings. Providing that the other decaperm is in fact in one of my other boats. I even thought it might be nice to pull the drawings out of the tube in the basement and add some more details. Her decks look pretty bare compared to some I've seen on MSW with hatches and scuttles all over. Probably I had trouble reading the drawings back then. LATER EDIT: I pulled out the drawings and wow, did I ever skip a lot of detail. Her decks are indeed full of hatches, ventilators, and scuttles. Also omitted all the light armament, armour belt edges on hull, protrusions on turrets which I assume are rangefinding lenses (?), vent pipes at the stacks, the frames at the top of the stacks (for covers when laid up in port?), all the doors, many many boats, etc etc. ill consider fixing her up but life is short; I still want to do this galley first.
- 536 replies
-
- 2
-
-
- Quadrireme
- radio
- (and 1 more)
-
Finally, after all these months, some actual numbers! Borrowed a fish scale from a neighbour. Testing in my (as yet unopened) pool, it reads about one lb pull when moving the twenty looms in a two inch stroke over one second. That's with blades measuring 5/8" x 1-3/4", and a loom length of two inches which is my desired value given the boat's likely beam. I can extrapolate from there. Force will vary in proportion with blade area, and as the square of the stroke velocity (as I can attest from many many hours pedaling a bike into the wind!). Stroke isn't going to be faster than one second, and will be slower most of the time meaning much less torque (inverse of the square). Each sweep servo will power two remes of oars, so 2 lbs thrust needed. If the servo only moves 60 degrees it will need a 2" arm to give the 2" stroke which represents a torque of 4 lb-in. If it can move 120 degrees then a 1.15" arm will give the 2" stroke, representing a torque of 2.3 lb-in. Obviously a higher-rotation servo is desirable. Since fastest realistic stroke is about 1 second, servo speed is not likely to be a concern. In an earlier video I showed return stroke speed at 1.5 times the power stroke speed which looked pretty good. If I stick to this value then the oars will be in a power stroke 60% of the time, and a return stroke 40% of the time. Sweep torque will be essentially zero during the return stroke. Sweep torque during the power stroke will vary depending on the angle of the servo arm , but let's just assume it is a constant 4 lb-in (to take the smaller-rotation servo case above) to be conservative. Over a cycle, then, the RMS torque will be about 3.1 lb-in (if I calculated that correctly). This value is the equivalent continuous torque. Since I can't get any info on continuous torque from Hitec, I'll need to do some temperature testing at this torque, with the servo arm going back and forth with an appropriate weight on it. If I find a servo that does 120 degrees, then the 2.3 lb-in power stroke torque yields an RMS torque of just 1.8 lb-in. Now I can look through servo specs and make an intelligent choice. I have been unable to pry any info from Hitec regarding continuous torque specs or thermal limitations so I will just have to select a servo whose max torque, "heavily" de-rated, is likely to indicate a continuous torque rating exceeding the above RMS values. So, rookie, your head must really be spinning now! 😃 It's OK everyone, I can tease rookie......he's my brother! Other unknown is what force is required to propel the actual boat? I just happen to have a WW I battle-cruiser I built for RC in high school which has a length, beam, and draft very similar to the proposed galley. I used the fish scale to pull it on the water. From a standing start it needs less than one lb to get going, which is much less than its displacement. Since four remes of oars should provide in the region of 4 lbs thrust, I think maybe I'm making a dragster! 😀 LATER EDIT: I forgot to take into account the oar gearing. For the twenty oars collectively, the 1 lb pull from the servo at the looms yields 0.35 lb at the centroids of the blades. Four remes thus provide 1.4 lbs thrust against the water, far short of the 4 lbs I mentioned above. Here are some pics of the battle-cruiser beside the oars at the proposed scale (fish scale is also seen). Size looks about right! The ship is Admiral Beatty's flagship HMS Lion, which was heavily damaged at Jutland. I got the plans from David MacGregor in the UK. Not a completely detailed build but pretty good for a teenager in the 70's. Powered by twin Decaperm motors (lovely motors, one of which remains) and oversized propellers which pushed it along like a destroyer. The other motor must be in one of my other old RC boats. There's even an old servo in there; might be fun to try it out.


- 536 replies
-
- 3
-
-
- Quadrireme
- radio
- (and 1 more)
-
Bill, if you get down there you must see Zion National park. It's like nothing we had ever seen, even though we just drove through it on a loop from Vegas. Promised ourselves to hike there someday. Sorry to digress from the ship, Tom! You seem to be a fast worker like Bill; he has nearly done the standing rigging after 11 months whereas most people take years to build this. Took me five. 😀
-
That would be ideal. My brother has a PLA printer; not sure I could drill and tap PLA without it cracking. Maybe I could prototype it in PLA, finalize it, then get my local machine shop to CNC eighty out of aluminum for me, including a tapped hole for a grub screw. Now that would be awesome! In fact, I can cut aluminum with my tablesaw/router using carbide teeth/bits. I'm sure I could jig up something to drill the holes repeatably....Thanks mtaylor!
- 536 replies
-
- 1
-
-
- Quadrireme
- radio
- (and 1 more)
-
Well no, that only occurred to me after; the 1/3 came to mind from 18th century ships. I expect wire, being stronger for a similar strain, will be smaller than a rope shroud so the lanyards will be a bigger ratio. I'm sure Longridge's Cutty Sark book must detail this, if it's anything like his book on Victory.
- 444 replies
-
- 1
-
-
- Cutty Sark
- Revell
- (and 2 more)
-
Yes, but the circumference and diameter vary in proportion. Longridge's "1/2 circumference" equates to "1/2 diameter" too. 😃
- 444 replies
-
- 2
-
-

-
- Cutty Sark
- Revell
- (and 2 more)
-
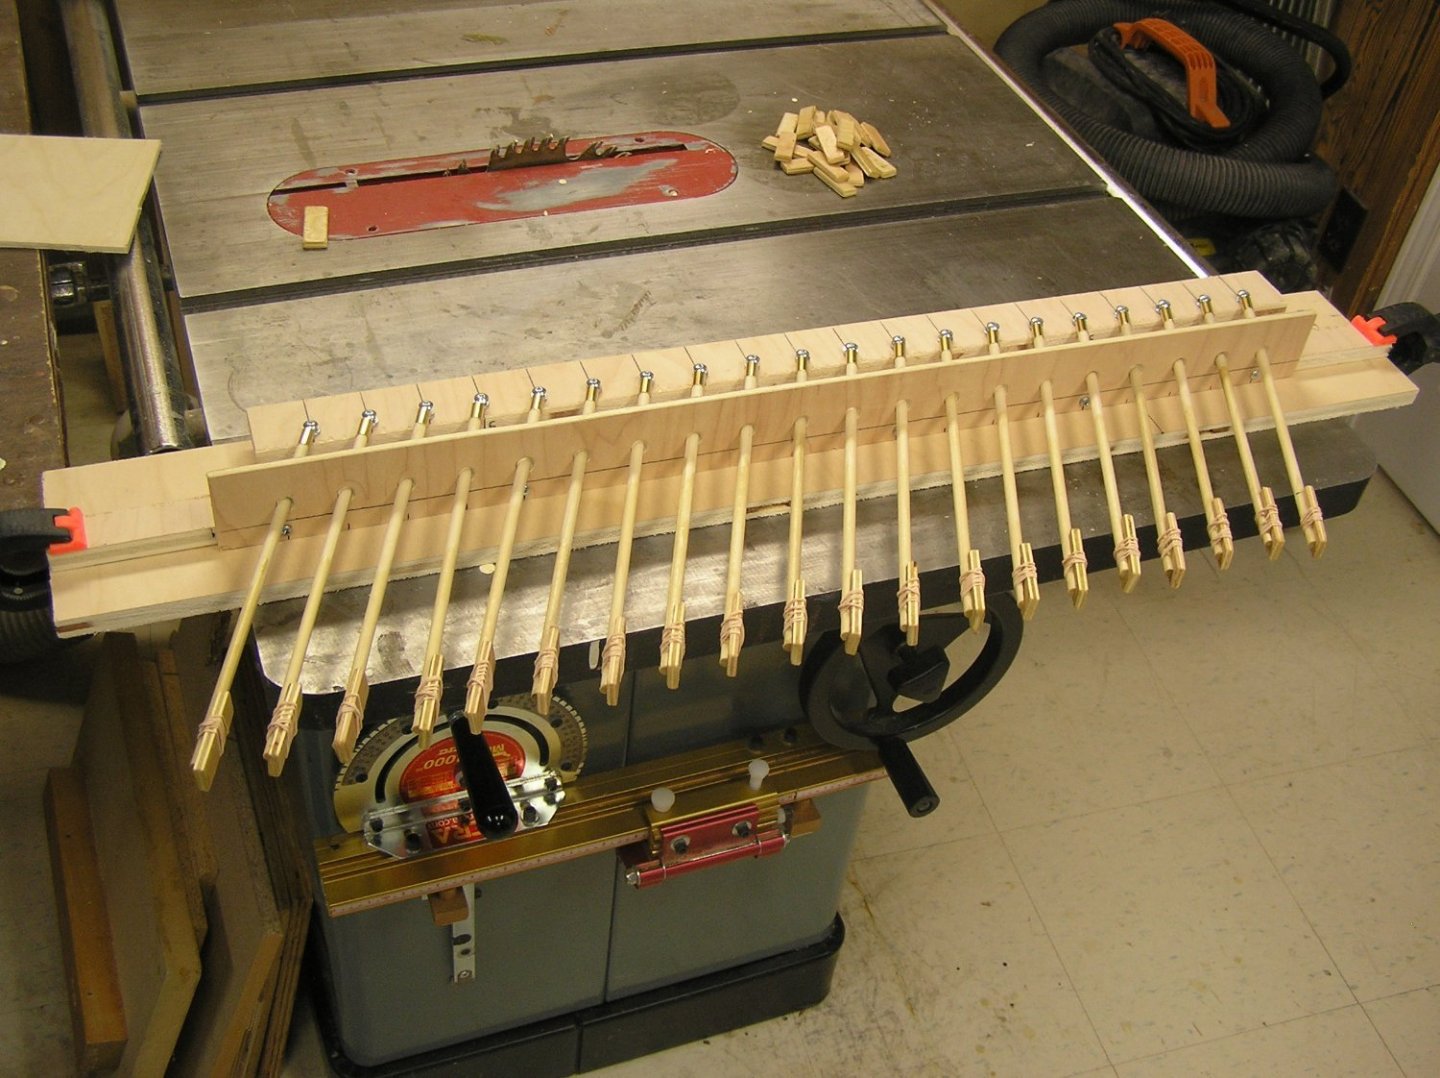
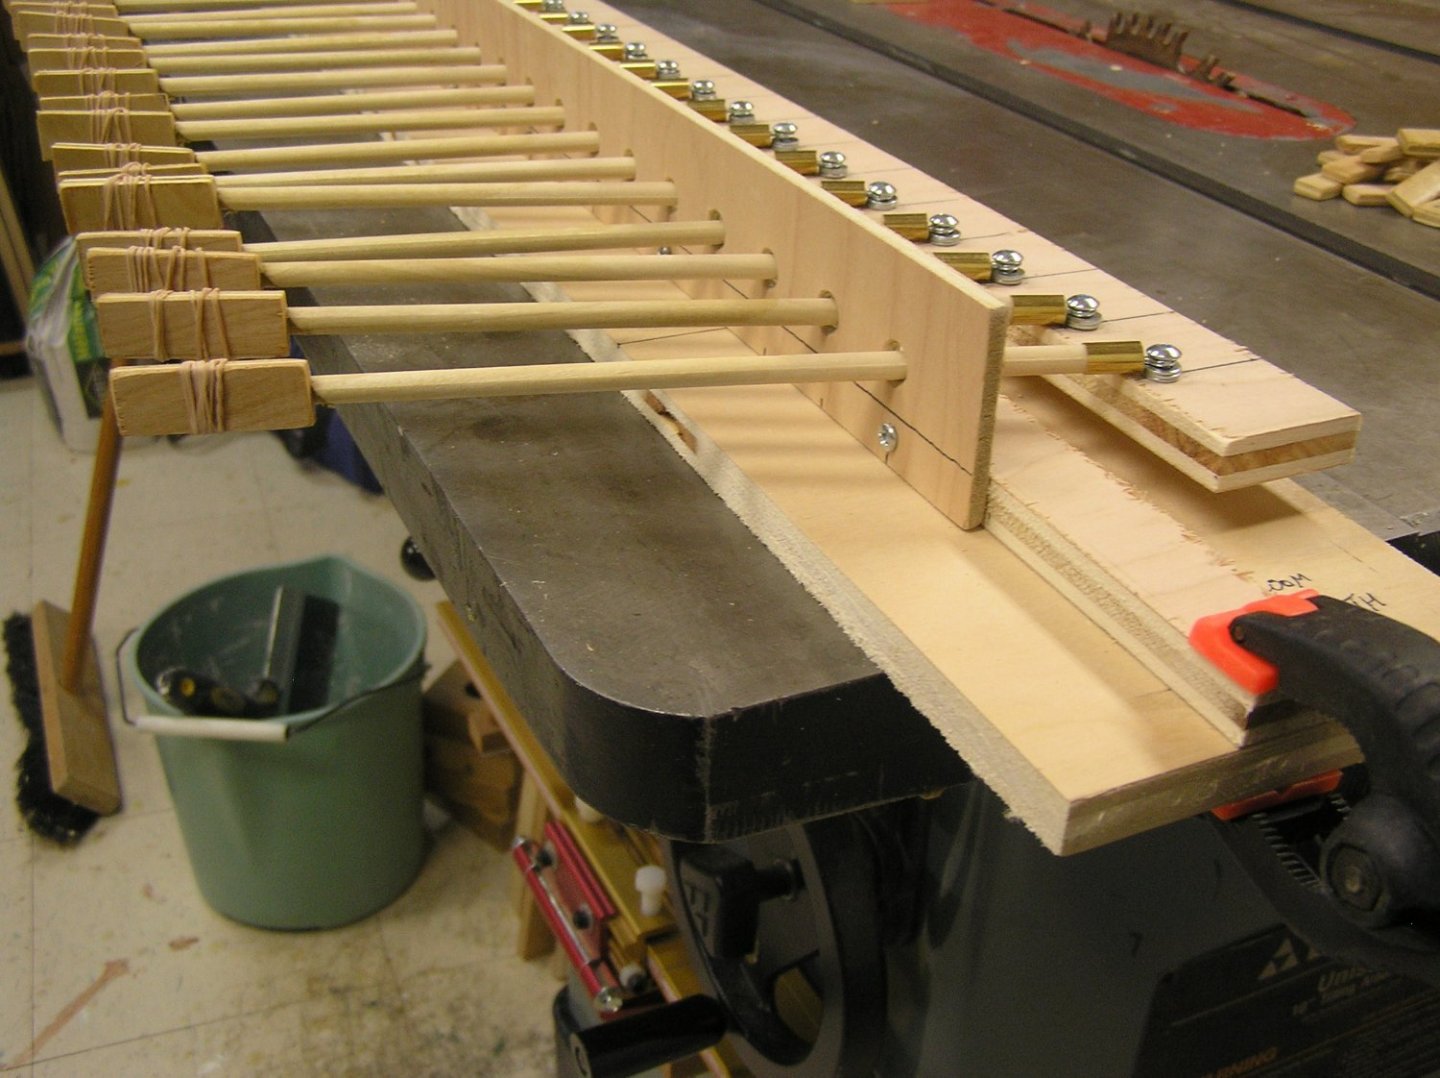
I built a jig to measure the force required from a sweep servo. It consists of 20 oars in a single tier as shown: The clamps at the ends allow adjustment of the "gunwale" position to change the ratio of the oar inboard loom length to total length i.e. the "gearing" of the oars. I just cut a flat on the ends of the oar shafts. Rubber bands hold the blades in place, allowing me to try different blade sizes. I slapped some "Helmsman" spar varnish on them. The plan now is to borrow/steal a spring fish scale and use it to pull the oar looms to measure the force. Still the cheap screw connections. For the actual ship I will use u-channel from Servocity to hold the oar ends. This channel is drilled at 8mm intervals. I will space oars every 5th hole, so 32mm apart. The upper tier will use the "3rd holes" in their beam to place them centred between oars in the lower tier. I was thinking of 3D printing a better oar attachment to allow them to pivot nicely in the u-channel. Something like this which I drew in TinkerCAD: The small hole is for an M4 machine screw which passes through the sides of the u-channel. The large hole is for the oar shaft to glue in. Disadvantage is that once glued in I cannot remove an oar from the boat, through the thole hole. I even contemplate making brass oars, then I can solder the blades in and solder a square tube at the inboard end; in this case the larger hole in the fitting would be square, obviously, and I can perhaps drill another hole to pin the shafts into the fitting and allow oar removal. The u-channels themselves will simply be hinged to the beam to allow them to tilt as the beam moves up and down. I have decided to use Servocity T-beam extrusions and mini v-rollers to mechanize the vertical movement, instead of round shafts and linear bearings. A bit cheaper, plus I can space the v-rollers at whatever distance whereas there are only two choices for length in linear bearings. That's all for now. Eager to see what kind of force is needed!

.png.74522fb04647e7a55408388565d2d252.png)
- 536 replies
-
- 3
-
-
- Quadrireme
- radio
- (and 1 more)
-
I think the simple rule of thumb is lanyards are 1/3 the size of the shroud or so. I see, though, that Longridge mentions 11" lower shrouds with 5-1/2" lanyards in the case of "Victory" at least; seems a bit overkill since the strain in the lanyard is divided by six....
- 444 replies
-
- 1
-
-
- Cutty Sark
- Revell
- (and 2 more)
-
Oh, I meant that the backstays were not done at all at the time I did the ratlines, but go ahead........
-
Couldn't recall what I did so I looked through my old pic files. I definitely did the ratlines with the topmast backstays just dangling, aft of the masts.
-
Bill, in the case of the lower mast head there are no backstays and the stay passes around the sum total of the clinched shrouds. As on your model. In the case of the topmast head, the stay similarly passes around the the sum total of the clinched backstays and shrouds. See Plan 9. The first photo is incorrect in having the stays buried under the backstays. Plan 9 has a nice inset drawing on sequence at mast head too. Finally, I notice in your pic that the mice are dark. You decided to paint the pearls?
-
I'd love to see some pics of these..................
-
For a moment there I thought you were going to try to rig the guns on the ship....Haha...now that would be a real miracle...
- 177 replies
-
- 4
-

-
-

-
- Independence
- bottle
- (and 1 more)
-
Agree with Daniel about the 5 sizes. For example, the 18" fore stay is not quite as large as the 19" main stay, but at scale 1.6mm is good for both. Same goes for blocks. Each available block size must cover a small range of actual block sizes.
-
In scale, the fore and main stays are 1.6mm, their preventers are 1.3mm. Fore and main topmast stays 0.75mm, preventers 0.5mm. Main and fore shrouds 1.0mm, topmast shrouds 0.5mm. Anchor cable was 27 inches in real life, which is 2mm at scale. Keep up the great work!
-
Kevin, I love the cat head on the cathead. Checking my old CS, there's nothing there, as you know. I would truly like to build another Revell CS and correct the deadeyes & lanyards at least, and rig proper shrouds, but I doubt there are enough years to get to it. 😢
- 444 replies
-
- 3
-
-
- Cutty Sark
- Revell
- (and 2 more)
-
Man, that's a lot of future work! The Heller Victory alone is a years-long effort for most.....happy modelling!
- 481 replies
-
- 1
-
-
- Cutty Sark
- Revell
- (and 2 more)
-
Bill, it might just be the camera angle, but it looks like your bunt lines are going through the double blocks below the sheave instead of above it, at least on the starboard side. The jeers and sling look good!
-
Bill, not sure what reference books you have. I don't have any simple diagrams. Longridge plans 8 and 9 are pretty good for all the blocks near the centres of lower and topsail yards. Also plan 7 "Running Rigging", although it takes getting used to, shows all the blocks mounted on yards and positions of footrope stirrups etc. But you need to know what you're looking at e.g. the two buntline blocks on a course vs the singles on a topsail yard. It takes some flipping between plan 7 and the other zoomed-in drawings. Sorry!