


Steve 12345
-
Posts
438 -
Joined
-
Last visited
Content Type
Profiles
Forums
Gallery
Events
Everything posted by Steve 12345
-
 Looking good sounds about right with the bulwarks I had to do exactly the same thing
 -
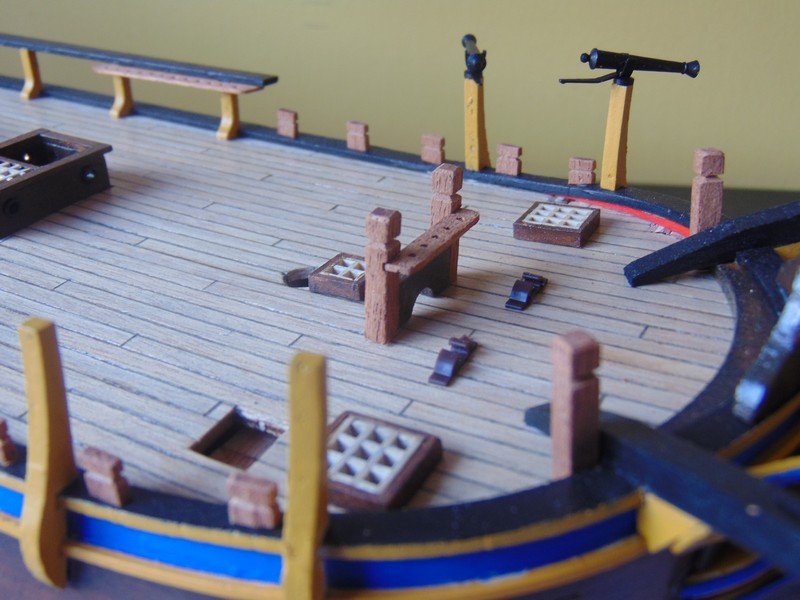
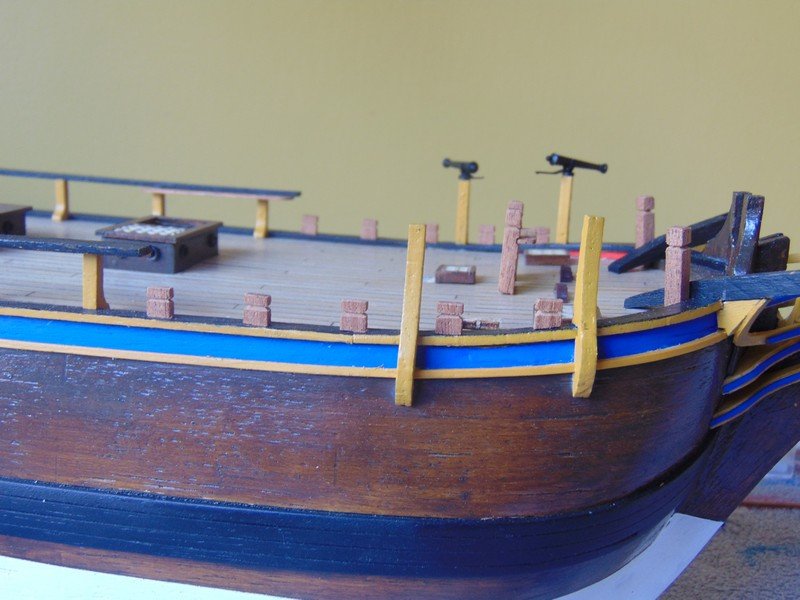
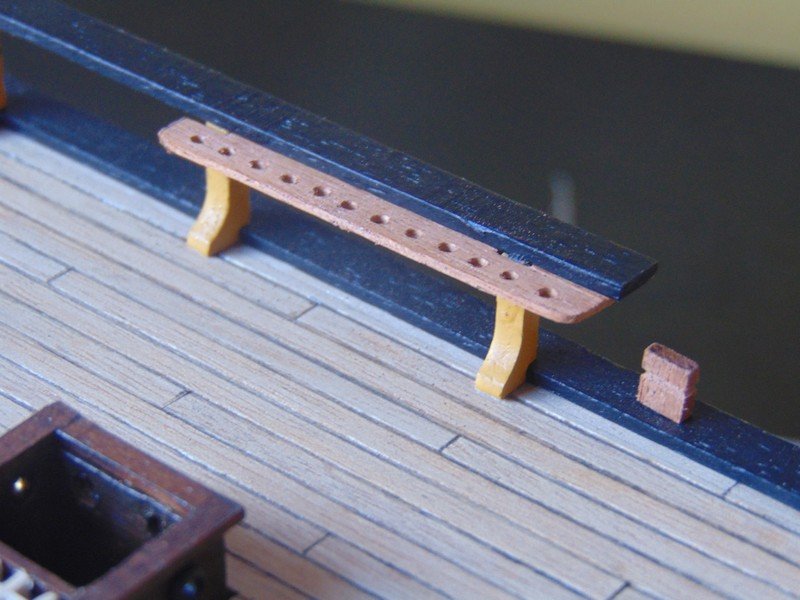
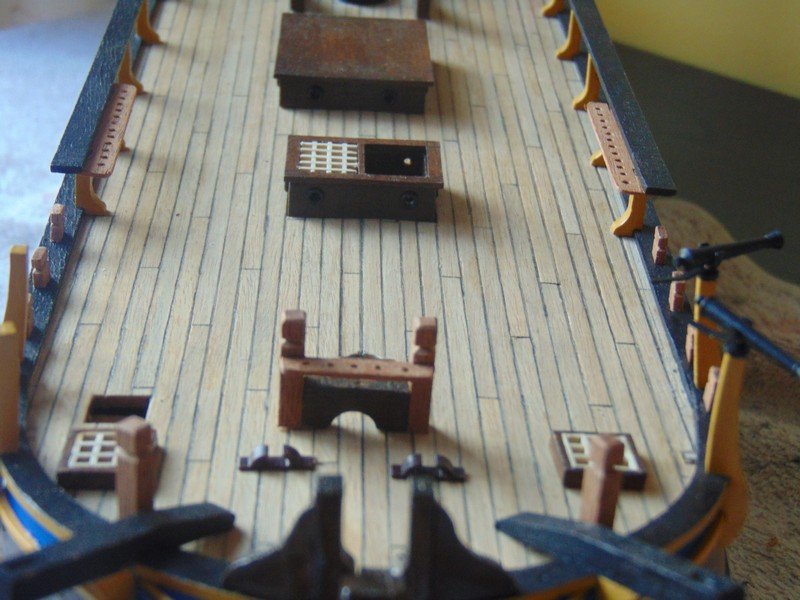
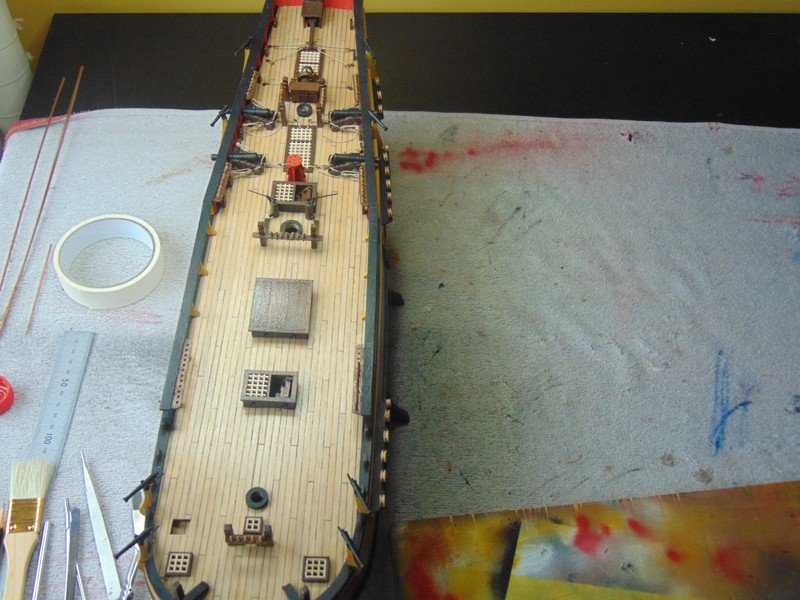
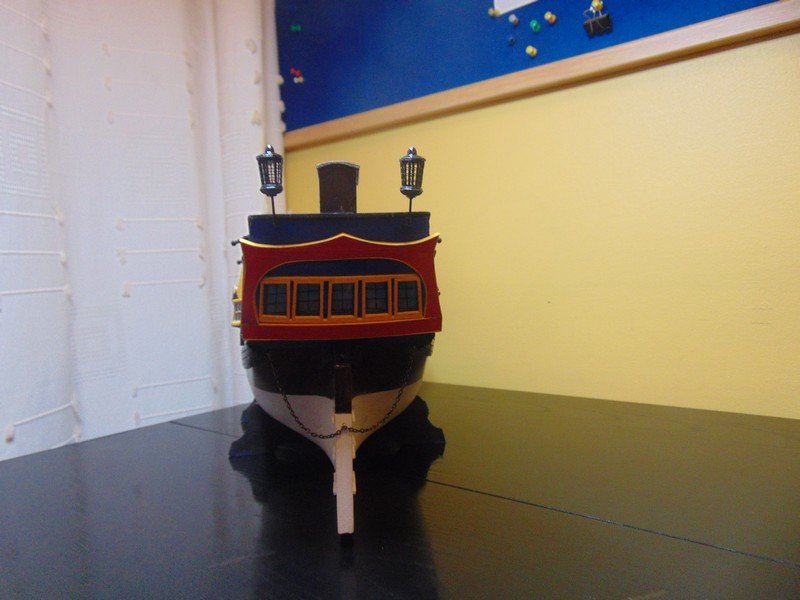
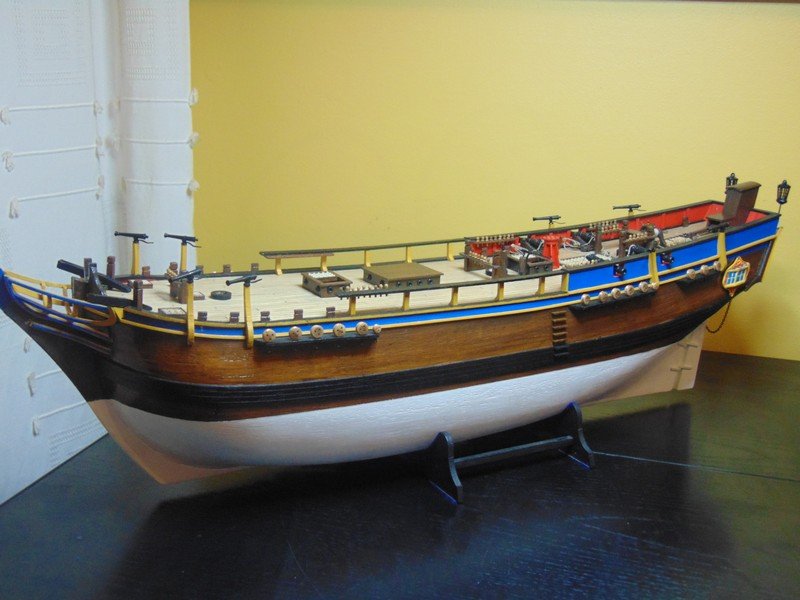
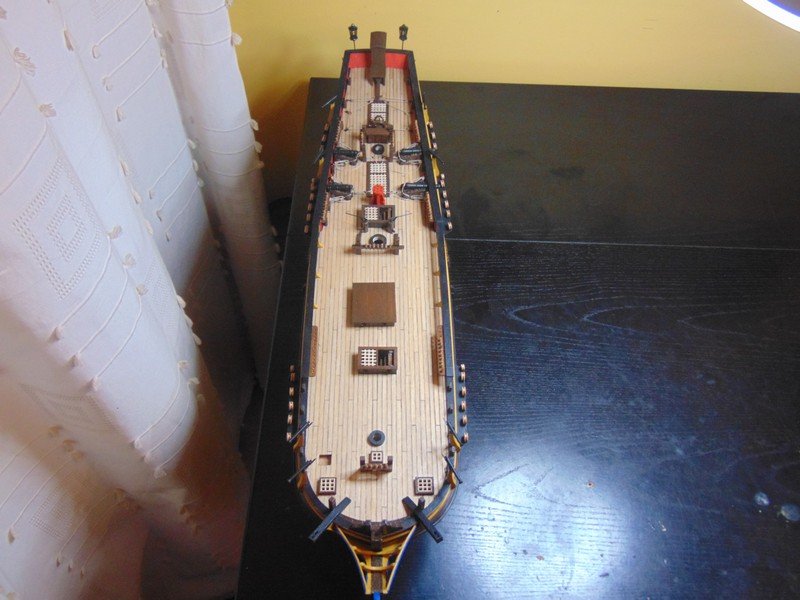
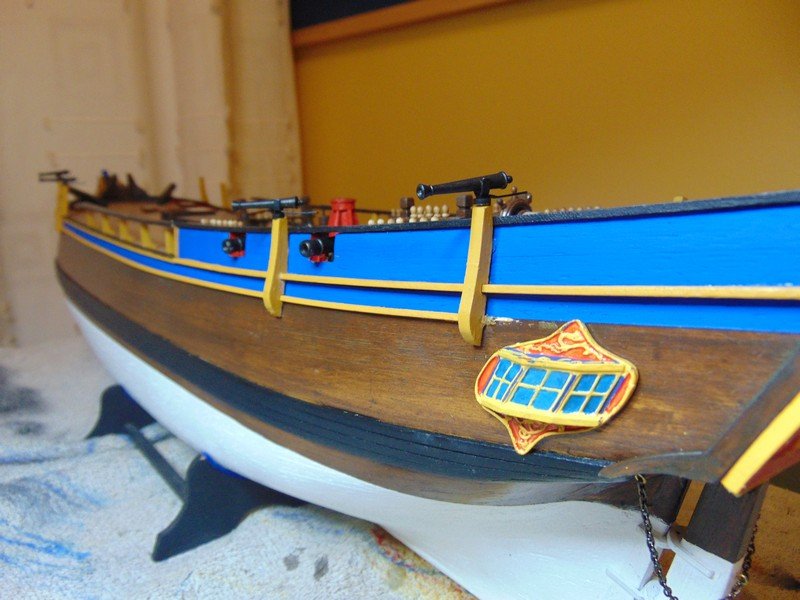
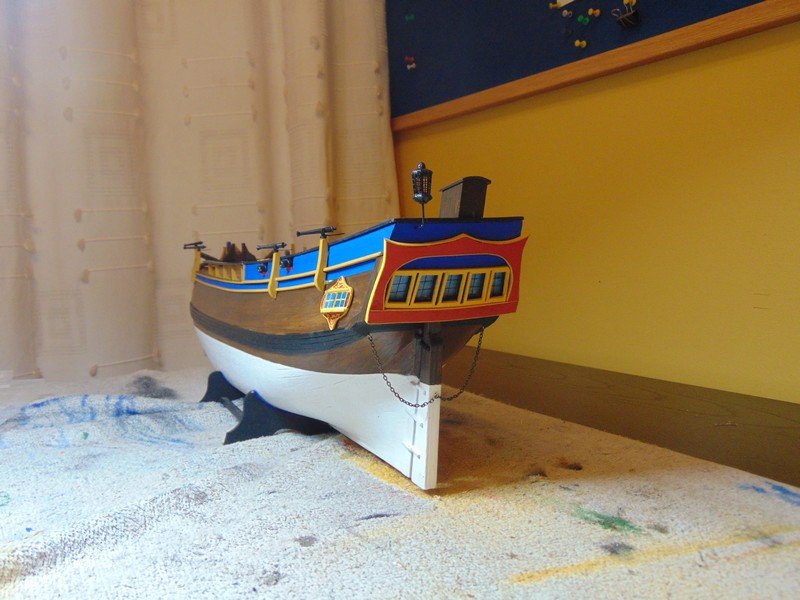
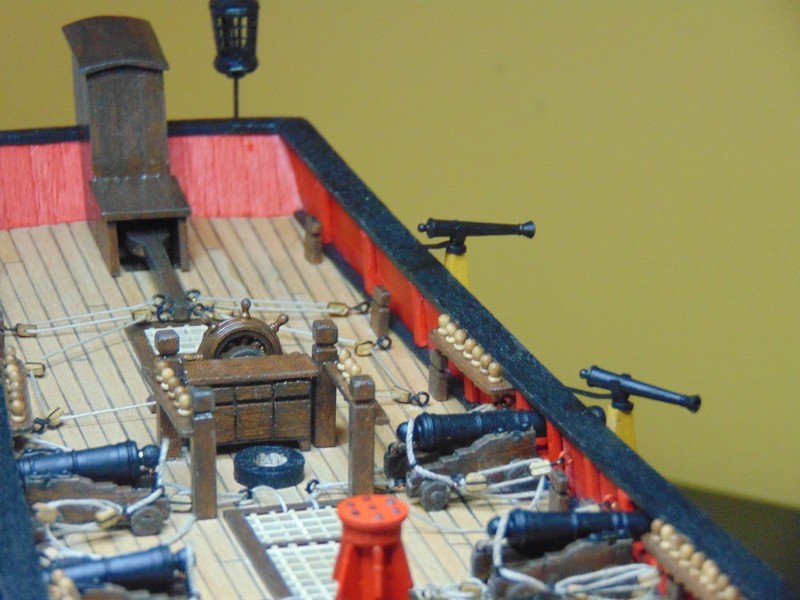
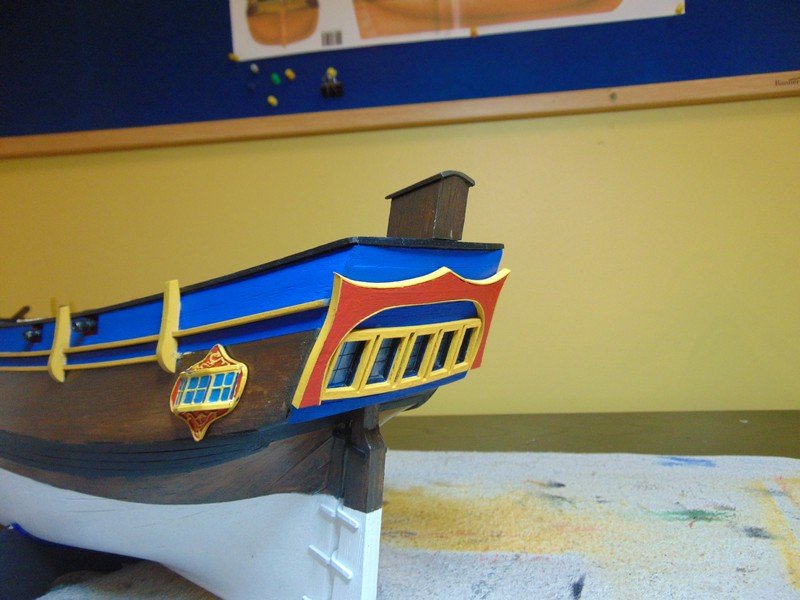
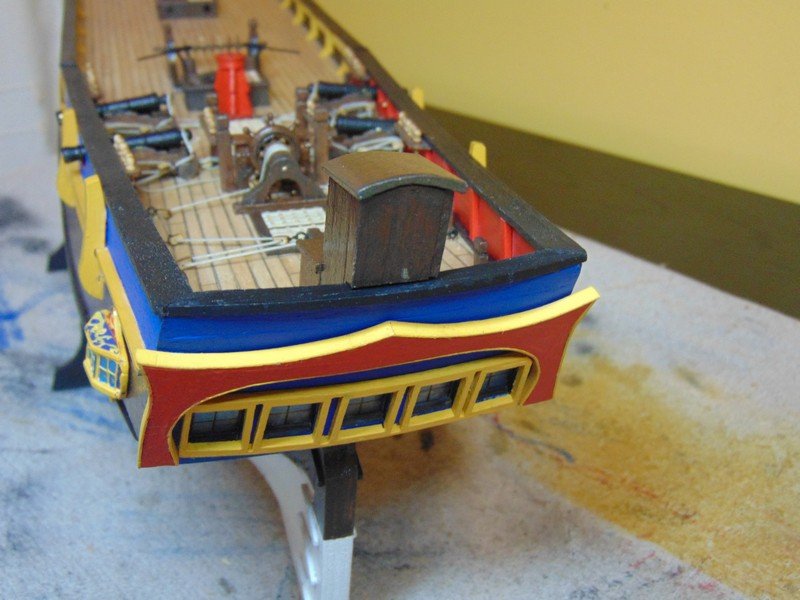
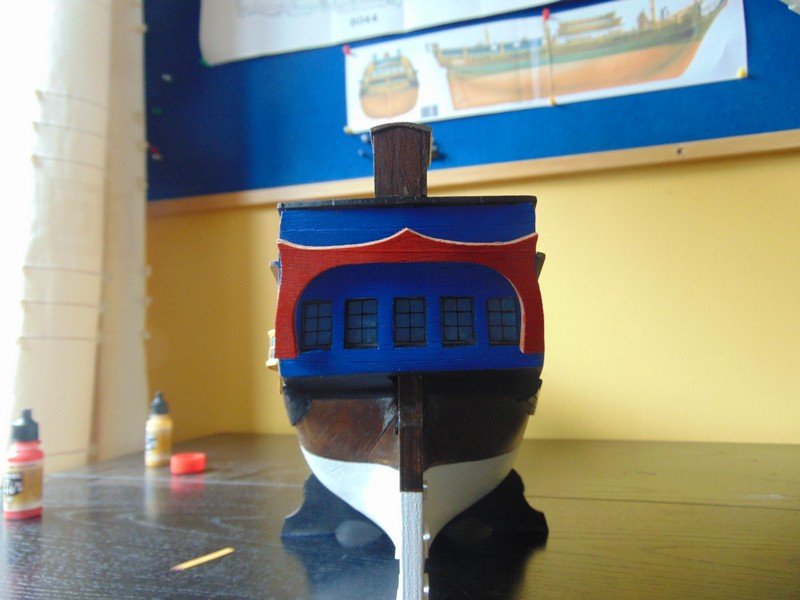
Hello all back with an update on the Bounty I keep finding excuses not to work on that transom so made more deck pieces and decided to bring the ship up to date on both sides I try not to let one side get to far ahead of the other. Here is the transom as she sits at the minute I think I will lower the height of the flag locker and drop the lanterns down a tad,the locker is still removeable and that is why I haven't fitted a door on it yet. there is also some work still required around the gallery windows. I really should be cracking on with these parts but the past few days this part of the builkd has really slowed me down I am not sure why cause I know if I set my mind to it and dive in I will handle it . today being Saturday a with some free time I decided to get the build speeding along again and just wanted a part I could build with not much thought so I tackled the dead eyes and channels and the ladders The deck is progressing nicely and im running out of things I can build to avoid that transom ,the last thing after the transom will be to scratch build of heavily modify the windlash then I can crack on with the masts . thanks for viewing steve.

- 291 replies
-
- 11
-

-
- bounty
- billing boats
- (and 1 more)
-
Where the shrouds attach I would paint black as for the rudder duplicate the hull with your water line should it be copper plates etc
-
Looking good nigel looking forward to seeing her progress
- 121 replies
-
- 2
-
-
- bounty
- constructo
- (and 1 more)
-
Ahoy frankie love your work thanks for the pics on the bounty
- 55 replies
-
- 3
-
-
- isabella
- billing boats
- (and 1 more)
-
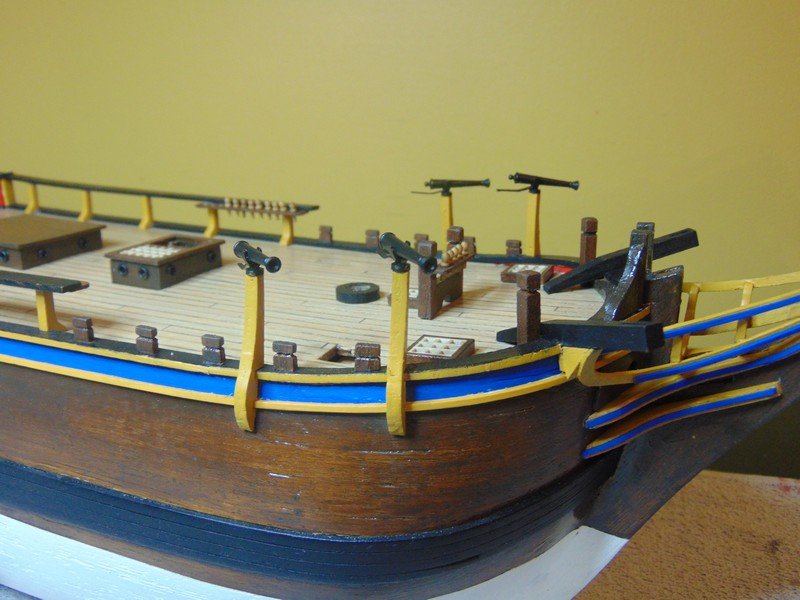
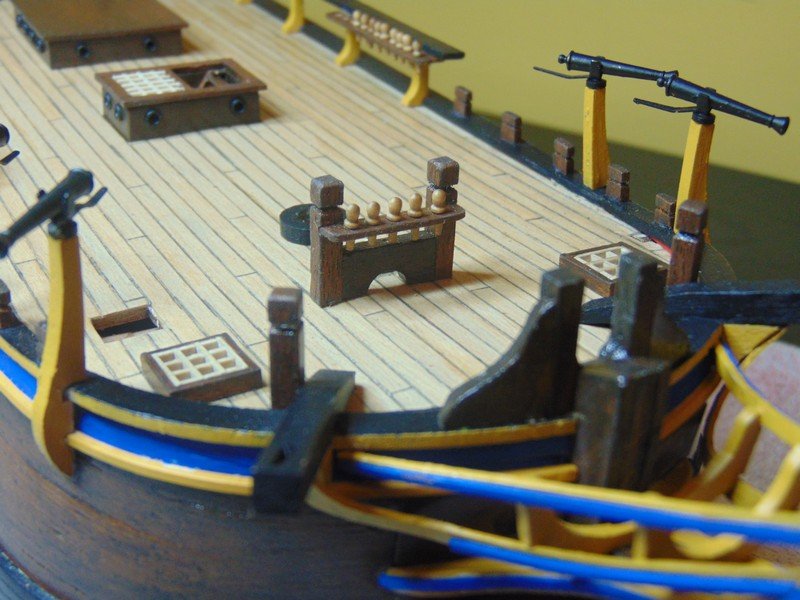
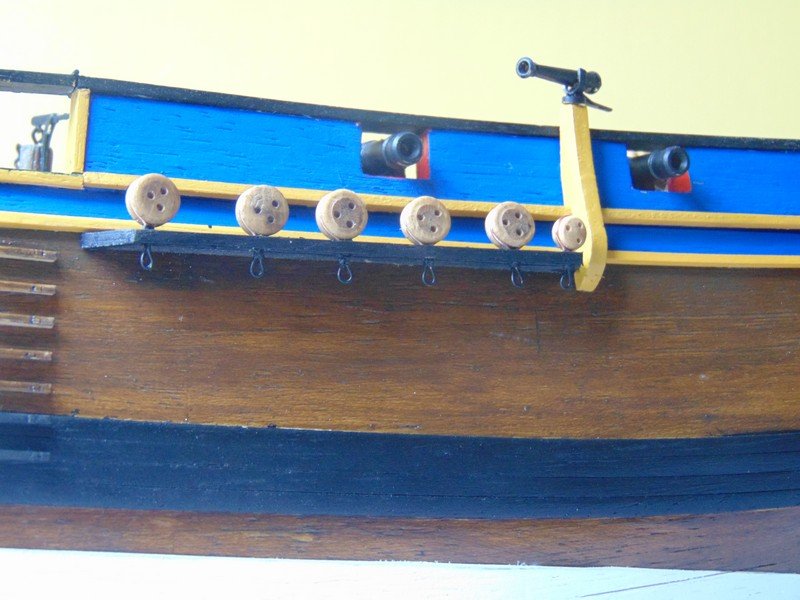
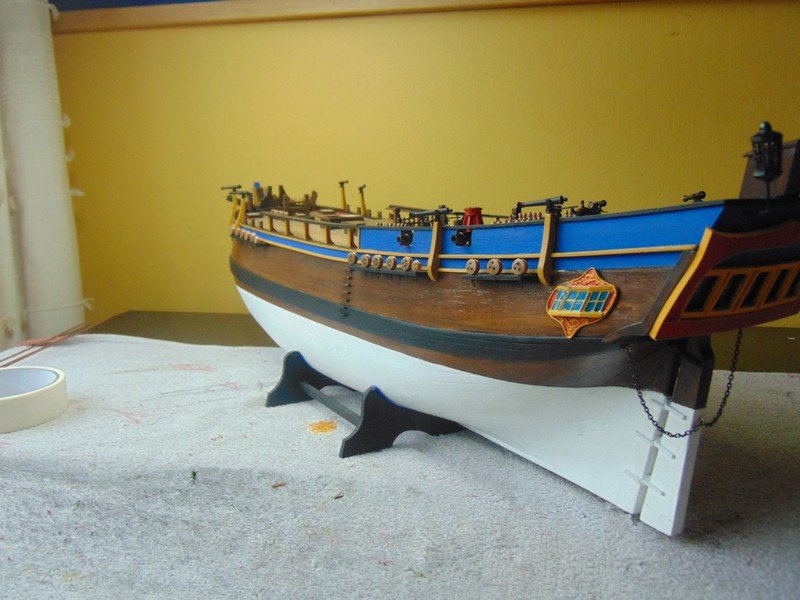
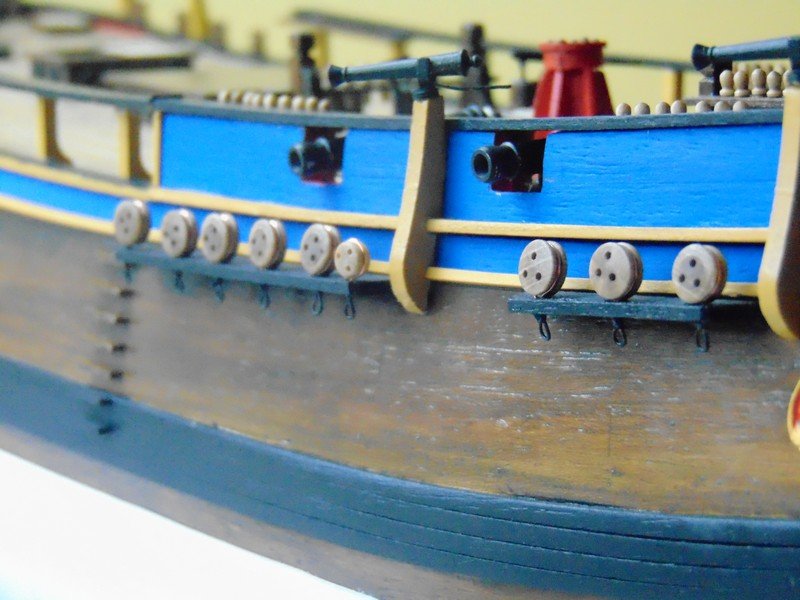
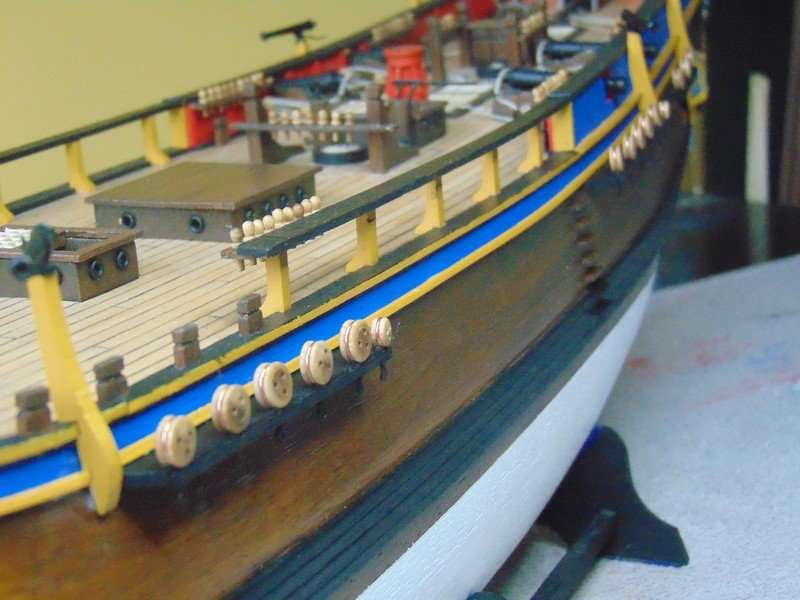
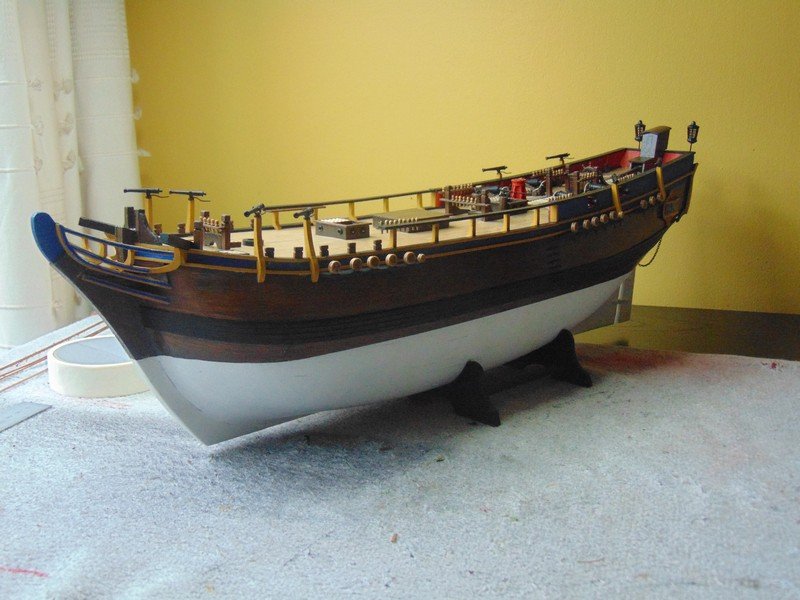
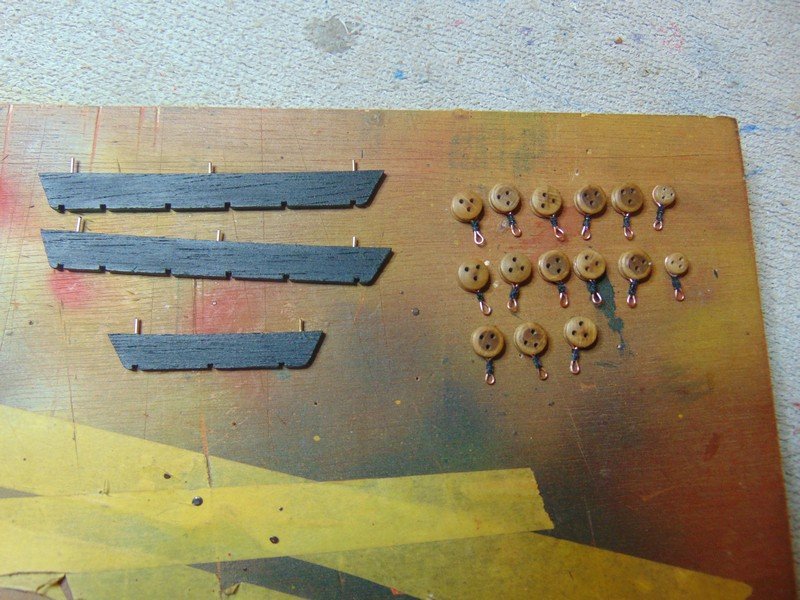
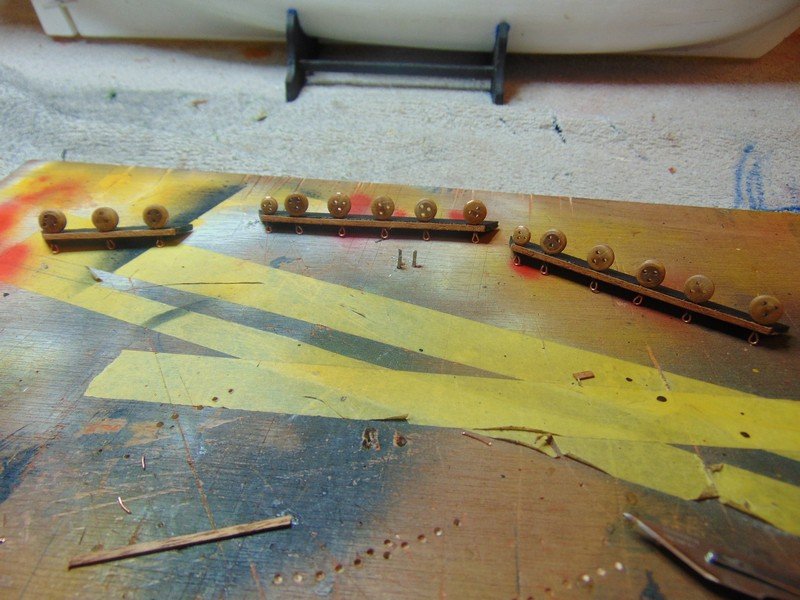
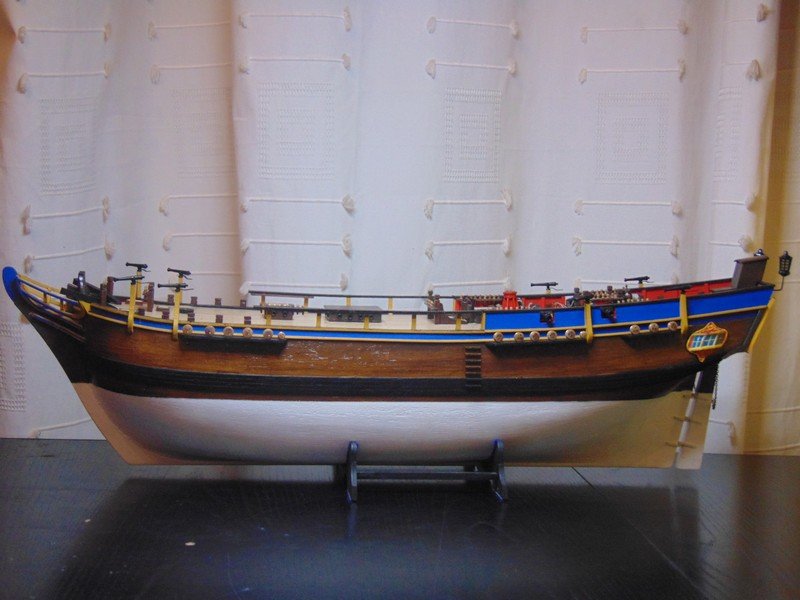
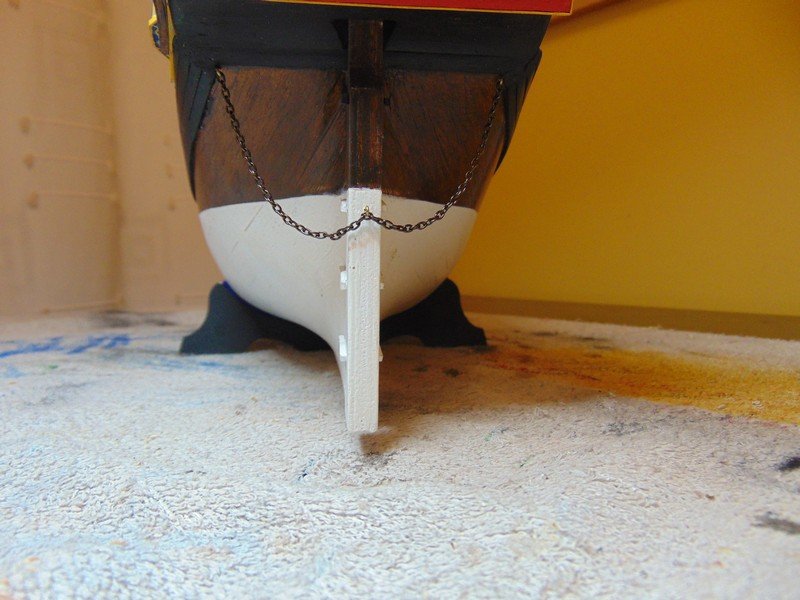
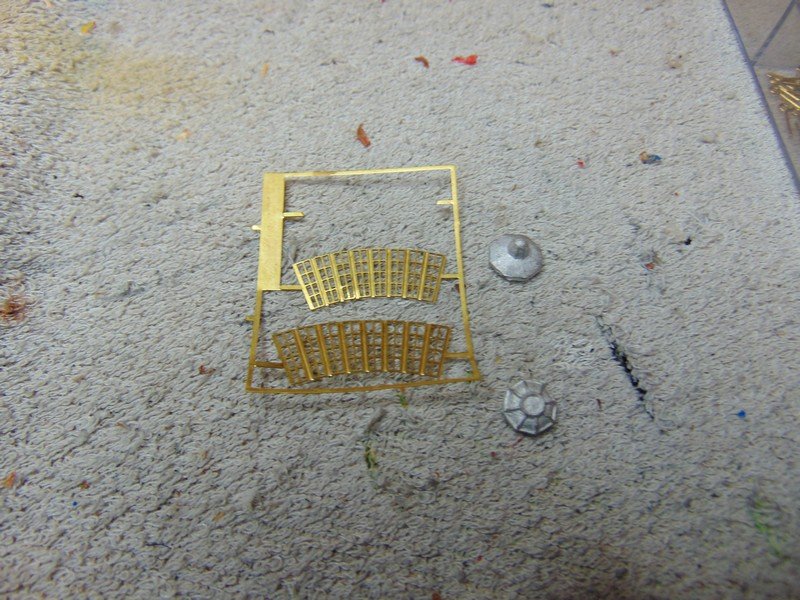
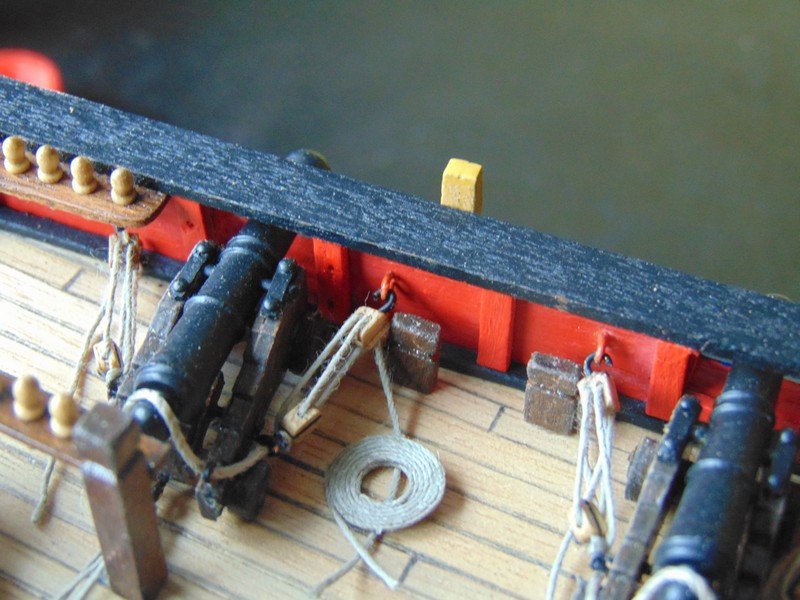
I found some left over rudder chain from my victory build which fitted nicely not a link to much or to little did a bit more work on the transom and while waiting for paint to dry put together one of the lanterns from caldercraft and built some of the billings supplied swivel guns there is a bit further work to do with the transom but im happy so far with the progress


- 291 replies
-
- 9
-
-
- bounty
- billing boats
- (and 1 more)
-
Thank you frankie sir for viewing its a fitting kit as I was born in 1980 I love your work on utube and I am honoured you took time to view I know your a busy man big thumbs up buddy
- 291 replies
-
- 2
-
-
- bounty
- billing boats
- (and 1 more)
-
Looking good frankie big thumbs up right at you buddy
-
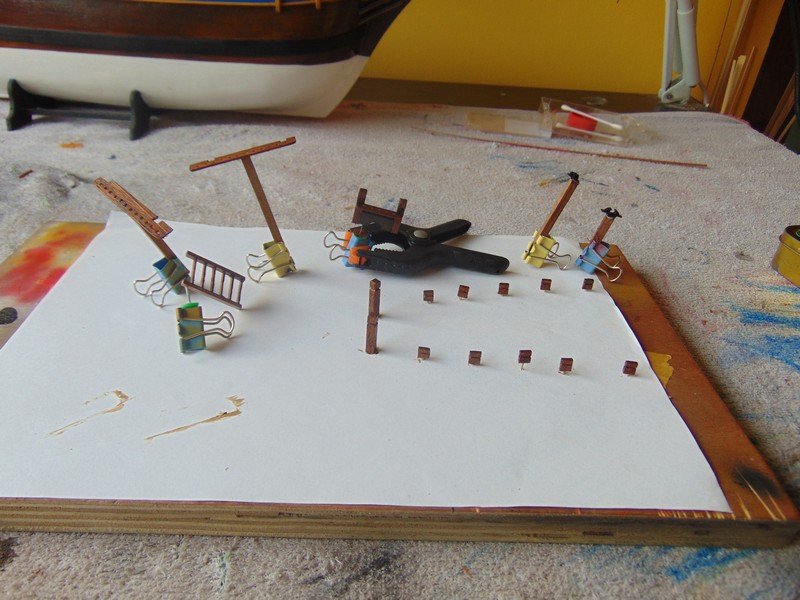
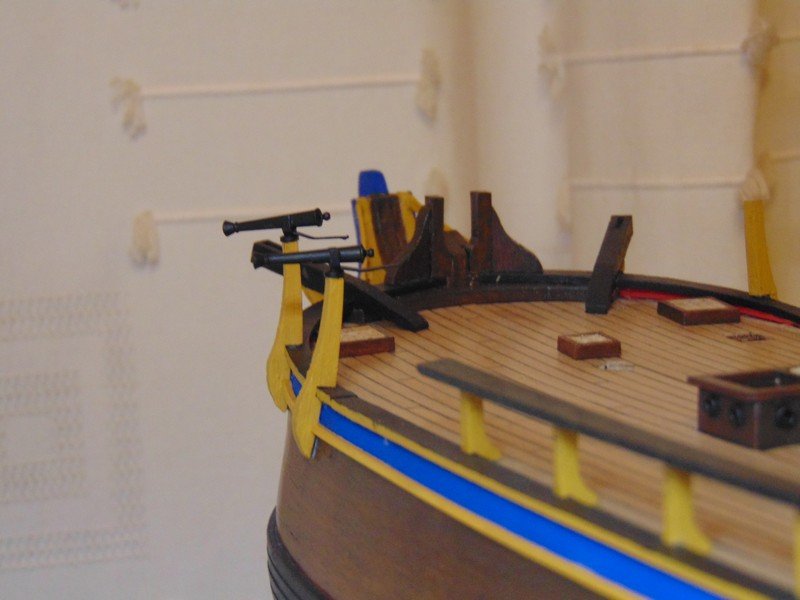
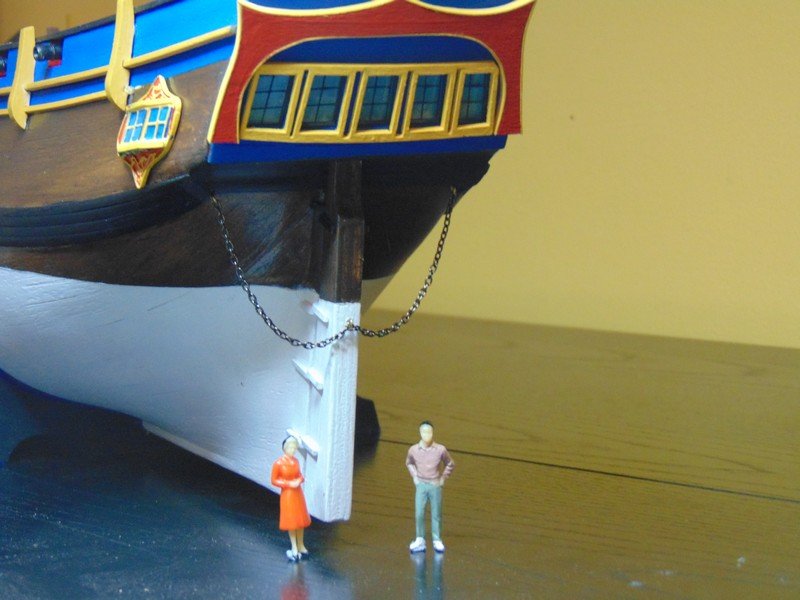
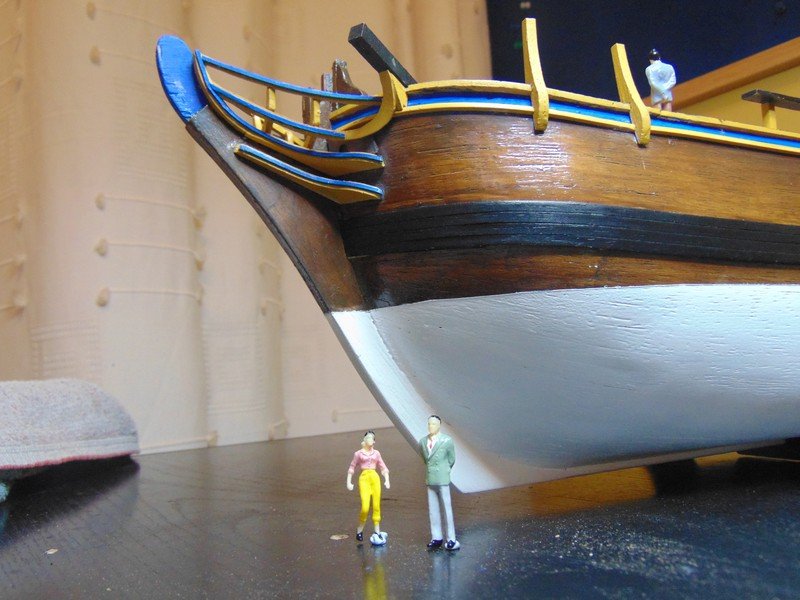
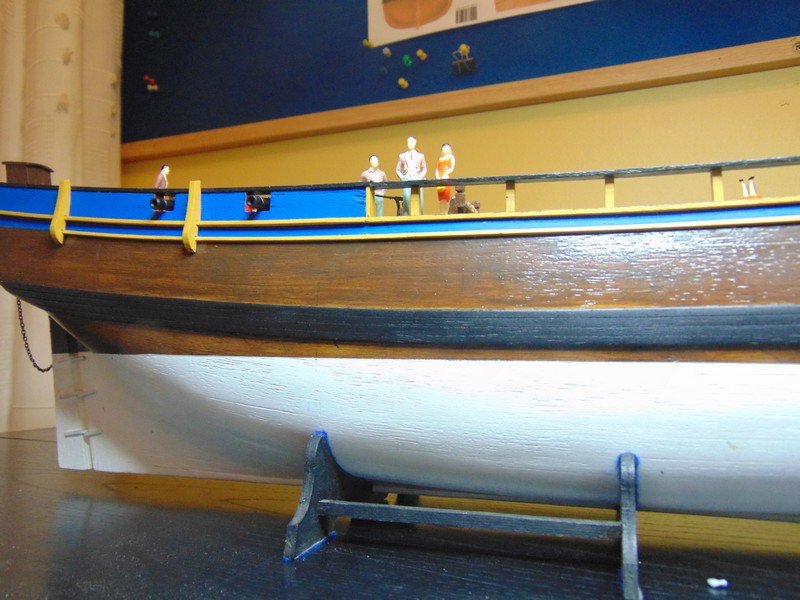
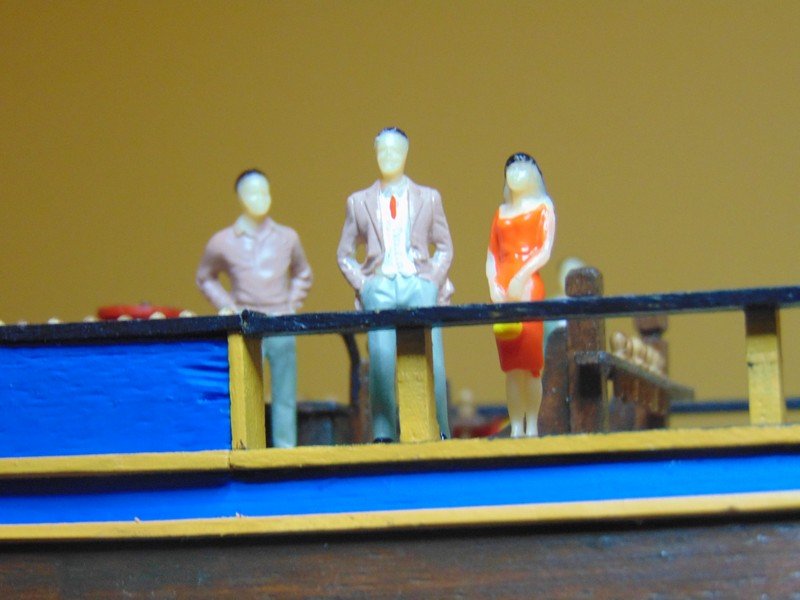
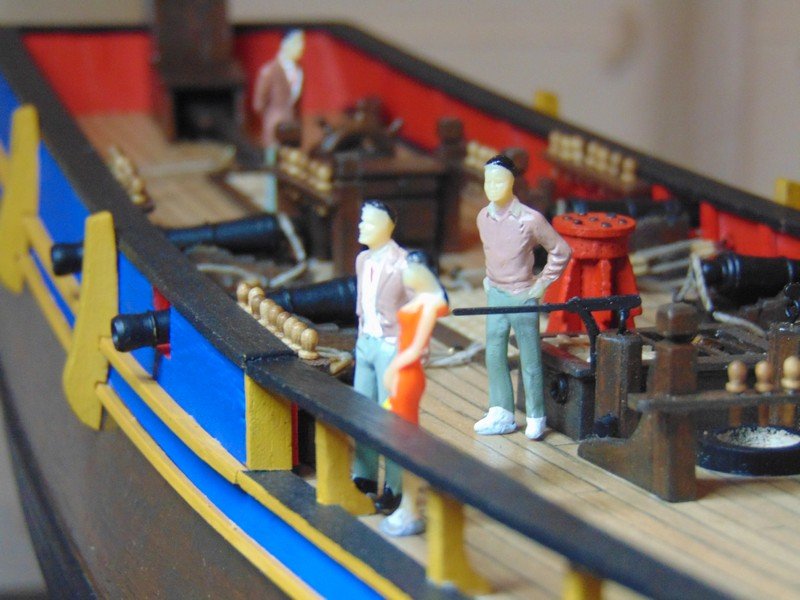
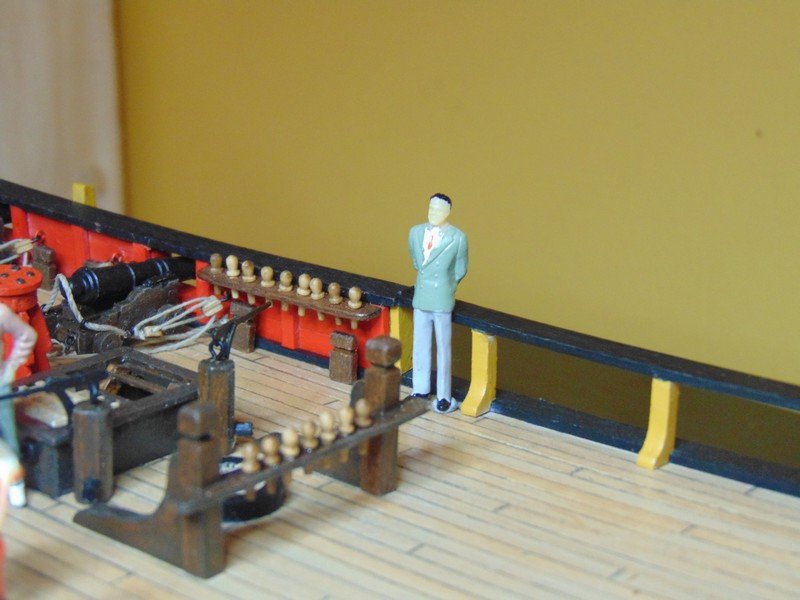
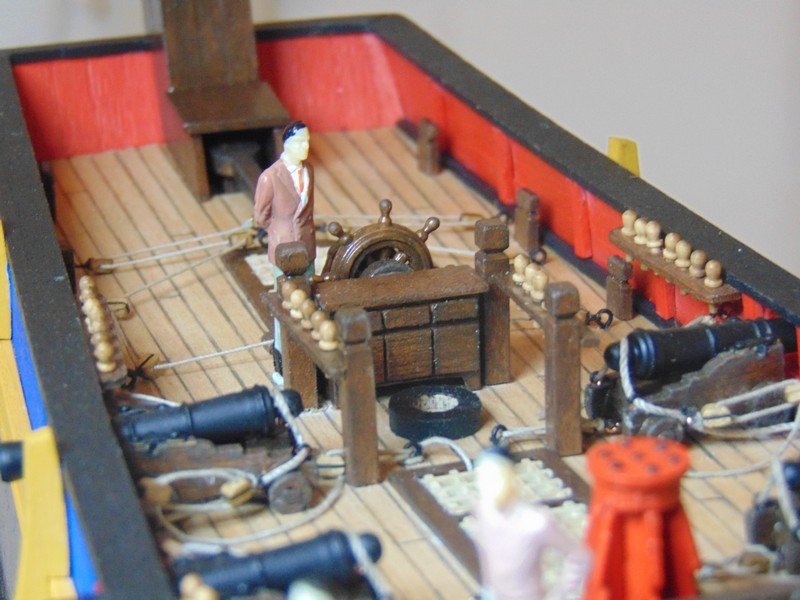
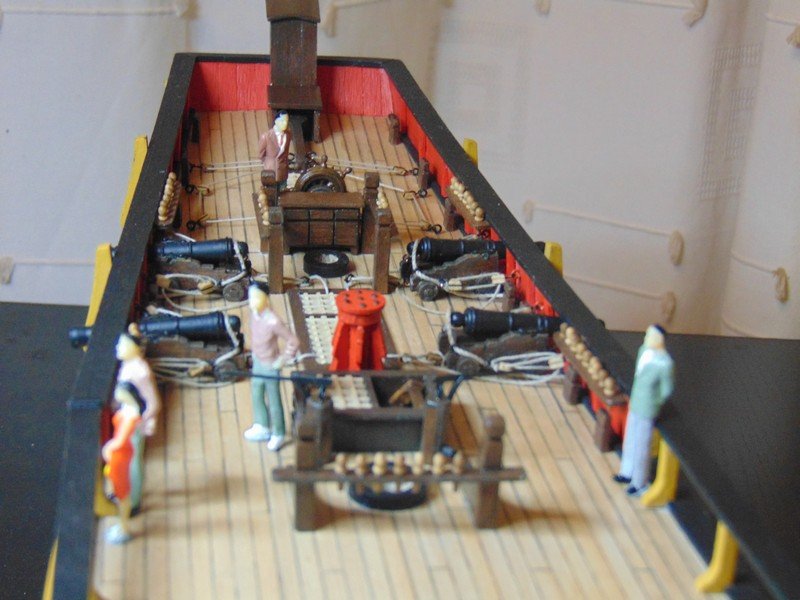
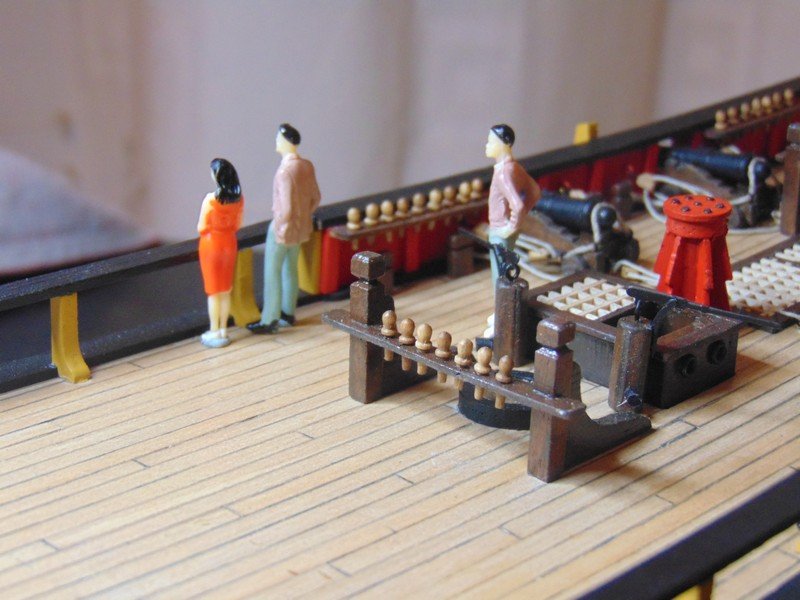
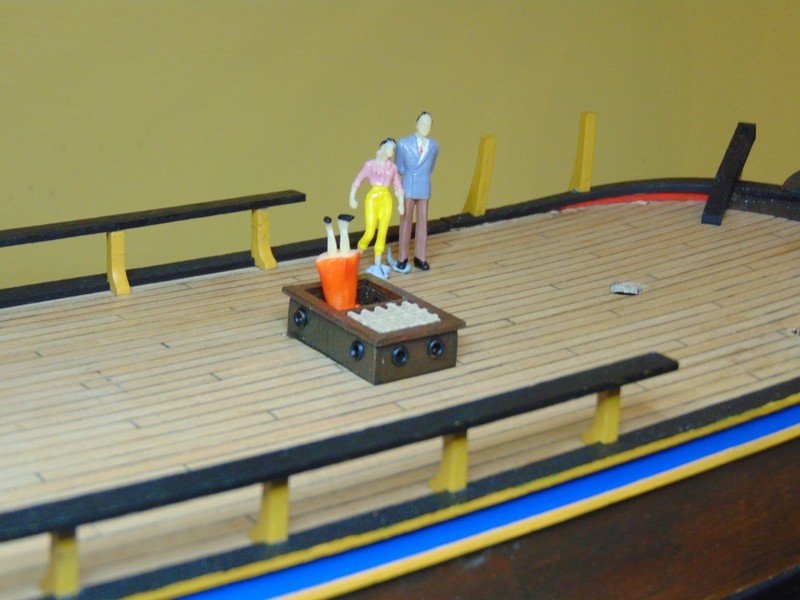
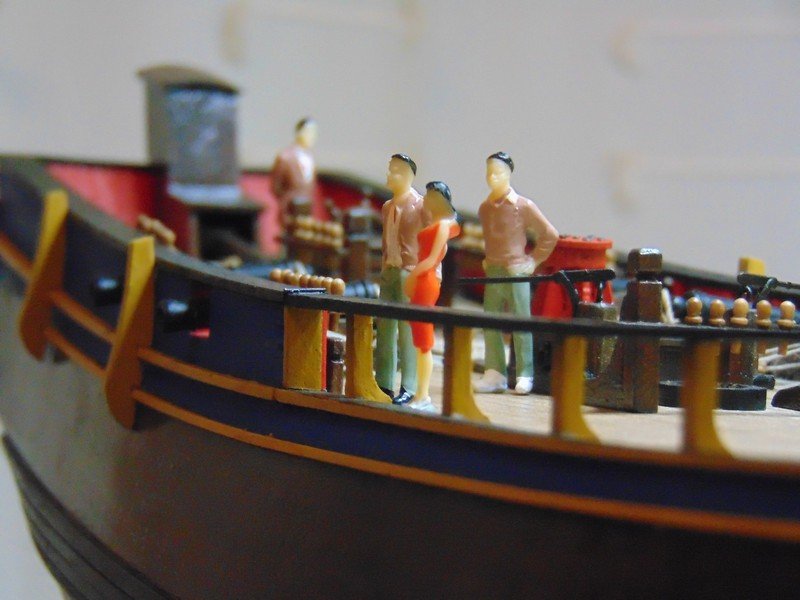
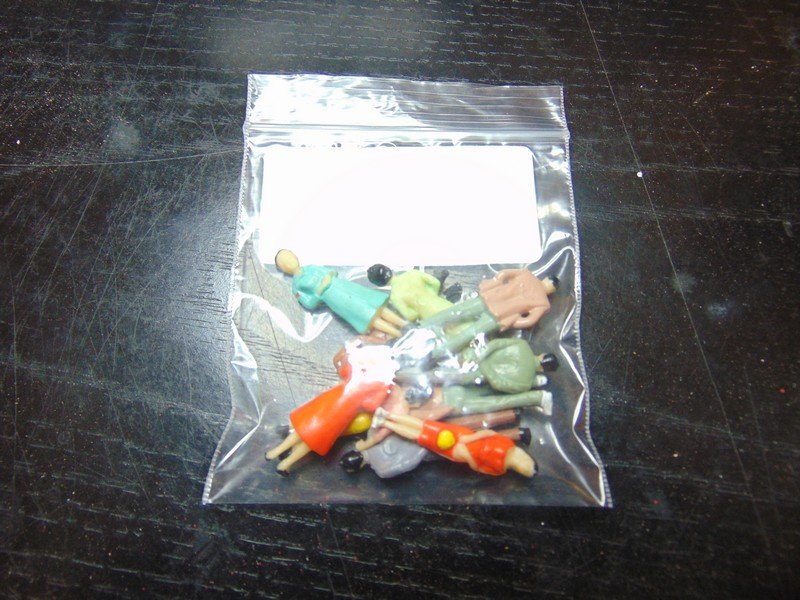
These little guys and girls arrived in the post today we are not quite open for business yet but I let them on board for a quick tour I actually bought these for reference so I can set them next to things and see if they look in proportion they where advertised as 1/50 scale same as the ship and I got a pack of ten prepainted for £3 including postage there seems to be only nine of them now I have no idea where one of them has wandered off to

- 291 replies
-
- 6
-
-
- bounty
- billing boats
- (and 1 more)
-
Looks like she will paint up fine derek to be fair not sure how I would have approached that hull there is a lot of planks heading for a very limited area
-
Thank you EJ I did not know such stuff was available I will def give that a go my printer is not a very good one and I don't know how it will react with decall paper but def worth a try ,I'm loving the colours in a previous post I mentioned I felt like it looked like a big toy but I am really pleased with it now,Im not sure about my technique about painting parts before glueing technically I'm only glueing paint to paint but to date nothing has fell off yet 😊
- 291 replies
-
- 2
-
-
- bounty
- billing boats
- (and 1 more)
-
Hi duncbe I hope I haven't caused you too much hassle you have a buetifull build and I'd always like people to point out anything I may have missed that snake kit looks fantastic also I've considered myself for a next build I was looking about the other logs for an Unboxing log but couldent find much in the logs if you can include that in your new build log when you start it that would be great thanks steve
- 49 replies
-
- 2
-
-
- sherbourne
- caldercraft
- (and 1 more)
-
a little friendly advice I hope its not to late but from your pictures it looks like your jig is holding the deadeyes incorrectly and maybe someone will correct me if im wrong but I have done mine in the past with the top deadeye as yours sits and the bottom one with two holes to the top and one at the bottom if that makes sense
- 49 replies
-
- 4
-
-

-
- sherbourne
- caldercraft
- (and 1 more)
-
The first few pieces of the puzzle added im looking to add another piece at the bottom running horizontal and want to add BOUNTY on it but there is no way I could achieve a result painting the name on and I think it may be a struggle for me to carve or cut the letters out ,any suggestions please has anyone tried stencils or such like steve
- 291 replies
-
- 4
-
-
- bounty
- billing boats
- (and 1 more)
-
I recently built this little ship it was an absolute pleasure to build good luck with yours I hope you enjoy the build steve
-
It's not everyone would regonise that knife graham I use them for a variety of things in work and like to keep one in my model tool kit also thanks steve
- 291 replies
-
- 2
-
-
- bounty
- billing boats
- (and 1 more)
-
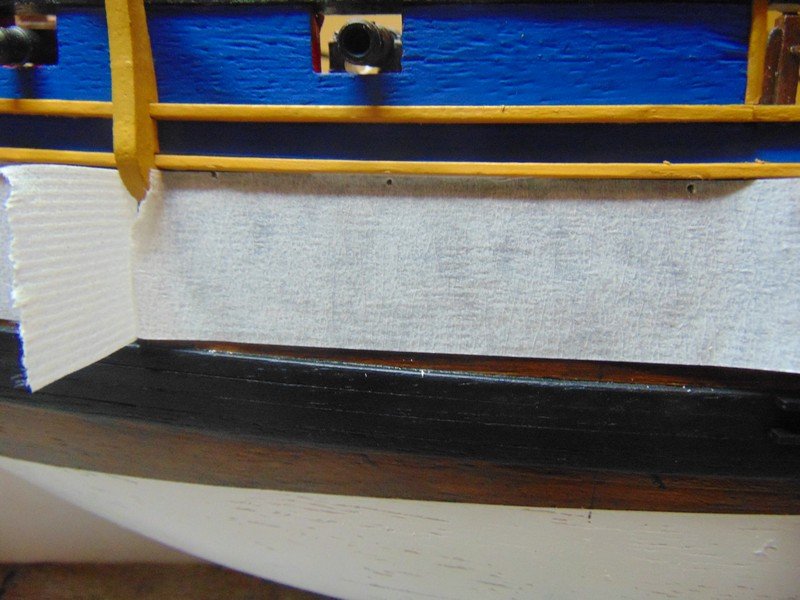
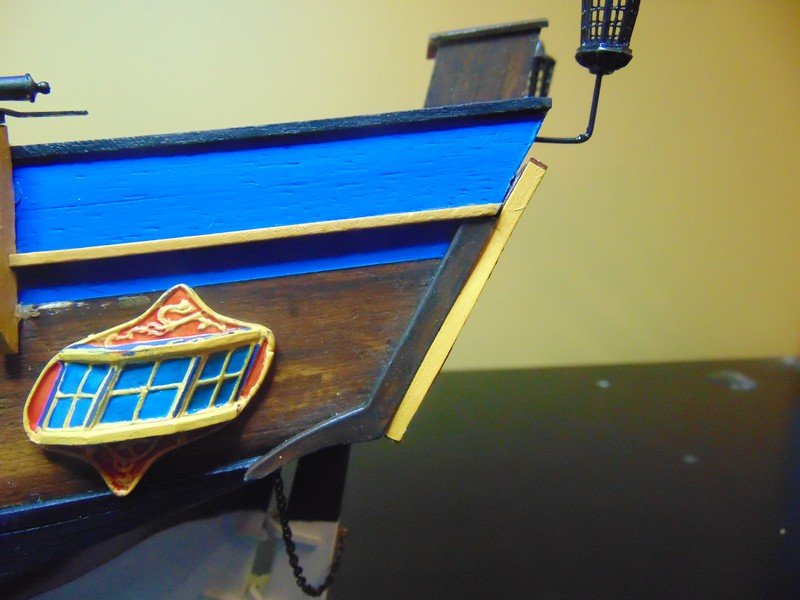
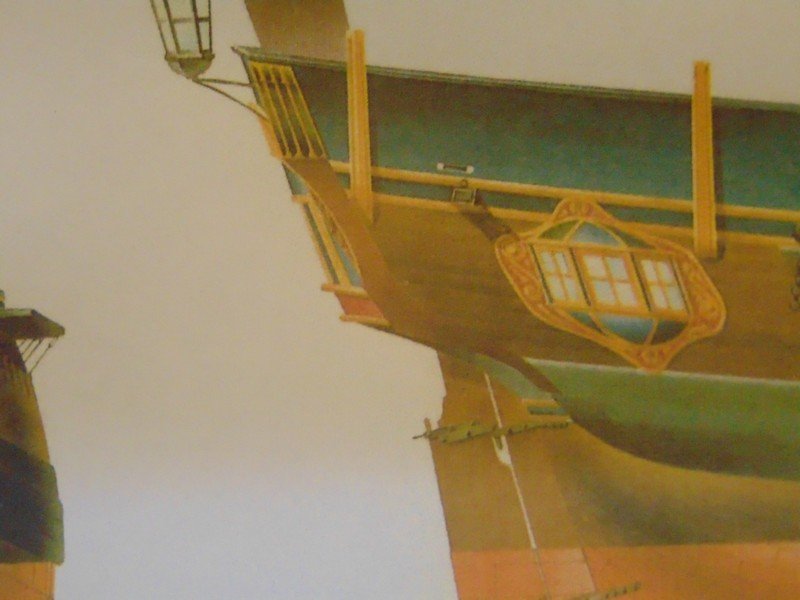
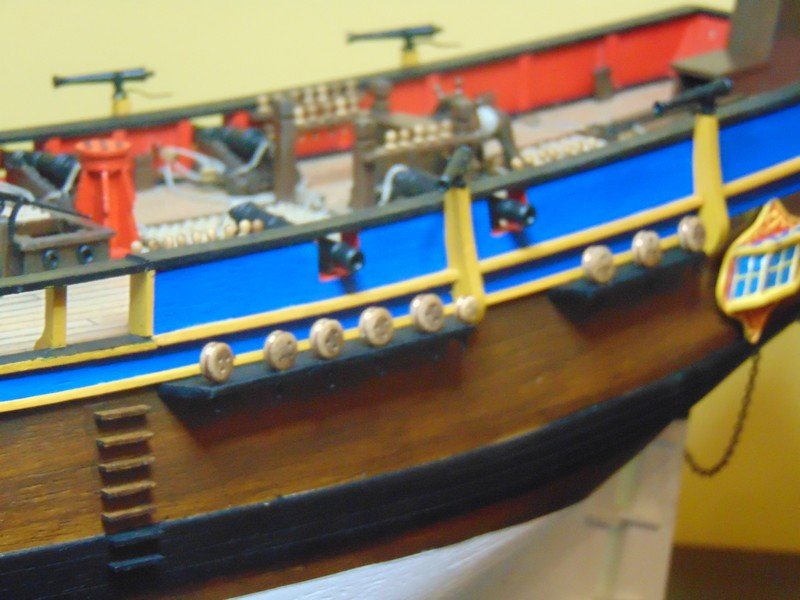
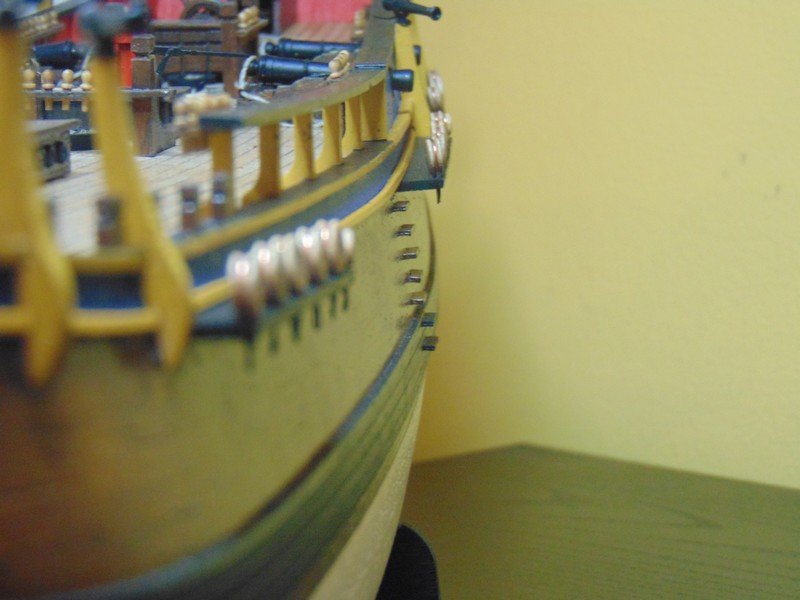
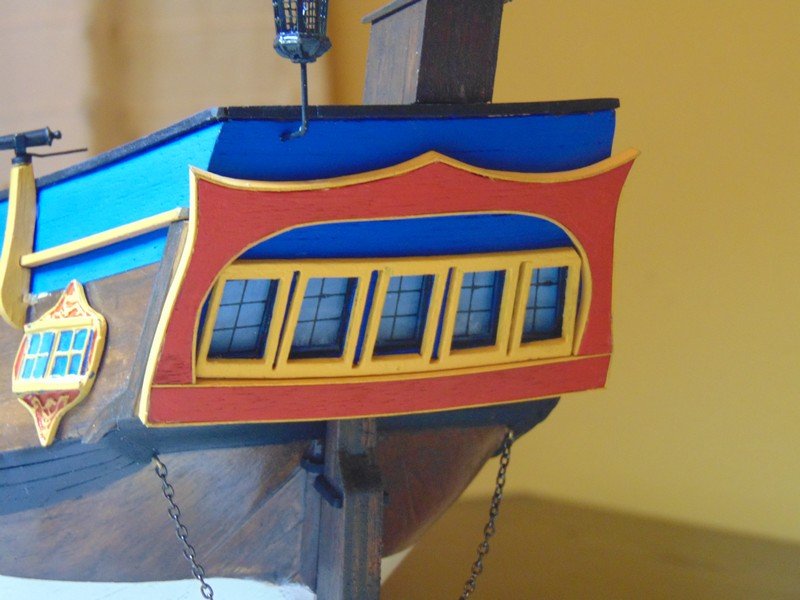
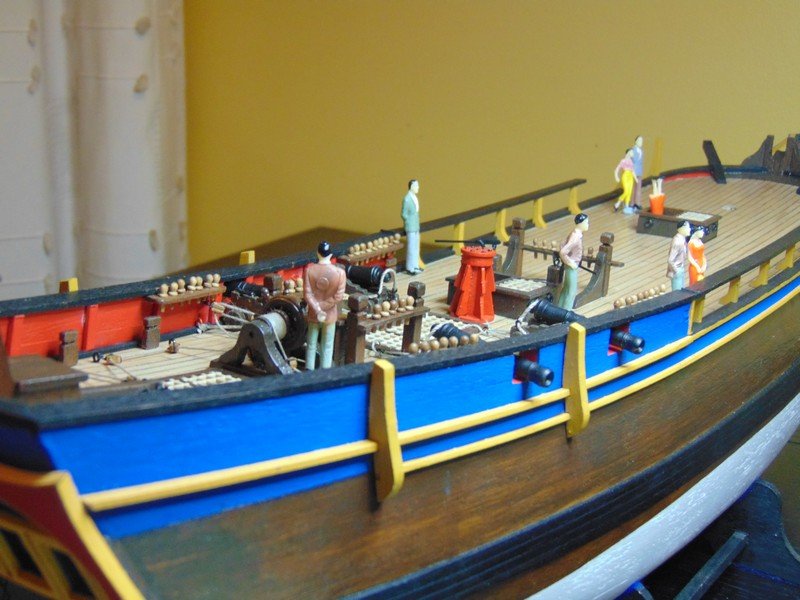
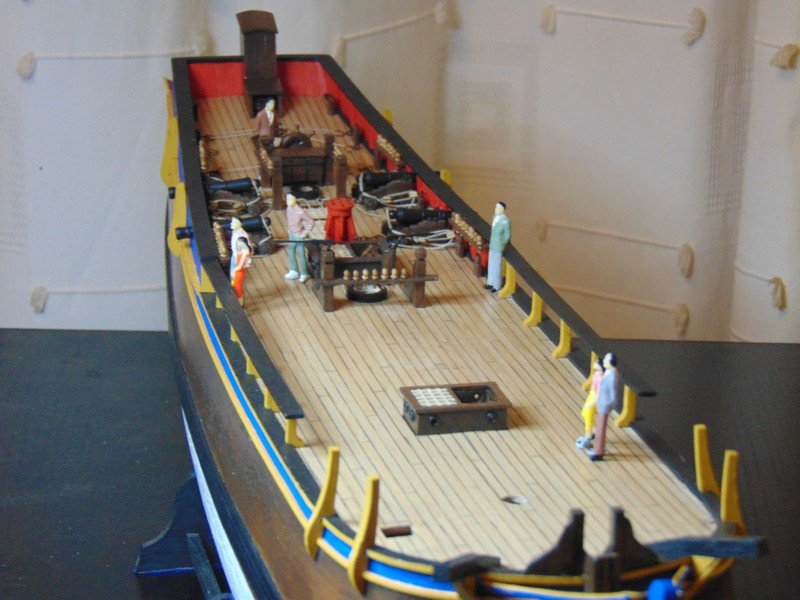
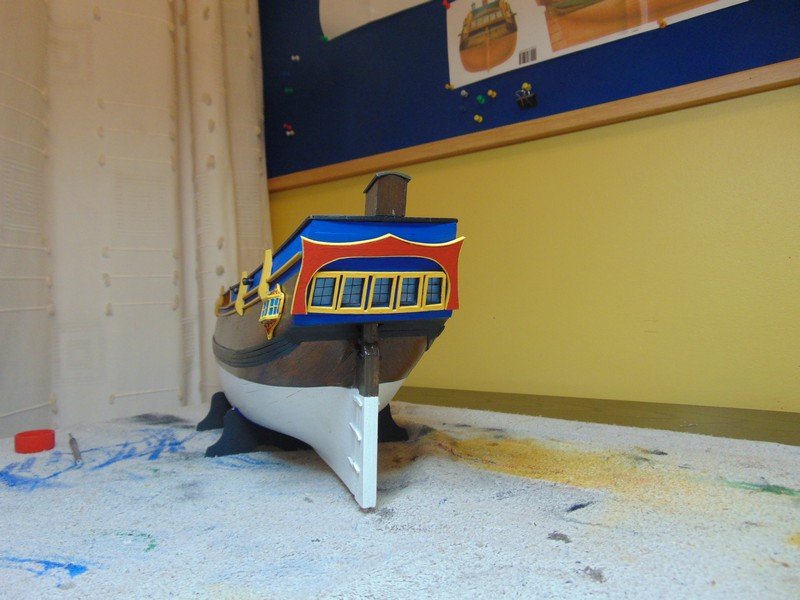
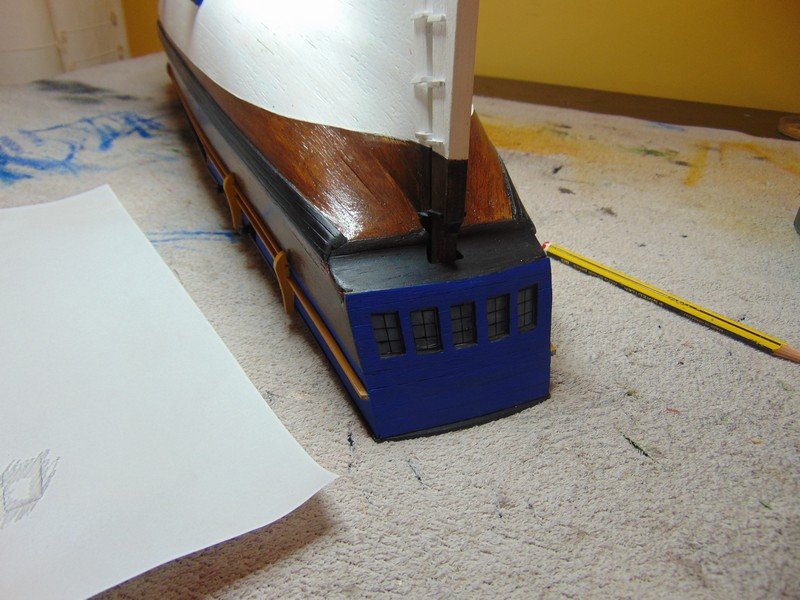
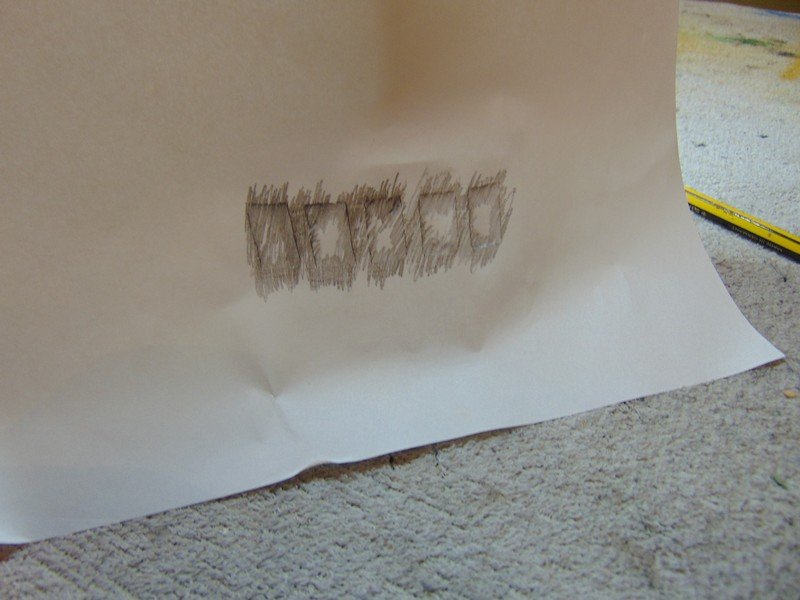
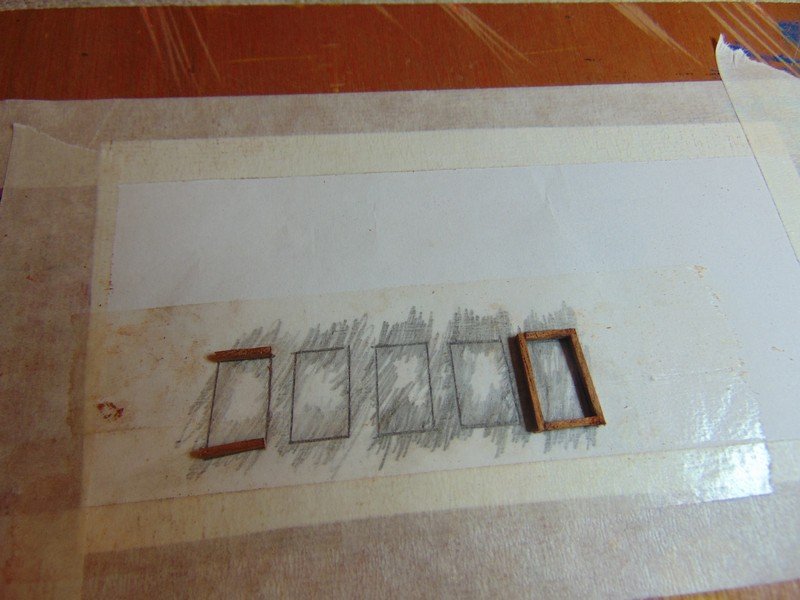
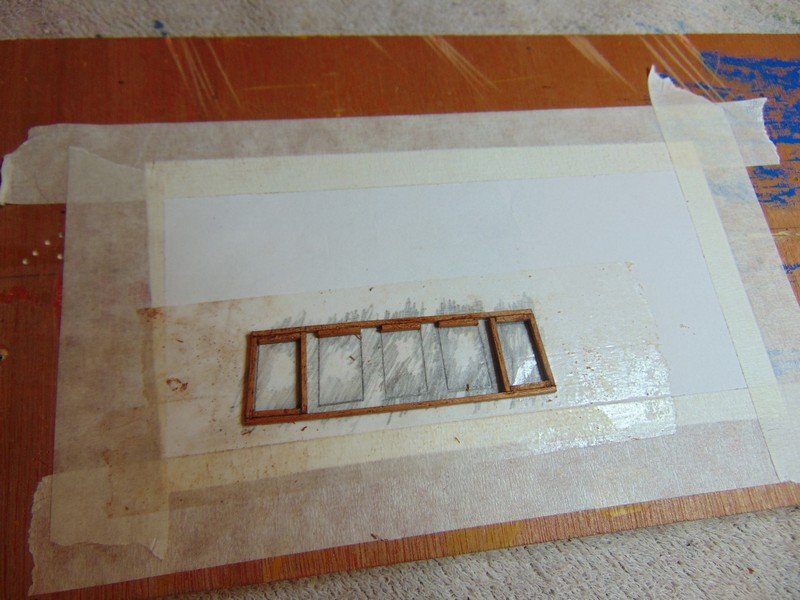
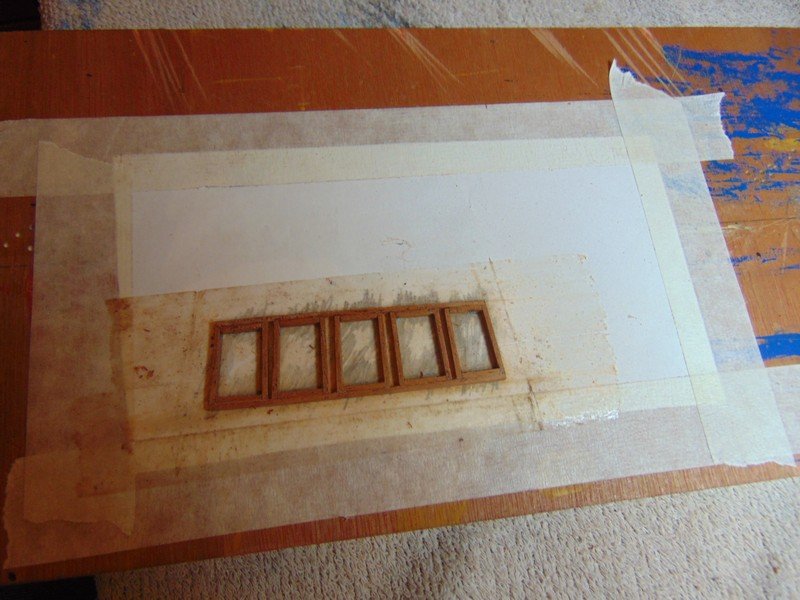
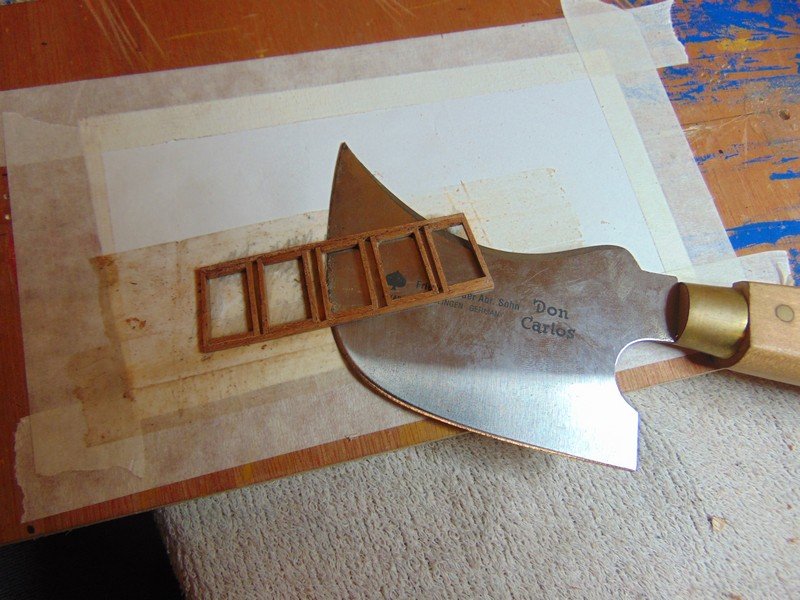
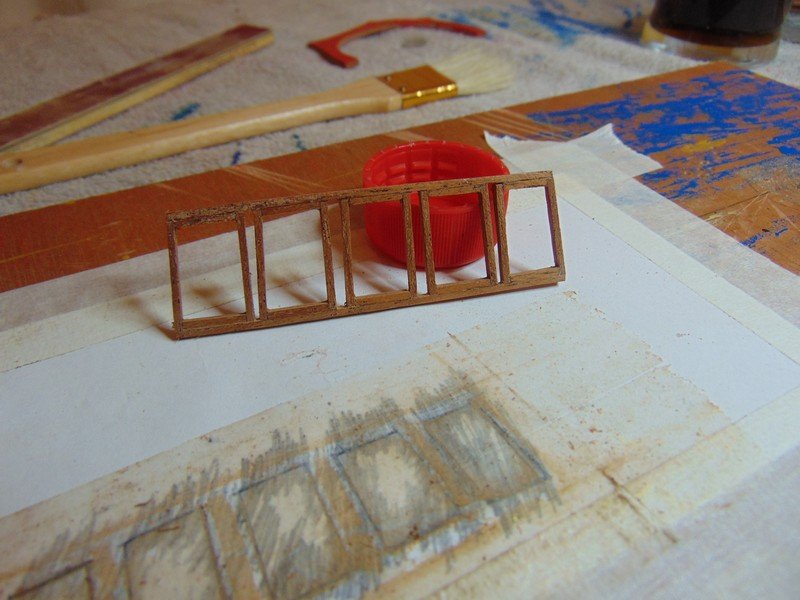
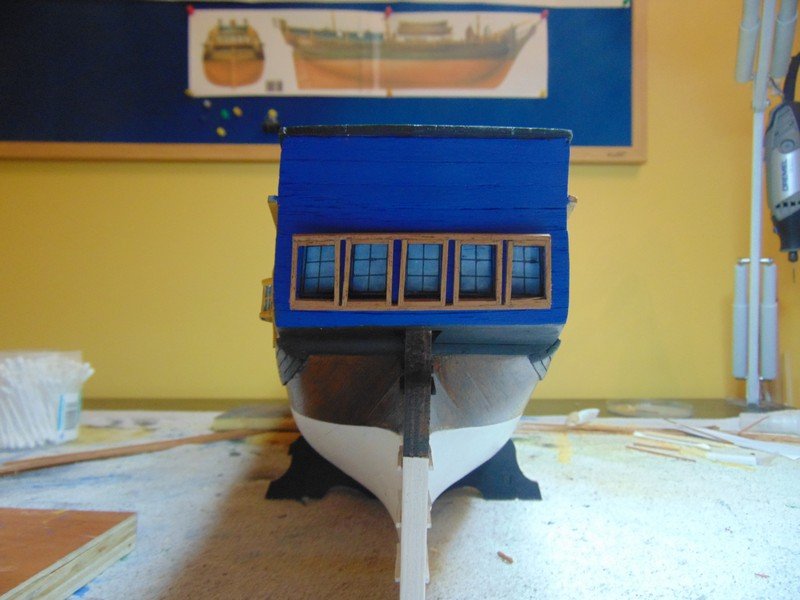
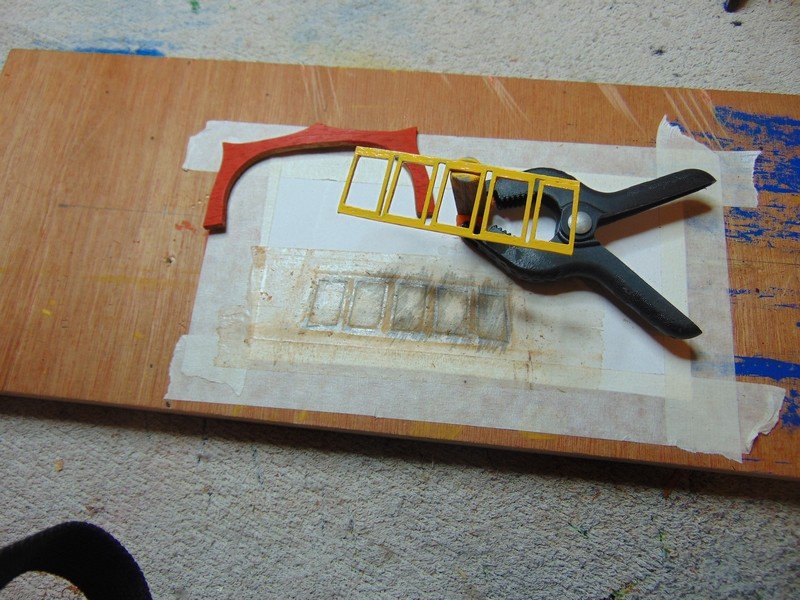
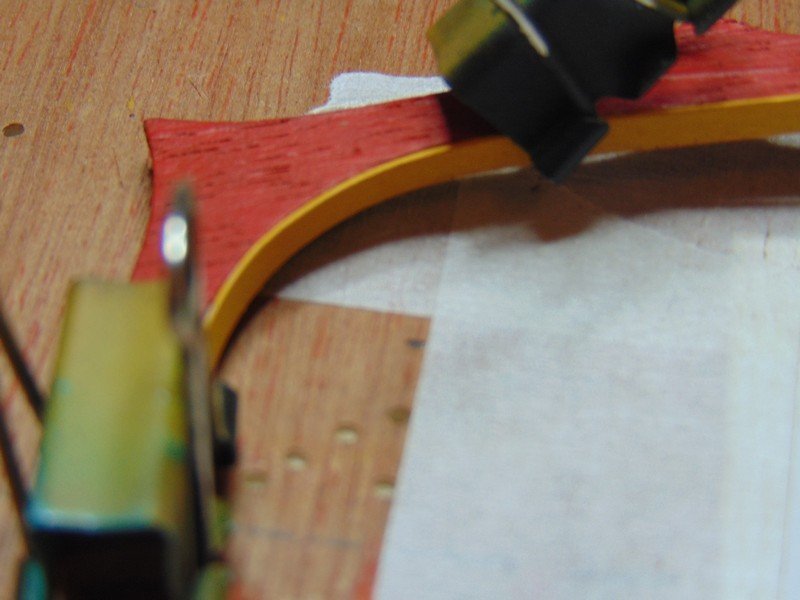
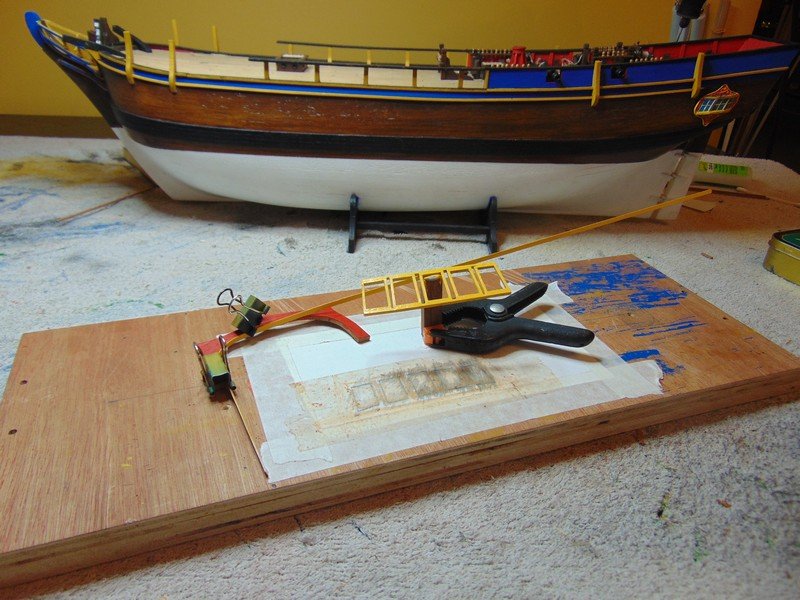
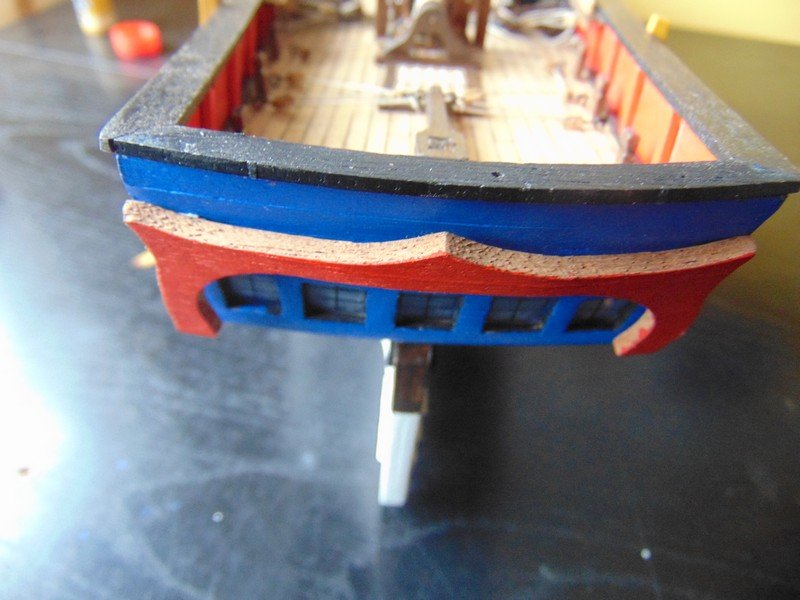
Building the gallery window frames first off I hade to capsize the ship ,this is not a problem as all the parts are glued and pinned in position ,you cant notice from the pictures but I have the stand pinned to the bottom of the ship this was because in my first build when it got to rigging etc if I wanted to move the ship I needed a second stand as the ship becomes difficult to lift with one hand and move stand to new location with the other hand this way I can lift the ship with both hands and the stand follows along I took a rubing of the window apertures and taped this to a board with some clear double sided tape over my picture then I was free to build the window frame structure after sanding I test fitted then painted prior to fitting you can also see how I plan to add the yellow to the red arched shape piece and lastly I would like to thank you all for the likes and comments I love to see that little notification button lit red but earlier today this just blew my away thank you all so much steve
- 291 replies
-
- 4
-
-
- bounty
- billing boats
- (and 1 more)
-
Hi Nigel I think you are doing a great job on the planking its certainly beginning to close up ,I think constructo is sending you a different route to the planking process than the path I chose on my bounty however there is no right or wrong way in my opinion the system you same to be using seems similar to how decktape is planking his Spanish galleon at the moment you may want to search for his log he also has some very good videos on utube of the same ship thanks steve
- 121 replies
-
- 3
-
-
- bounty
- constructo
- (and 1 more)
-
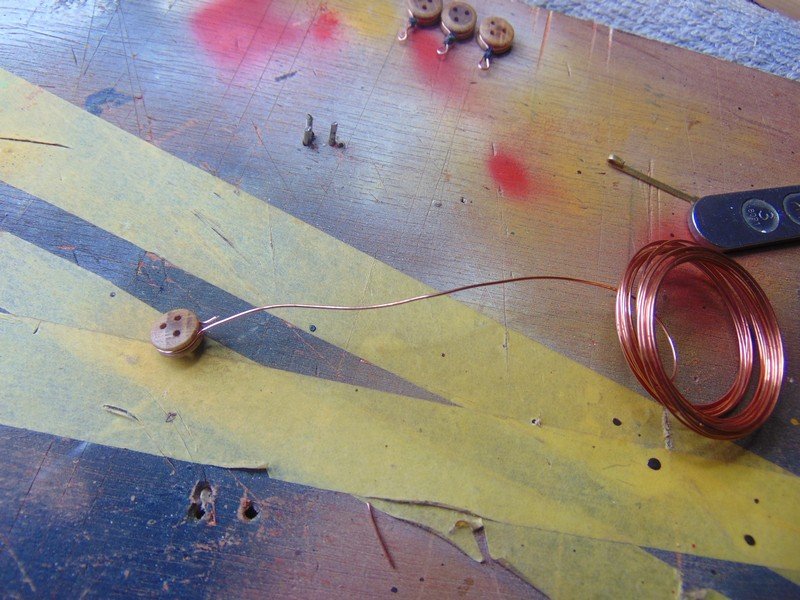
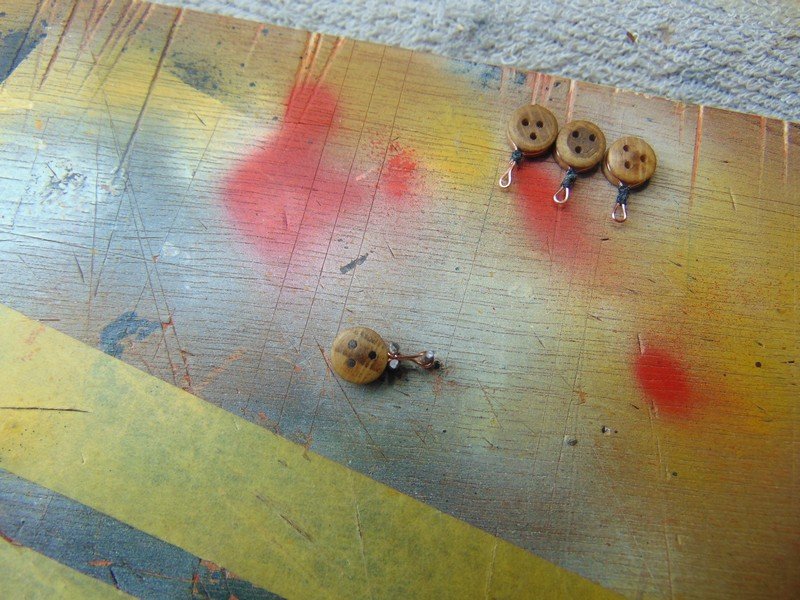
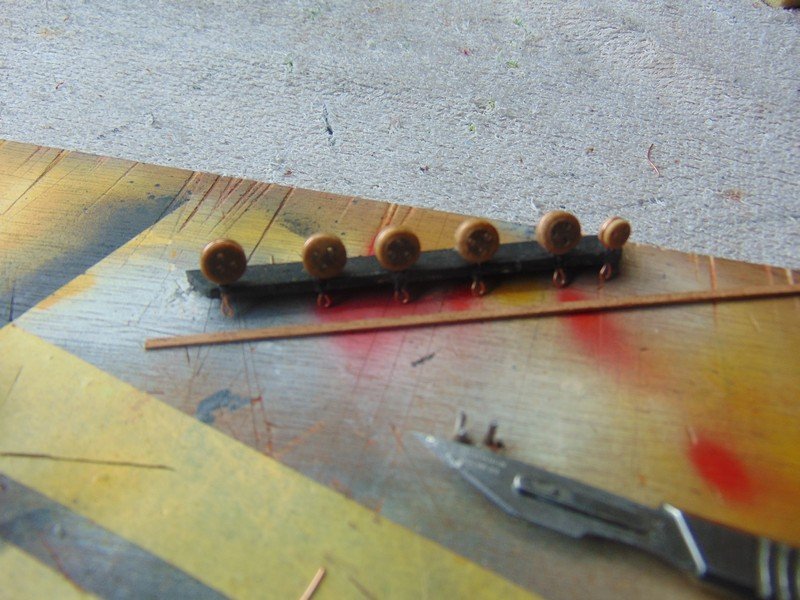
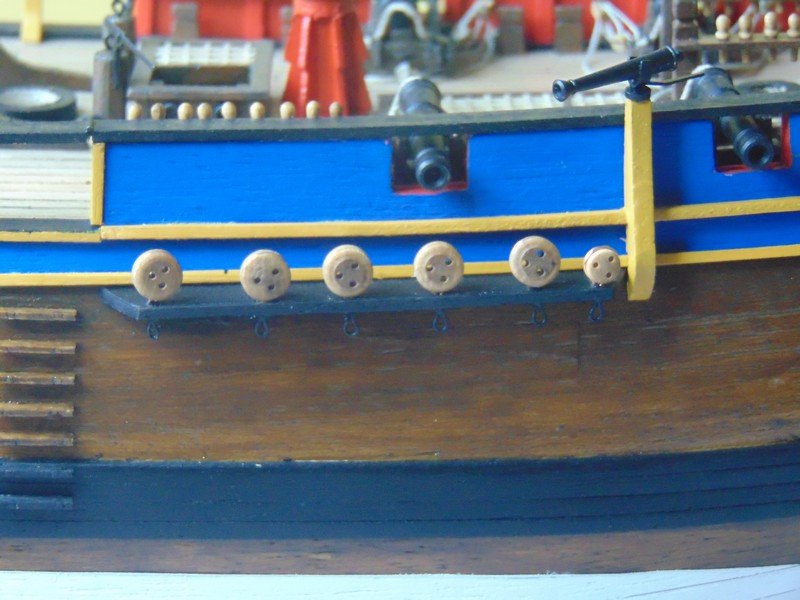
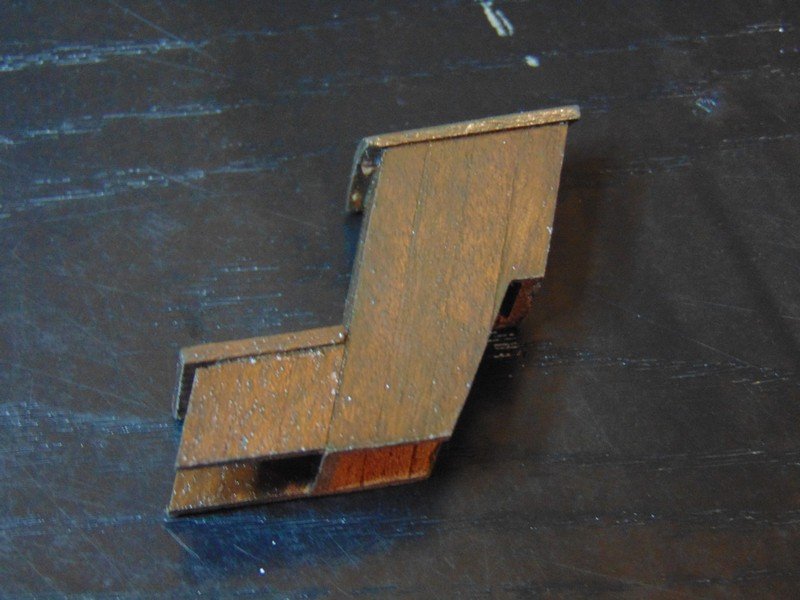
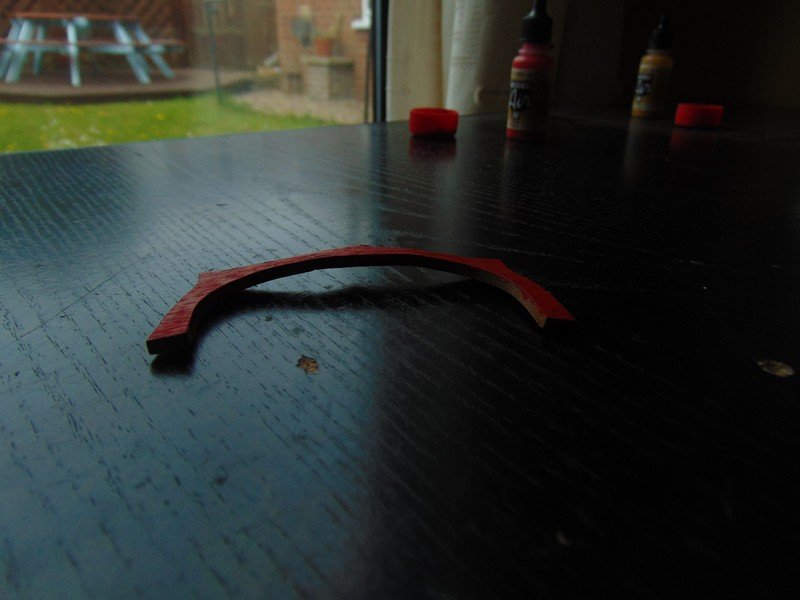
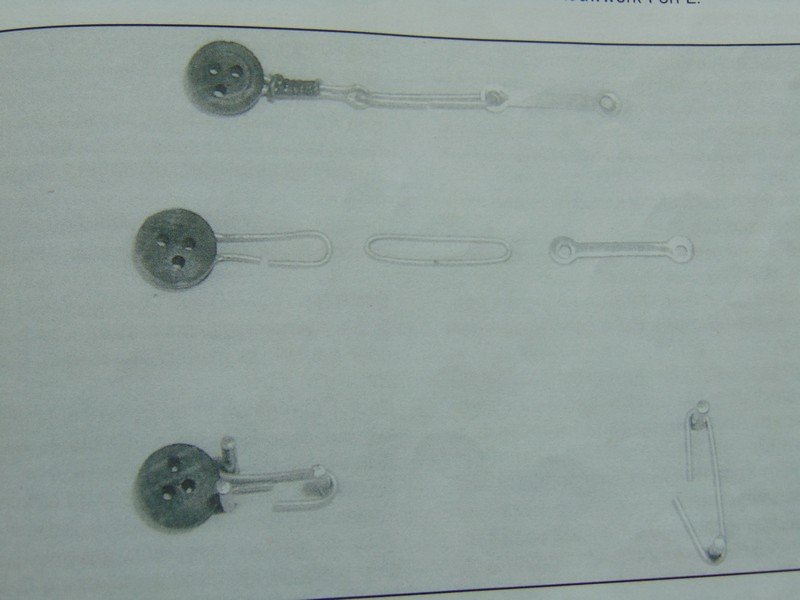
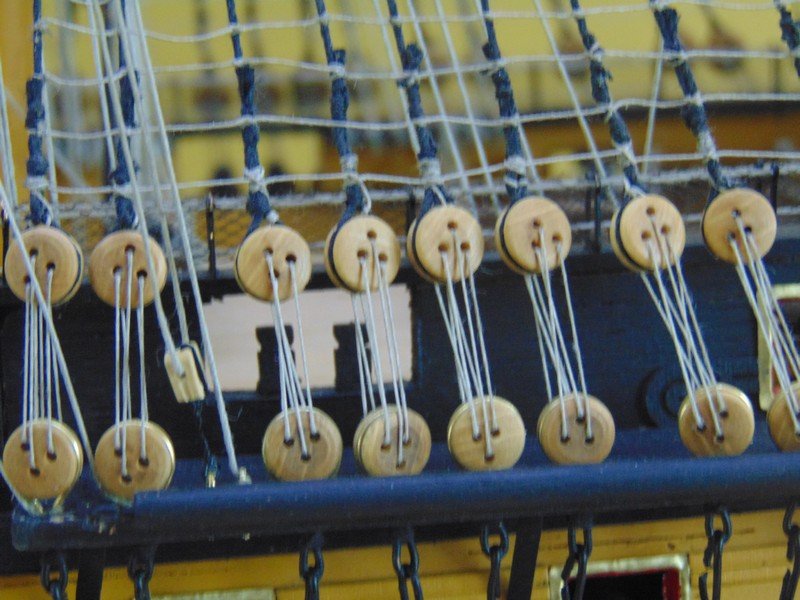
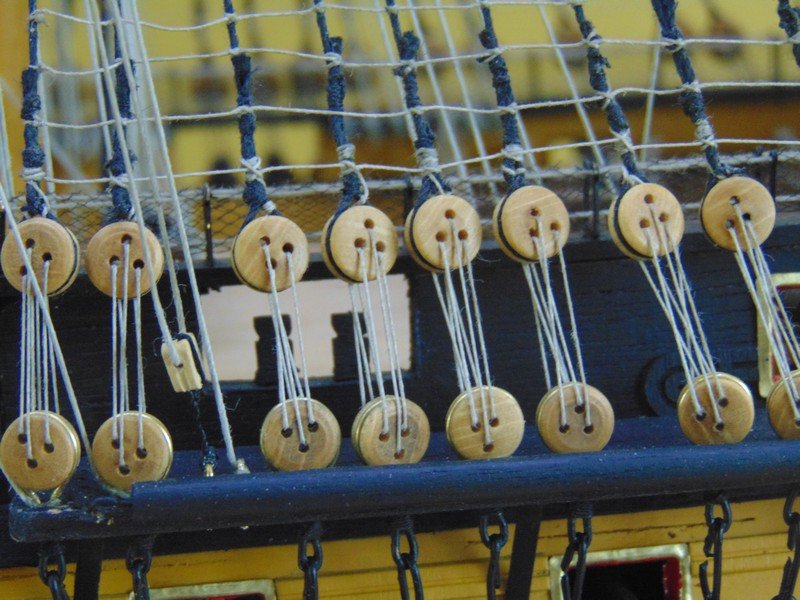
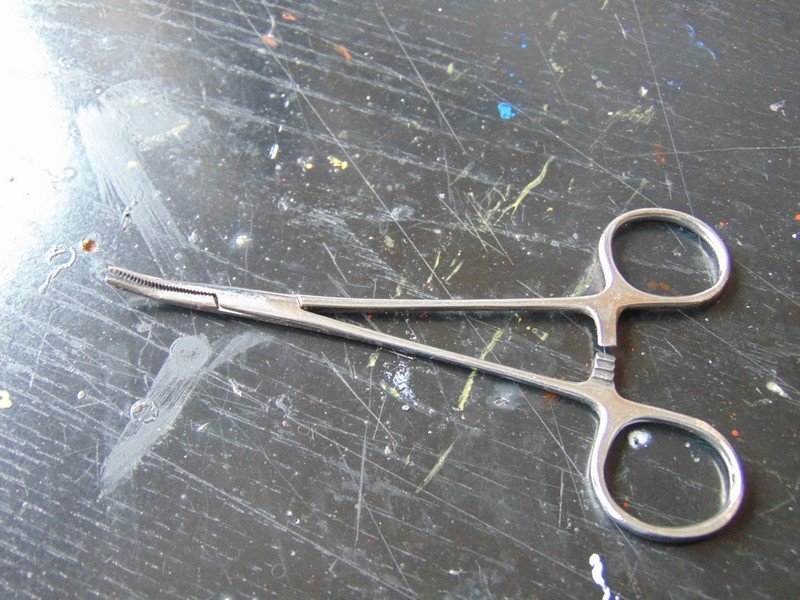
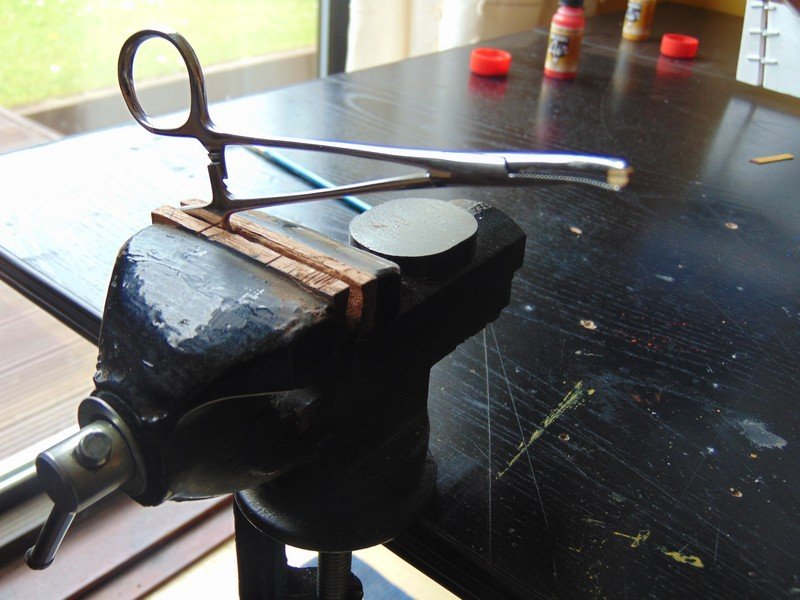
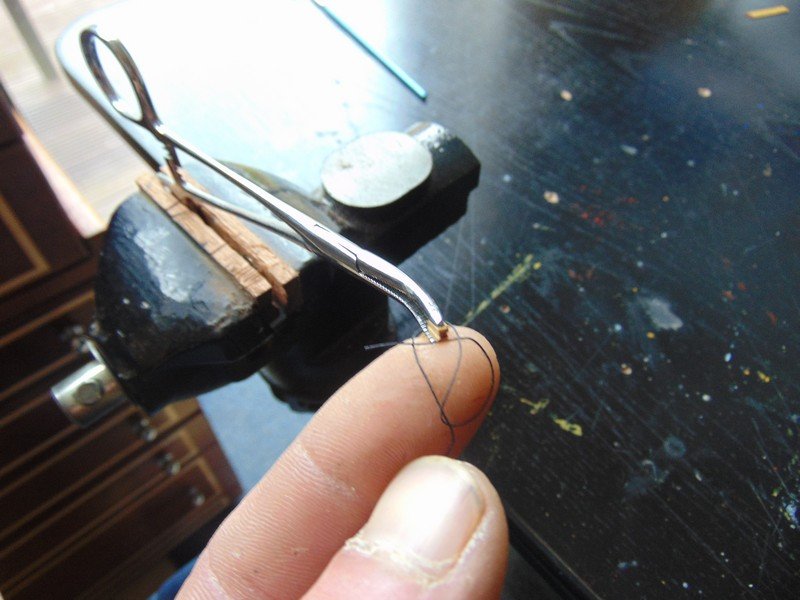
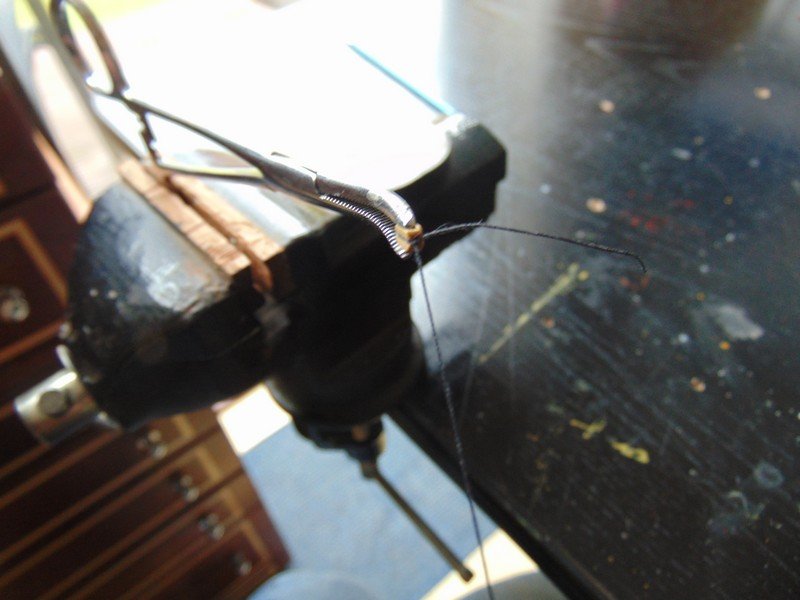
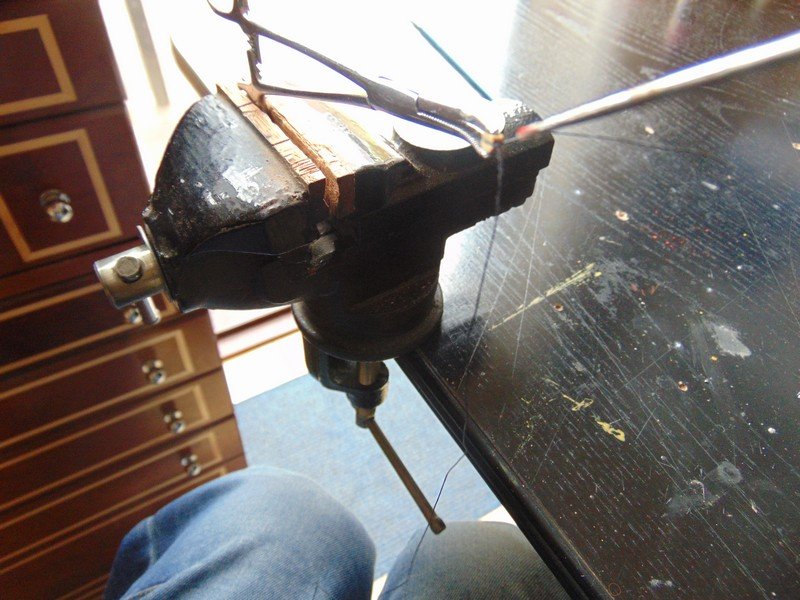
Heres that transom piece out of the clamps and as you can see it has held its shape well Hi Nigel thank you for the kind compliment and continuing to follow from my own limited experience many different manufactures will have there own process im not familiar with using brass wire for the blocks but would imagine it more difficult the beauty with model ship building is its flexability in those instructions not being very good we can draw from other instructions or from on here ,regardless to kit brand we are all aiming for the same result .at risk of teaching granny how to suck eggs here is how I do my blocks little knot like I would tie a fishing hook dab of ca or white glue in some instances I will make a tiny hook from an eye bolt and finaly for the dead eyes I do use brass wire heres a snippet from mantua instructions of a little jig and those fitted to my victory

- 291 replies
-
- 4
-
-
- bounty
- billing boats
- (and 1 more)
-
Ahoy frankie I am currently building a Hms bounty by billings I see you have made a very nice example of the same ship I would be honoured if you could take a look a steer me right steve
- 55 replies
-
- 1
-
-
- isabella
- billing boats
- (and 1 more)
-
Just found this brilliant read the whole log the bit when the lightbulb turned into a helicopter my jaw nearly hit the floor fantastic enjoy your build I know I am enjoying watching
-
Did you manage to get to the bottom of why the plans look used ? When I was building my victory I had no plans for where to belay the sails so I phoned mantua uk and they where struggling with my question so in the background they where opening a kit off there shelf to check the plans to see what I meant perhaps something like that may be the case
-
Ahoy frankie dam you can put these things together quickly putting us young fellows to shame great build log I also signed up to your utube channel thanks for posting 👍