


Blackreed
-
Posts
83 -
Joined
-
Last visited
Content Type
Profiles
Forums
Gallery
Events
Posts posted by Blackreed
-
-
So what’s in store for this model?
-
6 hours ago, yvesvidal said:
Cockpit and engine are absolutely stunning.
Yves
Thank you.
-
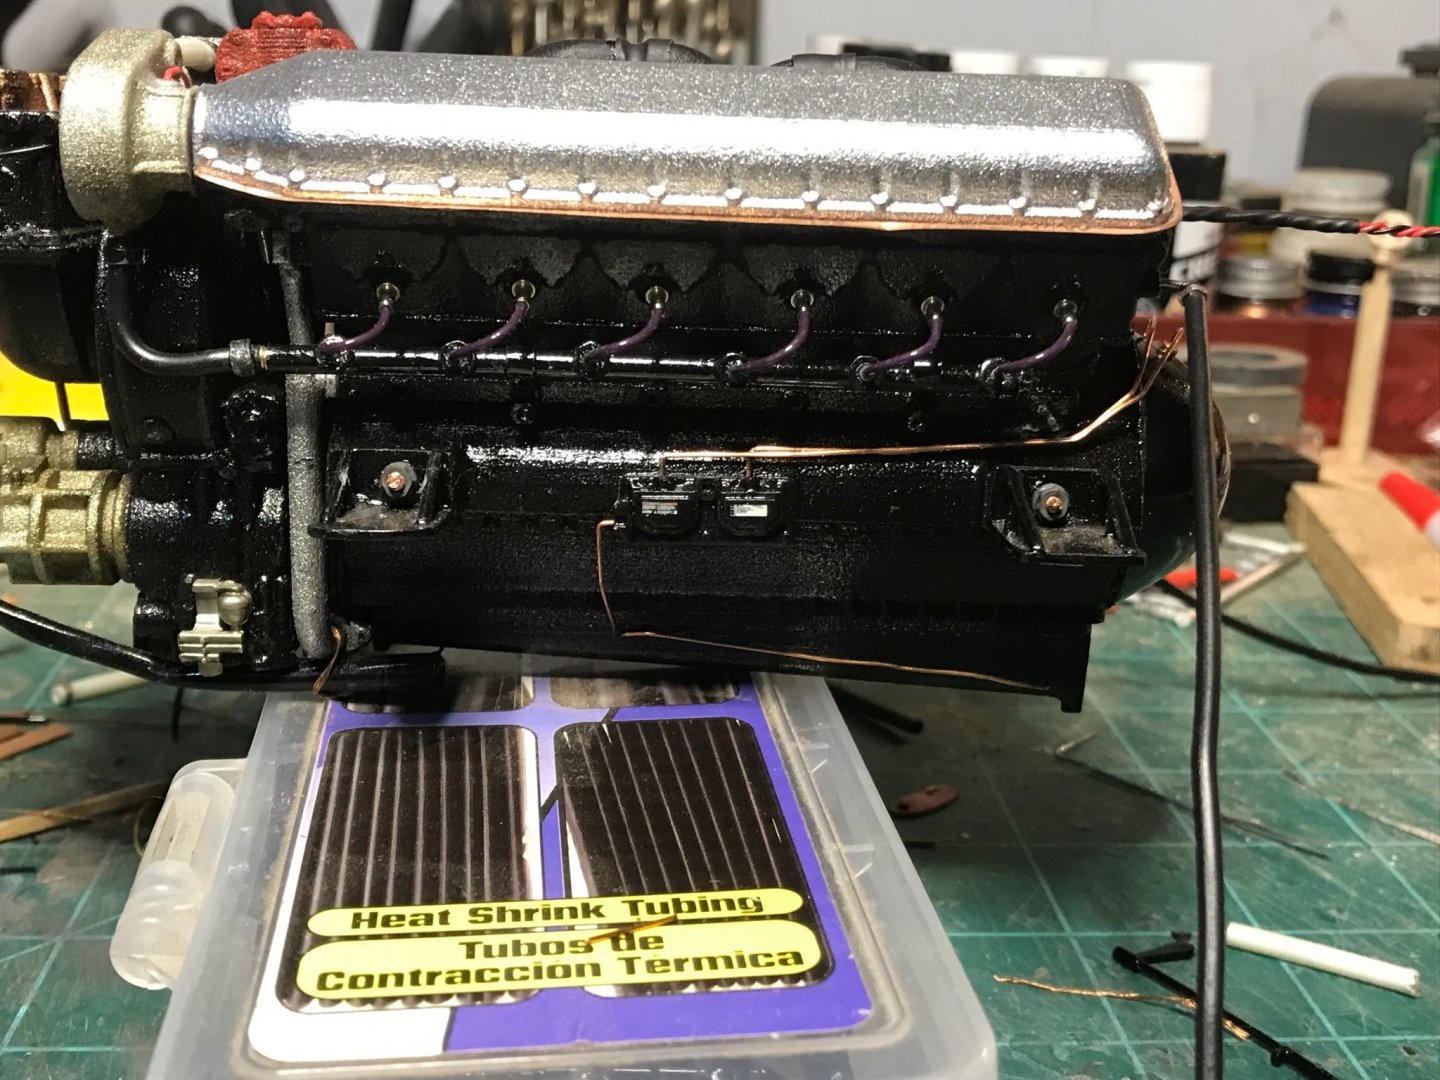
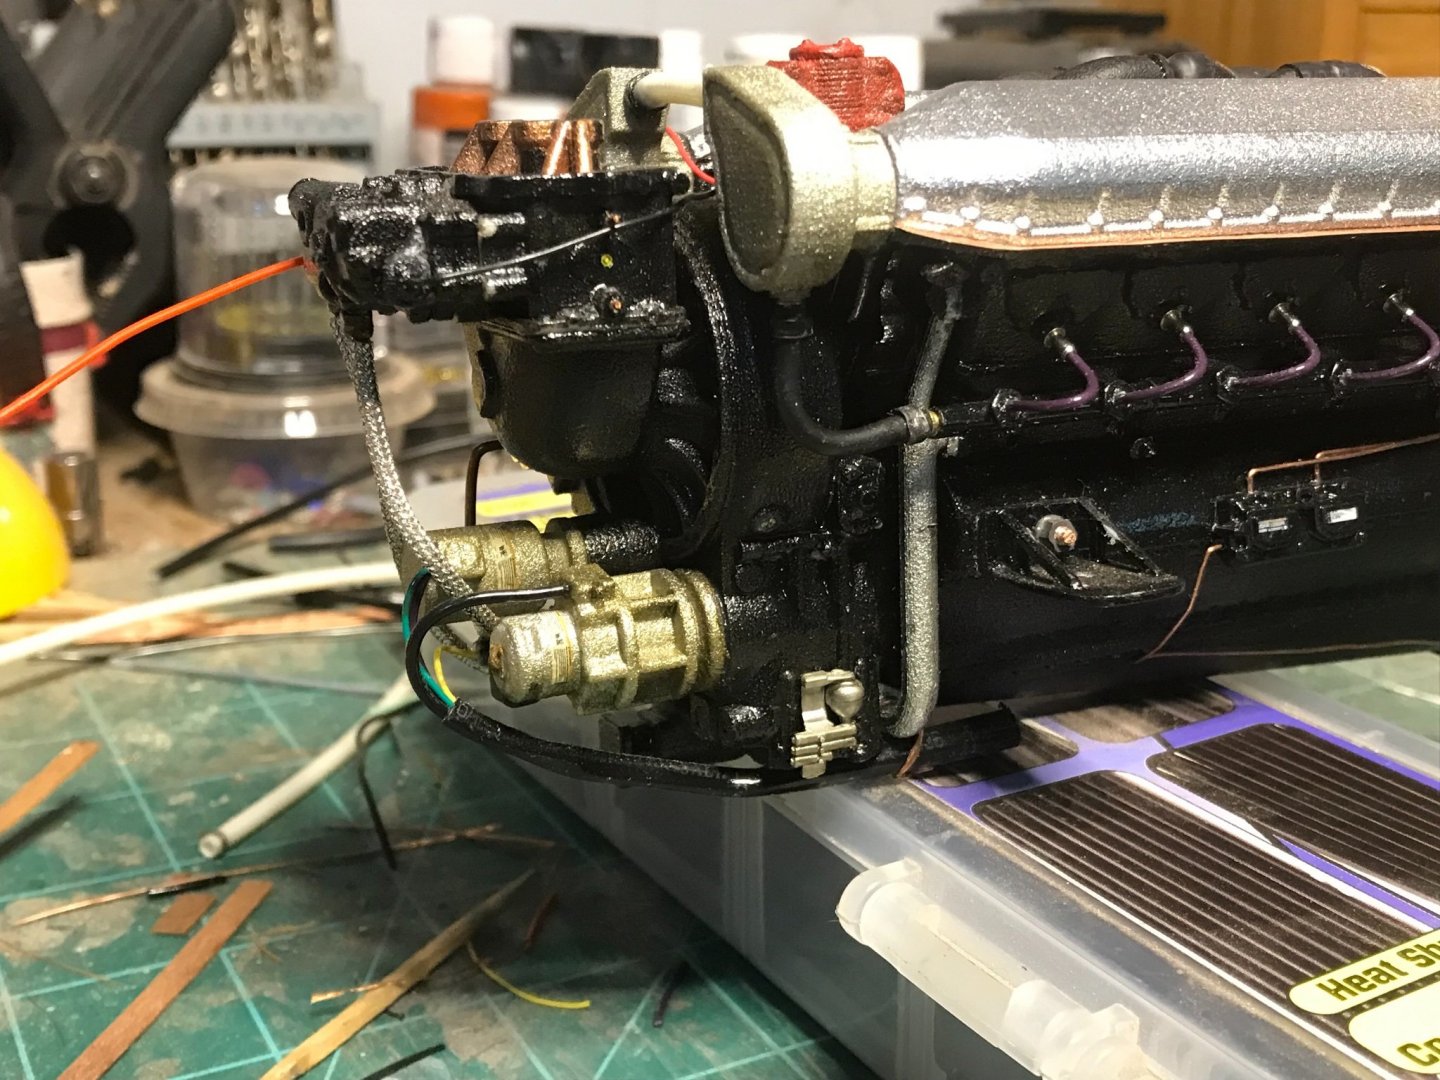
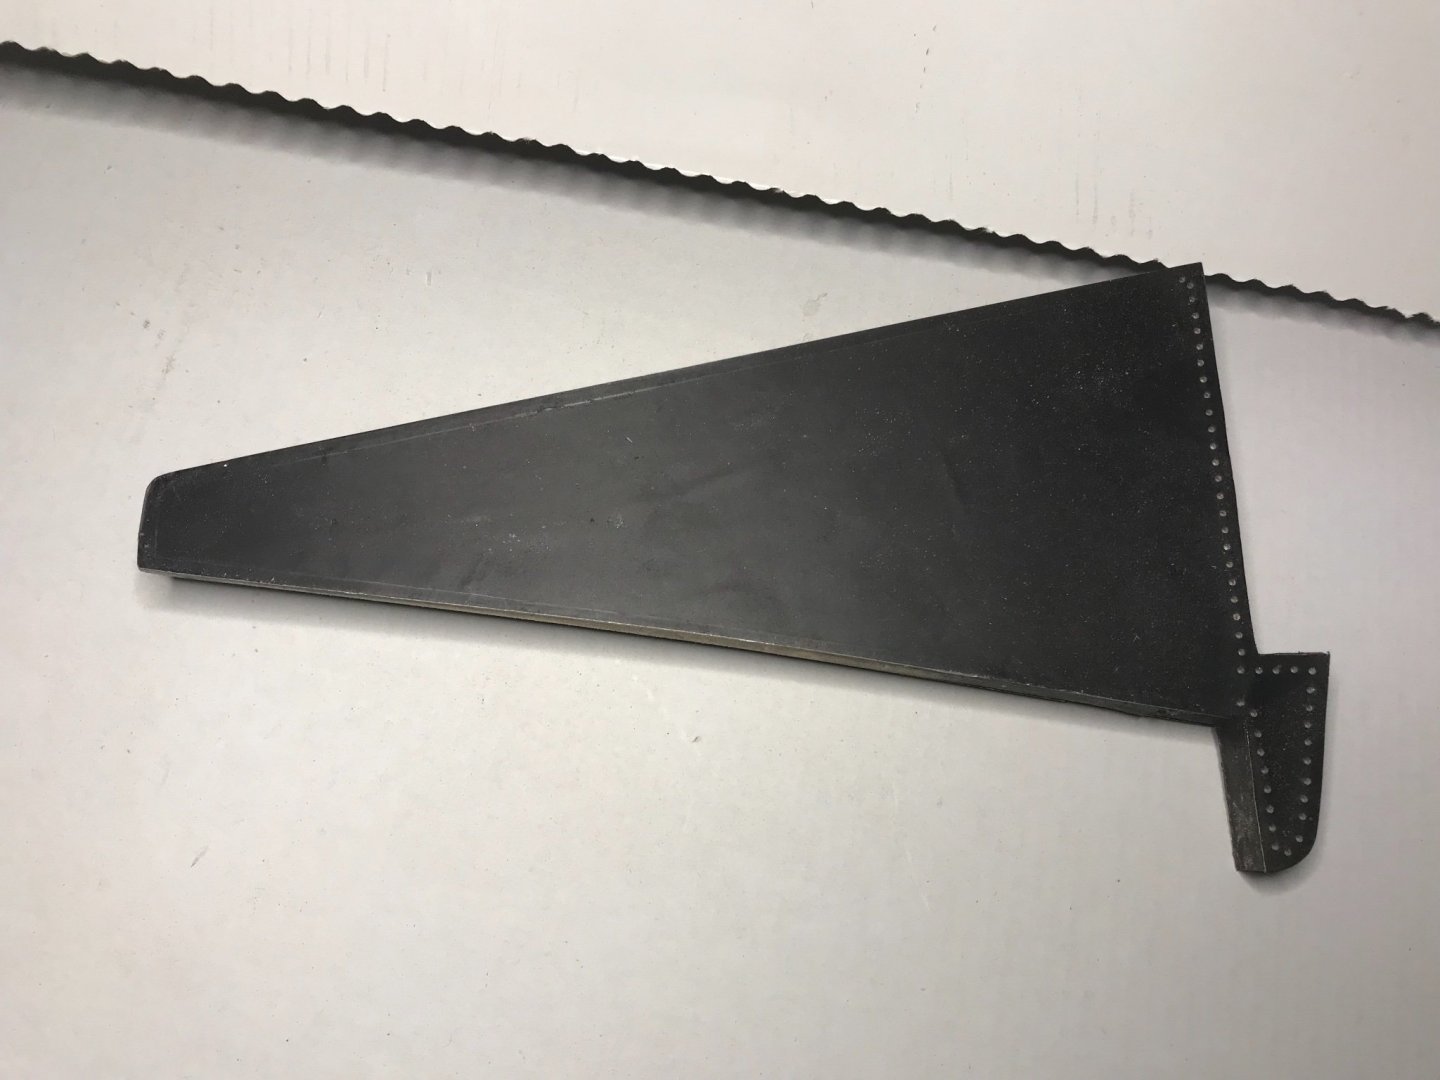
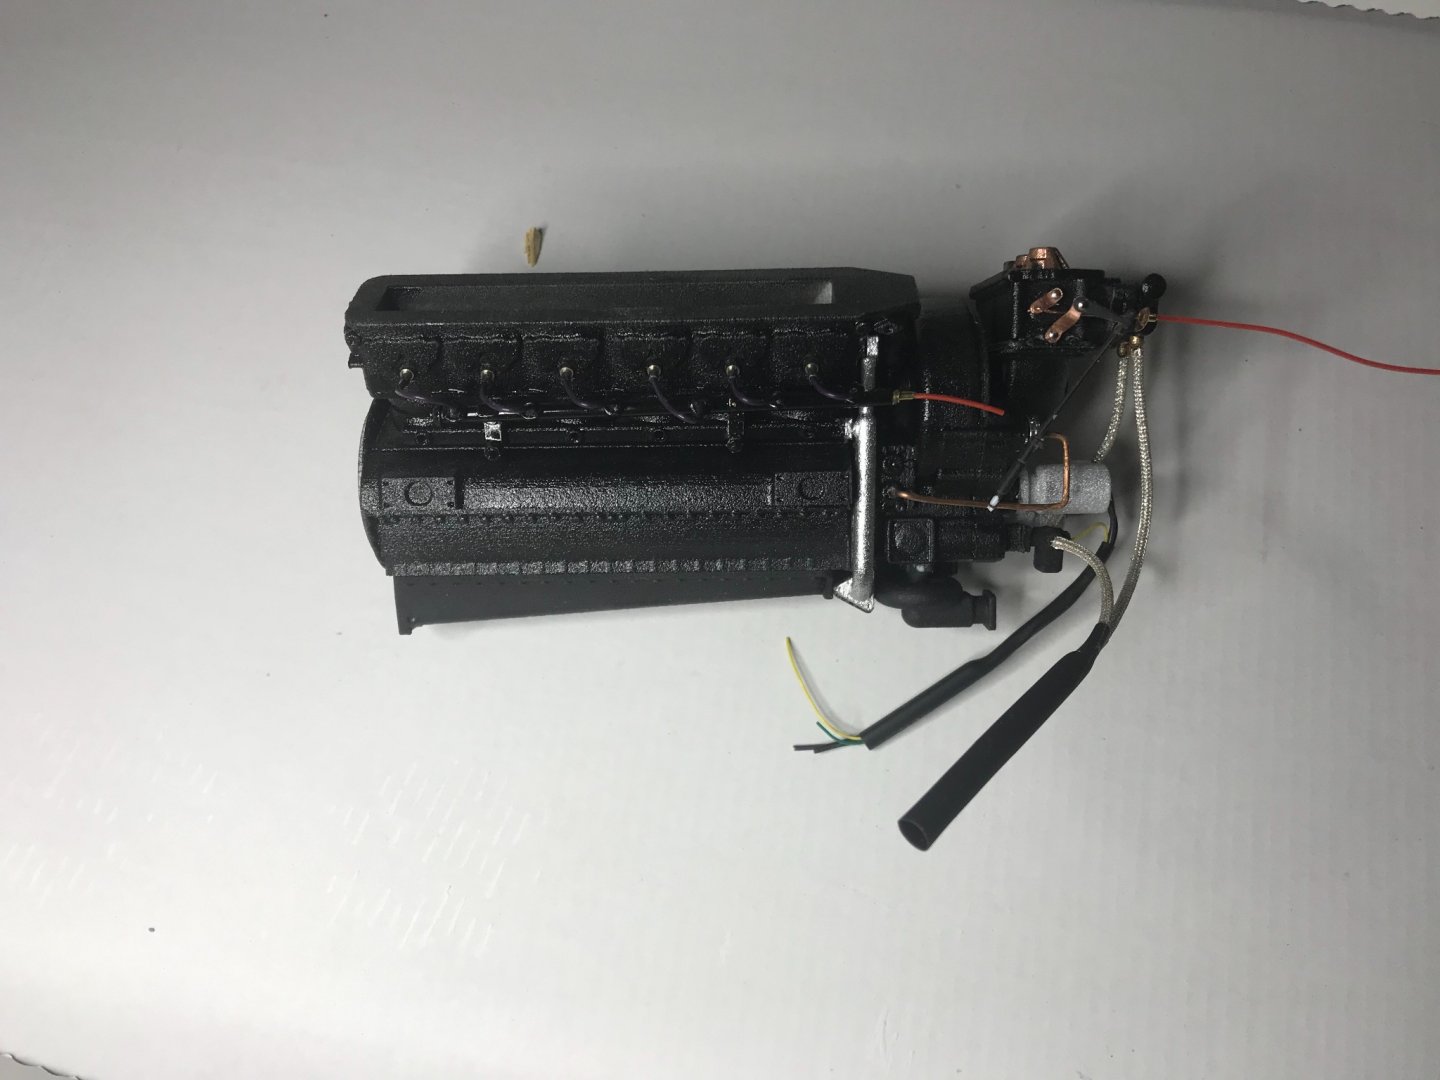
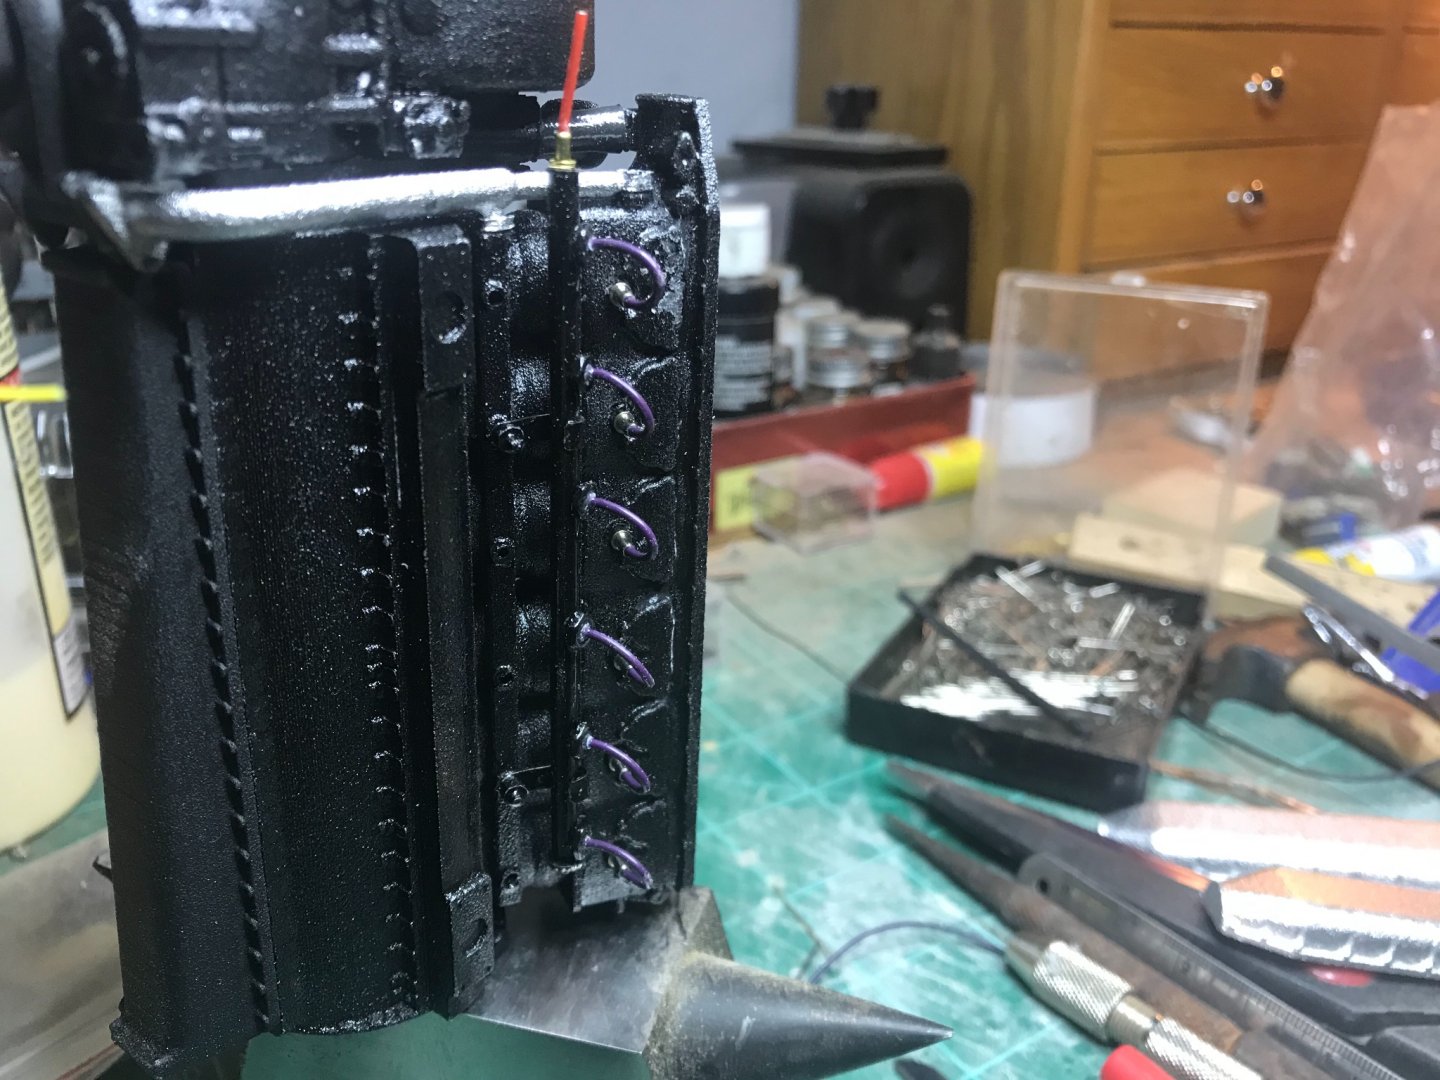
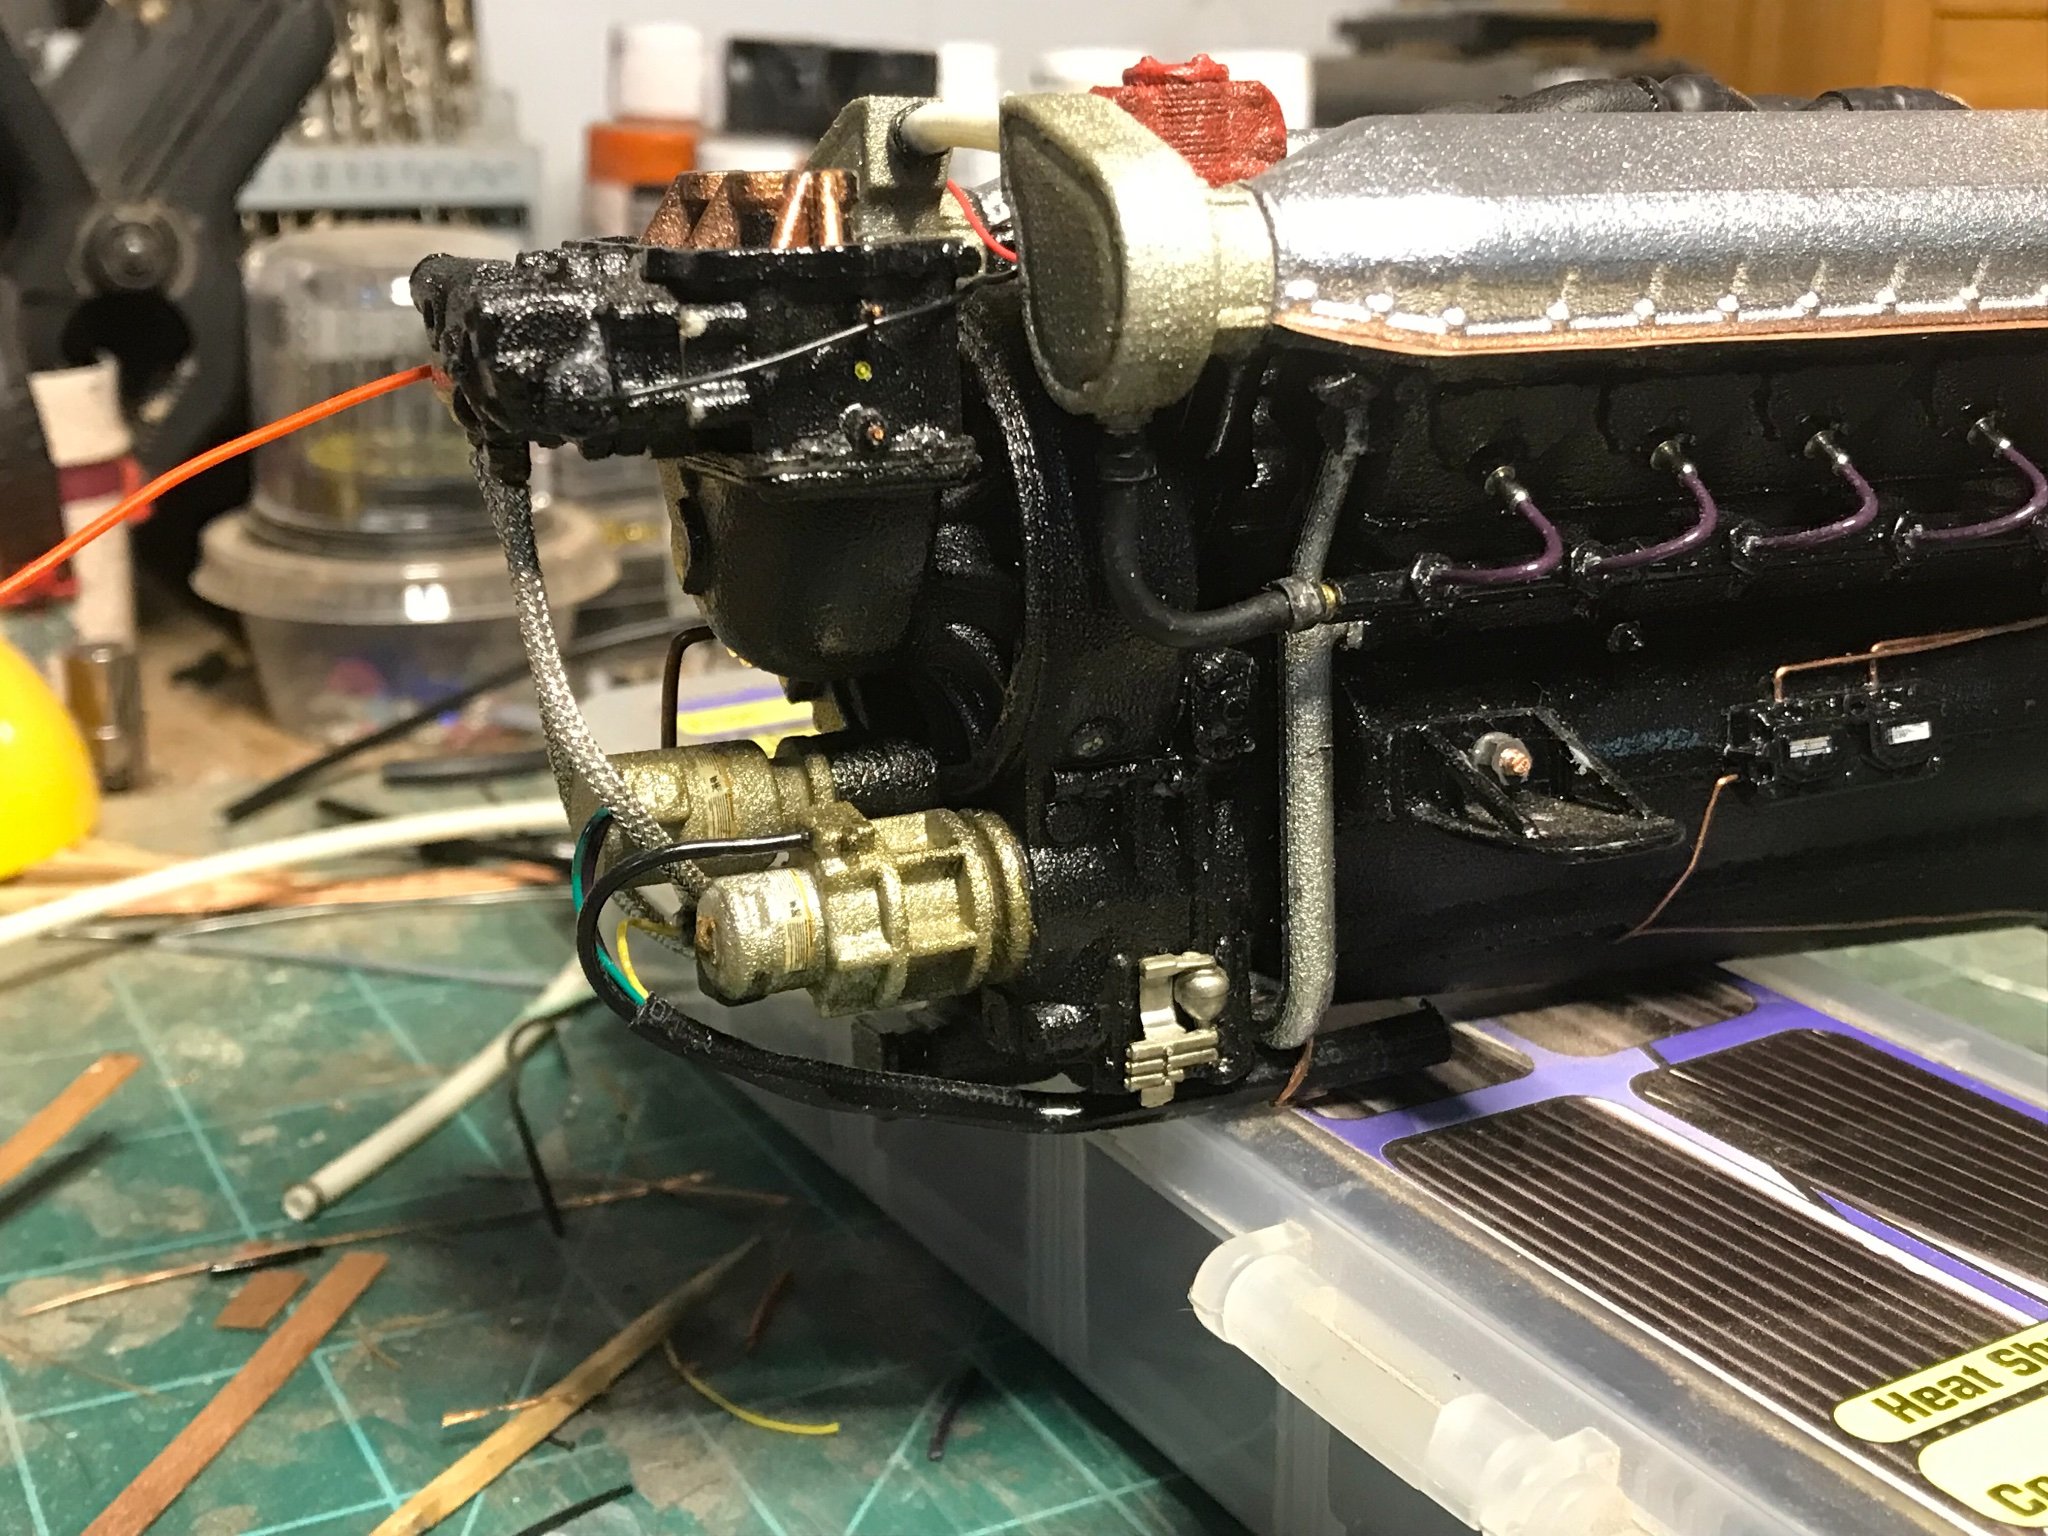
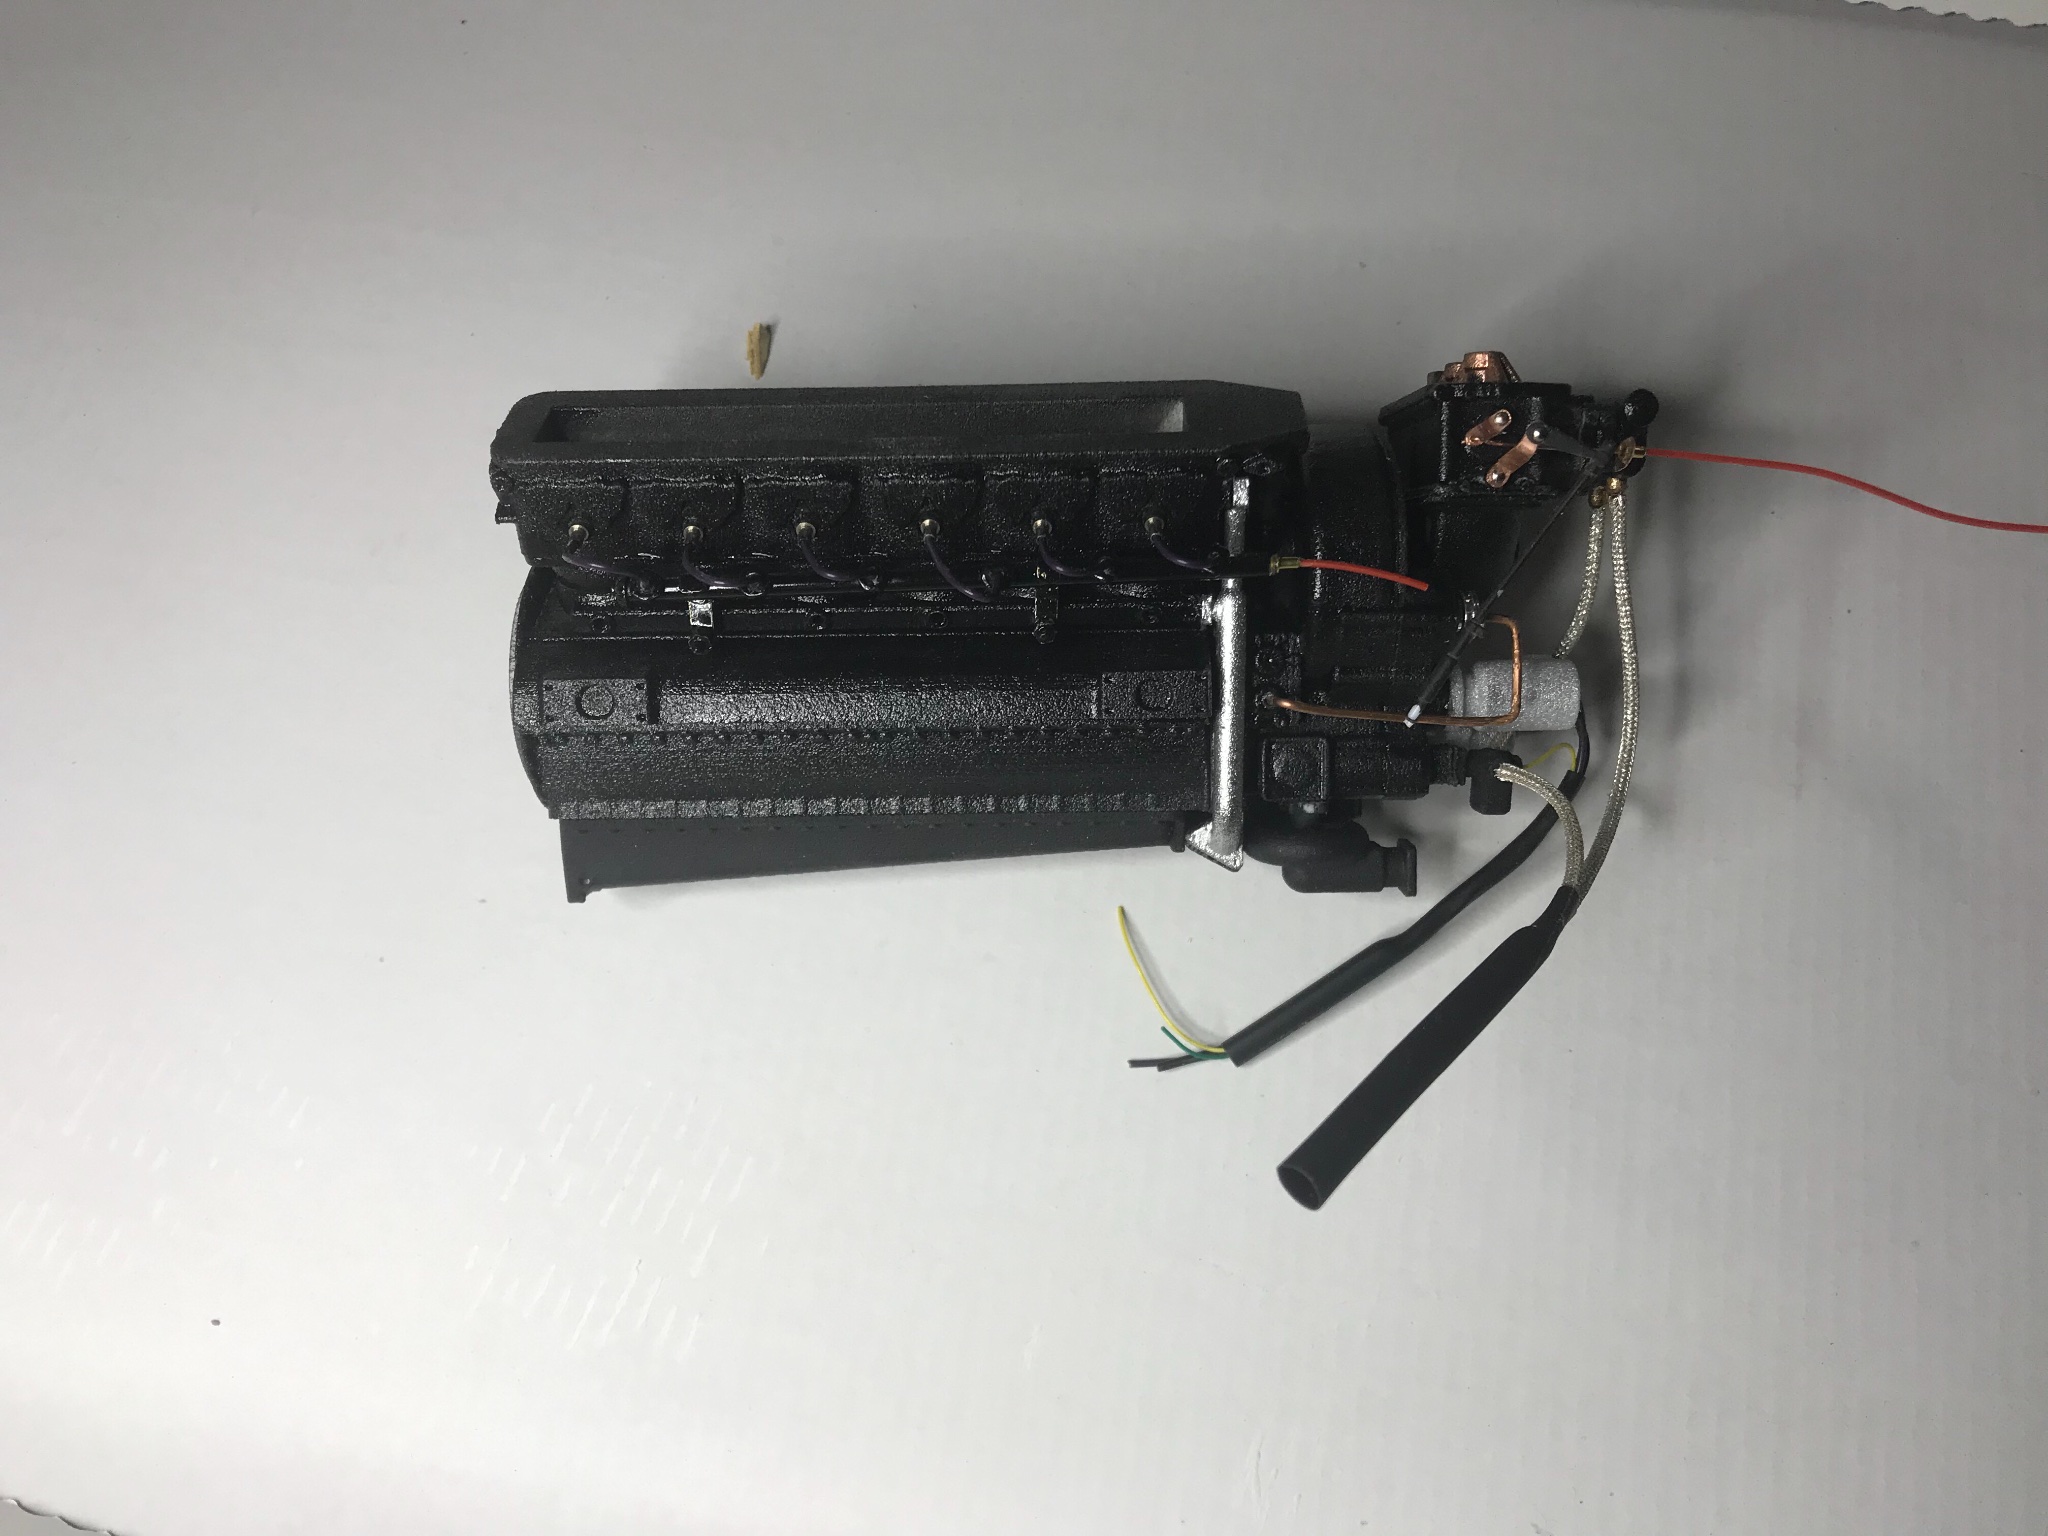
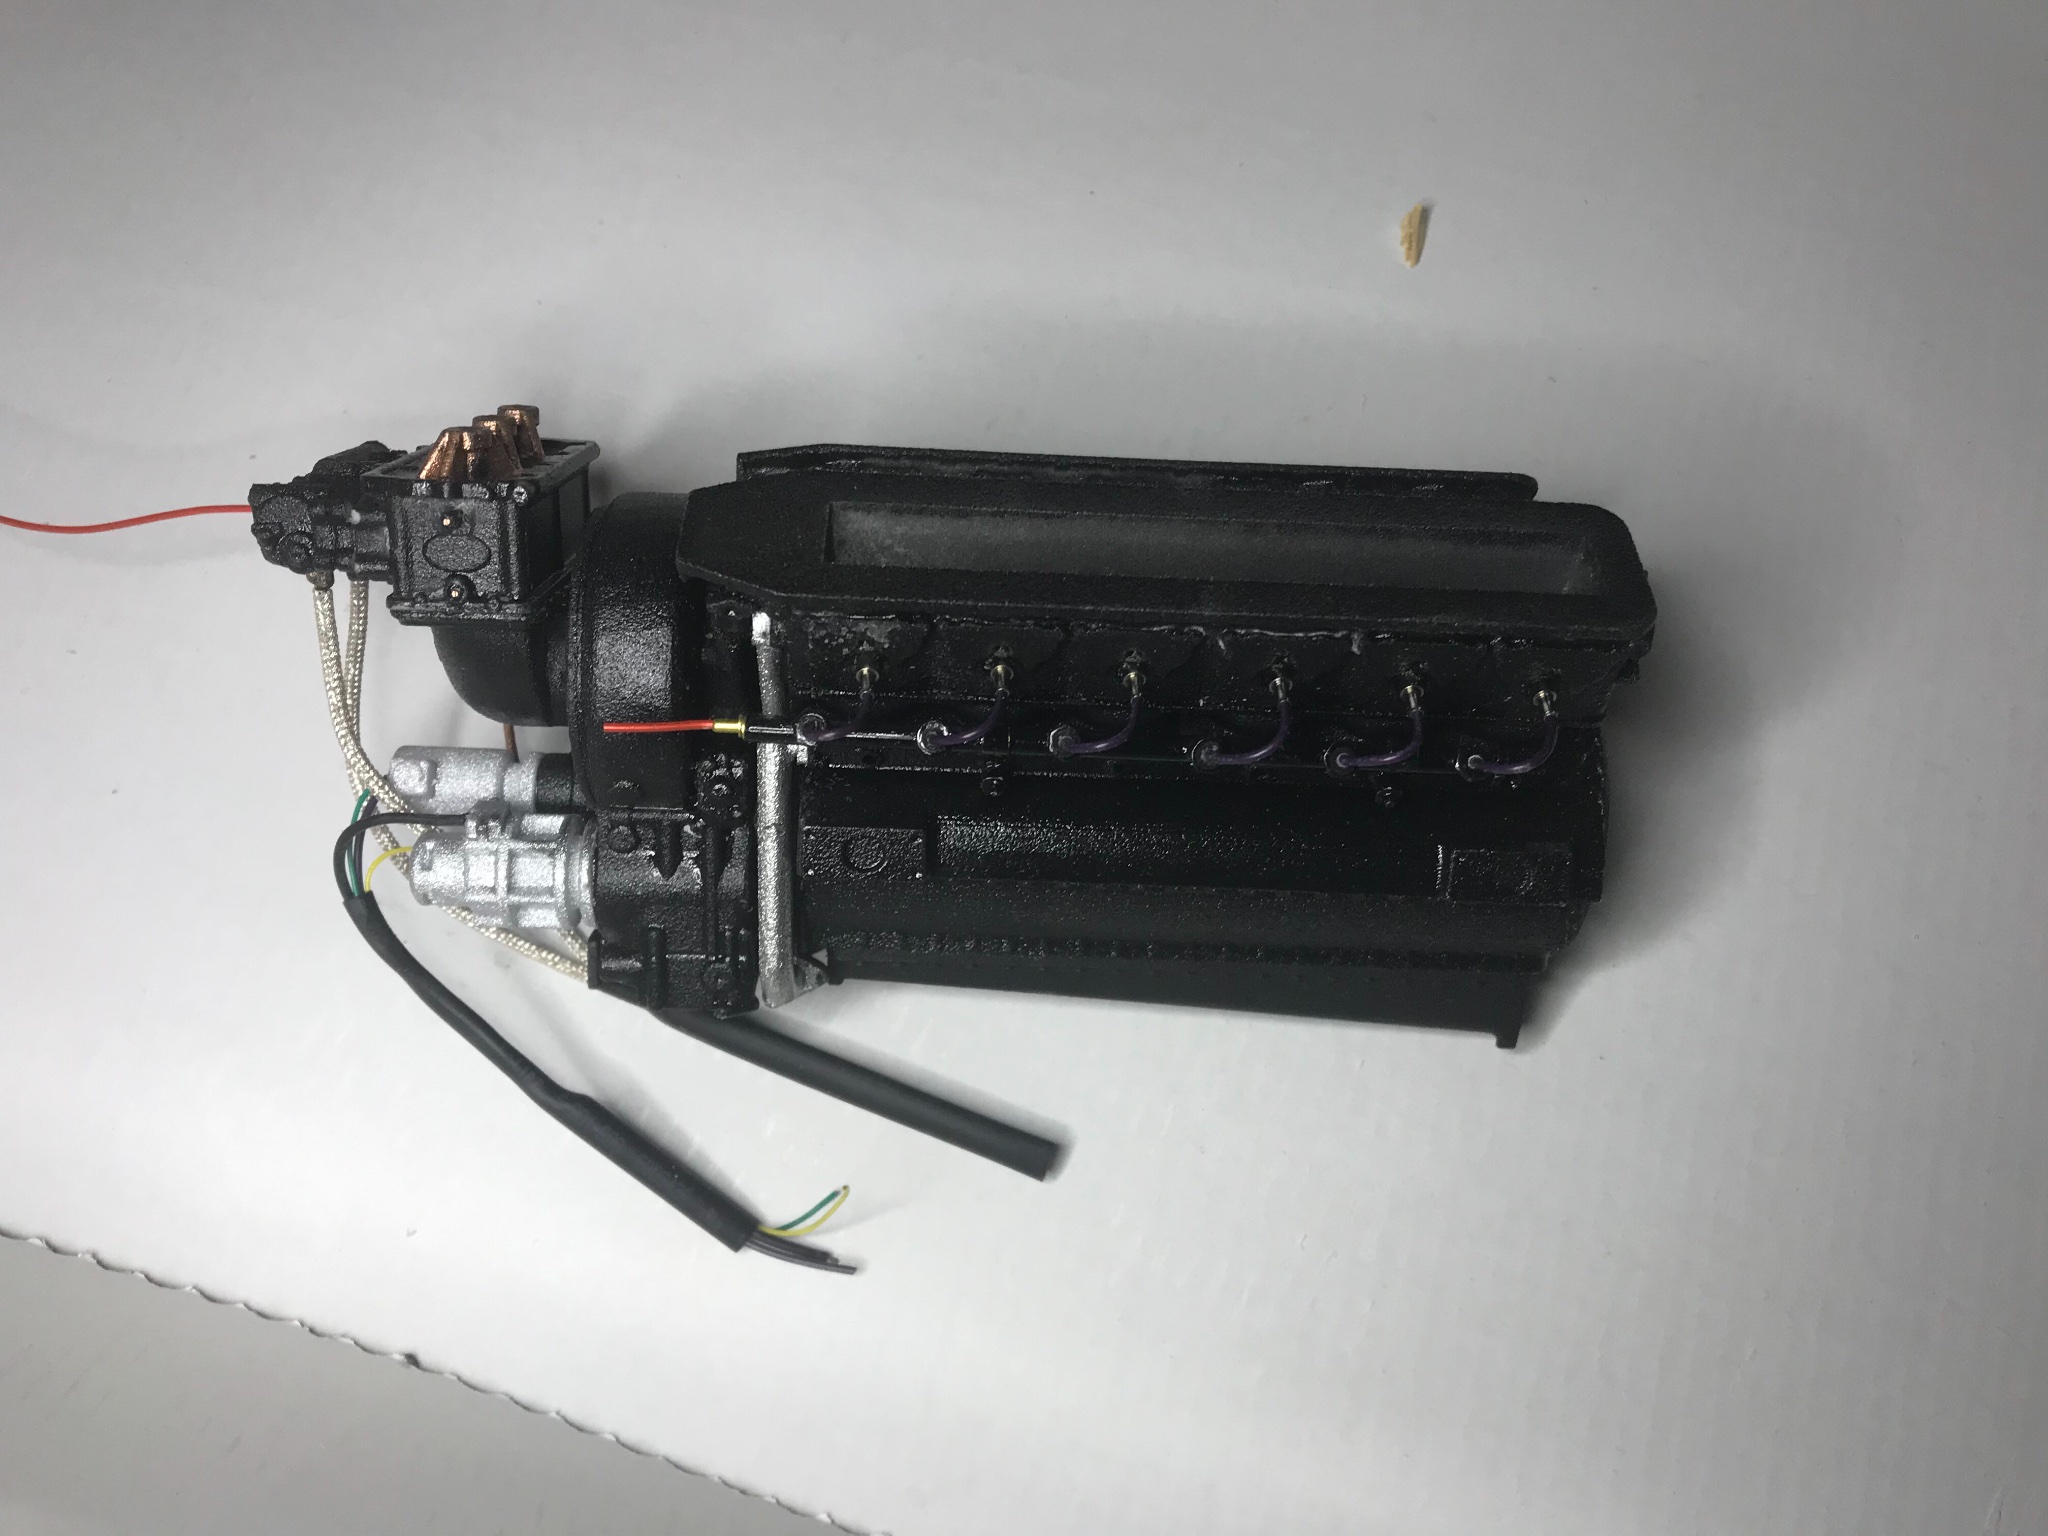
I have been working on the engine, along with the tail fin and the hundreds of pop rivets.
I have created the transmission, I’ve decided to simply allow the drive shaft to disappear under the engine, it does actually run into the transmission, it just seems silly to put so much effort into something we’ll never see again.
I ran the oil lines for the transmission, off of my make shift external oil pump.
I have all of the plumbing ready, there are 2 lines that are not on they have to go on after the motor mount bolts go in, and the exhaust system is the same.
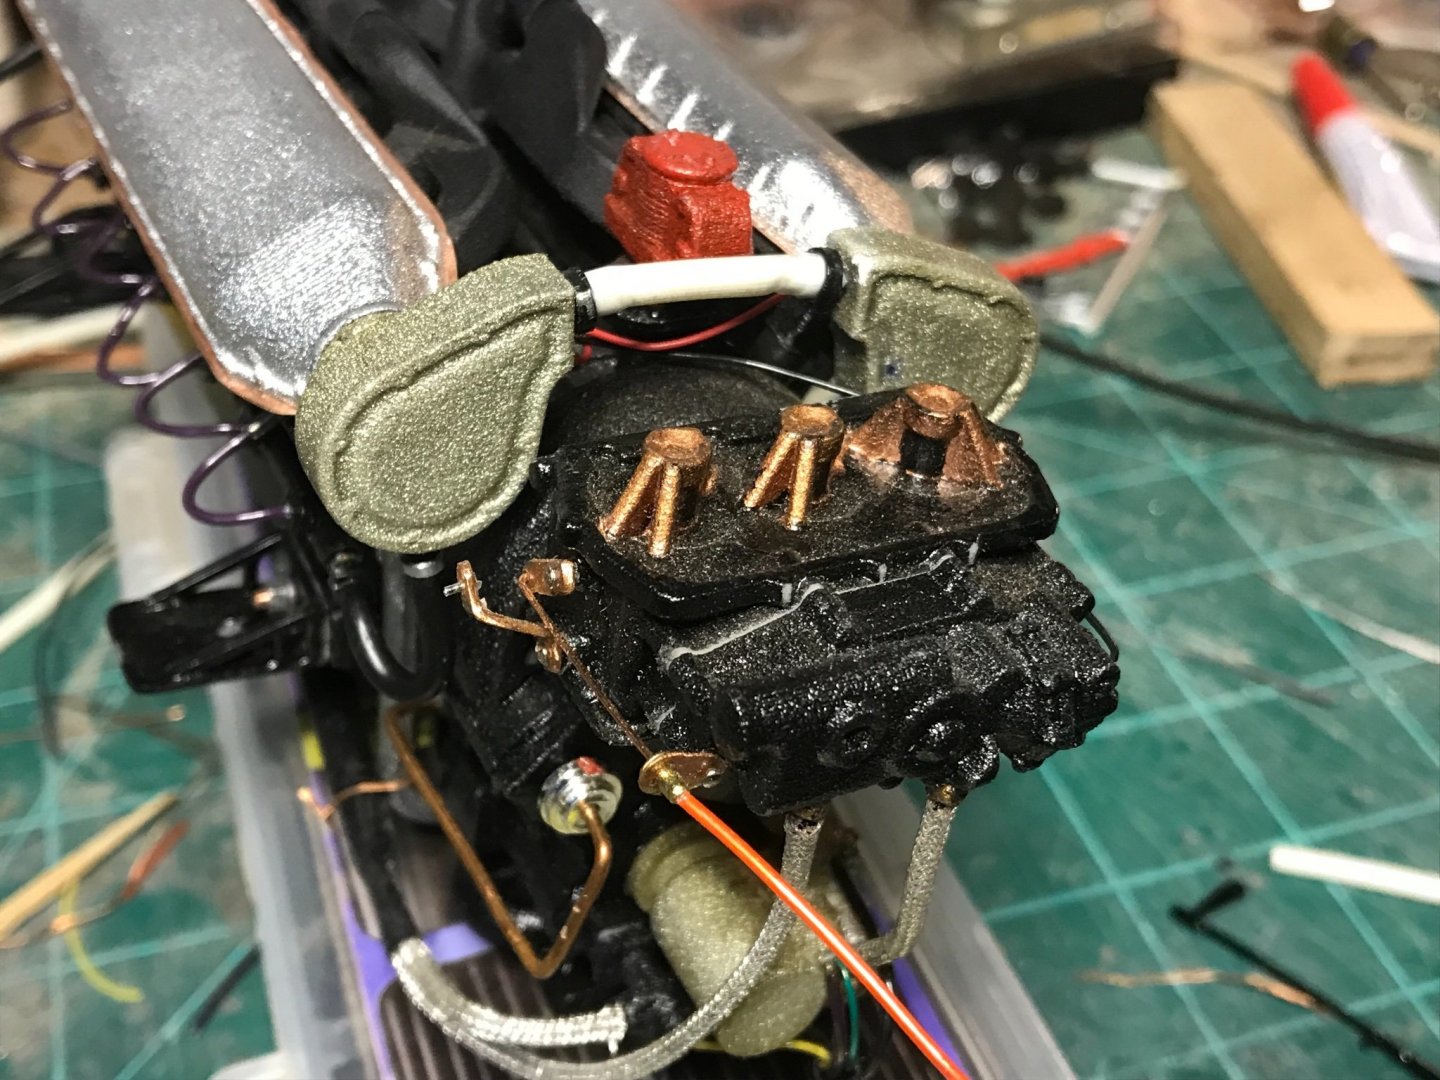
The intake is peculiar, the plumbing from the super charger is not in the kit, the intakes themselves fit perfectly, however the Y pipes are to short. I used shrink tubing to connect these parts, the end result was that one of the tubes shrunk a bit much, it’s still working, but any attempt to place a hose clamp on it emphasizes the fact that it’s actually short and needs to be adjusted. I also wish now I had put the copper gaskets on the intake like that of the valve covers.
I have to put the hose clamps on the fuel lines, and I also have the electric lines in.
The throttle linkage will go on after the engine is in place as well.
I have no way forward without painting, so that’s what’s next, and the rebuild kit for my new Paasche arrived.


-
I can’t get over the fact that you are building this, I was so shocked by the other one. You didn’t mention anything about warping and those models are old. Couldn’t imagine any decal from that era of being much use.
How are you gluing them together.
I have been collecting models most of my life, and sometimes I get a model that is more cool than practical, and other times someone may be dumping their glue bomb, this is where I have learned how glue makes the parts brittle and the parts are warped and are of little use.
That sanding is very sad, that detail looks amazing for that era, and arrow has the decals, at least for the pop rivets, if you don’t mind dry transfer, I think it would take a long time to put those pop rivets back.
Keep up the good work.
-
So after another week of being kicked while I’m down by this Murphy character, I managed to get a little done, slow and steady, I guess.
I managed to get 4 coats of clear down, I thought this would be a great place to start sanding for the stripe that needs painted on. So from here I will get to taping and painting.

-
Since my last update, I did gather my thoughts on some of the mistakes I have made. Especially with 2 of the parts I over looked, resulting in a lot of work to fix, definitely learned something about almost every part of this thing.
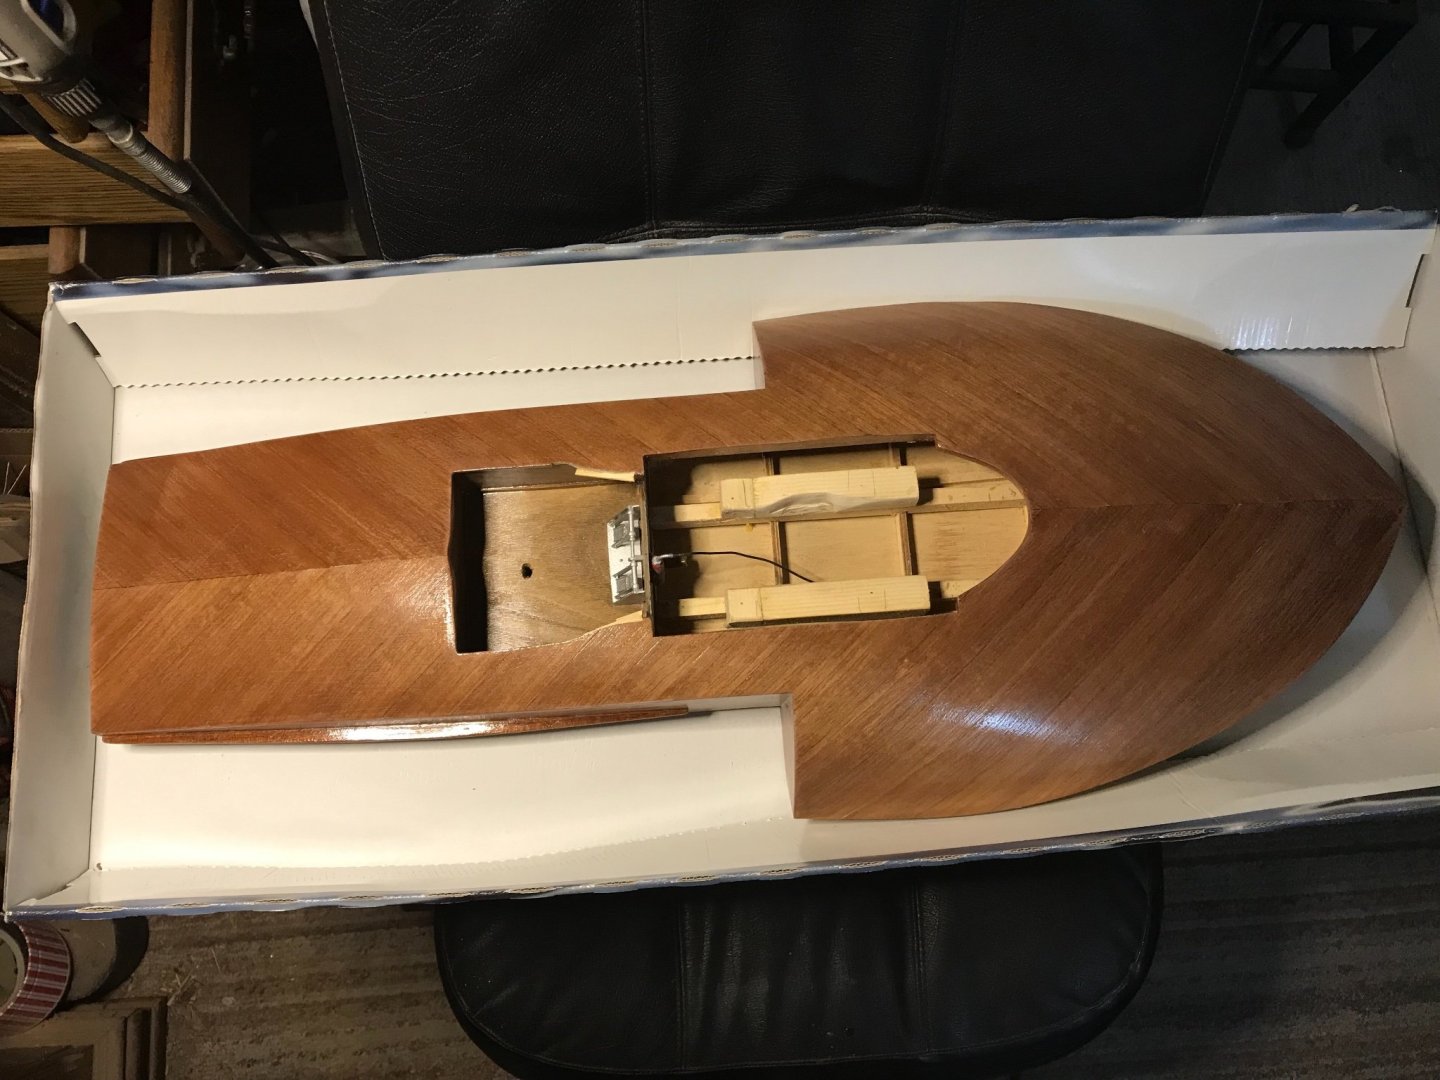
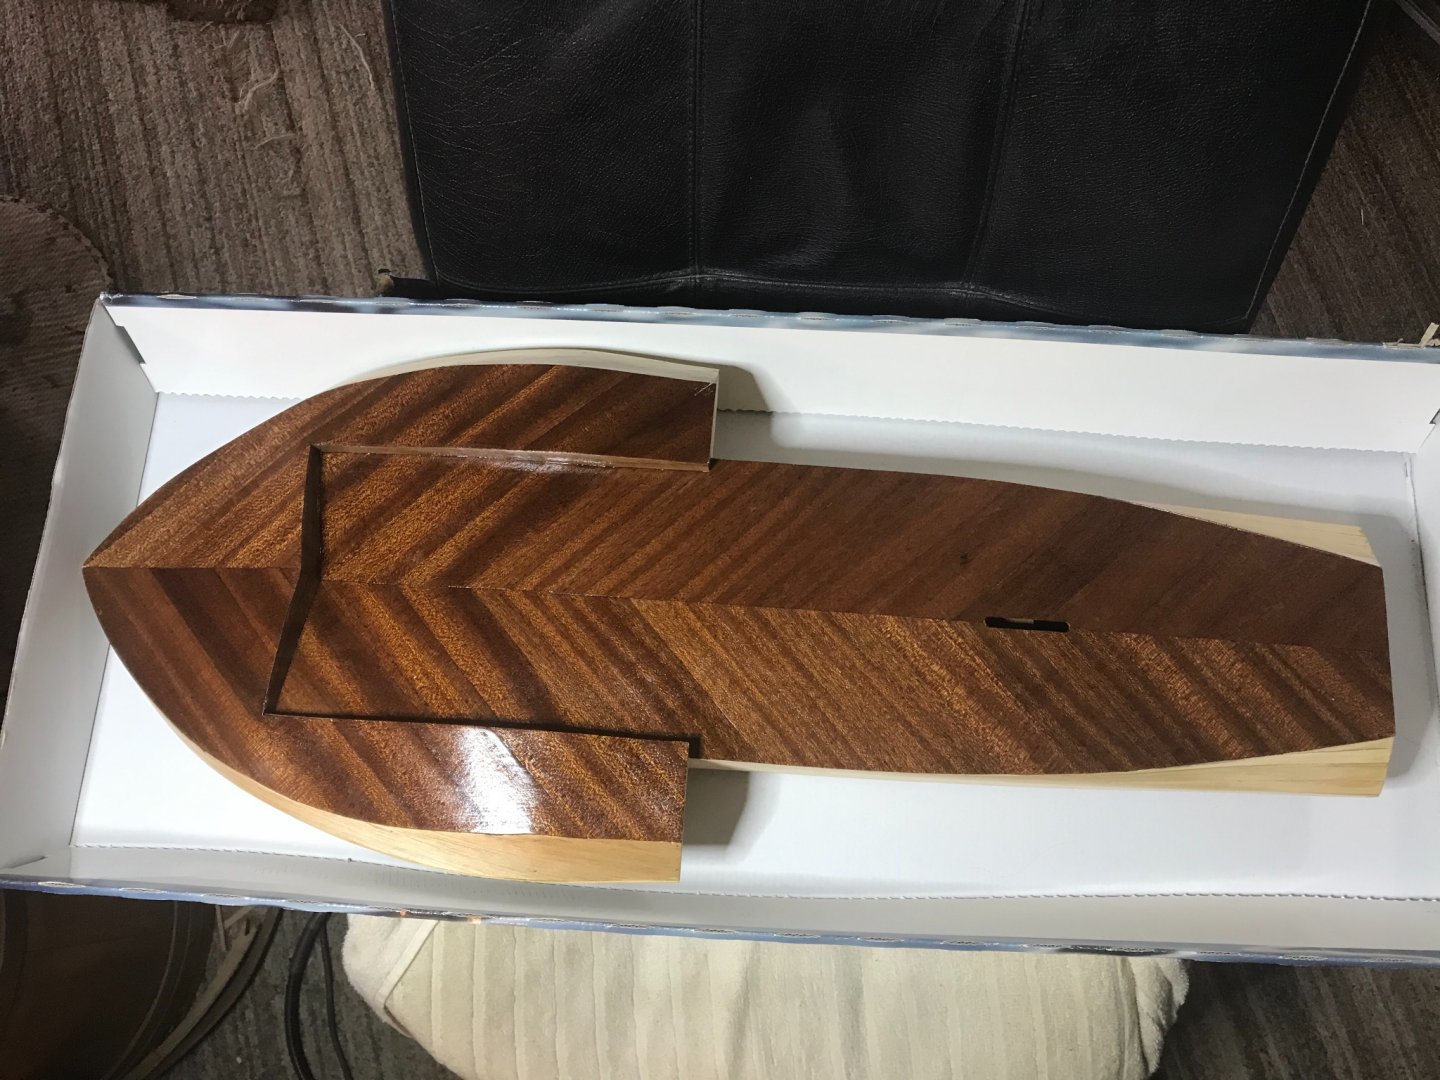
I have been working on getting the planking done, as for the wood, I think I may have gotten it.
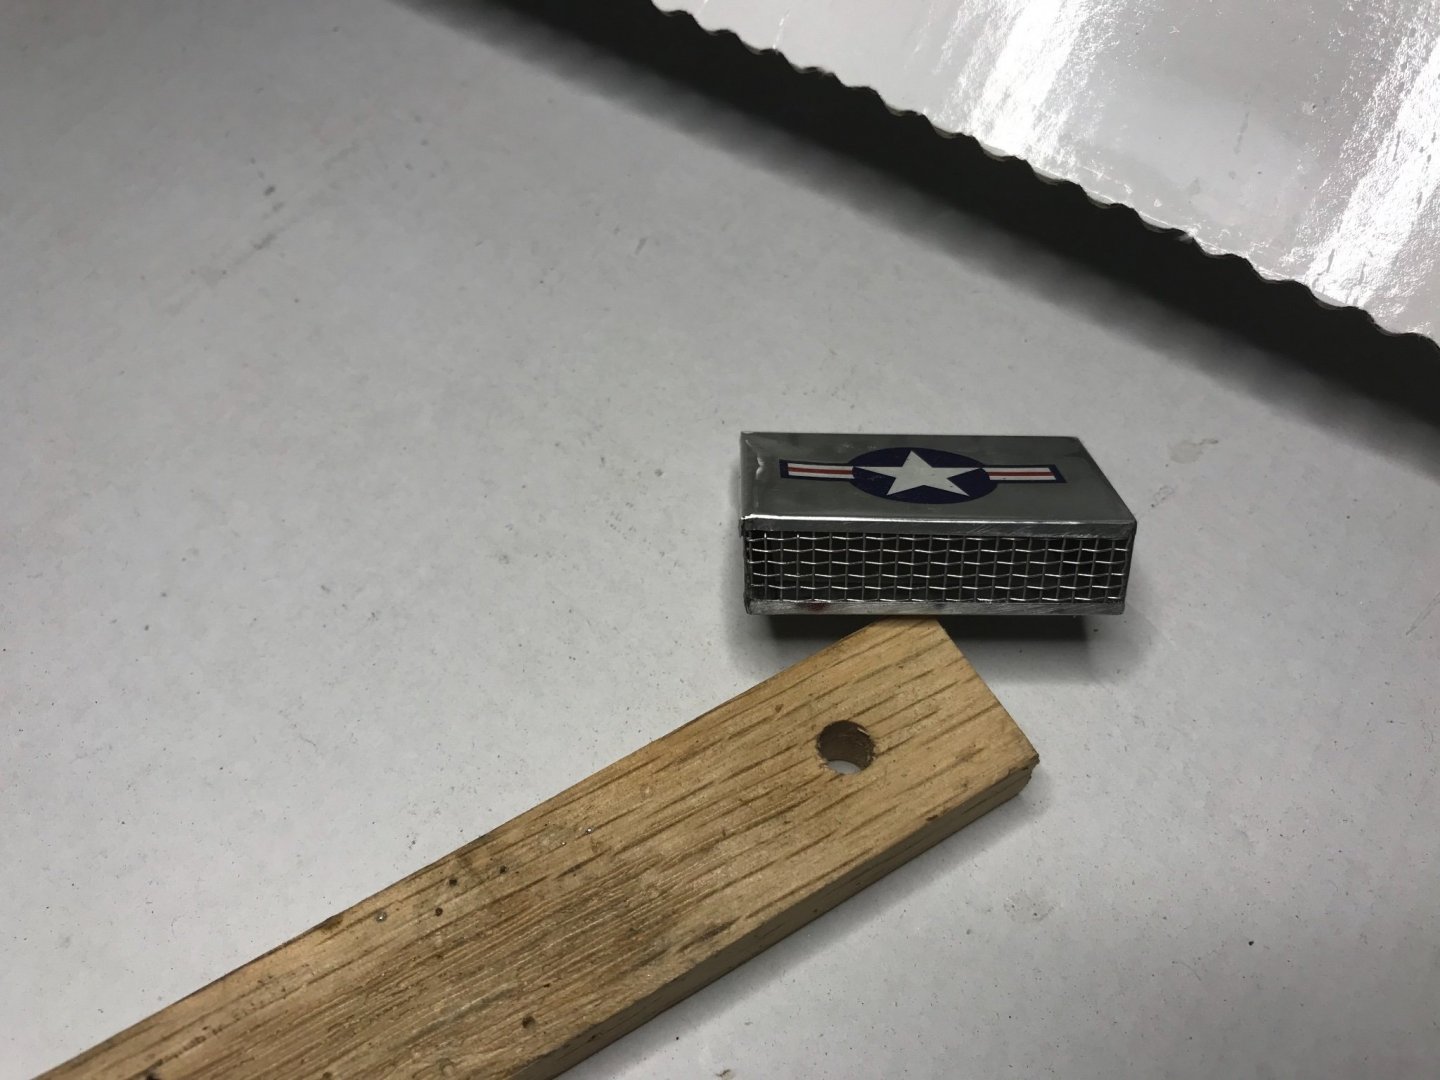
I also worked on the nose, I actually made 5 of them, broke 2, #4 is the finished one here, after I sanded and painted the first nose for the second time I began a production, sure enough I hadn’t beaten the orange peel, fool me once, so now I have a fancy piece of plastic with holes drilled in it for my parts bin.The air cleaner I made from soda can or something, those decals are my political statement, and not just because of my decal disaster.
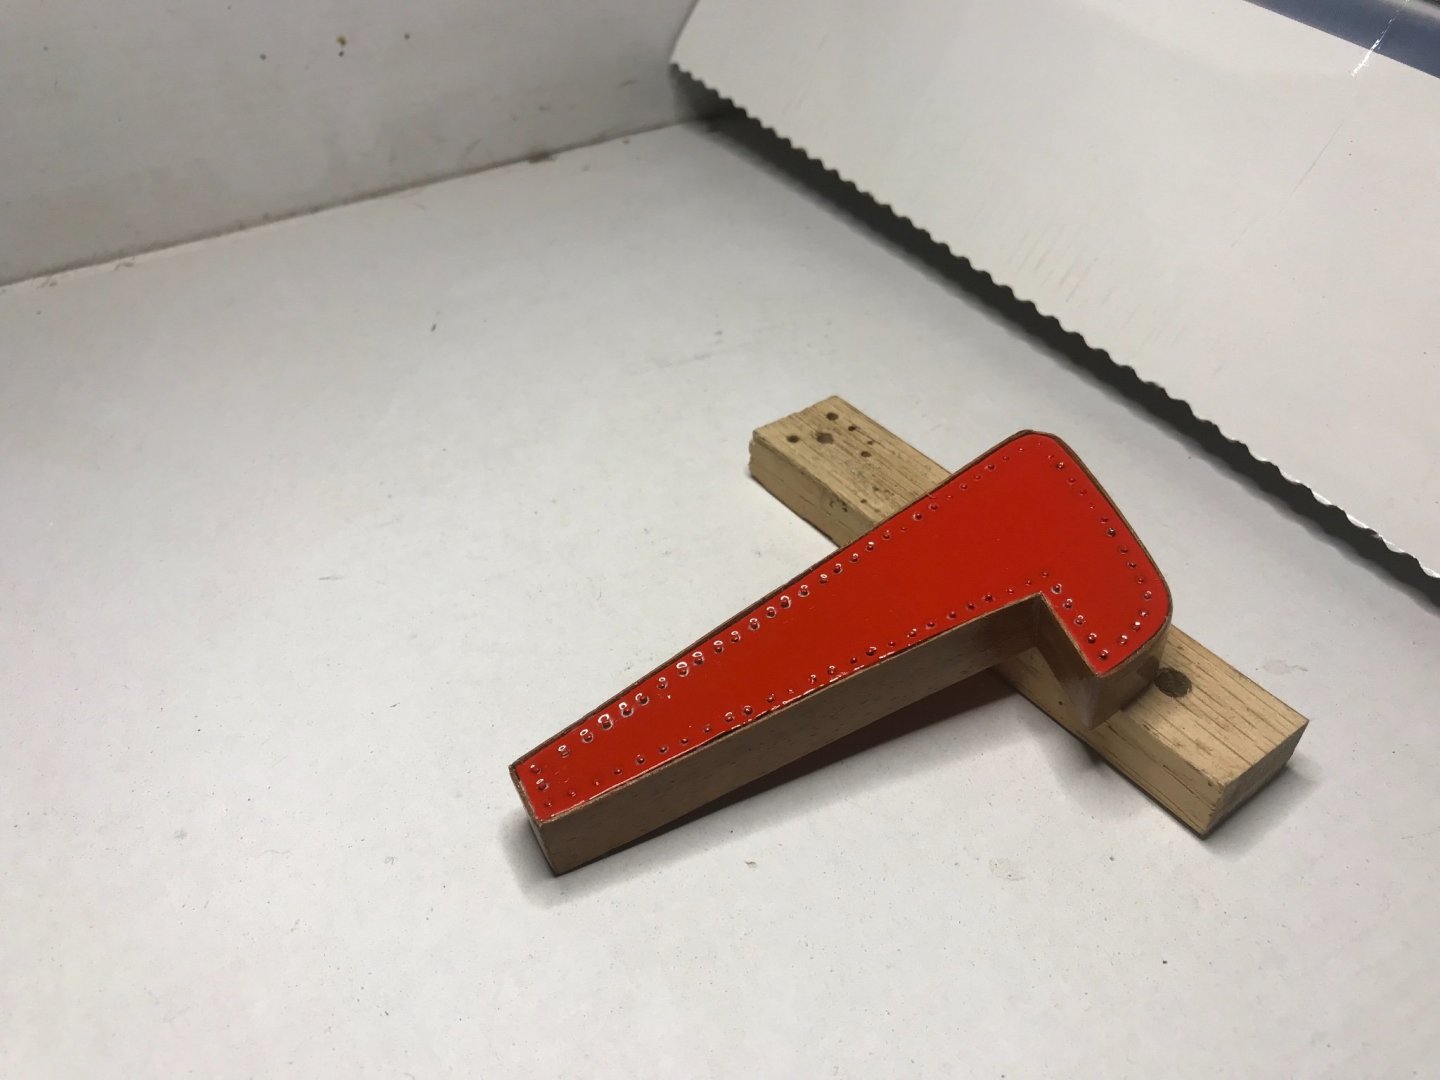
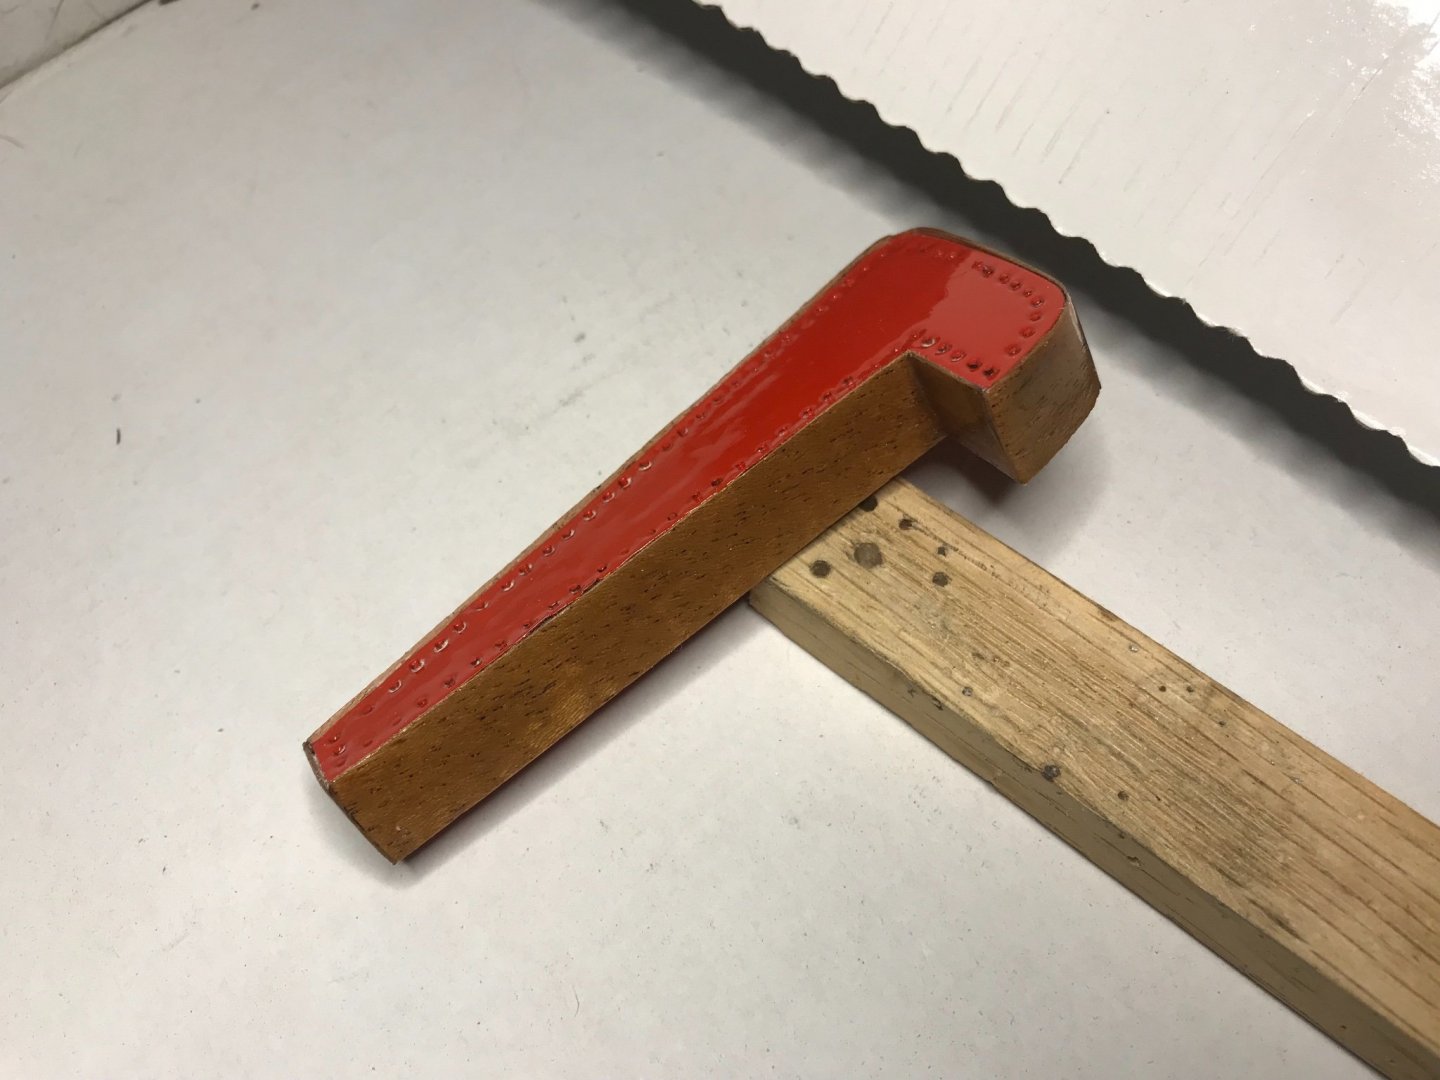
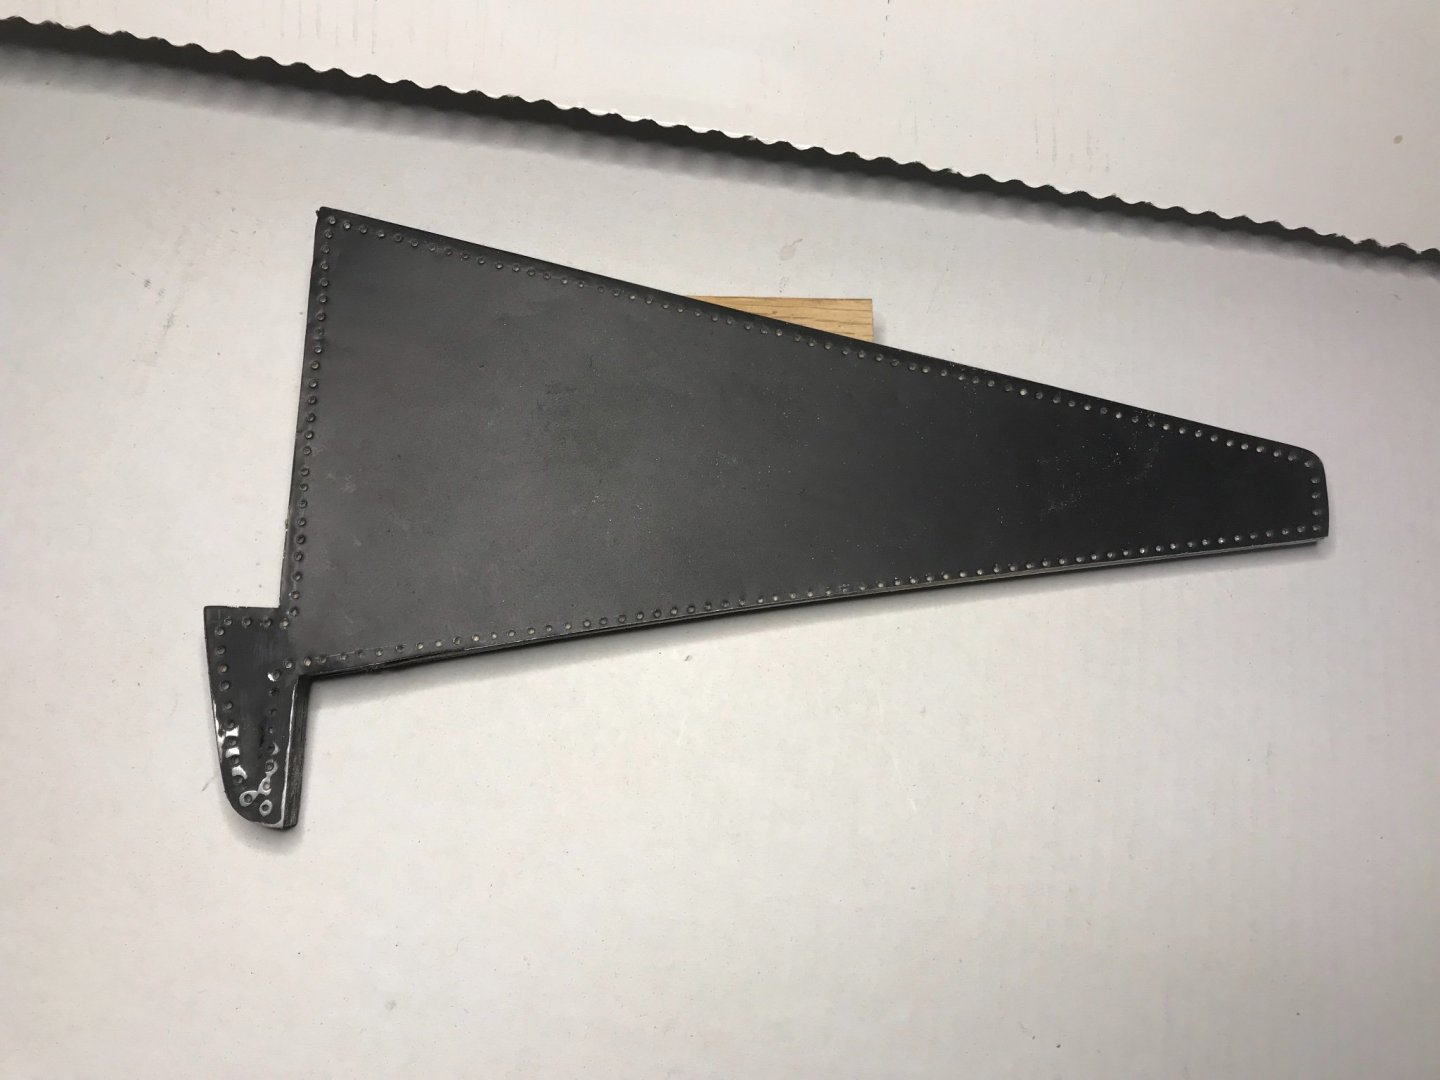
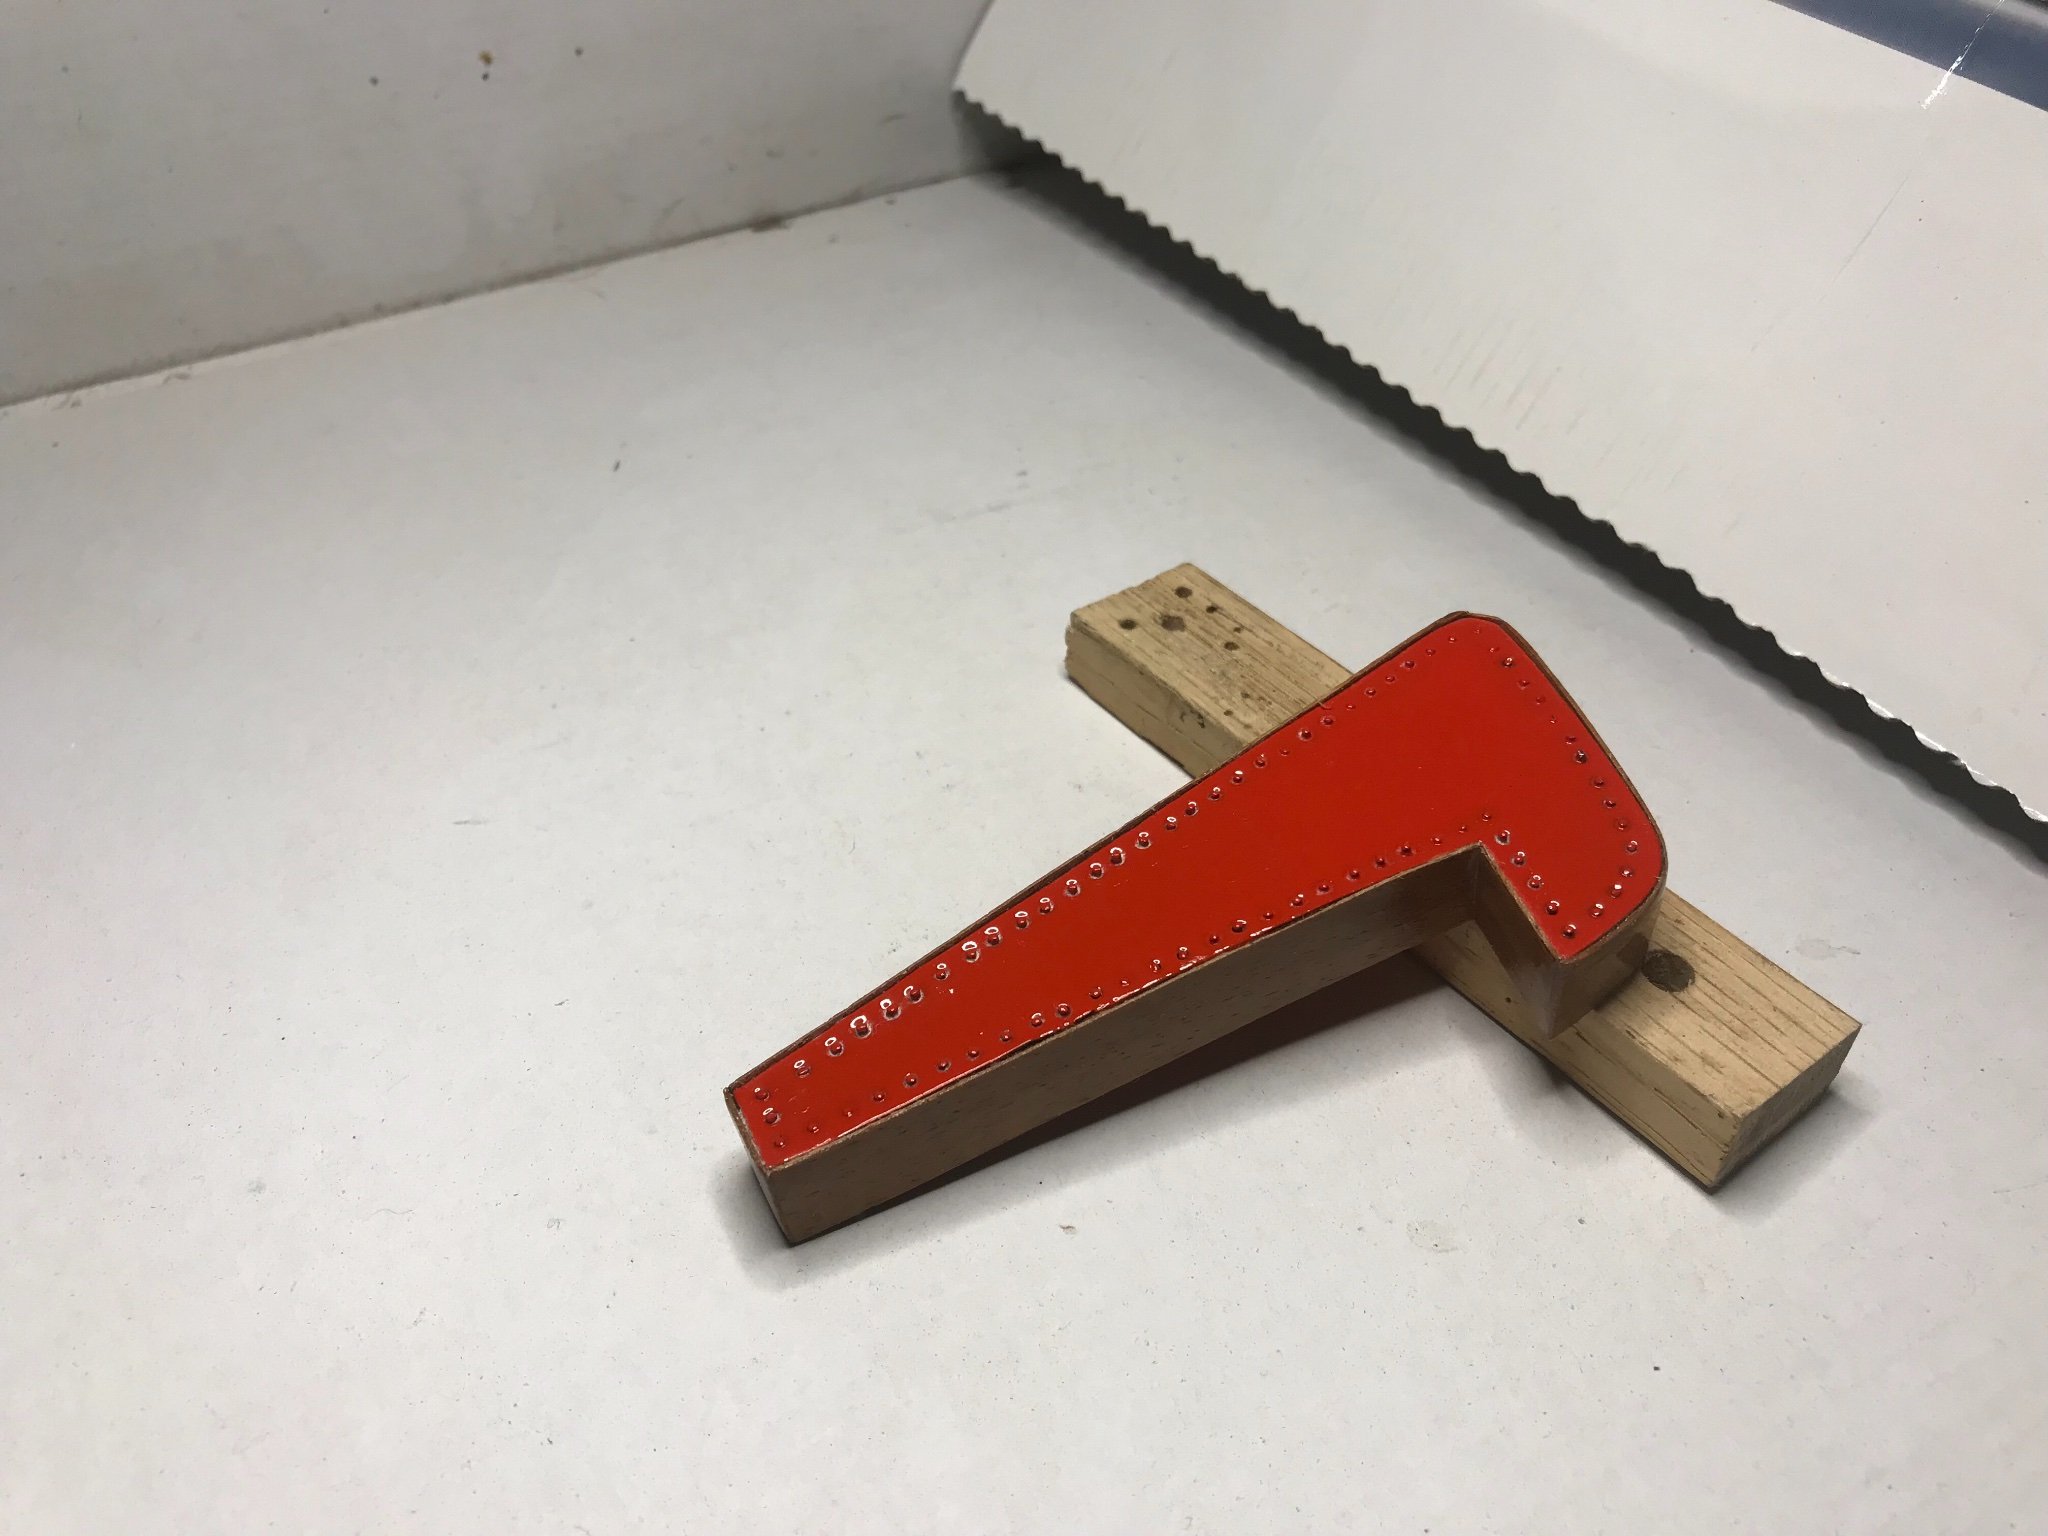
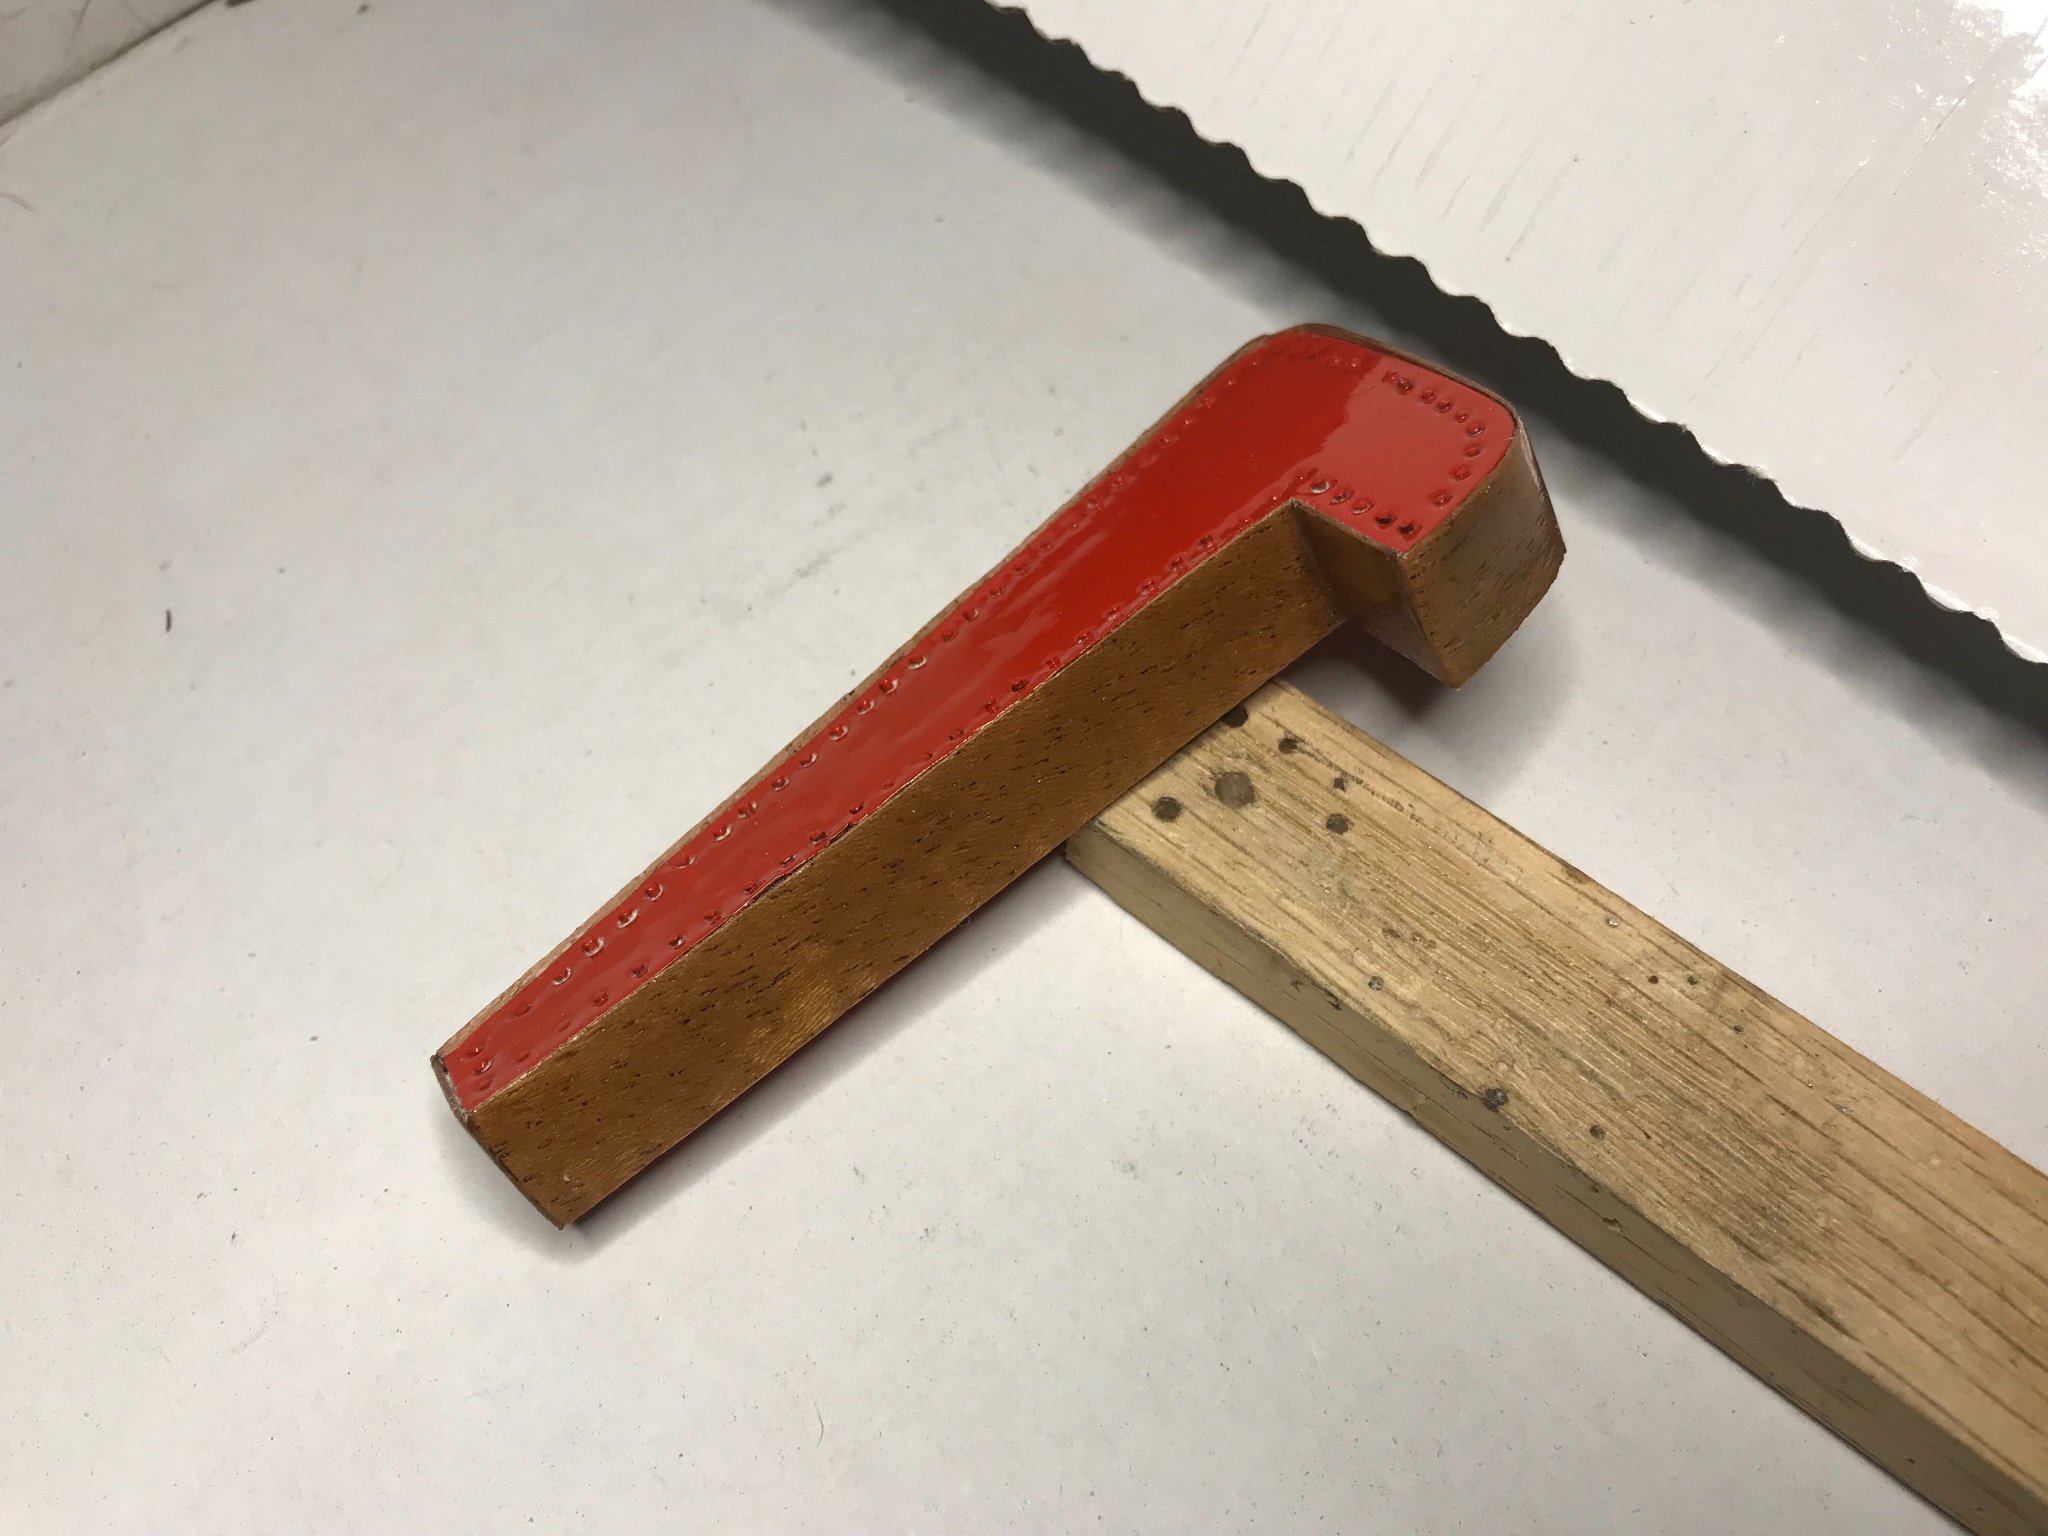
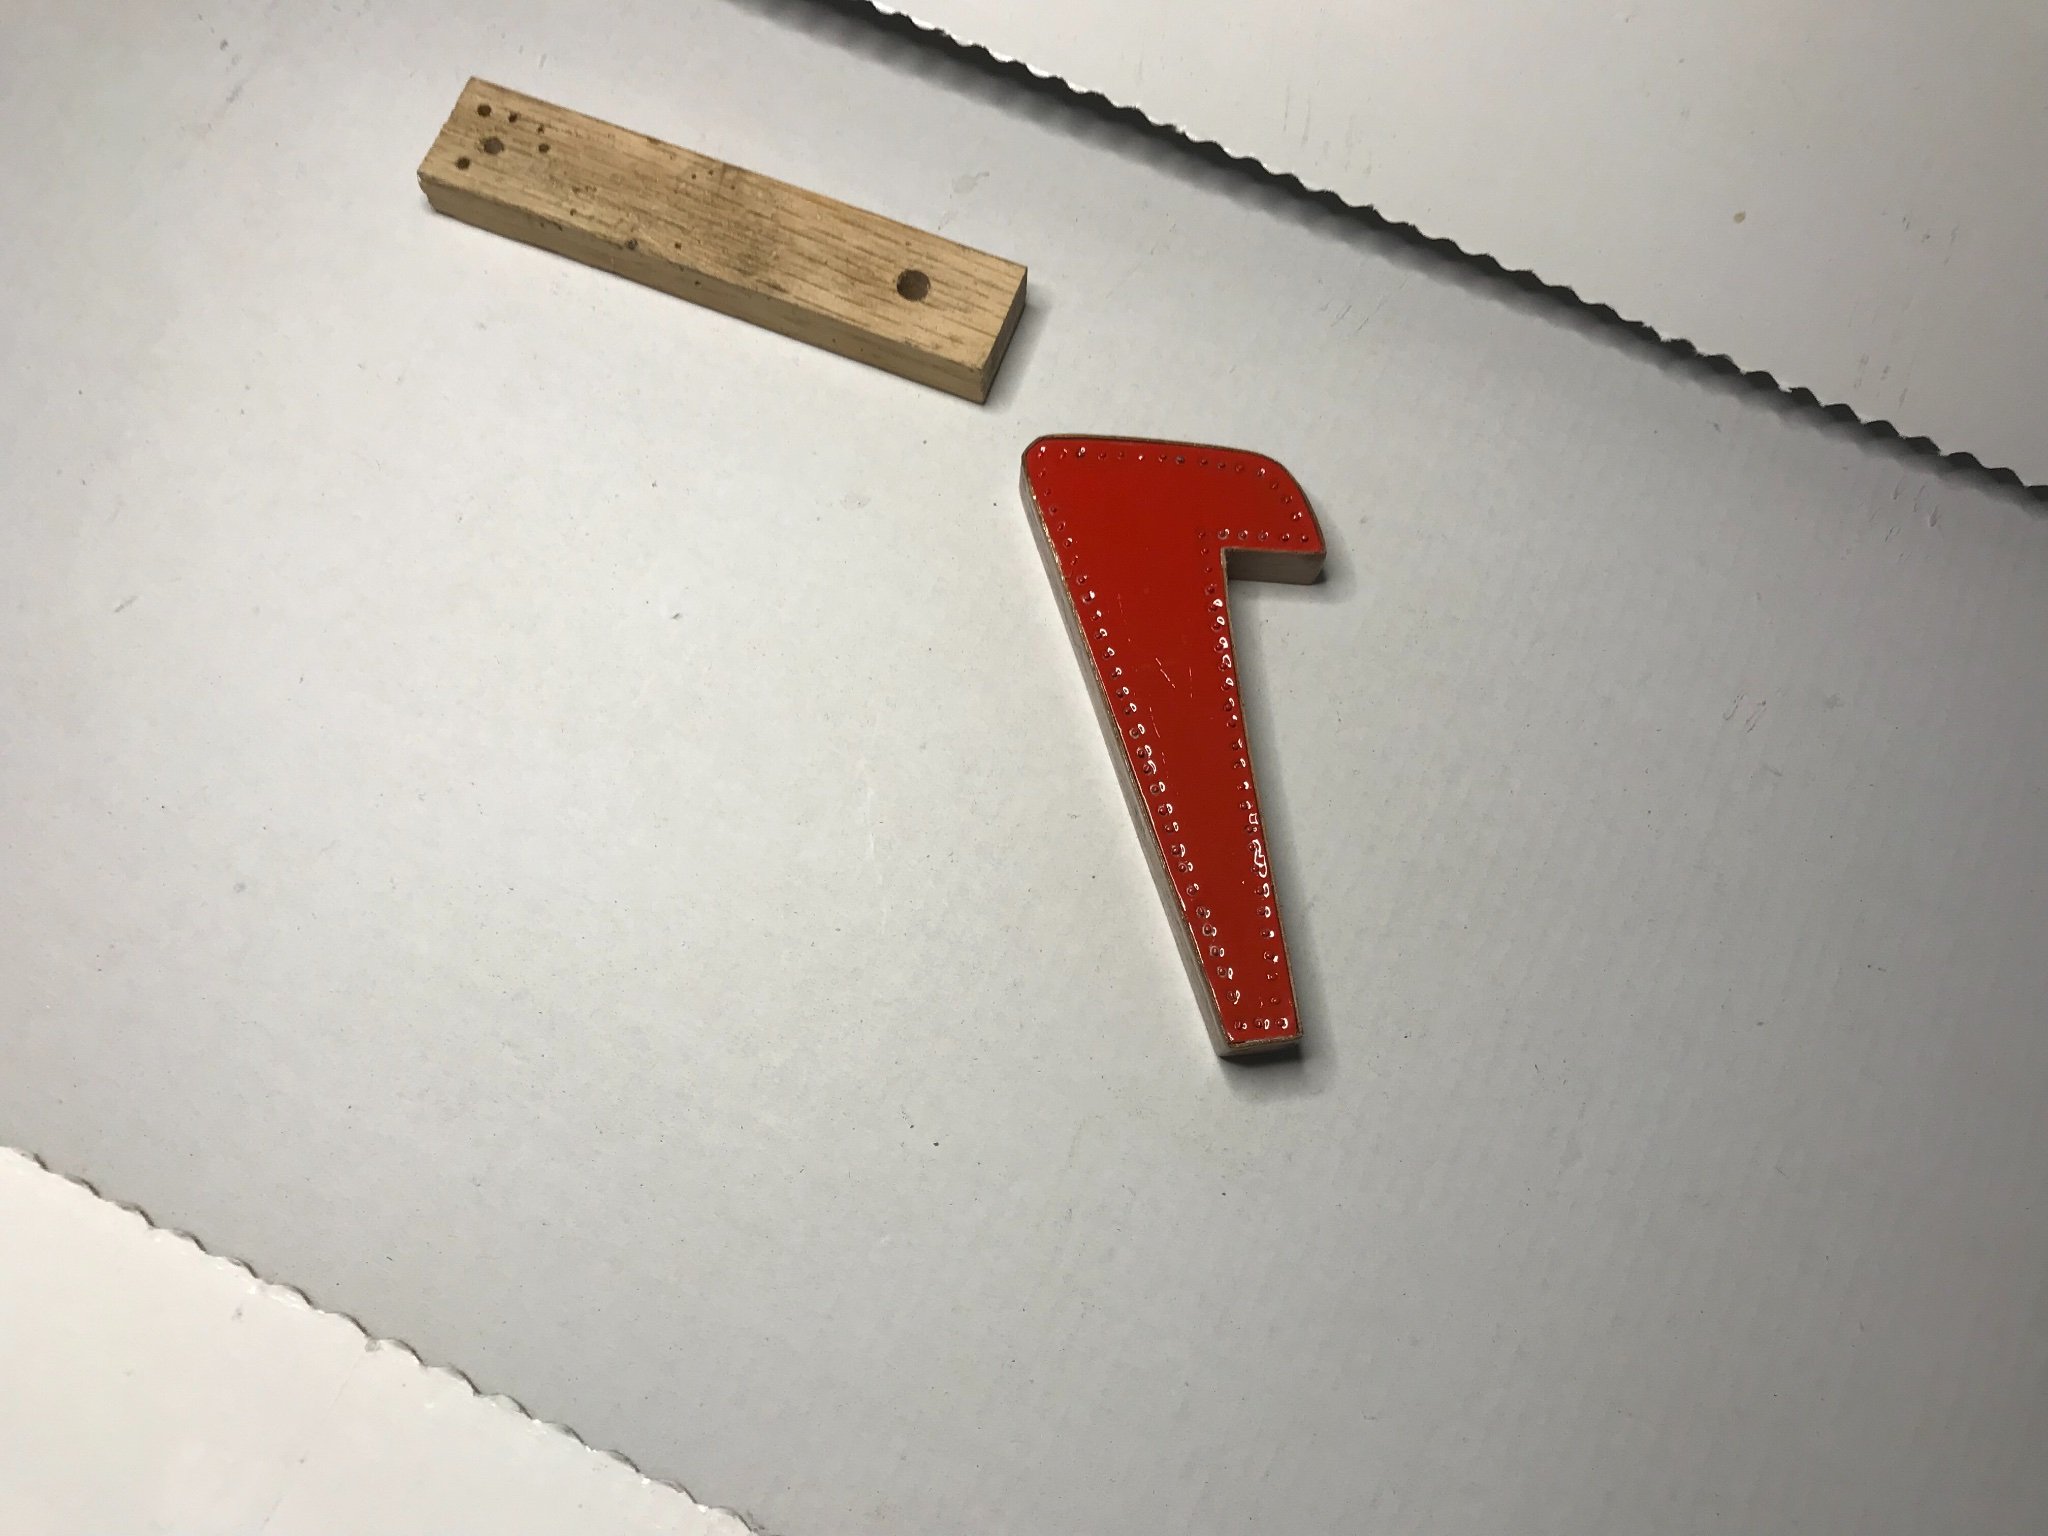
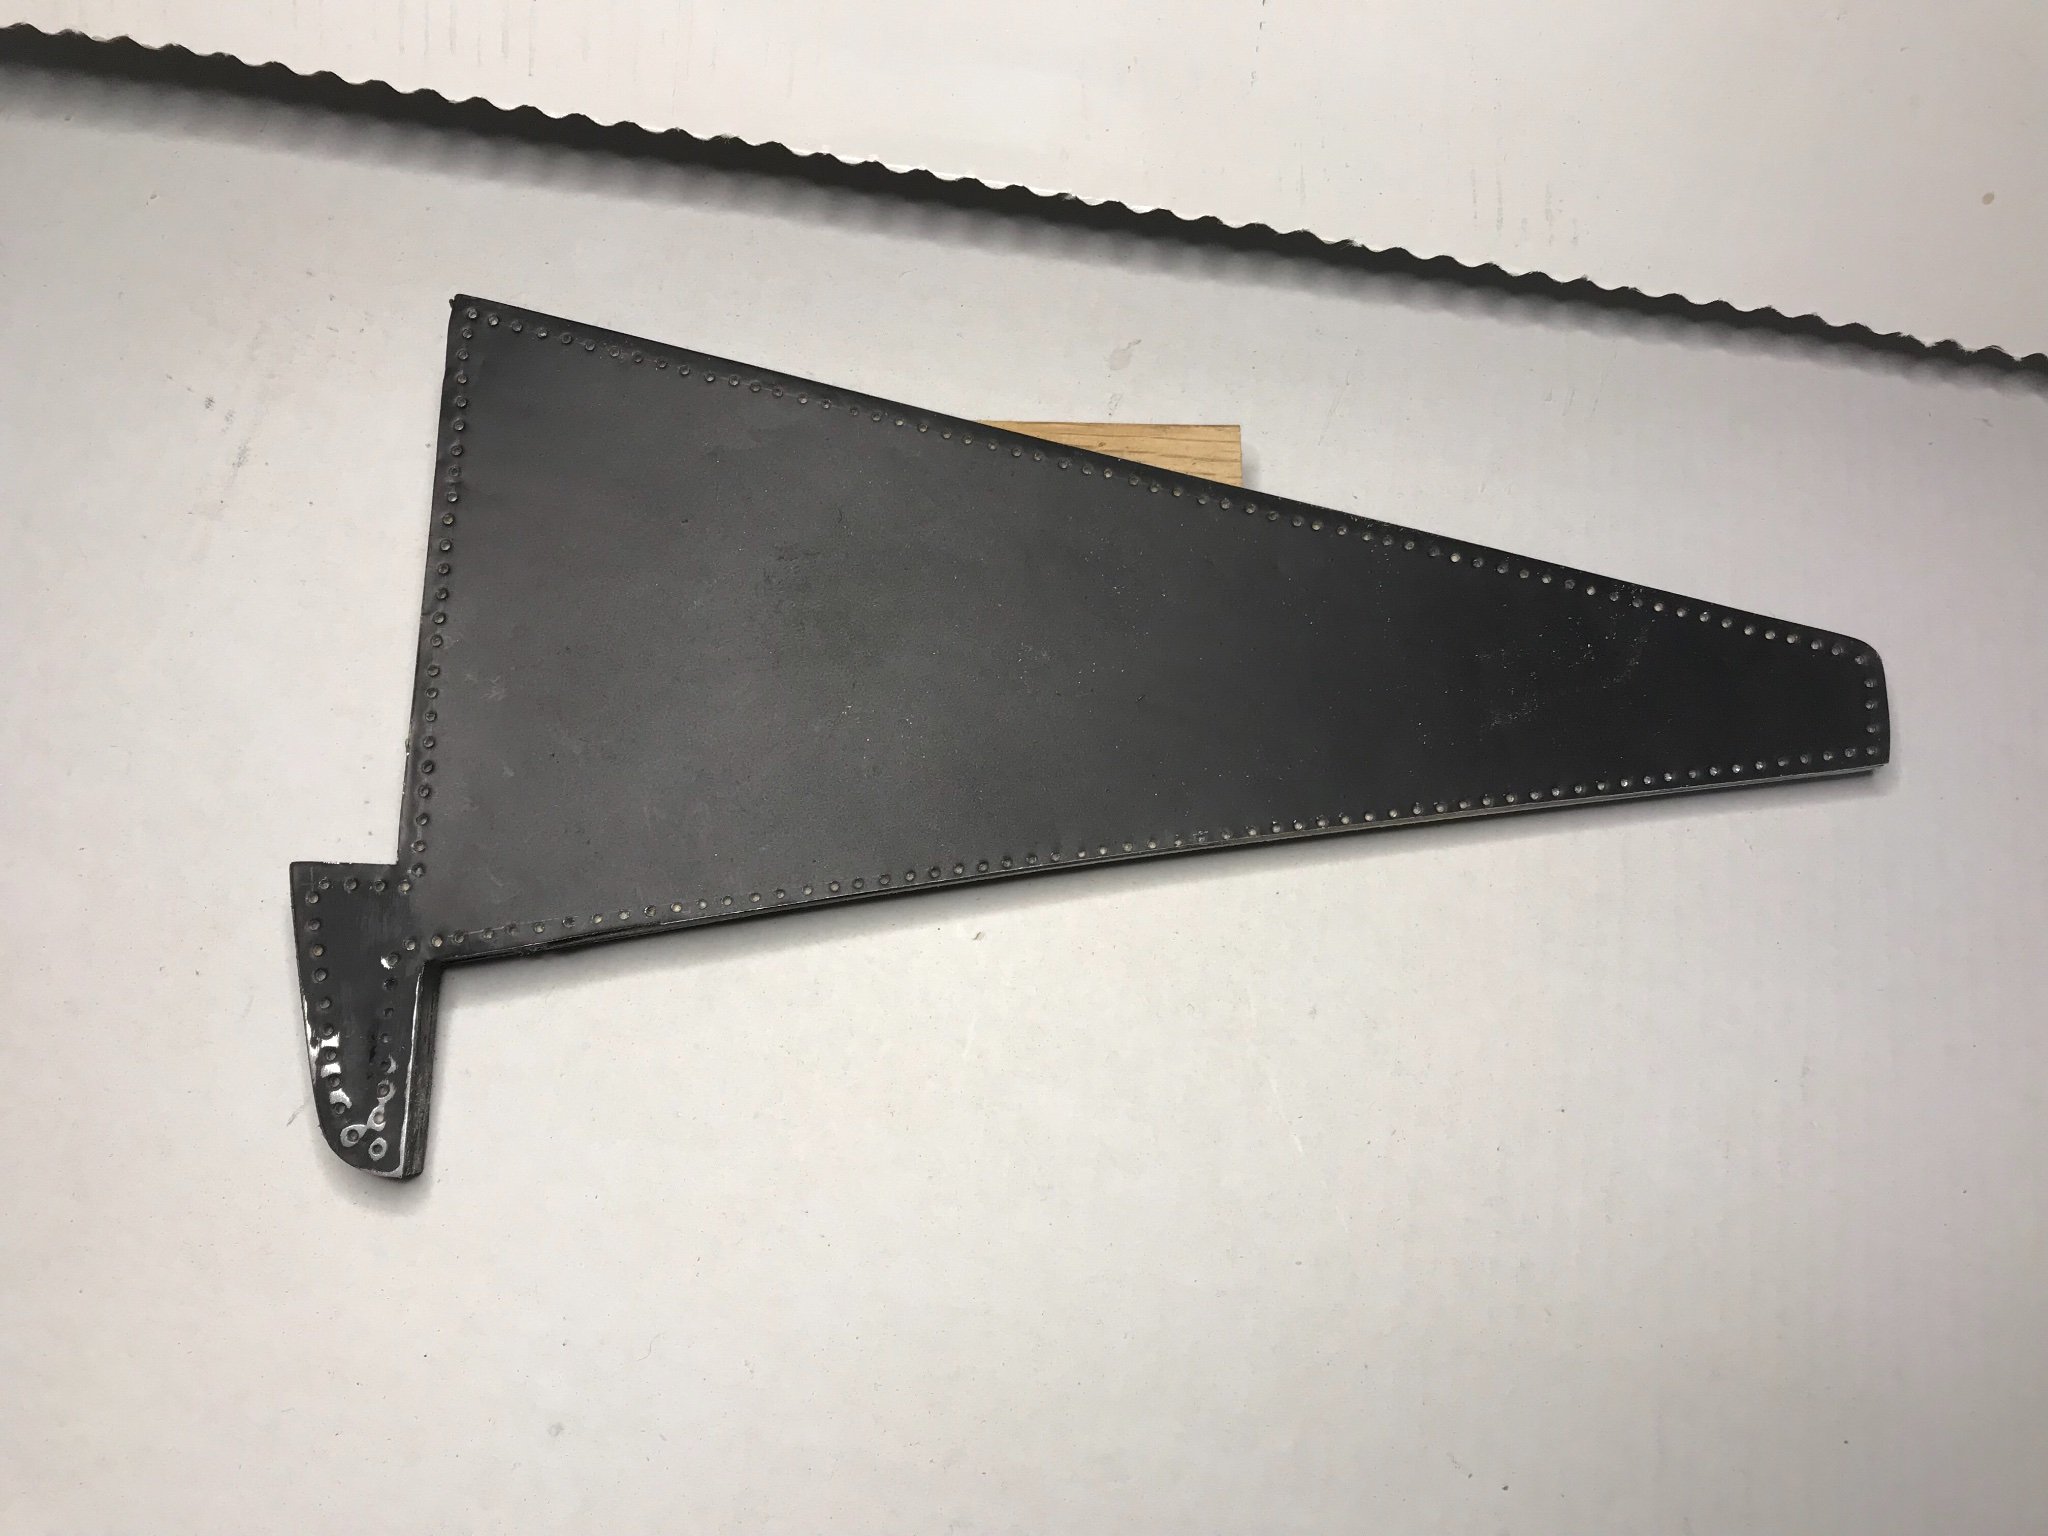
The tail fin has been going. I got decals from Arrow, they have a great line of products, I got ahold of several sets of pop rivet decals. I began my run of decals, after I got the main part of the tail fin done, something was stuck to my hand, I looked down and somehow, I offer no excuse, the decals had become wet and I had destroyed them. They took in total 2 weeks to get, to make a mistake or even several hundred on something I’ve never done before is almost fun, but to fail the decals set me back, so now everything gets a decal.
I decided to make the pop rivets, it’s been slow going.


- PRS, popeye the sailor, GrandpaPhil and 1 other
-
 4
4
-
Thank you Popeye.
I am in the middle of a model moving as well here. Madness.
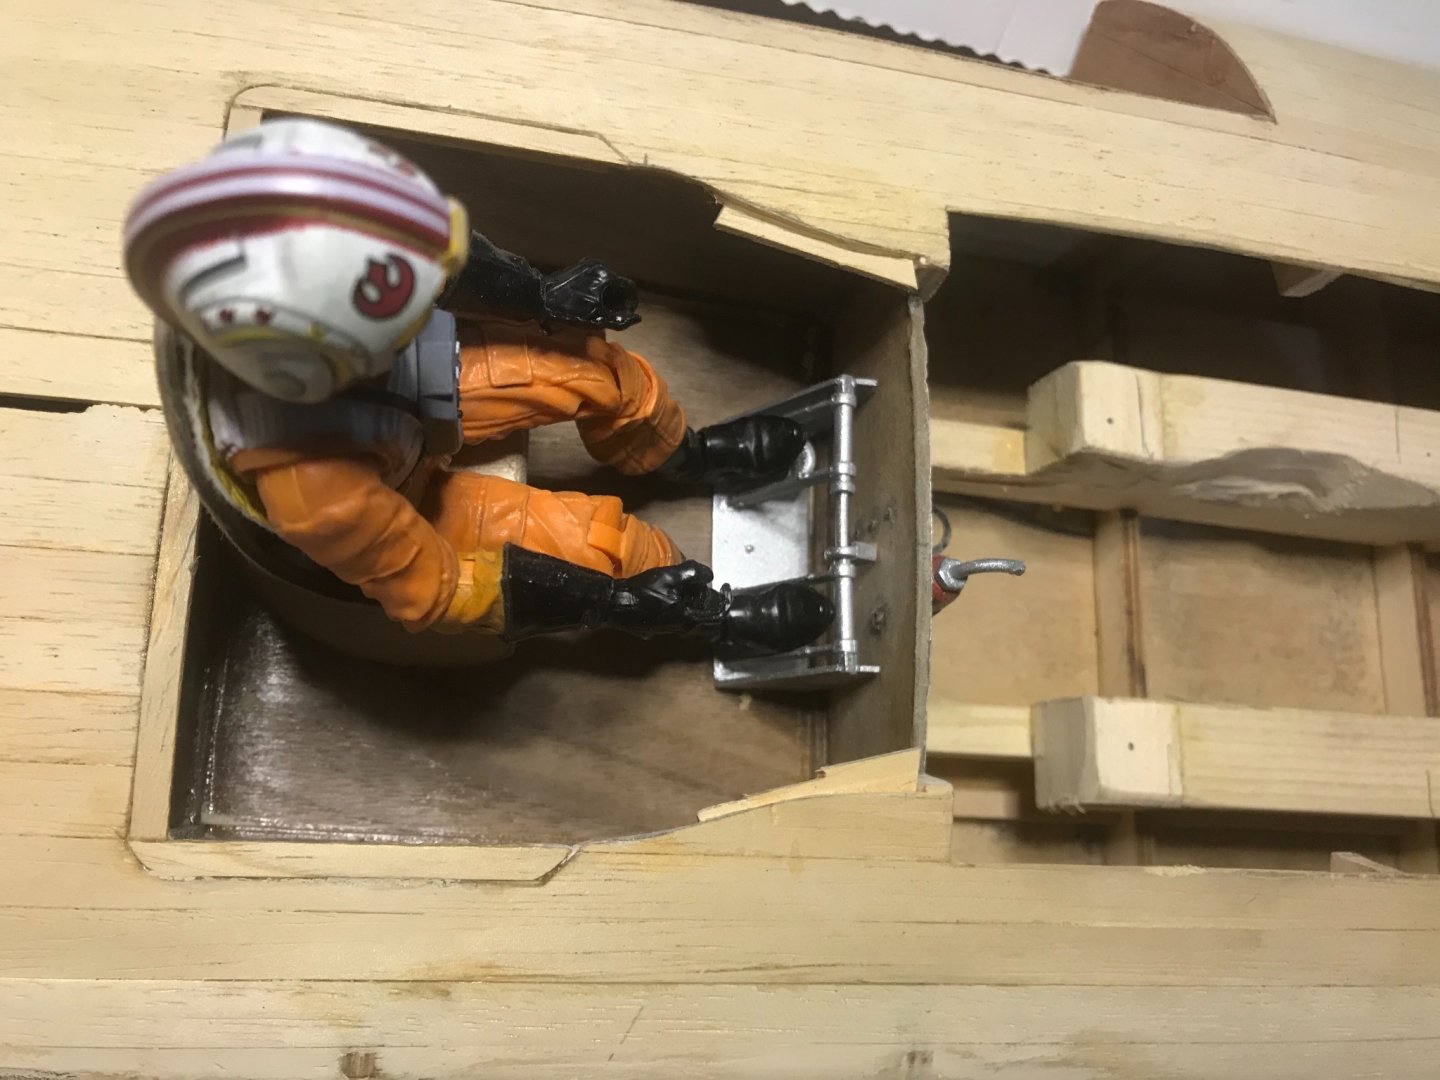
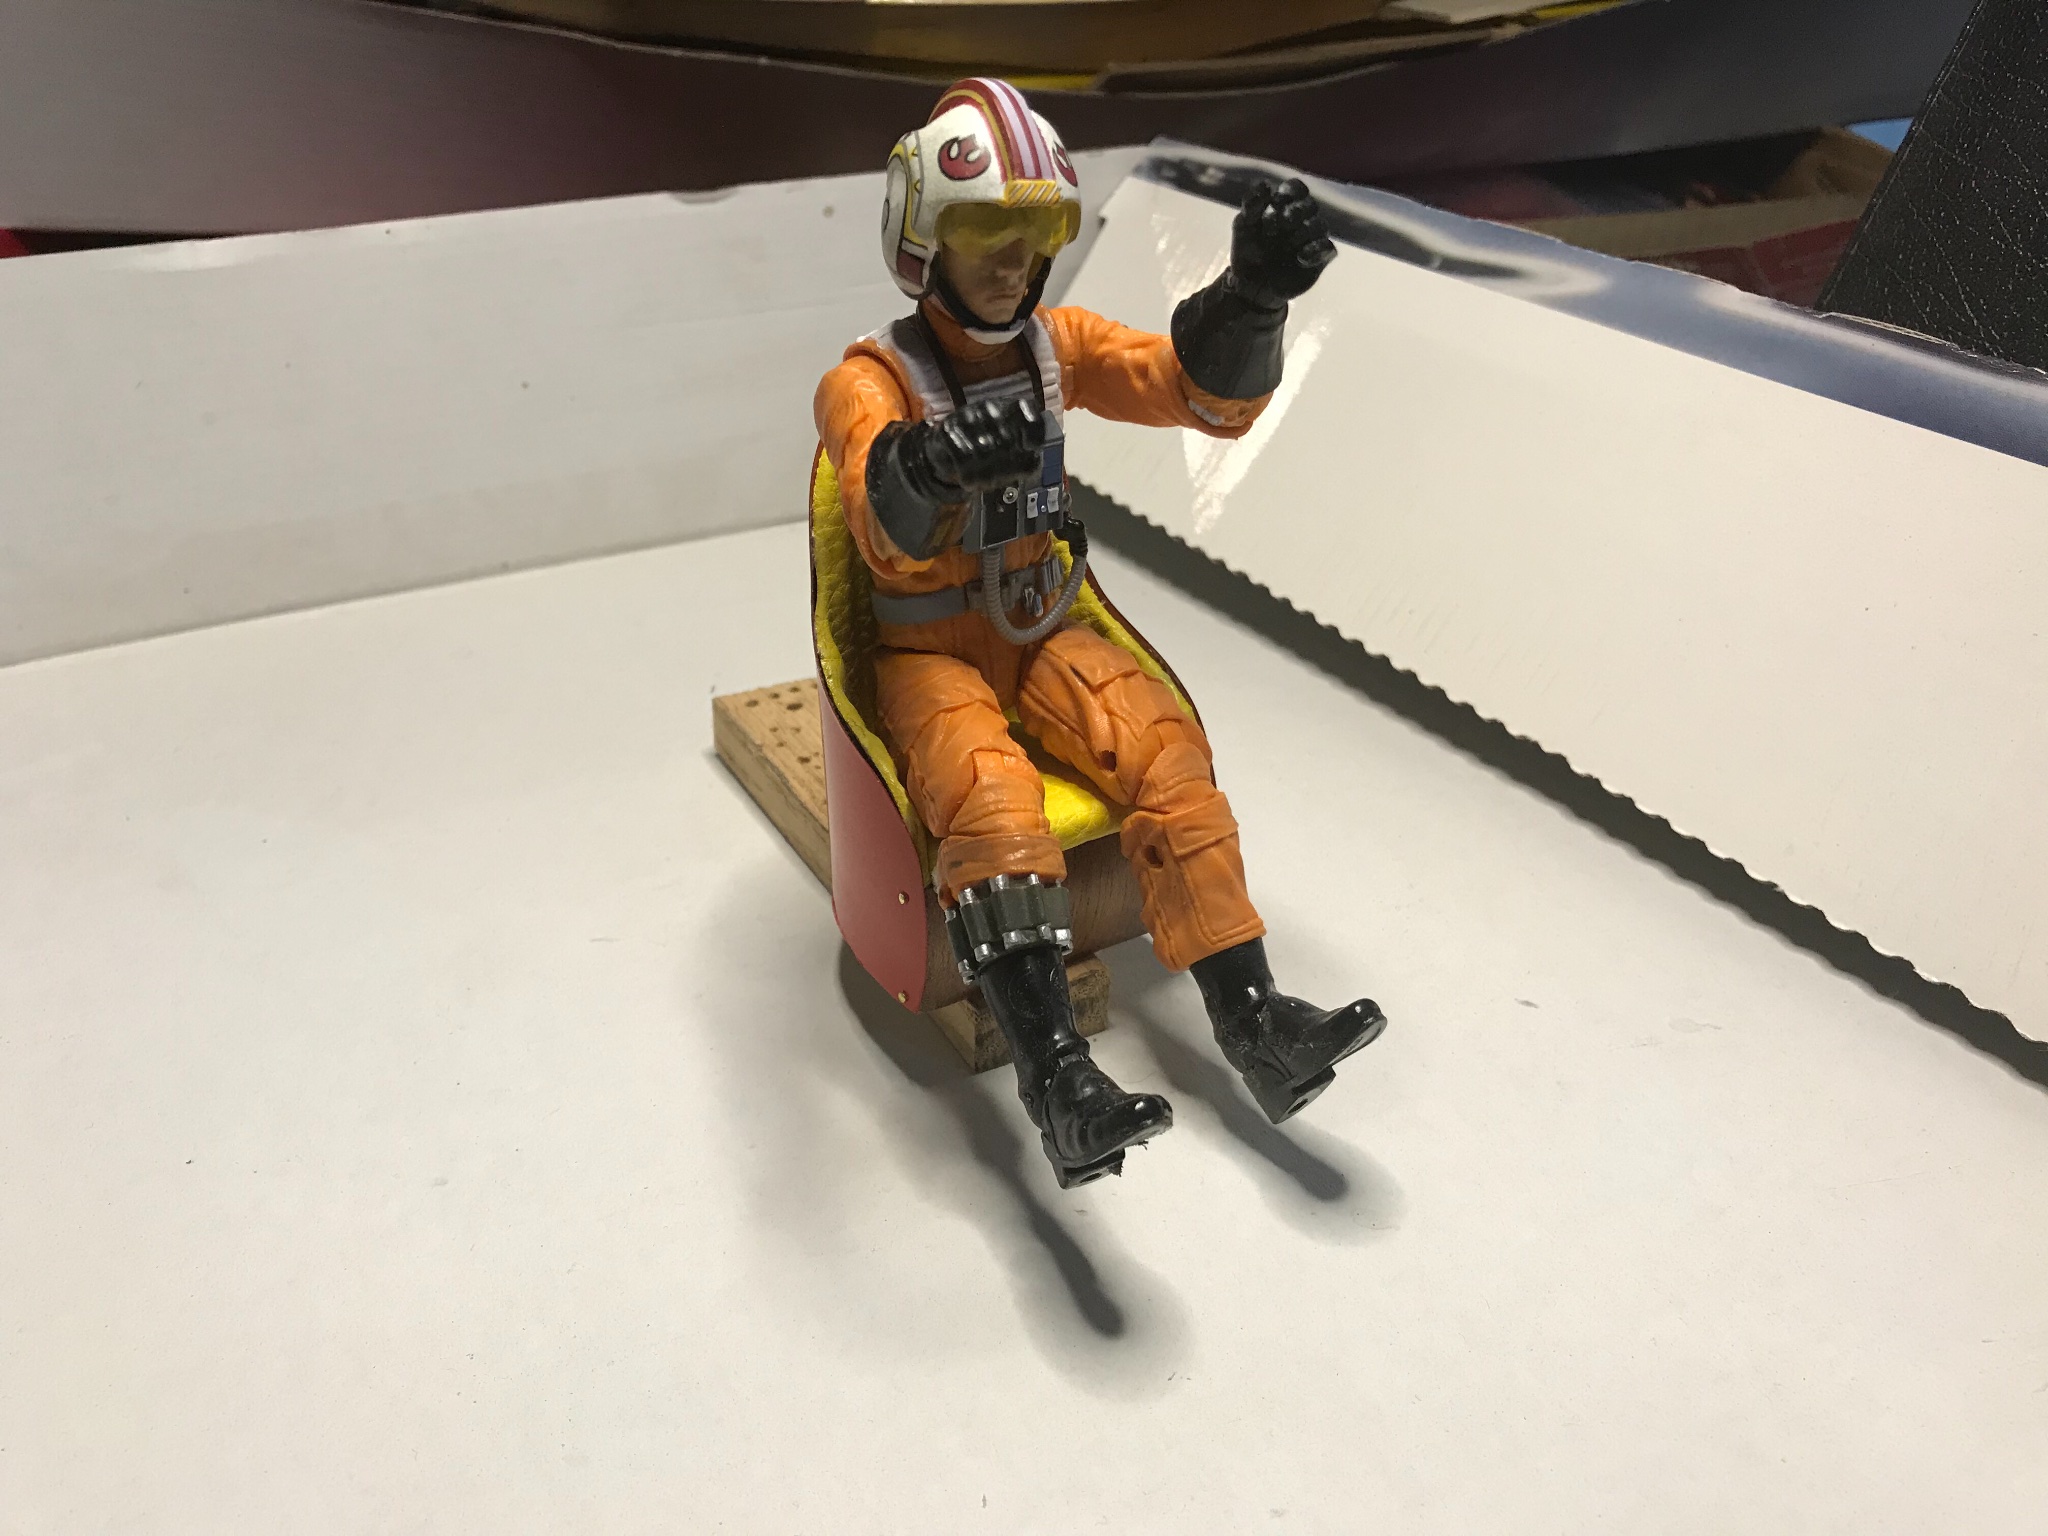
Back to the boat, I’ve gotten a chance to think about many aspects of this giant surfboard with an airplane engine, this would have to make the Wright Brother’s proud.
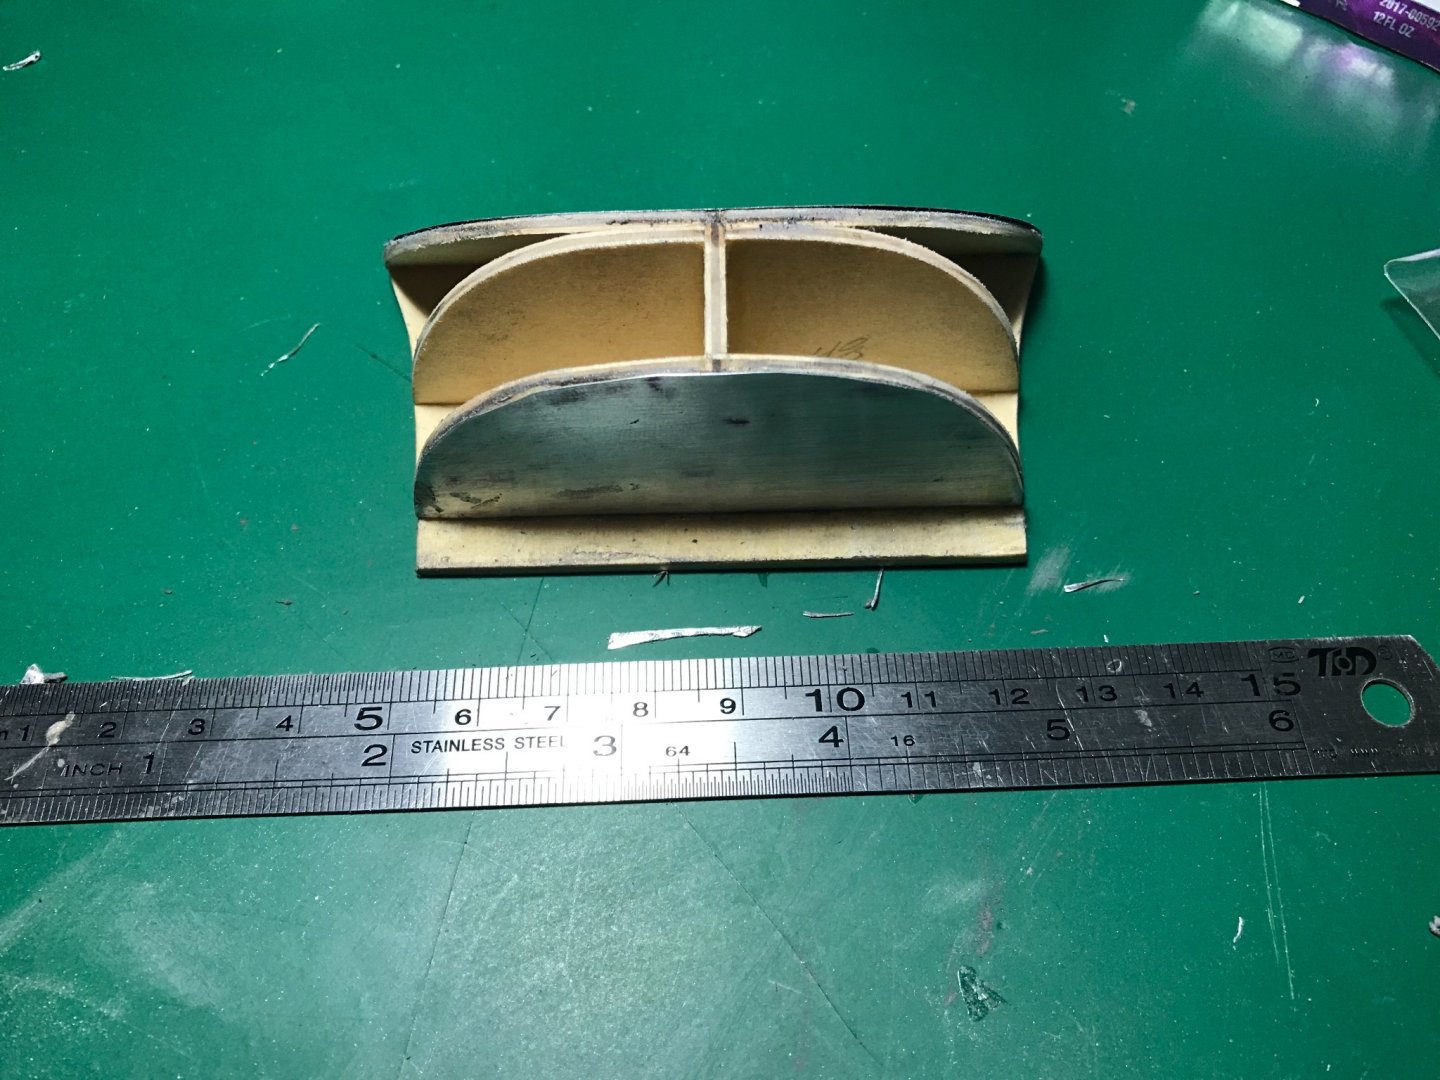
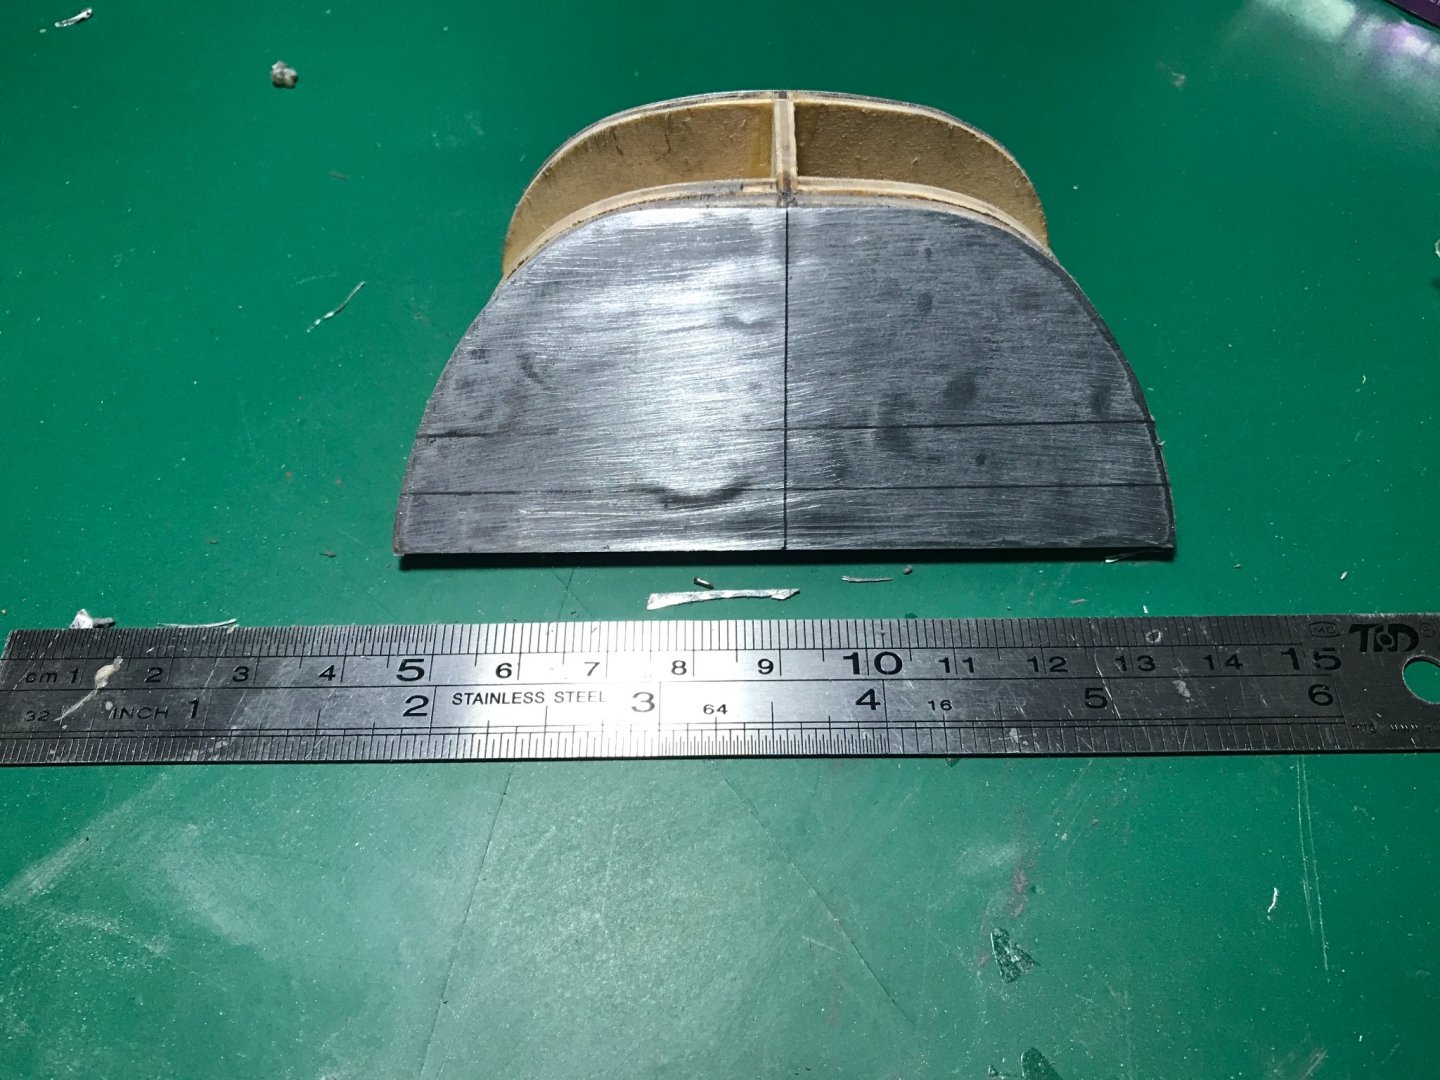
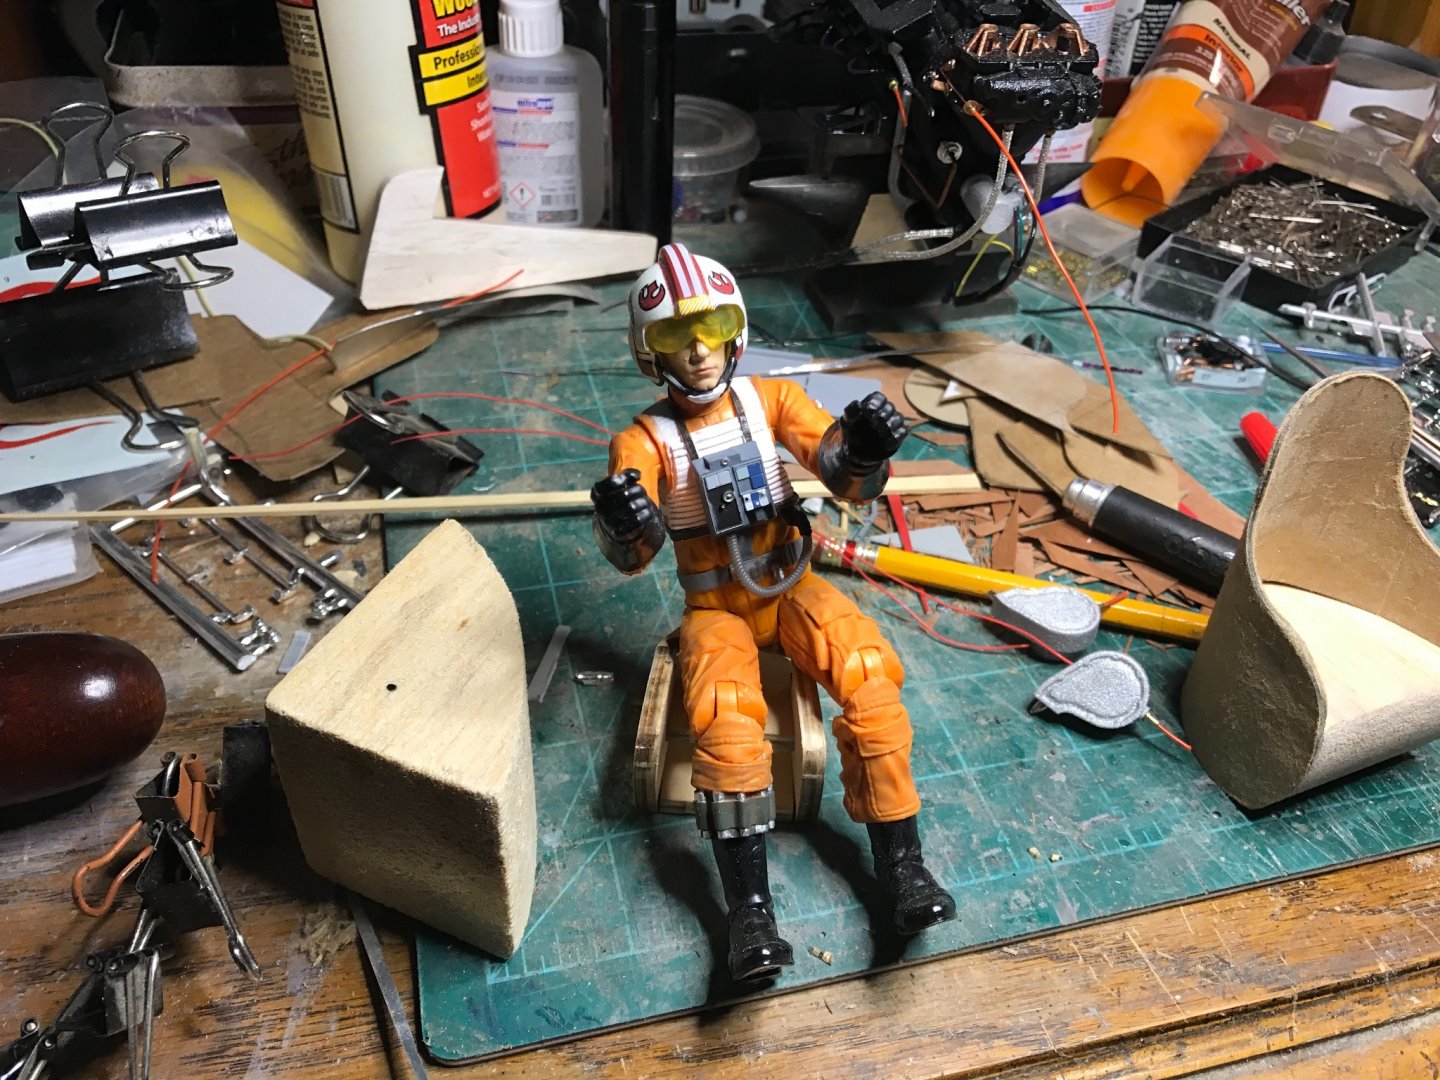
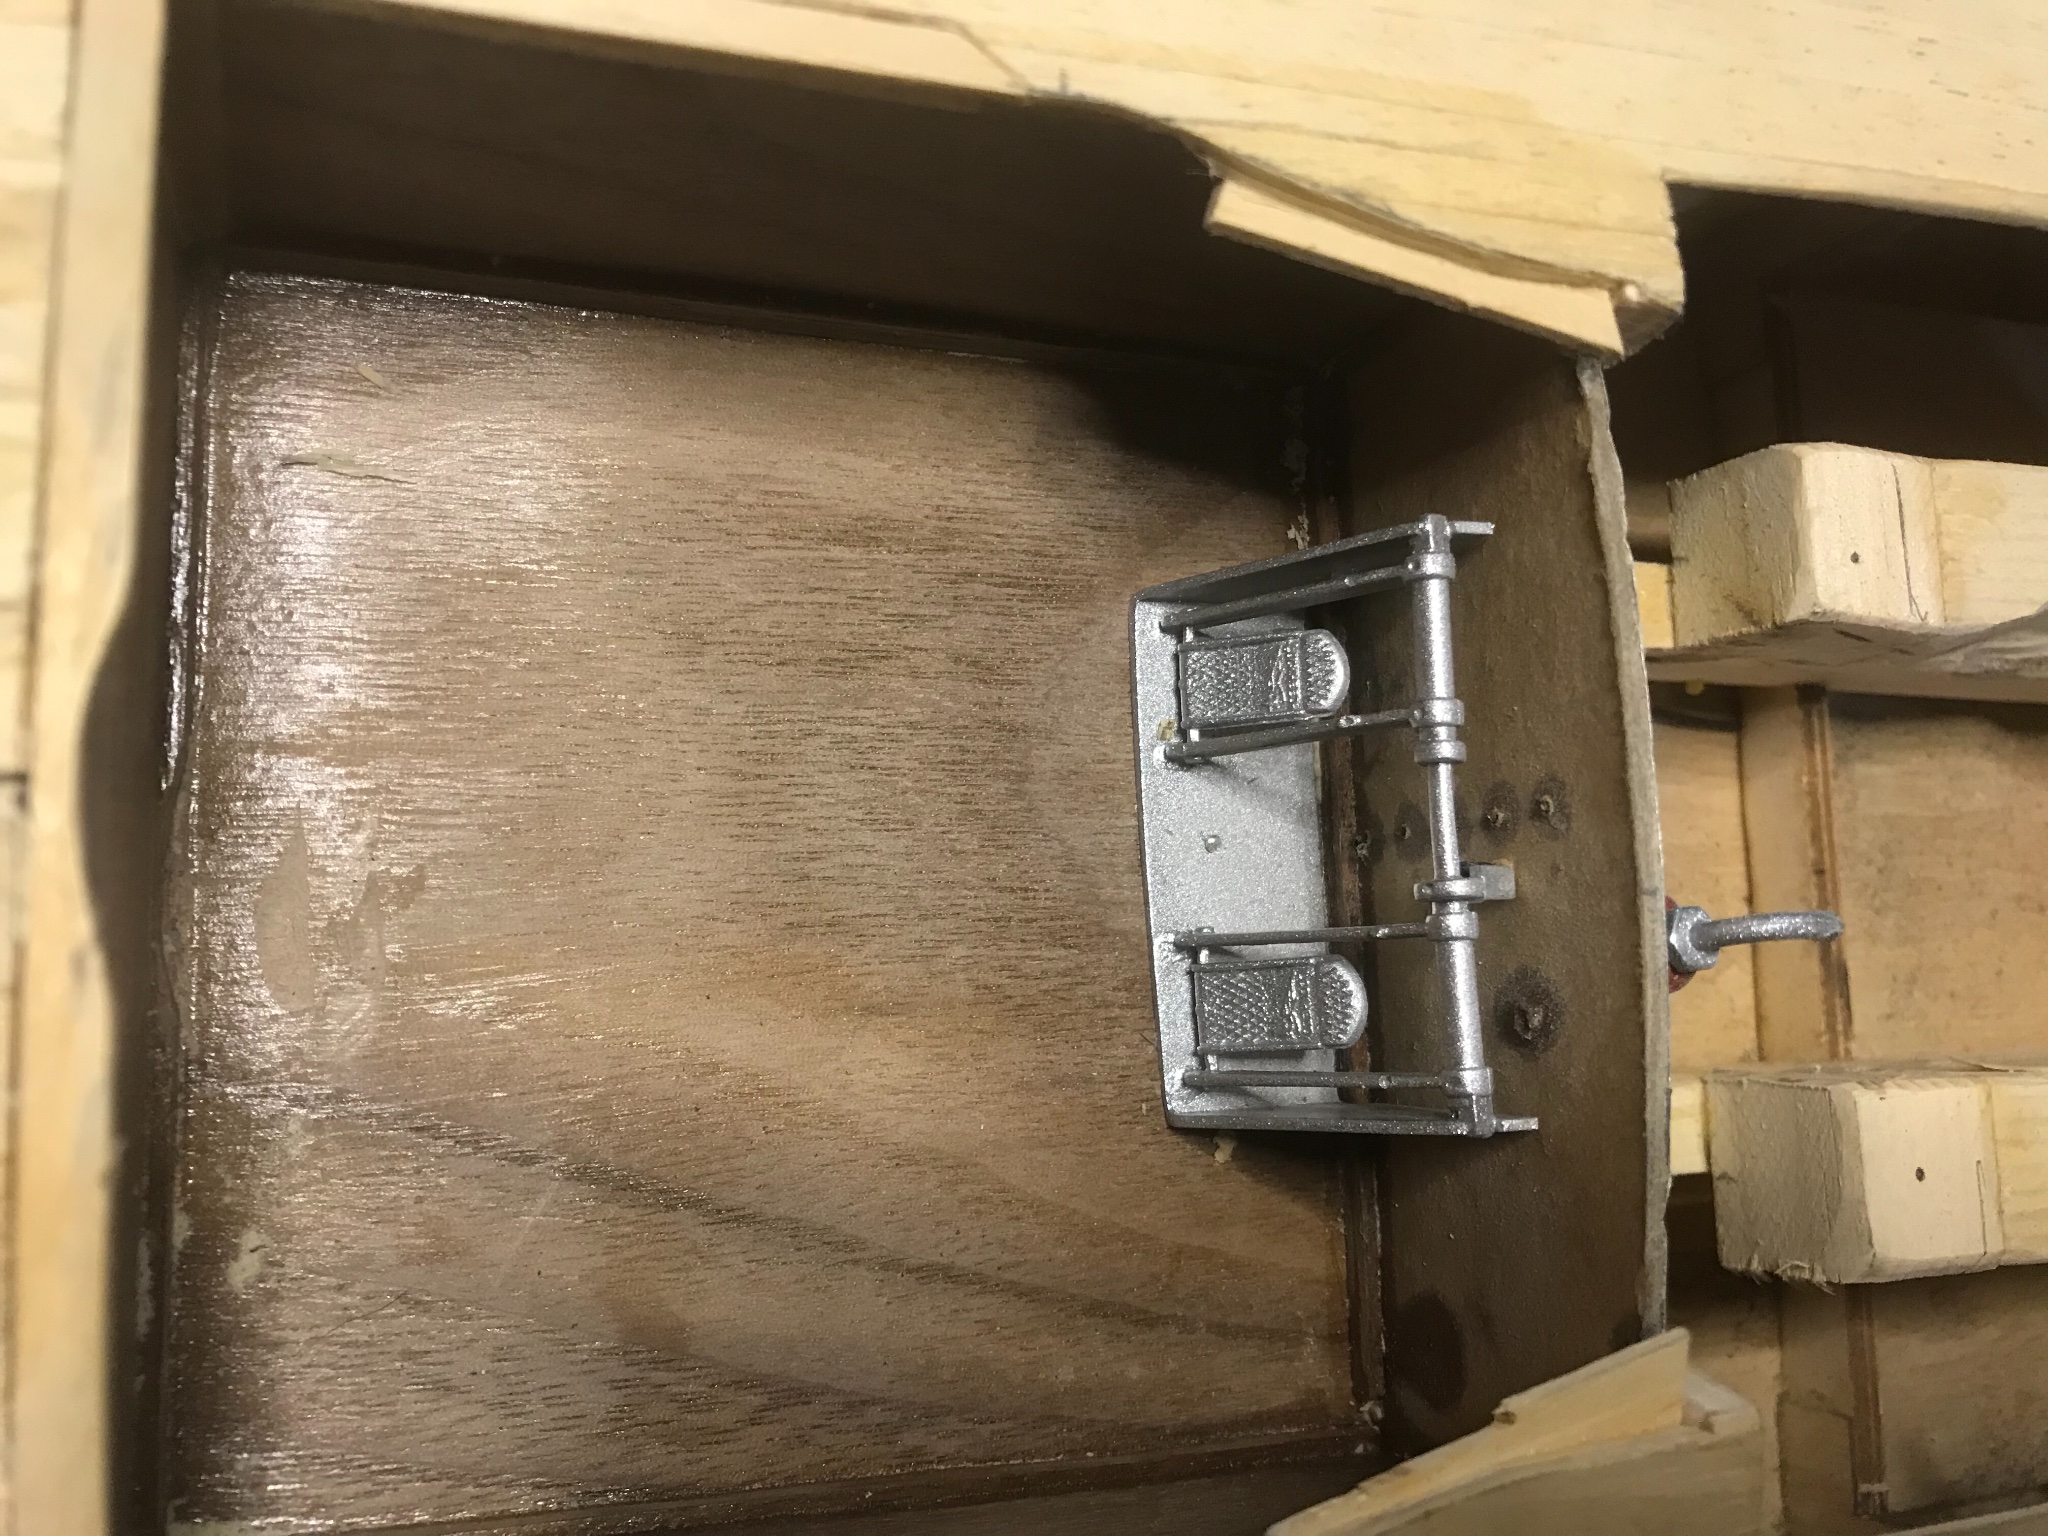
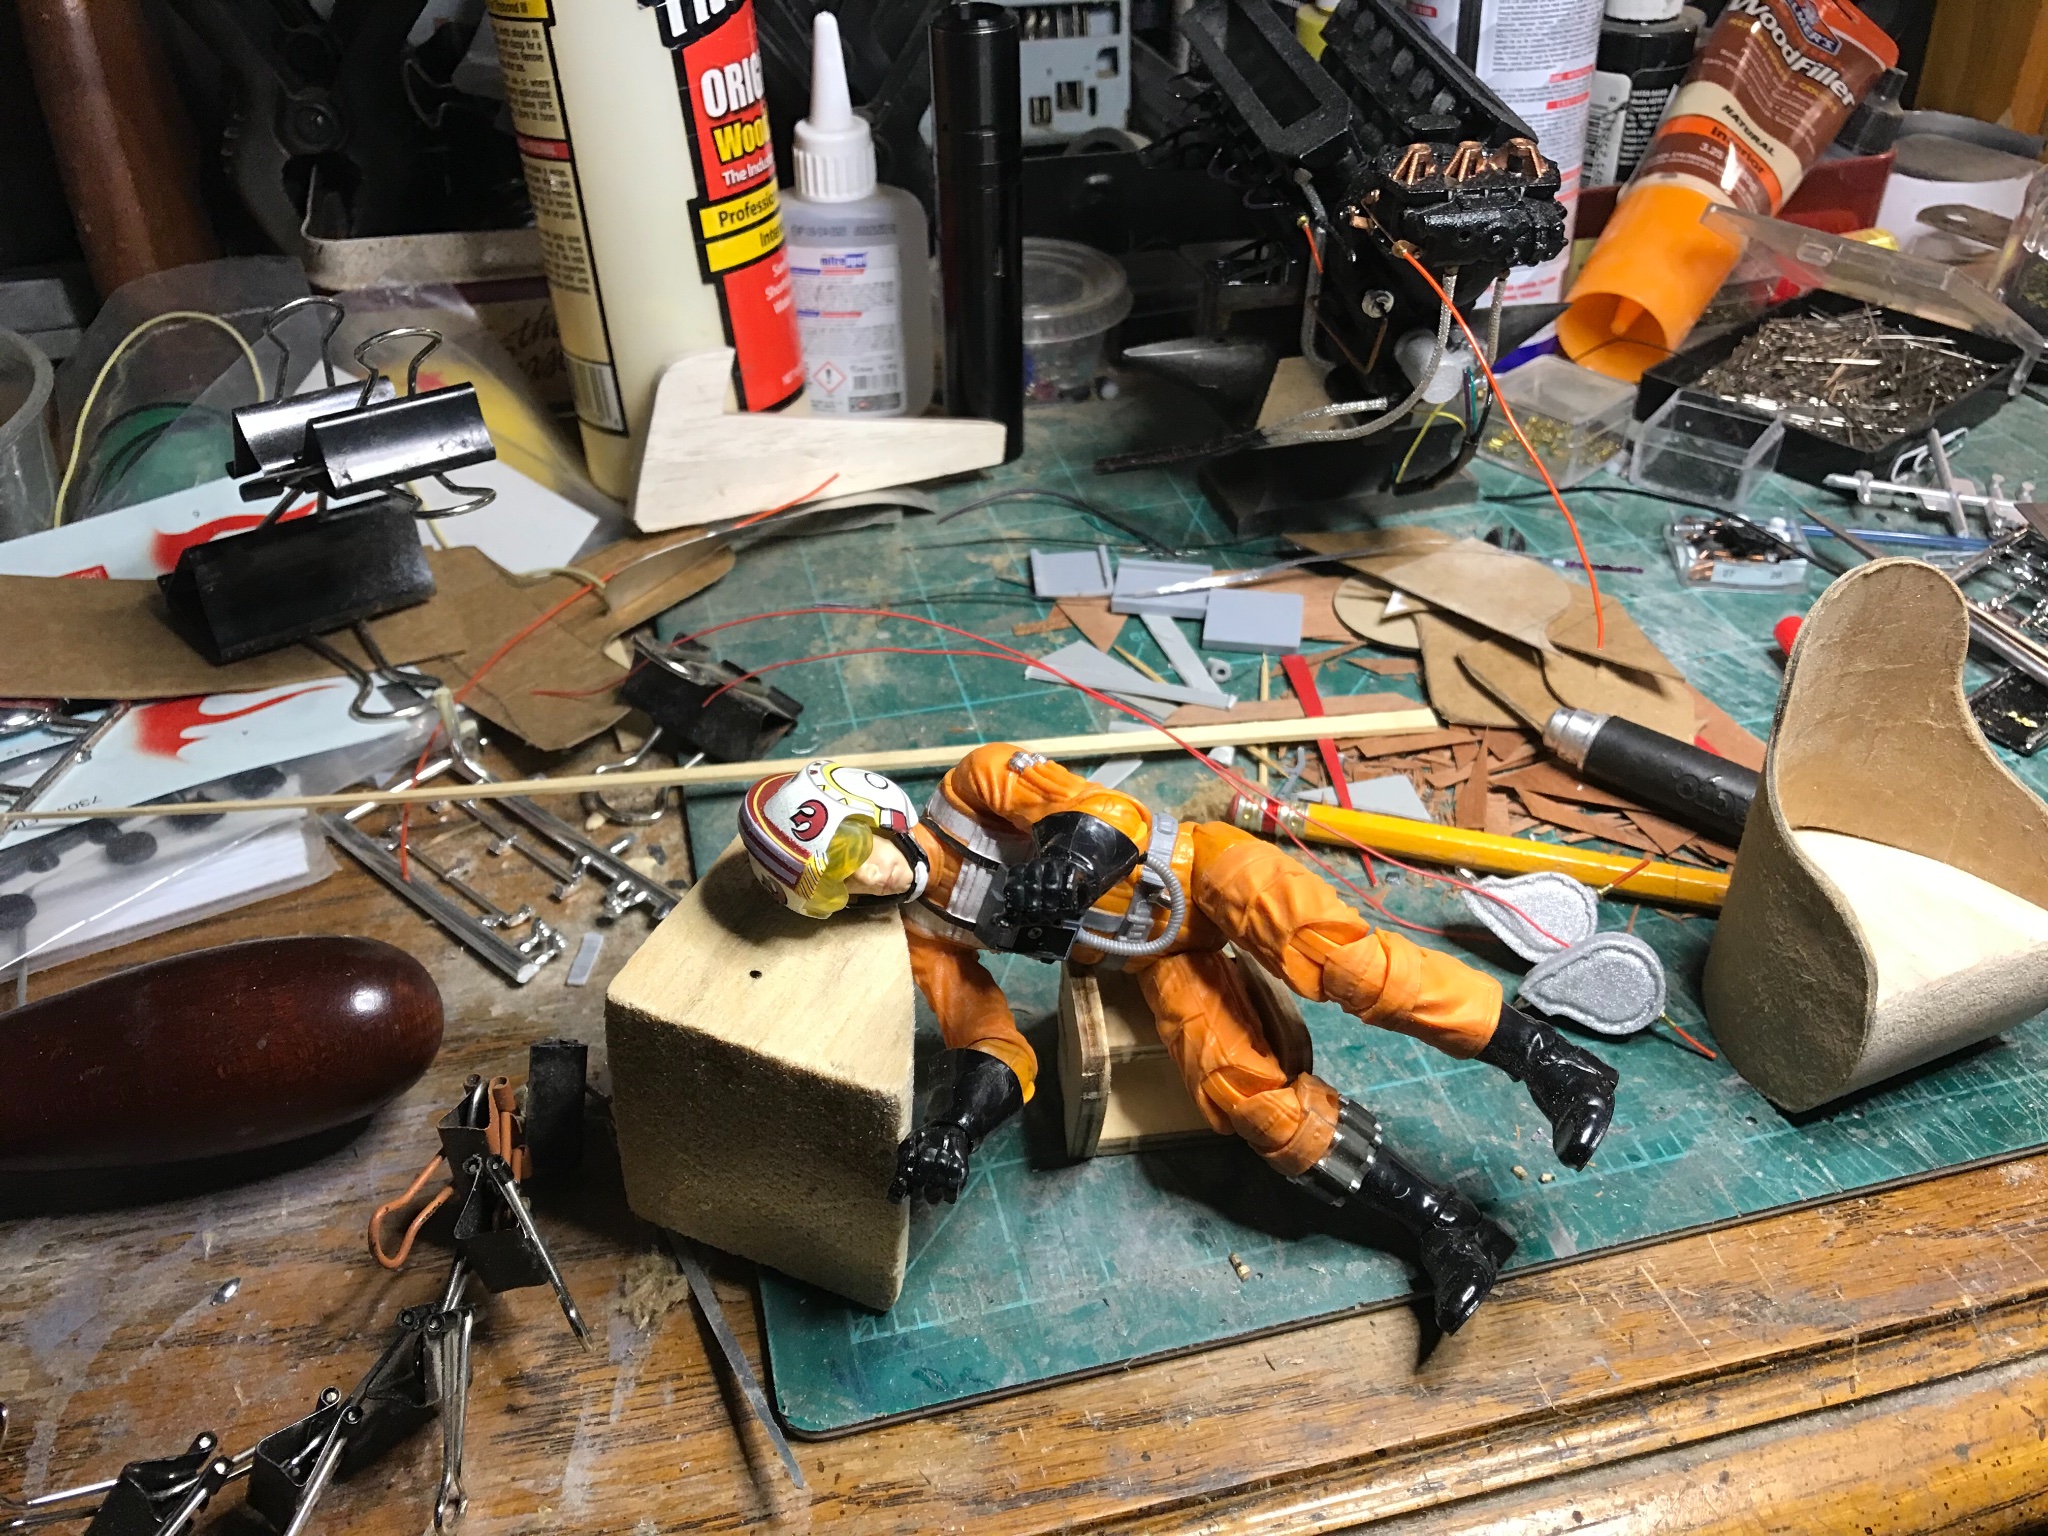
Its seems impossible to imagine that there was a time when the words seat and belt had no place. And here we are, I built a pedal for Lou, it fit perfectly, then I began thinking about what would his other foot have been doing if he had no seat belt.
This would have been like mounting a bucking bronco on the back of a bucking bronco.So if his feet are the only thing strapped to the boat, this puts his ankles in a bad spot.
So now Lou has 2 pedals pretty much exactly like that of the airplane the motor came from. This should allow him to keep himself in place, the cockpit, the distance the seat and pedals are seem about perfect.
You know even Wiley Coyote strapped himself in.
I was able to source a slack adjuster for the cable tie in, the cable hooks directly into the right pedal.
One thing I had to adjust was the width of Lou’s feet, they were a bit wider than normal, probably helps him stand.

-
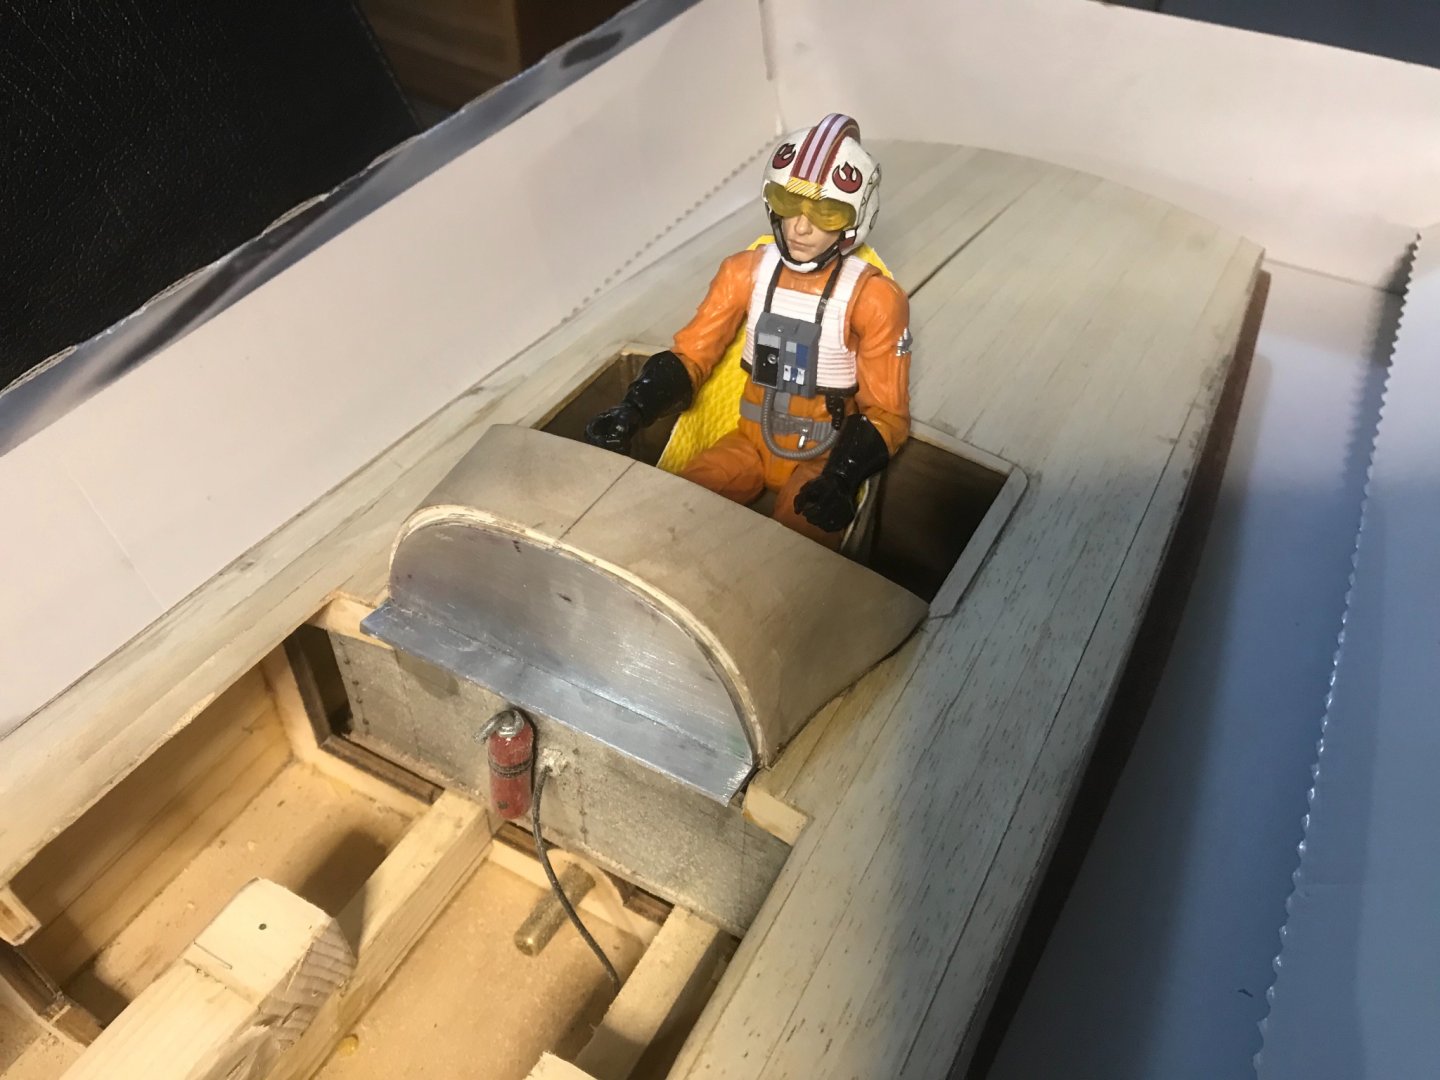
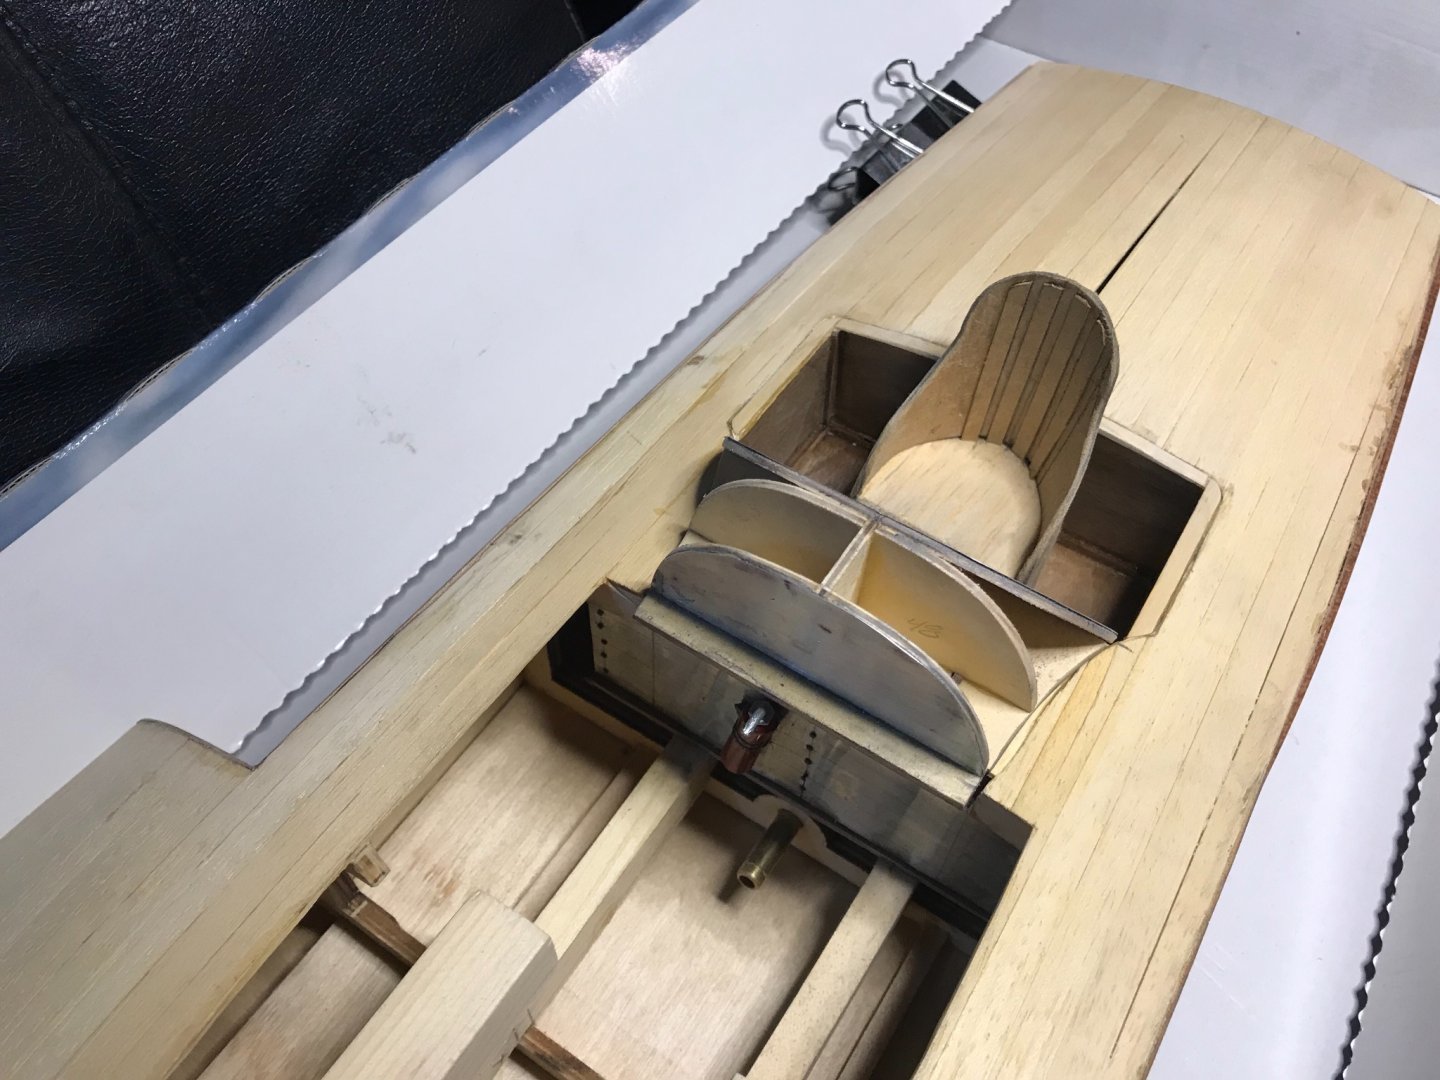
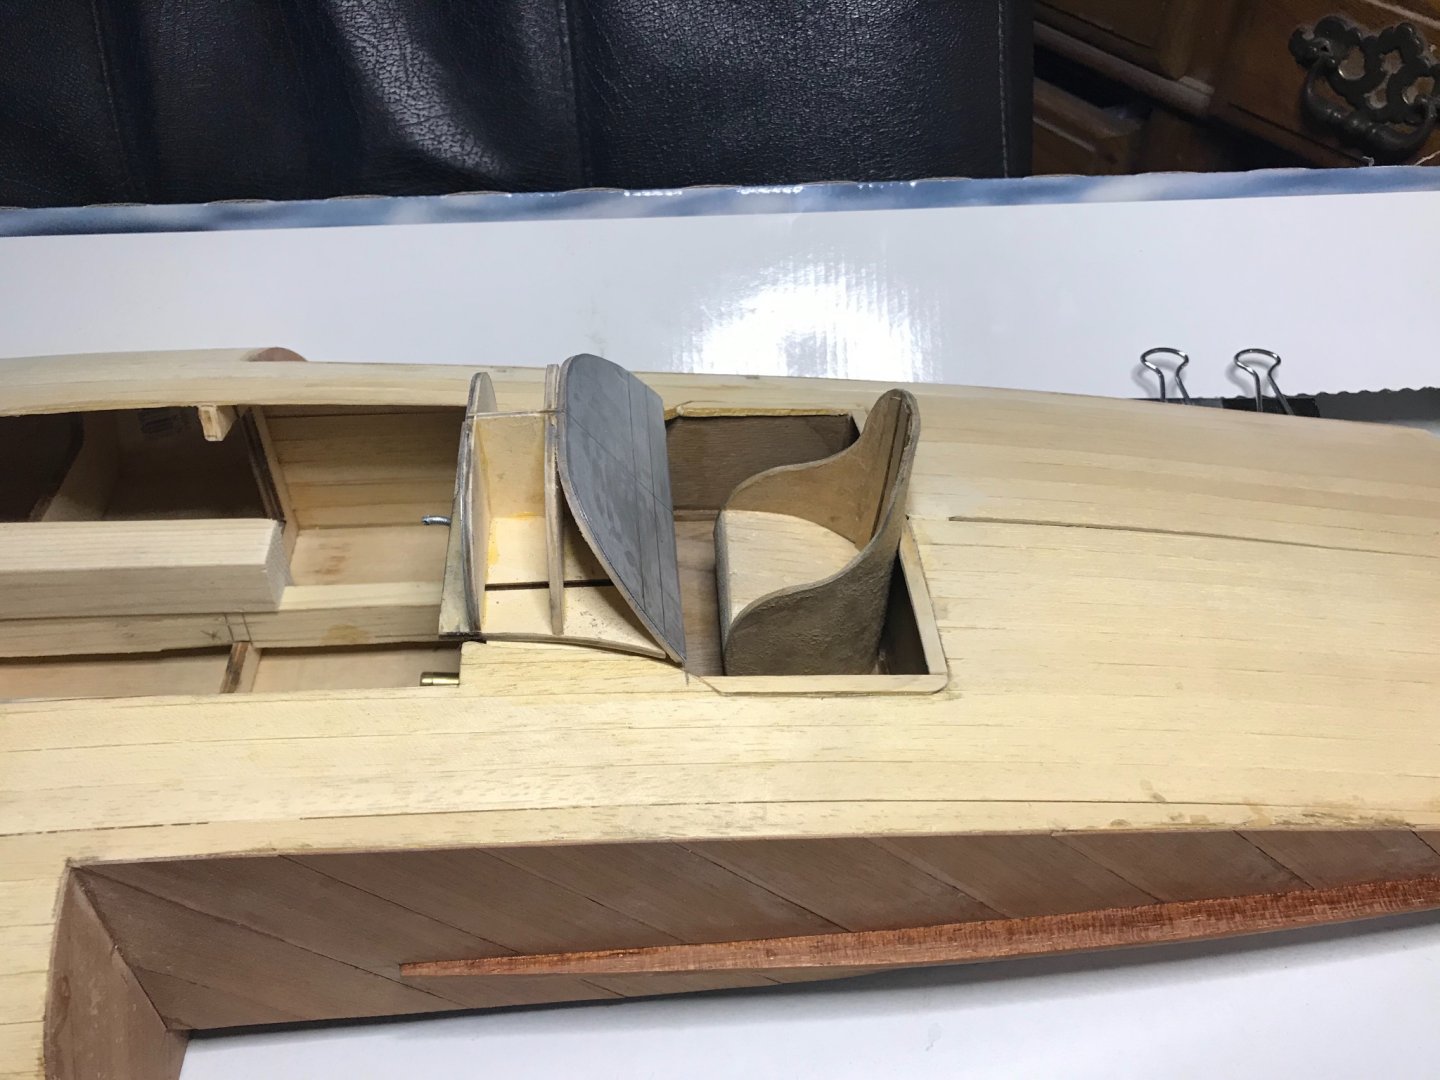
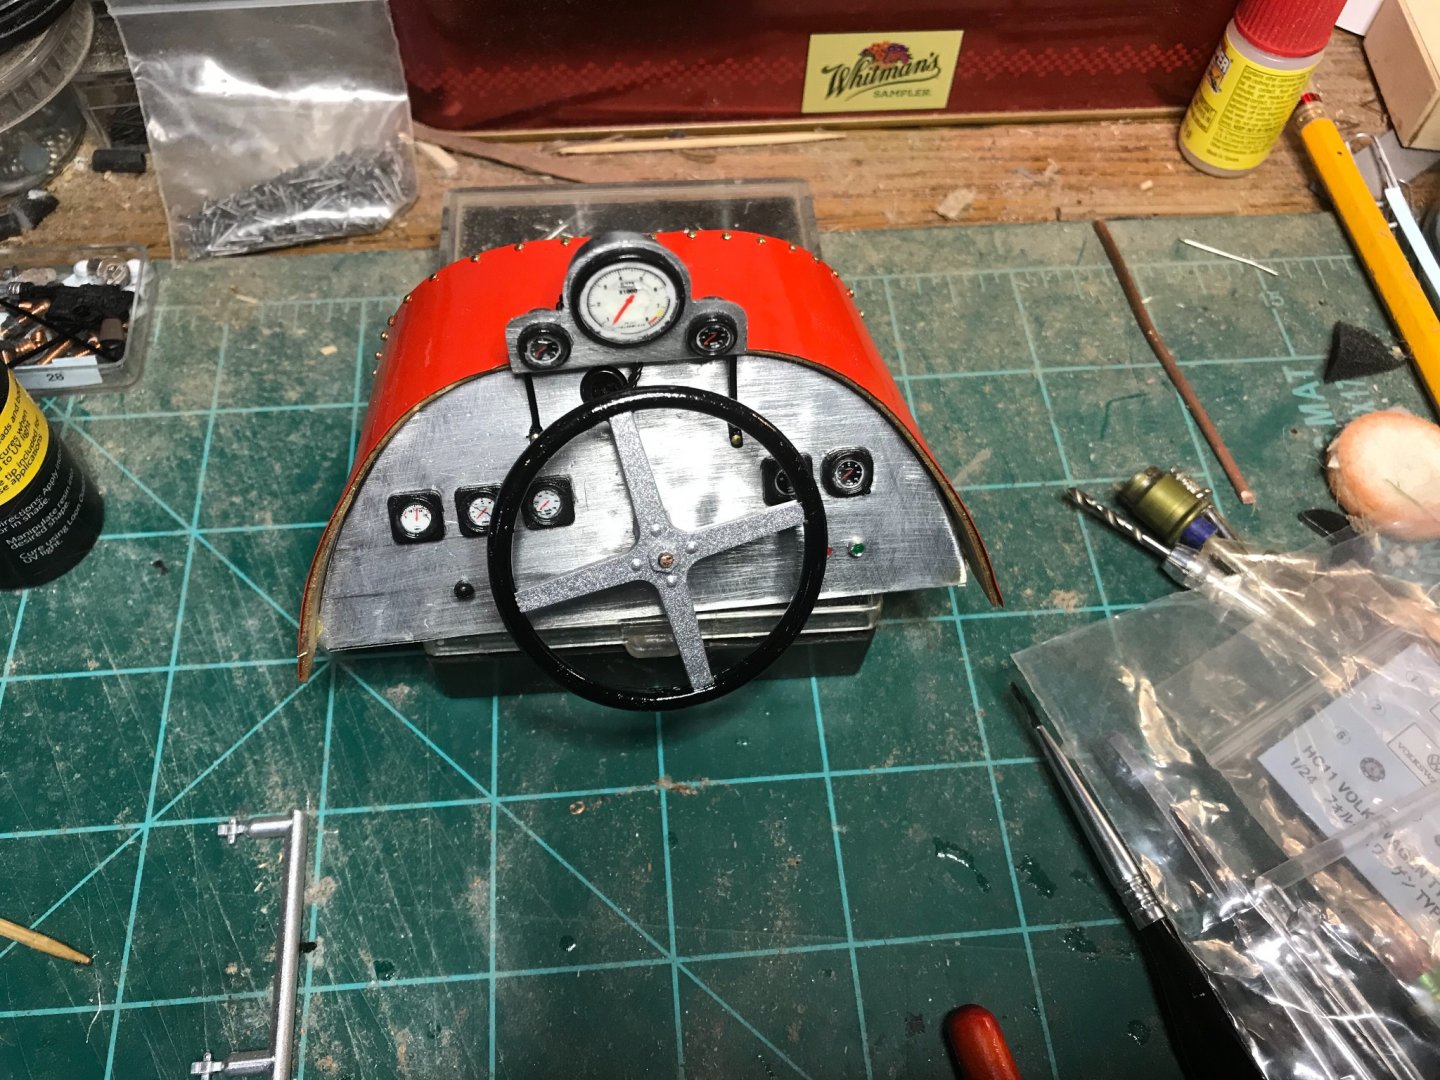
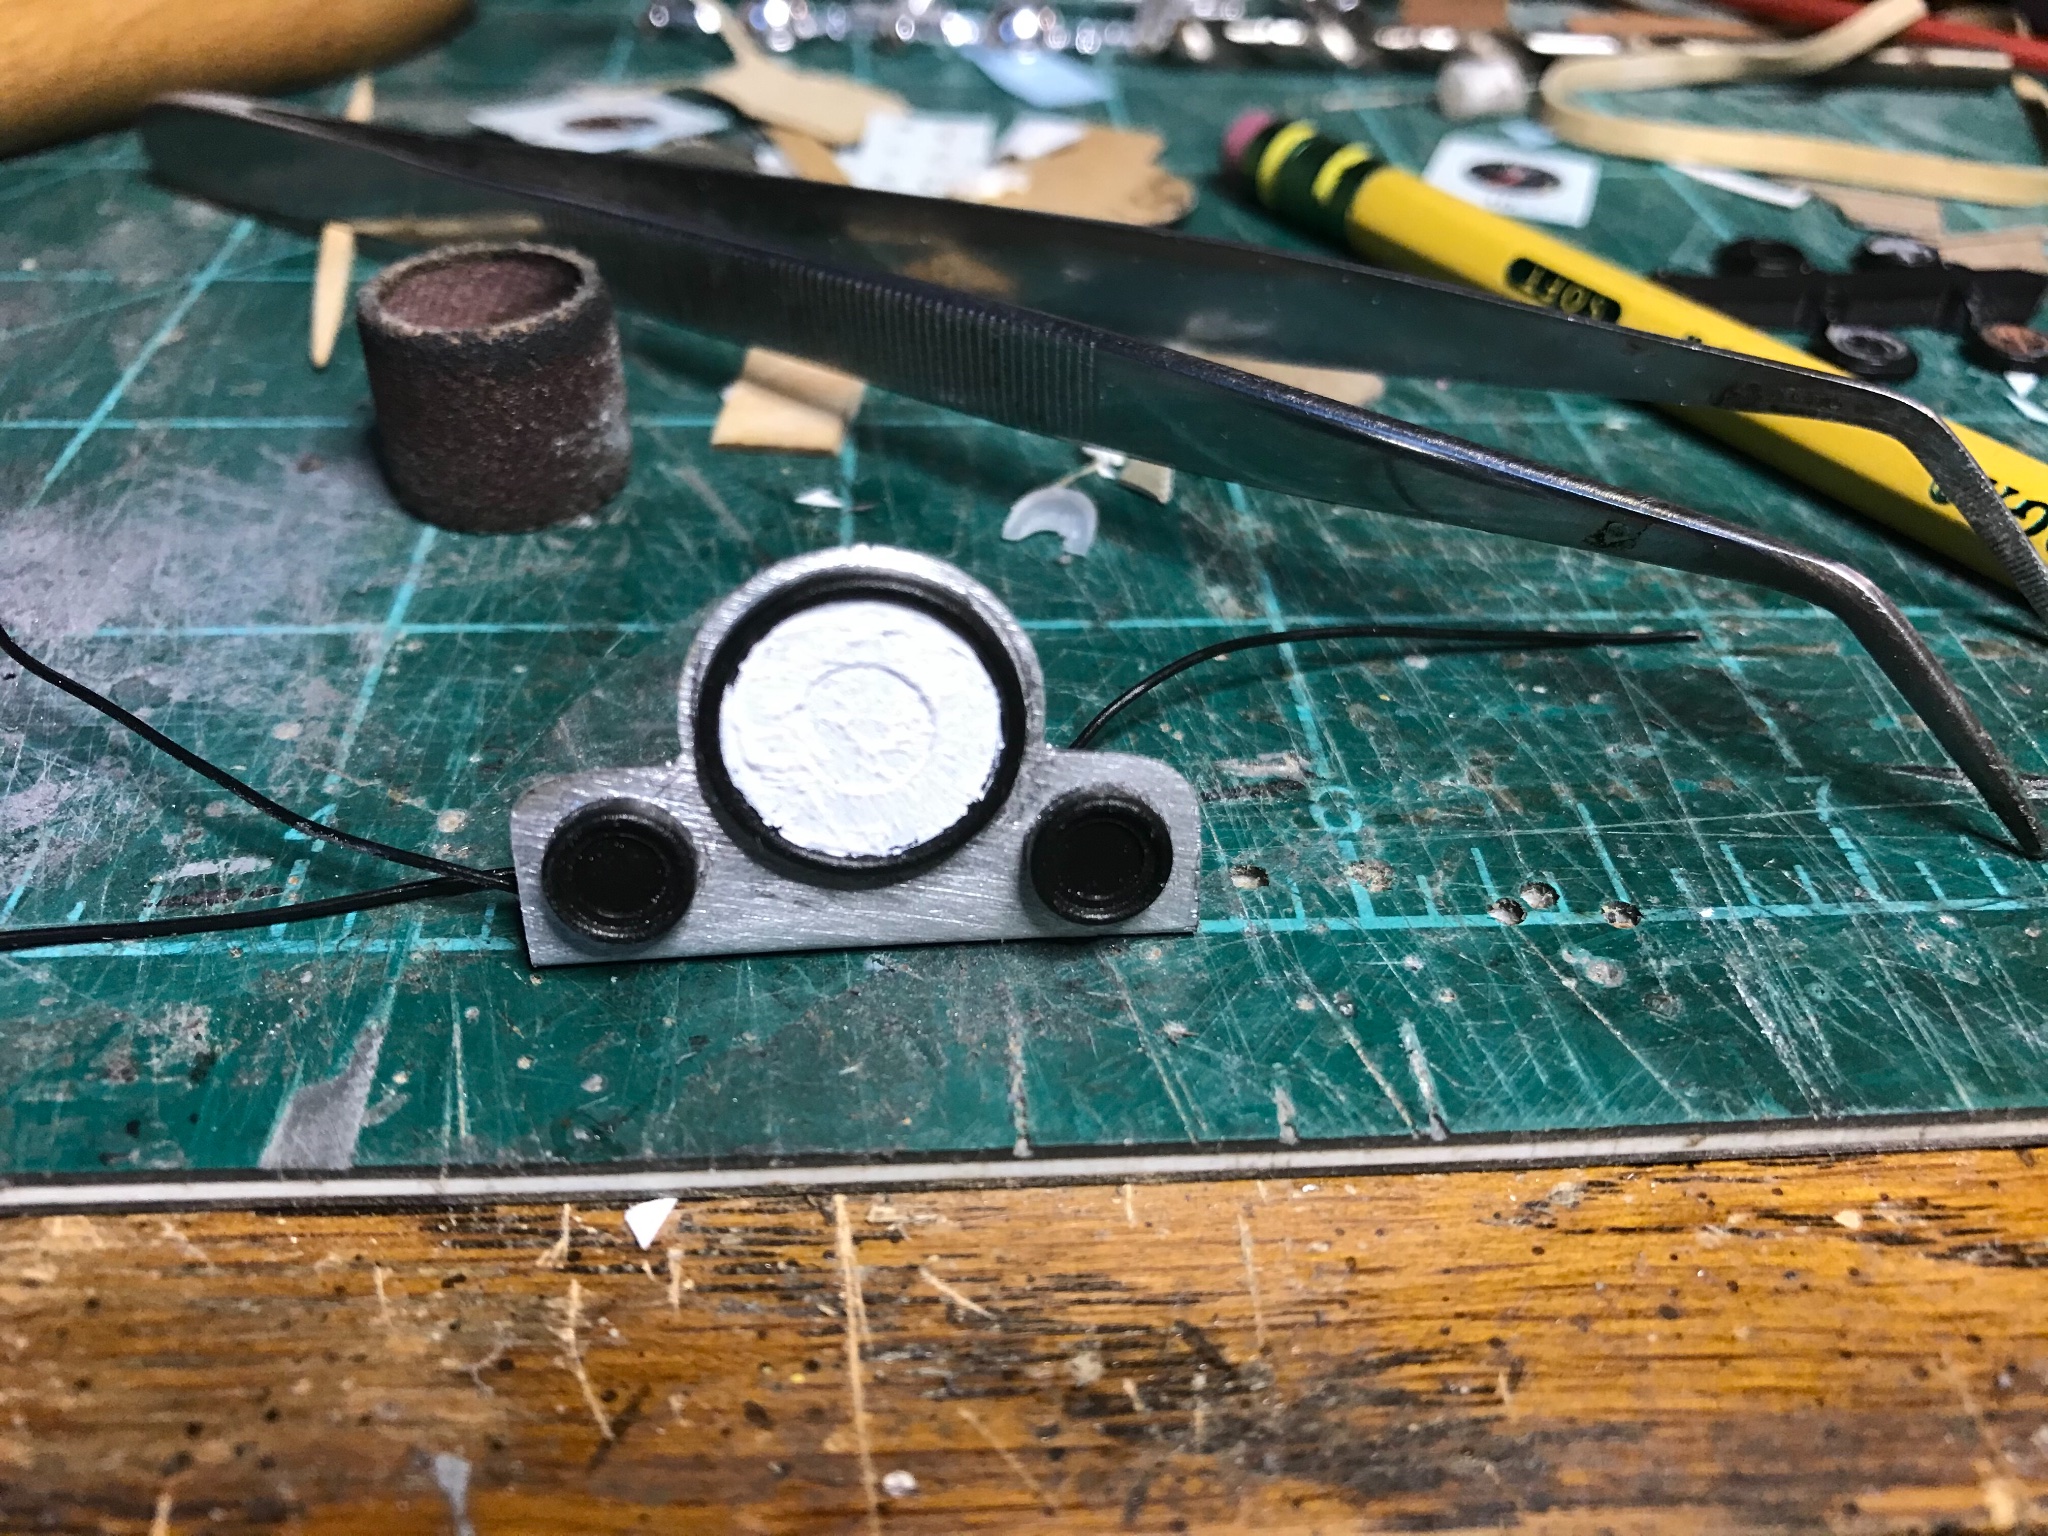
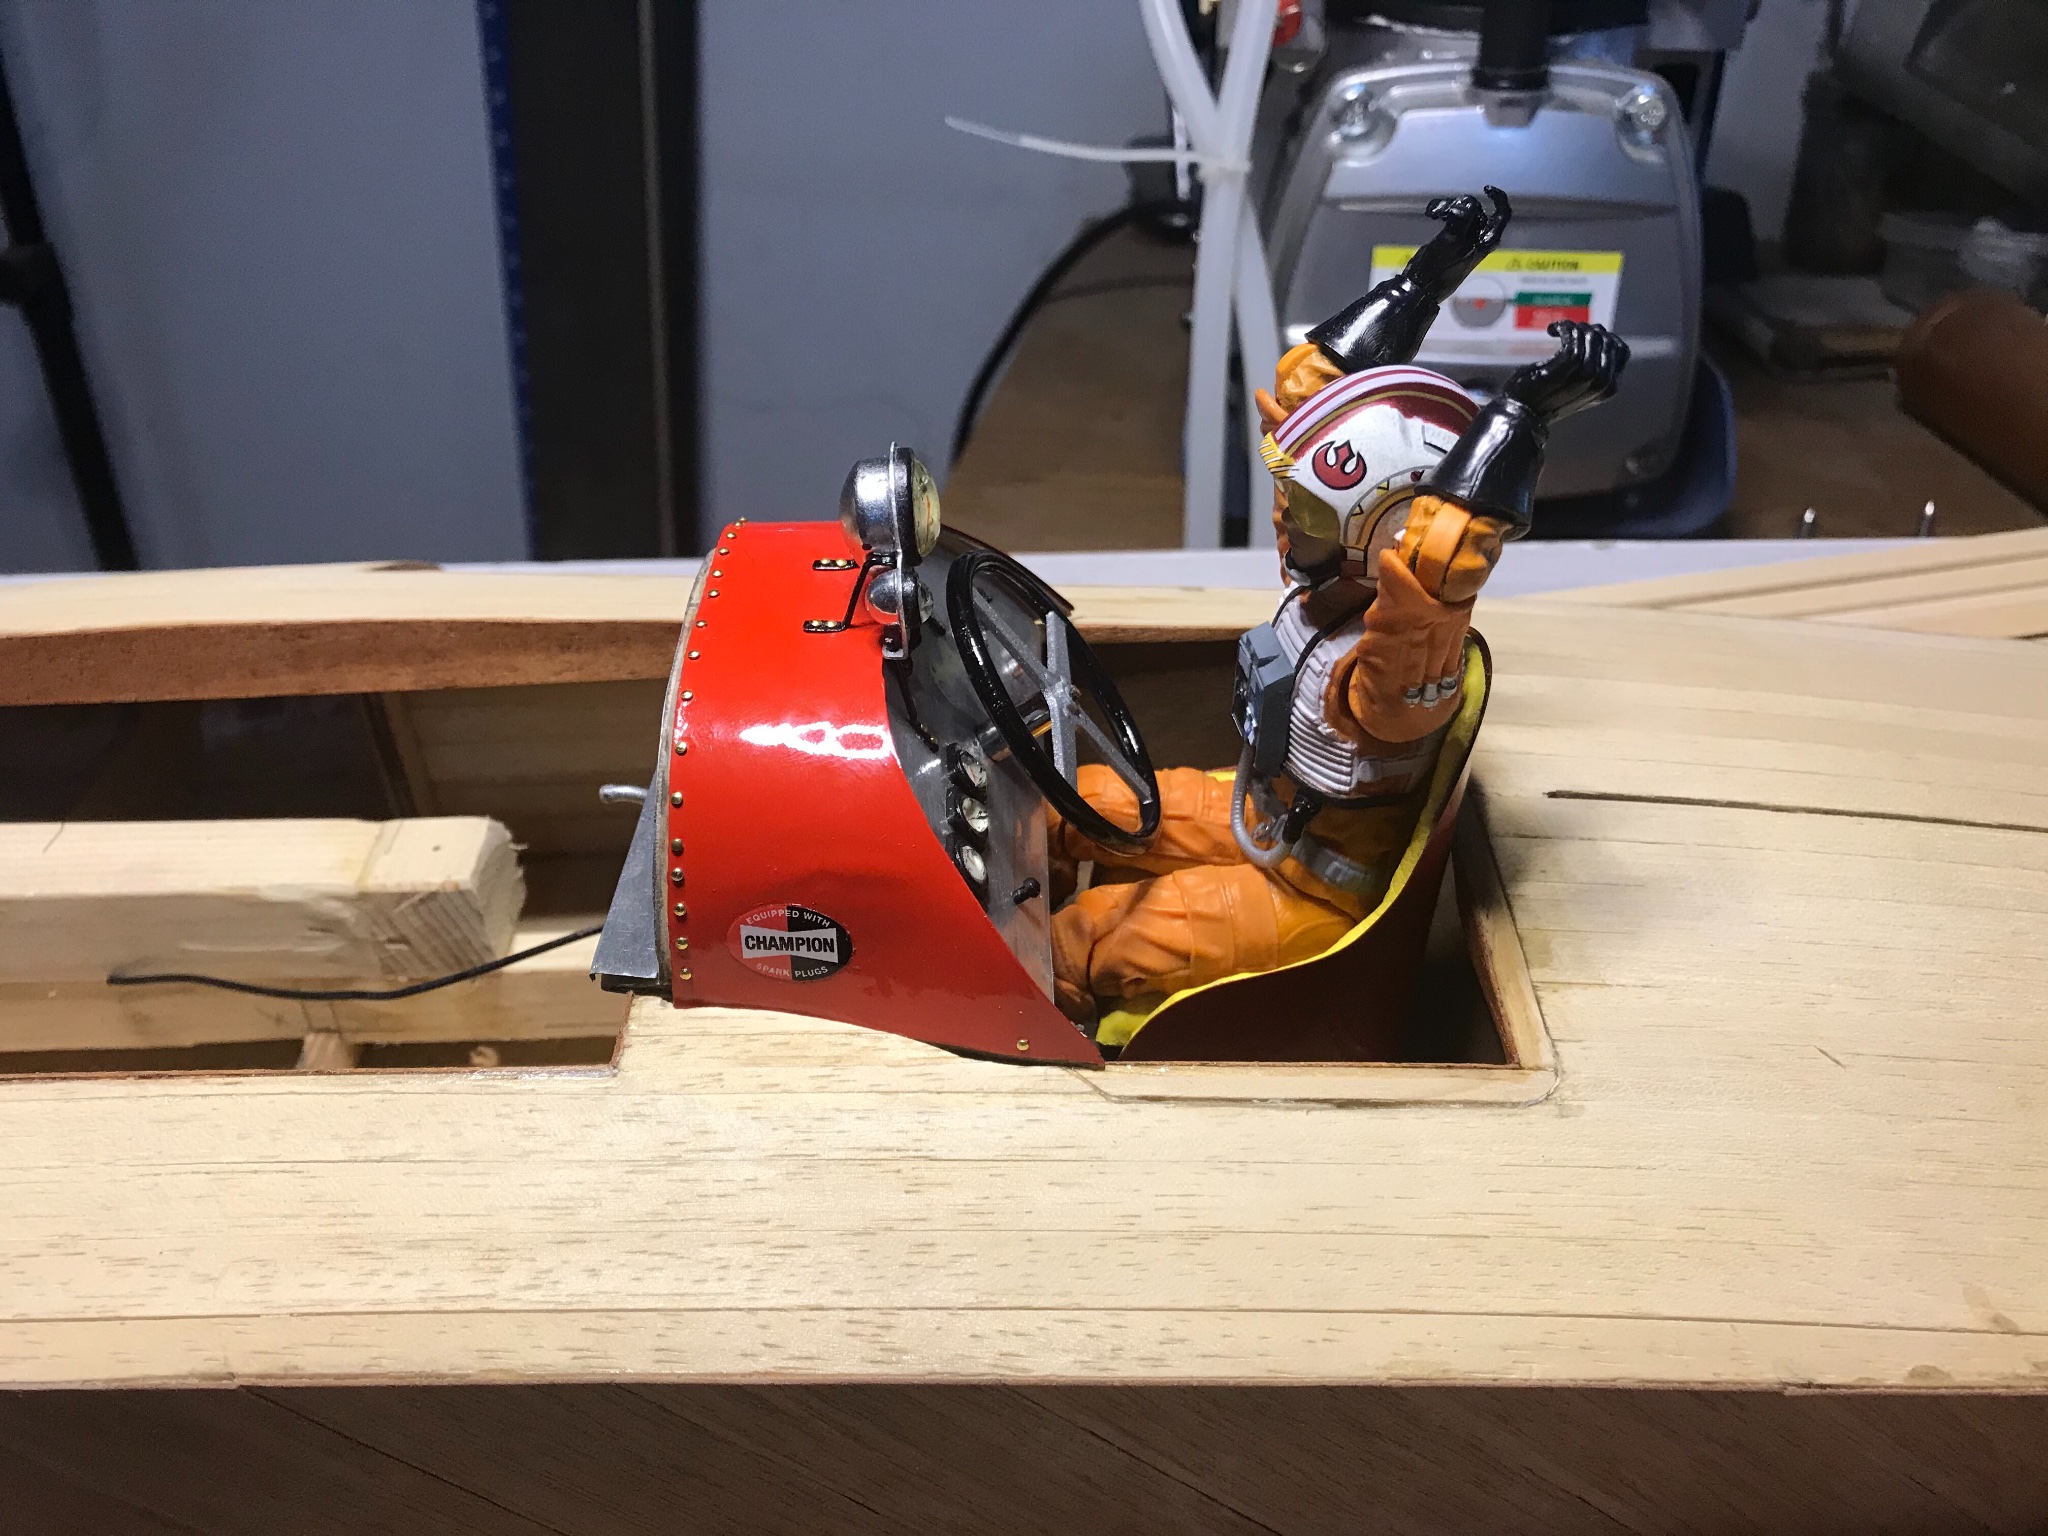
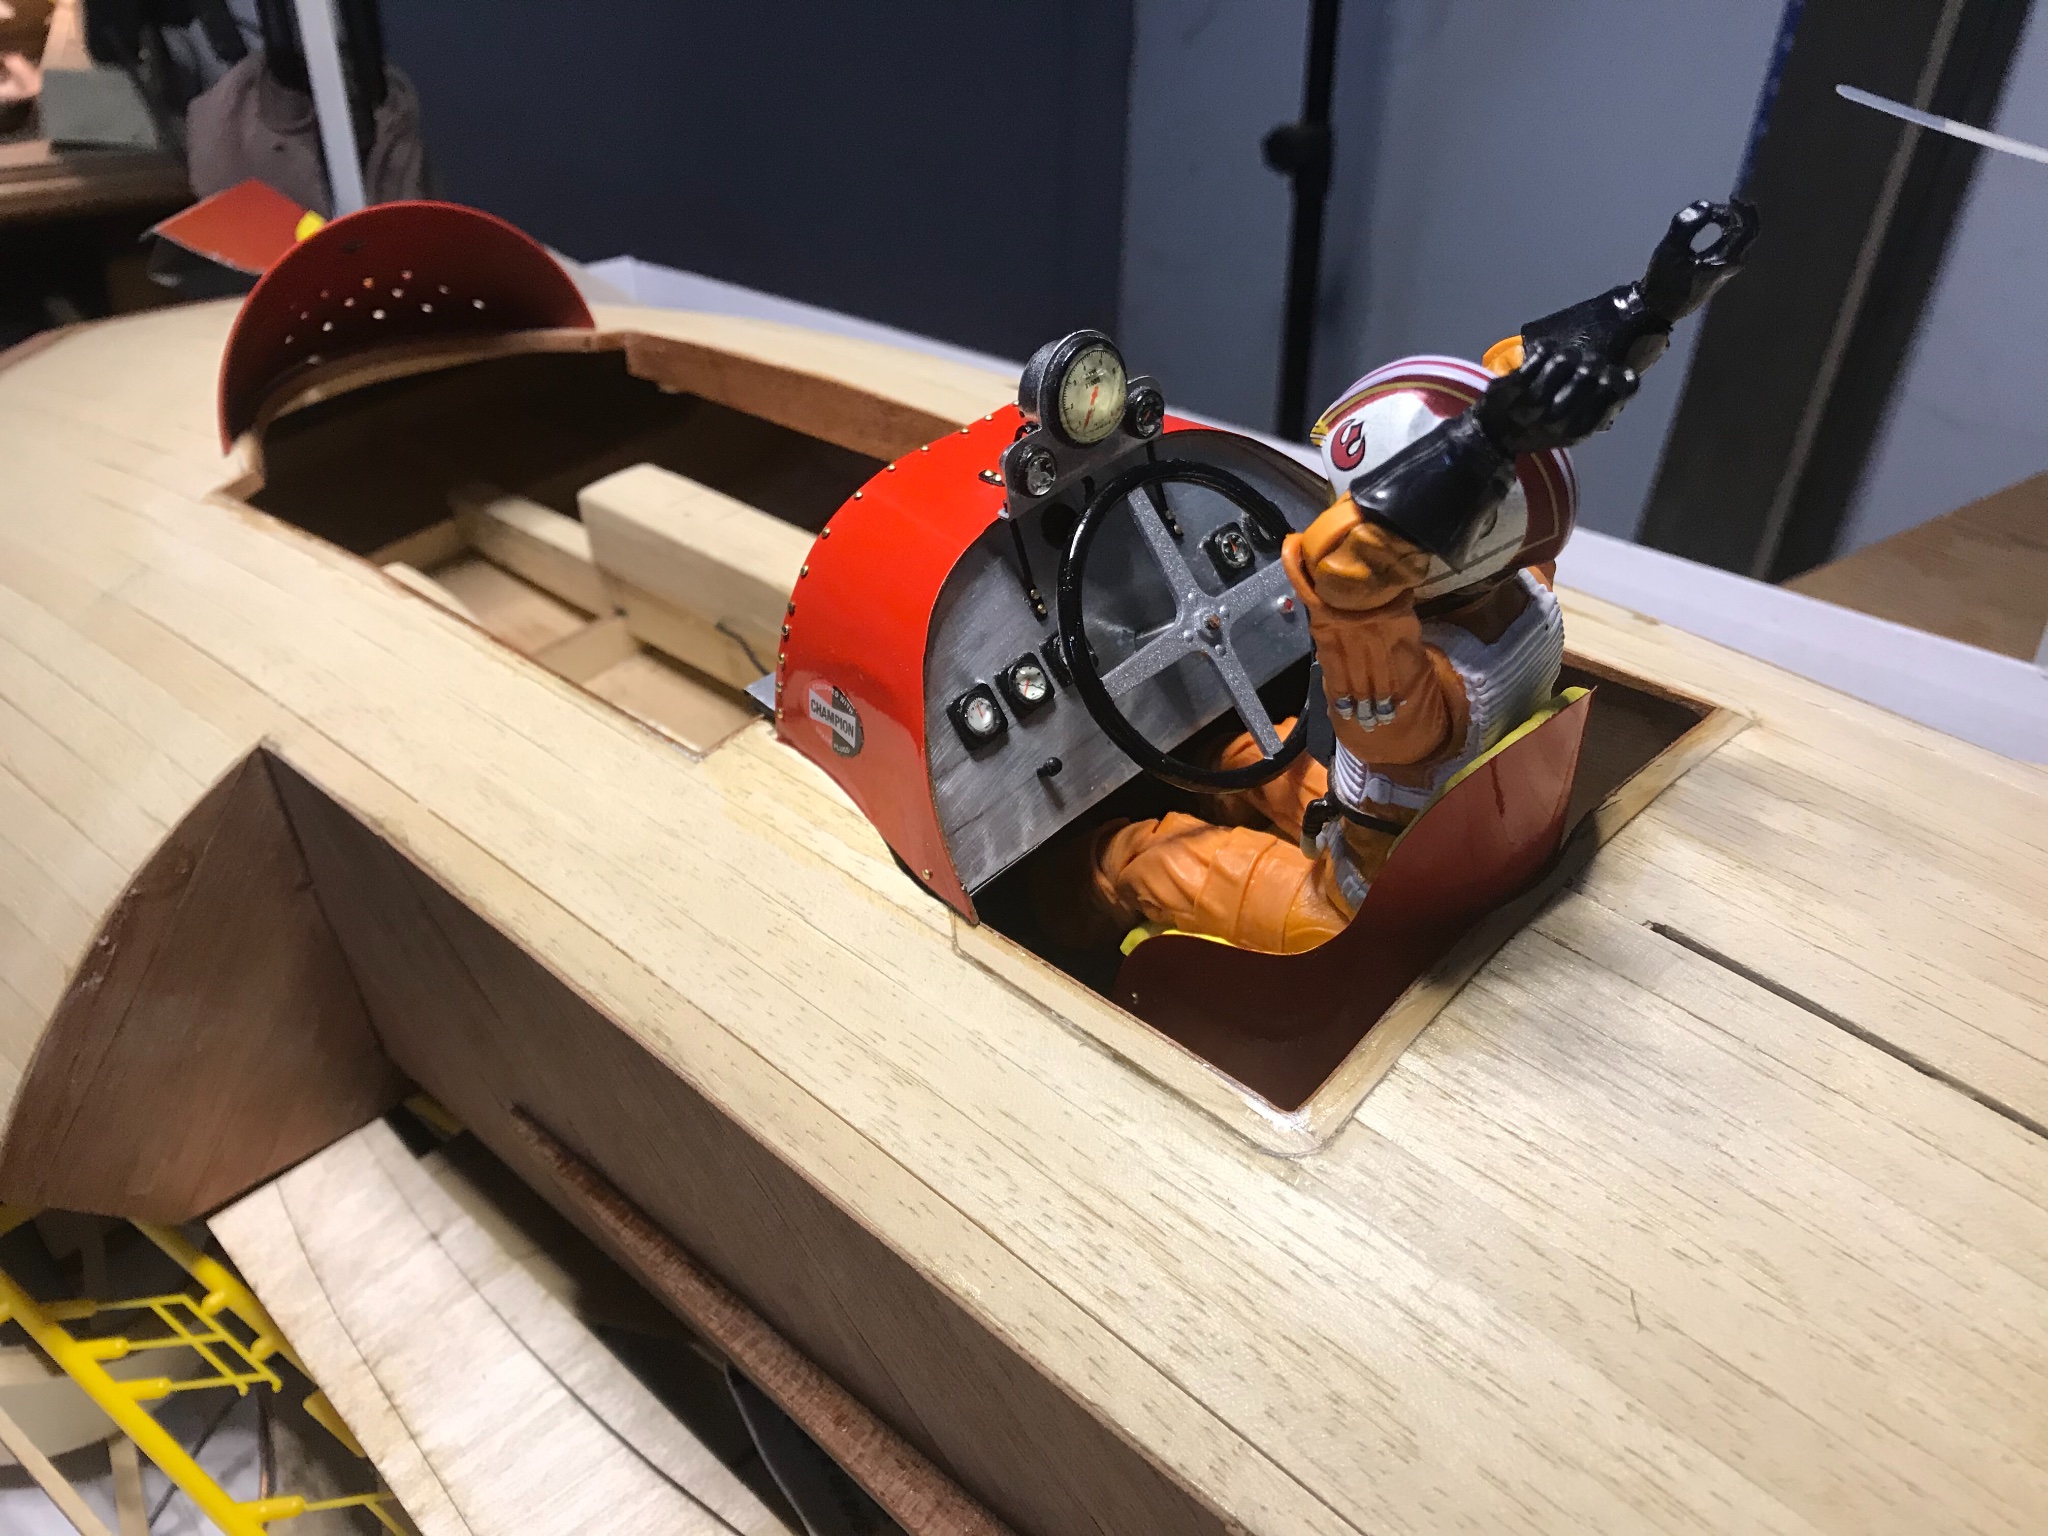
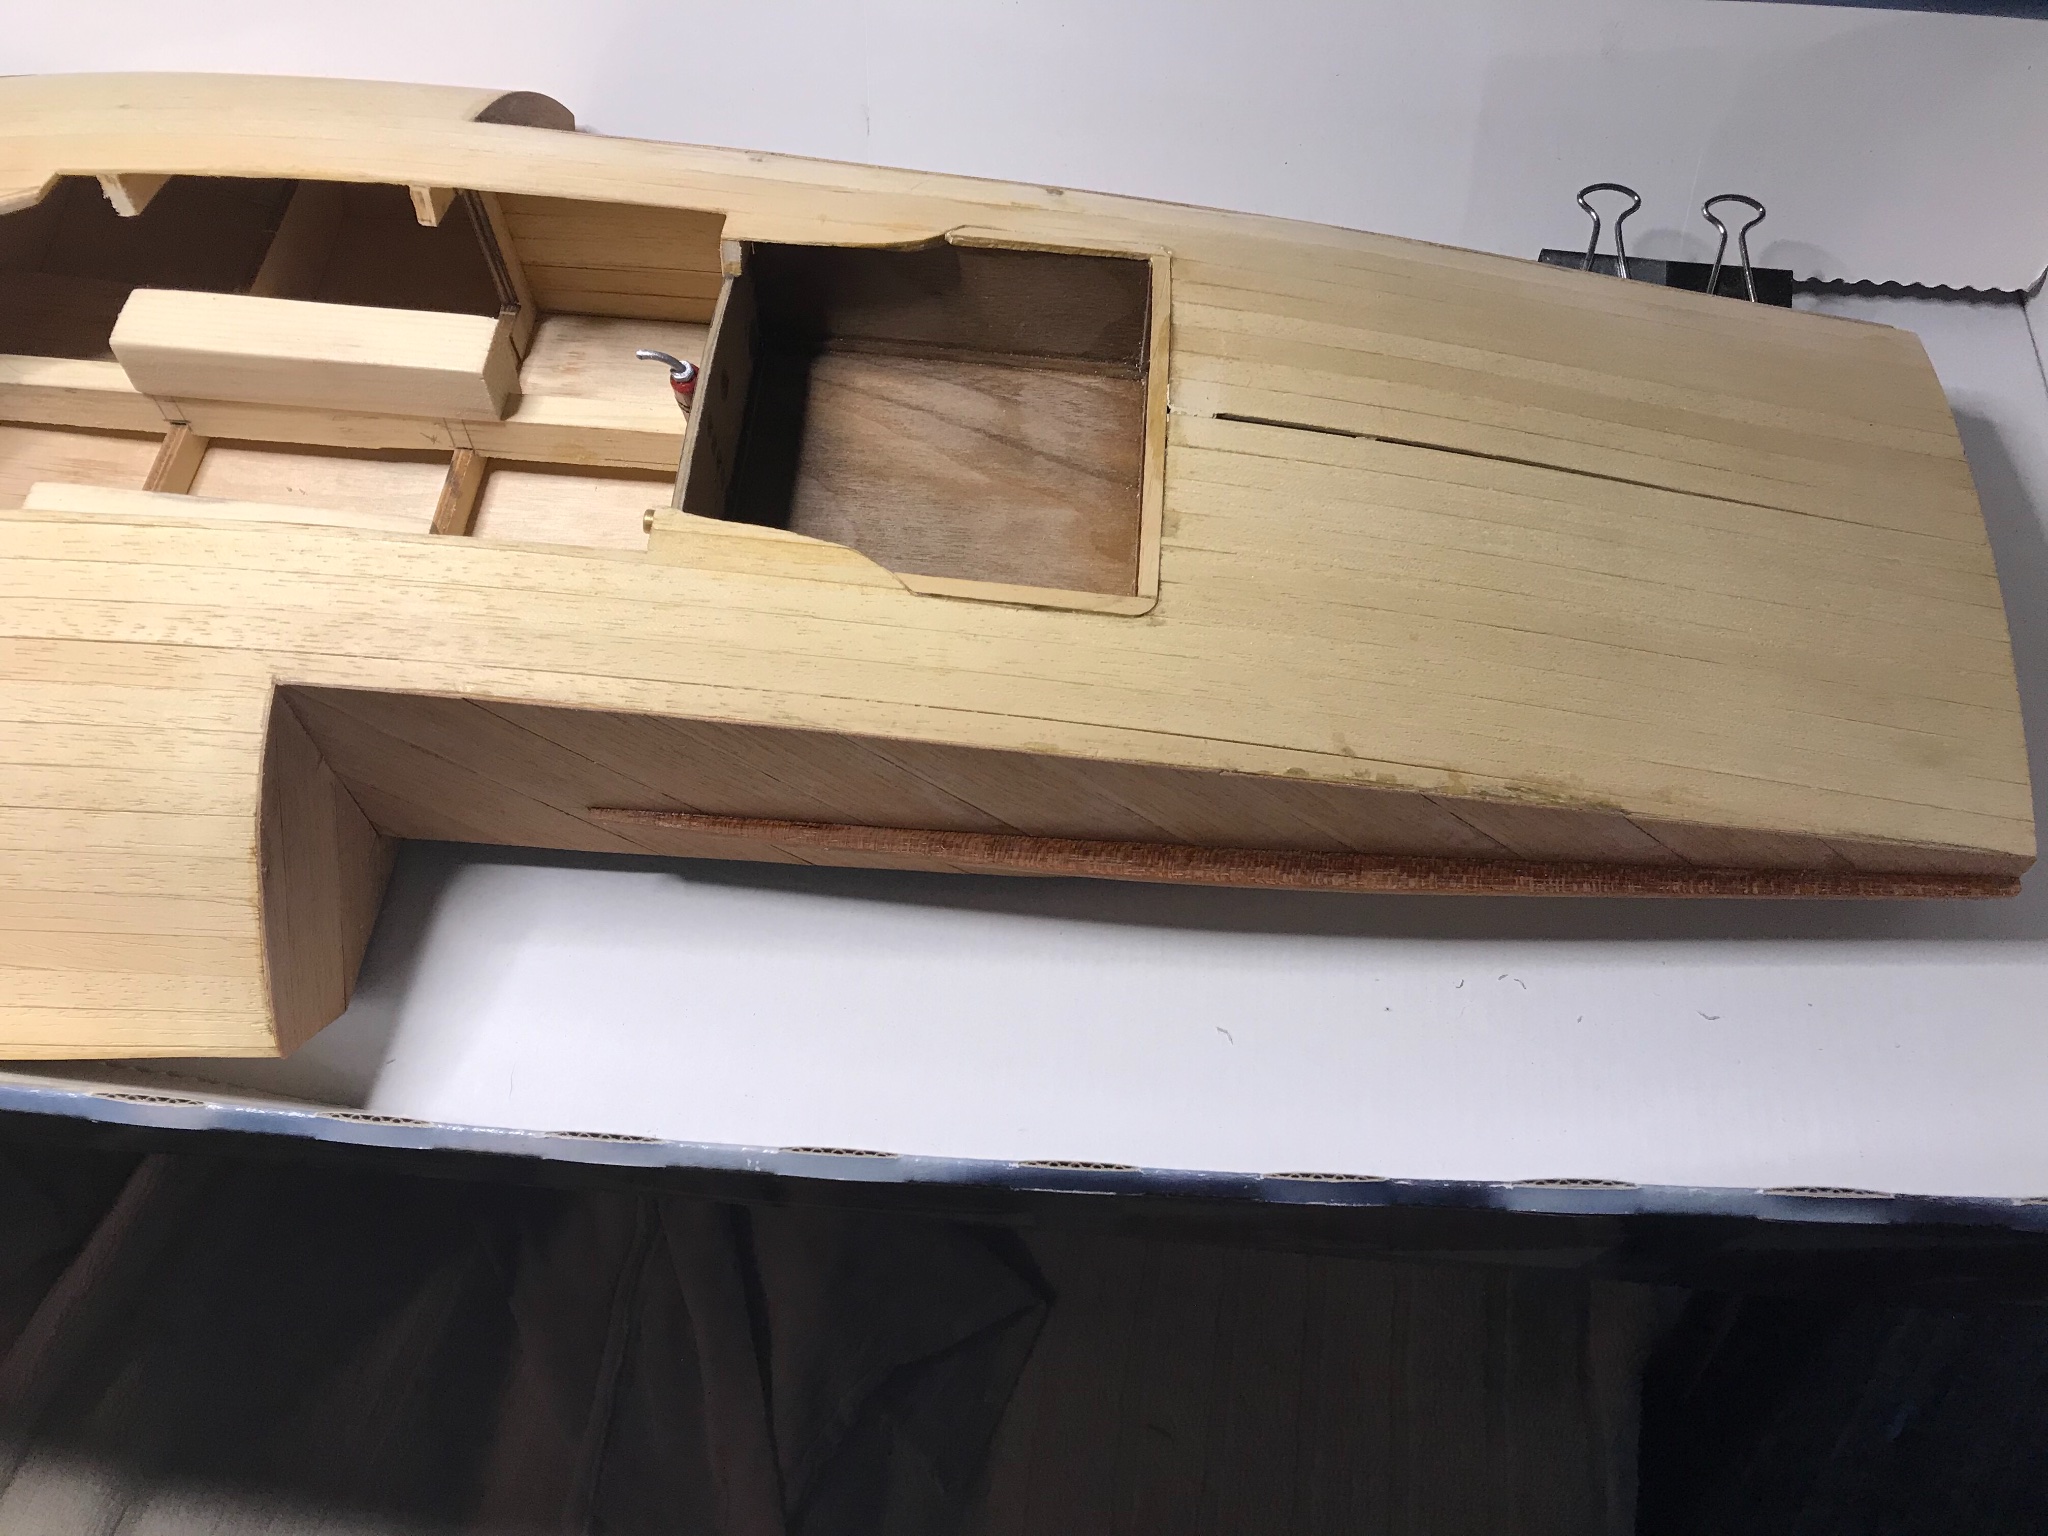
The next piece is the hood and dash.
This is where I shine, read the instructions 200 times and still managed to do this wrong.
I guess the nut behind the wheel here is me.
I first figured out how long this piece needed to be and cut it off at the best possible place I could see fit.
I then used piece #45 instead of piece #48, at first glance no harm. This changed the trajectory of the hood by a 64th of an inch just enough that I now need to add wood.
After I figured out how, what, why and.... I took part #48 cut it in half and glued it to the back of #45, changing the trajectory of the hoods plywood piece back to it’s proposed angle and now it’s fit is big and not small, in the end I like how this turned out.
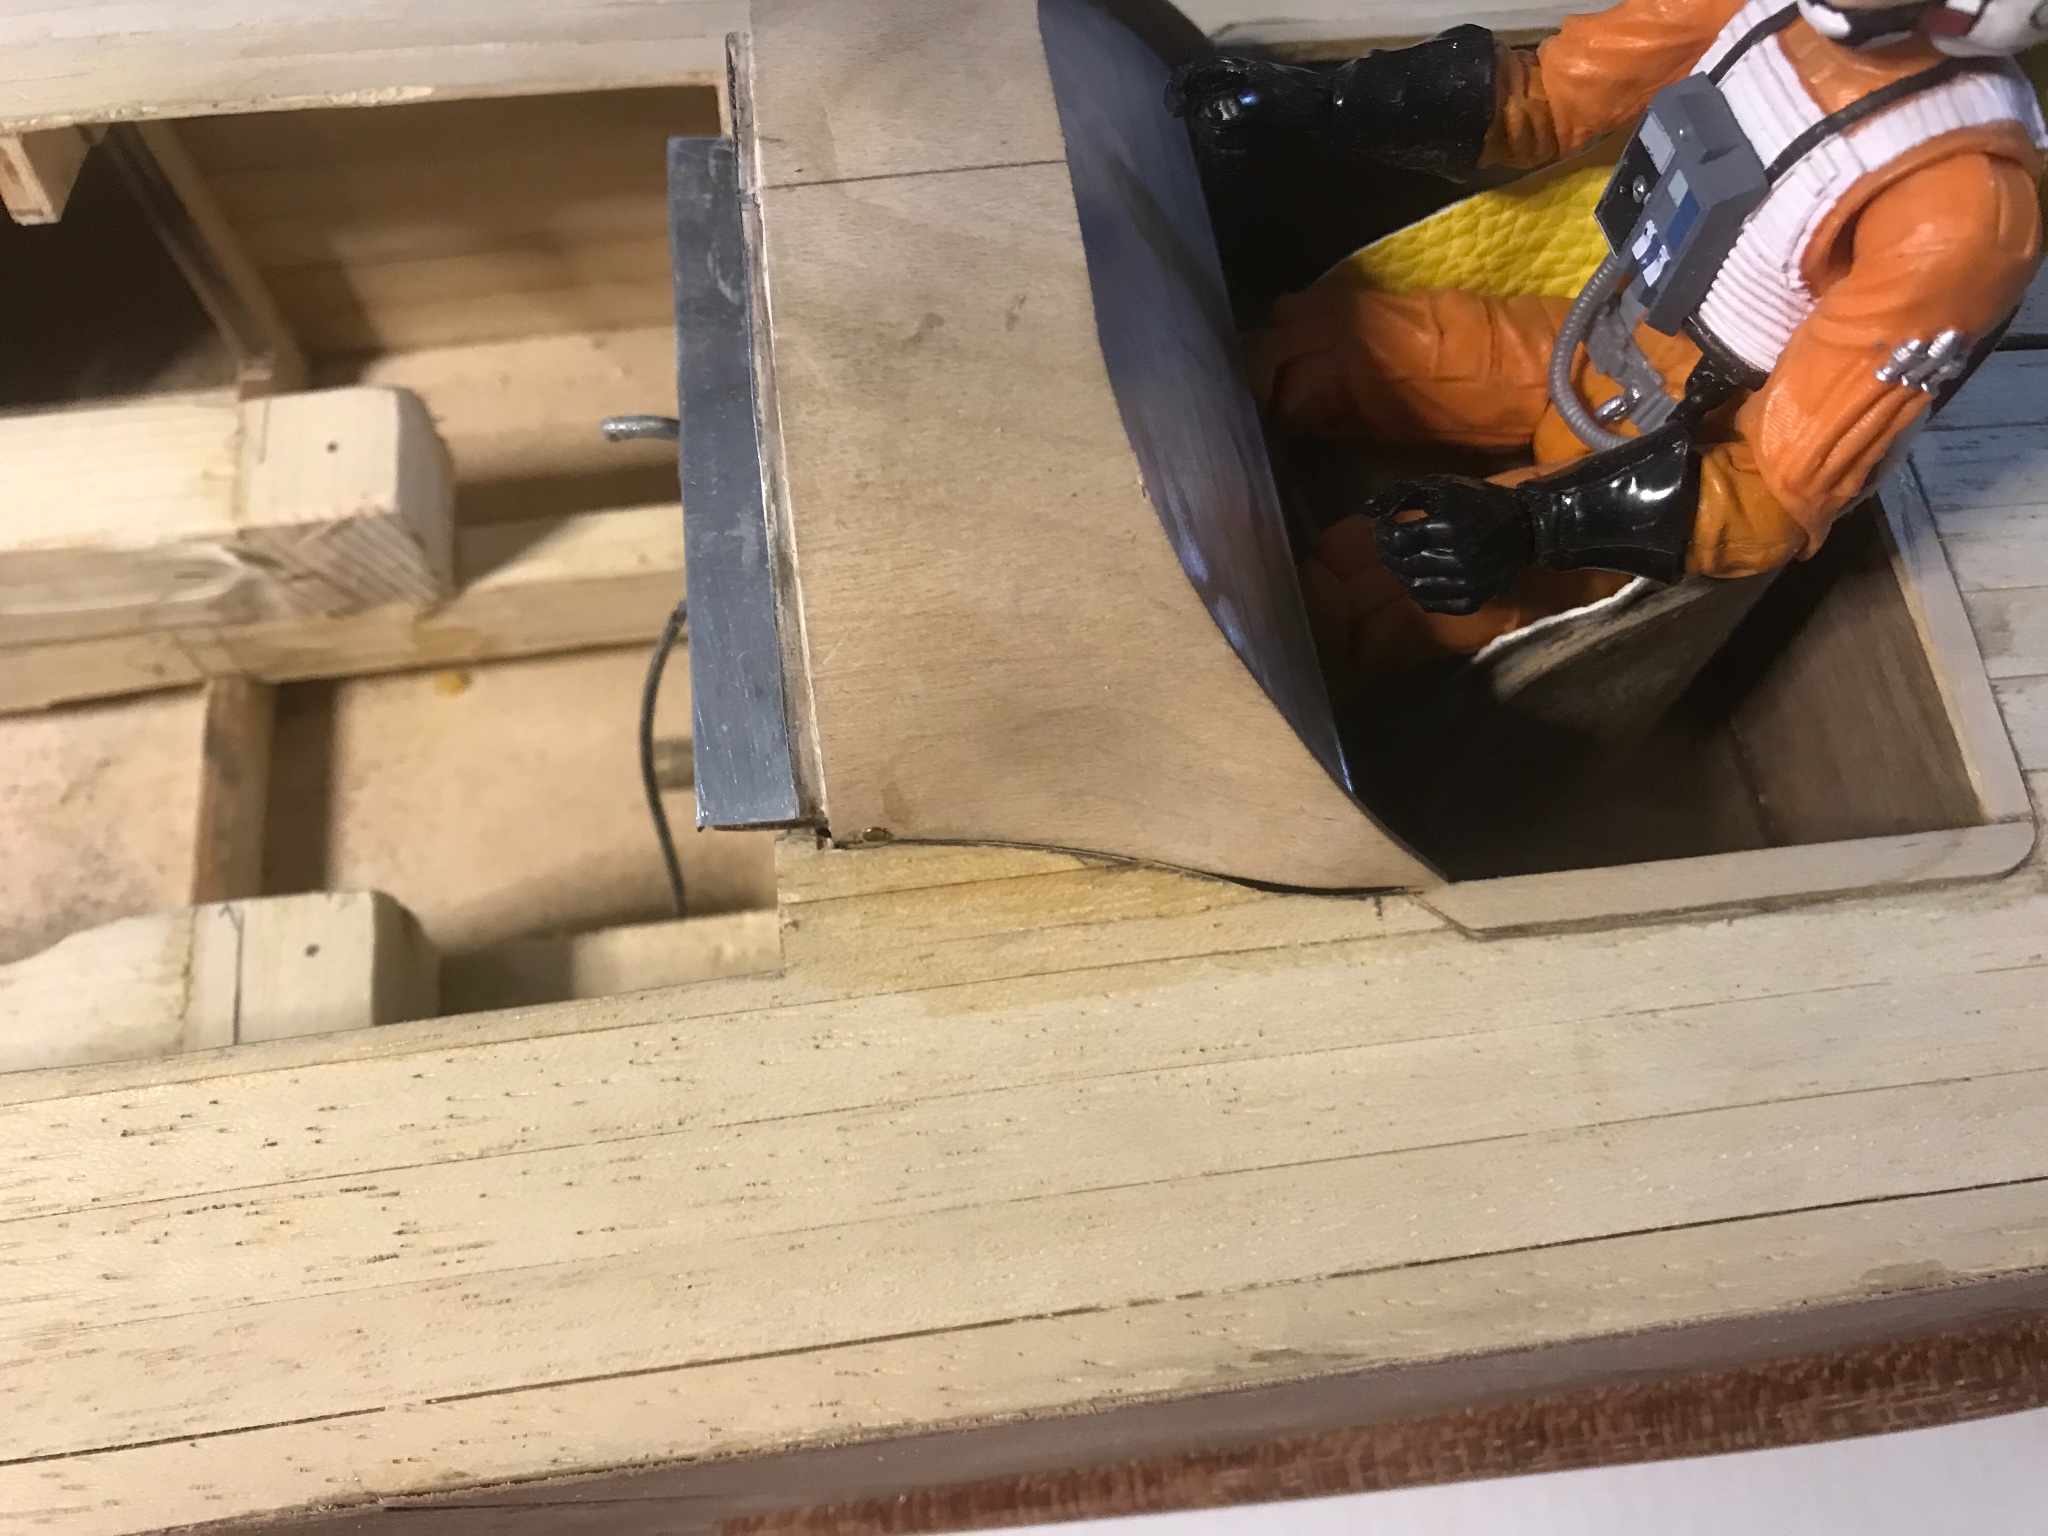
Once the hood/dash were together I began fitting it to the boat. This is where Lou proved to be the hero, he has to fit under this, the seat, floor and dash all have to come together here.
Then build all the aluminum pieces.
These gauges (now I have attached a few decals) but well this model... that’s behind us now, but, they are growing on me, I do like the way they turned out, not perfect... The dash went well.
The steering wheel, I tried everything to replace it, in all of the pictures I’ve seen the wheel seems big. This wheel is smaller than an 18 wheeler, a sports car had a steering wheel around 16 inches or so, this looks cooler in the boat but doesn’t seem to match the pictures I’ve got.
The only thing left here is the windshield, which I’m confident I’ve got sorted, so here is the hood/dash.


-
On 5/31/2021 at 12:47 PM, Roger Pellett said:
Beautiful work on an interesting subject.
The engineering to produce a lightweight hull capable of absorbing the power from the engine while taking the pounding from the water must have been difficult.
Is Lou, Lou Fageol?
Roger
Thank you Roger.
That is Lou Fageol.
I struggle with how the idea even developed, half airplane, half boat, simply because they could?
Let’s get back to building.
-
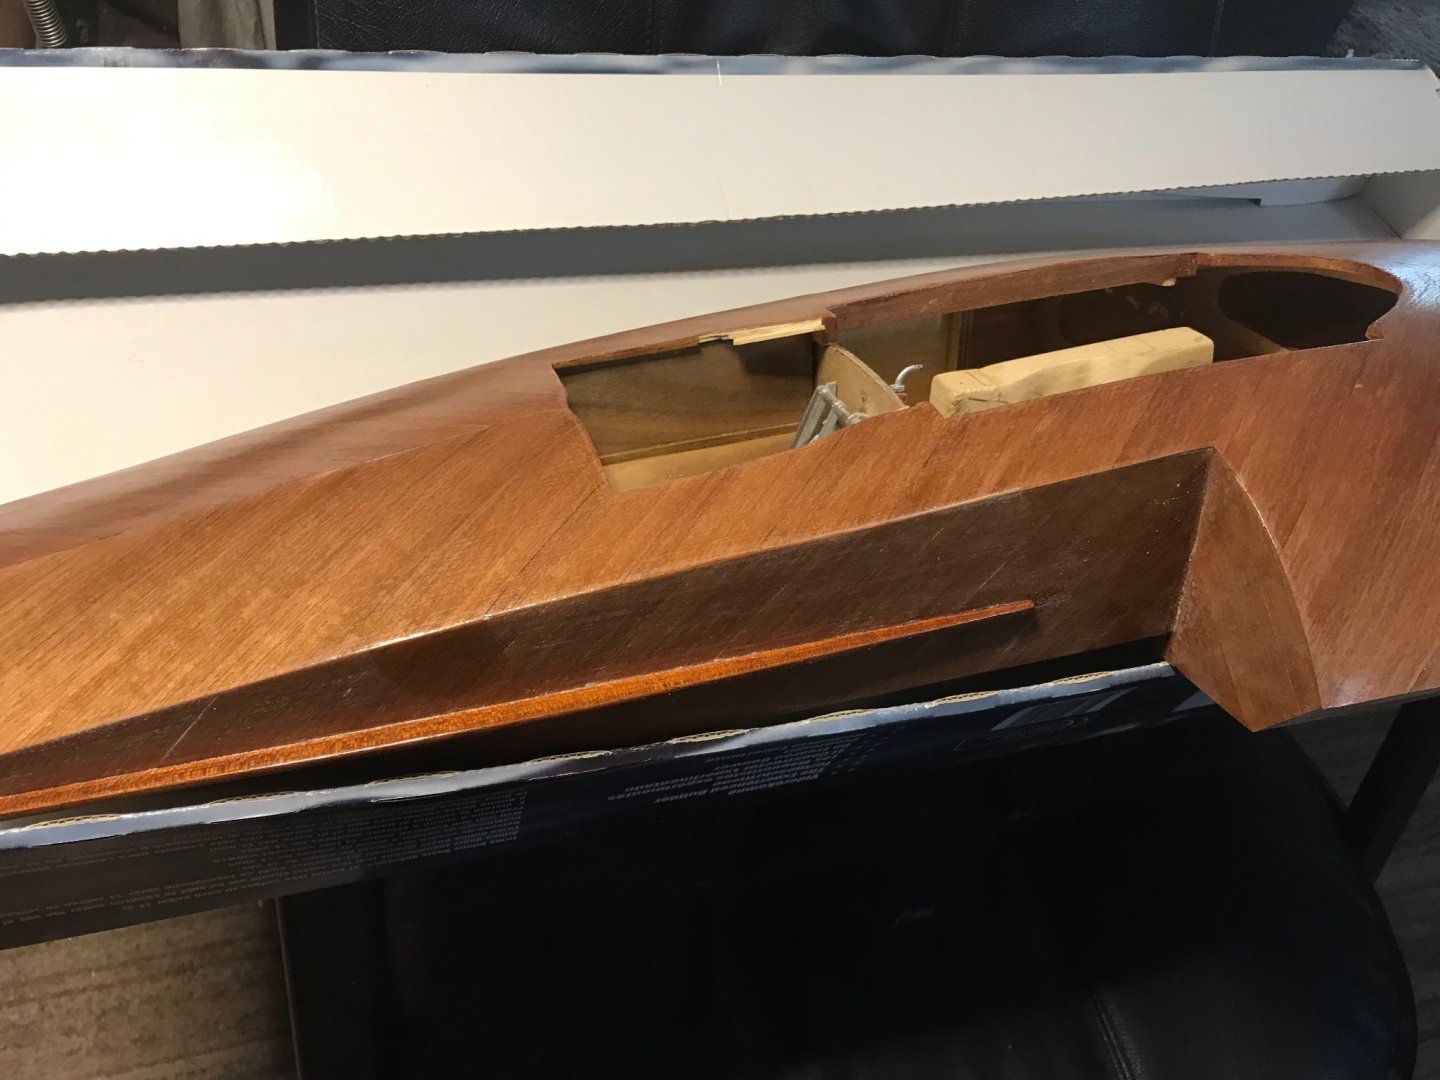
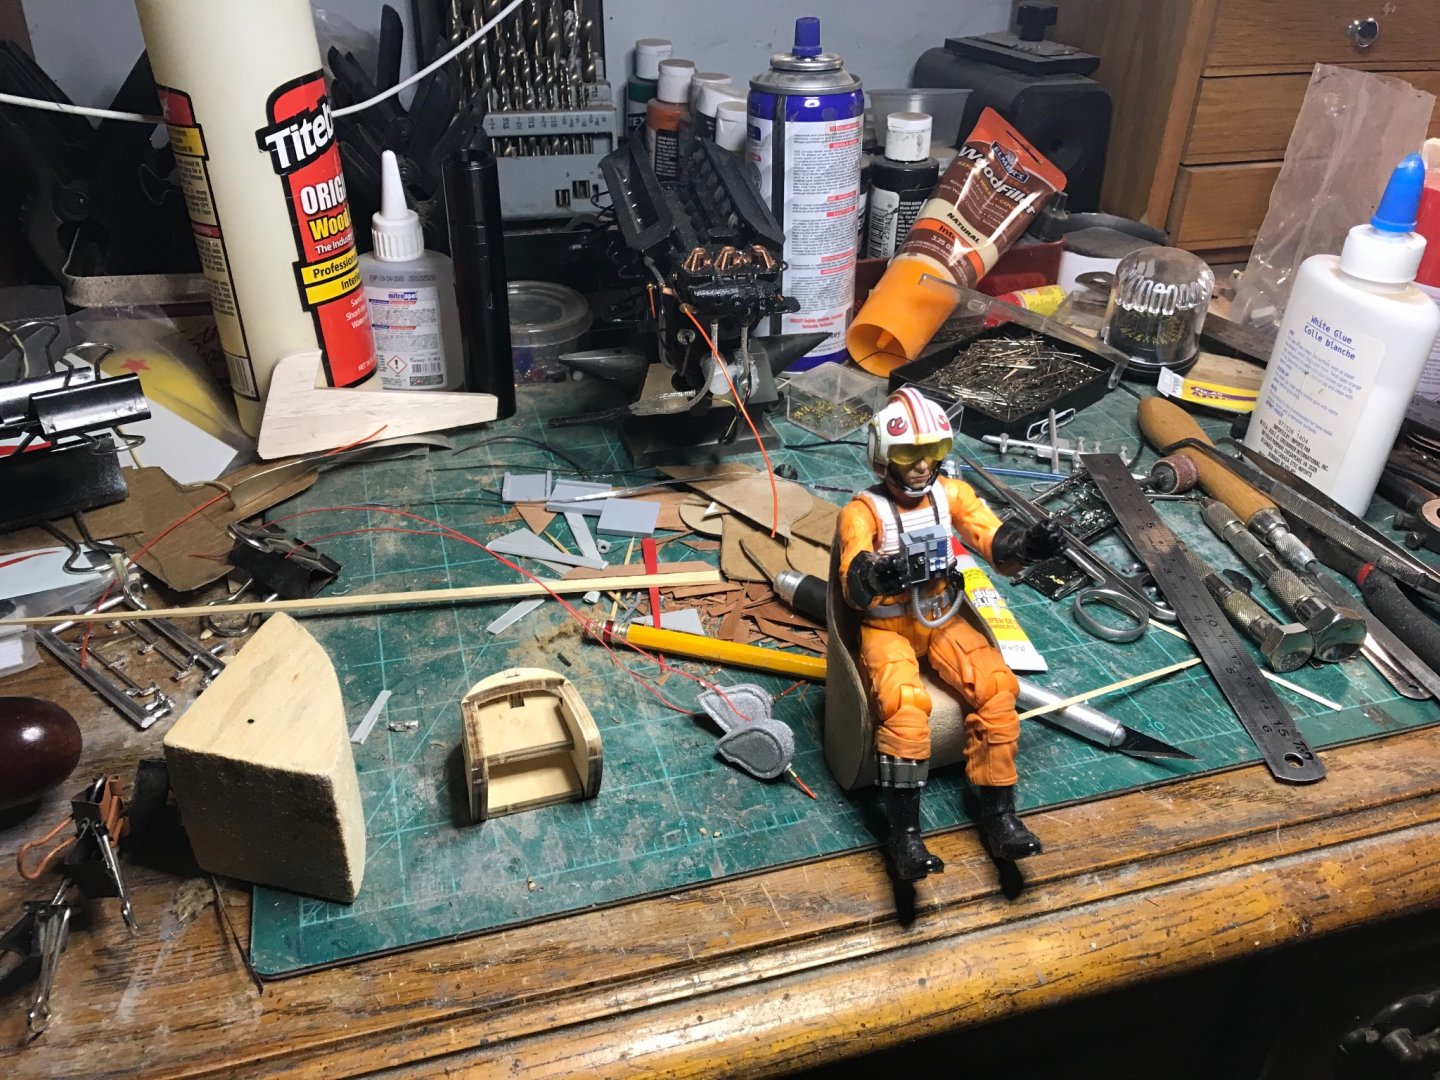
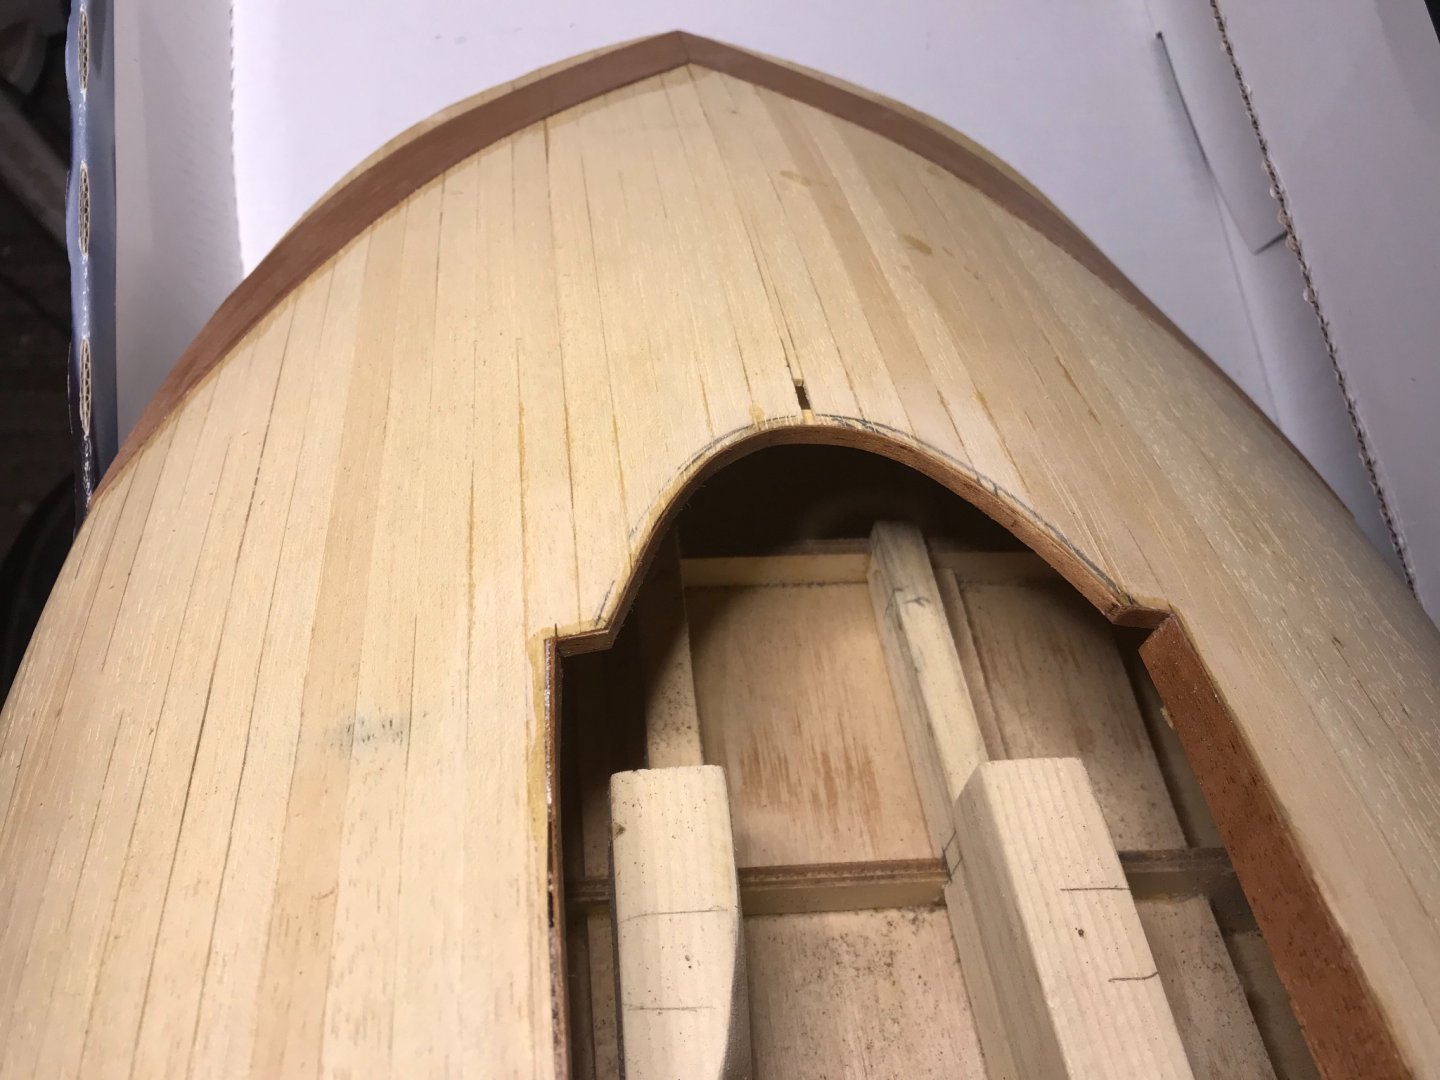
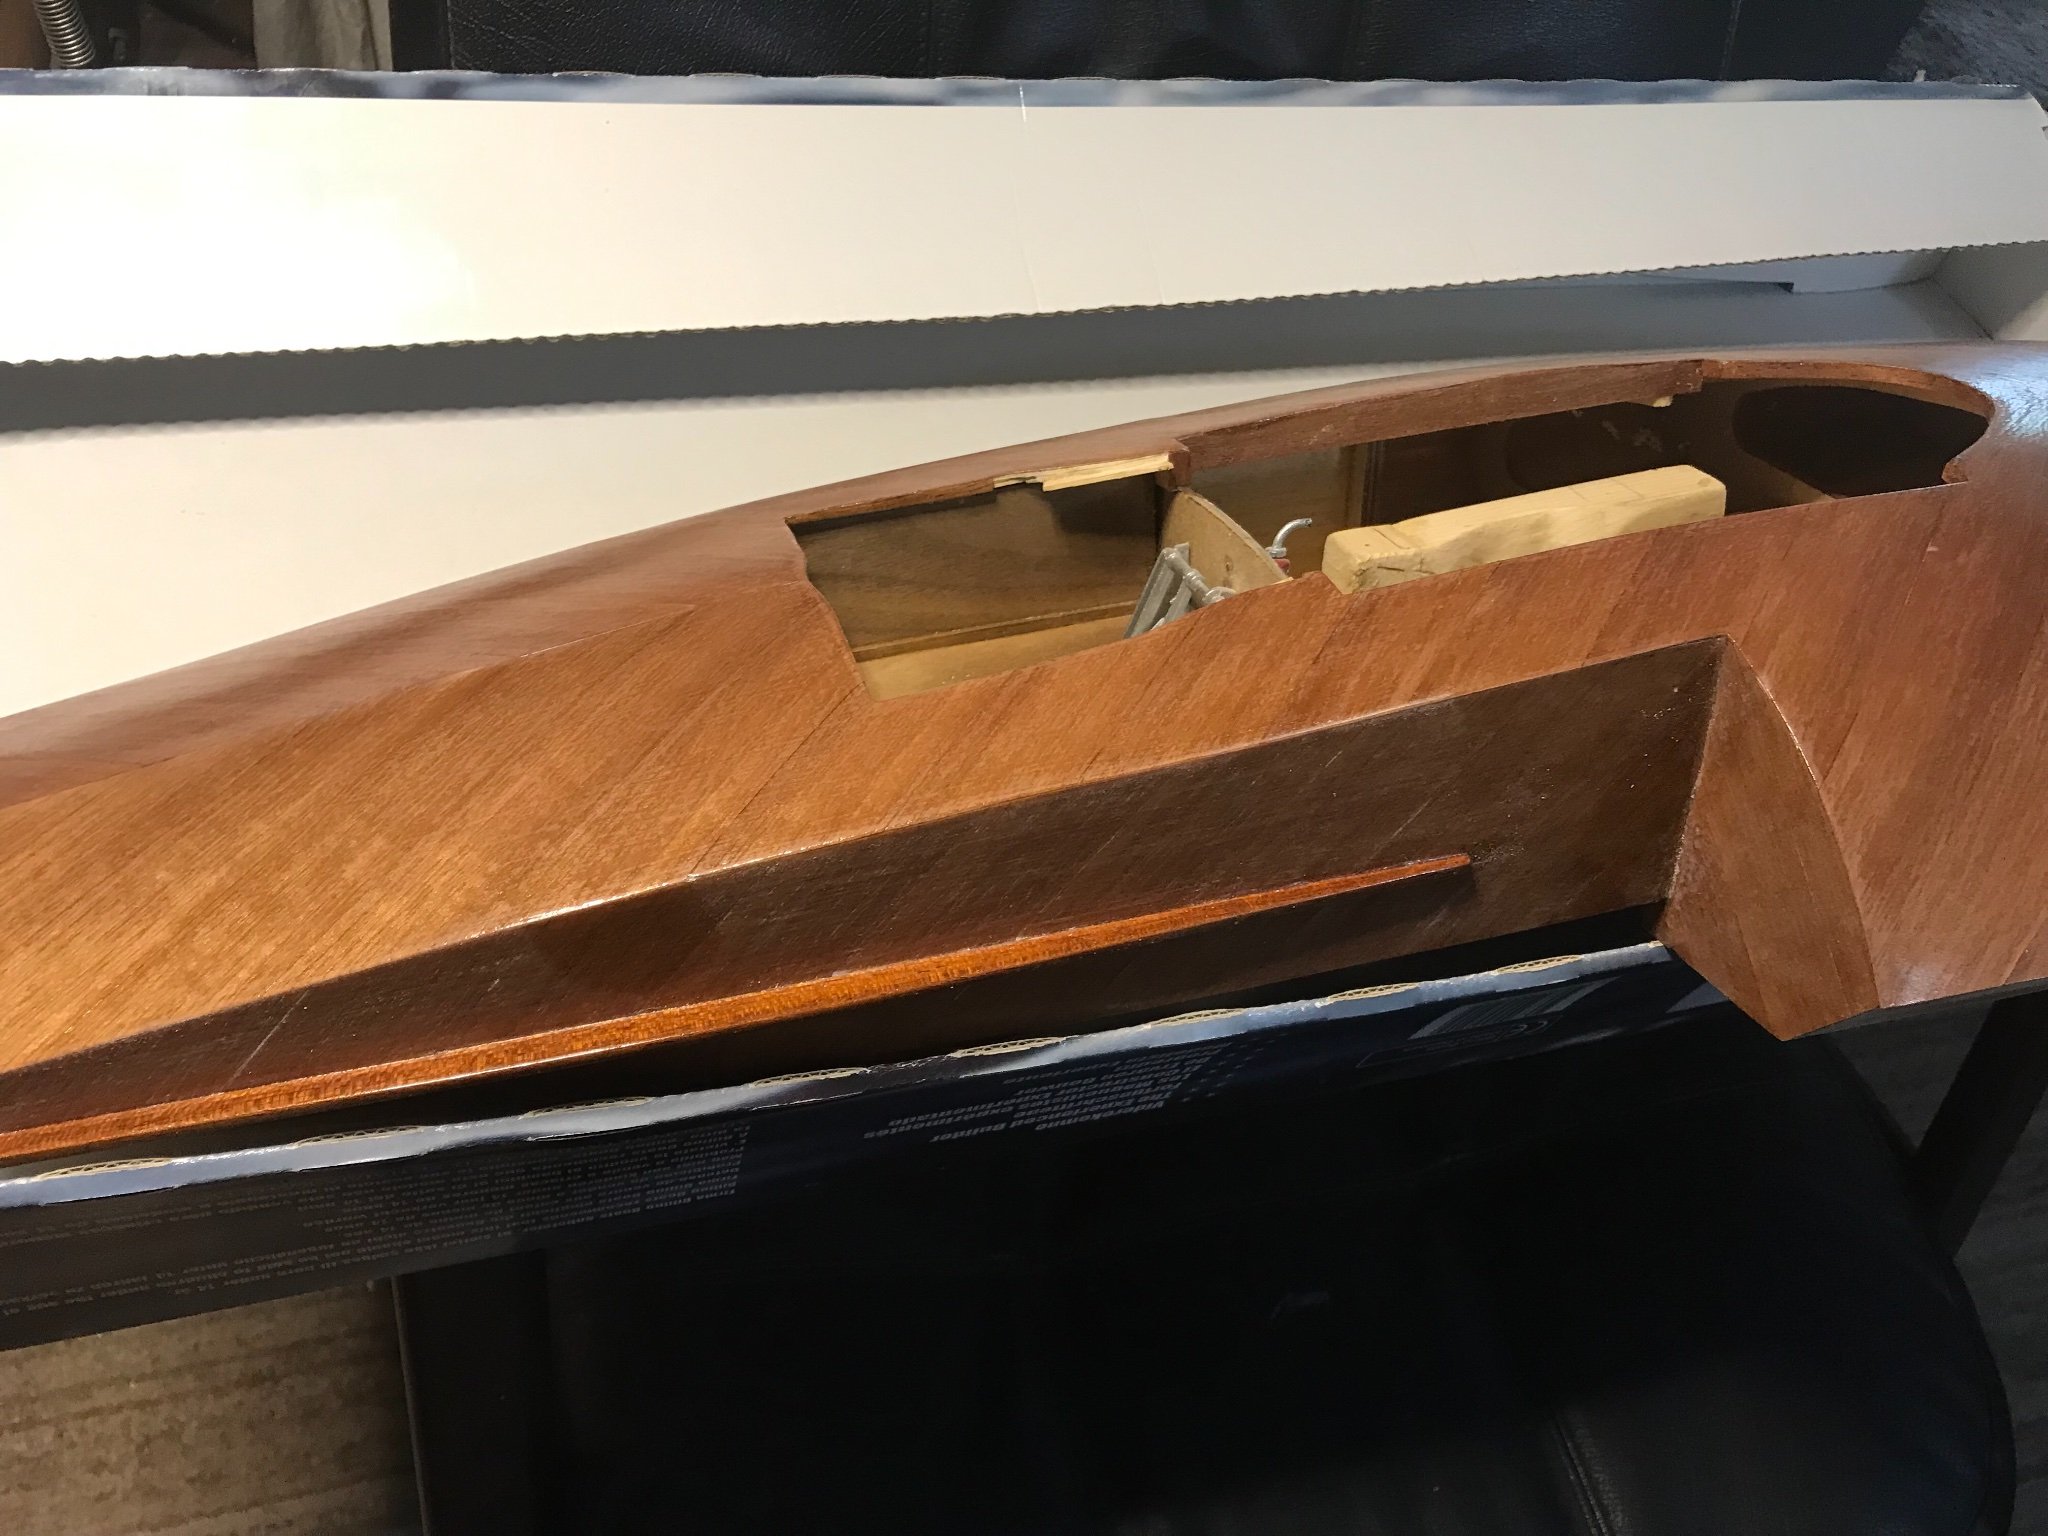
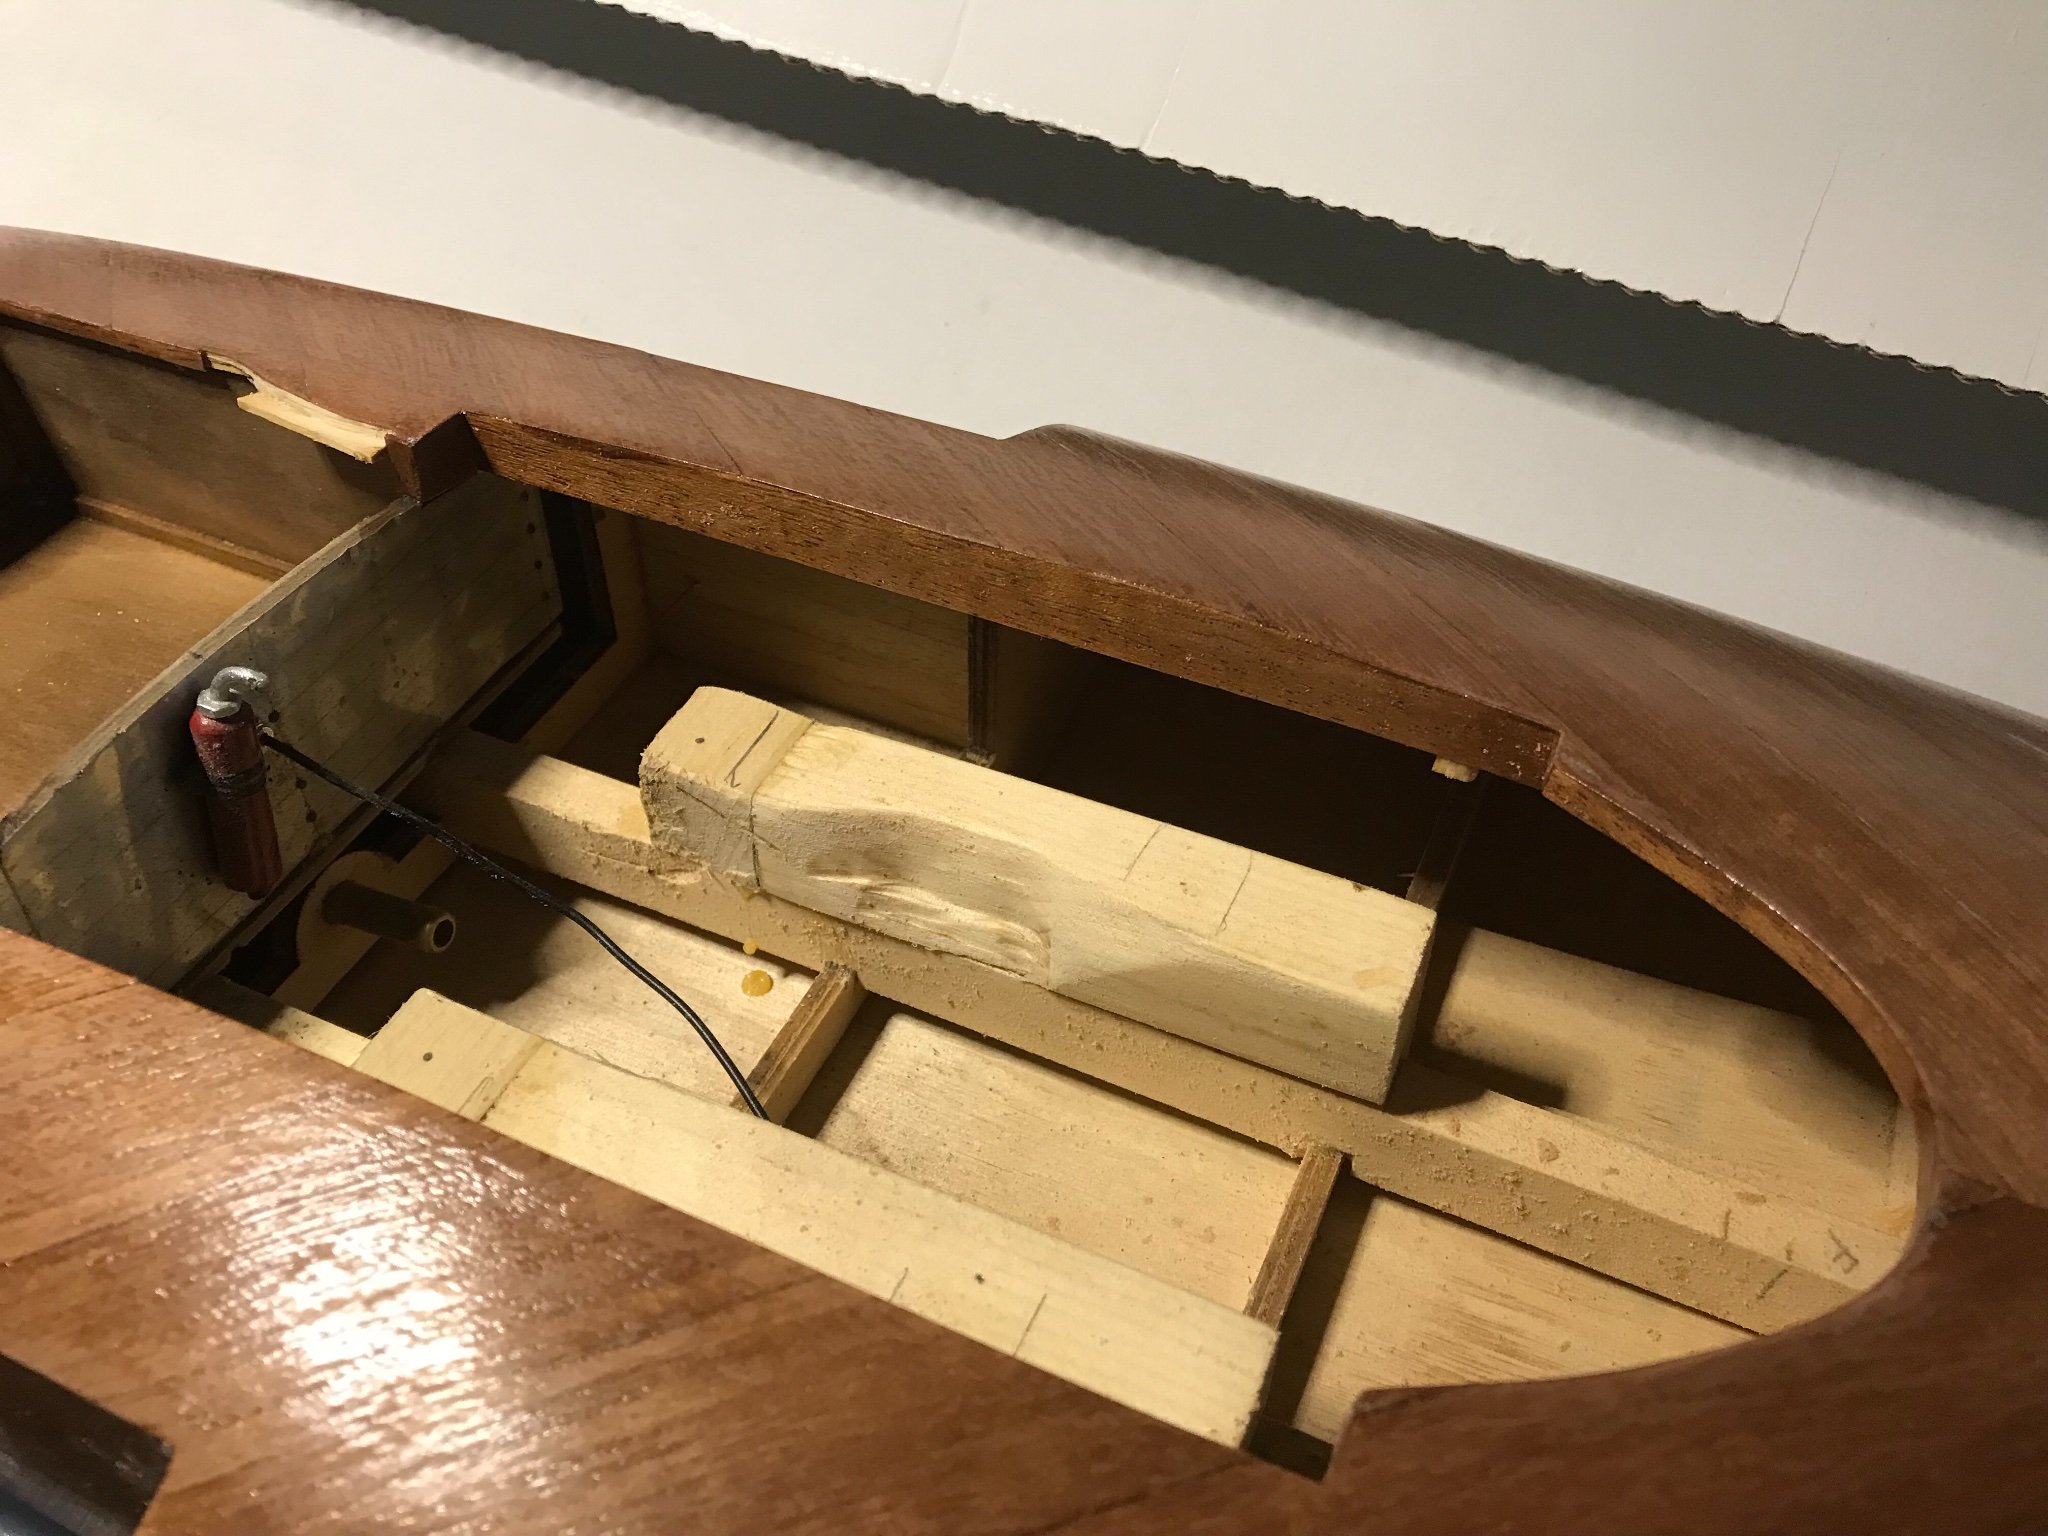
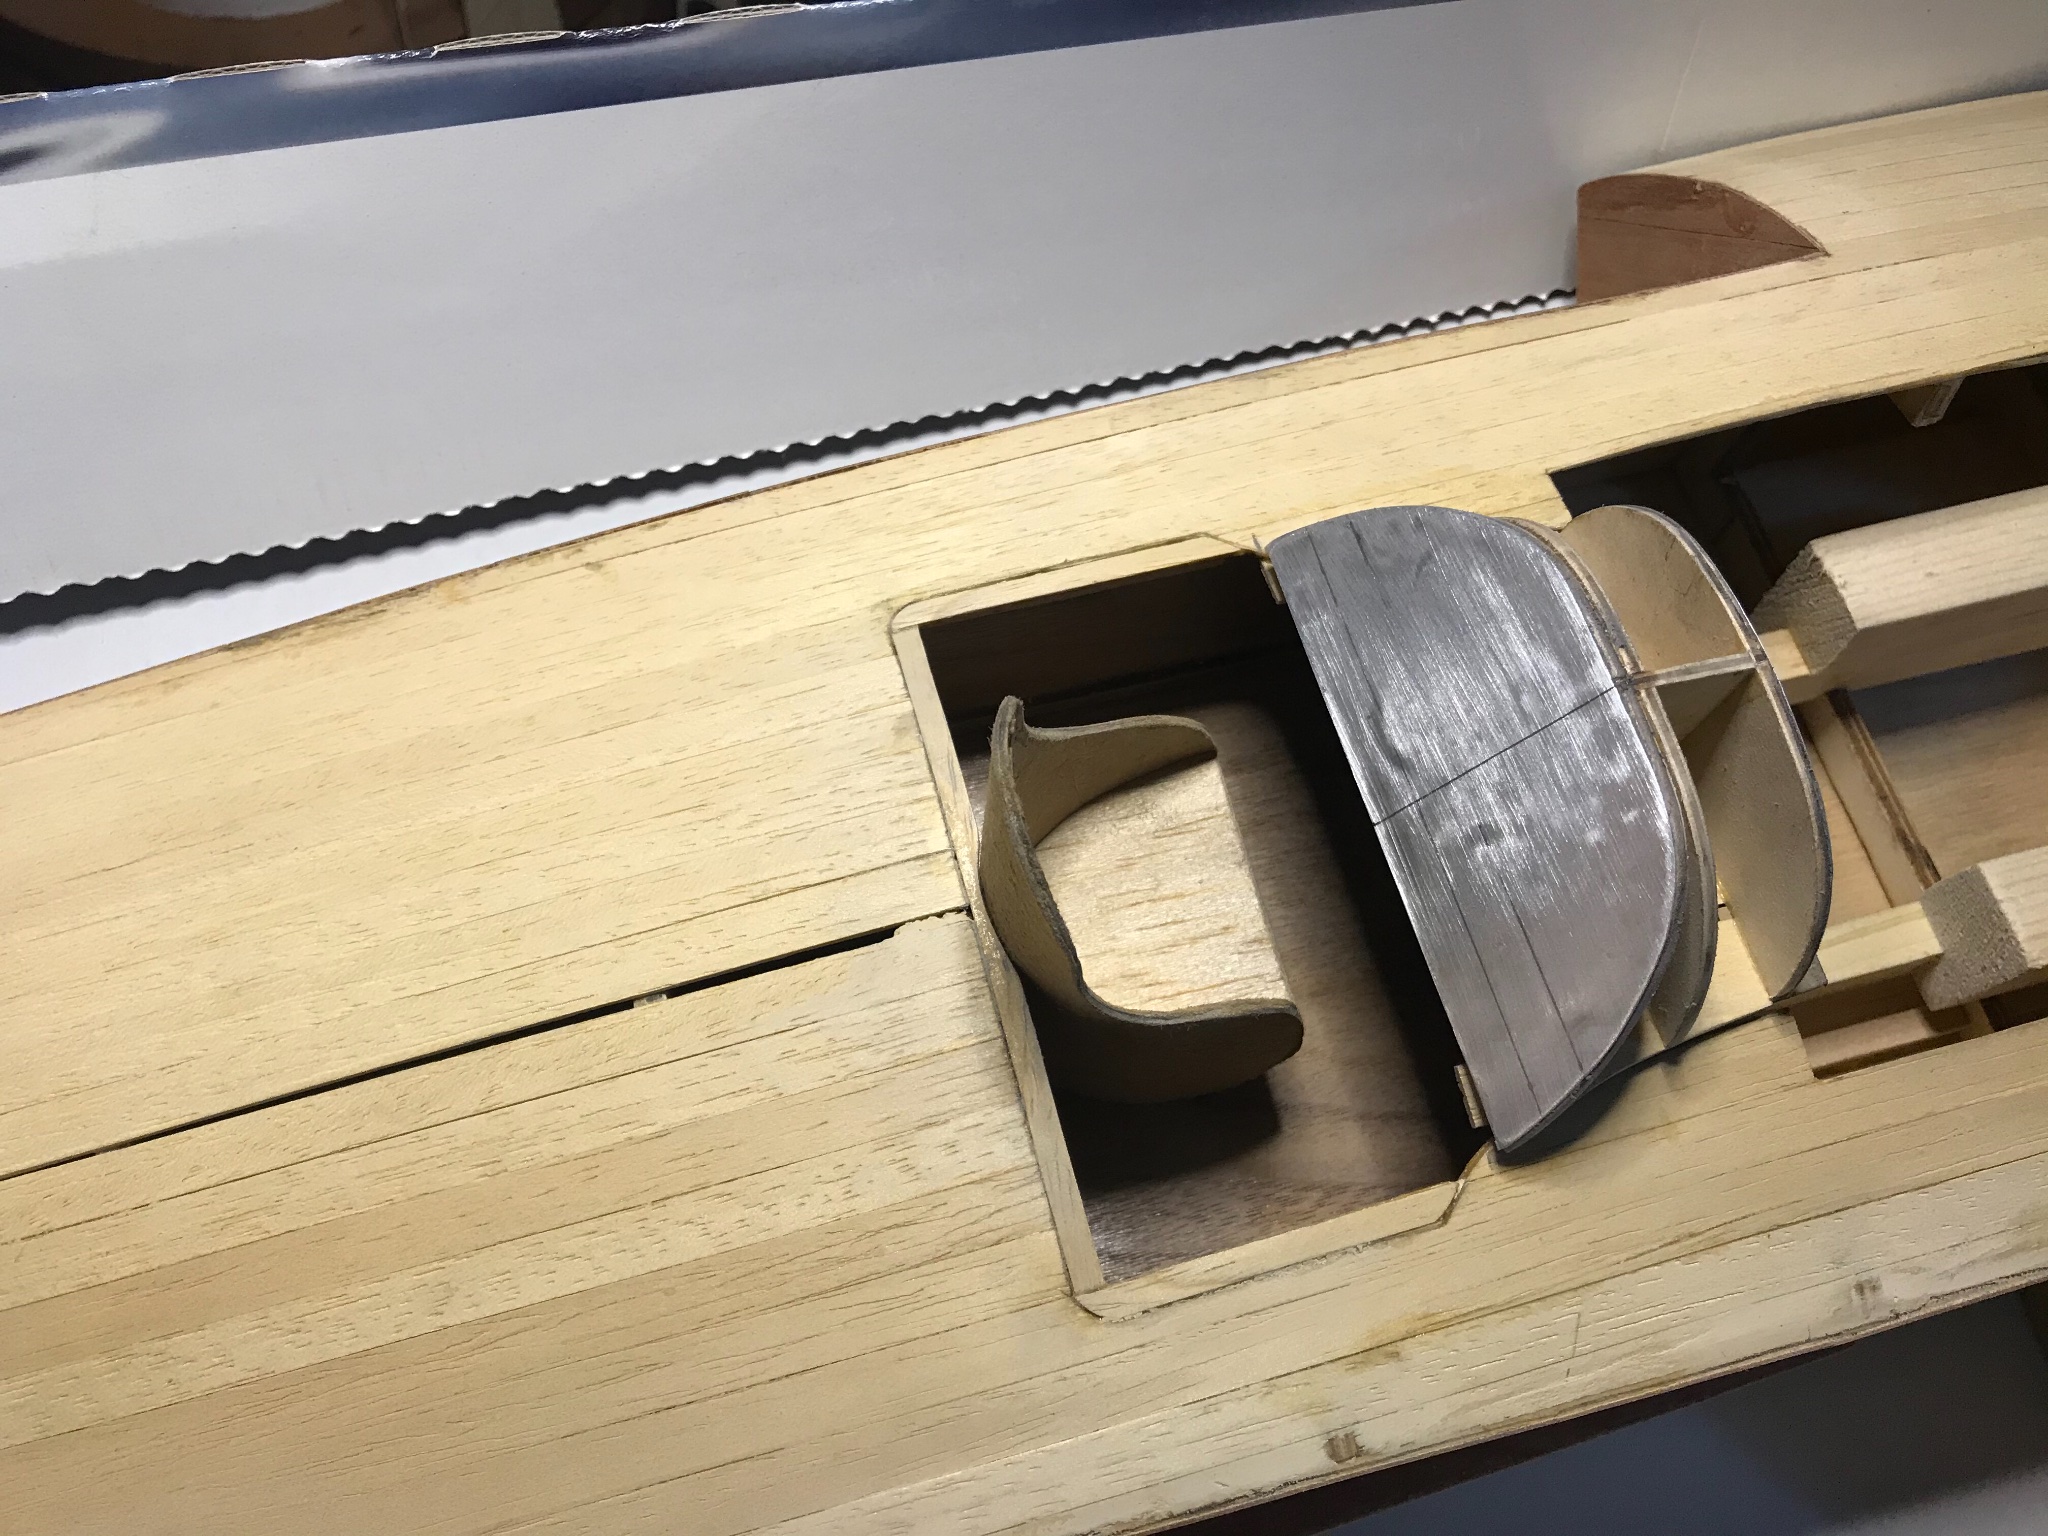
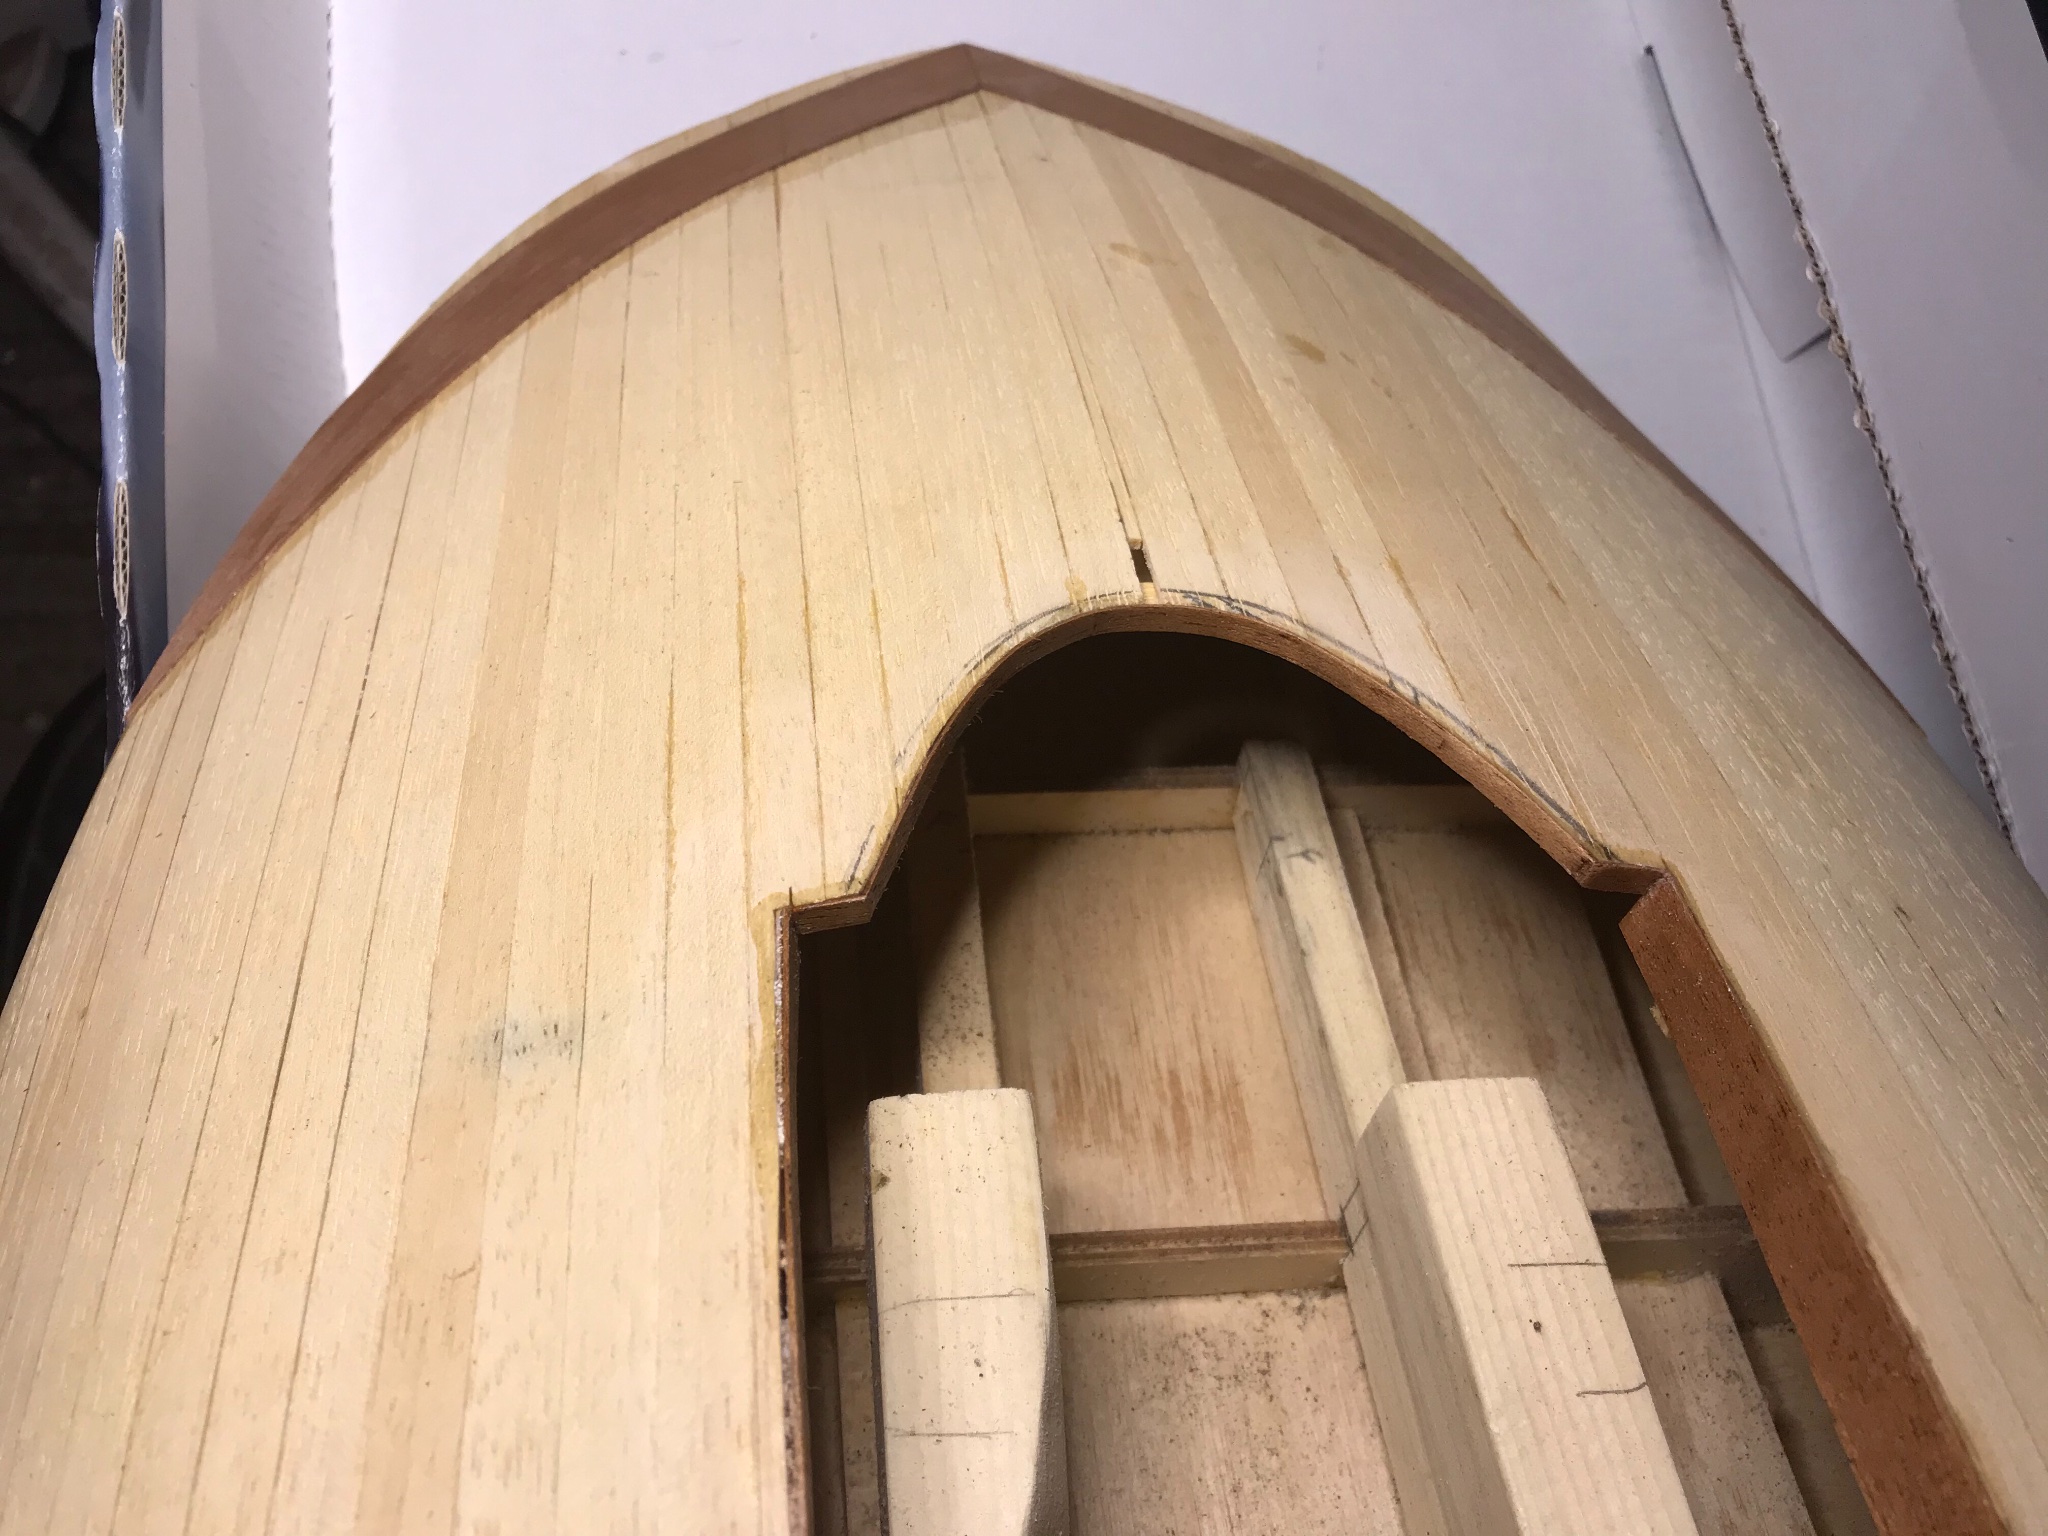
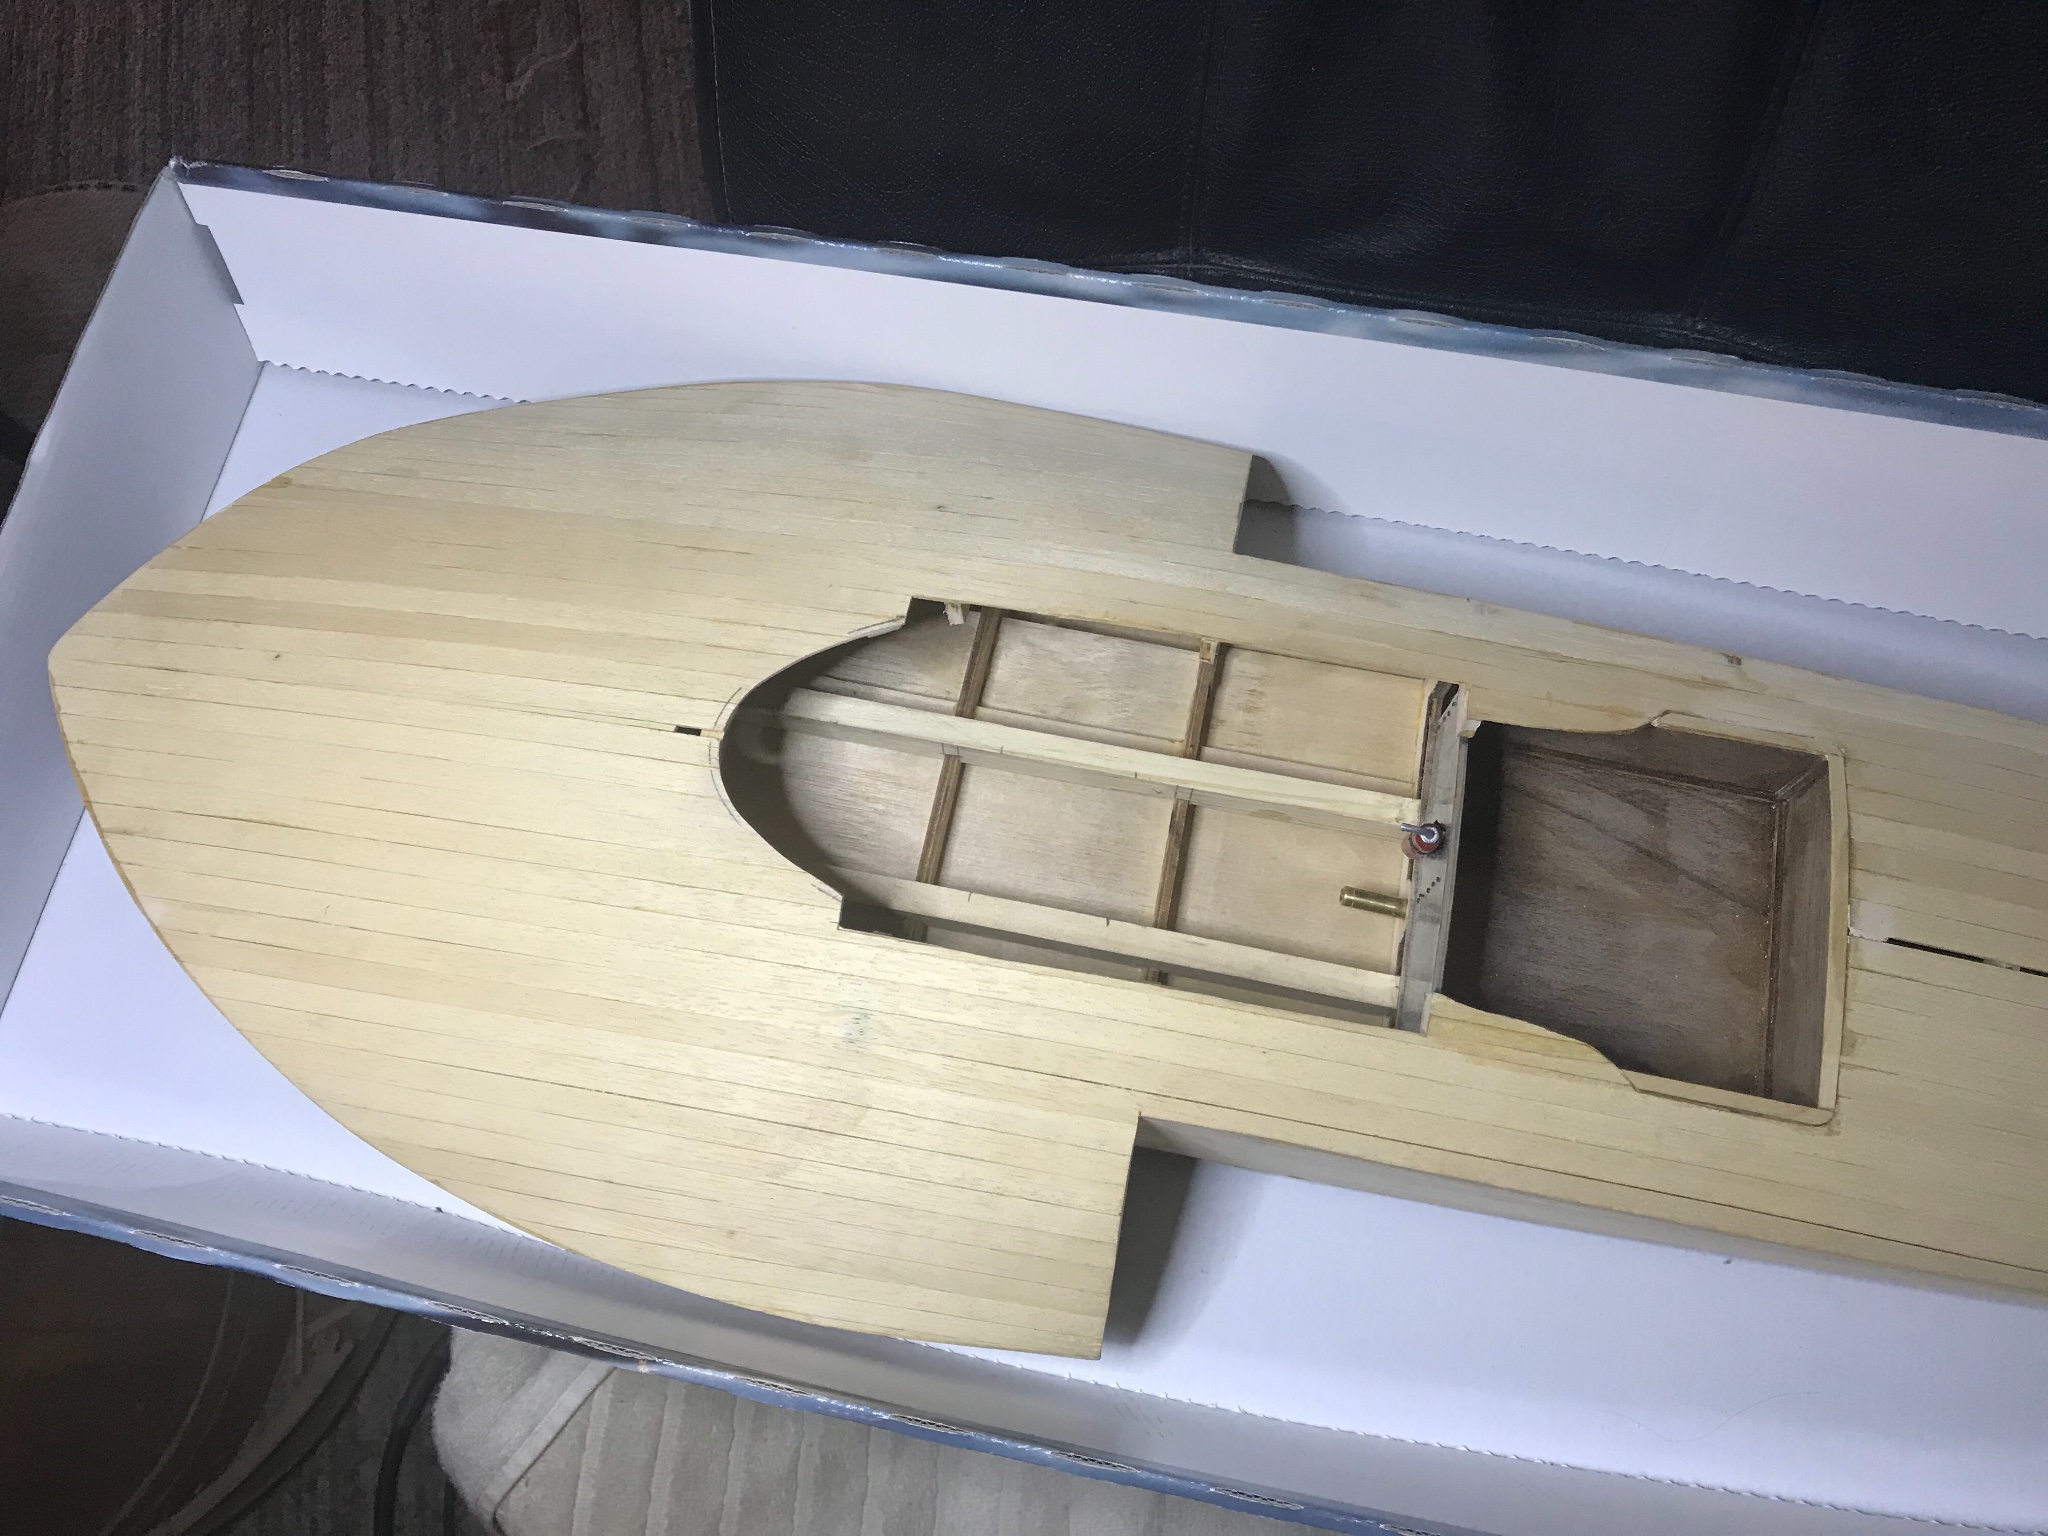
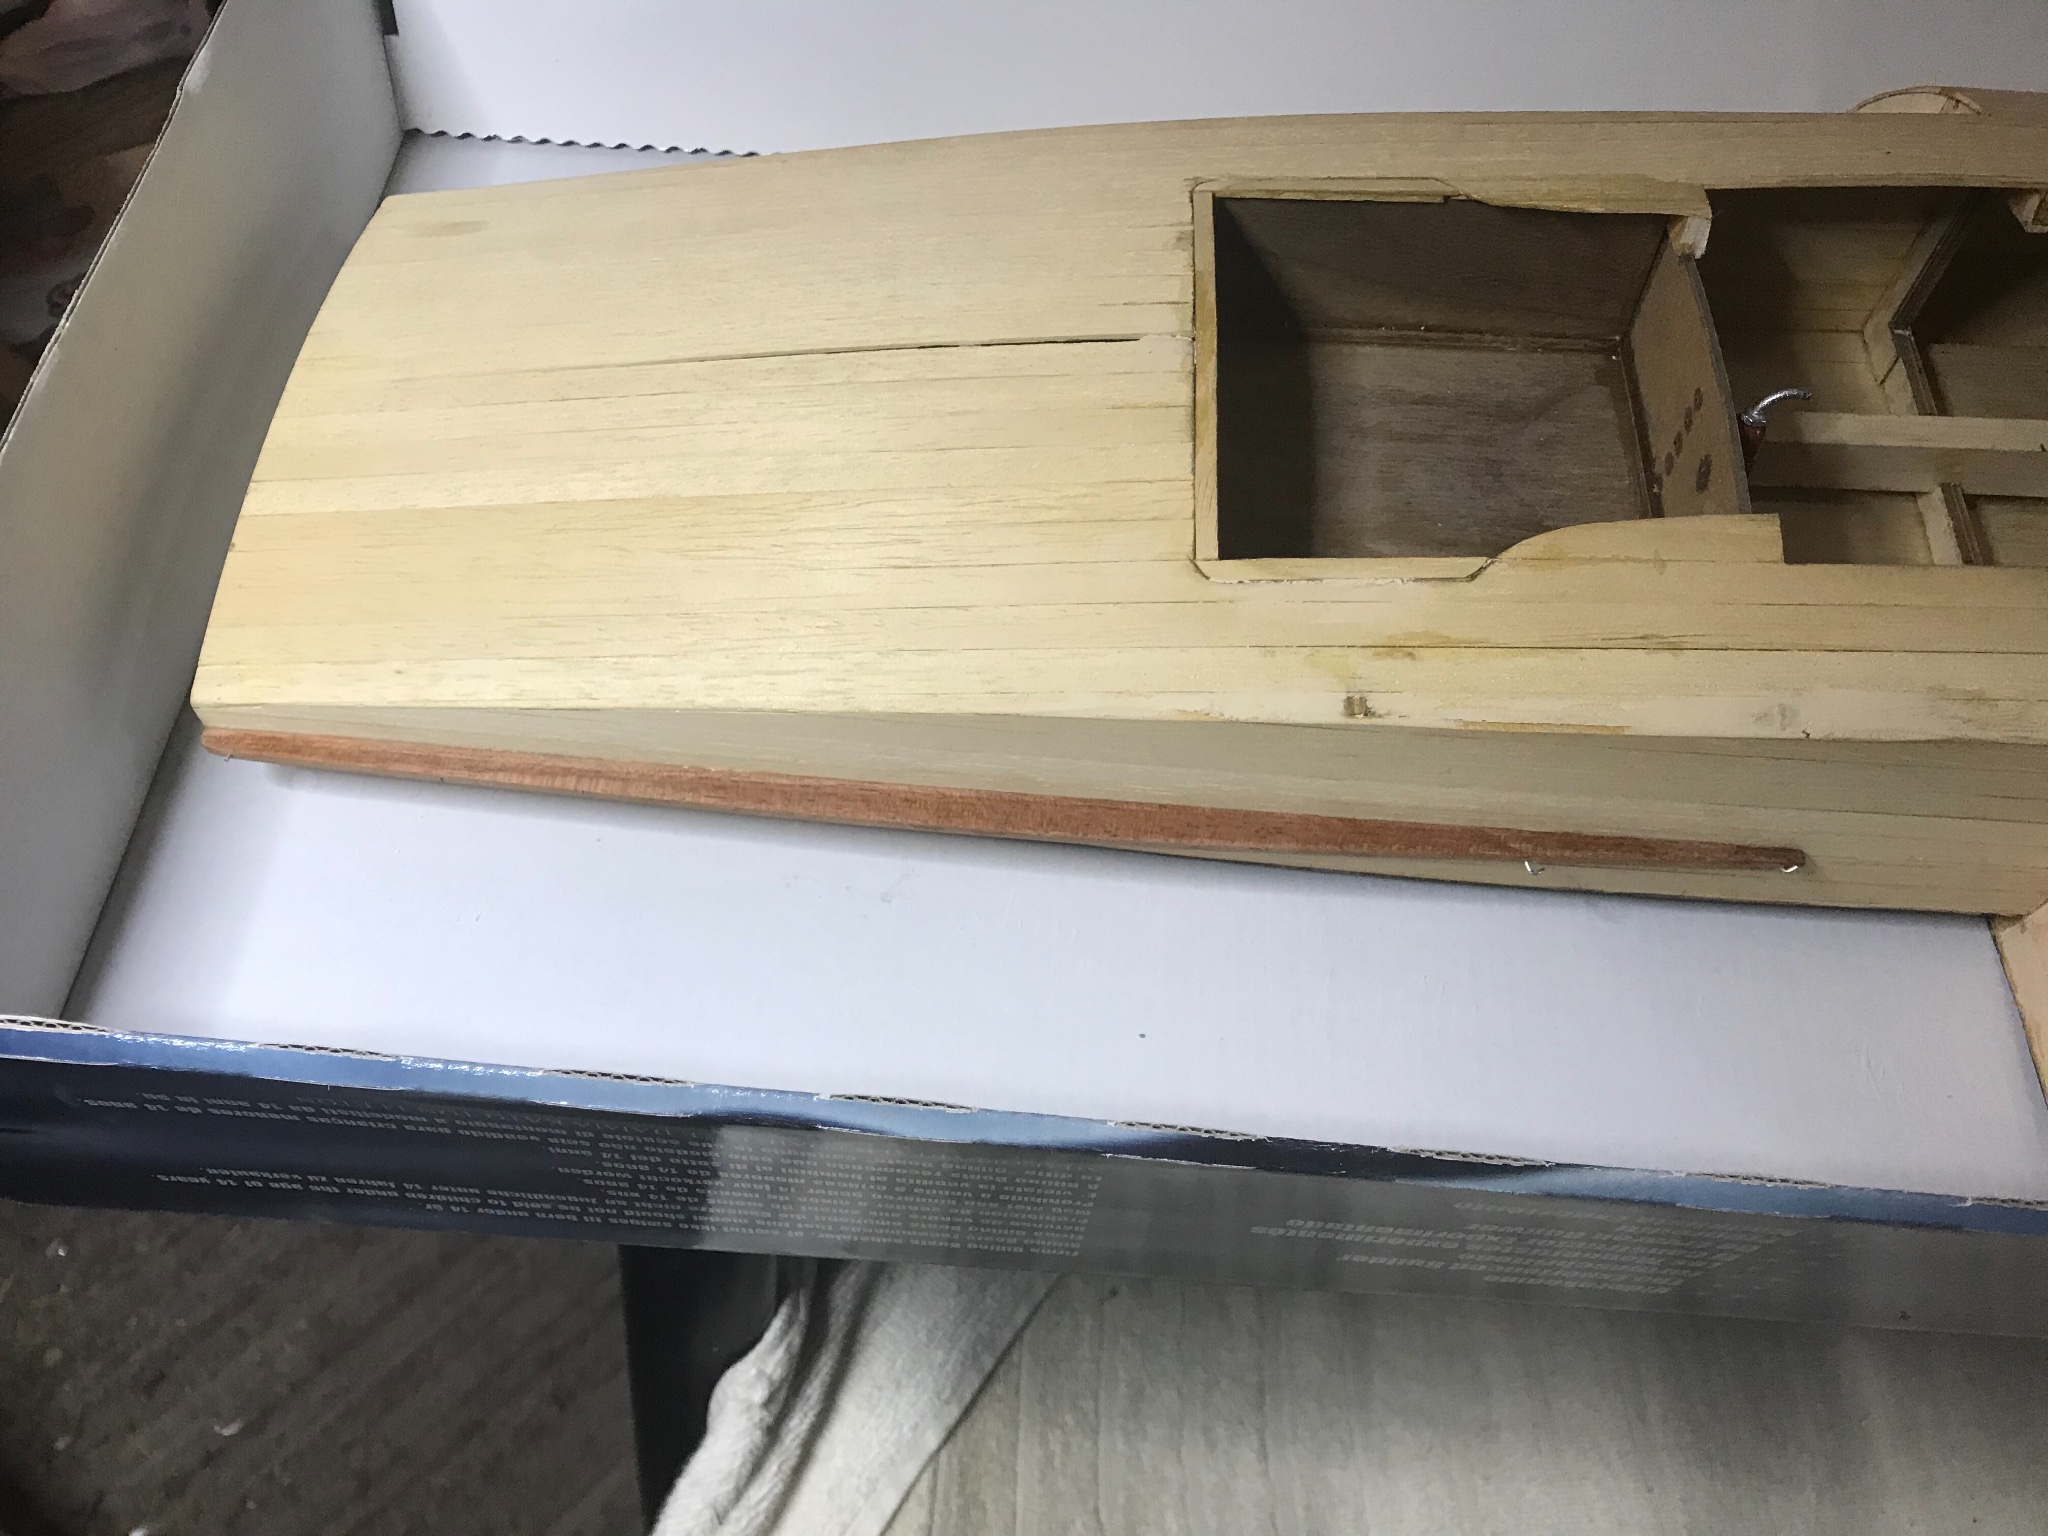
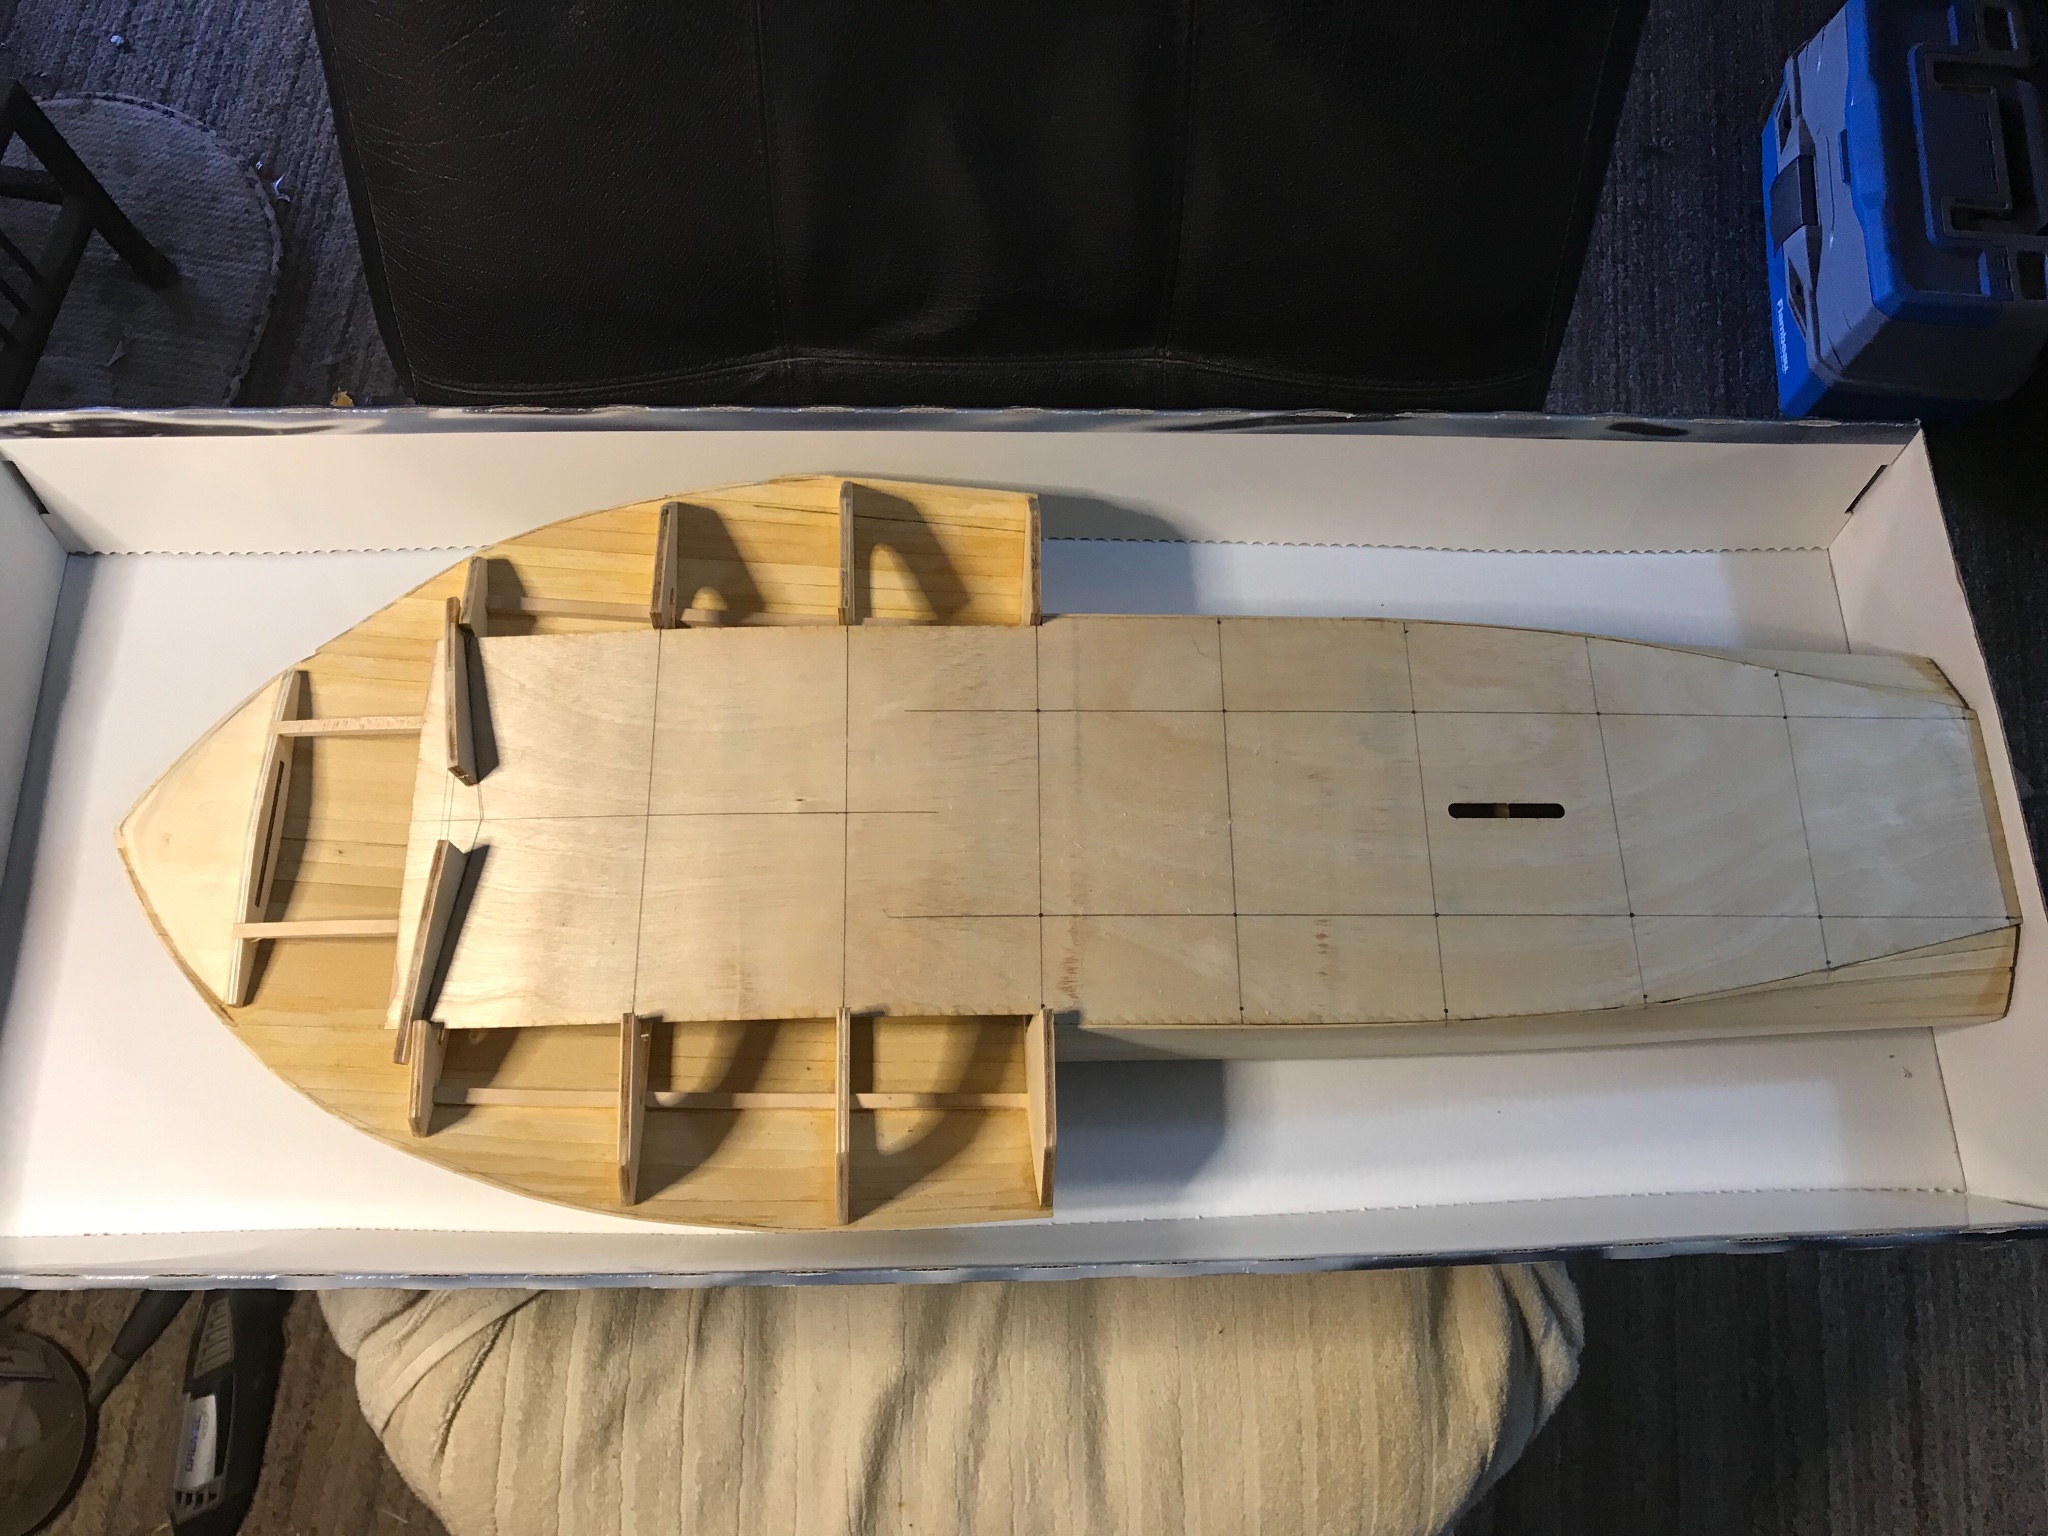
Along with this veneering the edges of the planking, I also began the prep for the three major components that I need to make.
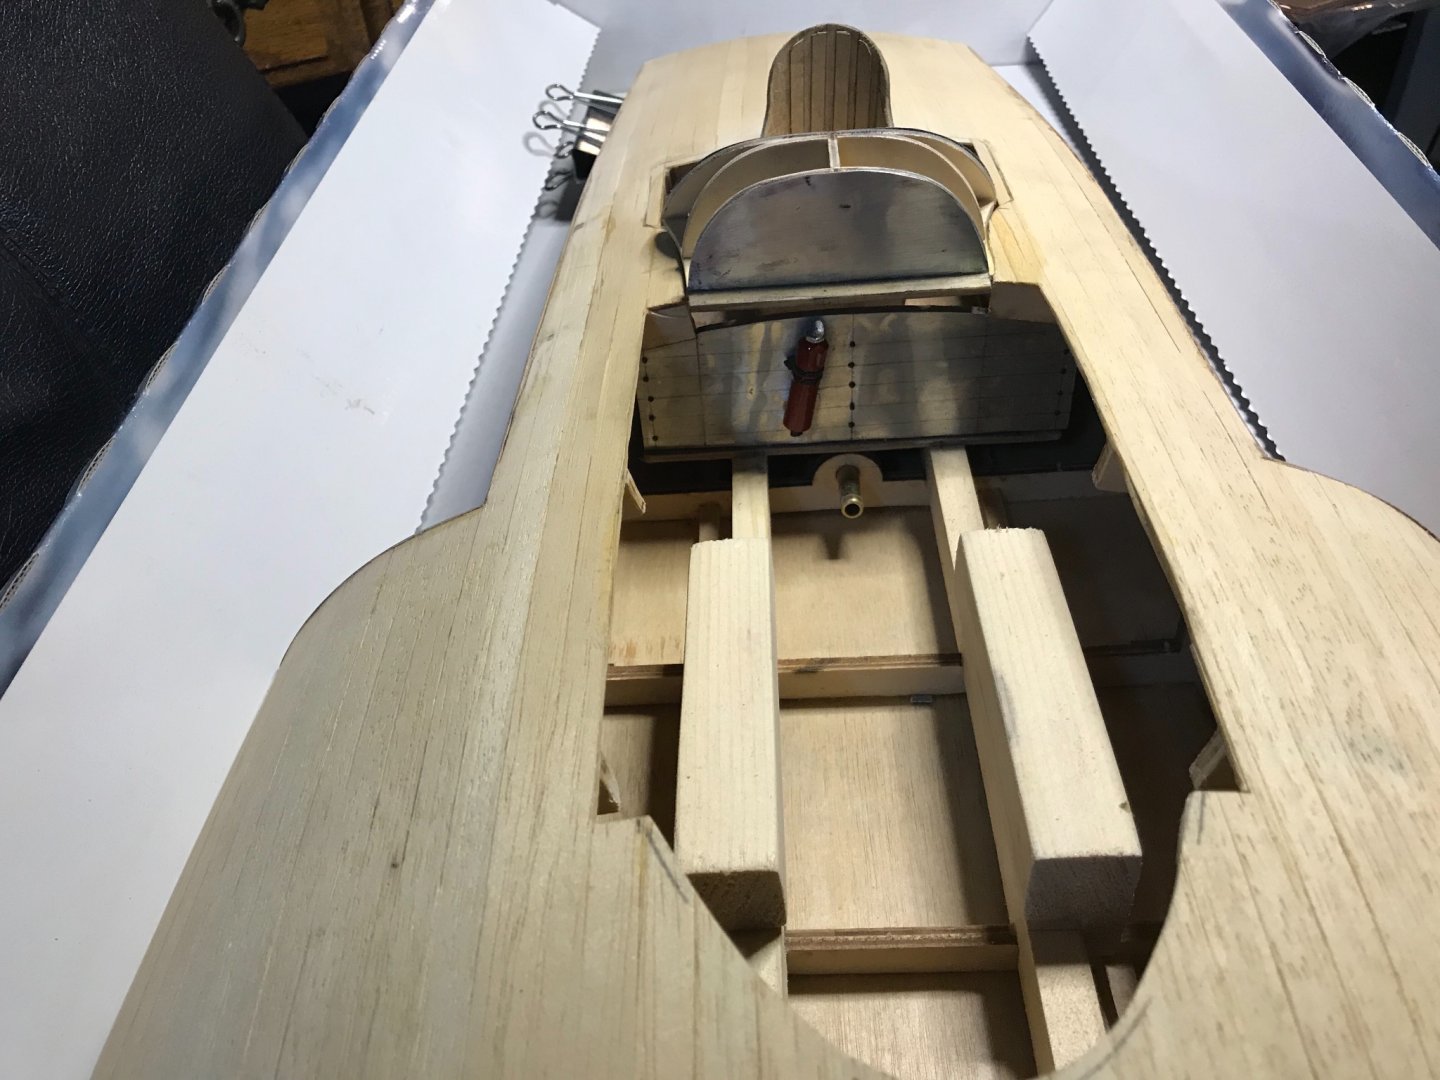
I have the cockpit as small as I dare make it, because of it not being a part of the kit, I have no idea of how deep to make it.
So now I introduce Lou to you all.
Lou will be our next most important piece for the next couple of parts.
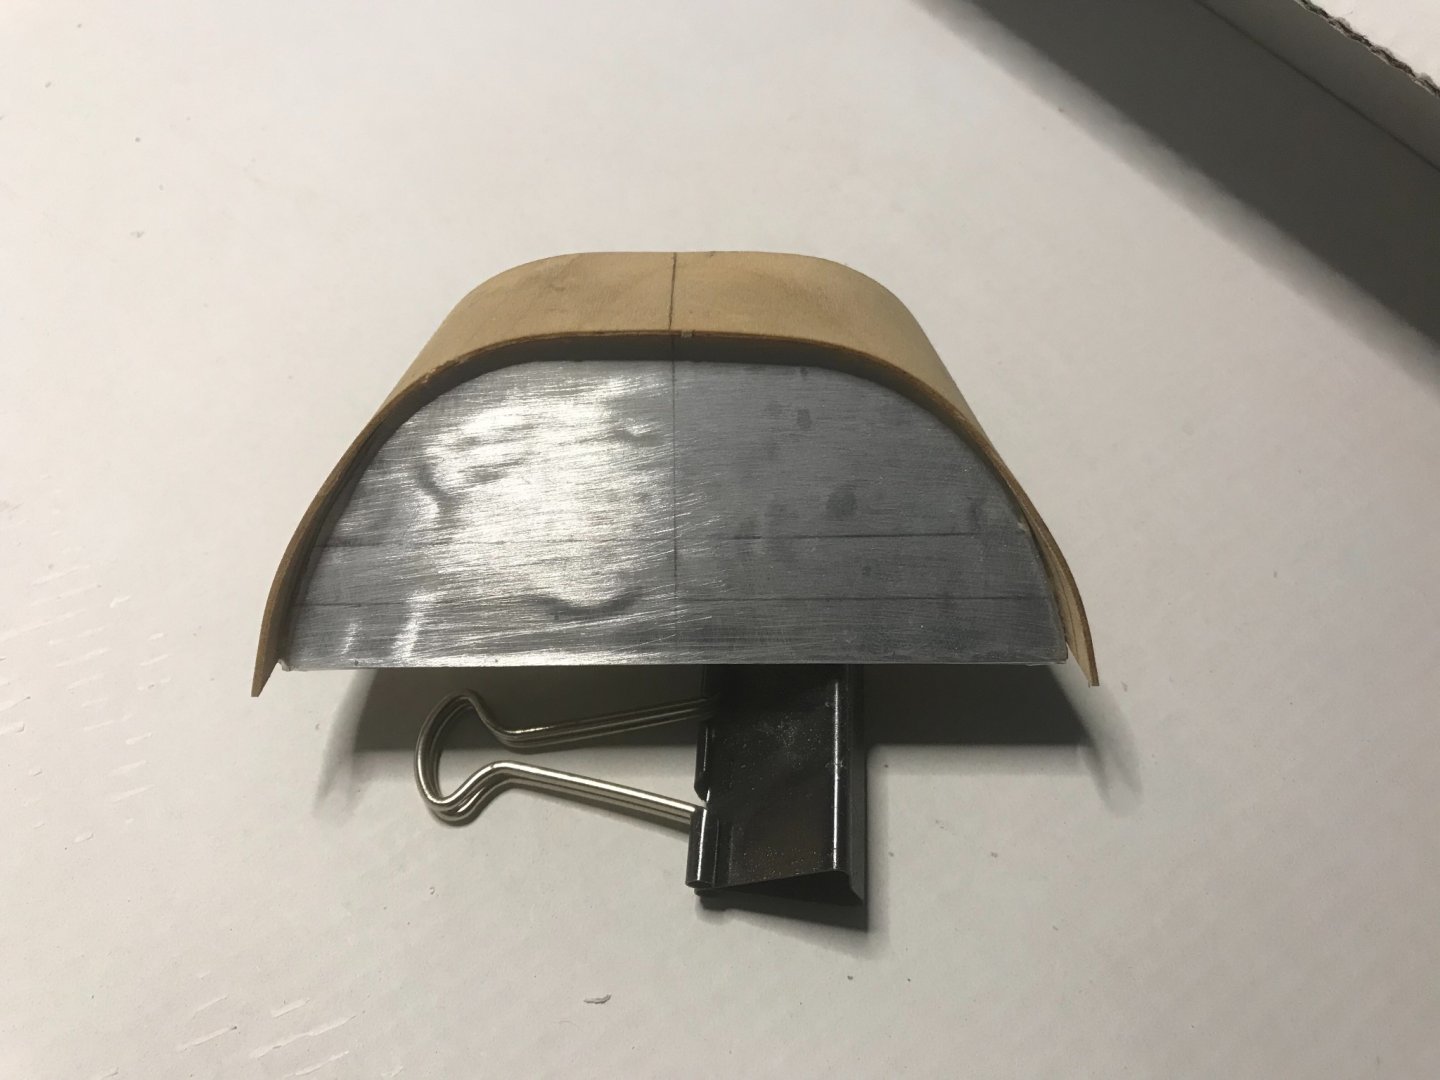
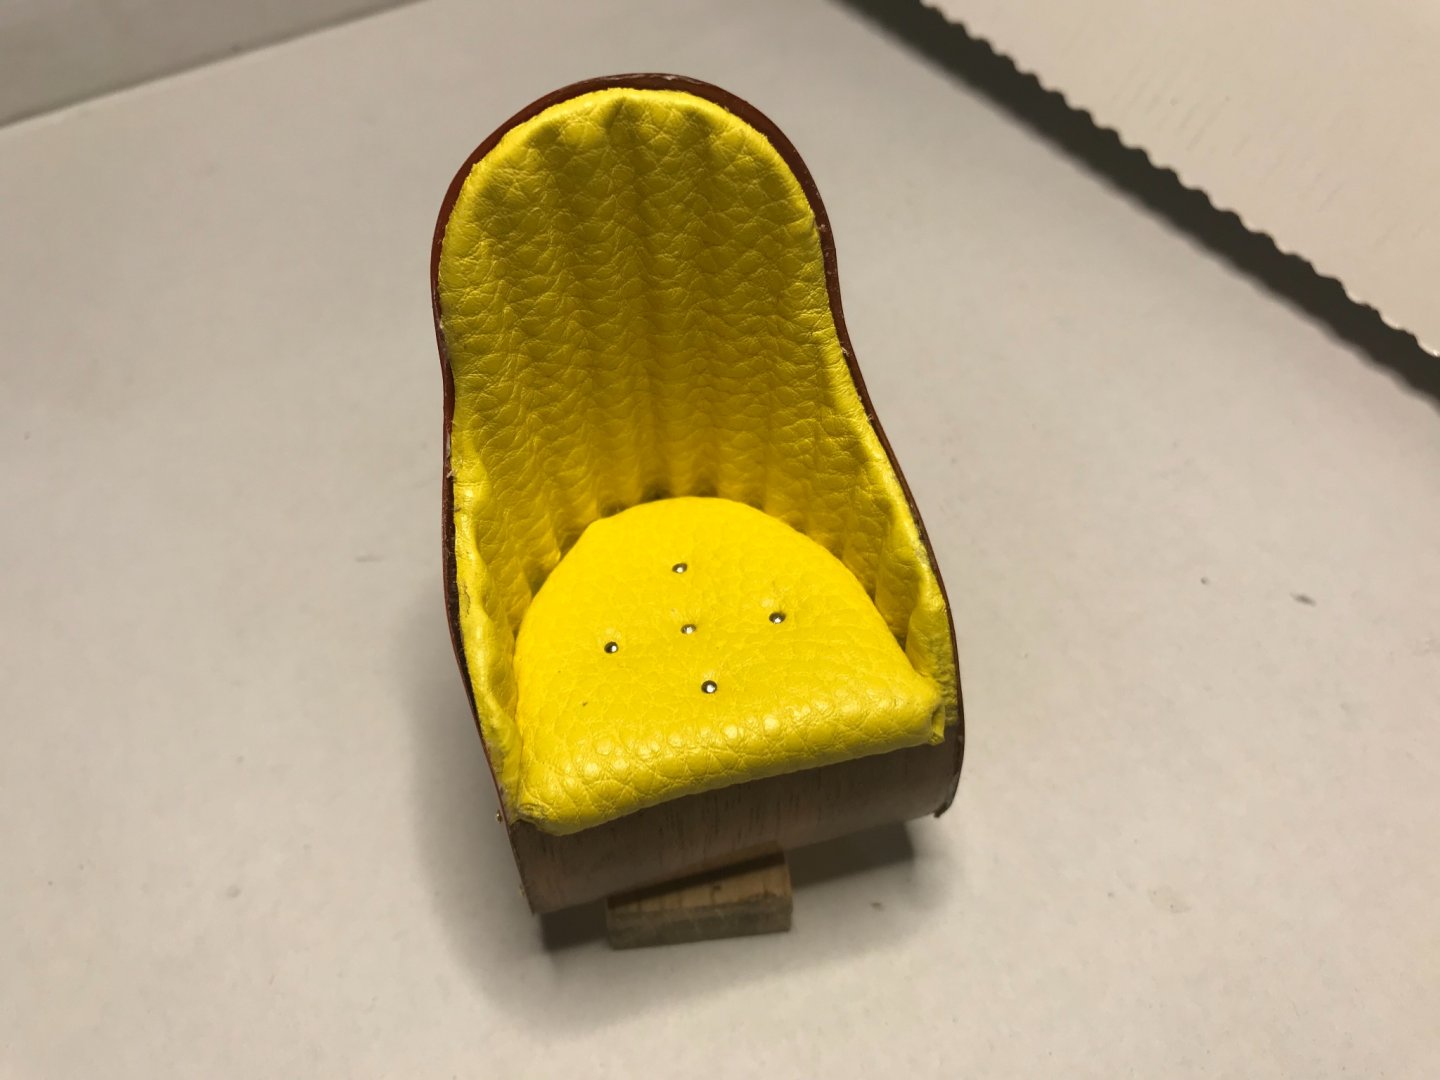
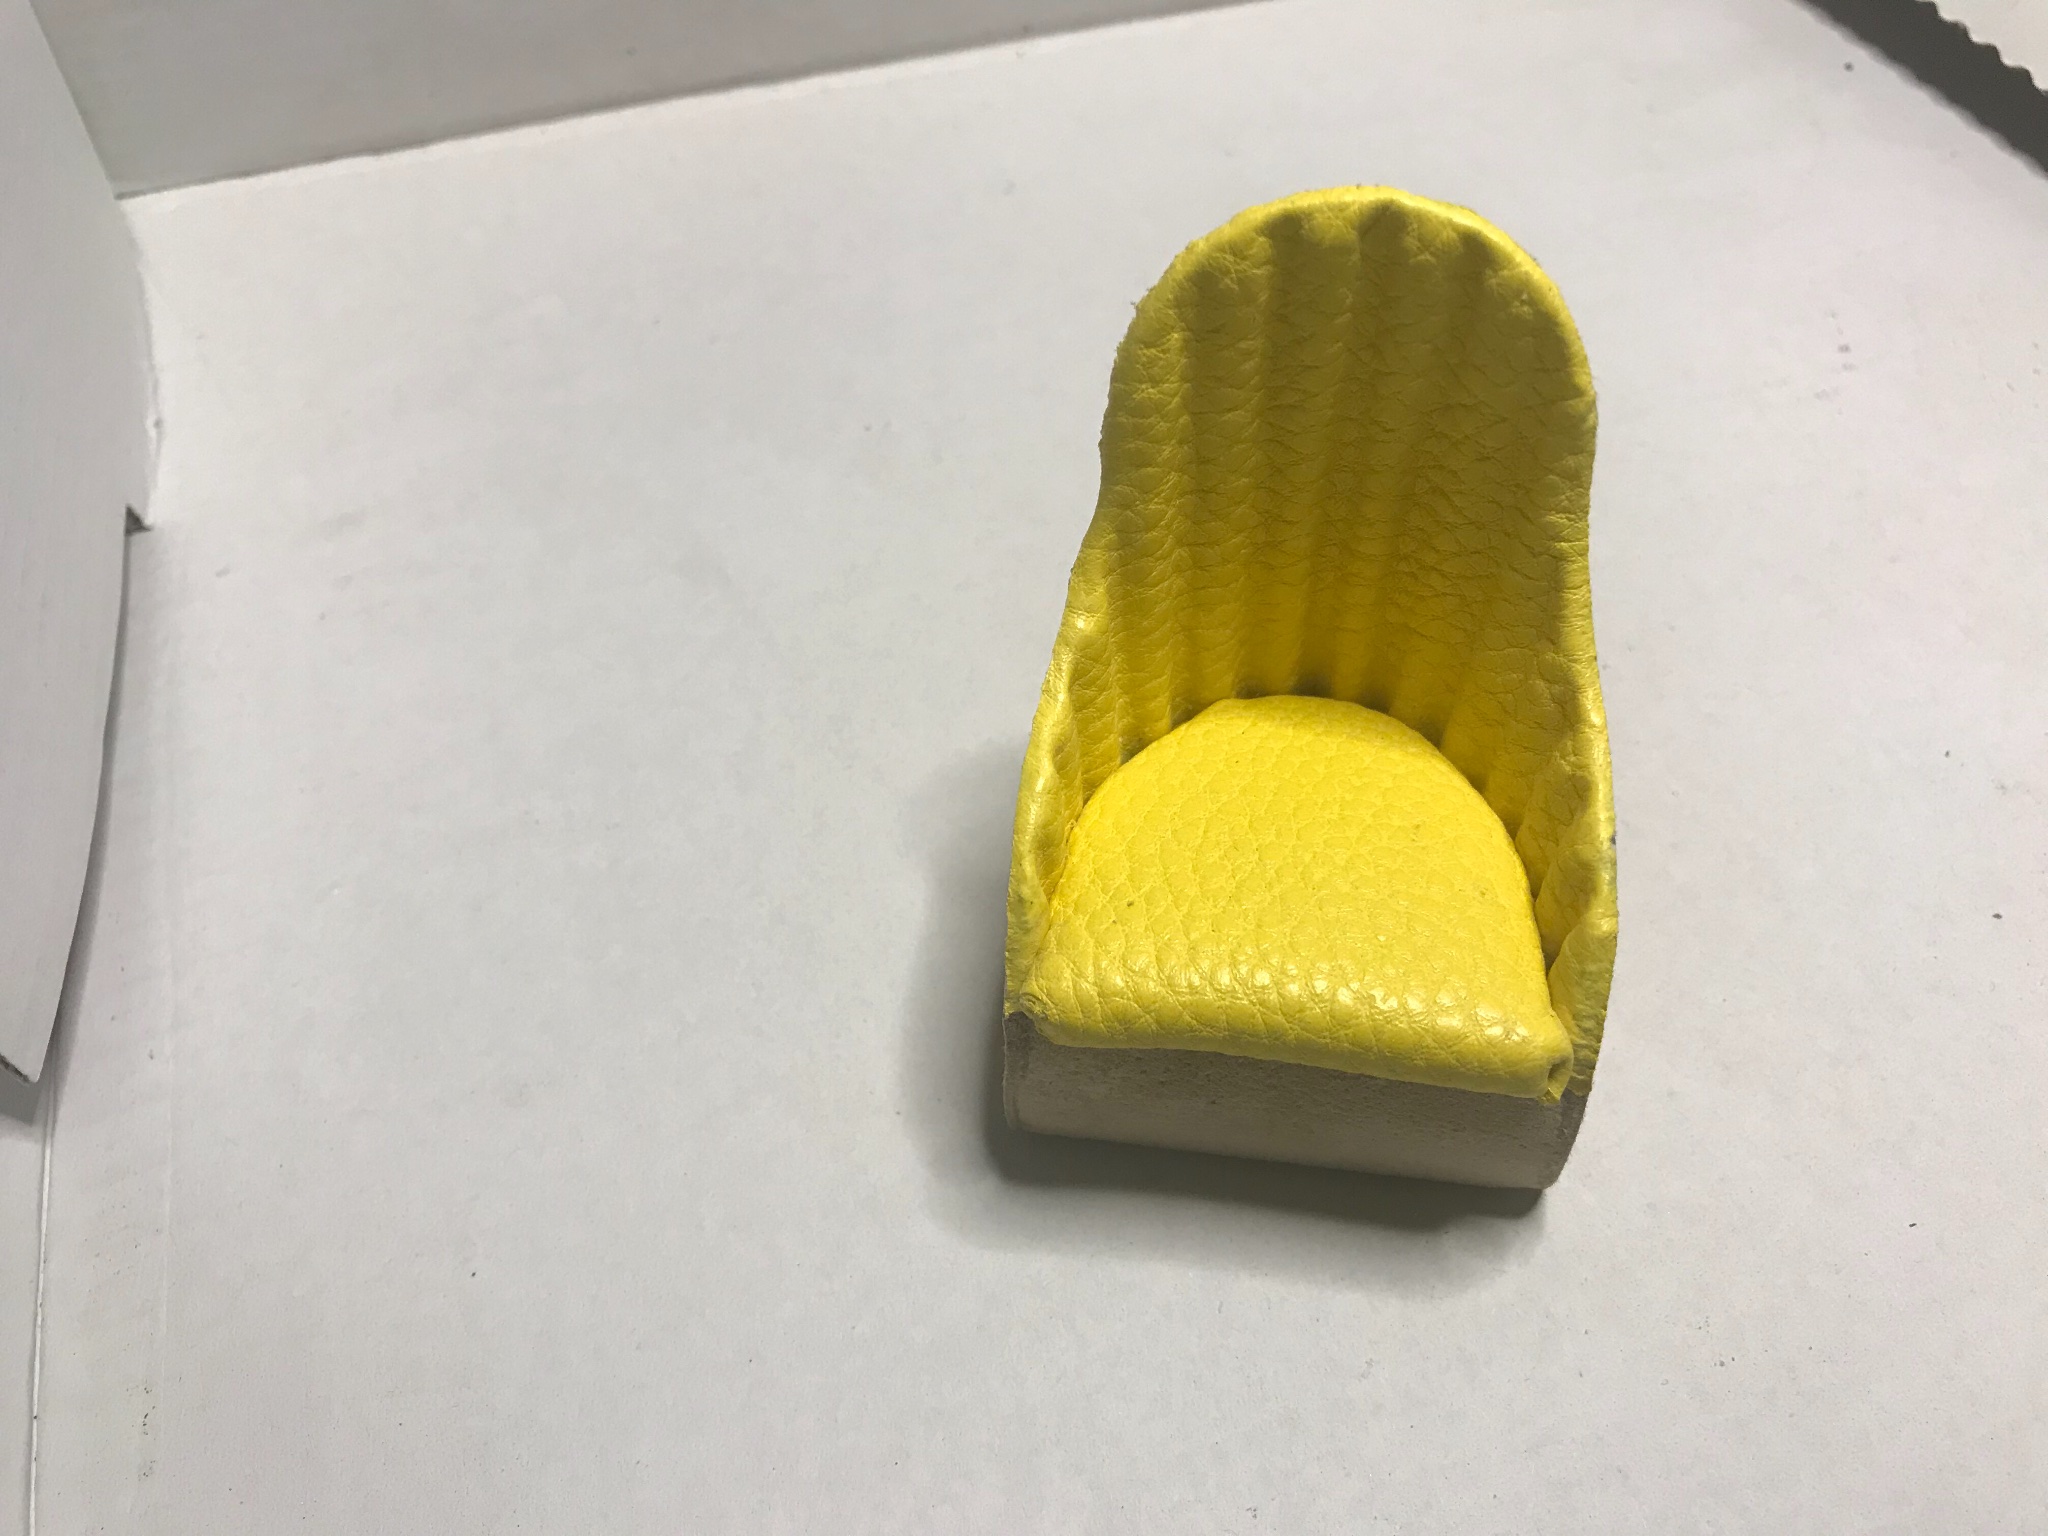
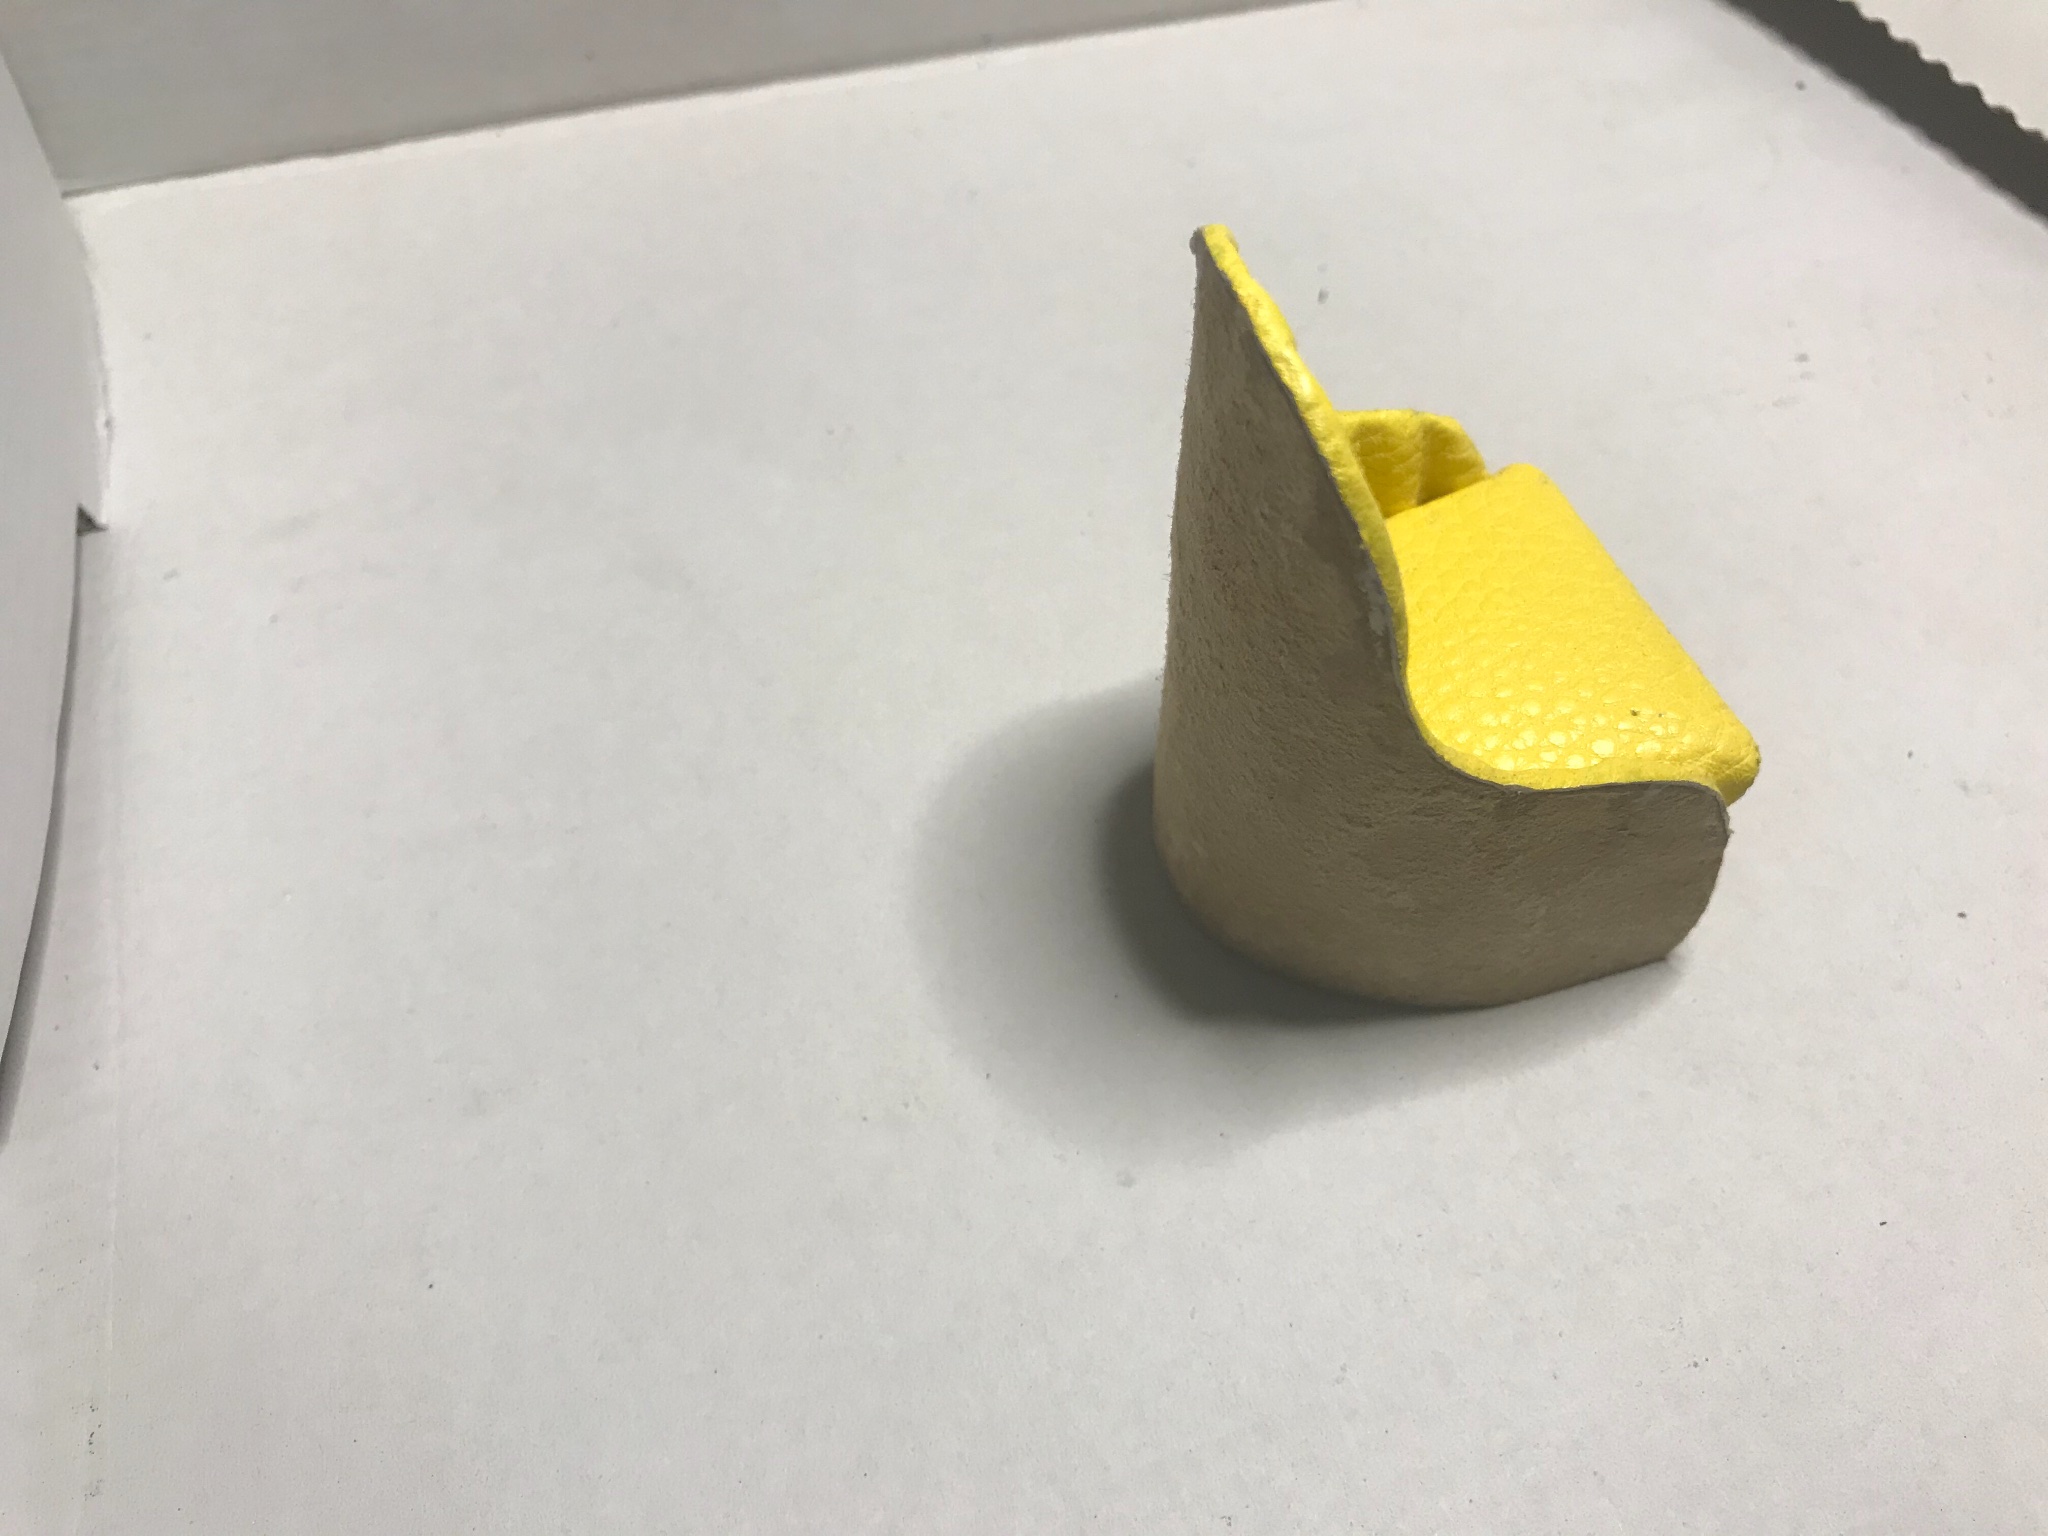
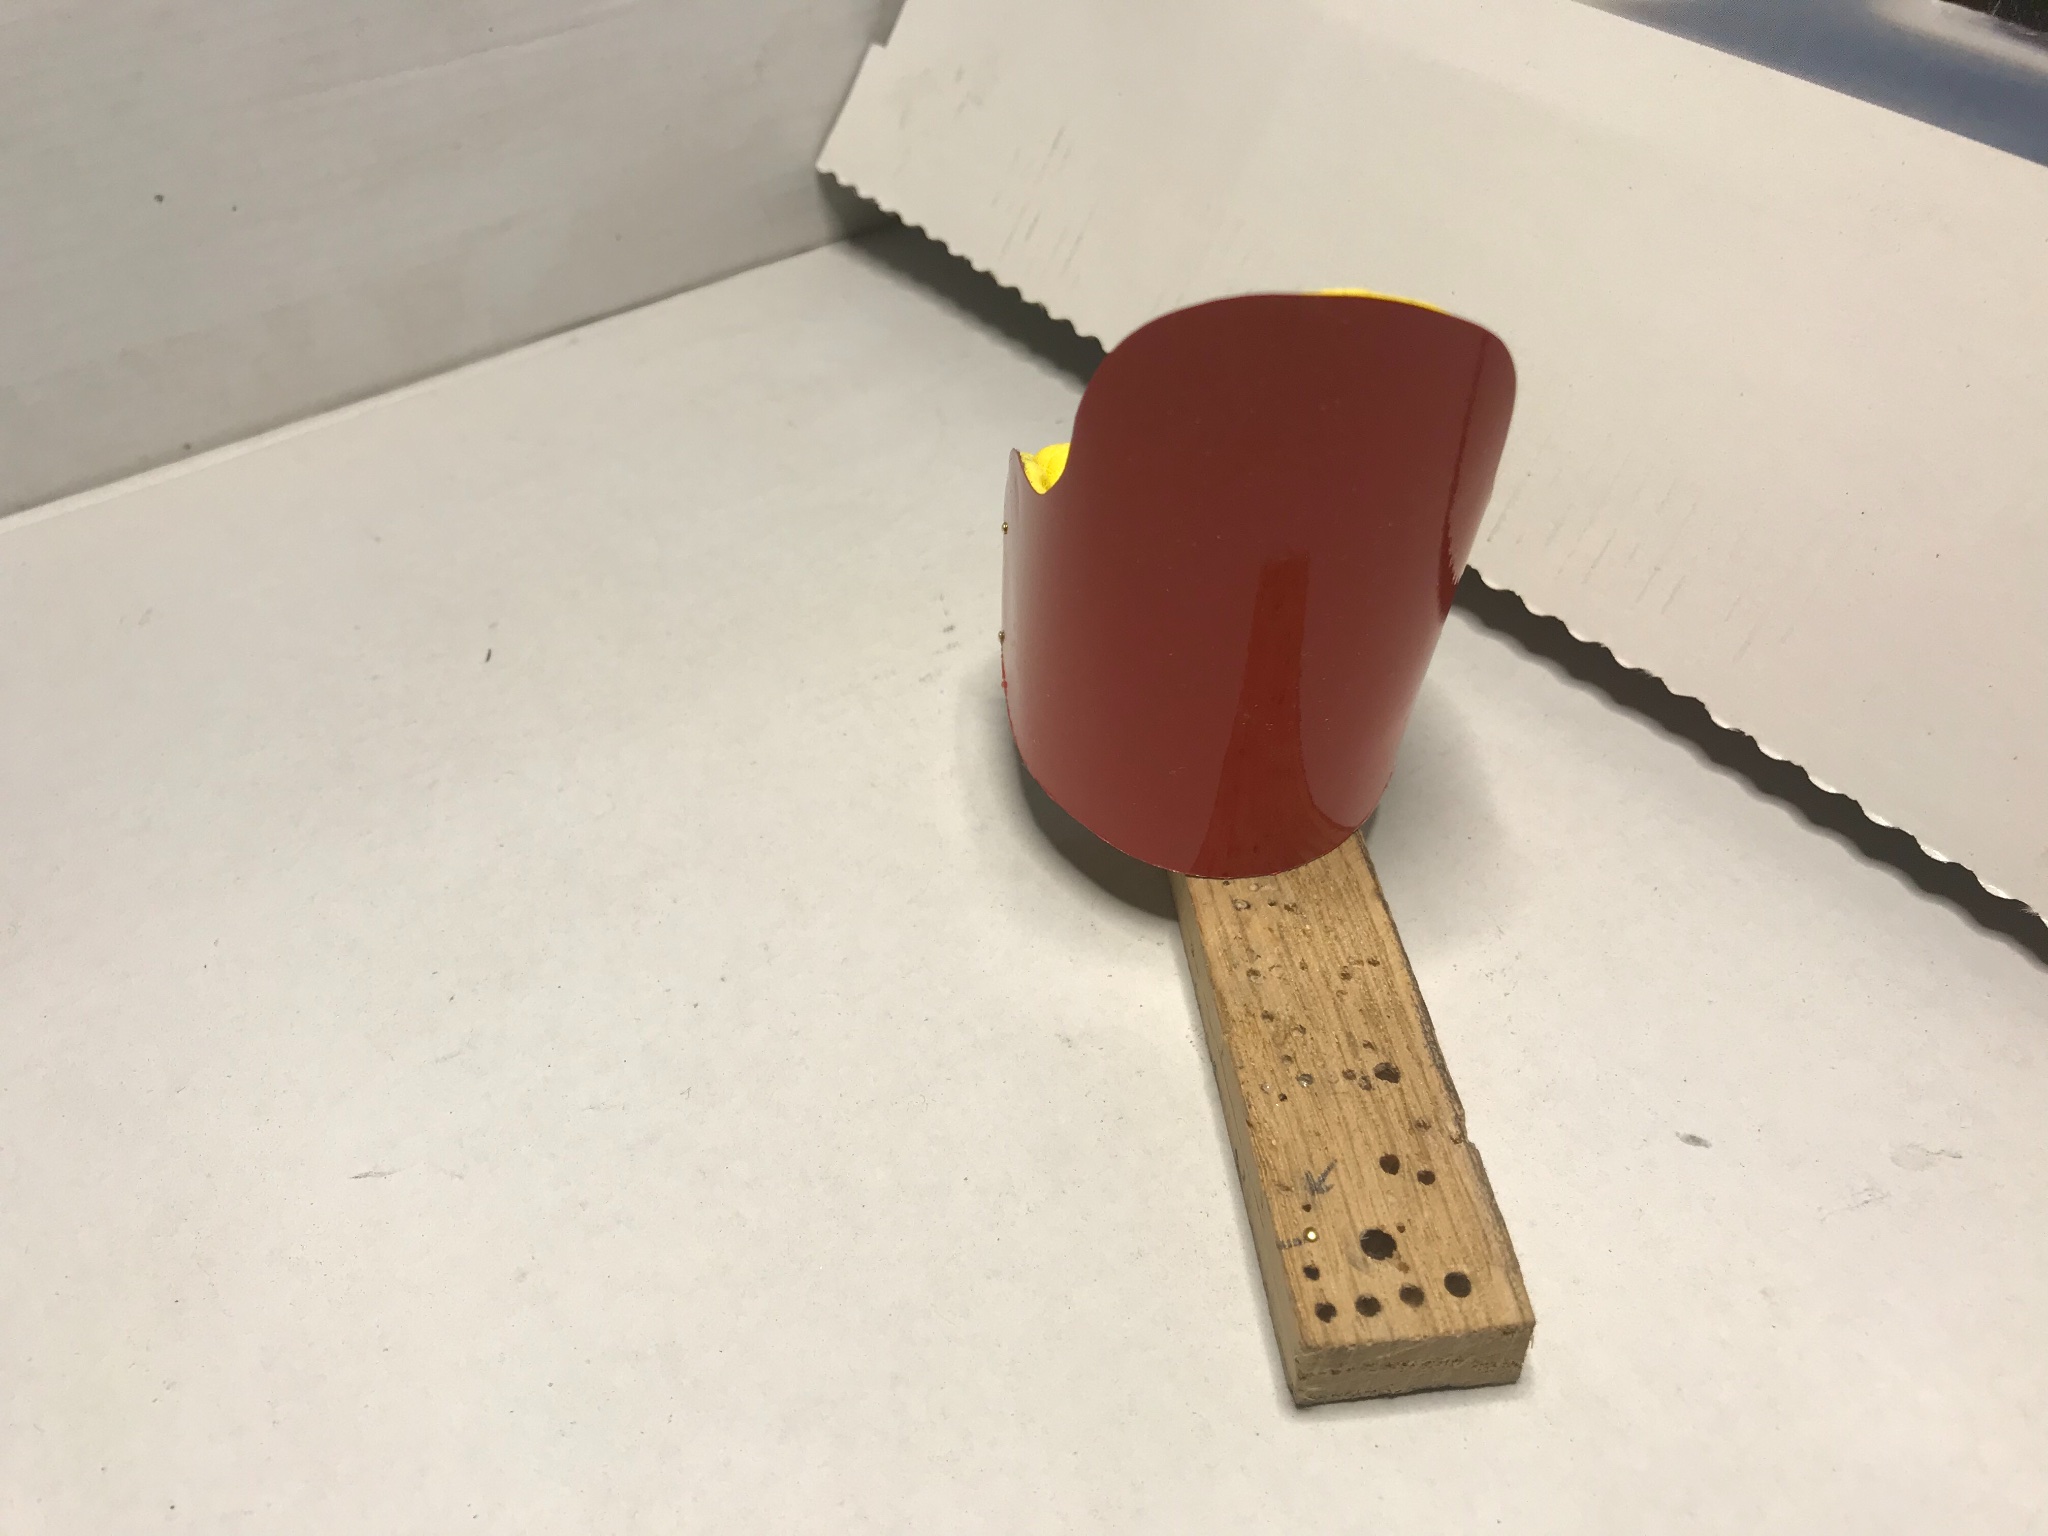
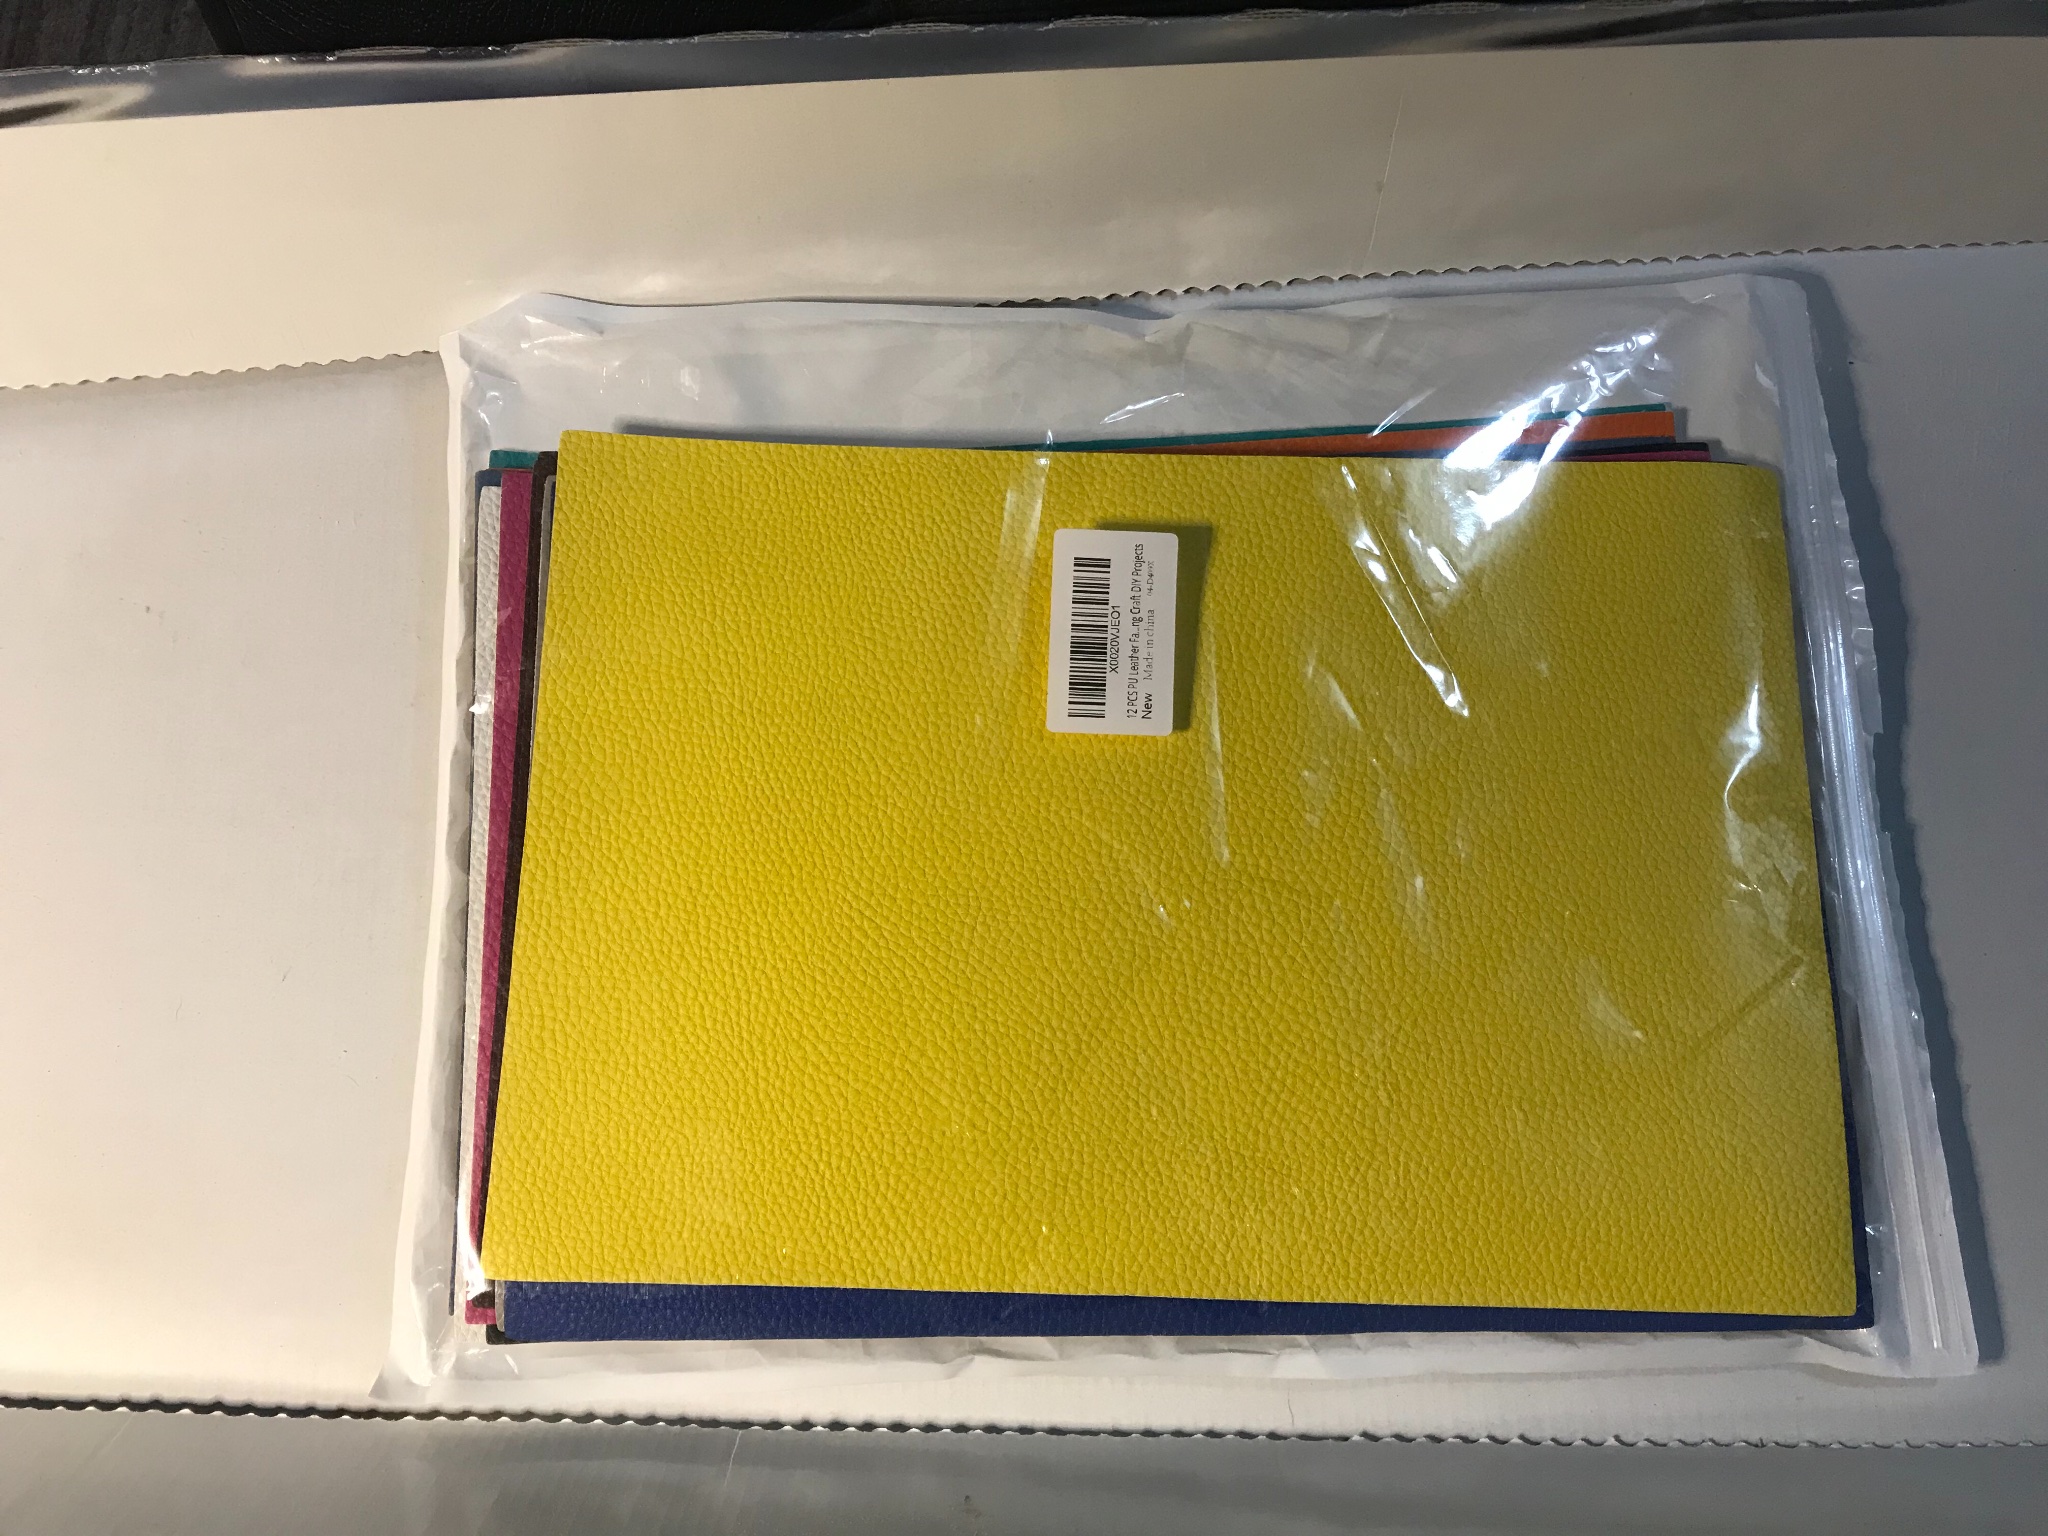
The next part after the cockpit and then the rebuilding of the area around the cockpit is the seat, now I’m not sure what Billing Boats wanted me to attach the seat to, however after getting the seat out I realized that it has an overall width of 1 inch, in my scale that’s 1 foot wide. I measured my granddaughter’s booster seat, that’s 16 inches wide.
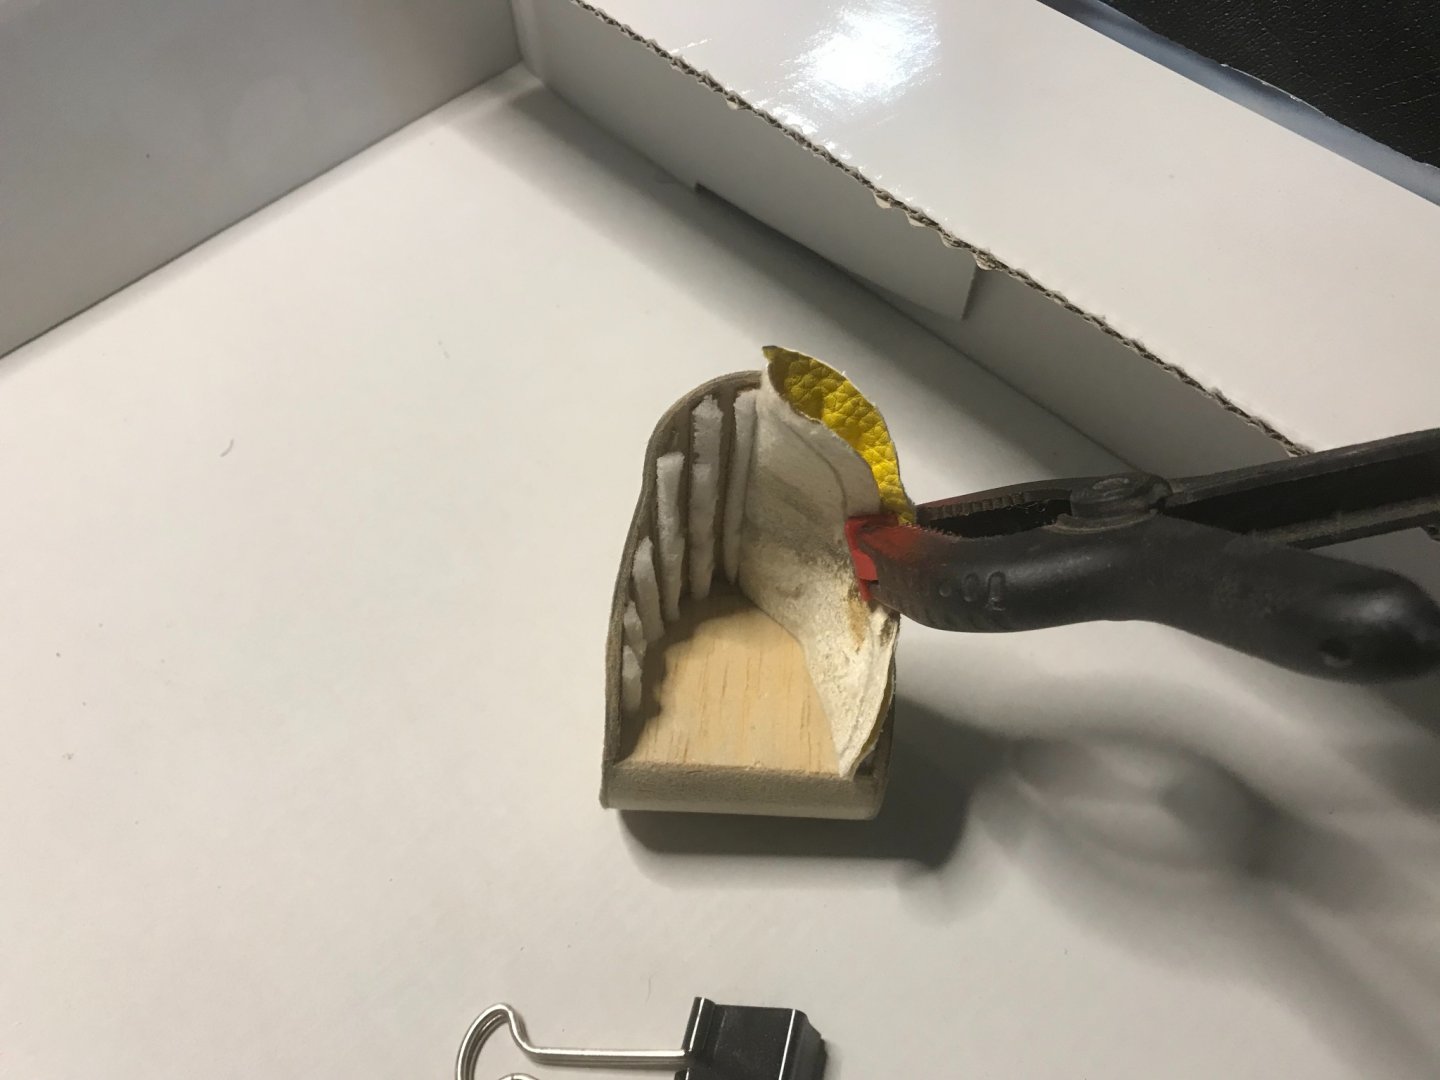
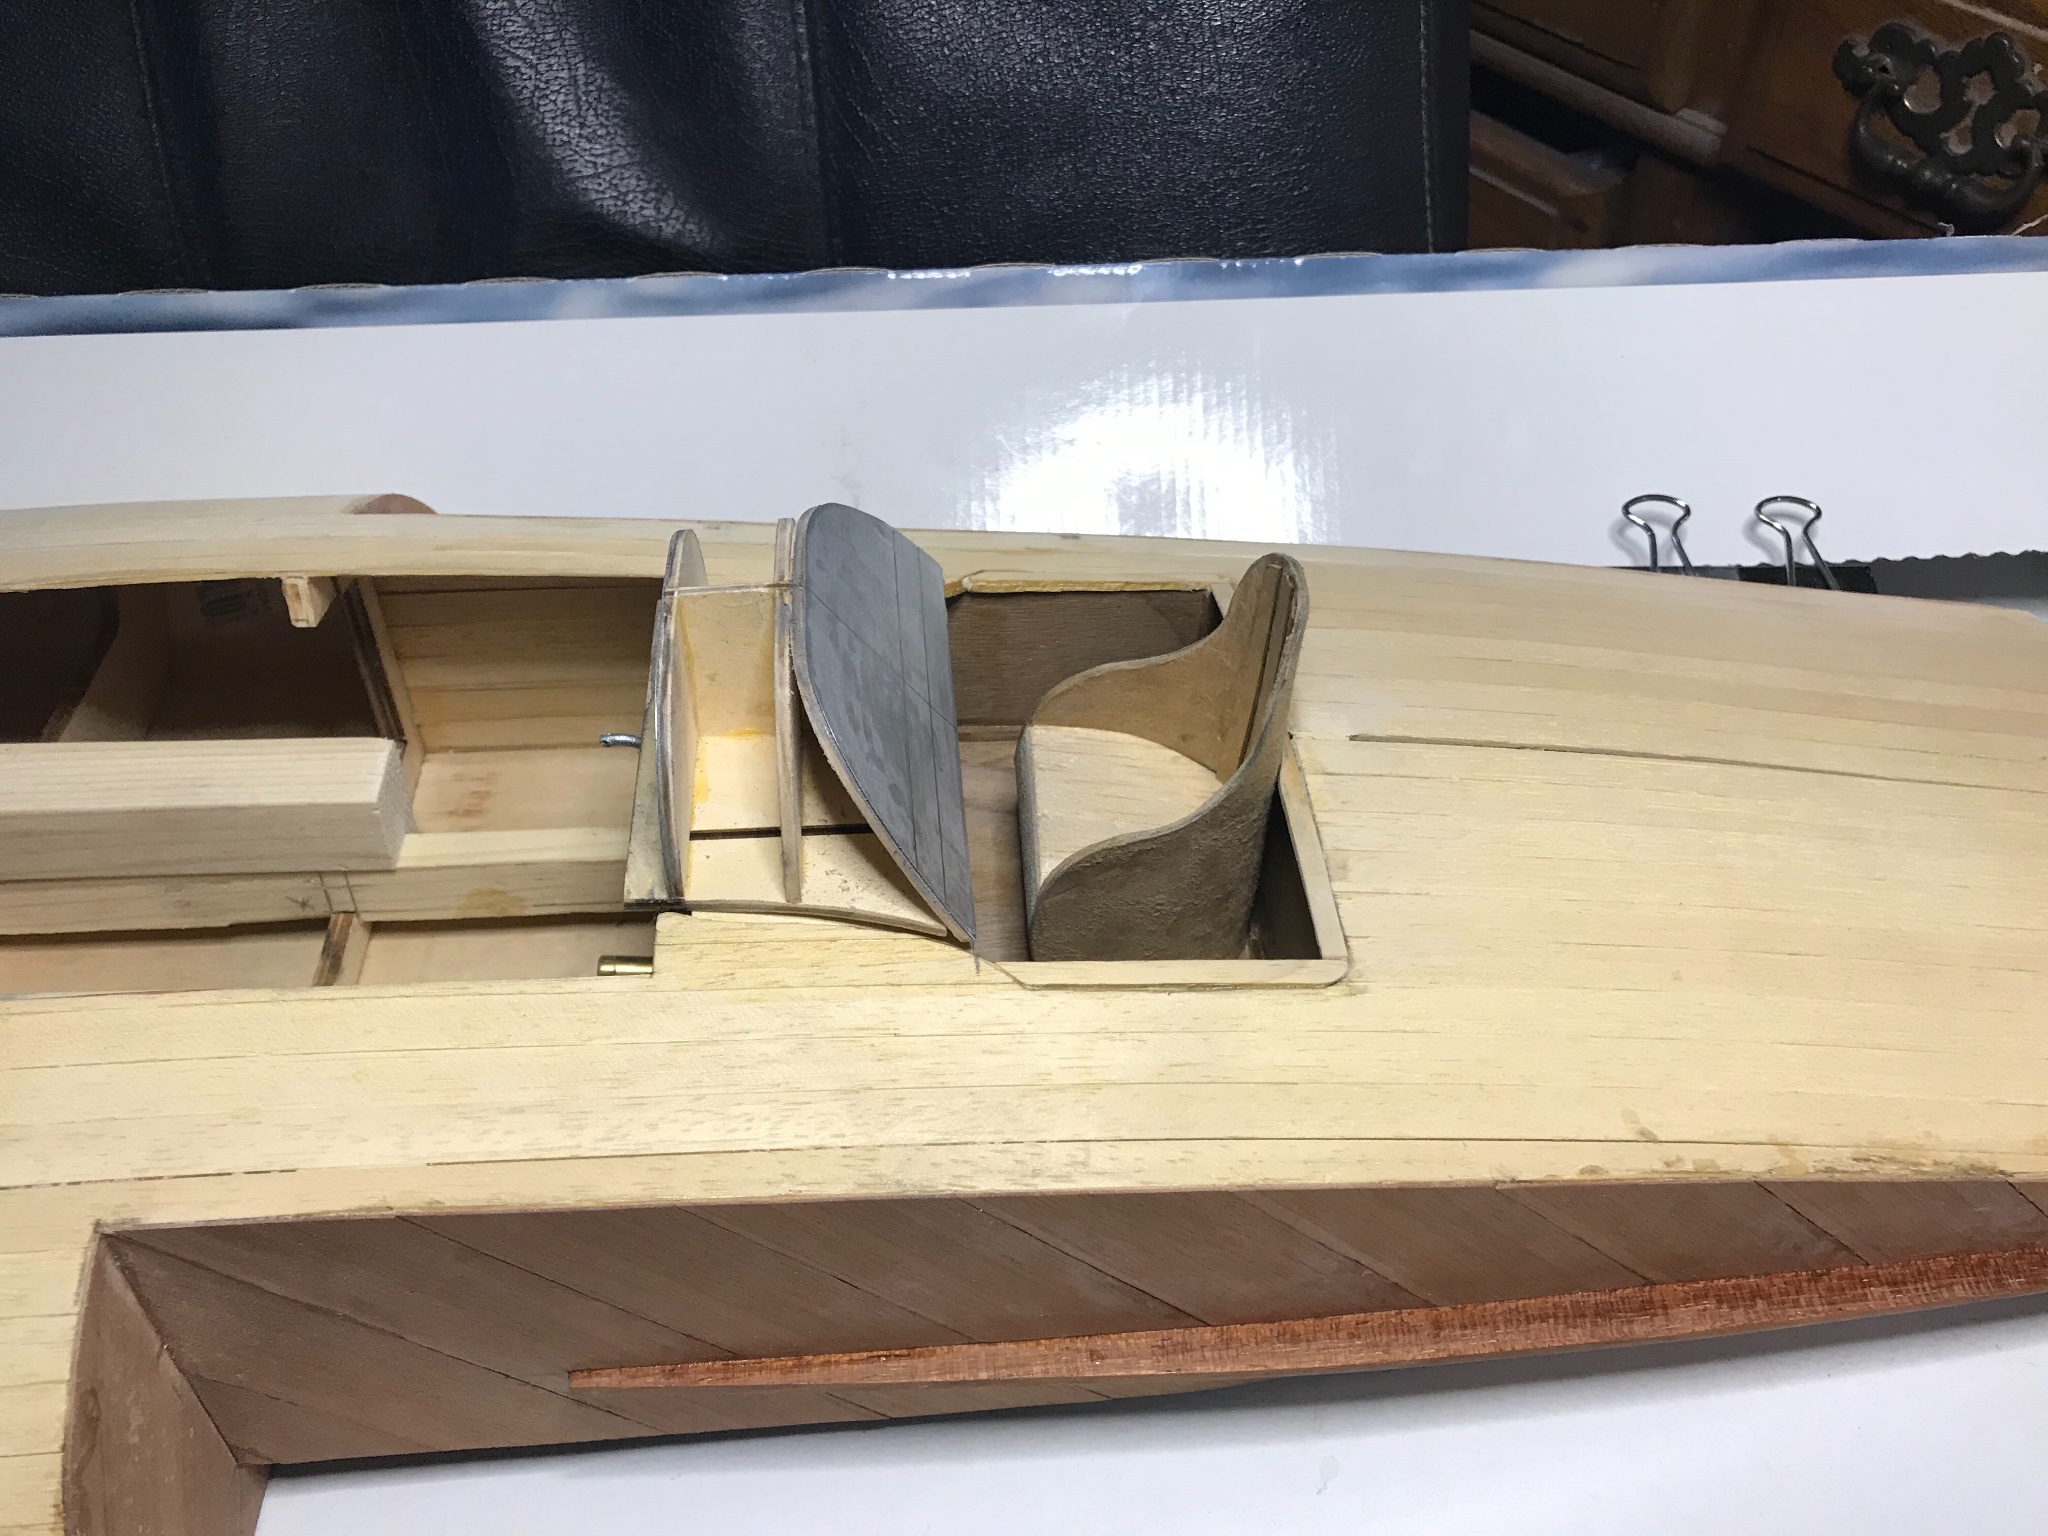
I began by learning about racing seats, at this point in time there was little difference between a race car seat and a bomber seat, besides the pedestal.I used the balsa from the Motorlogger, to copy the seat, I only made the profile allowing the seat to be a bit wider.
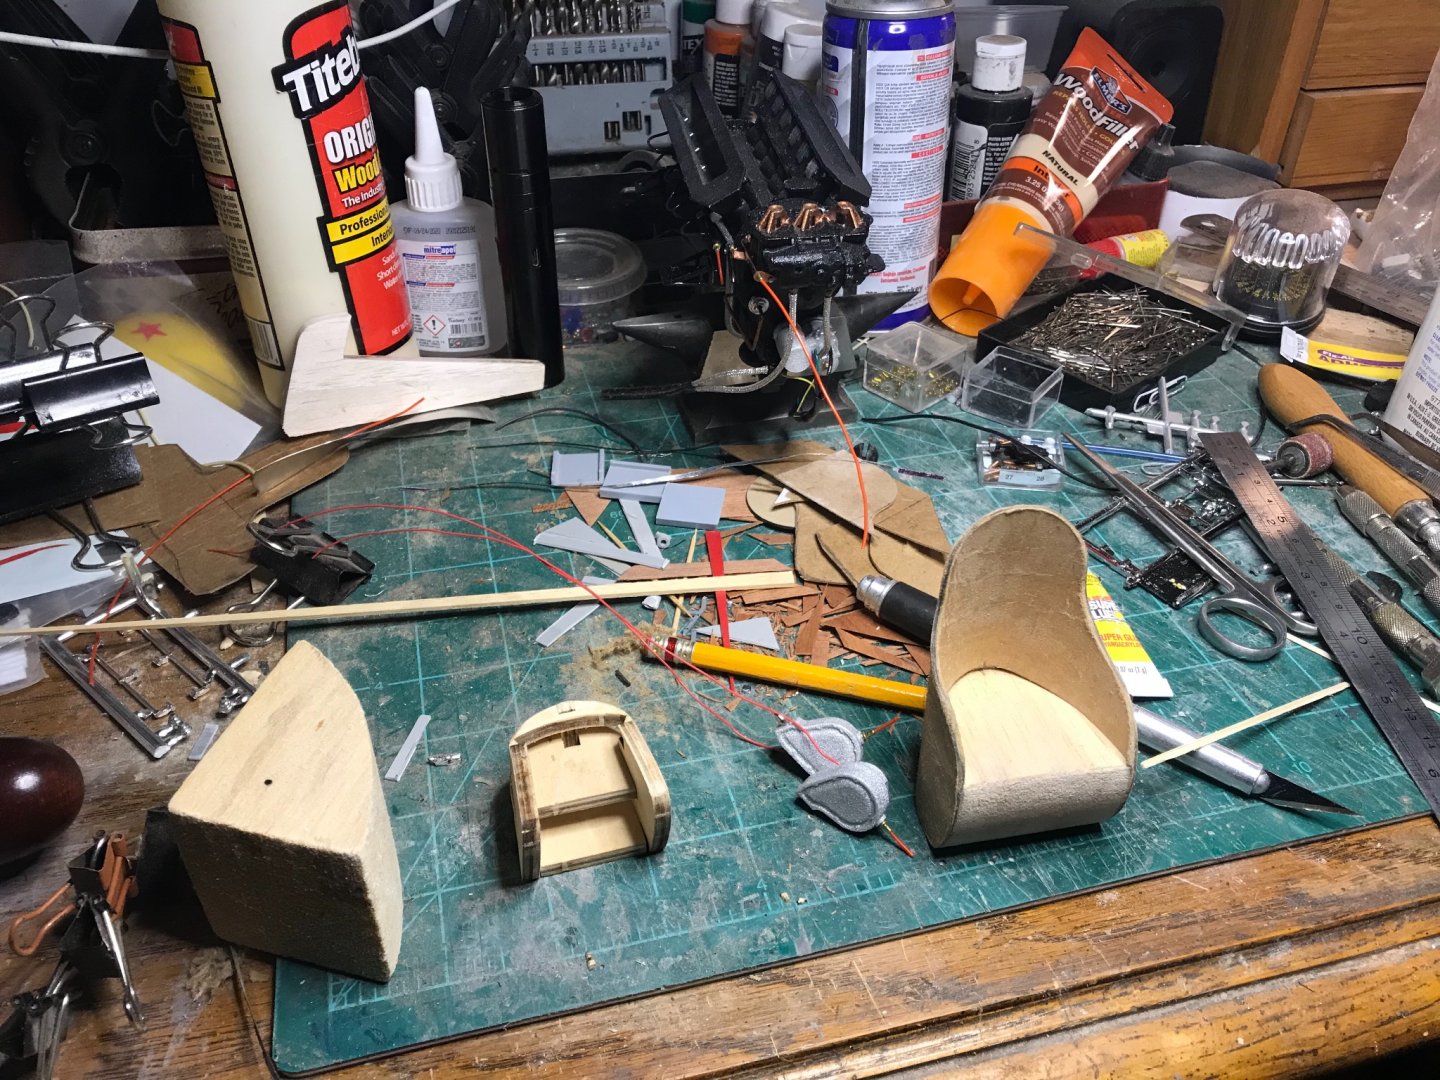
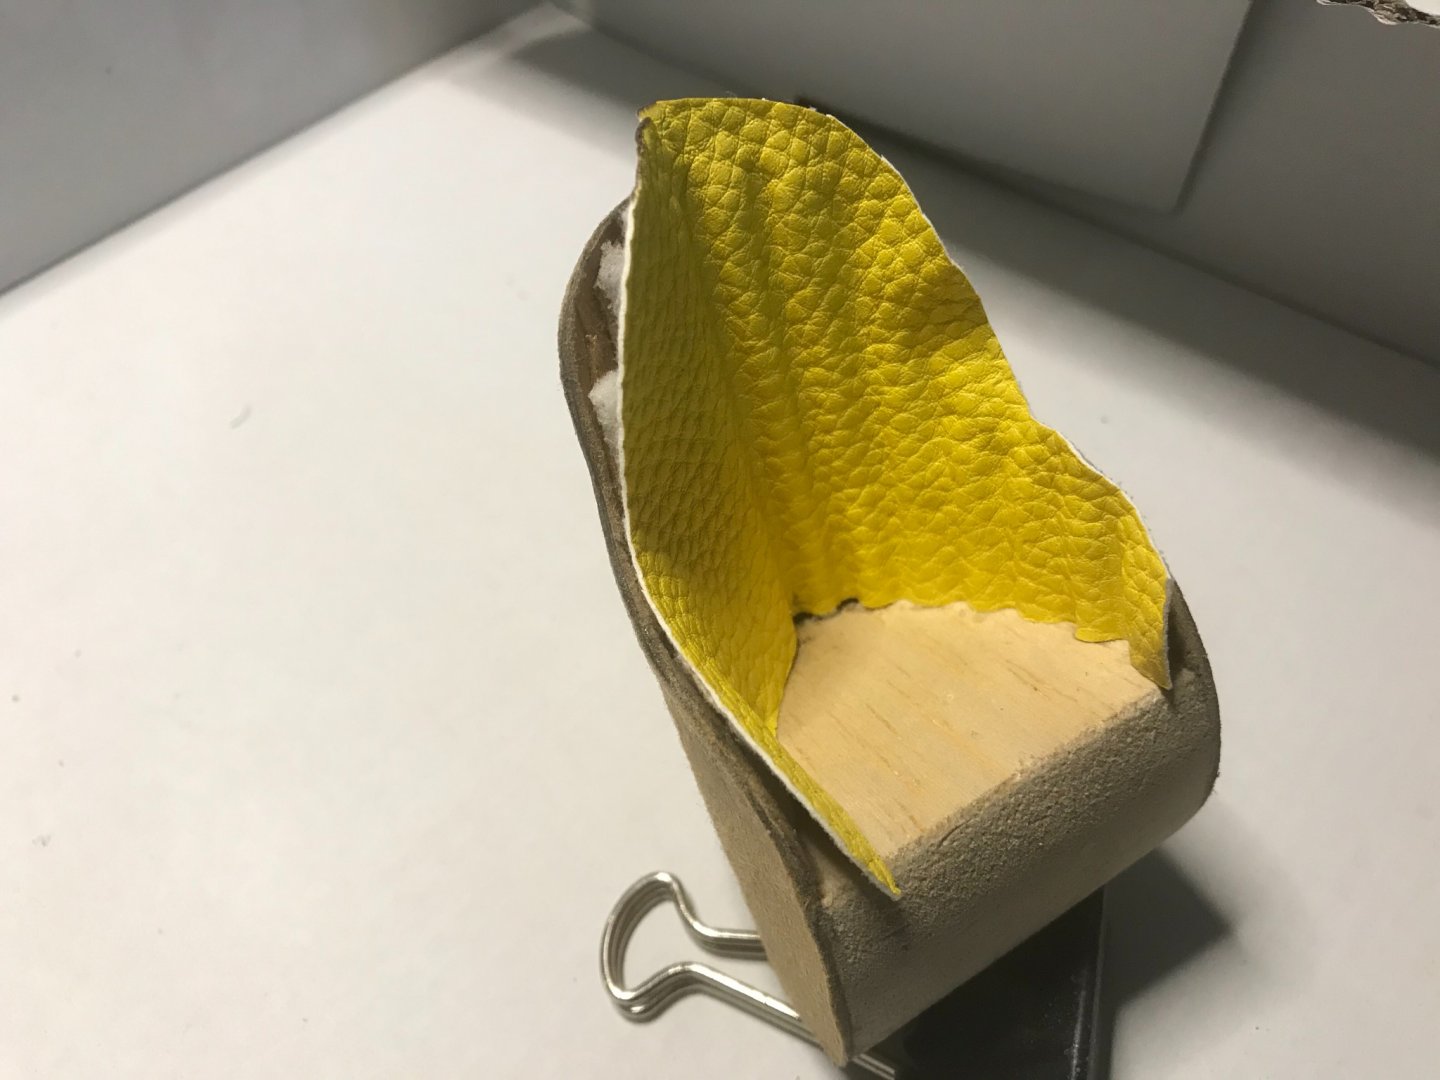
then using cardboard I began wrapping the seat, after several attempts I had the basic height and overall width I needed for Lou to be somewhat secure, I’ll get to this a bit later, and safe at 170mph.
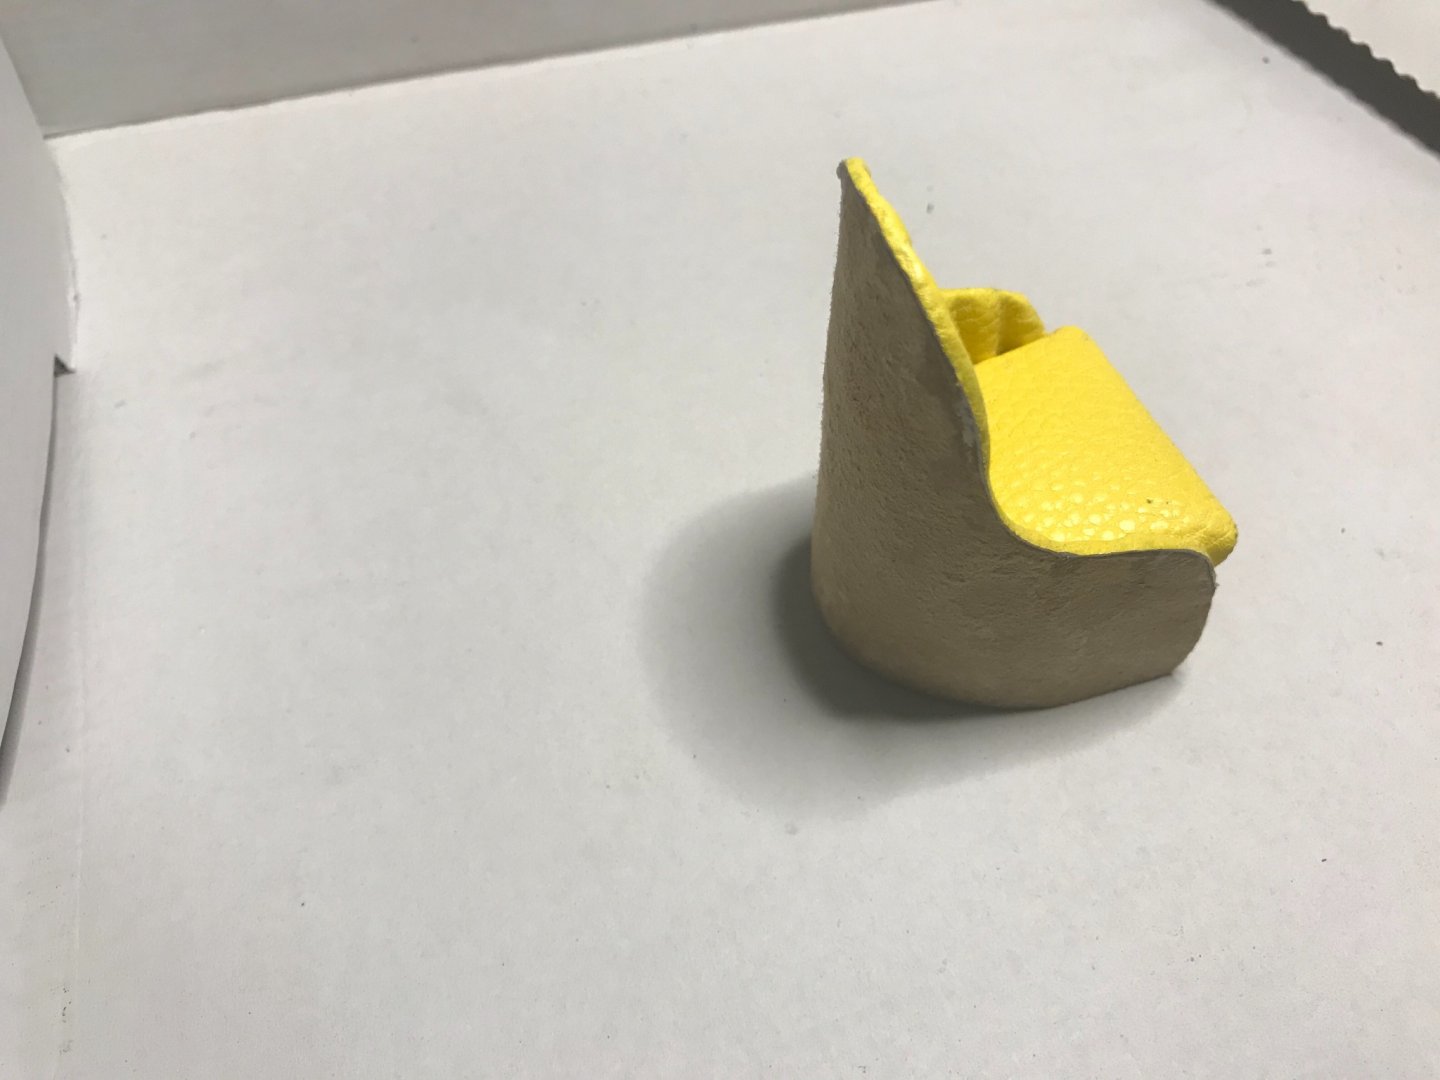
The fake leather worked out great after I cut all the backing off.
I used thin pieces of cardboard to raise the areas that would appear pleated, and a Magic Eraser for the padding, I like the magic erasers because of how the cut and squish.
Crazy glue is holding the bulk of the seat together, could not use staples on this one.
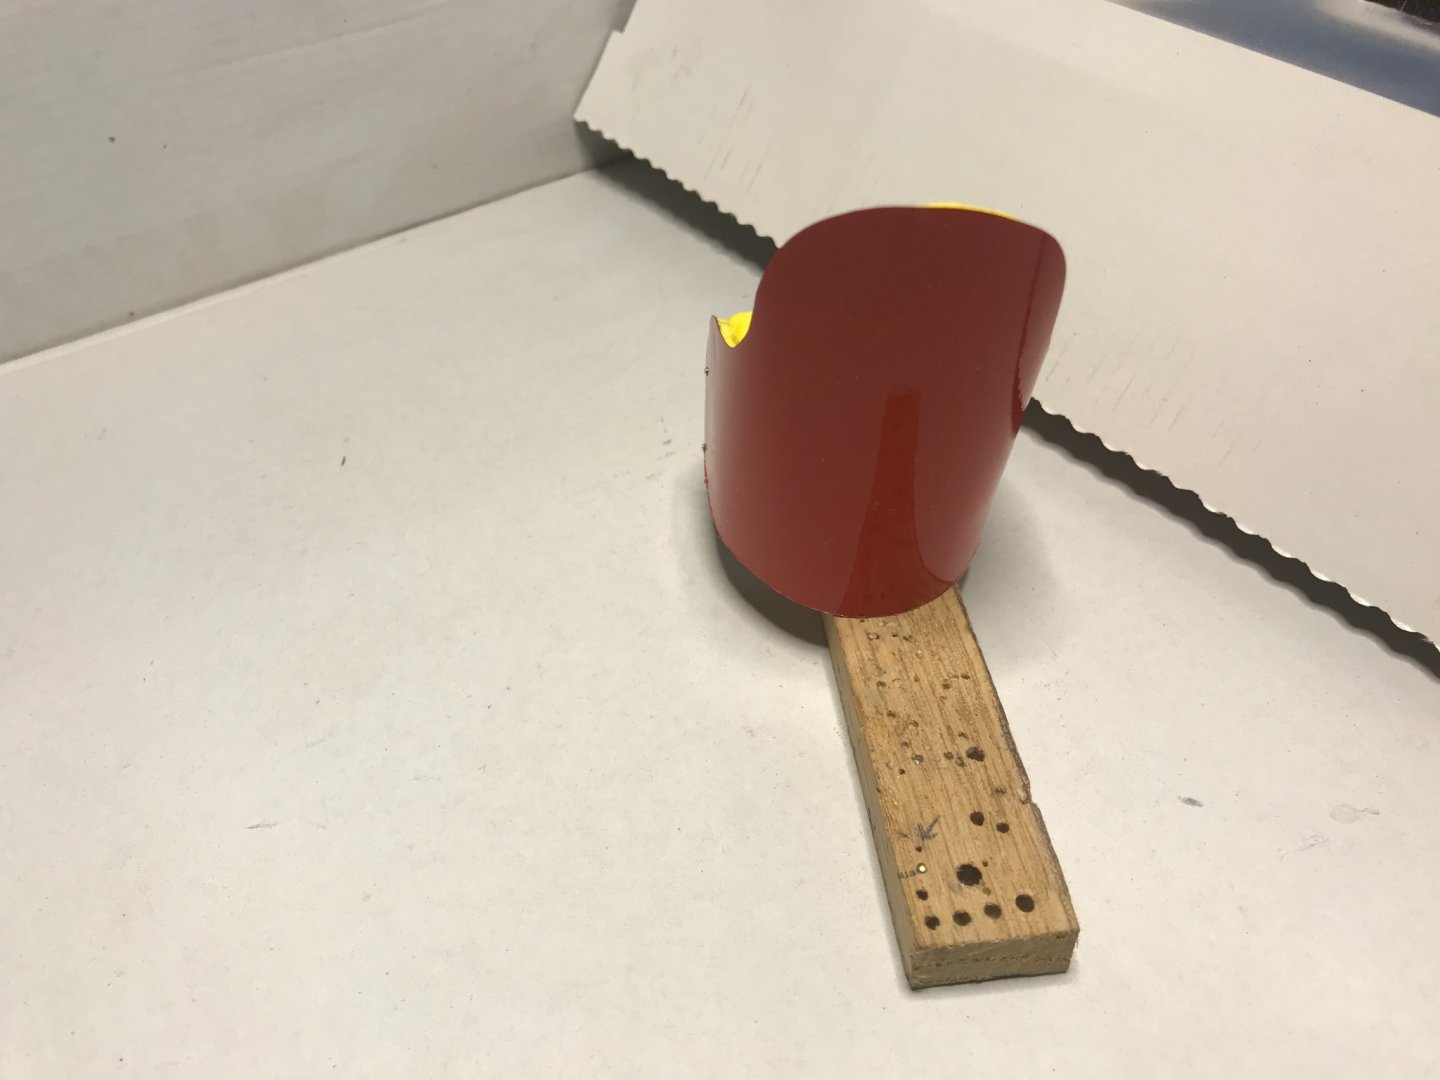
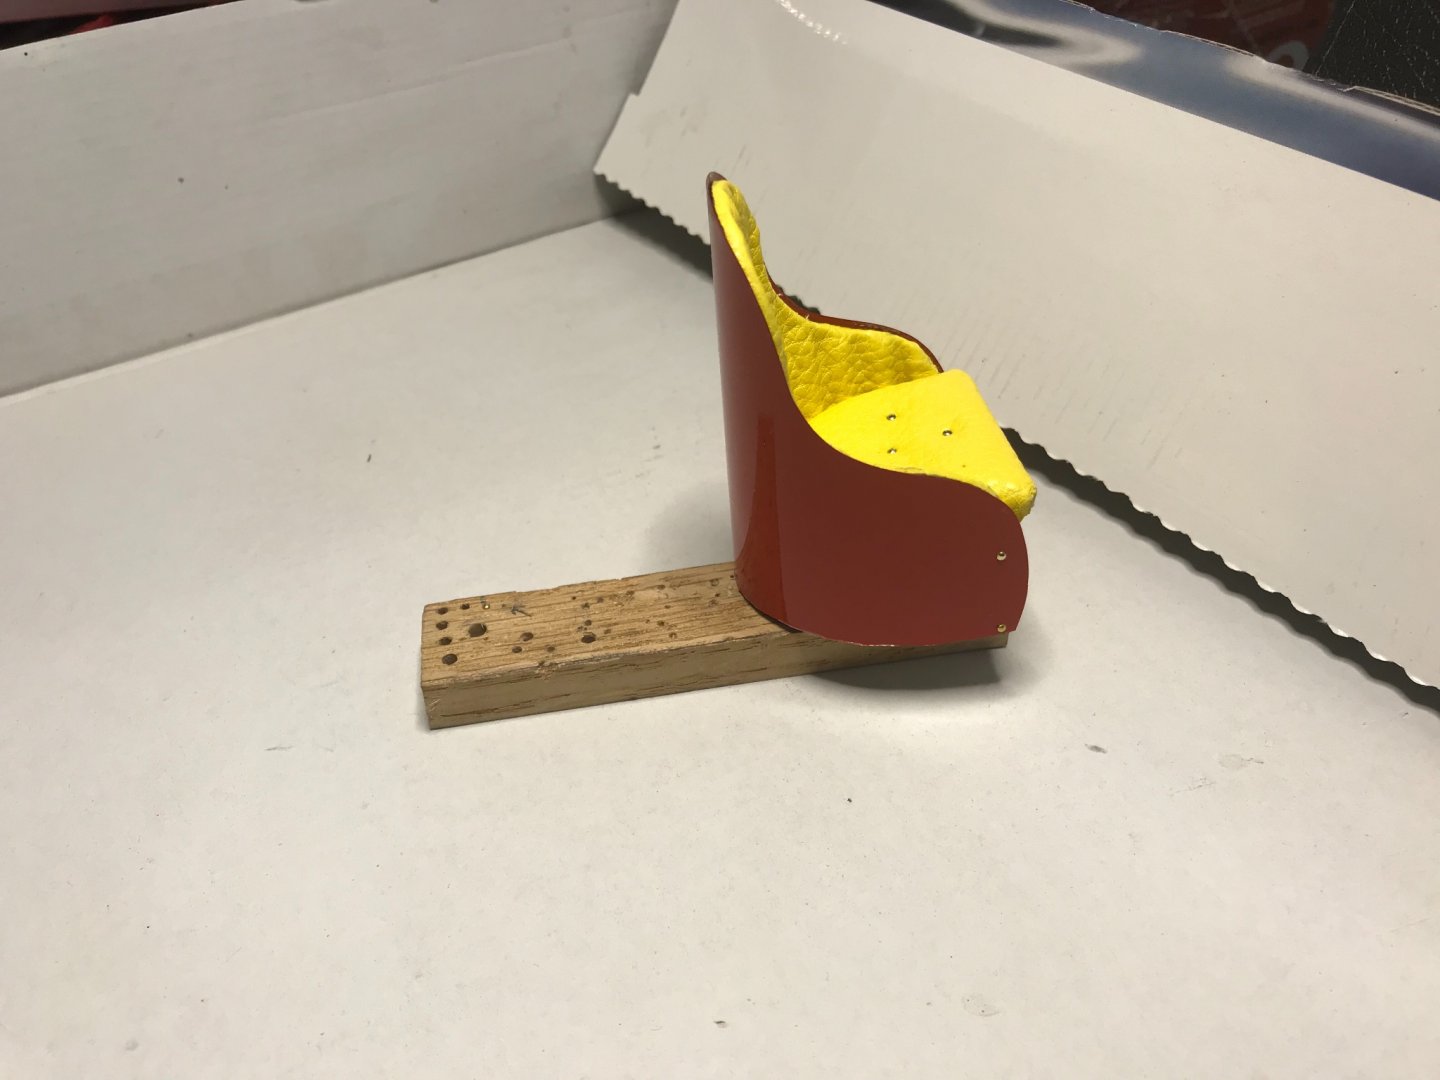
I then wrapped the seat with aluminum just like the real seat.
I had to make several cushions, to ensure that the seat back fit well with Lou.
And in the end I wish I had made the cockpit about 3/16 of an inch lower, or 4mm.


-
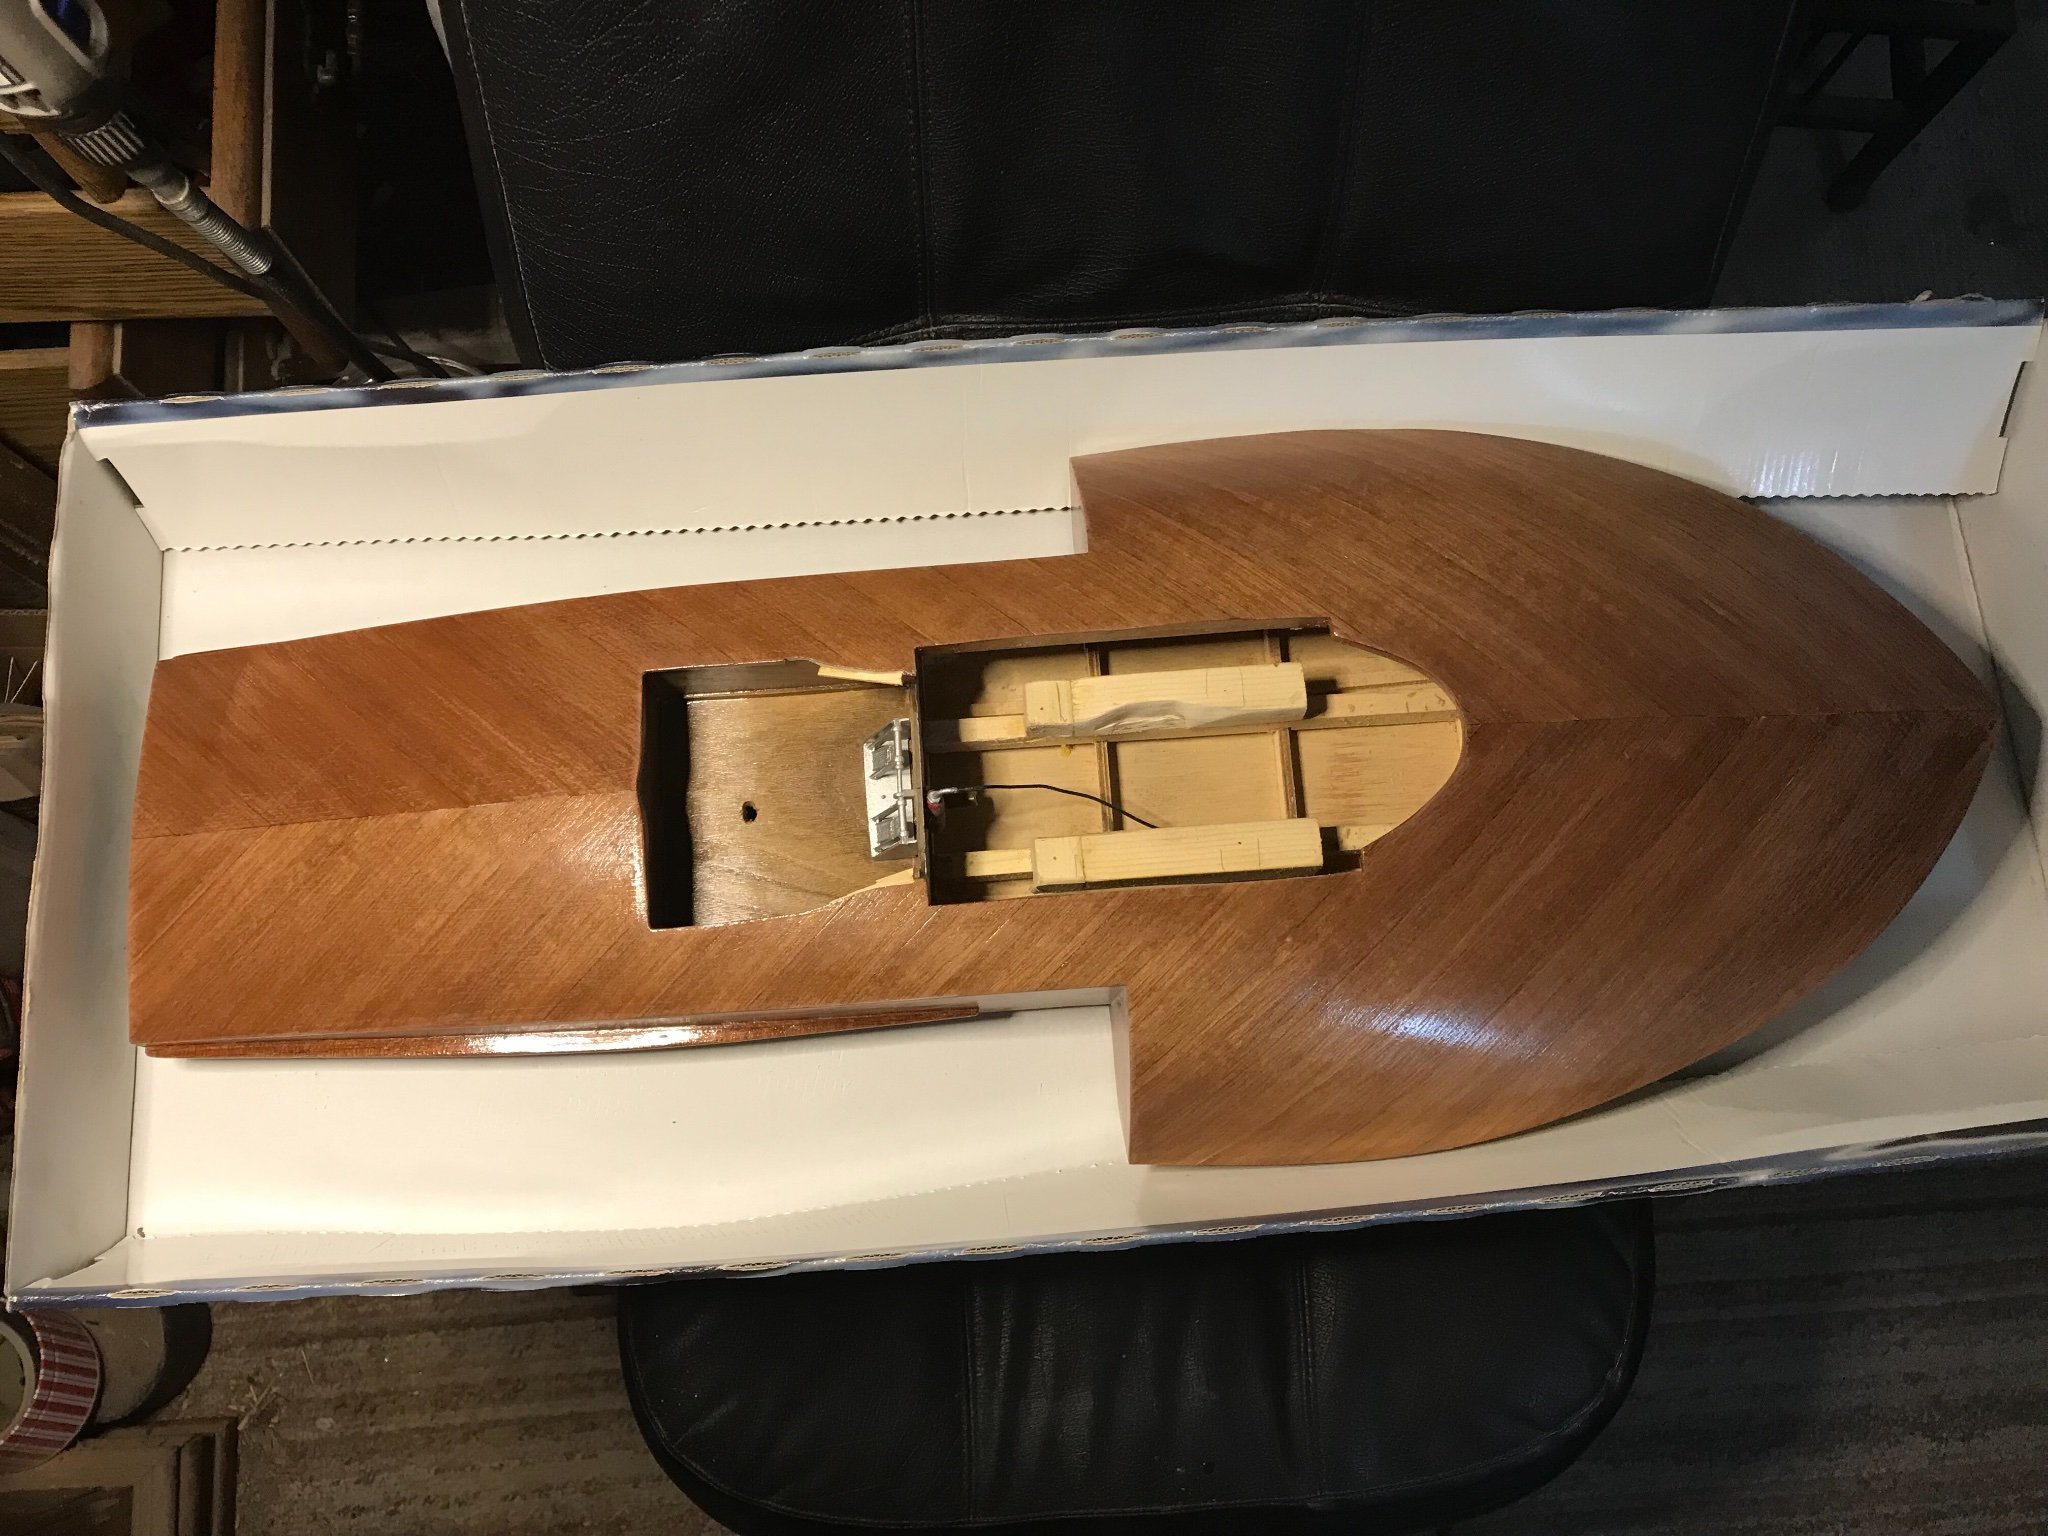
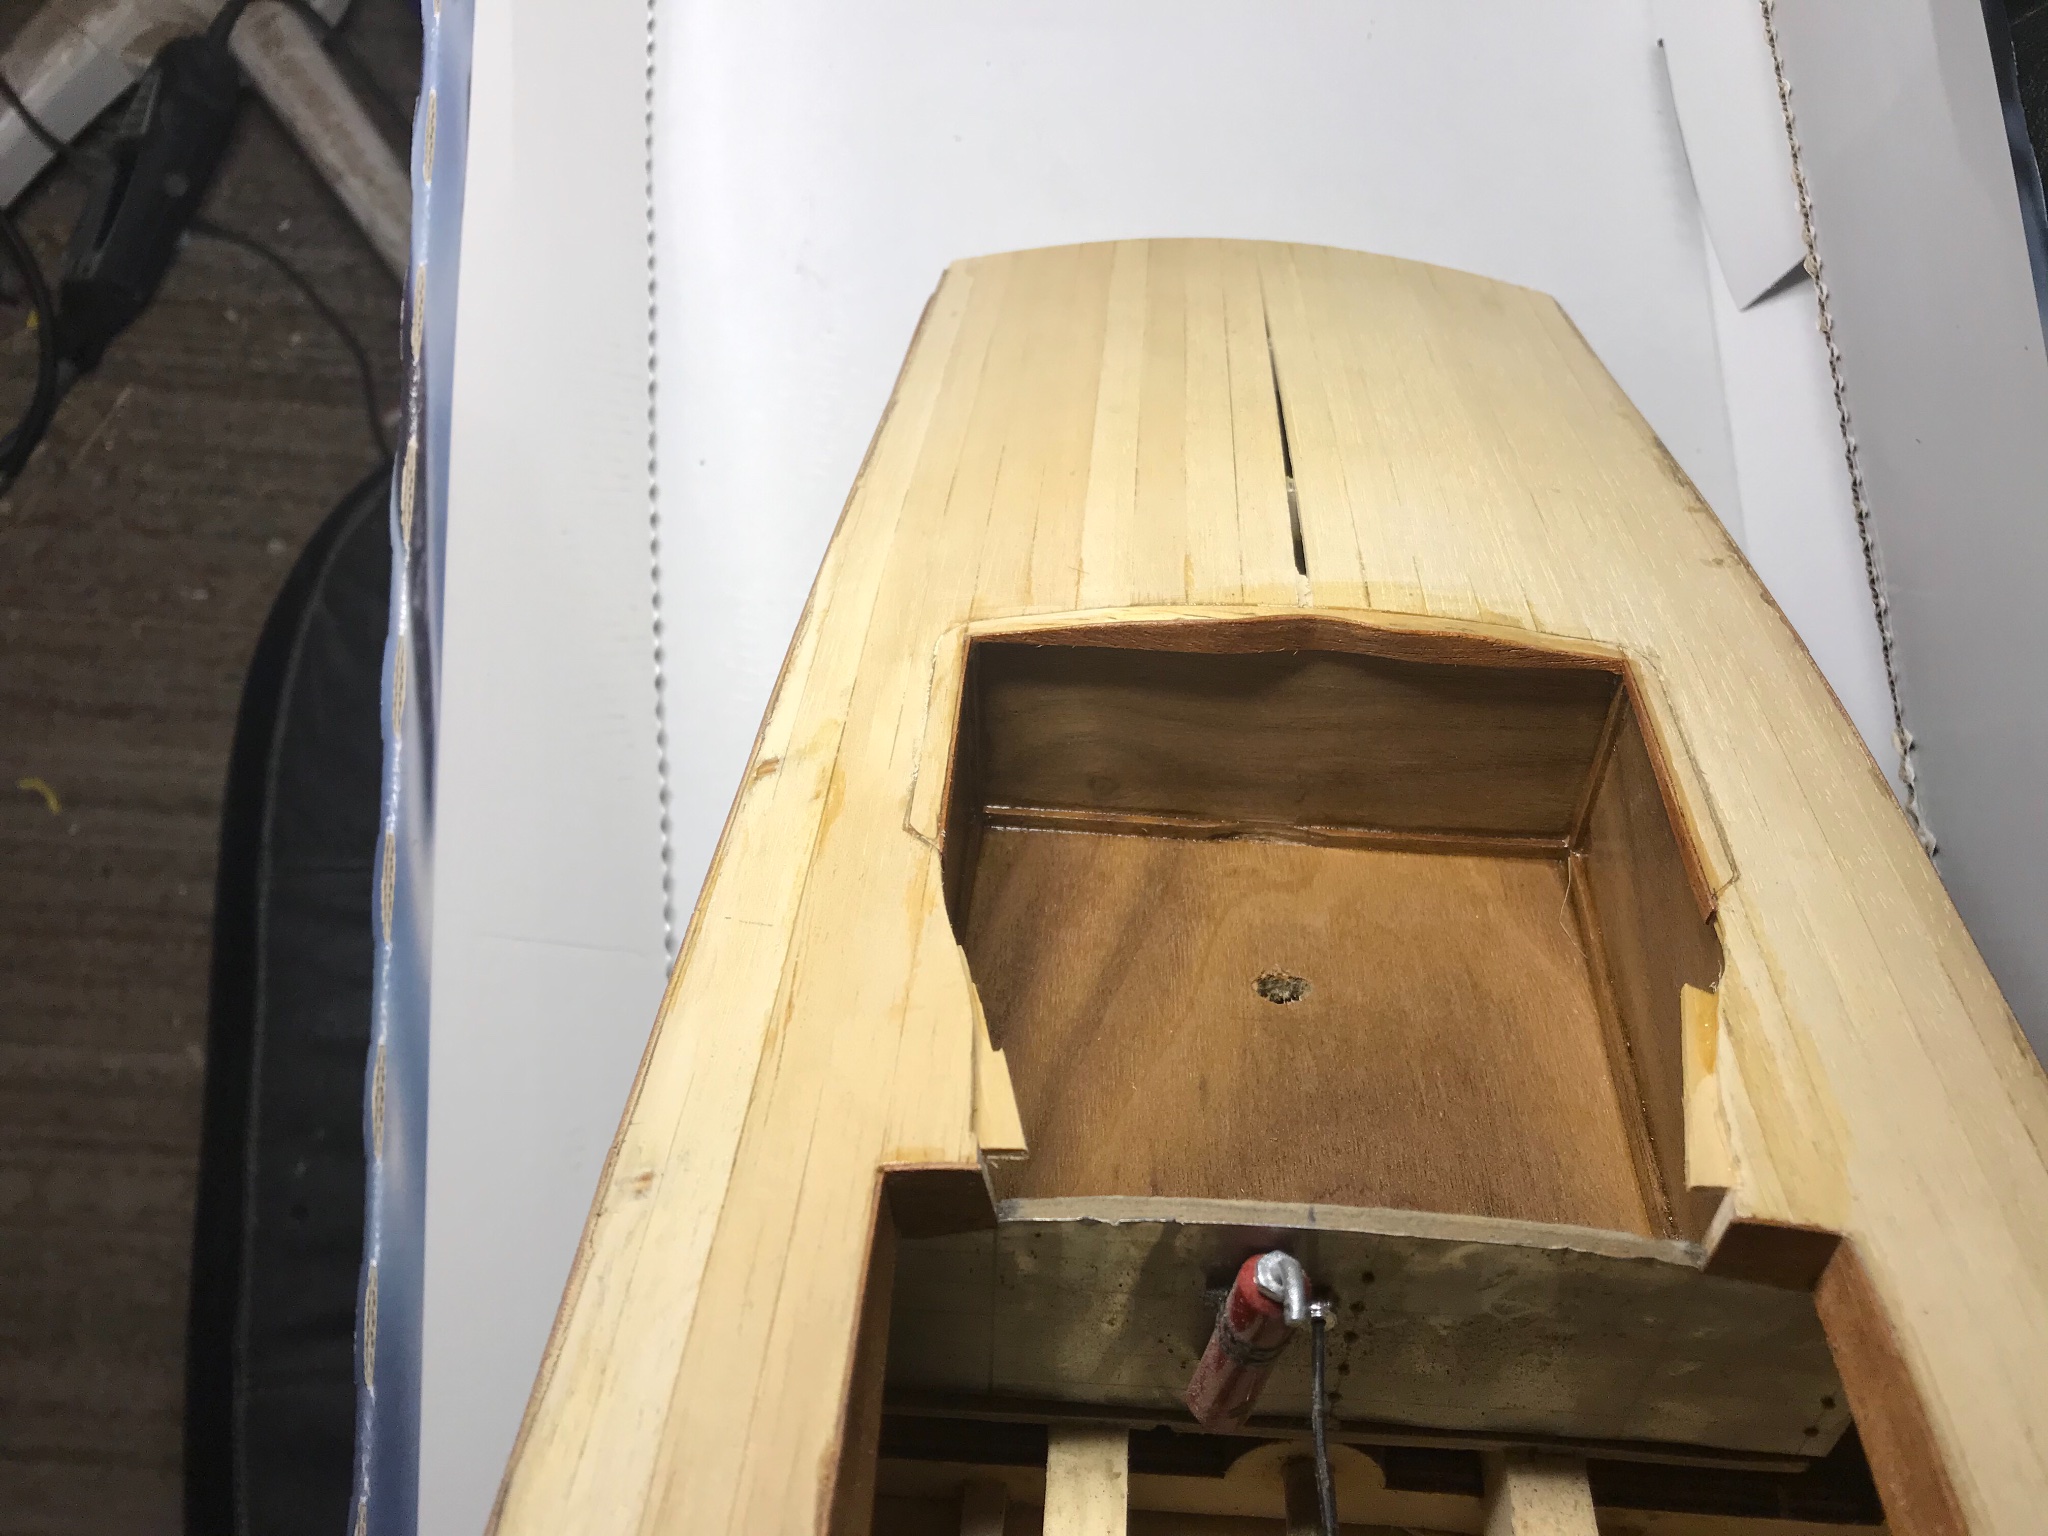
Here are the inside edges all covered and the blocks the motor will sit on.
I made a frame out of plastic similar to that of the real boat, however there’s no way to see it once all the heat shielding goes in, I also thought about wrapping the wooden blocks with aluminum, still not sure how much will be visible.
The only version of the boat I’ve seen with the side fin is the boat hanging in the museum.
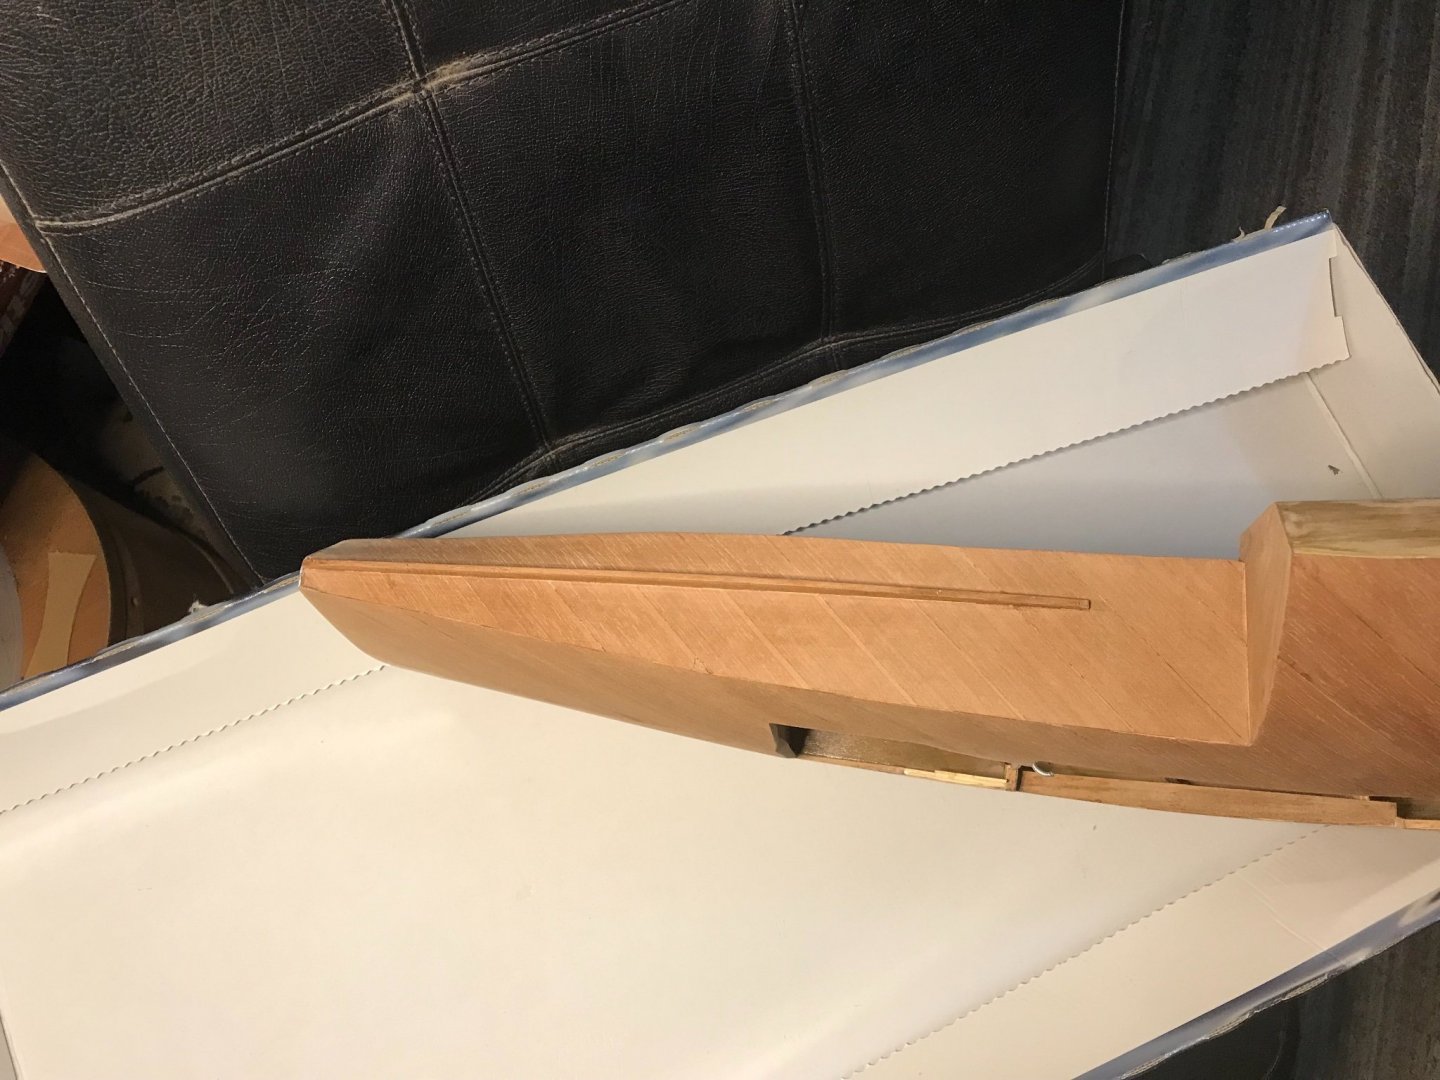
The fins turned out great, and made it so that my scrap dropped to about an inch long, I actually ran out of scrap wood.


-
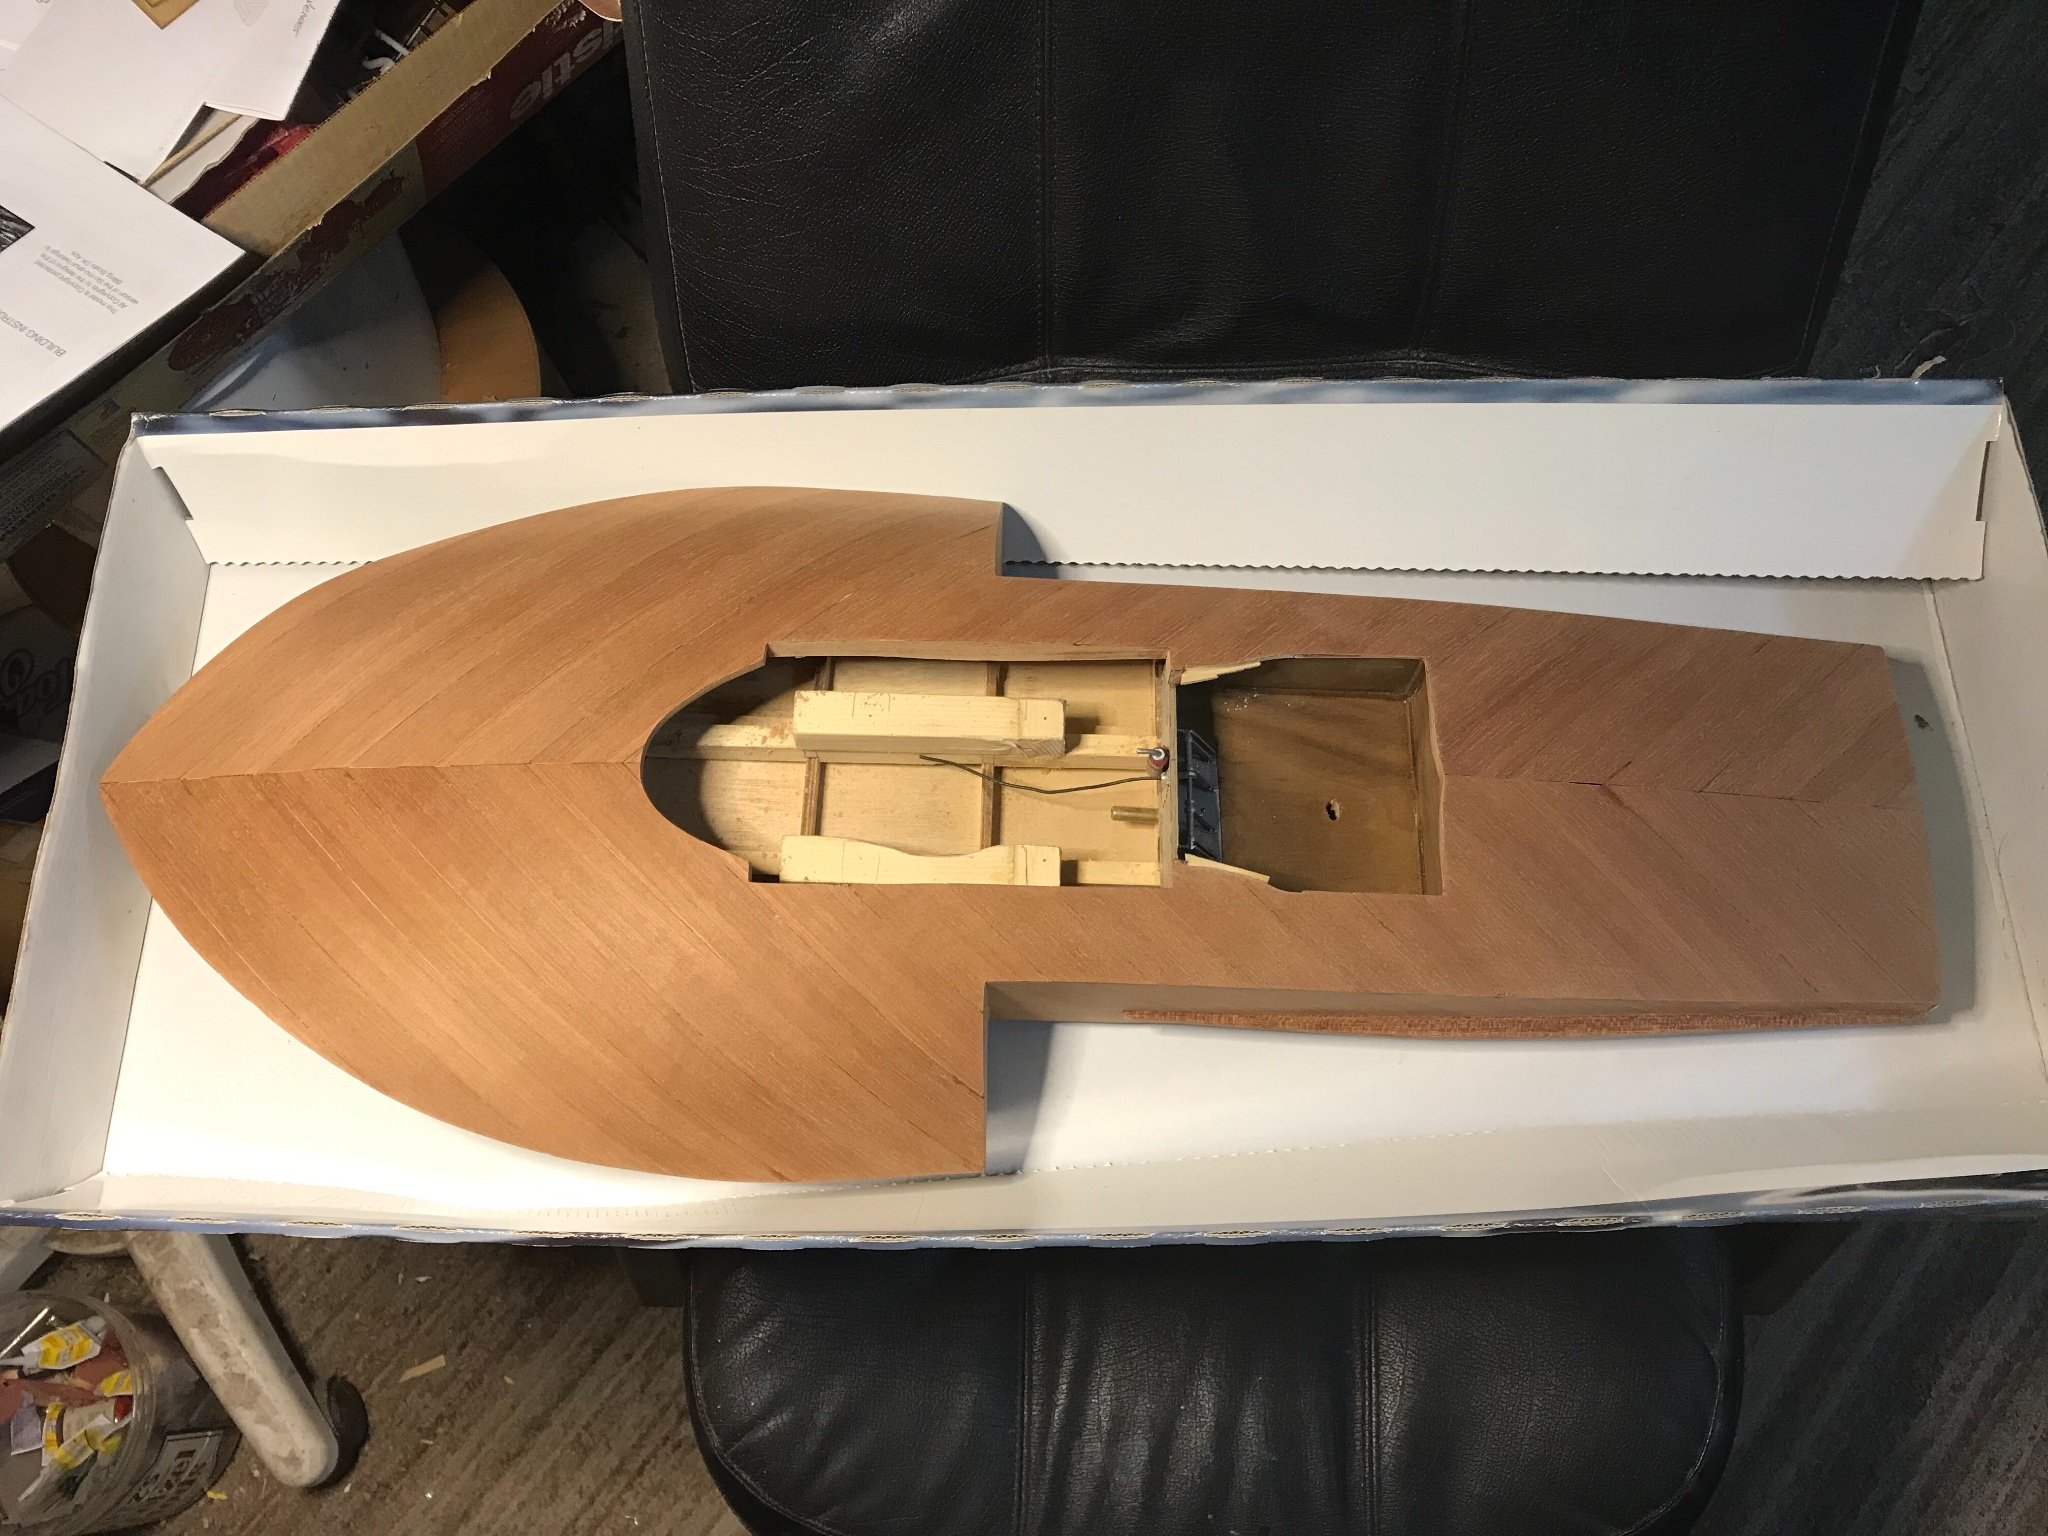
It’s been a bit, I have not stopped working on the boat, my actual work has taken over my time.
I finished planking the sides, got the fins on the hull, good and solid.
I also have the motor mounts for the hull in place, and sorted to the height I need for the motor.
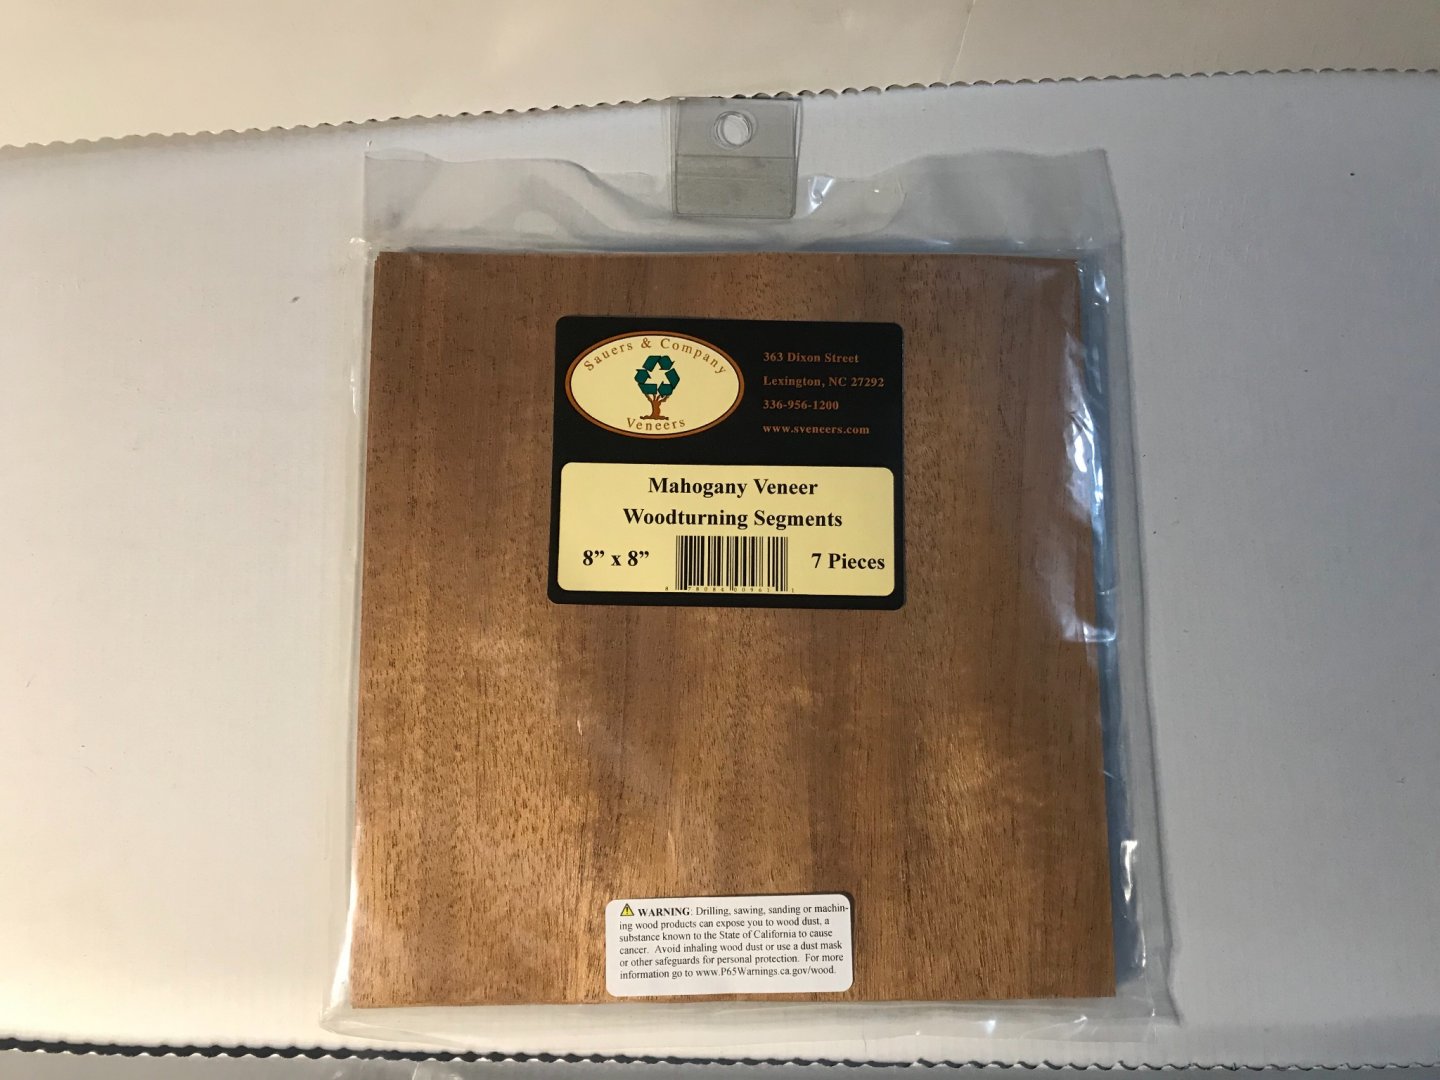
I got a free gift from Rockler, and that turned out to be a pack of mahogany veneers, 7 pieces 8 inches by 8 inches. I got this because I hadn’t visited their website in awhile.
I also found swatches of leather, they not only are not real but they also have a backer on them, $6.
I halted on the planking so I could finish up all the edging with the veneers from Rockler.


-
I didn’t see any mention of heat, the thinner the blade, not only wander but heat as well.
Good blade is the key.
I wouldn’t hesitate to grab a piece of walnut from the fire wood pile and run it through my big table saw, that’s where beautiful wood comes from.
You need to make yourself a zero tolerance spacer for the blade.
The better the blade the better the product, the faster the product and usually the cooler the blade stays.
I even order my lexan and plexiglass based on the width of my blade and most often adjust accordingly from there and never based on my saw dust.
97% of my wood is hardwood and is free.
I’ve even cut veneers that were 4 inches thick 16 inches wide and 8 feet long into 1/8 inch thick slices 4 inches wide and 8 feet long. I make all my wainscoting, flooring, steps, door trim, wagon parts, model truck beds, rail loads...
my small saw is a dremel and that to has a $40 blade(micromark) My only dislike is that the height of the blade is not adjustable, other than that it’s awesome.
-
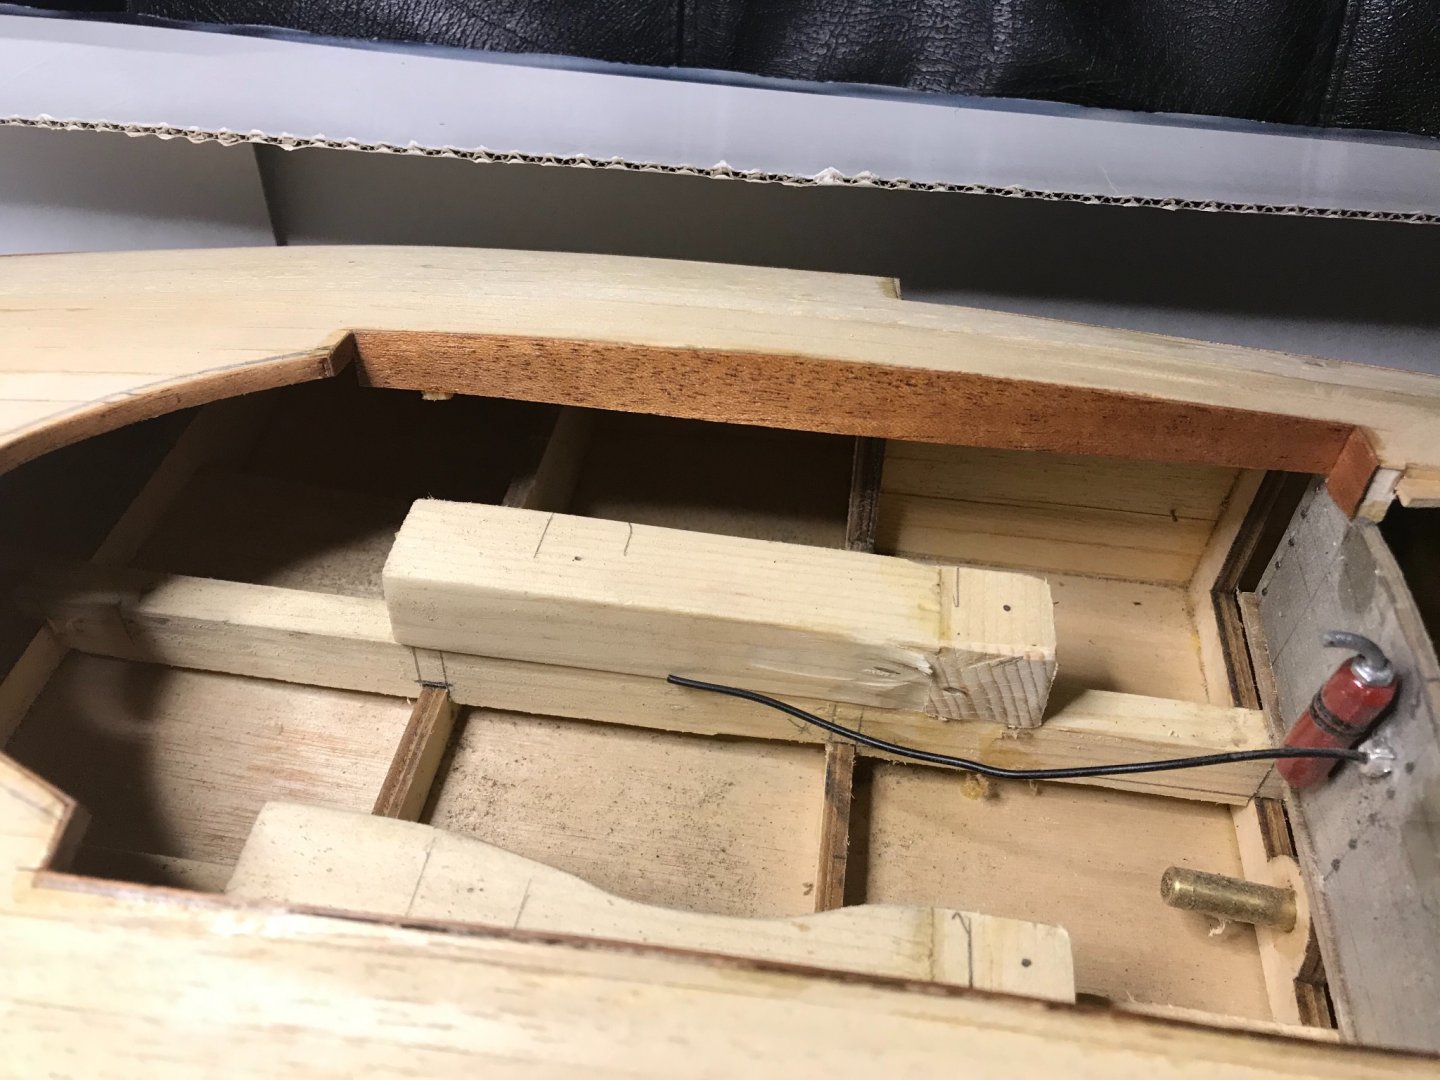
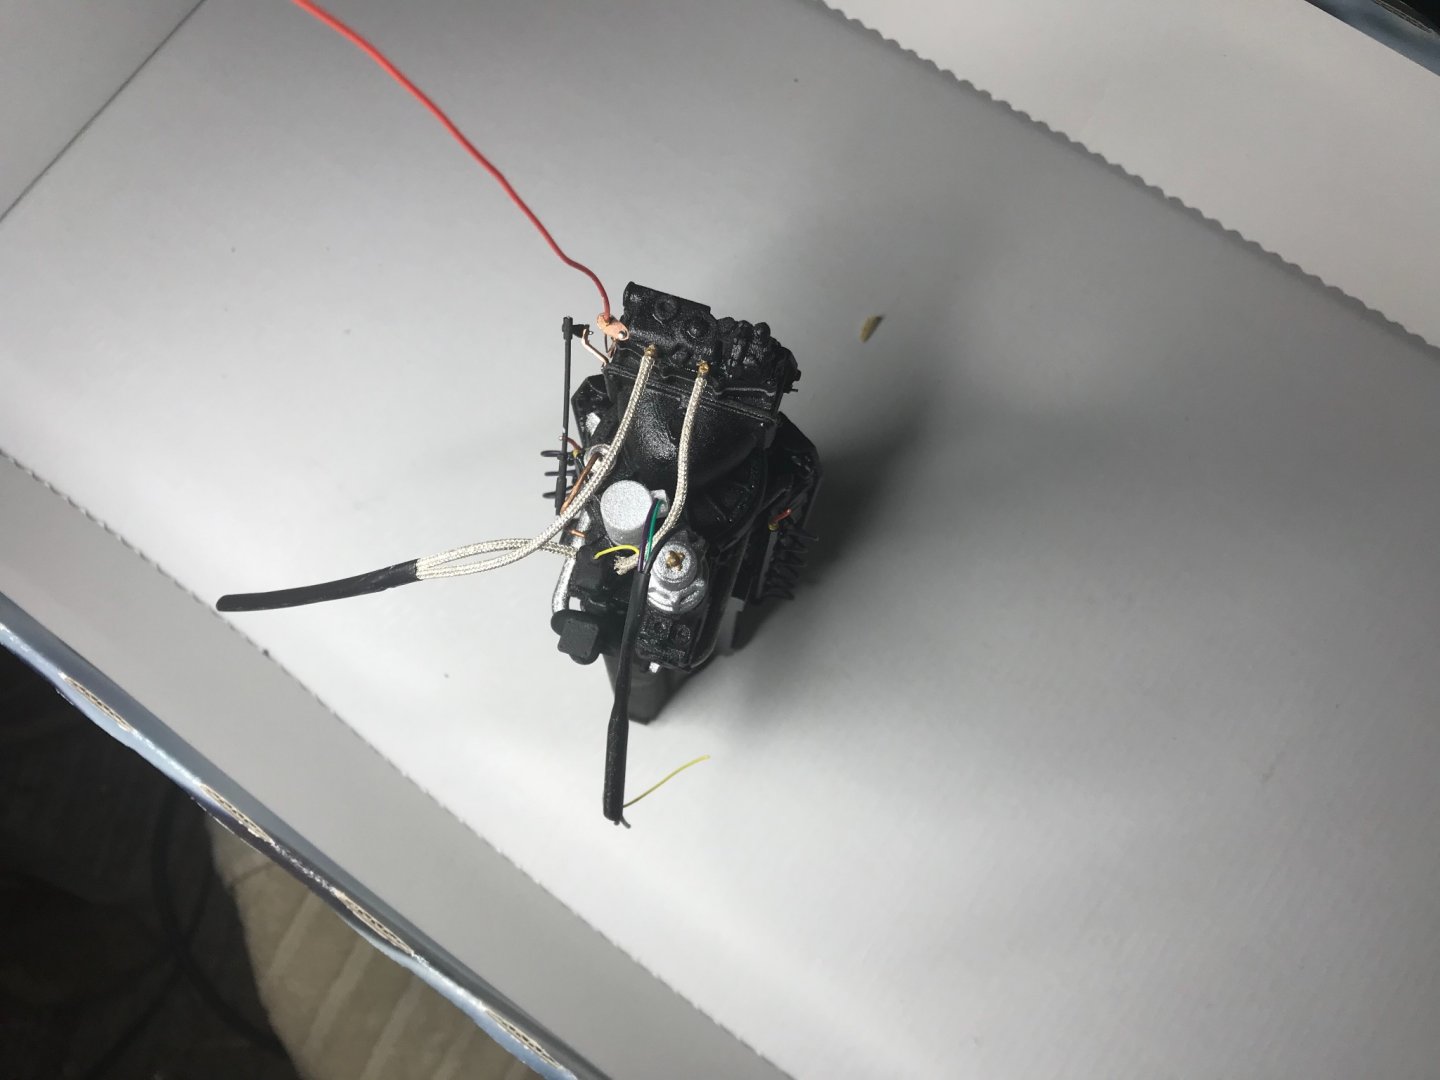
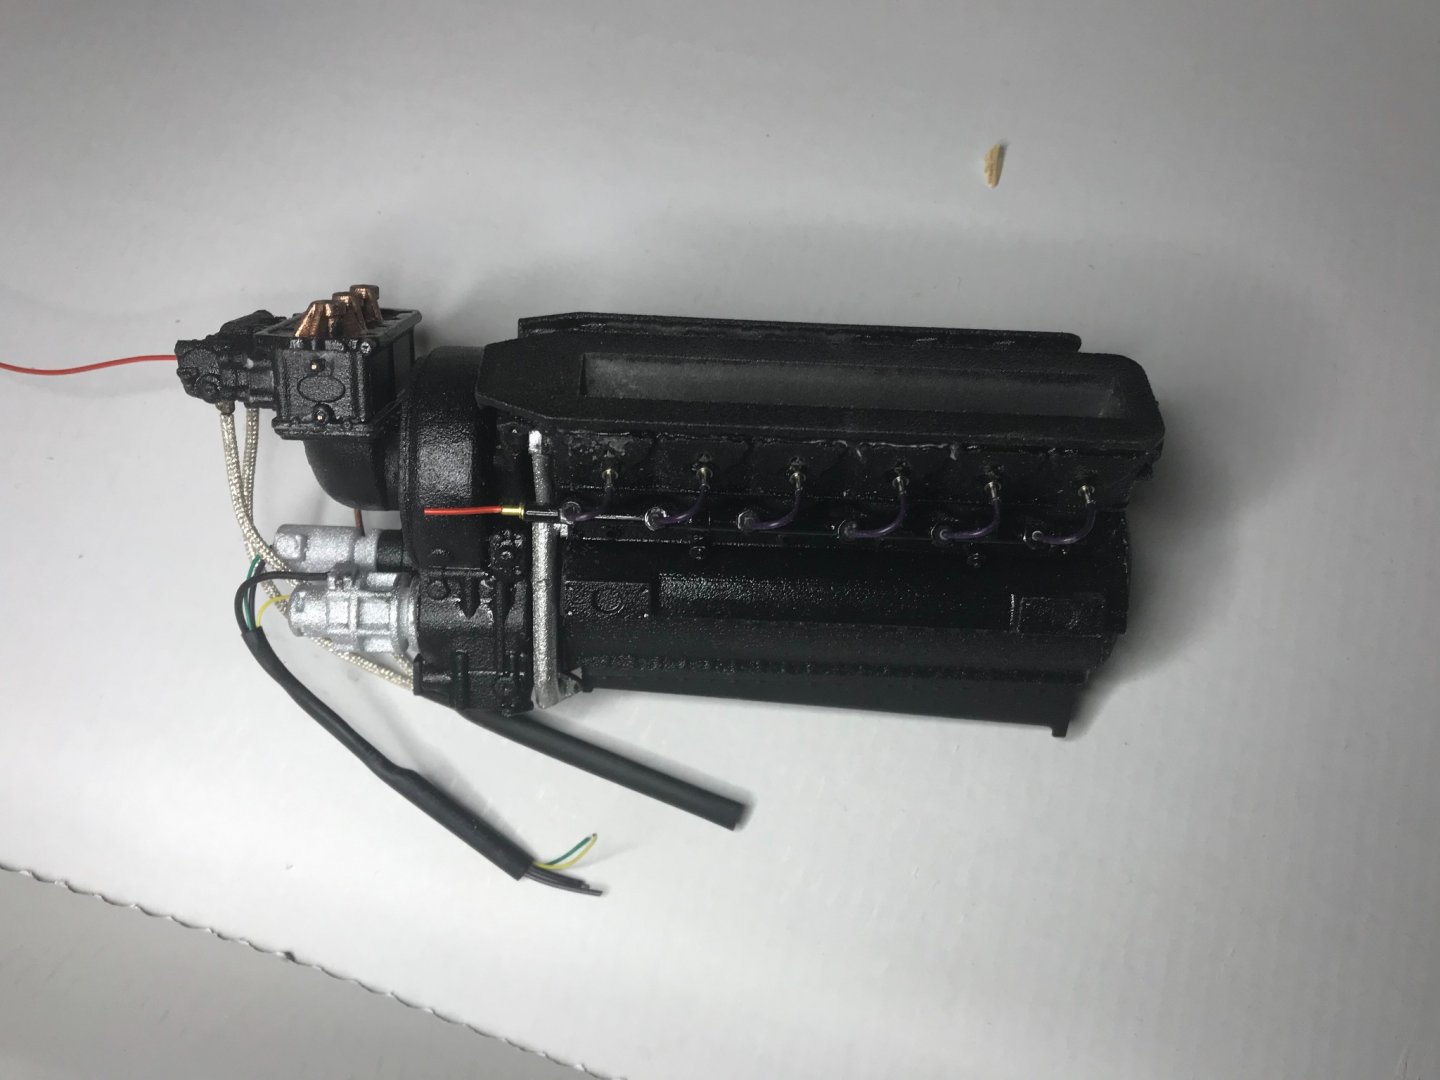
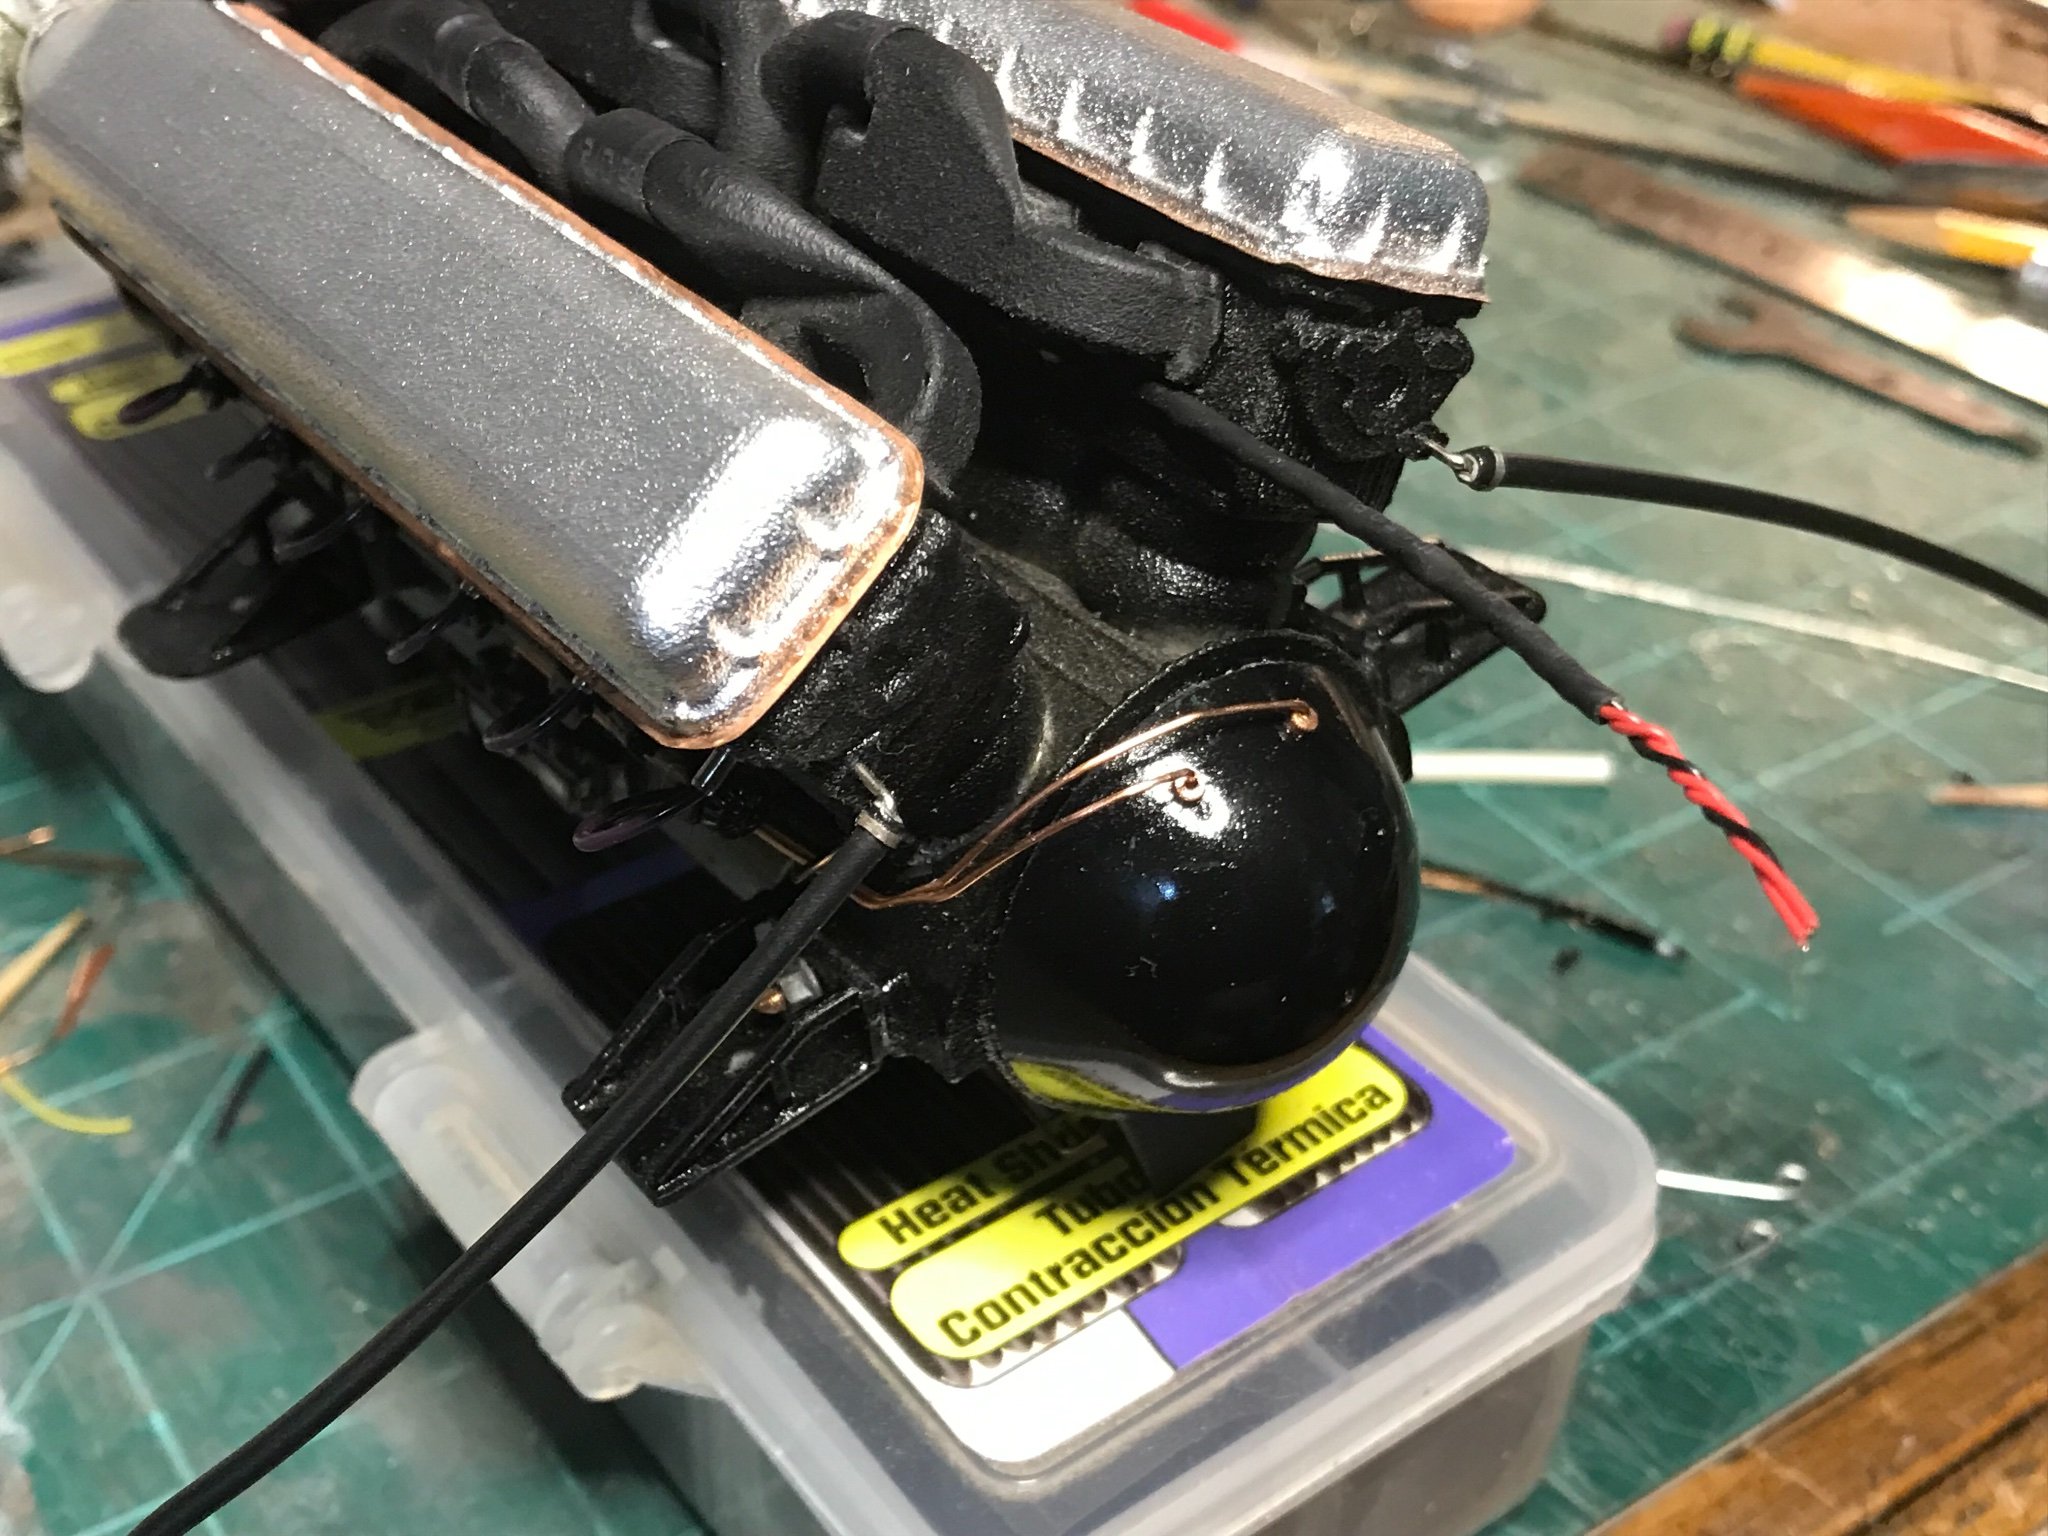
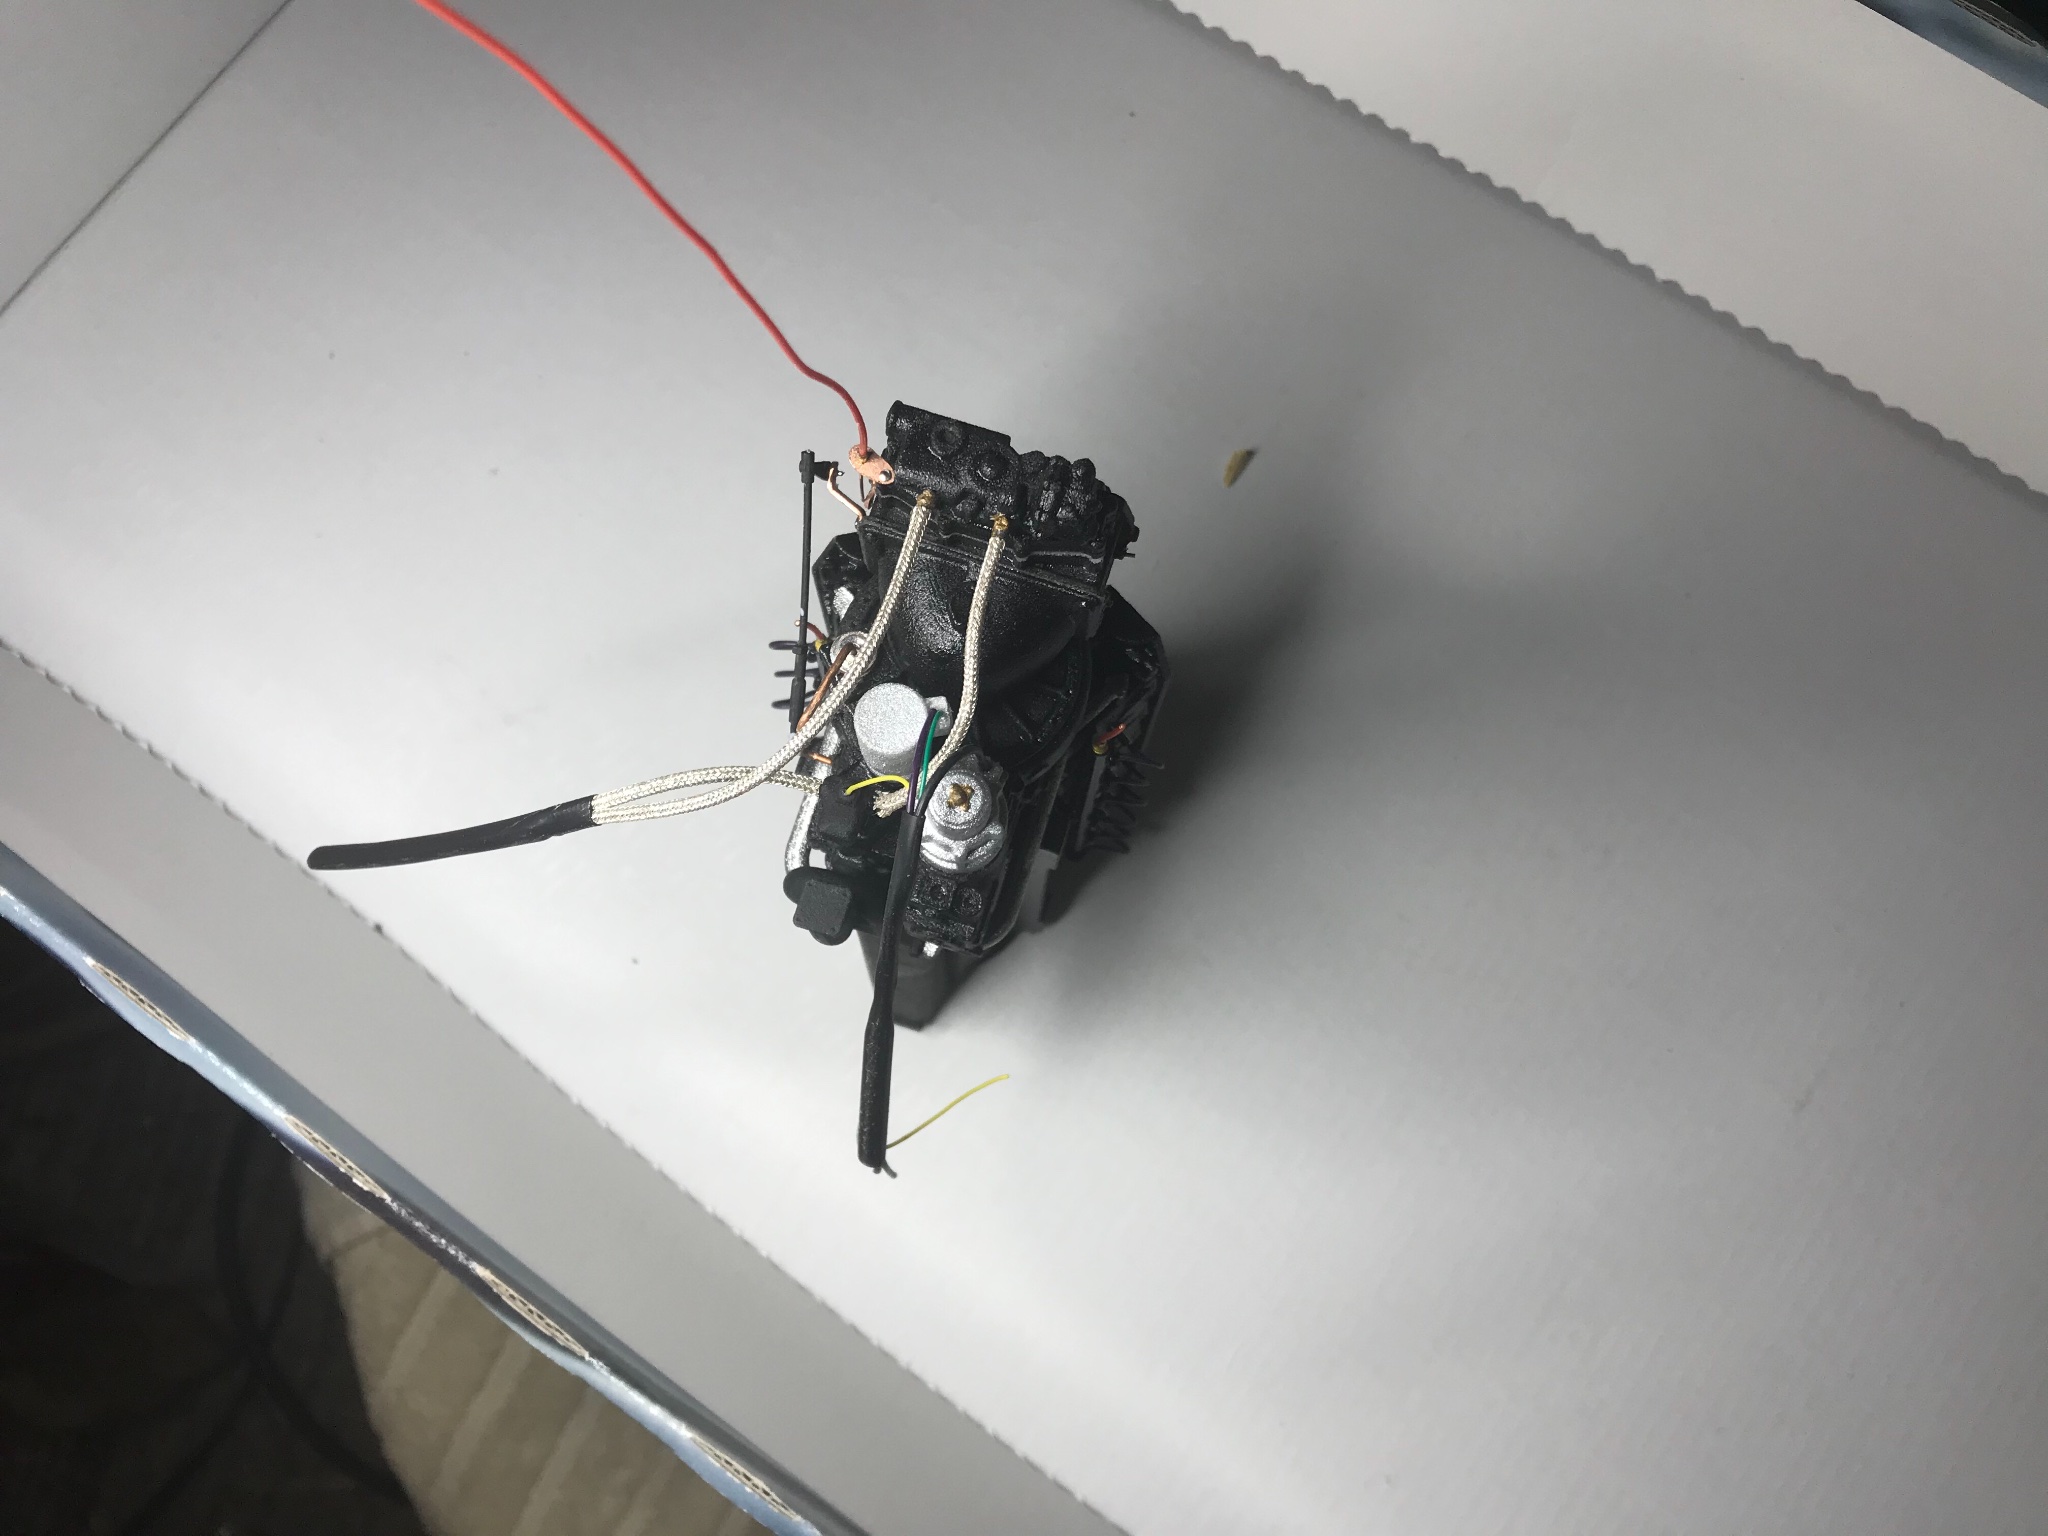
I also have gotten quite a bit of the engine done, I need to fabricate an oil pump, and then run the oil return lines, as well as the water lines that run out of the engine.
I also need to finish the transmission’s out put shaft. I’ll get that sorted once the motor mounts are on.
I noticed in the pictures that the throttle linkage is laying down, it will run into the nose, along with the choke line.
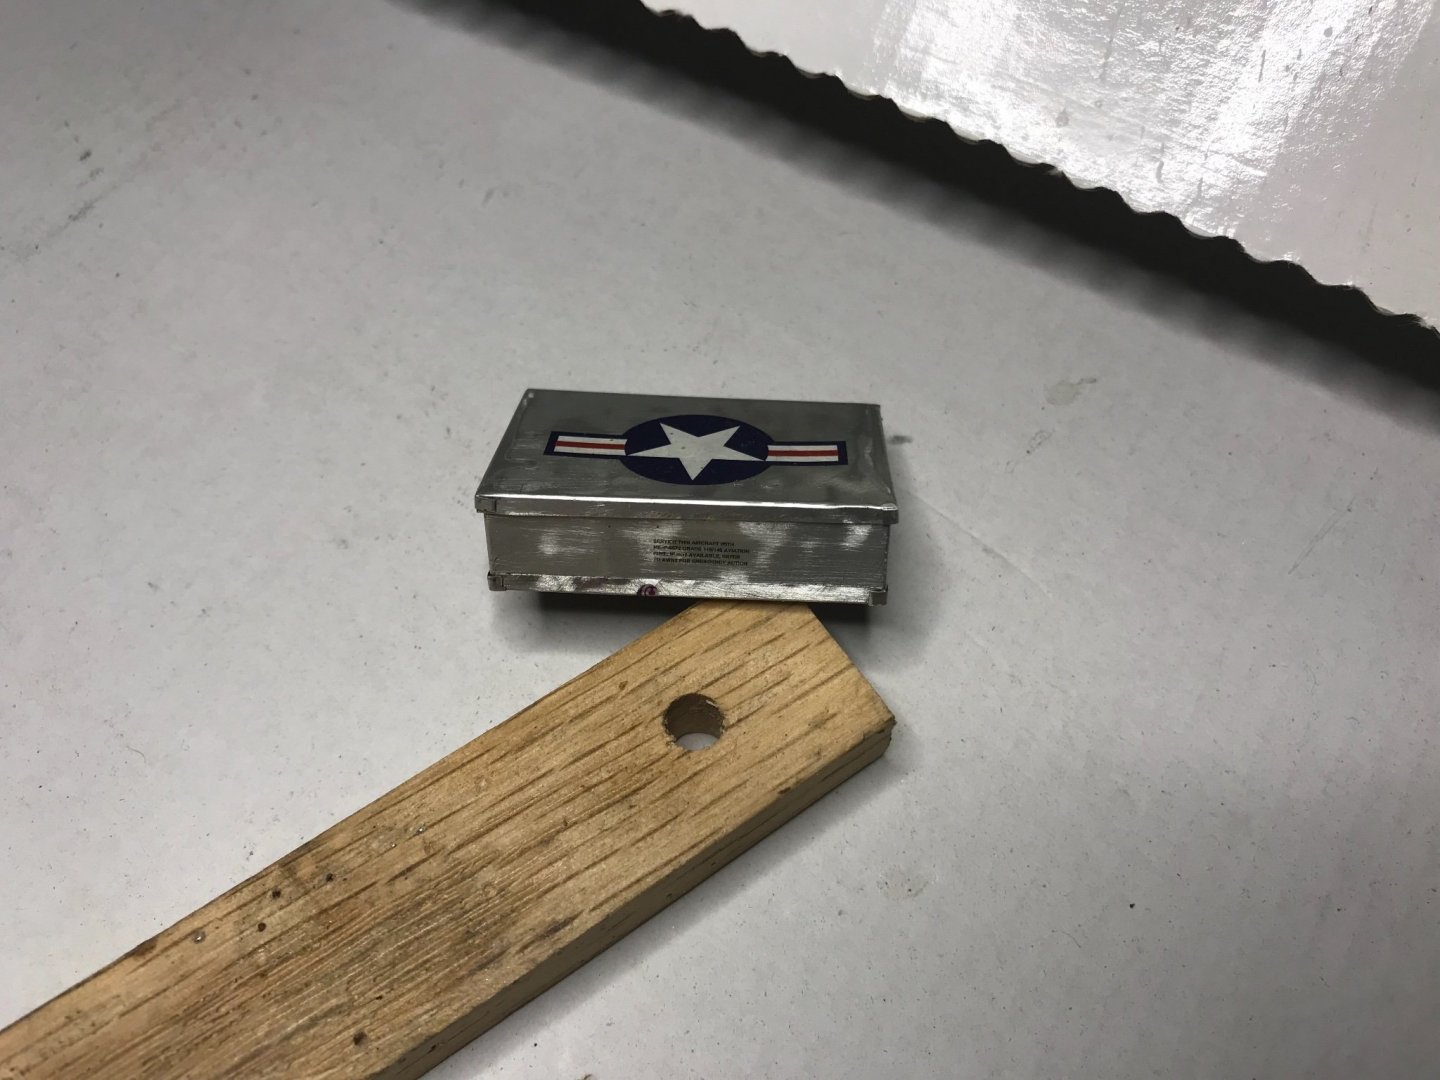
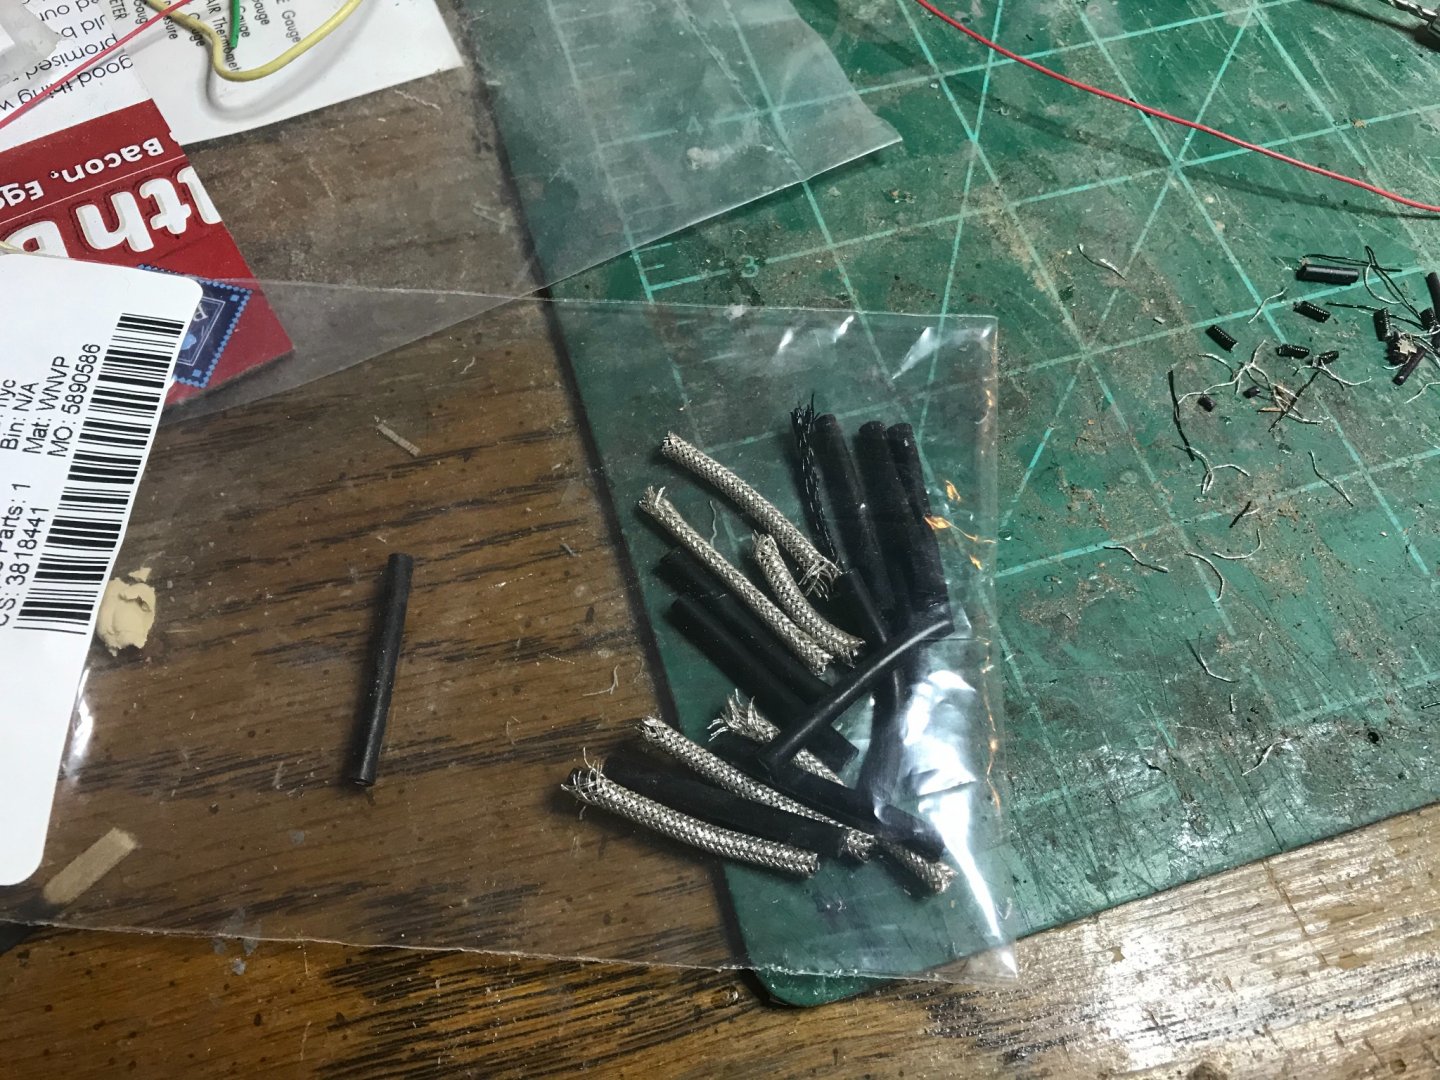
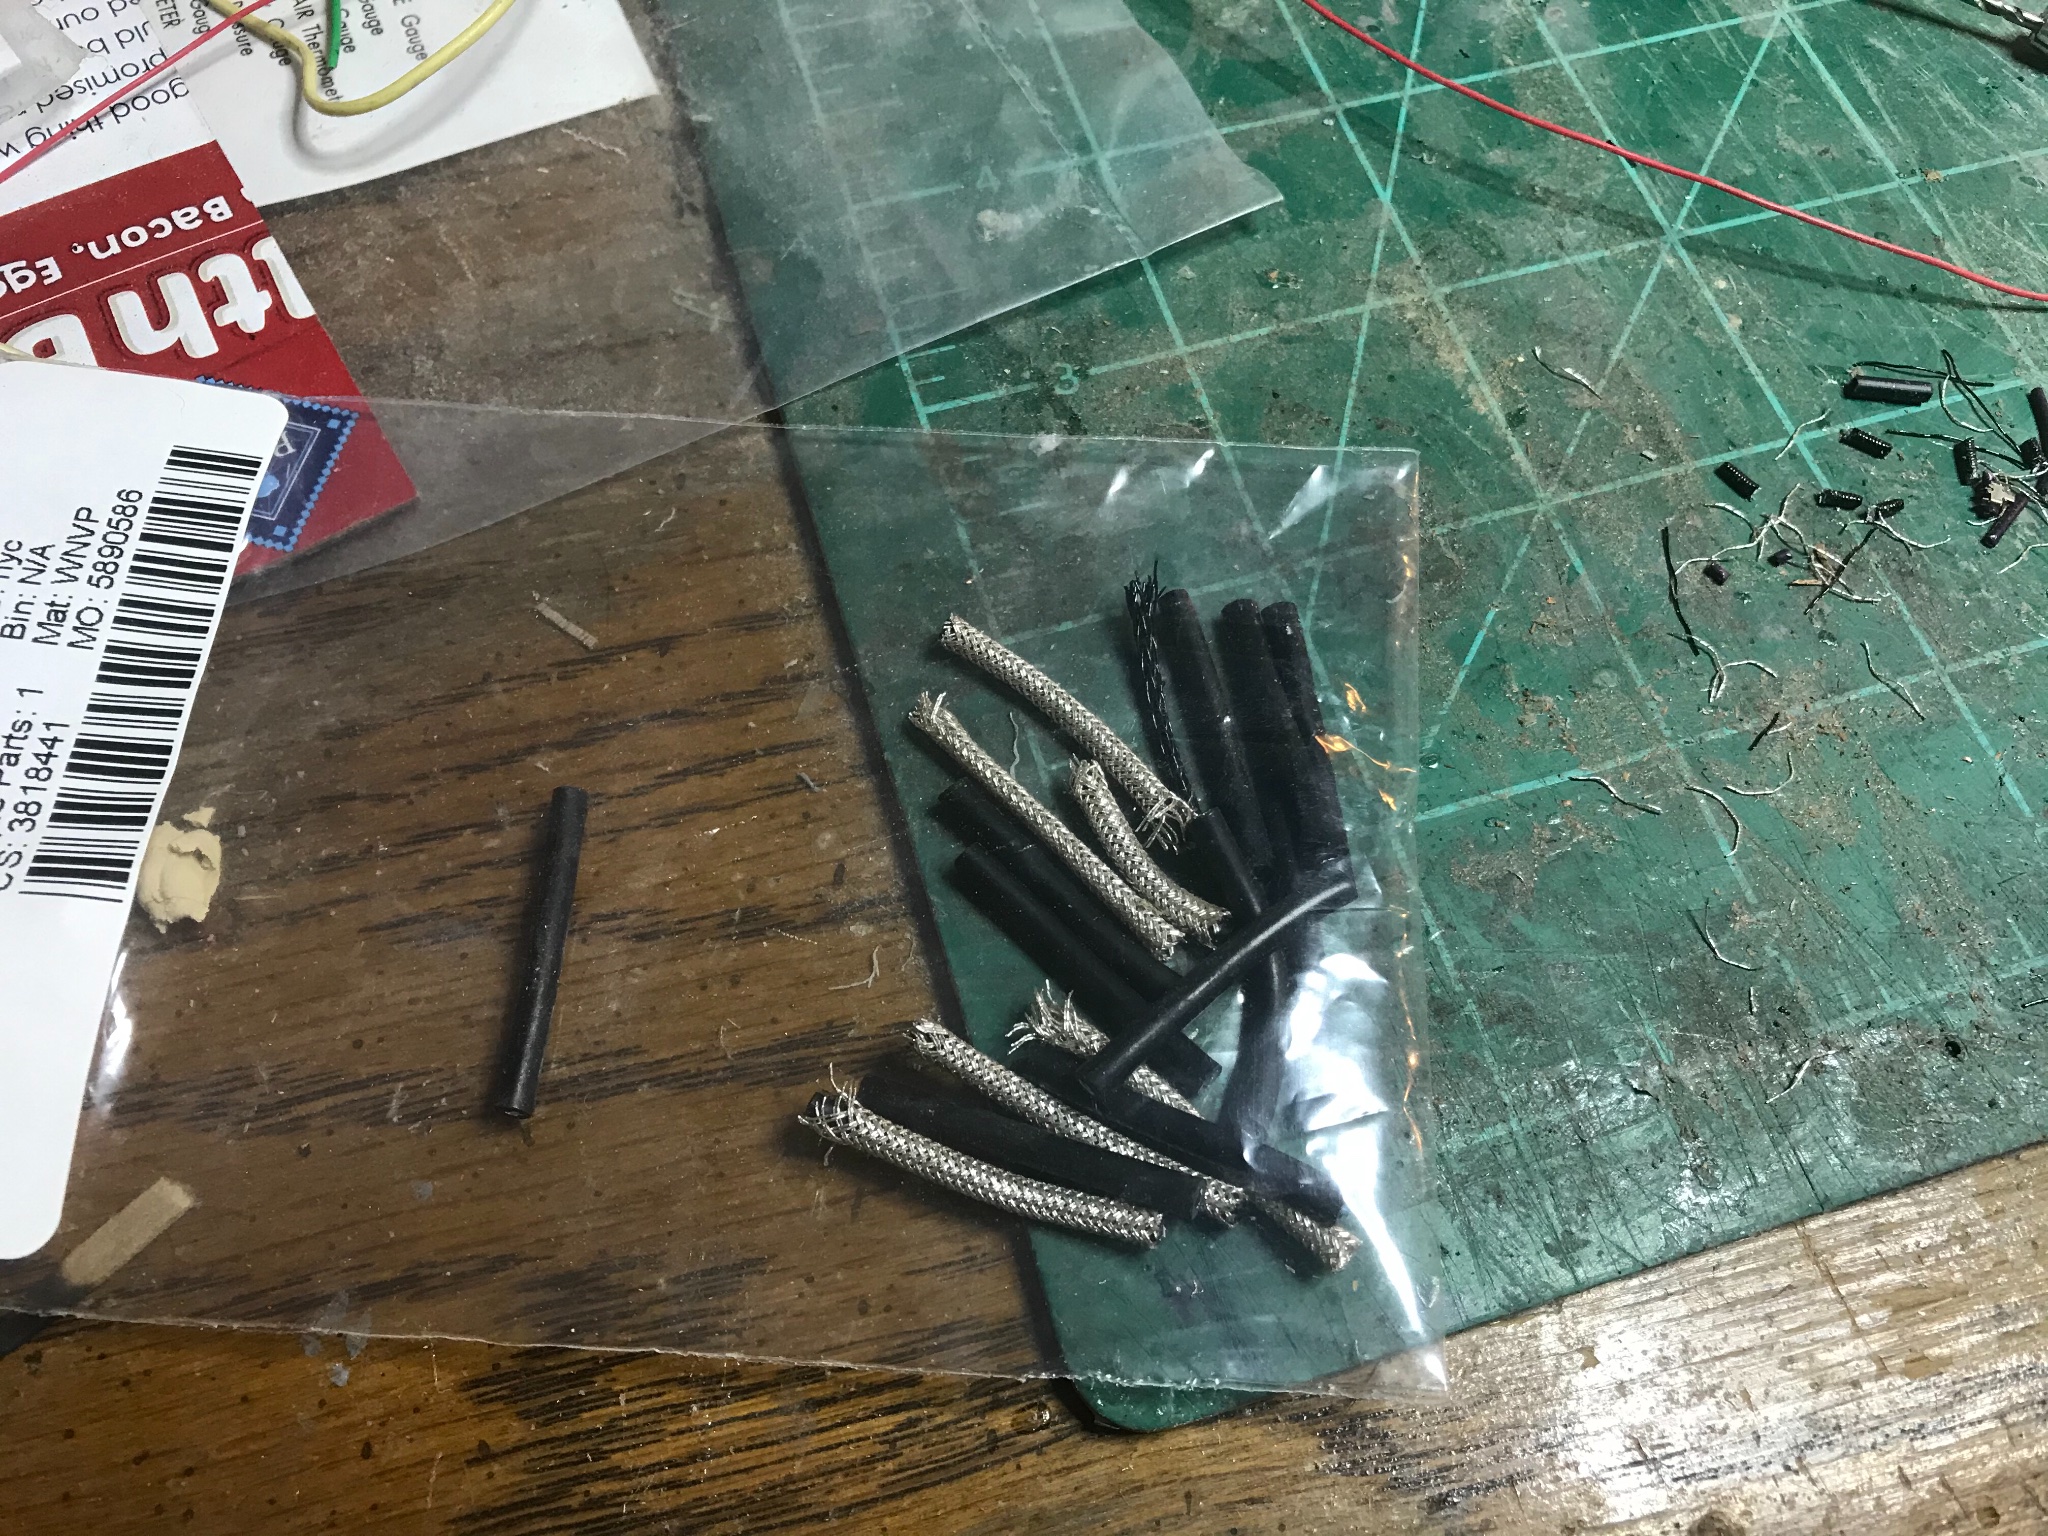
I have included a picture of the many spark plug wire fails, along with the completed spark plugs.
-
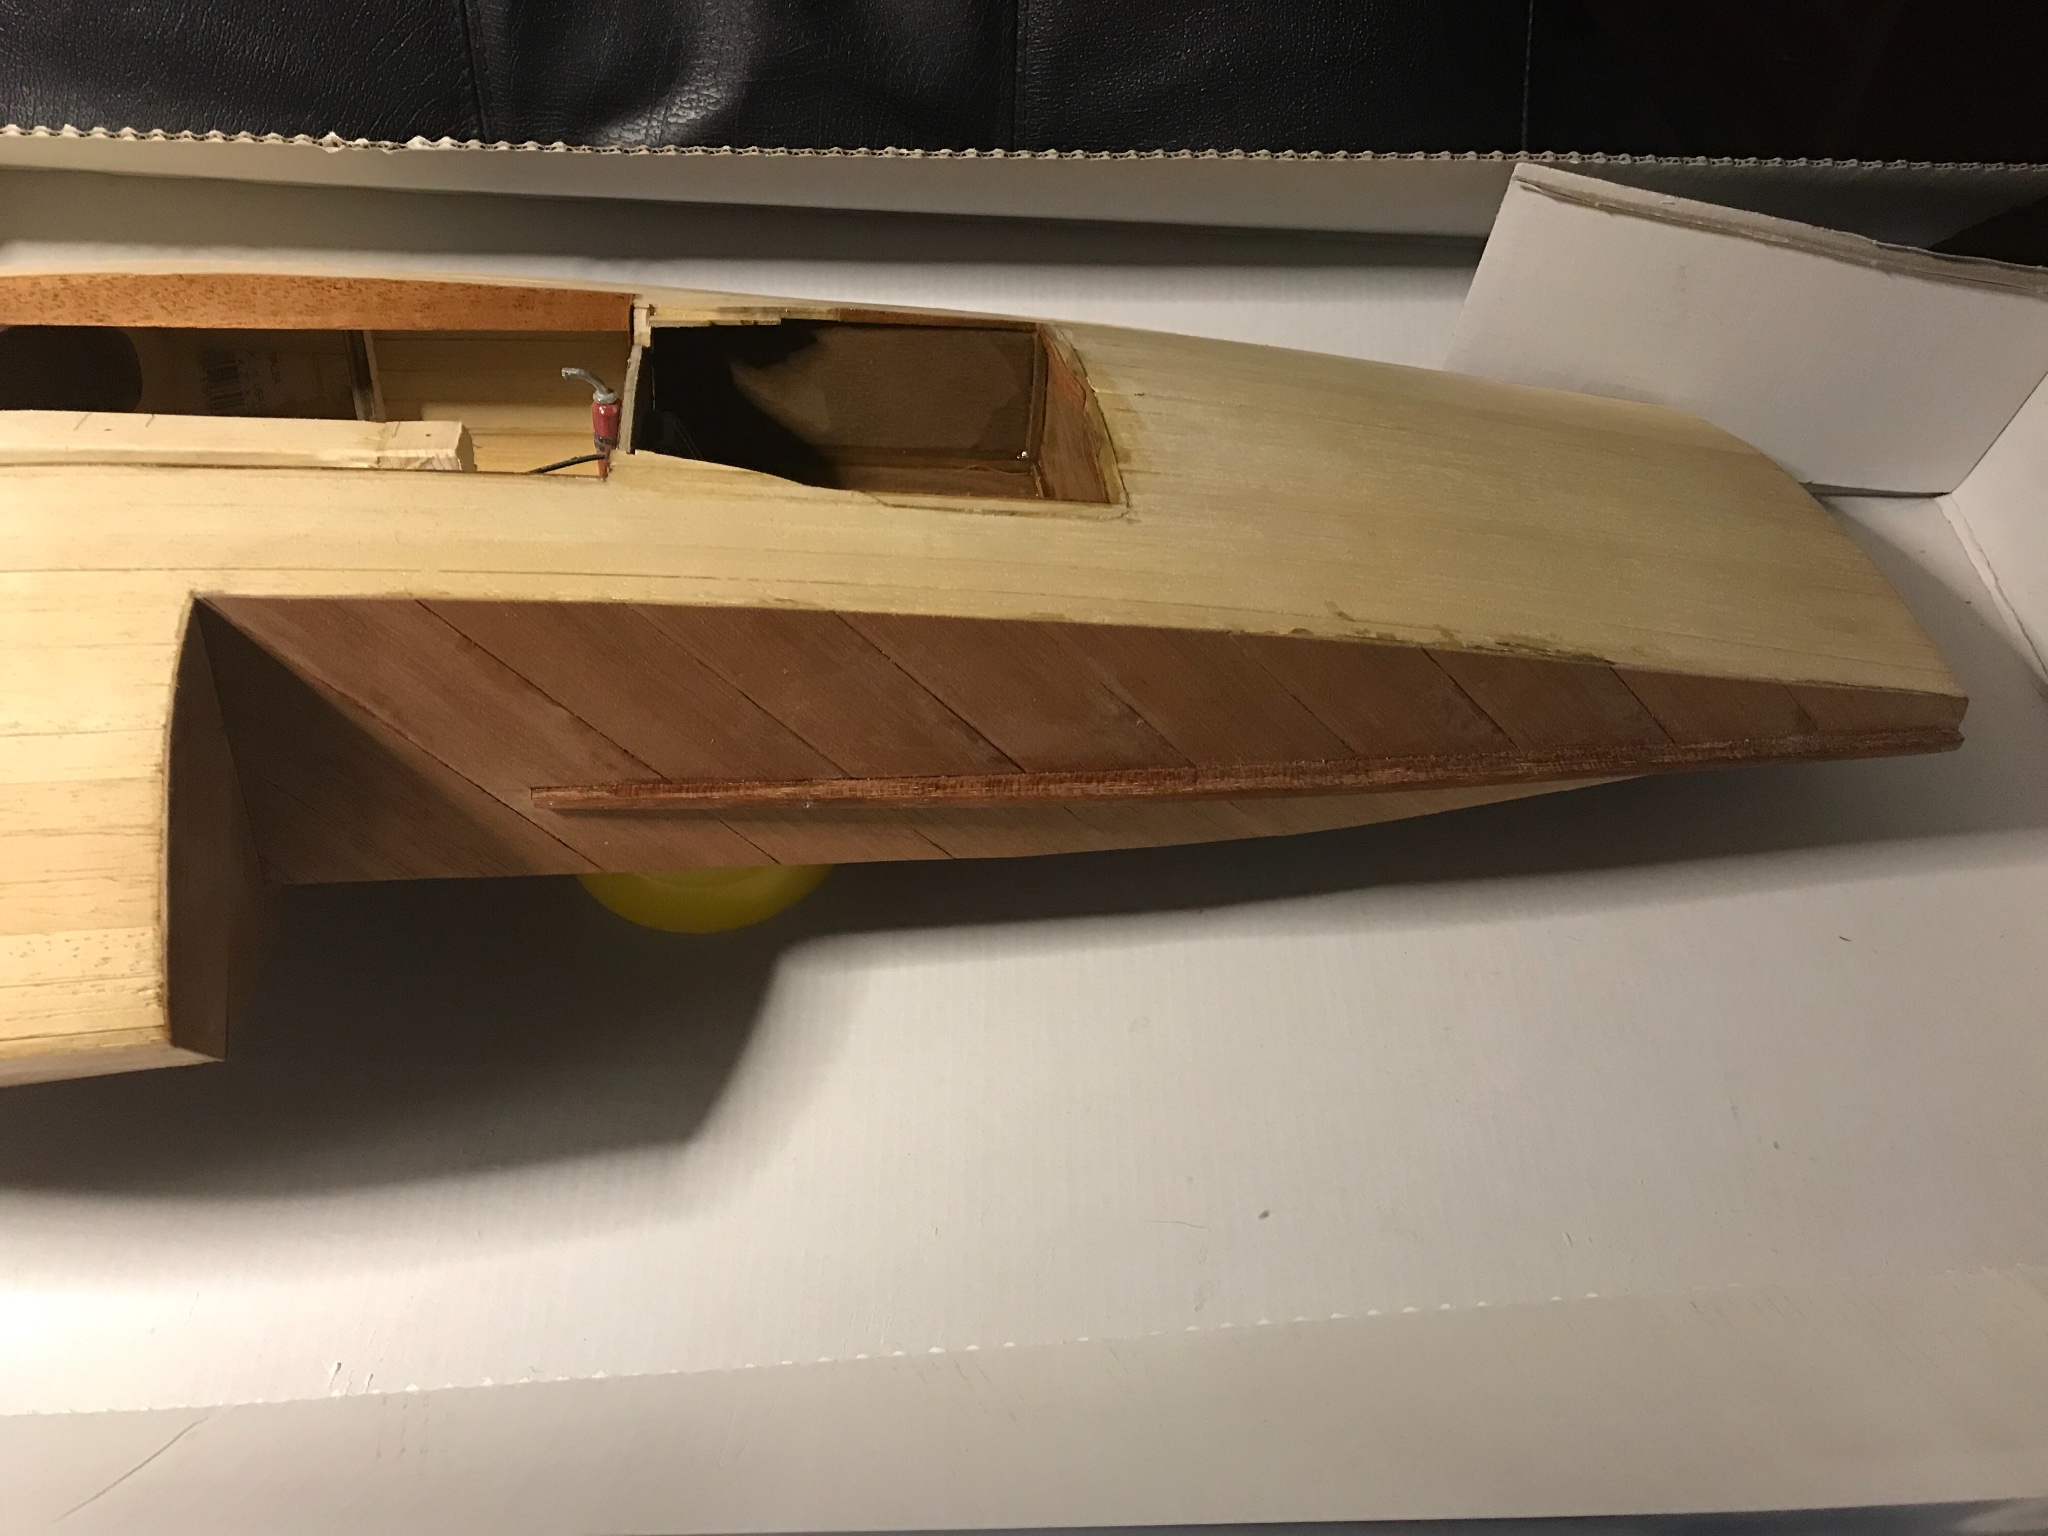
I was able to get some polyurethane on the bottom, I stopped at 3 coats as I will be sanding along all the edges.
I used Varathane by Rust-Oleum, it does get hard after about 24 hours, but it’s much thicker than Minwax, I was able to get more Minwax so I will be doing the rest with it.
I also was able to get the engine compartment opened up, the engine with it’s transmission is going to fit, along with the hood that I made, I’ll get a picture once the scoops are on it.
I also was able to find some mahogany in the stock pile so I made the rear fins and got them attached now I can begin to plank the top side.


-
I think sometimes this fret clears itself when I stumble past this point and something turns out like I in visioned or sometimes much better.
I also find that I stumble onto very unique creations and ideas of bettering myself.
Sometimes understanding something comes from experience, a fail is only a fail if it allows us to give up on our dreams, looking at this site should help you see especially the scratch built items, these guy’s rebuilt something until they realized they could do it better. The kit is simply the outside parameter or limits, so if you are good enough to have gotten this far, you are good enough to step out of that box and rebuild every part you are using.You are better than that kit, it has no power, but what you give it.
- mtaylor and Ryland Craze
-
2
-
-
Sidebar:
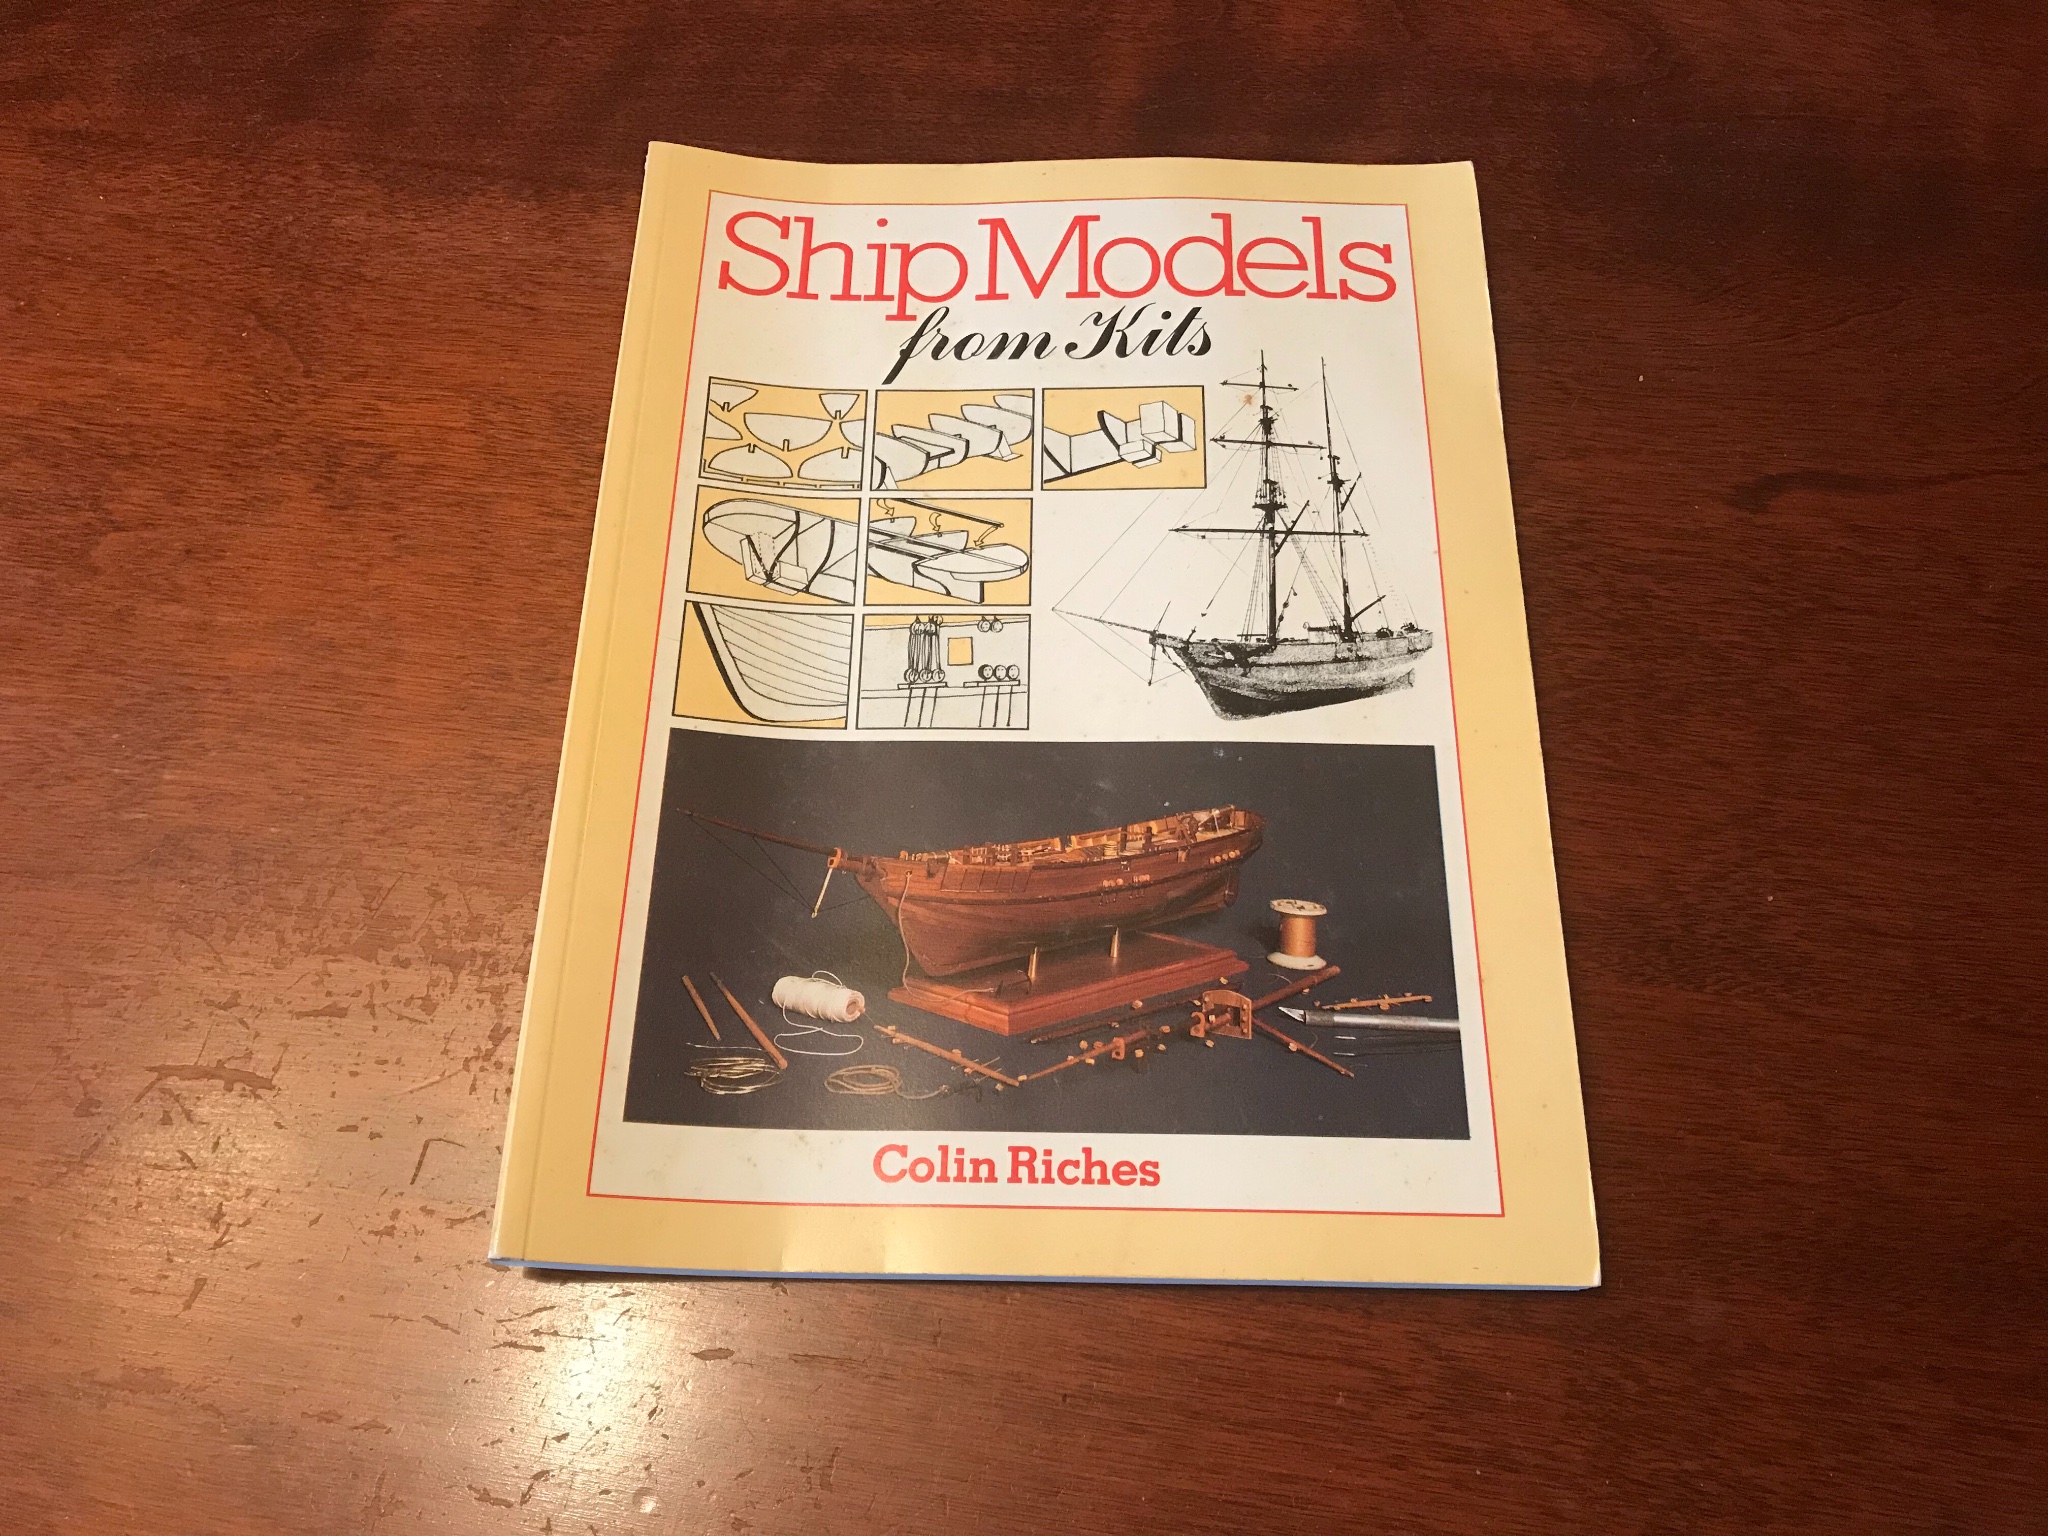
Today I received a book, (see picture) it appears to have never been opened before, the date on it says 1984, and it was printed by Model Expo.
I can’t wait to read it.
This morning while I was looking at the news I saw an article on piracy and how it shaped the world we live in, the article was about a pirate named Henry Every and how a man with a metal detector in Maine found a coin that he had looted, it all makes me think of this site, the page I opened in the book when I picked it up was about knot tying and spooling up the rope afterwards, I had never seen anything like this before this site and had never before given thought to what happens with the extra rope, (just my ramblings I guess).

-
-
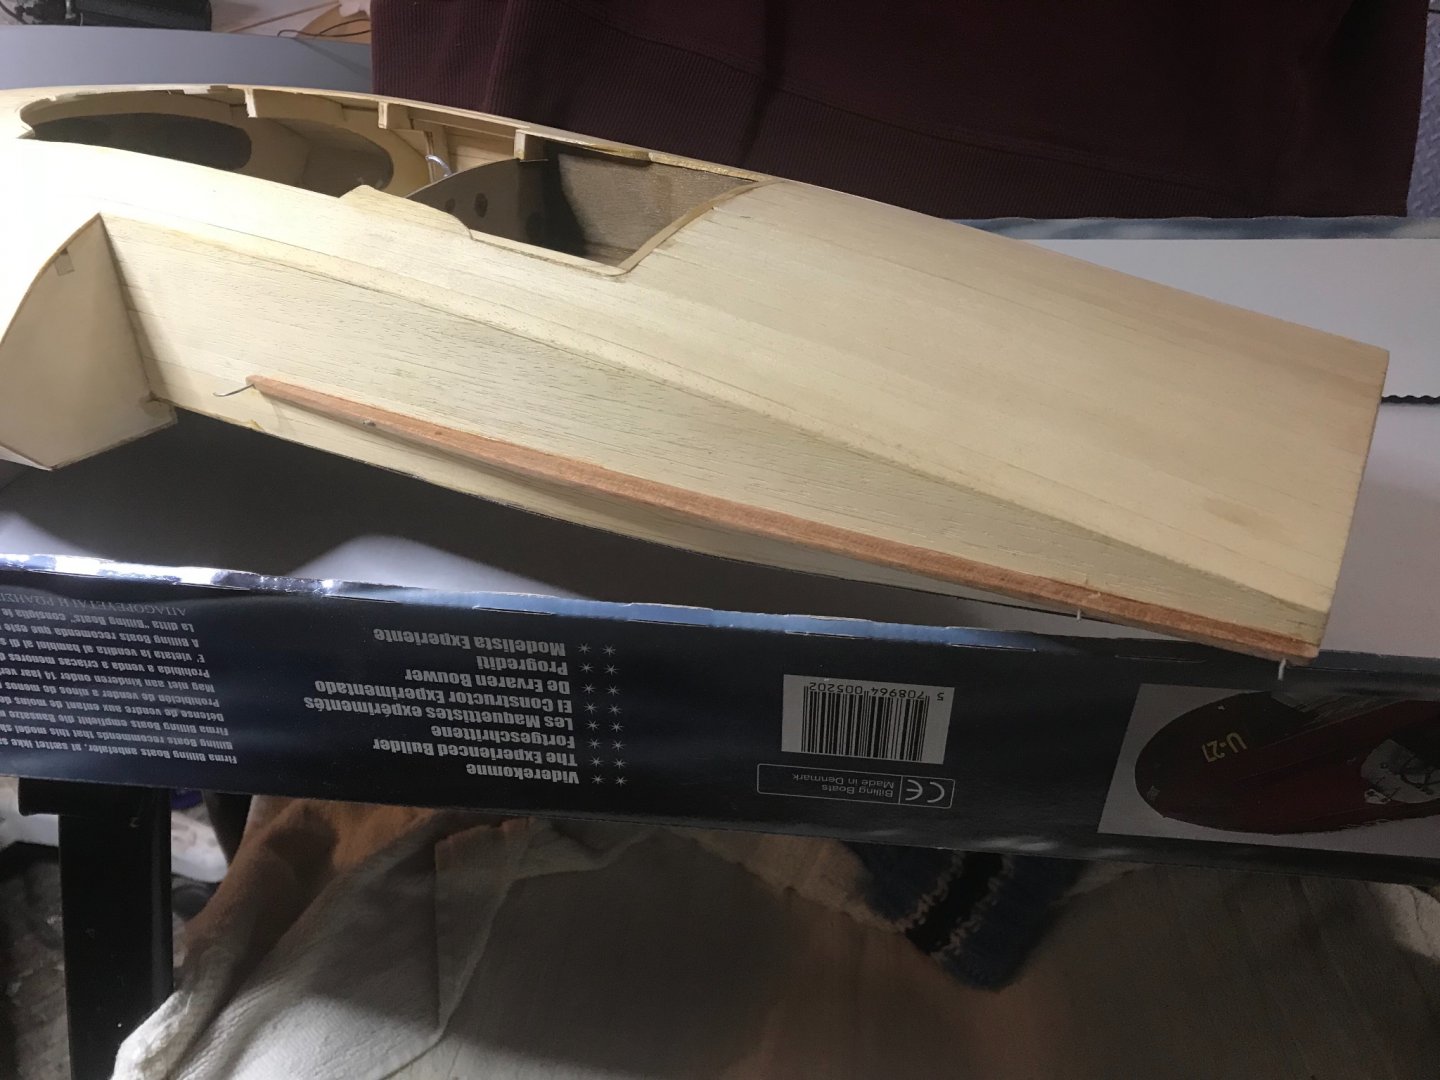
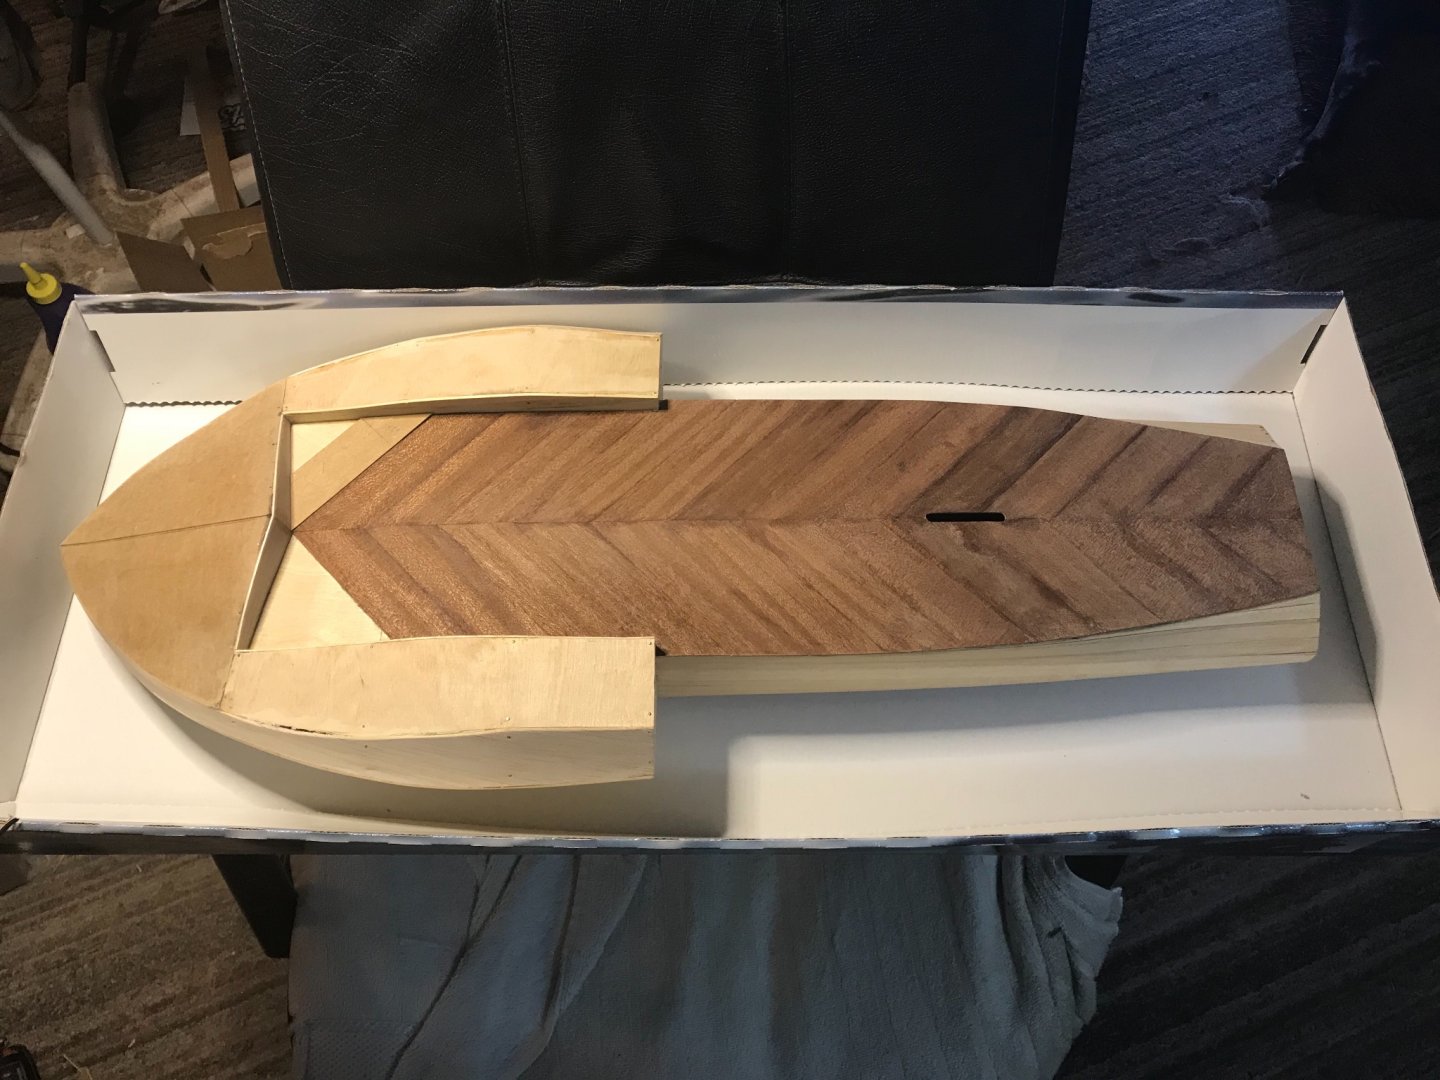
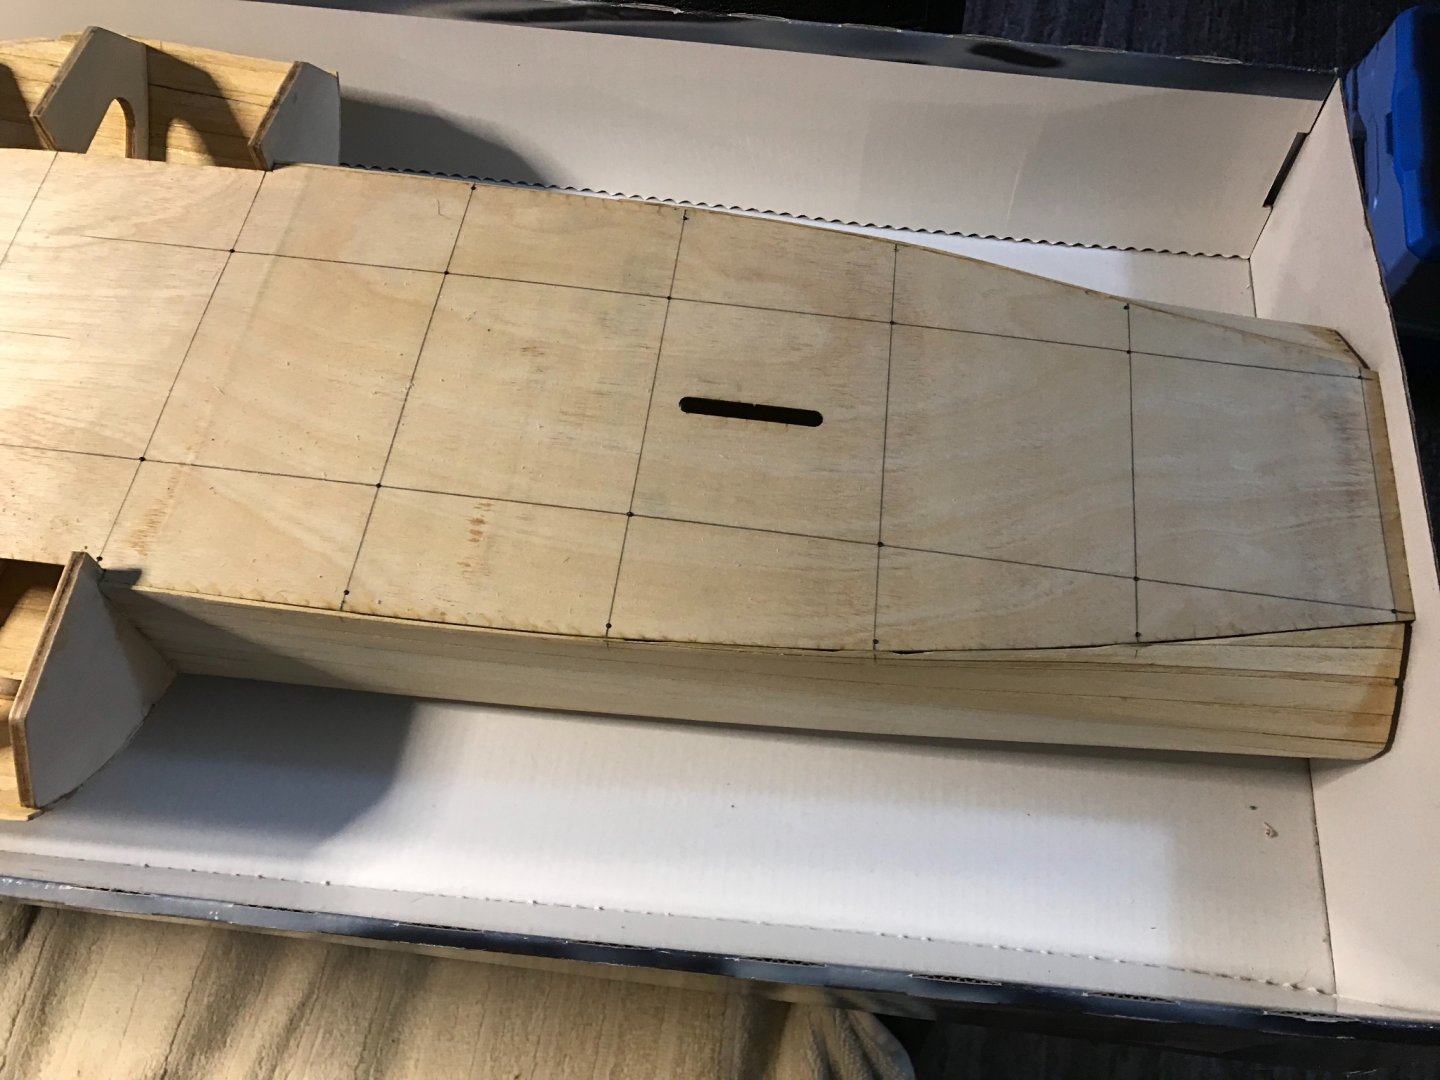
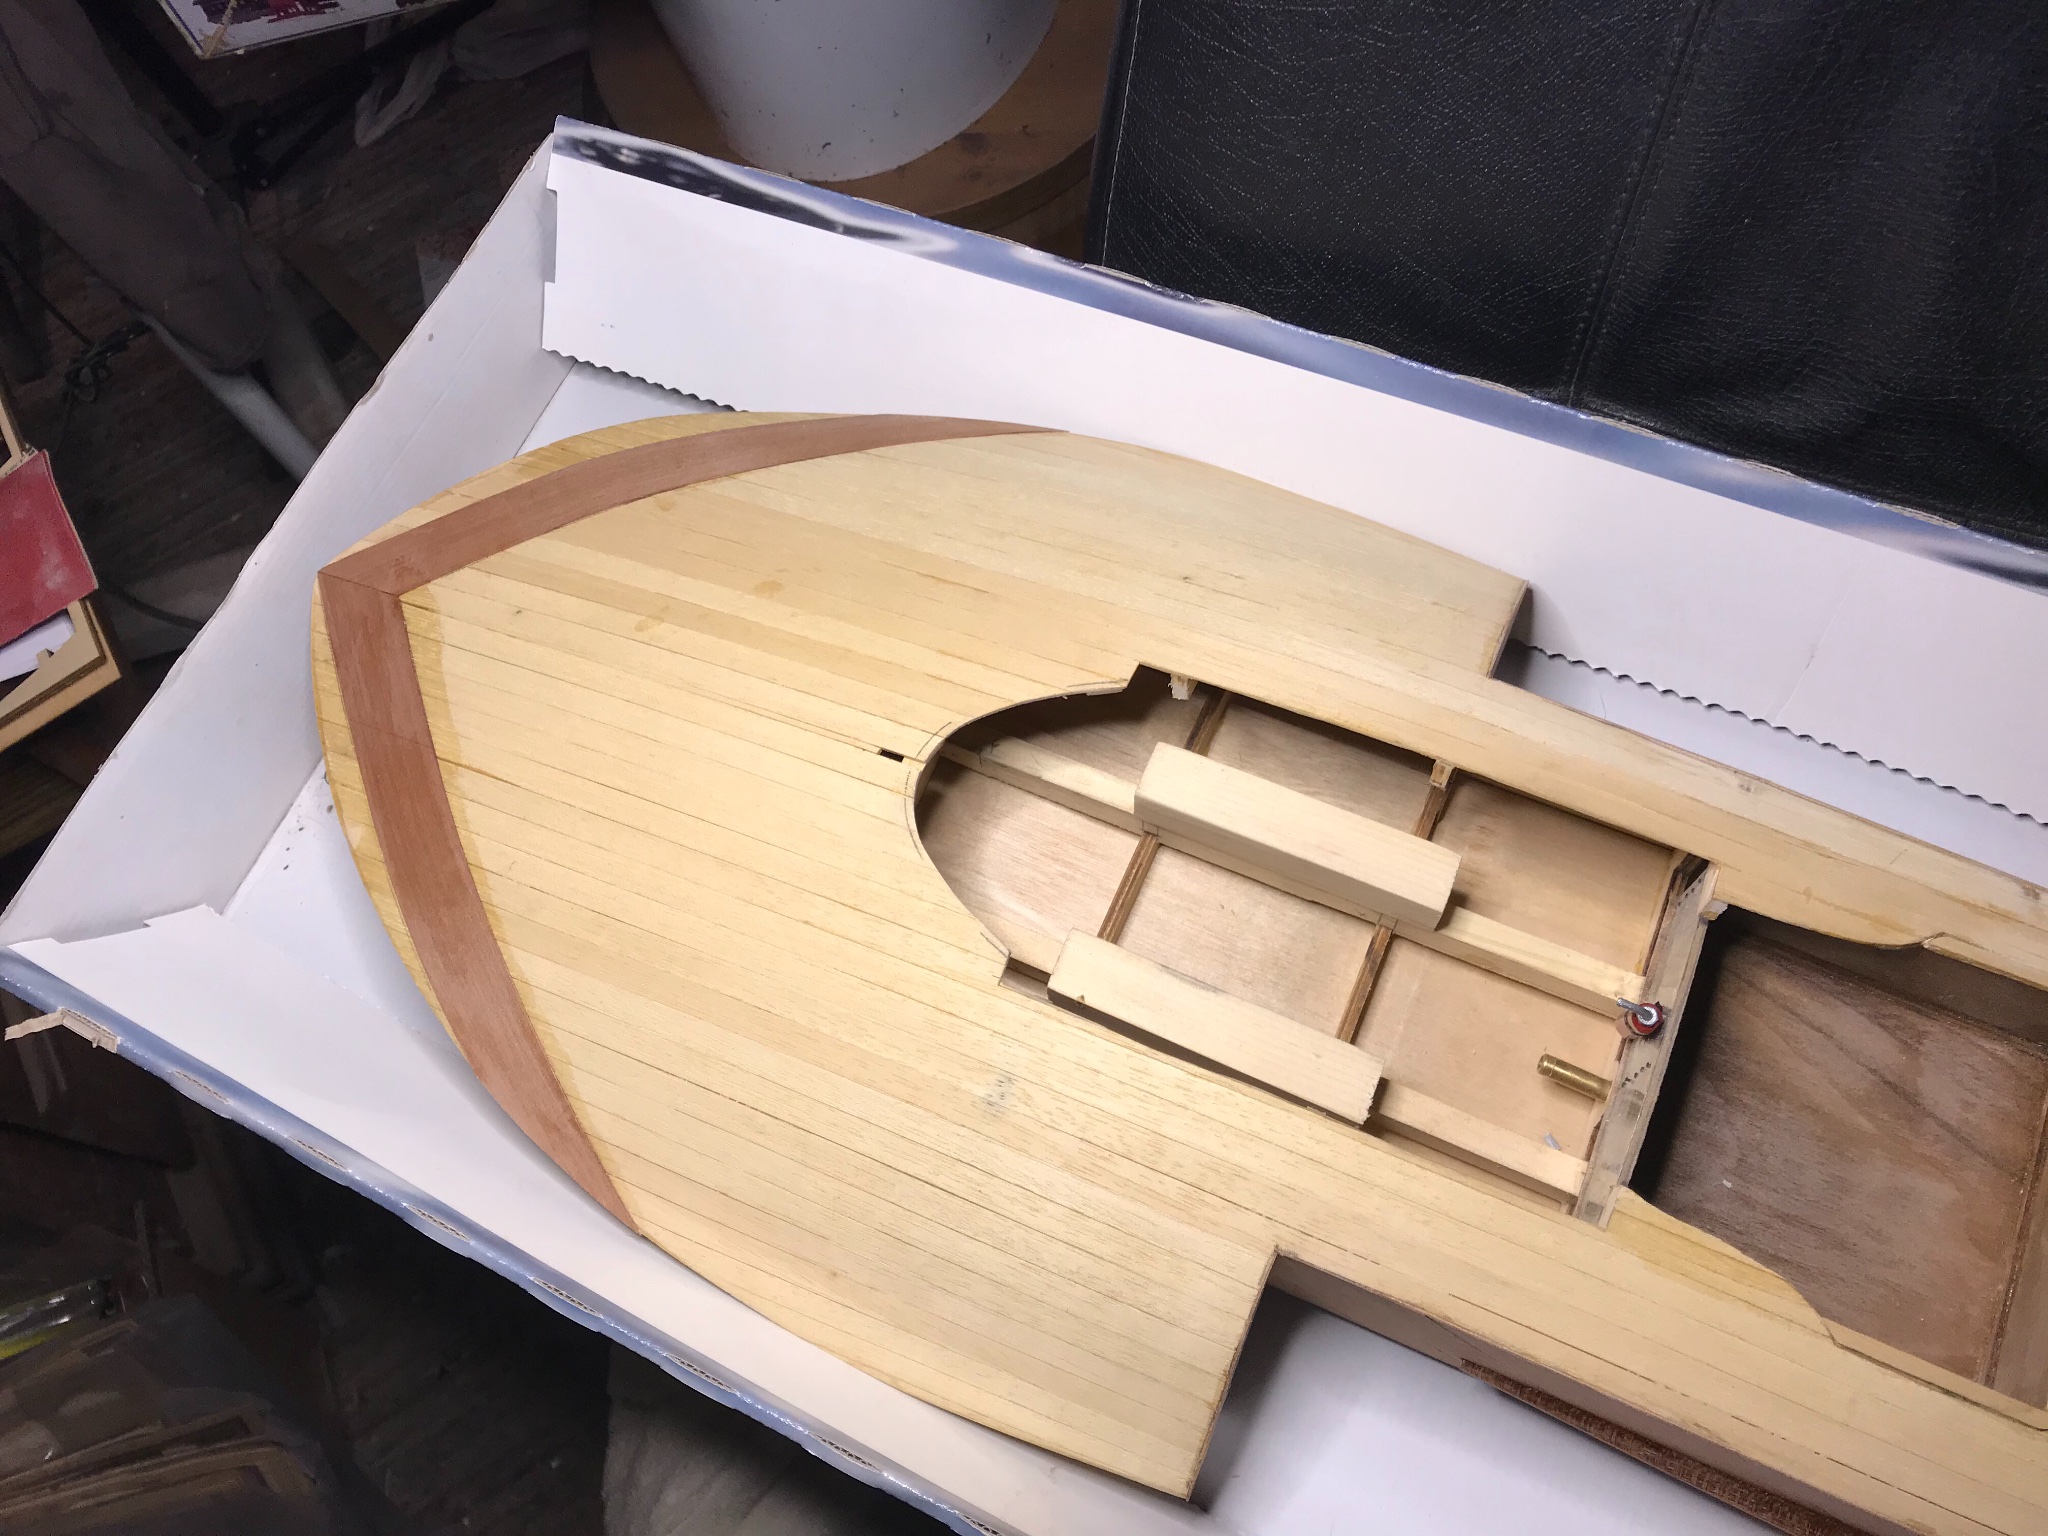
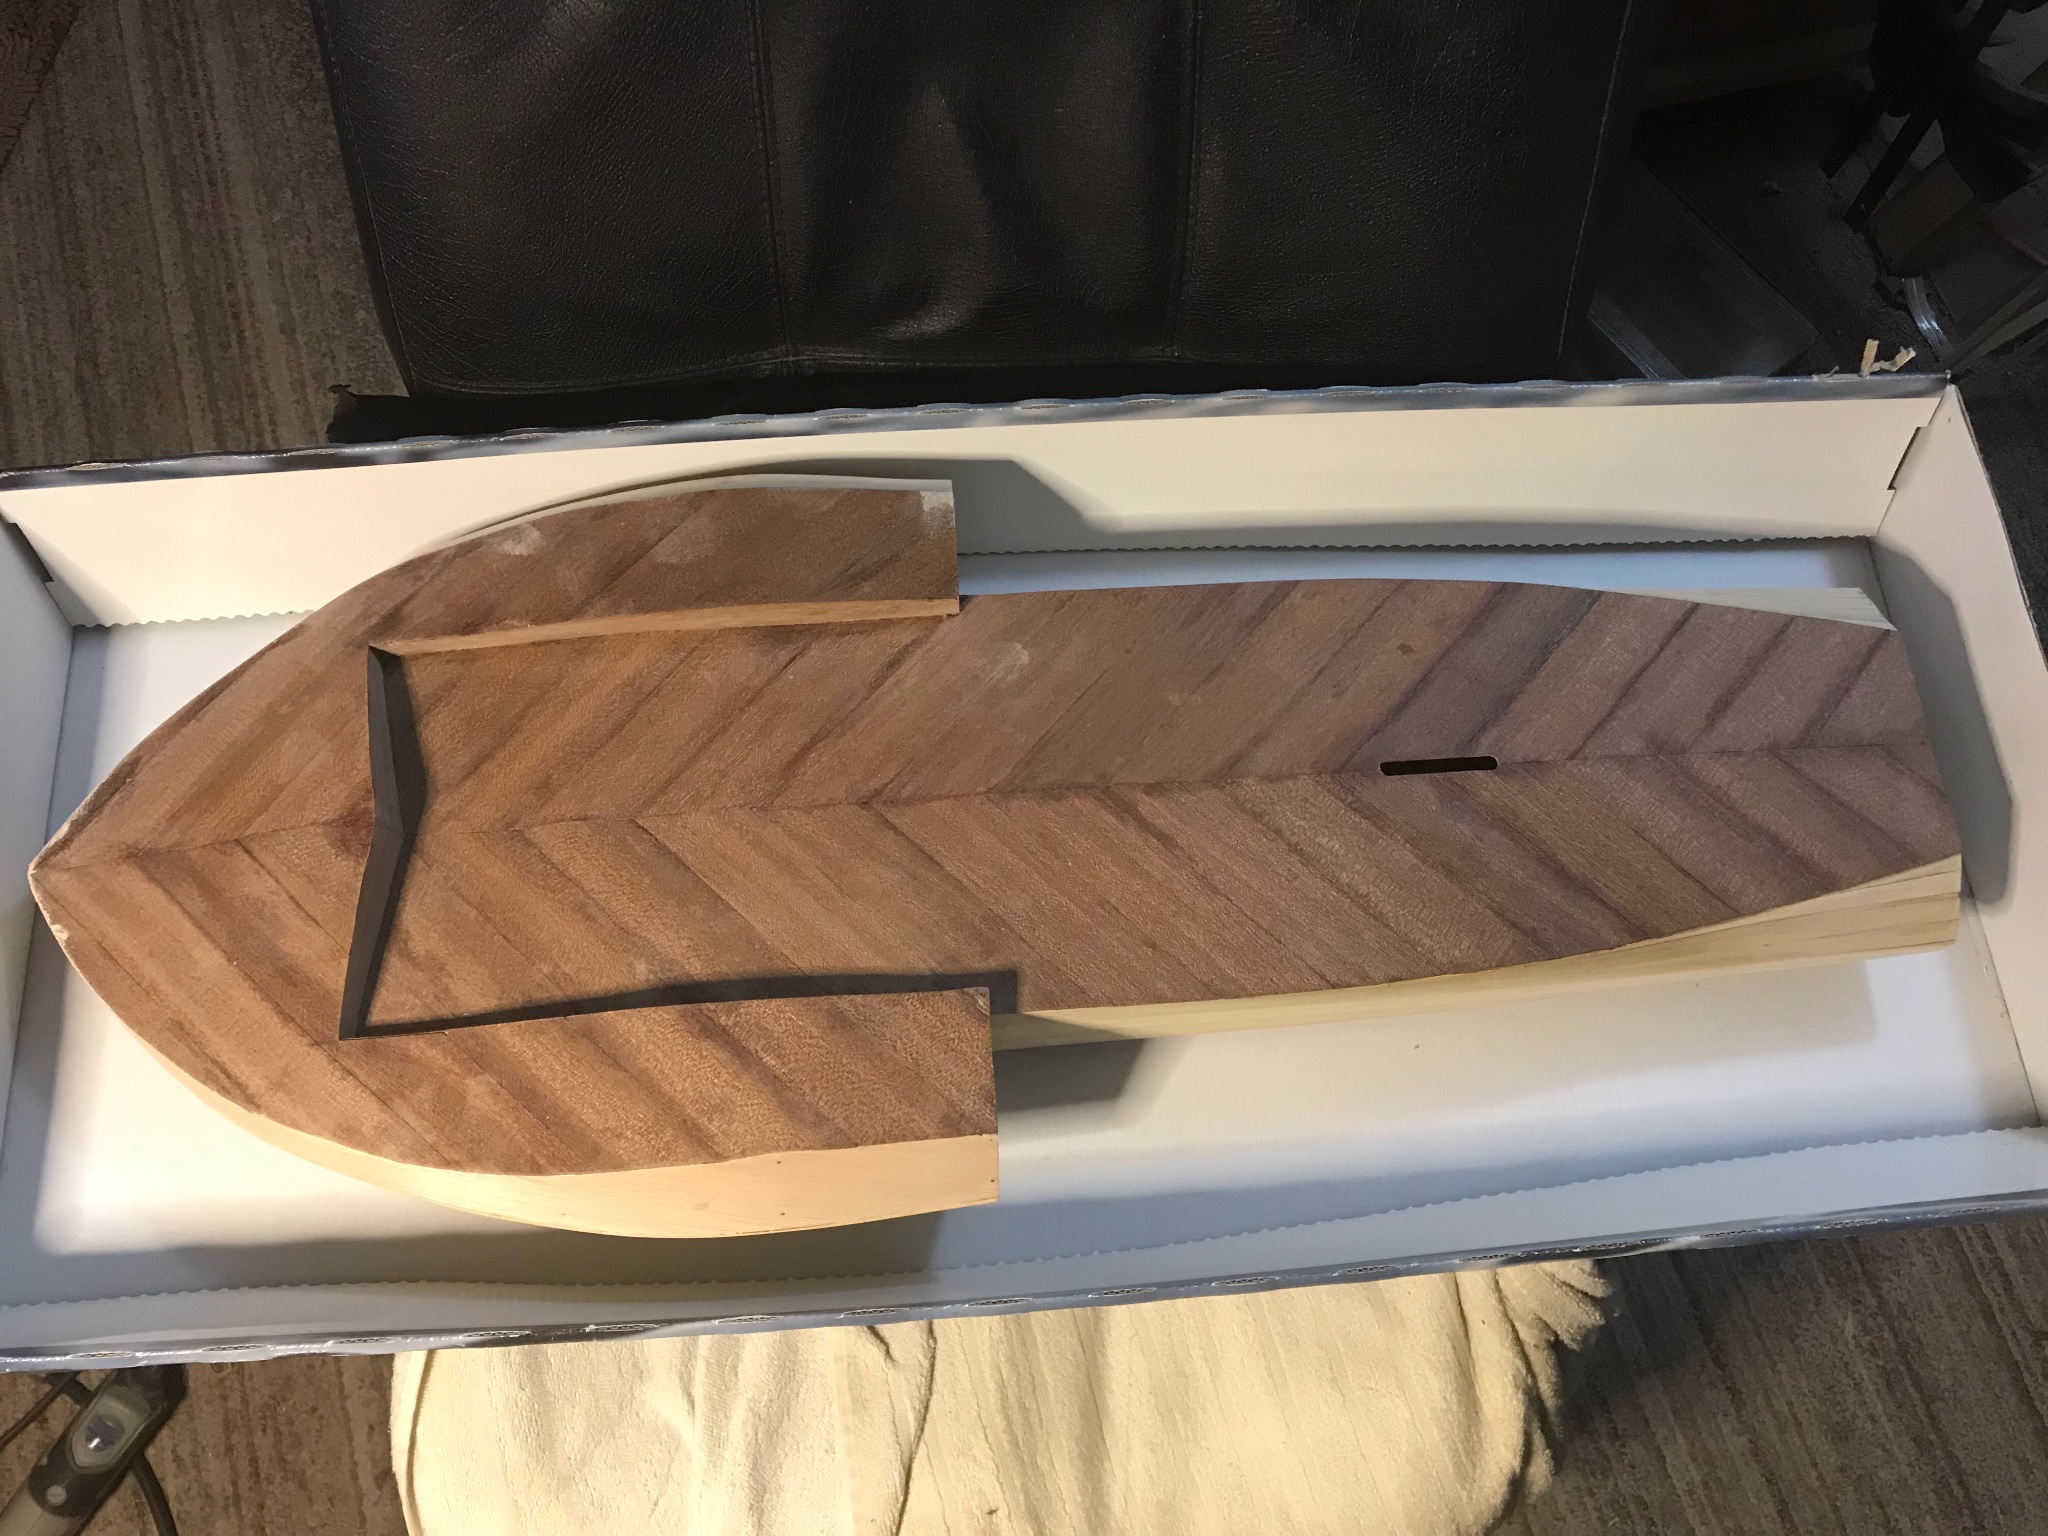
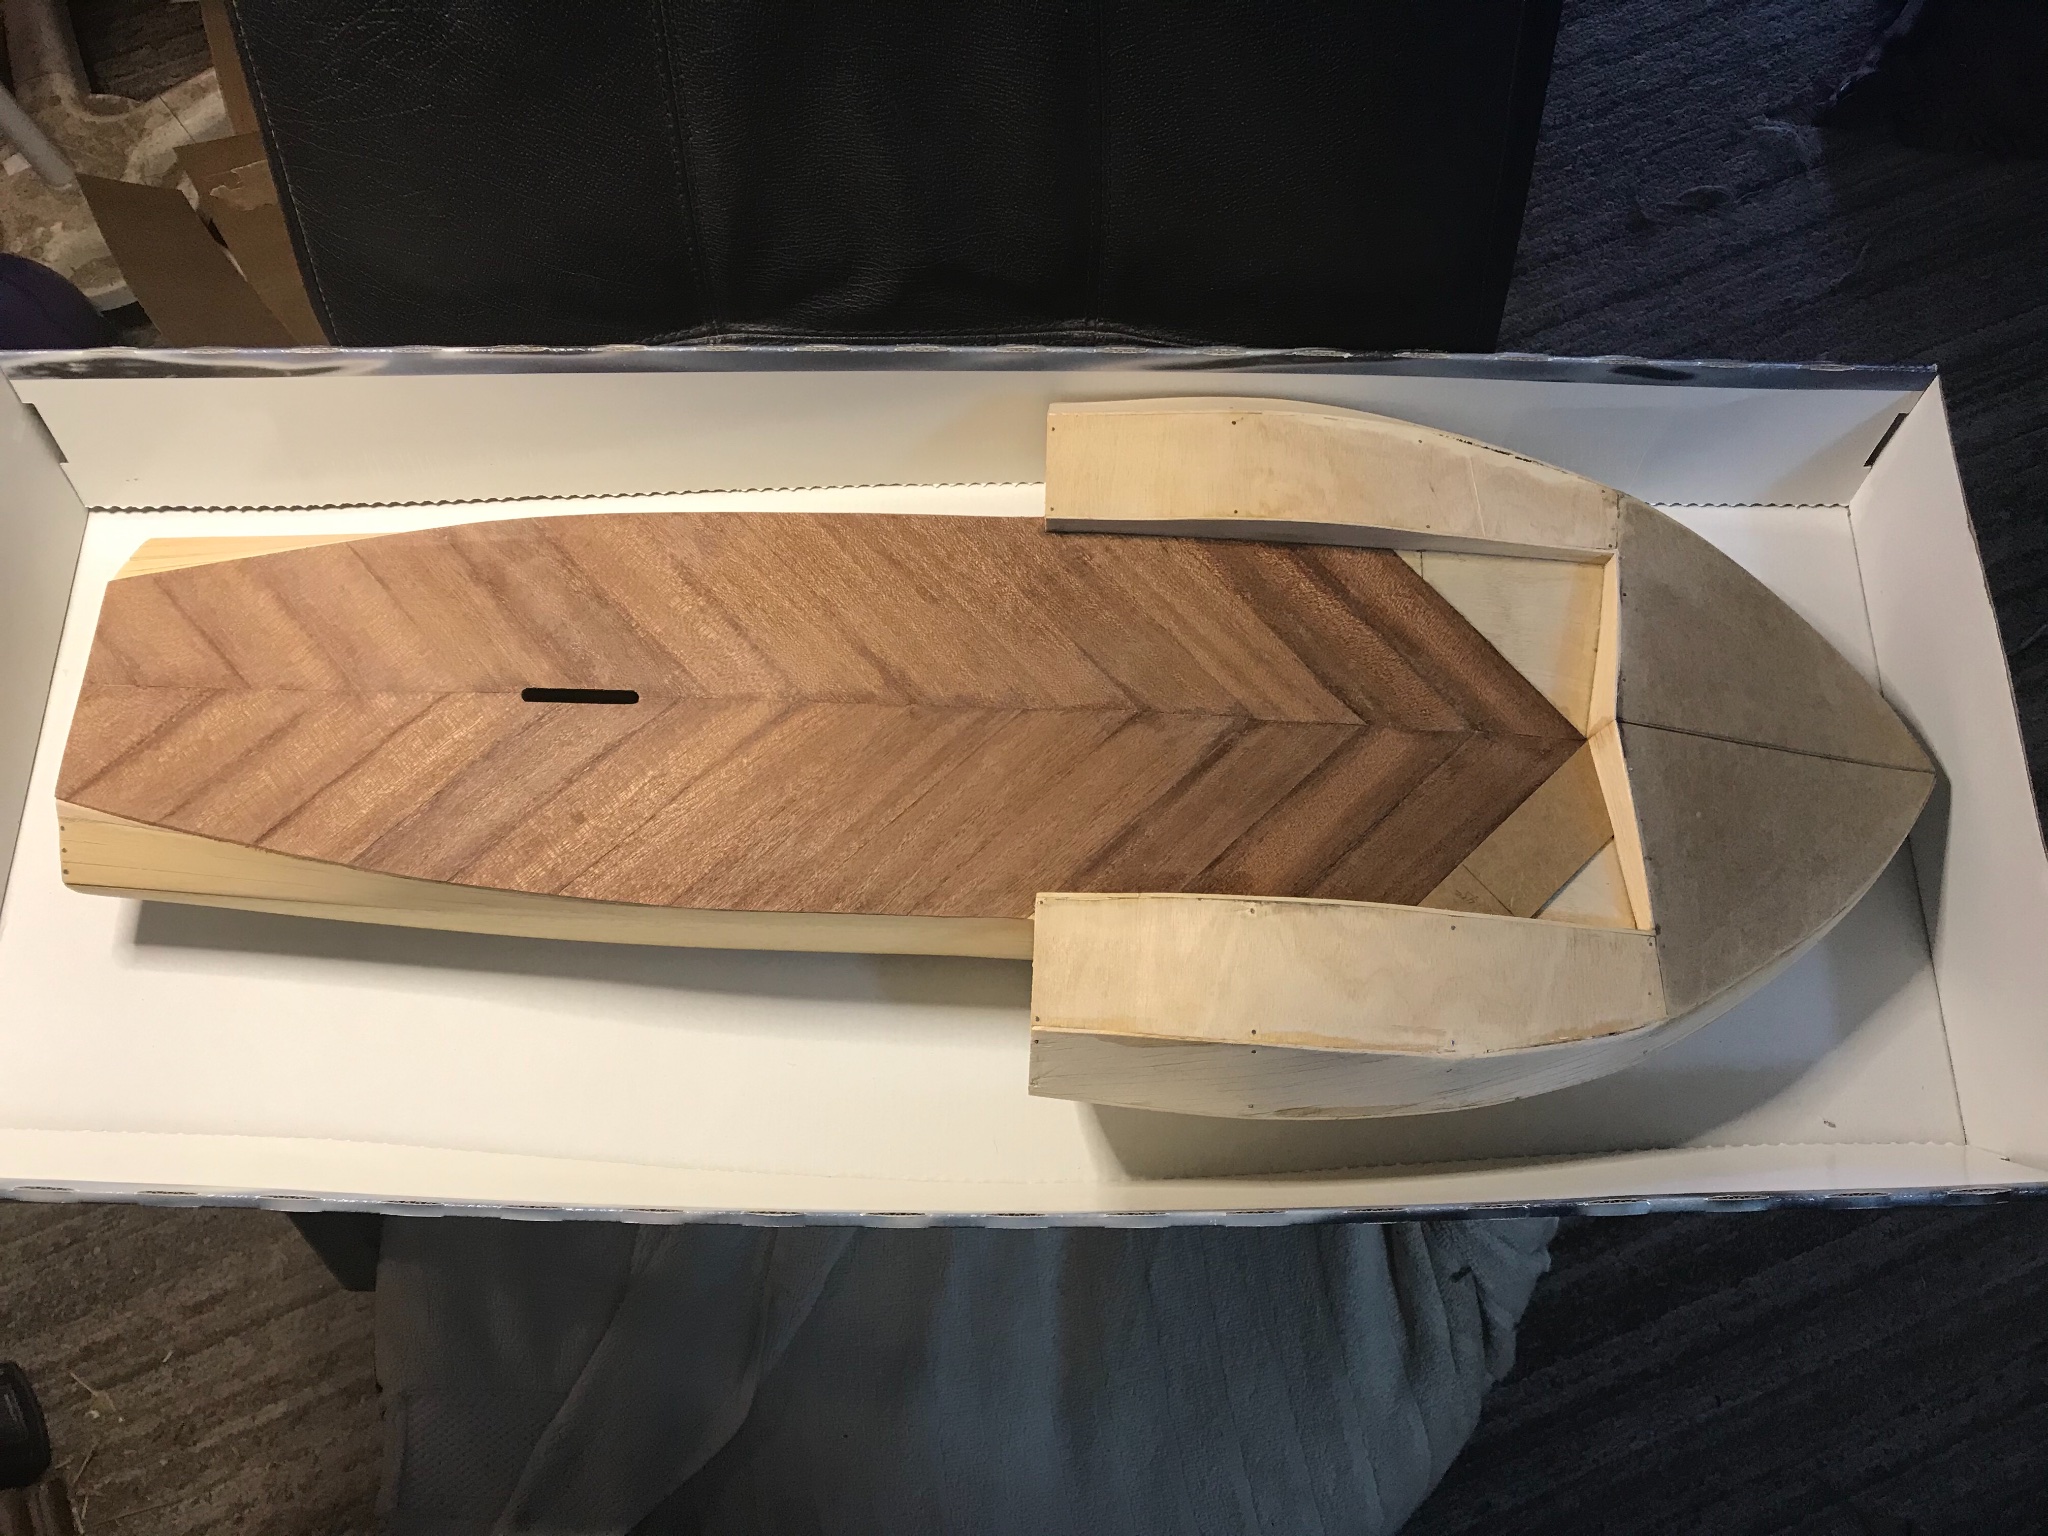
I finished planking the bottom. I’m happy with it, there are a couple of filler pieces, I’m sure after sanding will be very hard to find.
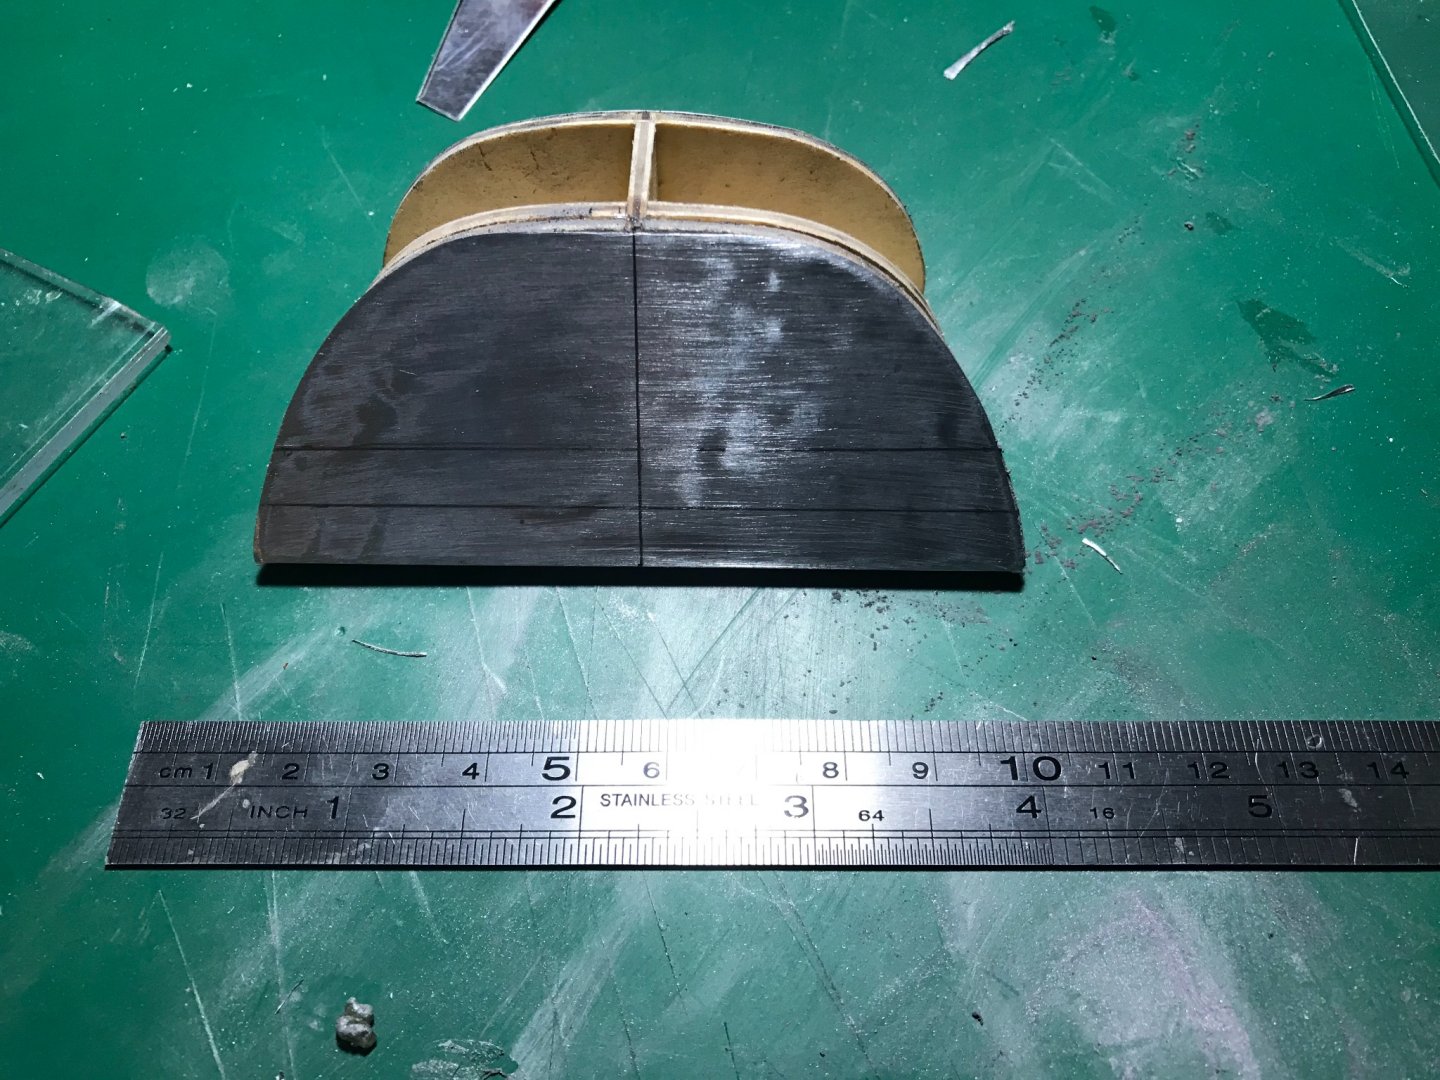
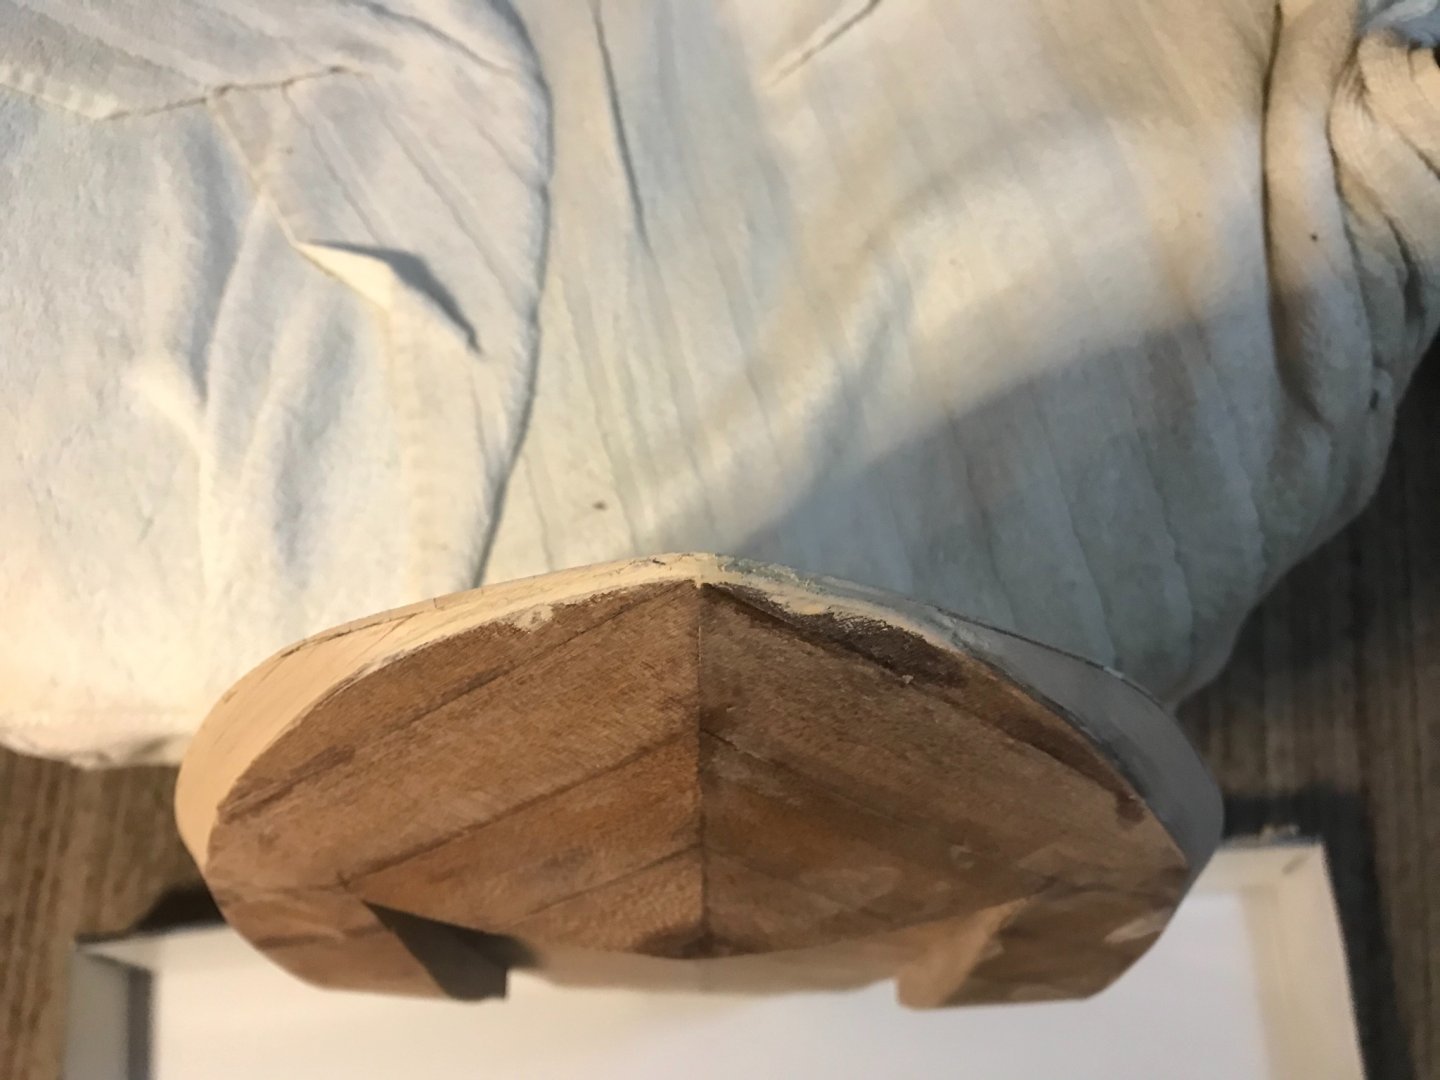
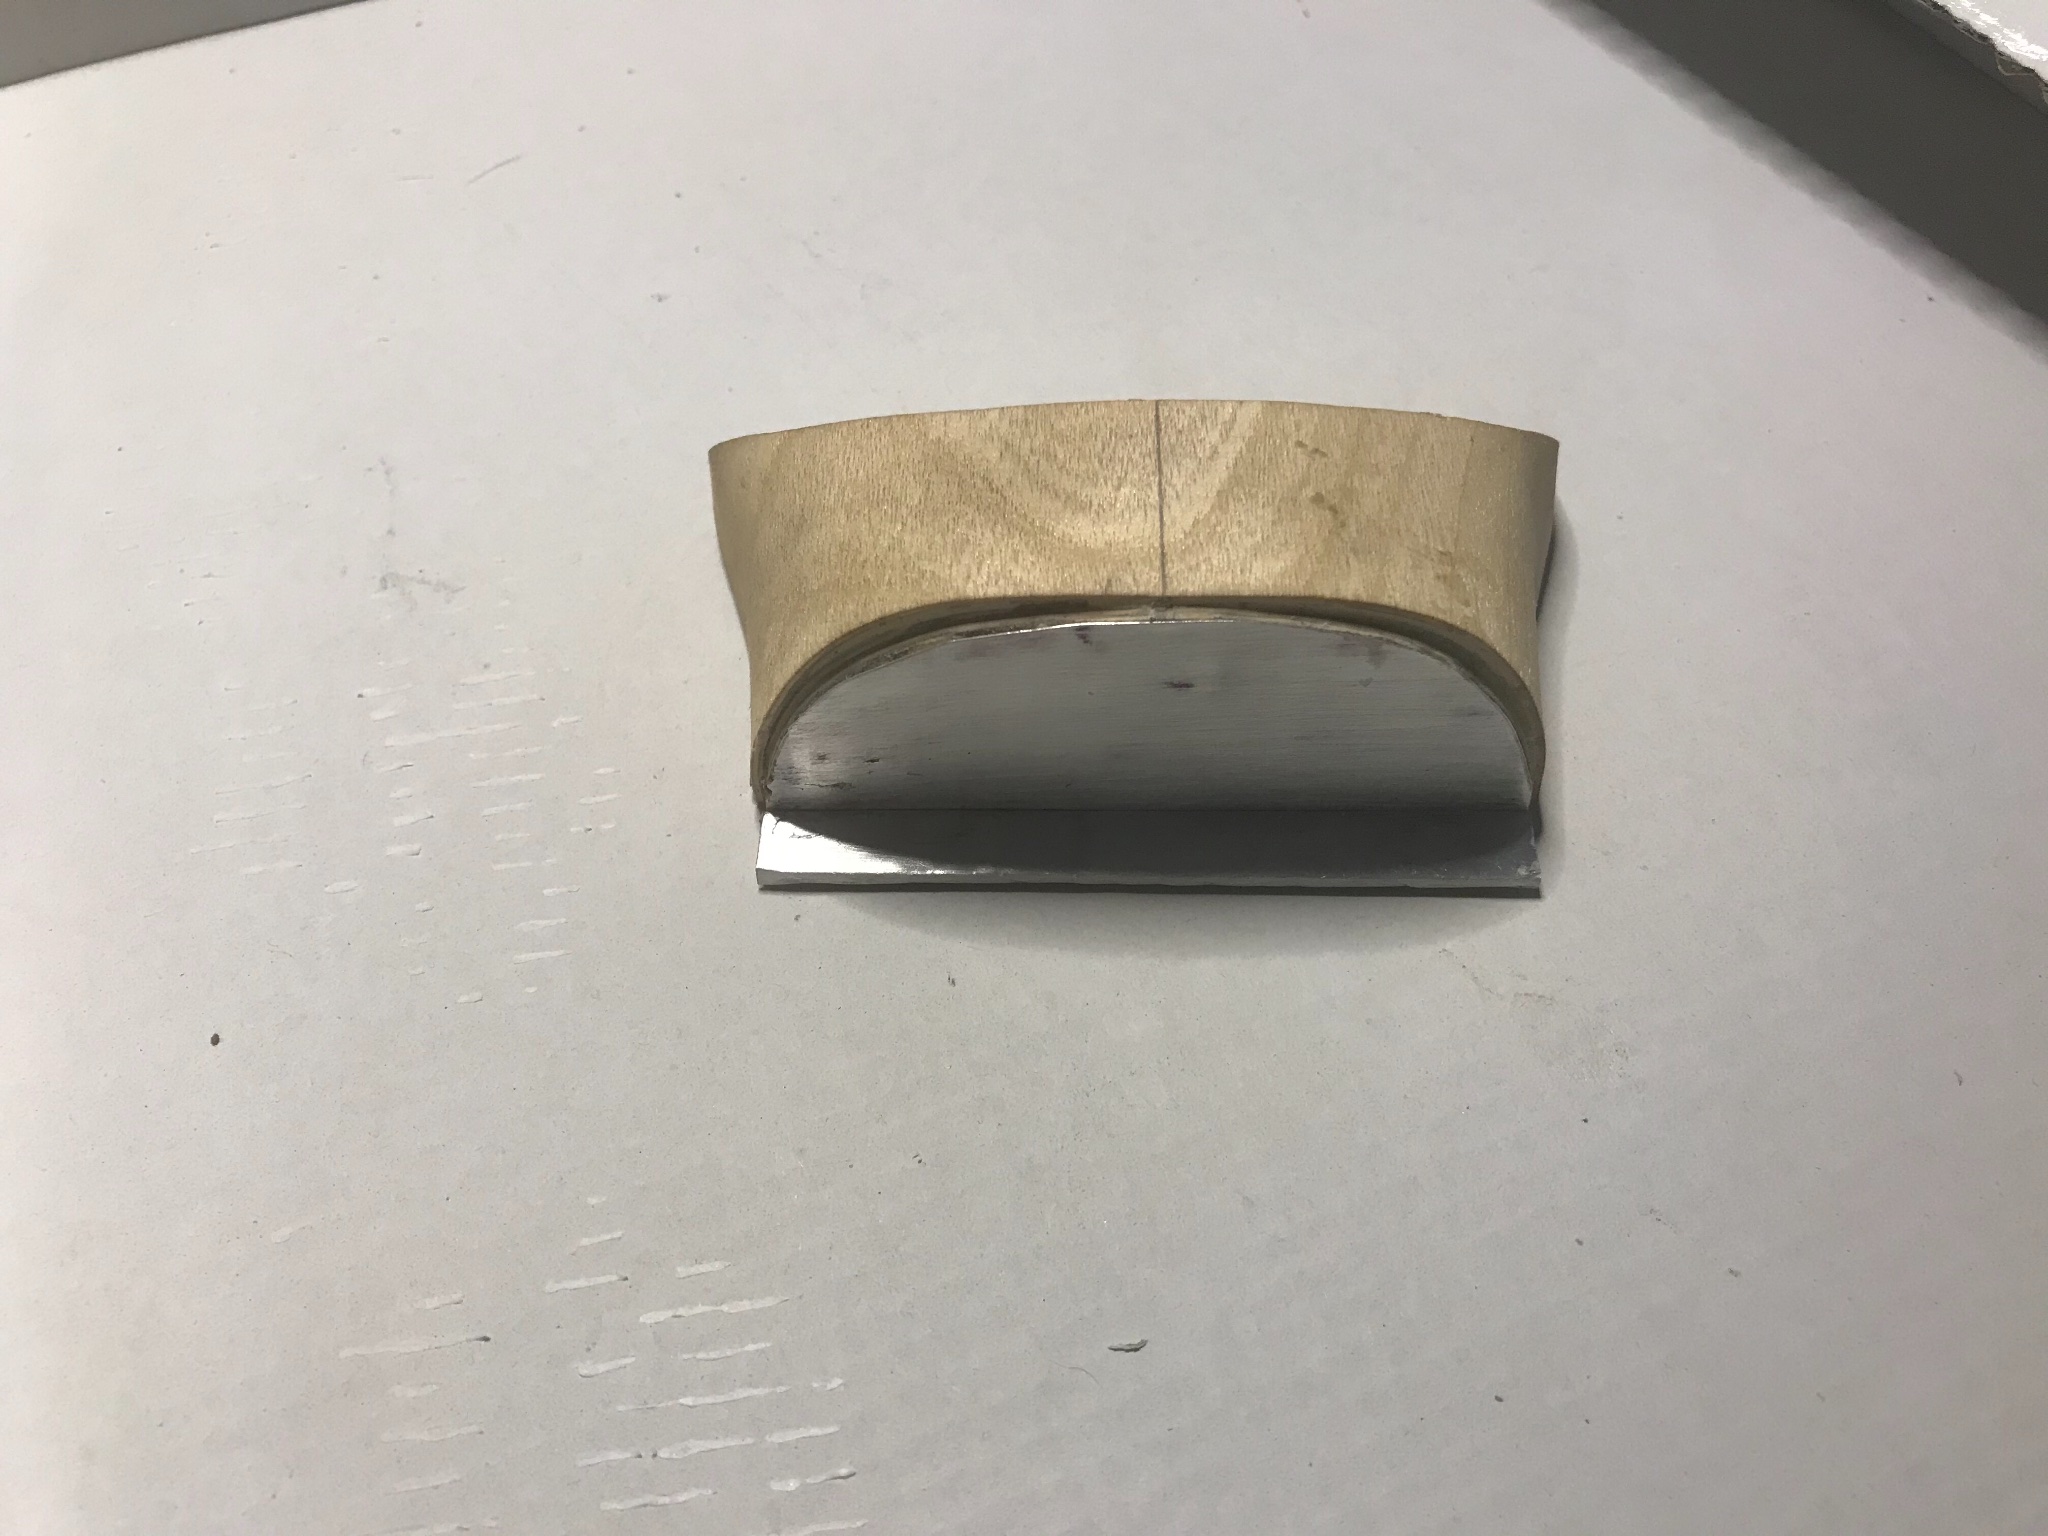
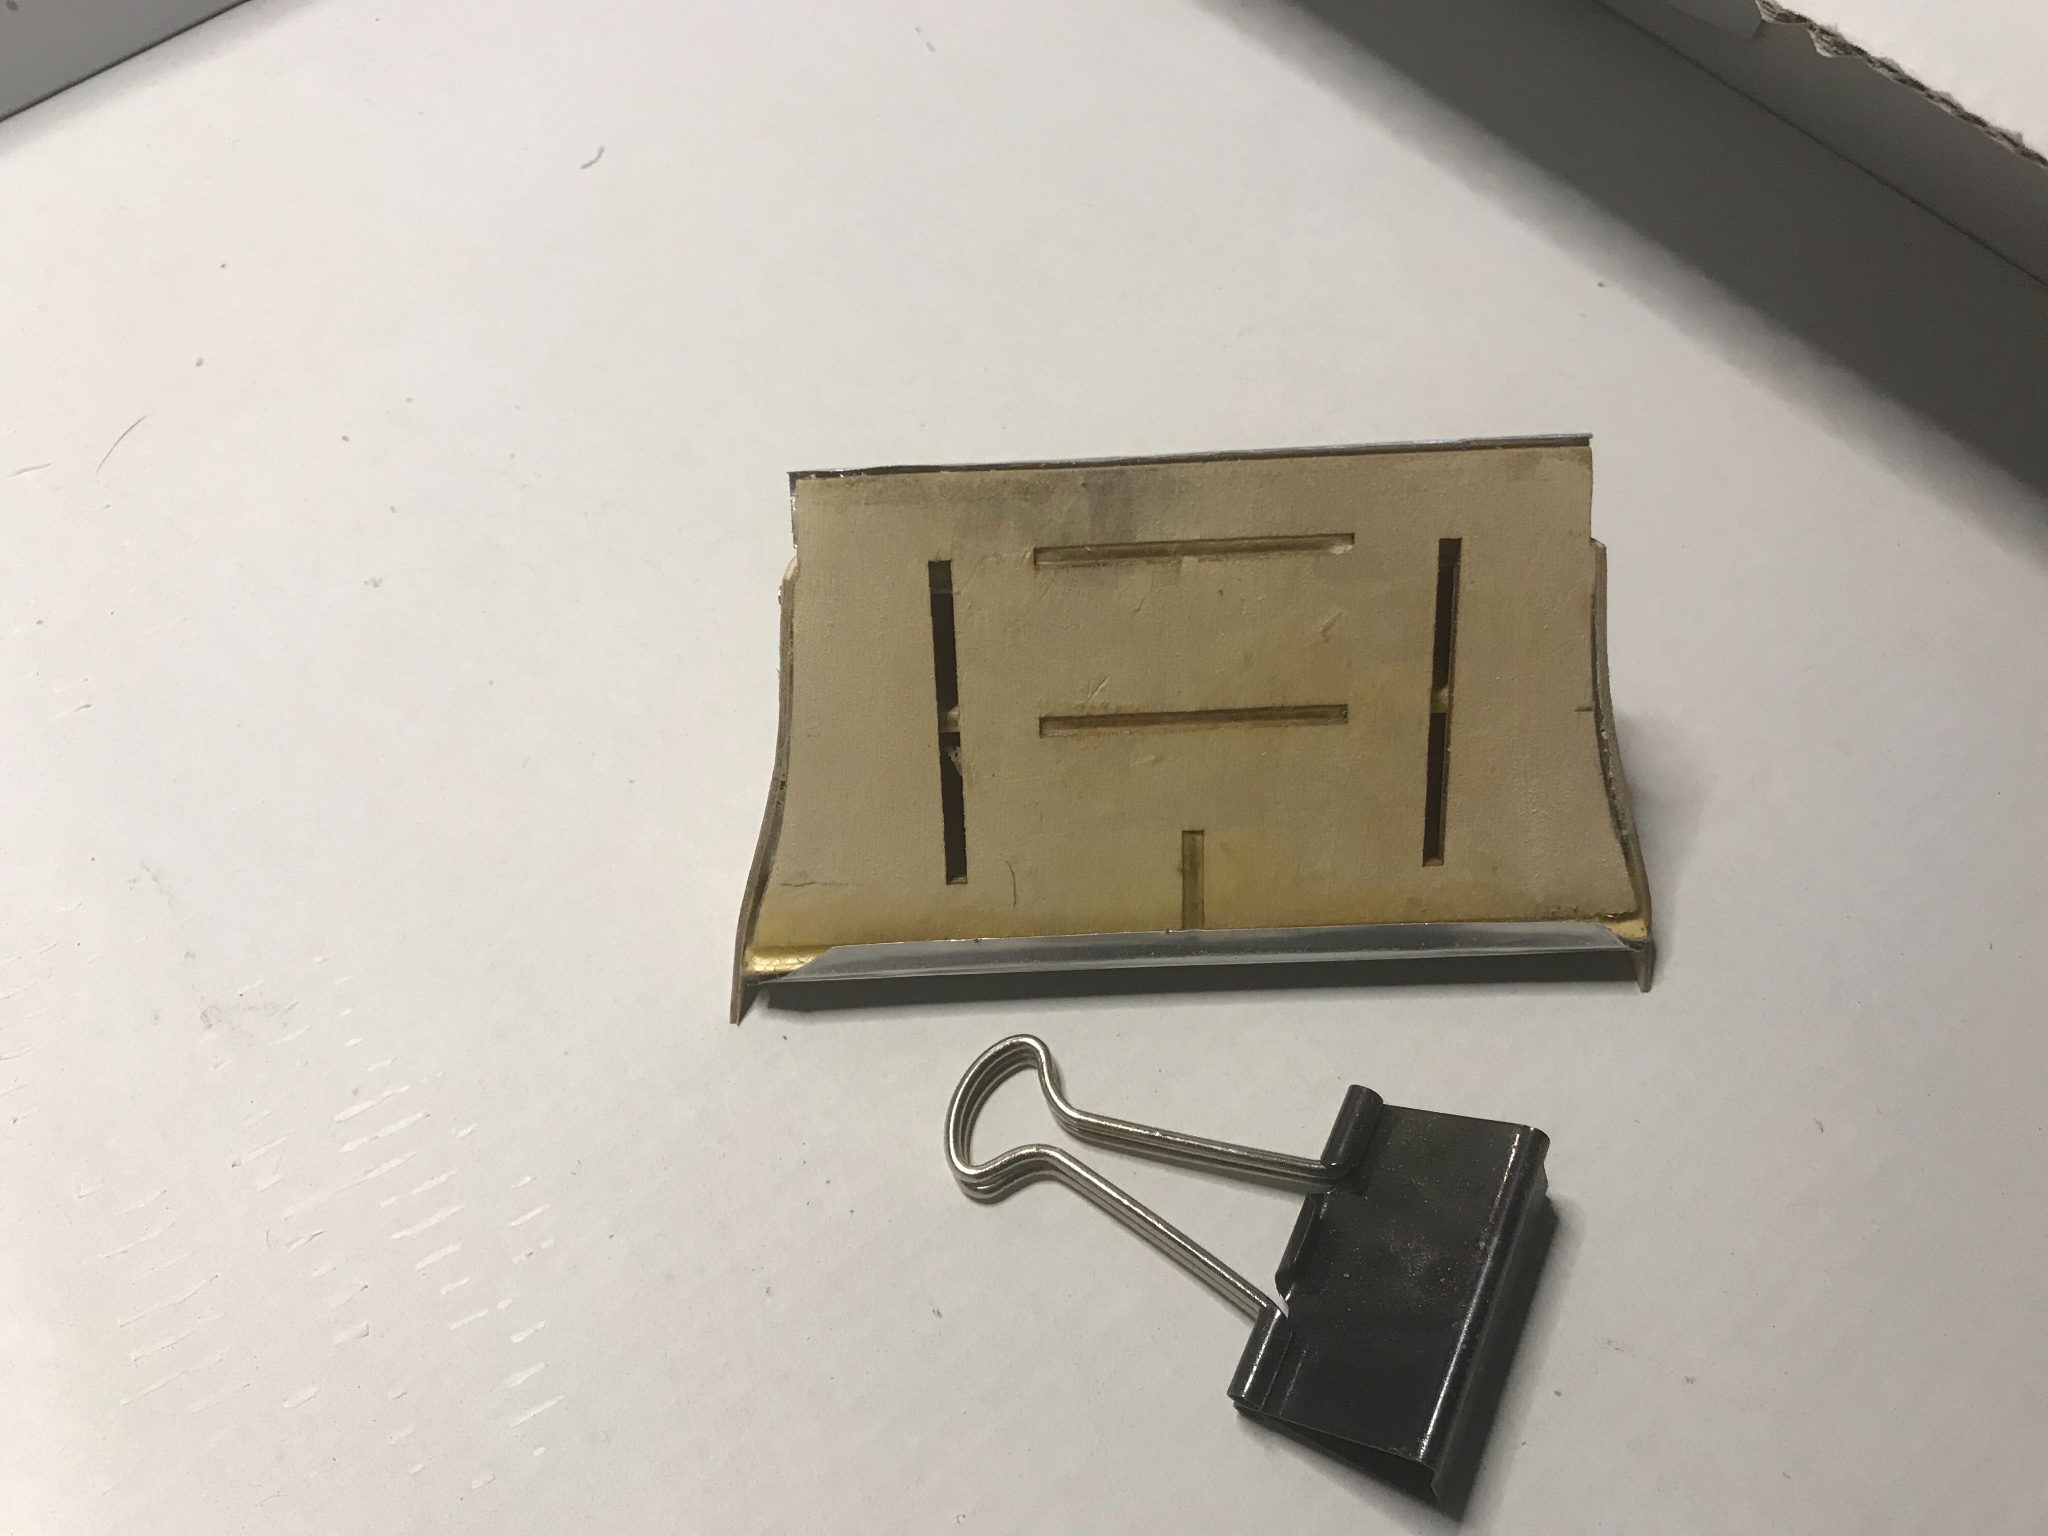
Filled the nose, I think the nose turned out great after my mistake and should cover nicely.
That suggestion to get some clear coat on is what the doctor ordered, then for surely it’s sealed and solid for ever.
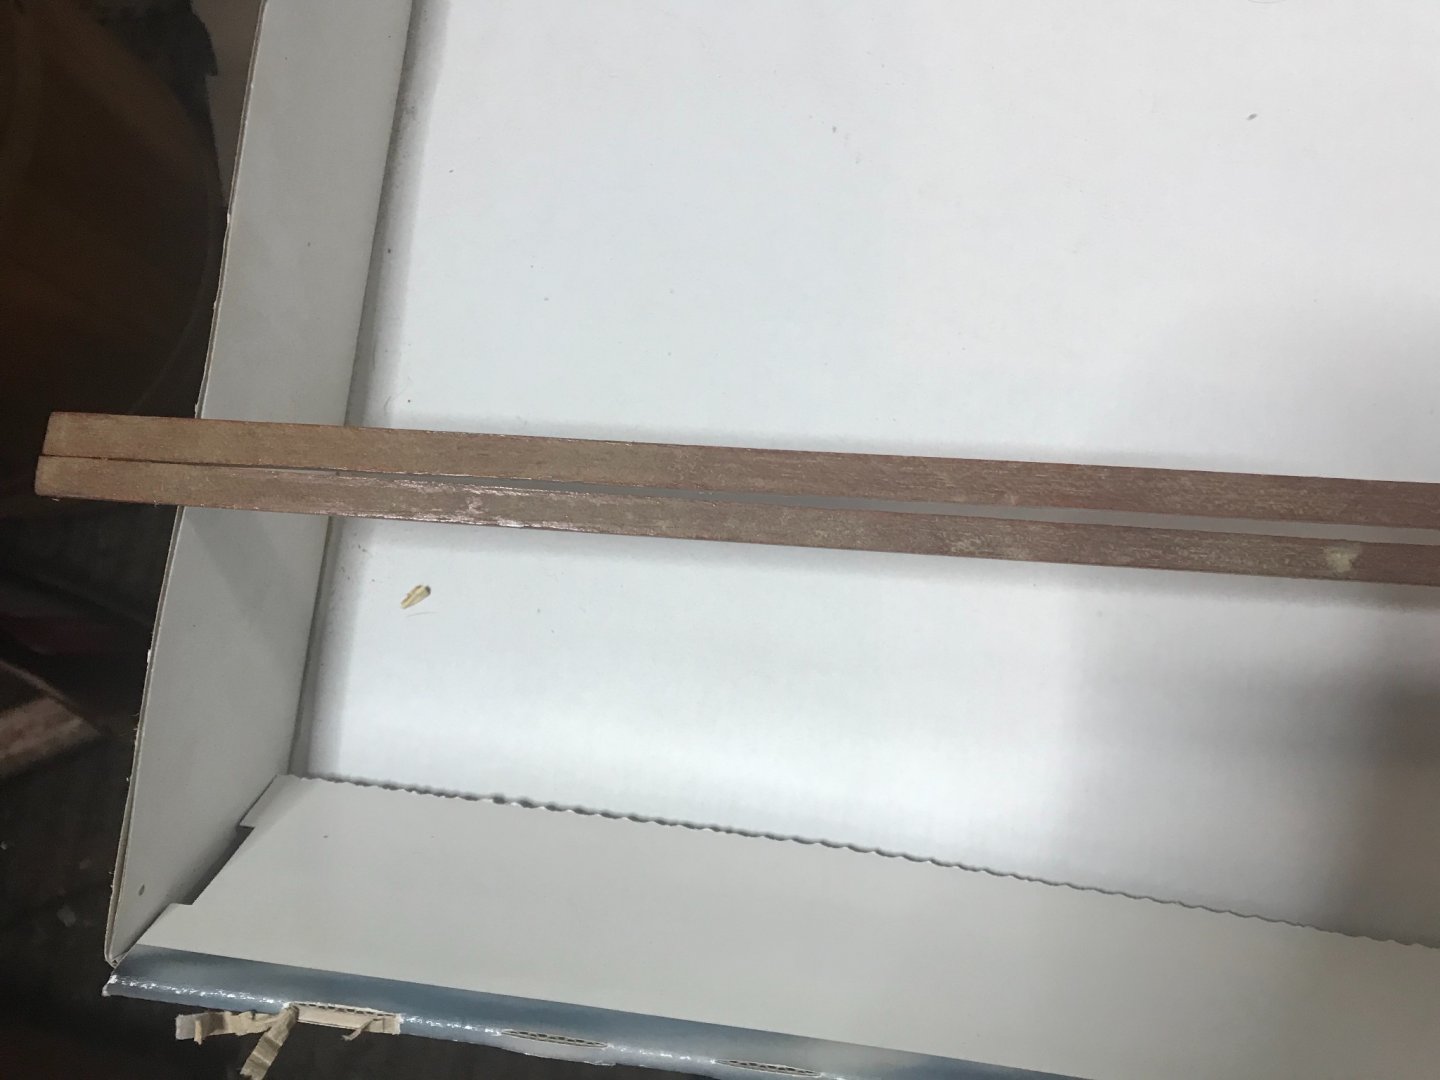
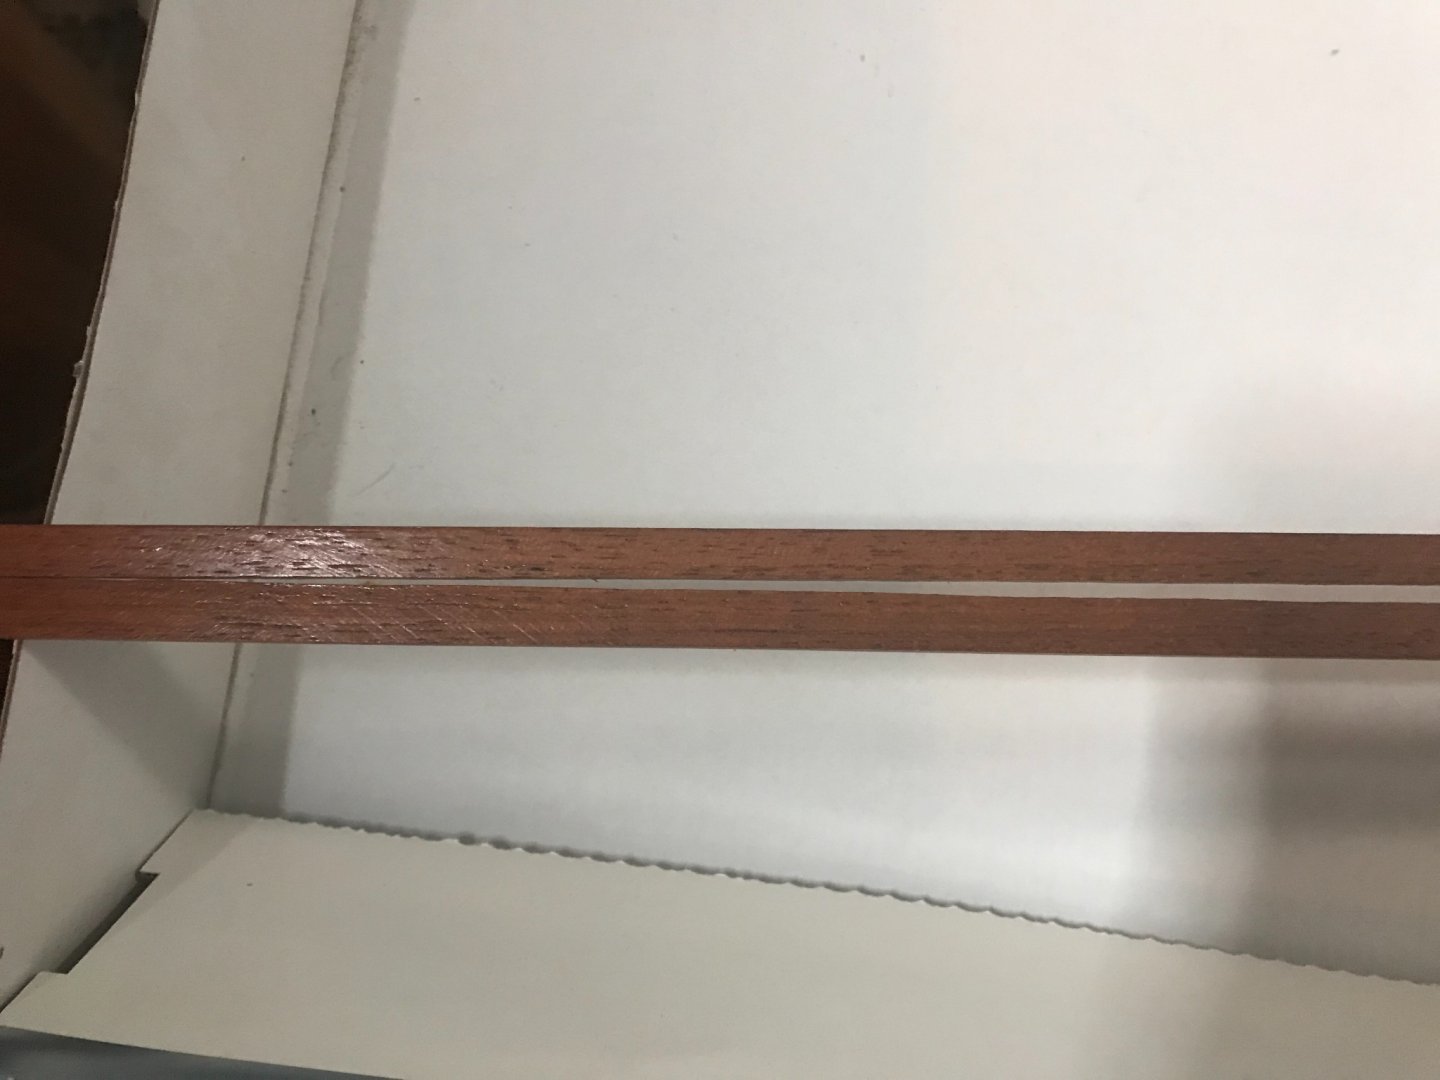
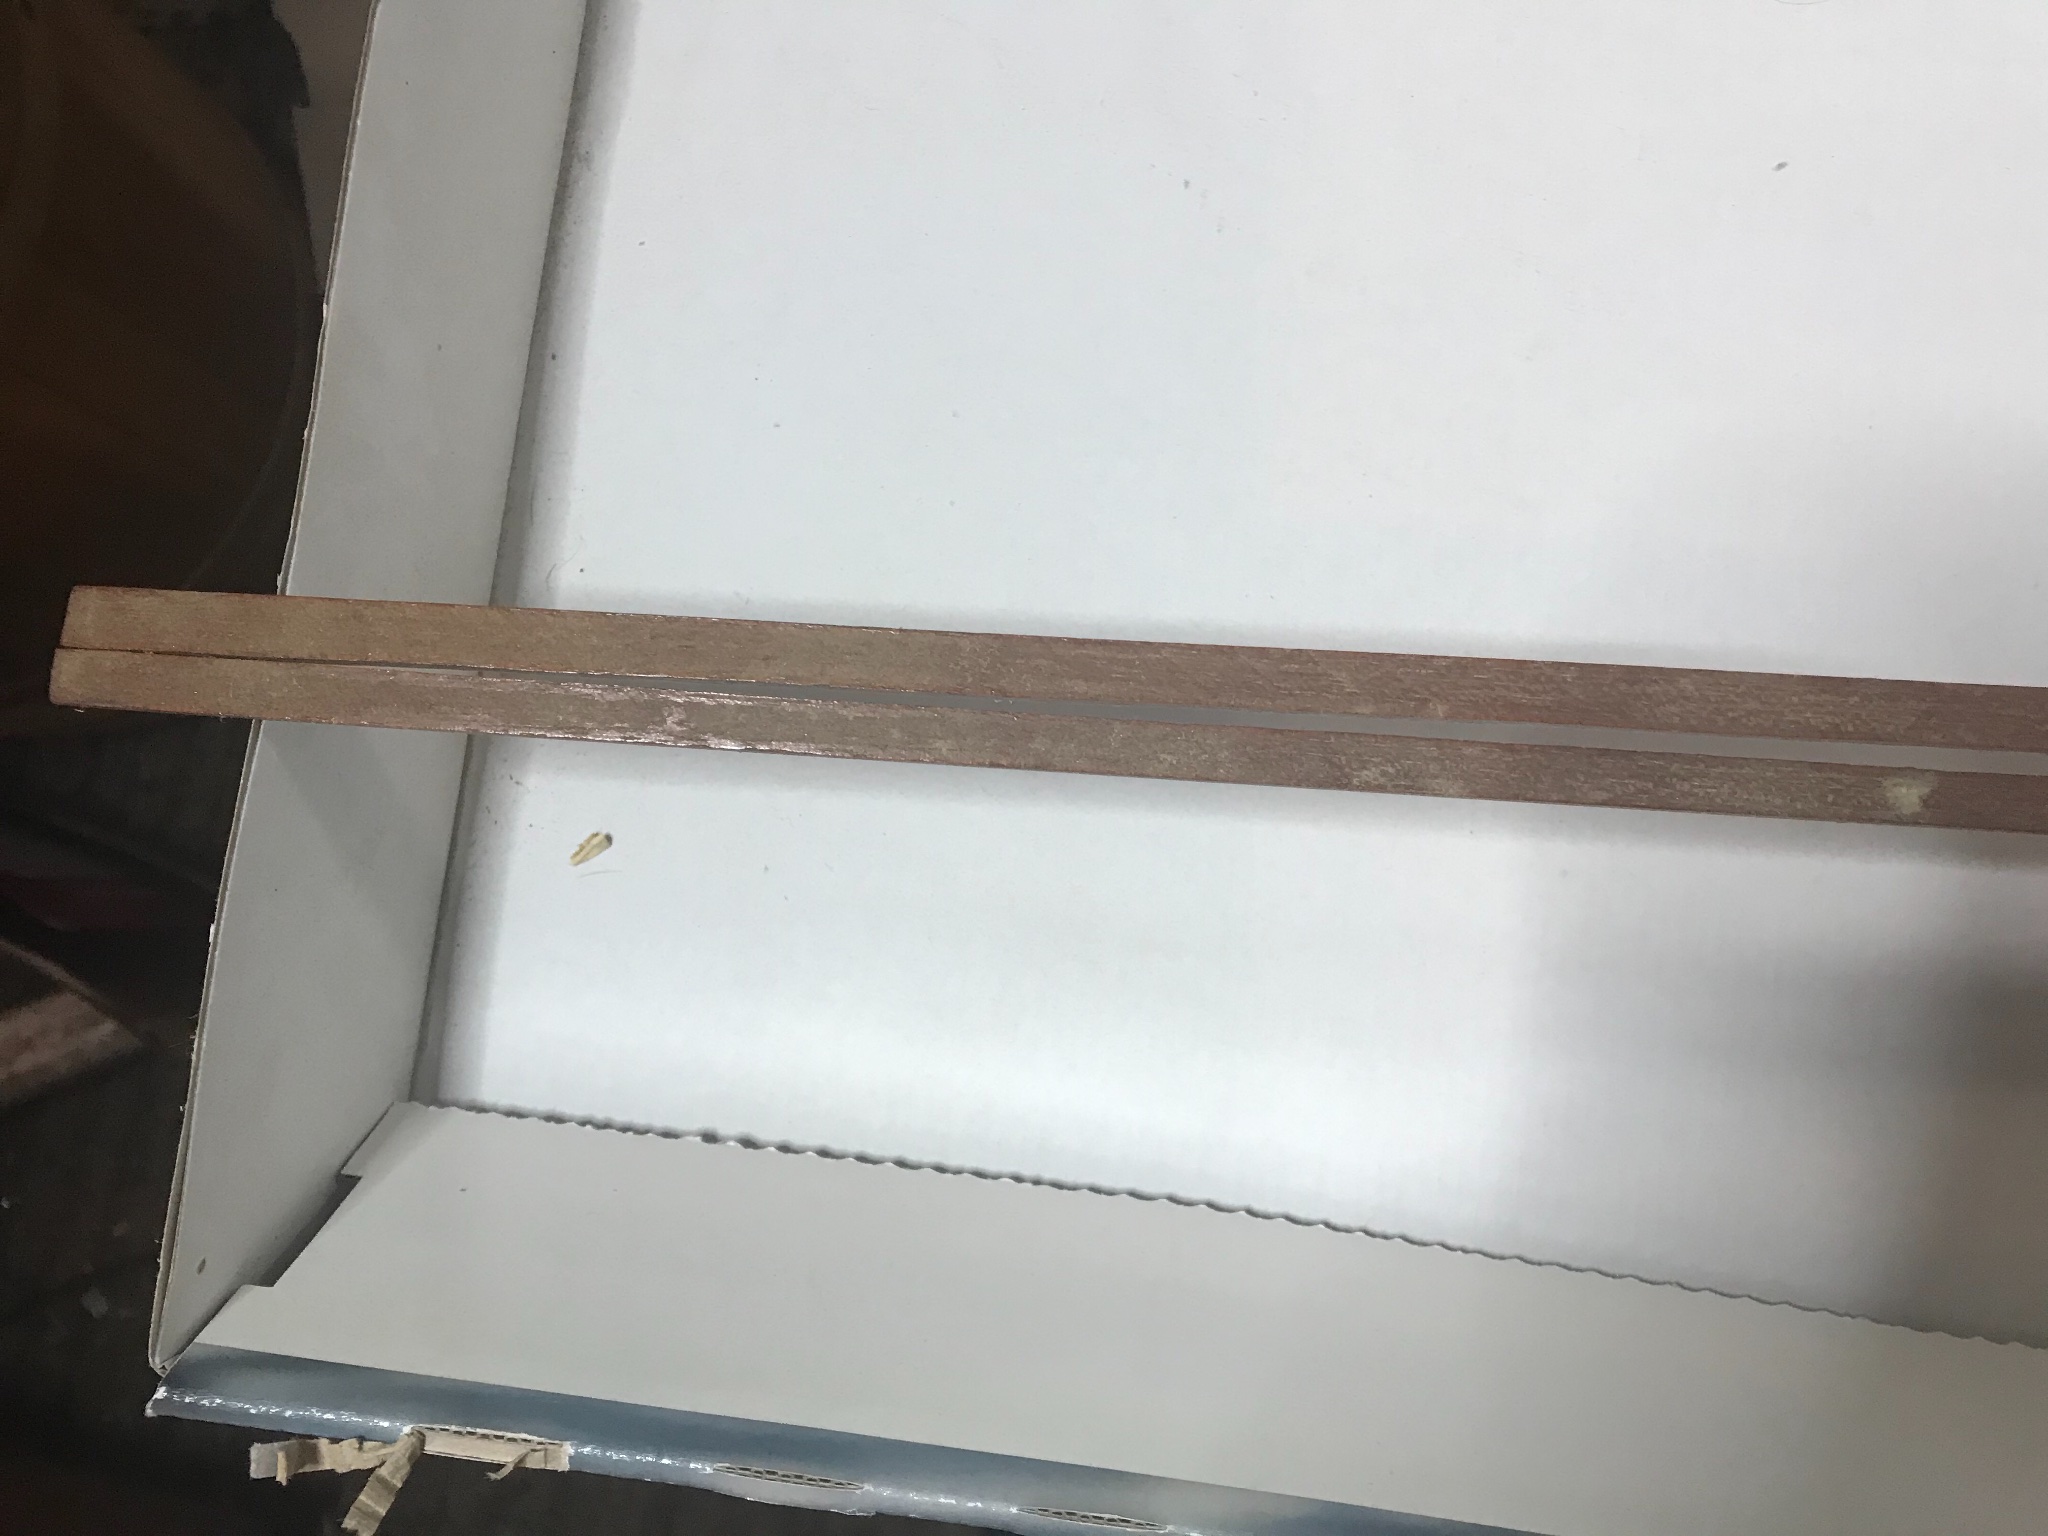
I did hide some walnut in there for the edge trim.

-
Keep up the good work.
- Egilman, popeye the sailor, Canute and 3 others
-
6
-
This week I did a lot of sanding, and then I sanded some more, then I realized I needed to do some sanding.
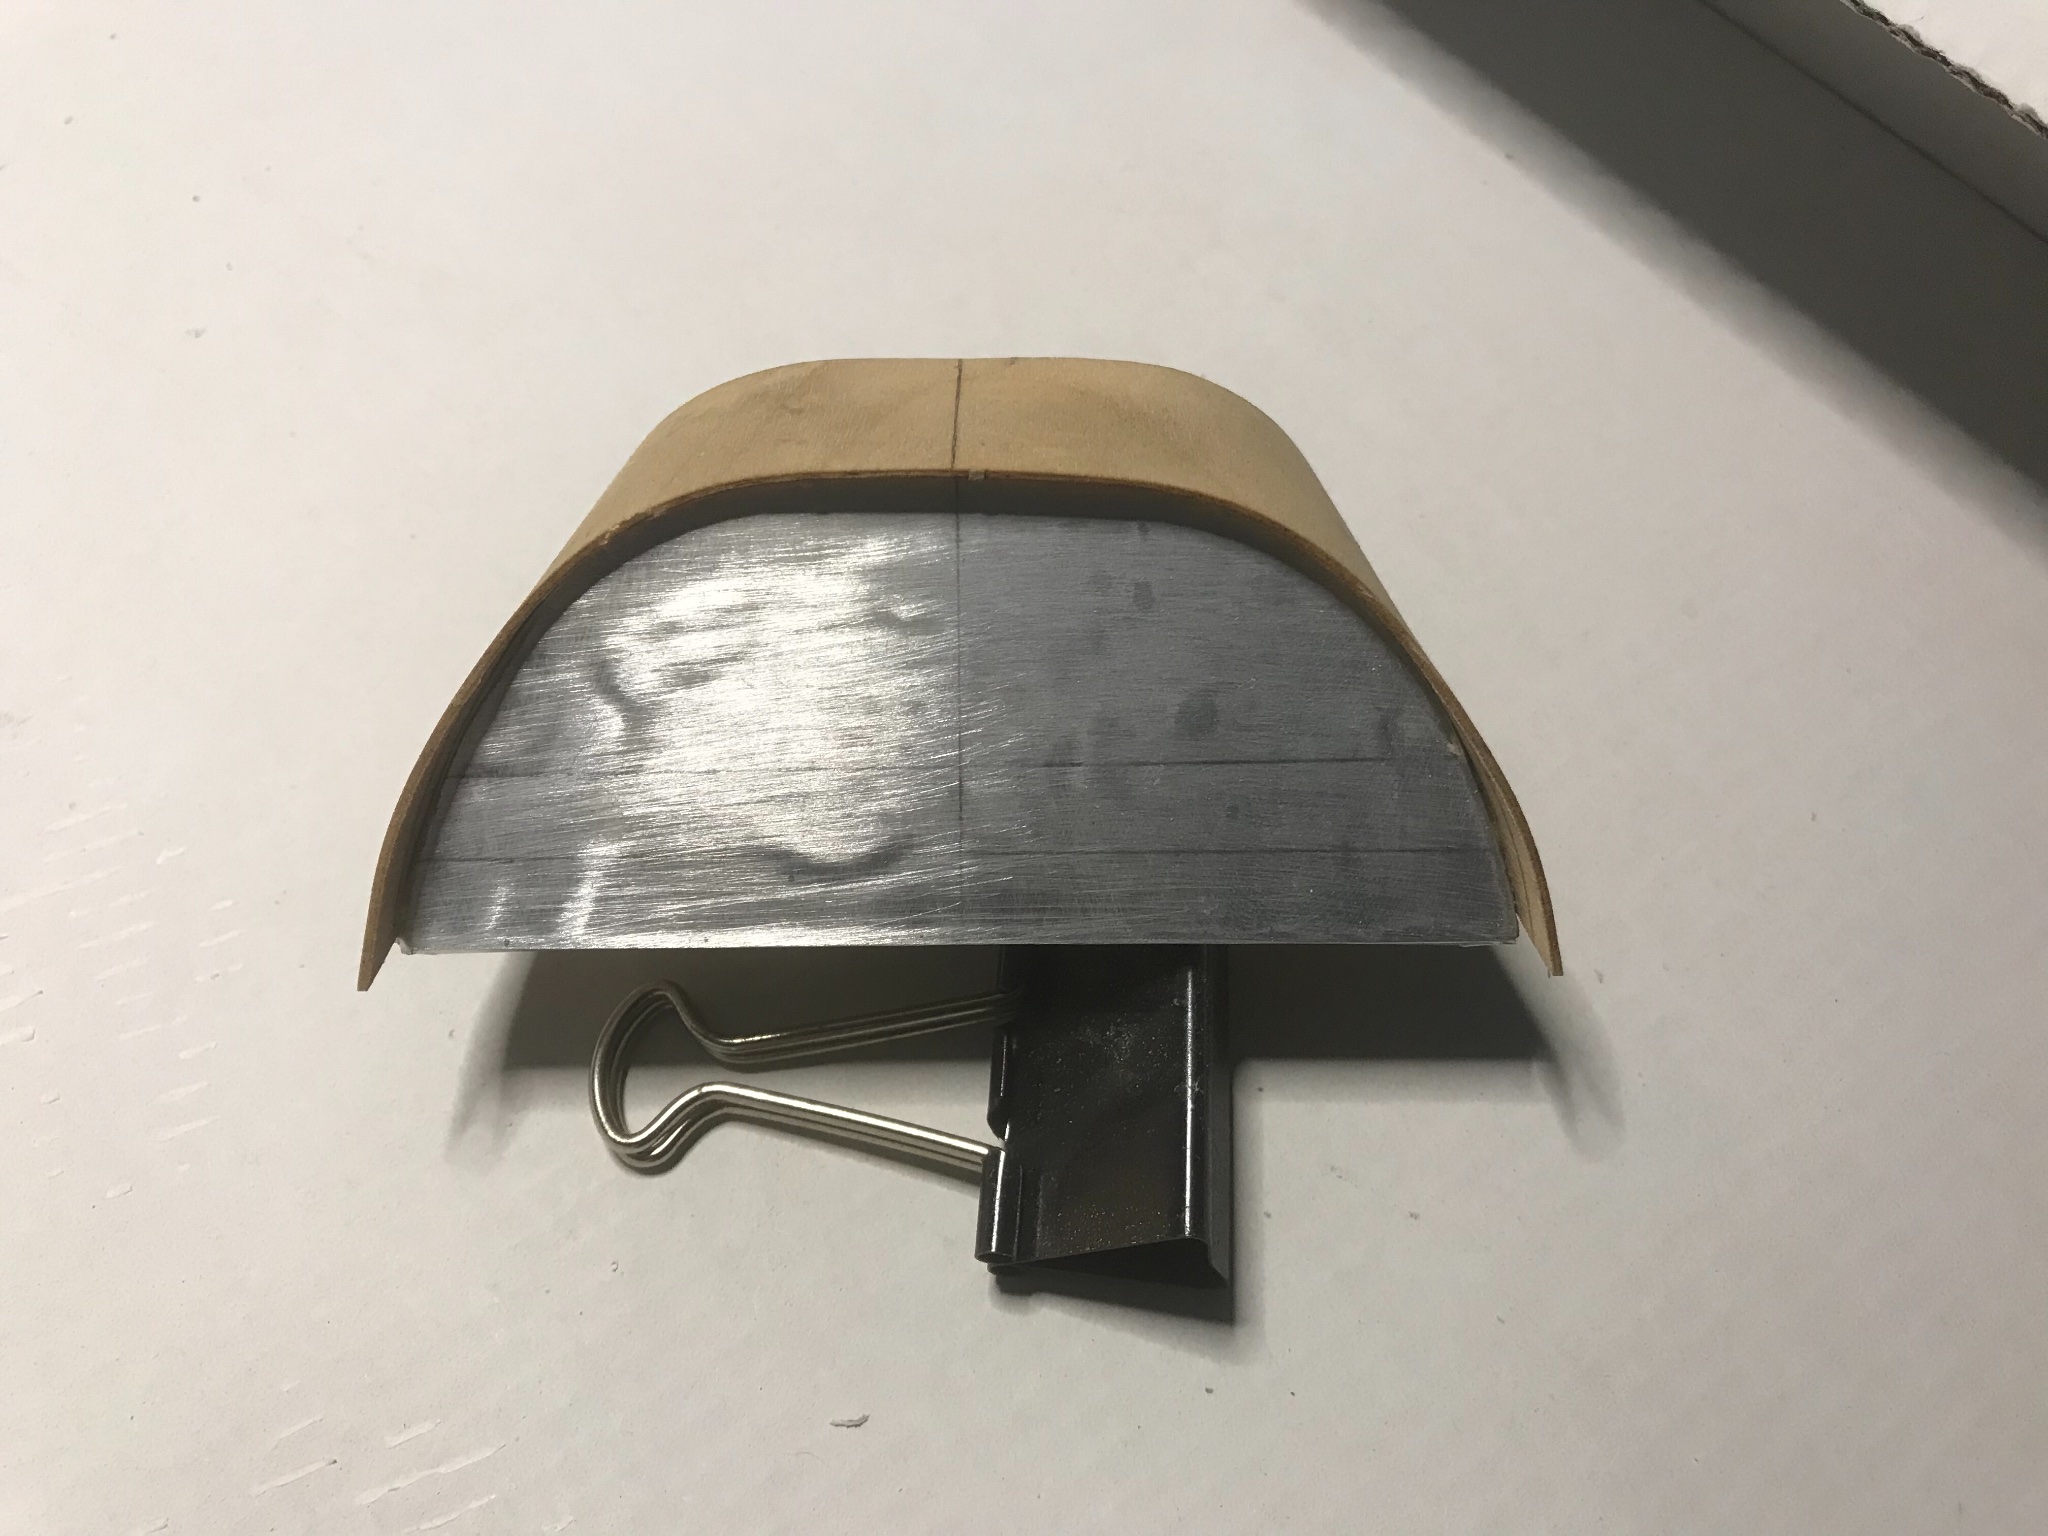
I got the bottom sealed up, I had to remake the nose, I used cardboard, this worked out really well, I managed to get the front end to look symmetrical, I’m really happy with it.
I began laying down the final layer of planking and made some more jigs. I’m very sure I have more than enough of this planking to complete the bottom.
I also got most of the engine completed, now for it’s final assembly. It did not come with the vacuum pump or the oil pump, I should be able to source them.


-
Looking great👍.
With the big 45% off sale at Model Expo, they must be out of everything.
-
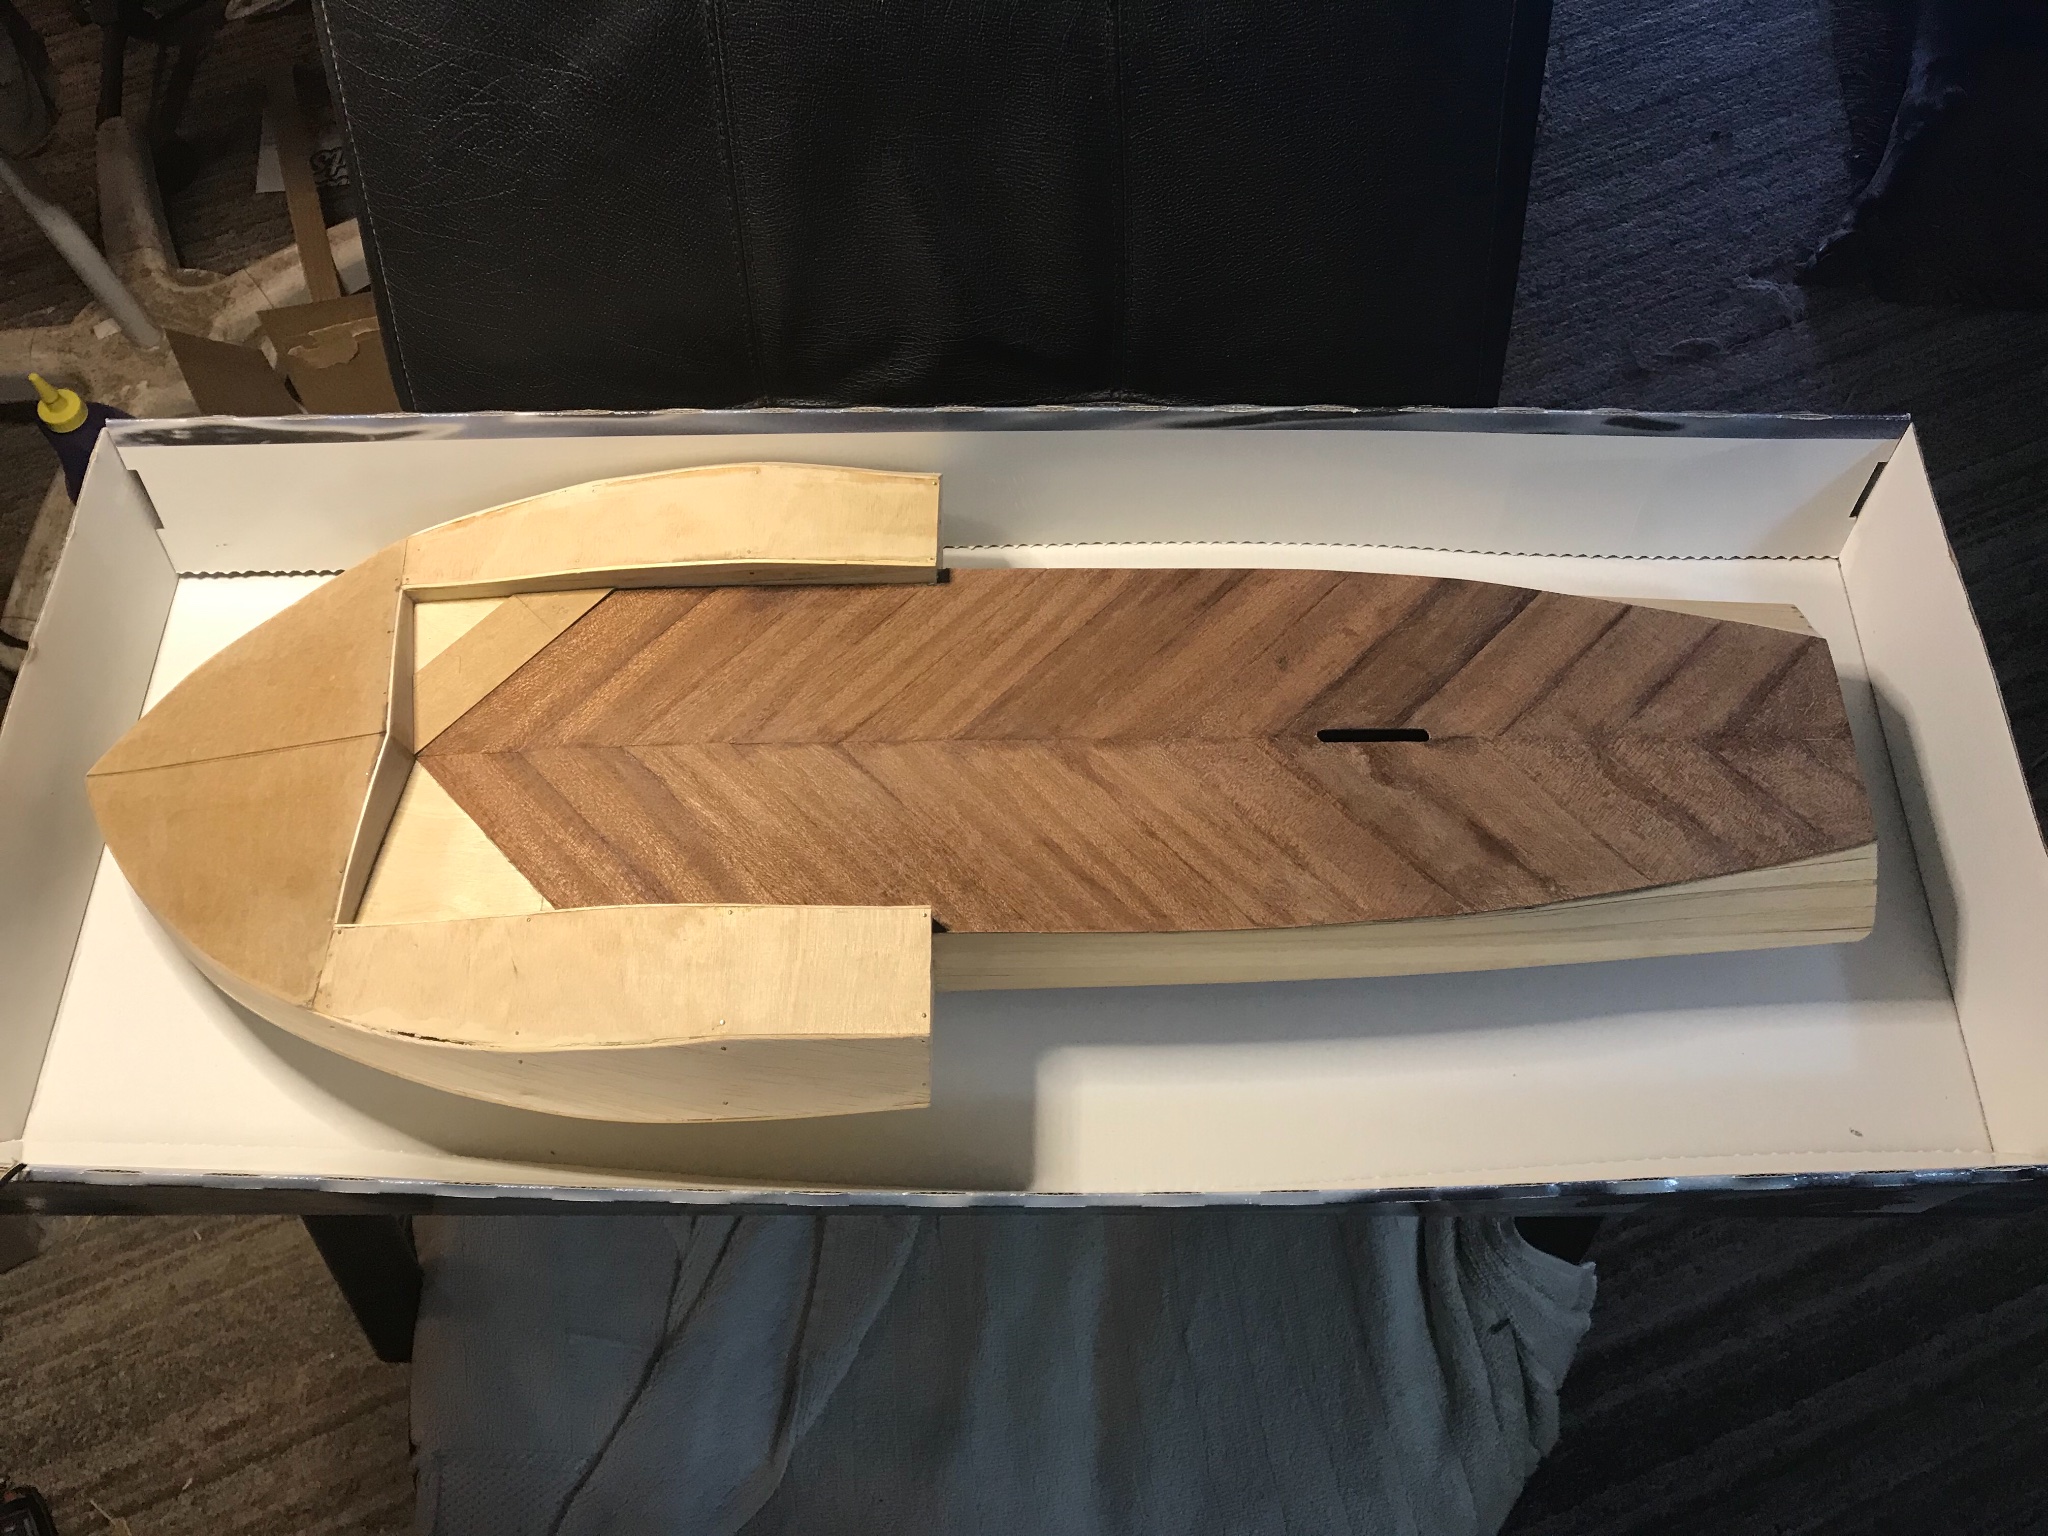
The overall bottom fit very well, and as you can see there is some places that can use a bit of filler.
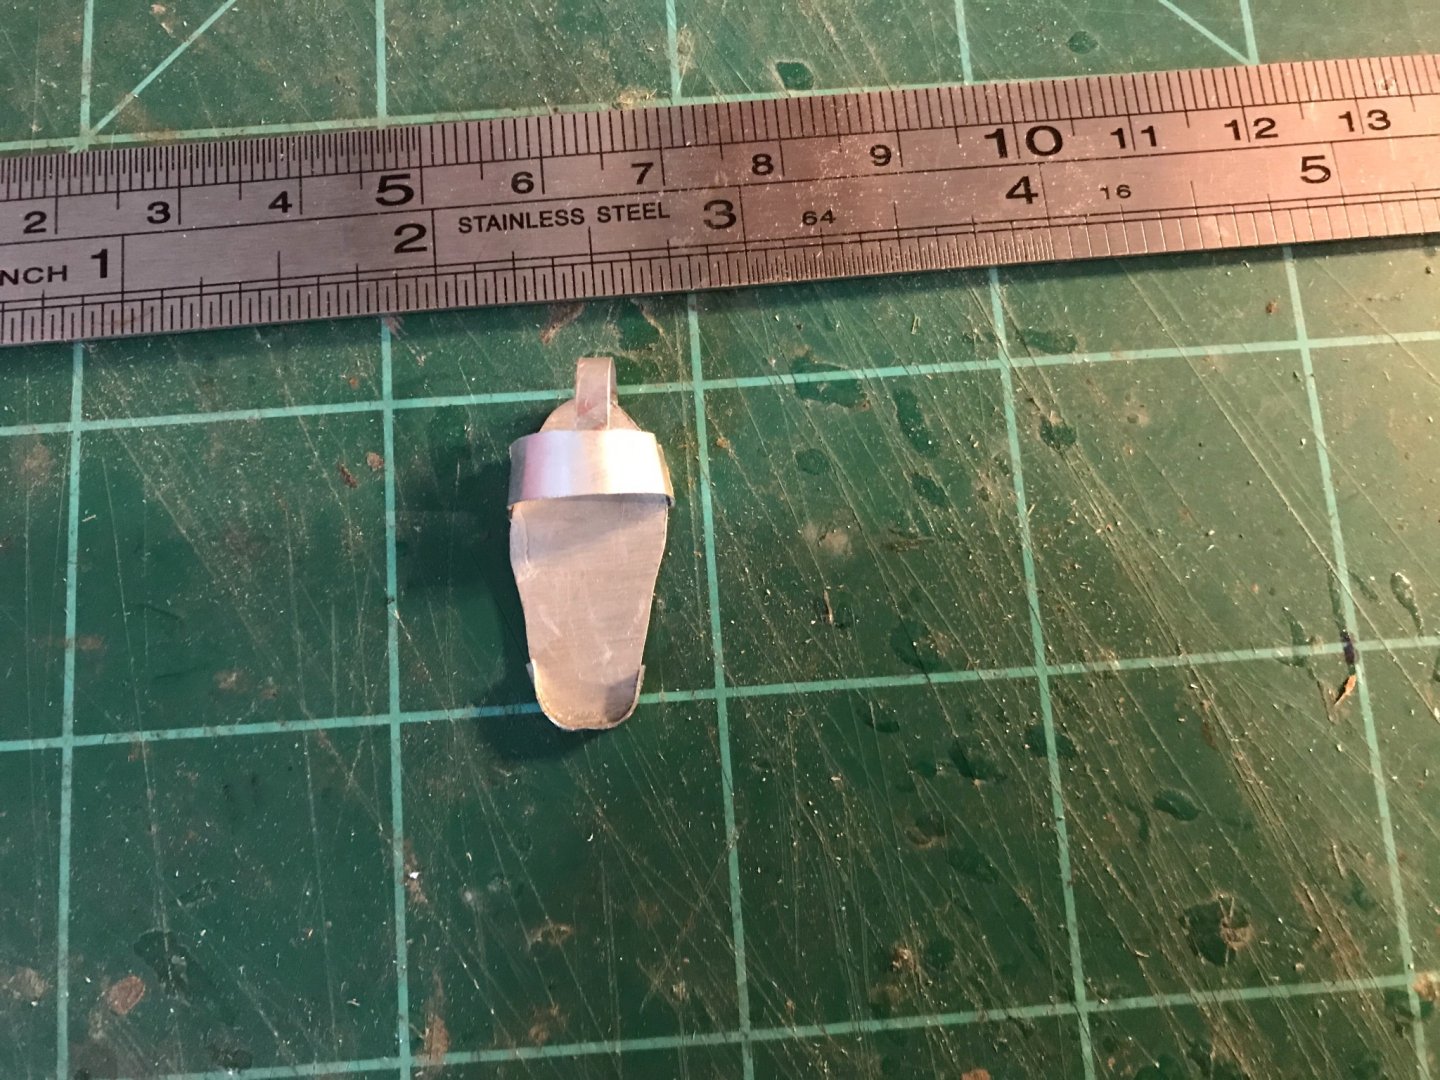
The upside of the week had been a vision of the gas pedal I had while walking the dog 🐶, I like how the pedal turned out. Kind of like an airplane meets push and pull. I looked everywhere for pedals, I did find several but none I liked, even the 1/12 drag cars didn’t have stirrups. I’m sure that’s where I got the idea, mixed of course with the foot looking pedal I don’t have in stock.


1869 Allerton Steam Pumper by gjdale - Model Trailways - Scale 1:12 - Finished
in Non-ship/categorised builds
Posted
So far so good, your parts are cleaning up nicely at this rate you are going to have a beautiful model.