


Hubac's Historian
-
Posts
3,220 -
Joined
-
Last visited
Content Type
Profiles
Forums
Gallery
Events
Posts posted by Hubac's Historian
-
-
I’m so glad that you gave that technique a shot. The results are excellent! Sometimes, it’s just more practical to free-hand the engraving.
-
What I have found is that I can lightly trace over my lines with the tip of a very sharp EXACTO blade. Three or four passes of incrementally stronger pressure. The key is to go light on the first couple of passes so that the blade doesn’t wander off the line. After the fourth pass, you’ll have a deep enough groove to use the heel of the blade to scribe. Again - light pressure on the first few scribe passes.
-
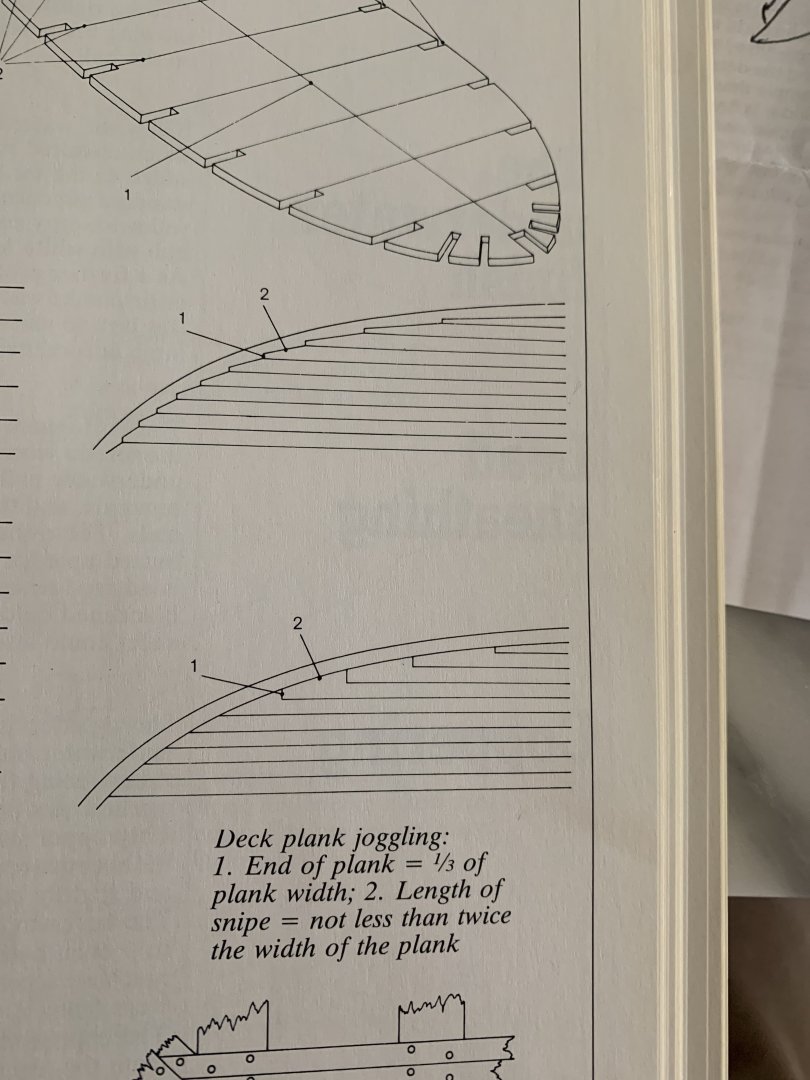
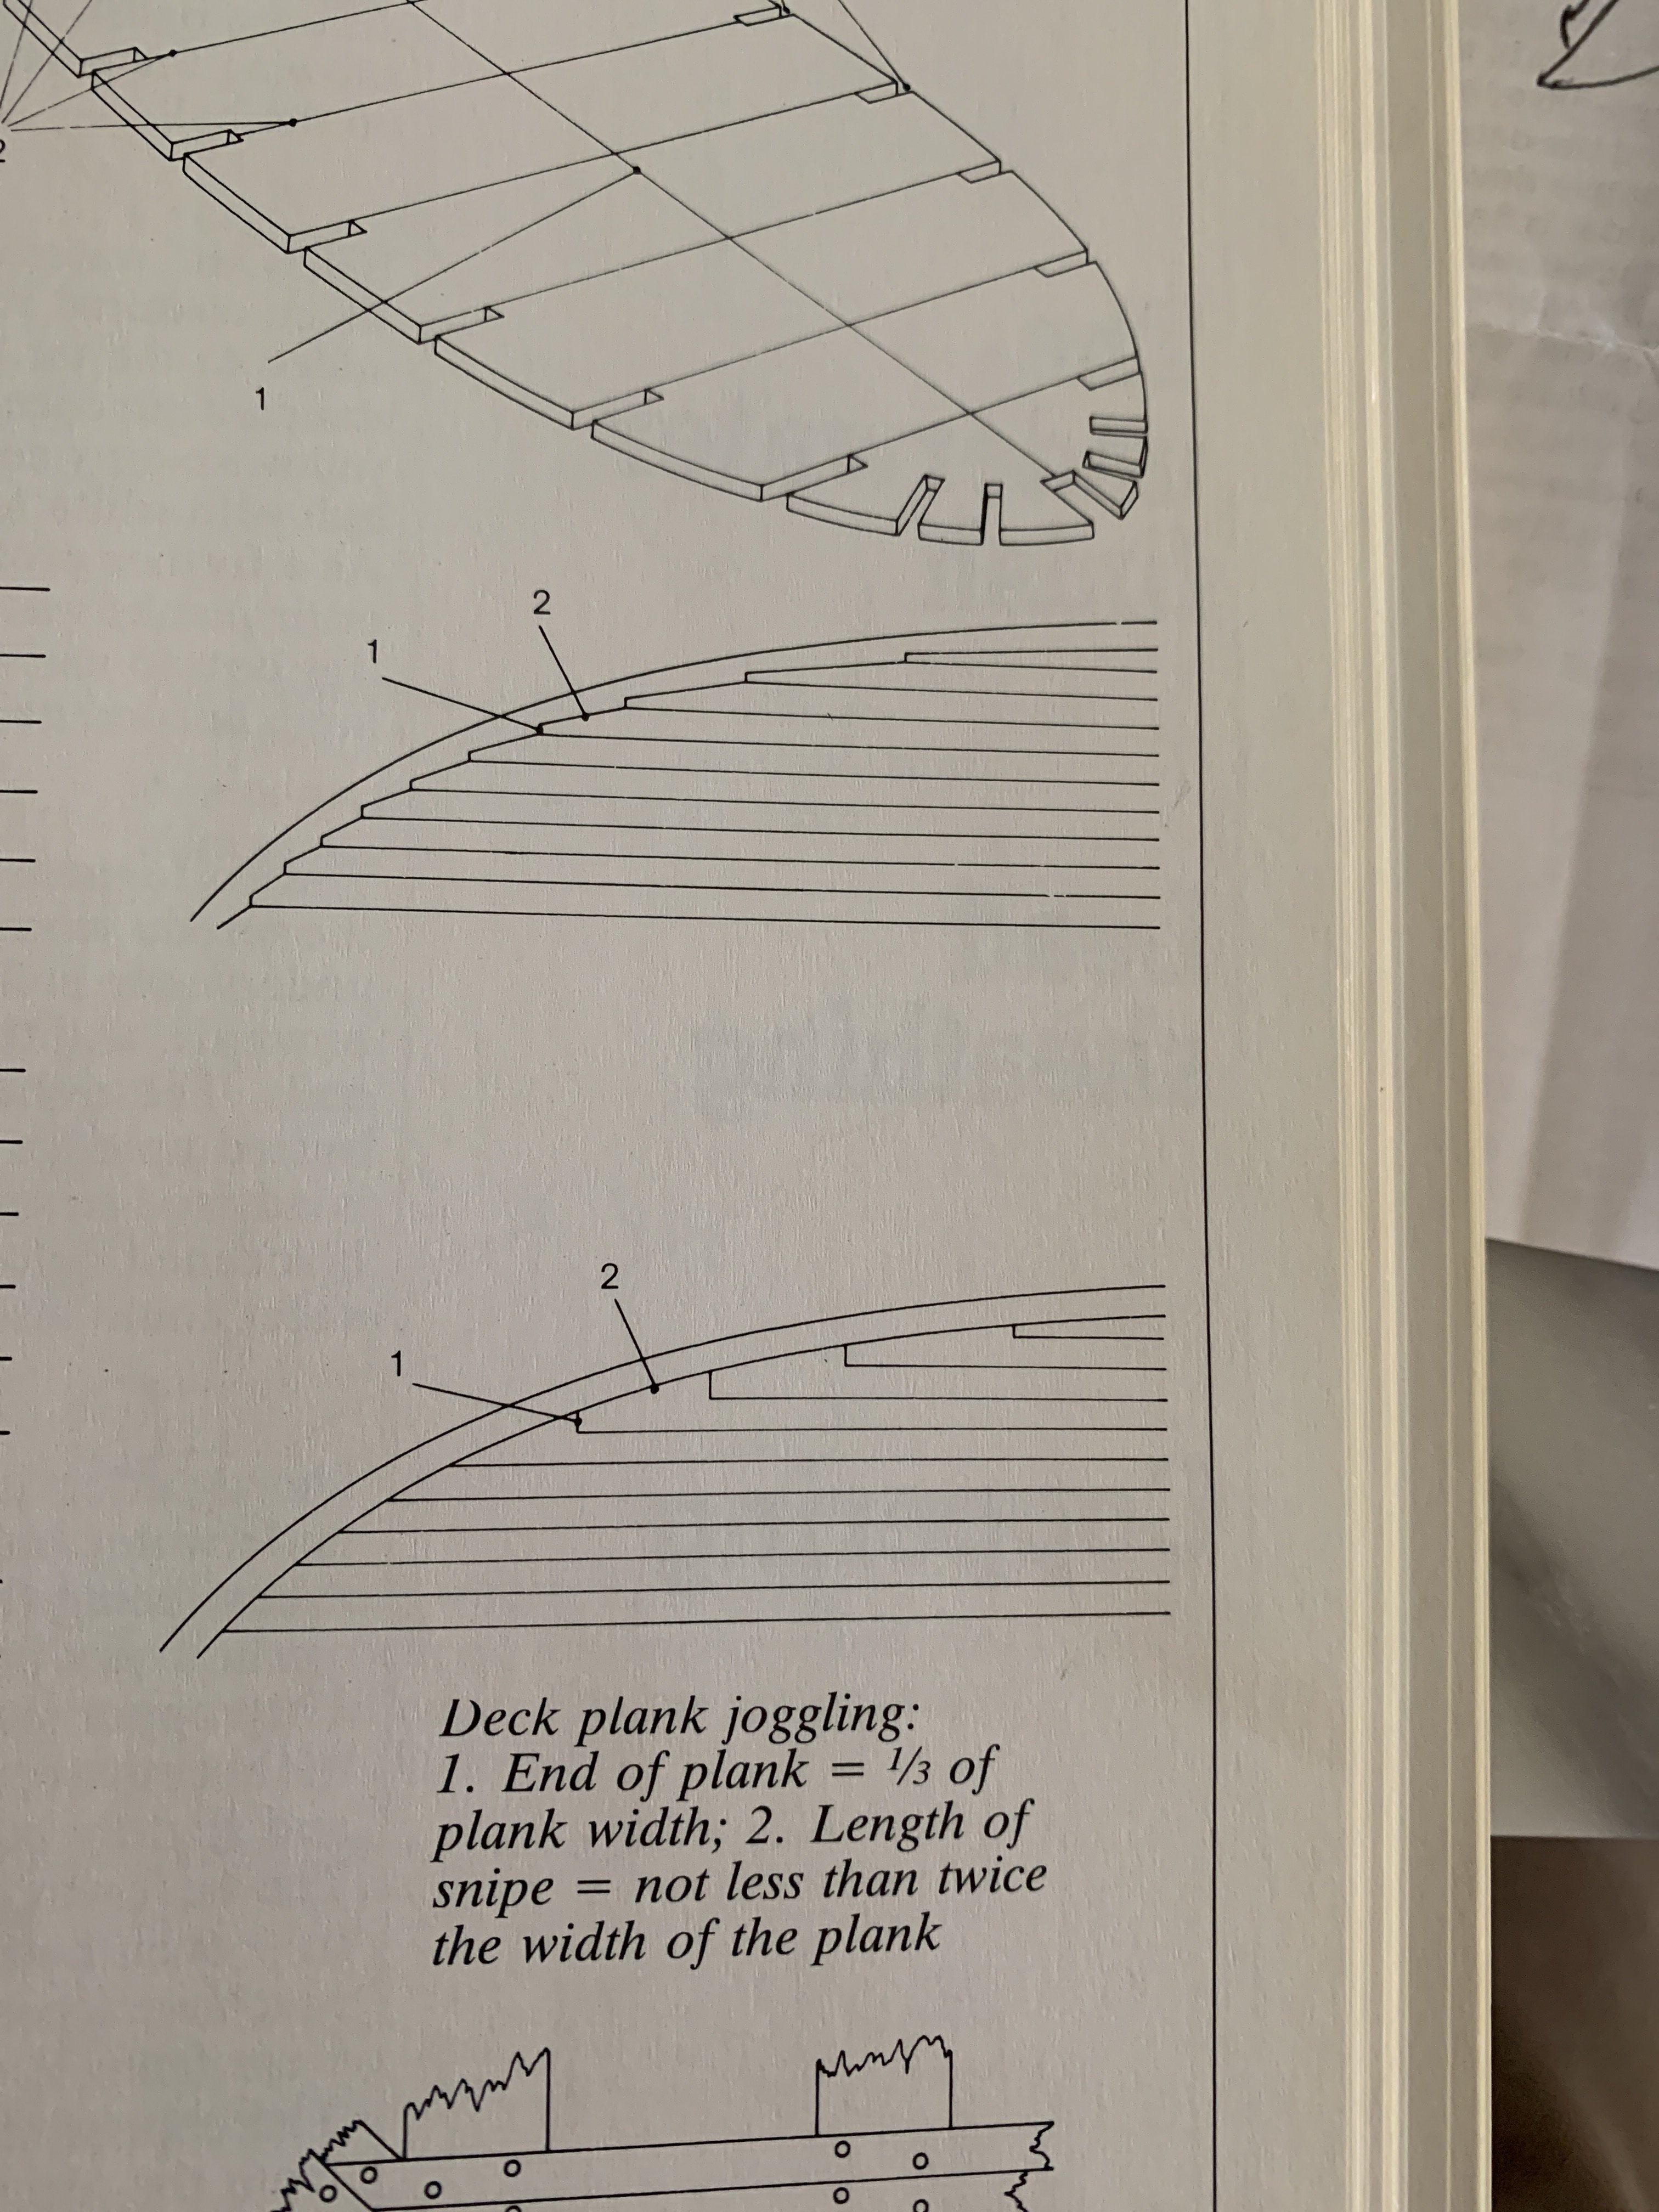
Generally, shipwrights avoid cutting timbers into long tapering points because those sharp timber ends become much more prone to rotting quickly. This is why deck planking is “joggled” into the margin plank, for example:
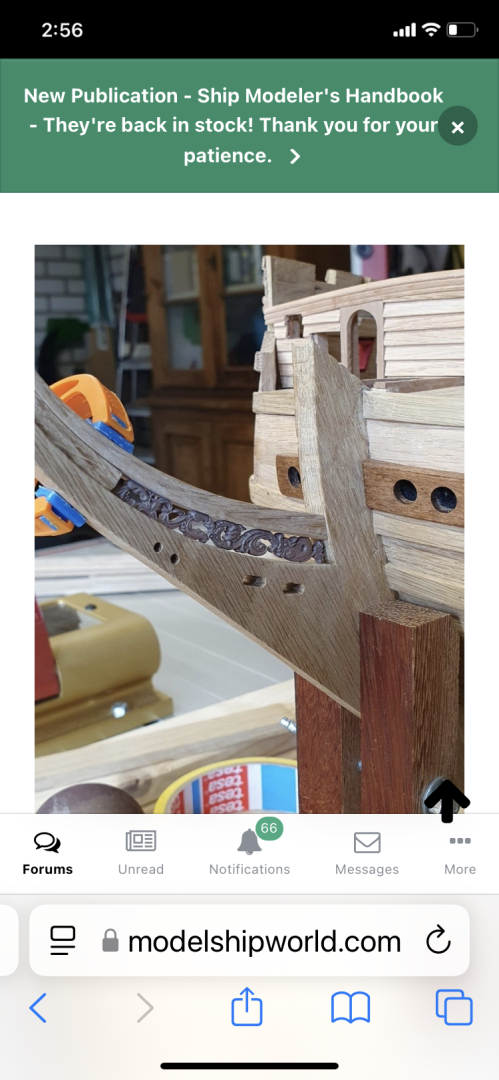
As it relates to the stem, it is also quite beneficial for the structure of the thing to be inter-locking with the use of hooks and scarfs. I’ve taken the liberty to draw an approximate sketch of your cutwater:

Ideally, you don’t want the gammoning holes to cross between timber joins.
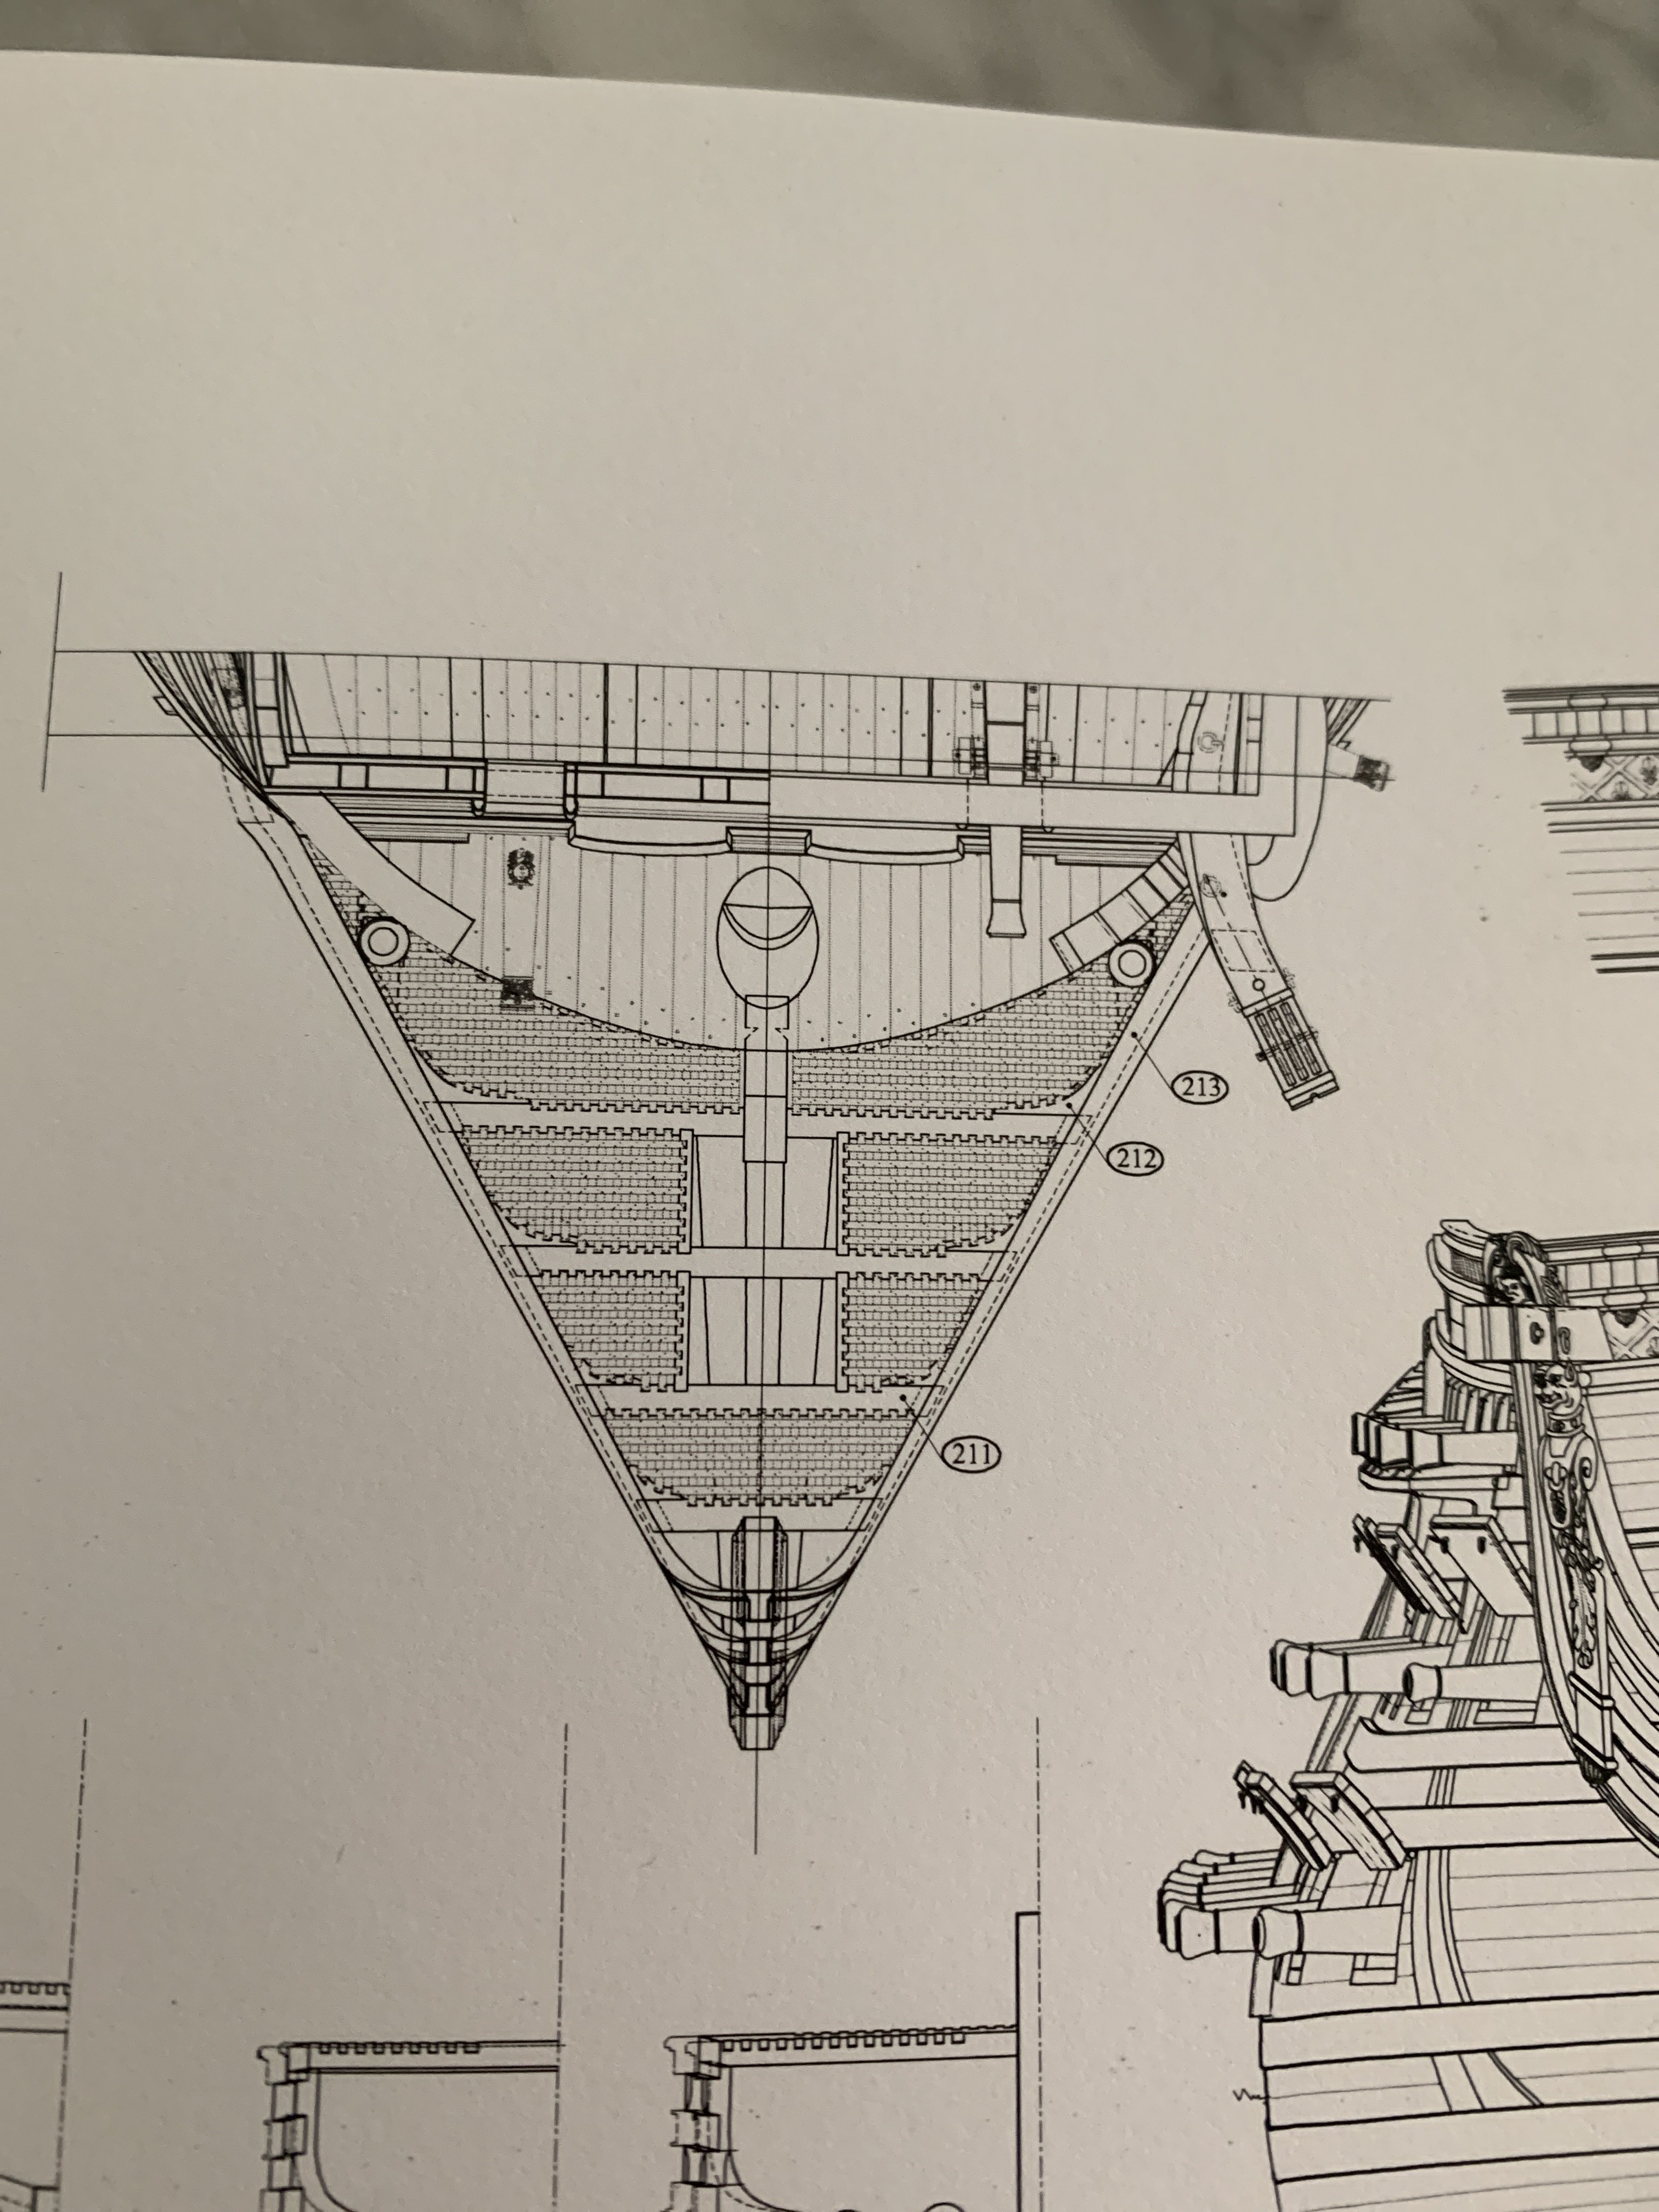
As for the tapering of the cutwater, Lemineur shows it as a long gradual taper across the full depth of the cutwater:
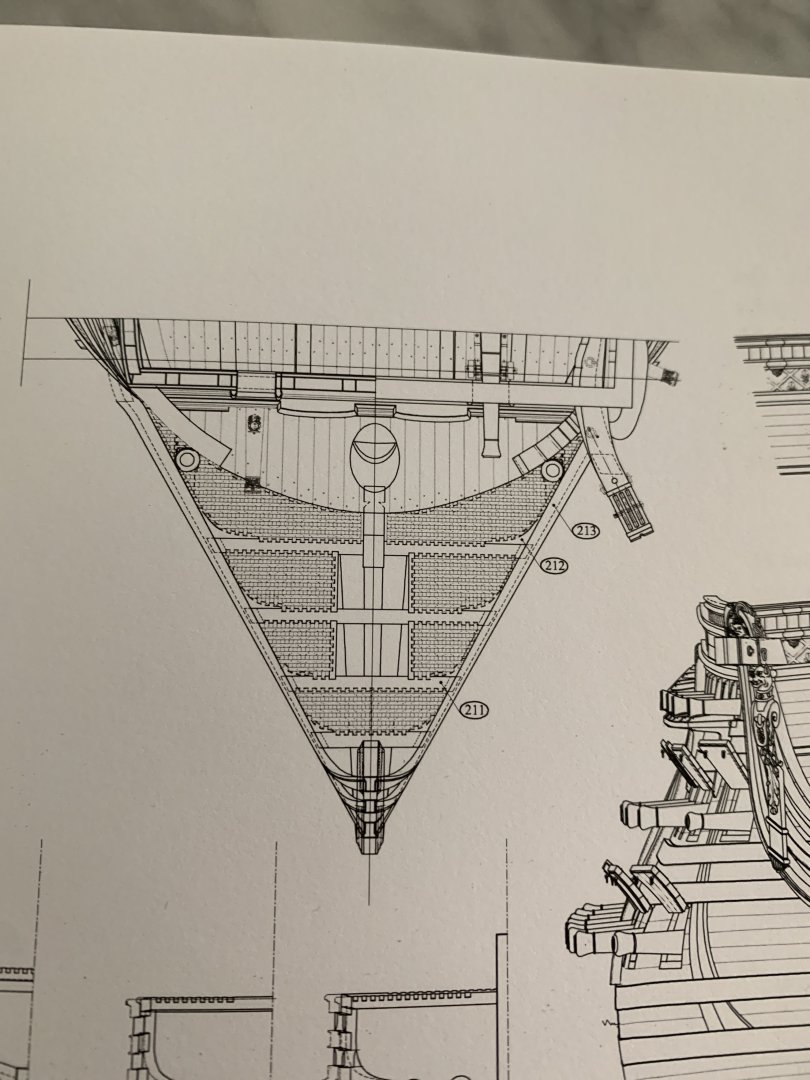
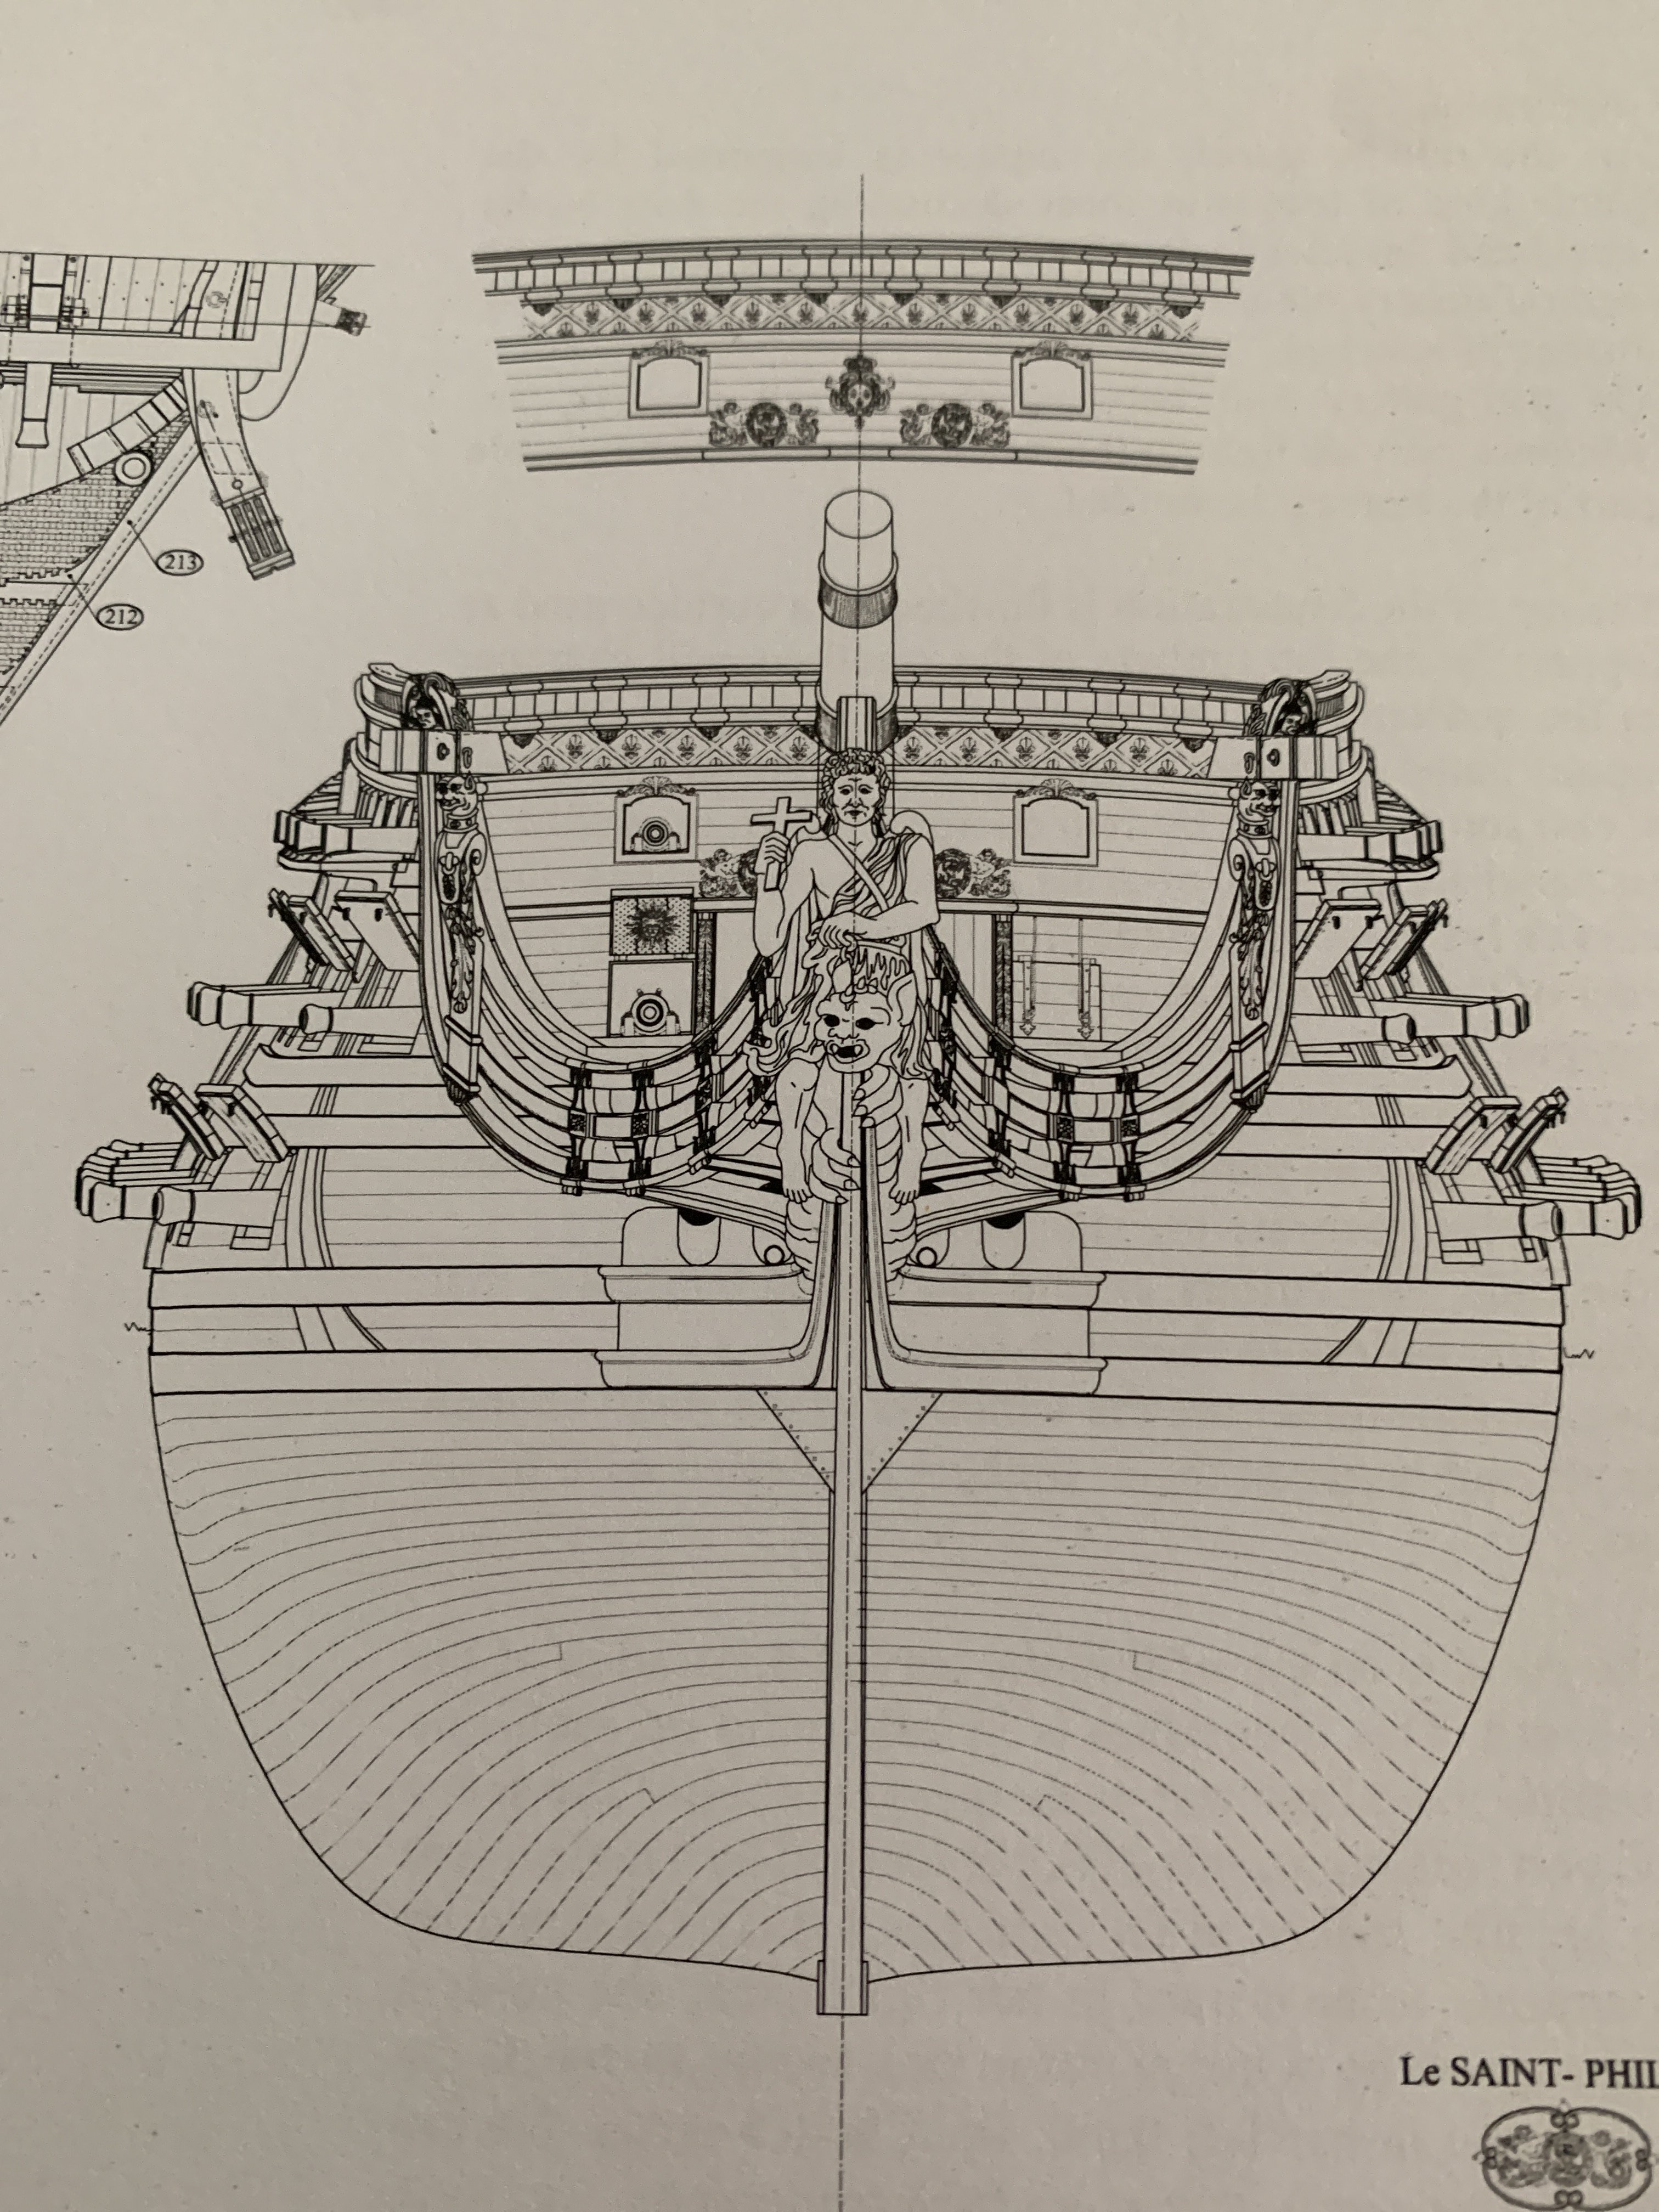
However, he also shows the foot of the cutwater as being full width, while the head of the cutwater (behind the head of the Figurehead) is tapered to half-width:
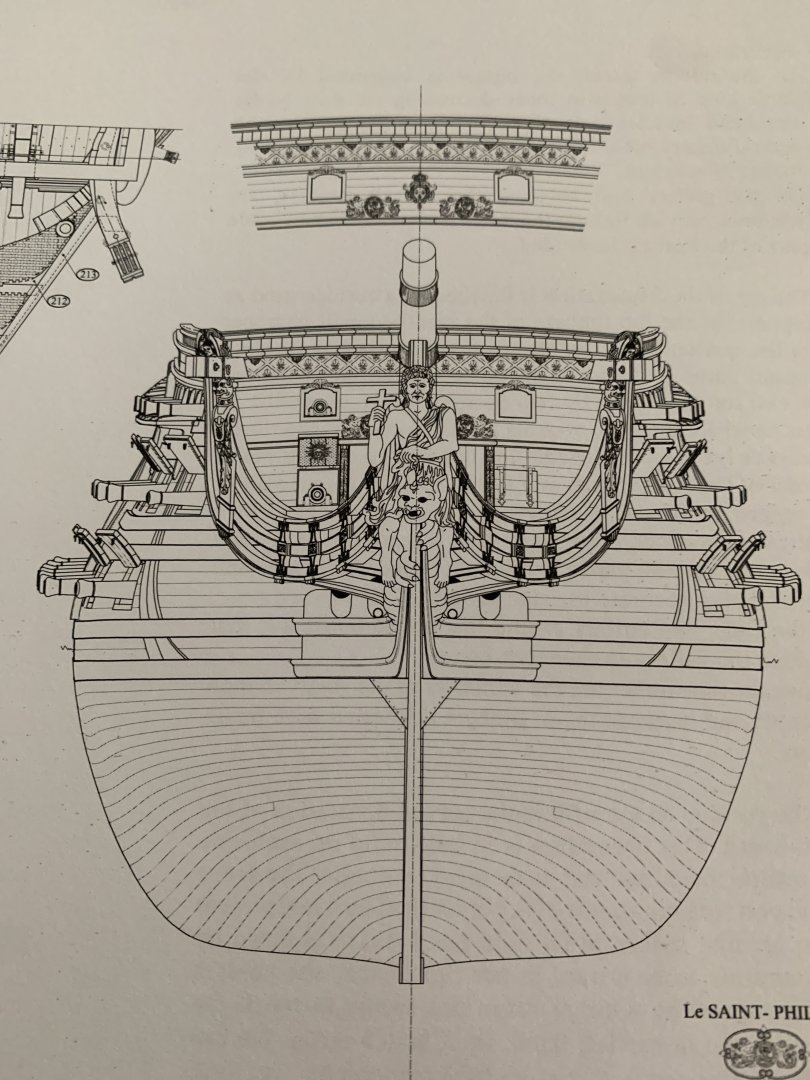
The way to understand this, I think, is that the foot of the cutwater is very shallow in depth, as opposed to the head of the cutwater, which extends some 30’ further, ahead of the stem.
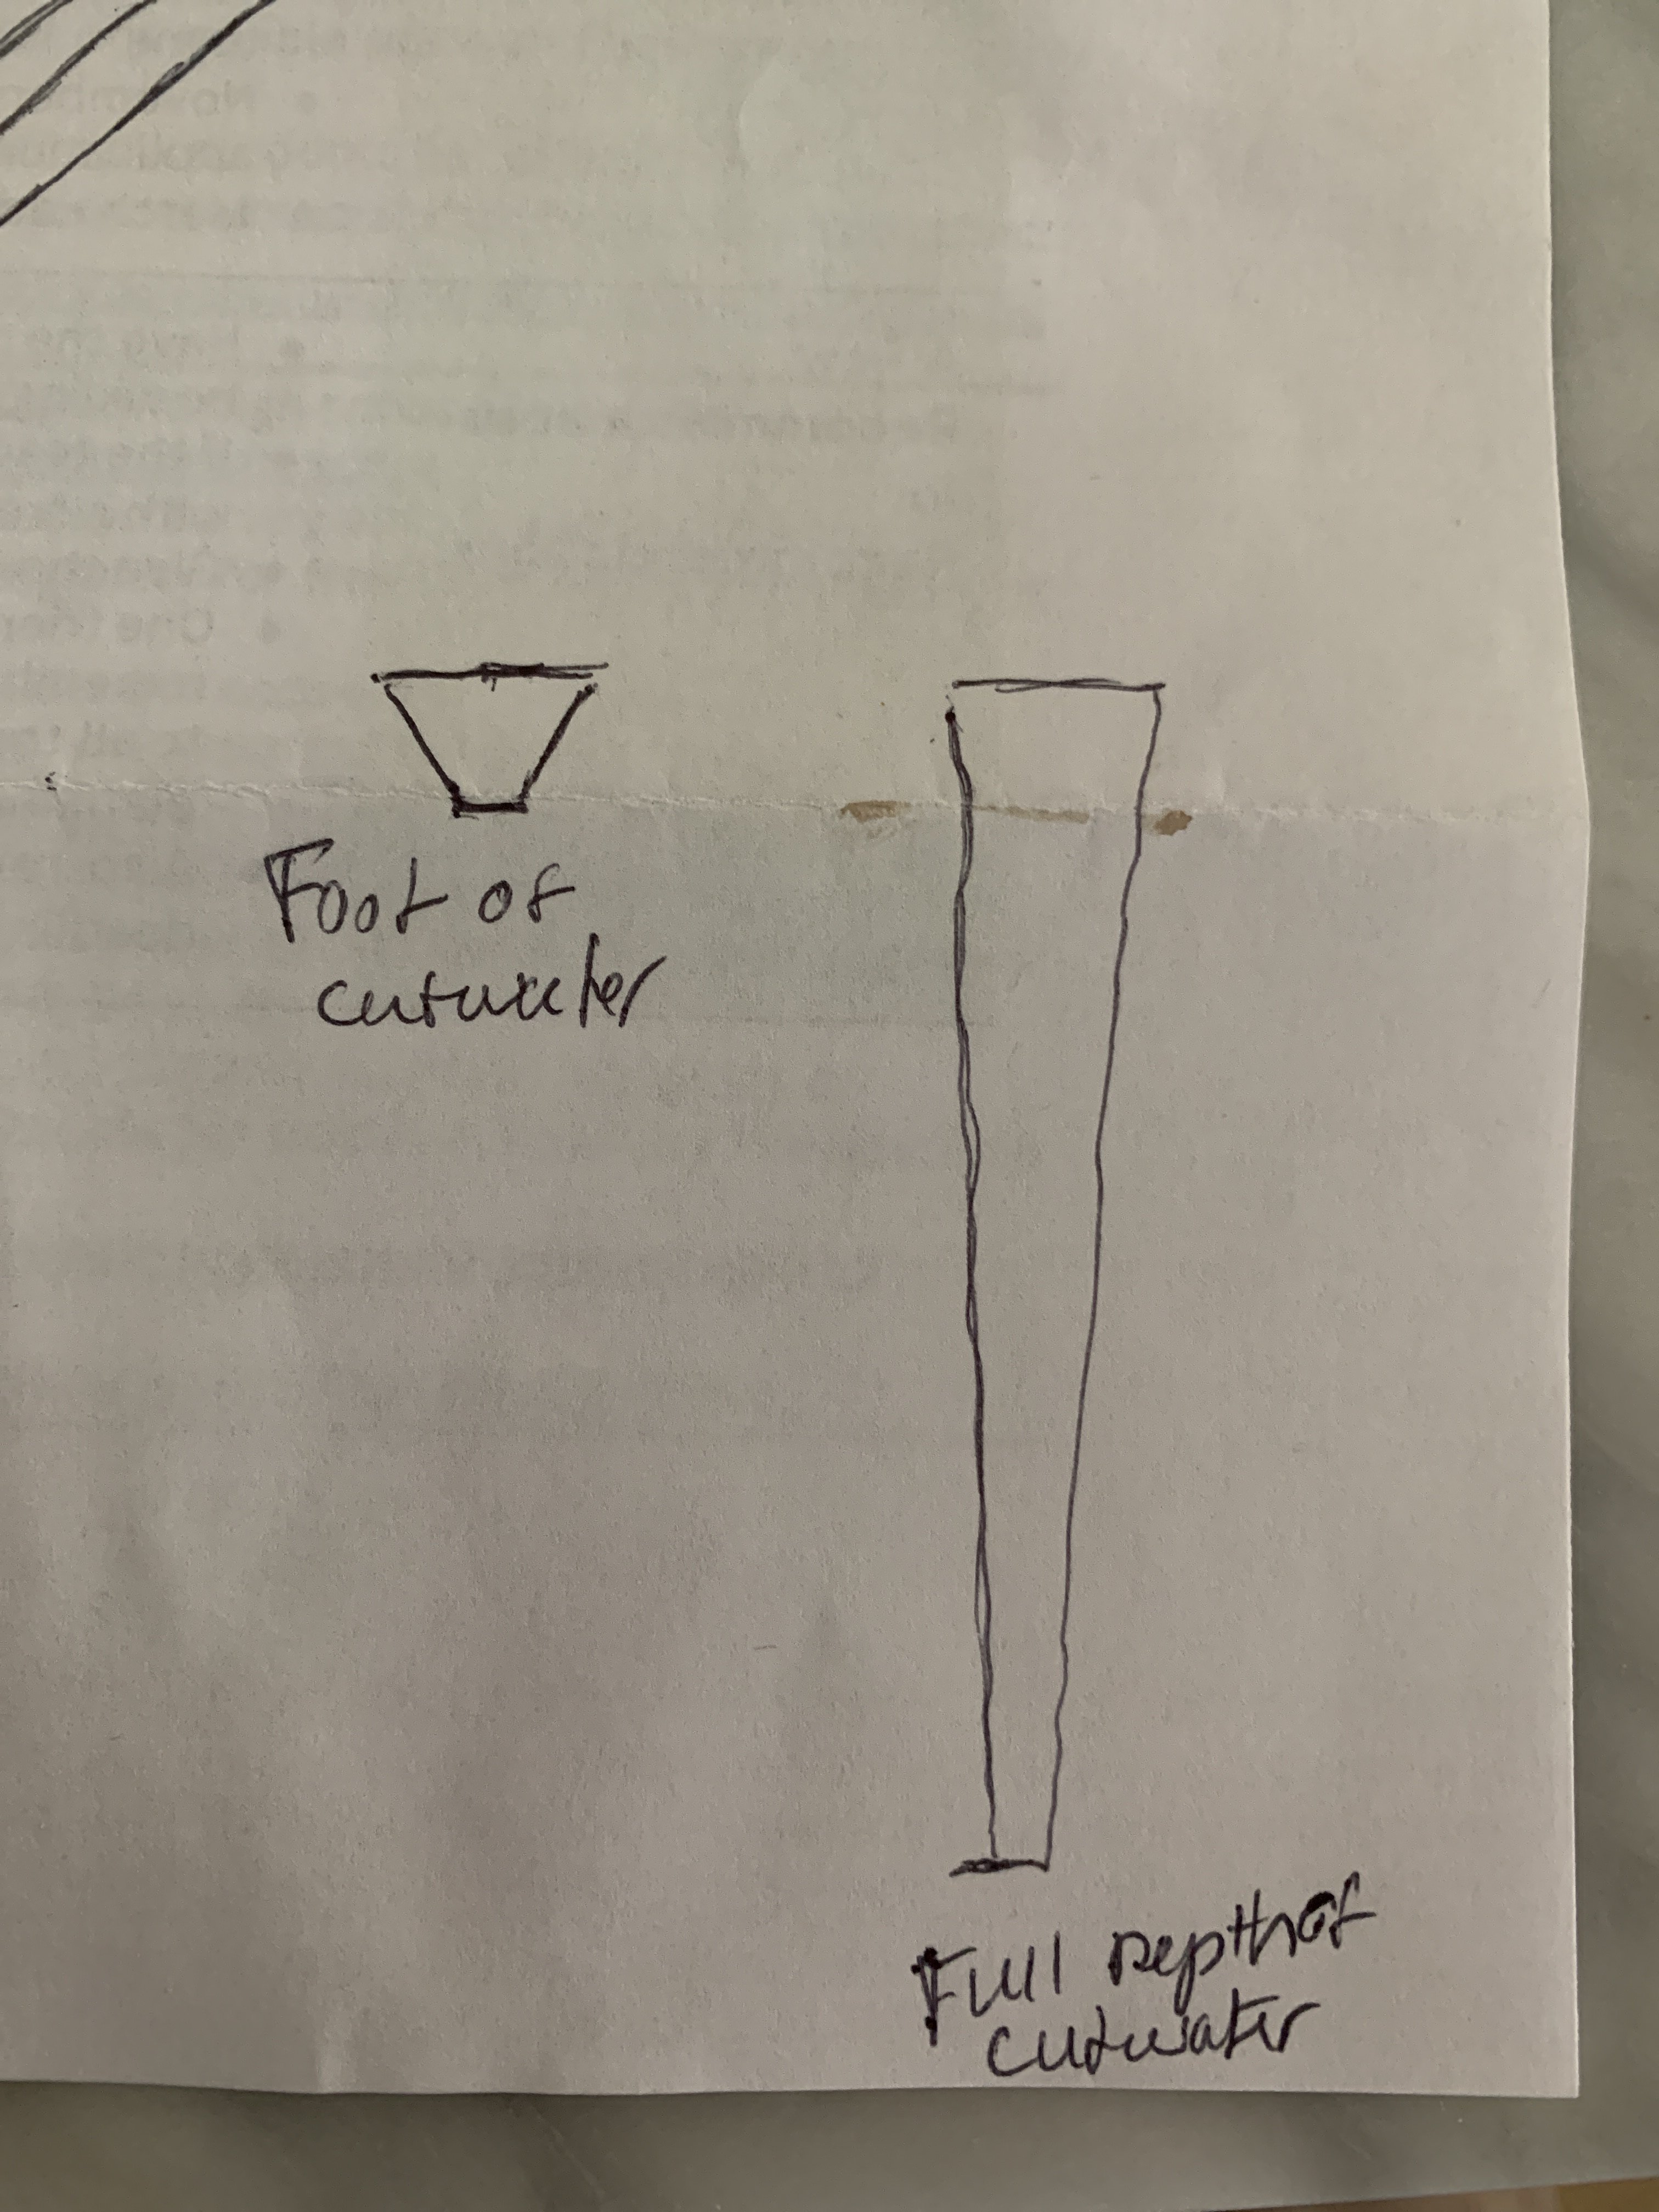
From a practical standpoint, you want that taper to be most pronounced at the foot of the cutwater, as it improves water-flow. This is what you have done. I do think, though, that the full depth of the cutwater should have a gradual tapering, back to full width where it meets the stem. What this means is that your cutwater foot will have a much more pronounced looking taper, because you are reducing by anywhere from a 1/3 to a 1/2 width, over a relatively short span:

I hope that makes sense.
- EricWiberg and Archi
-
 2
2
-
Post #167 of Yankee D’s Provincien blog:
-
Given that you are showing the full length of the cutwater, I would taper to somewhat more than 2/3 of the width. This is complicated, somewhat, by the variable depth of the cutwater, which shortens, as it approaches the keel. The tapering of the cutwater is part of the reason that I chose to pad out the stem, as you are doing; the extra depth, there, gives you a little more flexibility to massage those transitions. I think you can find good pictorial examples on Drazen’s Provincien blog. If I remember, he has a number of good pictures of his bow and cutwater. The long and short of it is that there are no concrete step-backs for where to begin those tapering transitions. I would estimate conservatively, and work slowly, checking as you go. Trace a centerline down the middle of the leading edge of the cutwater, so that you can remove material uniformly. This is one of those things, where, if it looks right at scale, it is right.
-
-
Aaaah, okay - perfect! Thank you, Dan. Sand makes perfect sense to me, as it would provide extra ballast, keeping the cask firmly planted upright.
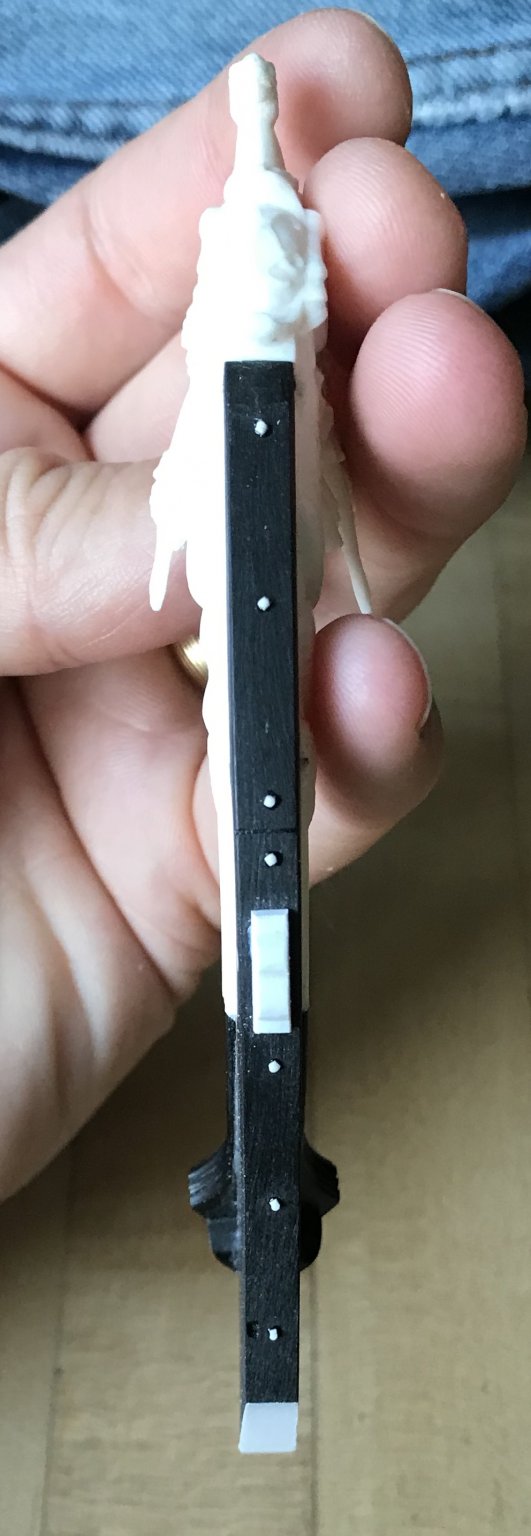
So, with this in mind, I can cut away the linstock staffs, drill out the centers, scribe staves, add barrel bands and a lanyard.
The other thing I’ve been debating is the feasibility of the profusion of single knight-heads. The French, at this time, do seem to like lashing blocks to an eye in the deck, as a fairlead to a cleat on the deck. I could do that. I could. However, the single knights are sheaved, combining both functions into one. I will probably use these knights, as I can’t find any argument against them.
For the fore and main braces, though, I will employ the block/cleat configuration to each side of the gratings.
- shipmodel, druxey and FriedClams
-
3
-
-
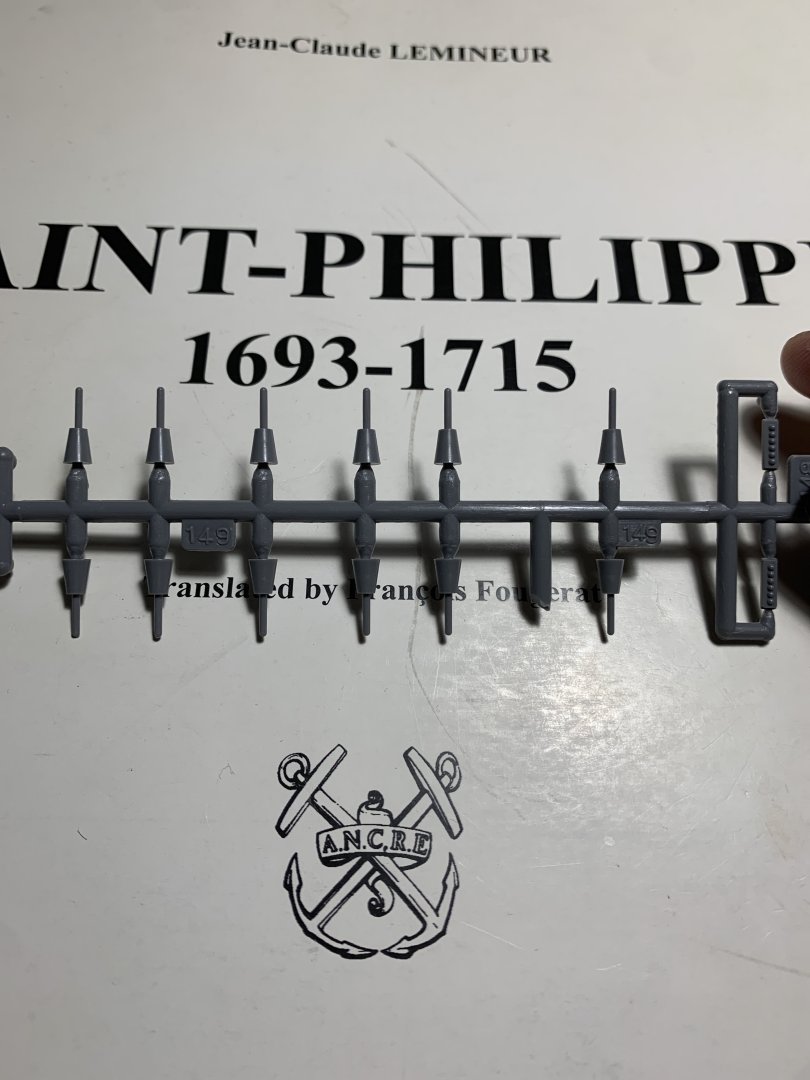
Thank you, everyone, for your thoughts on this matter. So, Henry, should the linstock barrel be depicted with simply a hole in its narrower diameter top, for where the linstock would be placed during battle?
I see some builders detail these tubs with coopered staves engraved, barrel bands applied, the linstock stick removed, and the centers bored out to look more like liquid carrying vessels. They even attach ears to the rim, to accept a rope lanyard.
What you are suggesting, I think, is that this tapered cone barrel is wider at its base precisely to be a more stable support for the lit match. In that case, the hole at the top should only be big enough for the linstock to be inserted. I suppose that for the sake of expedient clearing of the decks, it still makes sense for the lanyard to be attached.
The more conventional buckets (narrow at bottom and flaring at top) are really the swab buckets for swabbing the bore between shots. Heller only provides 10 of these and they instruct you to place them in non-sensical places along the decks, rather than as equipment specific to the battle stations.
Do I have this right, Henry?
- FriedClams, wefalck, Baker and 1 other
-
4
-
Hi Guys - does anyone know what specifically these are? They are part of the battle-station equipment for each gun. I think it is a cask, and perhaps the barrel swab is the long handle?
- Archi, GrandpaPhil and FriedClams
-
3
-
It seems quite reasonable to me that all QG windows would be false. You have given me good reason to black-out the single window on the Quarter Deck level of my model. Observe Tanneron’s model of L’Agreable of 1697. All QG windows are shown as false:
As for placement of guns within the quarter galleries, one thing seems pretty certain to me. A gun would not have been rigged in the door opening to the QG. This, for all the reasons you mention, but most especially because it must remain a clear pass-through - even in battle. If one doubts that officers had the need to use the facilities during battle, they must consider that battle raged for hours and hours at a time, and they were certainly anxiety producing affairs.
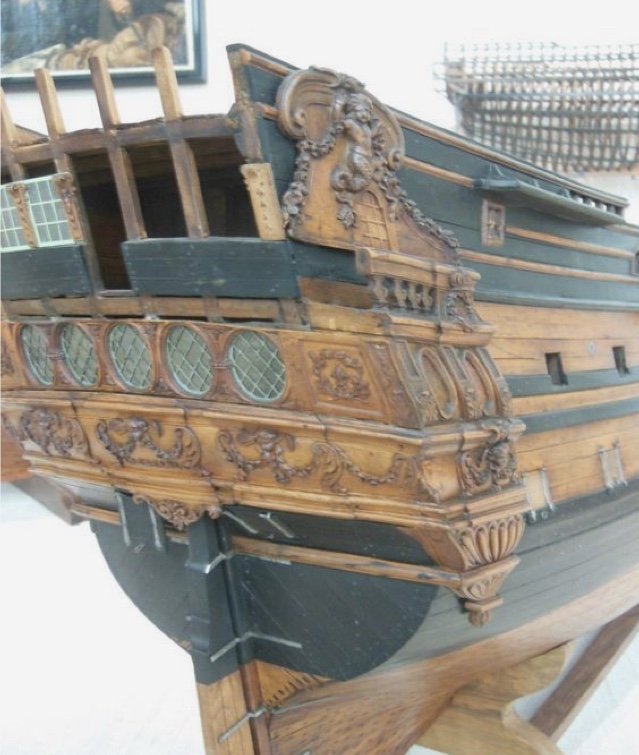
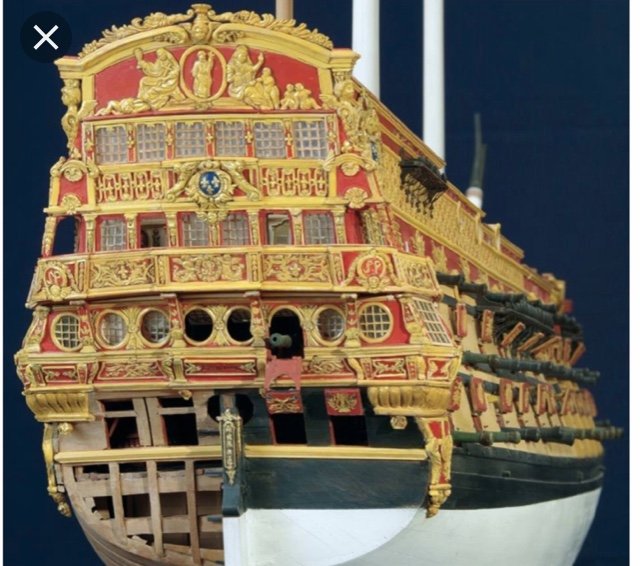
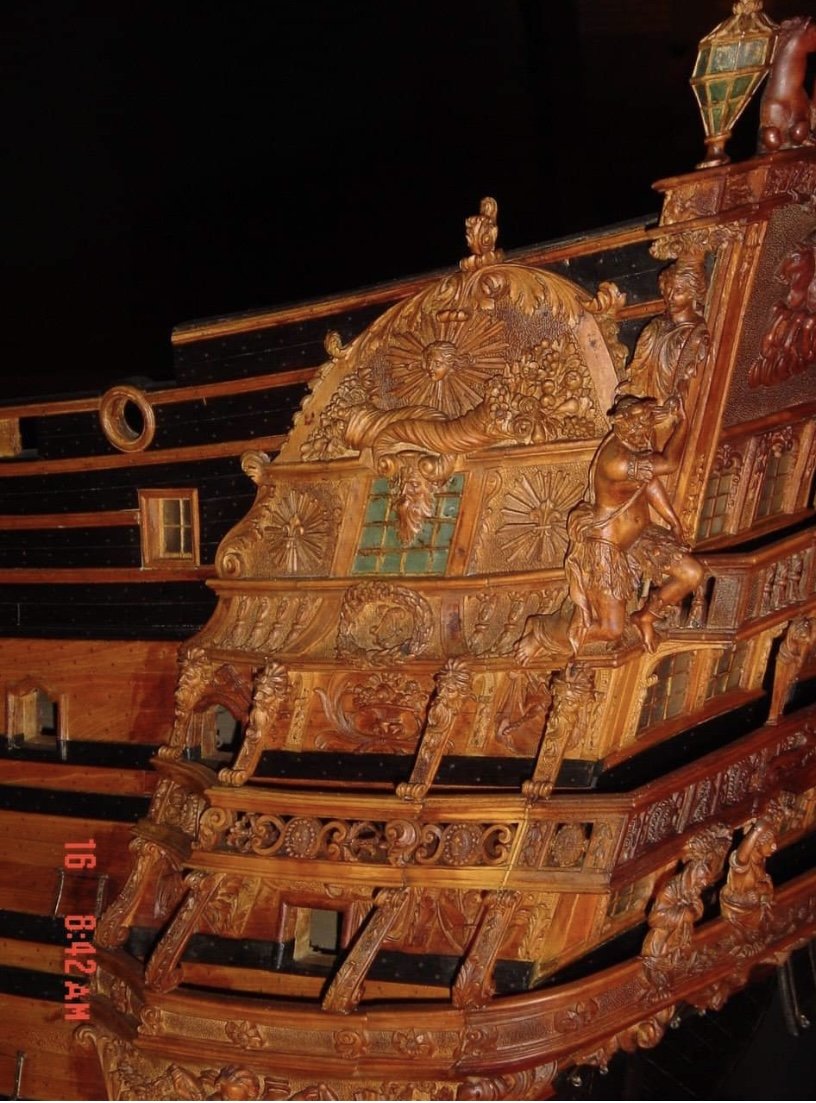
The Tanneron model of Soleil Royal is a confusing representation of the structure and function of the QGs. I will preface my following comments with the disclaimer that they are merely my observations, and not expert-verified facts.
Tanneron, in my opinion, has created a composite of what Soleil Royal may have looked like, both at the beginning of her career in 1670 and after the replacement SR was built in 1693.
Early features include the very tall stern, the completely open quarters and three stern balconies. The overall shape of the QGs, on the other hand, suggests the style of ships built during the second major building program of the 1690’s. The primary difference would be that the bottles, by this later date, would have been completely closed-in, in order to adhere to the reglements mandating this change in approach.
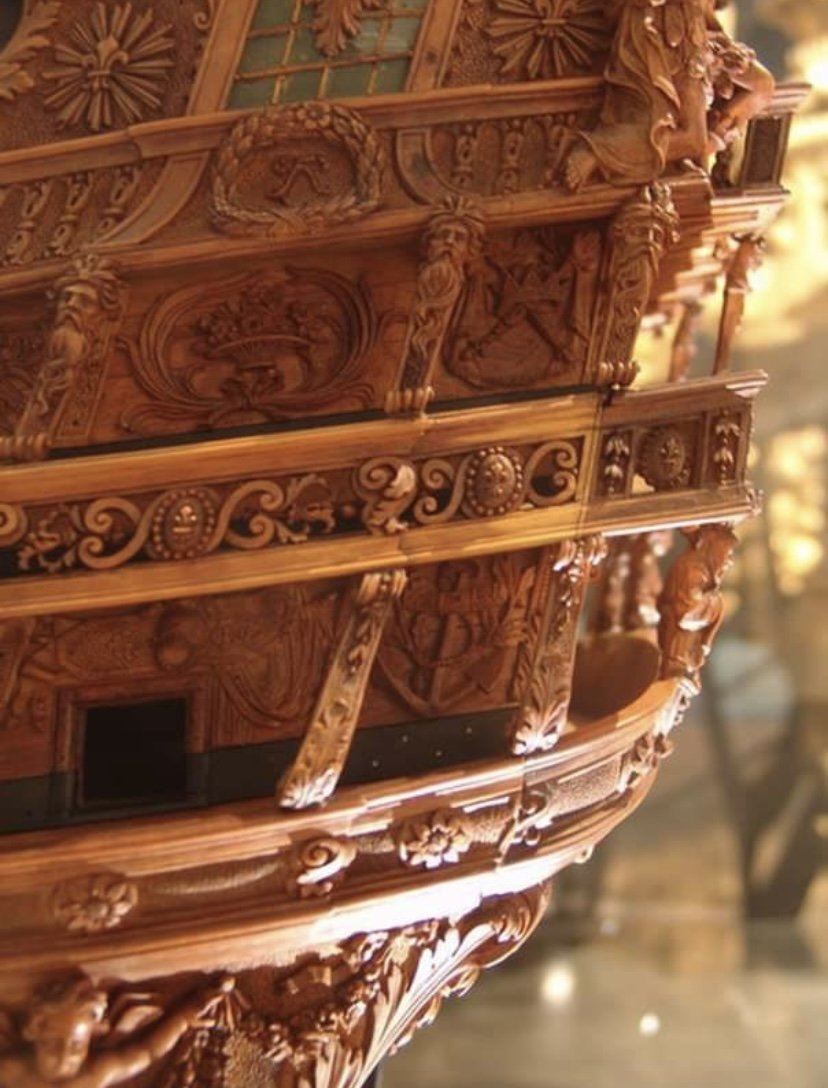
Tanneron shows an extra port on the main deck level, at the forward edge of the QG, where it makes structural sense to place a port within the QG. Also, though, he shows a port in the middle of the QG at the middle deck battery. This should be where the entry door to the QG is placed. Instead Tanneron shows this door opening from the center of the lower stern balcony, which is represented as open and walkable.

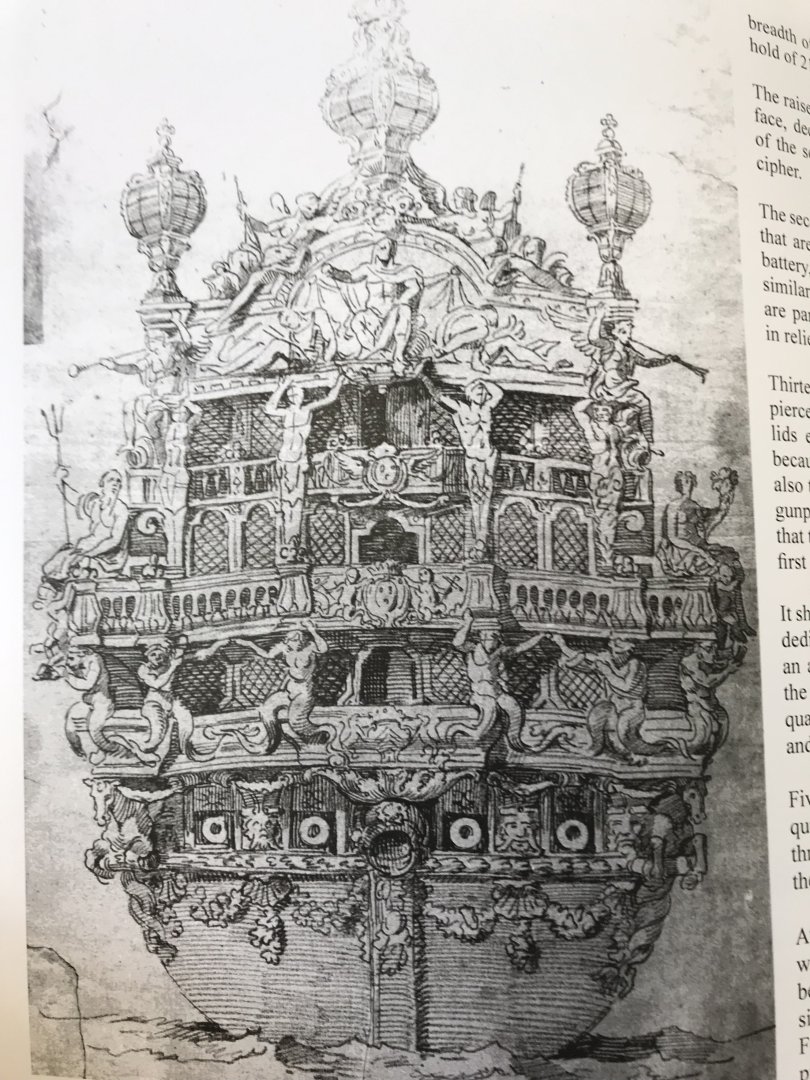
Perhaps, Tanneron pulled this idea from the conceptual LeBrun drawing for the Royal Louis of 1668, and the finished Girardon drawing of the same. Both show an open doorway in the center of the lower stern balcony, which suggests a walkable balcony:

In my view, though, there are several issues with Tanneron’s construction, at this level. My primary issue is that it seems to ignore the practical function of the QG as a functioning toilet. If the lower stern balcony wraps to the quarters, where is the seat of ease supposed to be?
The other issue has to do with the fact that even at this early time in the 1670’s, a lower stern balcony would be vulnerable to heavy following seas, and could be washed away. It is my belief, that the lower stern balcony was always a bit of theatrical representation; a shallow decoration of the lower stern counter, made to look like a walkable balcony, but whose functional purpose is really to serve as a shelf for the Four Seasons figures that support the middle balcony.
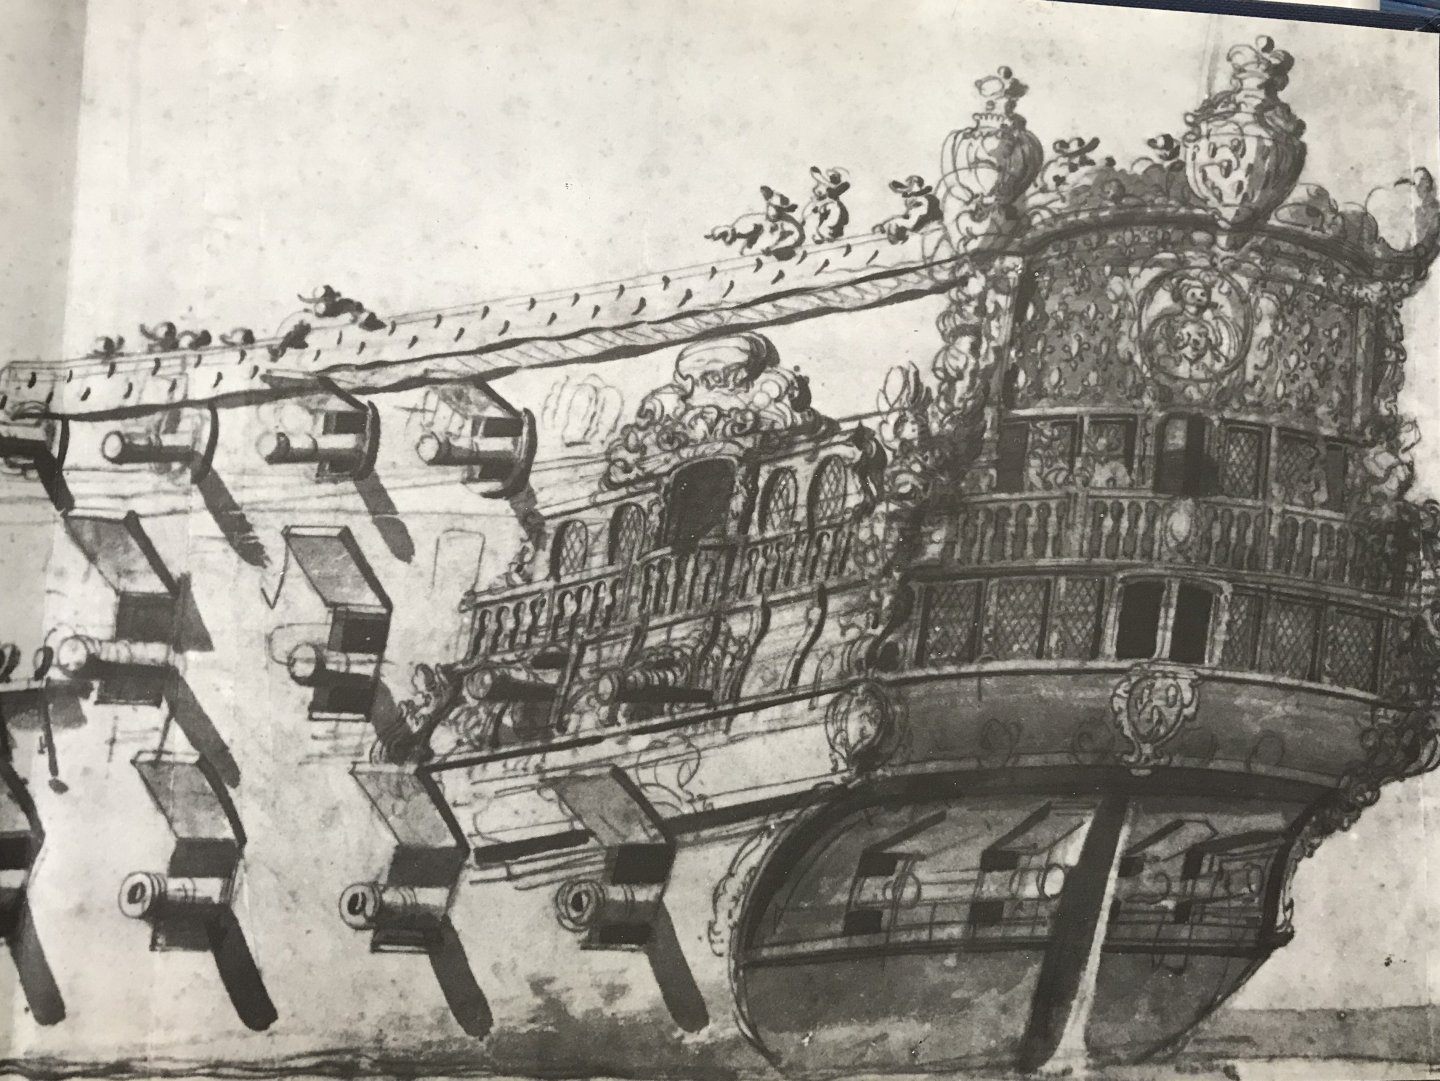
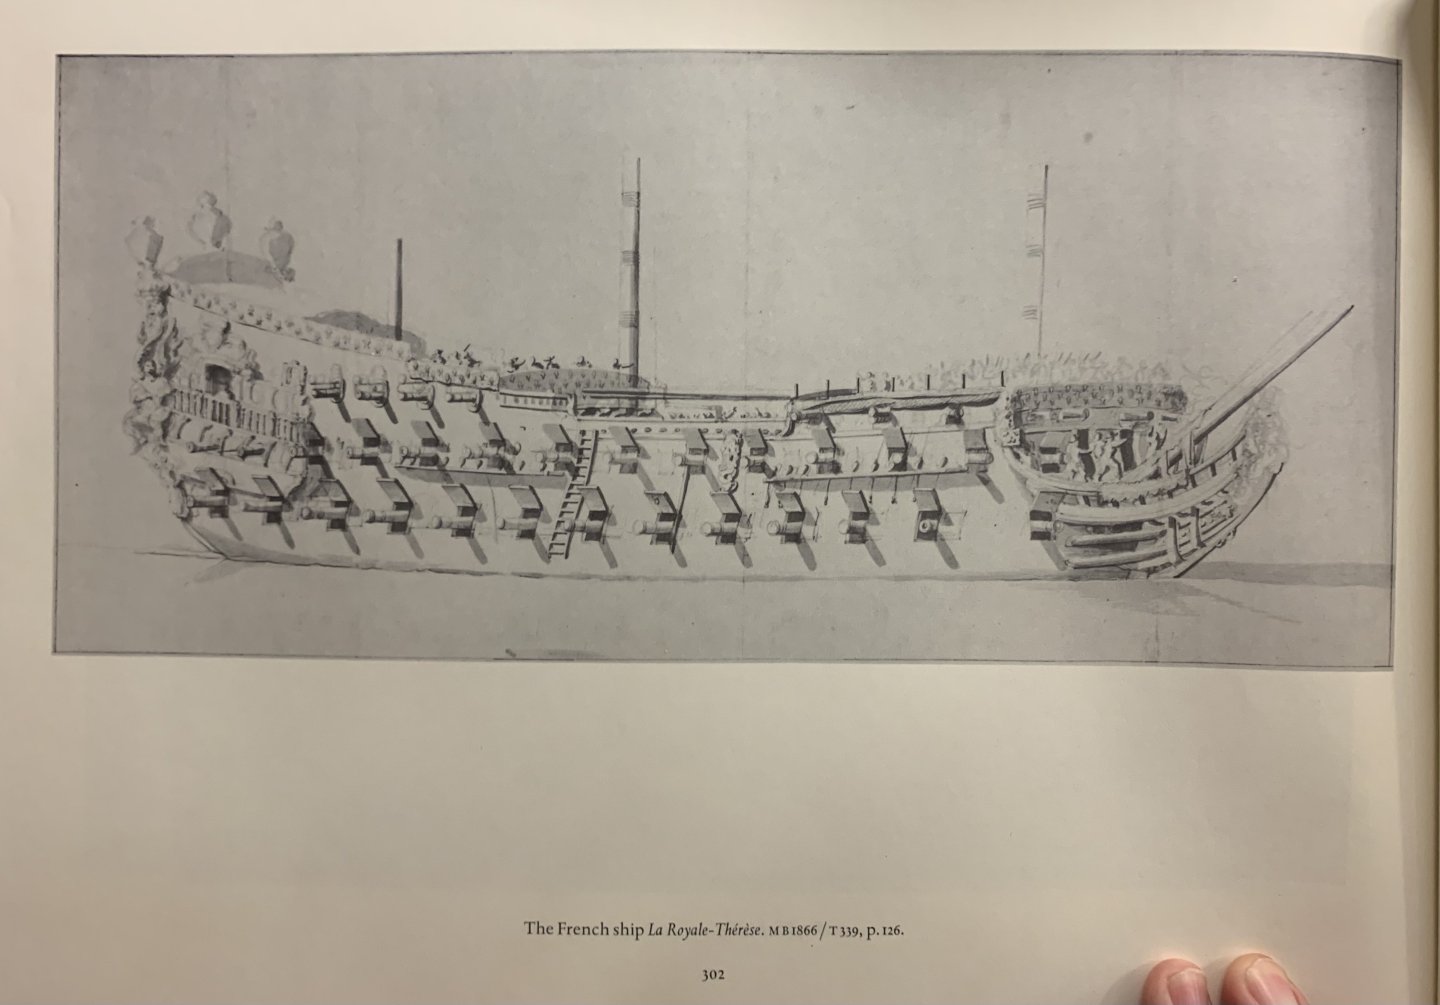
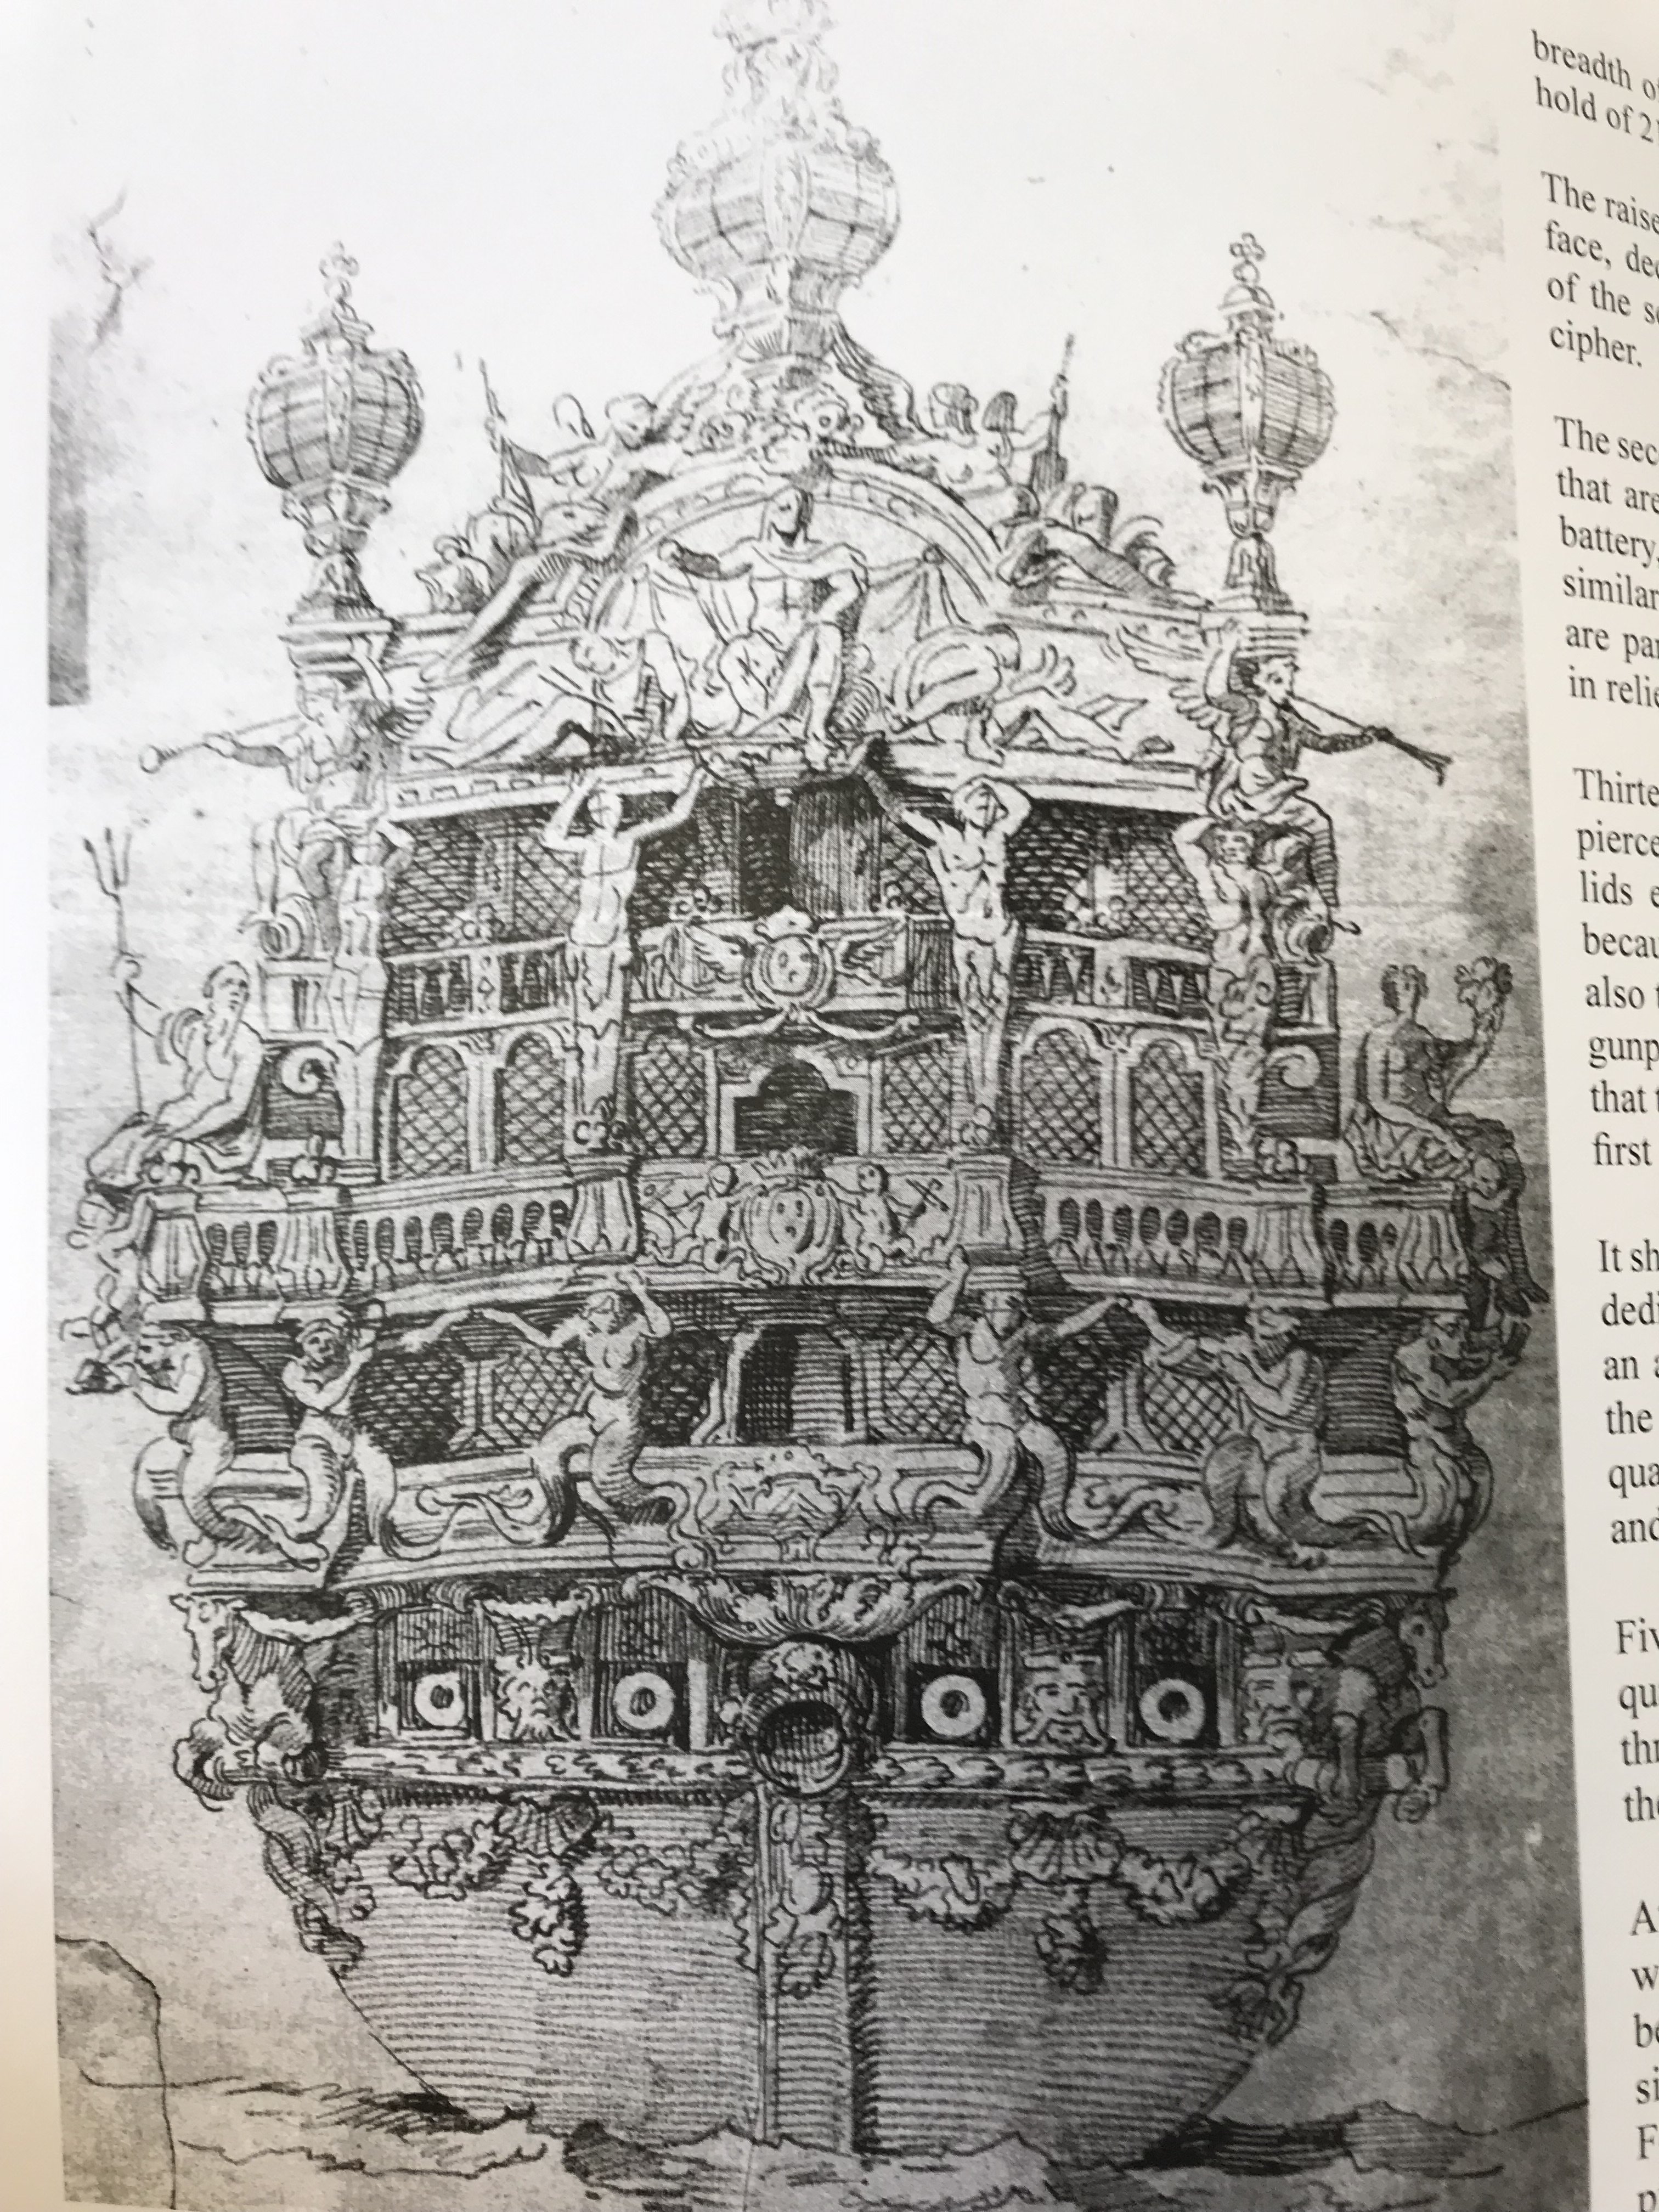
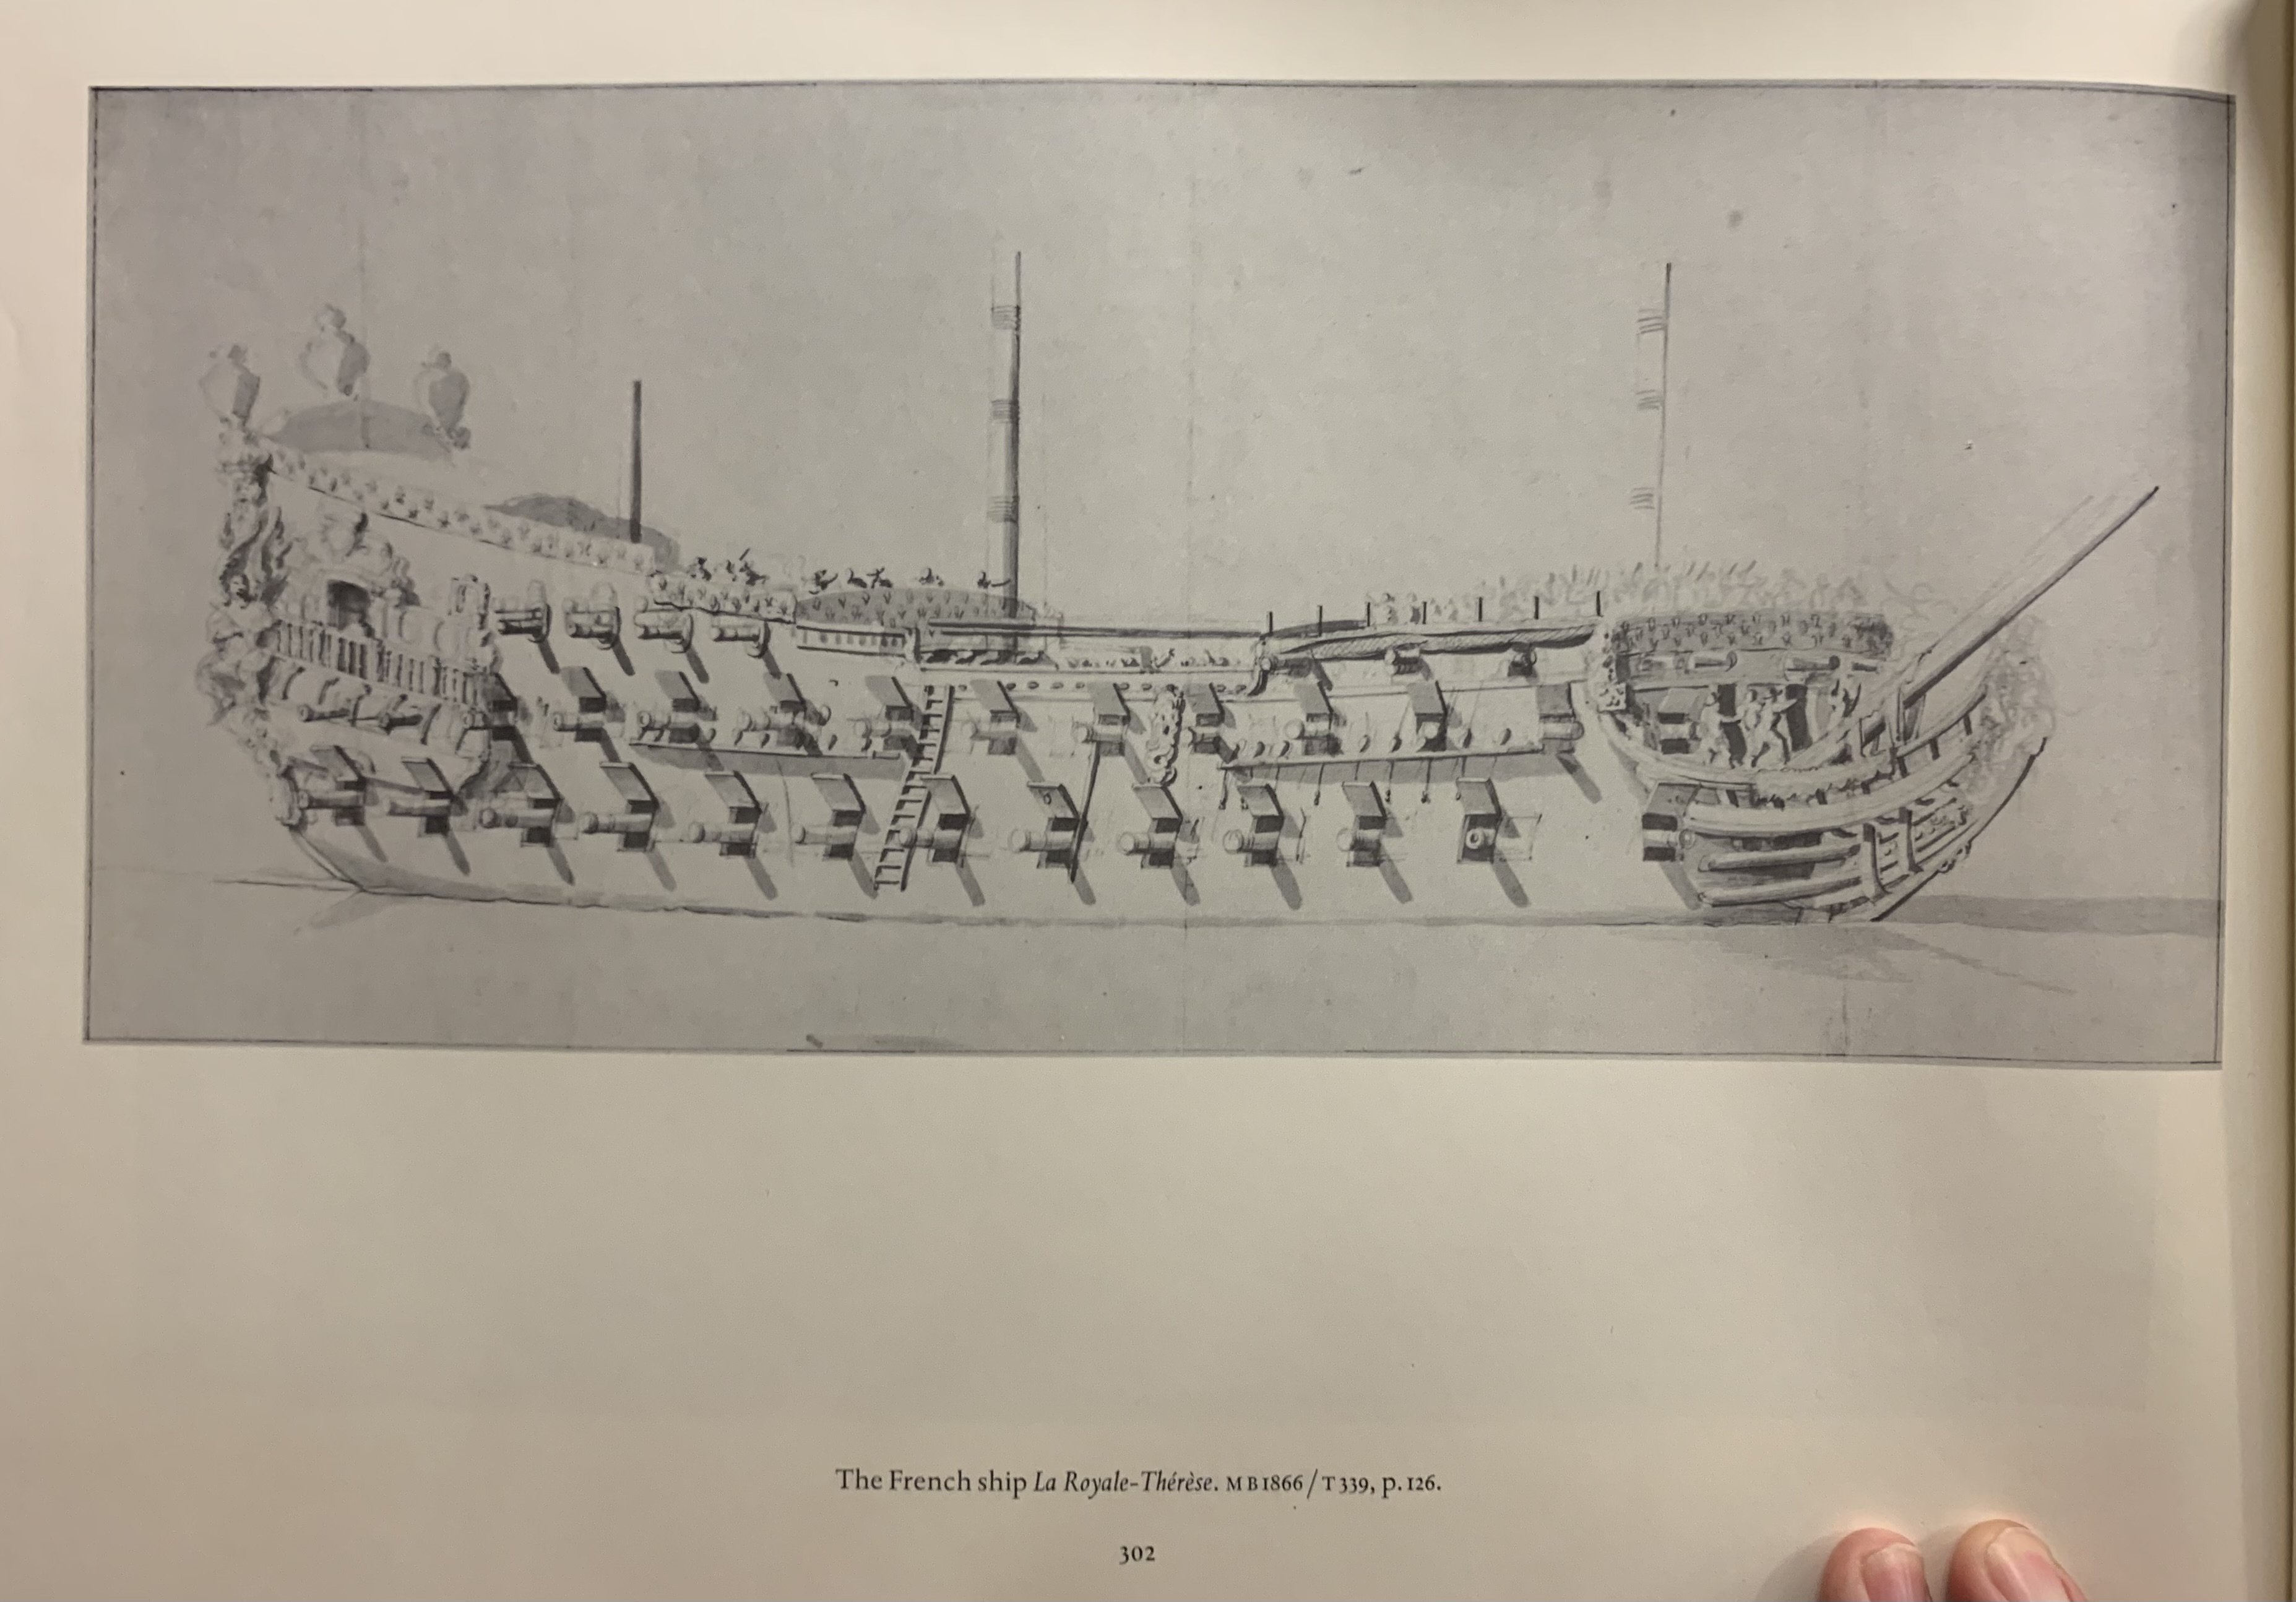
As you mention, though, there are early contemporary drawings that support the idea that the QG’s were occasionally armed. See the Royal Therese, below:
And, also, a contemporary drawing of the port of Rochefort:
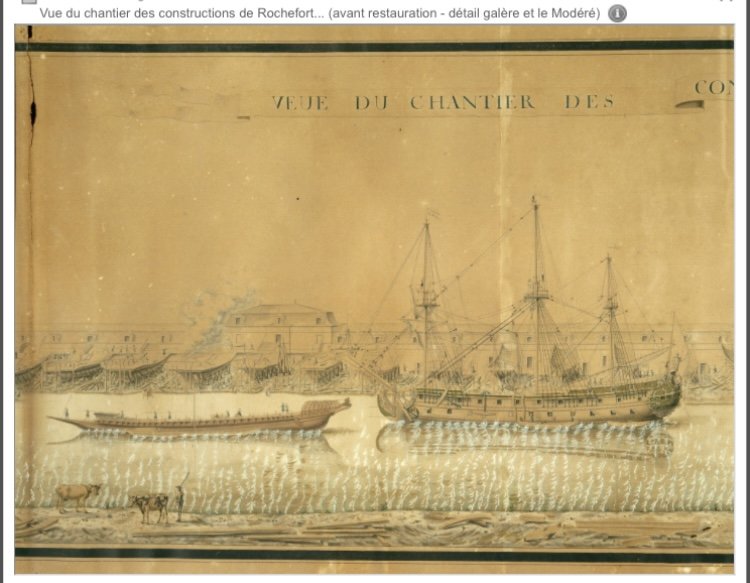
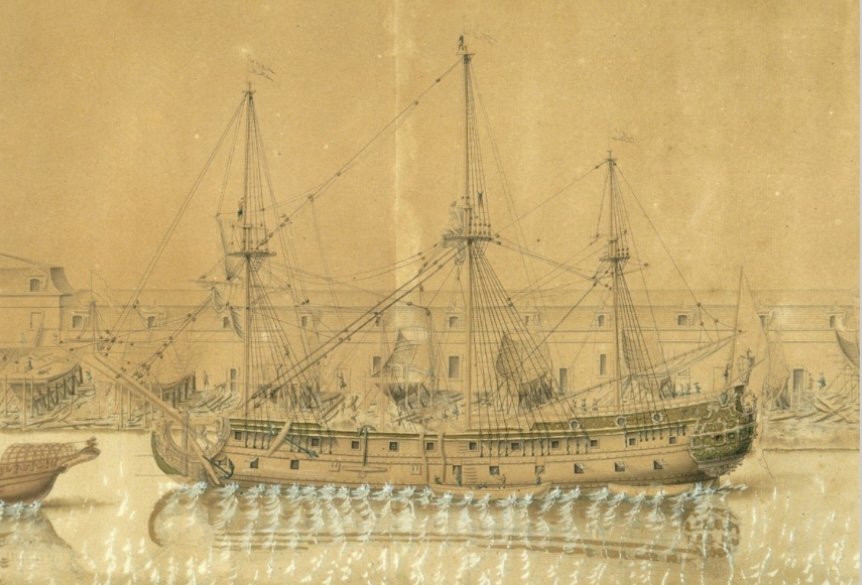
The vessel above shows a gun through a panel opening, forward of center. I think, perhaps, that your idea for a split panel has some traction. That is the solution Lemineur applied to the middle deck stern chase ports of the St. Philippe of 1693:
As for your email problems, perhaps the issue might resolve itself, if you created a new email account for your client correspondences. ‘Might be a glitch in your current account. Computers and their inner workings remain a mystery to me. I am like the dog that has no conception of what happens to their owner, when he walks out the front door.
- HAIIAPHNK, empathry, vossiewulf and 5 others
-
8
-
Ah, yes - I remember now. That will be a good one!
-
Another beautiful job, Bill! So, what’s next in your dockyard?
-
-
With regard to the two main issues you have raised, here, I submit the following for your consideration.
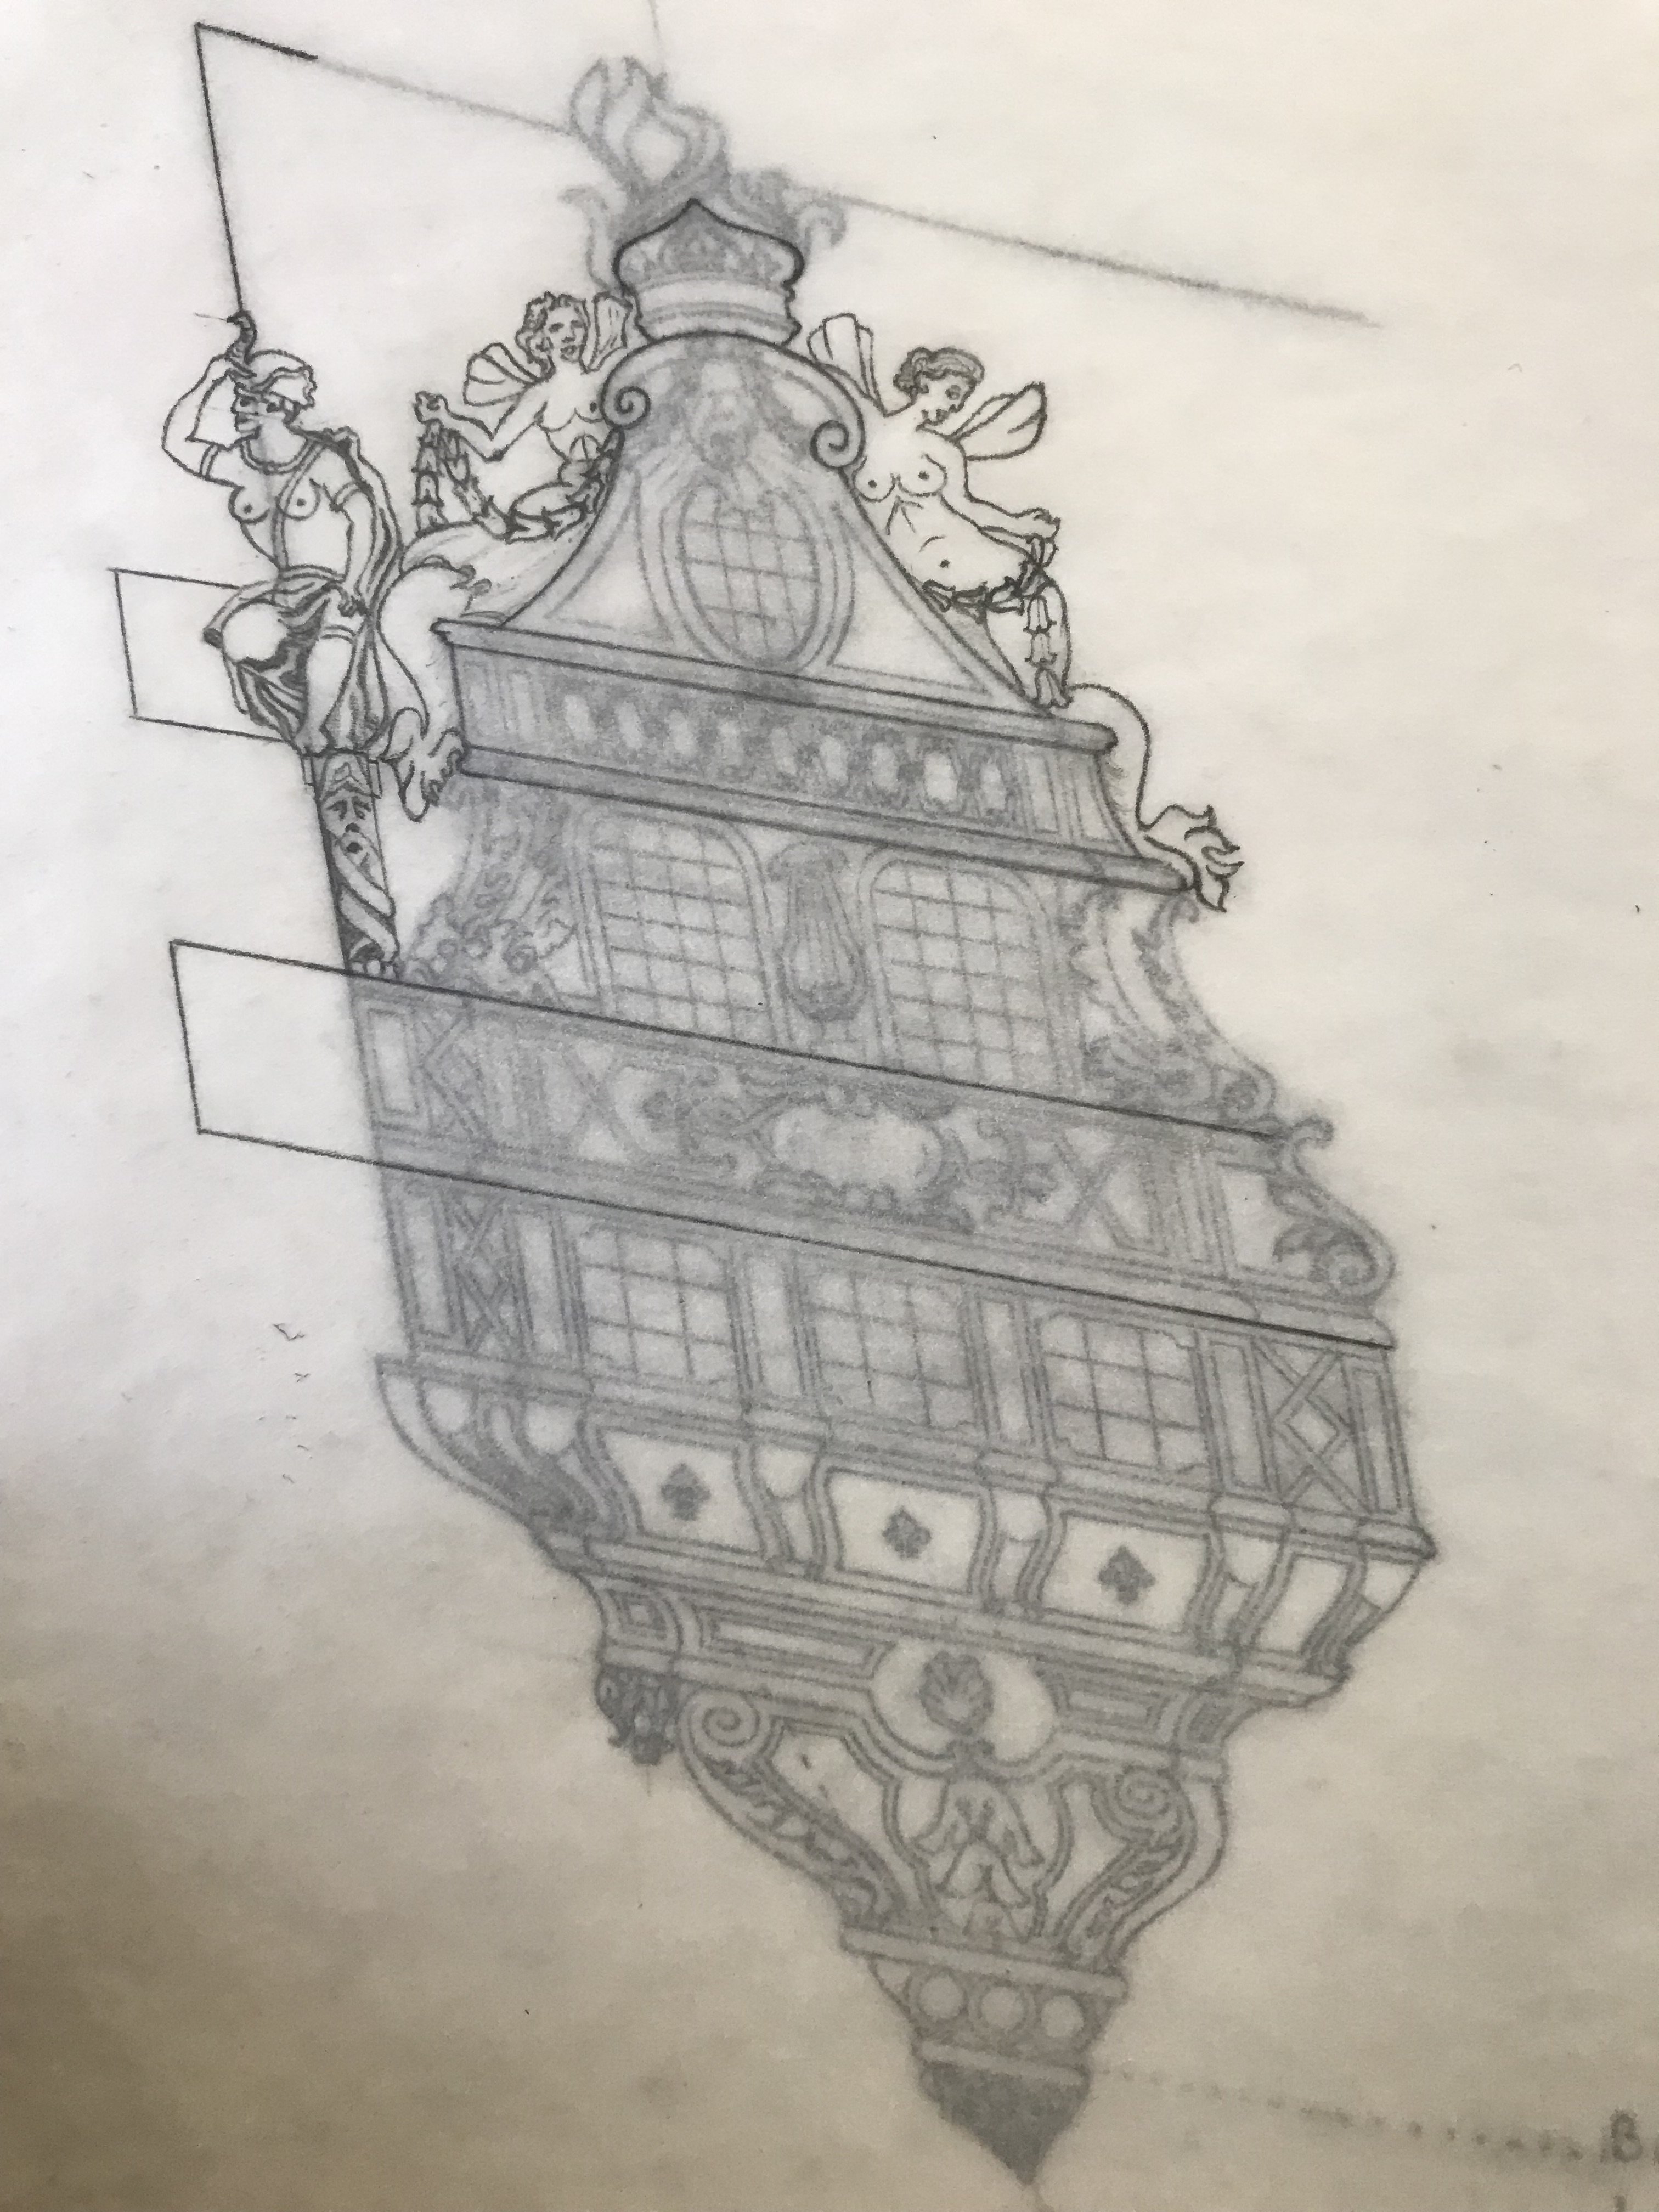
When I was first considering this, presumed to be Jean Berain, design for the 1689 quarter galleries of Soleil Royal, there were aspects of the drawing that seemed like artifacts of an earlier time. If I were to interpret the drawing literally, it would result in a cramped and muddled looking structure:
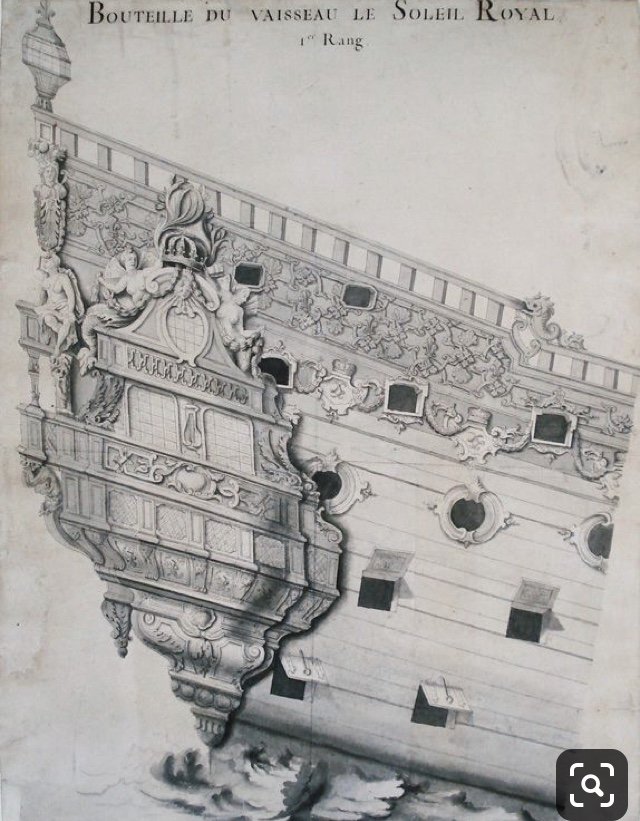
This profusion of five false windows in the lower gallery tier have more in common with the construction practices of the early 1670’s. The windows, themselves, are one thing, but where it really gets cramped is the area below with all of it’s pilasters and panels. The way this is drawn is unpleasingly asymmetrical to my eye.
Alternatively, I reduced the number of windows on the lower tier to three and arranged them along a central axis that runs straight through the crowned upper finishing, and the grape-clustered lower finishing. The triangulation of the 3:2:1 window arrangement better supports the essentially diamond shaped quarter galleries in a more harmonious way. The pilaster and panel arrangement is also much more coherent:

This light re-design has the added advantage of being much more consistent with the construction practice of these times of the latter 1680’s.
With the exception of the quarter deck level (Admiral’s quarters) - the single window in the amortisement - all other quarter gallery windows would be false, with perhaps a small, hinged center window within the window, for ventilation while using the toilet.
It is my belief that all of these lower tier false lights would have been removable panels, behind which there could be an additional cannon port. You see this at the main deck and middle deck levels of Tanneron’s model:


photos, courtesy of Yoann Guillemenet.
-
I understand your impulse toward perfection, but the windows are really excellent. The mullions follow the horizontal camber of the stern, and the vertical tumblehome of the topsides.
One point I am still curious about. How did you ultimately get the tagua nut carvings to re-adhere to their place settings?
- HAIIAPHNK and Keith Black
-
2
-
Absolutely stunning work!
-
Are cavals the single sheave post belay points? Curious because the Heller SR is littered with them, and I have not yet determined whether they were a real thing. Do you know more about these?
-
-
Hi Guys - very late to this discussion, but my 1 1/2 CENTS:
I was searching for pictures of the replica ship under sail, and could not find any that showed boomkins rigged.
Perhaps the crew employs other practical work-arounds, although I have no clue what they might be.
-
I would add, also, that I’ve coiled and flaked rope as a volunteer on South Street Seaport’s historic schooner Pioneer. Coils have to run freely, so longer loops and fewer are better than smaller, stacked coils. Mostly though, at scale, I just don’t like the appearance of perfectly round coils that instantly bring to mind the knitting needle they were formed on.
The varnish tip is a good one, but I would be reticent to apply acetone to an acrylic painted, plastic model. This approach, it seems to me, is perfect for wooden modeling. ‘Something I will definitely tuck away for the future.
I can tell you from my several mis-adventures of blemishing my ventre-de-biche hull that color-matching that distressed appearance is a real biche 😜
- FriedClams, mtaylor and Siggi52
-
3
-
Hi Ian - Those are actually blocks that Kevin is printing with his own equipment. The smallest I found were also 2MM.
- Ian_Grant, mtaylor and FriedClams
-
3
-
Gentlemen, thank you all for the likes and kind words. It is all very much appreciated, coming from such an esteemed group as you all are.
Kevin, I don’t think there’d be any significant difference in time period for single and double blocks. The larger, purpose-specific blocks of the yards are a different story. I’m a ways away from those.
Wow! - you are absolutely right, what a scale difference it is to go down to 1.5mm. I suspect that I could rig them with the same 100wt silk thread that Michael is using on his Sovereign.
- Siggi52, FriedClams, druxey and 1 other
-
4
-
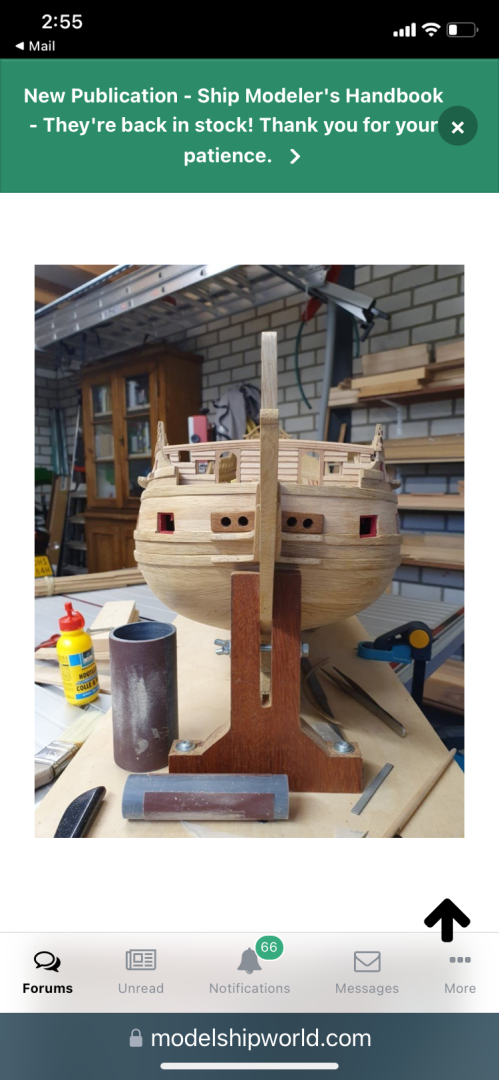
It seemed to take me a Dog’s Year, but I finally completed the rigging of the main deck guns. Like so many things that I am now tackling on the project, there was quite a steep learning curve. I will do a few things differently on the upper decks, where the guns are fully visible.
The main deck guns, however, are largely obscured by the connecting gangway, overhead, so I did not feel any strong compulsion to re-do anything. What was important to me were the lay of the breaching ropes and the coiling of the haul-out tackles.
Mine was a multi-step approach. The breaching ropes held their shape pretty well, once the white glue set. I tacked the loops down to the deck with a small amount of gel CA applied with a toothpick. Once that had all set, I brushed them all over a few more times with dilute white glue.
The haul-out tackles were quite challenging to hook to both the bulwarks and carriages. Eventually, I learned that a drop of CA, applied to the eyelets enabled me to set one hook (bulwarks first), and then to the carriage.
My first significant mistake was that my seizings to the hooked single block were twice as long as they should be. In a number of instances, when I drew the tackle taught through both blocks, the ends of the seizing wanted to kink up in the reeves of the double block. I did my best to mitigate this problem by slacking the tackle to whatever degree I could reasonably manage. In truth, these seizings should only be two wraps, maximum.
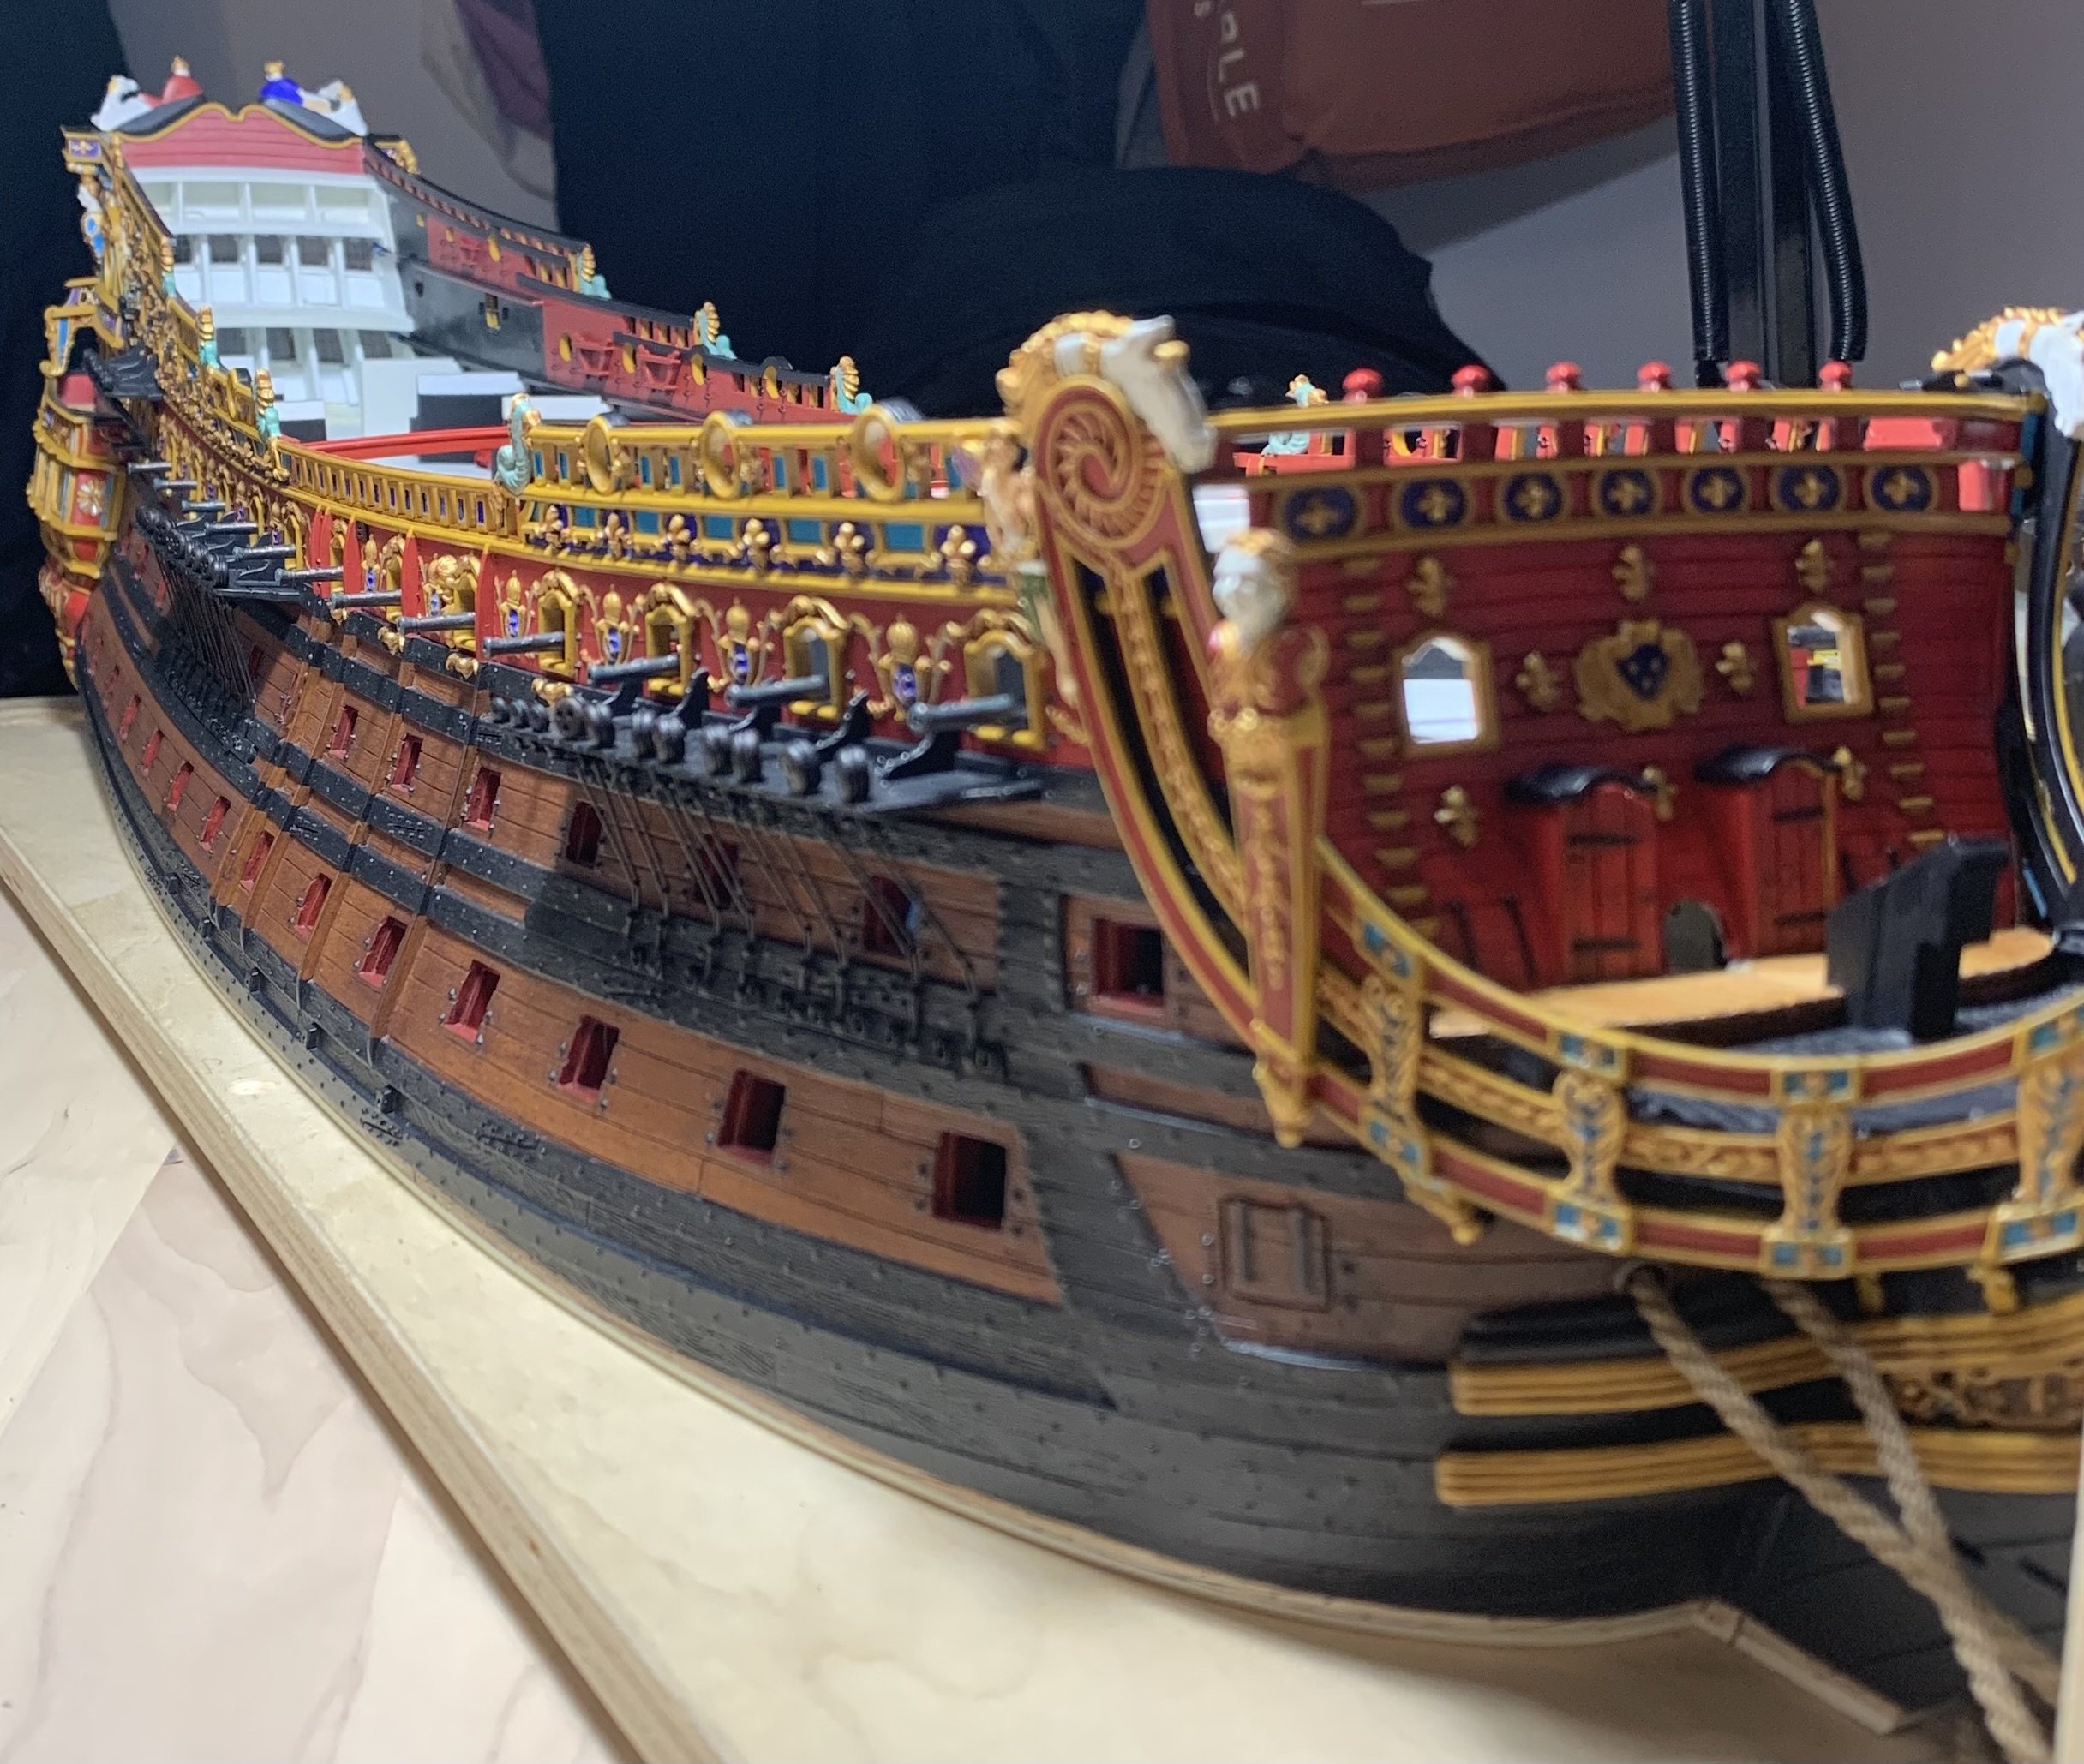
The other mis-calculation of mine had to do with the scale of the blocks I used (2mm), and the hooks I made (also almost 2mm). My reasoning was that because I had shifted the stock middle battery up to the main deck, I’d be able to set the longer barrels further inboard so that there was a bigger gap space between the carriage eyelets and the bulwarks. That was all true. The scale upgrade of the cannon caliber looks convincingly better on the broadside view:

Nevertheless, what I should have sourced were 1.5mm blocks and figured out a way to make even smaller hooks. I will resolve these issues by the time I do the QD and F’ocsle guns (up-shifted stock main deck guns and their carriages).
Once the tackles had set, I tacked the running end down to the deck with a small spot of CA. I then came back and saturated the visible section of line with dilute white glue, in order to give it a more convincingly slack appearance. Once that was all set, I nipped away the excess line and did any carriage touchups that were necessary, as well as a dab of dullcoat, wherever CA glue was visible.
For the coils, themselves, I adapted a Tom Lauria technique that I found on YouTube. Because these were not to be suspended from pinrails, it wasn’t necessary for me to make rope hanks the way that Lauria illustrates. Instead, I could make a running series of coils.
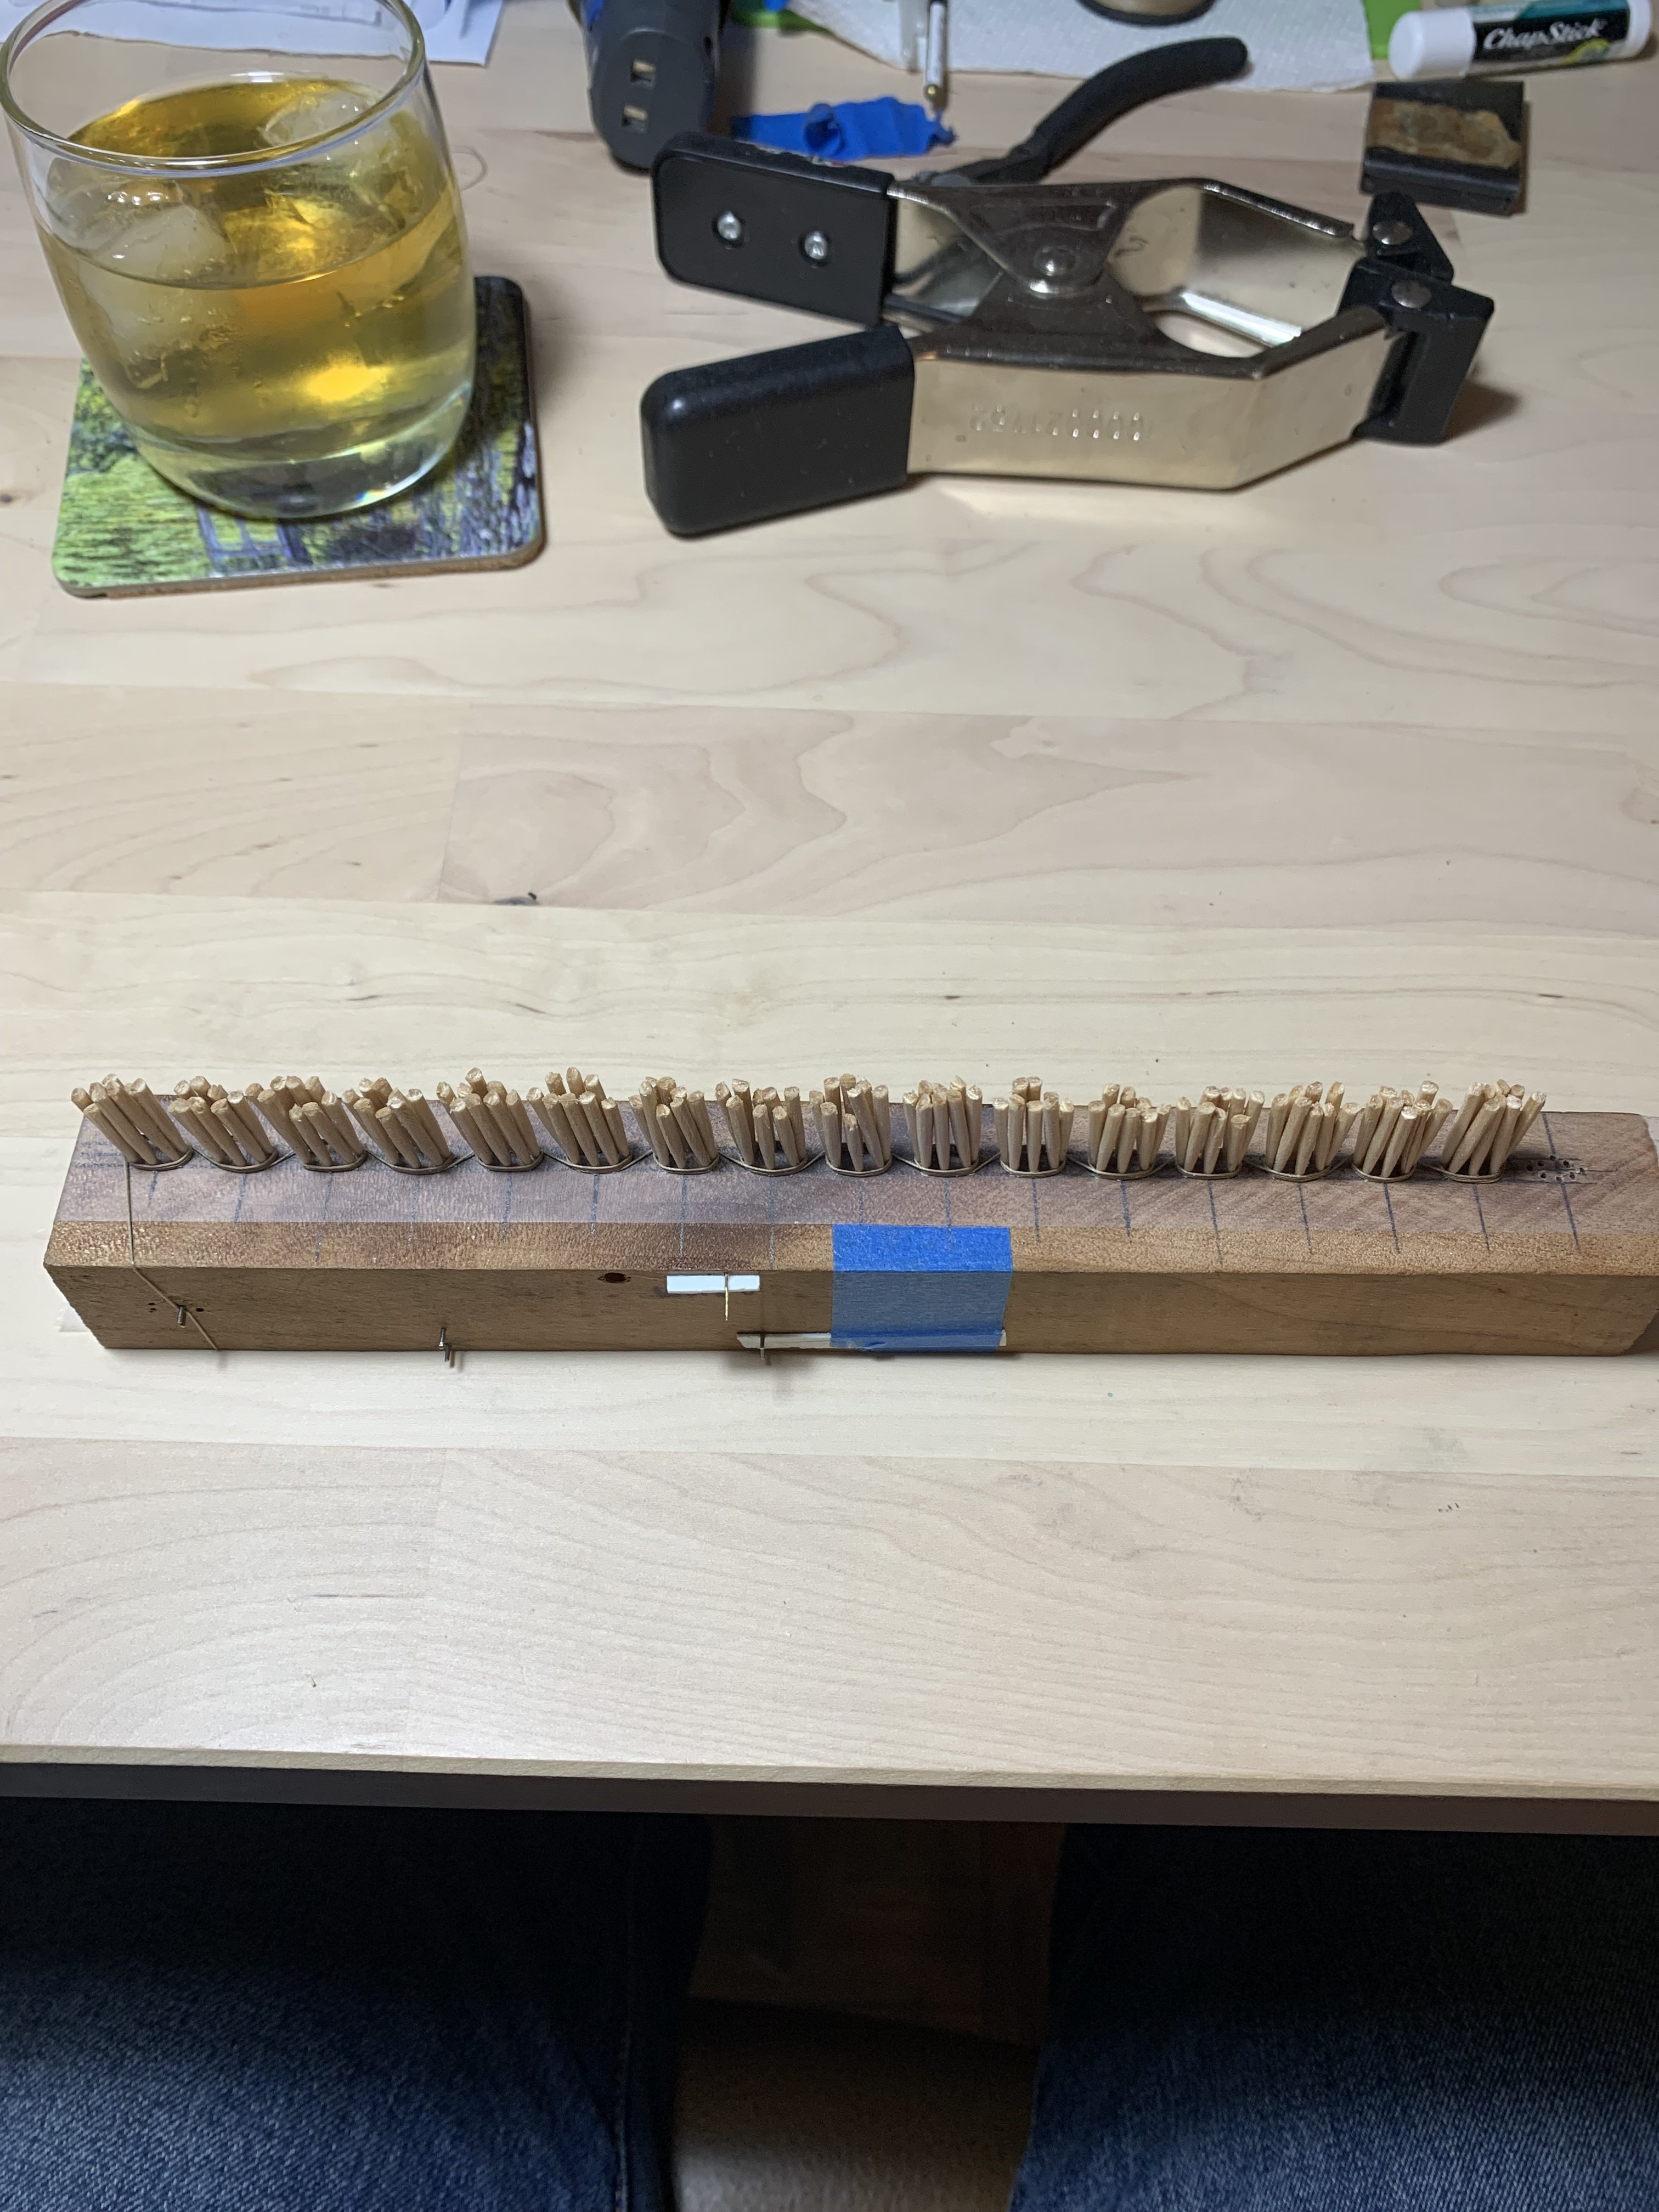
I began by marking out uniform 1/2” spacing for coils that would measure just slightly bigger than 5/16”:
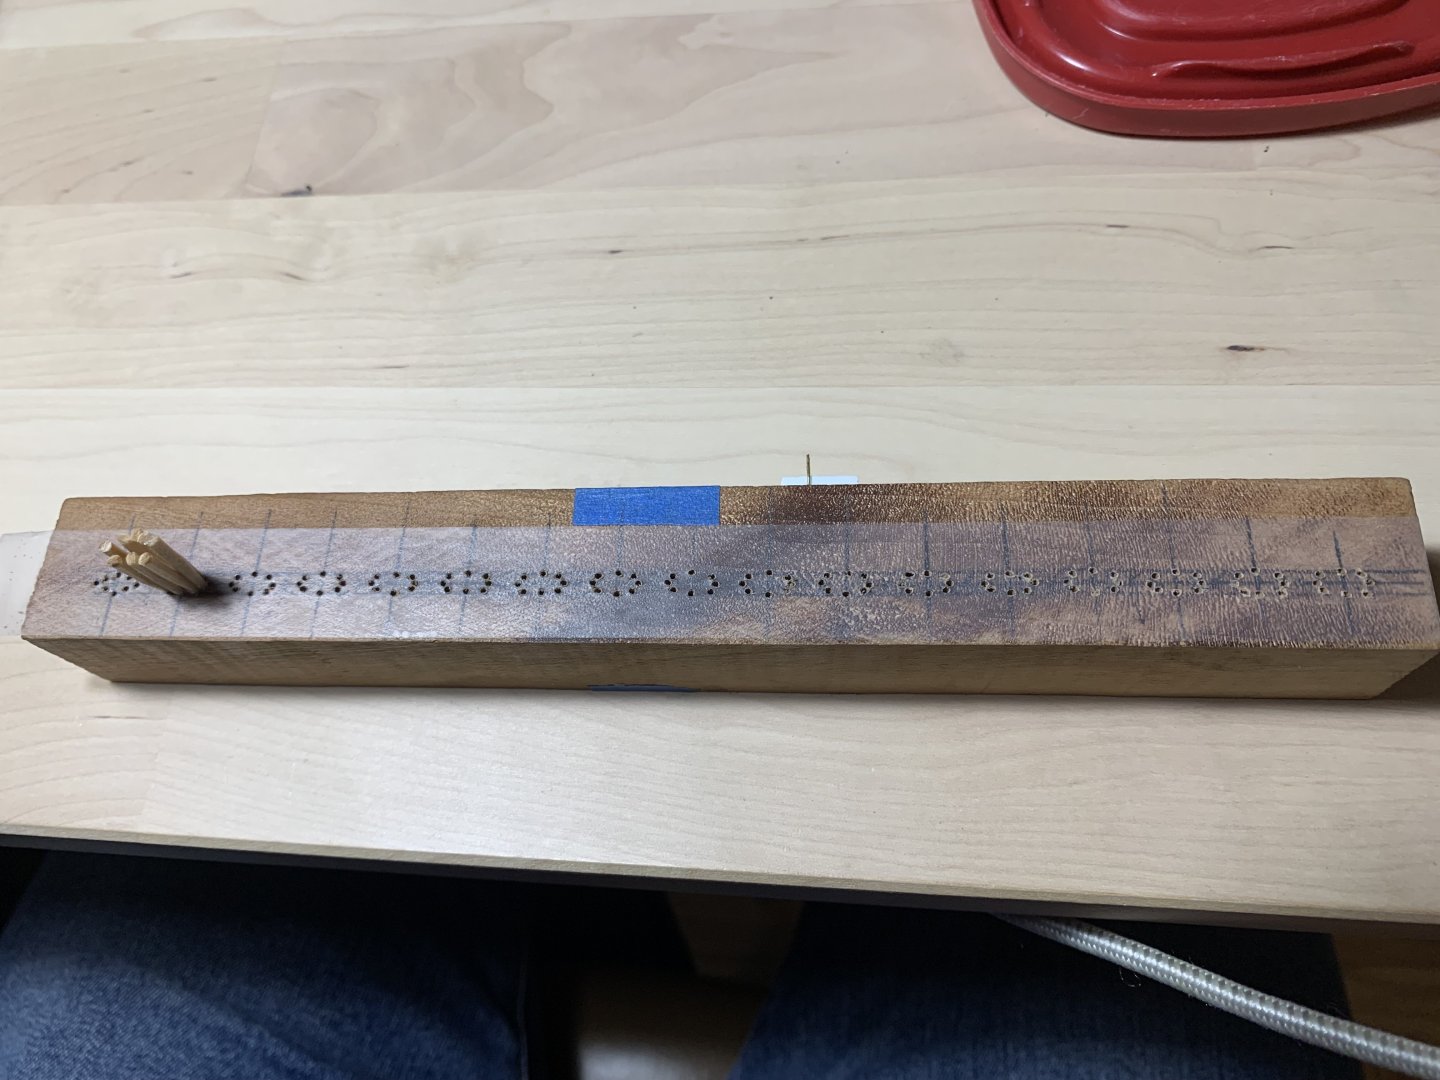
Scotch tape prevents the glue from sticking. I found that the ends of toothpicks that I rubbed with beeswax made perfect peg formers.

I made three wraps around each peg stack and wove in and out from one stack to the next. The pegs released easily enough, and I set them aside for the next batch:

I had simply scotch-taped the beginning and end of the line until the glue had set. It was probably overboard, but I brushed over each coil four passes with the dilute solution.
When I removed the coil cluster I found that there was glue flash along the bottom of each coil. I spent a little time cutting most of that away with a sharp Exacto.
Right out of the former, the coils are pretty stiff and segmented looking. First, I tried soaking them in rubbing alcohol, but they did not really seem to soften or become pliable. I was not a Chemistry major.
On the next batch of coils, after separating each coil, I merely had to dip them in water for a few seconds to soften them. Now, I could squash the coils flat on a paper plate with my fingertip. The result was what I think are slightly irregular and more natural looking coils:

Once they had dried, I used a small dot of CA at each cut end, and then trimmed those ends close to the coil. I suppose I could have tacked the coils down to the deck with gel CA, but I chose, instead, to do multiple washes of thinned white glue. My rationale was that I knew I could easily clean away any stray white glue:

On the port side, you can see the tackles before coils. Here you can see the fully cleaned-up effect:

In my view, coils on a ship would be tidy, but not perfectly round and symmetrical. I am pleased with the effect.
Next, I will have to map out all necessary cleats, blocks and belay points for the main deck, before I can shift up to the f’ocsle deck. I will probably put a small carving kit together to take to work with me, so that I can chip away at the Africa carving. I’ve had a long time for those shapes to gestate in my mind, so I think I can approach that with more confidence, now.
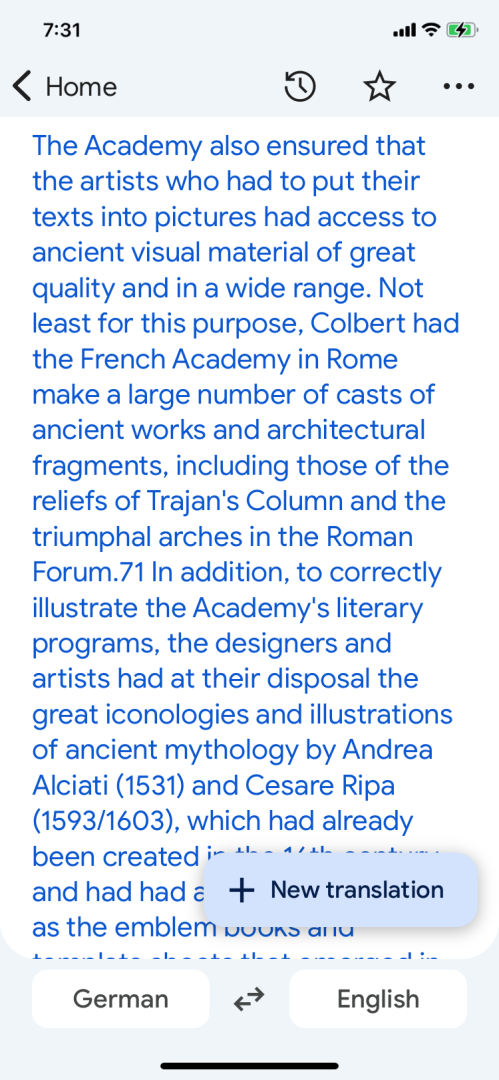
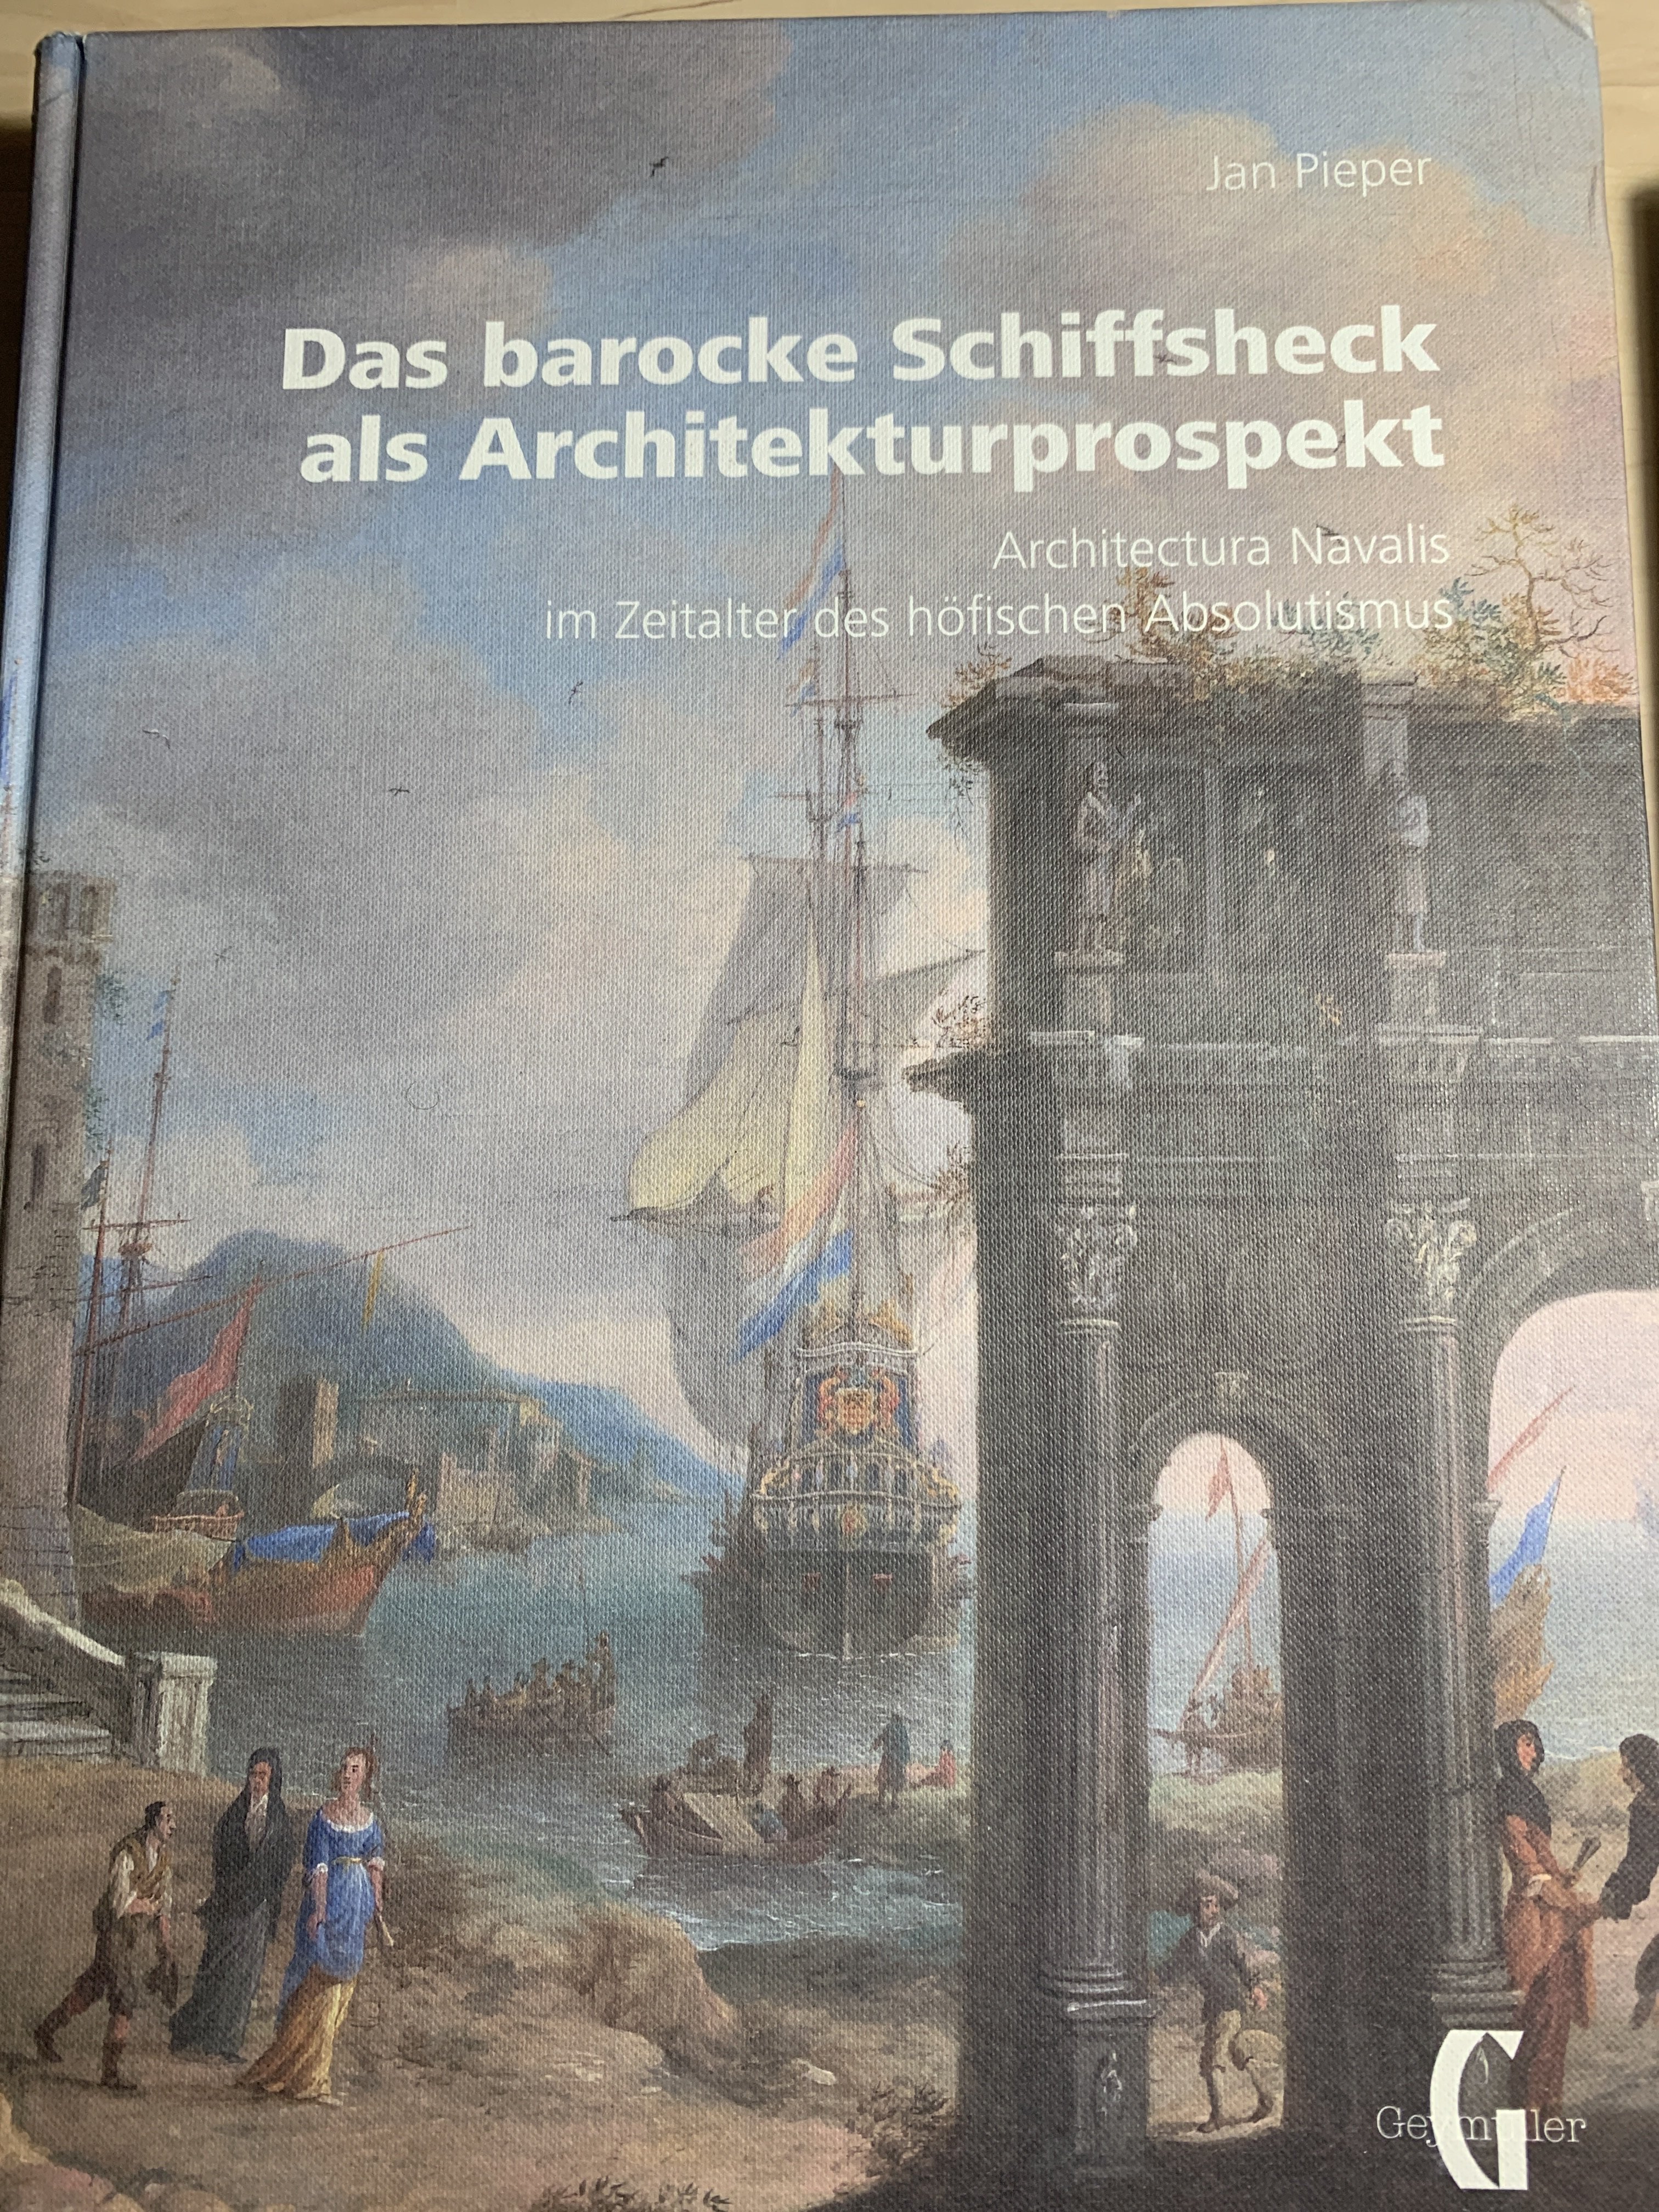
I continue to work my way through this book:

Unequivocally, this is the best treatment I have found of the architectural development and allegorical framework of French sterns. It is chock-full of fascinating insights such as the following:
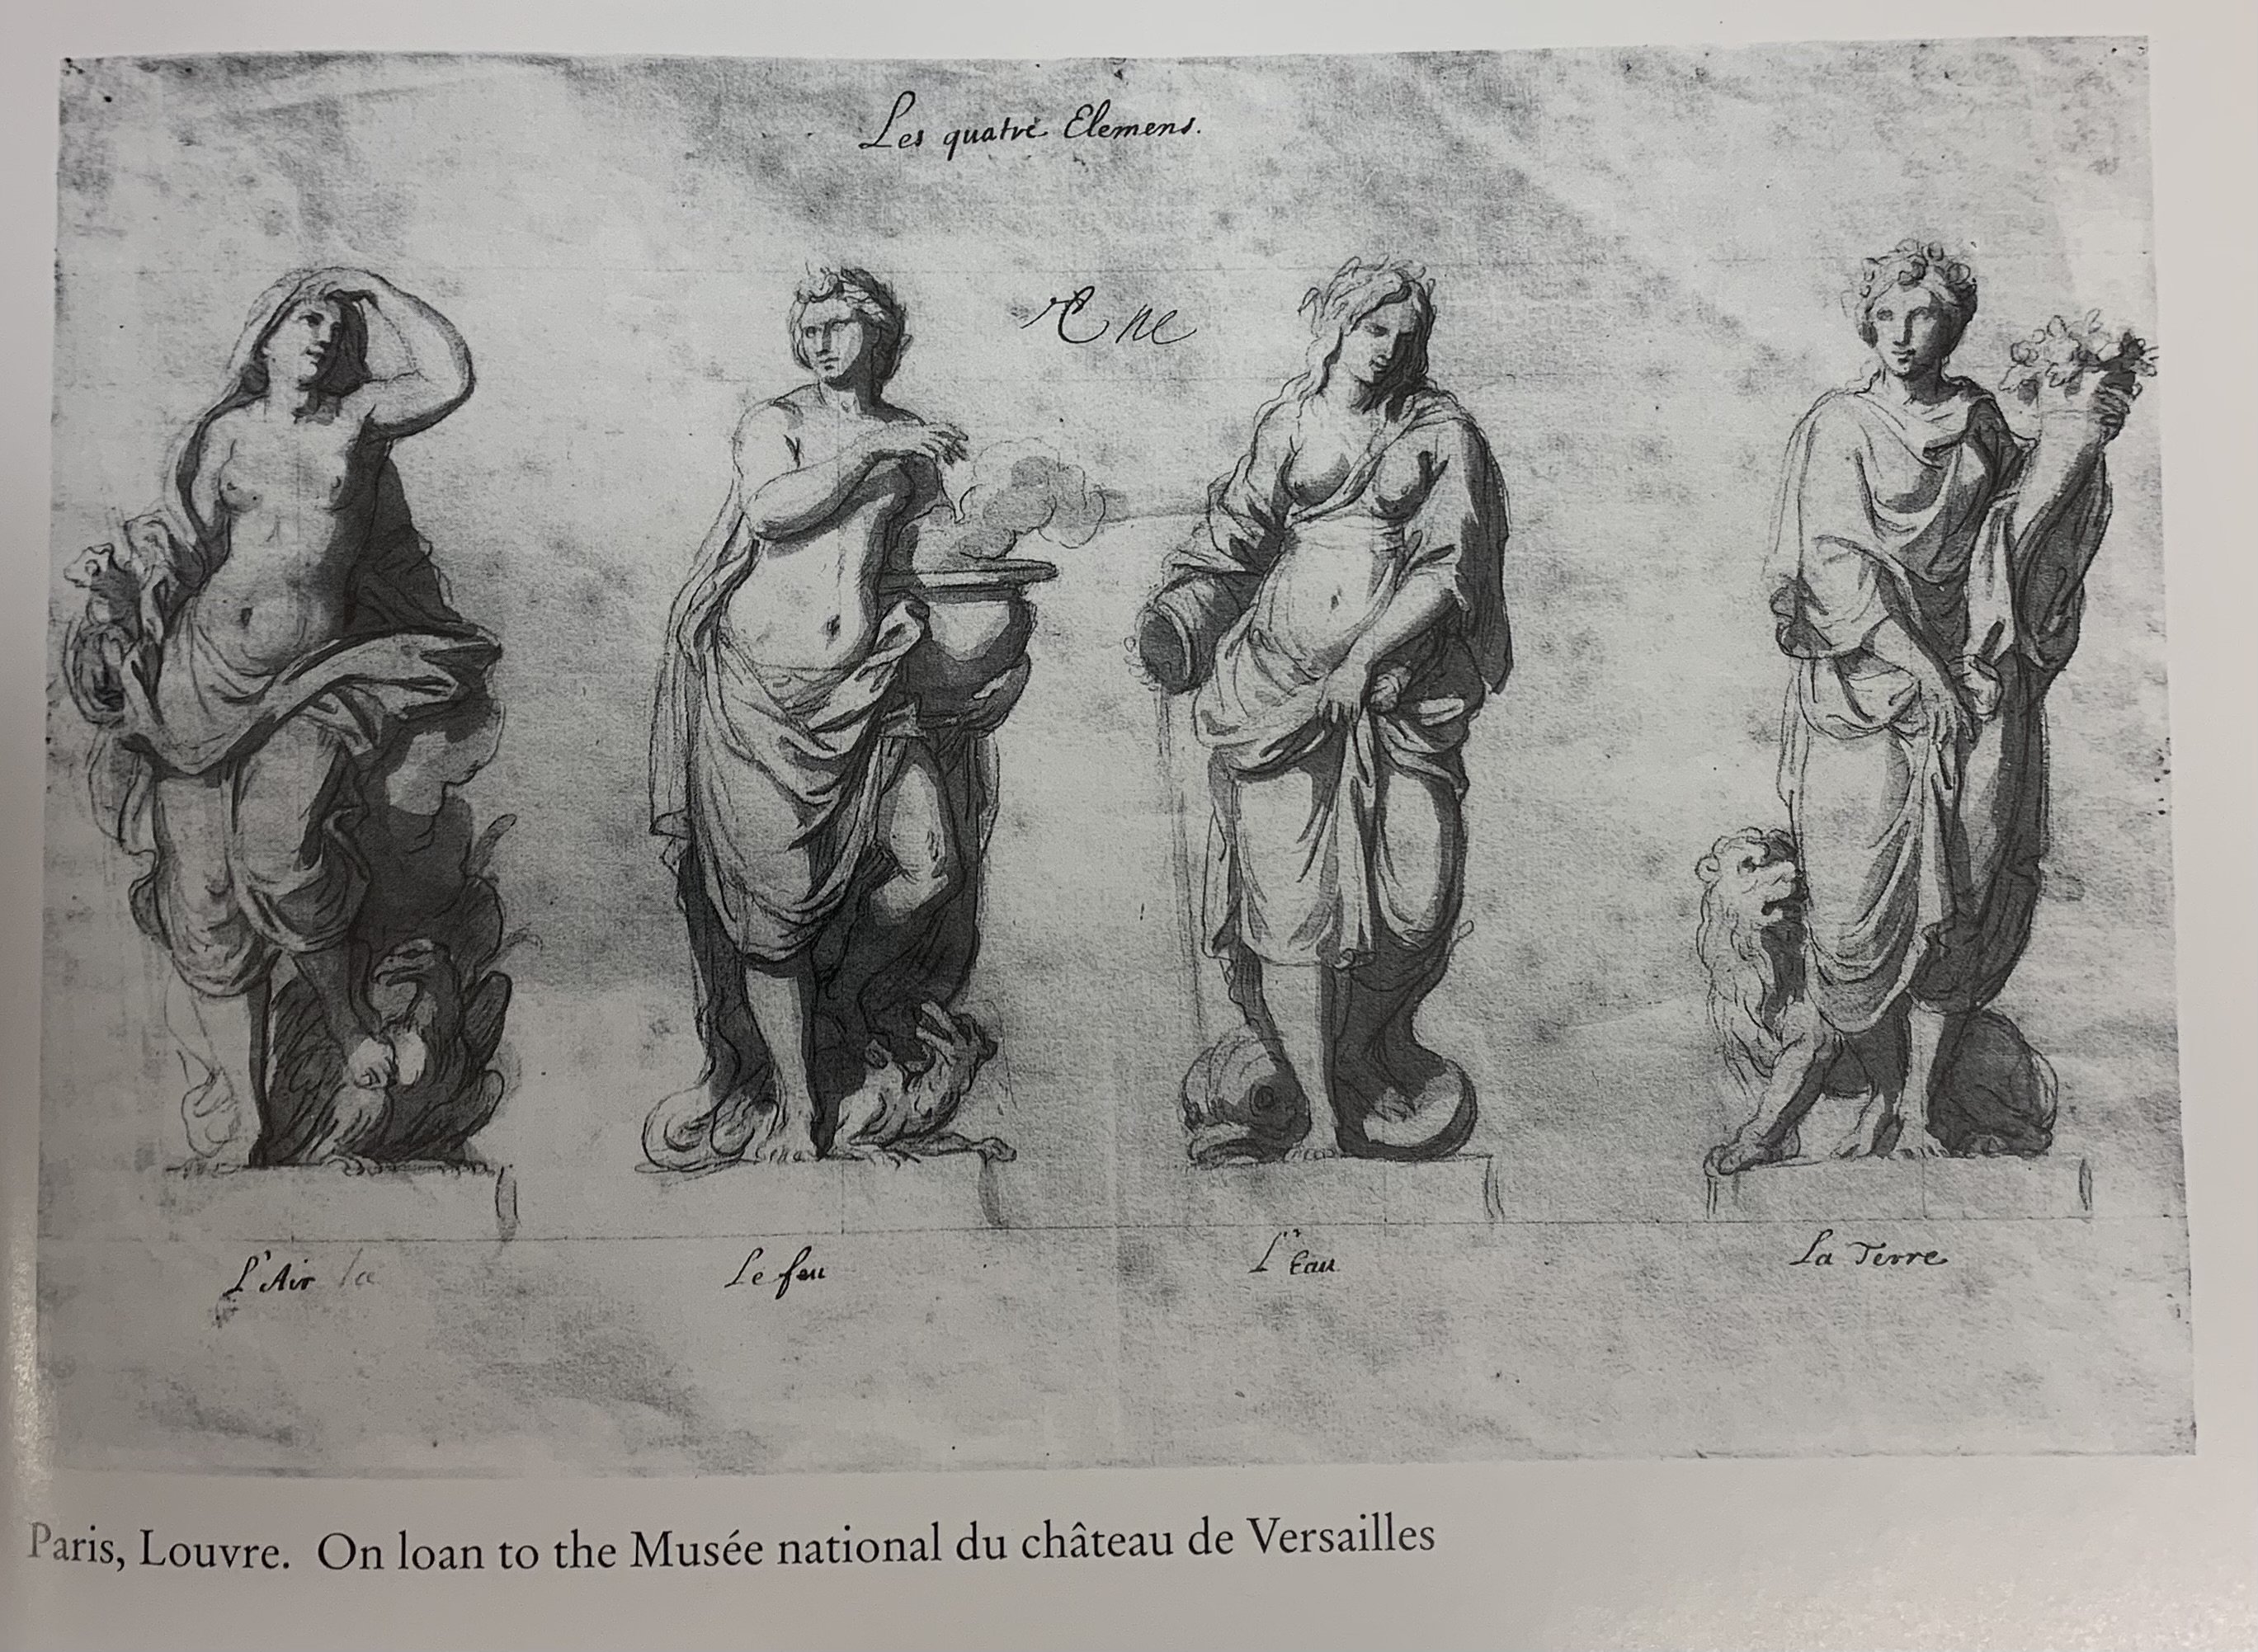
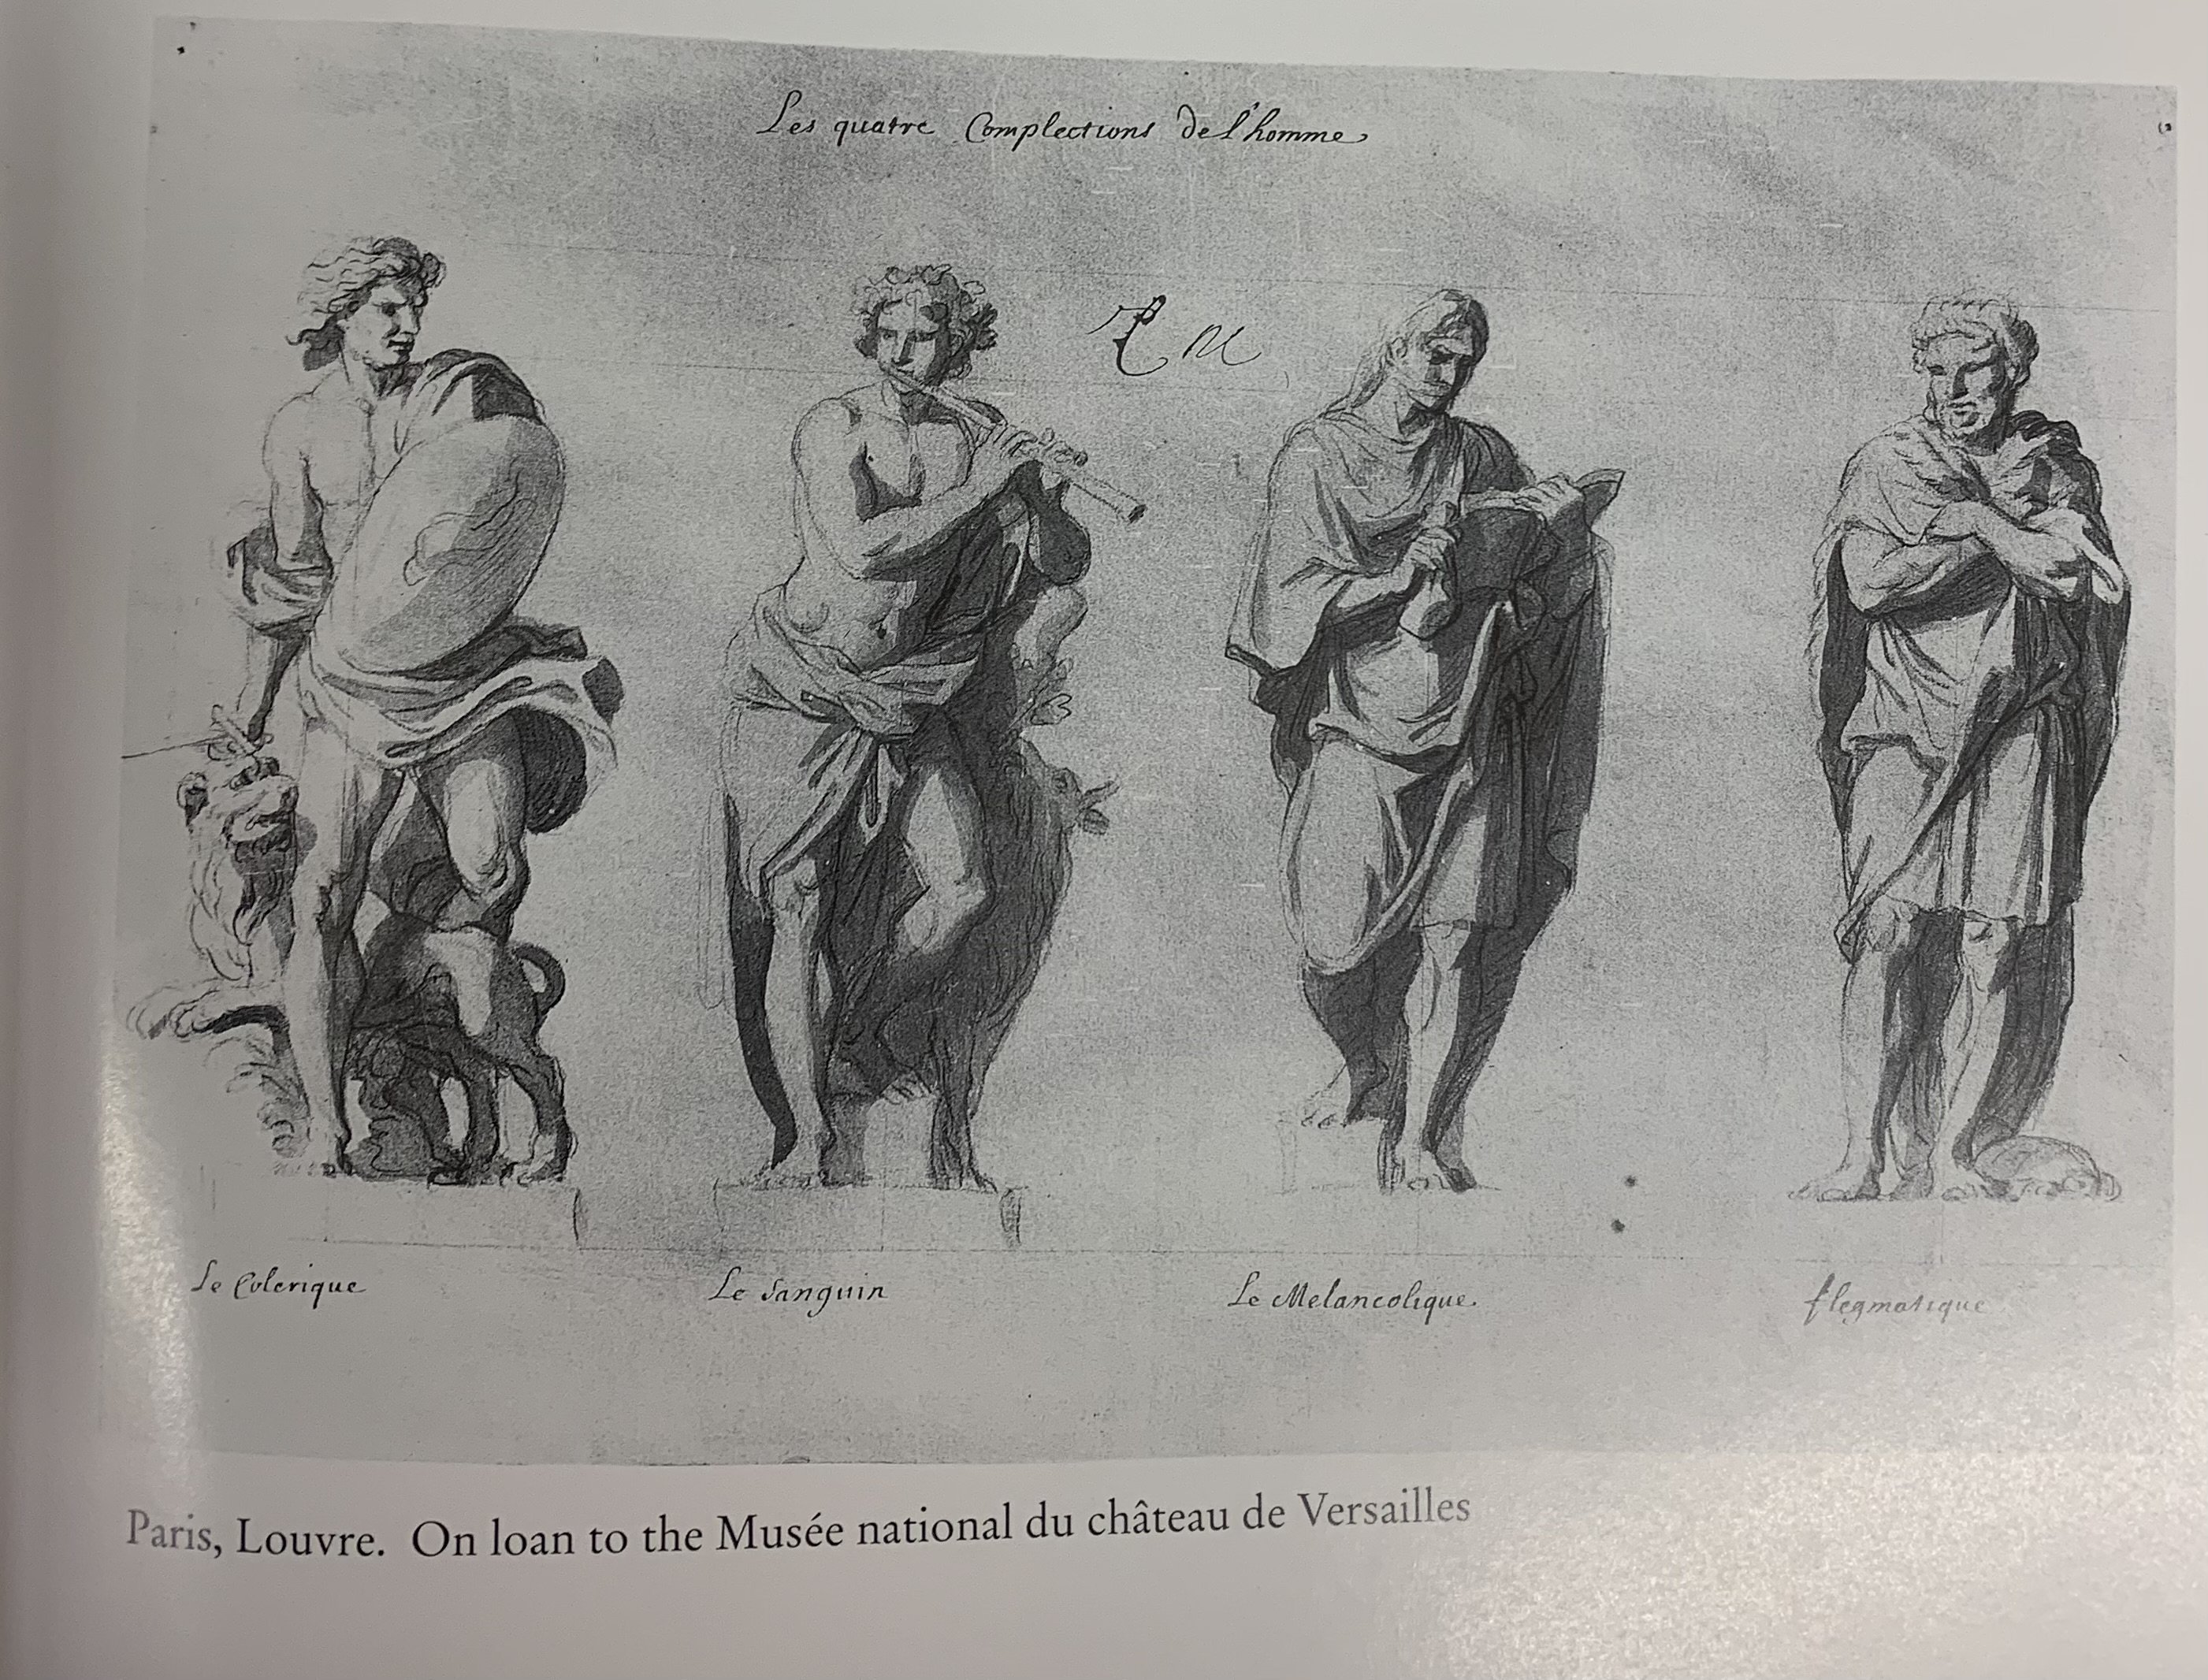
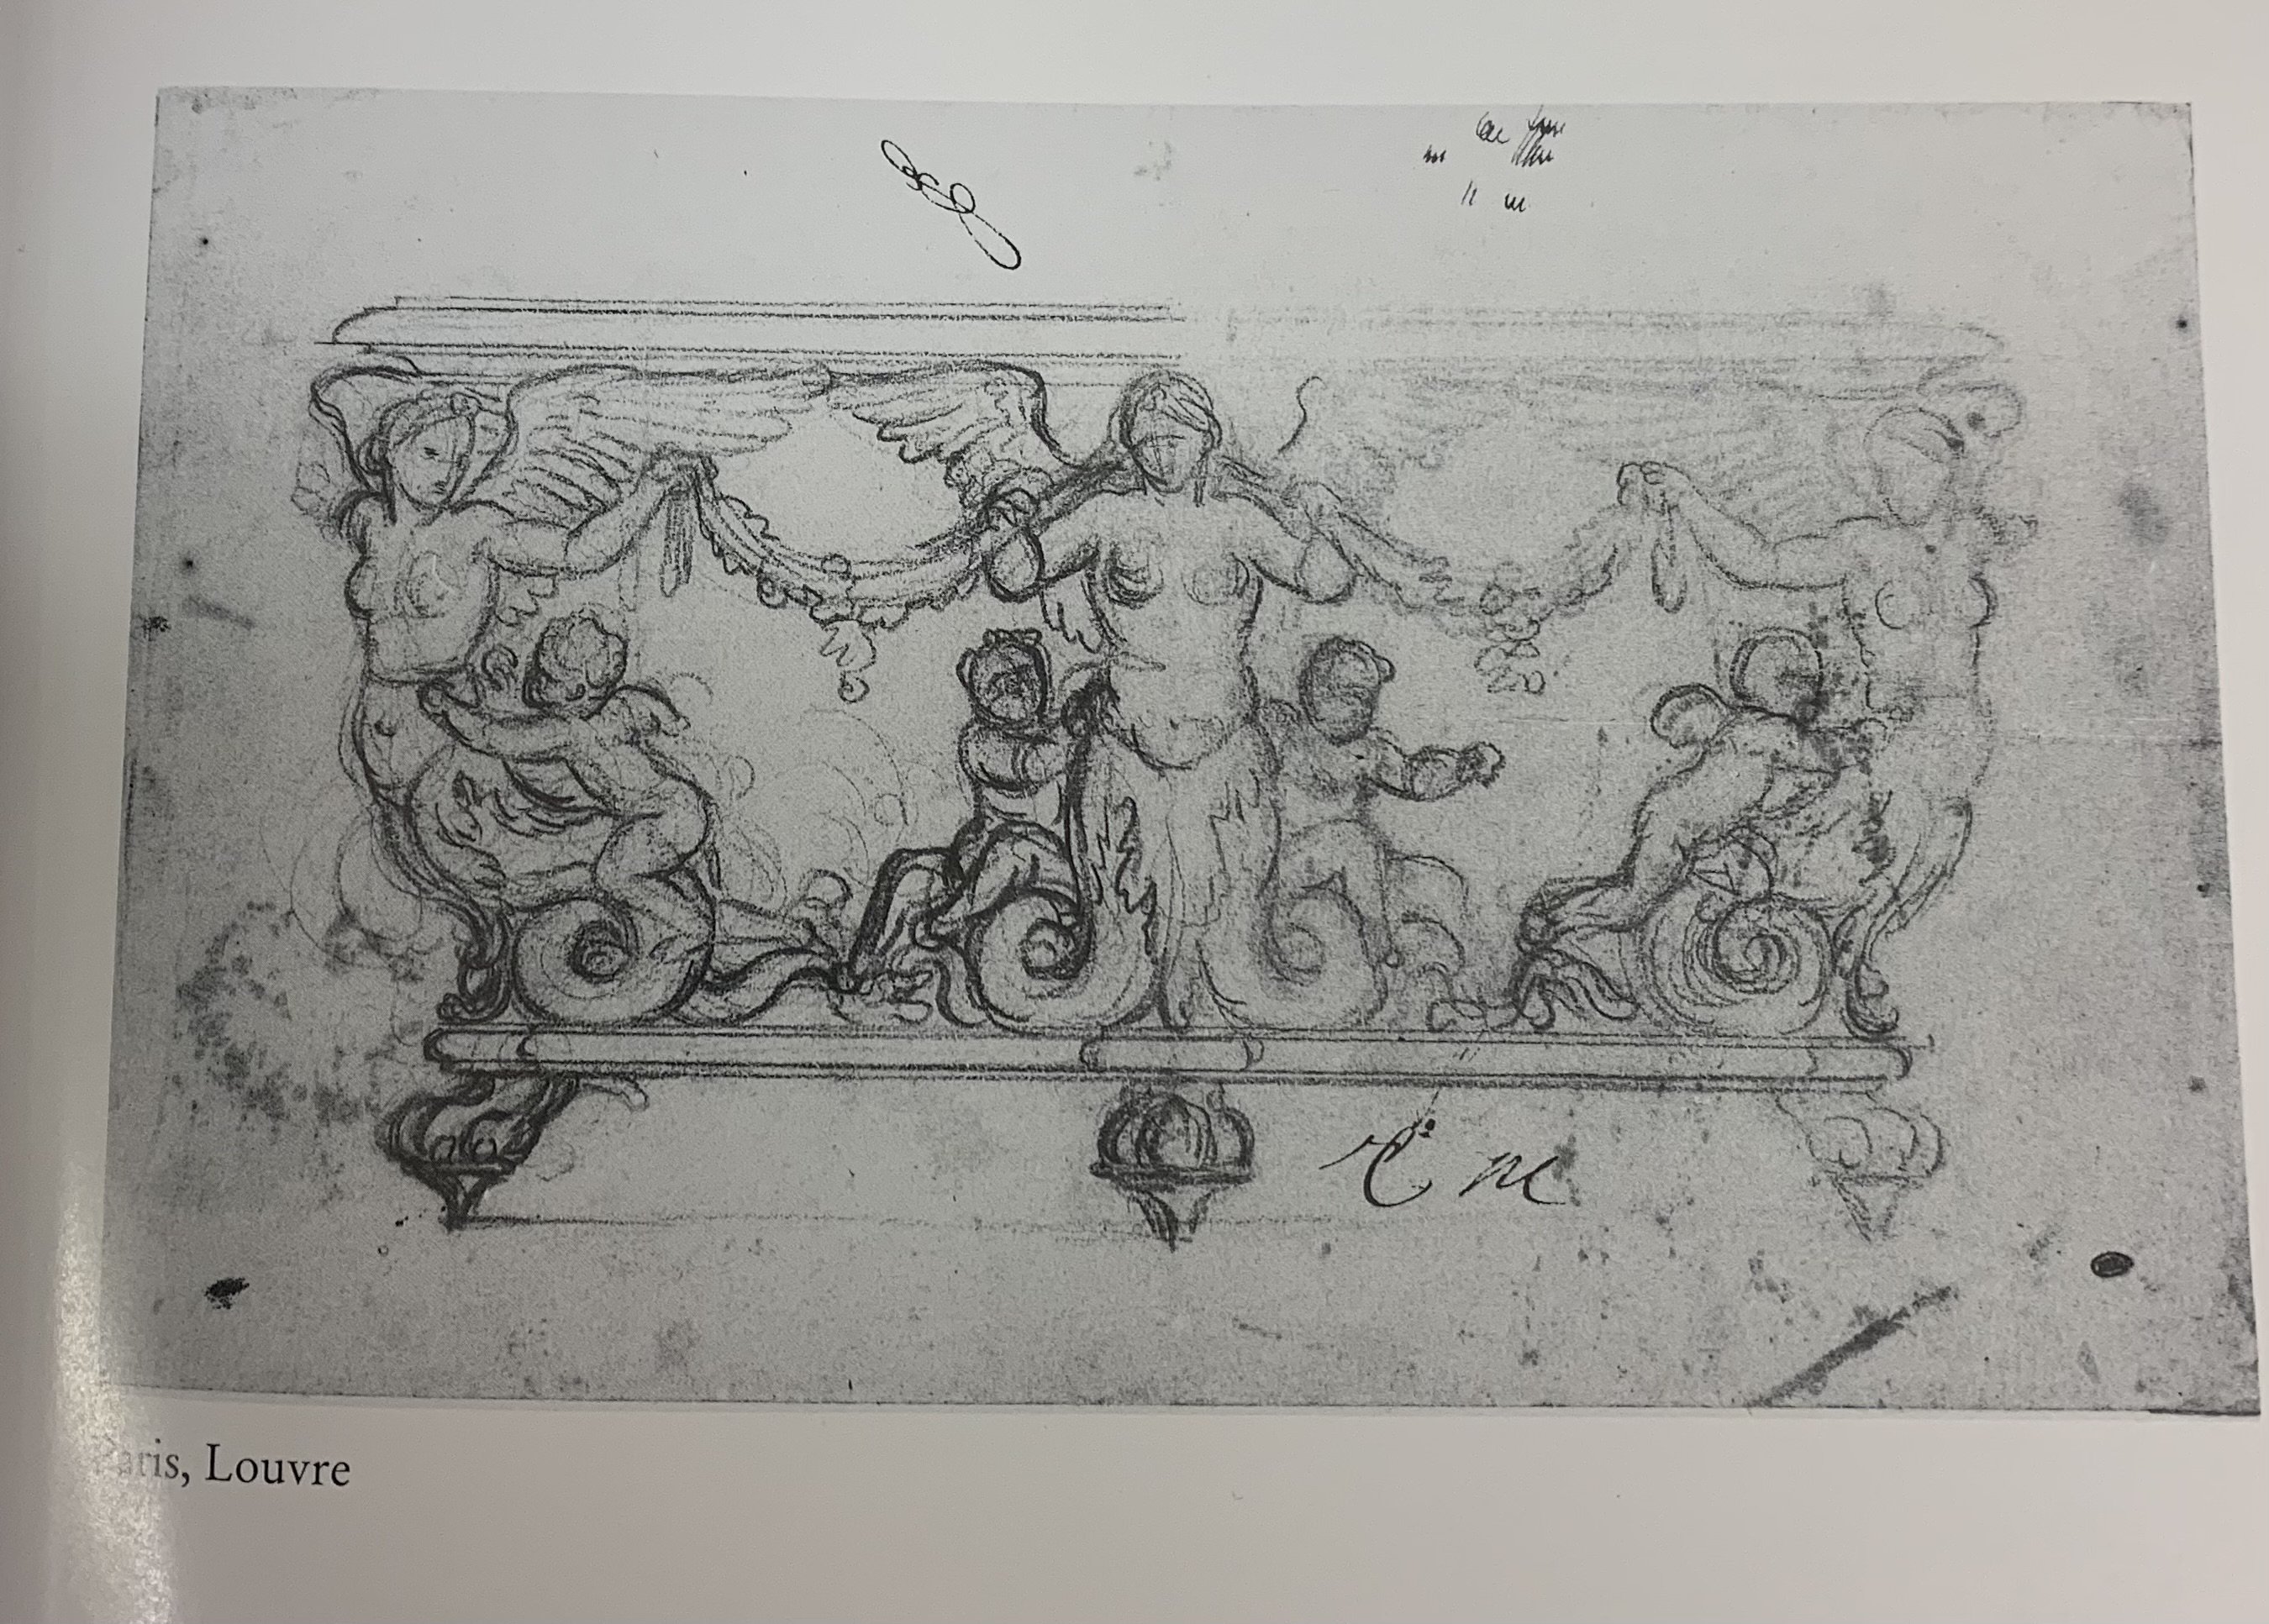
I also continue to immerse myself in the earlier works of Charles LeBrun and Puget, so that I can better understand how to construct an ornamental program in their style for SR 1670:


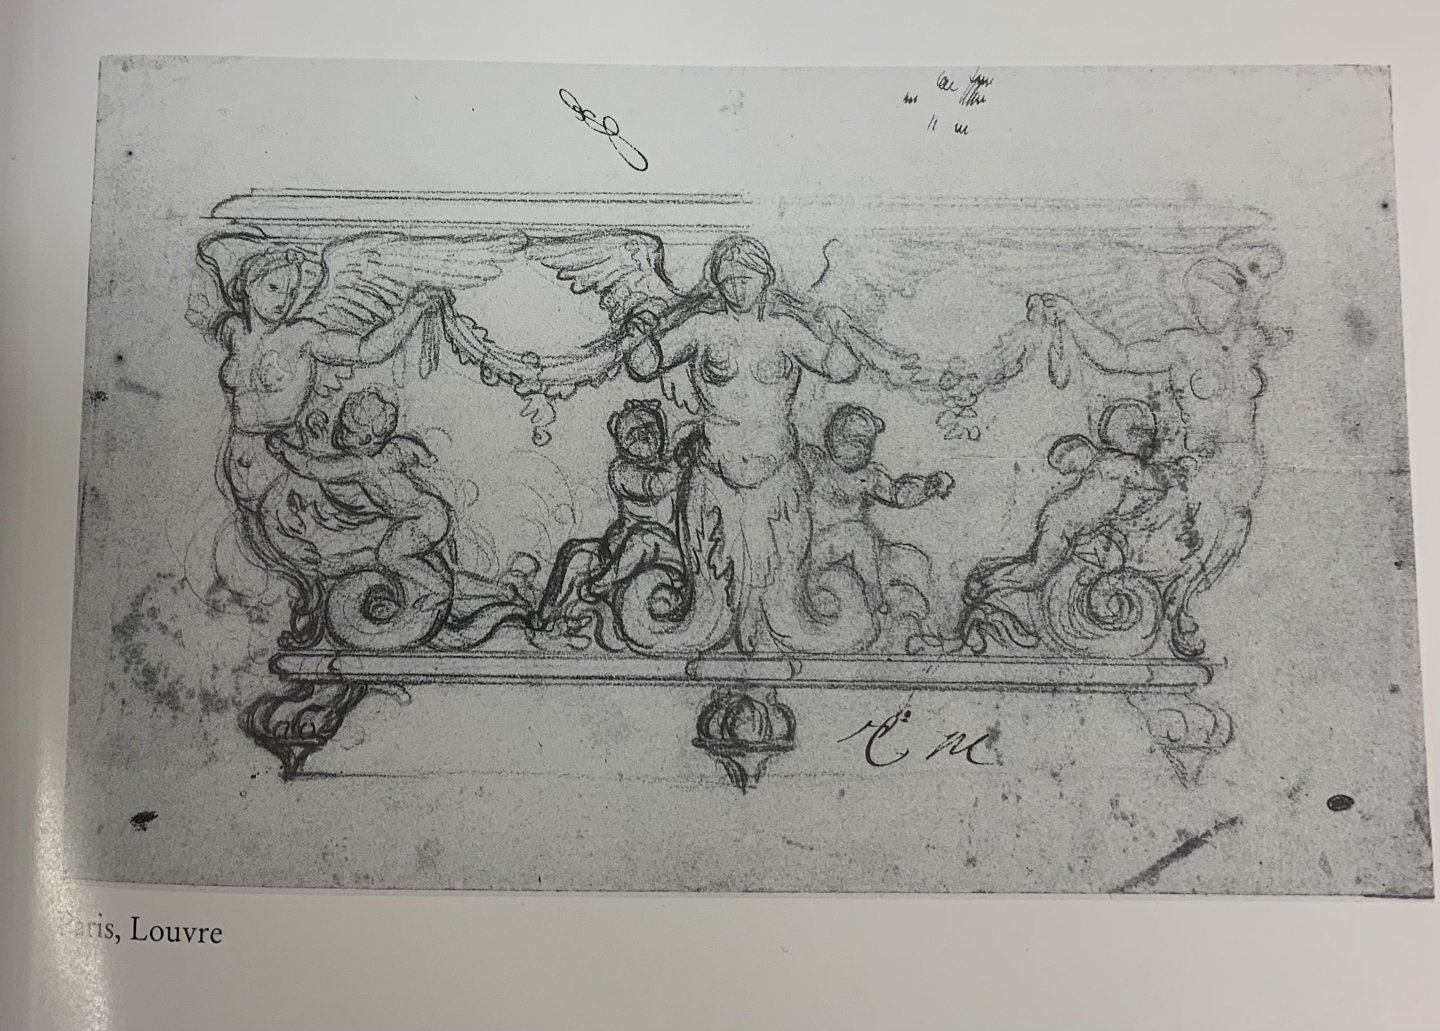
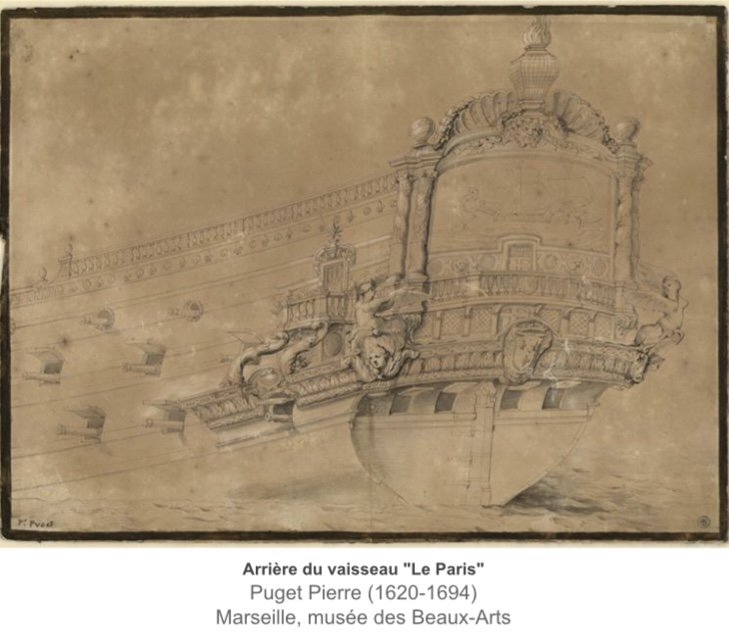
I have had a number of significant realizations as that puzzle clicks together in my mind’s eye. While I’m not physically modeling as much as I would like to, at least I continue to improve my understanding of this earlier time.
Thank you all for looking in!
Best,
Marc


The Gokstad Ship 900 AD by Siggi52 - 1:50
in - Subjects built Up to and including 1500 AD
Posted
Just incredible!