HOLIDAY DONATION DRIVE - SUPPORT MSW - DO YOUR PART TO KEEP THIS GREAT FORUM GOING!
×


Hubac's Historian
-
Posts
3,292 -
Joined
-
Last visited
Content Type
Profiles
Forums
Gallery
Events
Everything posted by Hubac's Historian
-
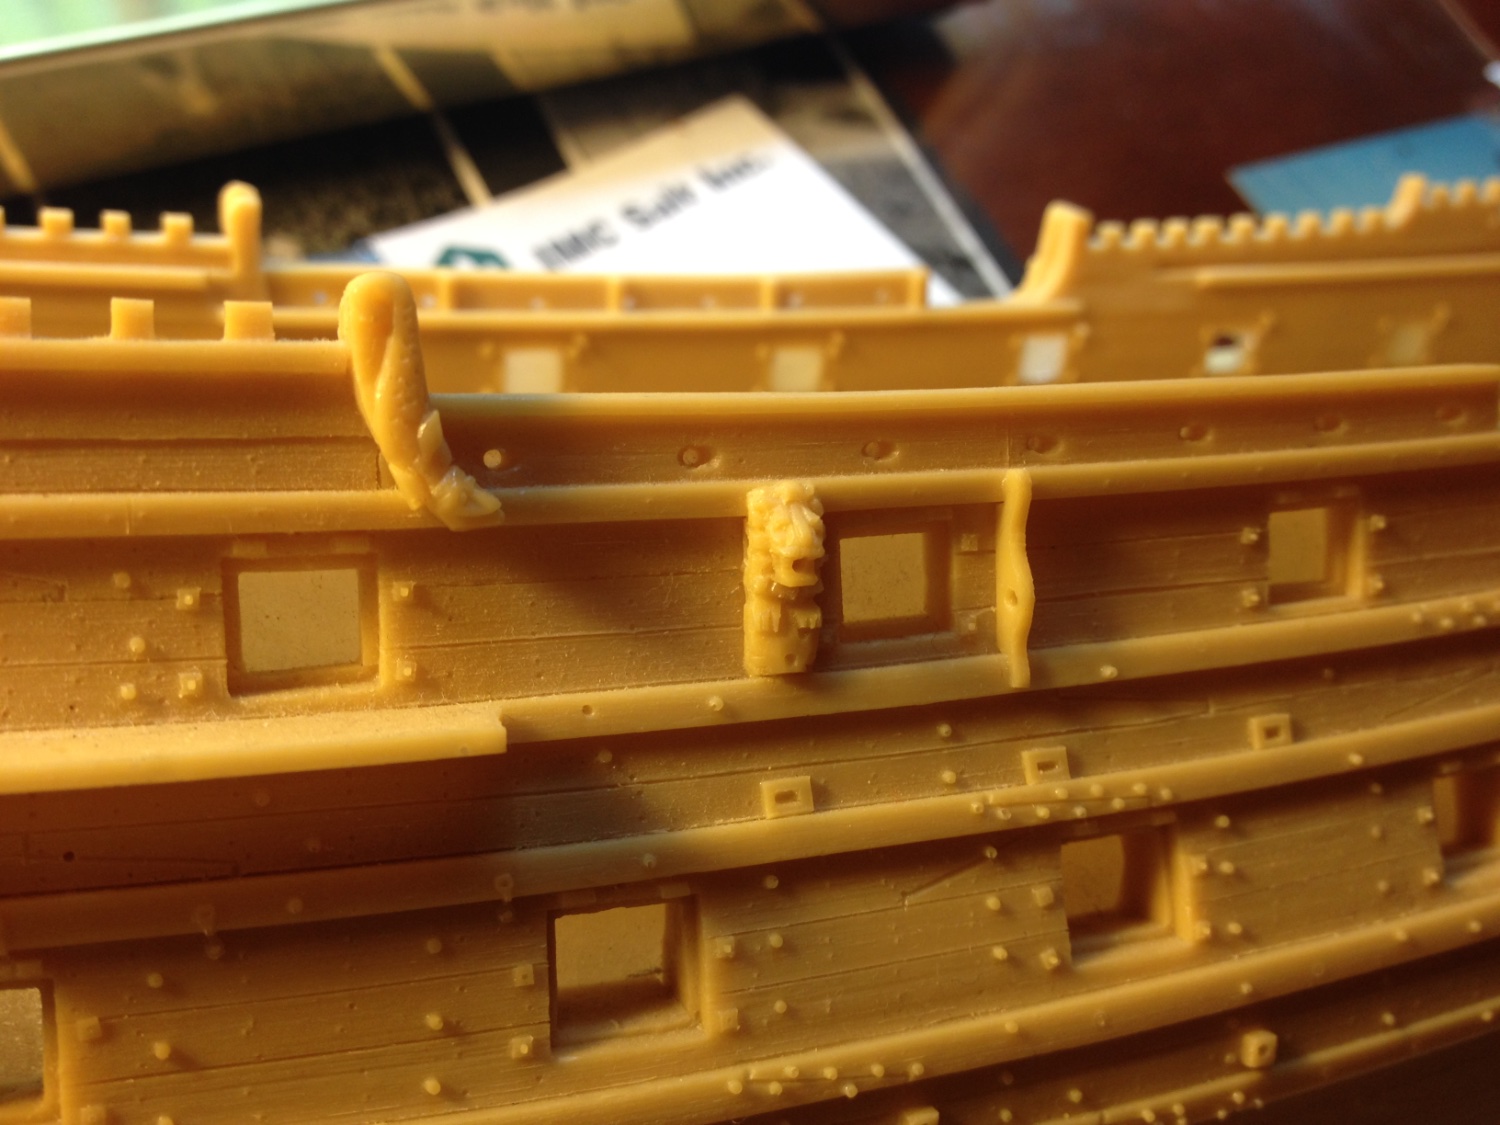
 Okay, I see the confusion. That discussion centered specifically around my treatment of the wale scarf joints. I had decided to mimic something from an influential Dutch modeler that I had met in Amsterdam in 2003. Herbert Thomesan represents the scarf joint bolting this way: When I started this process on the wales, I began by bolting the scarf joints that I had scribed. At the time, I was slicing heavy 1/32” segments of .020 styrene rod and then attempting to pick them up with the tip of a knife and stand them on-end, where I wanted them. This was extremely difficult to do. And, it was impossible to maintain any uniformity; it is amazing what minuscule differences your eyes can perceive! This is where Dan came in with his suggestion to drill into the wales to receive the rod, and then to subsequently clip and file them to a uniform height. I followed his advice and it worked like magic. These were the scarf joints, only. After that, I made an artistic decision; I wanted to highlight the scarf joints with the hard tipped bolts, and differentiate from the regular wale bolting with soft-headed bolts. That is where I developed this idea of “flashing” thin slivers of rod with a wand lighter for a domed appearance. In reality - the bolt-head profile would have been the same, whether it was on a scarf, or anywhere else on the wale. The difference would have been in the bolting pattern. I decided, though, that I wanted to call more attention to the detail of scarfing the wales. I hope that all makes sense.

-
Thank you, Aurelien. Imperfection is just baked into a piecemeal process, such as this, but results have far exceeded my original expectations for this project. To answer your question, I do not think you can satisfactorily widen the stern without also widening the bow. None of this is possible without cutting away the lower hull, and you have decided to do that. This is good. The problem, if you were to attempt to widen the stern without widening the bow, is two-fold; for one, you would be introducing significant tension to the joint where the stem halves meet, and you would also introduce an unnatural re-curve of the bow deadwood into the stem. Think of it as though your bow suddenly has cleavage, when really it would be better to remain flat, so to speak.
- 2,696 replies
-
- 2
-

-
- heller
- soleil royal
- (and 9 more)
-
A good trick is to level these down to a uniform height with a sanding stick; less is more, so I’d go pretty low.
-
Yes, I referenced a link to the process, a page or two earlier in Bill’s log.
-
If you backtrack a few posts to the drawing I did for the lights, you will see where those alignment issues arise from.
- 2,696 replies
-
- 2
-
-
- heller
- soleil royal
- (and 9 more)
-
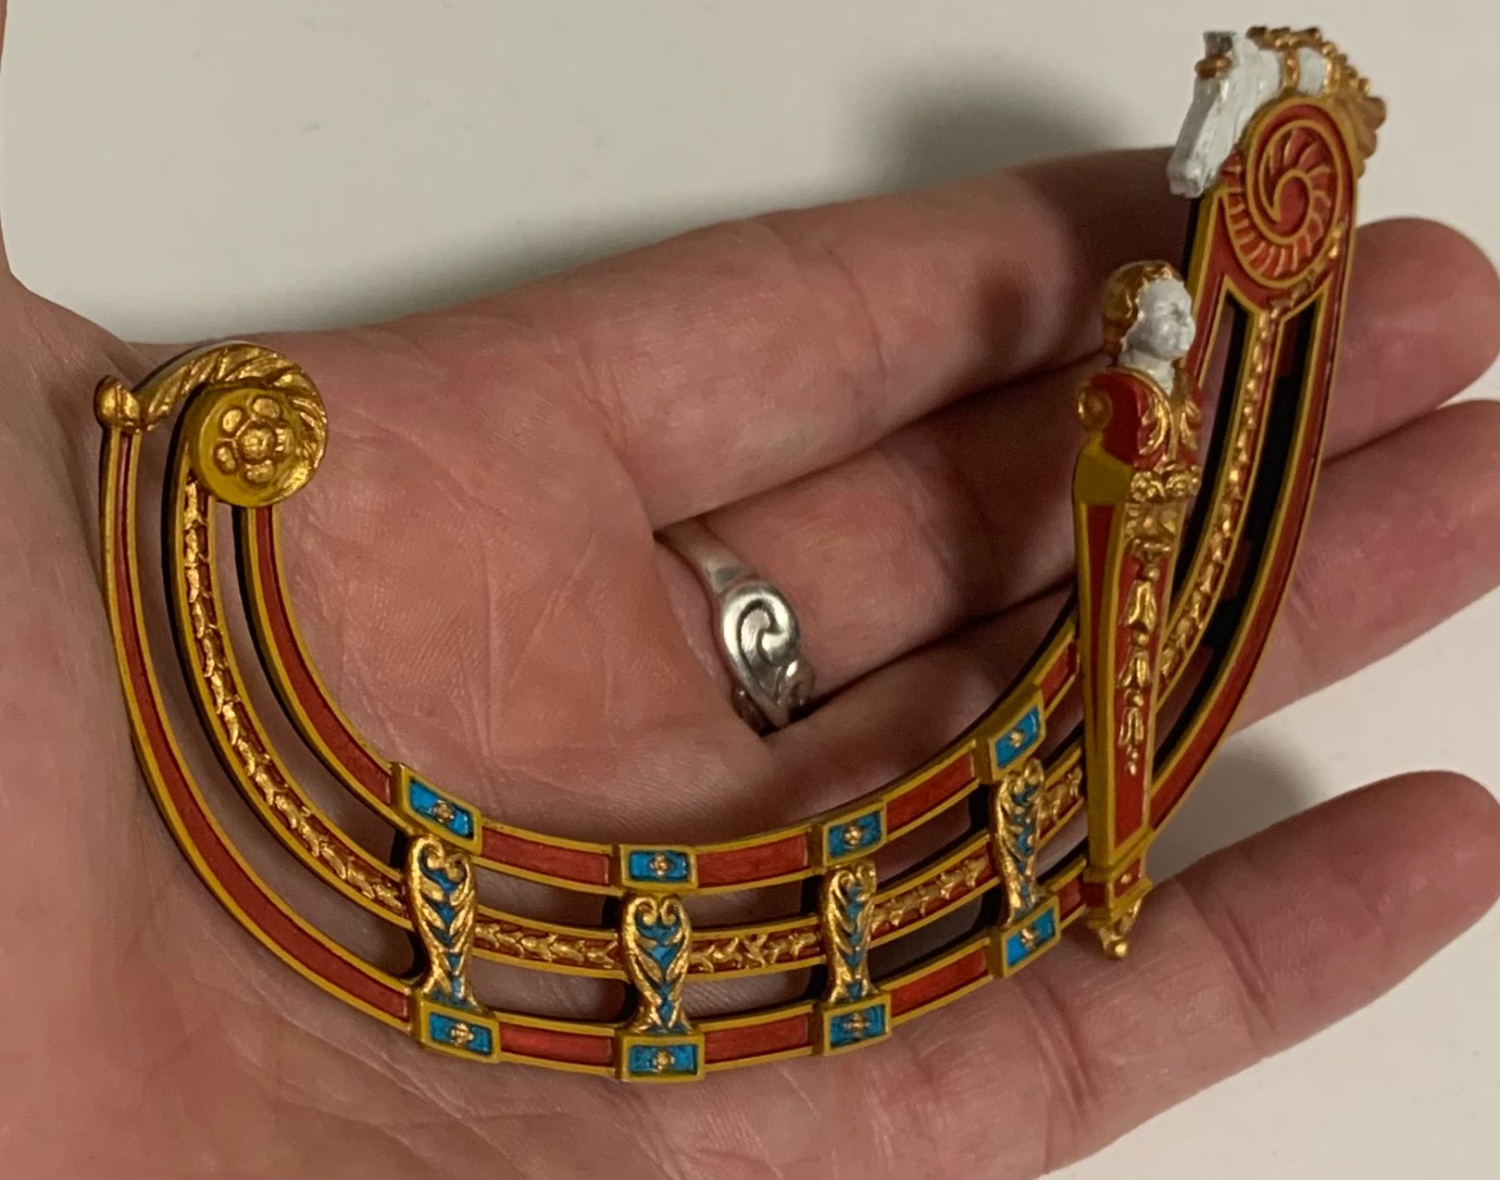
These lovelies are so good, they’re NSFW! Sincerely - this is some of the best hand-carving, at scale, that I have ever seen.
-
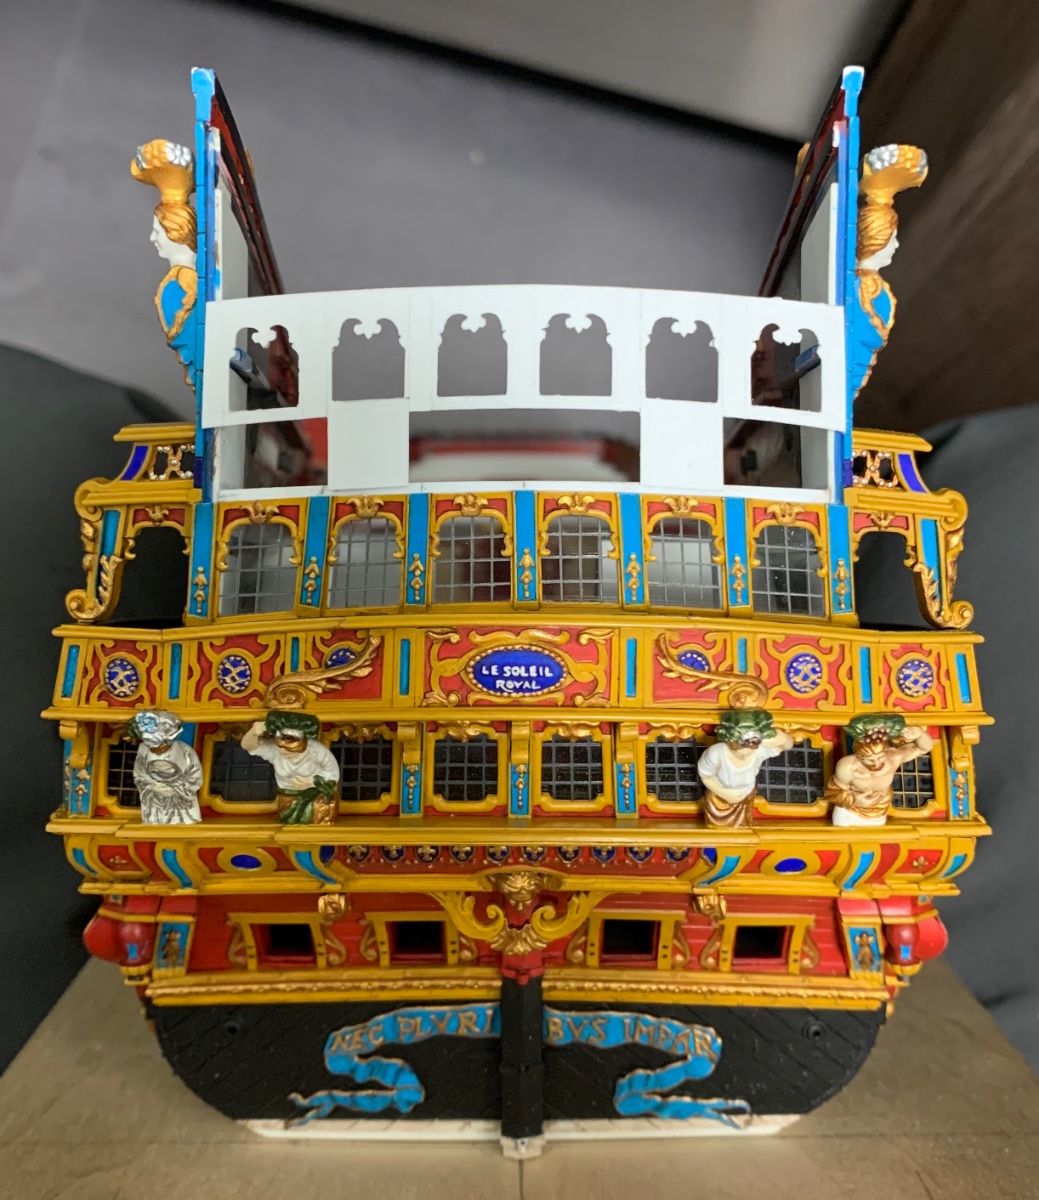
Which level and pilar are you referring to? As for the painting of the figures, it is my belief that they would have been painted in a more naturalistic way, as was done decades earlier on the Vasa. All of my figures, and there are quite a number of them on this ship, are done this way.
- 2,696 replies
-
- 3
-
-
- heller
- soleil royal
- (and 9 more)
-
I echo the sentiments of all above - truly a masterful job and just a lovely ship model.
-
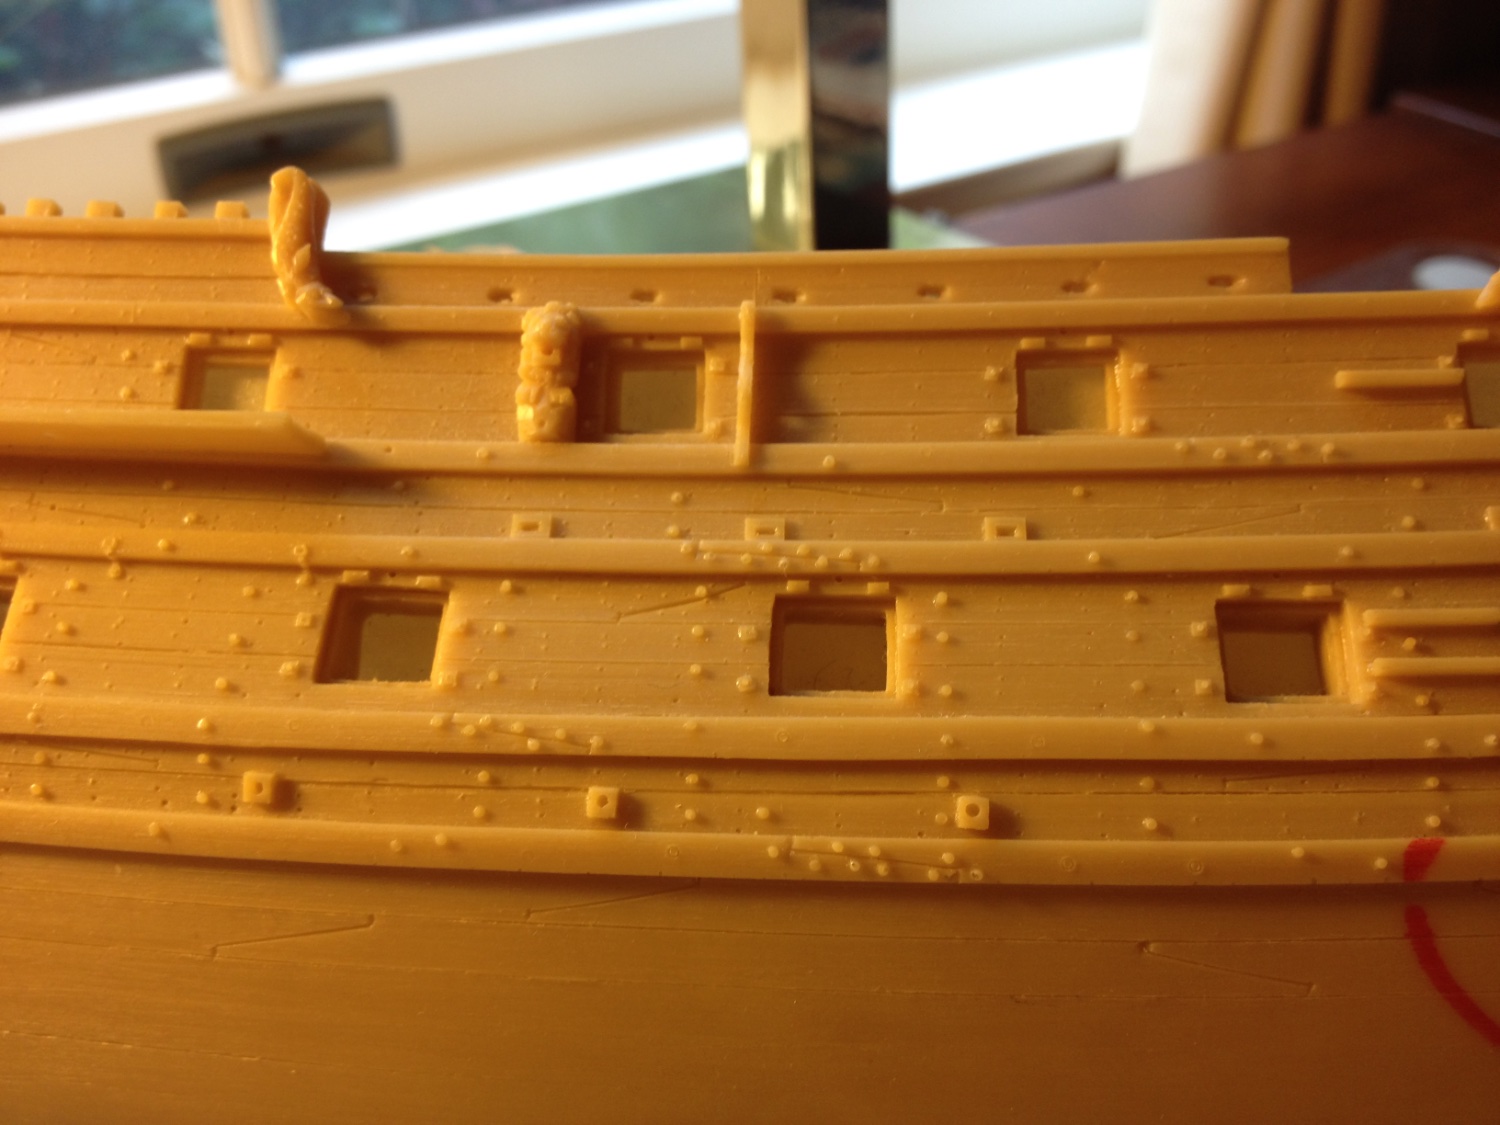
I think you will enjoy that process. For me, it was the realization that “WOW - I can add a few artfully arranged bits of extra plastic and suddenly this magical transformation takes place and my model is bound together with representational “iron” work!” It was much easier to do than I had ever previously imagined. Paying attention to scale is the main thing: 1/8”=1’ 1/16” = 6” 1/32” = 3” 1/64” = not important
-
Thank you so much, Bill! The bow has really been a tremendous challenge for me, given the changes I wanted to make. All I can say about backtracking, a bit, to add details is that paint is pretty easy to scrape, and I have never, personally, regretted the extra time to try and make a detail “pop!” 98% of what you see on my log is just 🕰️. I am extremely slow in my execution. Also, I’m not so up on my understanding of the various anchors carried, but a ship like SR, would have had two per side.
-
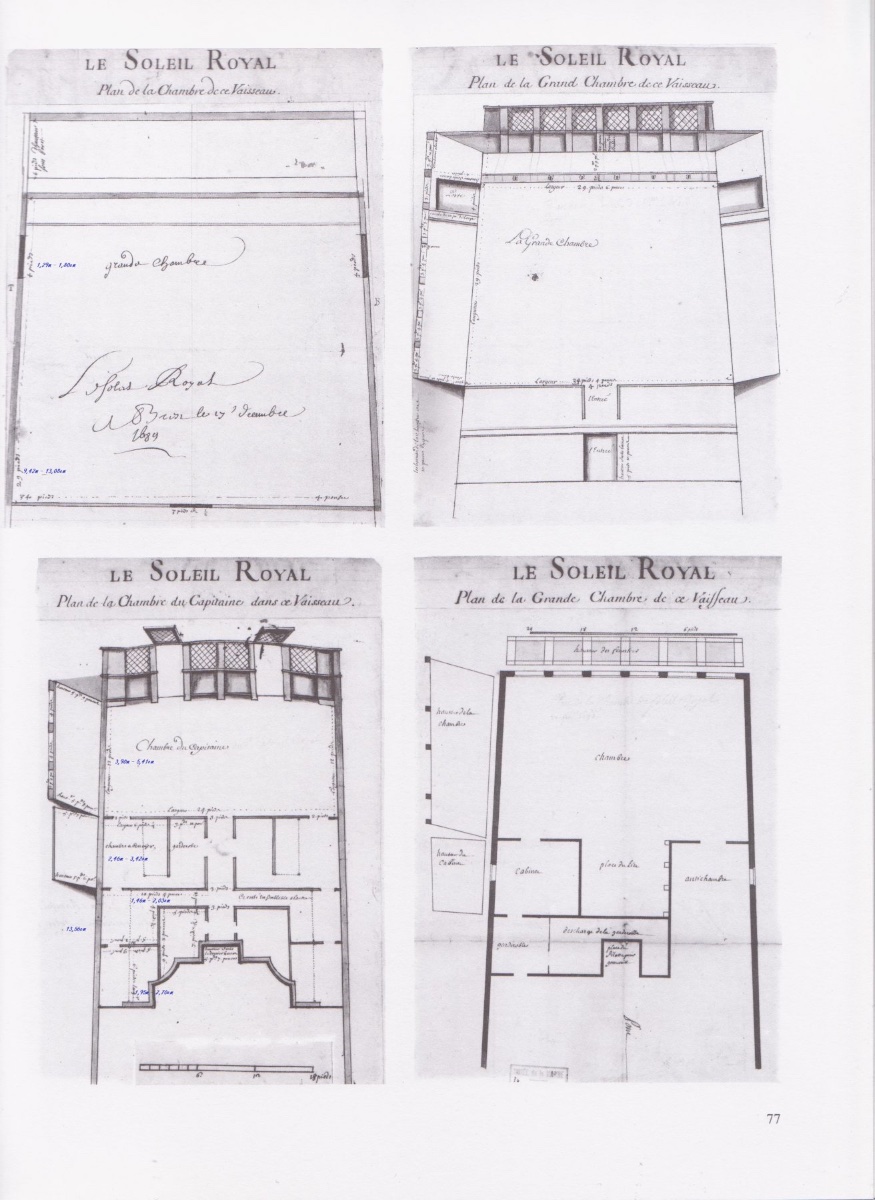
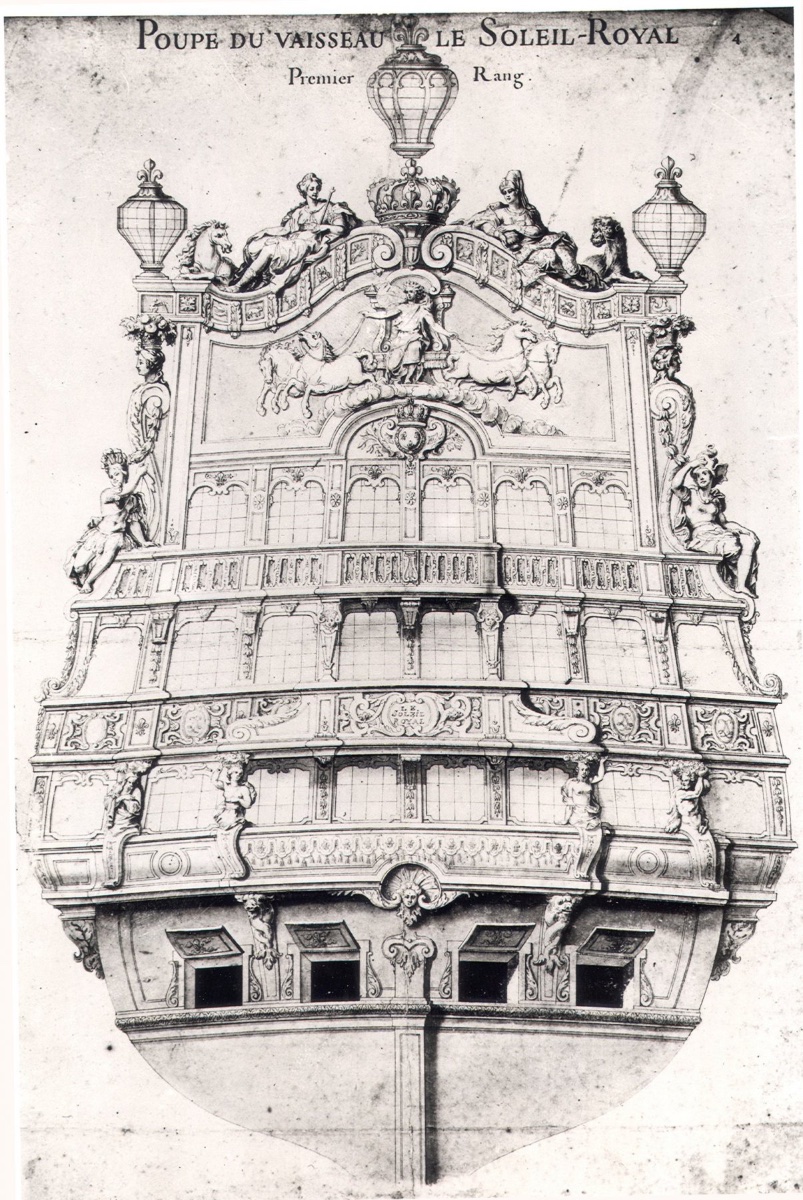
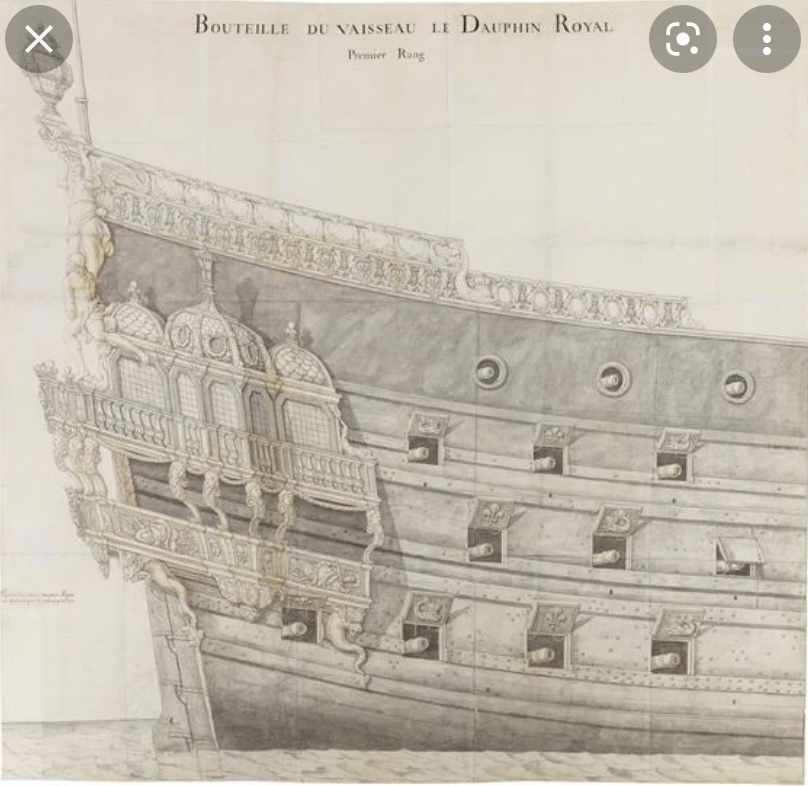
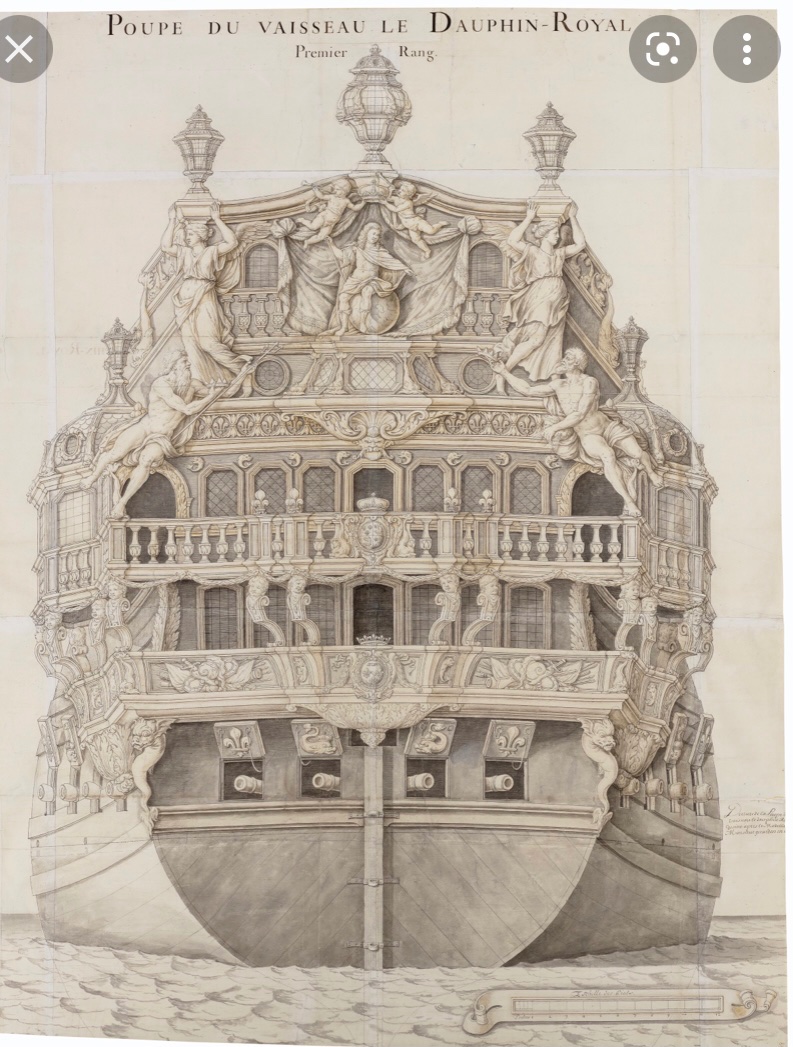
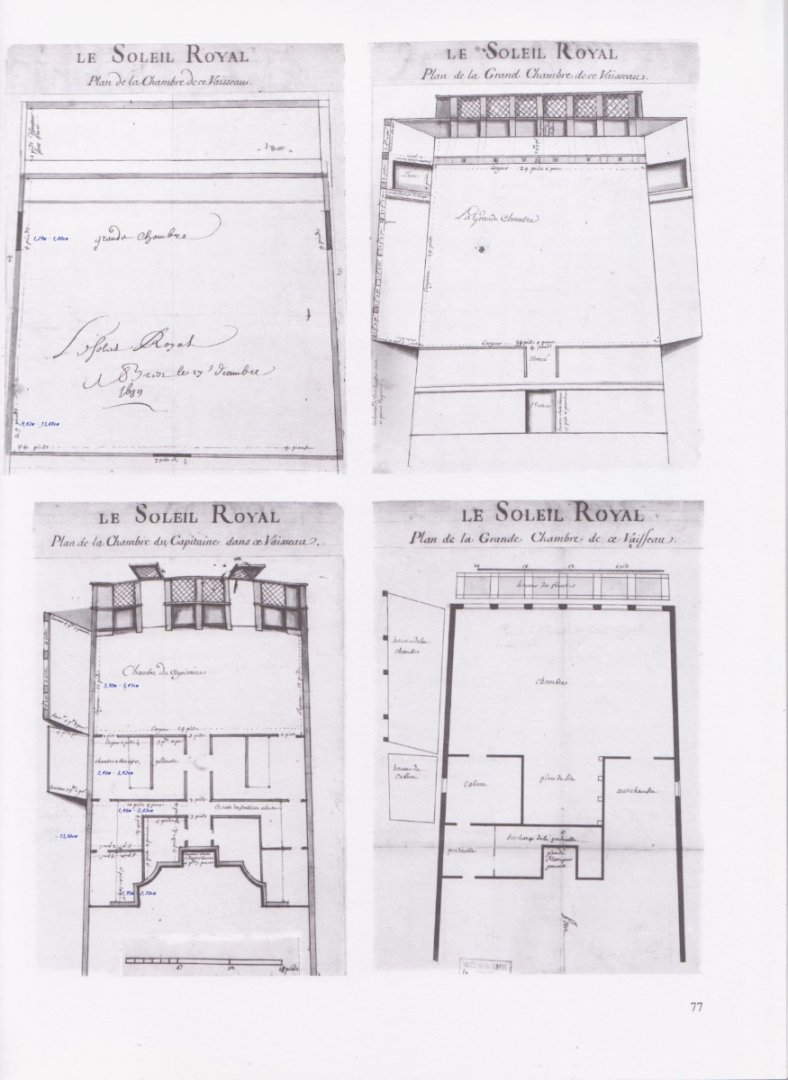
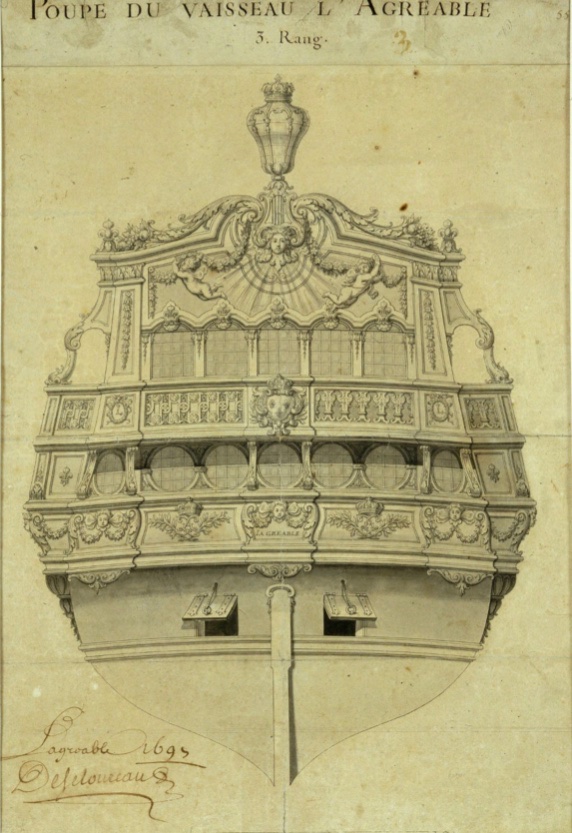
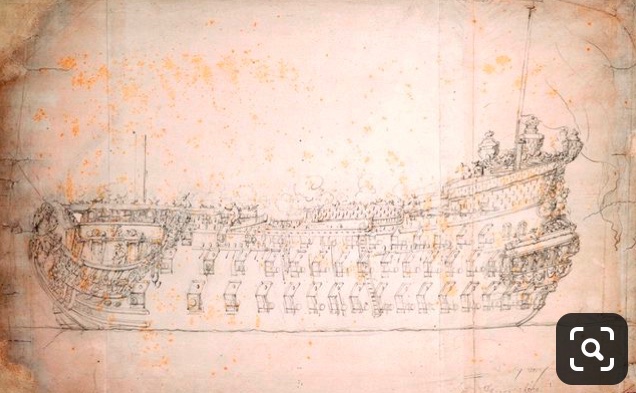
Yeah, it’s completely bizarre. The same style of notation appears on other drawings, both earlier and later, and they are absent of these anomalies. The Royal Dauphin of 1668: SR’s interiors, circa 1689: L’Agreable, 1697:
- 2,696 replies
-
- 5
-
-
- heller
- soleil royal
- (and 9 more)
-
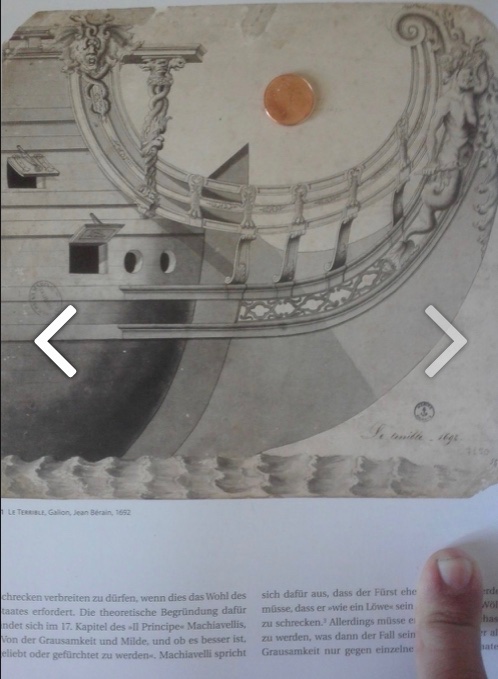
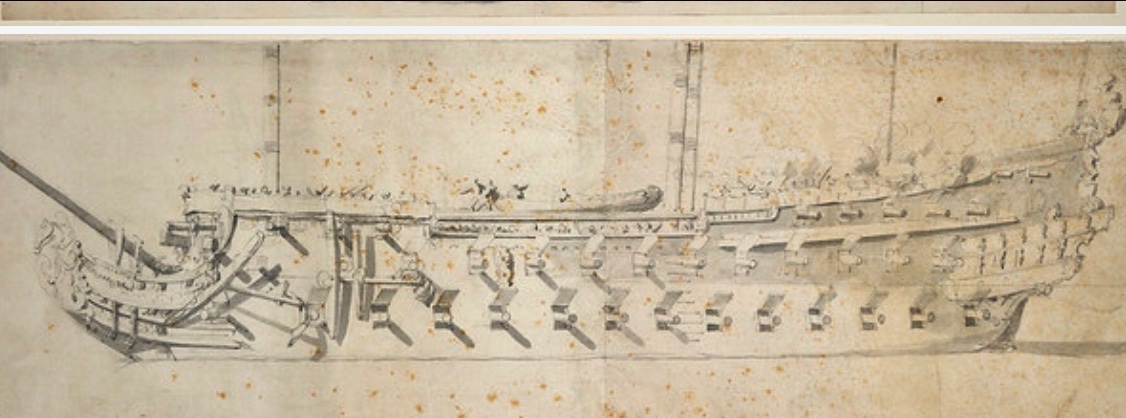
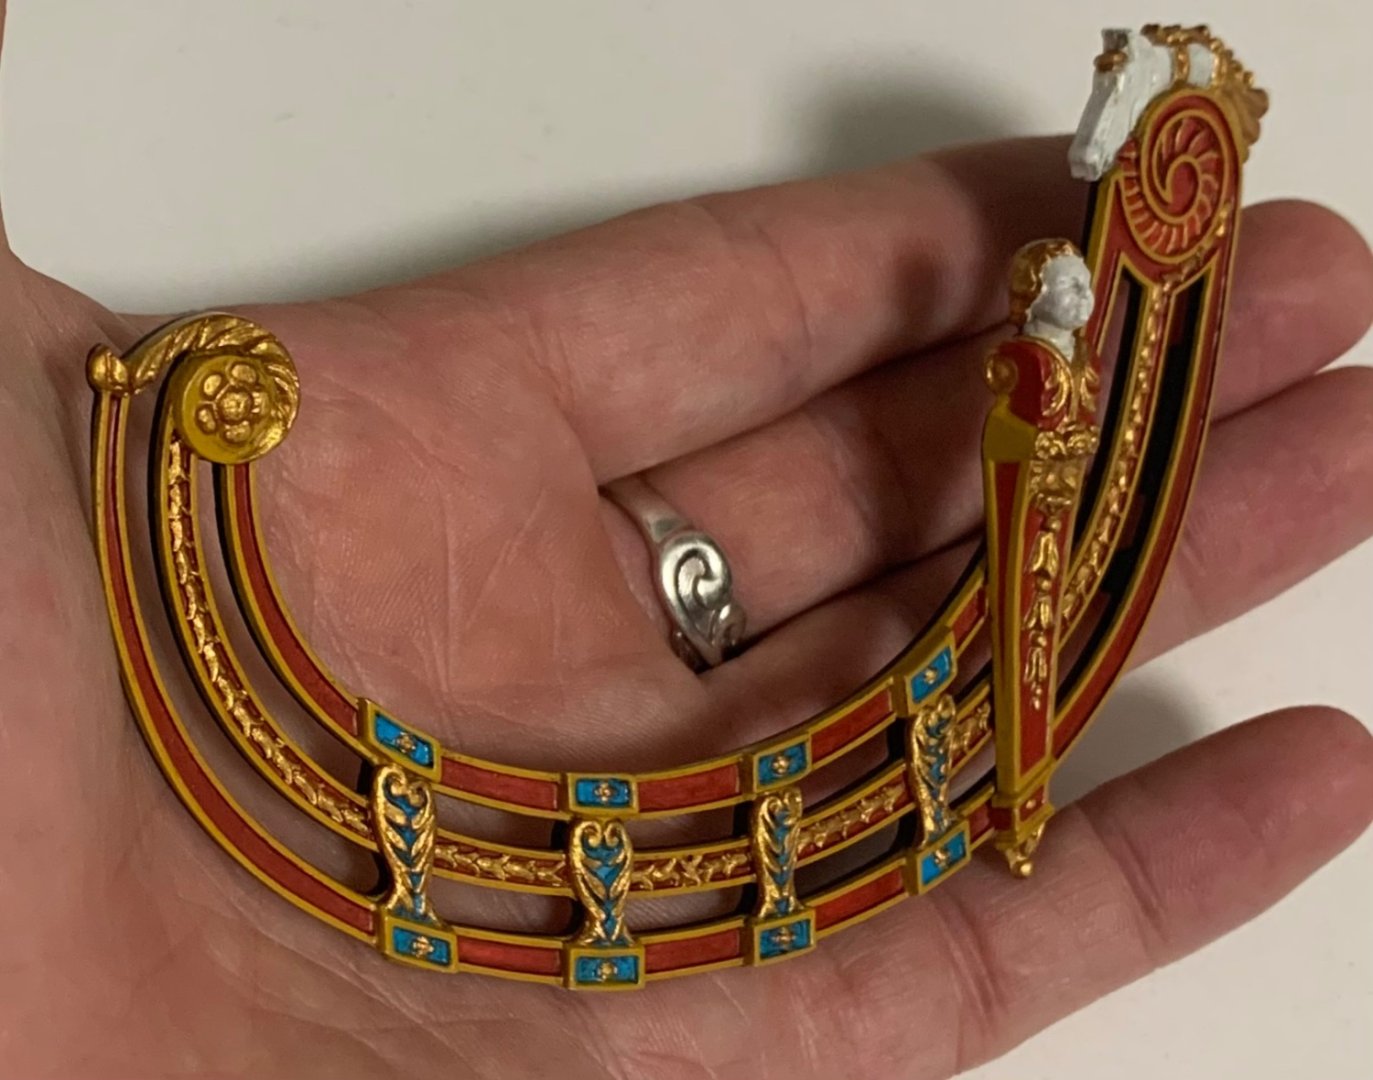
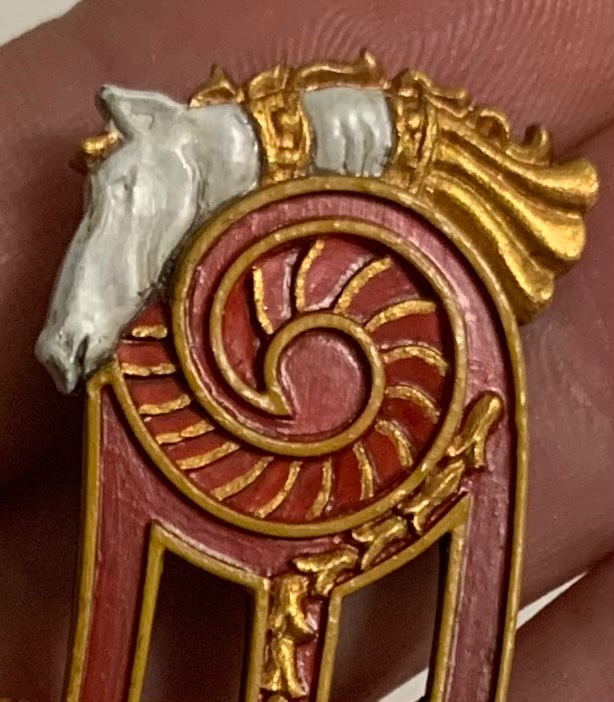
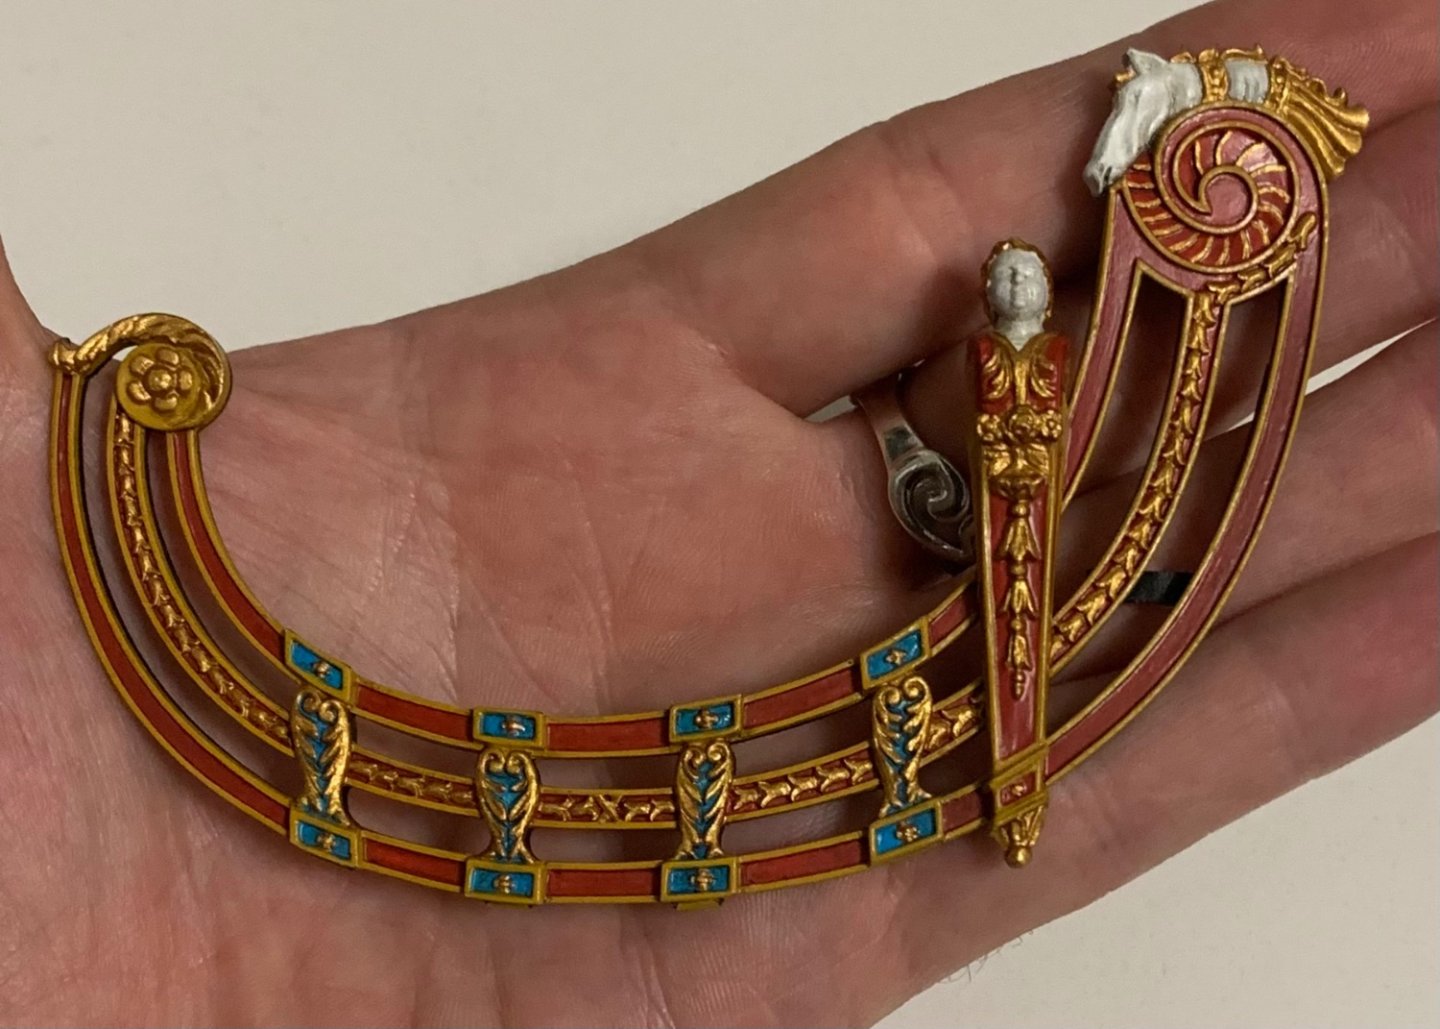
Also, I might add, that this headrail arrangement is indicative of this later evolution in head construction in the 1680’s: And a dated (1692) drawing of Le Terrible, also by Berain: In contrast to the 1670’s:
- 2,696 replies
-
- 8
-
-
- heller
- soleil royal
- (and 9 more)
-
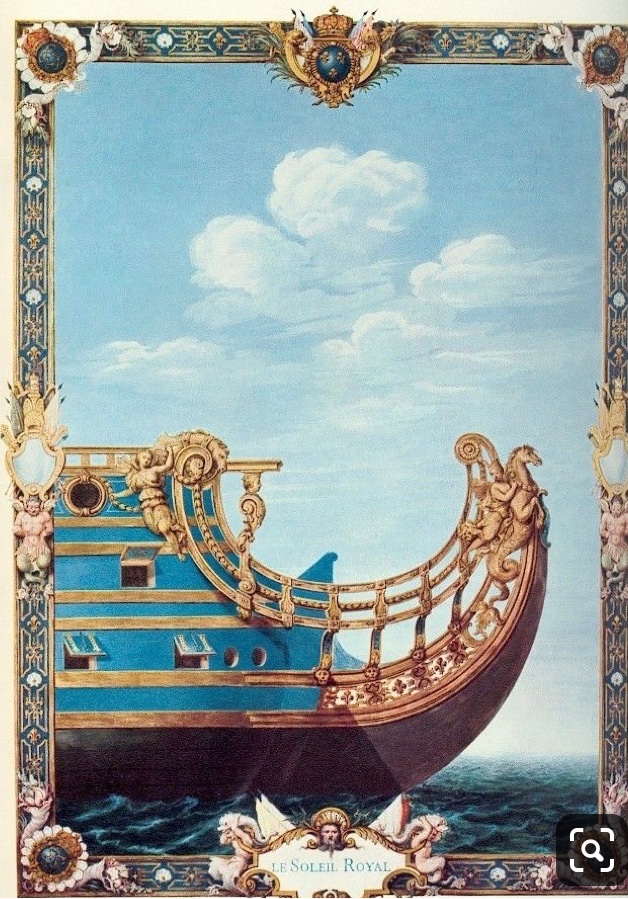
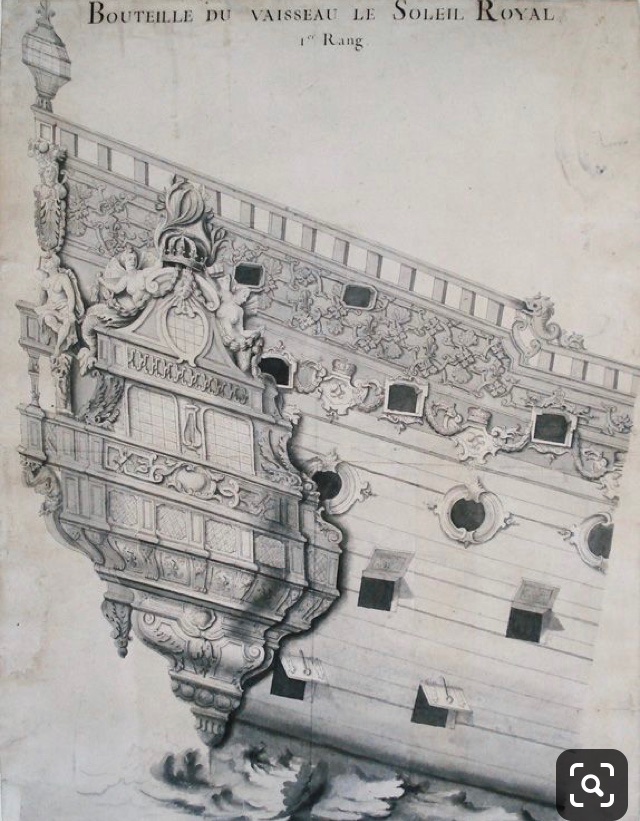
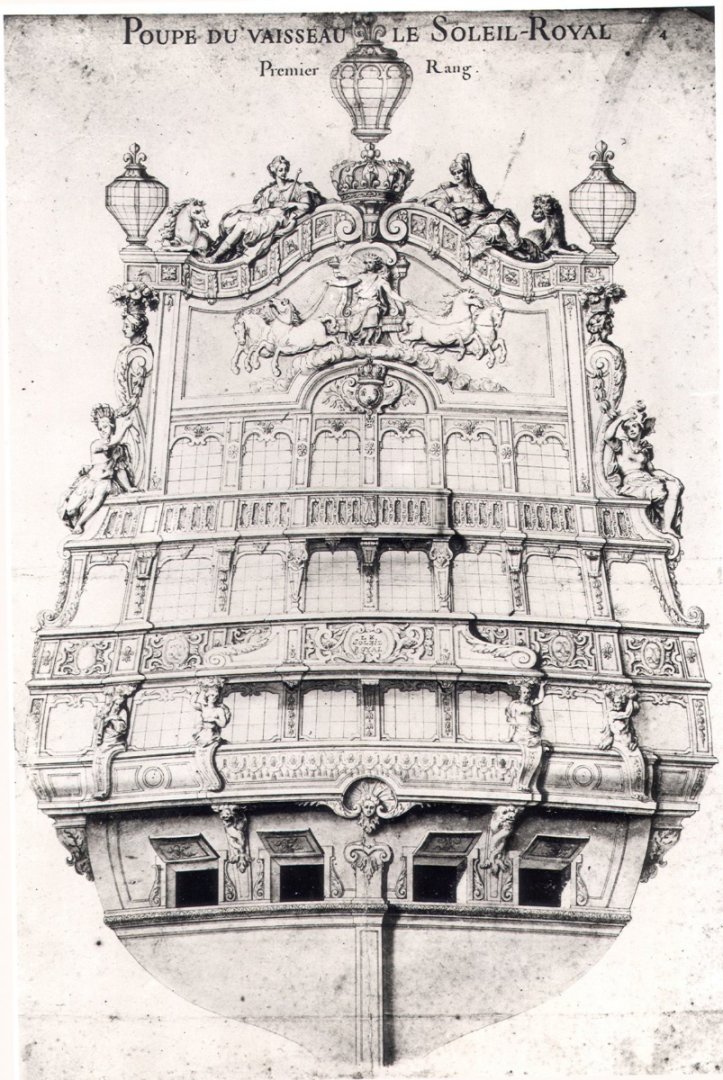
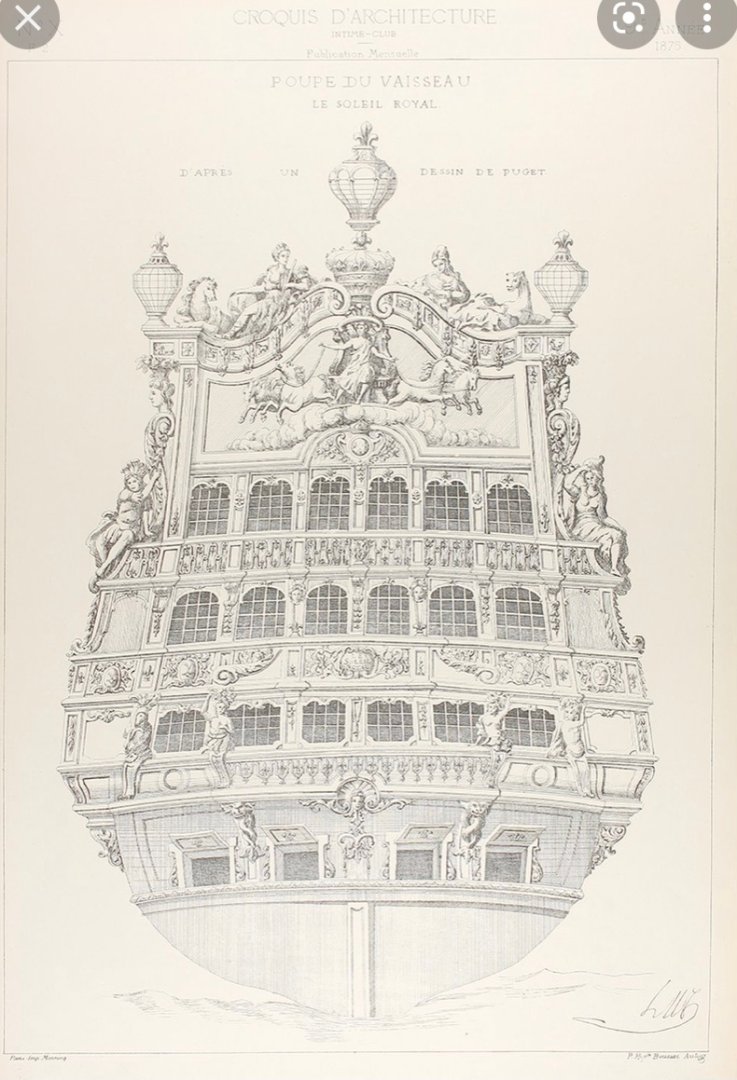
The Berain drawings date to the time of the refit. Berain does not officially become designer of ornament to the King’s arsenals until after Lebrun’s death in 1690, but his famous stern drawing is a re-working of the original design by Puget - the underlying conception for which was established by LeBrun. The quarter drawing, I have argued, is consistent with the evolution in QG design (closed lower bottle on middle deck level, wrapping main deck balcony, QD amortisement), in the 1680s. There is strong correlation in the design elements that make up the windows and decorative rails between quarter and stern drawings. What is somewhat confusing to me is that this quarter drawing lacks the flawless continuity of the stern drawing; there are design problems with the quarter drawing that would lead to an impractical construction, if taken literally. Also, this drawing shows the extremely pronounced aft sheer that would have been a feature of 1670 (see how the wales/precients are cut completely by the aft ports), yet the stern height is definitely not as high as that time period. Also baffling is the cropping of the image. At the right margin, the drawing ends in a soft line, but the angle of that line, relative to the digital right margin, makes it seem as though the ocean water is cascading downhill and that the ship is sinking, bow first. Rotate the drawing 15 degrees counterclockwise and one’s perception of the thing changes dramatically. All of this suggests that the heading, “Bouteille du Vaisseau…” is a later notation than the date of the drawing. It is the heading that has determined the modern cropping of the drawing. Why it is notated at such an odd angle to the original intent of the drawing is anyone’s guess.
- 2,696 replies
-
- 6
-
-
- heller
- soleil royal
- (and 9 more)
-
I think this looks truly incredible, Michael. The attention to scale and variation of wood tones really captures the salvaged original!
-
It tends to wear through on any sharp corners just from the handling of painting the rest of it.
-
The case I make for it, eventually, will qualify it for the permanent installation known around here (my home) as the “heirloom furniture project” in Marc’s Museum of Decorative Wooden (and some plastic) Objects.
- 2,696 replies
-
- 9
-
-
- heller
- soleil royal
- (and 9 more)
-
The yellow is so fragile, and it already needs re-touching. I will wait for that, though, until after the installation. As I have throughout the model, I use the darker gold Citadel Armor as a base coat, and then I highlight with the bright gold. It creates a nice, if subtle sense of depth: Next, I’ll do all the gilt work for the starboard side. I’m also ready to begin making the third tier of stern lights. Thank you for stopping by. More to follow..

- 2,696 replies
-
- 20
-

-
-
- heller
- soleil royal
- (and 9 more)
-
You can just cut the existing cables and shove them back into the model. Then, just run new rope in one hawsehole and out the next. This is what I will soon do on my model because the existing cables just aren’t good enough.
-
Incredible!
-
As you have it is the way that the kit is designed, yes.
- 1,508 replies
-
- 2
-
-
- Le Soleil Royal
- Heller
- (and 1 more)