
Jim Rogers
-
Posts
1,381 -
Joined
-
Last visited
Content Type
Profiles
Forums
Gallery
Events
Everything posted by Jim Rogers
-
I picked this one up at a Model Expo Sale.
-
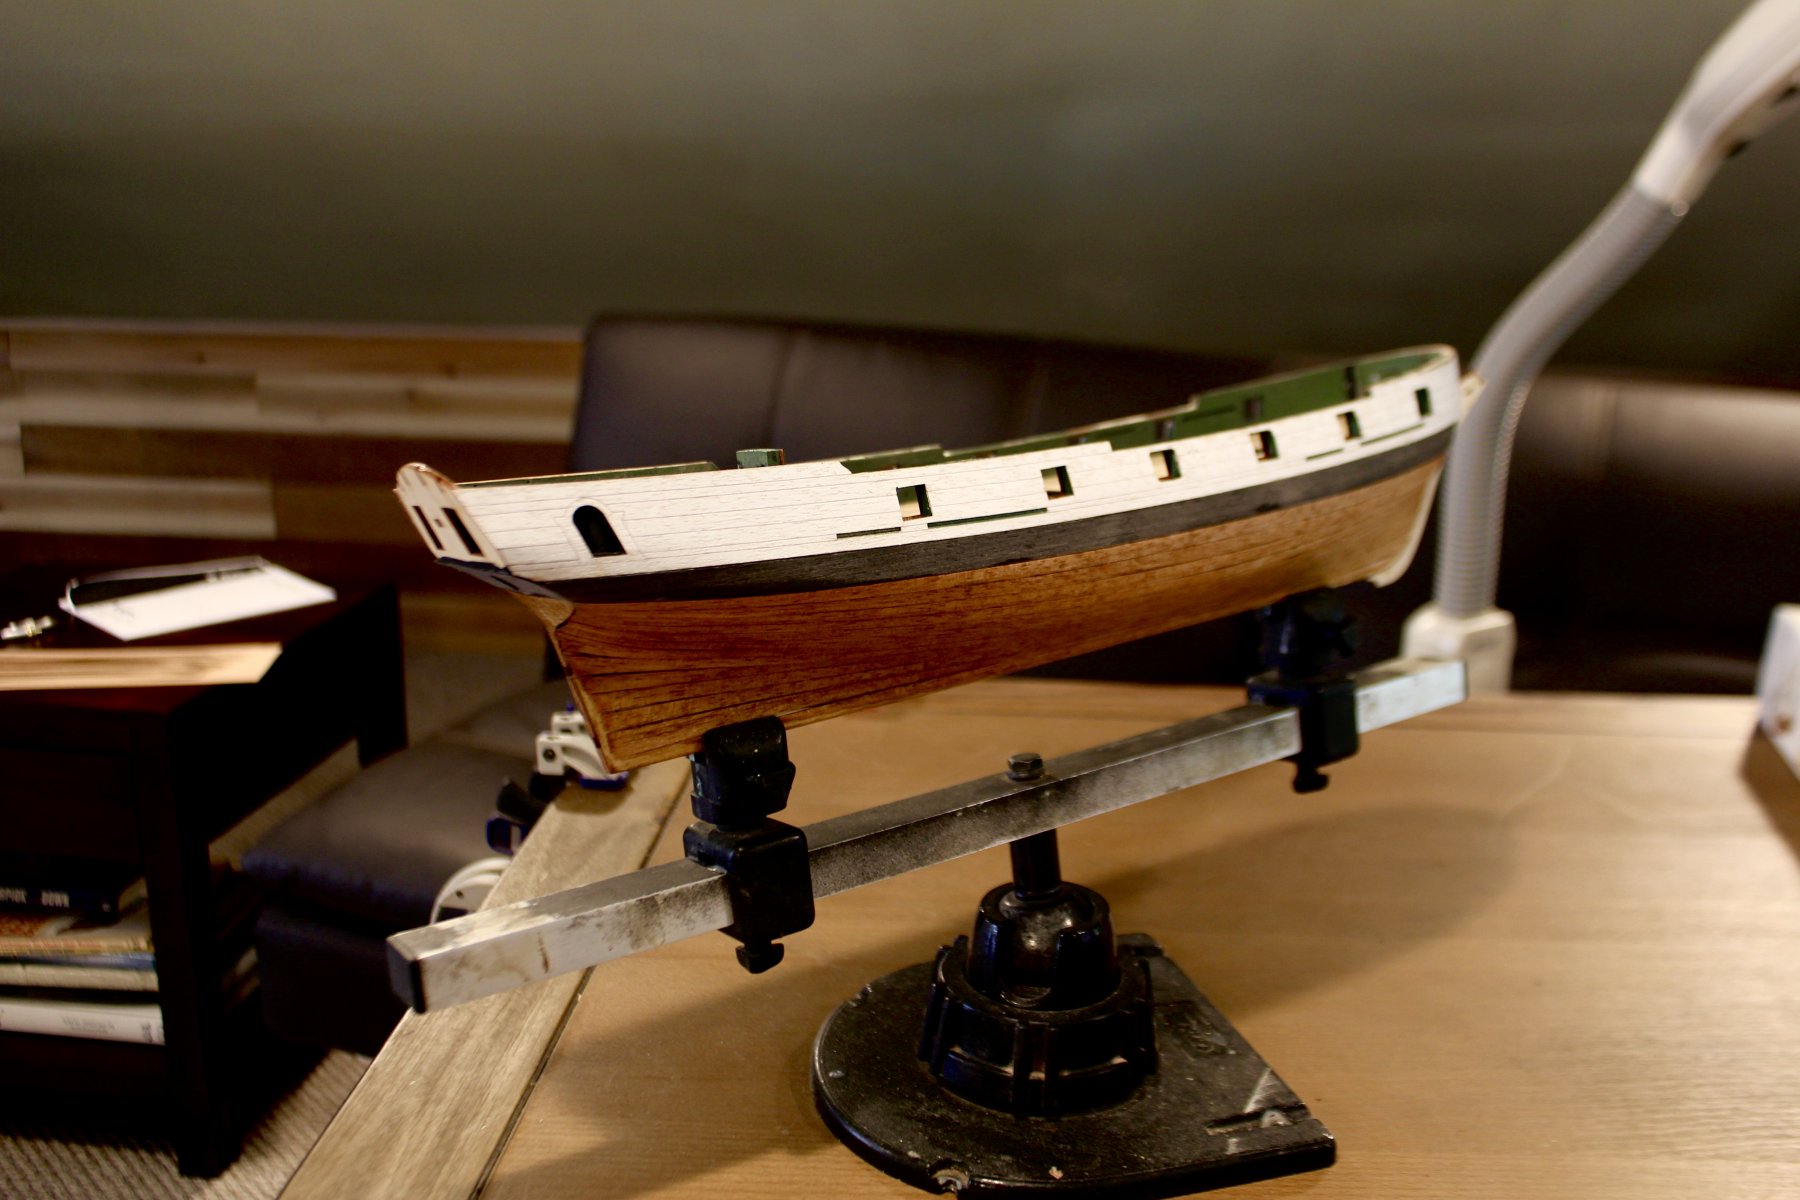
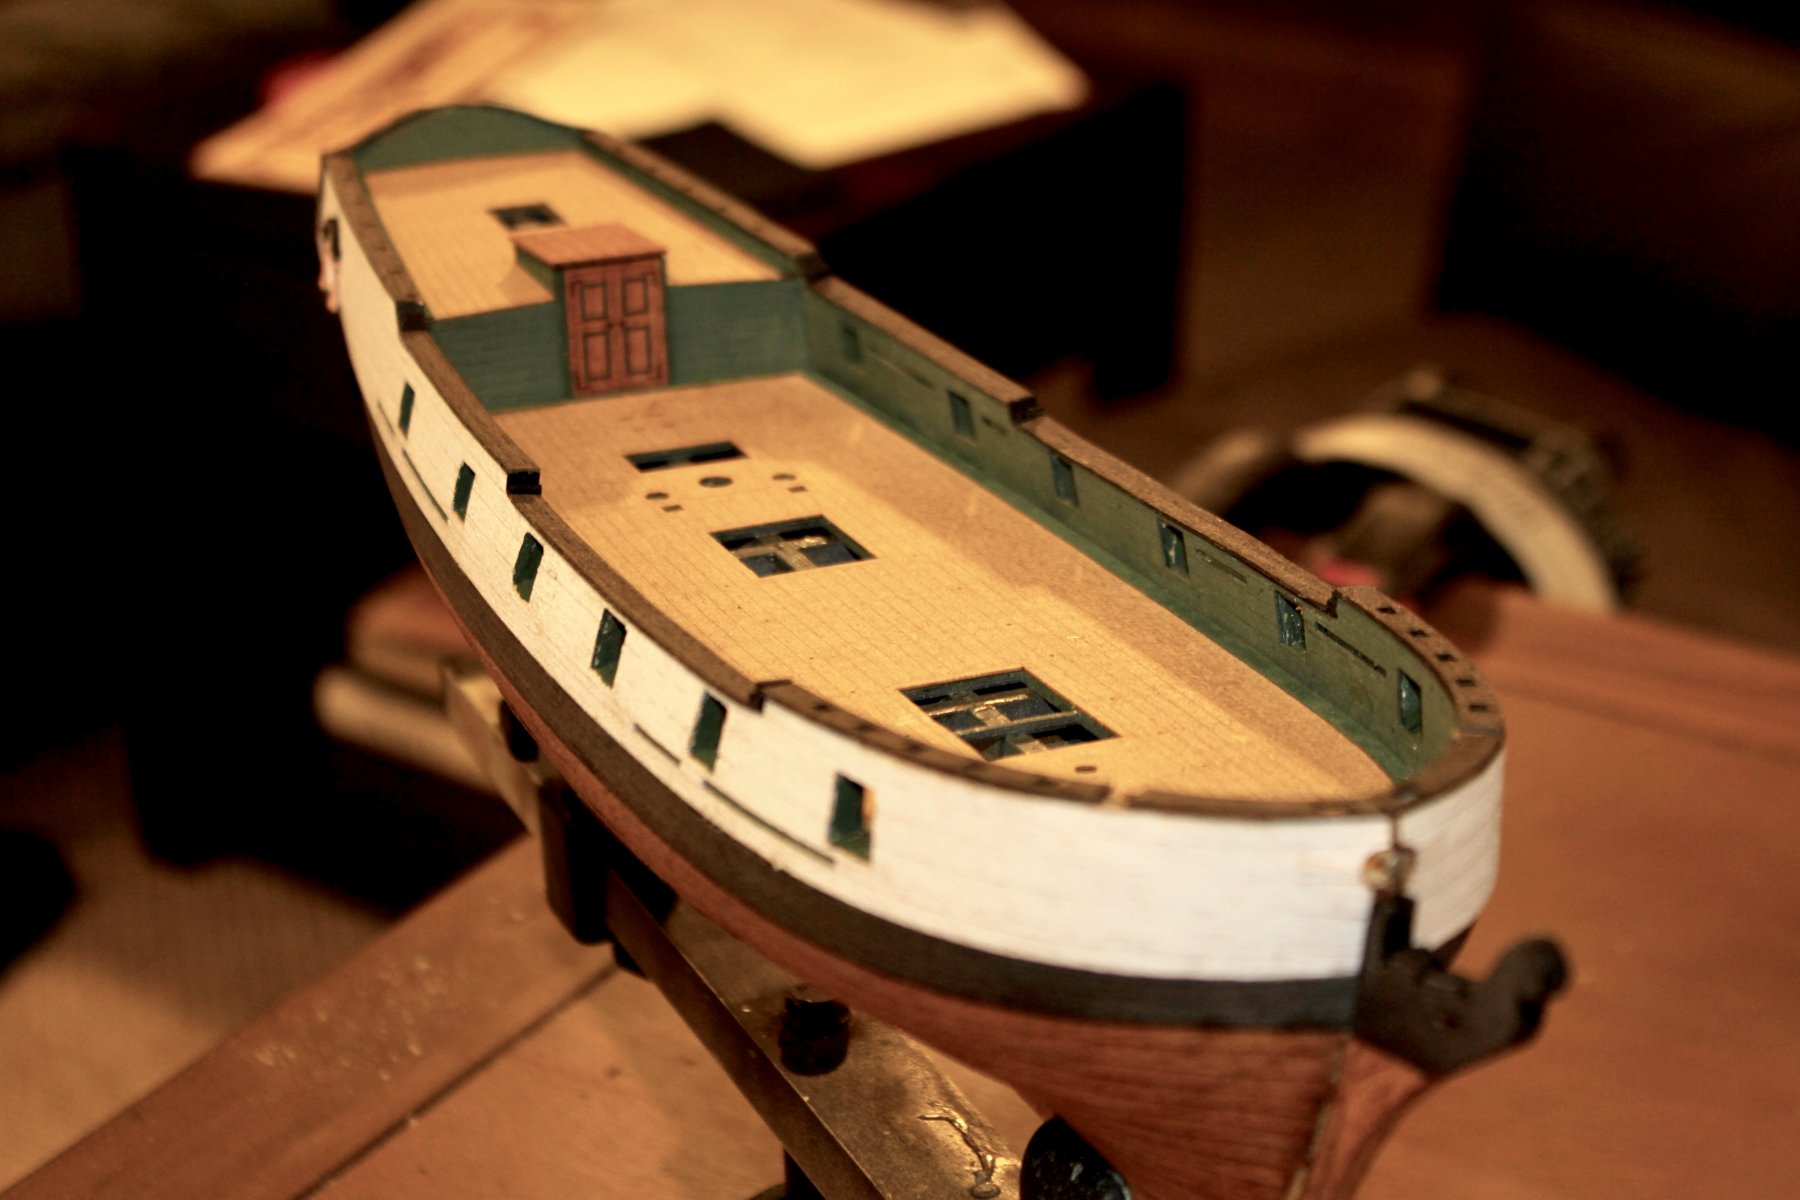
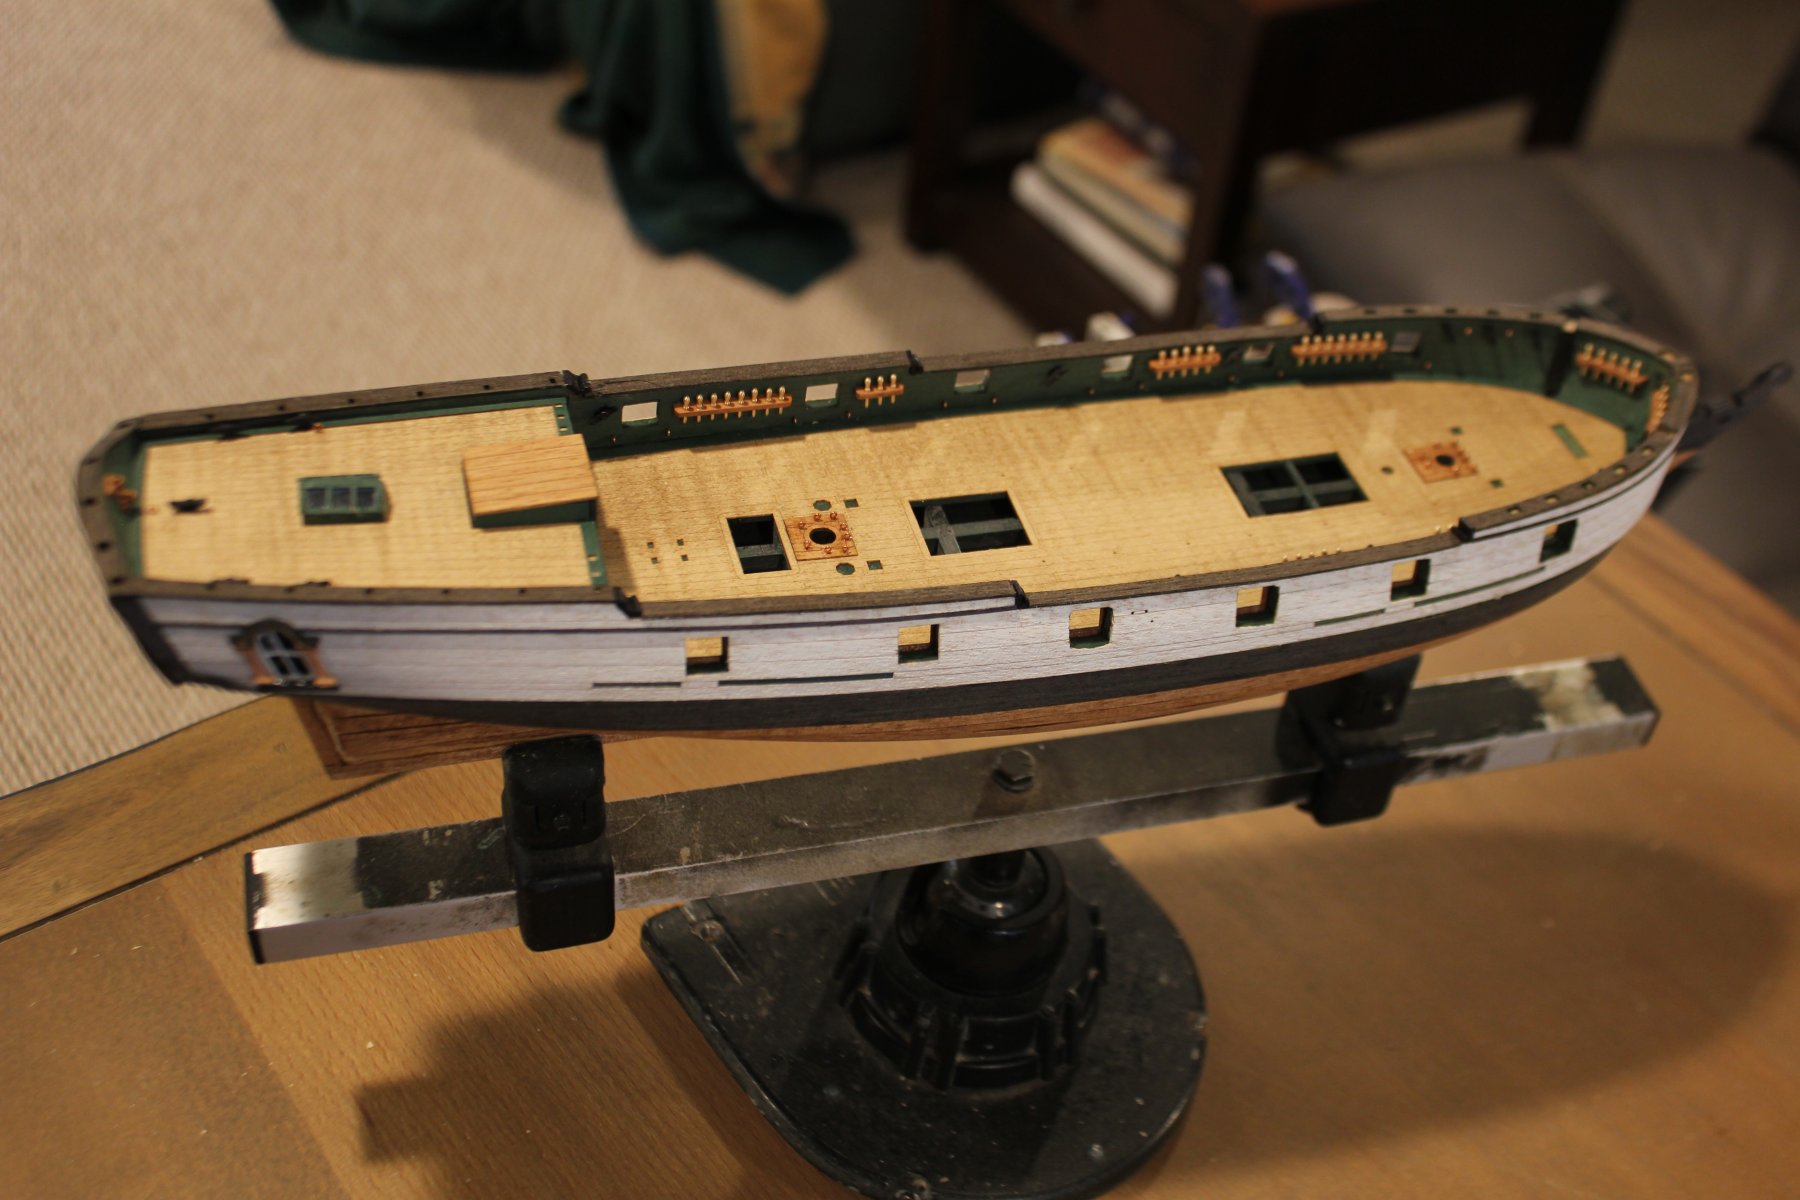
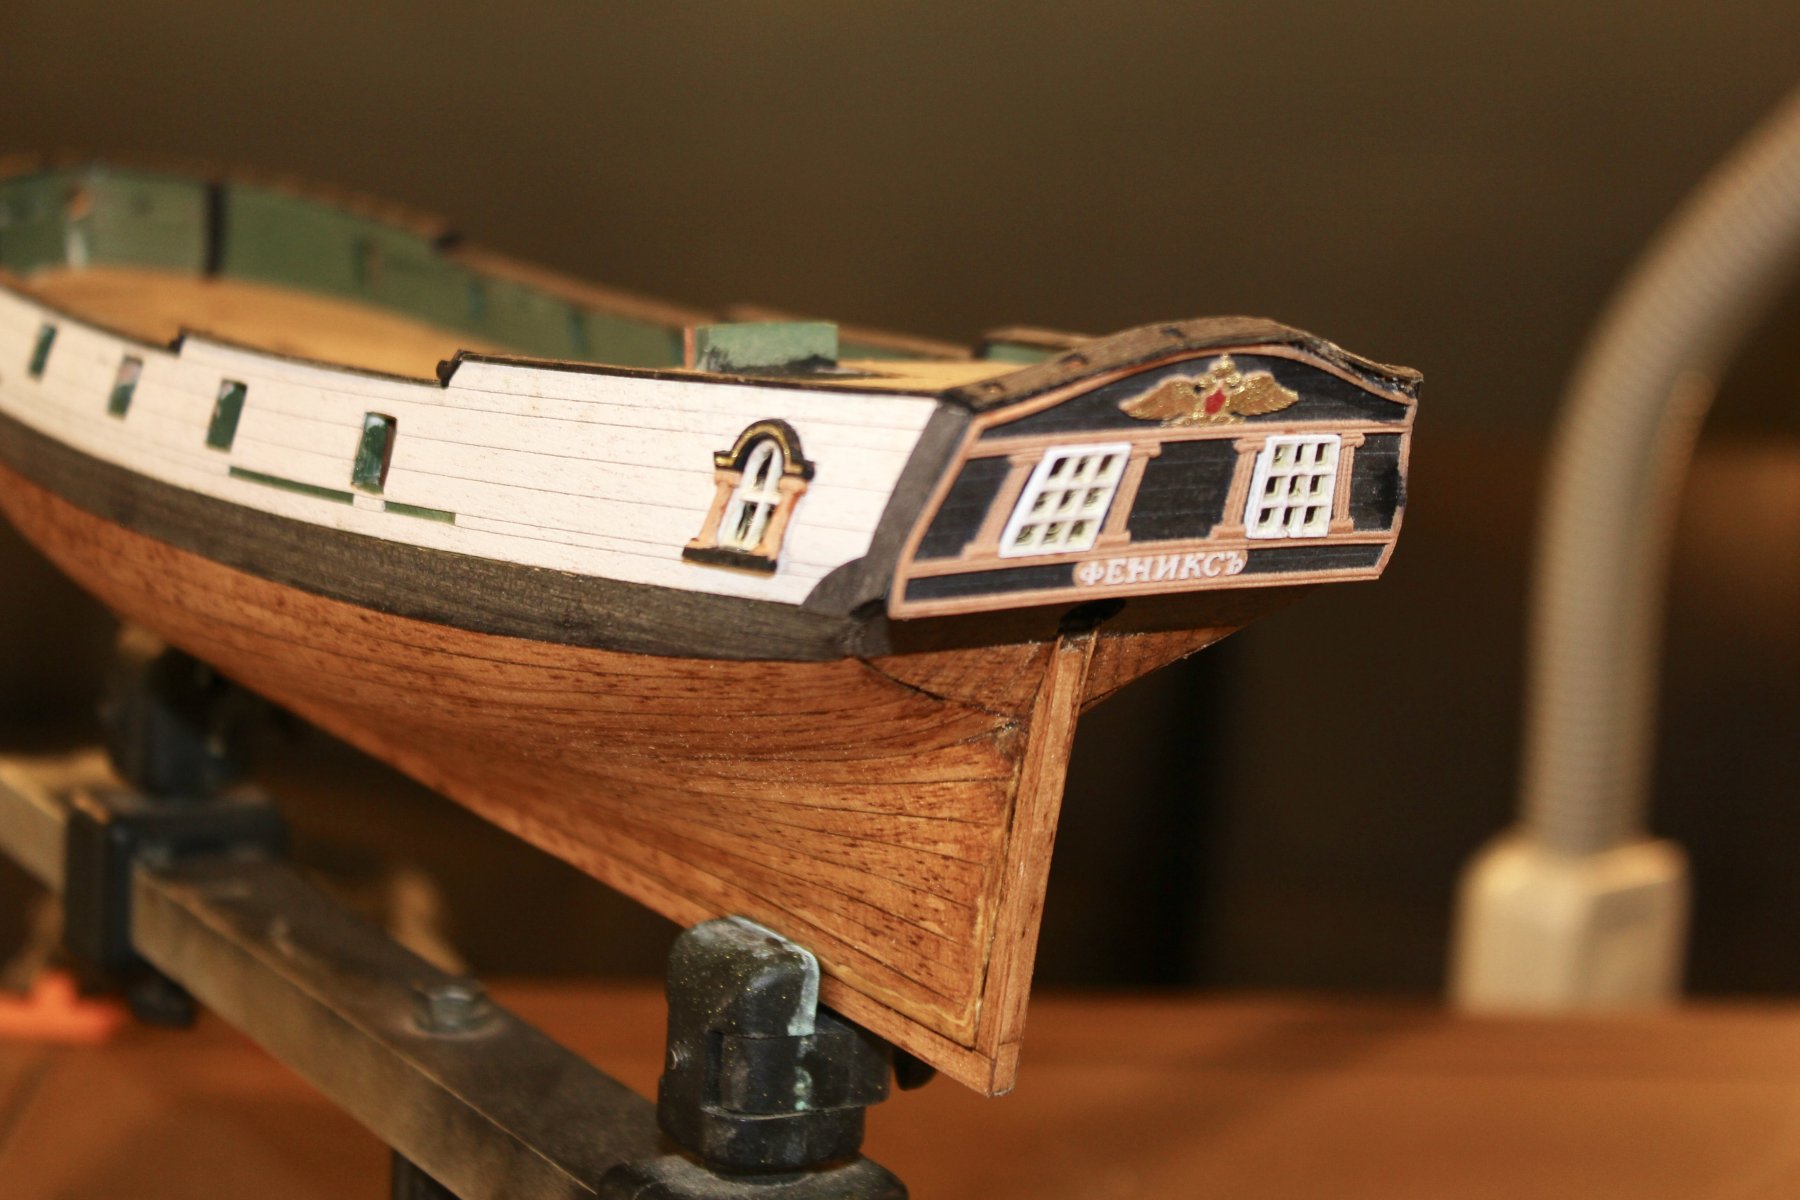
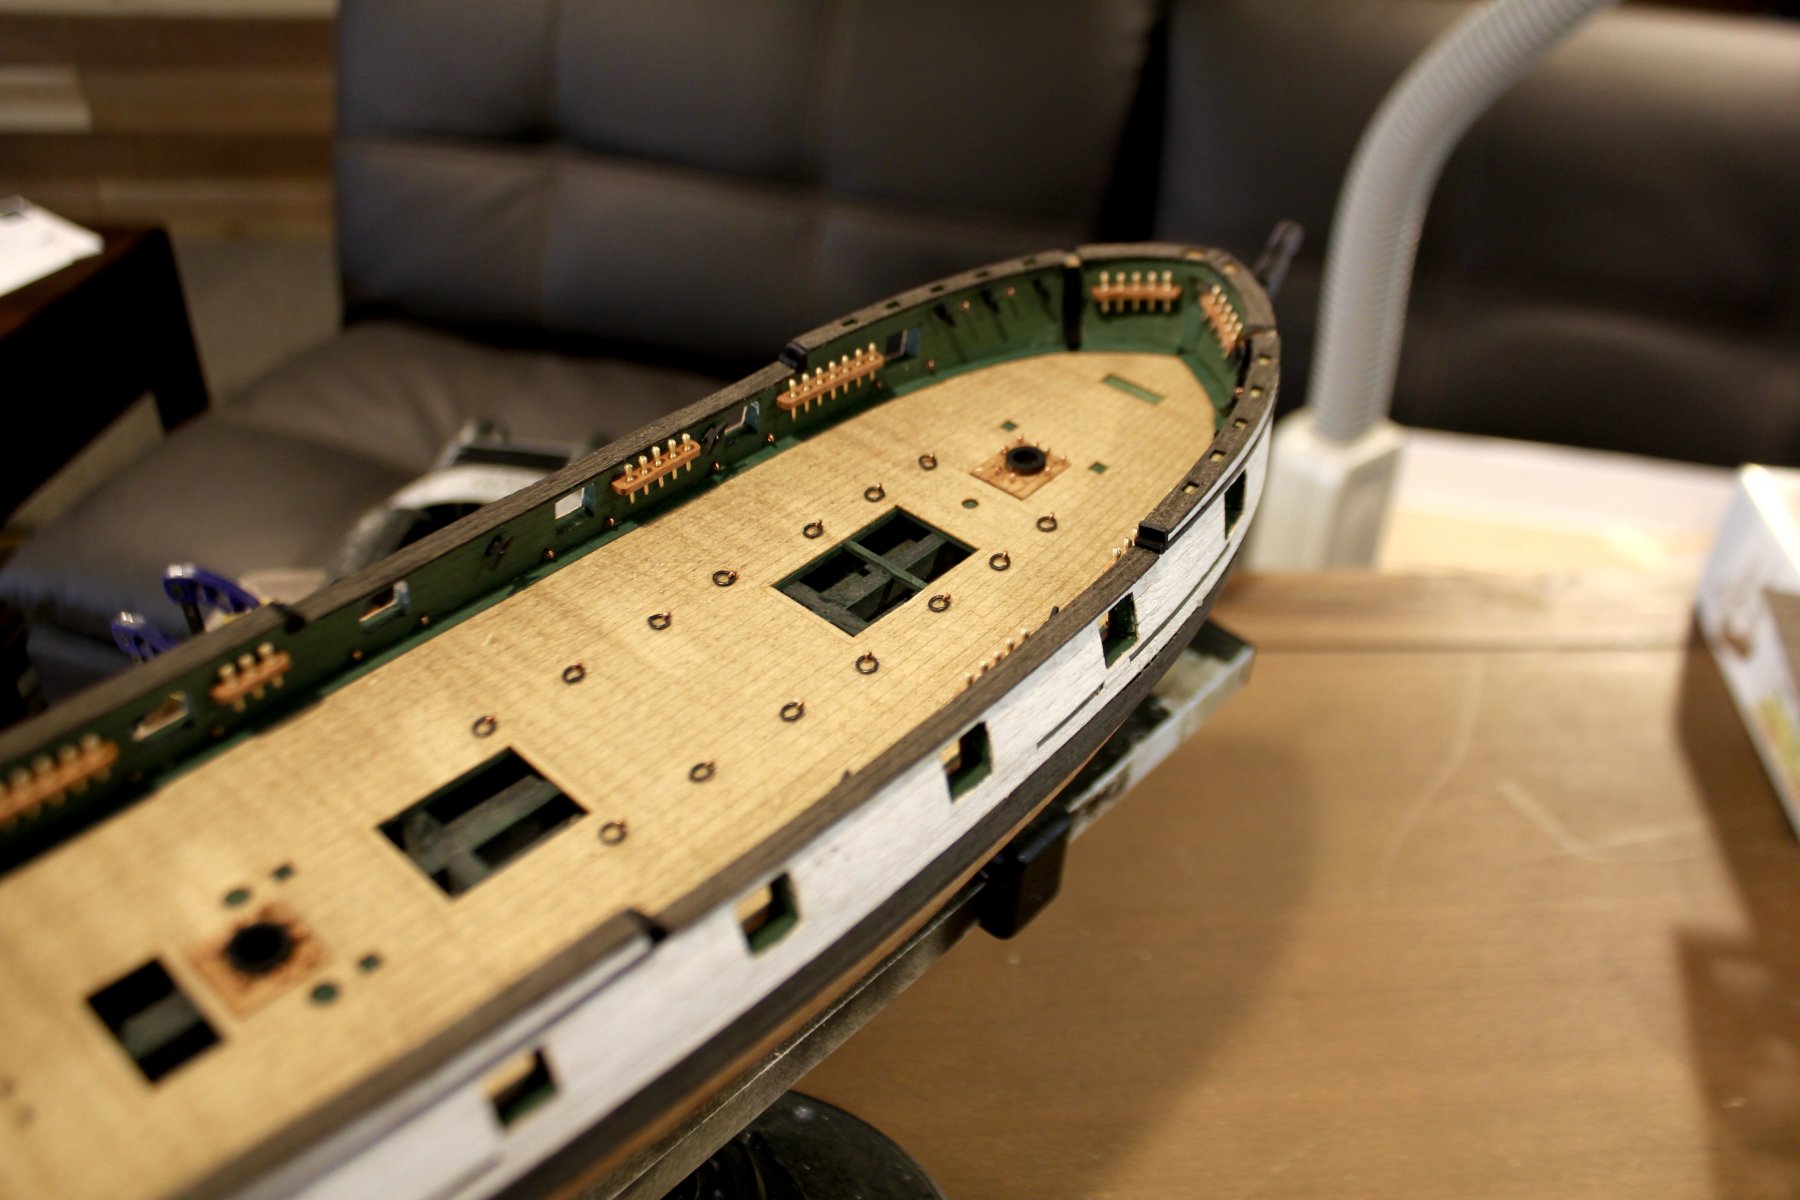
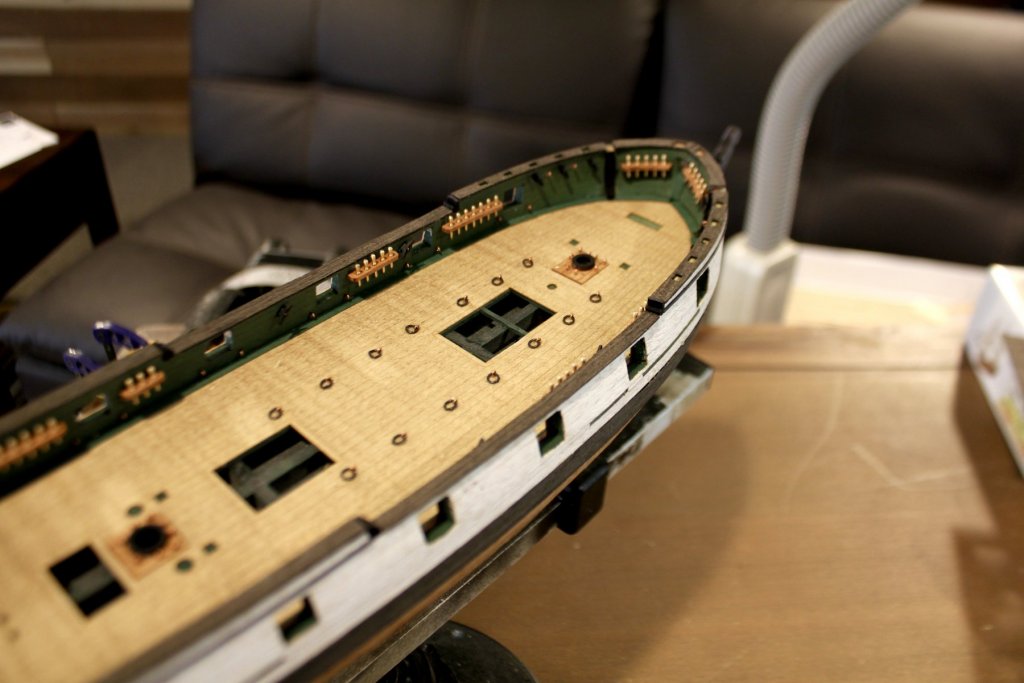
Update: 1. Finished Second planking 2. Attached interior and exterior veneers. Painted exterior a flat white and interior a flat green. 3. Got decks installed. 4. Received my Laser upgrade parts and got them installed. 5. Got belaying pin racks and pins installed. 6. Companion way and skylight installed.


-
Welcome aboard Richmond. You may want to look at Russian Manufacturer Master Korabel. They make a good product and I would consider them entry level.
-
Welcome aboard. Ships In Scale Magazine did an entire series on building that kit. You should be able to get the back copies. It will be a big help in your endeavor
-
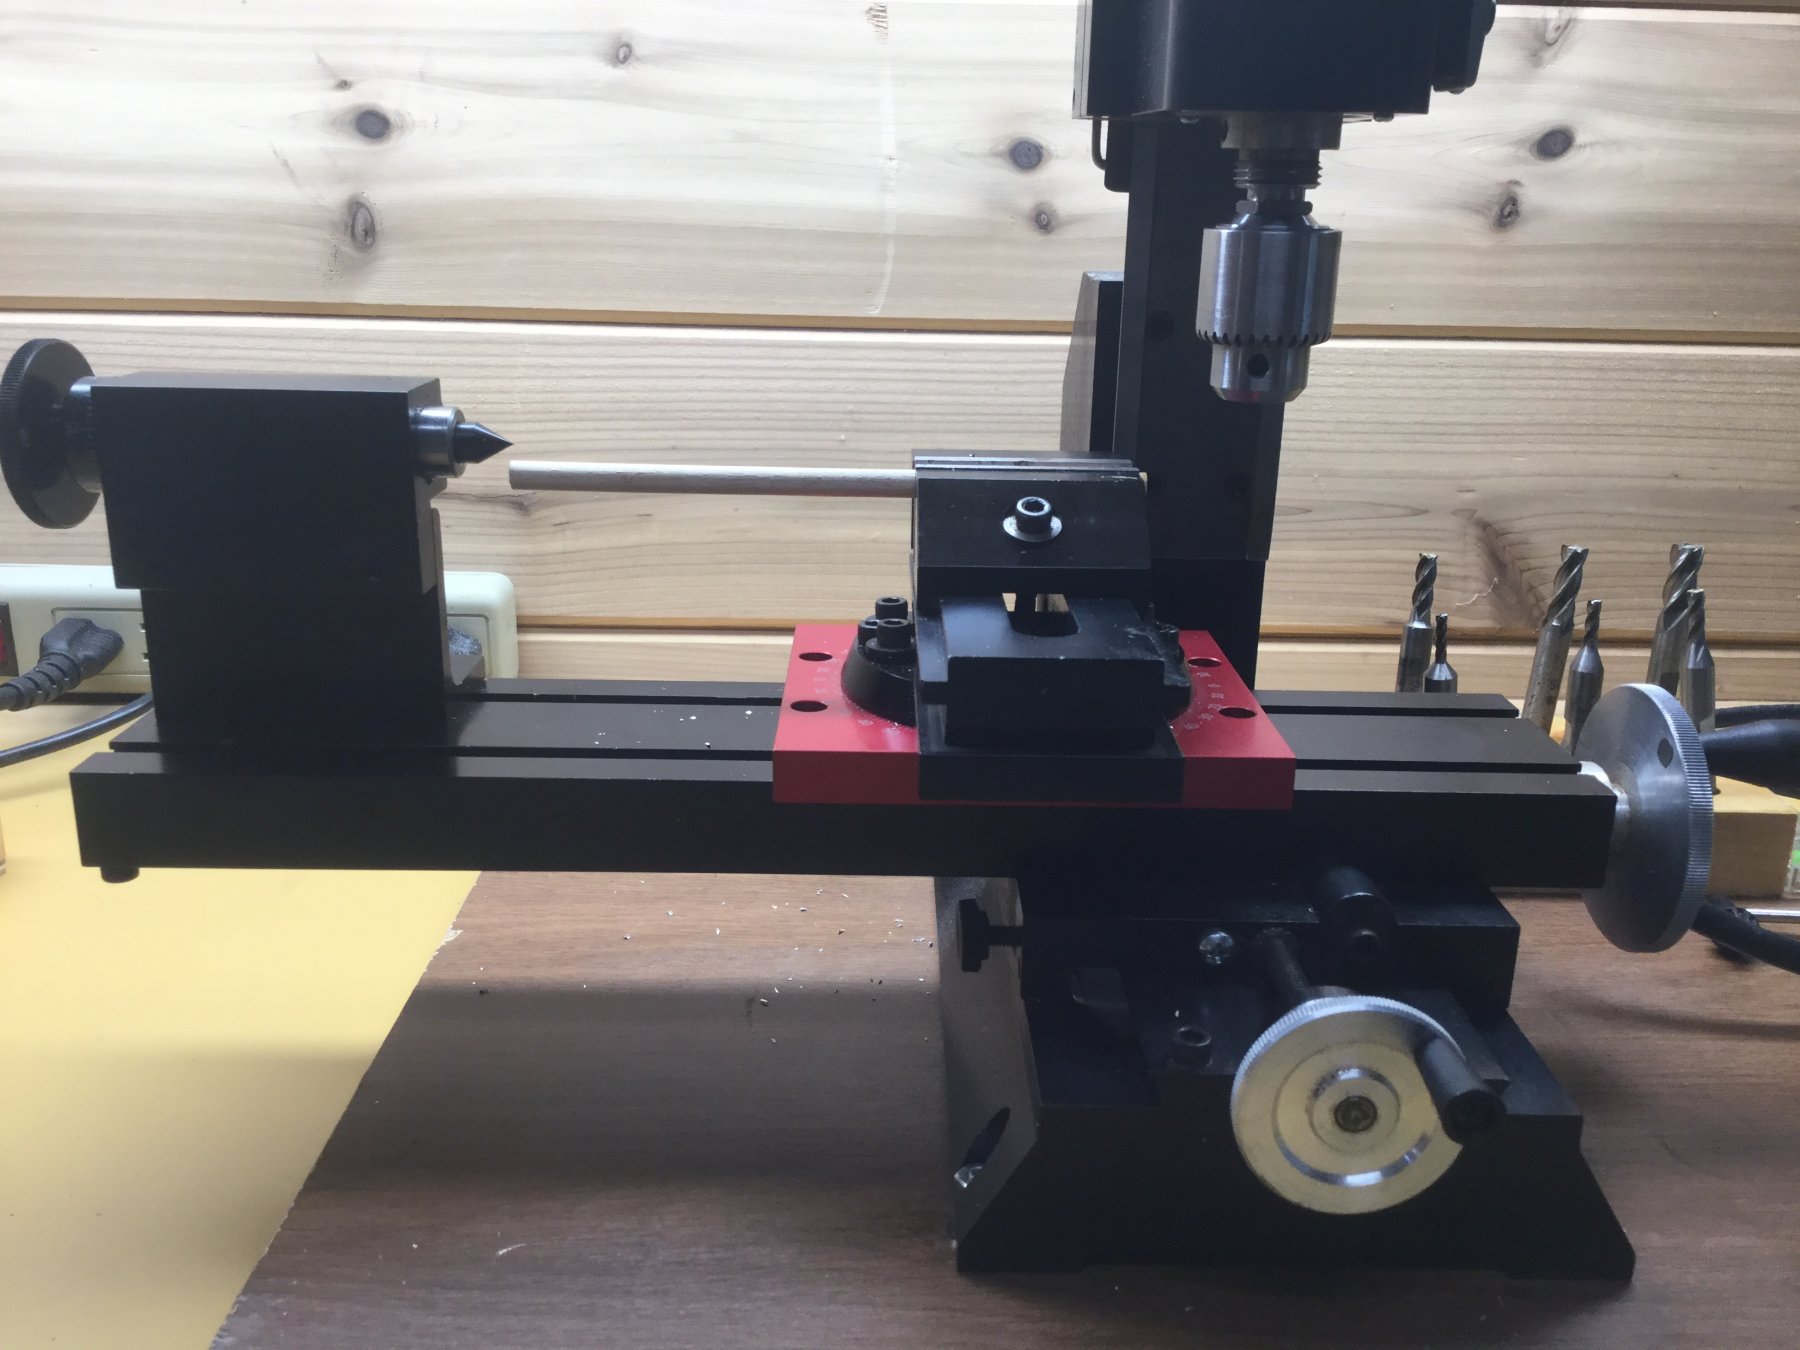
Recommendations For A Good Milling Machine
Jim Rogers replied to Thistle17's topic in Modeling tools and Workshop Equipment
So I have received my Right Angle Attachment and my Rotary table. They send two L shaped useless brackets to use for mounting work. So do I get a drill chuck or 3 or 4 jaw set to hold my round stock? And is there something else I don’t know about that I’ll need to get before I can use this? -
I have seen a ring on an eyelet in a similar location and the breech rope passes through the ring to keep it dressed. Another had this fancy lions mouth with the ring in the mouth that served the same function.
-
Recommendations For A Good Milling Machine
Jim Rogers replied to Thistle17's topic in Modeling tools and Workshop Equipment
Got it. I knew I had something wrong. Ordering rotating table. -
Recommendations For A Good Milling Machine
Jim Rogers replied to Thistle17's topic in Modeling tools and Workshop Equipment
According to my communications and this photo sent to Sherline I am the only person to ever have this problem and they tell me they make no adapters to fix this problem. They told me to build an adapter. I find it real hard to believe they don’t have attachment to fix what appears to me to be a common issue. Right hand attachment plus rotary table with vise mounted on top does not align. Any suggestions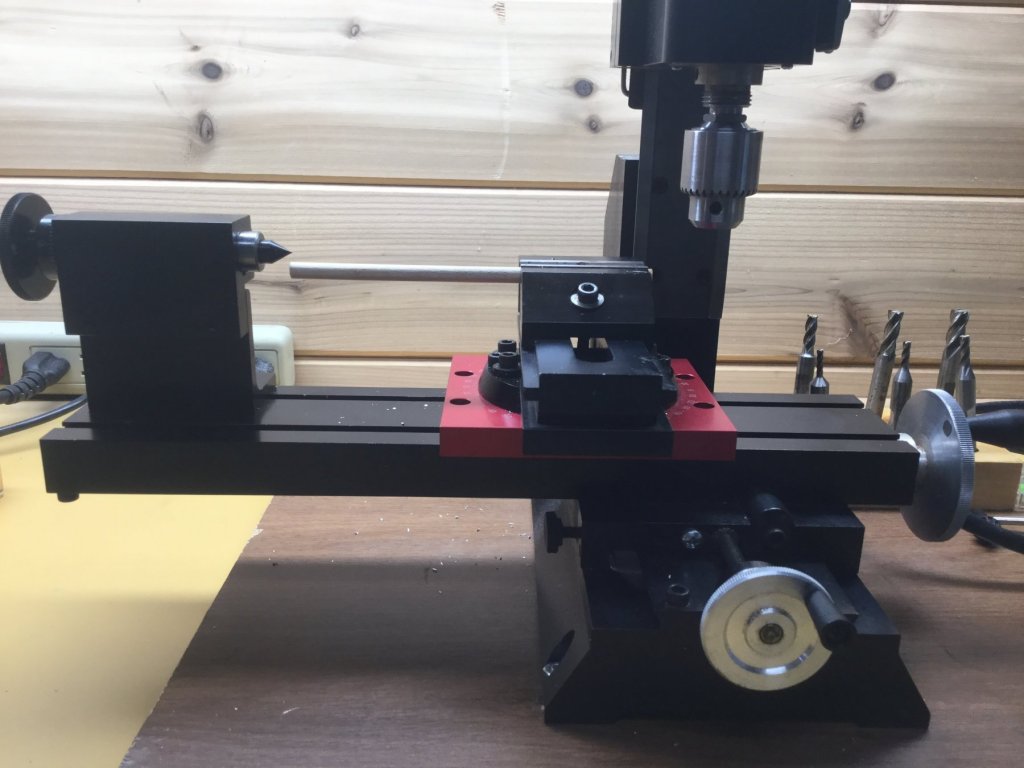
-
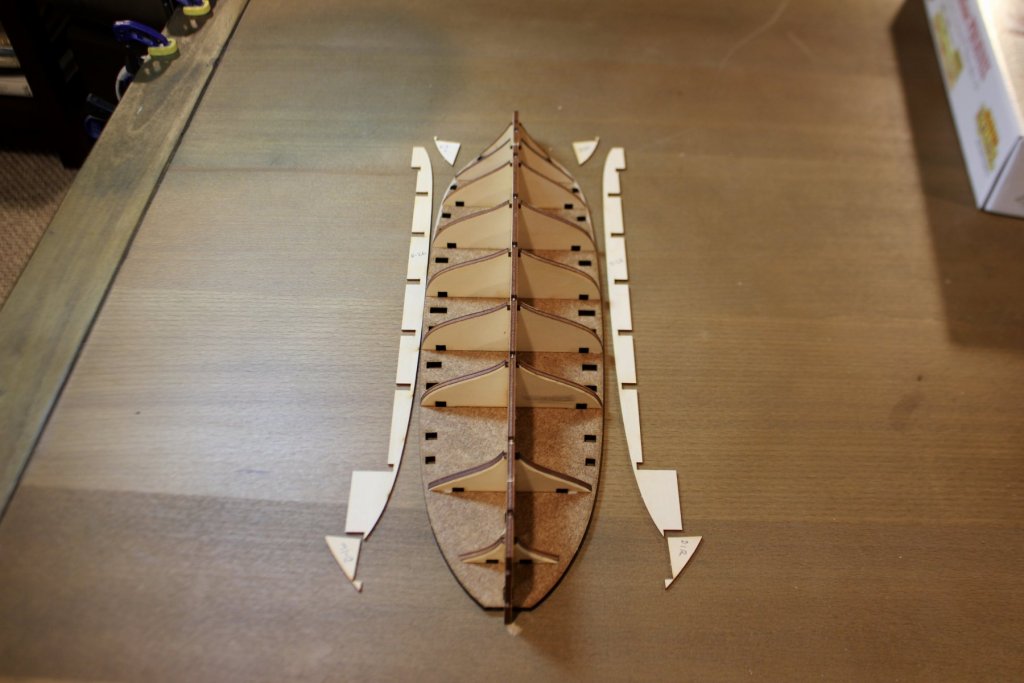
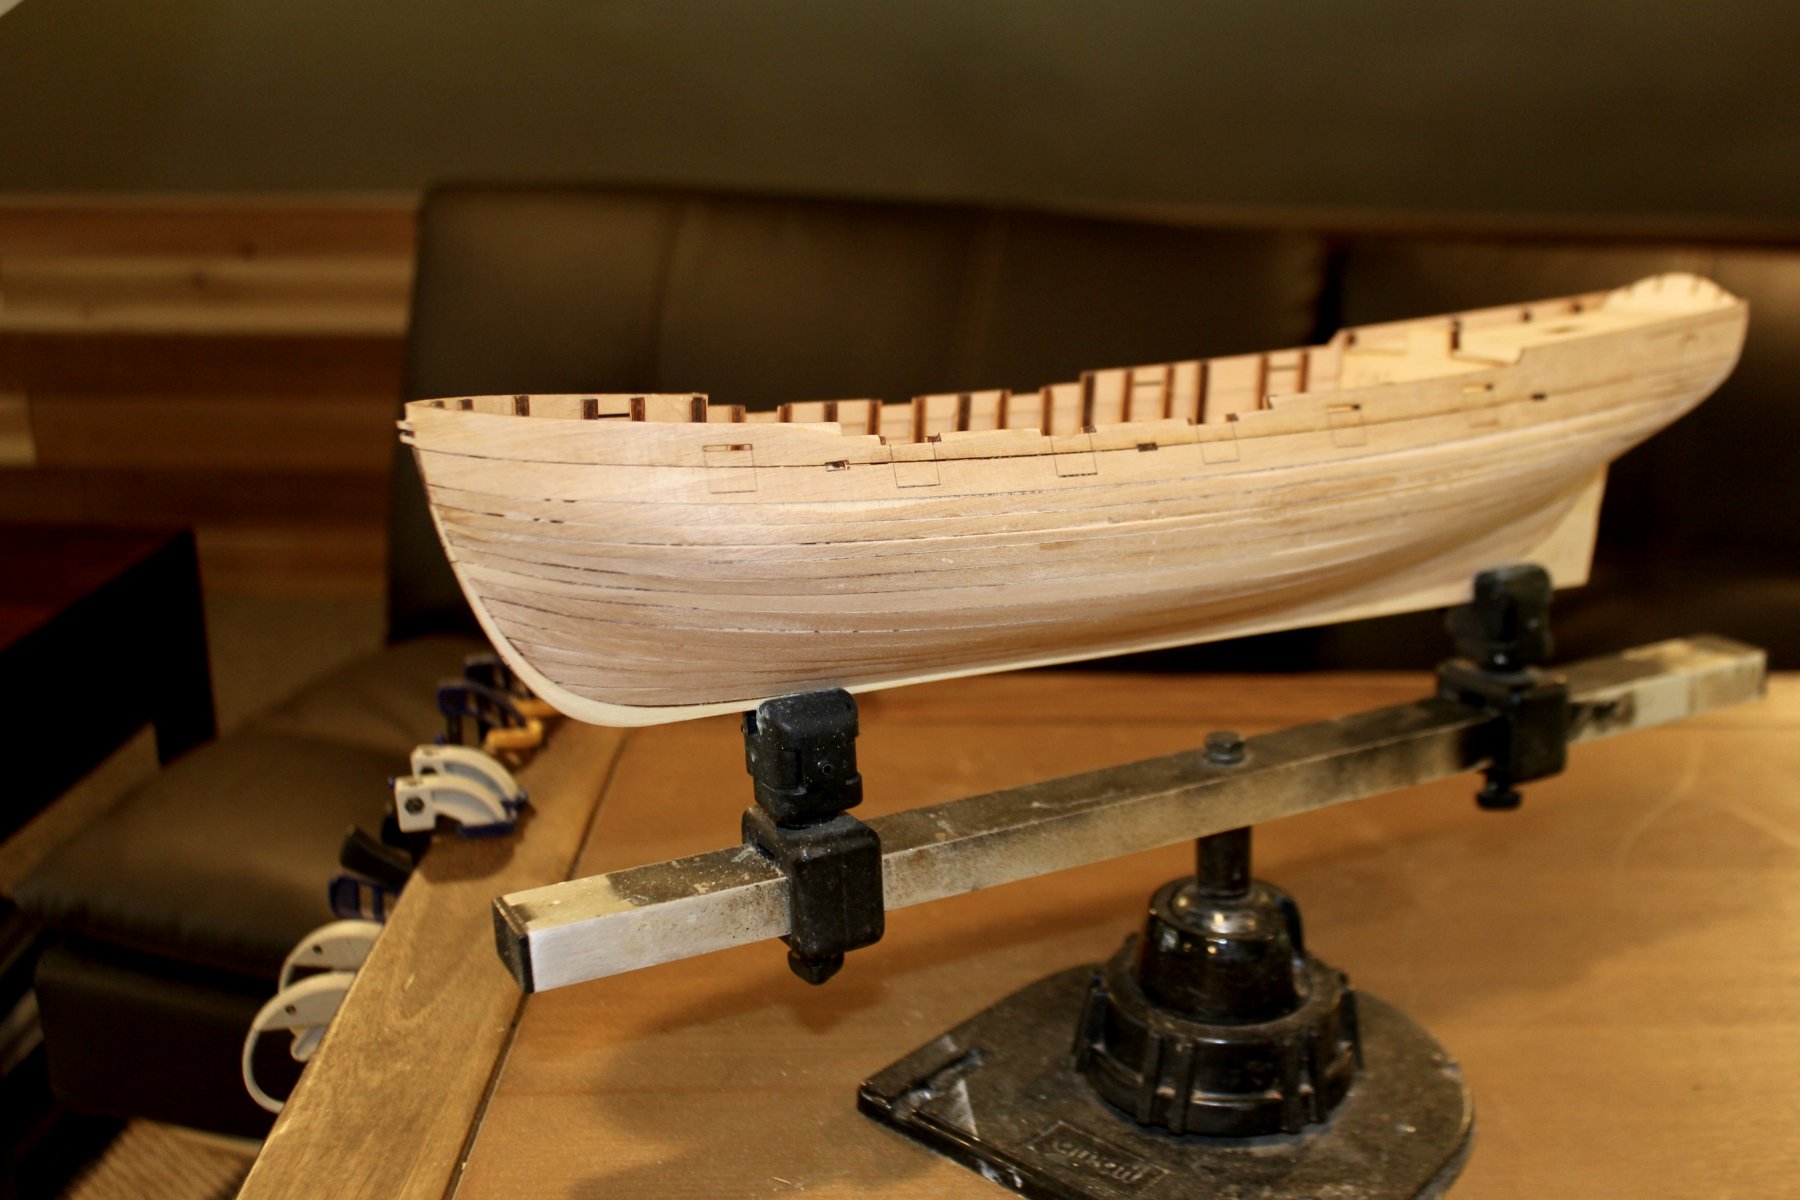
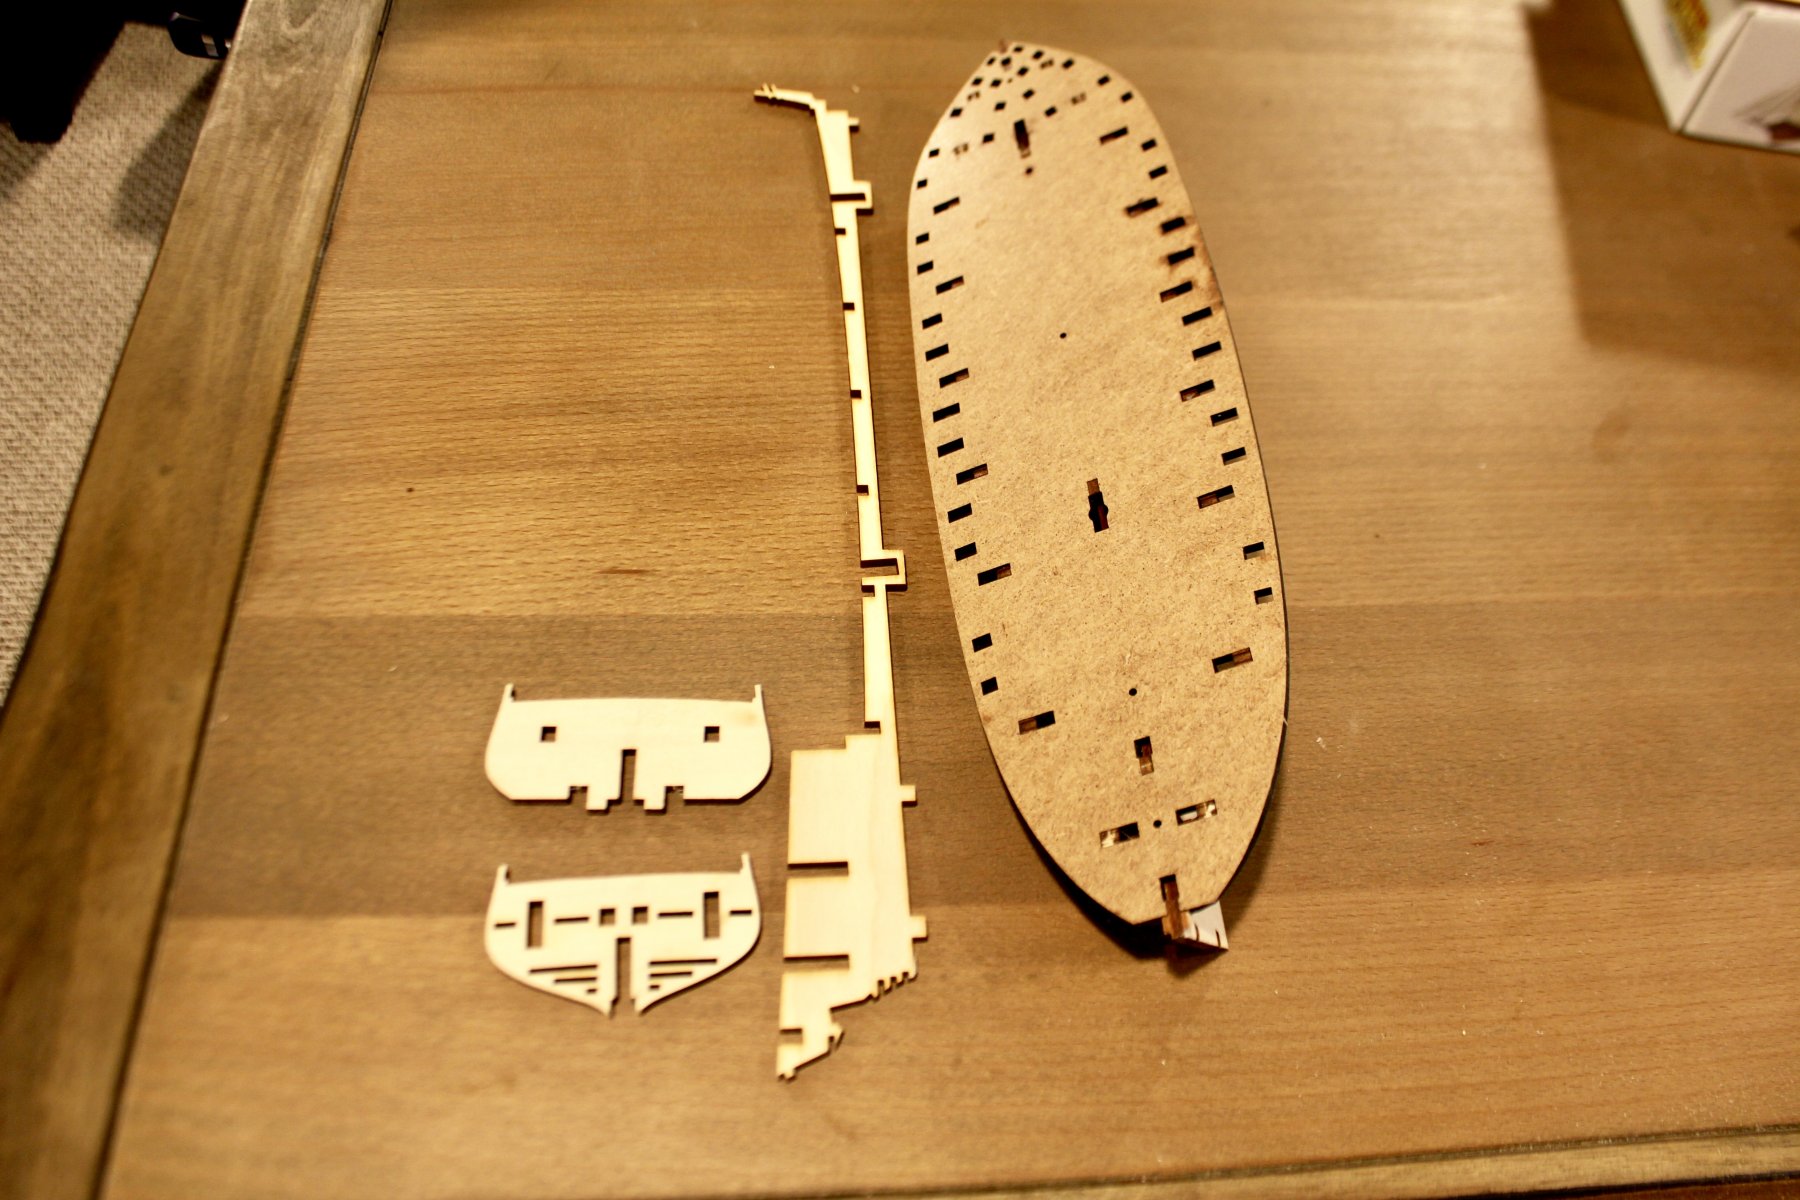
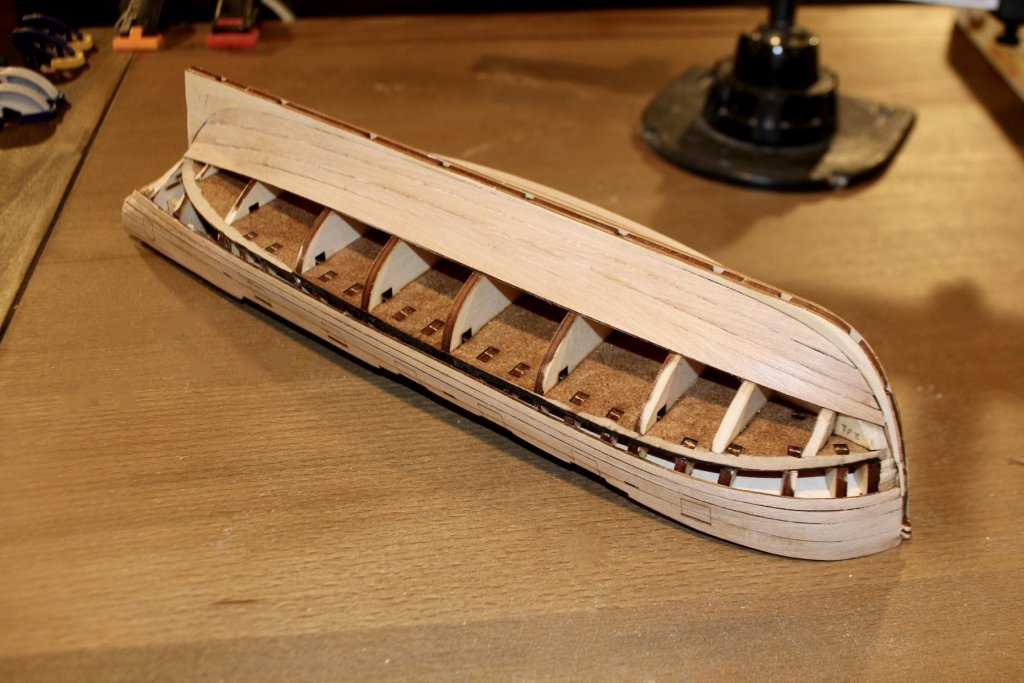
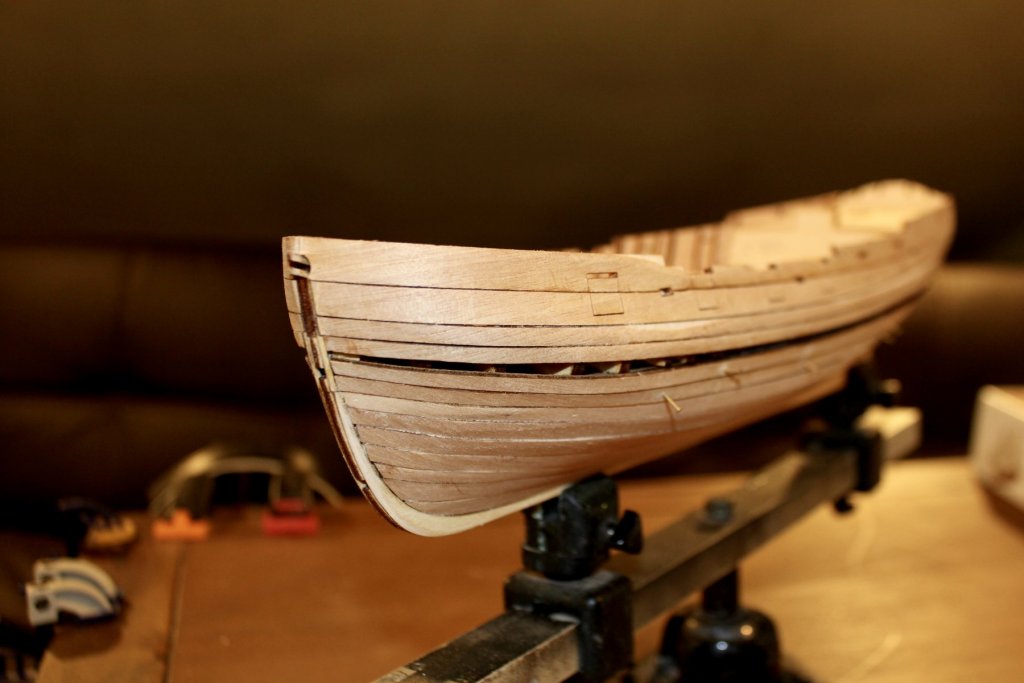
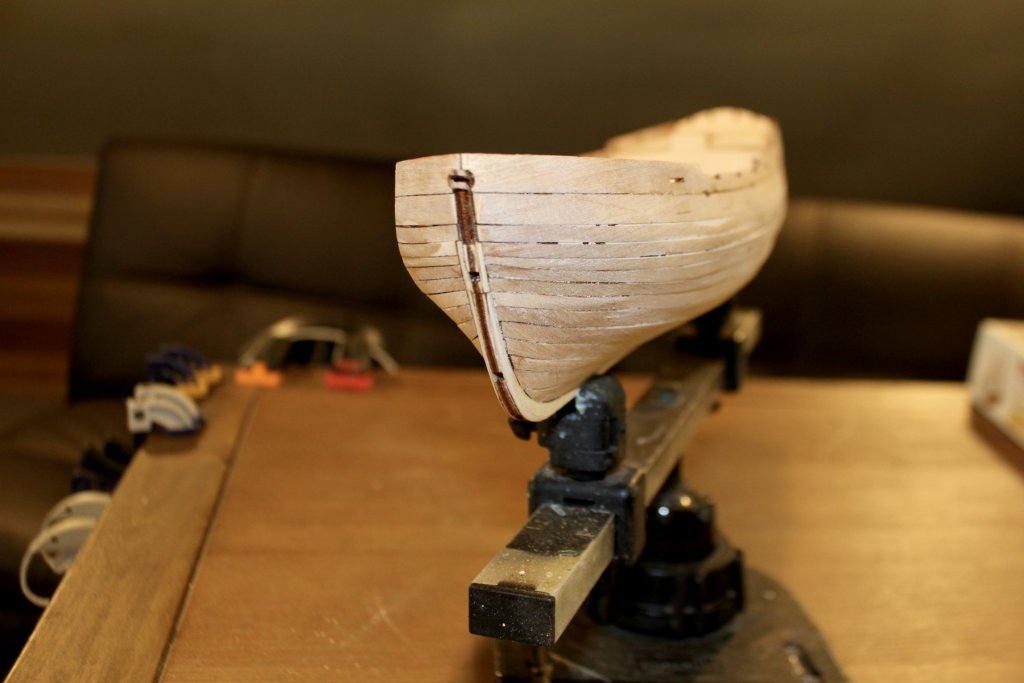
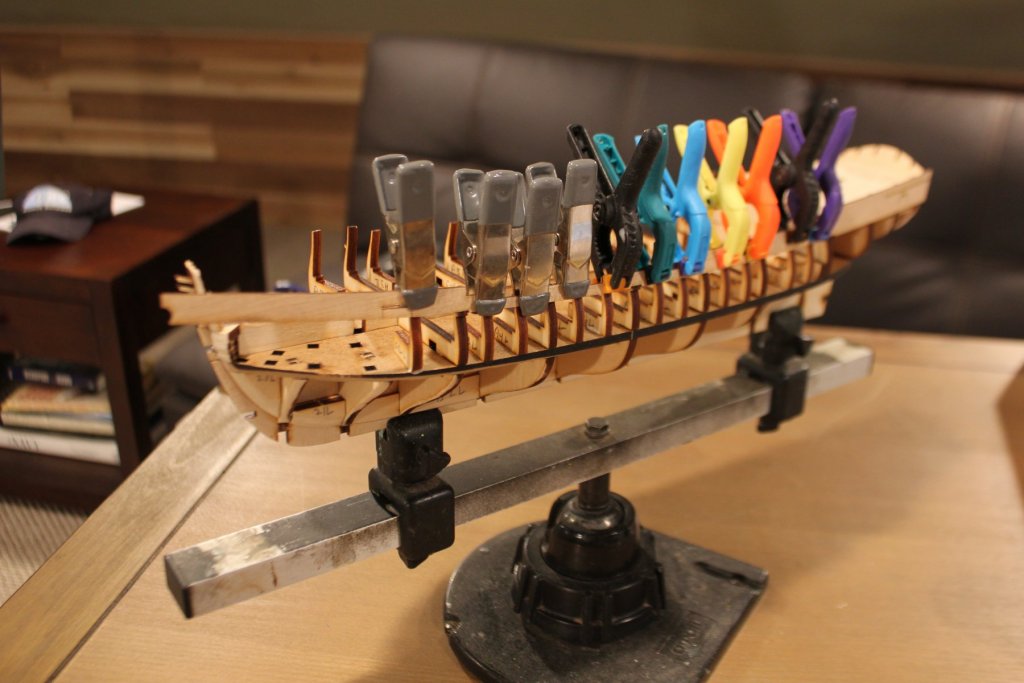
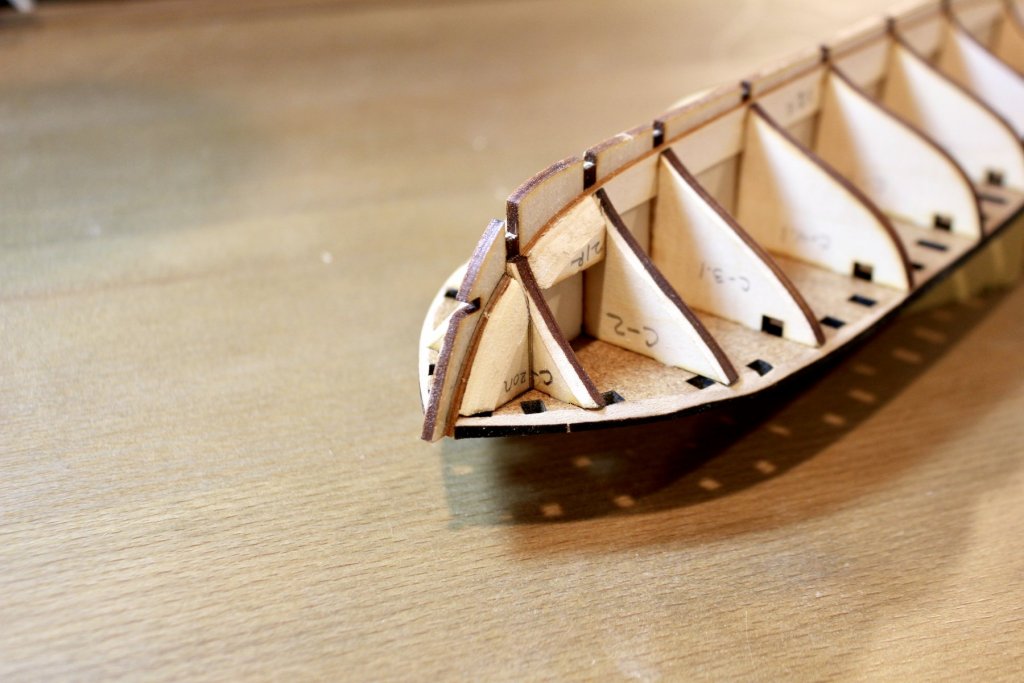
The remainder of the planks are attached from the Garboard up. The final Plank E-5 must be adjusted to fit. Rough sanding followed.

-
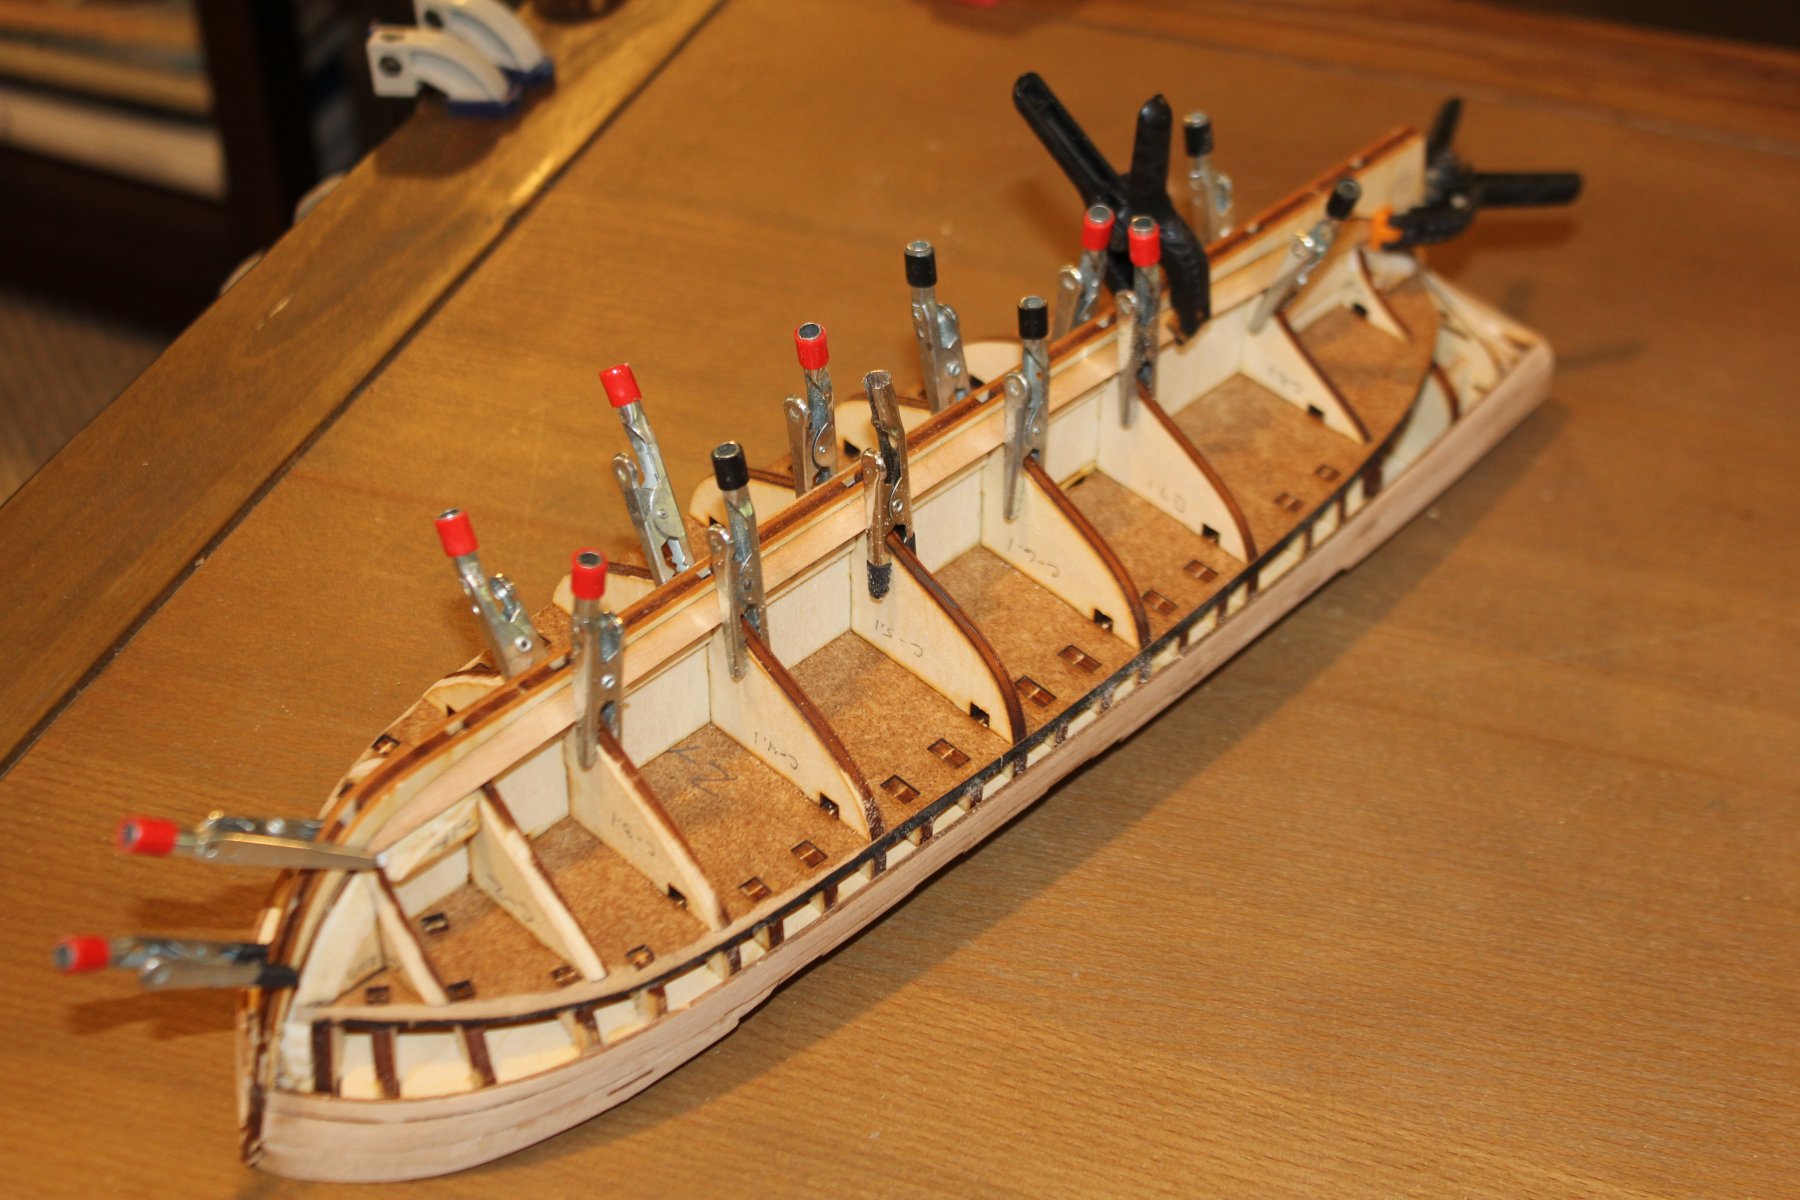
Next we start planking by attaching the first four upper planks and the Garboard plank. All planks are preshaped and numbered. The cellophane wrapped jig is really just a PITA during this operation. After attaching E-1 I removed it.


-
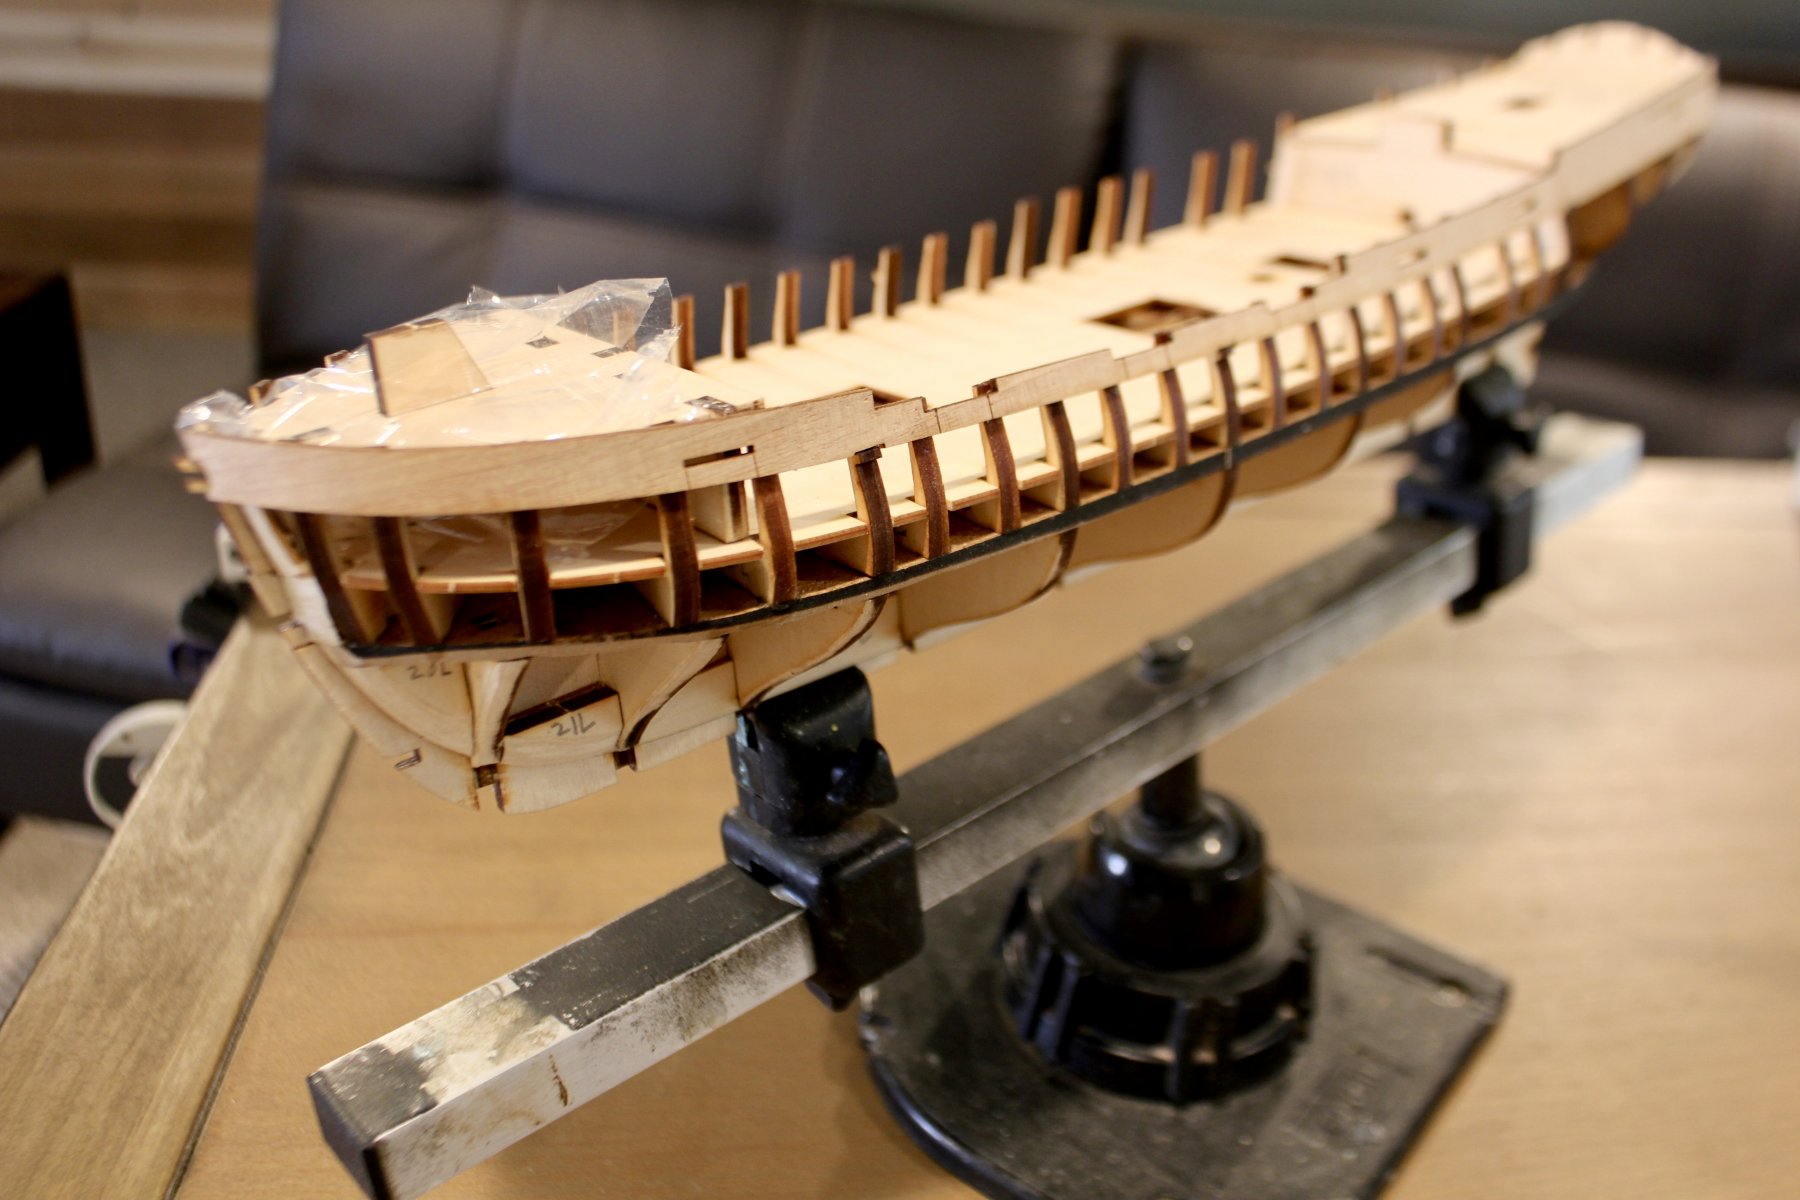
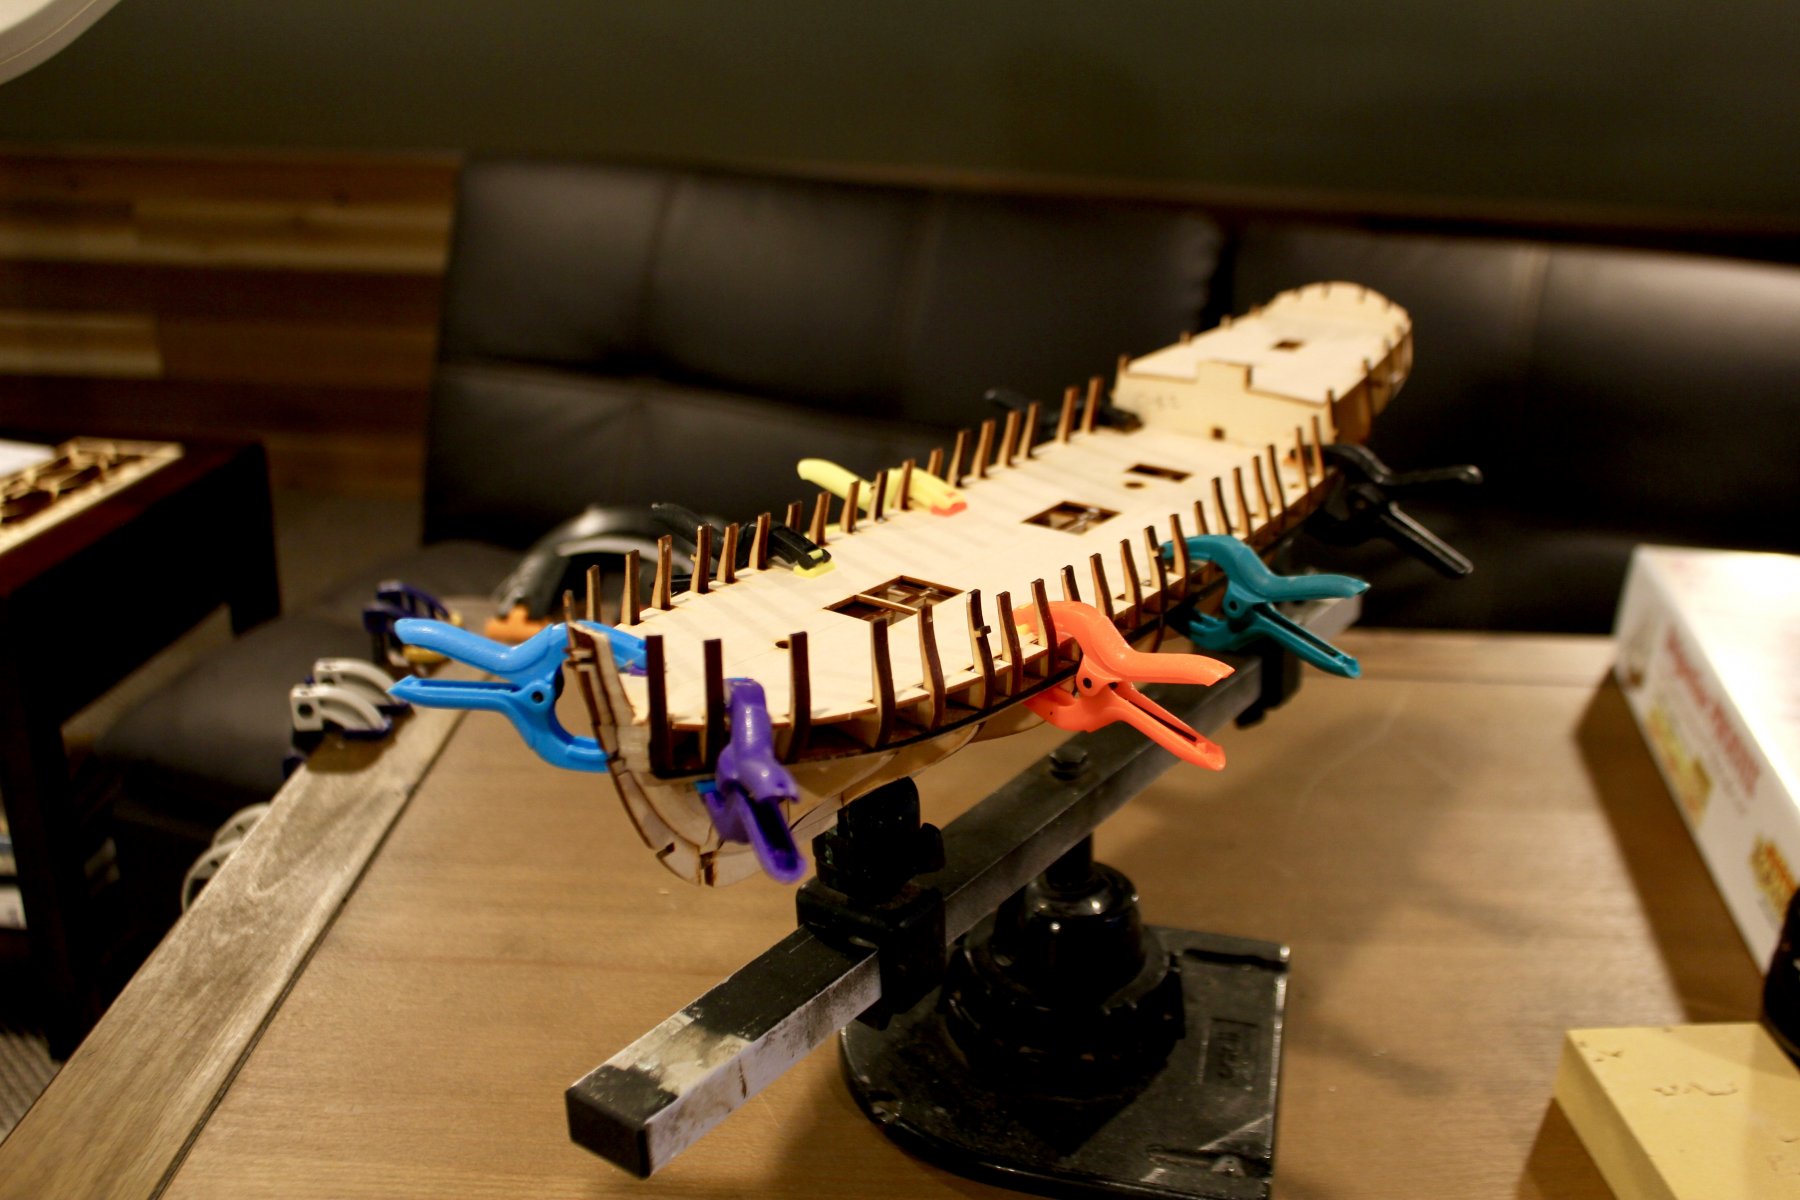
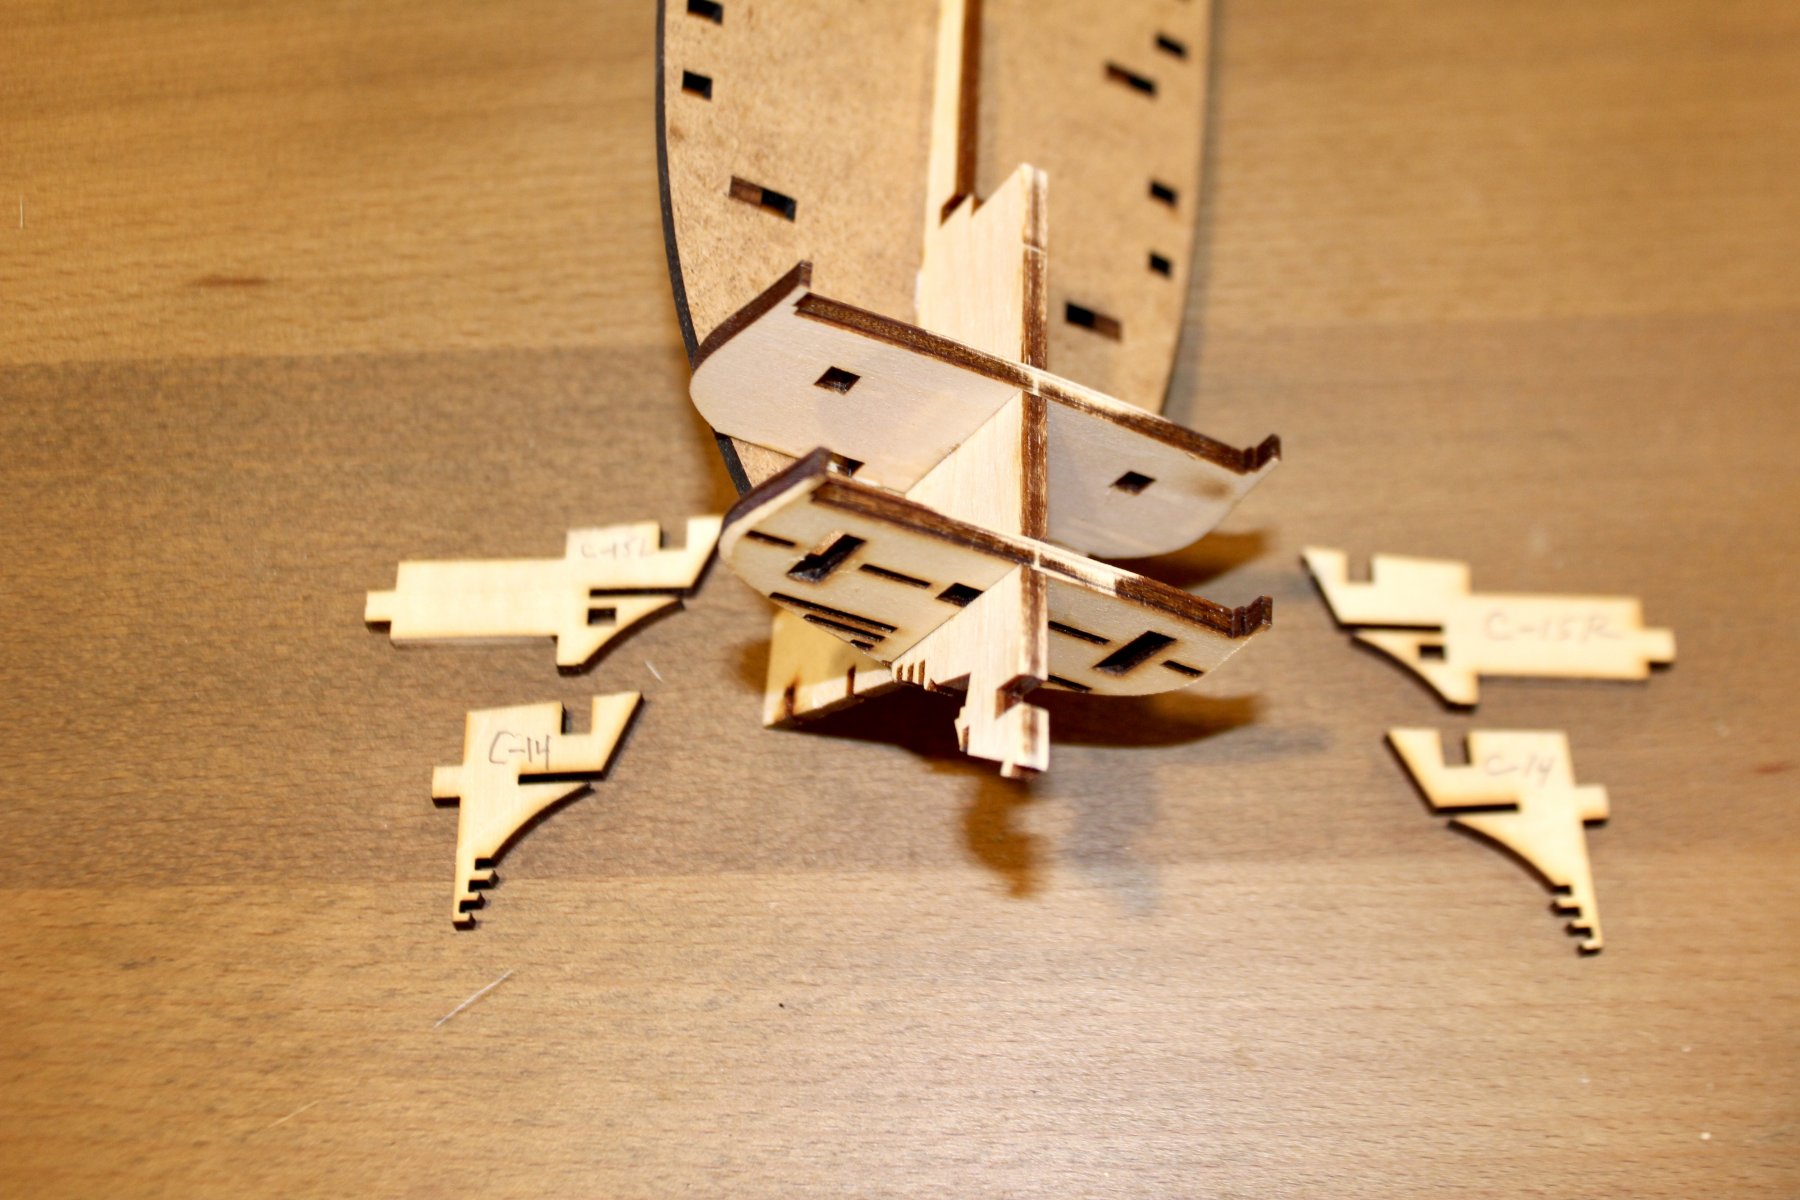
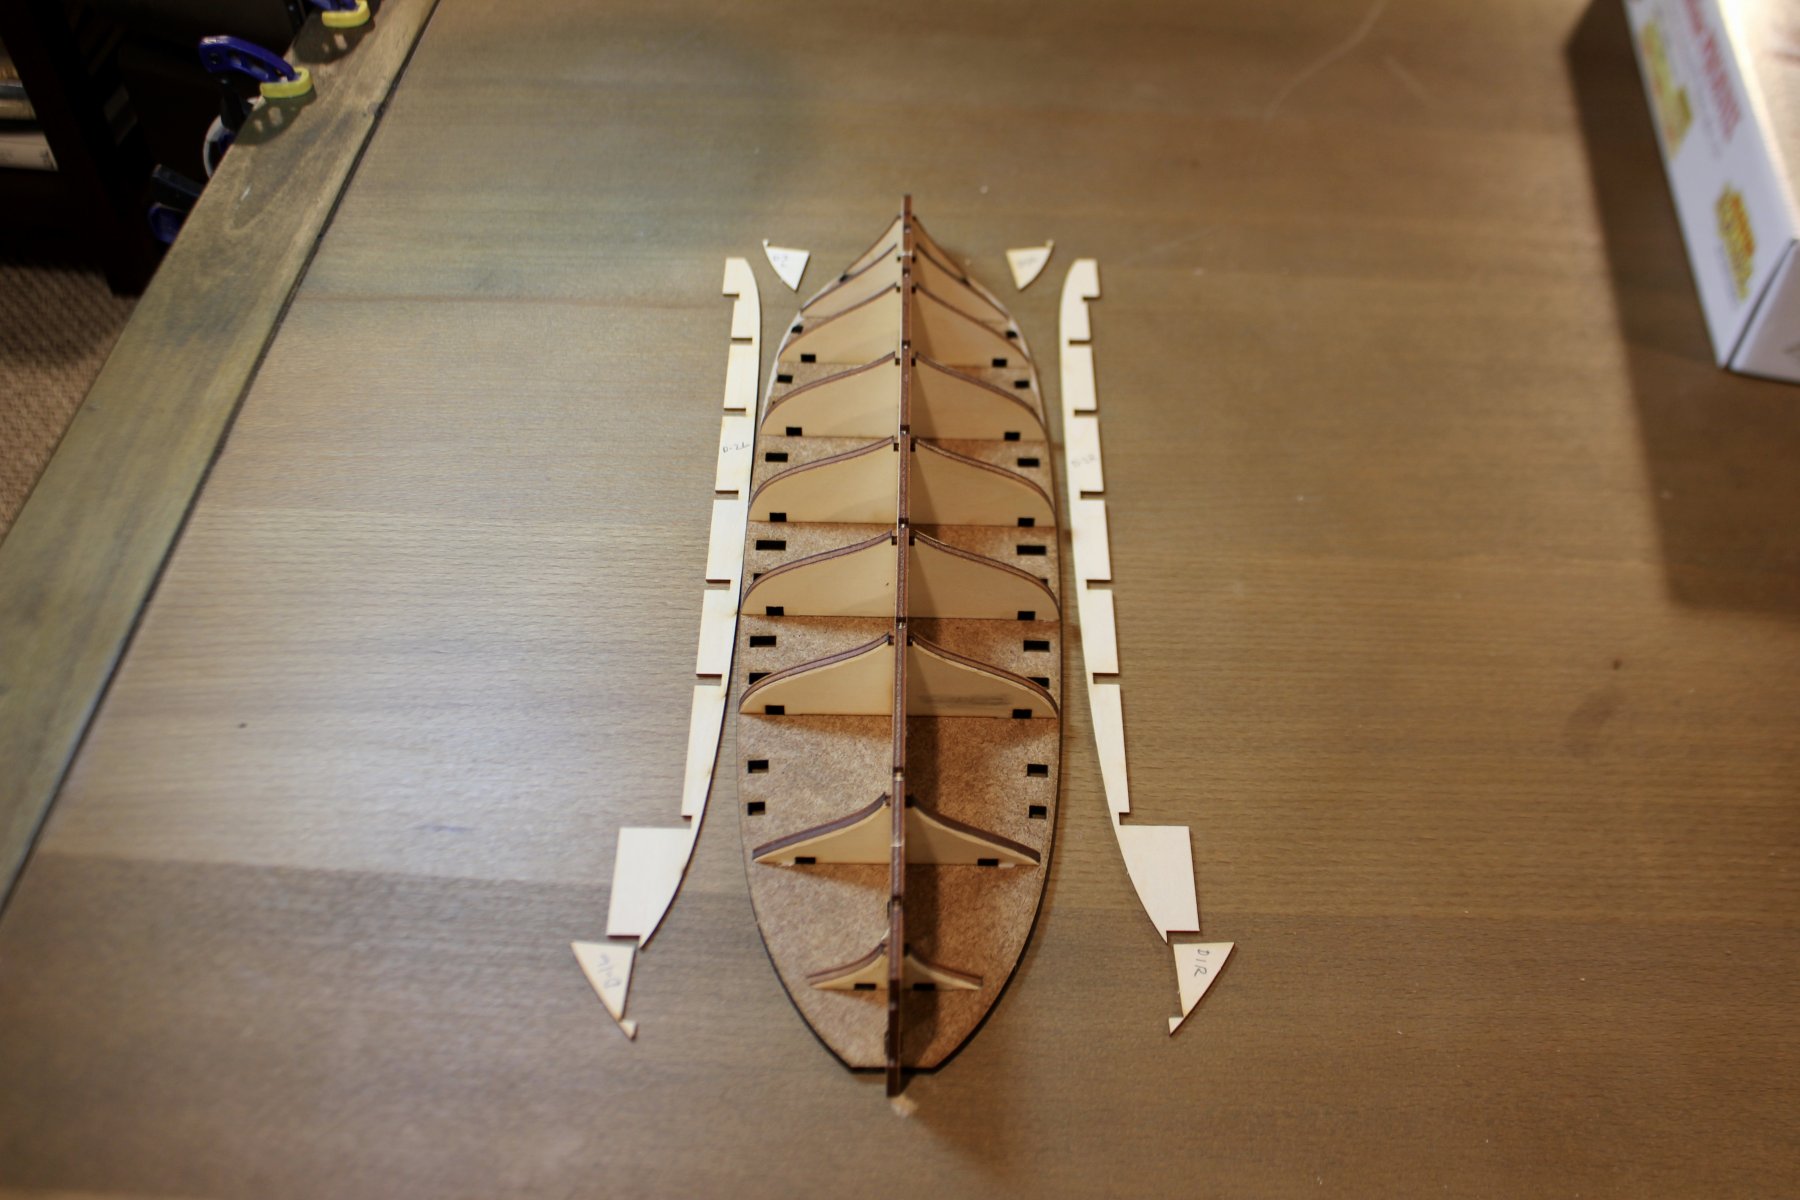
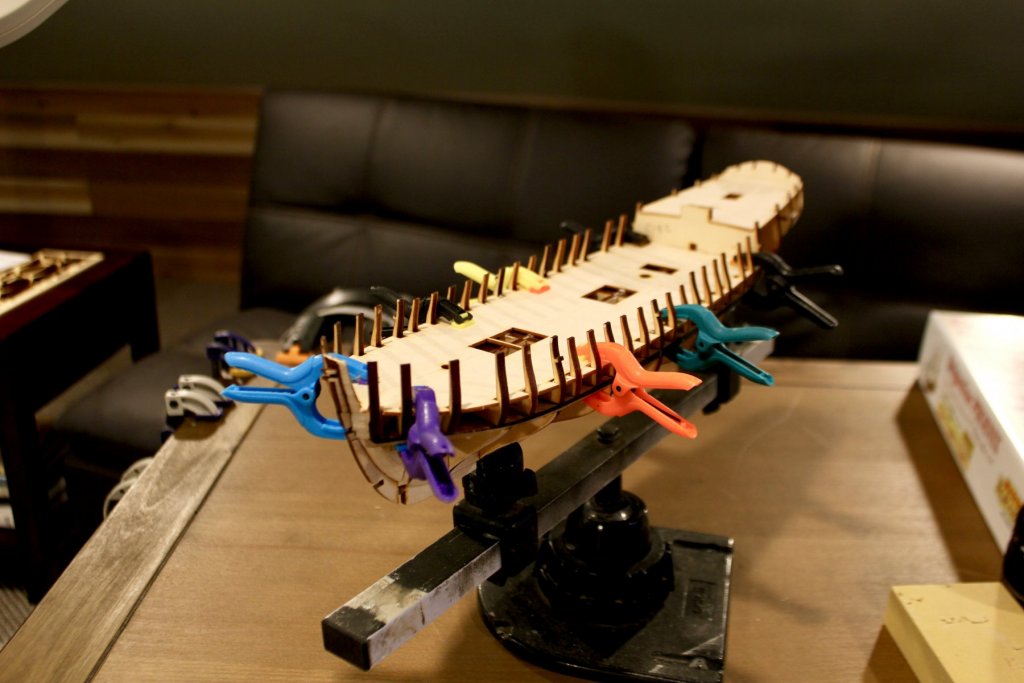
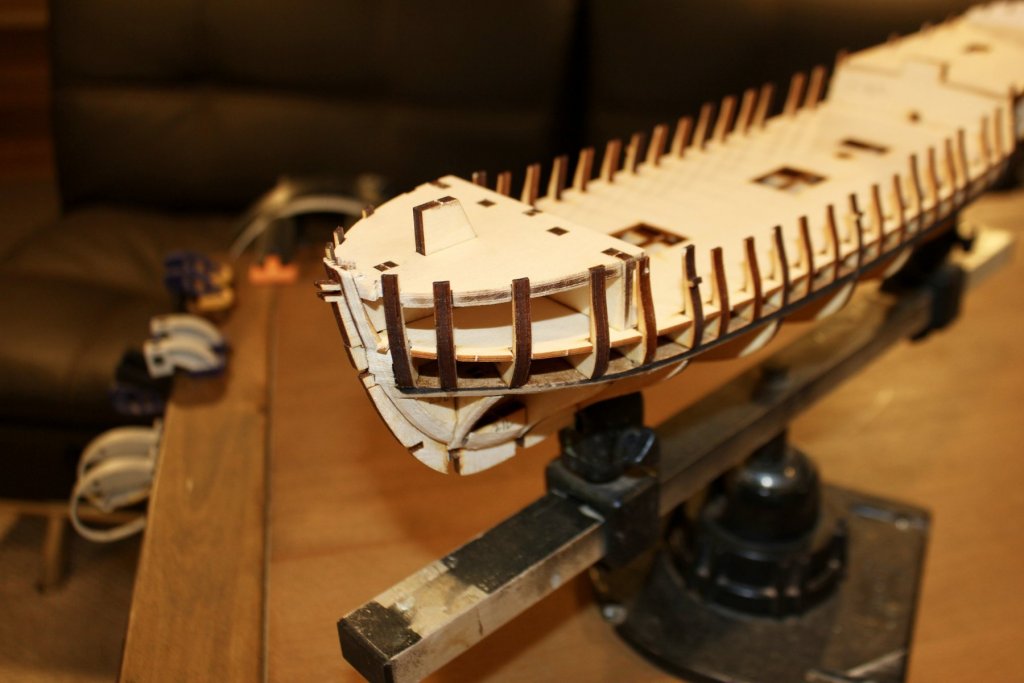
The decks and forward timbers are added next. During this operation you assemble a jig ( although it is not called this) to aid in lining up the forward timbers. It is called a conductor in the plans. The instructions have you remove it, wrap it in cellophane and reinstall after your timbers are aligned. I did this but really see zero reason. After the glue drys the forward timbers are really sturdy. Oh and they NEVER tell you to remove it.
-
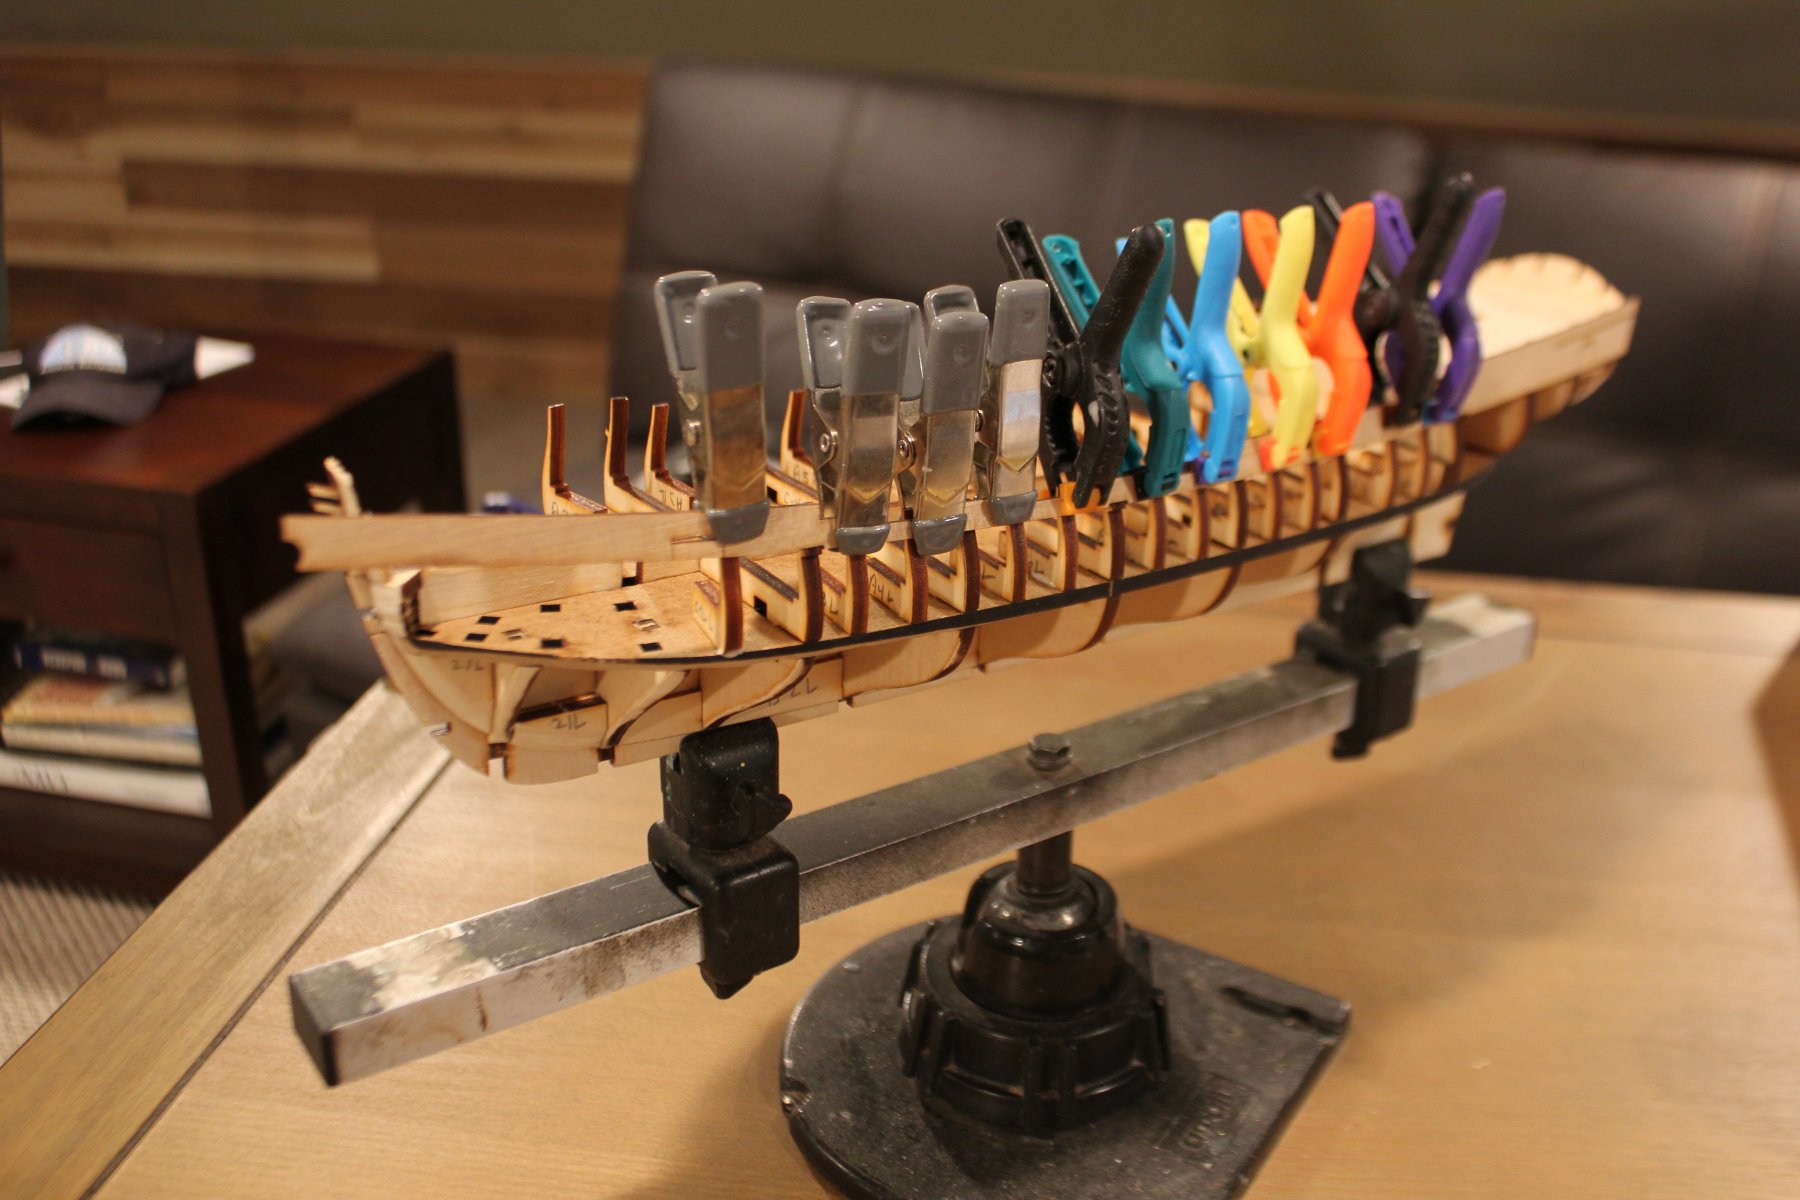
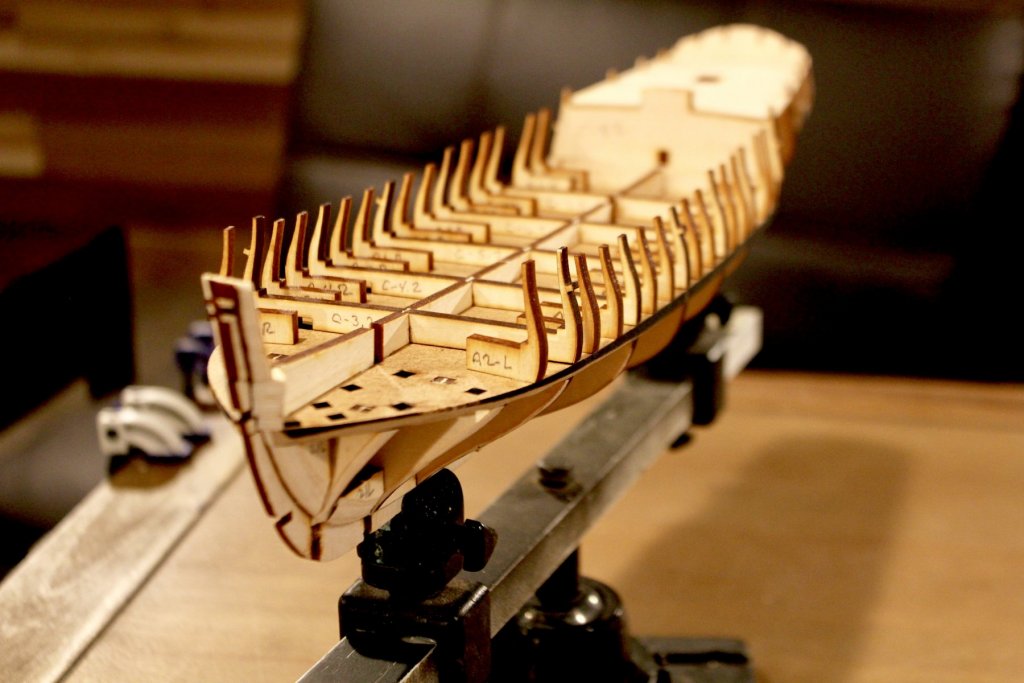
Weekly update Finished framing the hull Alignment of the bulkheads is accomplished by attaching E-1 to the top and then aligning the bulkheads to the gunport. E-1 rests on cutouts and stepson the bulkhead
-
One of the great benefits of the additional blocks comes during planking of the deck. Now you don’t have to be concerned about being over a bulkhead to attach decking planks as you have the entire surface for glue. I do this all the time, makes the build really sturdy.
-
I purchased the laser upgraded parts. I’ll have another update tomorrow.
-
Paying a teenager to do it is even better. You get Trenails, they learn a skill.
-
Thanks for the history Viggen I love the context. Amazed how close my Model matches the museum model as I was just adding color where I thought color should be.
- 28 replies
-
- 6
-

-
- cannon jolle
- master korabel
- (and 1 more)
-
Click on “more” at the top of the page Go to Article data bases. Go to planking. covers all your questions.
-
I am following the instructions so far. I have found one hiccup. You have to remove a chunk of the main upper support from the slot B9 goes in as it blocks the entire slot, but that is why we have Dremels. This is a nice little kit BUT you will learn ZERO skills that you don’t already have. Everything is cut so precise and fits so snug it goes really fast. I stop to let the glue set up otherwise I would be planking this puppy already. The figuring out what exactly they mean in the English translation can be frustrating. When I was mounting C9 they mentioned setting in a beam as in figure such and such. A beam means one thing to me a square chunk of wood, to them I finally figured out it was the upper support. I went through the box, examined each figure, tried to figure out where this elusive beam would go. Took a half an hour to settle on the upper support.
-
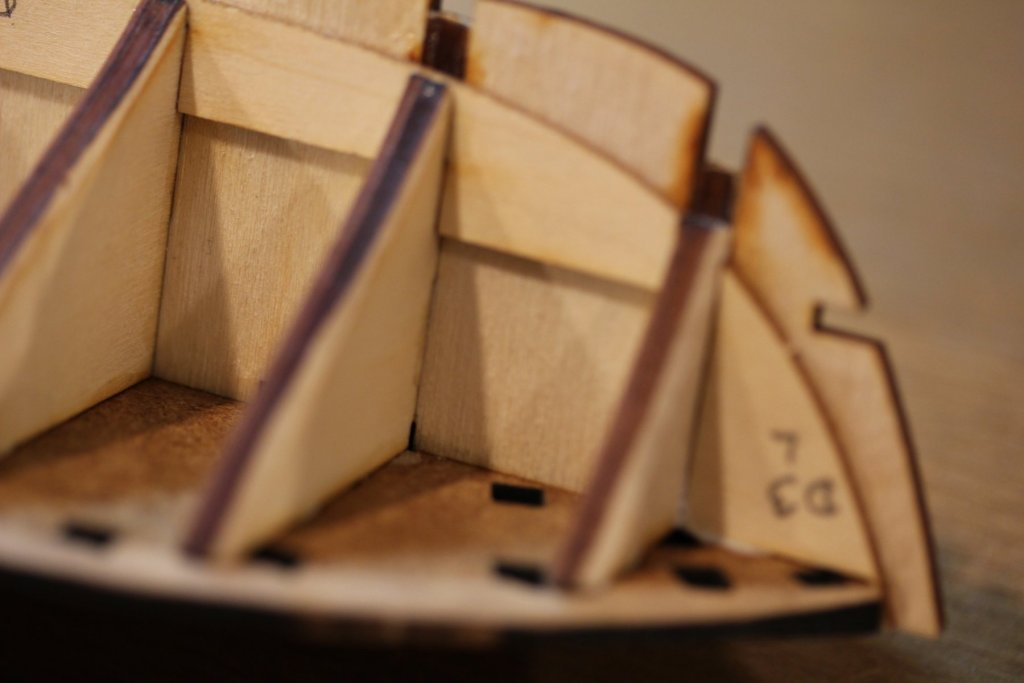
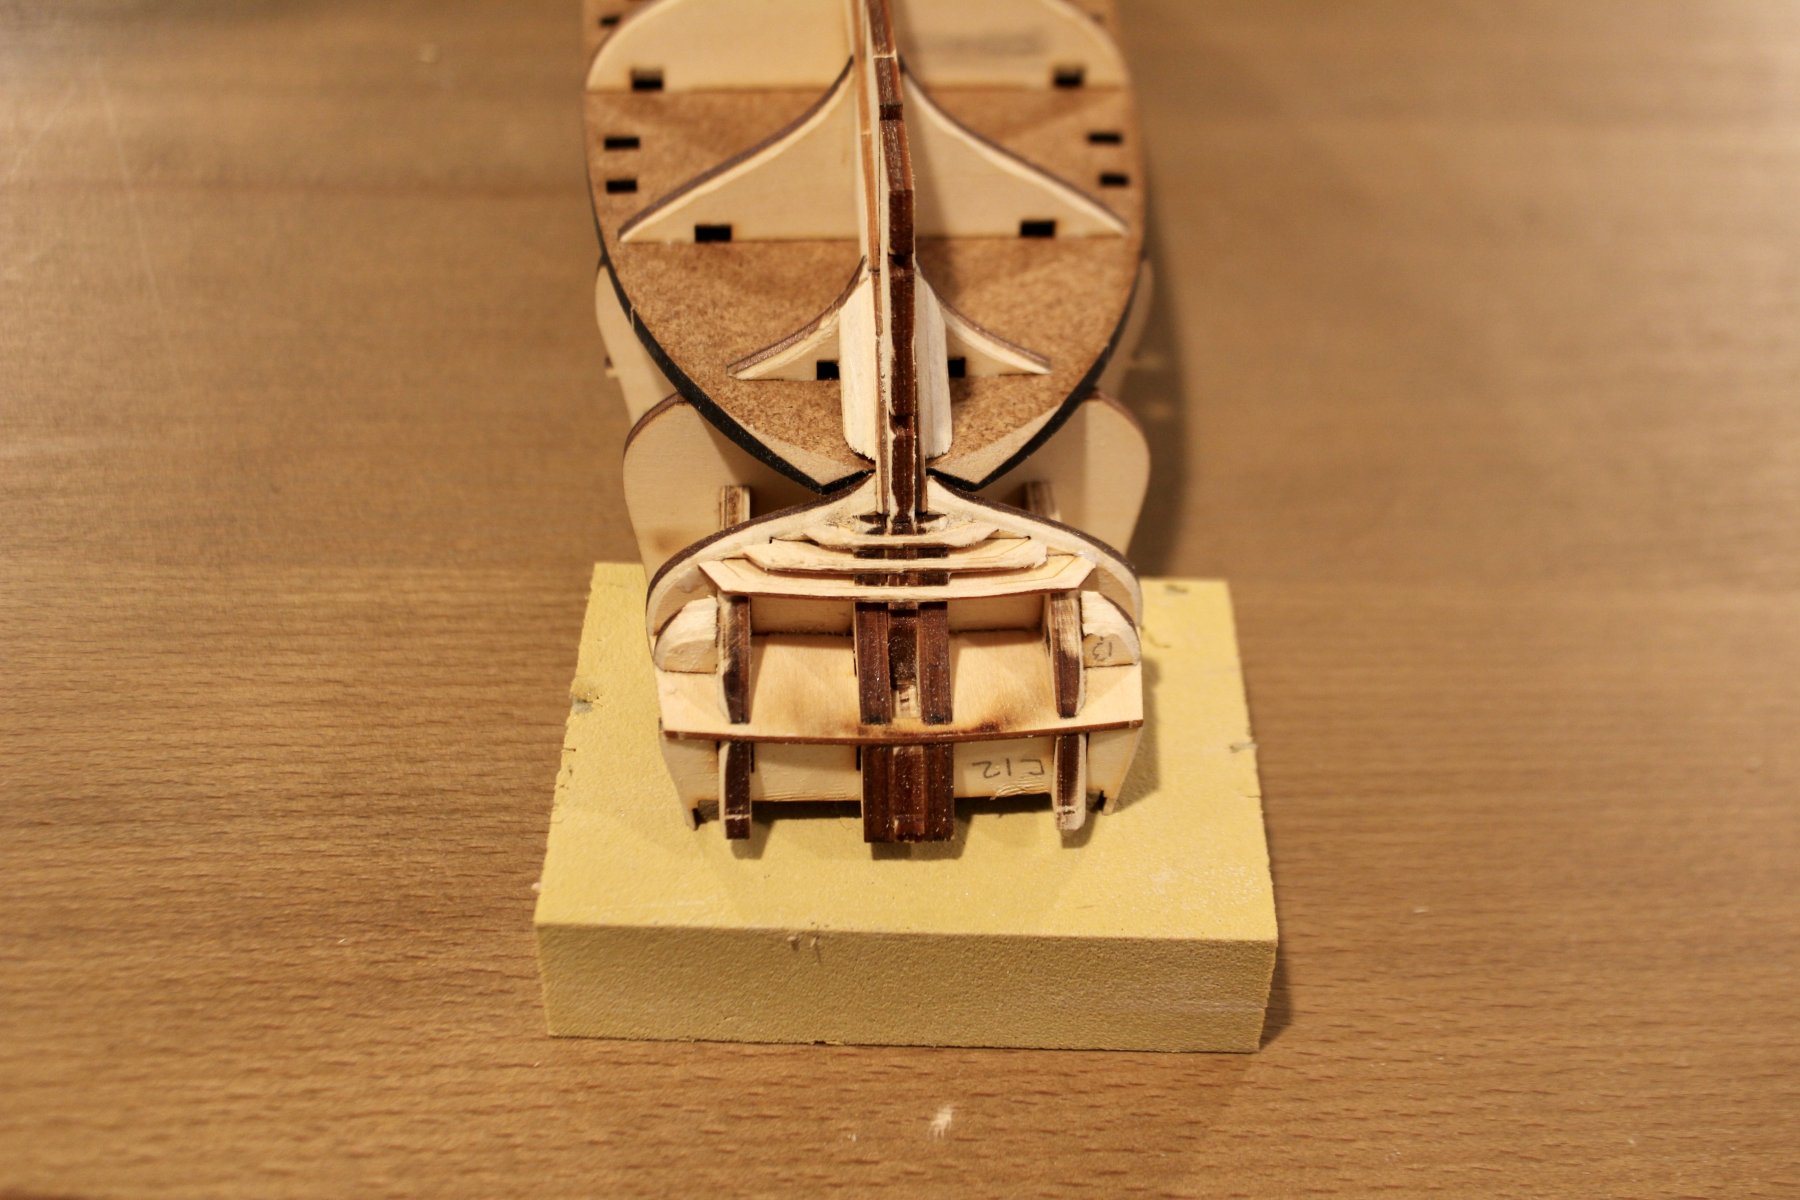
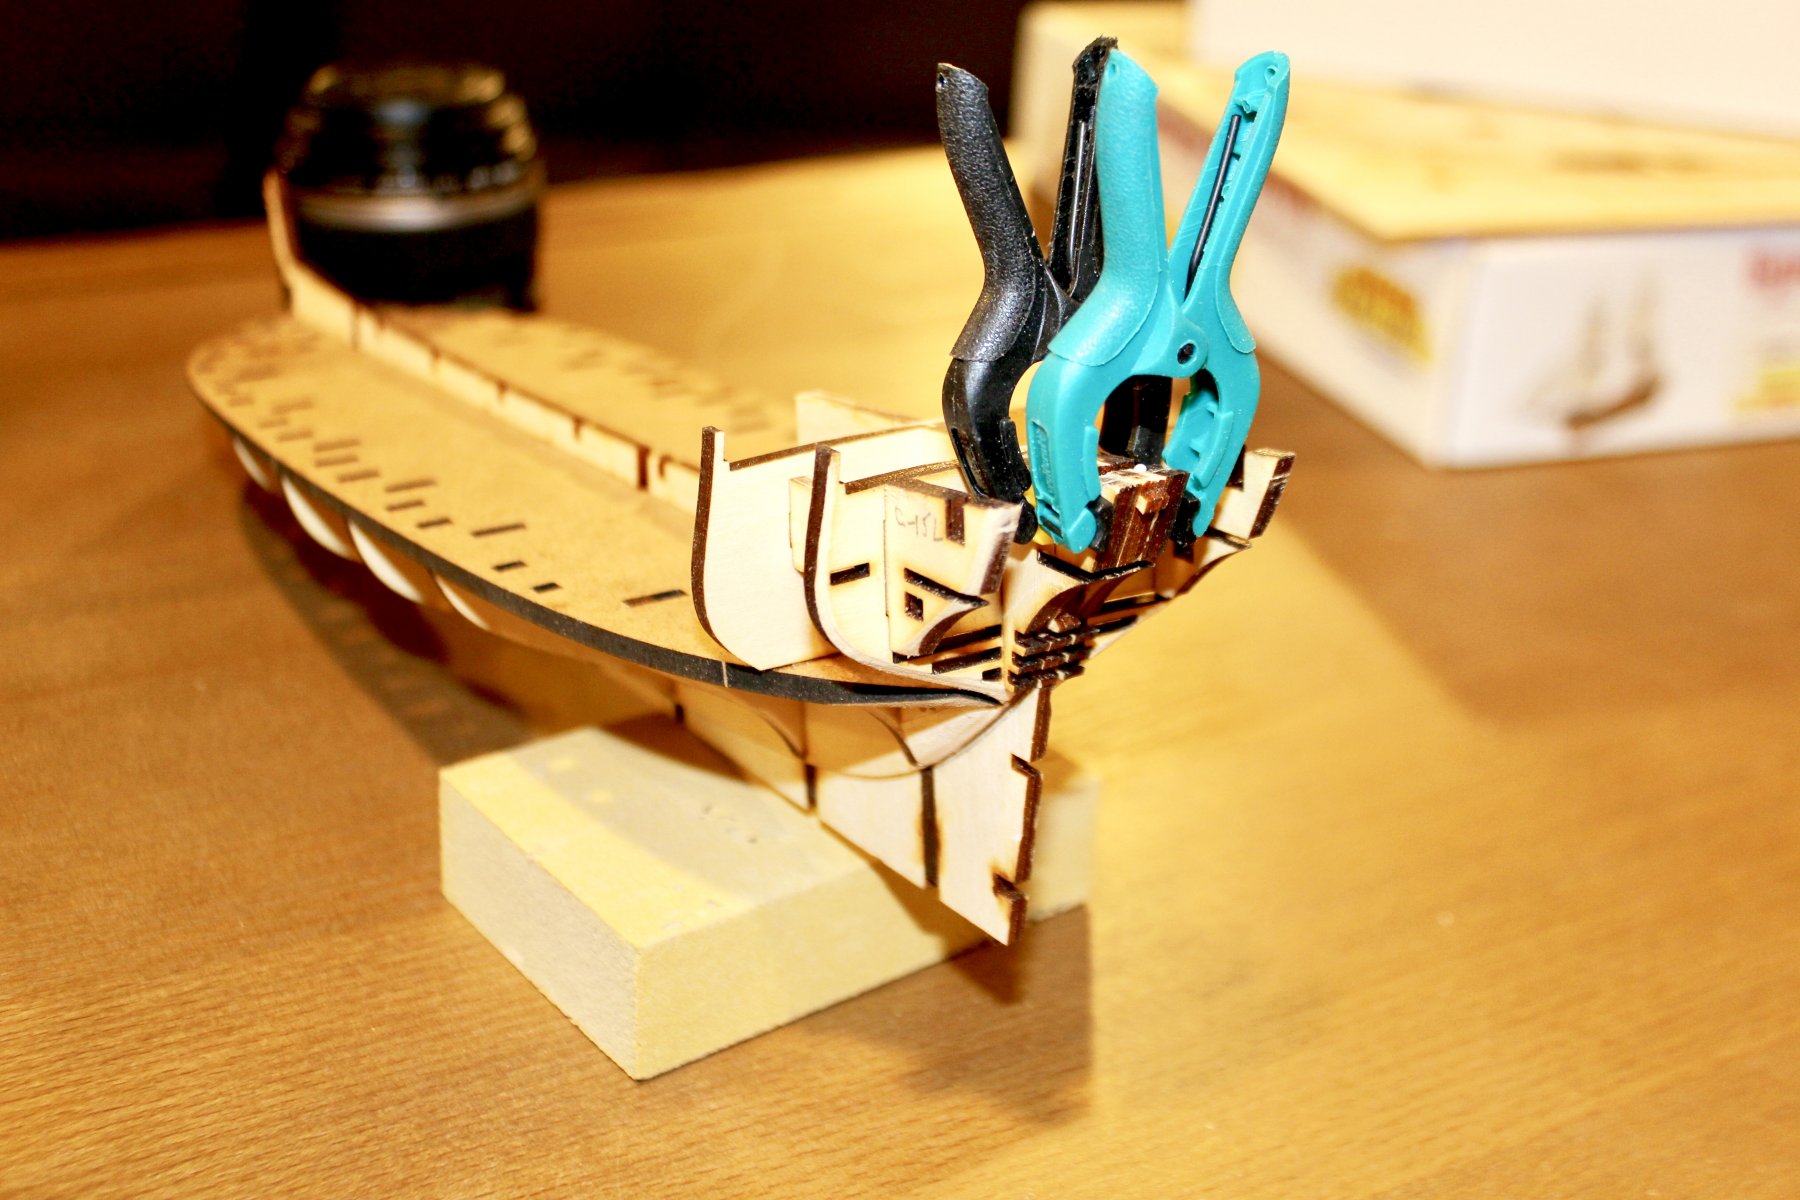
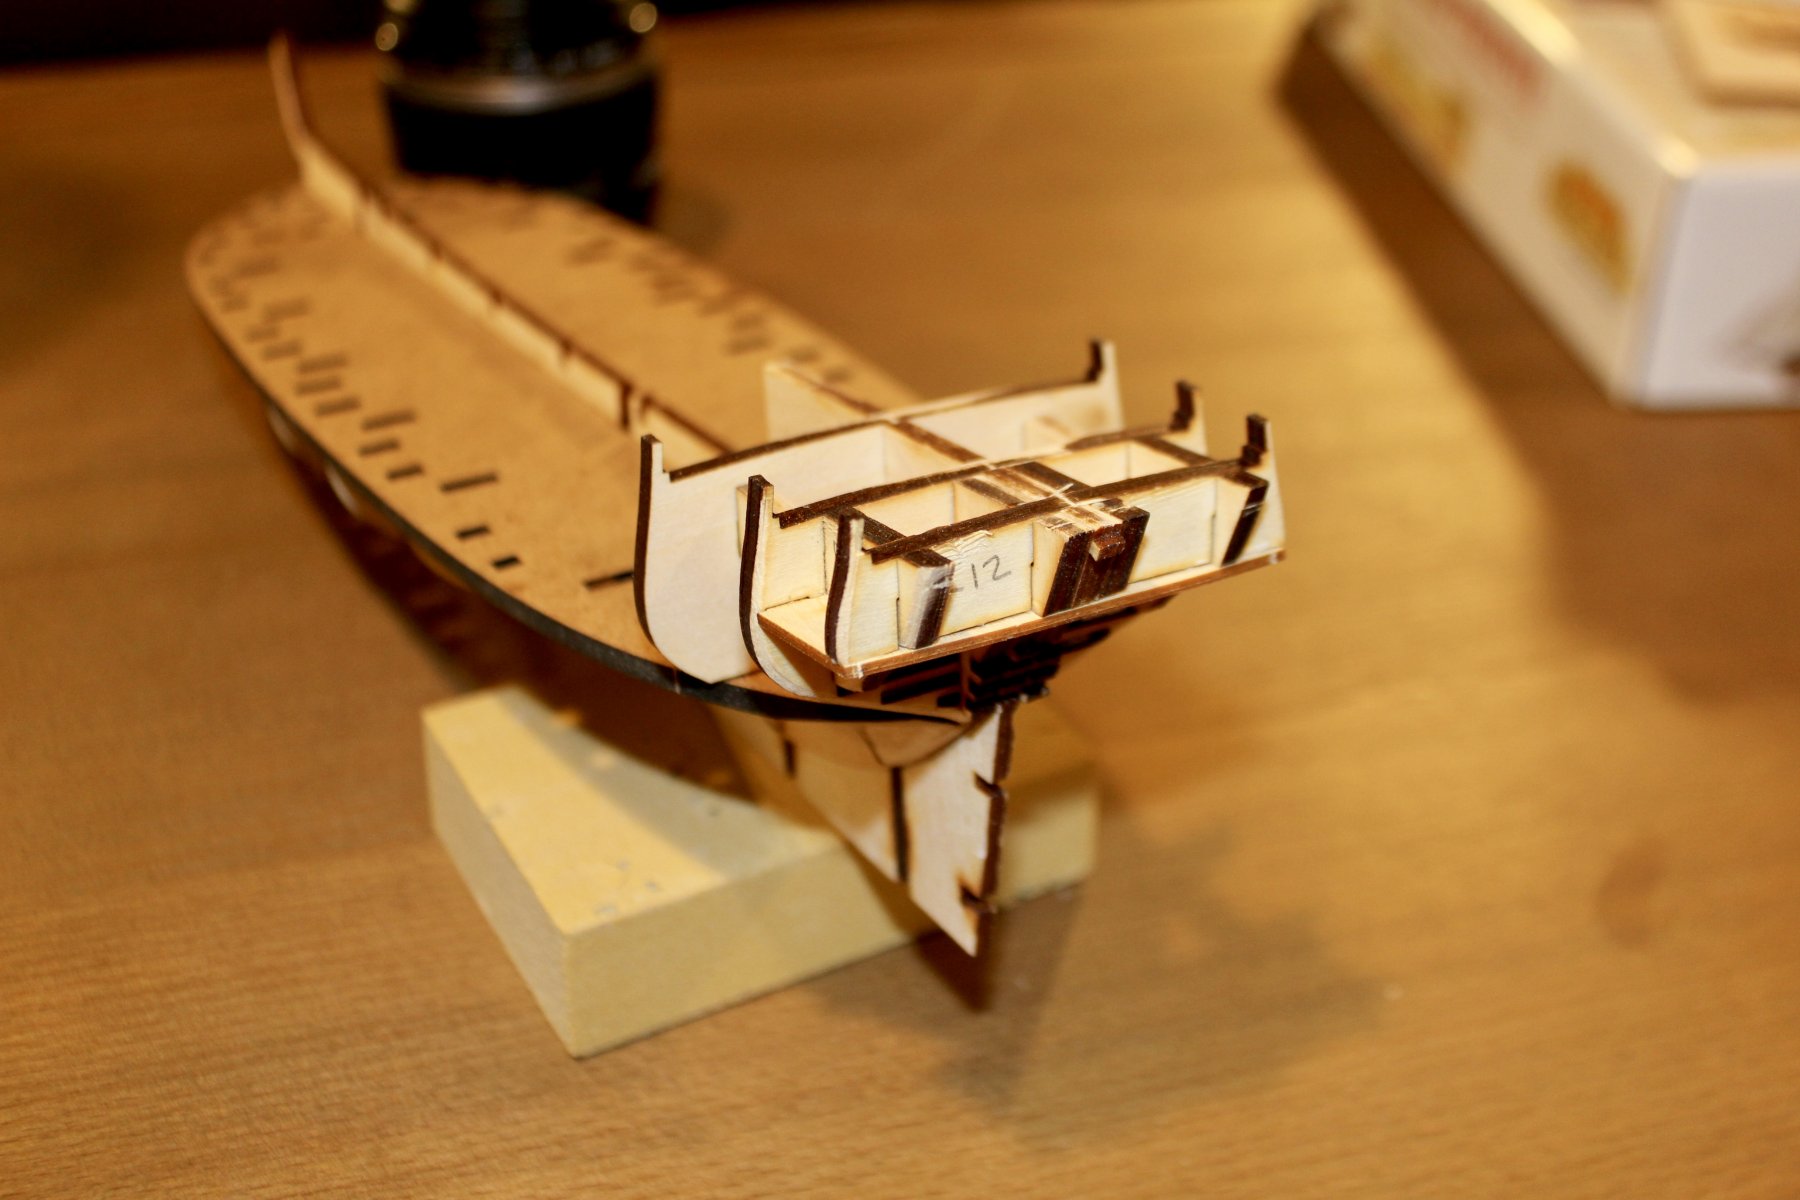
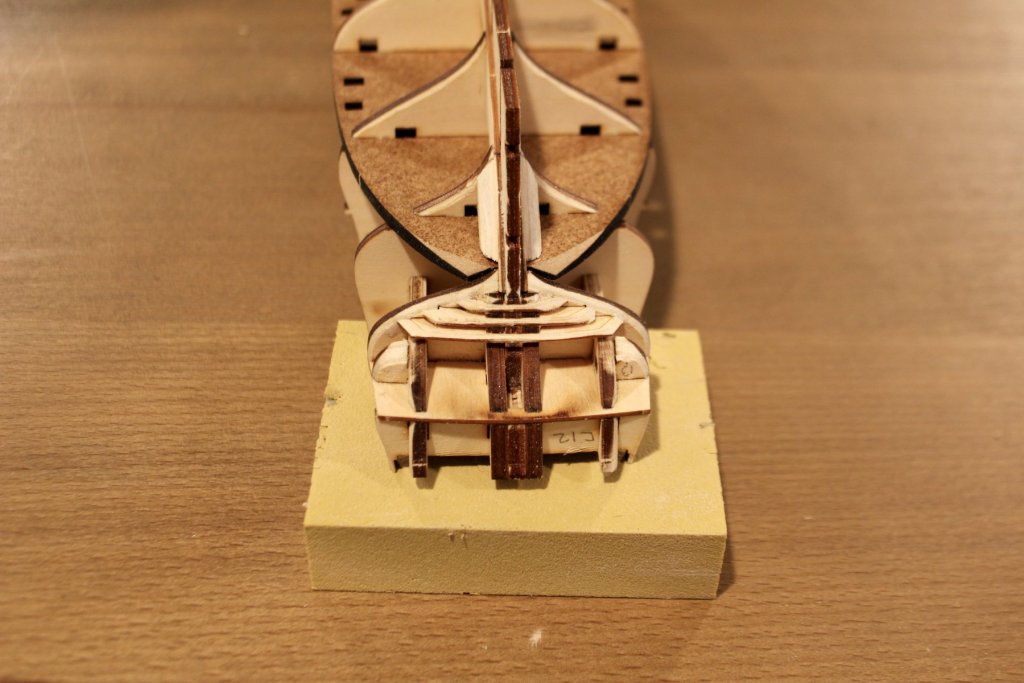
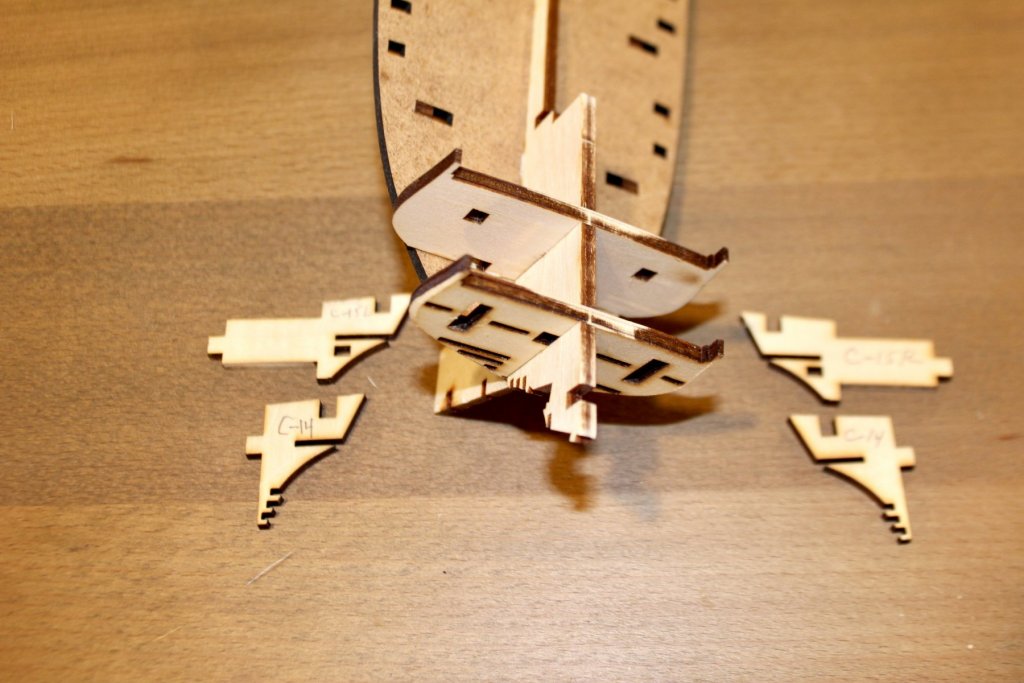
Counter frame work.
-
Today I worked on the Stern Assembly and the counter. Again all the parts fit nice and snug.


-
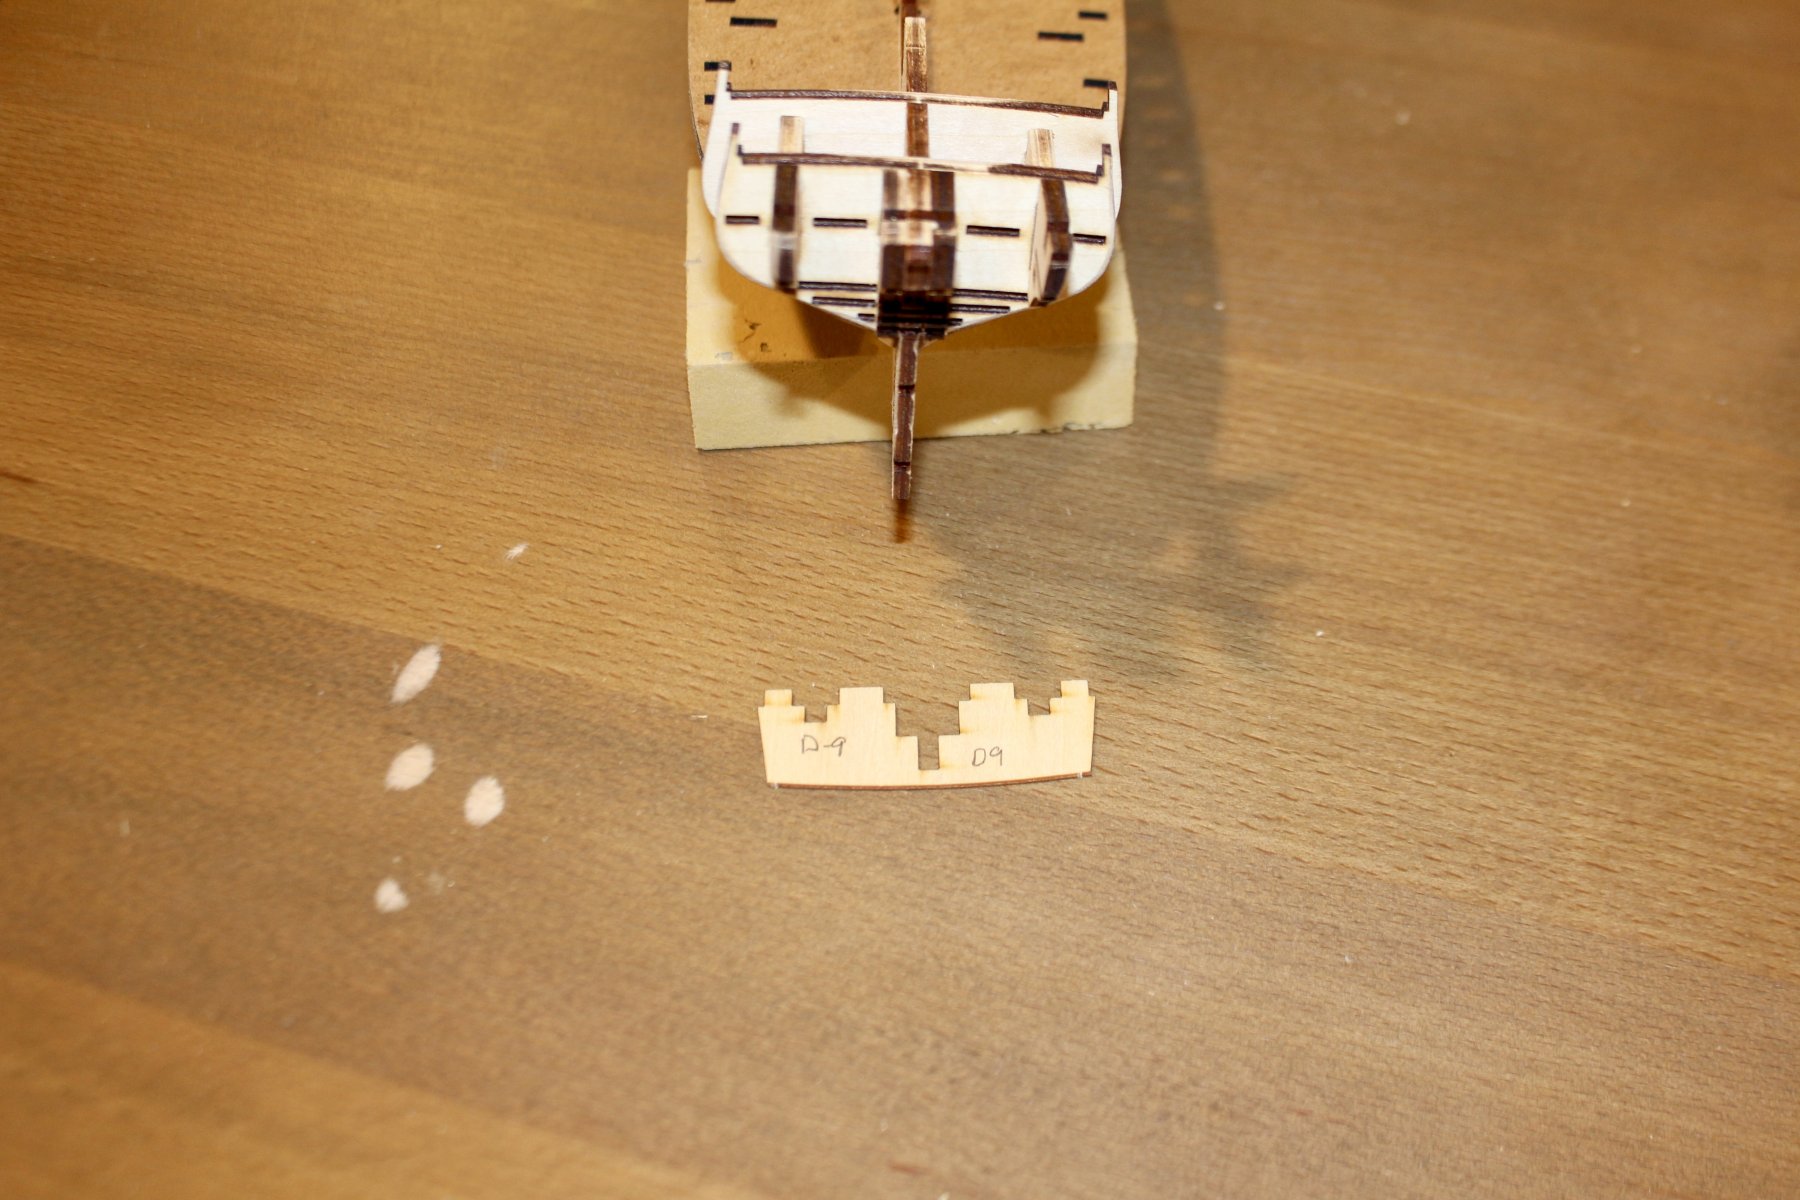
Don't know why the photos are out of order, not the way I uploaded them.
-
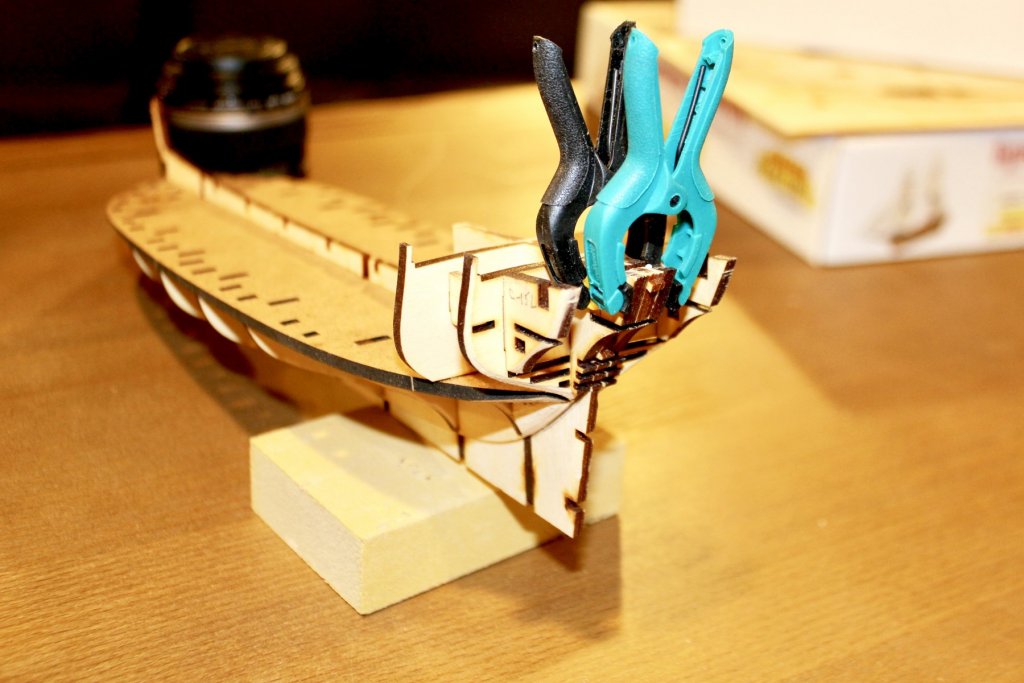
The last thing I did today Lou was add the Bow and stern fillers and get a rough fairing sand done.
-
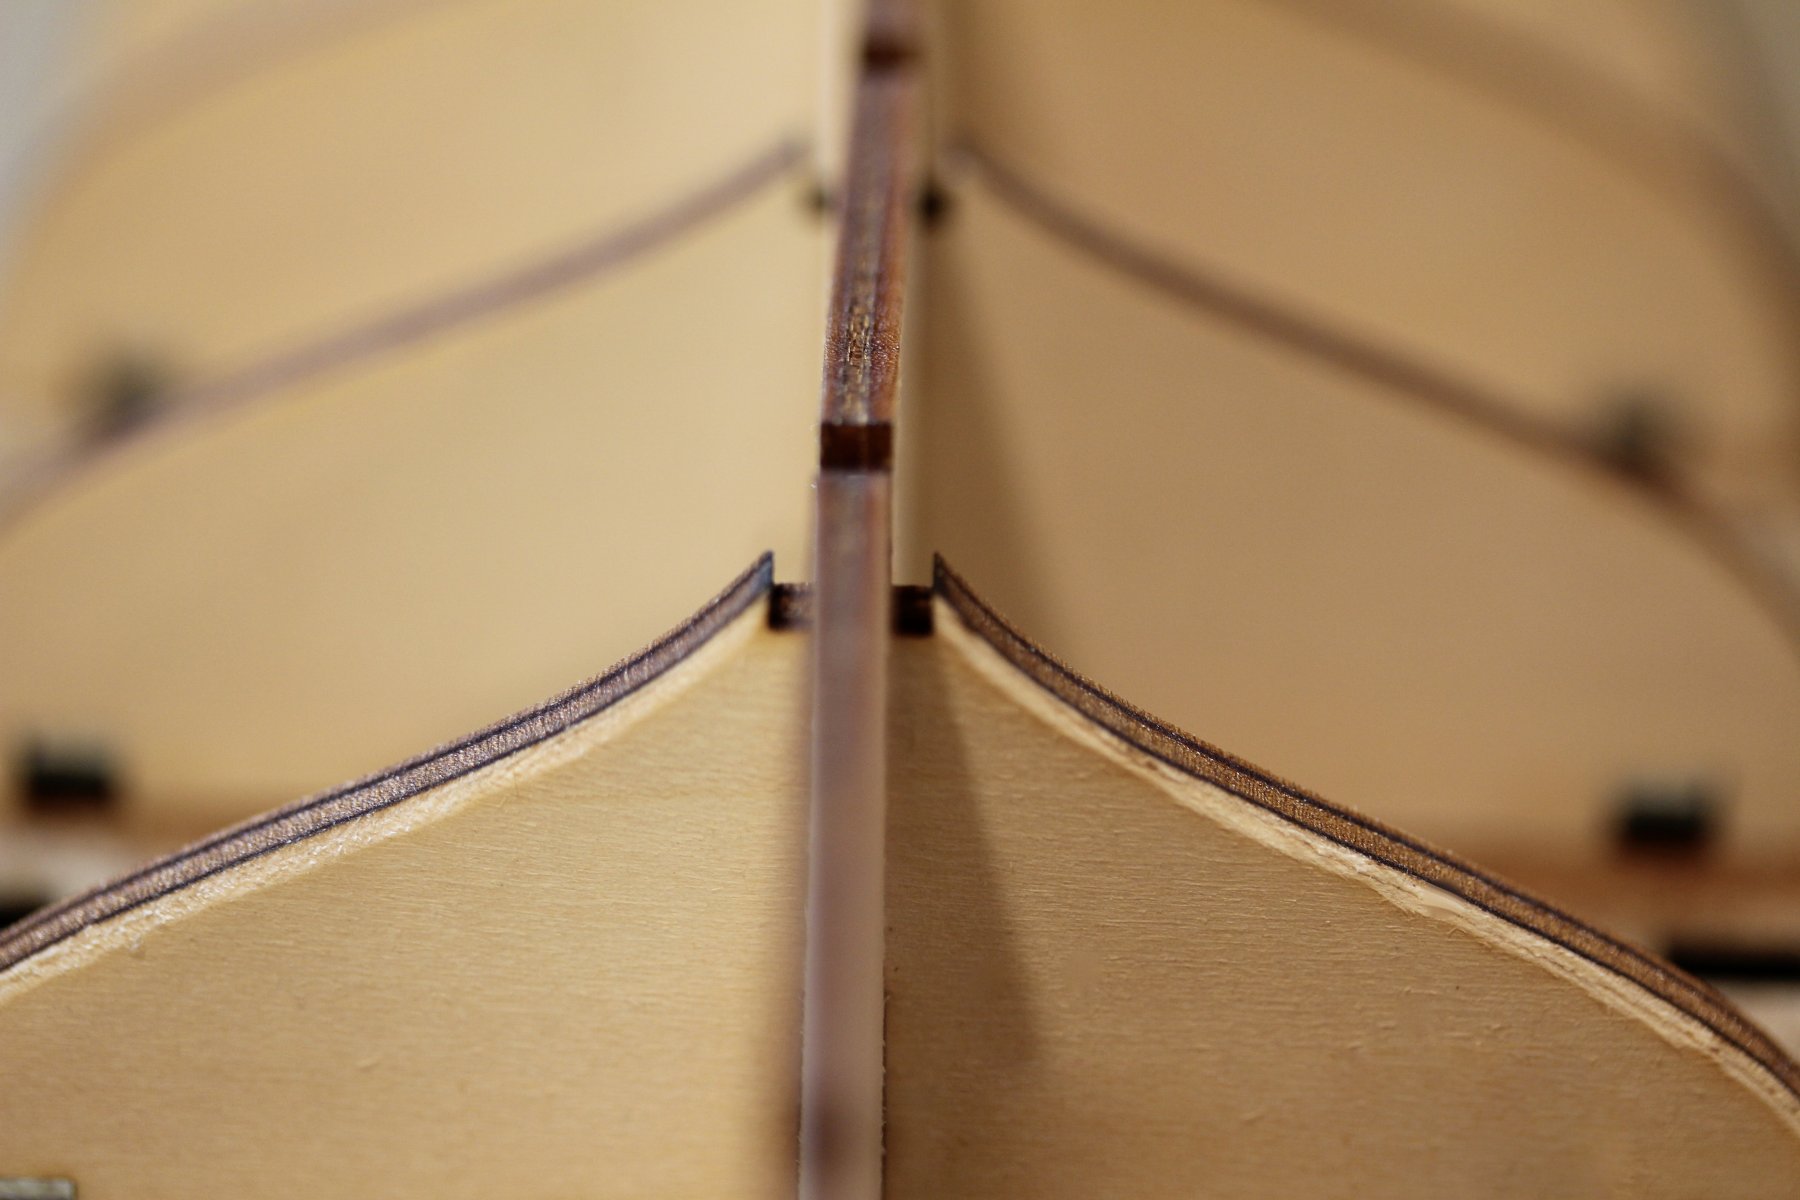
No need to carve a bearding line as it is formed by adding pieces D-1 through D-3 into slots left between the lower bulkheads and the bulkhead former.