
Jim Rogers
-
Posts
1,381 -
Joined
-
Last visited
Content Type
Profiles
Forums
Gallery
Events
Everything posted by Jim Rogers
-
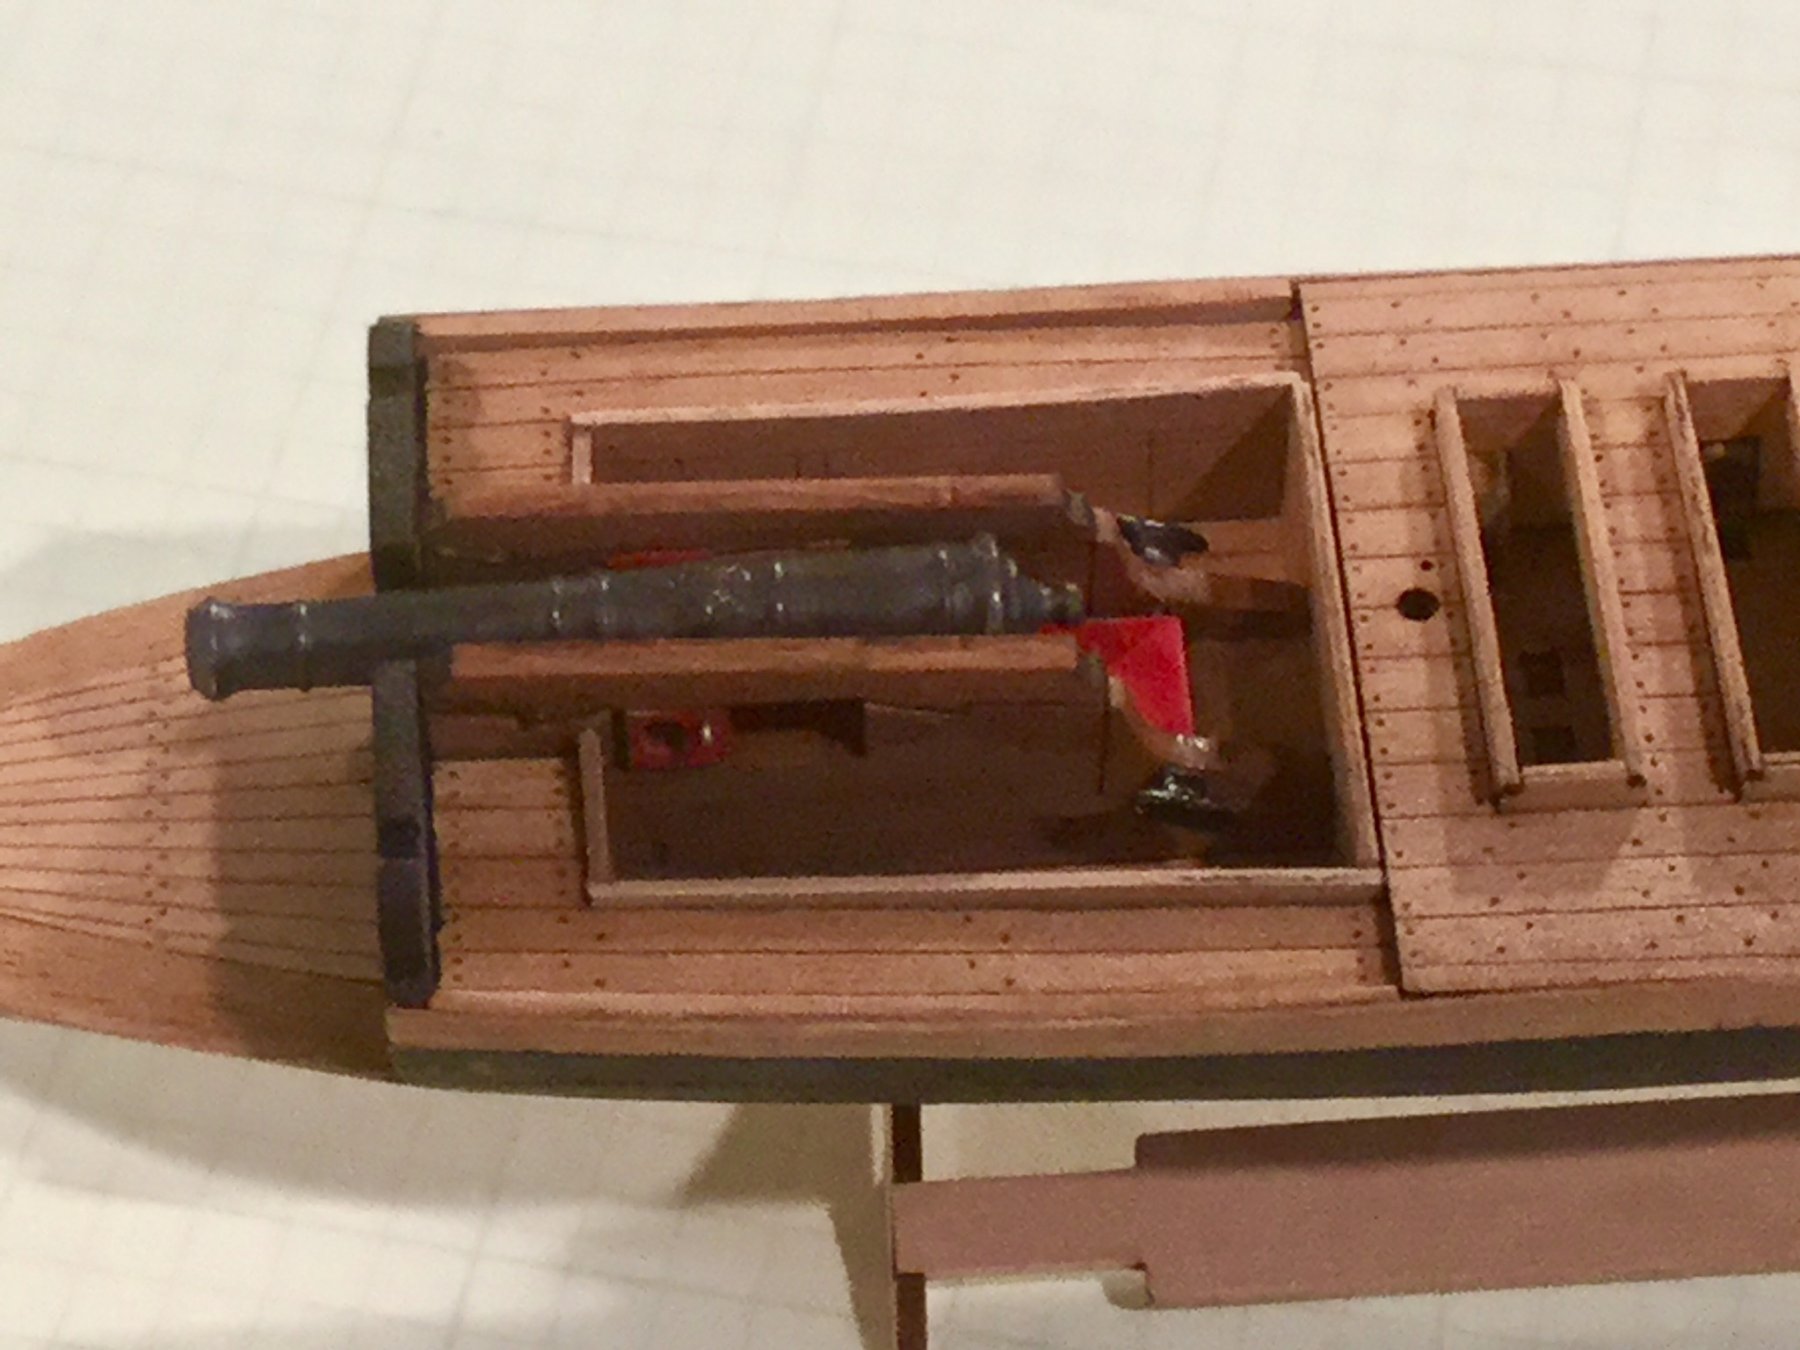
The boat was designed this way. Cannon pointed aft, boat designed to fight in skinny fiords and as you point out probably as a bombard platform.
- 28 replies
-
- 6
-

-
- cannon jolle
- master korabel
- (and 1 more)
-
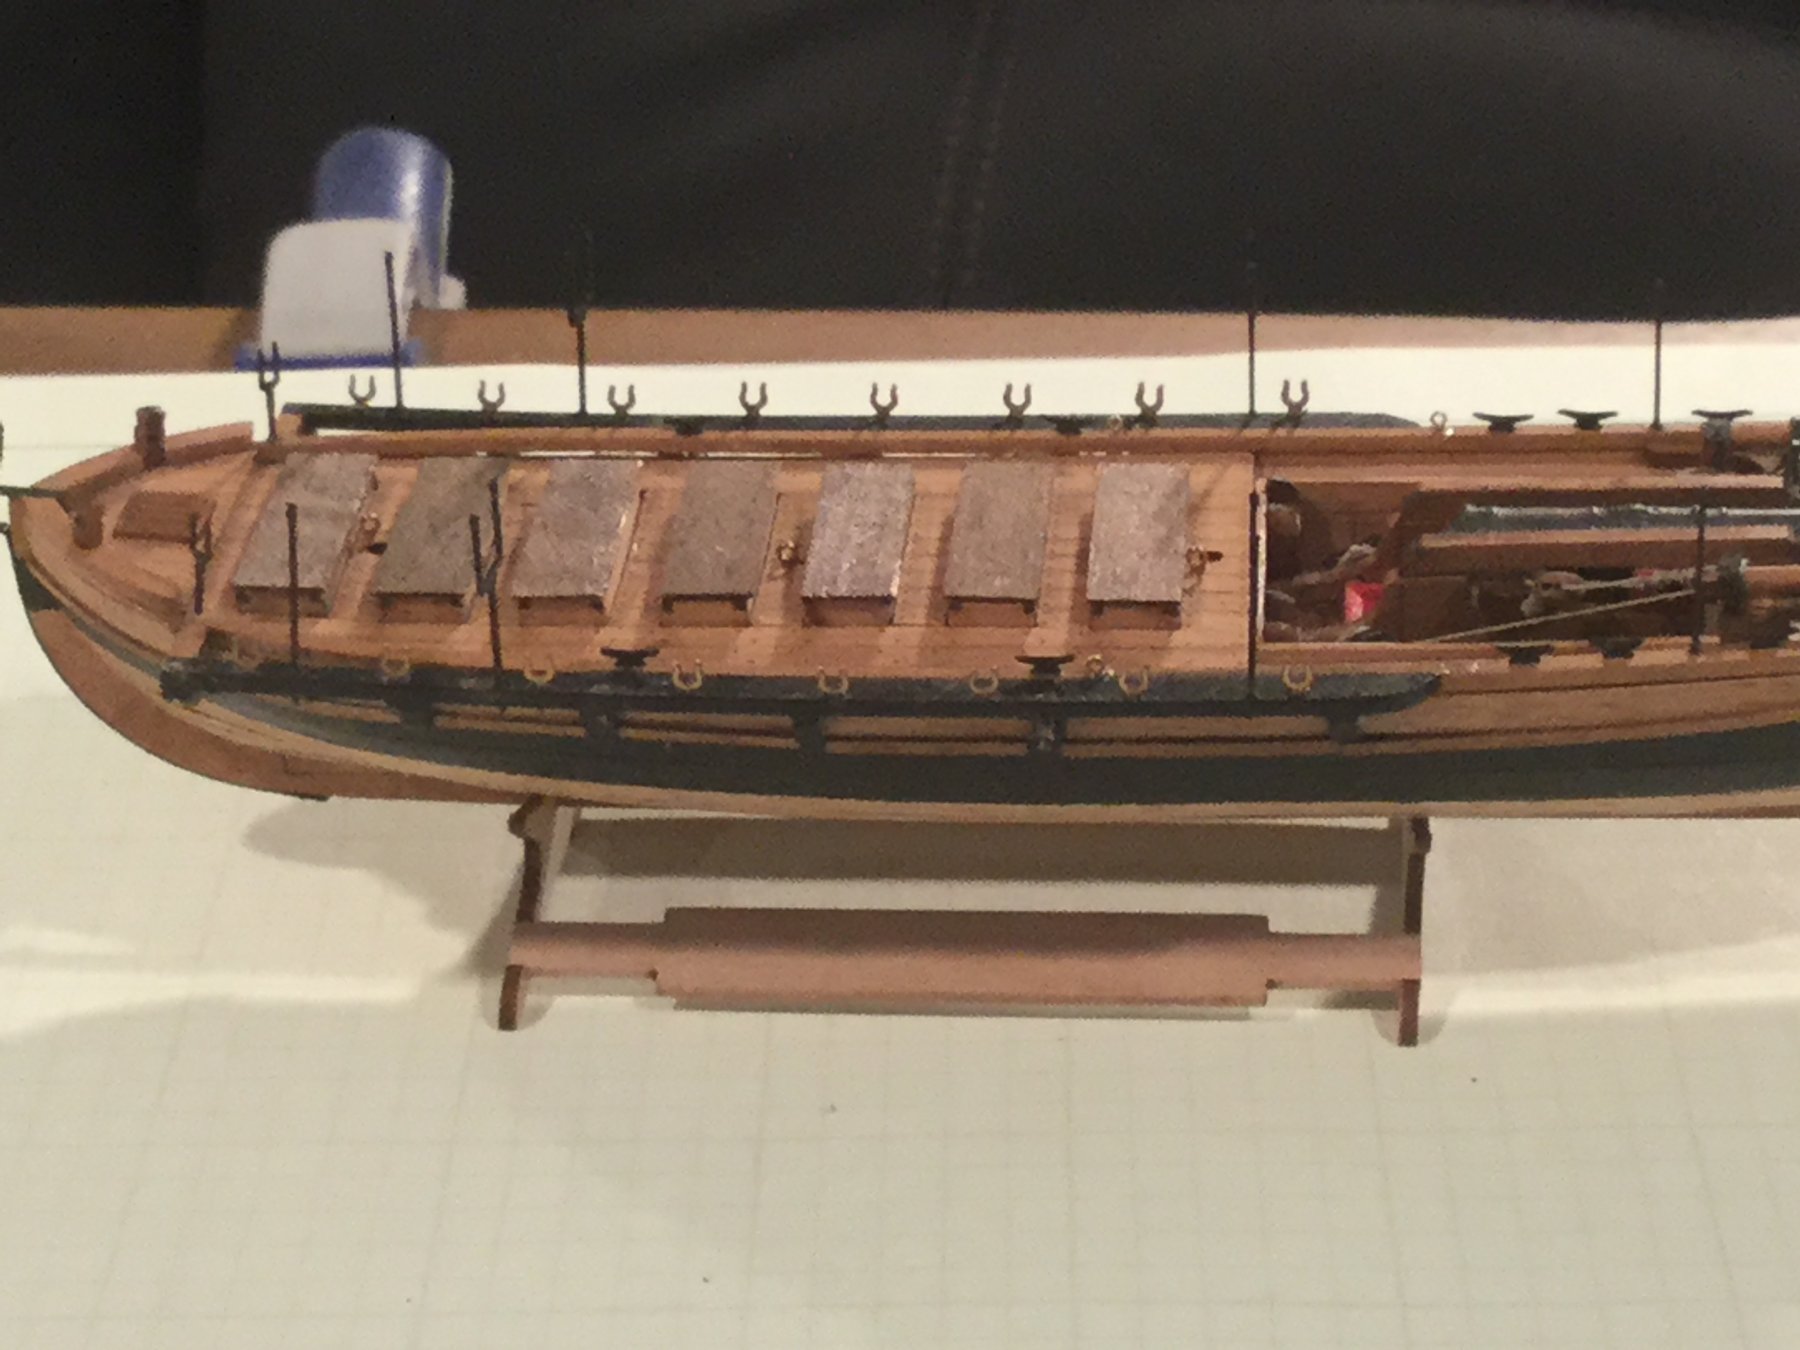
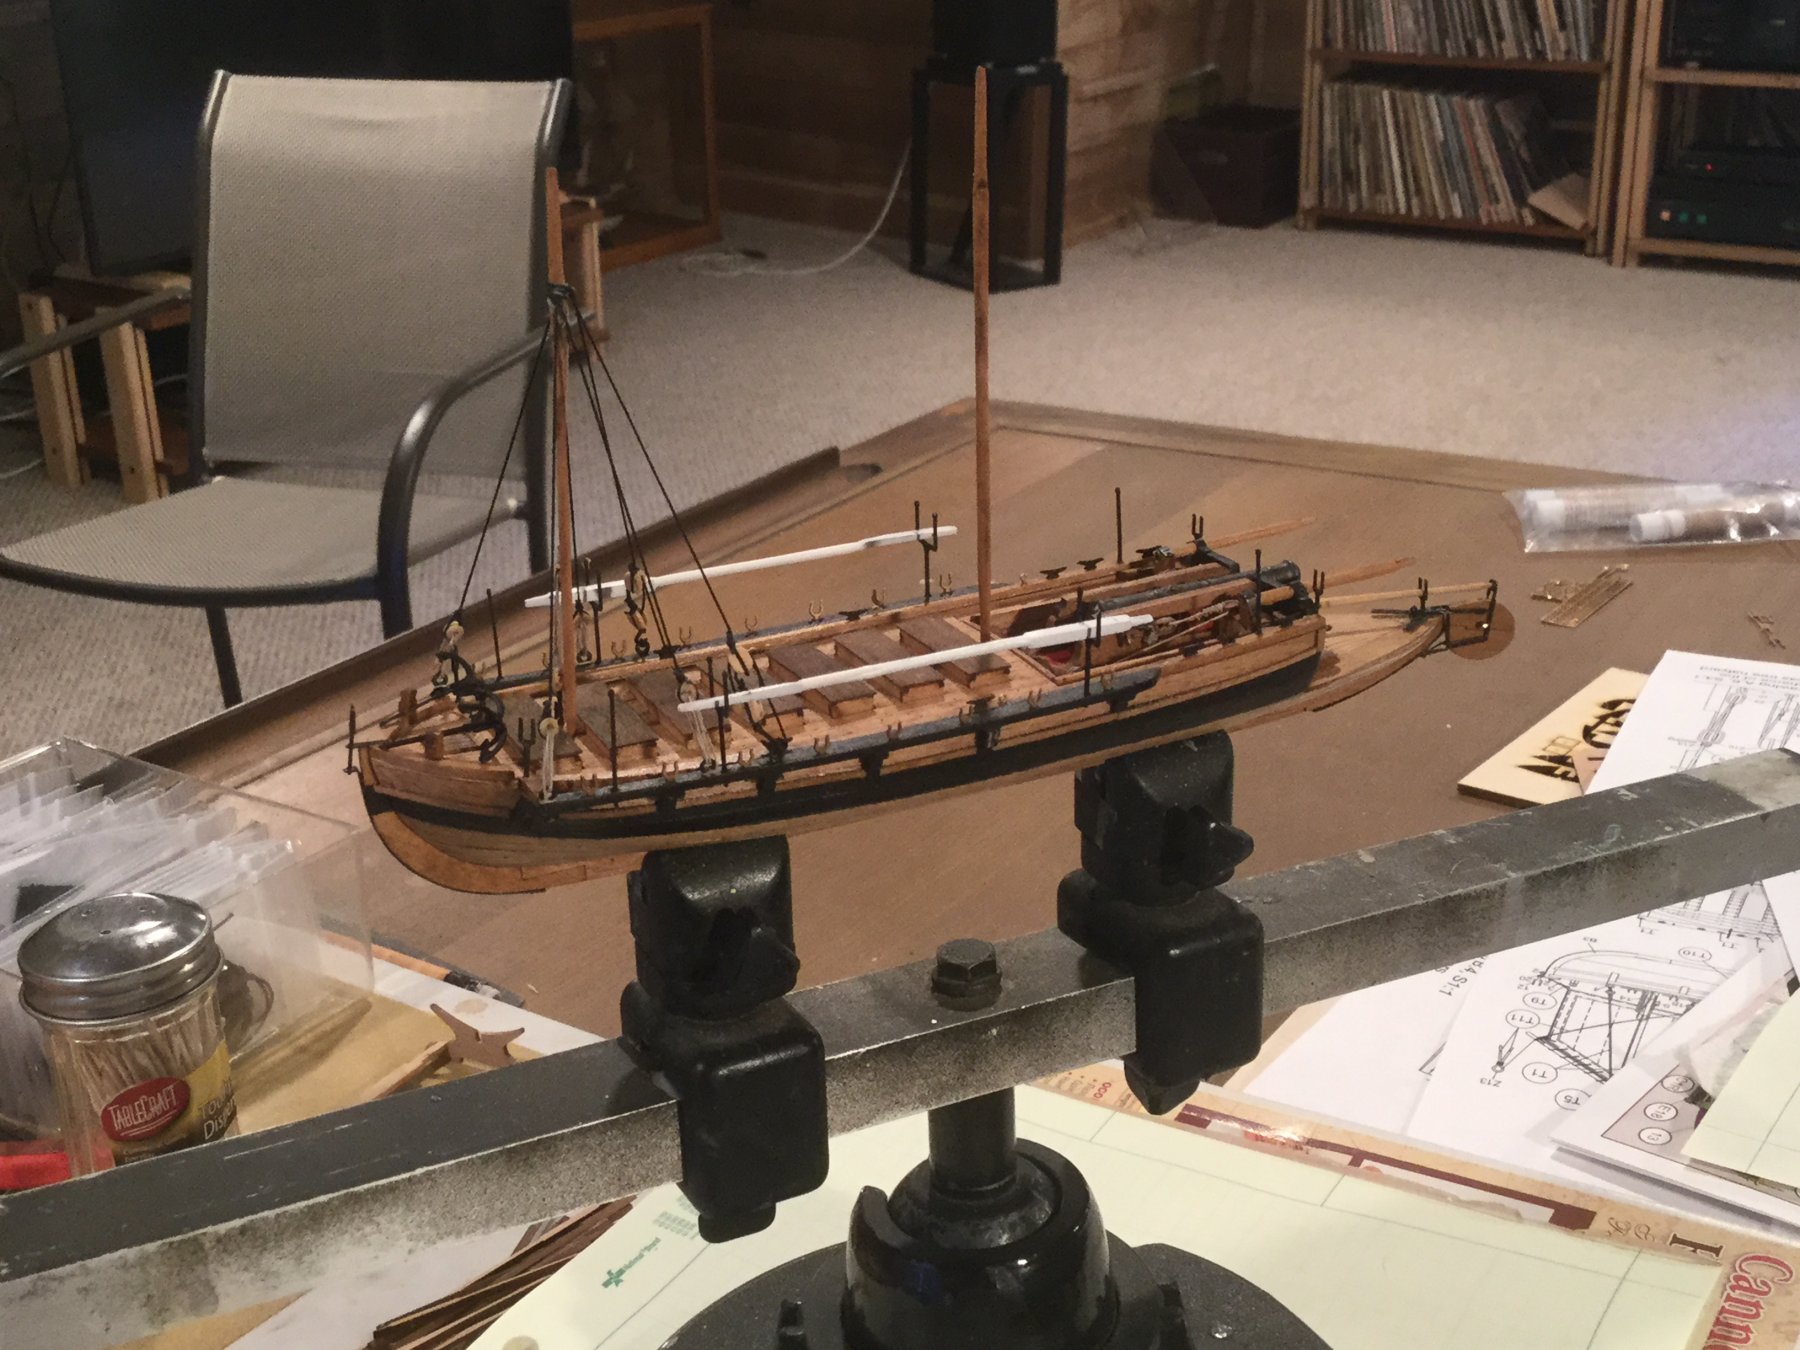
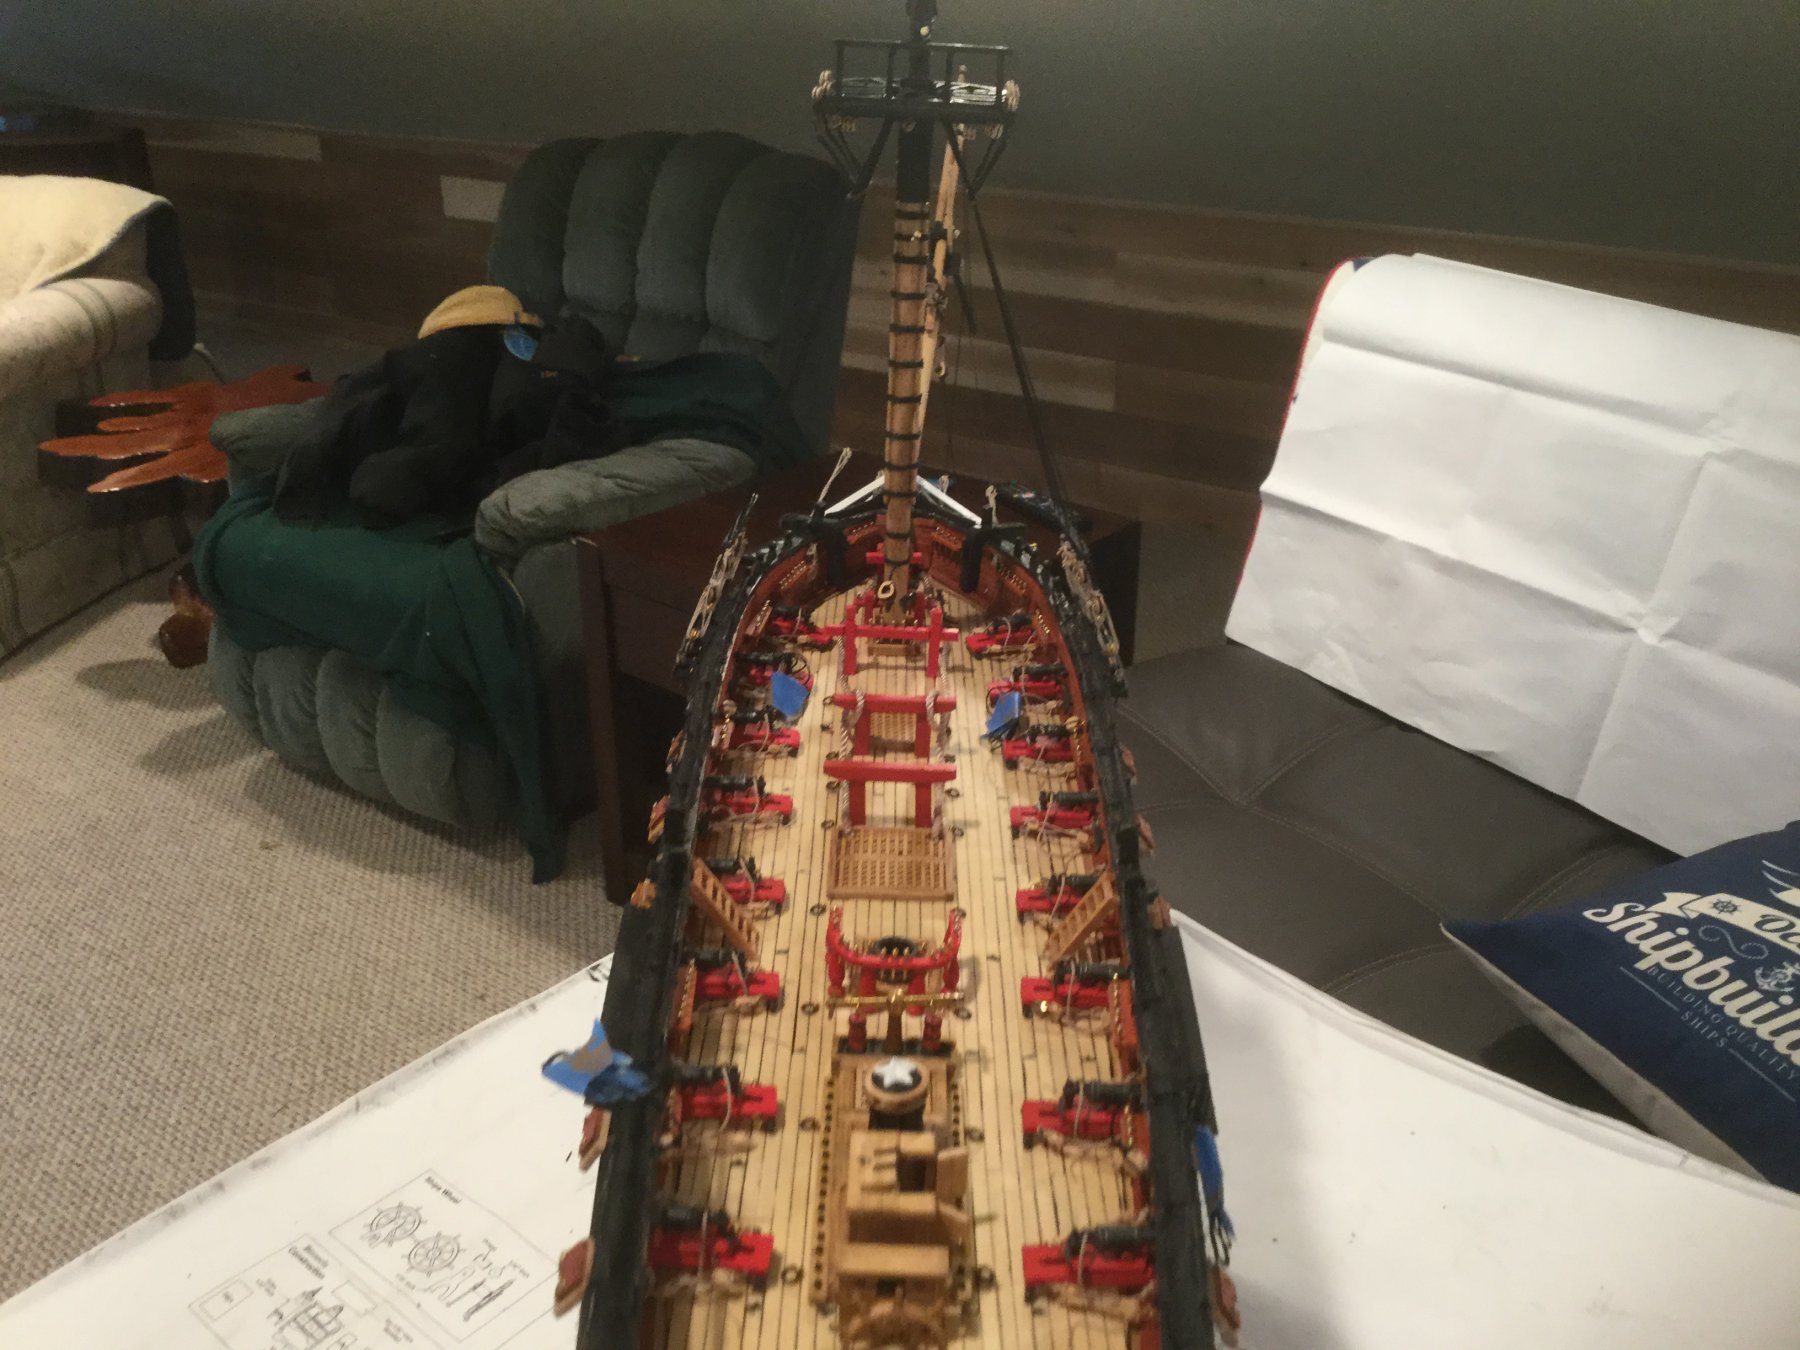
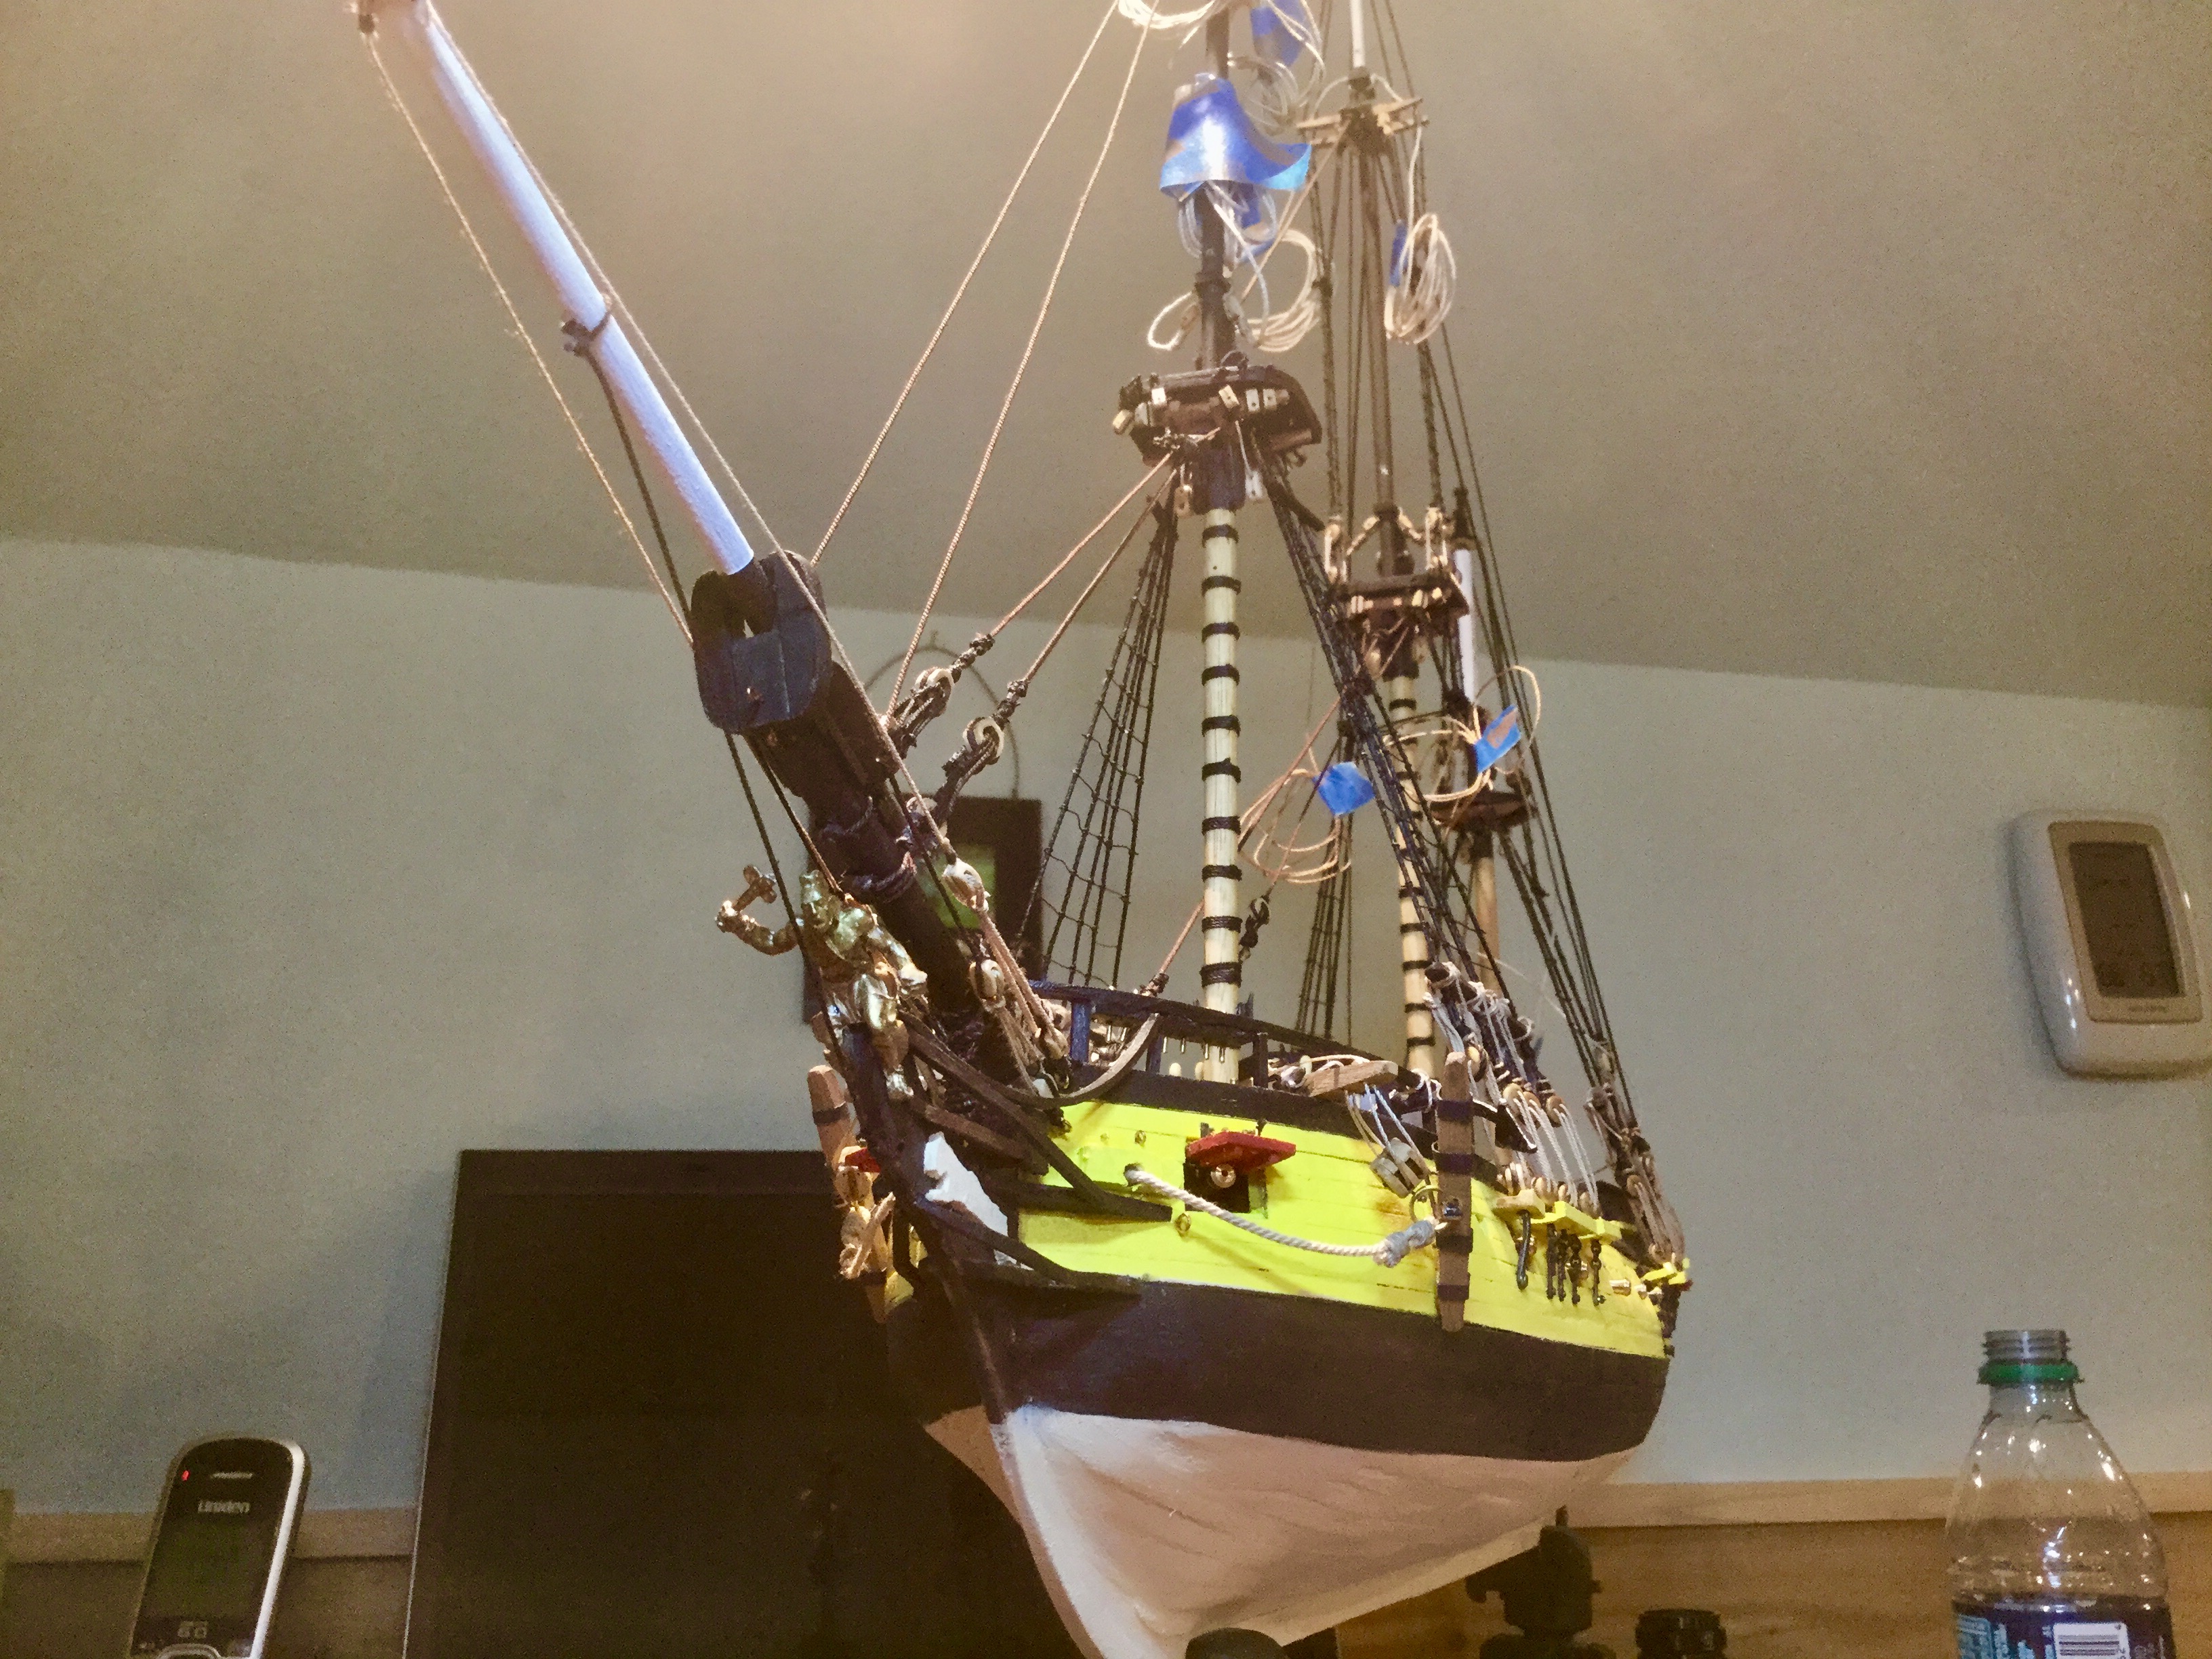
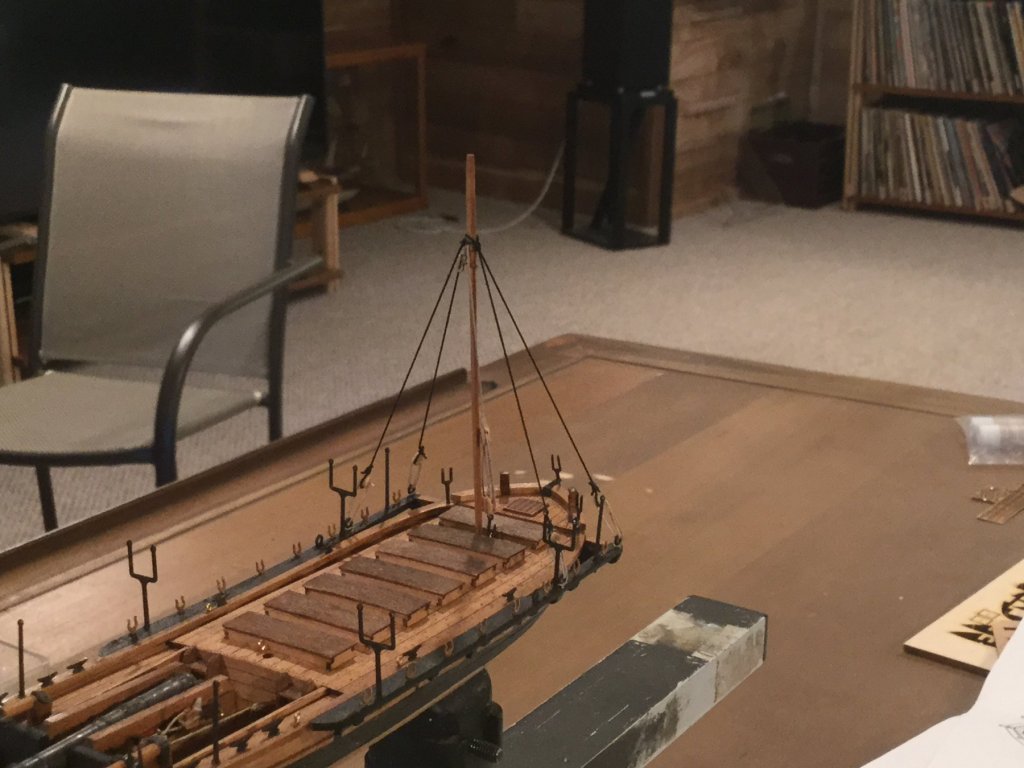
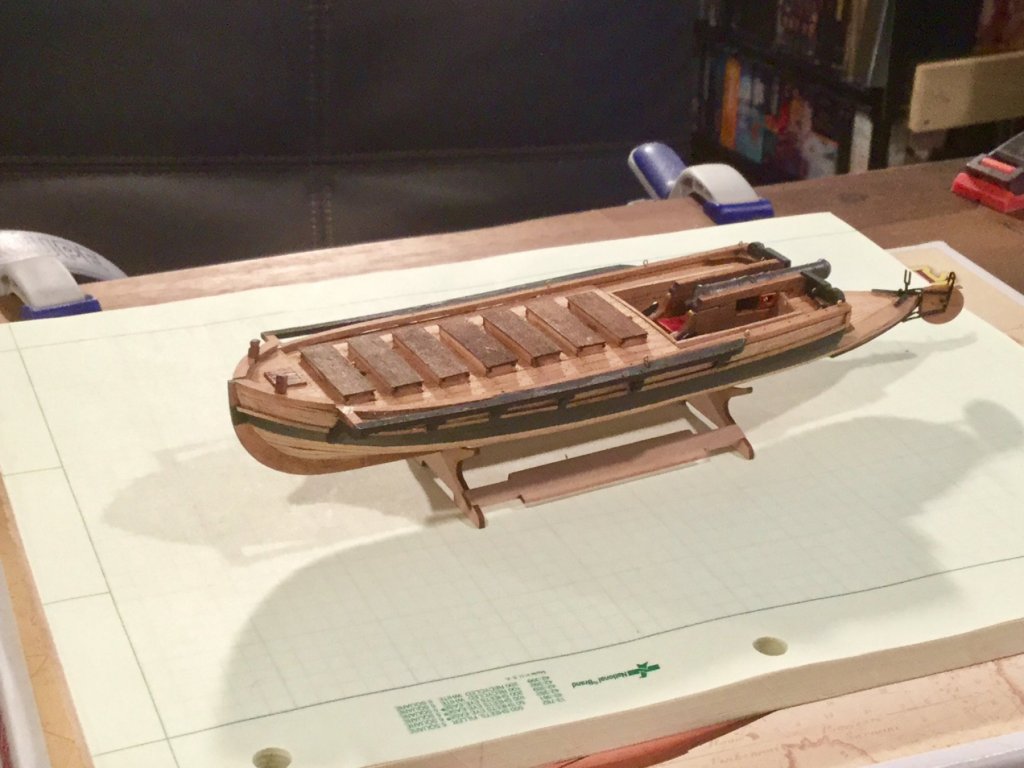
Next up attaching PE, masts and rigging. One of the confusing instructions is the double labeling of the masts and spars. My many years of writing technical documentation taught me pick a number or nomenclature and stick to it. So either call a mast R3 or B18 but not both. My 2 cents. Also if your rigging plan shows black line (figure 29) it should probably be included in box. After rigging masts I am on hold until my sails arrive from Russia sometime in July. I’ll finish up then.


- 28 replies
-
- 9
-
-
- cannon jolle
- master korabel
- (and 1 more)
-
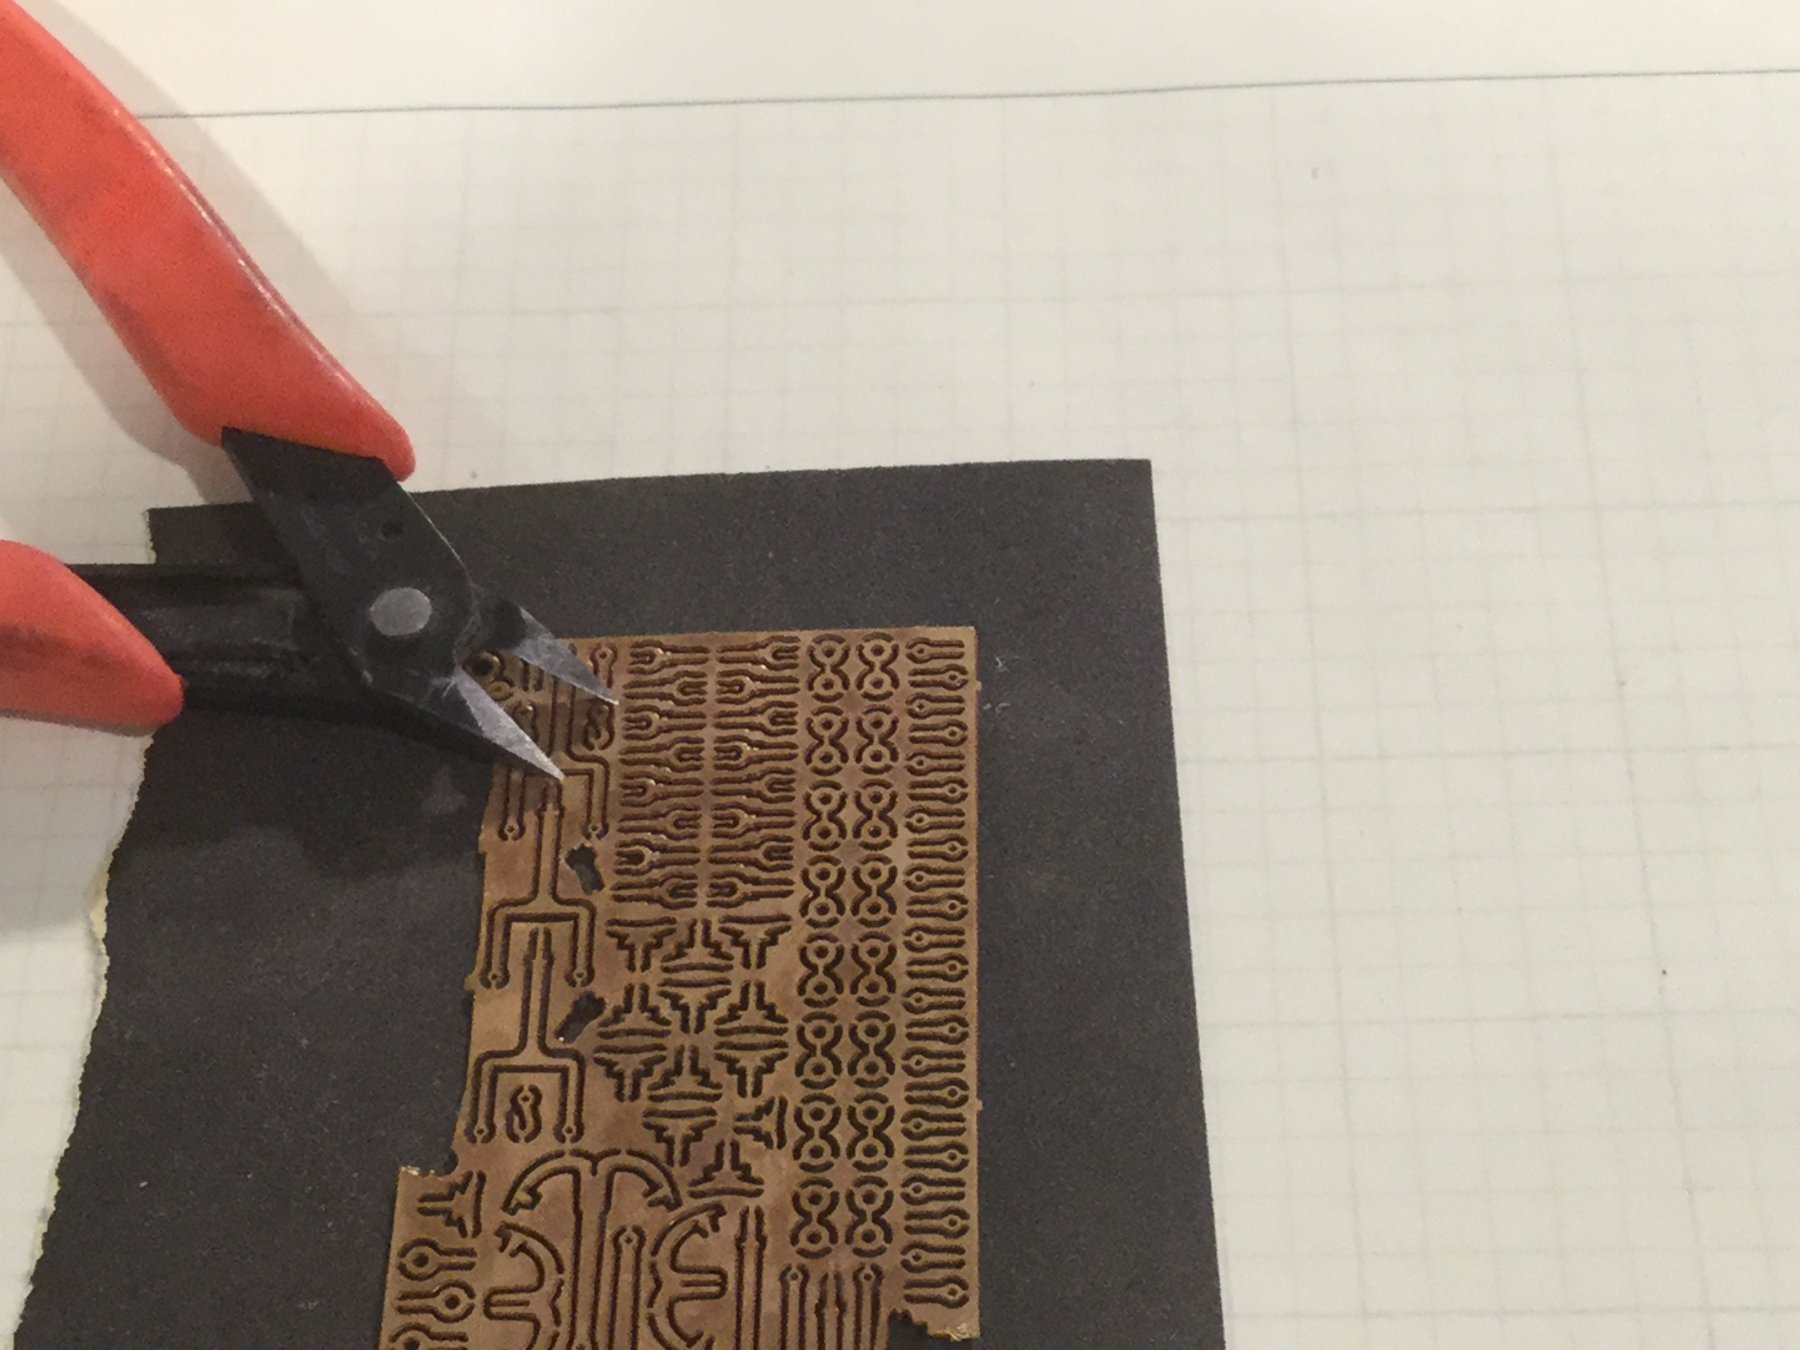
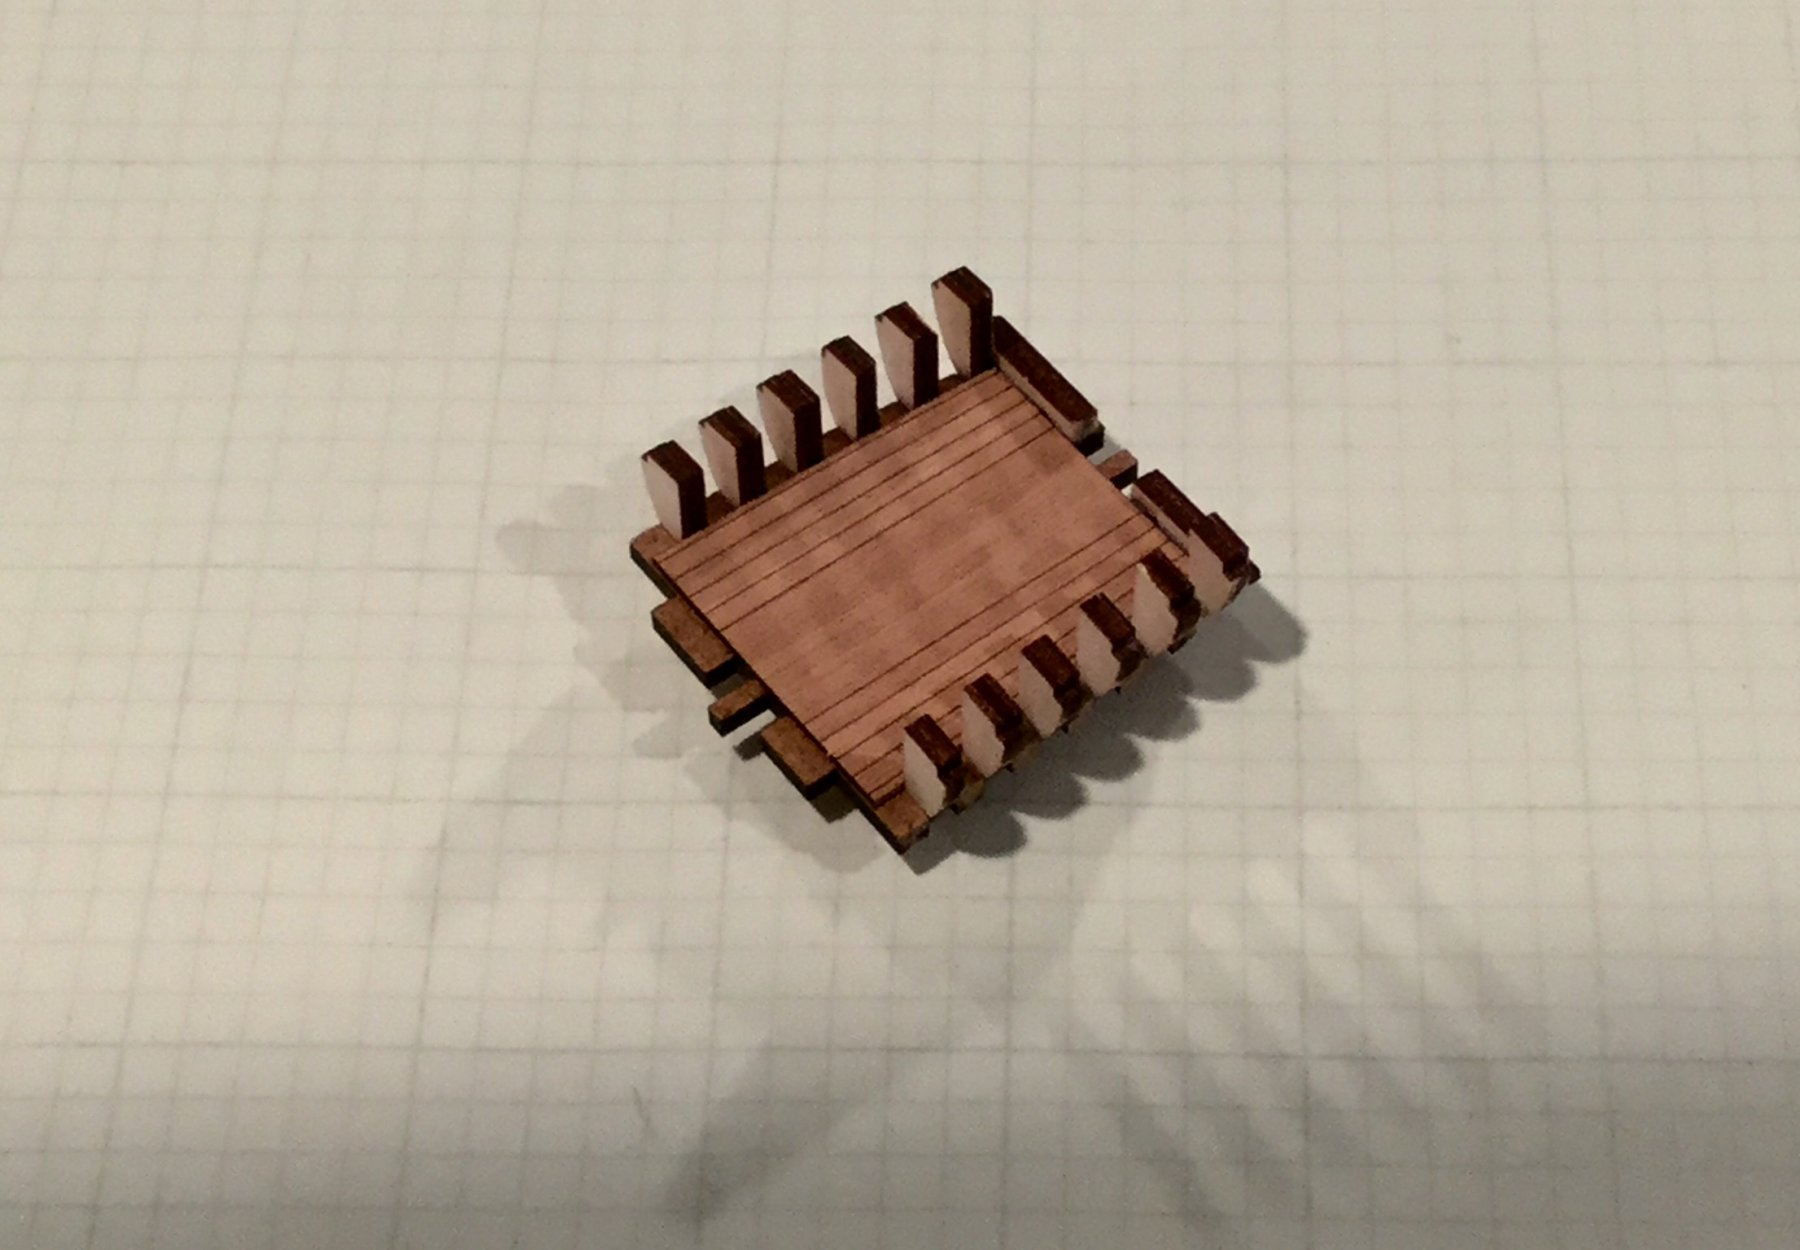
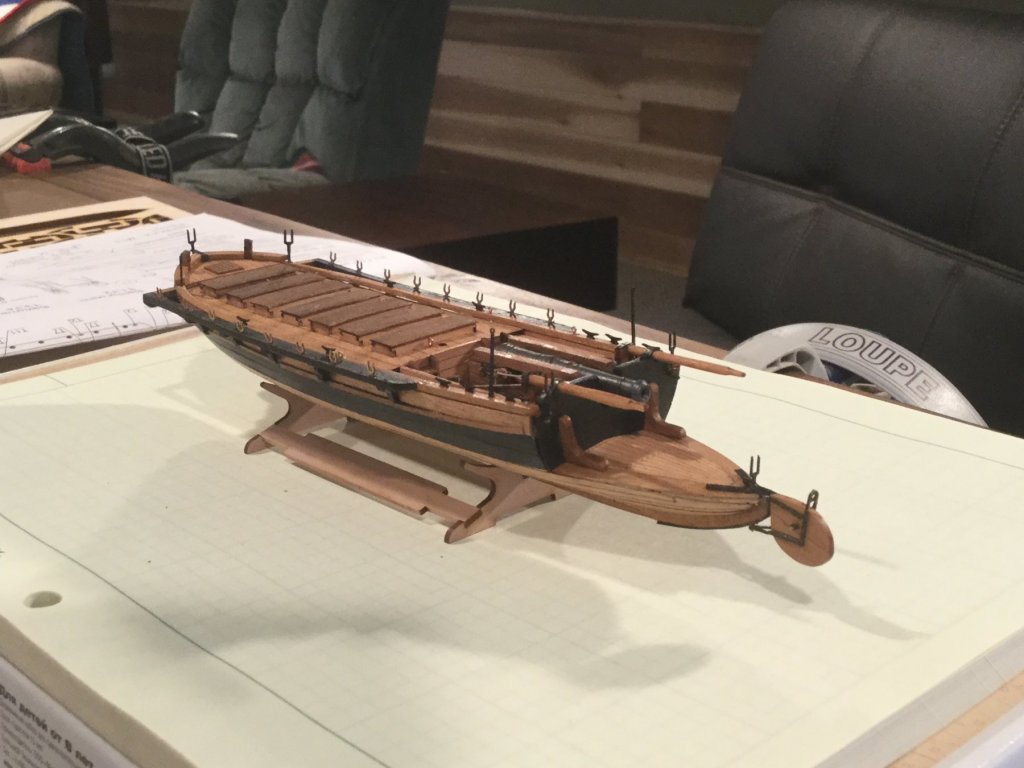
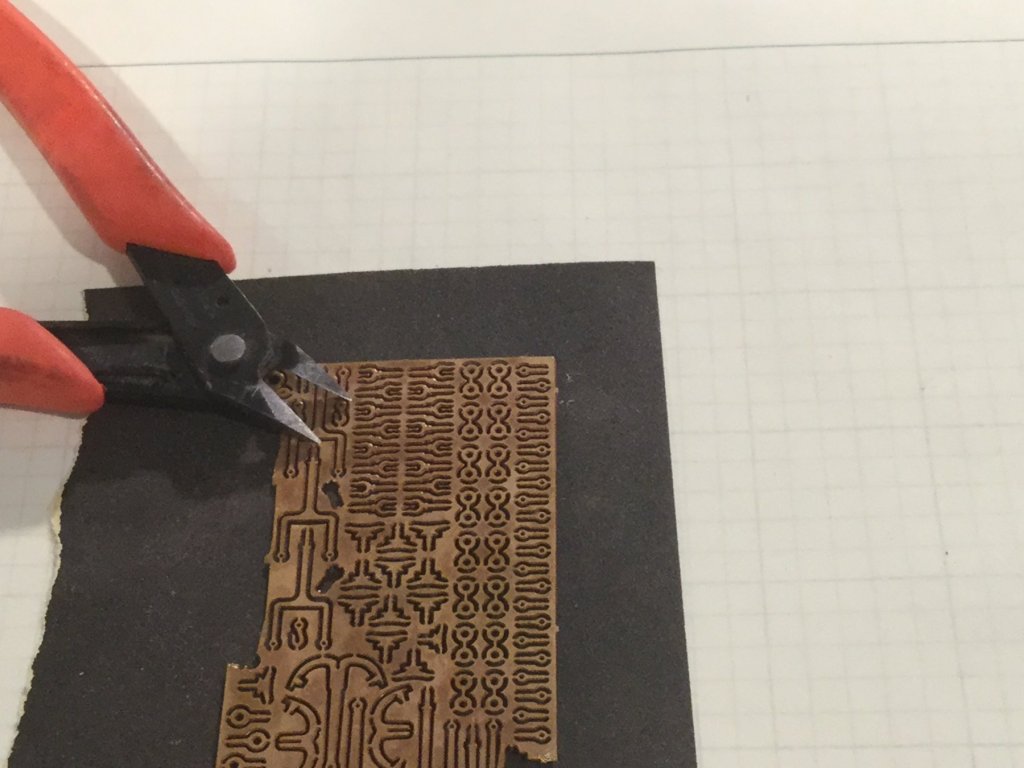
The seats , top rails, “railway” and knees are next. The seats are a two part construction and fit very snuggly. I stained them English Chestnut. Location of the knees are etched on the top plank. Life would be easier if it was also marked on the bottom of the railway. Watch those little knees or get good at making them yourself. I launched one never found it, those things are so small I kept breaking them during construction. We should make a law that all itty bitty launchable parts must have at least one extra provided. I pre-drilled all the holes on the top rail and railway prior to assembly. The PE for this kit is lazed real tight. It is a pain to remove as my parts nipper is just to large. Have fun.

- 28 replies
-
- 6
-
-
- cannon jolle
- master korabel
- (and 1 more)
-
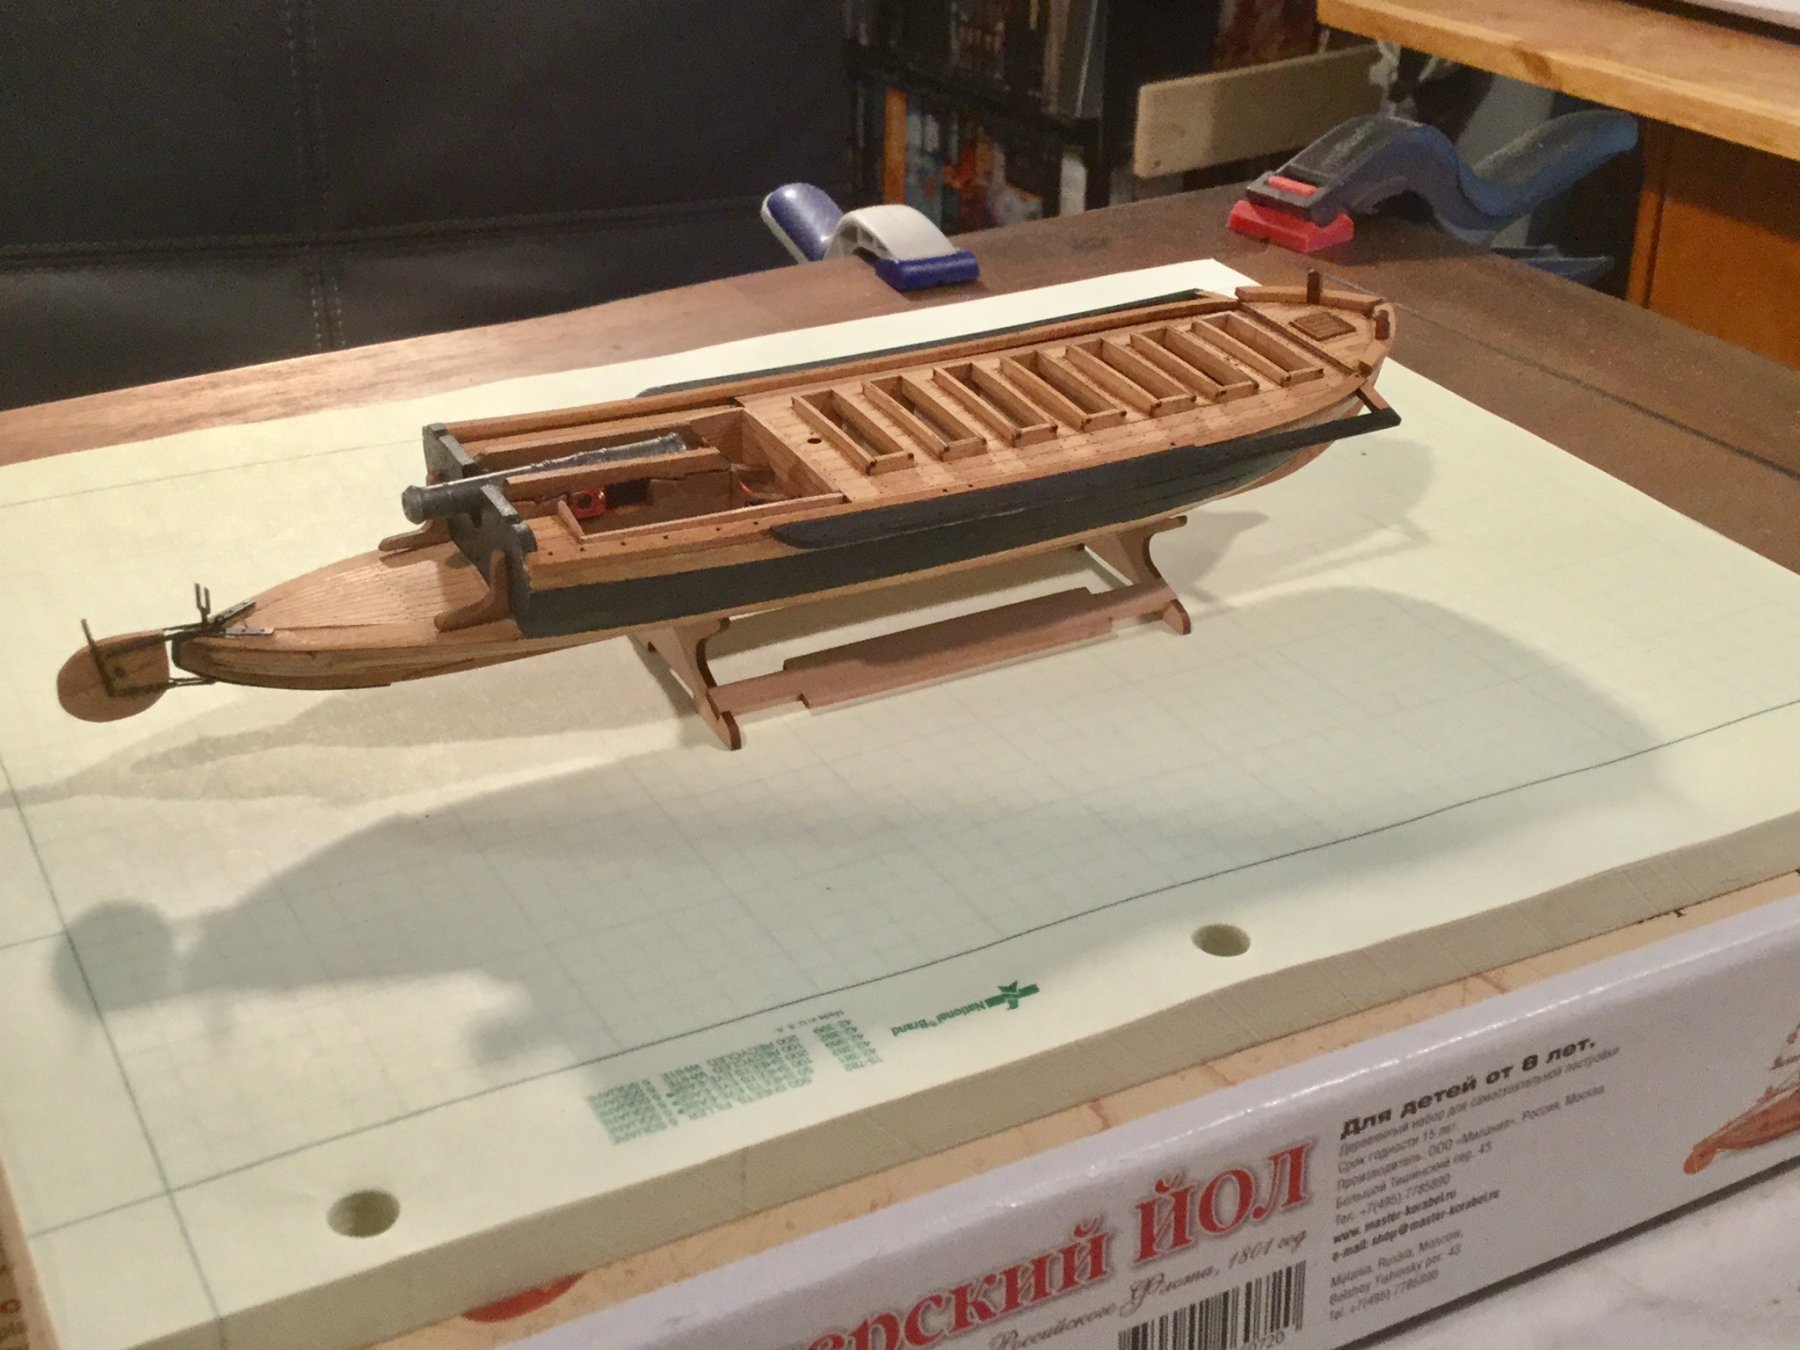
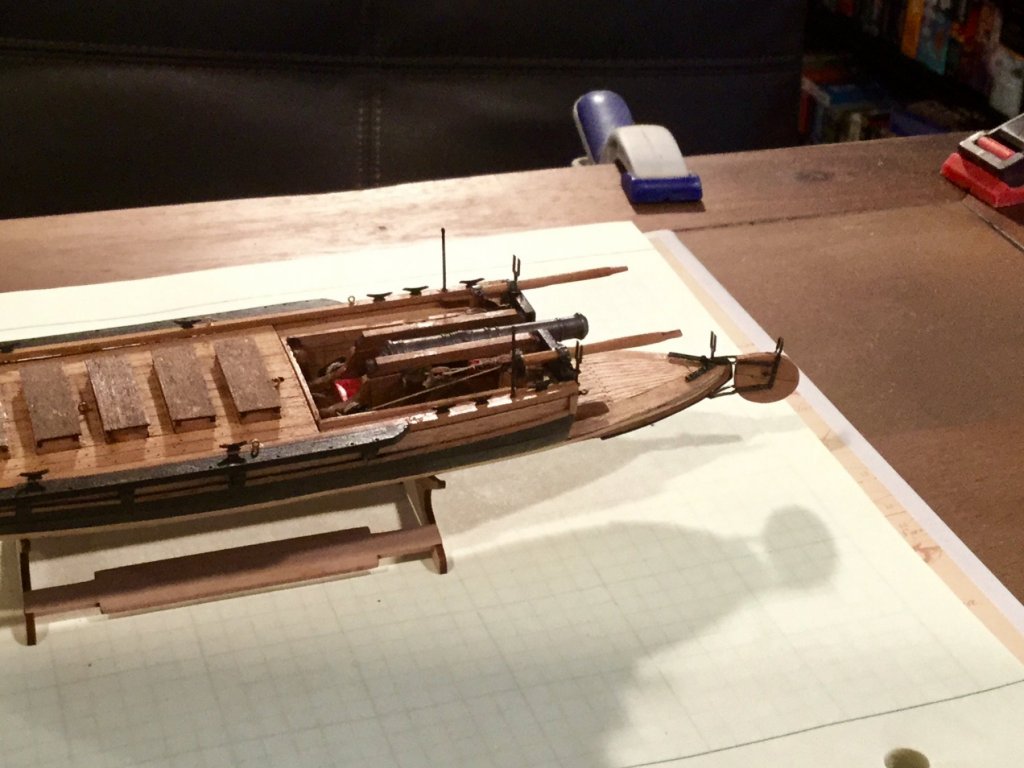
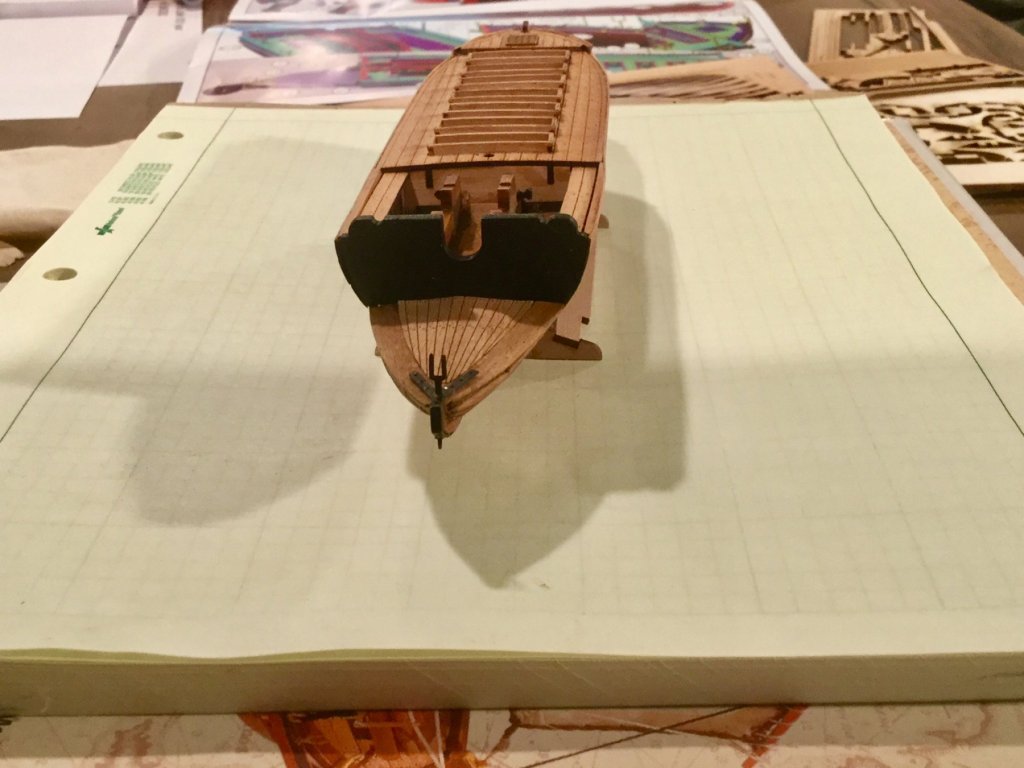
Next was assembly of the Gun slide and it’s installation. As I pointed out earlier there is an issue here with part numbers AND don’t make the mistake I made. I installed the gun slide all the way forward in the carriage DO NOT DO THIS as it totally messes up the rigging. Two blocks the blocks. I made a gunners decision and moved the block eyepin back. Not in any way accurate but 99.9% og people would never notice it won’t work in real life.

- 28 replies
-
- 5
-
-
- cannon jolle
- master korabel
- (and 1 more)
-
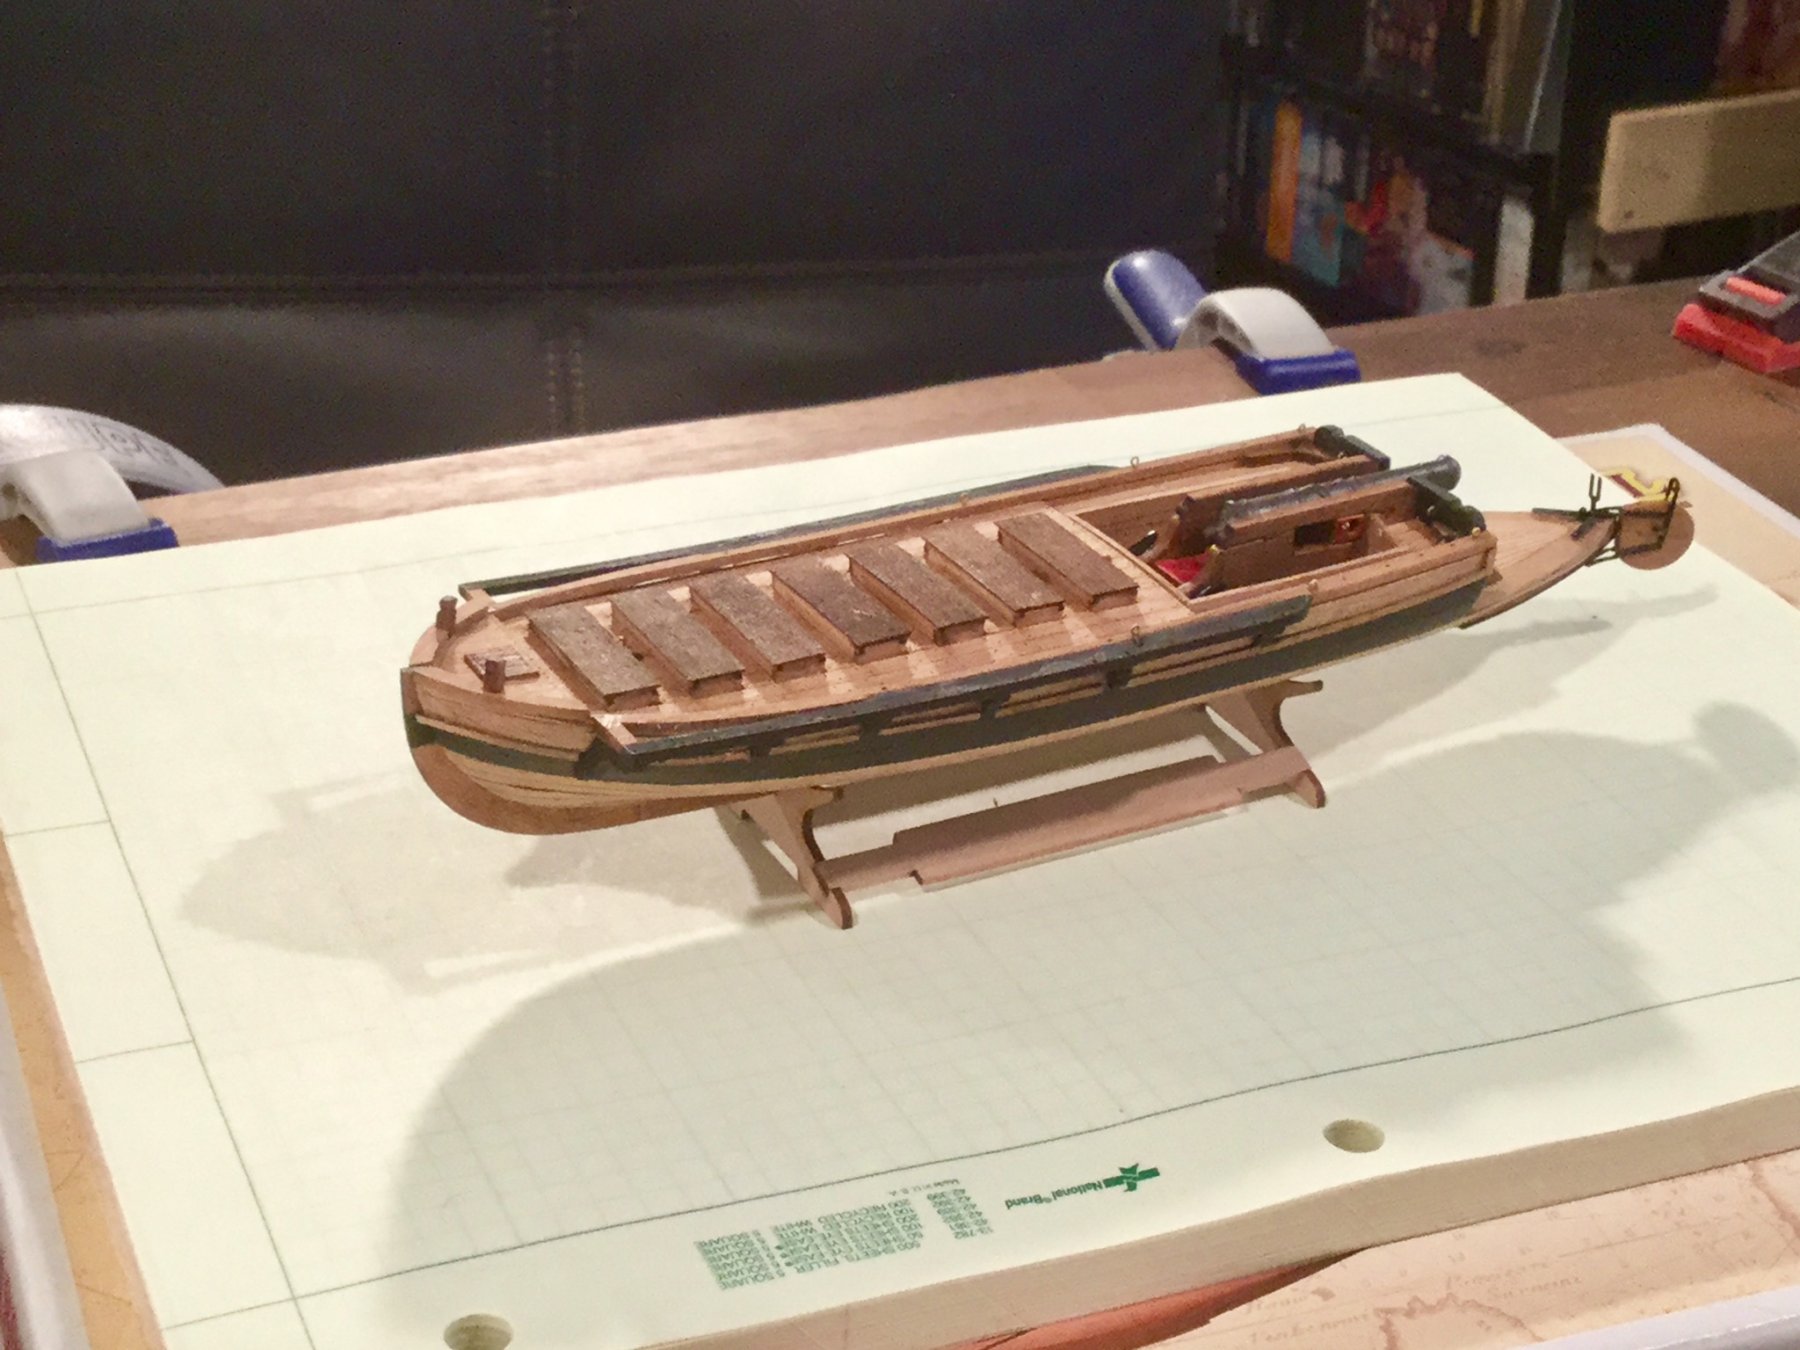
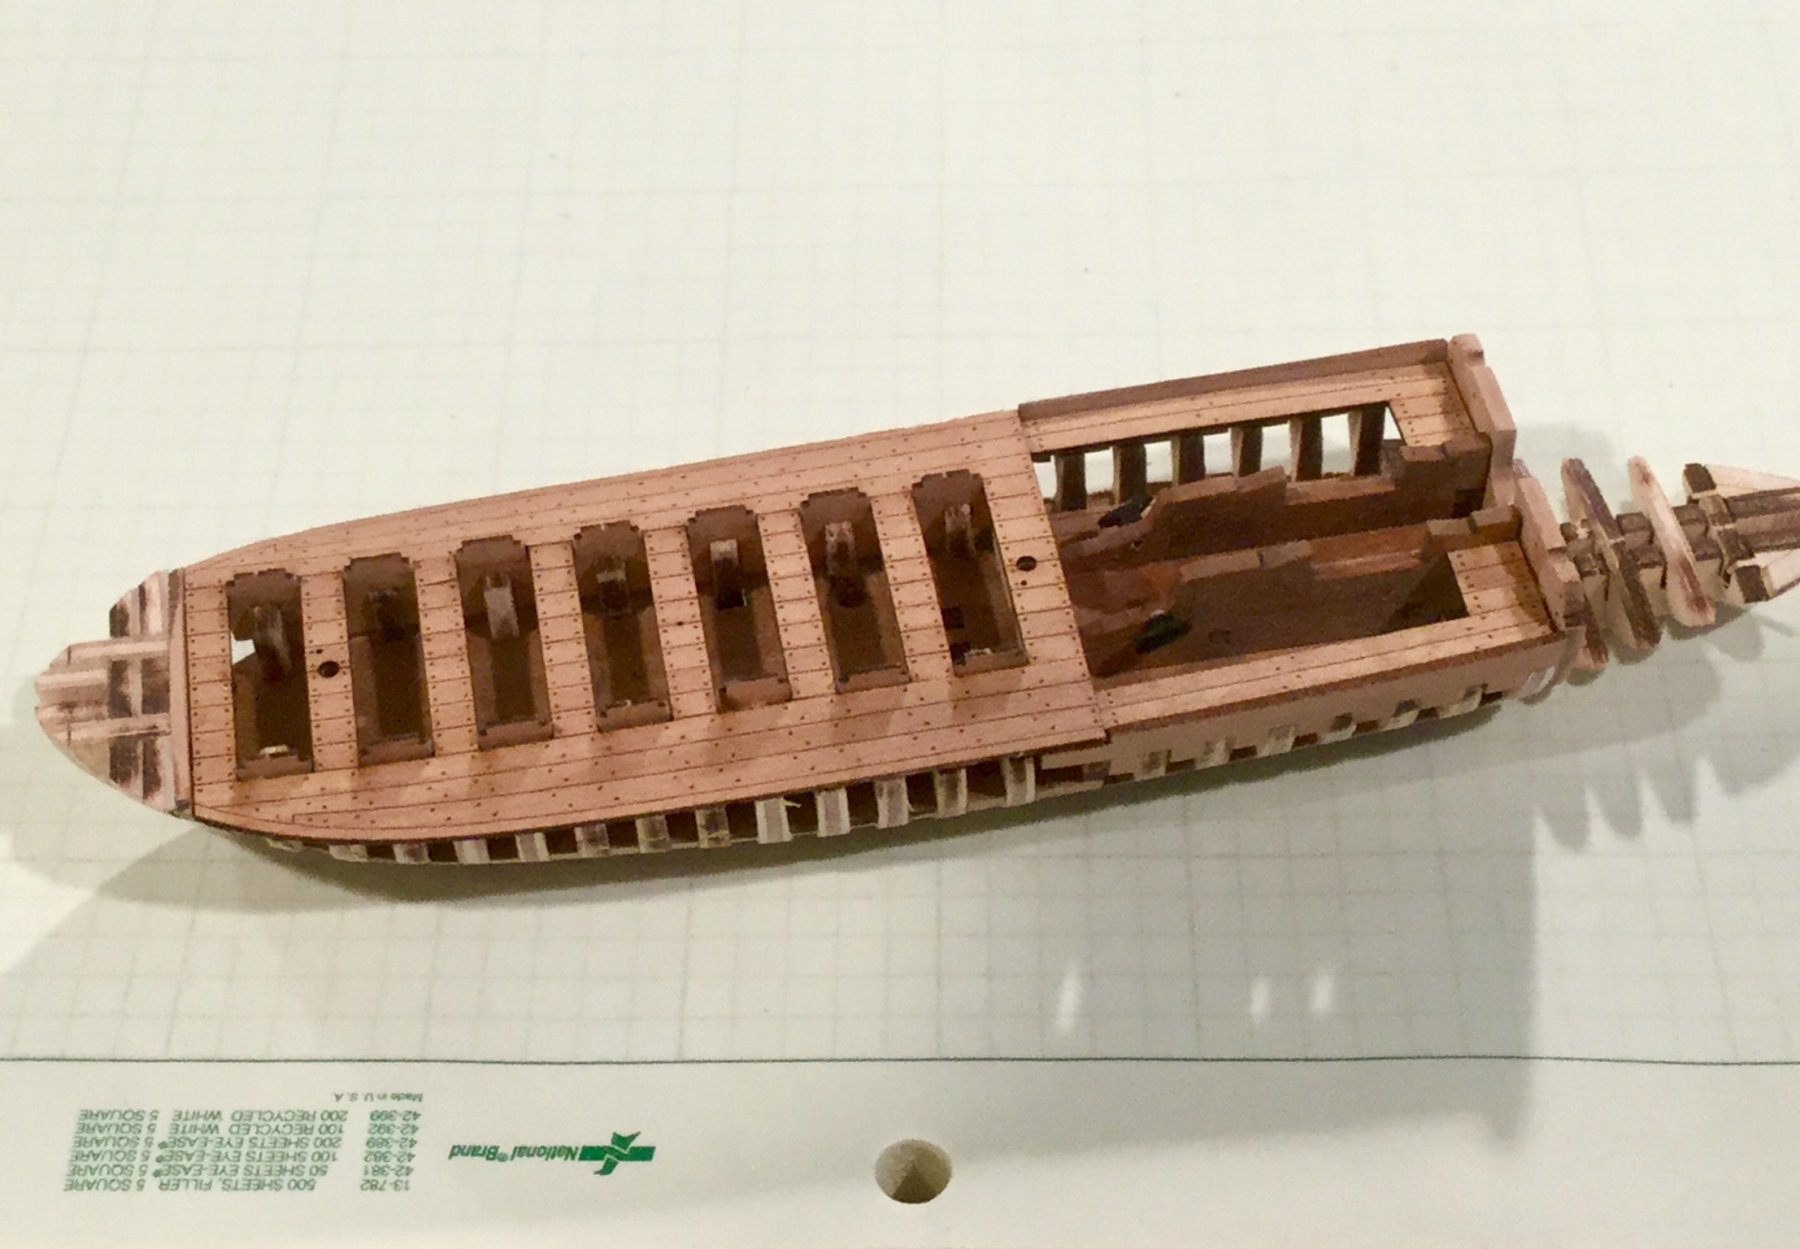
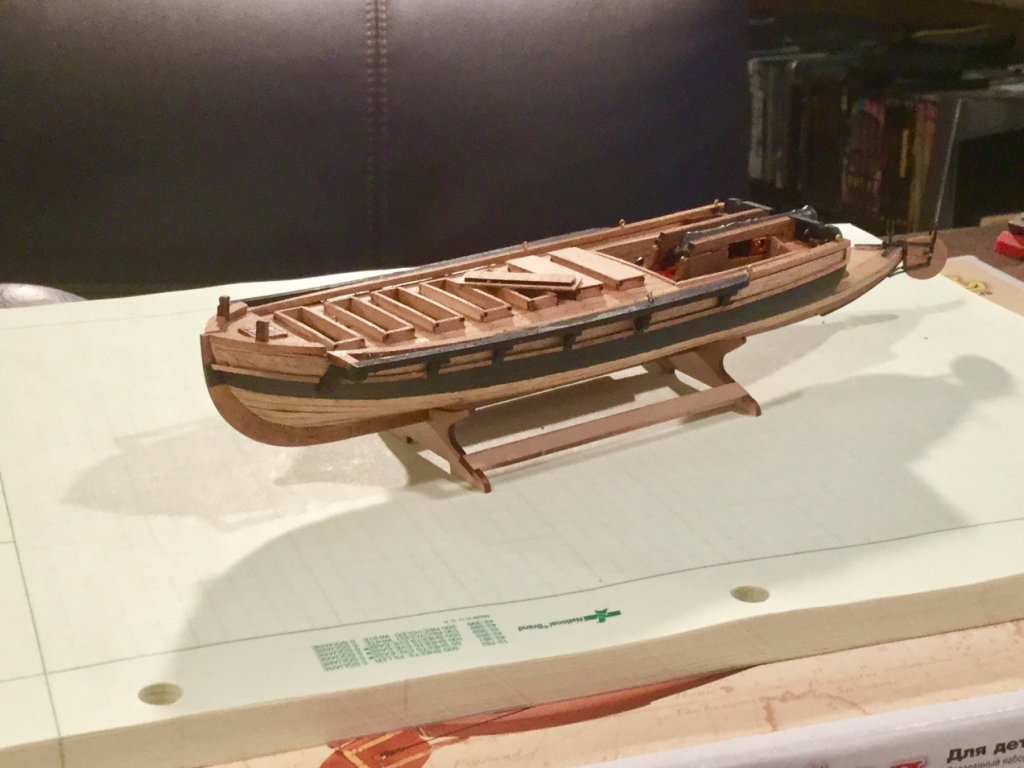
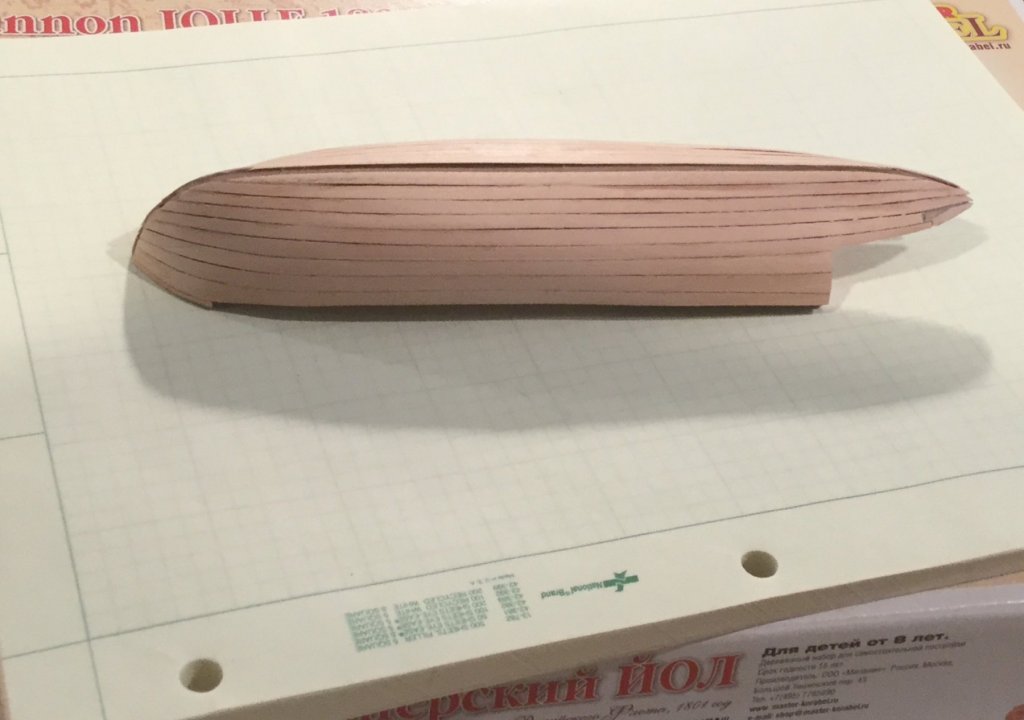
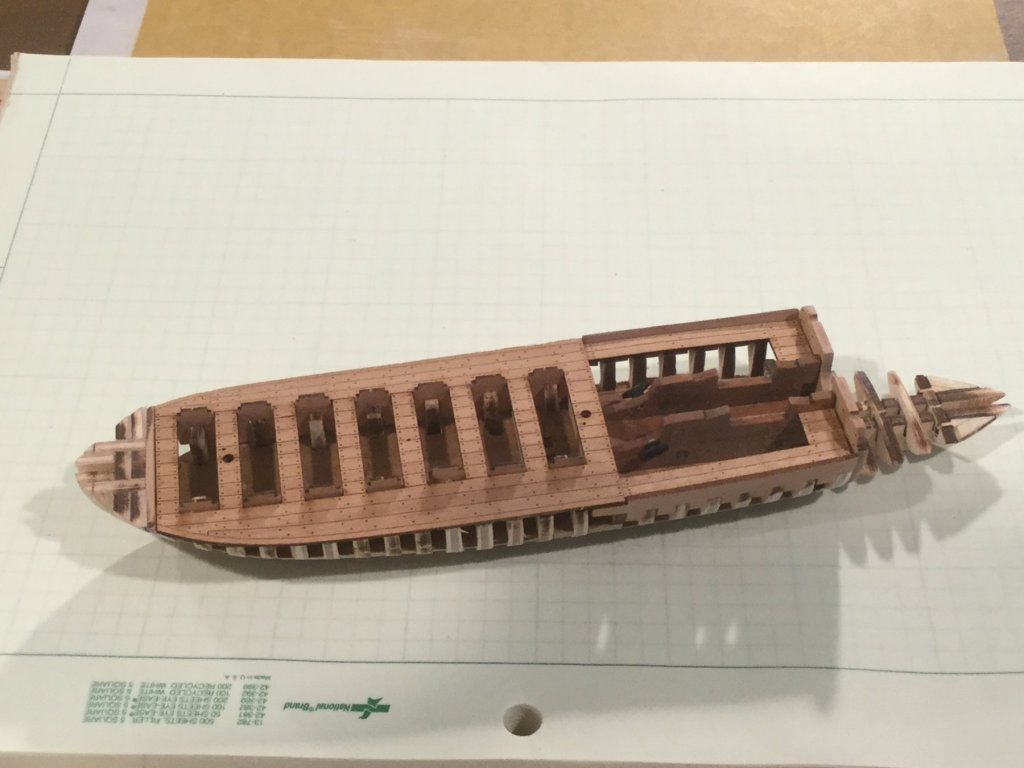
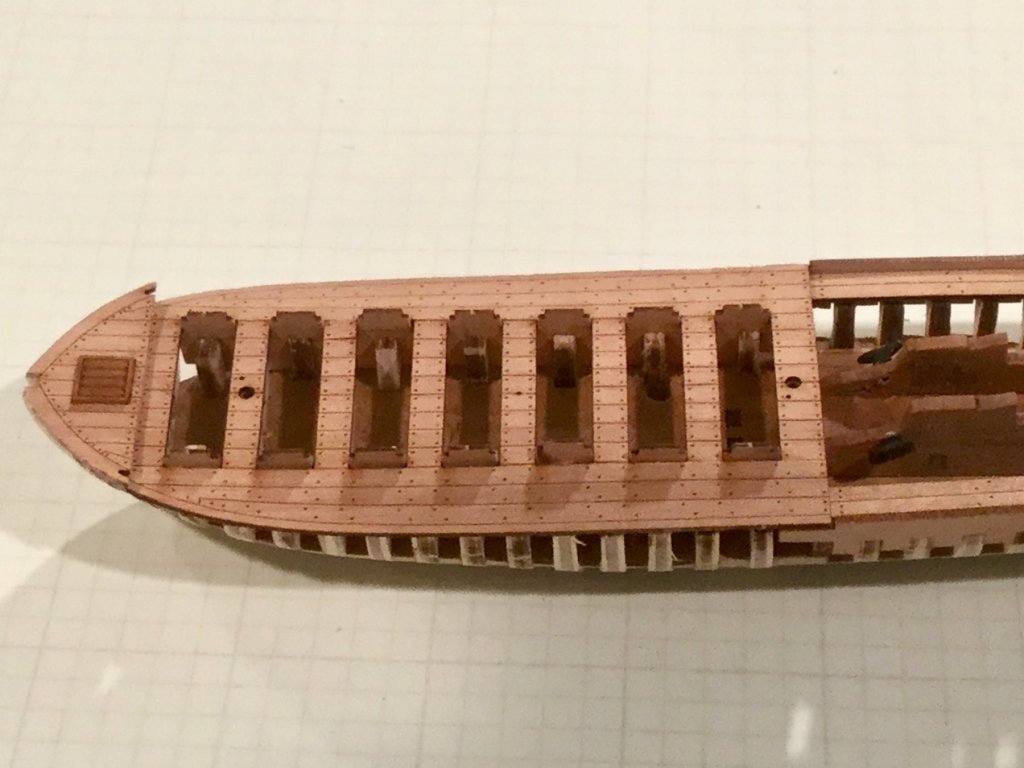
Next up....the easiest planking I have ever done. Perfectly cut planks. Make sure you delicately remove the nibs. Part of me wishes all manufacturers would go to this process. Got it on, sanded, painted and WOP applied.

- 28 replies
-
- 7
-
-
- cannon jolle
- master korabel
- (and 1 more)
-
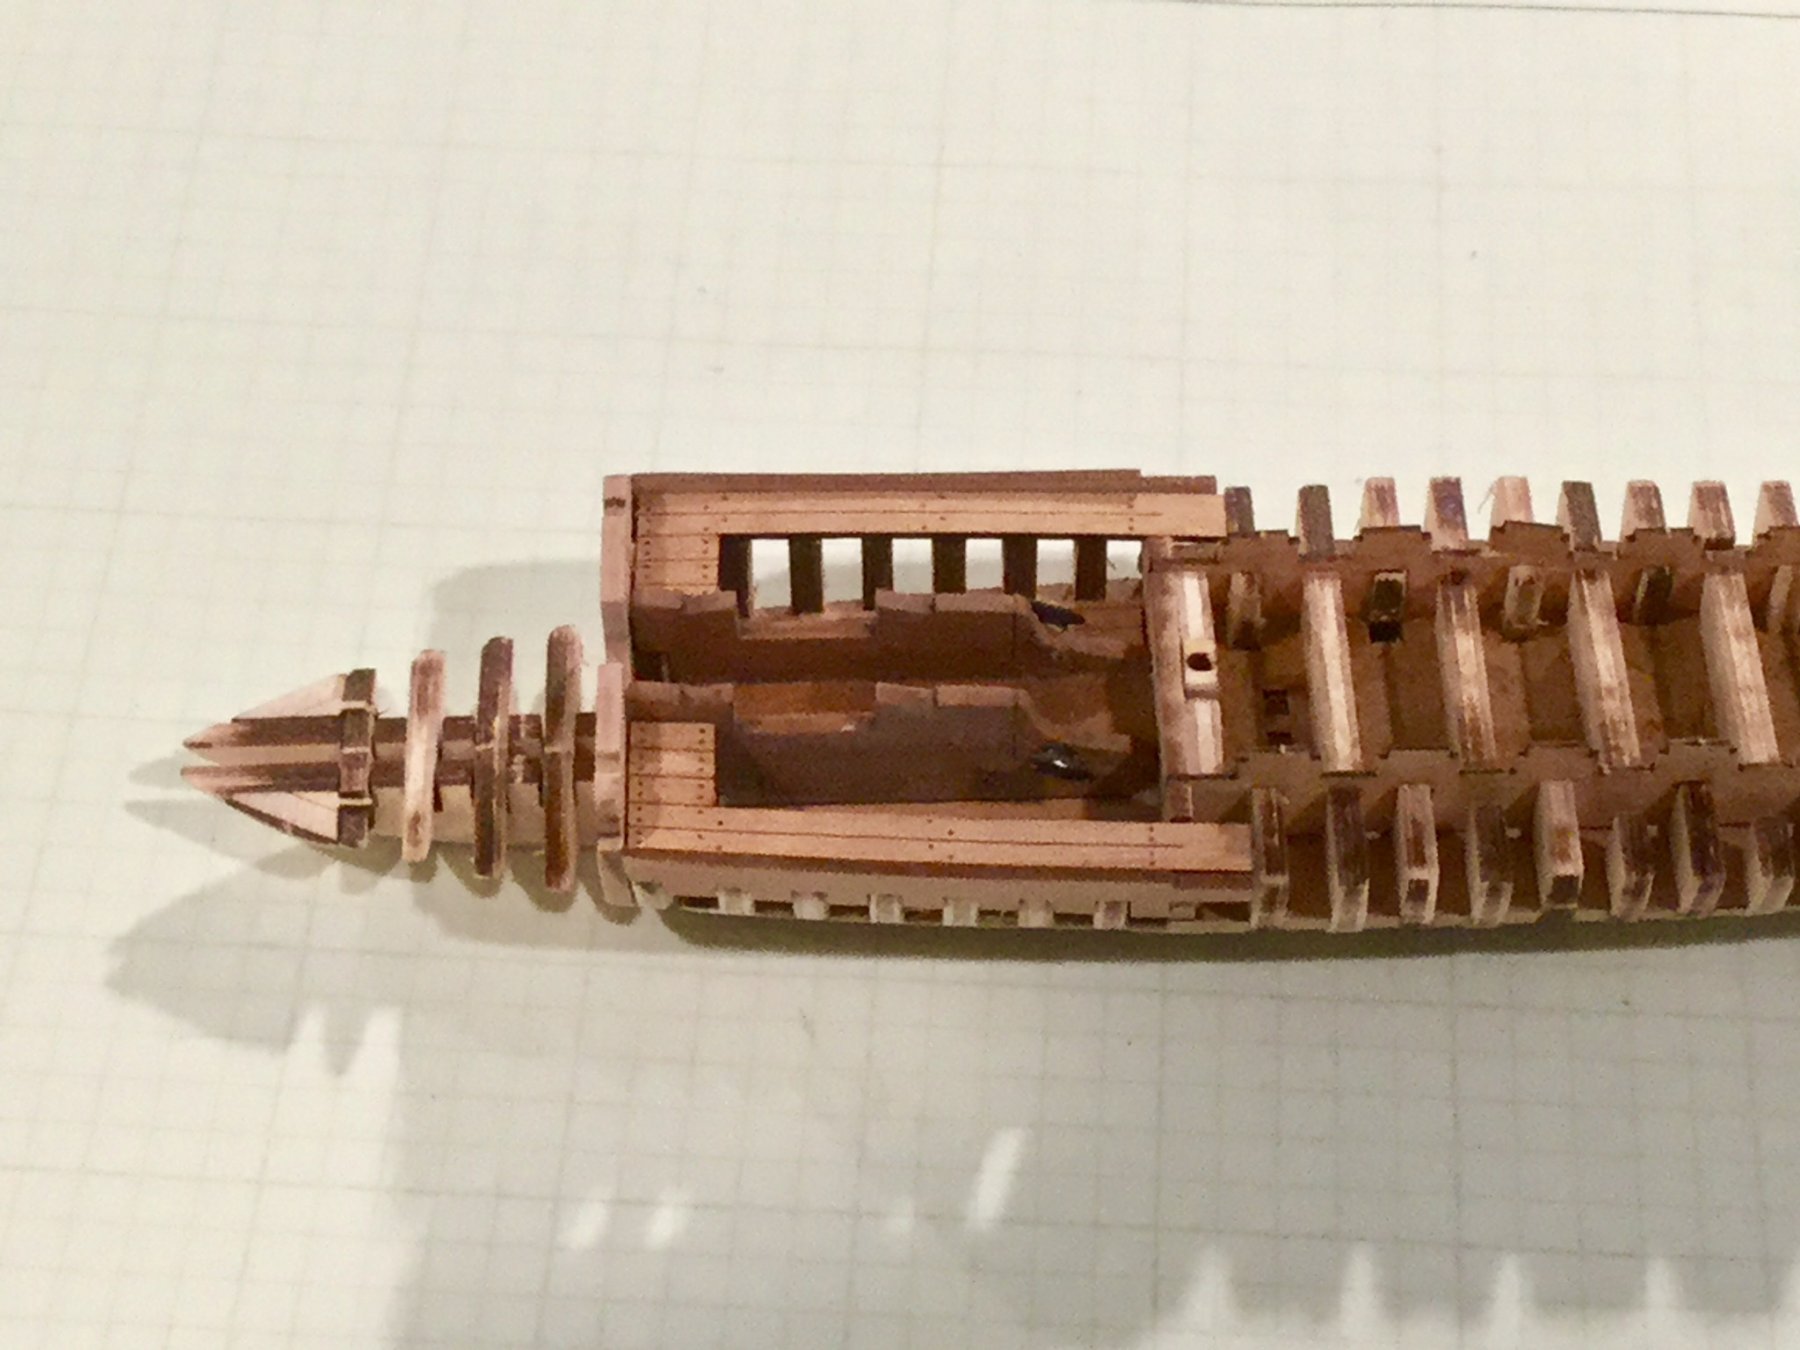
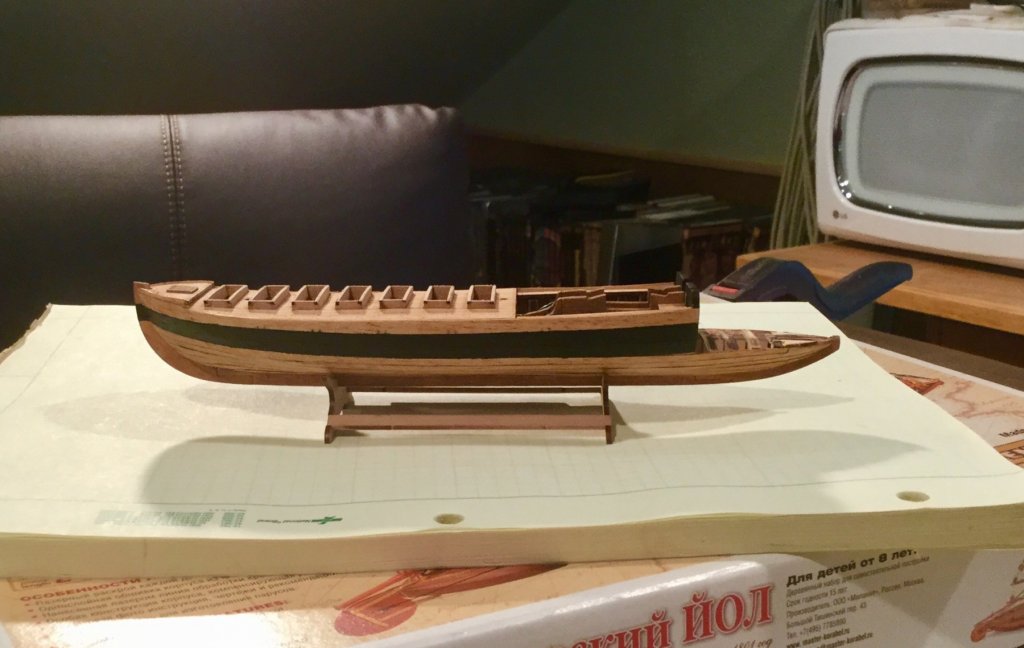
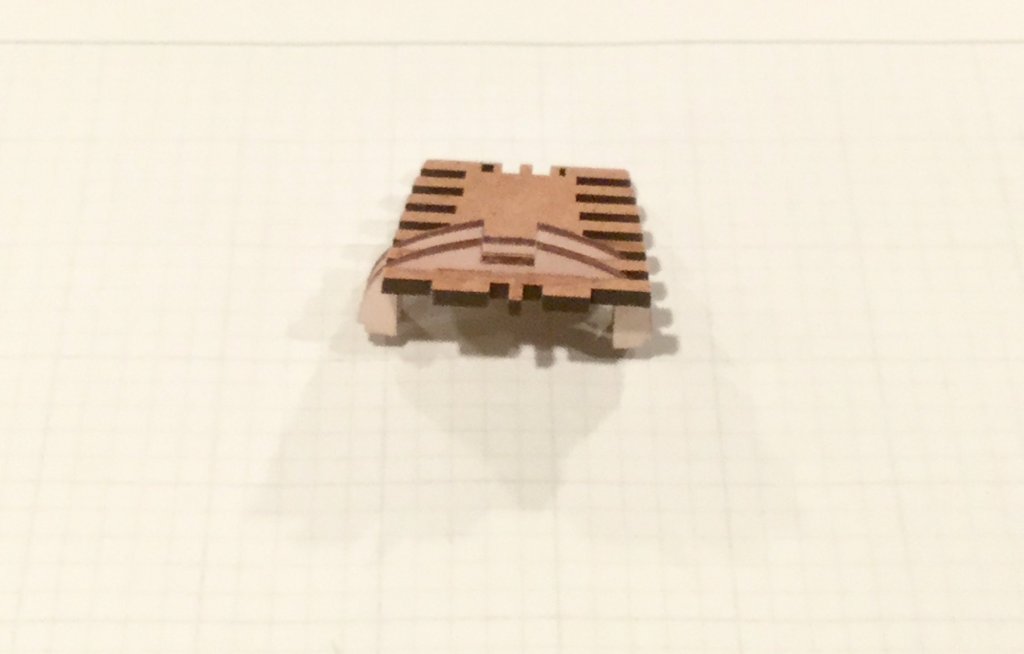
The next steps involve assembly of the carriage, seats and decking. NOTE: There is a mistake in the instructions. During the assembly of the gun carriage you use part B5 as the base of the carriage. Later on when you are assembling the gun slide photo 26 shows part B5 as the base of the slide it be B11. Be very careful when attaching D10 to assembly. Very,very delicate. I found the color pallet of the model as built to be very bland so I added some contrast. The hull was stained Golden Oak with the Wales painted black then added coats of wipe on poly, the decks were left natural with WOP added, the Gun Carriage was stained English Chestnut, gun slide flat red, oars painted white.


- 28 replies
-
- 9
-
-
- cannon jolle
- master korabel
- (and 1 more)
-
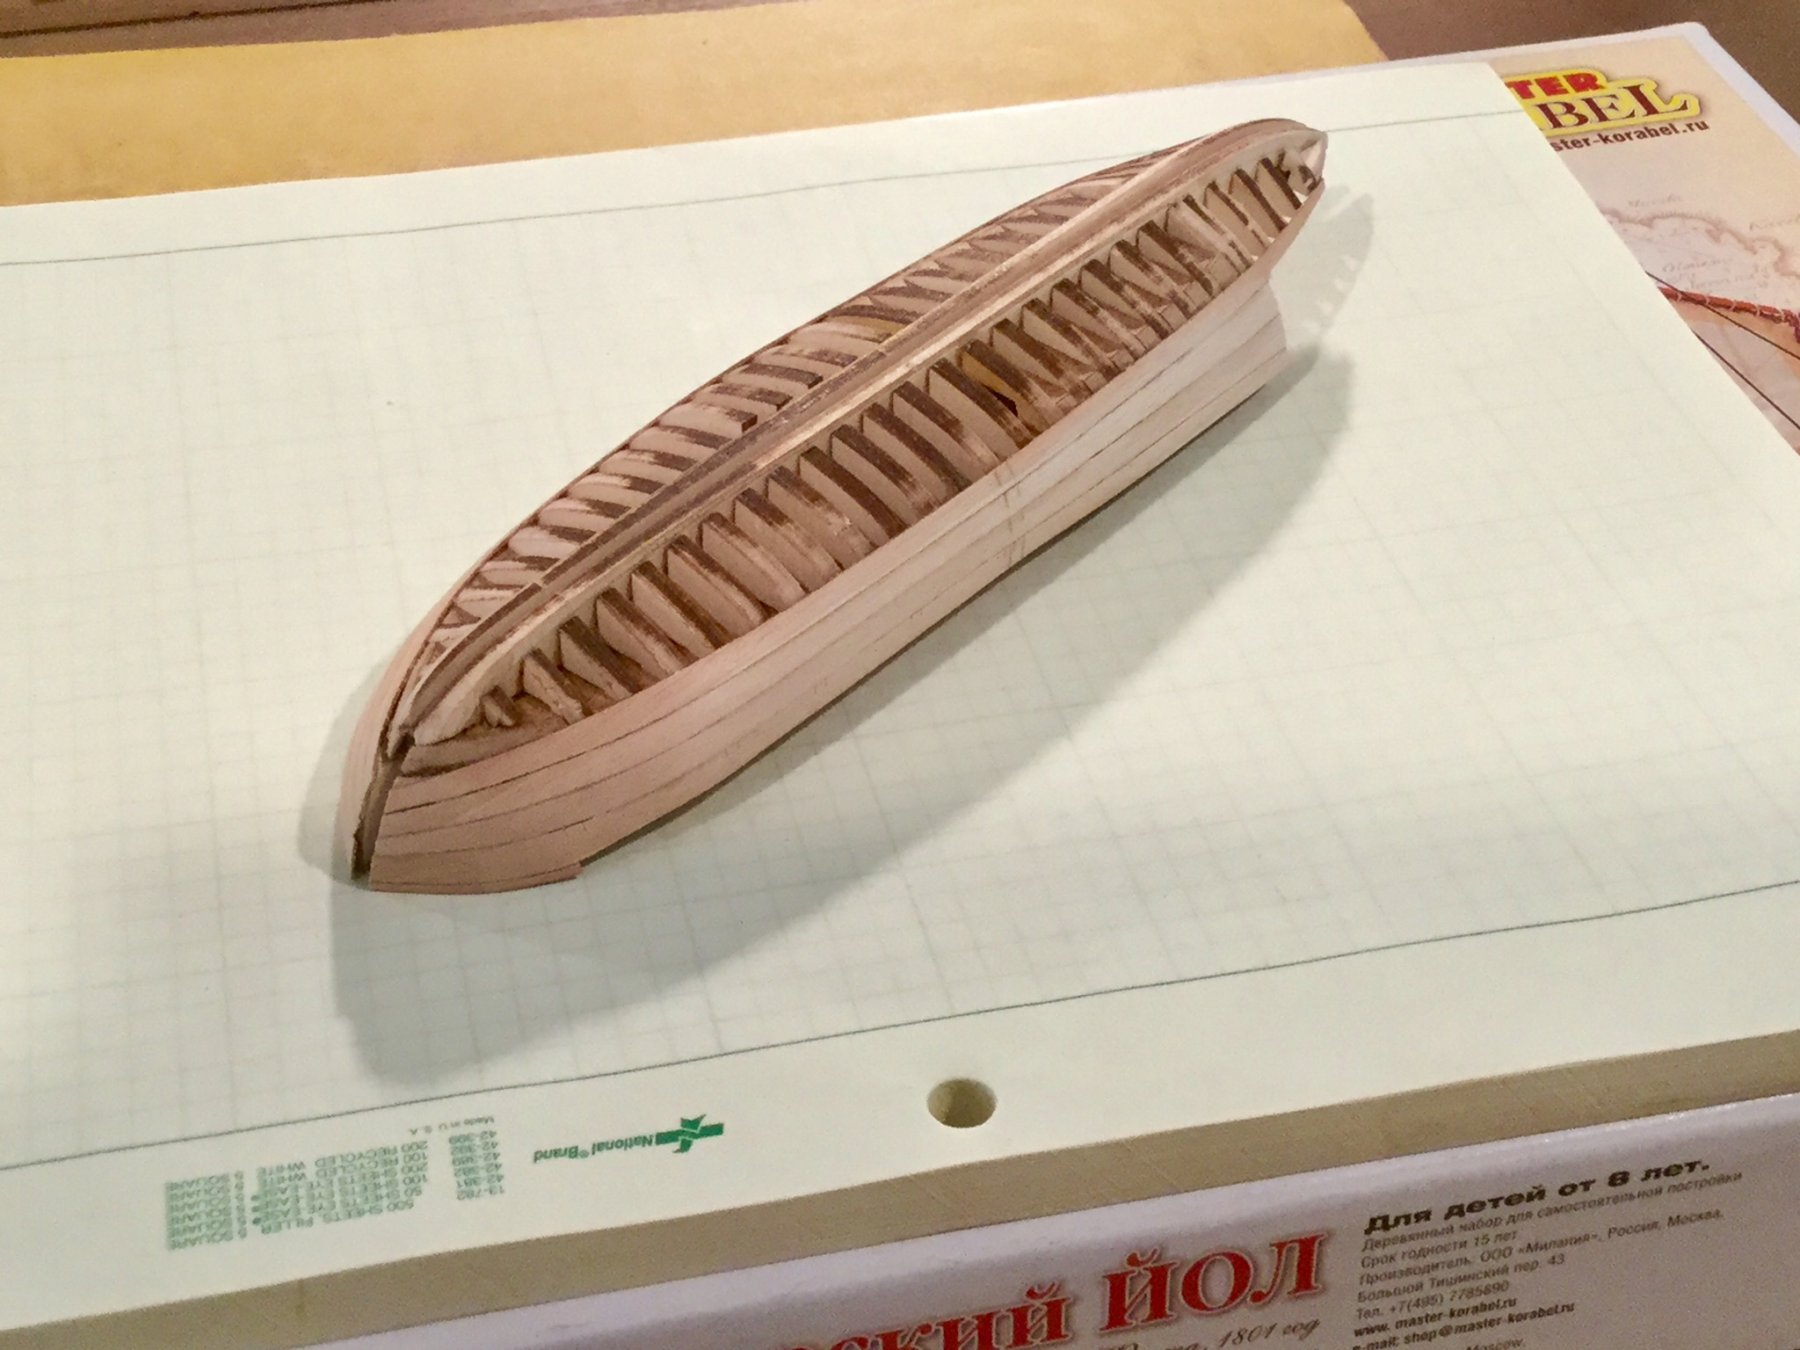
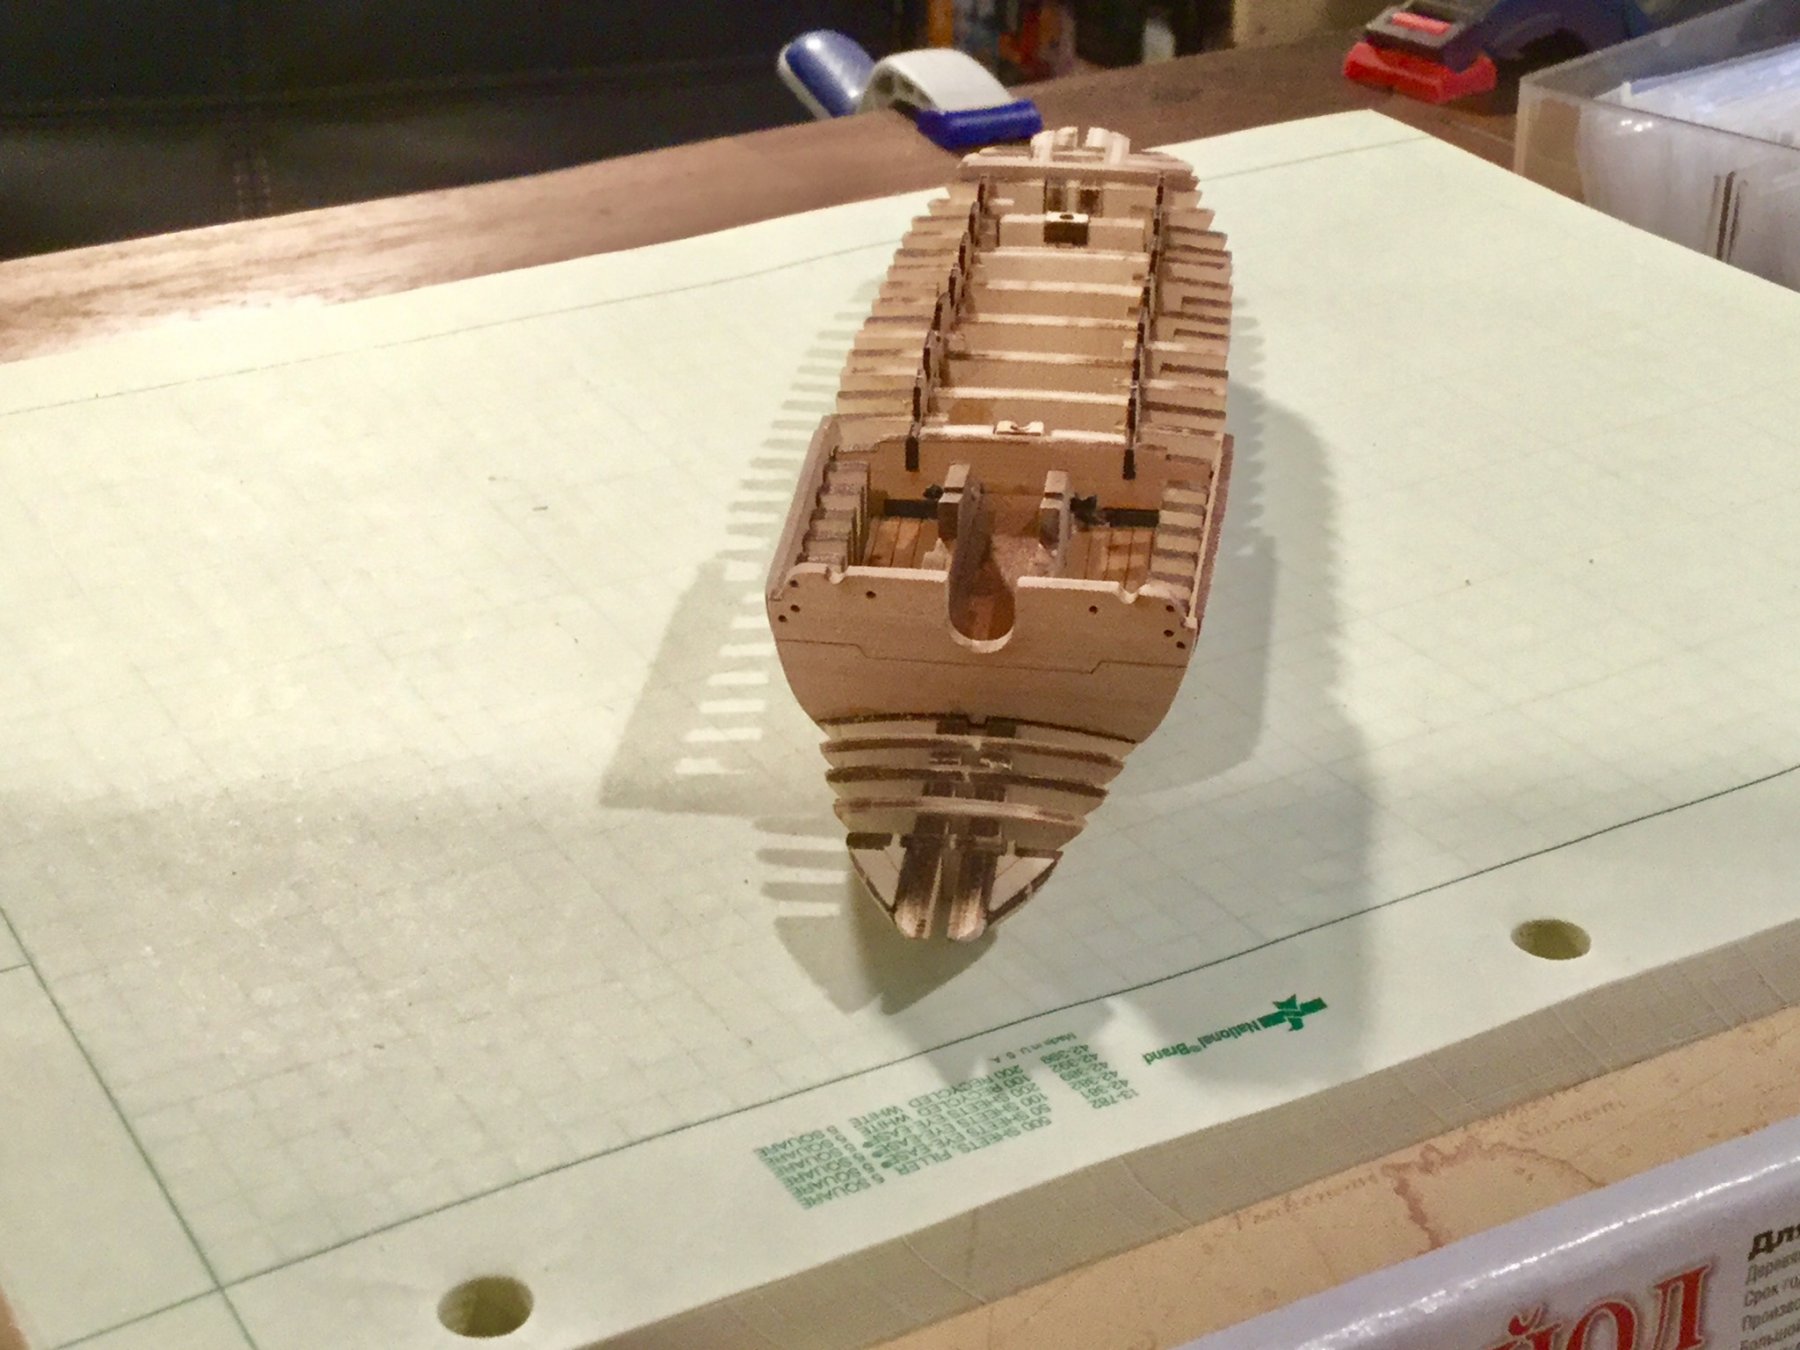
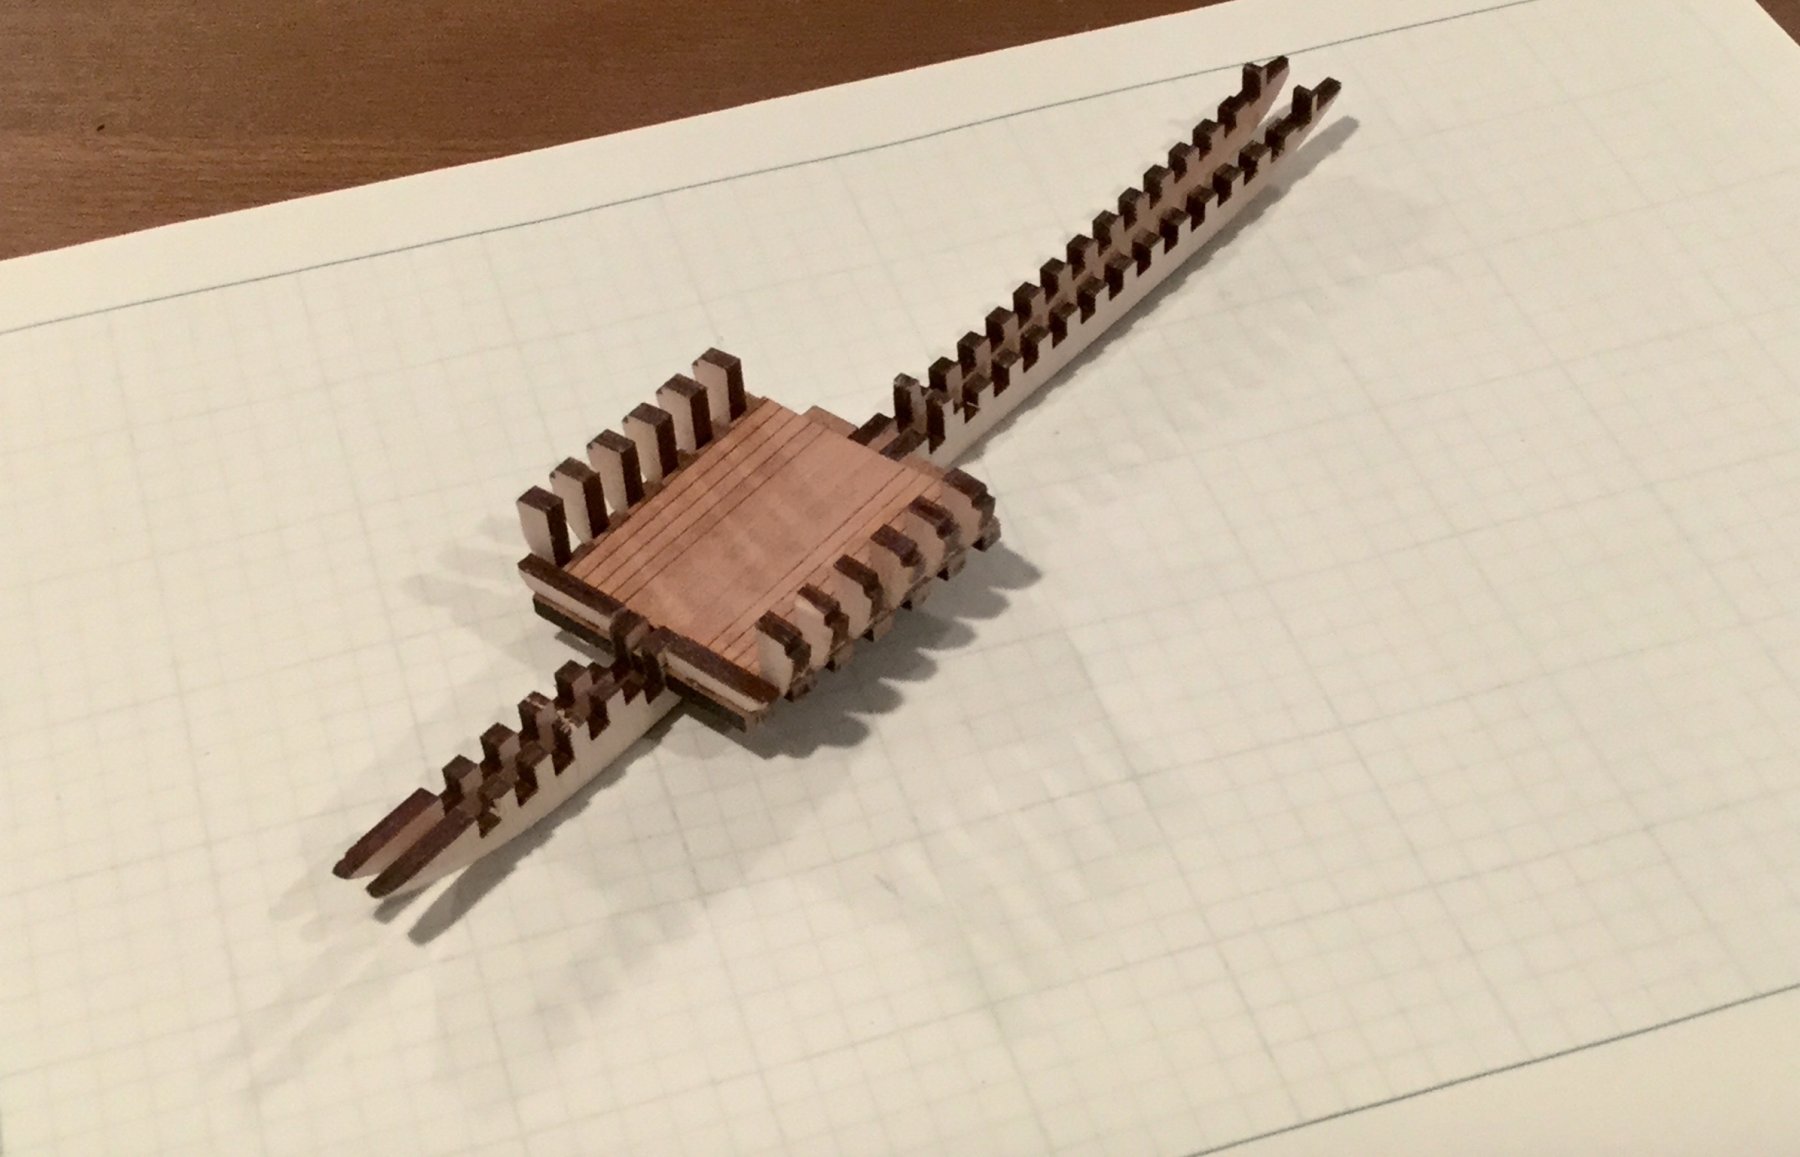
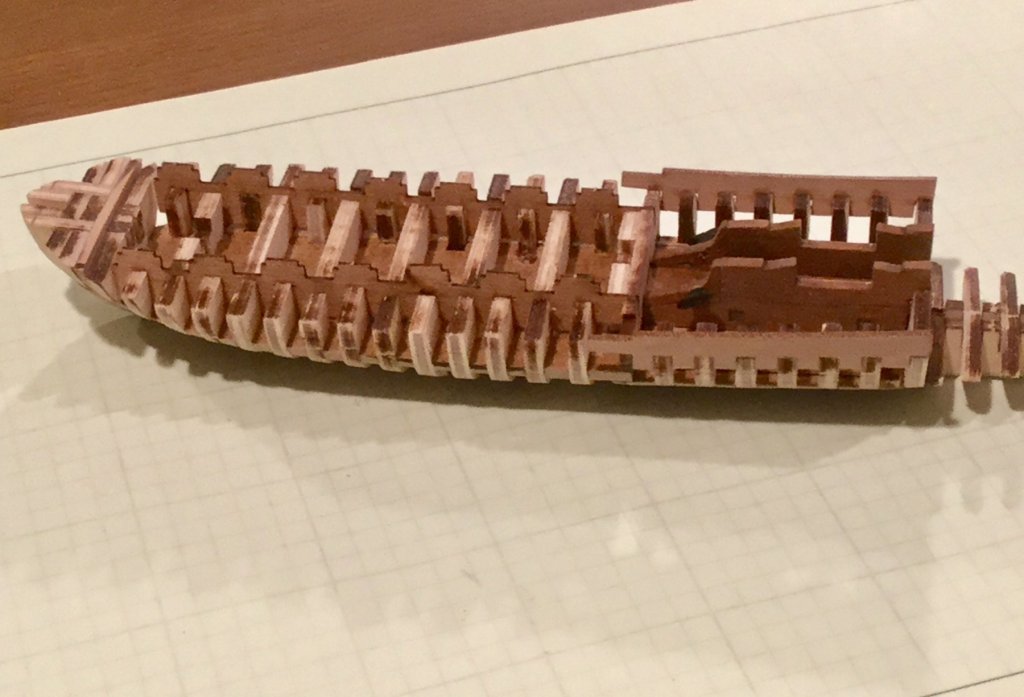
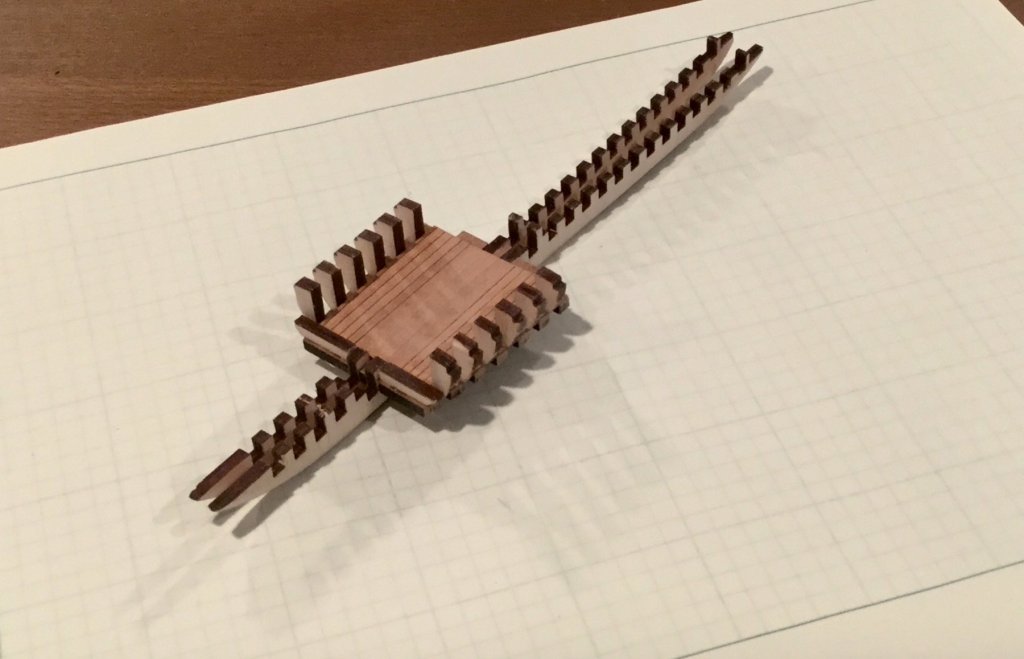
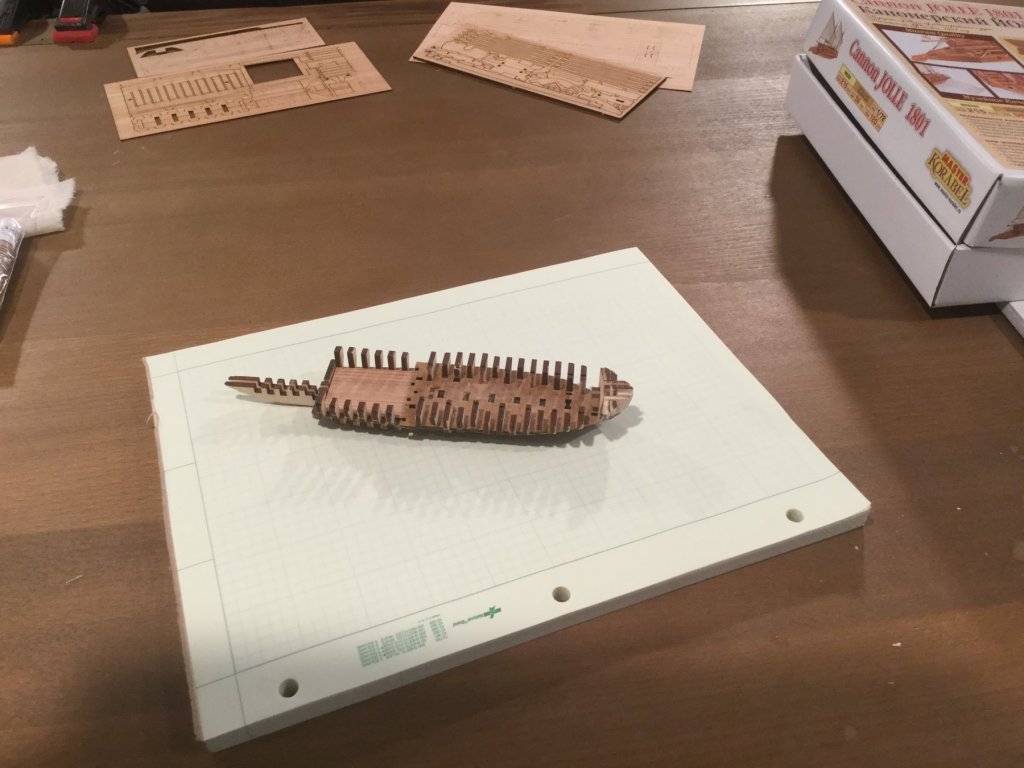
The next step is assembly of the rest of the frame and main keel. I didn’t follow instructions here. I noted there were so many frames that it was almost like assembling a POF model. The instructions have you glue the frames to the main plate (Z3) and then assemble to keel pieces, I assembled the frames to the keel and then placed the deck. After all of the hull was assembled I faired her up.
- 28 replies
-
- 7
-
-
- cannon jolle
- master korabel
- (and 1 more)
-
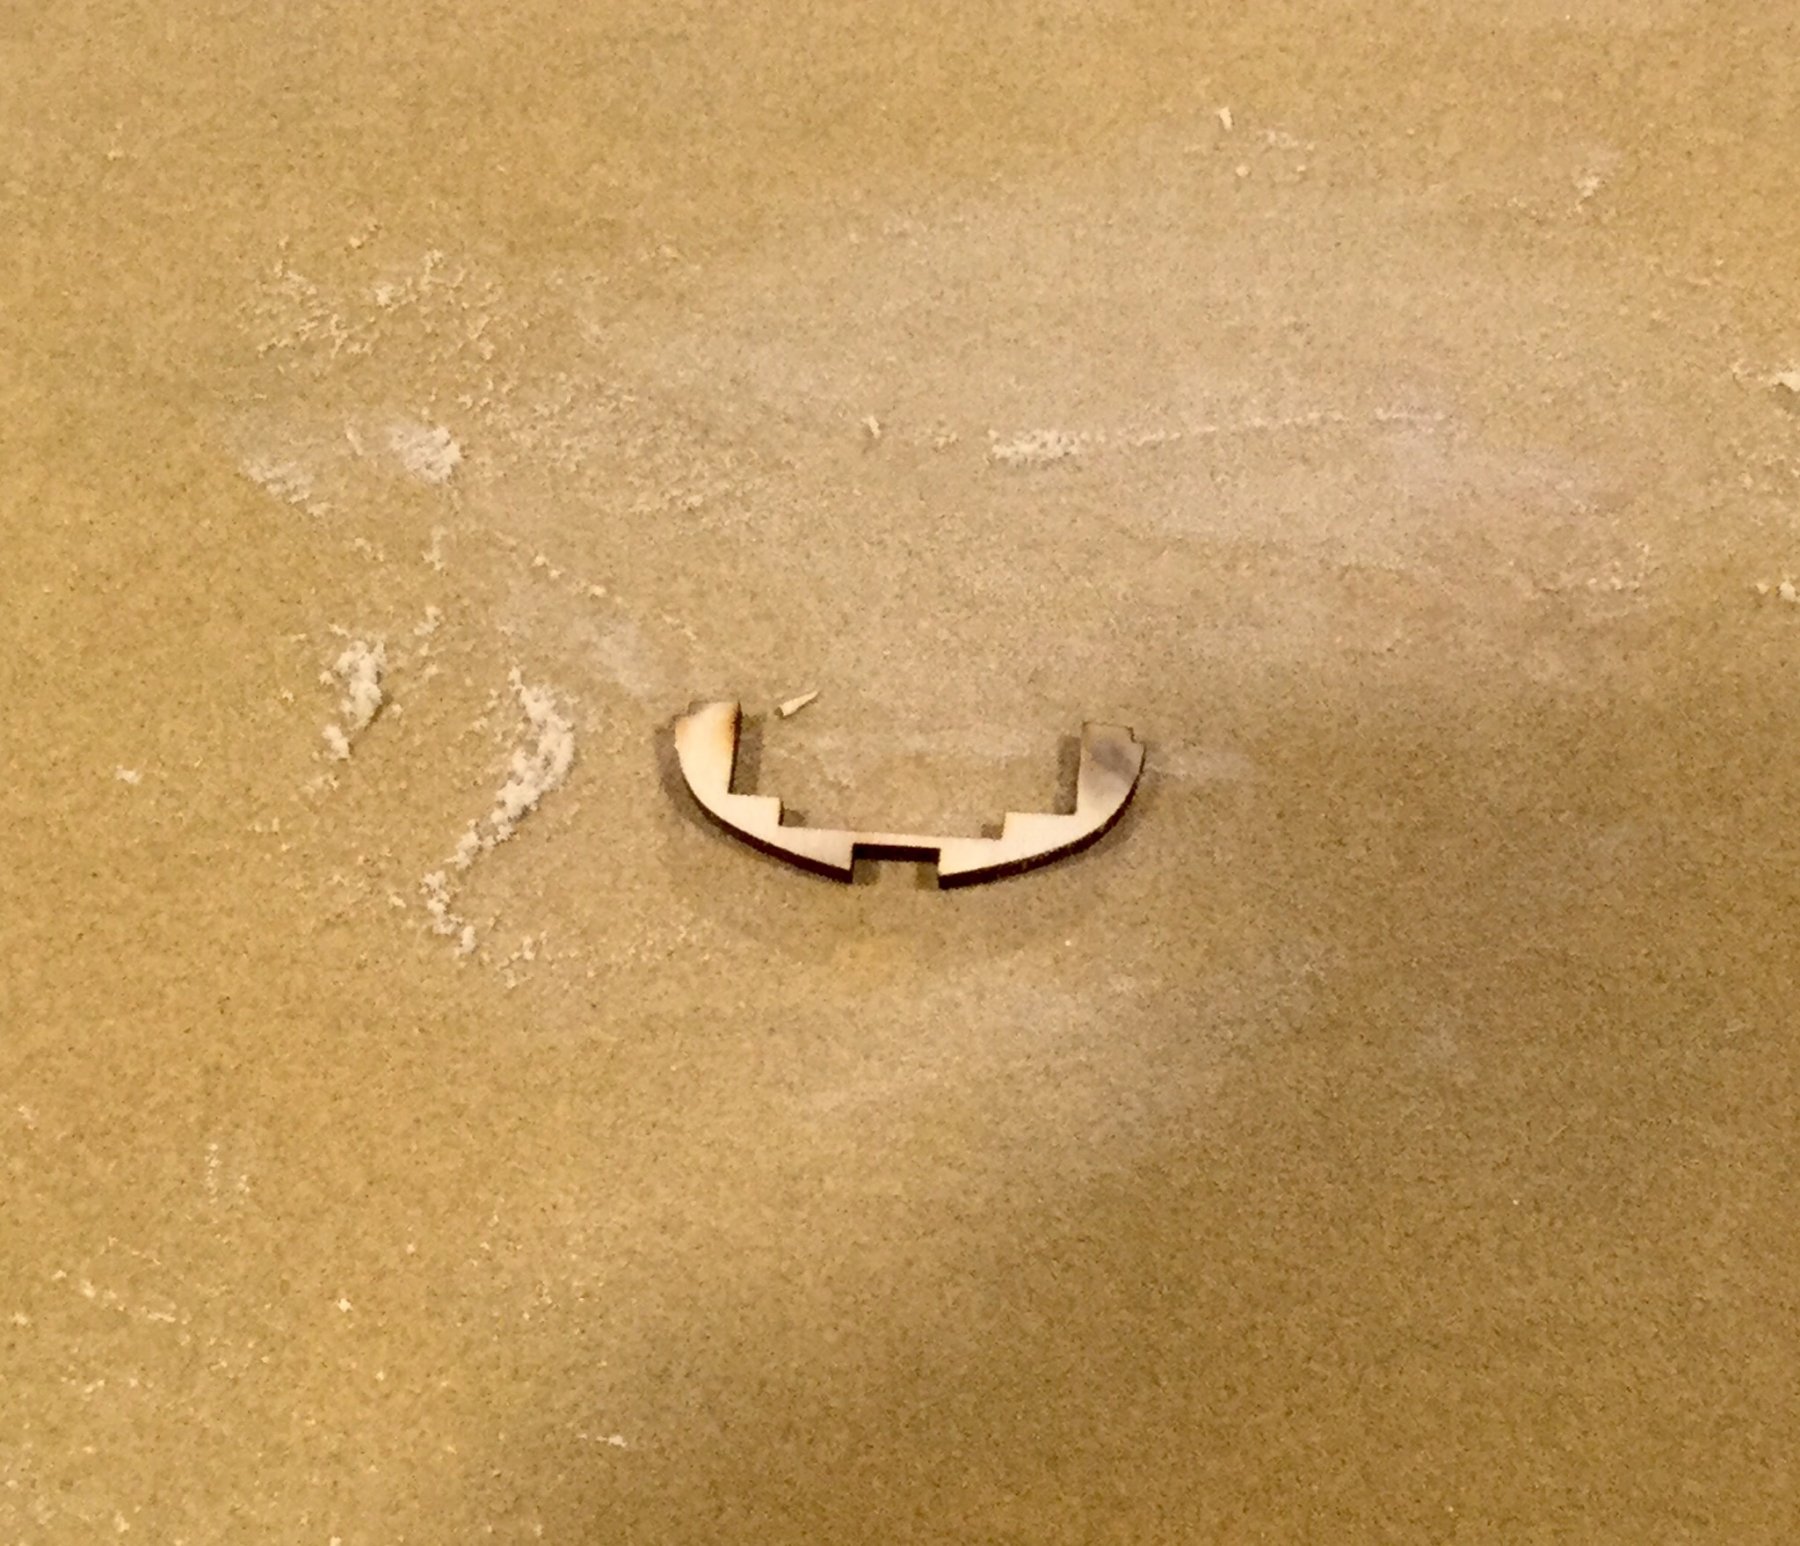
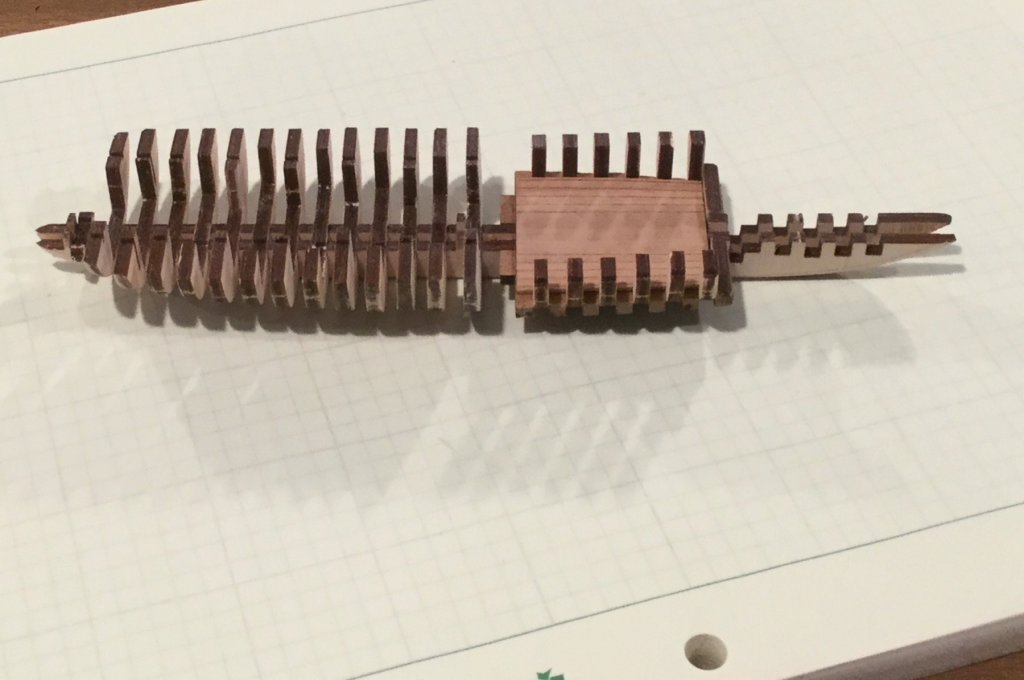
The first steps all involve assembly of the hull frame. The frames are all a little bit thicker than the plate (Z2) so you must sand them down. I used 220 sand paper glued to a piece of marble to make a large even sanding block. Couple of passes on each side and they fit nice and snug. Be careful in assembly as they will go in both ways. Verify the notches are all aligned. First photo shows notches NOT aligned properly.


- 28 replies
-
- 6
-
-
- cannon jolle
- master korabel
- (and 1 more)
-
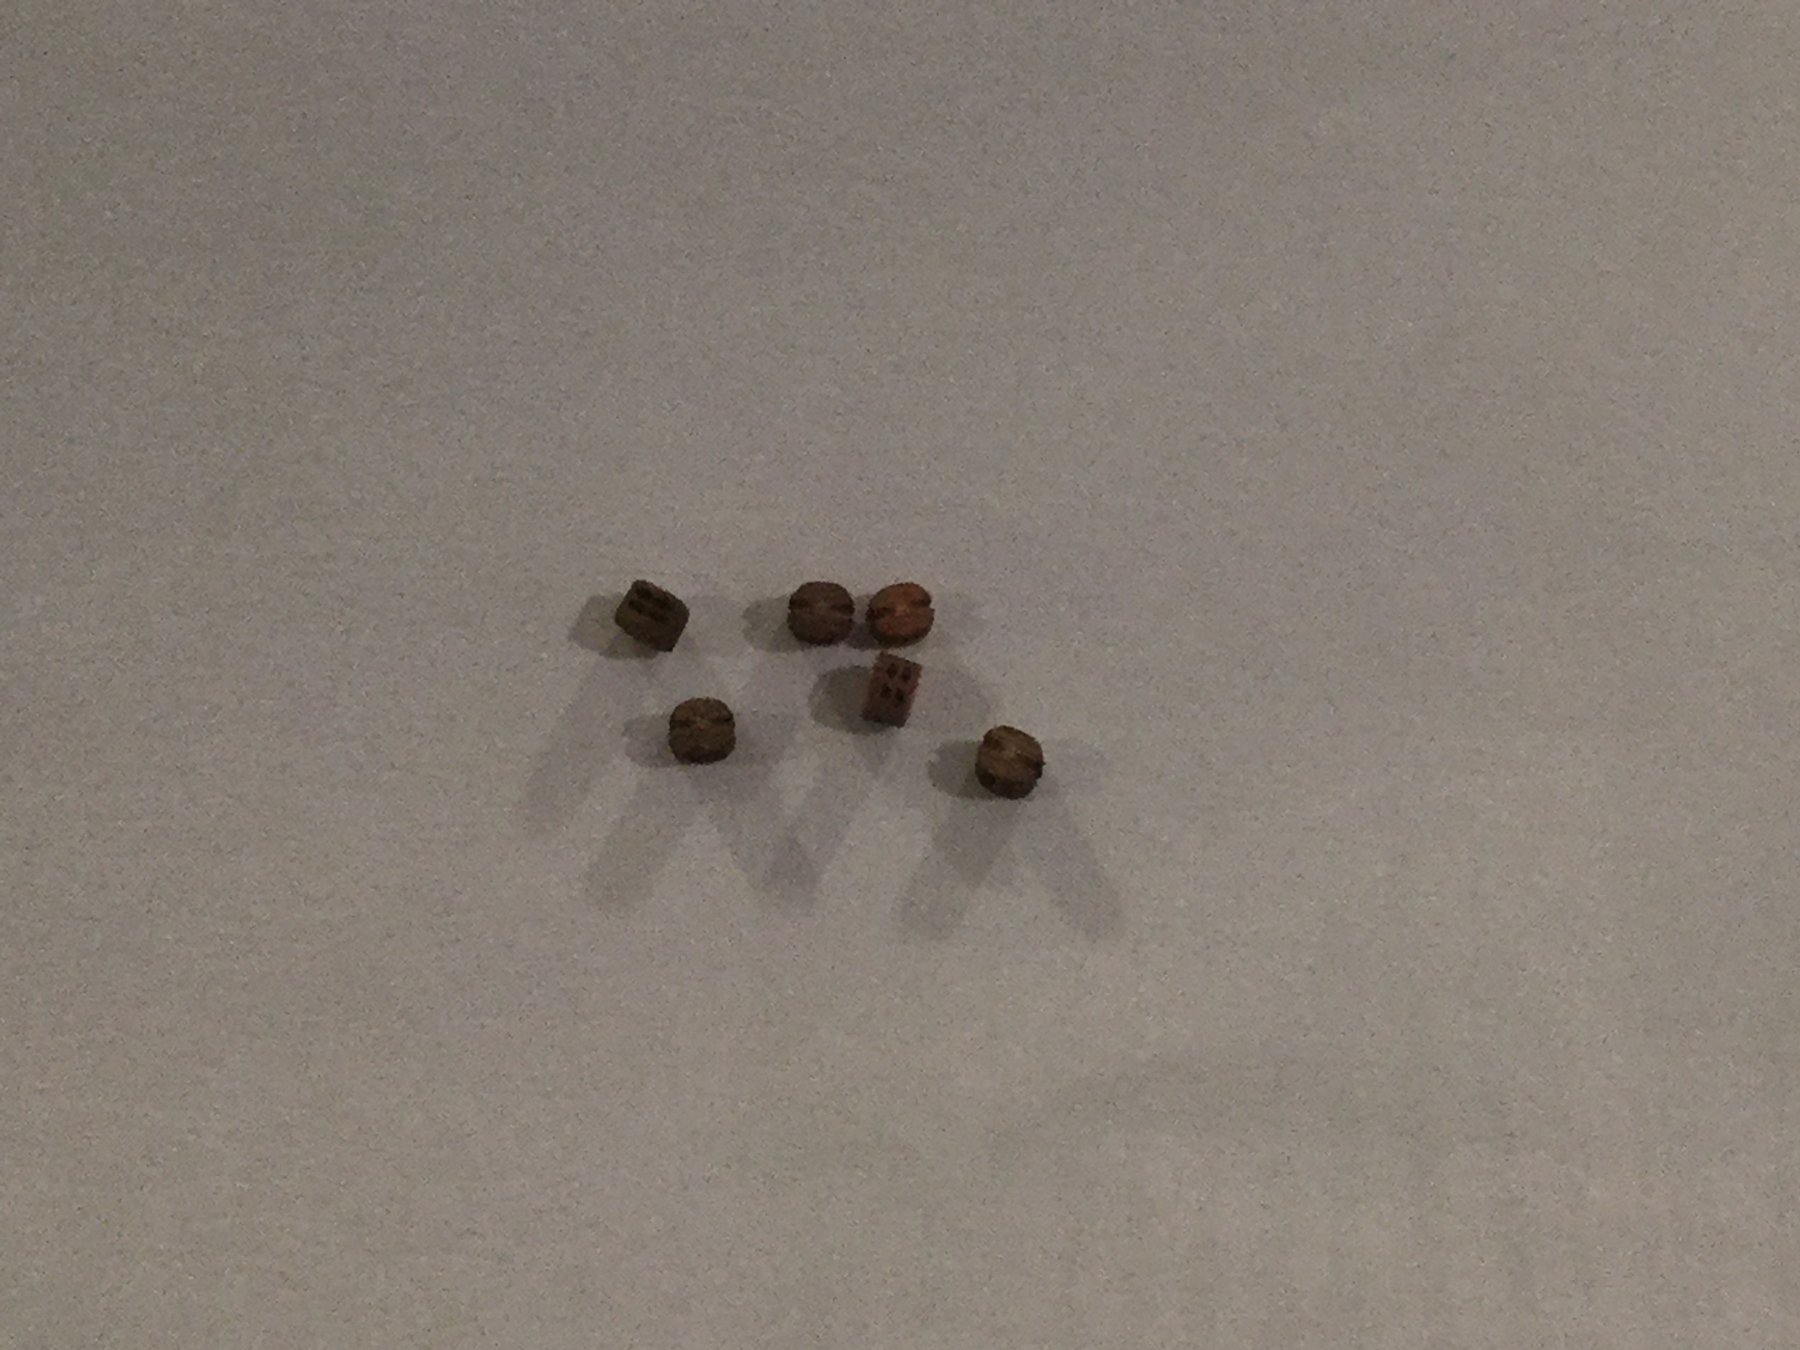
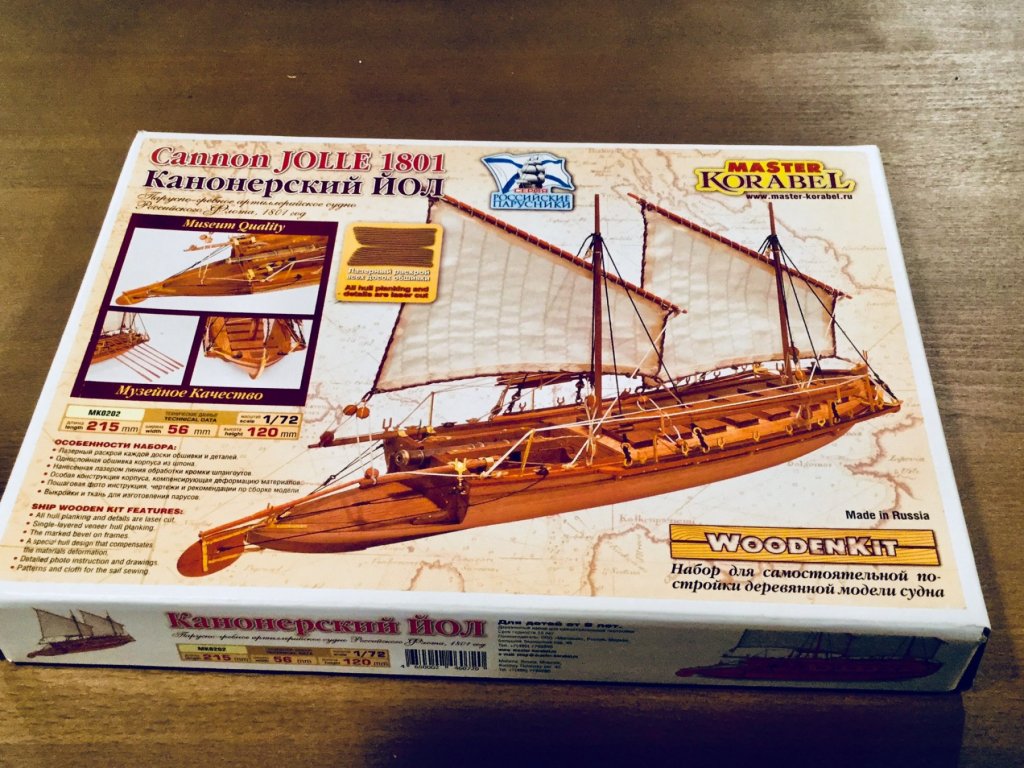
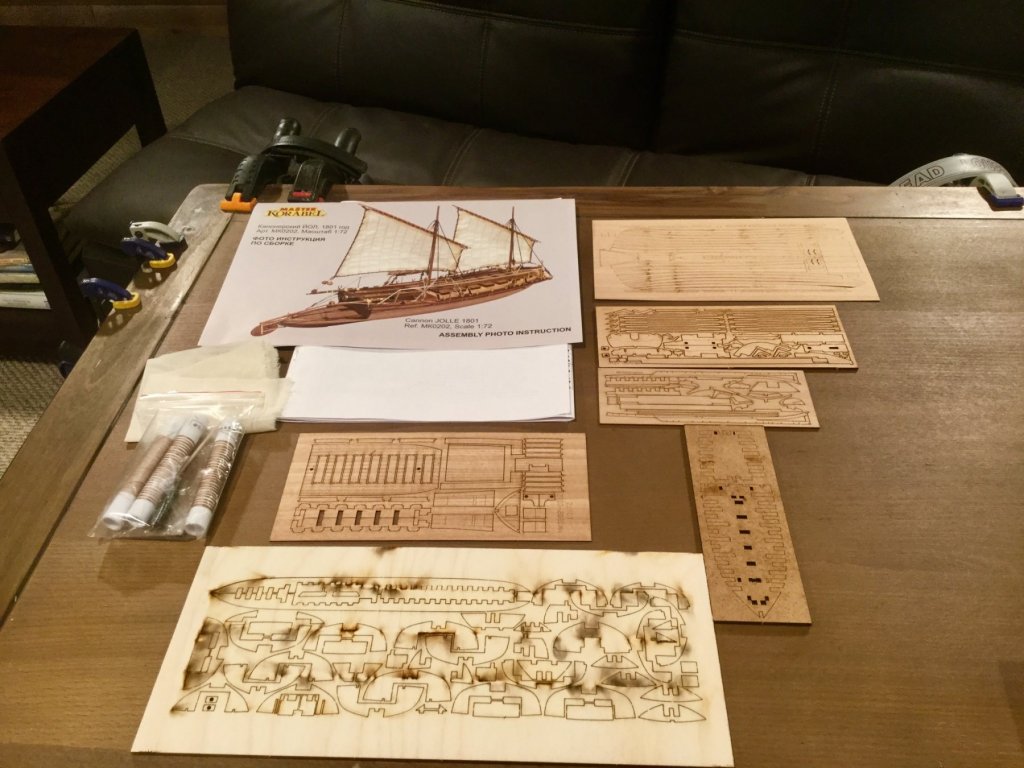
This is my first build log. I have been building wood models for about 10 years and they were always meeeh. And then I found this website and I have learned so much so thanks to all. I picked this model for a couple of reasons one it is different and unique in style, I wanted build something from a new manufacturer, well at least to me, and it is my tweener project between my just completed Syren and my start of the Essex. My Likes and dislikes of this kit: Likes: masterful lazing of parts, the preformed planking is spot on. The instruction PICTURE booklet is very helpful, the English version is just okay. Now that being said my Russian is non existent so more power to the multi-linguist designer of the instructions. Terms are different which lends to some confusion. Dislikes: the name plate is only in Russian. Evil Chuck Passaro has turned me into a line and block snob. I totally did not care for the line provided with kit. It was all shiny and all brown. I attempted to use the blocks supplied but they would all disintegrate or split in half when drilled and the hole was so small My 68 year old eyes just could not use it. What was in the box:
- 28 replies
-
- 6
-
-
- cannon jolle
- master korabel
- (and 1 more)
-
There is nothing wrong with your build. If it were mine I would be happy, happy. Great job. I love the look of the Yellow Cedar decking. I use it myself for my decking.
- 51 replies
-
- 6
-
-
- cheerful
- Syren Ship Model Company
- (and 1 more)
-
1:64 Copper plating
Jim Rogers replied to Peter Y.'s topic in Building, Framing, Planking and plating a ships hull and deck
I agree with Stein. I bought some of the single plates and compared them to punched foil tape using Chucks jig and the tape won hands down. I also like a little overlap as edge to edge can leave a slight gap caused by plate imperfections during manufacturing. Just my opinion.- 14 replies
-
- 3
-
-
- pickle
- caldercraft
- (and 1 more)
-
Looks great
-
I use it for decking as I think the color is closer to a real hollystoned deck than Holly.
-
Can I get some knot advise?
Jim Rogers replied to Antonio Vasquez's topic in Masting, rigging and sails
I have never tied knots directly to the hammock crane. I always started and finished the lines tied to an eyepin at each end passing the line through a hole in the hammock crane. -
Brass Black
Jim Rogers replied to Nirvana's topic in Painting, finishing and weathering products and techniques
And what is the name of the product? Never mind it is in the Title.... read James read. -
I always build launch way stands because they easy and I like the look. I use a much simpler graying process. Dip in Golden Oak Stain wipe, dip in Gray stain wipe. Done.
-
No problem. I just took some 1/16th stock and rounded it off.
-
I purchased the Cannon Jolle just to get a feel for your kits. What a wonderful little model. Precise laser cuts. My only issue is getting the metal parts cut off the tree. They laser cuts are so small and precise I can’t get my parts nipper in the slot. Love the precut planking. The plans call for masts as part Z3 but there isn’t any Z3 in the box. I will be purchasing the Phoenix and the tender. Does Model Expo carry the plus models? Where can I get pre made sails.
-
She looks awesome. The green is growing on me.
-
Torpedo Warheads (MK 44) are Brown with a yellow strip or Gray with a yellow strip. MK 48 warheads are Green with a yellow strip. Exercise heads are orange. Never saw a Red or Yellow Head in my entire 40 years. A Submarine out for a war patrol would not carry exercise Torpedoes. Modern weapons are waxed to help prevent corrosion and use special paint that does have a shine to it During WW2 Torpedoes were generally a dull steel color or green including the warhead. Retired Torpedomen’s Mate Chief