king derelict
-
Posts
2,958 -
Joined
-
Last visited
Content Type
Profiles
Forums
Gallery
Events
Everything posted by king derelict
-
A beautiful model and complimented by the figure which is super and the tidy base. alan
-
The weathering really makes the model a spectacular work. The sand blasted window is great and very subtle. alan
-
A great idea and beautifully executed alan
-
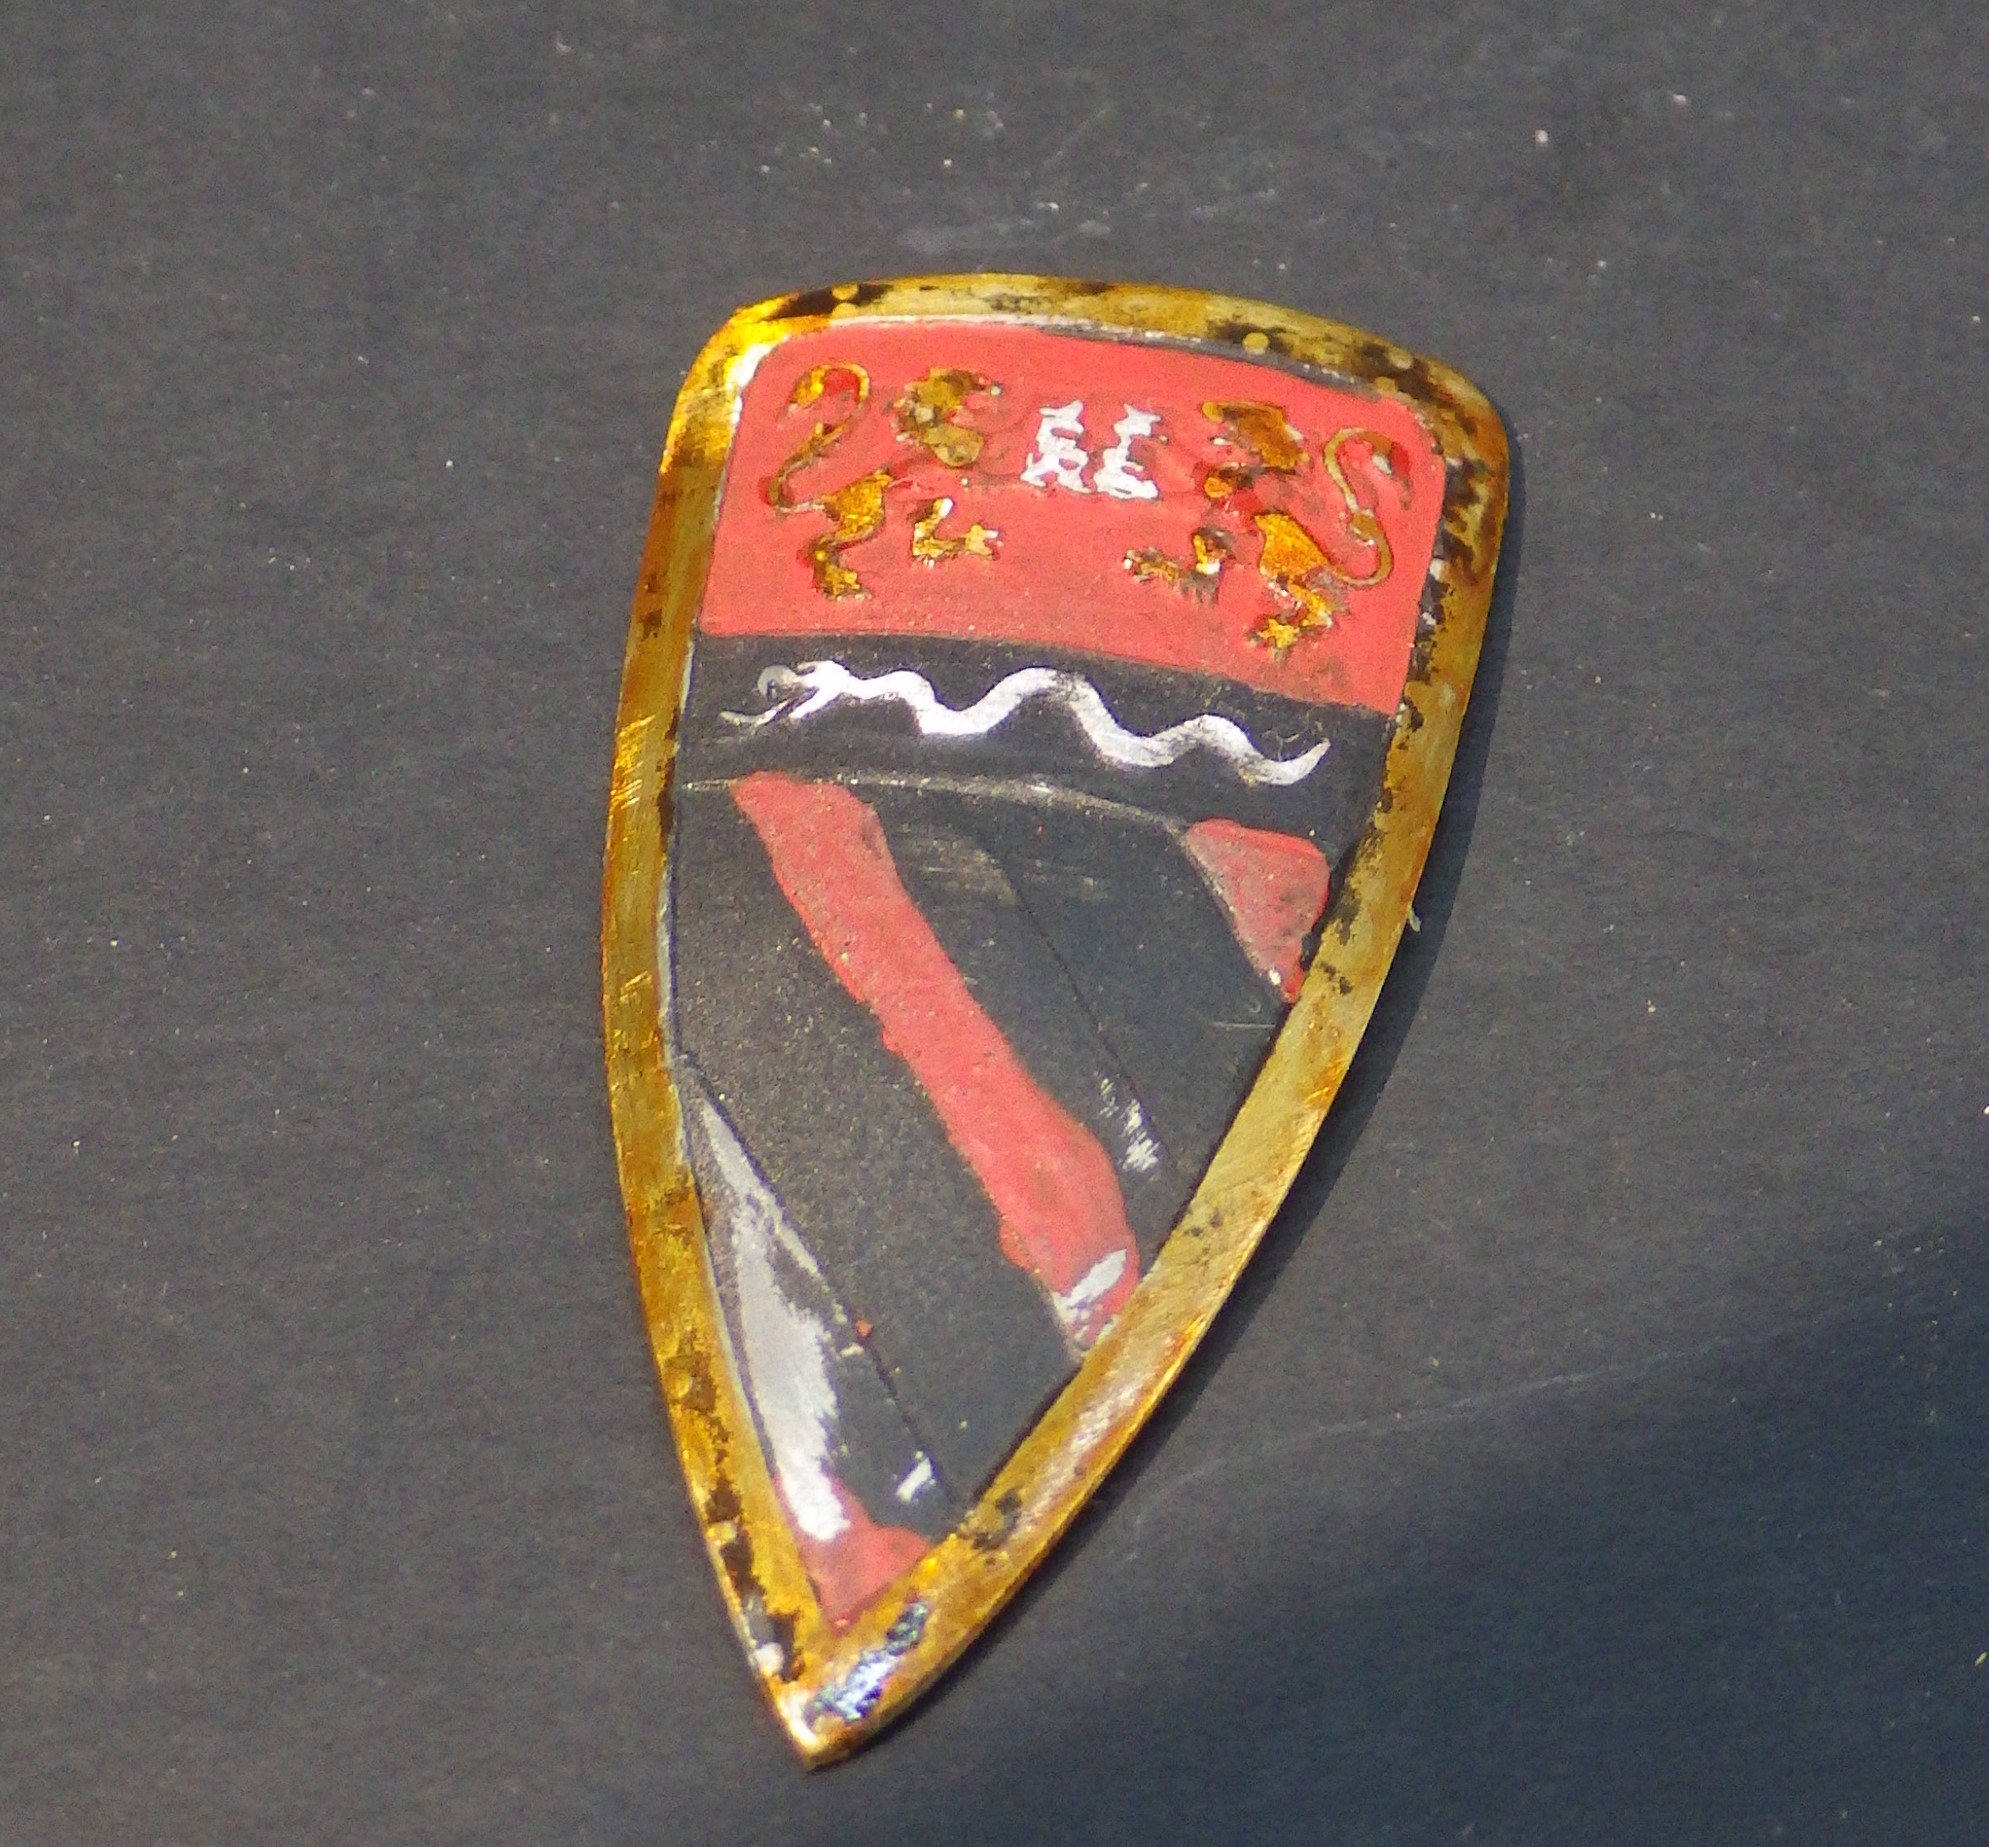
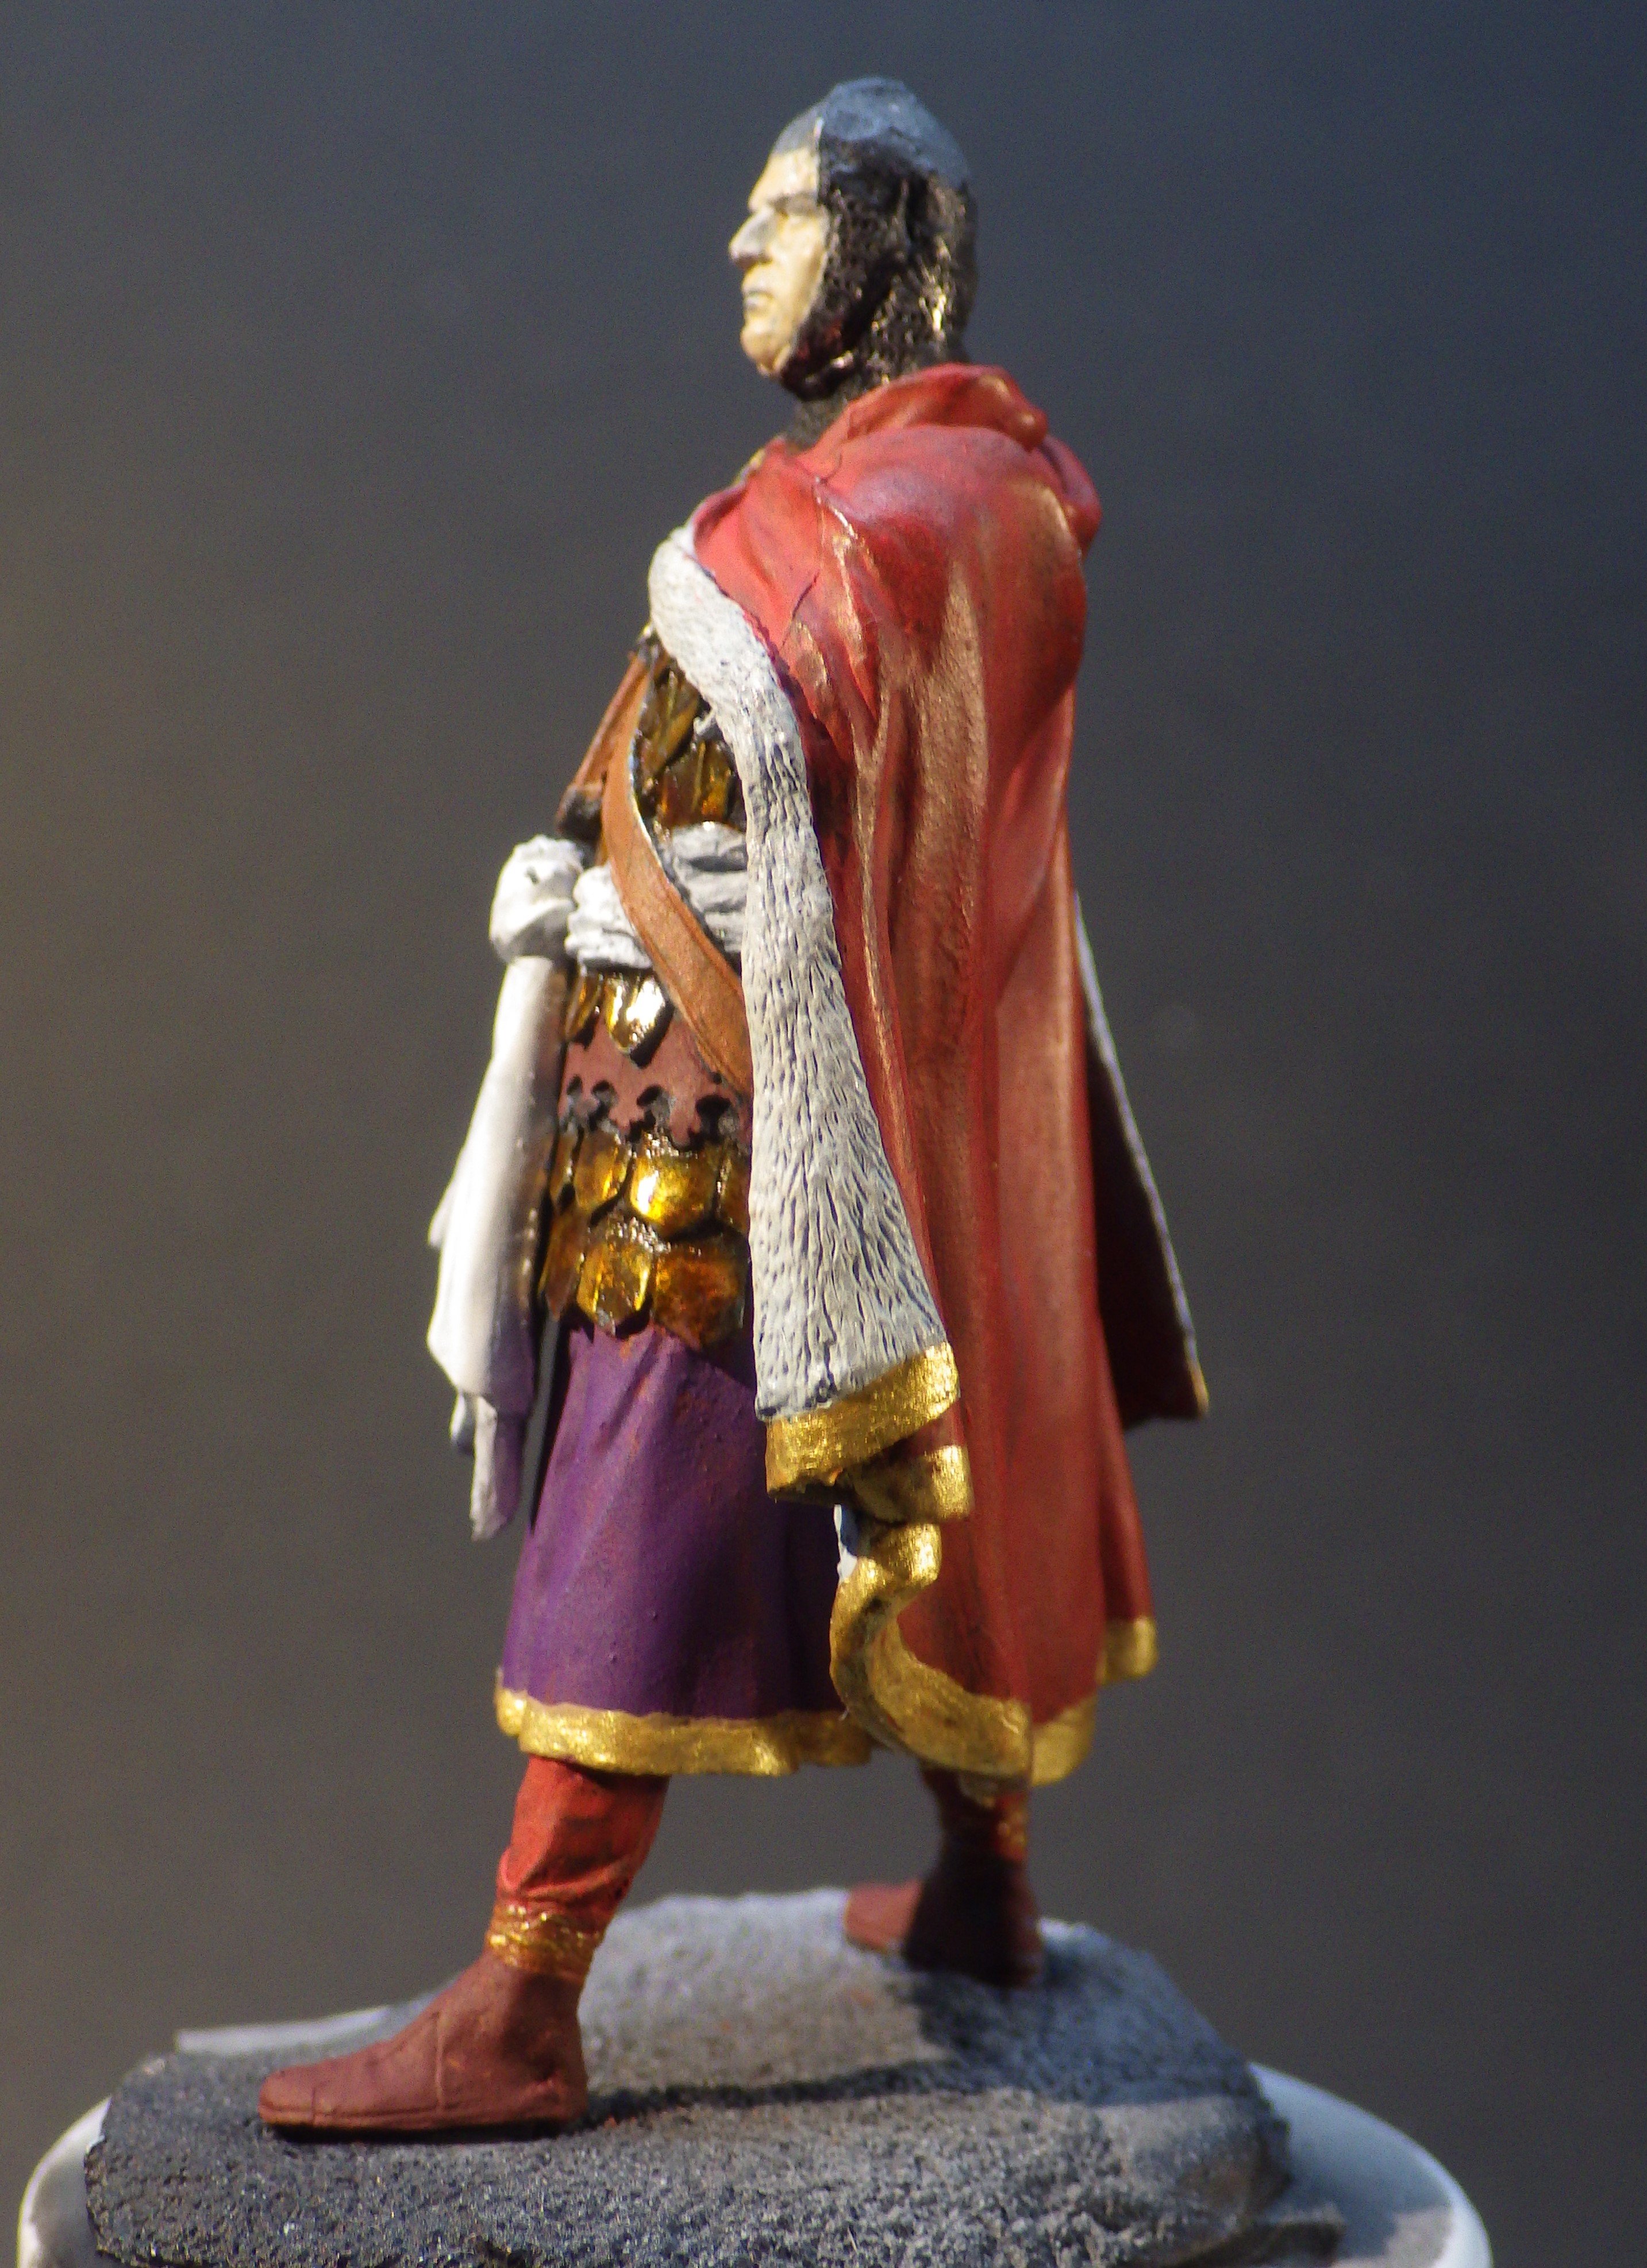
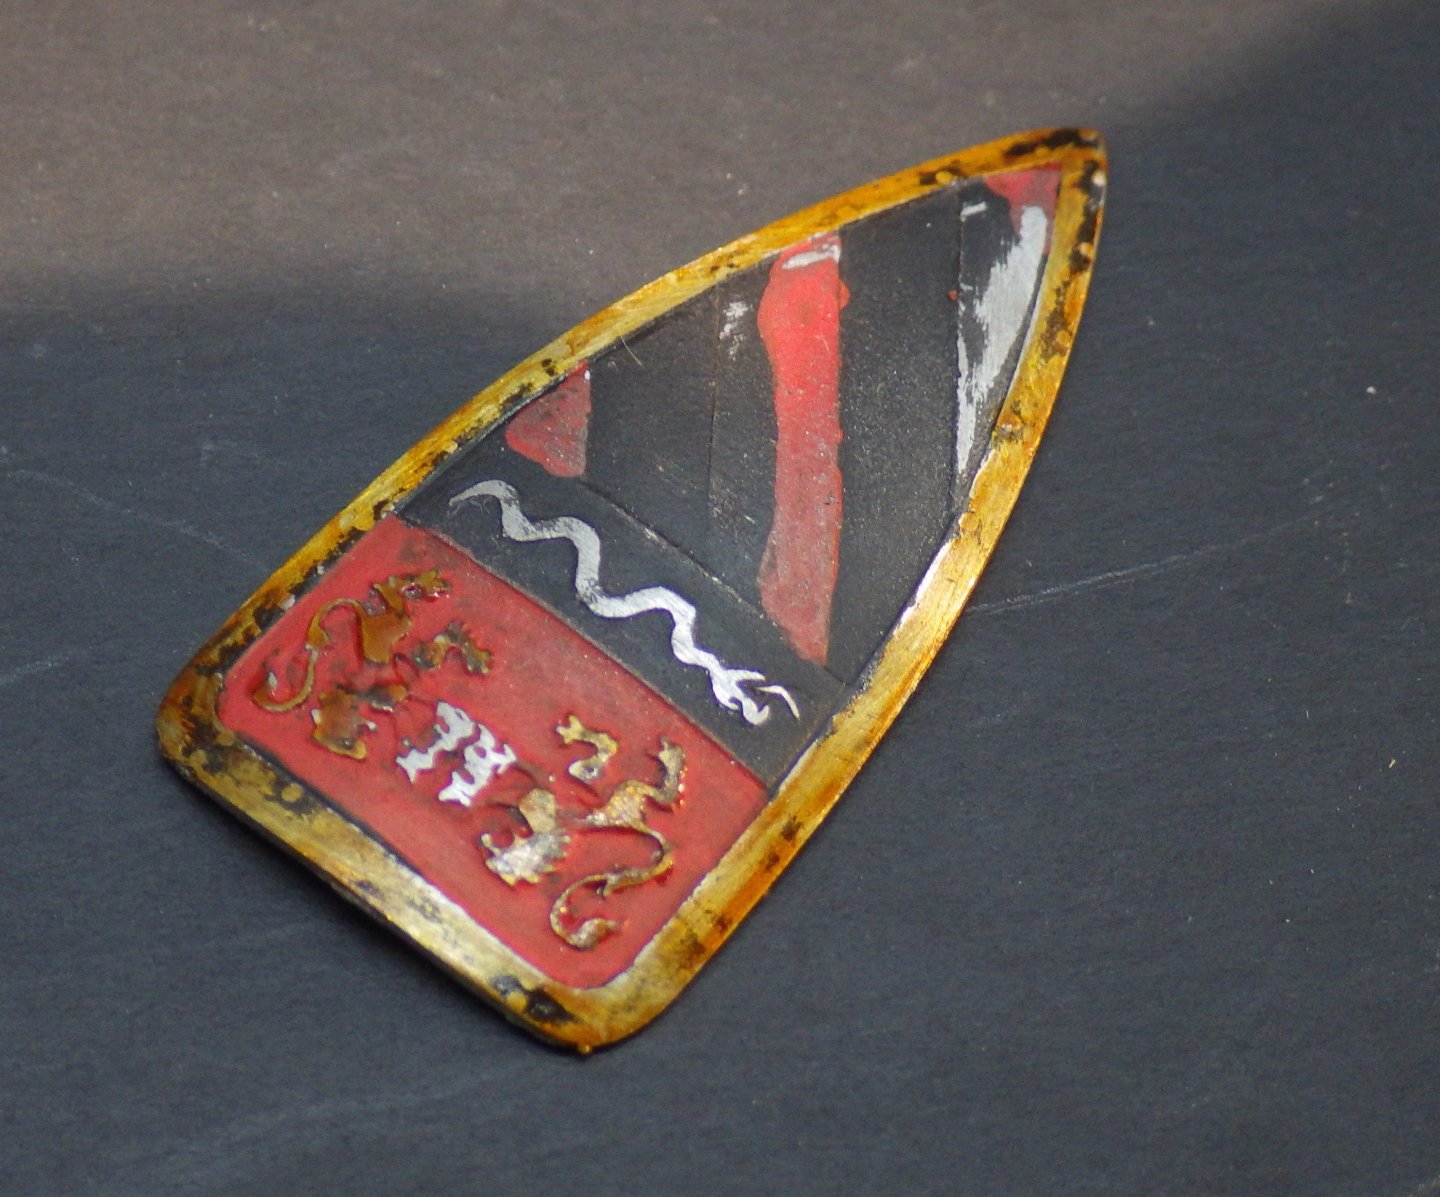
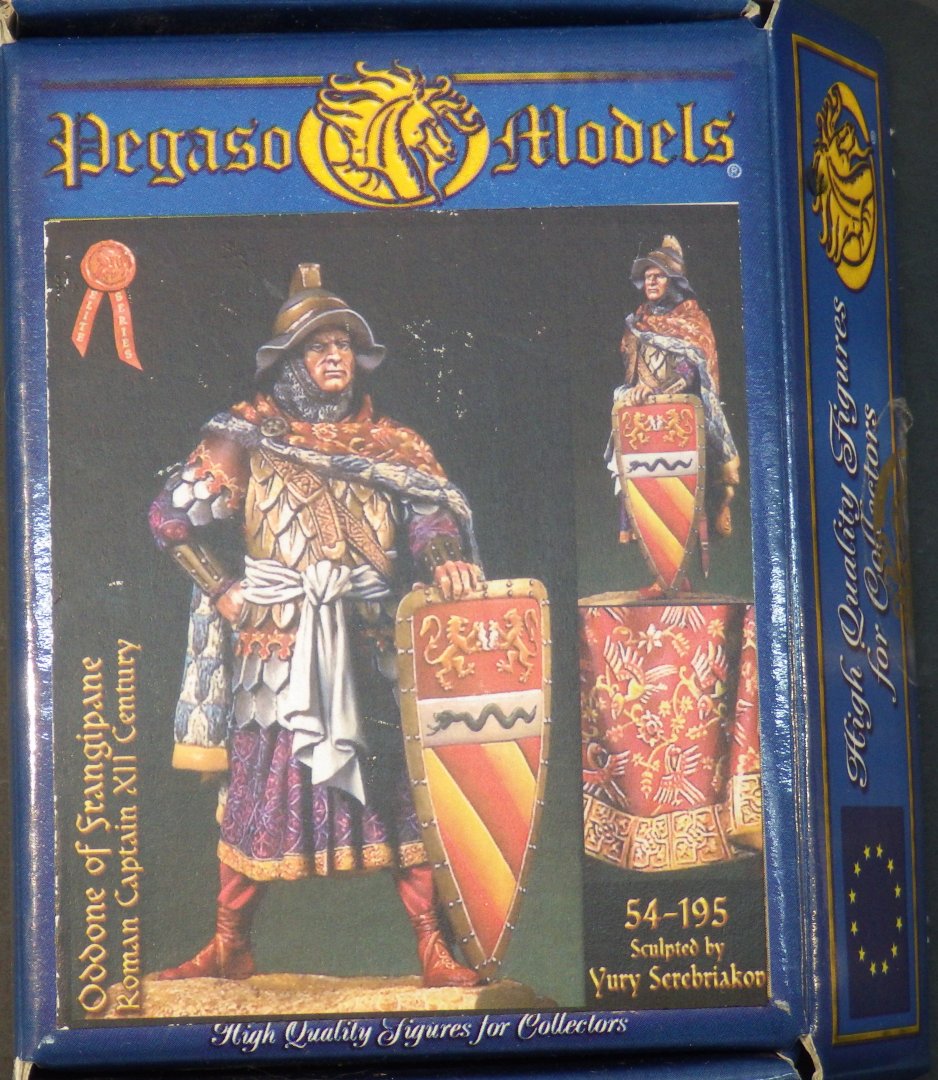
Thank you very much Henry. That is very useful information. I couldn’t decide on a plan to shade the colors of the diagonal stripes on the shield and had decided that they would be solid red and gold. I’m not sure whether the box art is really the model or an image based on the model. There are a few minor differences between the box art and the model (and the painting notes). I honestly can’t see how one would paint the embroidery on tunic and cloak either. so far I have only found two other completed Oddones. One on Etsy and one in Kazakhstan. Both for sale at about $60. Neither attempted the squirrel fur, shaded shield or embroidered tunic and cloak. The lions are apparently ripping a piece of bread apart. Alan
-
Thank you very much Henry. I’ve seen the blue and white pattern in heraldry but never realized how it came to be. That does tie in with the painting notes from Pegaso too. I may work up the courage to try to enhance the cloak lining. thanks again alan
-
Coming together really well. Making a crowd of pets to ship onboard is a terrific idea Alan
- 55 replies
-
- 1
-

-
- Le Martegaou
- billing boats
- (and 1 more)
-
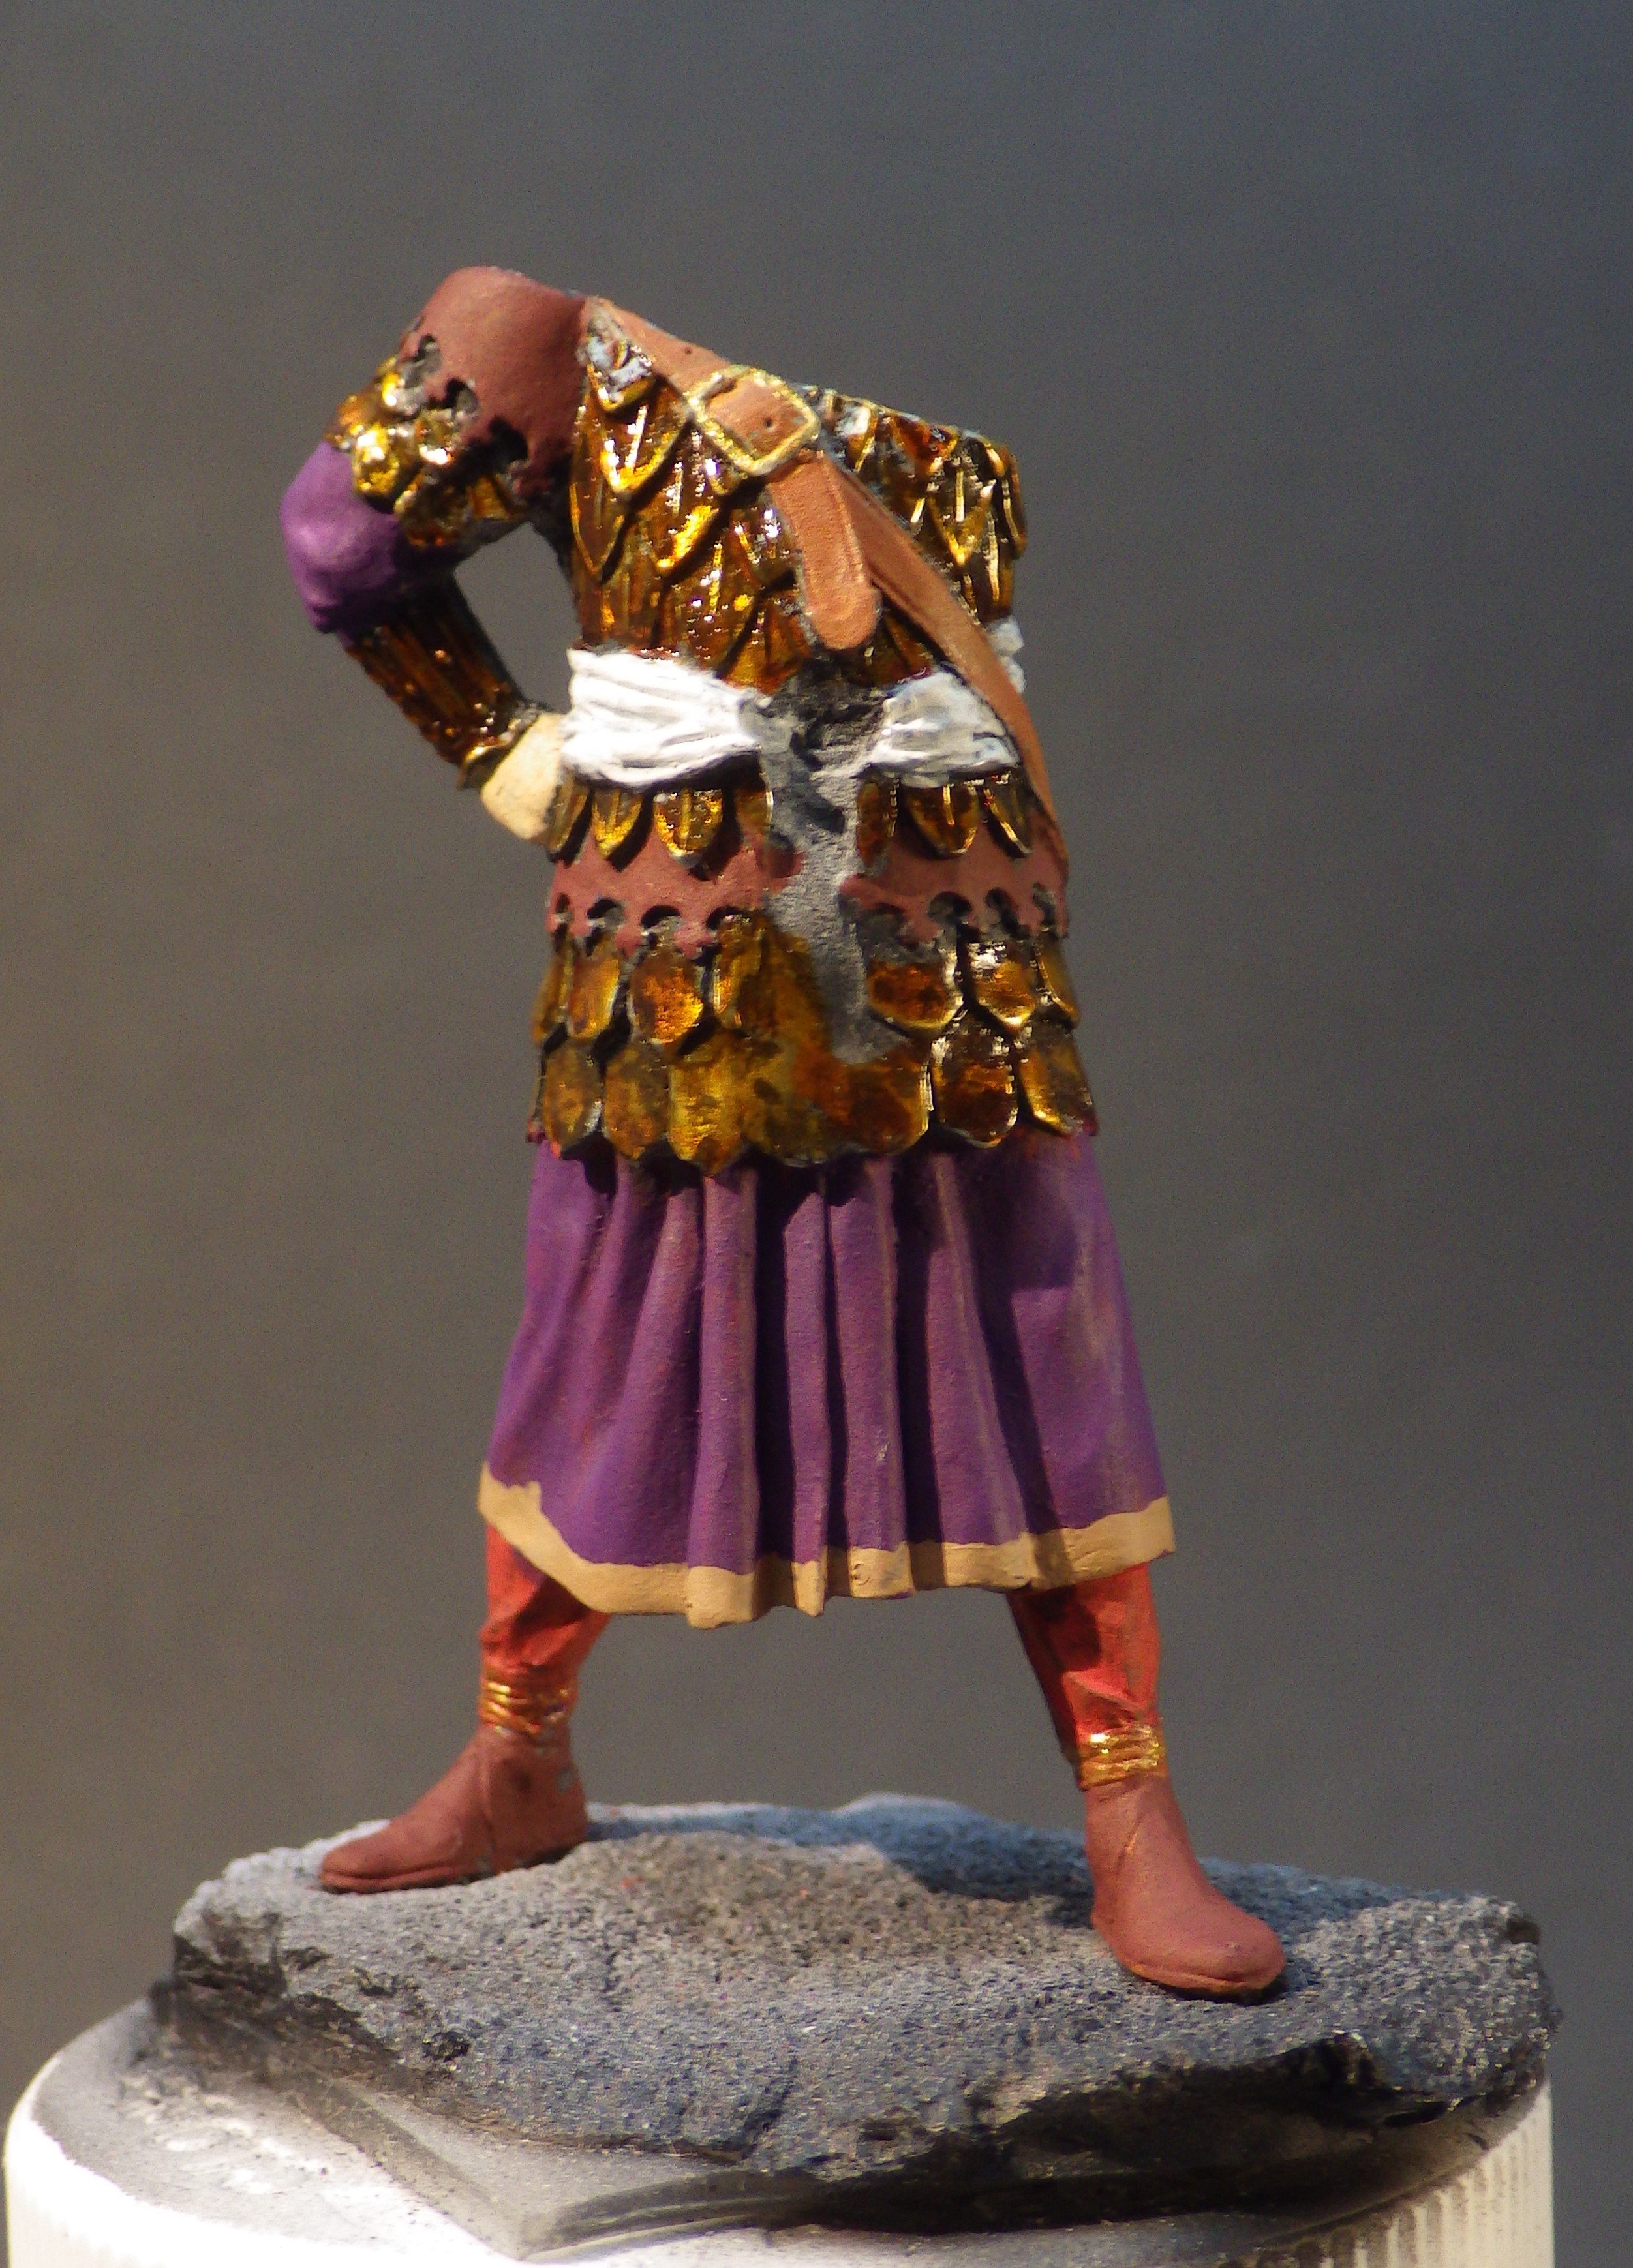
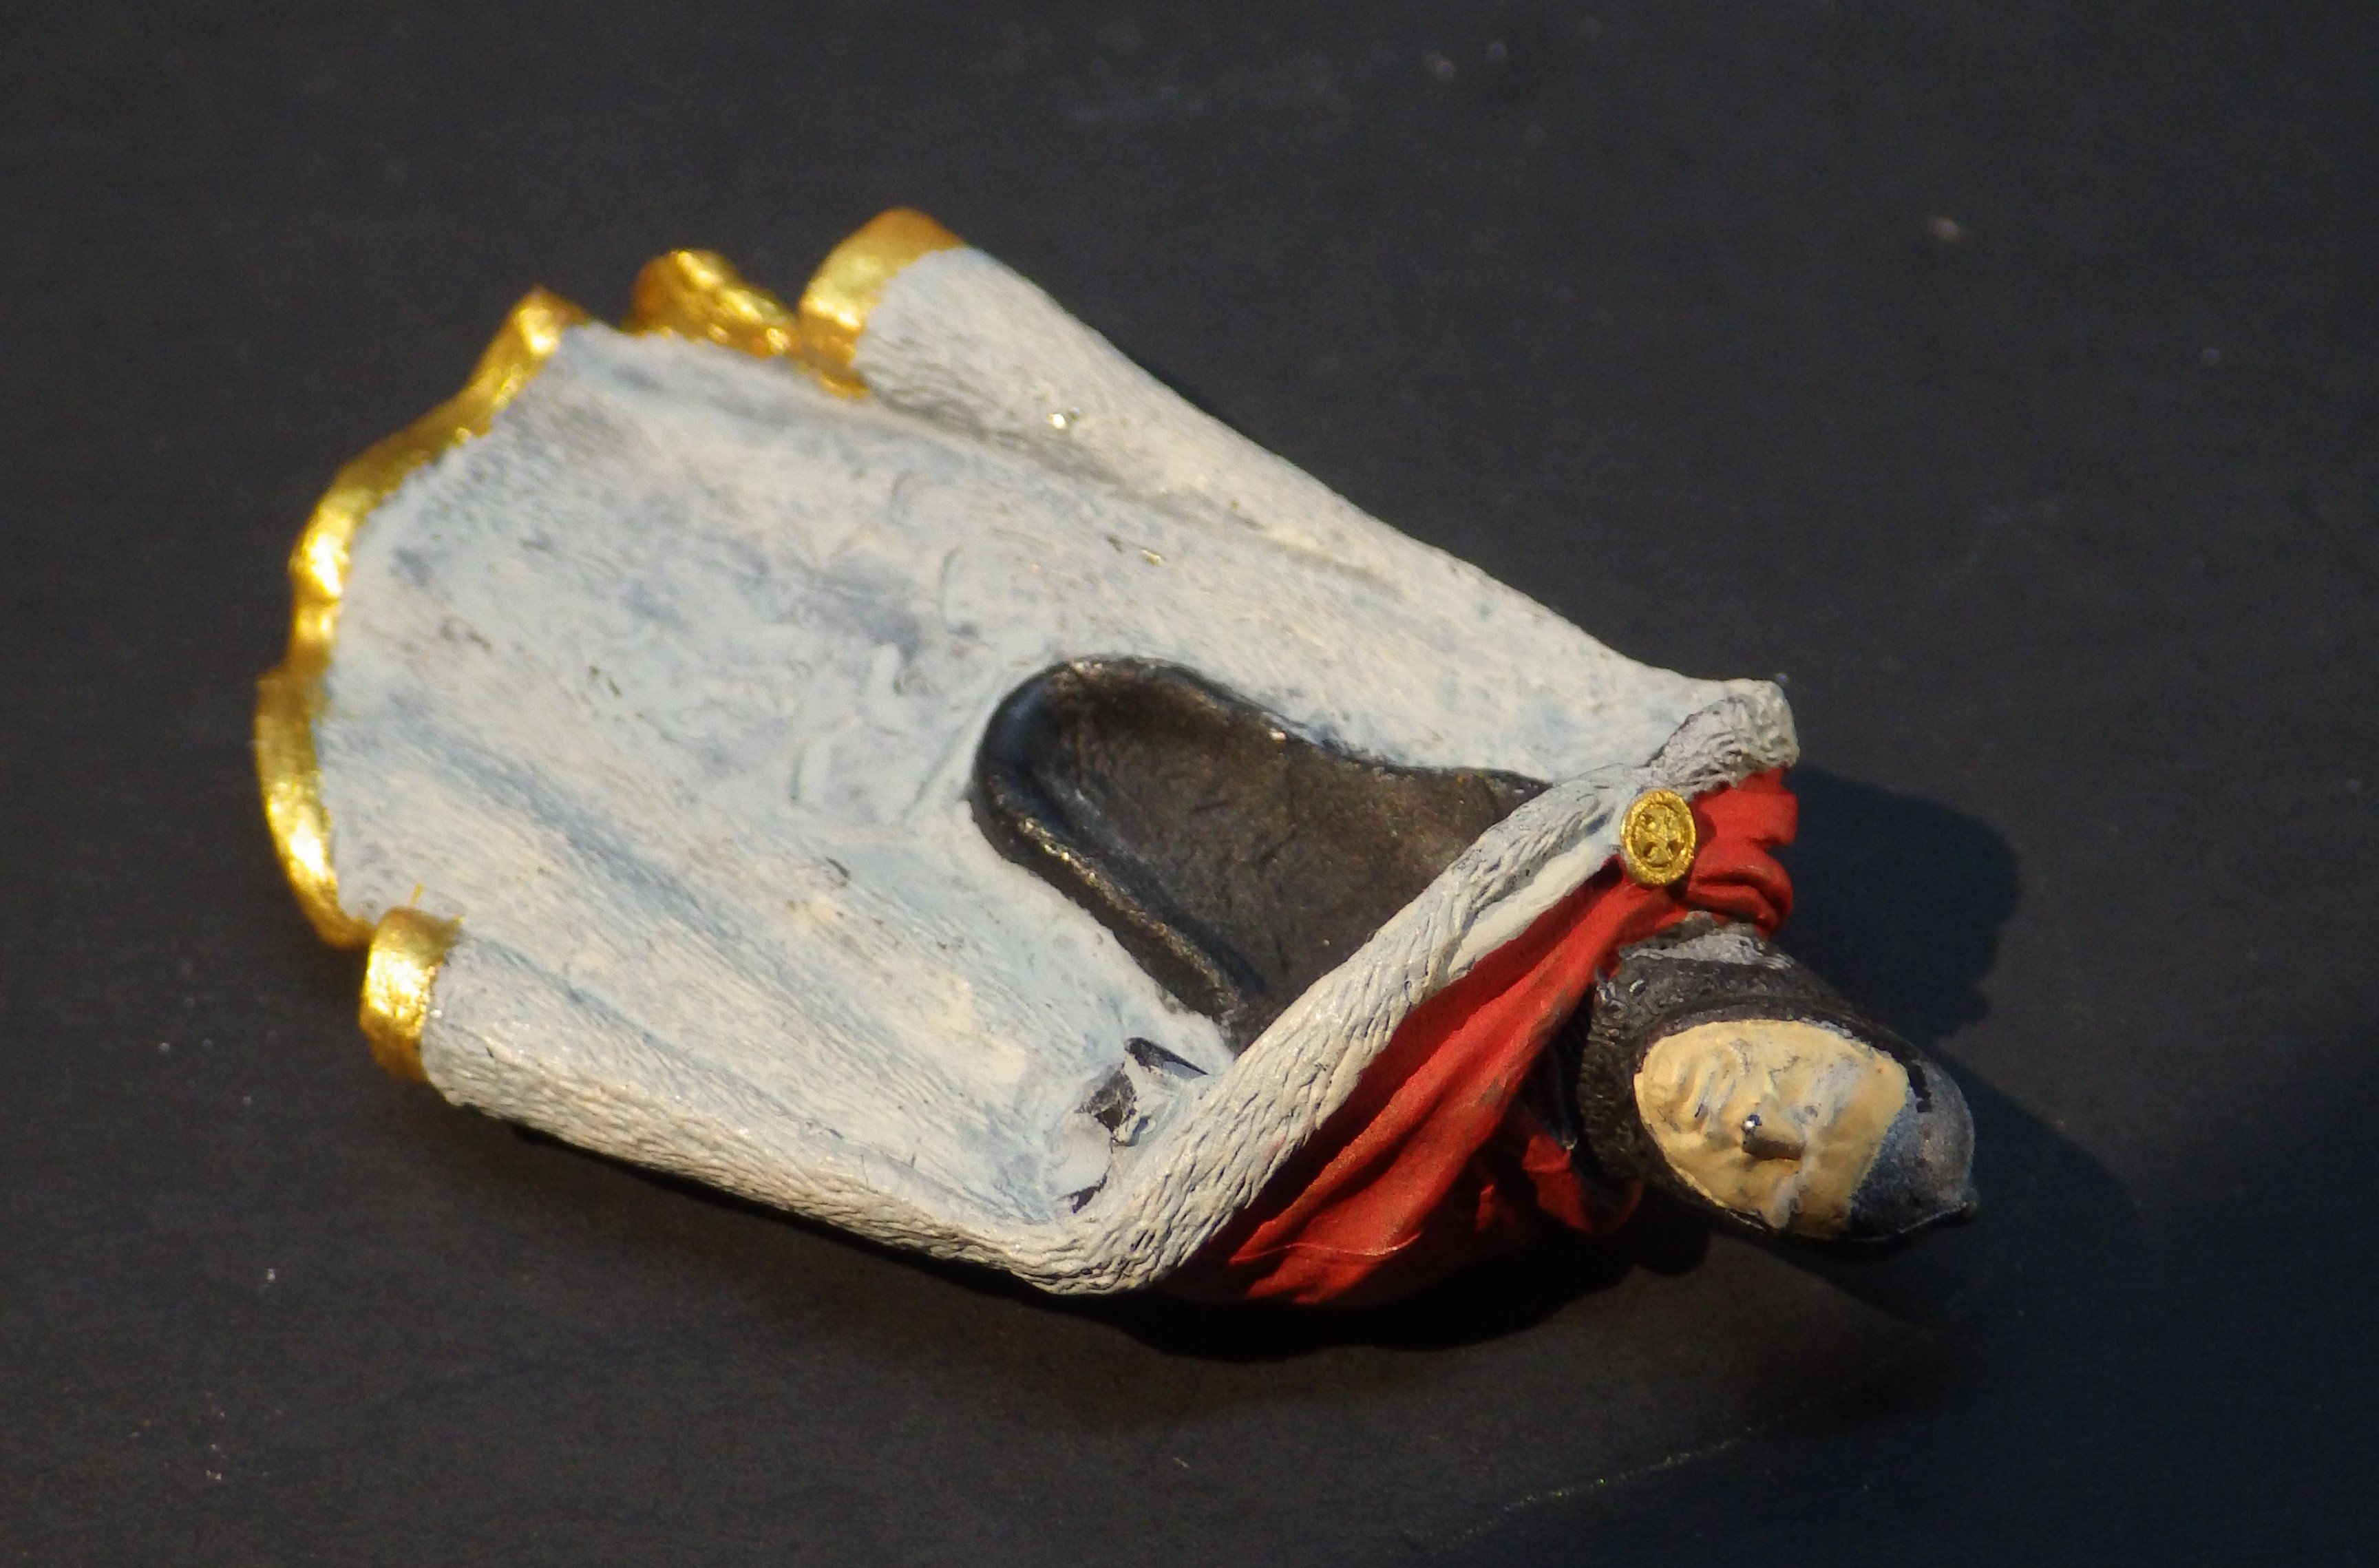
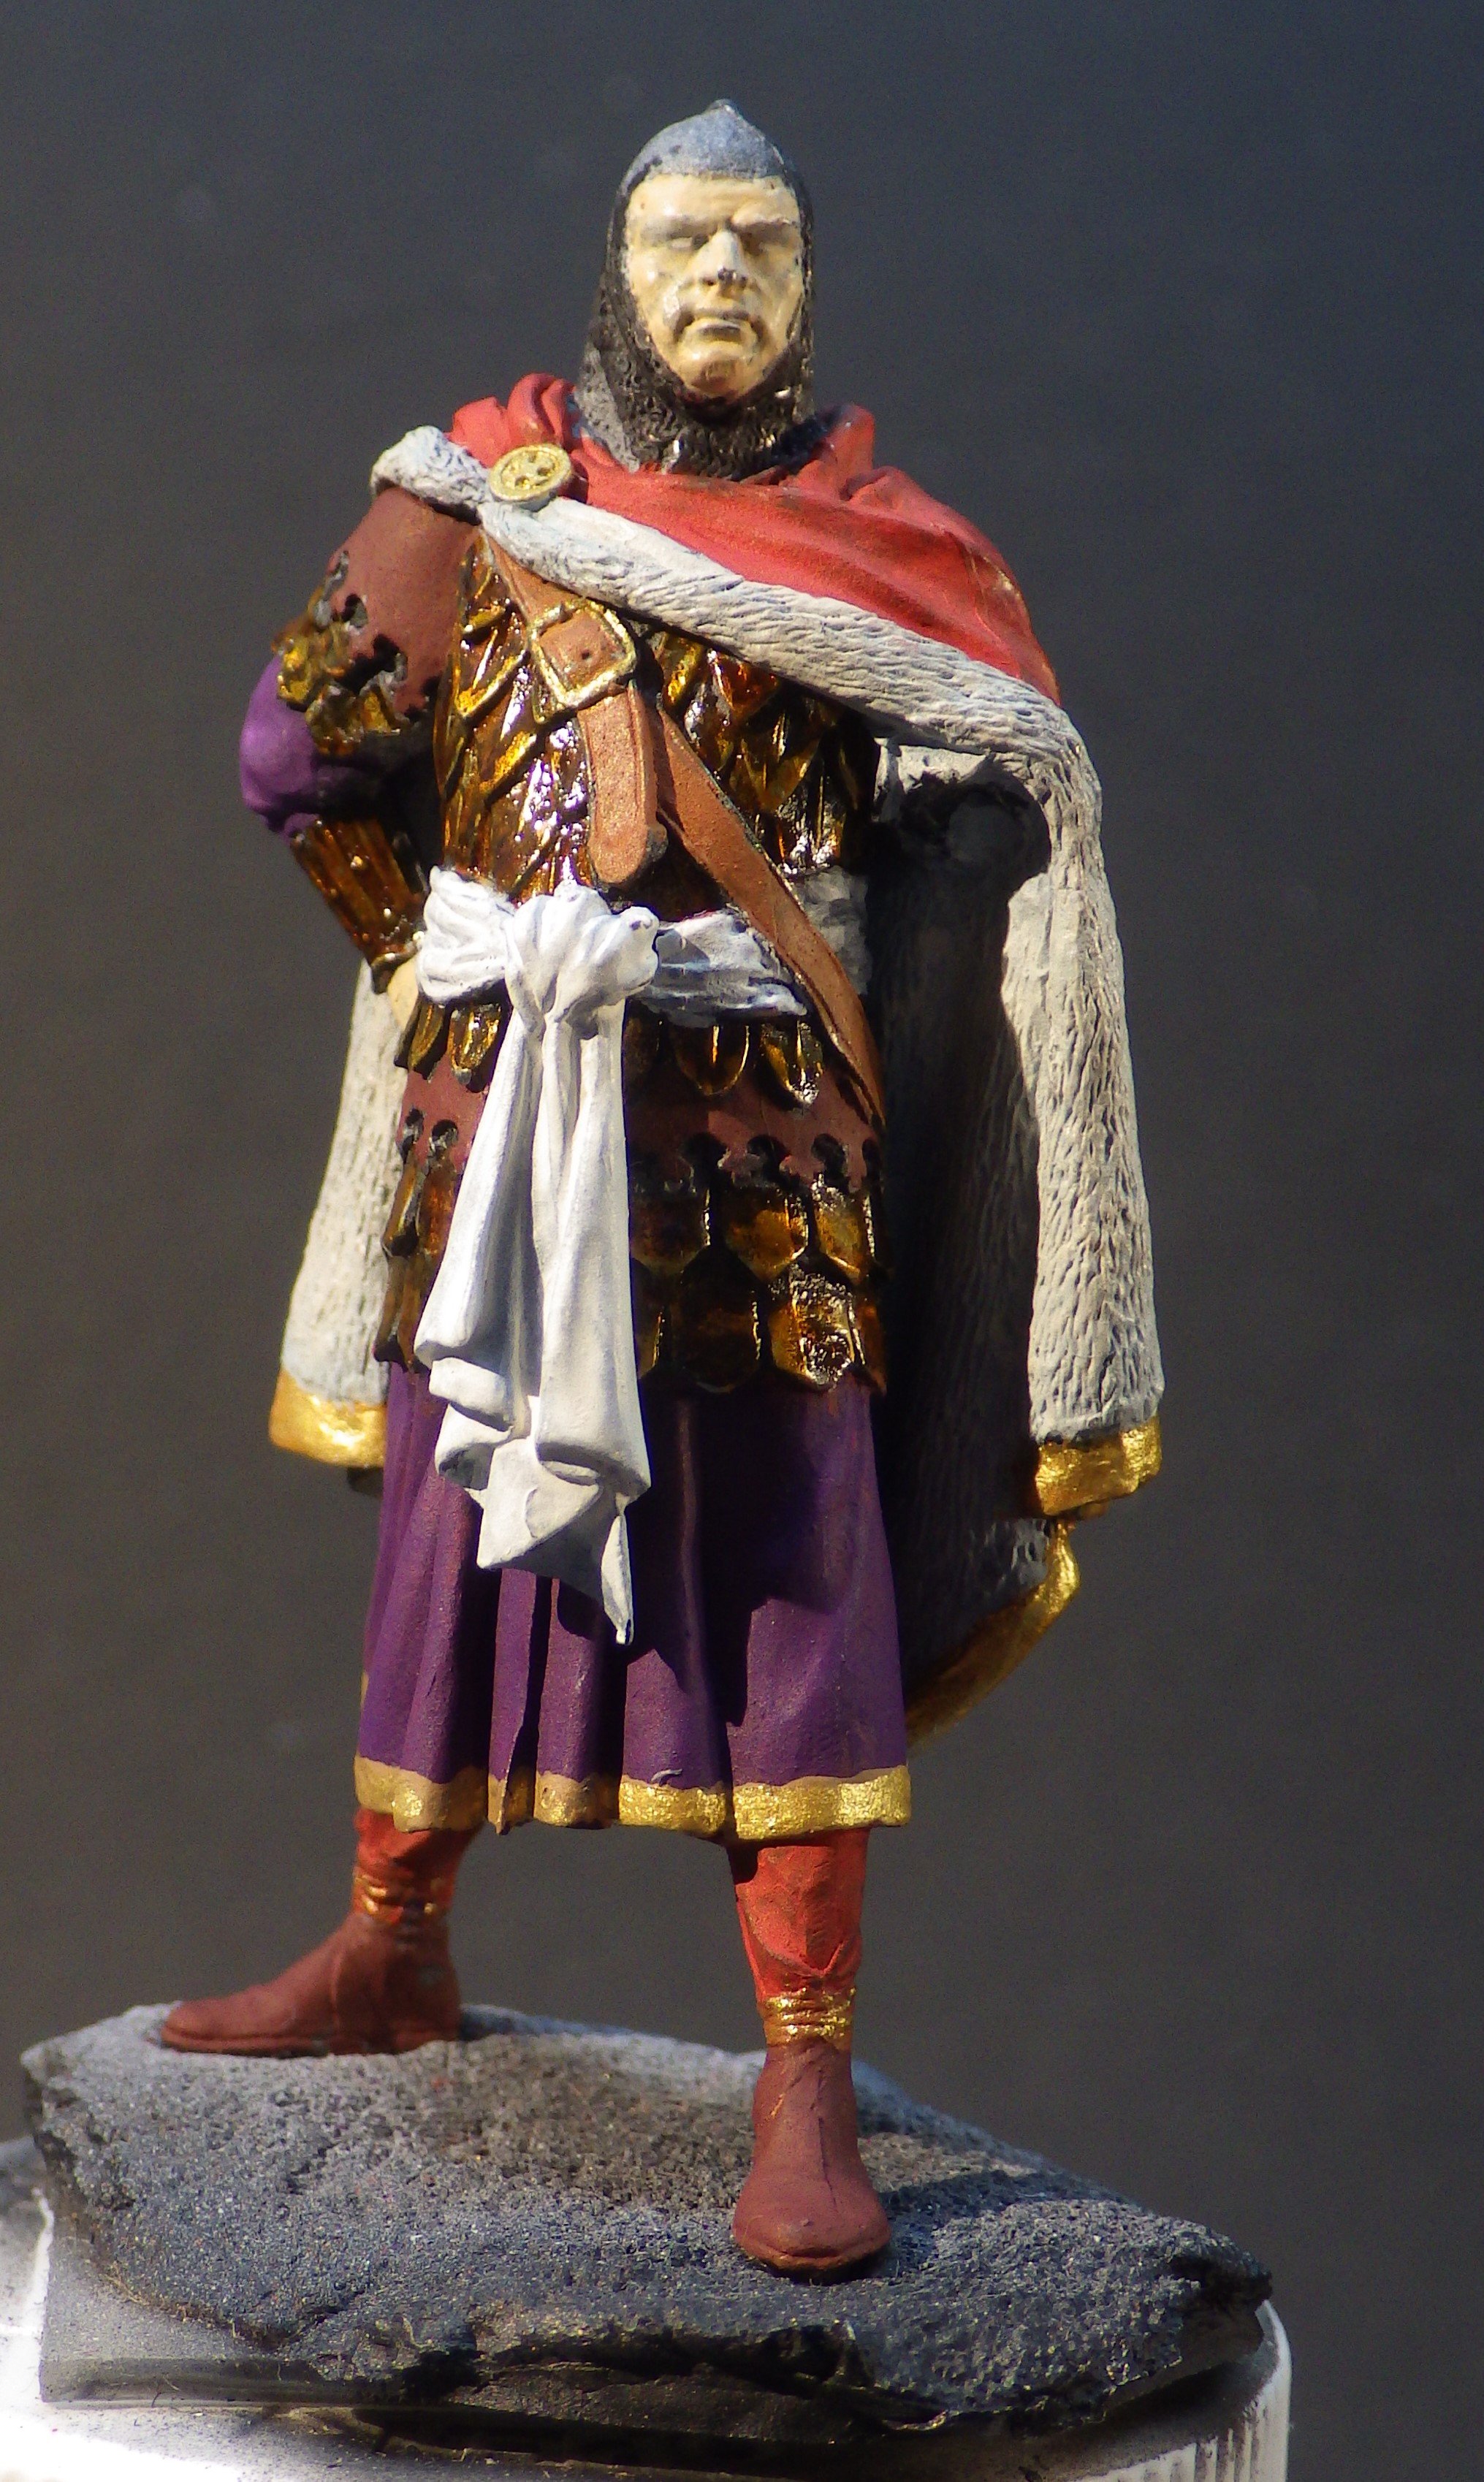
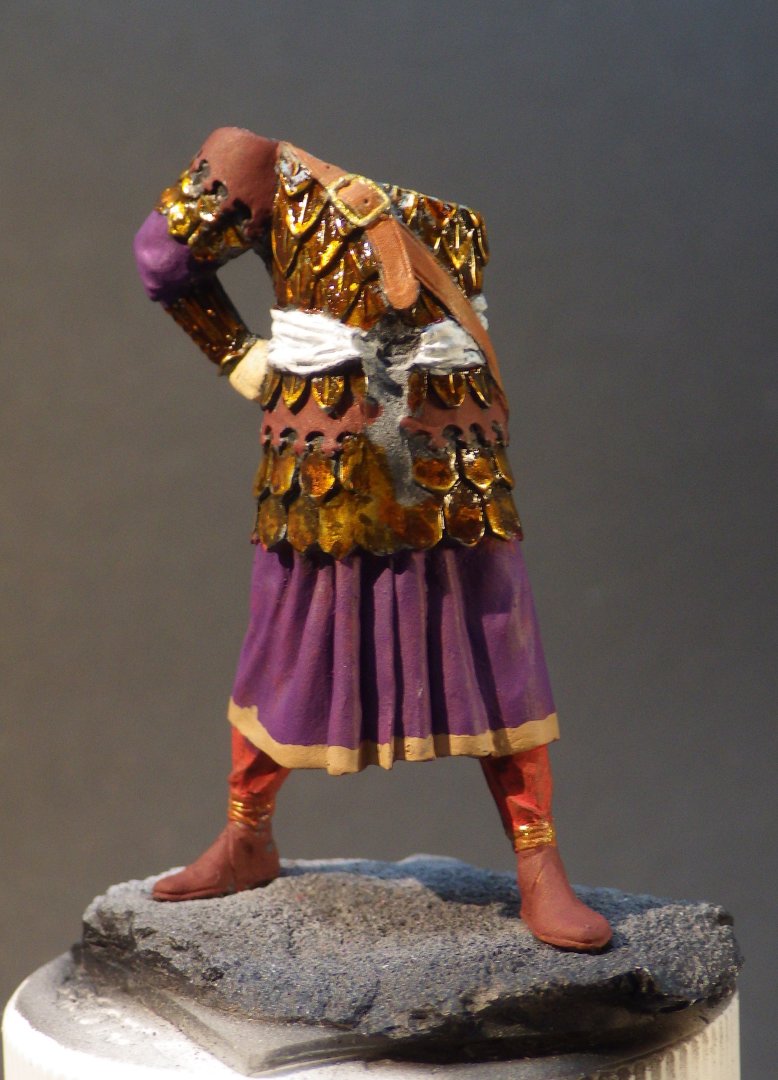
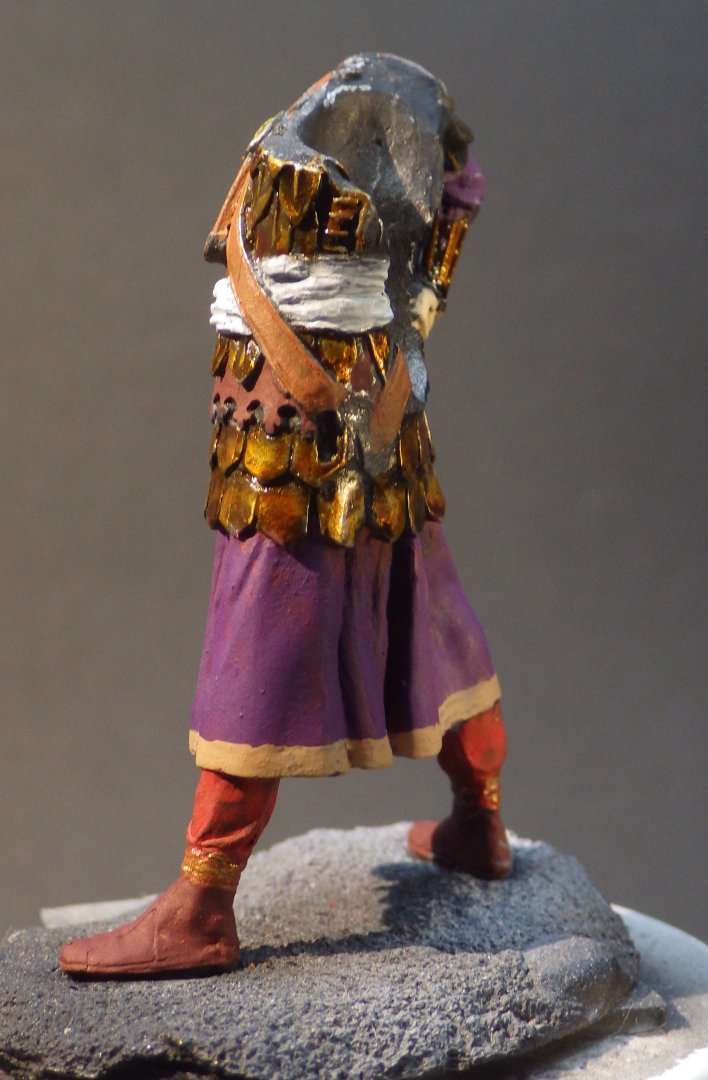
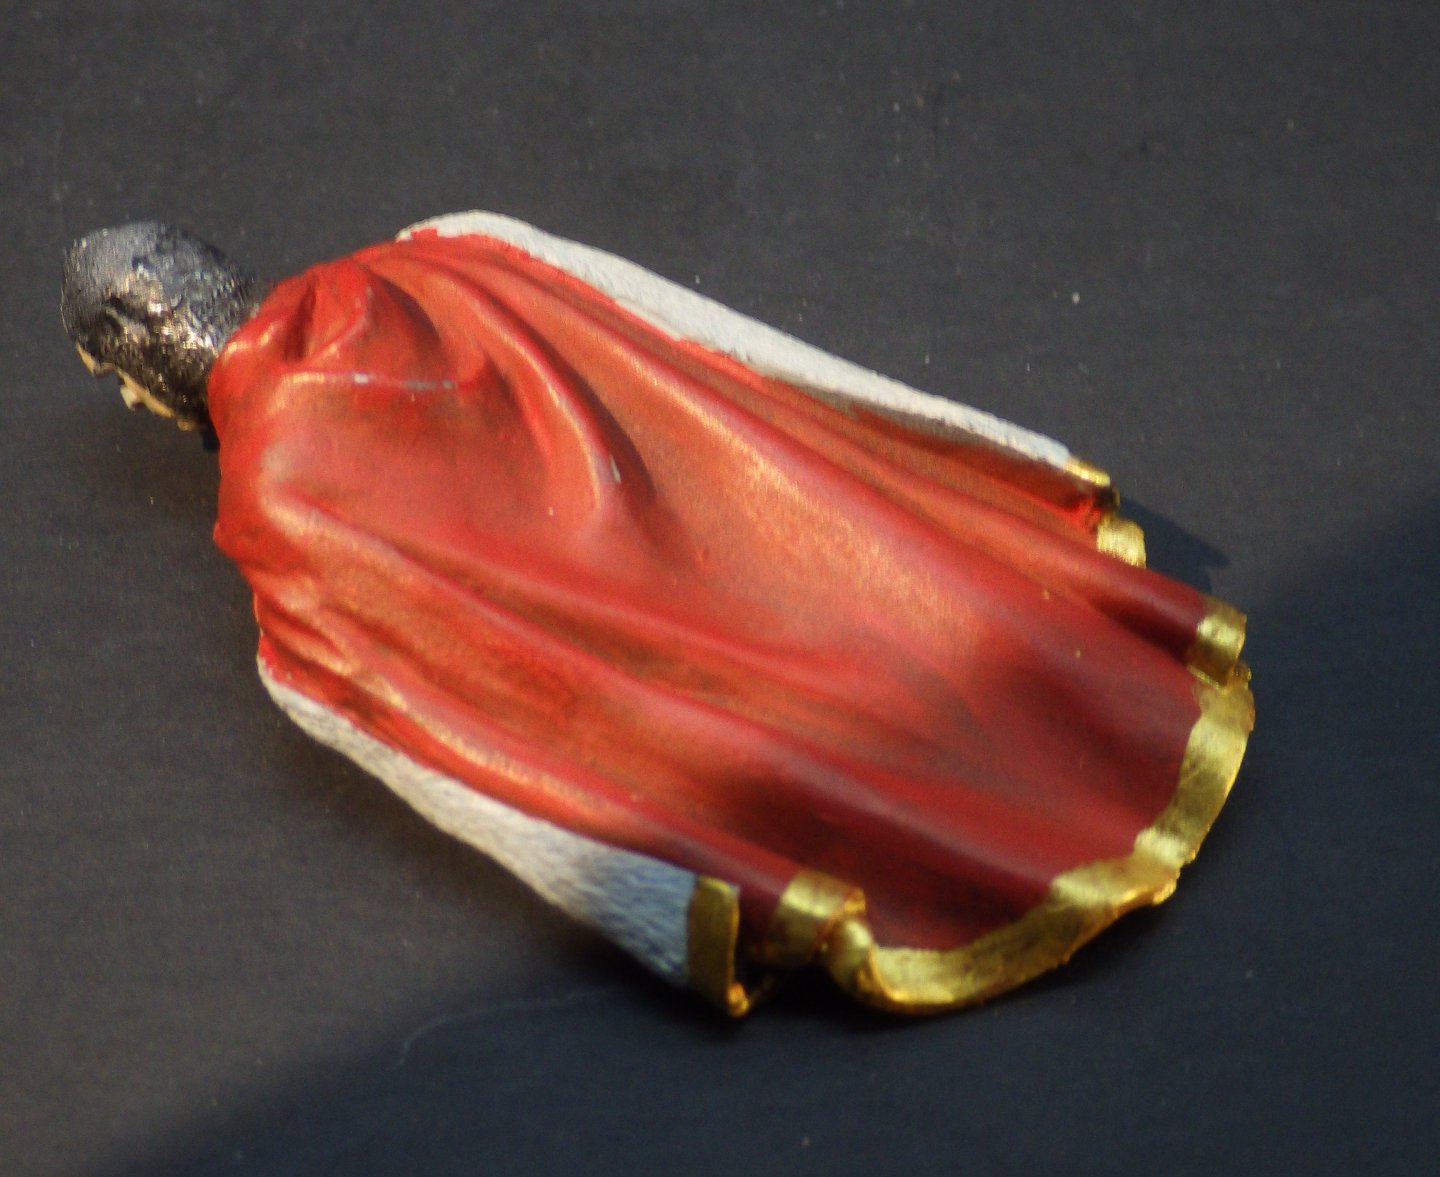
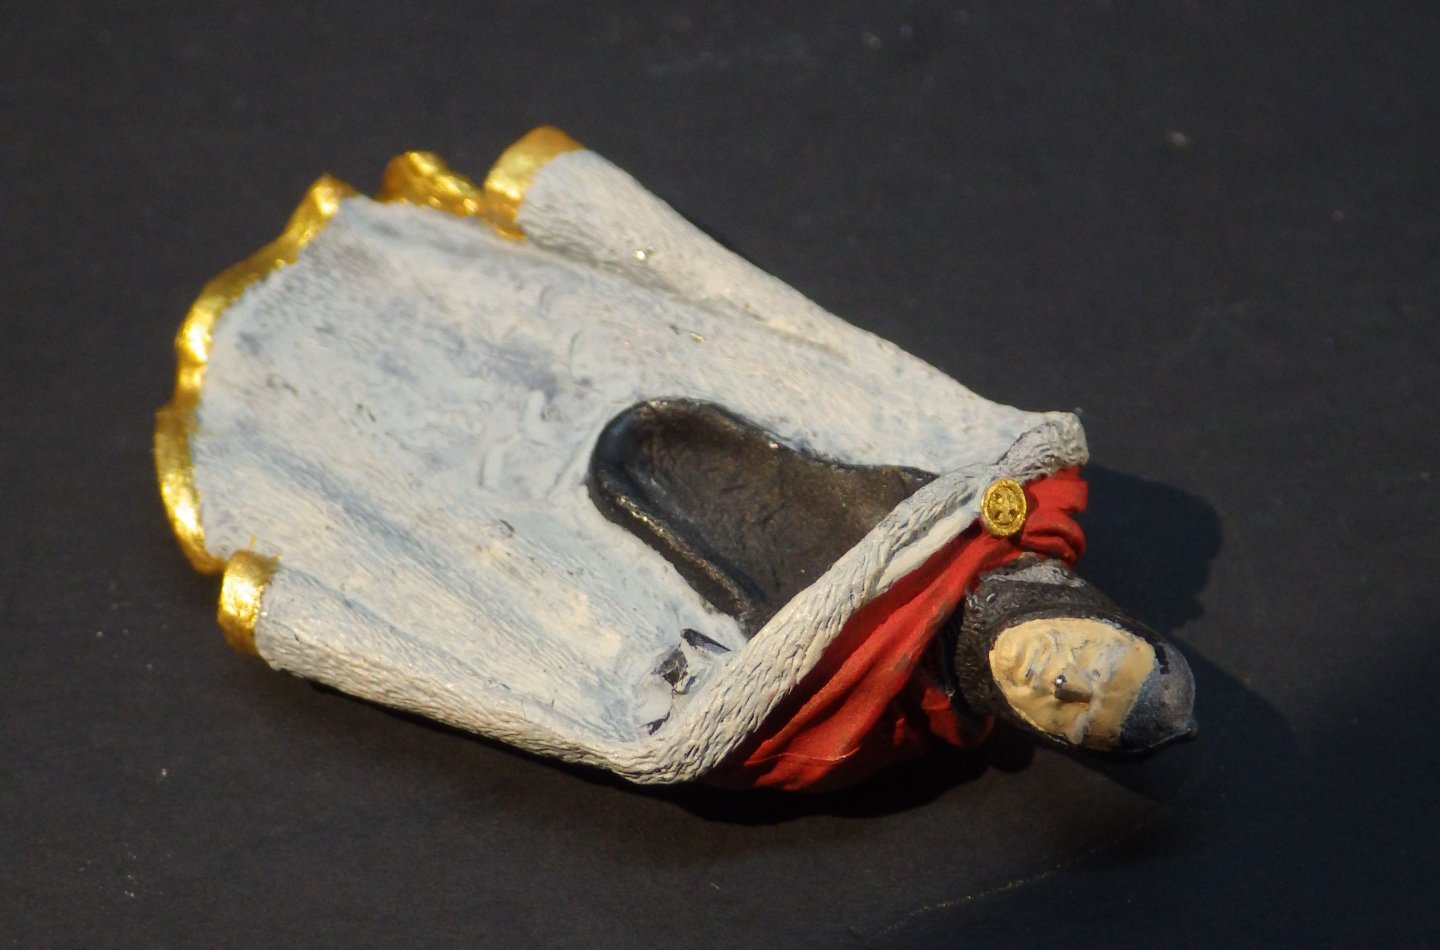
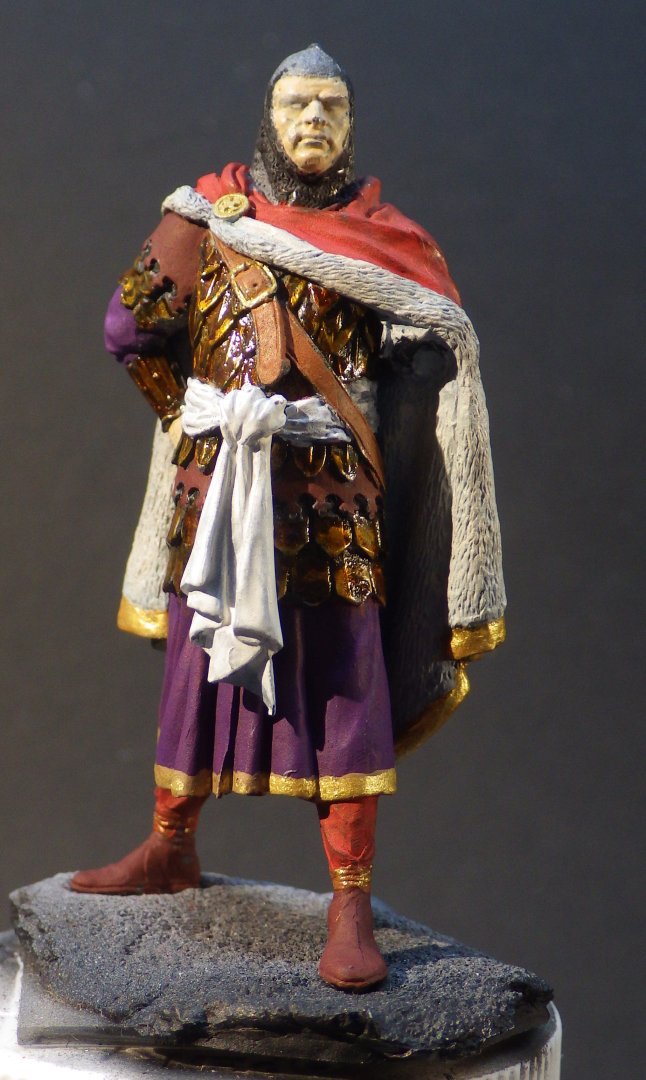
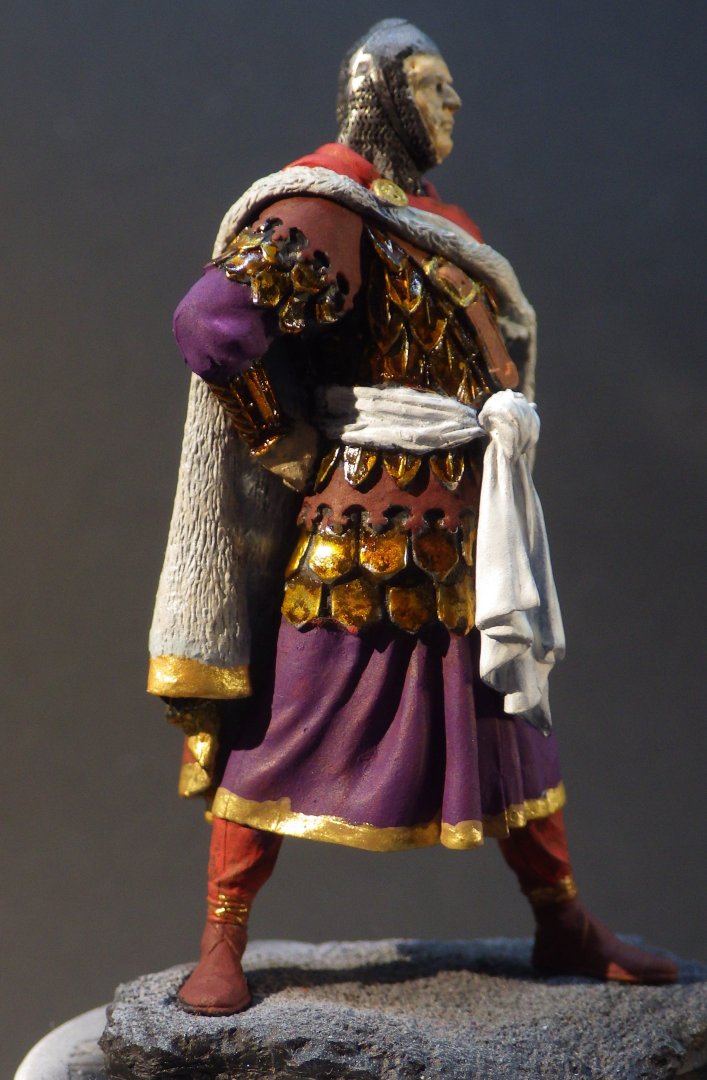
I started adding some colour. I used Tamiya clear orange which does a good job of simulating gold on polished metal. The inside of Oddos cloak is supposed to be squirrel fur in an alternating blue / grey but I didn't like how that worked out so I used a light blue grey and dry brushed silver grey over it. As far as I can tell there are few references to what Oddone wore so I'm staying with this. The figure doesn't have any delineation on the fur so blue and grey looked wrong somehow. The cloak has had several glazes of red and the gold trim added. The purple kilt thing has the buff undercoat ready for the gold trim. I started on the shield with a coat of black primer which I then sanded back to bare metal for the lions and the edge. This got the clear orange treatment but its not as effective as I hoped. I may try another coat before stripping it back and trying again. At this point I decided it was going to be easier working on the face and the details if I assembled the majority of the figure. The gold has been added to the kilt (he doesn't look like someone you would accuse of wearing a skirt), the basic colour has been added to the face. The box art shows very fine embroidered patterns on the kilt and cloak but I cannot think of a way of doing that convincingly at my skill levels so he's going to have to put up with being plain. The arm, helmet, face and details next. I like the Pegaso figure; the metal is softer than the alloy Art Girona uses but the detail is still good and its easier to drill to add brass rods at the joints. Thanks for looking in, the likes and comments Alan


-
Welcome Ken. Its all new to me. Medieval Europe is far more complicated than I thought. Alan
-
Thank you Phil. It’s been a very enjoyable work alan
-
Thank you Phil alan
-
Thank you very much Ken. There a few times it nearly had a test flight into the bin. Not sure what the next aircraft will be but it WON’T be the Mallow Alan
-
Welcome OC, they are spectacularly good kits. I’m looking forward to it after the recent struggles. It will be.a waterline model and no diorama- I’m running out of space alan
-
Looks like a beautiful ship. Looking forward to seeing it come together. alan
- 180 replies
-
- 3
-
-

-
- Card
- Pre-Dreadnought
- (and 2 more)
-
Seriously I think the work you are doing with the plates is amazing. A huge effort but it’s going to result in a fantastic model. alan
-
Thank you OC. It looks good now that it’s sitting properly on its gear. I guess we don’t see too many Amodel subjects here, probably I’ve learnt why alan
-
Thanks Andrew, I think I used up next years worth of bad language on this one but the end result is okay. I cleaned up the last of the glass shards in the spare bedroom so the cats are cleared to go and lie on the bed again. alan
-
Rigging looks very nice and tidy. Lovely model Alan
-
Welcome OC, the shield has raised details but the cloak doesn’t. I may be using a simplified approach there. Alan
-
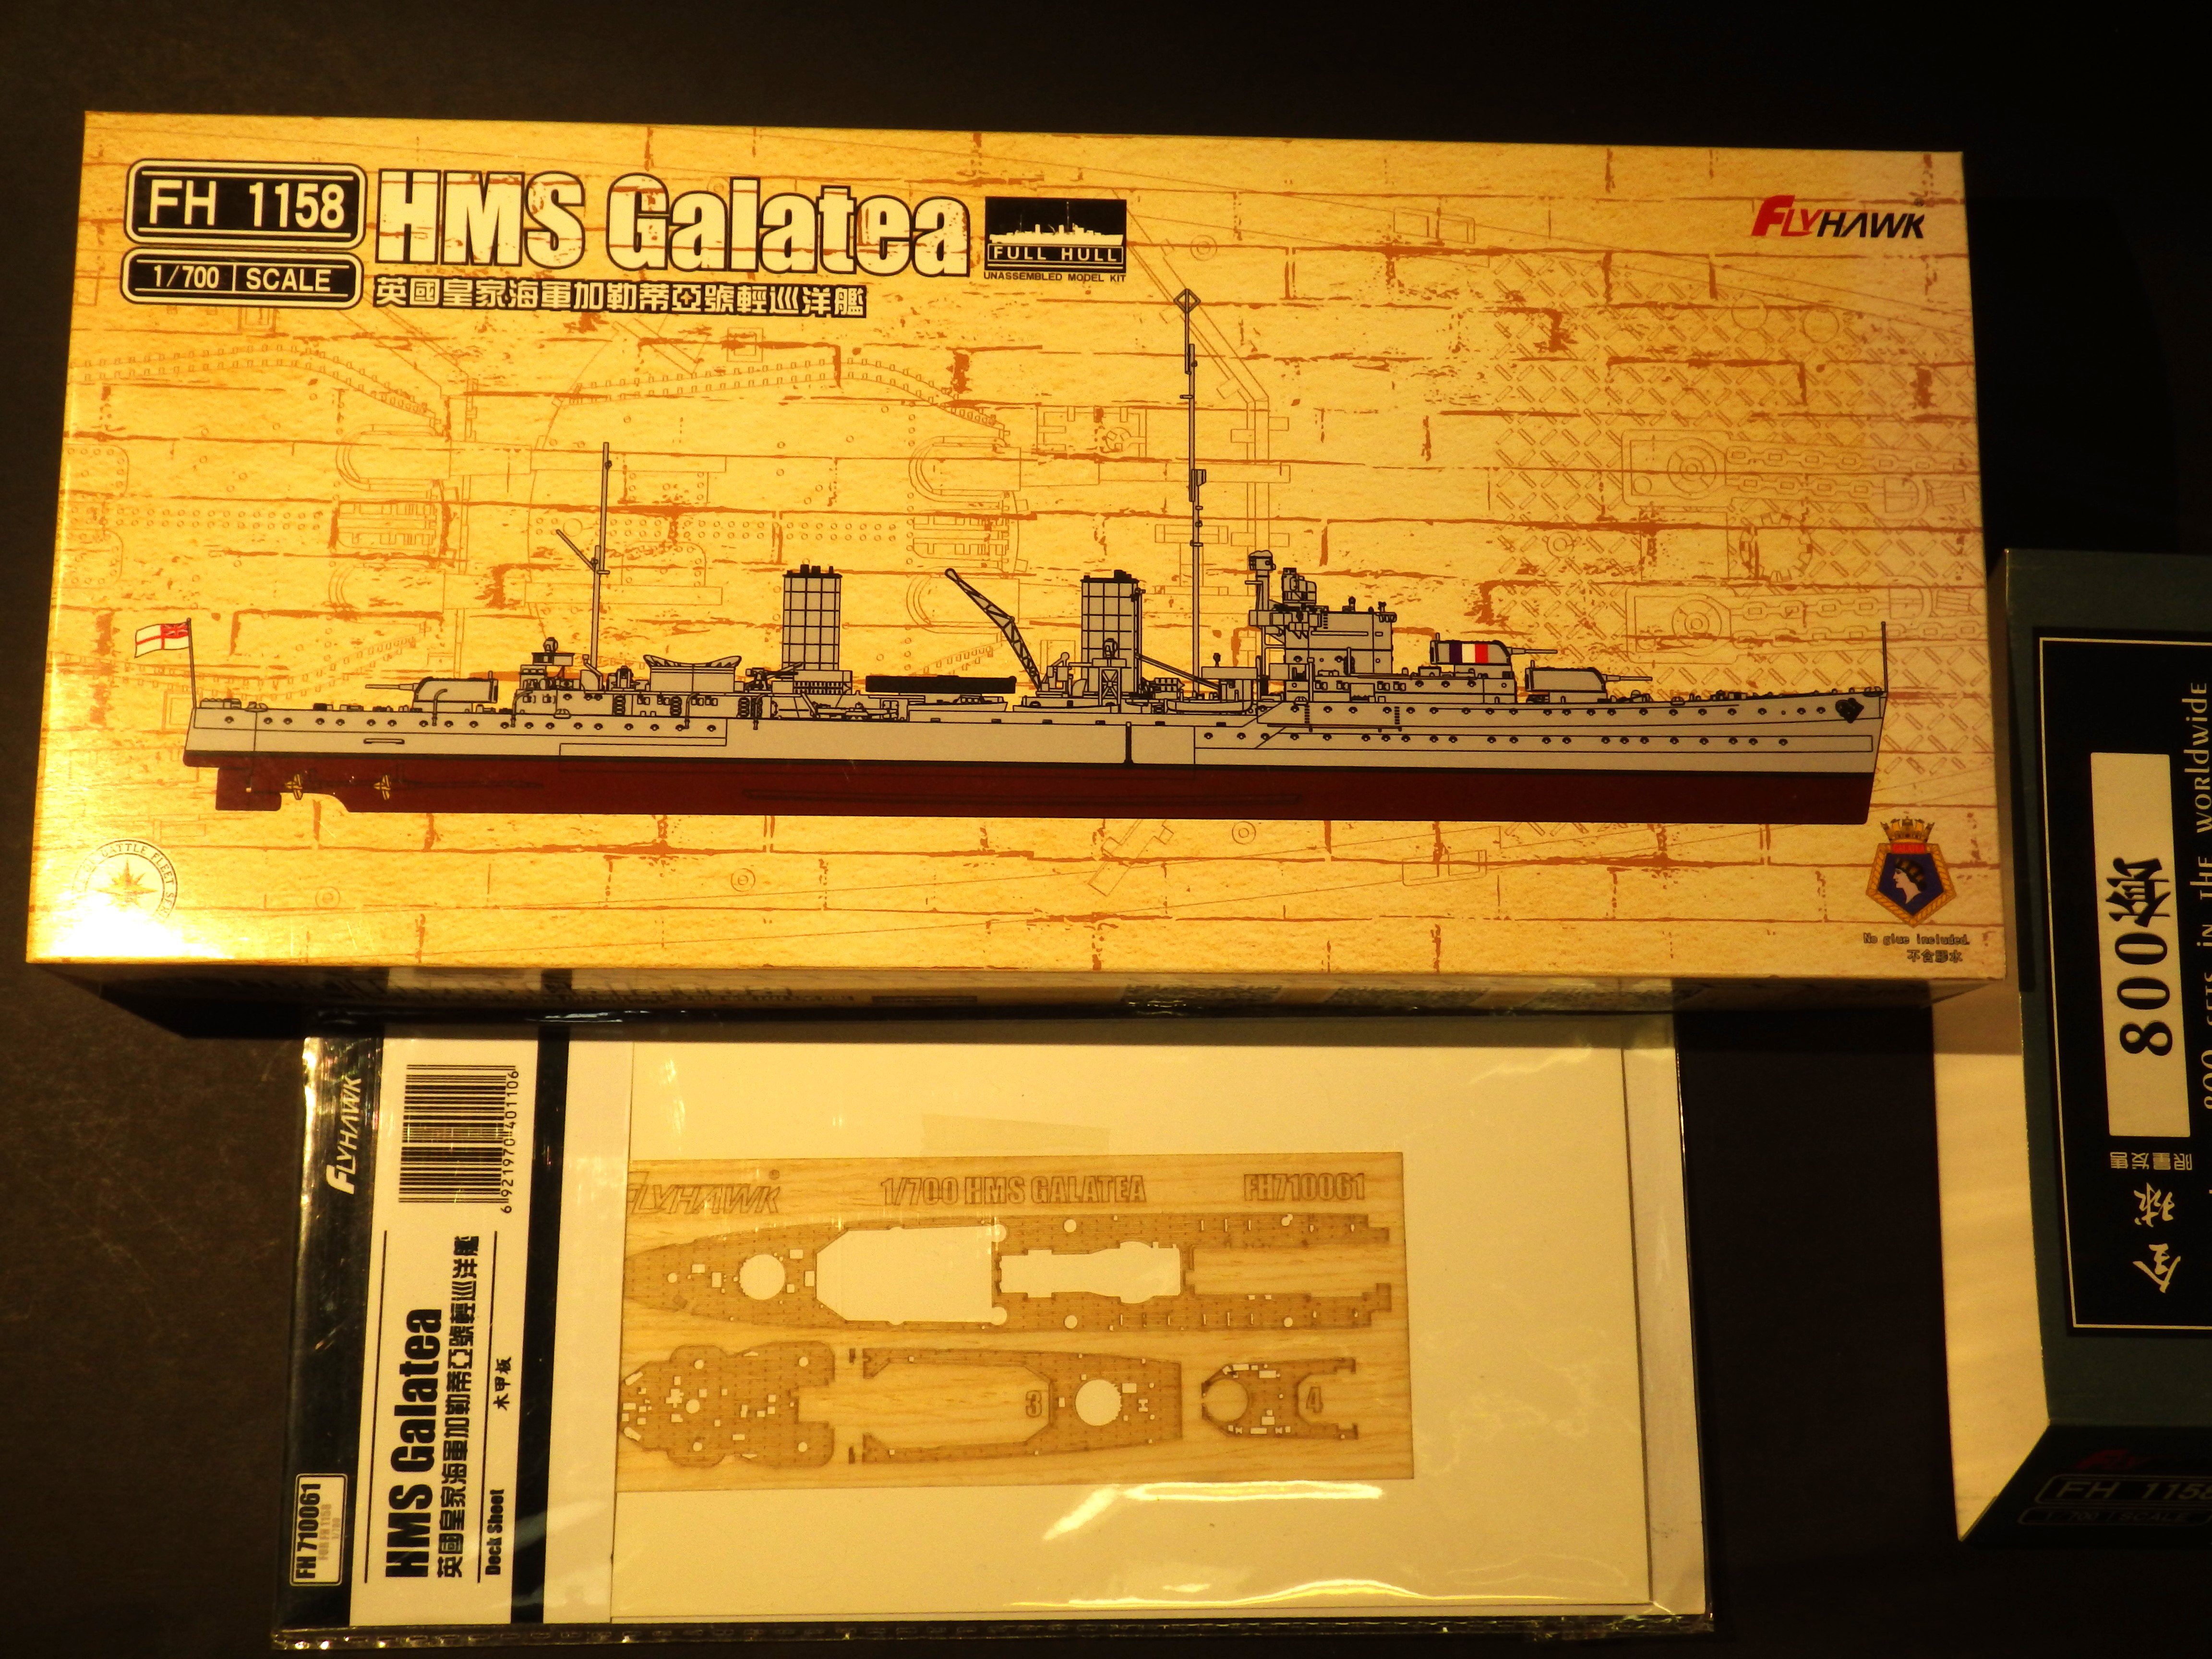
This will be the next major project. After the Amodel kit and its shortcomings a Flyhawk model seemed like the best antidote. This is a limited edition kit. I'm not sure what that brings to the kit but we will see. I have added a wooden deck set. I'm not sure if I will need anything else. Time to get my eyes recalibrated to 1/700 again Thanks for looking in Alan

-
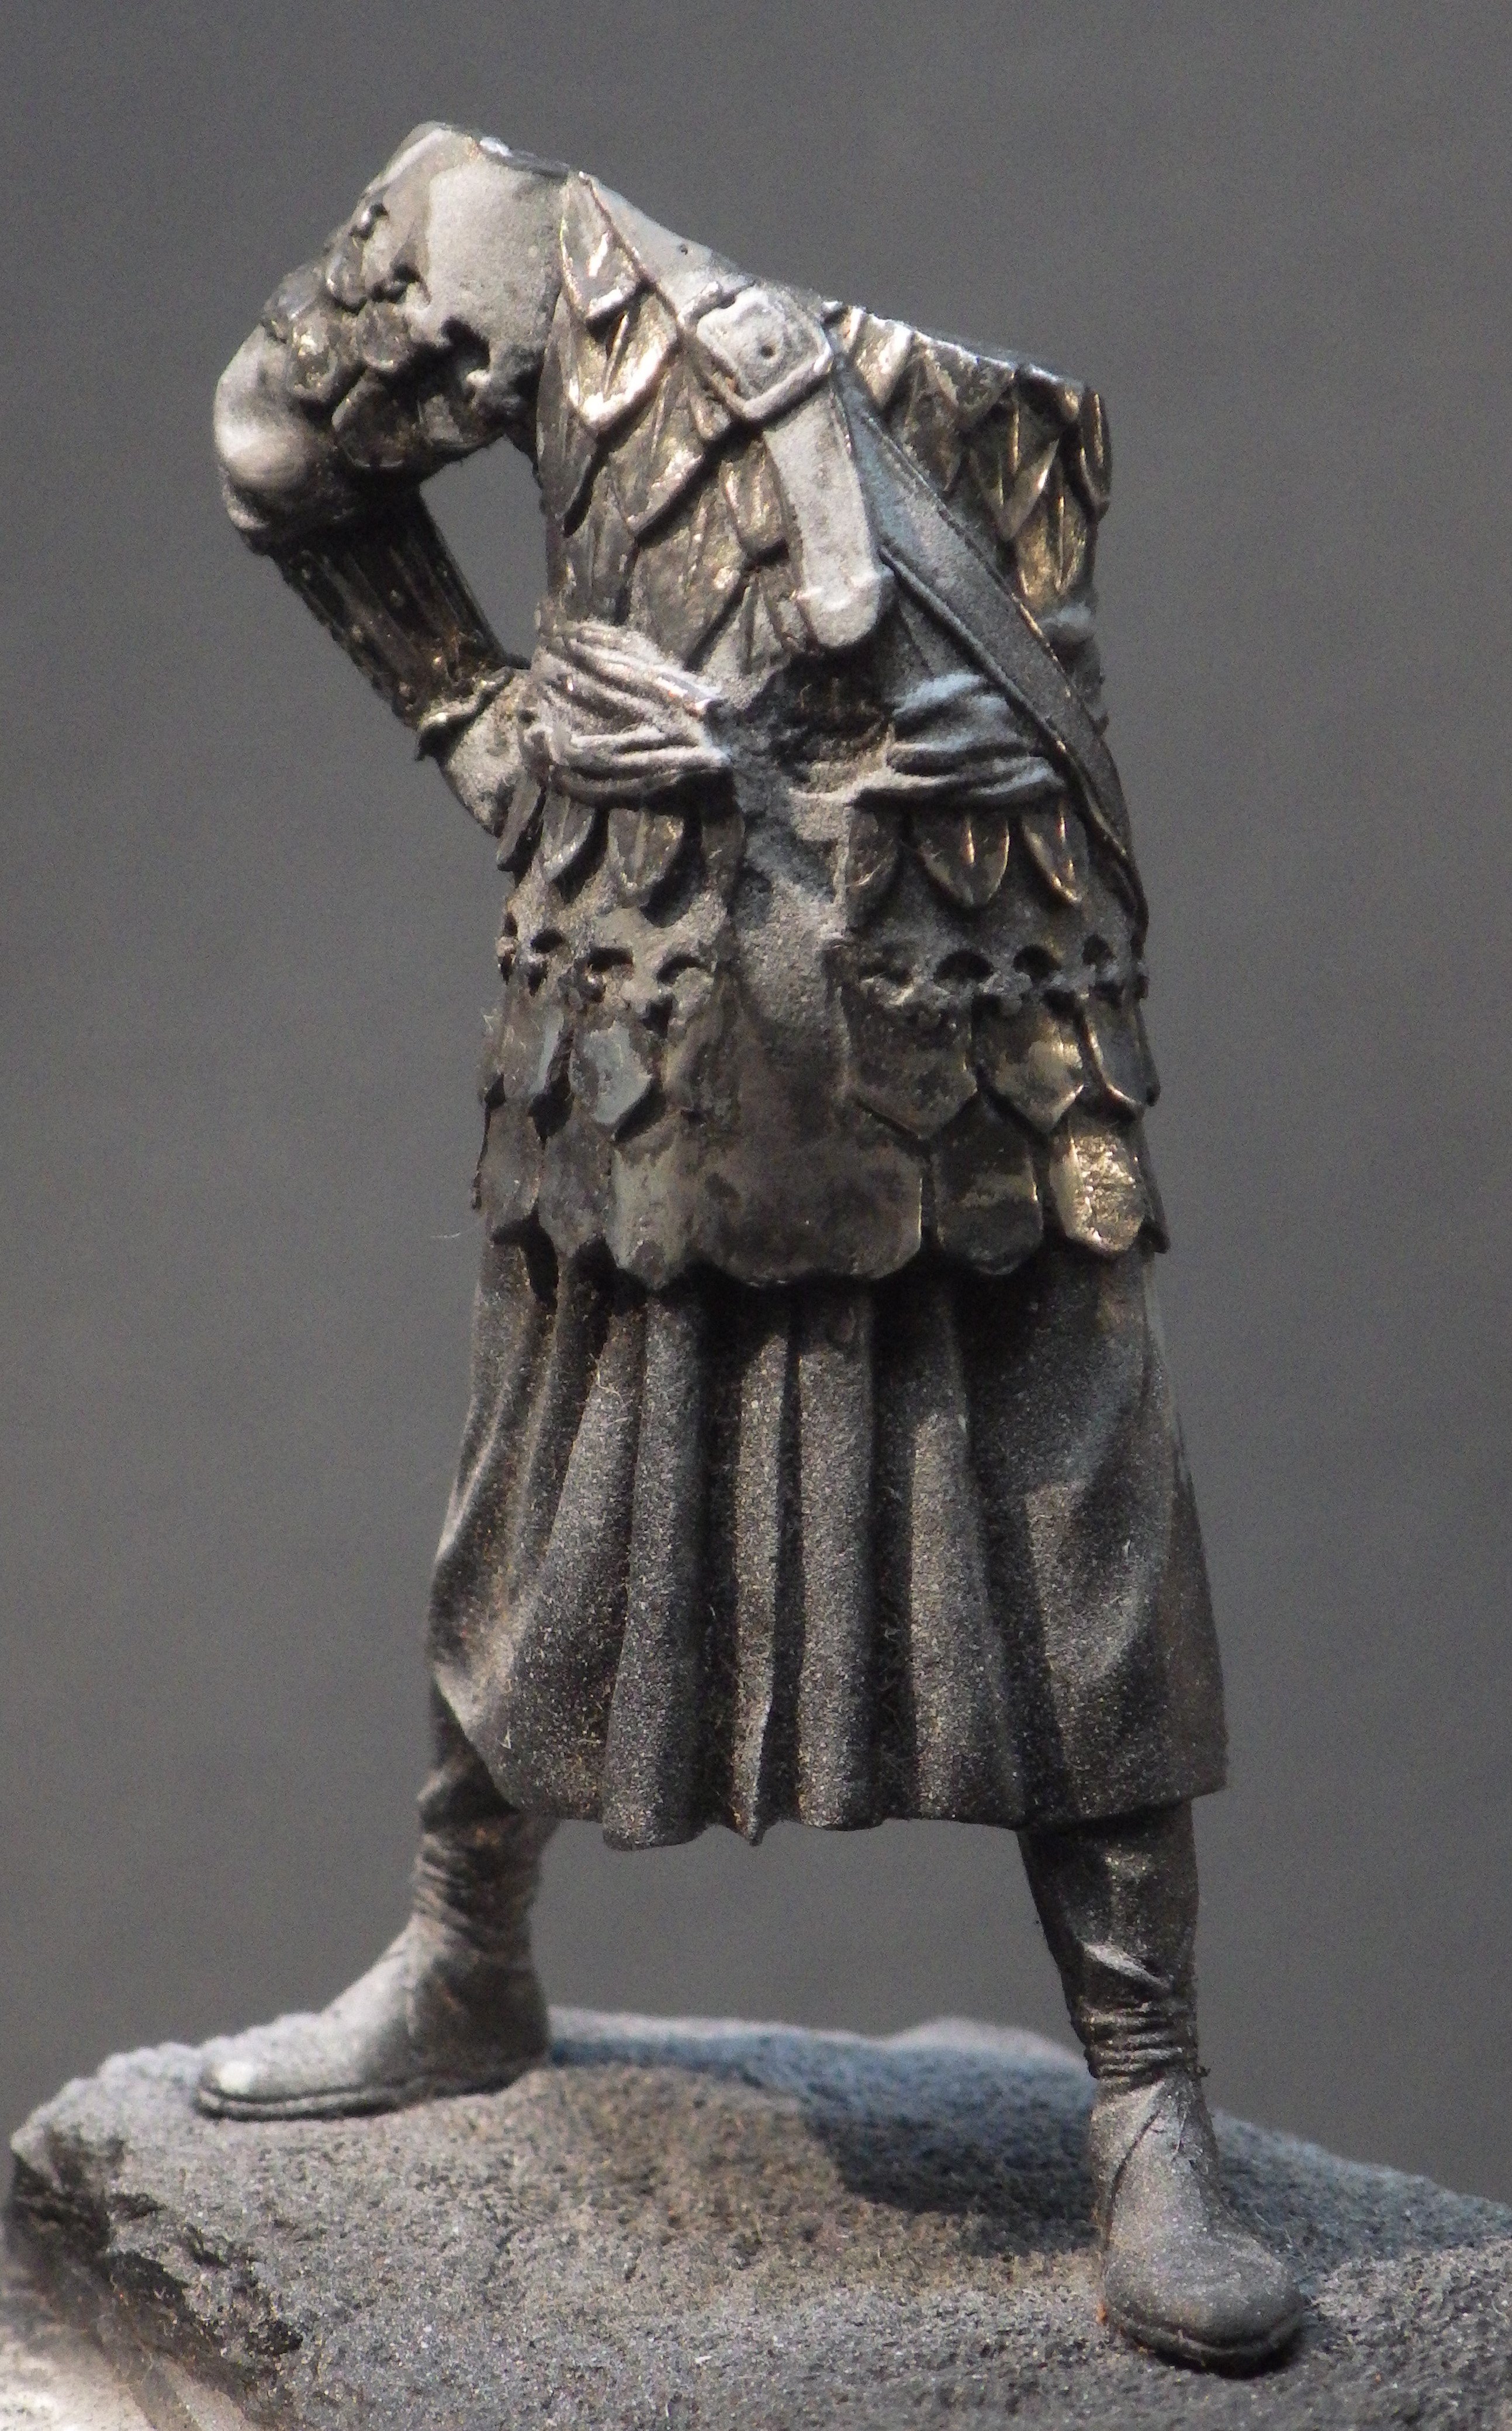
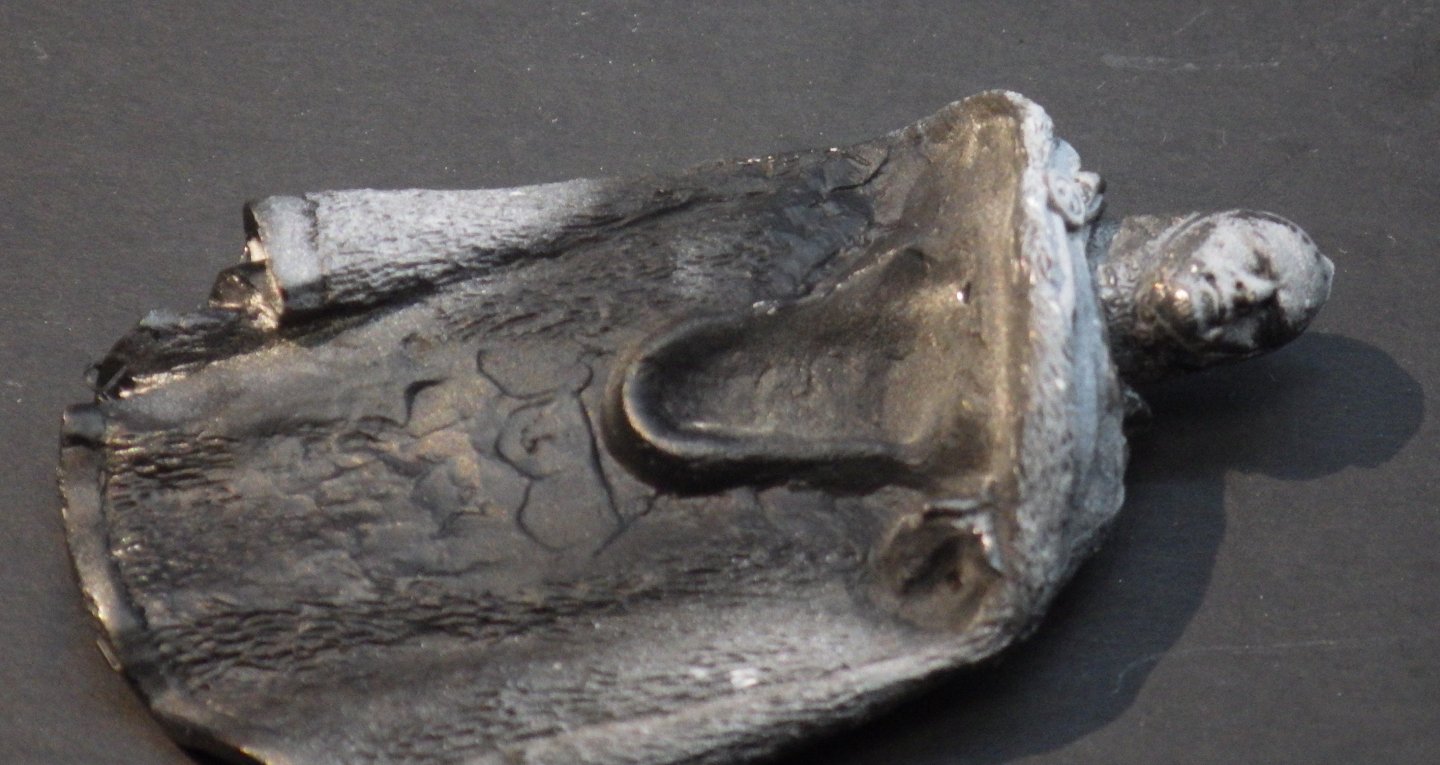
I thought it was time to broaden my horizons and try a figure from someone besides Art Girona History (well Wiki) tells us Oddone Frangipane (also Oddo or Otto, Latin: Odo Frajapanis[1]) was a Roman lord and military leader in the service of the Papacy in the 12th century. He was the son of Leo and grandson of Cencio II of the Frangipani family. Oddone had another brother named Cencio. During the middle of the twelfth century, he was the most influential aristocrat in Rome. His career began sometime around 1130. He supported the legitimate popes and opposed the Ghibellines and their Senate. His family acquired the fortress of Tusculum from Ptolemy II somehow before December 1152, when he sold his rights over Tusculum to Pope Eugene III. In 1155, he acted on behalf of Adrian IV in negotiations with Frederick Barbarossa. In 1156, he was at Benevento to accept the submission of William I of Sicily to the pope. This submission resulted in the confirmation of the Treaty of Benevento. After the papal election of 7 September 1159, Oddone wrote to Louis VII of France exhorting him to support Alexander III. When Alexander was arrested by supporters of the imperialist Antipope Victor IV, it was Oddone who freed him and sent to safety in Campania. Oddone took over the military leadership of the city of Rome during the absence of Alexander and even afterwards. His son Leo was captured in battle with the emperor's troops in 1167 and he himself led the largest army of Roman citizens since the days of the Roman Empire into battle at Monte Porzio, where he was defeated by Christian I, Archbishop of Mainz.[2] In the spring of 1170, Oddone remarried to a woman named Eudoxia, a Byzantine princess. He had a son by her named Emanuele. He died some time not long after. It was a chance to try a bit more armour and some intricate work on shield and other details which I may regret. The figure is nicely cast; the details are good and everything seems to fit well. I started fiddling with it while trying to get the Yak to sit on its wheels properly and the photos got left behind a bit. I've primed the figure and then added the directional highlights in white. I have then started polishing the armour plates and the chain mail. The chain mail will get a black wash to add some detail and the plates are supposed to be a gold colour so will get a coat of Tamiya clear orange. Thanks for looking in Alan

-
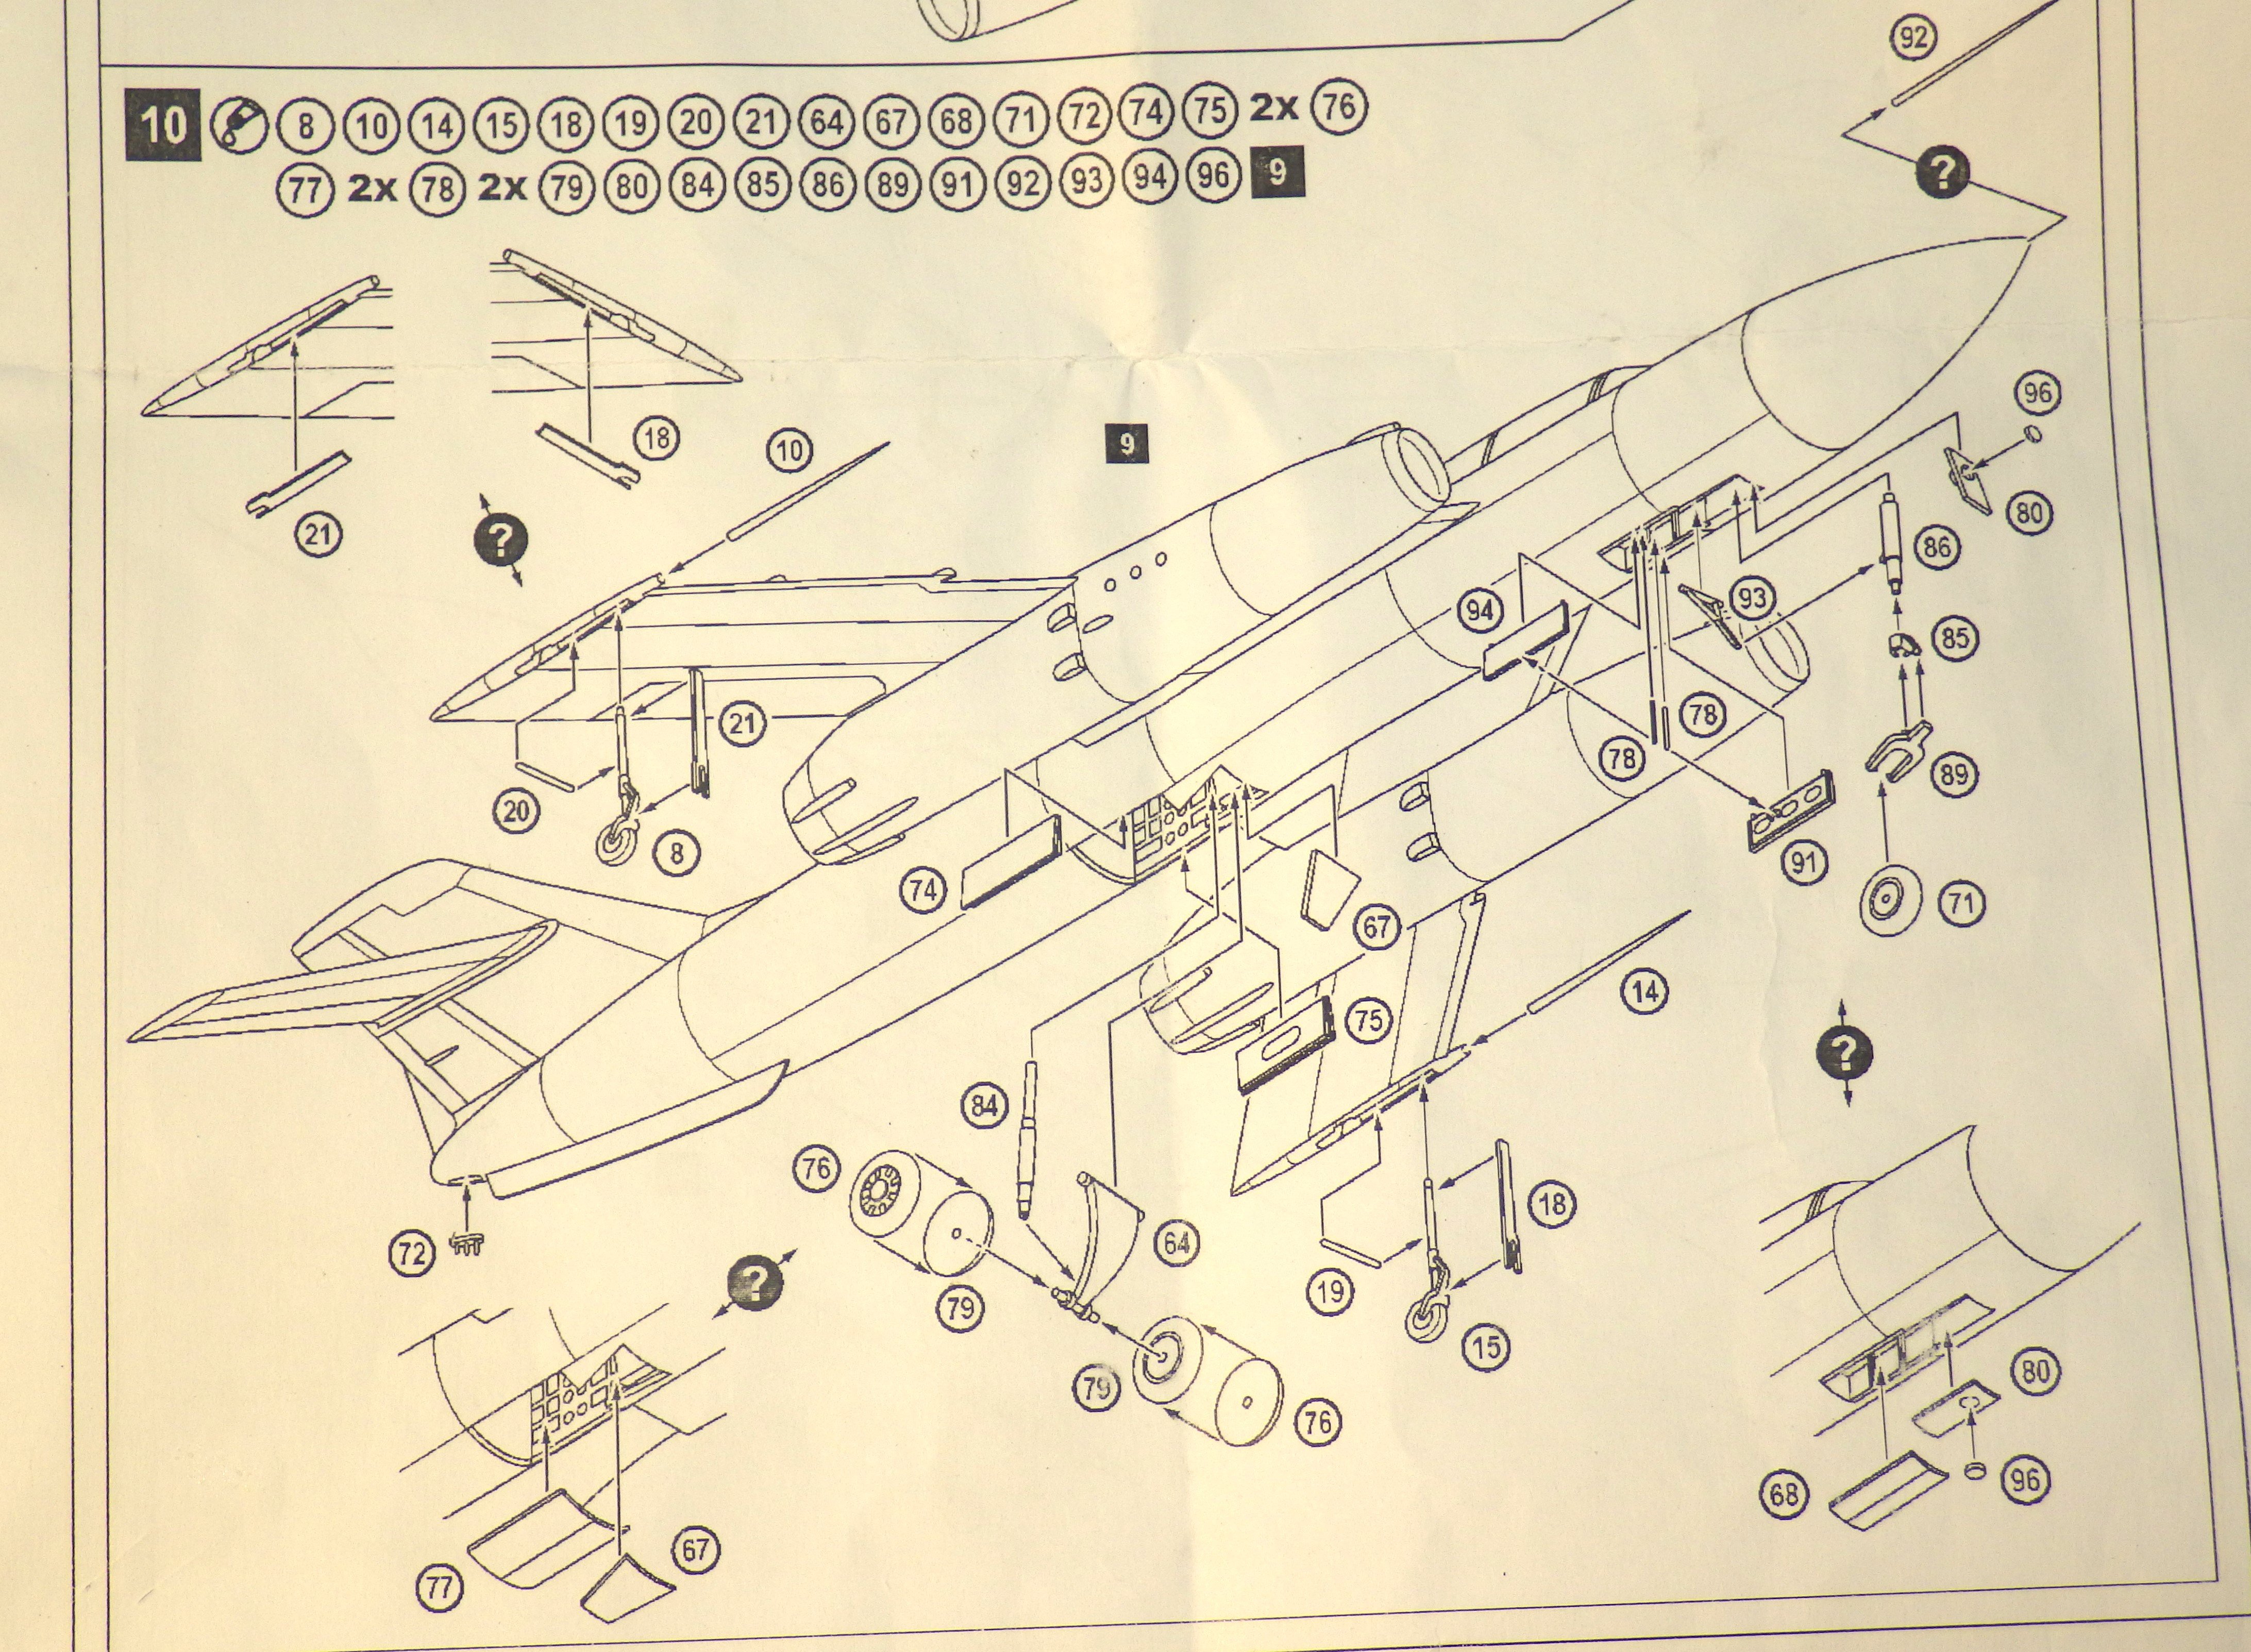
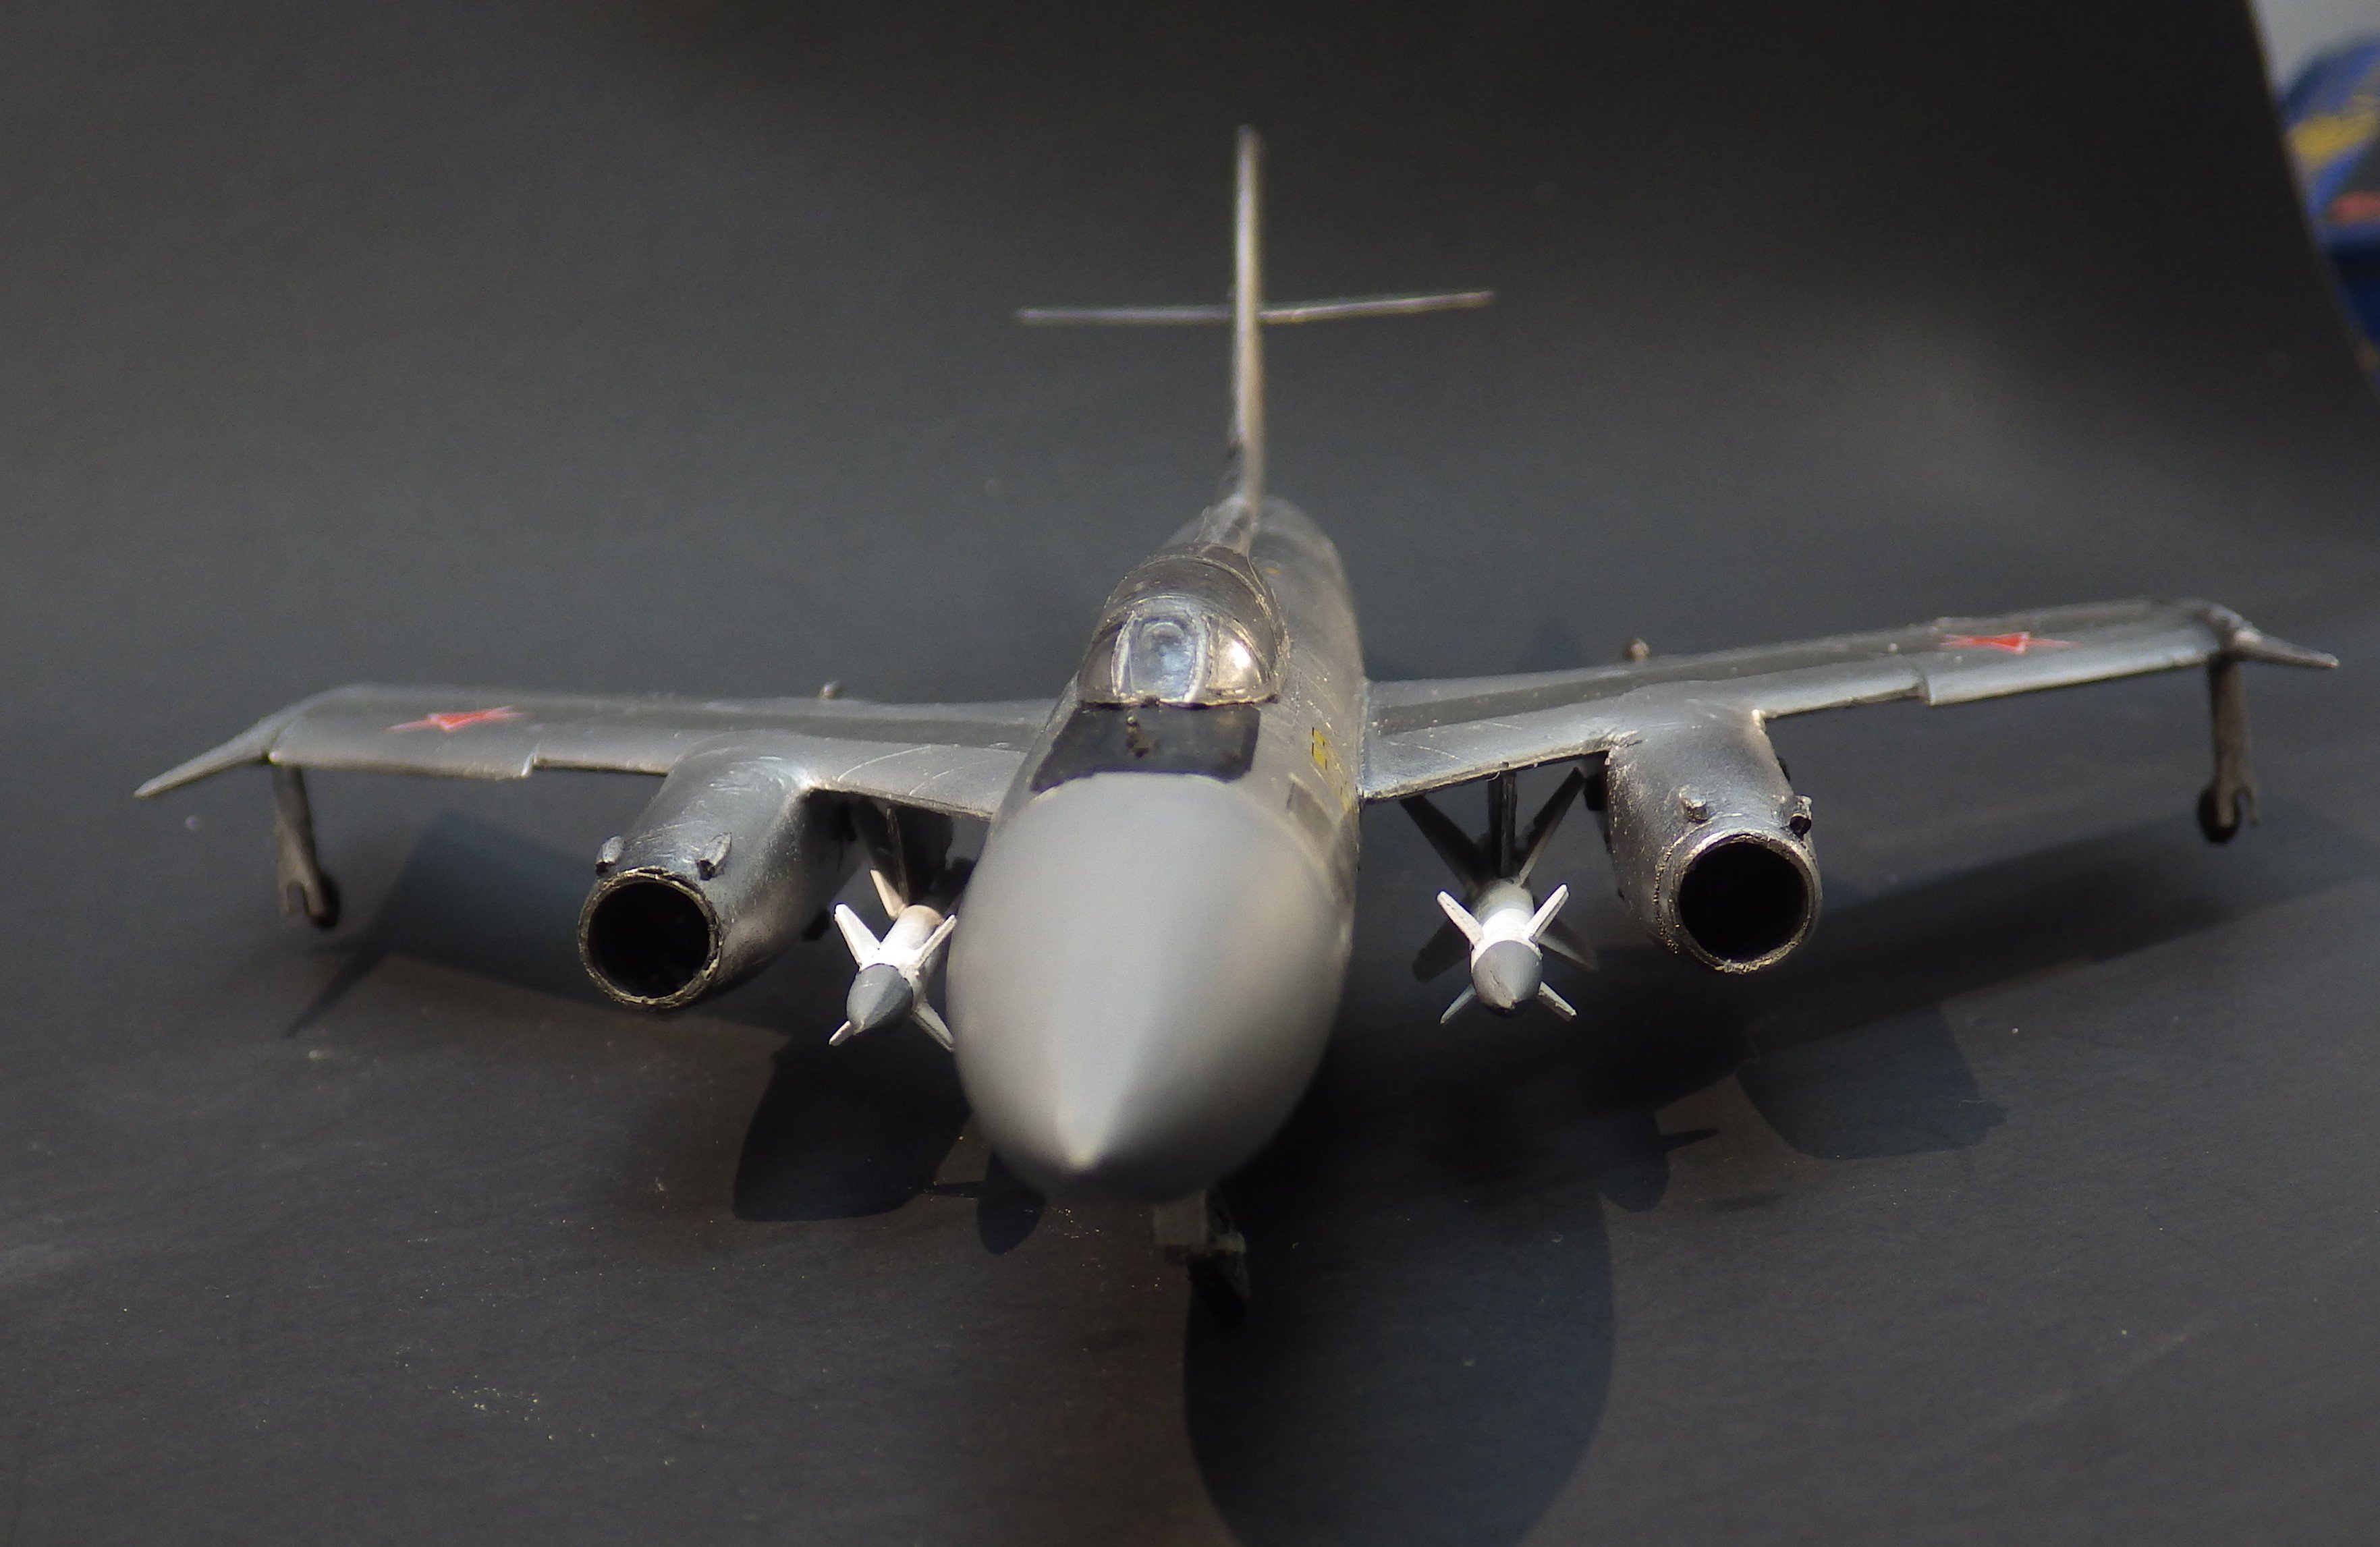
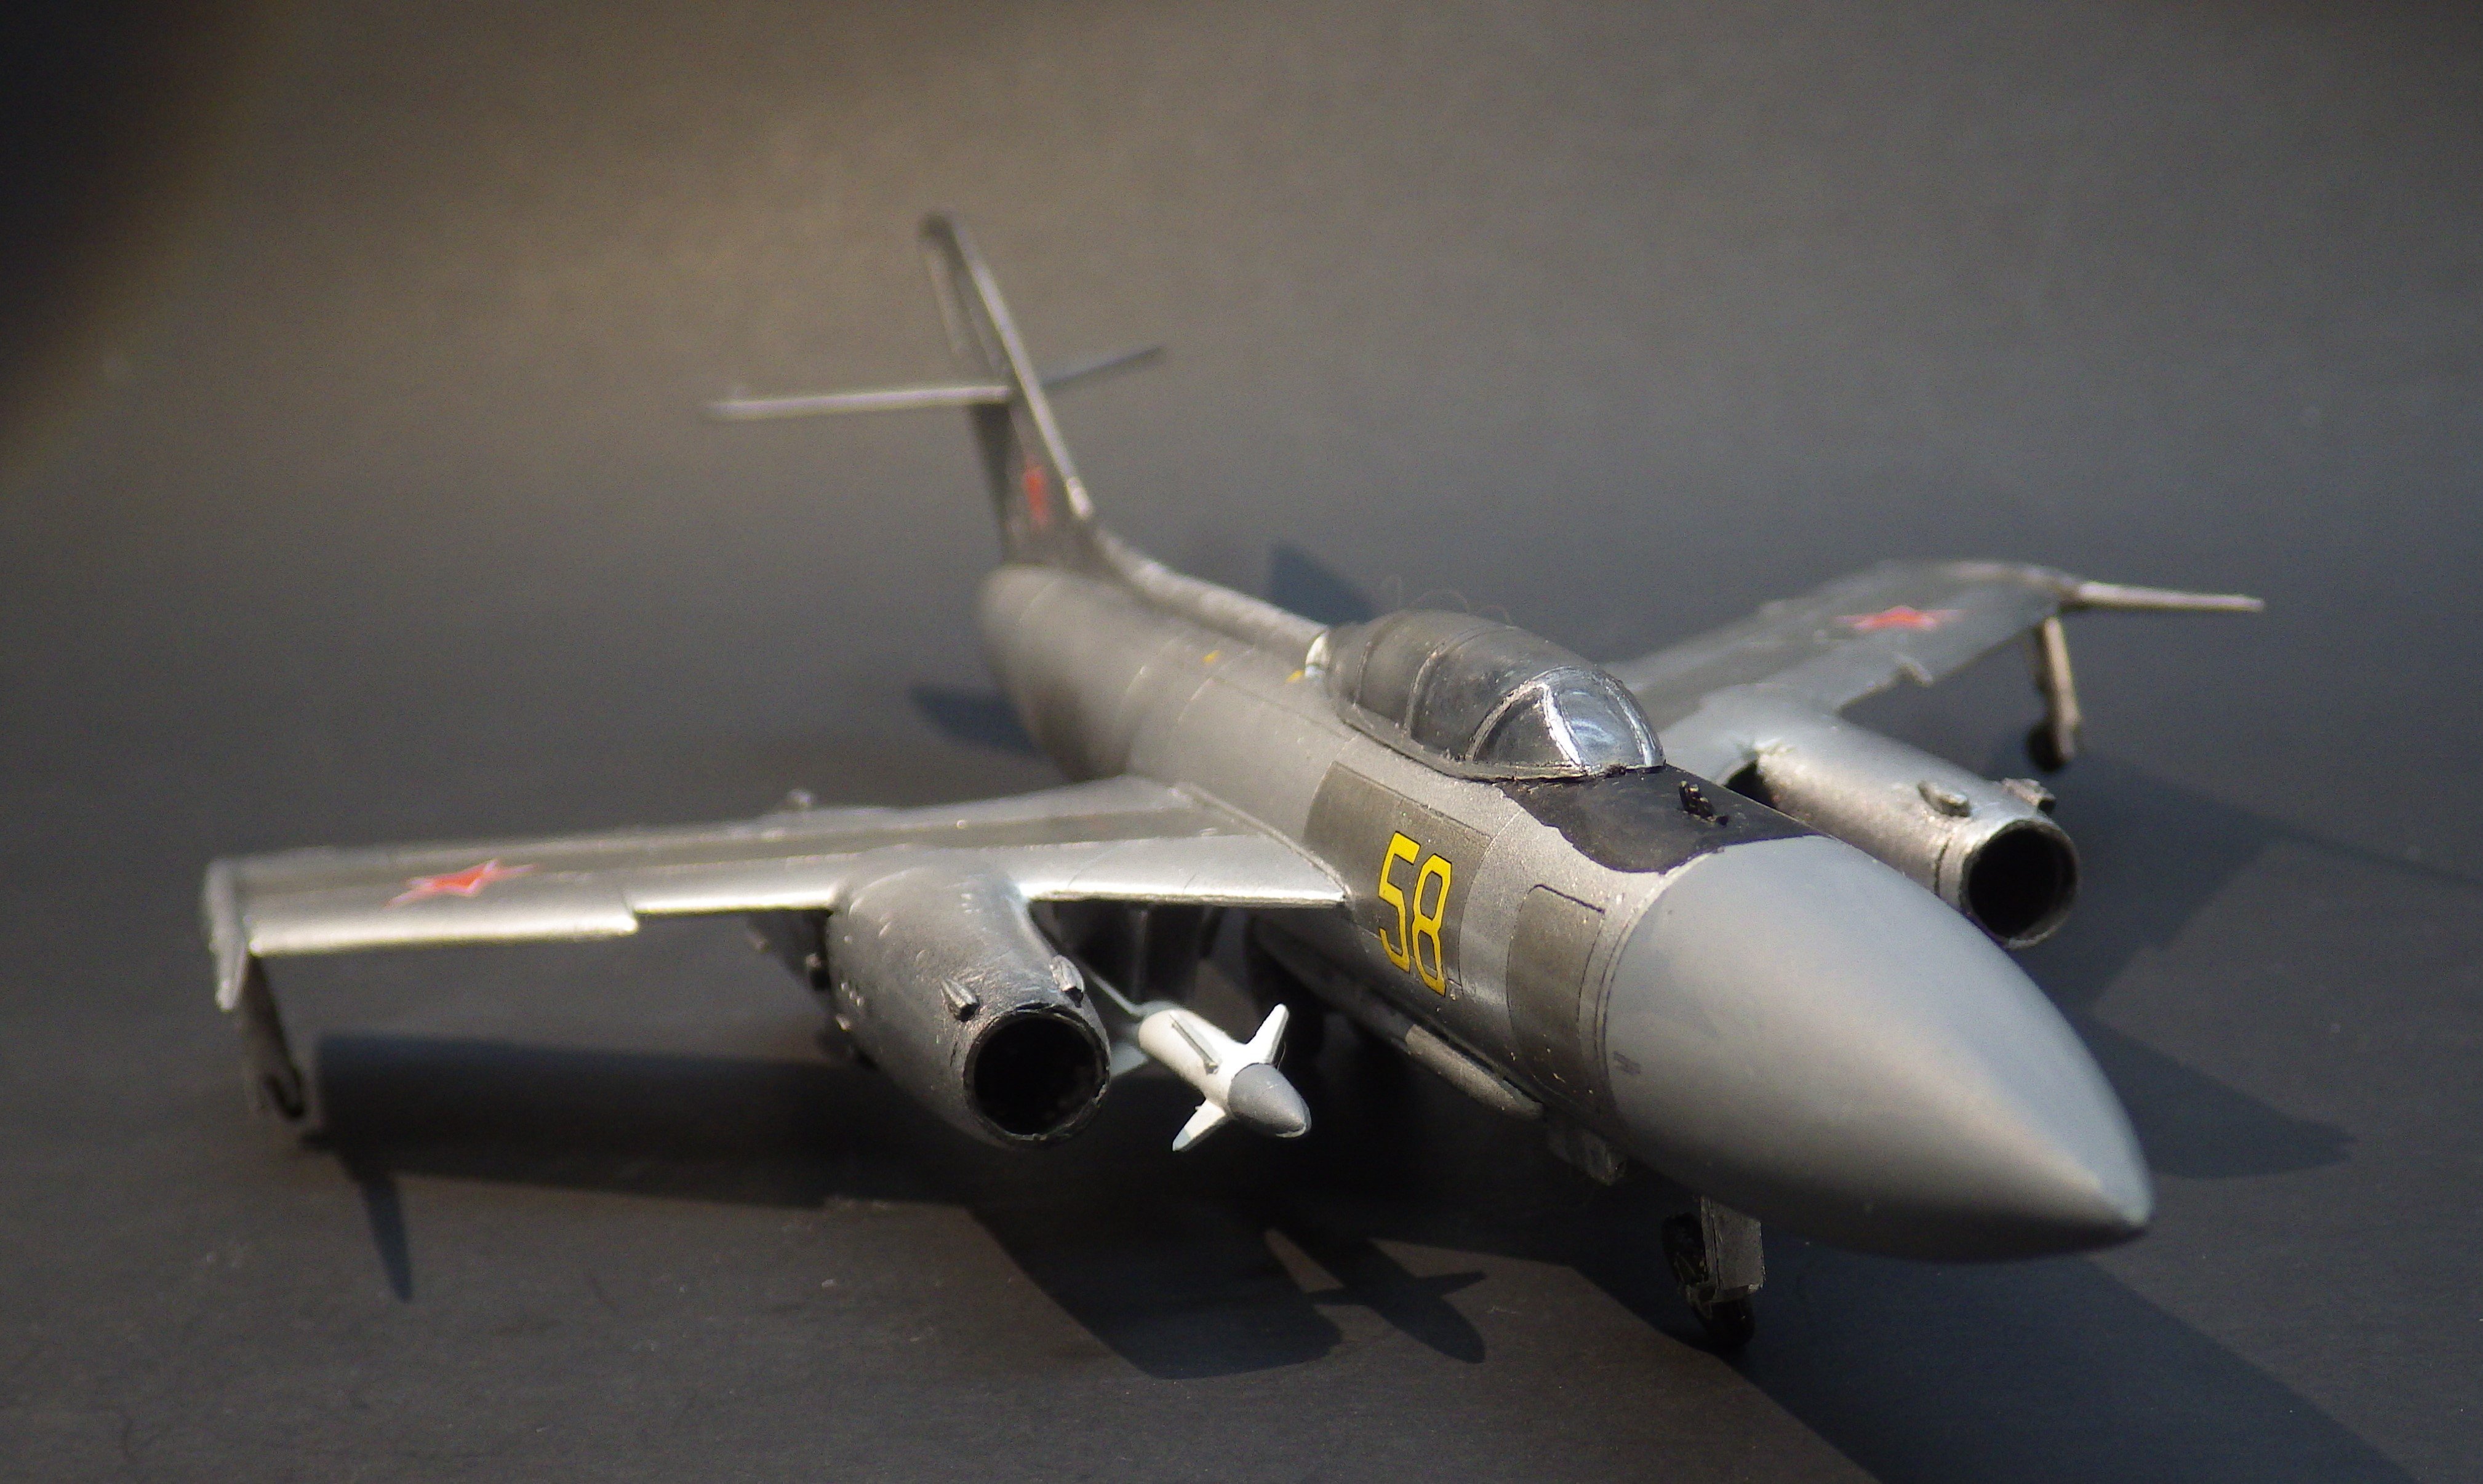
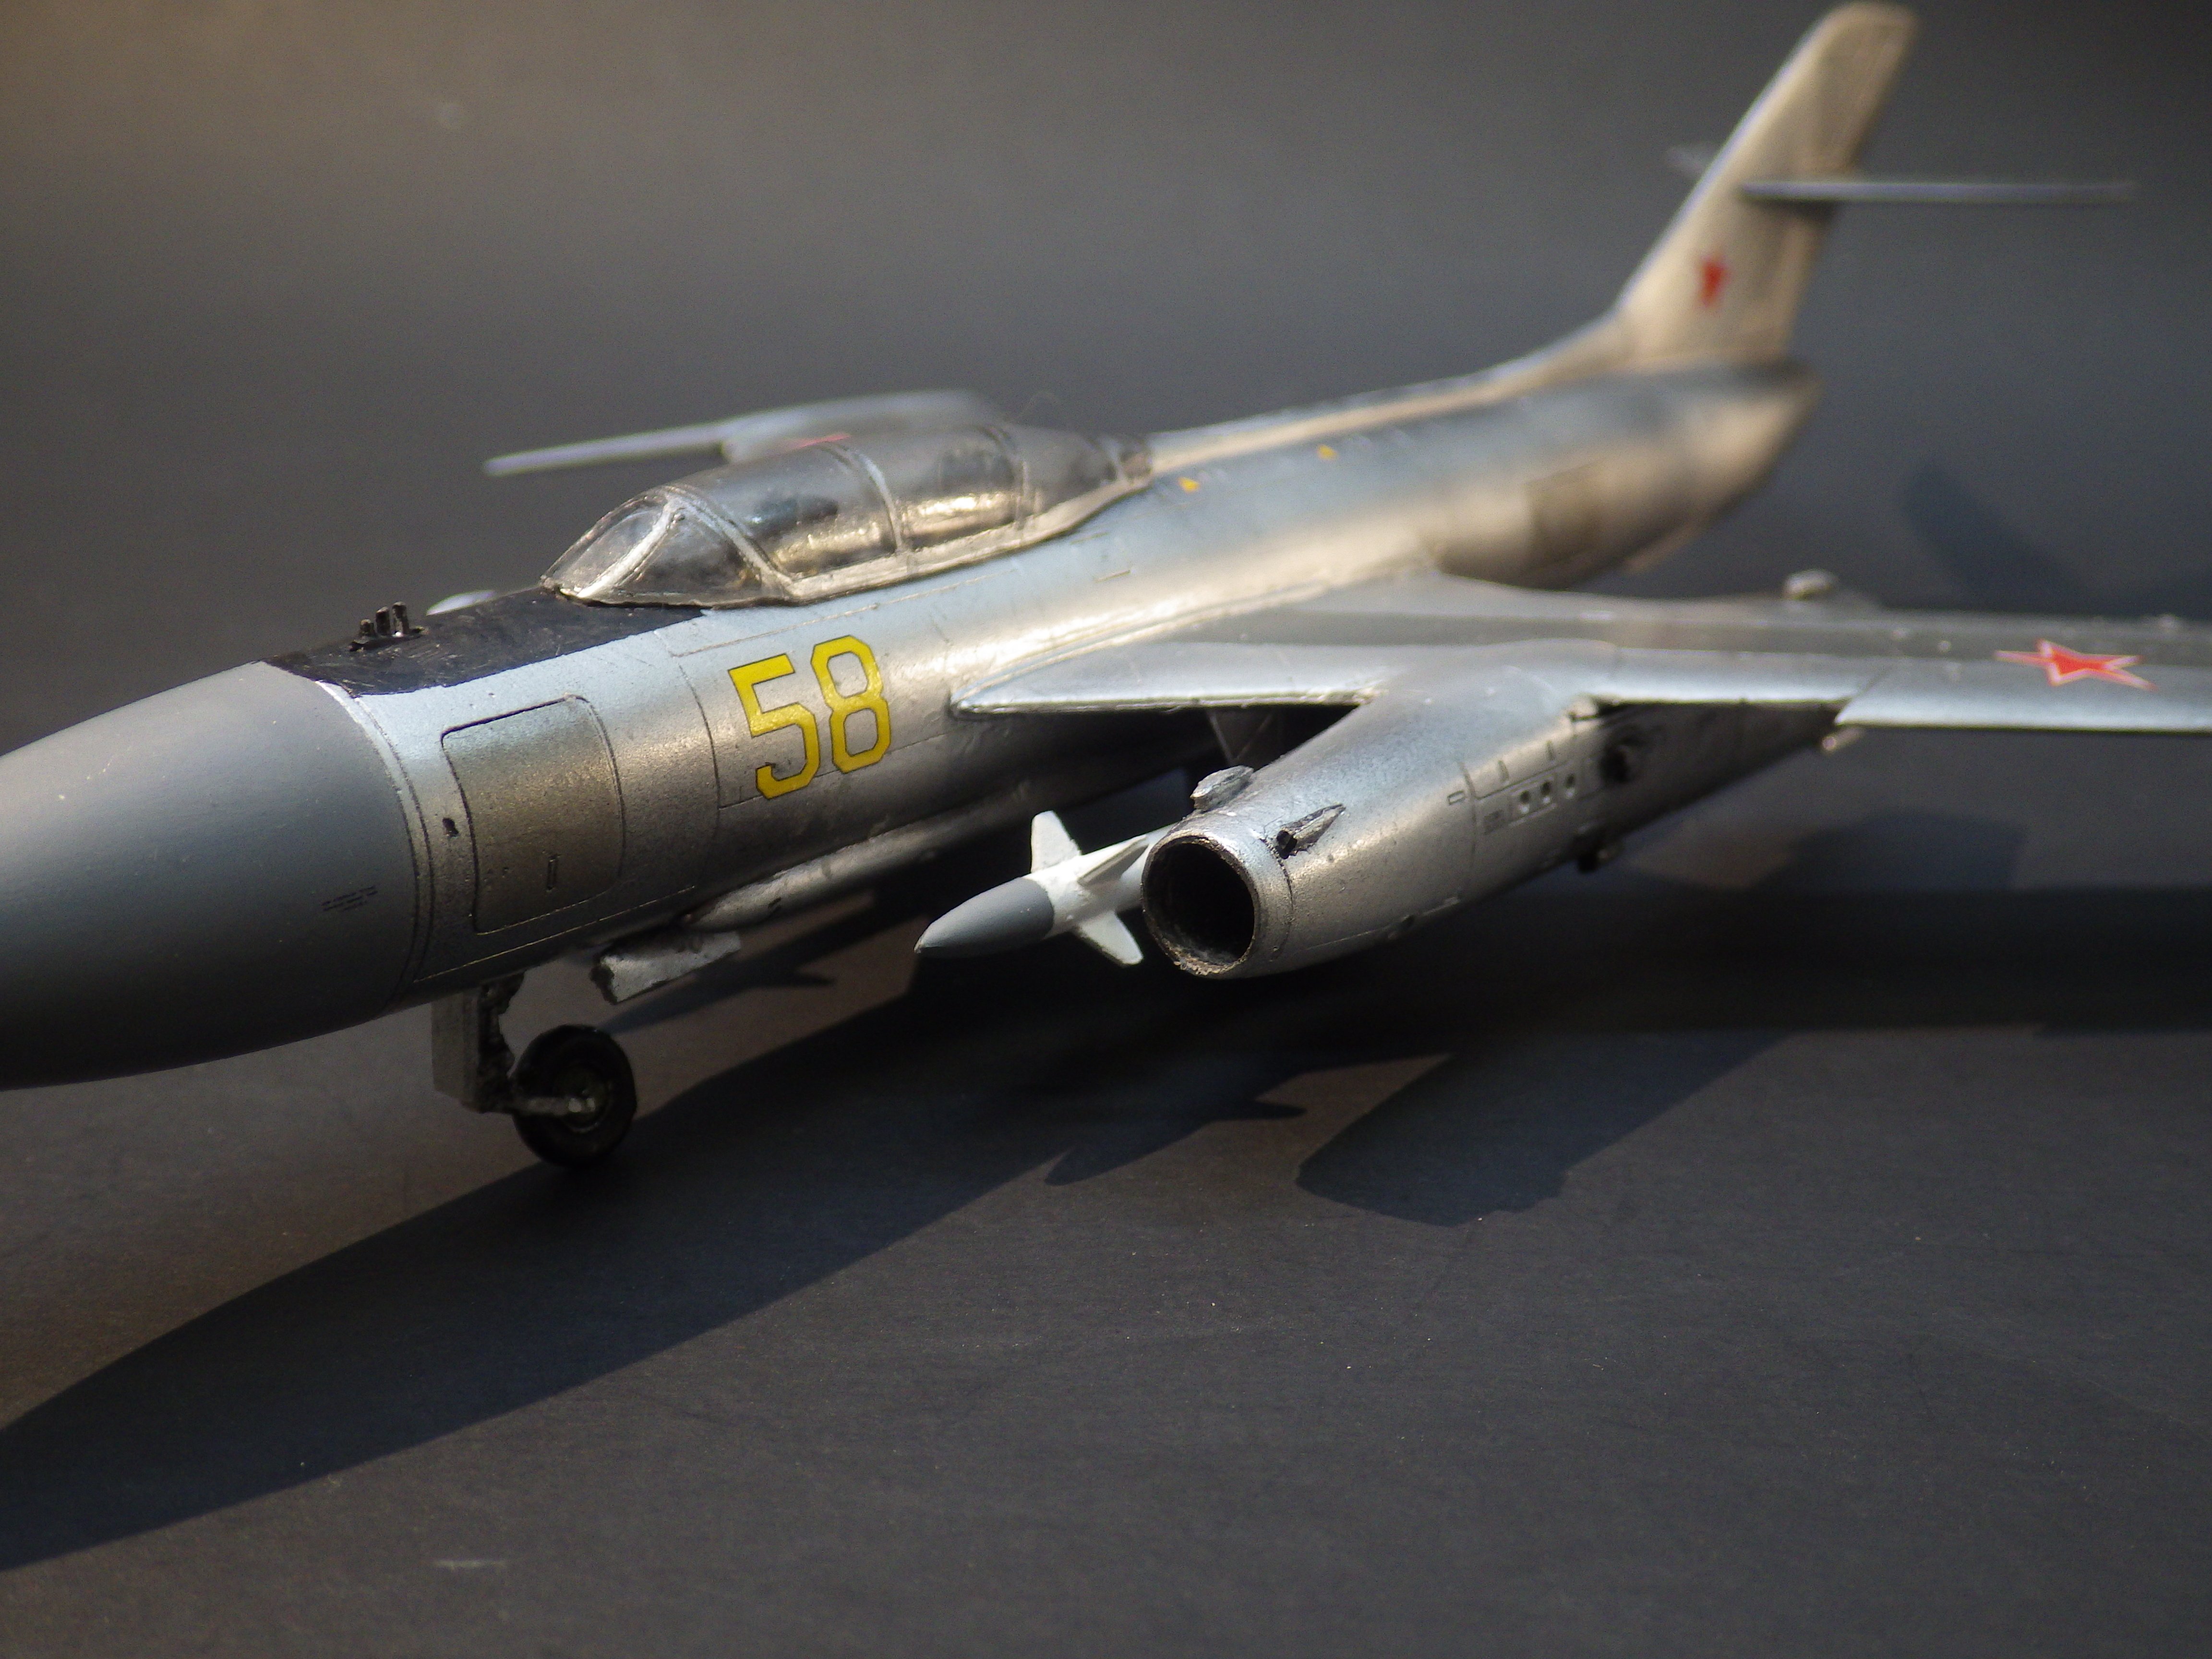
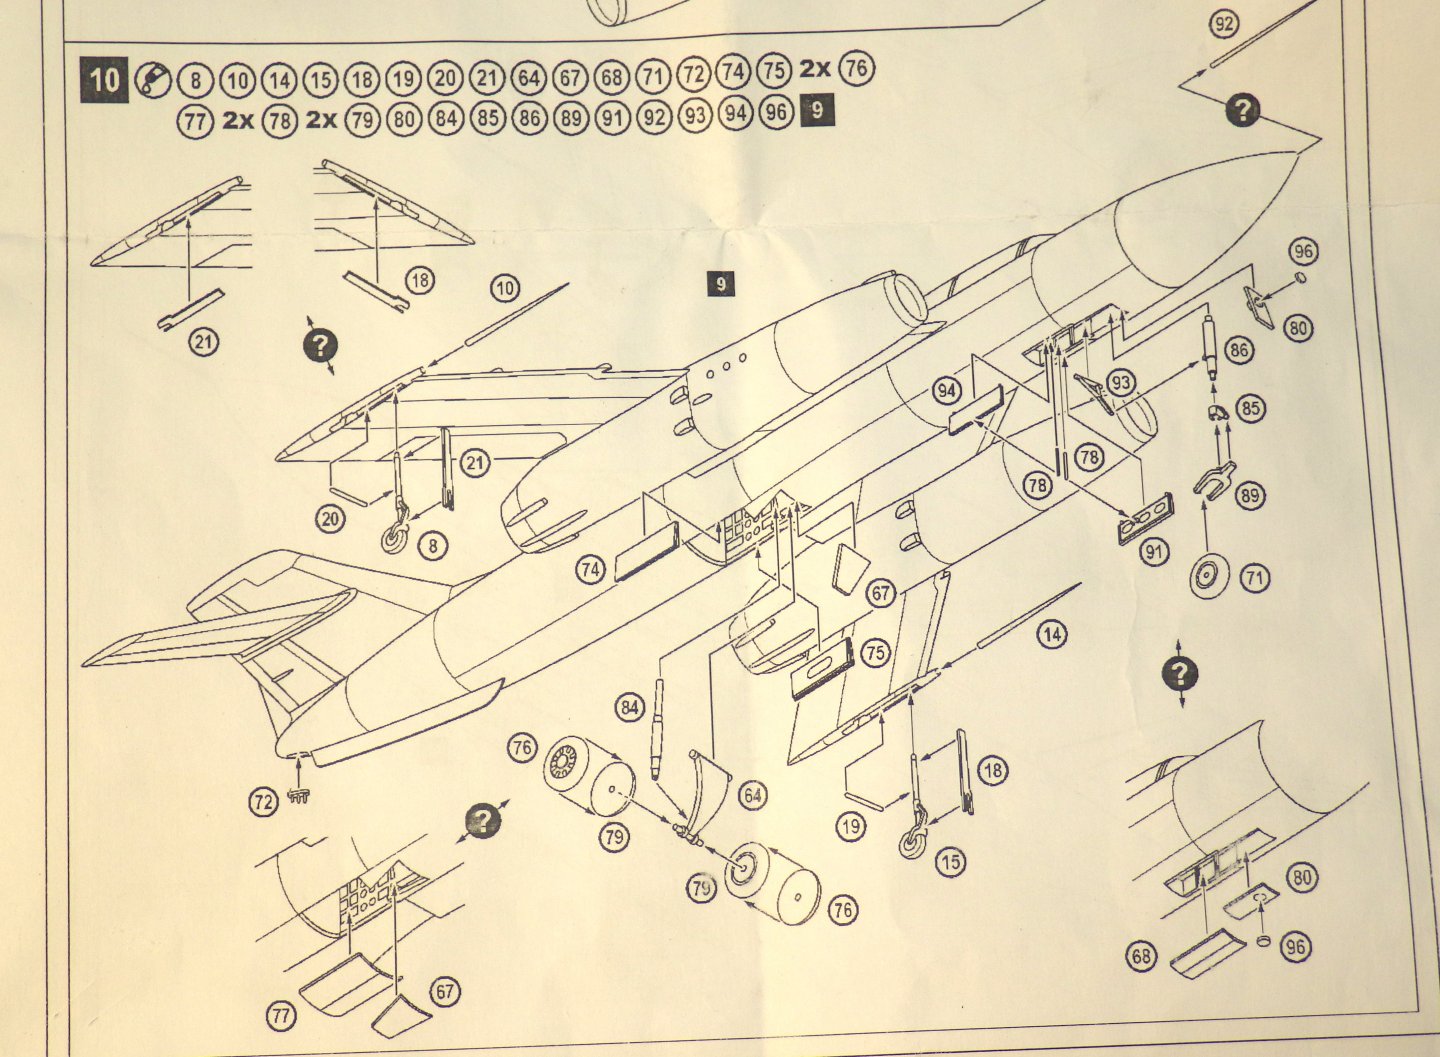
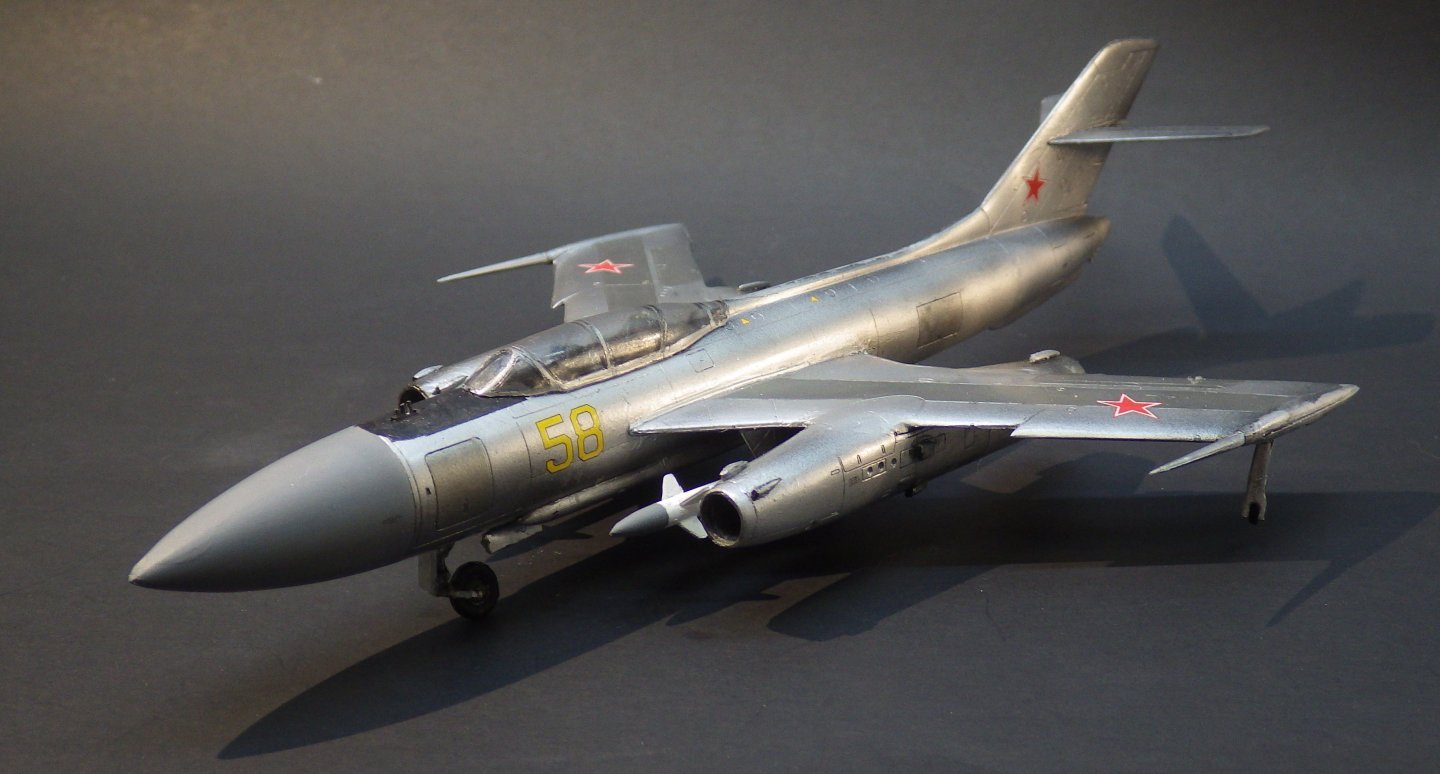
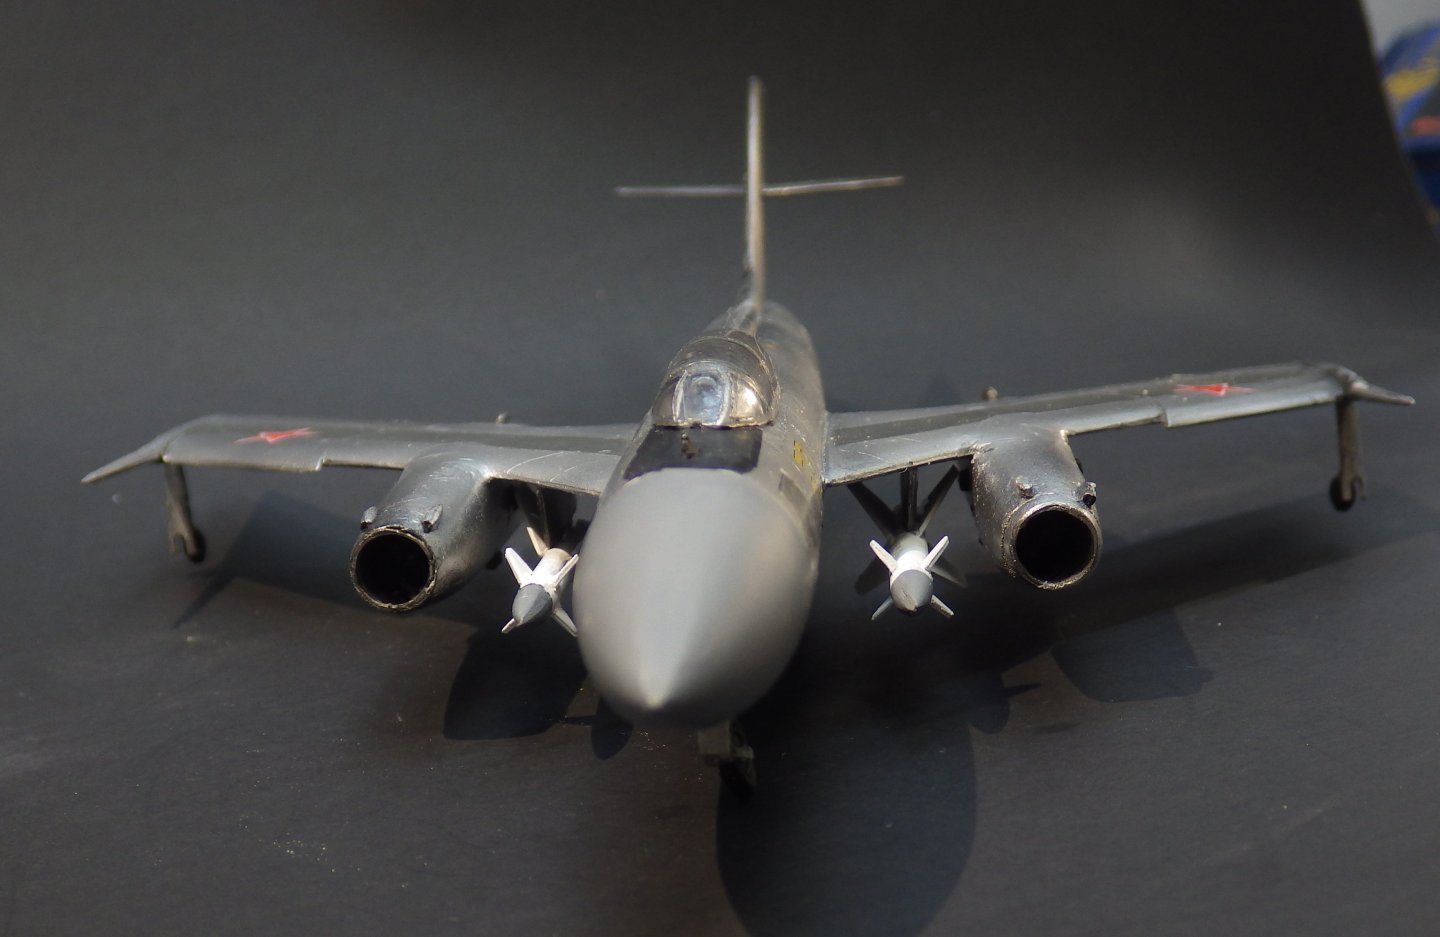
Yesterday the last of the window repairs were completed which is a big help towards feeling "normal" again. Neighbors still have a long way to go. I've been working slowly through the last elements of the Yak and it hasn't got much easier. The major remaining work was the landing gear. And we finally encounter some locating pins. On pieces 93 and 64 for the nosewheel and main gear. Unfortunately the pins would have needed to be trapped when the fuselage halves were joined together all the way back in the build (and yes I should read ahead but .......) The assembly of the nosewheel strut was not exactly clear and it seemed to be missing pieces which I made from scratch. The wing outrigger wheel struts were replaced with brass rod. The kit parts were a mess of flash and looked awful even when cleaned. And, of course, once the gear was assembled it took two days of adjusting and fiddling to get the plane to sit on the mains and nosewheel with the outriggers clear of the ground. The wingtip booms have been added and the missiles have been dug out of the flash and assembled and painted. I think I am going to call it finished. This one has been annoying at times but it does have the fifties space age look which makes me happy. Its been a useful exercise in learning about NMF treatment and I think i can do better with the Vallejo acrylic metals next time I still have a couple of AModel kits on the shelf including a Mallow flying boat I was very taken with. It is likely to sit for a while before I work up the courage to start it. Thanks for all the likes, good wishes and helpful comments Alan


- 89 replies
-
- 13
-

-
-
Thanks Mark For a simple kit its been a rough ride. Alan
-
Very nice. Such a lot of really great detail in that kit. I’m going to have to try another Roden kit. alan