


king derelict
-
Posts
2,158 -
Joined
-
Last visited
Content Type
Profiles
Forums
Gallery
Events
Posts posted by king derelict
-
-
-
2 hours ago, lmagna said:
Hey, it's your turn.
 Try running up a bill that covers ALL of the ships of the 1941 ABDA fleet! In two scales in the case of the Houston! Books and plans for them all, plus a couple that also held an interest to me. I am still glad I did though as his work is at the top and some of the stuff I have is no longer available. The PDF plans are kind of interesting as they have a watermarking on them that says they were printed just for me, (My name). Makes me feel a little important when I look at them.
  The only plans that I have ever bought that were more detailed were the 12 pages of 1/96 plans of the HMS Hood I bought from PC Coker twenty something years ago. Even my plans for the USS Oahu from The Smithsonian are not as detailed.
I just bought the USS Wasp and HMS Malaya books so many thanks for the link. I may get the Jupiter and Niaid books if these live up to expectations
Alan
- lmagna, Ryland Craze, Canute and 3 others
-
 6
6
-
if you can paint buttons on the Rifles you would walk all over a 1/700 Flyhawk kit. They are beautifully designed so everything fits and their PE integrates seamlessly
- Canute, Old Collingwood, mtaylor and 1 other
-
4
-
Many thanks OC. I have bought some of the Flyhawk kits from China and they have generally shown up much earlier than advertised, maybe about a month. I've used a guy Yanworld who has always delivered early.
I'm trying to work up to HMS Good or Prince of Wales
- Canute, popeye the sailor, mtaylor and 1 other
-
4
-
2 hours ago, lmagna said:
A bit more expensive but also a few more options if you go direct. I have a number of his books and plans and have never been disappointed. His research seems top notch and one would have to be VERY well versed on the ship to find fault.
I can see me using this a lot. Many Thanks
-
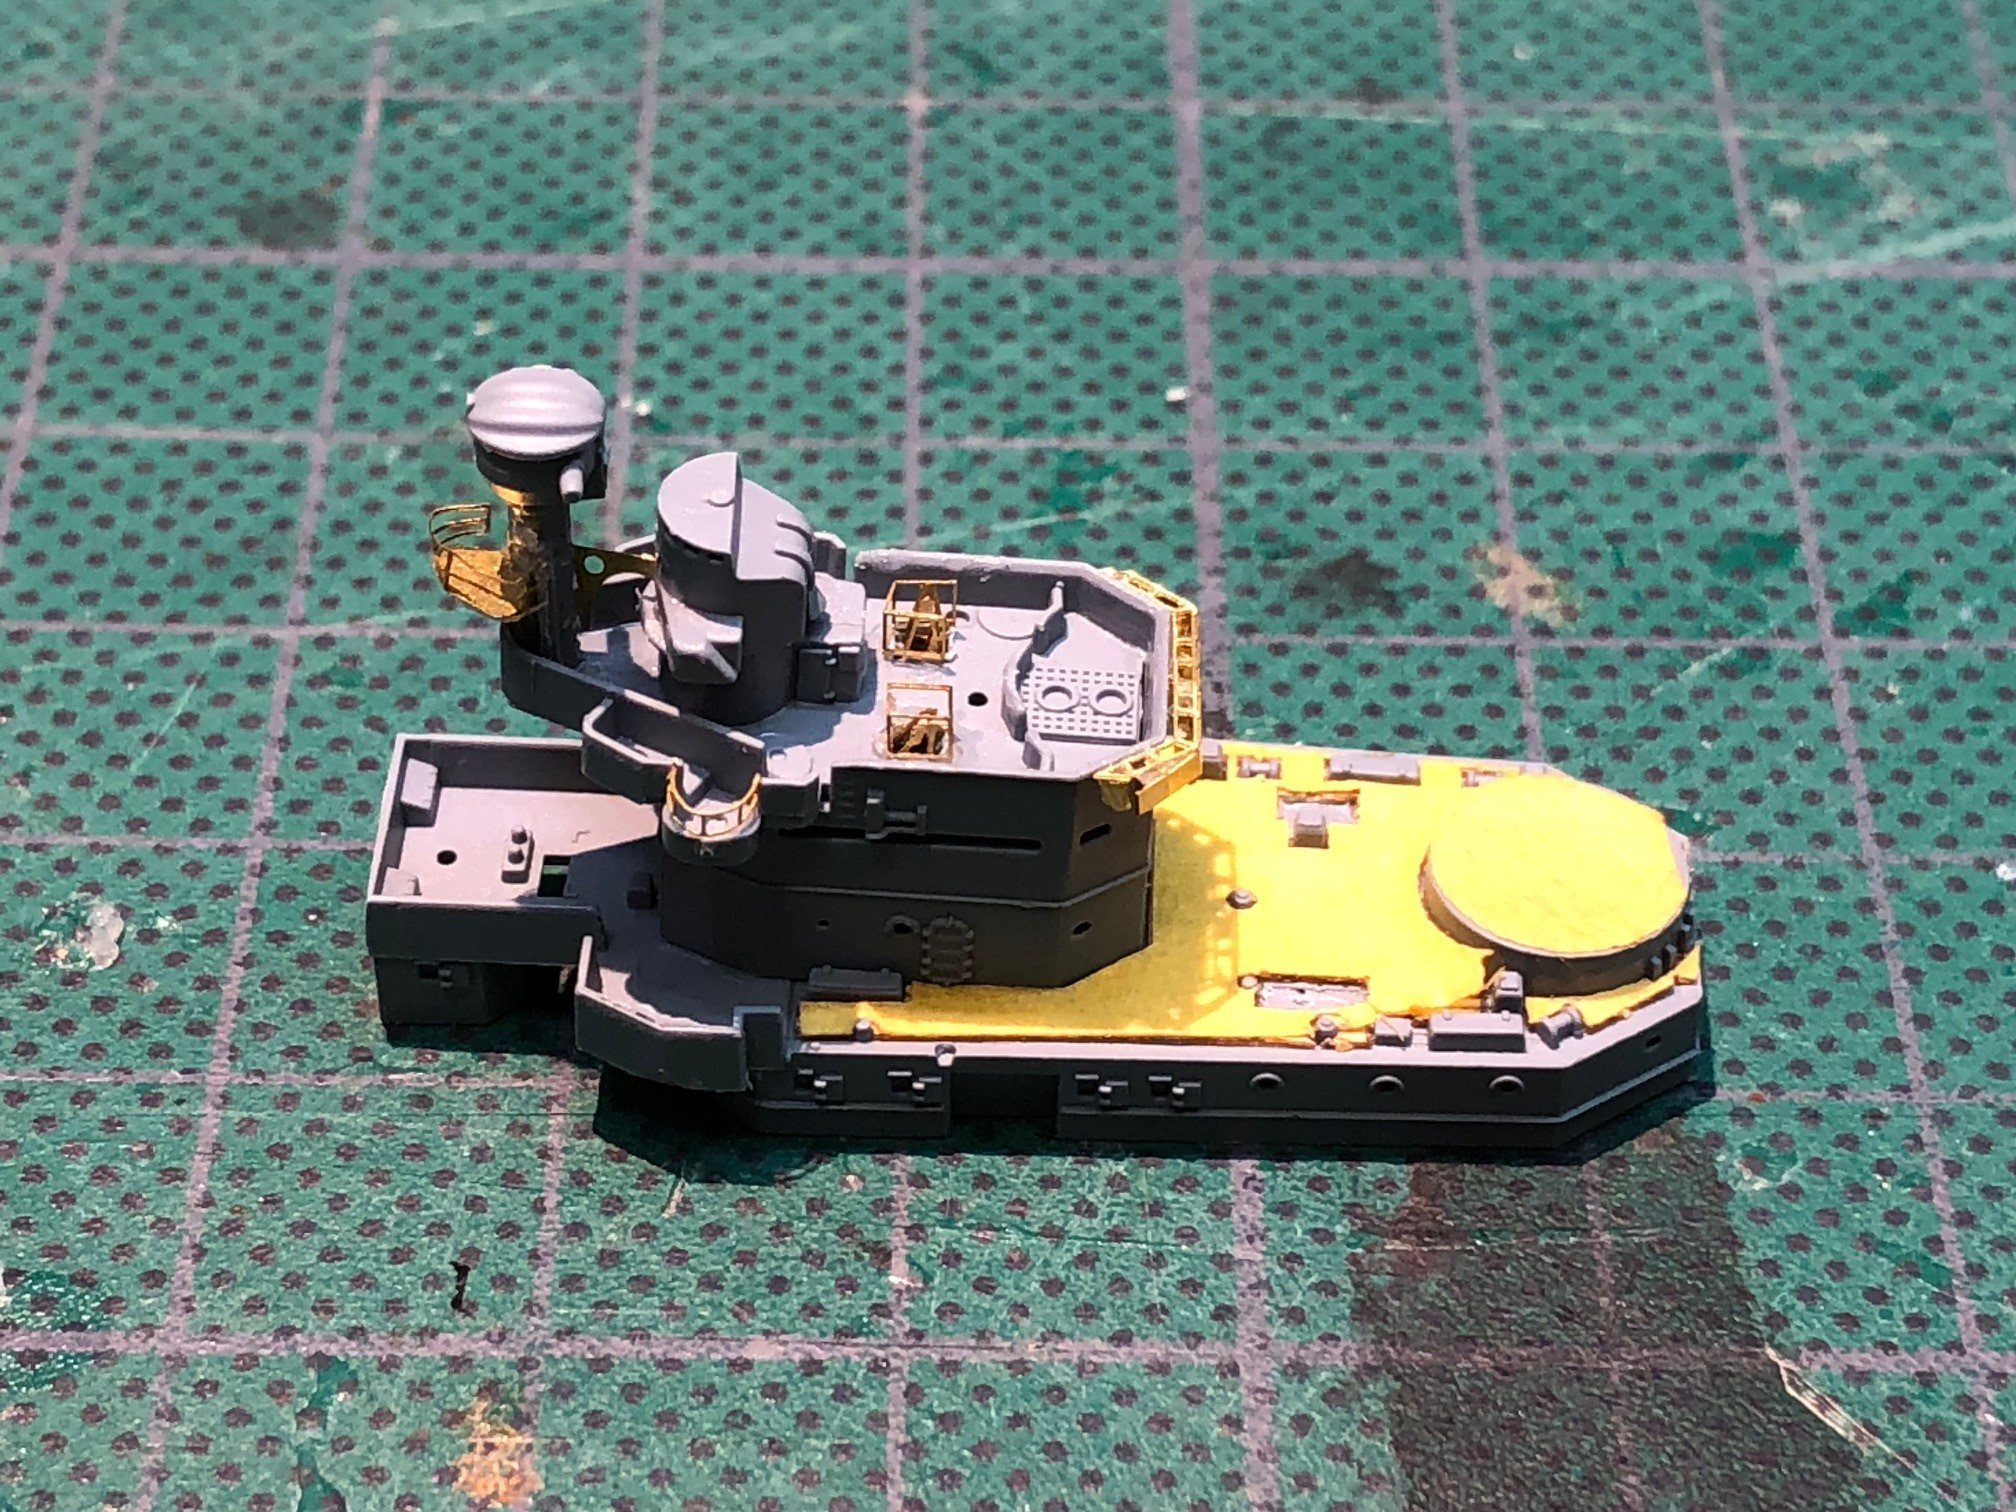
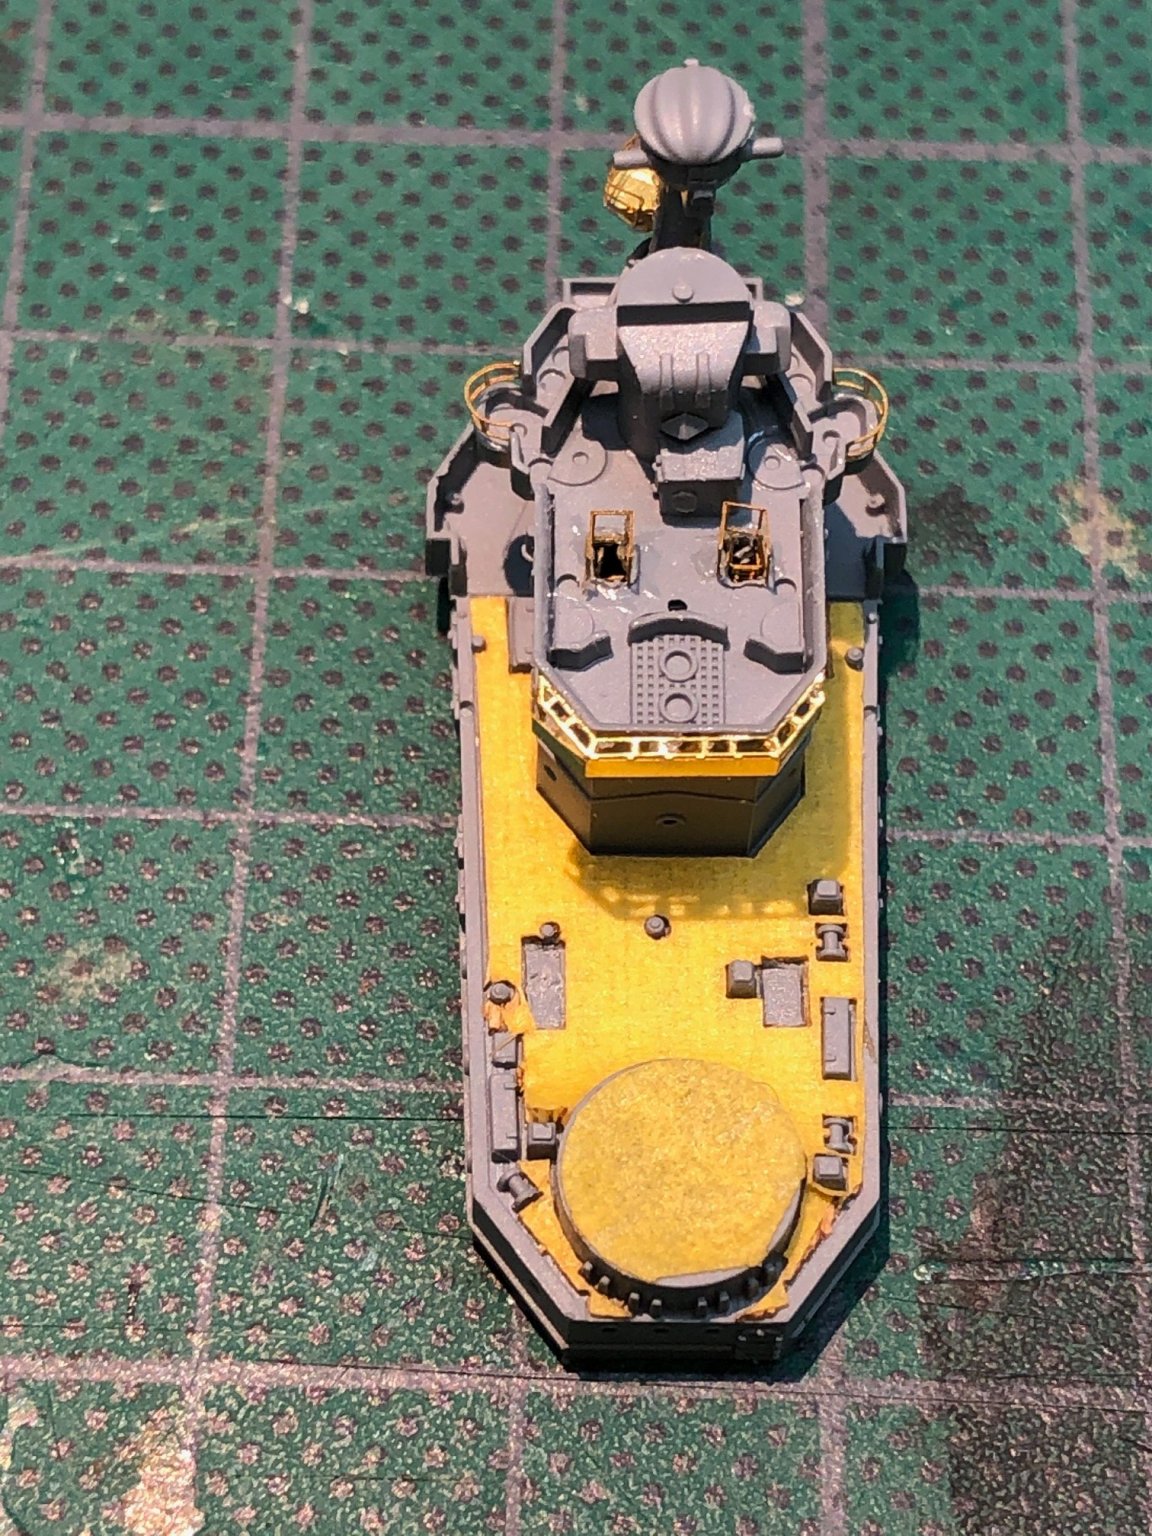
The accumulation of brass continues. The bridge is about complete, the funnels are in progress and I worked up the courage to make the derrick. I am quite happy about how it came out. I still have the crane hook to add to complete it. The Flyhawk PE is very nice to work with. The fold lines are deep enough that the bends come out nice and clean although the downside is you don't get too many attempts before the part fails at the fold line. The fit with the plastic parts is good too. So far I'm thoroughly enjoying the kit. There are a lot of elements to work on. I need to start the brass guns and the Seafox.
Thanks for the likes and support
Alan
.jpg.93b871e10d6ed824e52936bfcd6af69a.jpg)
.jpg.a8d8700d3aa90ca5efc554154fdca322.jpg)
.jpg.2928025db6e3bdf88bc594c3761b3685.jpg)
.jpg.c3e28ce3836fabbed4807c820fcea021.jpg)
-
On 6/8/2021 at 6:45 PM, Canute said:
Good idea to take those breaks, Alan. I assume you have good lighting and some kind of optivisor to work with that fine stuff.
Thanks Ken
Yes I installed a pair of LED strips above the work table as well as a focussed desk light. I use a pair of 3.5 x magnifiers for most of the work.
- Canute, Old Collingwood, mtaylor and 1 other
-
4
-
2 minutes ago, Old Collingwood said:
Very nice work - very tidy and clean - not easy at this scale.
OC.
Thanks OC. I need frequent breaks to let my eyes unfocus a bit
Alan
- mtaylor, Old Collingwood, Canute and 1 other
-
4
-
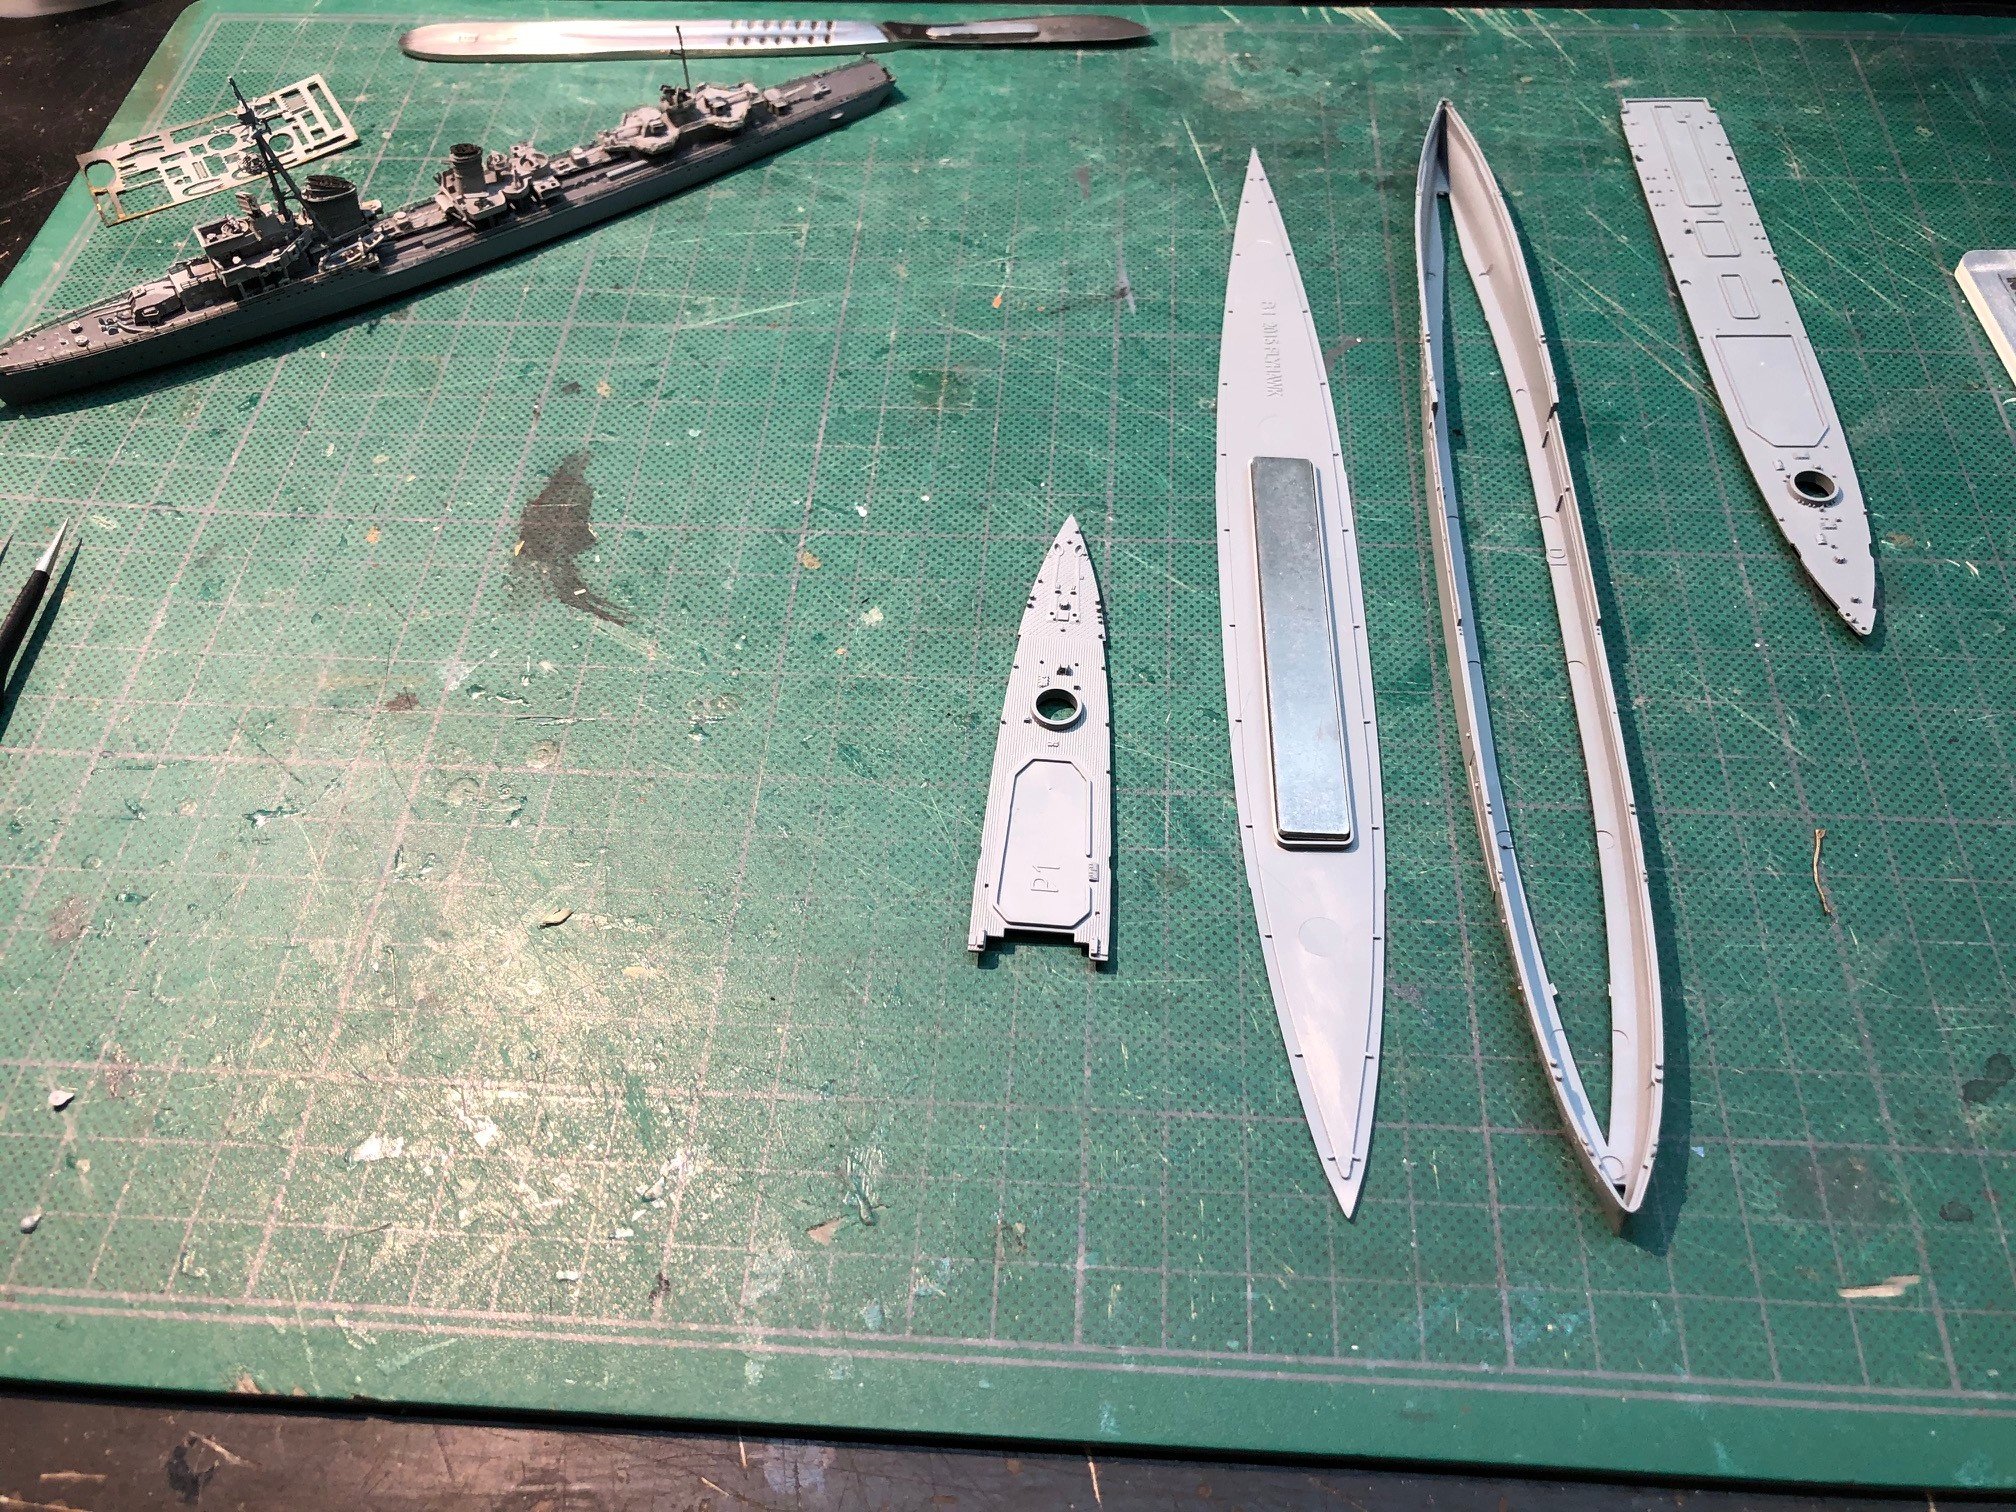
A tentative start has been made. It seems to me that one of the necessary skills is the ability to look at the kit and decide how to break it down into elements to build and paint, especially when masking is required. I spent most of the morning staring at the parts and the assembly information and decided that I will complete the hull, build the elements of the superstructure as far as masking will allow and then assemble, add final details and touch up paint. Some of the PE is much too fragile to stand any form of masking.

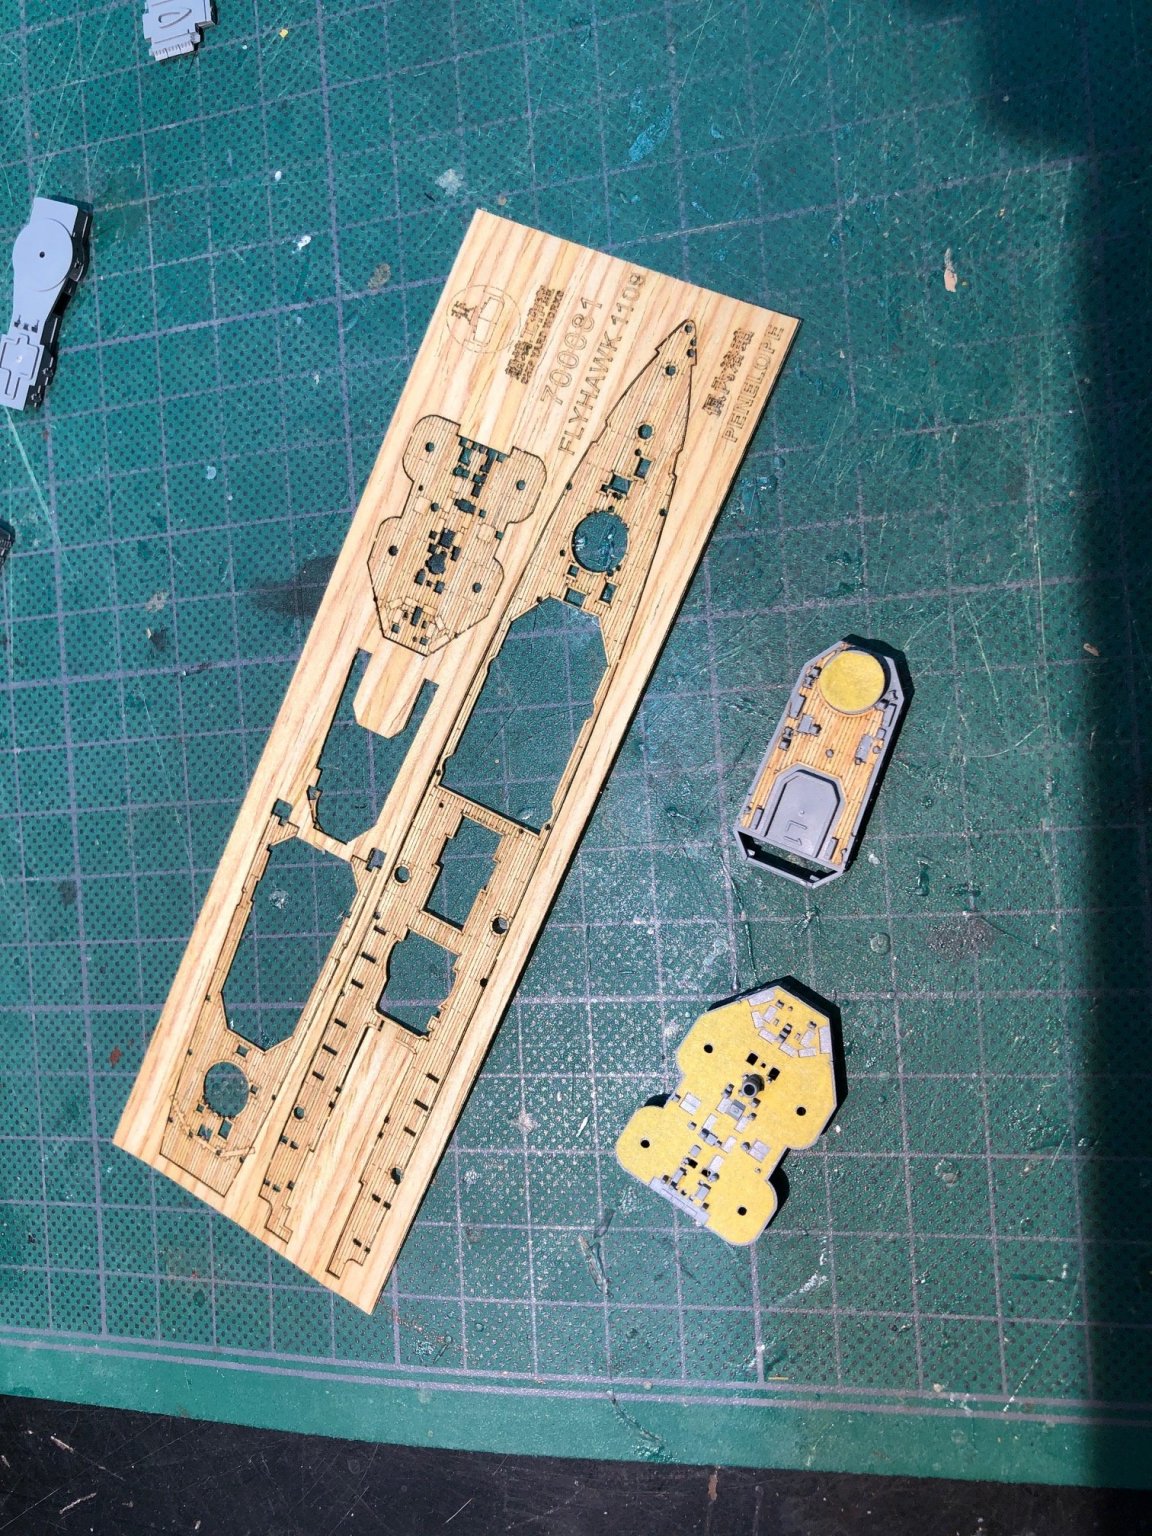
The waterline hull assembly and the weight were completed. all tightly fitting. This was followed by the first consideration. The wooden decks came with a set of masks and I was unsure whether to install the wooden decks and then add the masks for subsequent painting or to add the masks to the bare decks and install the wooden decks before final assembly. I decided to install the masks on the bare decks thinking that if any paint got under the mask it was likely to be insufficient to affect the adhesion of the deck but if might be hard to get a perfect register with the mask over the wooden deck and any paint getting on the wood would be disappointing. I made one exception with the lower bridge structure where I did install the wooden deck and then applied the mask. The build up of the structure would make adding the wooden deck difficult later in the build. This is the first time i have used a wooden deck so this may be completely incorrect.
.thumb.jpg.41f60145a69b5618539ce5e5b366cac7.jpg)

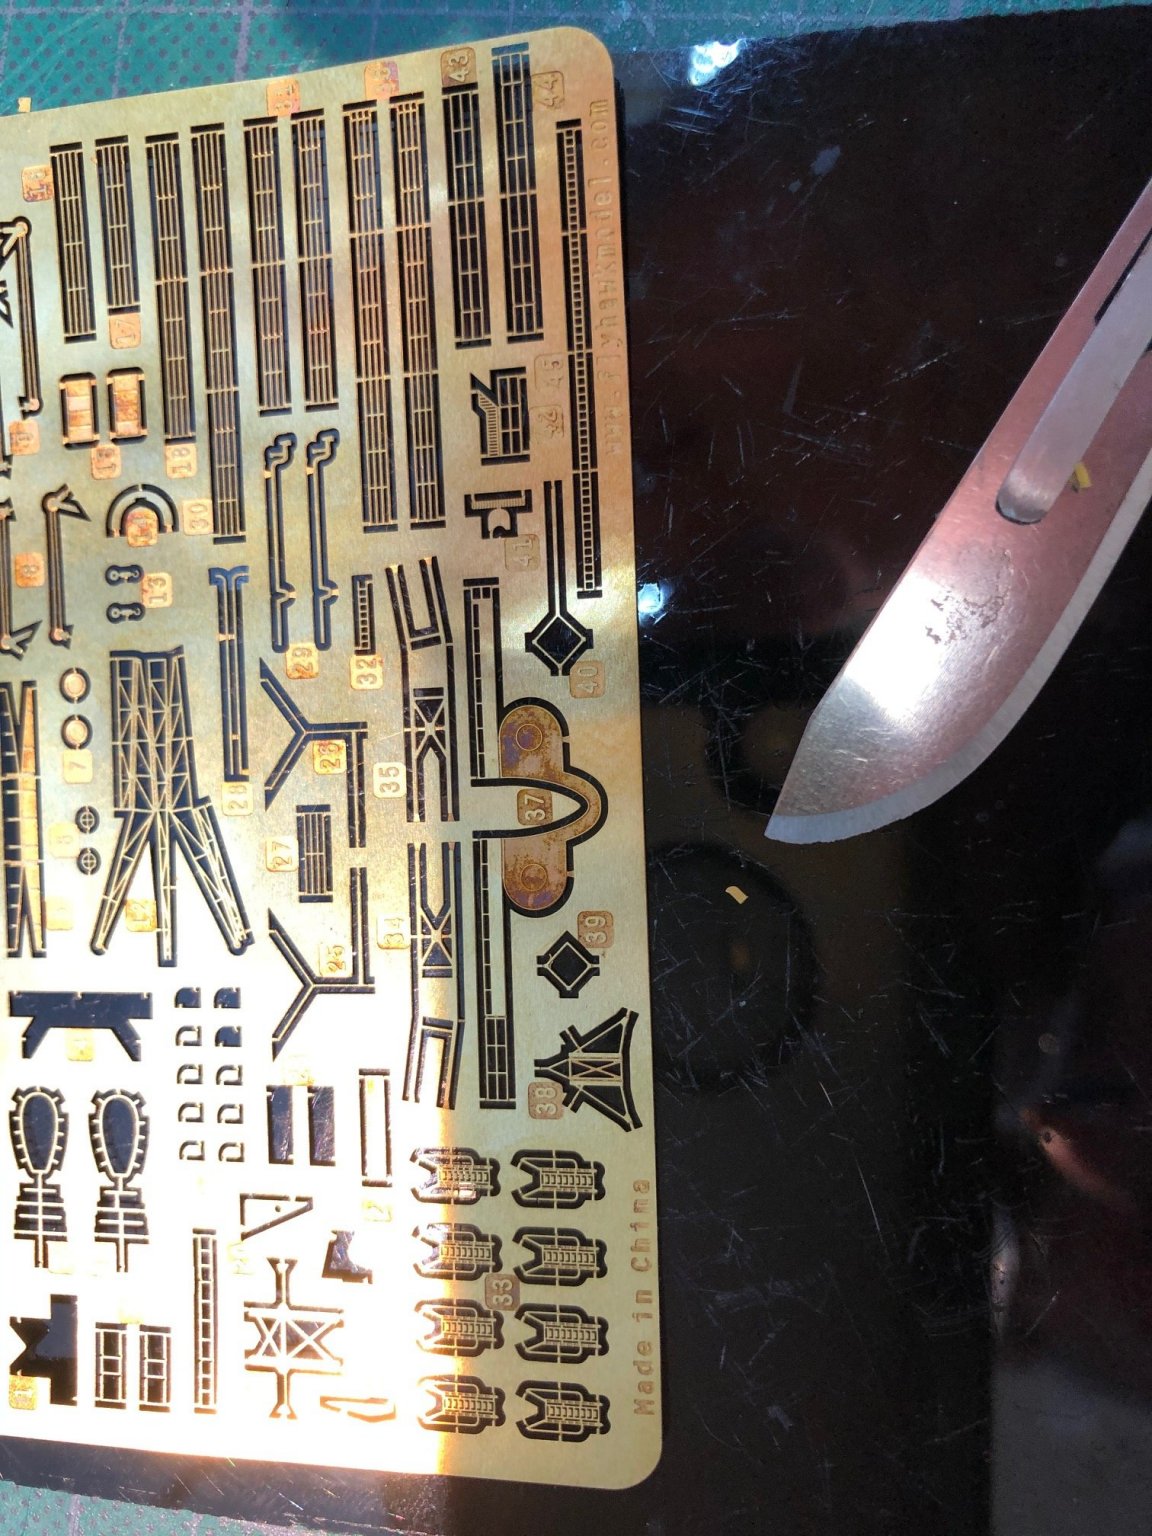
The PE has been started. This is as small as I think I can handle. It is probably invisible on the final model. It a support for the bridge upper works
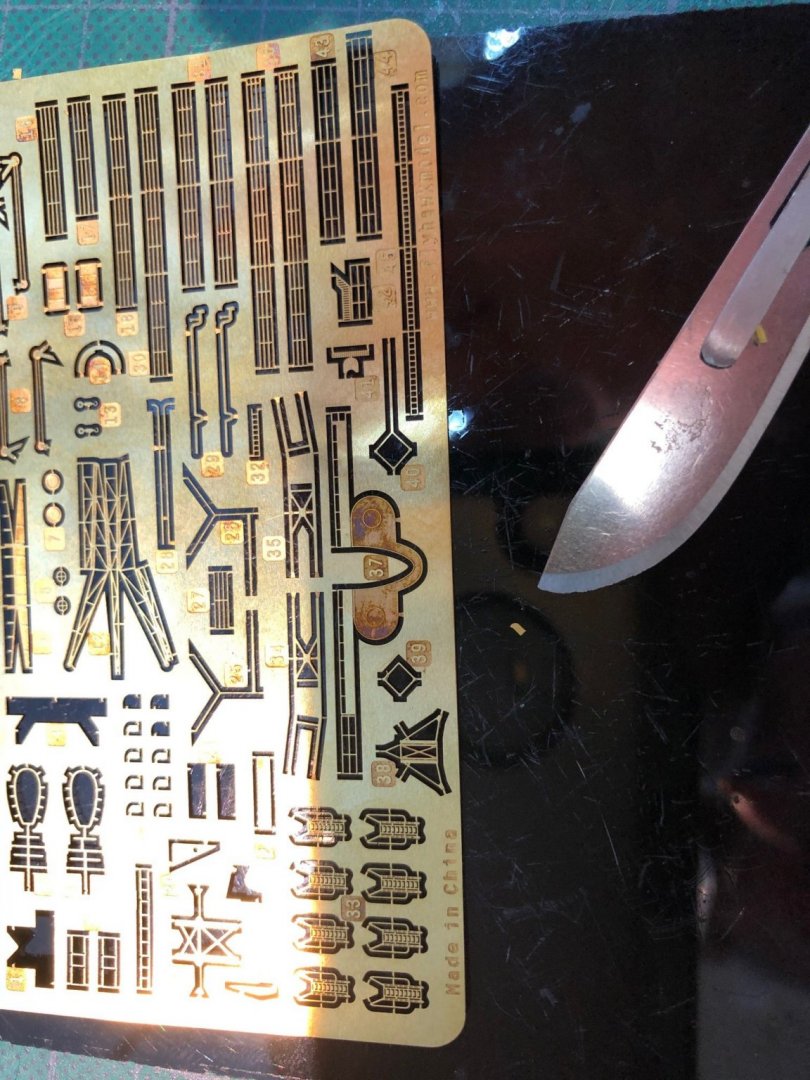
The PE is very nice to work with so far although I go in fear of teh crane and catapult that will be built later. There are even ladders and railings around the bridge companionways


Thanks for looking
Alan
- popeye the sailor, mtaylor, CDW and 2 others
-
5
-
17 hours ago, Old Collingwood said:
Count me in - I will stare just like your cat is at the amazement that happens with people who have xray vision with these tiny Builds.
OC.
Thanks OC
I welcome advice from you and the other grand masters
Alan
-
6 hours ago, Canute said:
I'm in, too.
Any Maine Coon in the cat? Looks like the one we have.
Hi Ken
Yes she is a Maine Coon cross. She came from a local shelter as a kitten with her sister three years ago. They are both great cats. Wonderful companions
-
Hello Everyone
This is my first pass at a build log so please forgive all the omissions and errors.
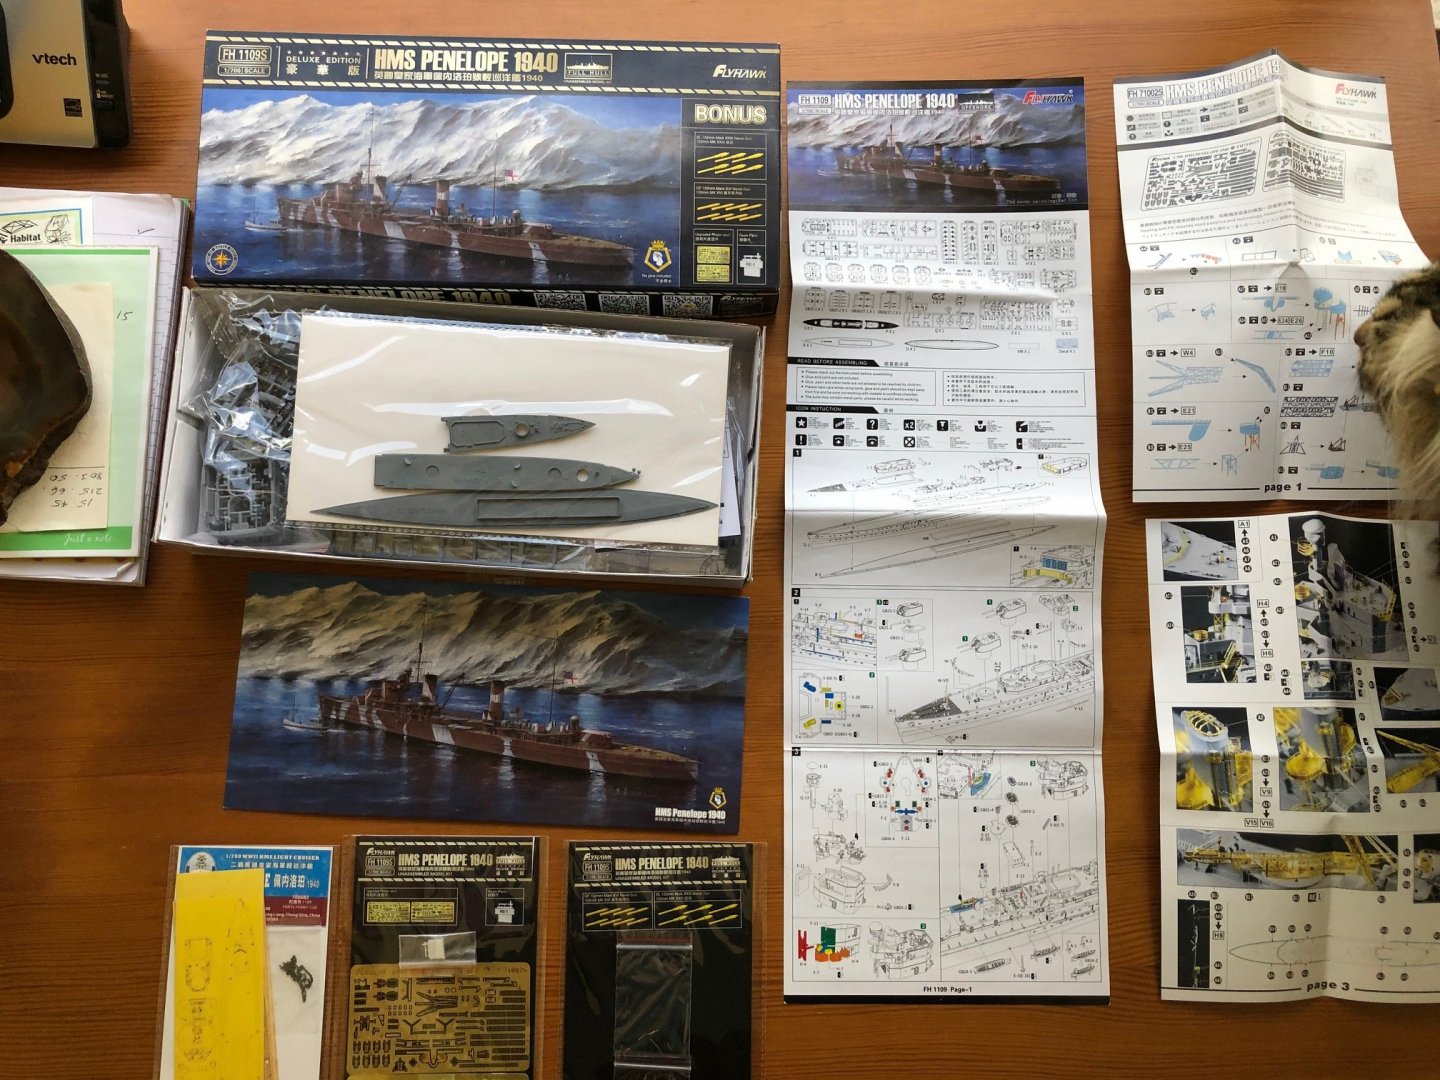
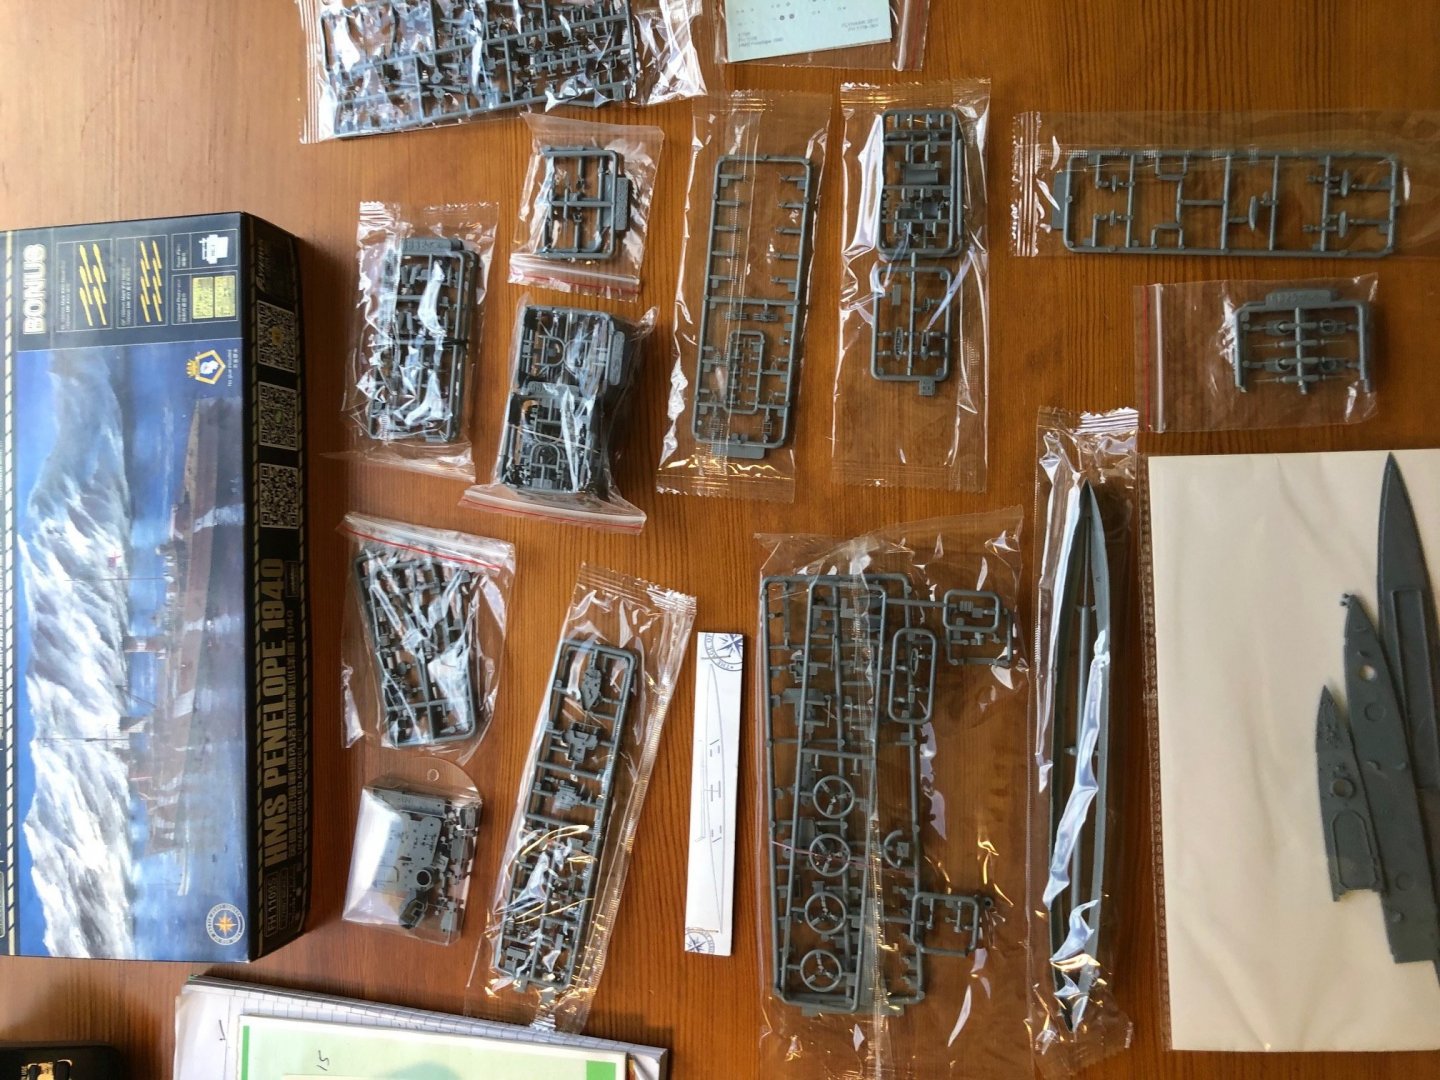
I am attempting to build HMS Penelope from the Flyhawk 1/700 scale kit. I have the Deluxe kit with two sheets of PE and metal gun barrels. I also have a wooden deck as an additional item.
I returned to plastic models last year having not built a kit since 1970 and I find things have changed since those days. Kits and aftermarket parts are spectacularly good and my eyes and hands have gone in the other direction. I have been building WW2 RN destroyers from Flyhawk, IBG and Trumpeter mostly with some elementary PE. This will be a step up in many ways so I hope I can bring it to a successful conclusion.
HMS Penelope like so many ships had a pretty rough war. HMS Penelope was an was an Arethusa-class light cruiser commissioned 13 November 1936.
She operated with the 2nd Cruiser Squadron on convoy escort duties. In April and May 1940, she took part in the Norwegian Campaign. On 11 April Penelope ran aground off Fleinvær while hunting German merchant ships entering the Vestfjord. Her boiler room was flooded and she was holed forward. The destroyer Eskimo towed her to Skjelfjord where an advanced base had been improvised. Despite air attacks, temporary repairs were made and she was towed home a month later.
Penelope was holed both forward and aft by near-misses during air attacks on Malta in March 1942. While in the island, she was docked and repaired at the Malta Dry Docks. Day after day she was attacked by German aircraft and the crew worked to fix a myriad of shrapnel holes, so many that she was nicknamed HMS Pepperpot; when these had been plugged with long pieces of wood, HMS Porcupine.
Further service in the Mediterranean saw her bombed and mined several times. On 18 February 1944, Penelope, was leaving Naples when she was torpedoed by the German submarine U-410. A torpedo struck her in the after engine room and was followed sixteen minutes later by another torpedo that hit in the after boiler room, causing her immediate sinking; 417 of the crew, including the captain, went down with the ship
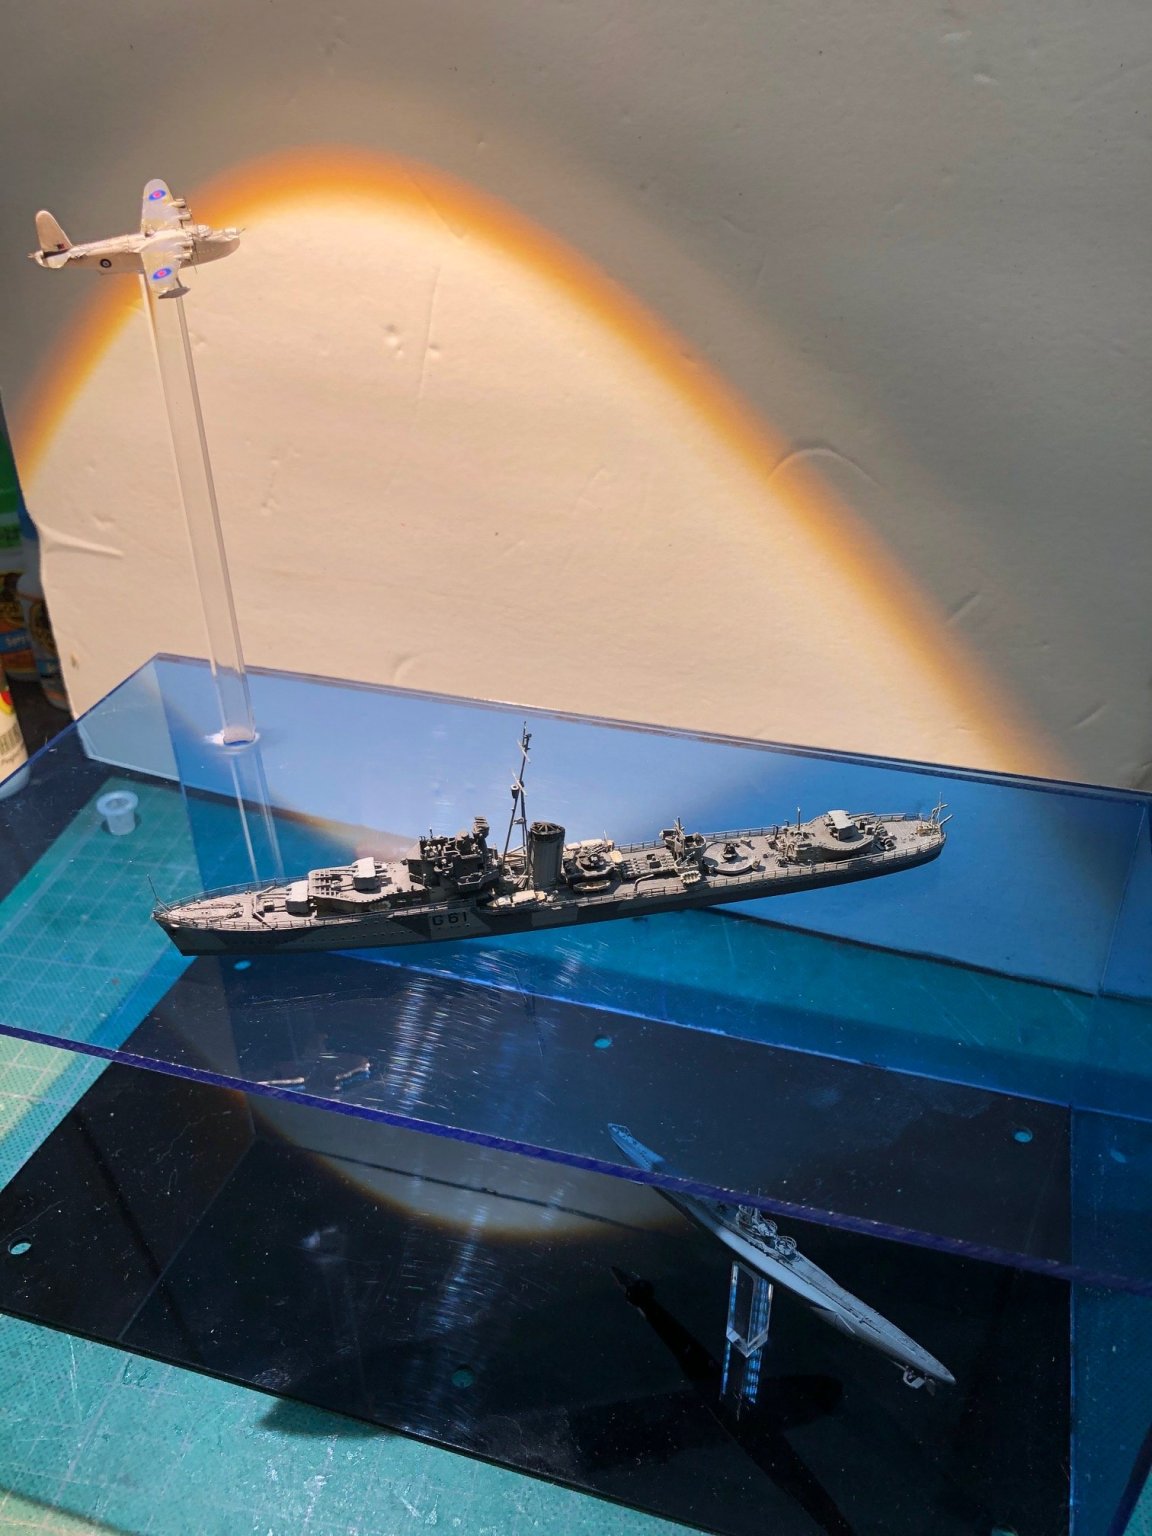
I plan to try to replicate the brown and white camouflage used in 1940 during her stay in Skjelfjord . This was an improvised scheme to try and match the colours of the snowy mountains surrounding the fjord. The colour balance was changed over time with the brown elements increasing to reflect the snow melting. That does give me some license to depart from a strict copy of the layout depicted with the kit. There is some controversy and little pictorial evidence of this paint scheme but the ships log attests to it and confirms that it was brown and whit and not just a simple overpaint of brown onto the light grey hull and superstructures. The exact colour of brown is undetermined so will be my choice.
My goals for the model are to replicate the Skjelfjord paint scheme, install my first set of wooden decks, use the metal gun barrels (another first) and try to use as much PE as I think enhances the model and remains below my fear limit. A stretch goal is to try a Norwegian fjord diorama. I plan a waterline model.
The Flyhawk box contains a nice print of the box top image with some brief notes about the ship on the back. Instructions for the basic kit assembly and the PE are on separate sheets and there are many sprues of beautifully moulded small parts. a metal weight is provided to and some substance to the model. Parts for a Walrus and a Seafox aircraft are provided. The Seafox is the correct choice for 1940.
My helper will provide company and make sure there is a liberal supply of long cat hairs to add character to the model.
This will probably be a slow build as I think through the sequence of build and paint and the appropriate points to add PE and the wooden decks. The wooden decks do come with masks which I think will give me some choices
I hope this log will help me at my best efforts. I would be grateful for comments from the many experts and I hope this provides some entertainment
Thanks
Alan

-
On 5/29/2021 at 3:41 PM, CDW said:
Might also mention that it's helpful to cut the long sections of photo etch railing into shorter lengths for better control and ease of installation. The long sections often just don't work well because of the lateral and vertical twists and turns of a deck. I cut mine right adjacent to a vertical post then give an ever so slight overlap when gluing them in place. It's almost impossible to detect they have been cut after assembly, but it sure does make the job of installing them so much better.
Thank you for the tip about working the railings as short sections. That has made it a lot easier for me for both long side decks and complex shapes. It also makes it easier to use Gators Grip glue instead of CA . I need to get tidier but now it's a lot more feasible. Many Thanks
Alan
-
I think I'll be in line behind you too get those new Flyhawk releases. Their 1/700 kits are just so well made and detailed. I'm just finishing their 1/72 Pz Kpfw1 kit as light relief from the Dragon Z-38 and it is as good as their warships. A lot of parts, nice PE and impressive detail. A joy to build all the way through.
- Landlubber Mike, Canute, CDW and 4 others
-
7
-
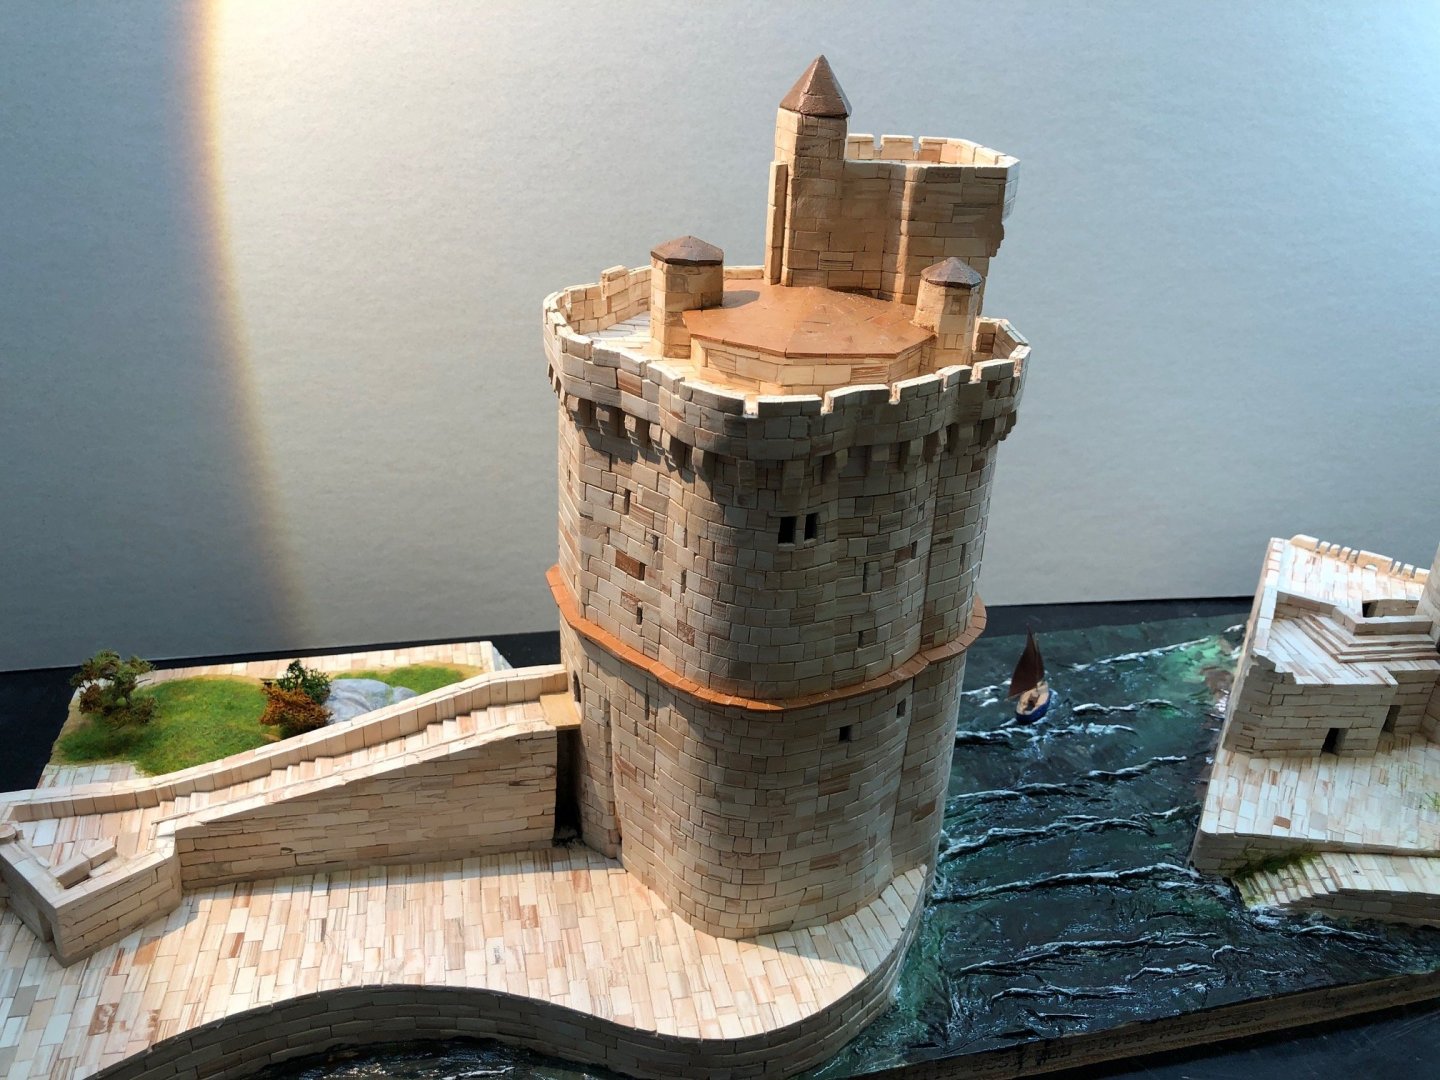
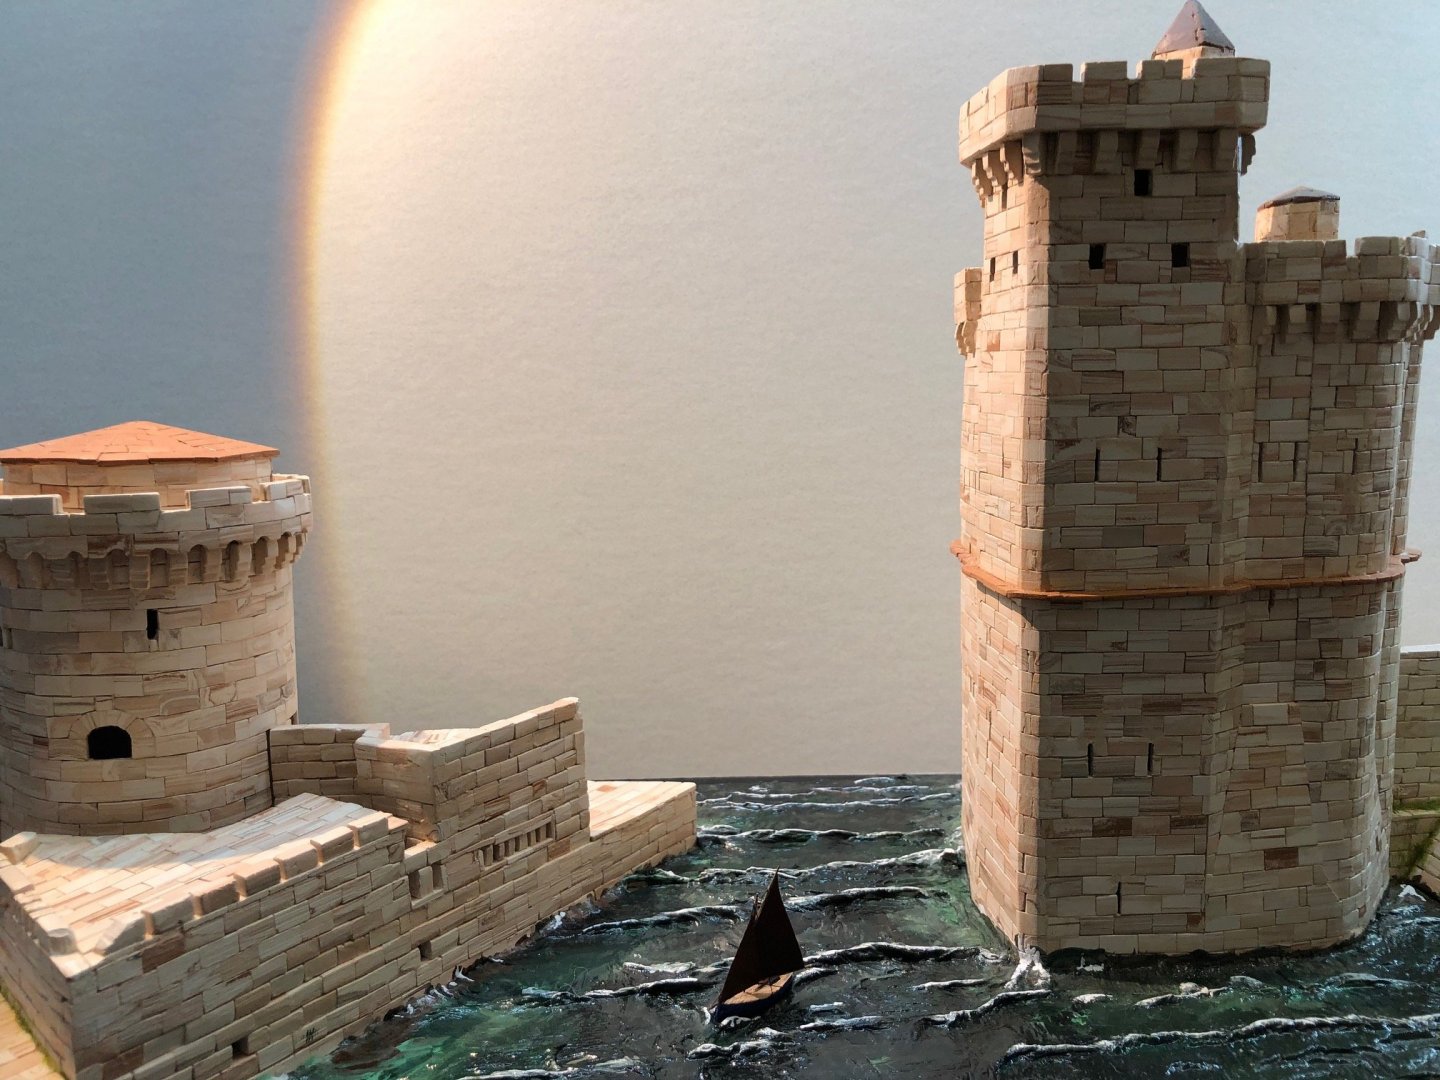
Your work is spectacularly good. After a year of on / off building and 8000 pieces I completed the Aedes Ars Towers of Rochelle. The main ( St. Nicholas) tower was a slog with each tier needing about seventy bricks. The size of the bricks let's down the finished model at 1/200 scale and there is some artist licence compared to photos of the real thing but I am quite happy with it although it's not up to your standard. The out of box finish called for the water area to be painted blue but I wanted to try to improve on that if possible. My apologies if this is an inappropriate post
Alan
-
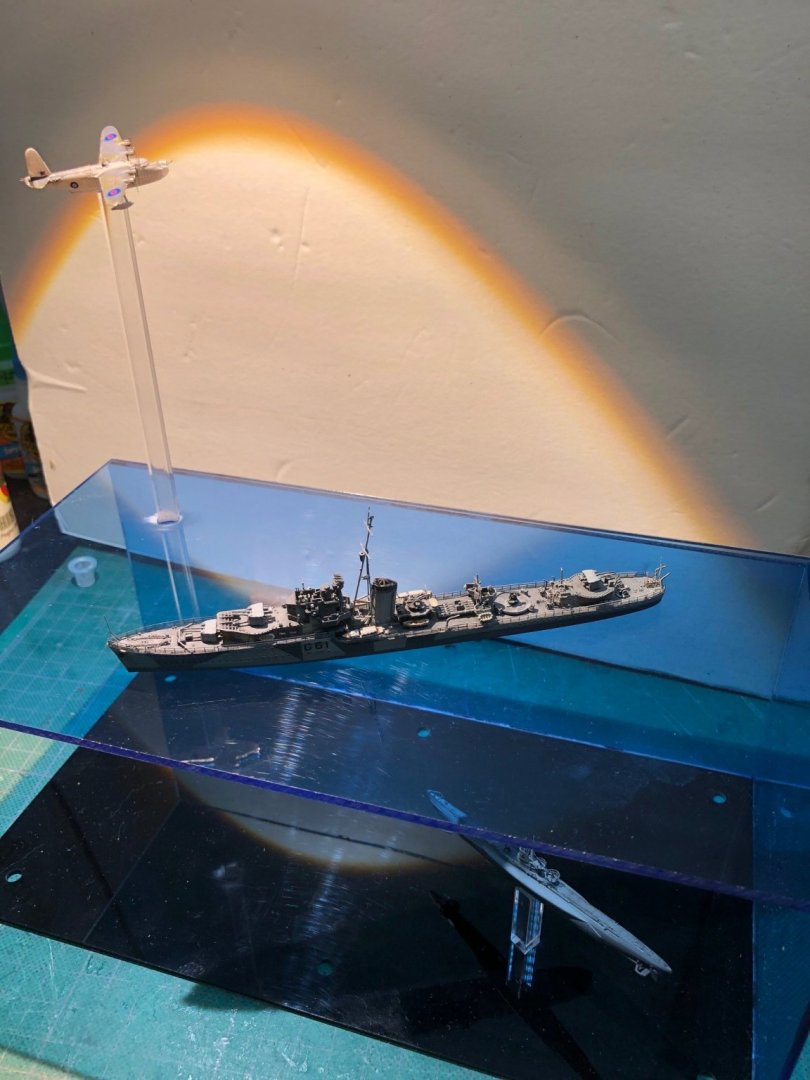 I'm very much a beginner at plastic modelling but I think Flyhawk make some of the best 1/700 models. Their detail is fantastic even without PE and their masts are fine enough to not need replacement by brass. I've mainly been building 1/700 destroyers and I think Flyhawk are considerably better than IBG, Trumpeter and Dragon. I recently finished their Battle of the Atlantic diorama and liked it a lot. There are PE .303s for the Sunderland and the U boat is a gem. I tried to set the pieces in context rather than using their base. It looked better in my mind.
-
-
The best yet, completely excellent. The control to pain the moustache is impressive.
Alan
- mtaylor, popeye the sailor, Canute and 2 others
-
5
-
For things like the spire the 10 x 6 x 1.5 mmm tiles sometimes work better. It's easier to bring things to a point. The Rochelle towers are mostly built with These tiles and they have their own problems. Larger variation in size, distortion and need more tinkering but you can get sharp triangular shapes etc. I did like the spire but have no idea on historical context
-
We use beeswax at work to hold a bolt on a socket when it needs to be installed in a tricky spot on an engine. It reduces the risk of the dreadful rattle, rattle , now how do we get it out again. Some of the beeswax seems to have come home with me ( it's cheap on Amazon too) and I use small balls on cocktail sticks or skewers. It great for gently picking up dropped PE not that anyone does that. I like the Gators Grip glue a lot. It retains a bit of flexibility when dry so PE is less likely to ping off of it gets touched later. Earlier this year after getting hit by two hurricanes his website said he was giving up on making it but I'm very happy to see he has resumed the blue business. The water clean up helps after placement of the part.
Alan
- Egilman, RGL, popeye the sailor and 5 others
-
8
-
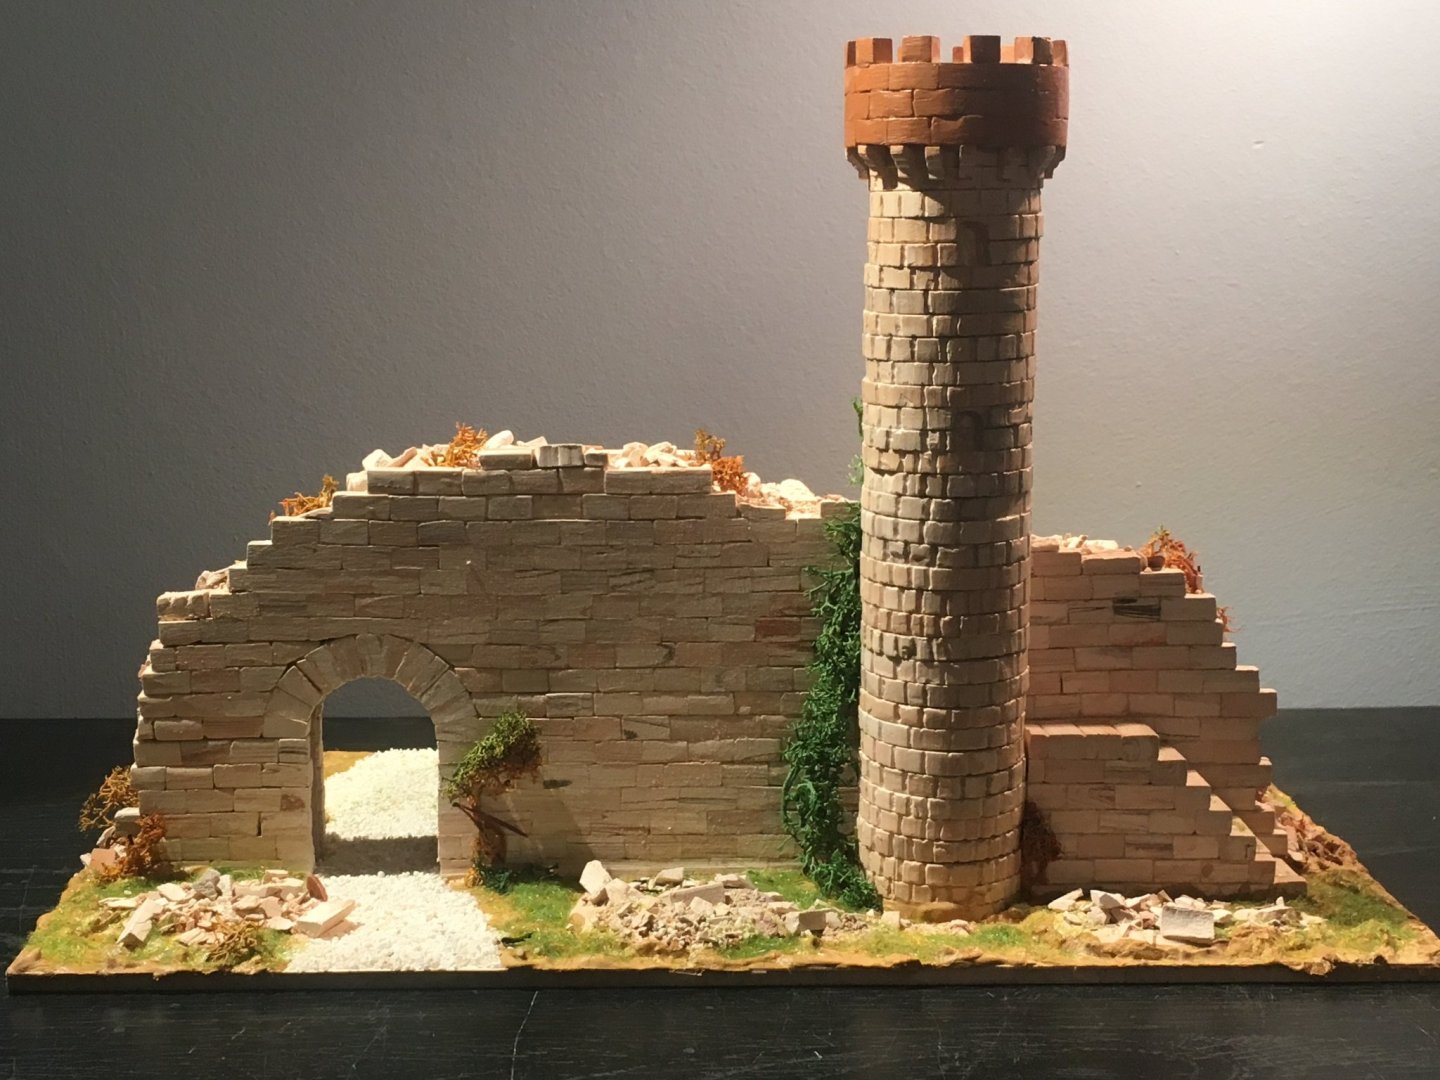
I save the dust and mix it with diluted white glue and use it to fill gaps or build up low spots. Just a variation. I brushed dust into the gaps of the watchtower before dealing it with matte varnish.
I think resizing to 1/87 is a great idea. The construction and the block sizes then fit into scale. I'm realizing that with my 1/200 Towers of Rochelle I'm going to end up with a recognizable model of the real thing but it won't pass close scrutiny for detail.
- mtaylor, Canute, popeye the sailor and 6 others
-
9
-
With the river valley there is scope for watchtowers, a mill maybe a small boat yard
These kits definitely stimulate the imagination. I plan to upgrade the harbour part of the Rochelle Towers with an attempt at water effect rather than using the blue paint provided in the kit. Then a couple of boats under sail. I was thinking today about trying to retrieve the illumination plan. Maybe it would be possible to snake some fibre optics through the card formers.
- popeye the sailor, Egilman, mtaylor and 5 others
-
8
-
Stellar progress and looks very nice. it's making me a bit more determined to make progress on the Towers. I had thought about adding lights but I didnt think the lead outs through the card formers well enough so it will have wait for the Loarre castle kit which is next up
Alan
- Canute, mtaylor, Old Collingwood and 6 others
-
9
-
I think the bricks are a standard size across the kits. I built the ruined medieval watchtower which seems to be about 1/72 scale and I'm now building the Towers of Rochelle which is 1/200 and the bricks are the same in both kits.
The watchtower went fairly quickly but I'm very slow building the Towers. The shapes of the main tower require sanding almost every brick to fit. It's still fun but I need to take a break now and then and build something else. I'm not sure why the picture of tower is the wrong way up. It's resisting my attempts to flip it
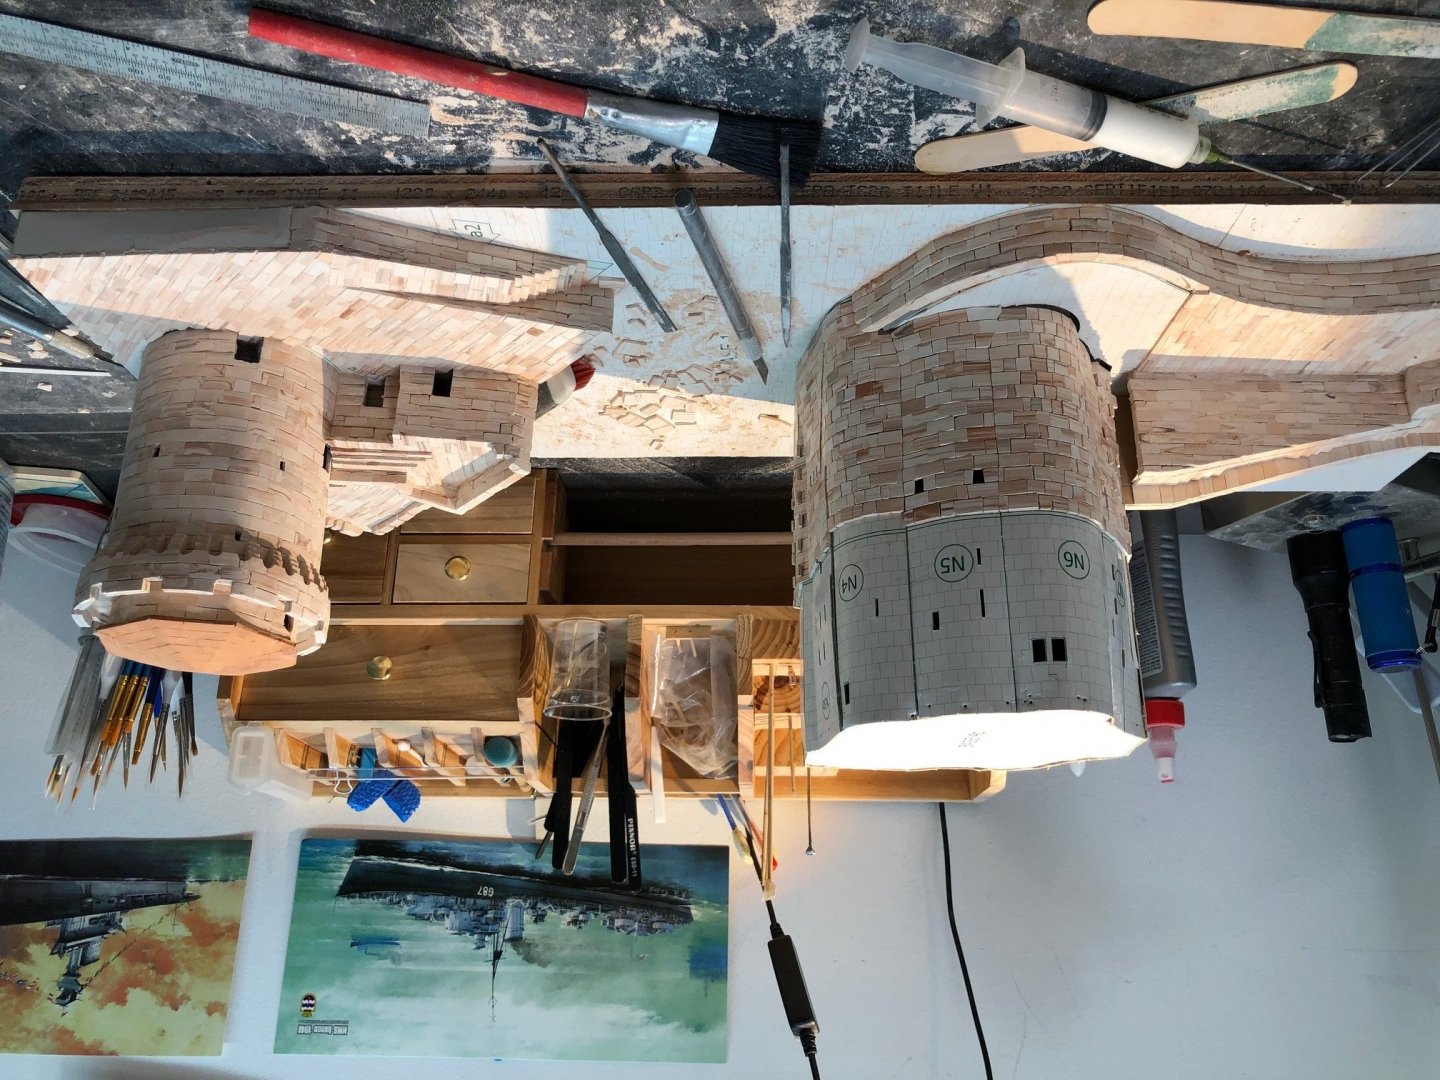


.jpg.f105913a34a749a24b88d96b08fa5f5a.jpg)


HMS Penelope by King Derelict - FINISHED - Flyhawk - 1/700 - PLASTIC
in - Kit build logs for subjects built from 1901 - Present Day
Posted
Well I feel honour bound now to buy the Prince of Wales. So I just did! It's only money