Tim Moore
-
Posts
357 -
Joined
-
Last visited
Content Type
Profiles
Forums
Gallery
Events
Everything posted by Tim Moore
-
Hi Pete, great looking job! I simply used Elmers pro bond wood filler from my local hardware store, applied first with a palette knife for rougher areas where I needed some fill, rough sanded, then more filler thinned out with water and painted on broadly with a wide hobby brush to blend everything together. After very light final sanding I applied a spray can primer over the whole model. The grey primer I used is pretty thick which gave me a good base for final airbrushing. Tim
-
Lyle, your Bounty is looking amazing. I really like the look of your aged sails. A real beast of a model this is, a triumph pulling it off like you have.
-
Thanks Craig and Popeye, much appreciated…I’m just packing up and preparing to move from Ontario to Vancouver Island end of this month. As soon as we get settled and I can get a new model workshop up and running, I hope to pick out another vehicle to take a crack at here in shore leave.
-
Paasche Airbrush TG-3AS
Tim Moore replied to David W's topic in Modeling tools and Workshop Equipment
Hi David, I have that Paasche Talon airbrush with 3 heads and have used it on several projects. The integral cup is a decent size and works fine. It can deliver really excellent results. I’ve had issues from time to time with paint not always flowing properly and getting gummed up in the needle, requiring some fiddling and careful cleaning. I’ve only used it with Vallejo airbrush paint and their flow improver. -
Thanks Lyle, seasons greetings to you and your family out there! Yes my kids have been complaining about the snow on Vancouver Island, but it looks like things will be melting and get back to the usual rain next week. Your Bounty is looking good. I chose the Sierra product because I like the idea of exploring some different fabrication, painting and weathering techniques, and to get back to woodworking. I’ll probably modify things a bit, do some experimentation. Might start incorporating some dioramas on future models so this might be a good intro into that.
-
December 23. On this date last year I completed my Fifie, and started soon after on a non ship build, a Fiat 806, which was a blast. After that I began this Mikasa, which has gone on for a stretch but is now nearing completion. Thought it about time to think about what’s next. Decided on something entirely different again, before another ship. Was going to do the Italeri 1:12 Bugatti, but it doesn’t seem to be available yet, so inspired by Grant’s (gjdale) excellent Shipyard diorama from Sierra West, I had a chat with Brett Gallant in Texas this morning, and have ordered one of his fascinating and detailed Craftsman kits. Happy holidays to everyone! The weather is frightful but our hobby is delightful.
-
That’s a wonderful rendition of the ice bound Endurance. Ian: these photos from endurance archive give a good idea of the width of deck boards. Looks like 6 or 8 inches, which I think is about 2 to 3mm at 1:70 scale.

-
I know that feeling Bruce! Typically strikes me during planking and ratlines. I’m sure you will get over the hump. Looking forward to seeing your Fifie progress when you pick it back up.
-
Really lovely work, inspiring! Looks like a really fun project, thanks for opening my eyes to doing an architectural subject.
-
Hi Lyle The AL plan is almost correct. Unfortunately for us, wood model shipbuilding at this level isn’t horseshoes. I recall this snag on the plan, and concluded it is just that the altitude of the two single blocks either side of the mast (shown as 342 on front view) is inconsistent with the side view. The block you circled in red on the side view is (must be) the side view of the blocks circled in green on the front view, which obviously don’t match up. I located mine as shown in the side view, in the higher location, fixed to eyebolts as usual. This location made more sense since it will be employed in rigging the yard. The rest of the plan/blocks specified seem ok in terms of nothing being omitted; or at least it is how mine is rigged and everything seems accounted for. There are only 4 blocks in this area of mizzenmast above the platform: 3 singles (1 at the front and 1 each side) and 1 double at the back of the mast to rig the gaff. Hope this helps. If not, you could sail on up to Vancouver Island and pick me up to discuss this summer, I should be there by then. Tim
-
Lyle - I will look at my Bounty today and try to summarize the block attachments on the mizzen I used. Took a quick look through my photo archive but nothing is that helpful on that specific area. There were a couple of mast plan omissions I recall where I needed to use the rigging diagram to determine every block necessary.
-
I’m in the same ‘boat’ - placed an order but haven’t yet been able to figure out a good way to forward a payment from here. They did get back to me by email. Great looking product.
-
Thanks s-boat and Jeff. I’ve been keen to get back into the workshop to finish Mikasa, but a renovation job has me extending the contracting season a bit. Should be back to it next week, finishing off the rear bridge and railing madness, then I will post an update.
-
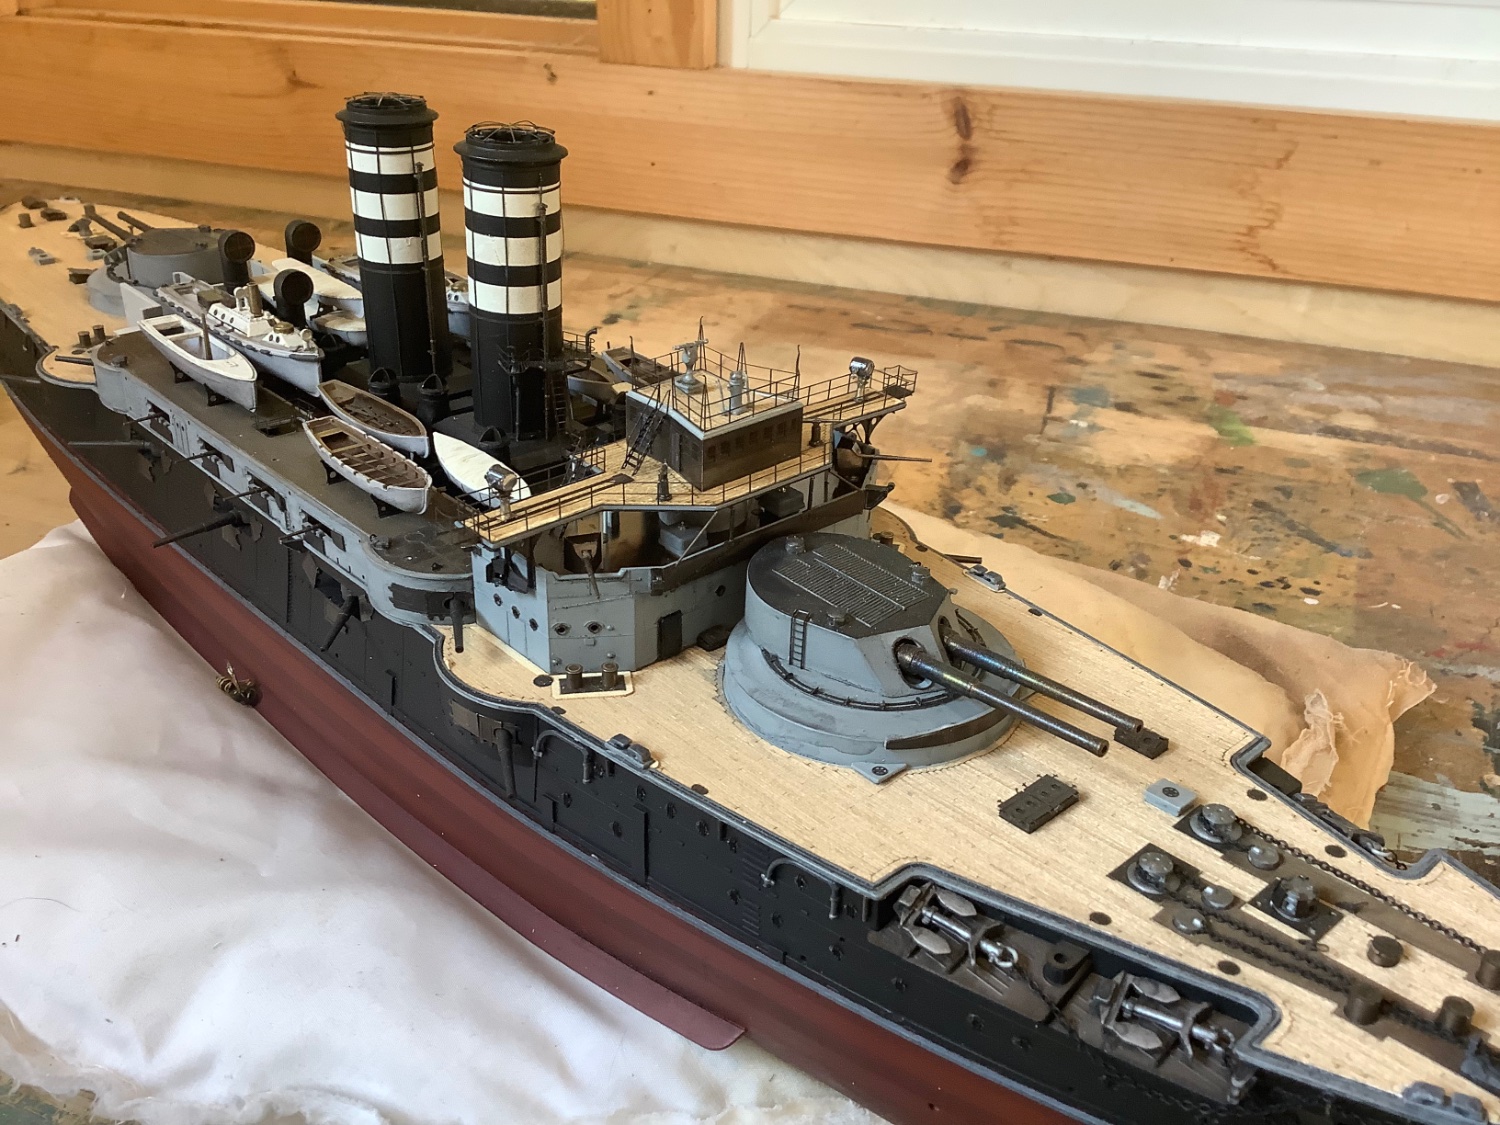
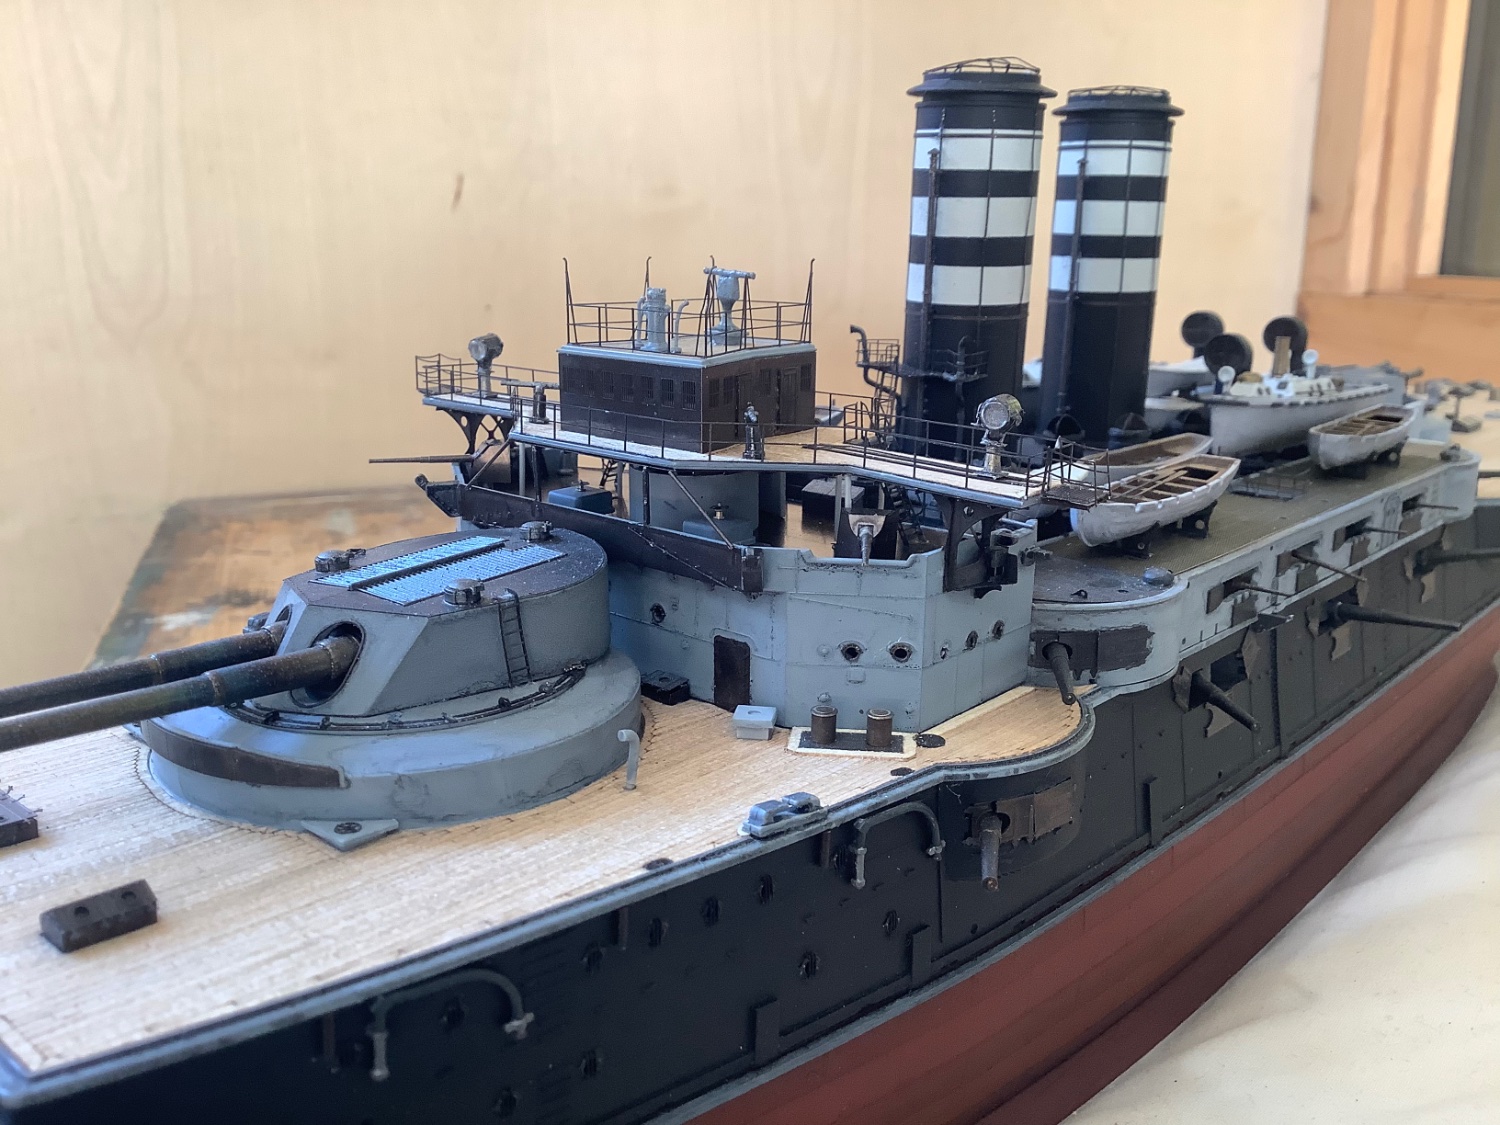
Hi Ted. Mark is correct. Using ‘gun blue’ on the brass sheets before cutting them out produces a gun metal finish. That is how I am doing railings on my Mikasa. After putting in solution and drying, they appear jet black. I then buff the sheet with a soft cloth to achieve the final result which is a polished gunmetal. Possibly you can buff your blackened sheets to get same result? I don’t know as I haven’t used that particular product.
-
Haha I just noticed the man (wasp) overboard on that first picture. He didn’t make it sadly.
-
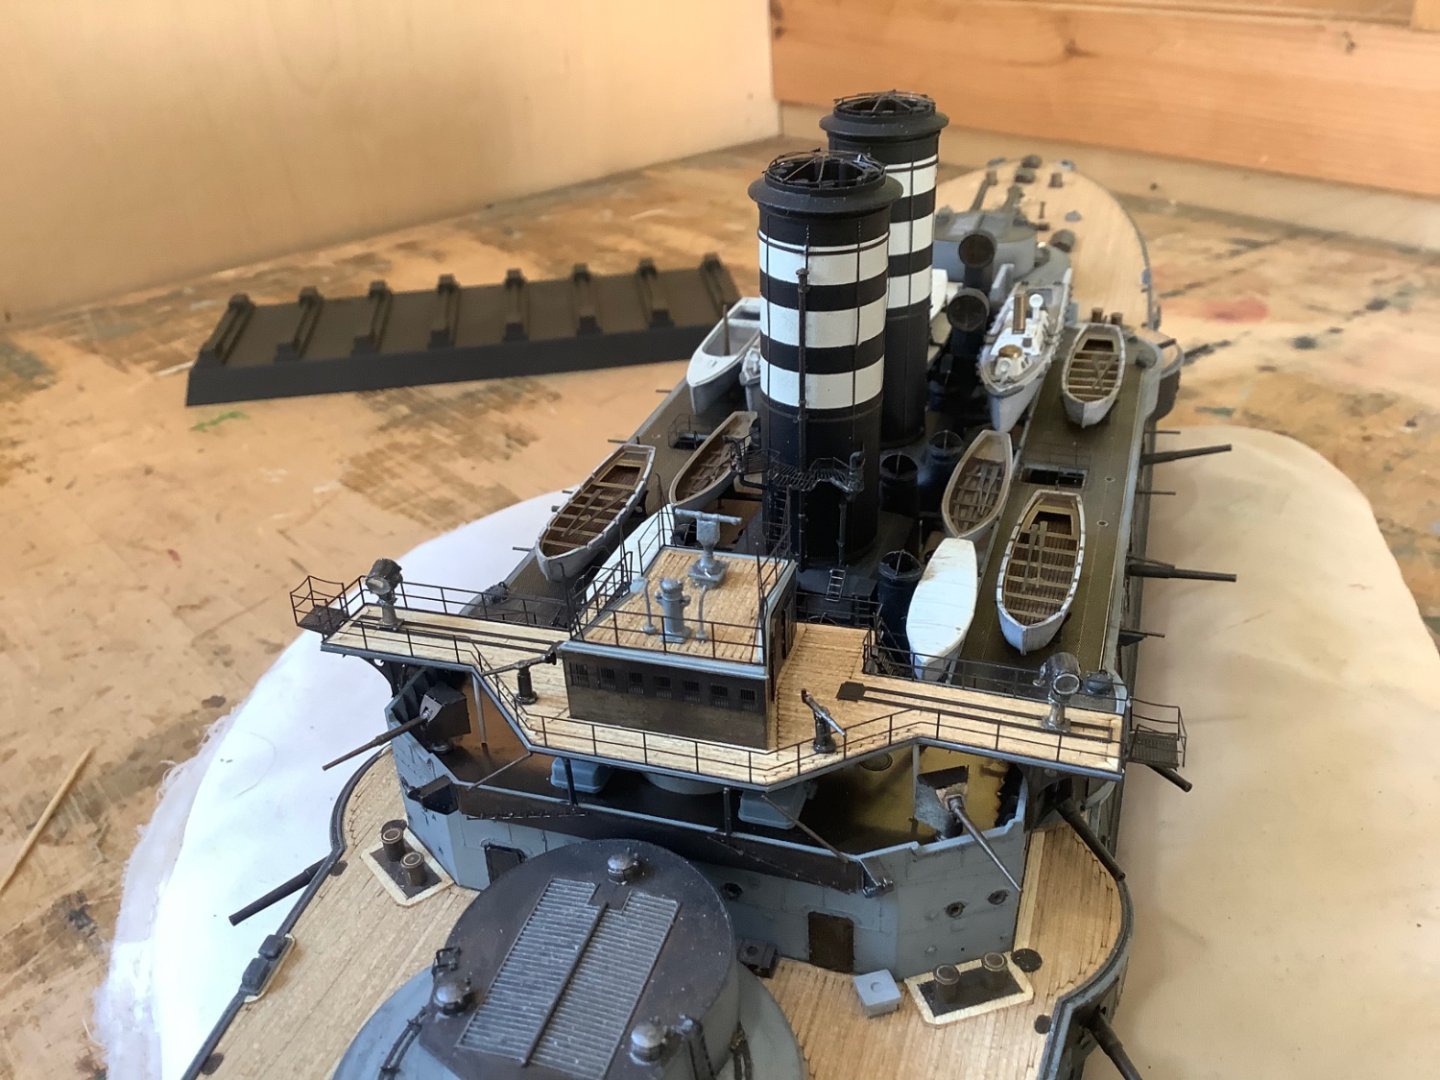
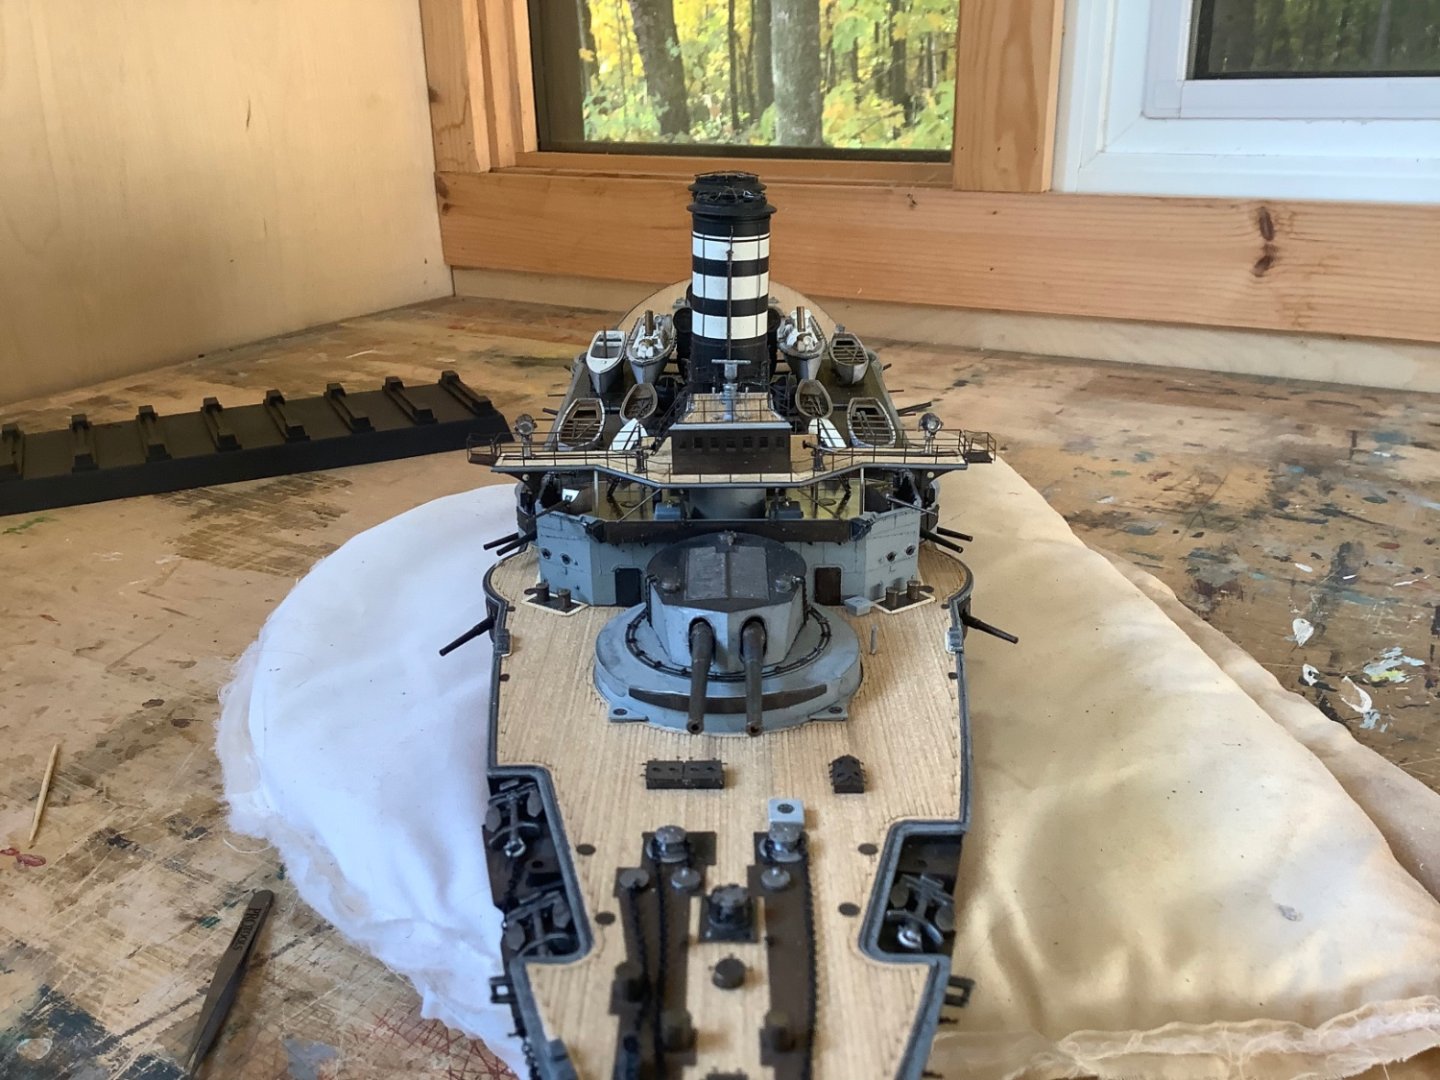
Installed the front bridge with all the Pontos minutiae. Modified the two larger guns to be a bit more in line with a photo of Mikasa which showed them with steel shrouds, or whatever the correct term is. Just checked the Vegas odds on me managing to finish this without mangling the extremely fragile railings at some point. 1000-1.


- 62 replies
-
- 12
-

-

-

-
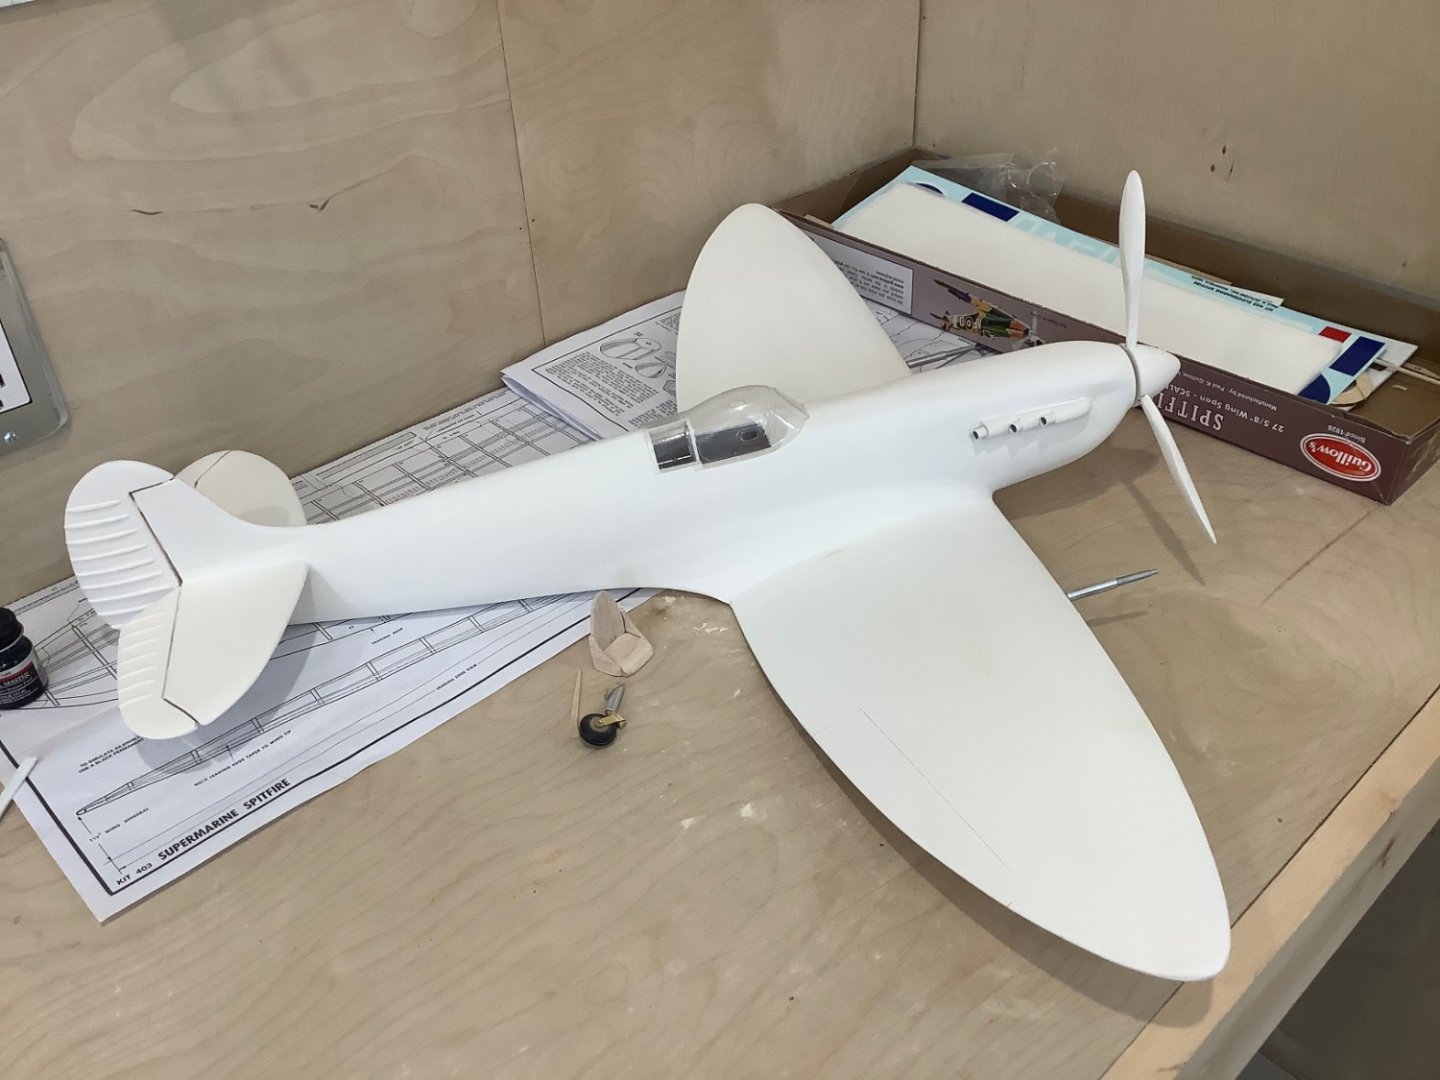
Before airbrushing, I brushed on a thin coat of wood filler and water on the whole body, sanded with 400 paper, then used a rattle can to spray on a white latex primer. The final paint finish turned out pretty well with that prep. Tim
- 74 replies
-
- 10
-
-
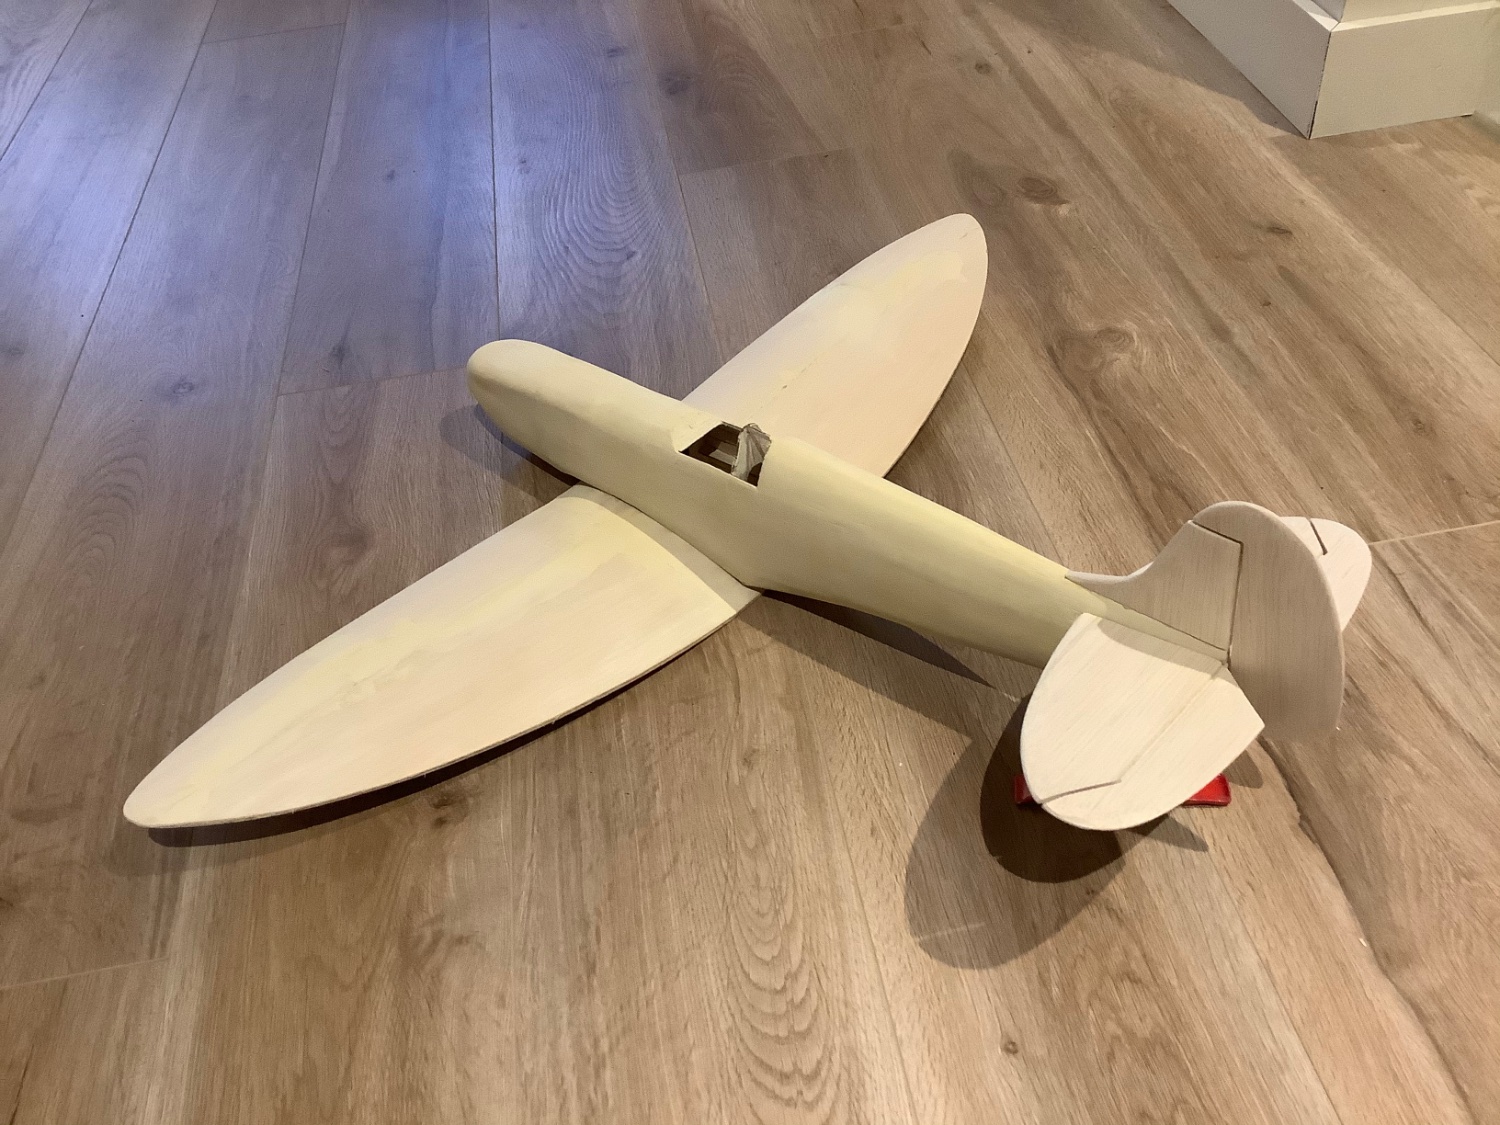
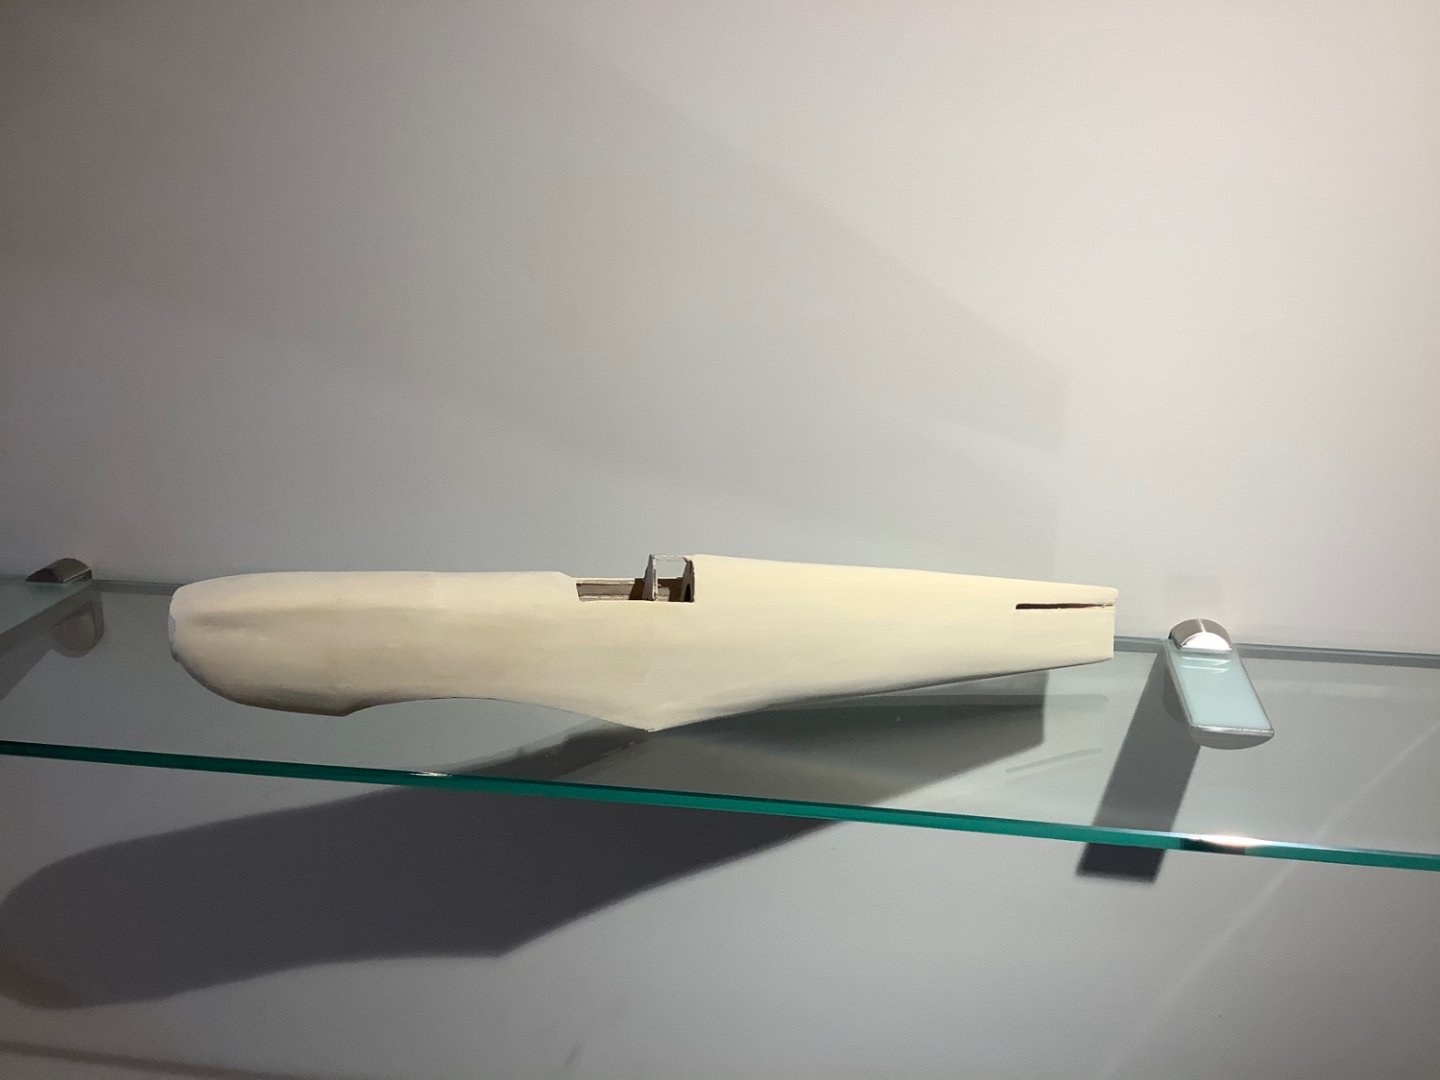
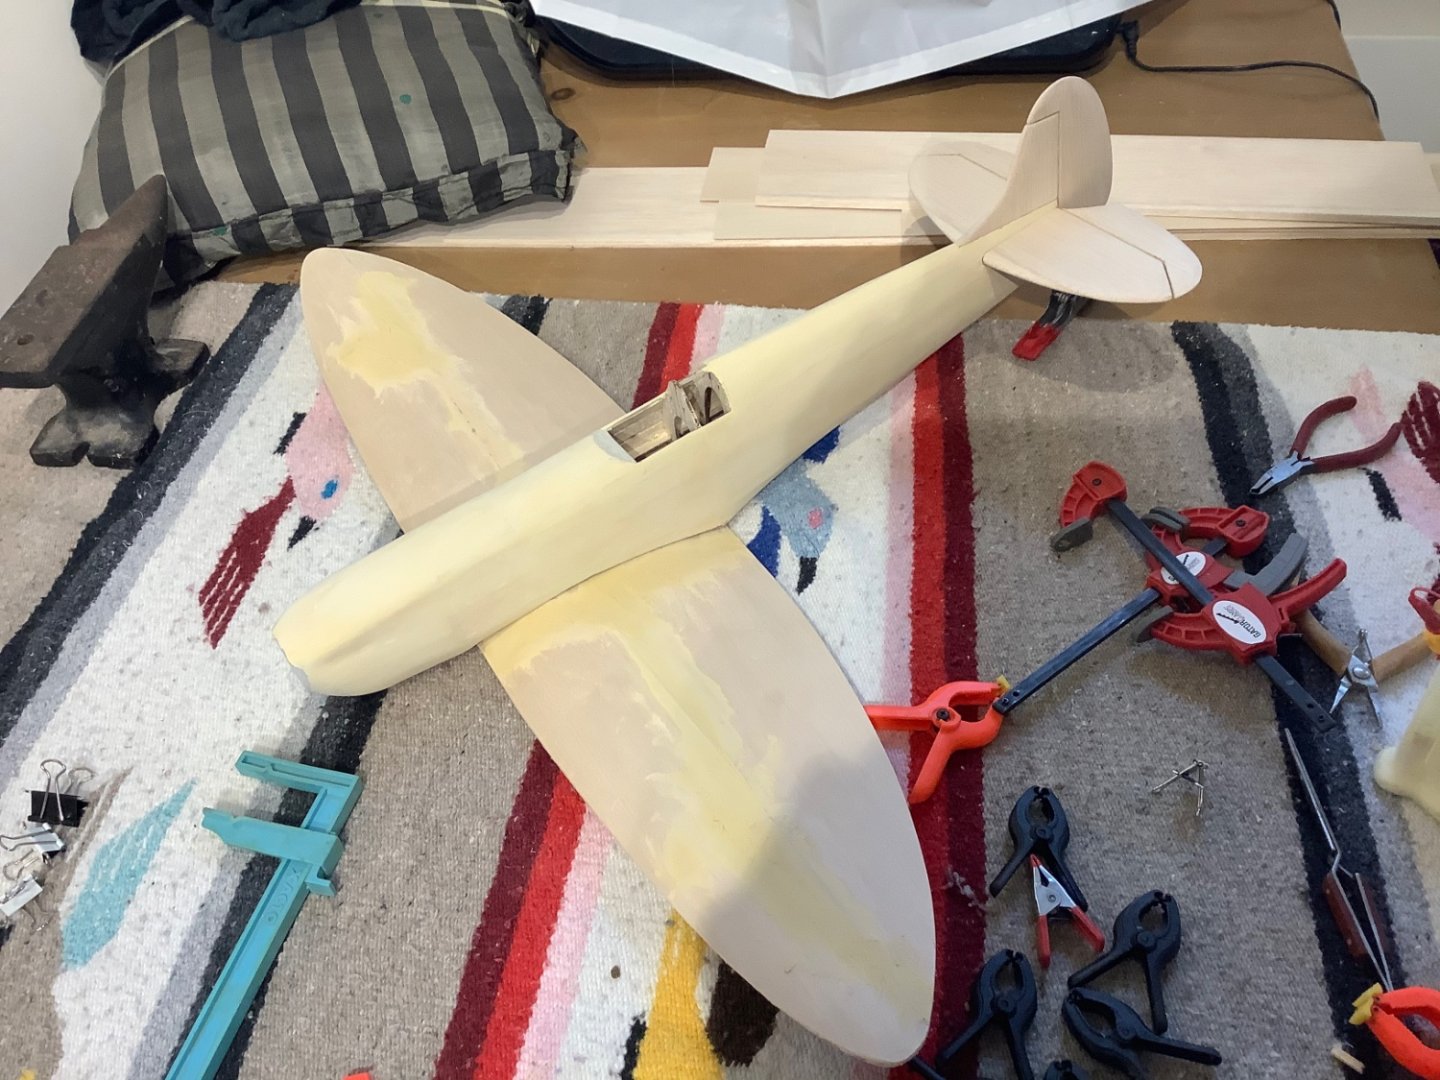
Paul: I found a few build photos on my iPad that might show the cladding process a bit more - looks like I just used two sheets, and made the junction on the flatter part of wing so as to minimize filling. I thinned Elmer’s wood filler with water to perfect the joints.


-
Hi Paul, thanks for comment! yes Egilman is bang on, the basswood was easy to bend along the grain, I didn’t need to do any soaking. Two or three pieces running from the fuselage to the wingtip following the contour of the spit’s wing. I just used yellow wood glue, nothing fancy.
-
Hi Jeff, yes I’m back into it, just started on the fore superstructure. I’m out on the west coast for a couple of weeks but hope to settle back in soon as I return in October.
-
Great work on all the railings Jeff, I know how tricky they are. Looks amazingly clean.
-
It’s great - a beautiful hull rendition.
-
review HMS Wolf 1754, 10-gun Brig (Snow) - Shipyard - 1/72 - CARD
Tim Moore replied to catopower's topic in REVIEWS: Model kits
Wow! Looks like a tremendous amount of detail and comprehensive inclusions in this kit, and that a lot of effort has gone into the plans and instructions. An enticing prospect! Thanks for putting this together Clare.