hamilton
-
Posts
1,933 -
Joined
-
Last visited
Content Type
Profiles
Forums
Gallery
Events
Everything posted by hamilton
-
 Just catching up here Jason - she looks great - the time (and money!) you spent on the carronades was well worth it - I'll echo BE's comment about the deck shots - they look amazing. hamilton
 -
The shrouds look great - nice symmetry with the deadeyes hamilton
-
It seems I have to split this into two posts....here are the rest of the photos.... hamilton
-
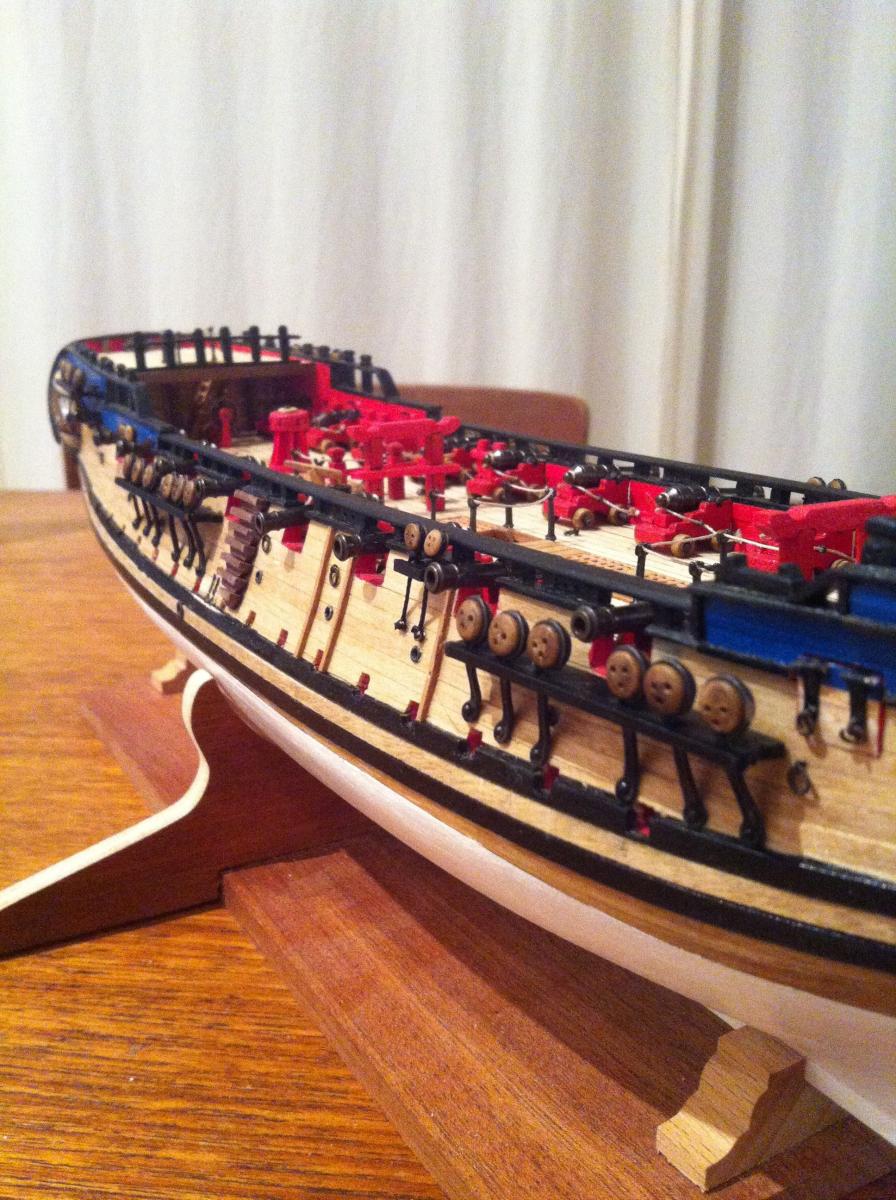
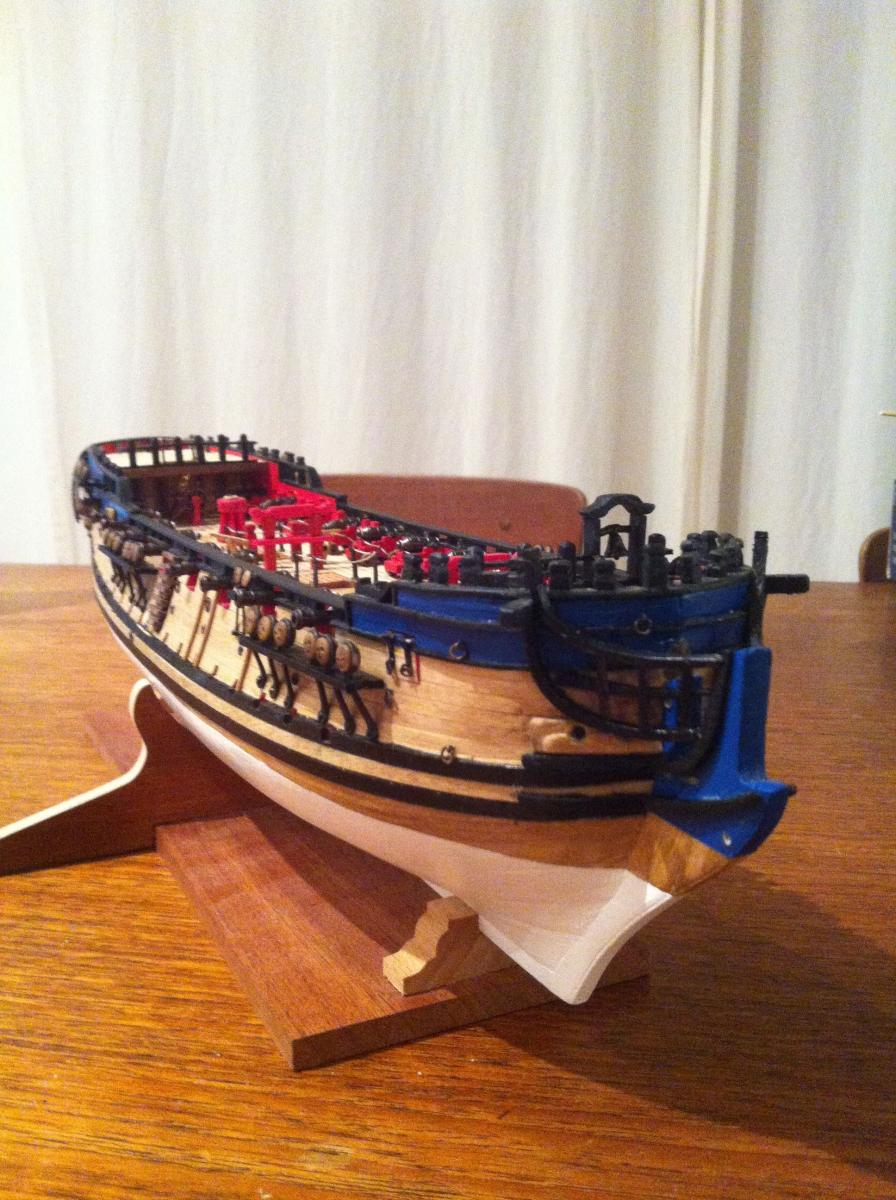
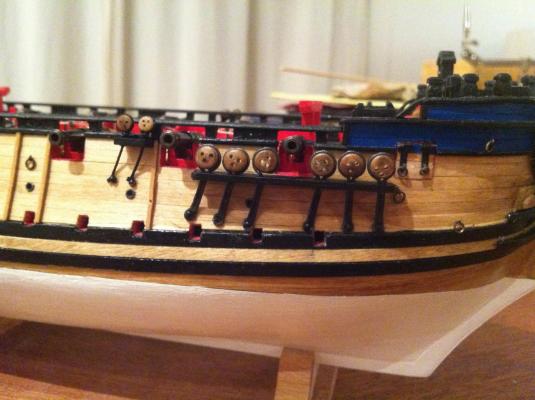
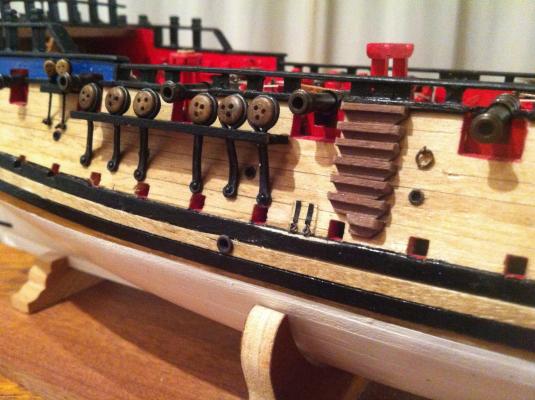
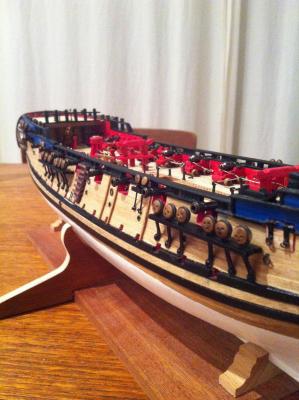
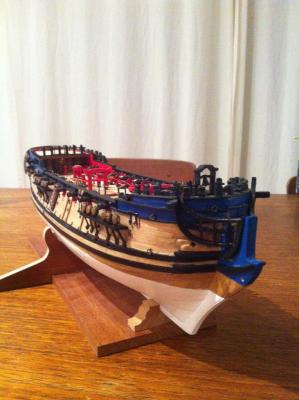
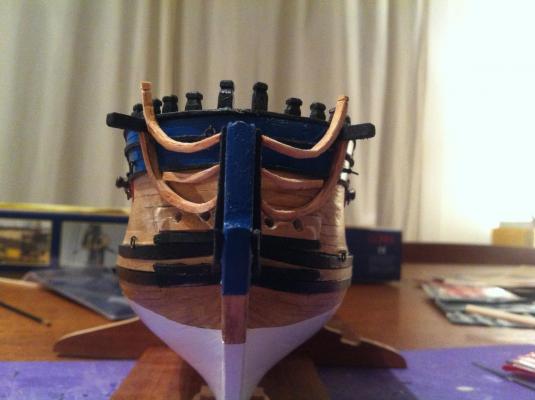
As promised - here's a quick update with photos. I've now pretty much finished the hull - saving the sweep port lids, the figurehead, and the beak gratings, which I'll install after the bowsprit is on. Tonight, I installed the moldings on the channels, the backstay deadeyes and the ballast ports. I have to say I'm pretty happy to be moving on to the masting and rigging - it'll be nice to start building up! Enjoy the photos. hamilton


-
Thanks BE, Wayne, Ferit, Mark, Alistair & Michael! The scale is very tricky....much of my scratch work ends up being more or less overly large for 1:100 (the belfry knees and kevel bitts are cases in point), but I'm happy overall with the results.... Through this build I have developed great admiration for this class of vessel - more than I have for others I have built. Building it as the Blandford out of the Corel kit has at once led me to appreciate the lovely lines and composition of the Blandford, but also to feel a lot of frustration that I have not been able to realise it as neatly as I feel I could at a larger scale - due to limitations both in my skill and in the kit itself, which is not altogether suited to this kind of modification, as I think I've said before....More recent victims of these limitations have been the anchor linings and the aft gunport lids.....I don't think the build is much the worse without them, but they would have added another little bit of interest for the eye. A 1:48 scale build of the Blandford would be a really fun project. There is (or was) one on the go that I found on another forum while I was researching this build - this was a really beautiful scratch PoB build, but hasn't been updated since 2012, and I'm not sure if it's still on the go or what....In any case such a project will have to wait for my retirement - 25 years or so from now!! Between now and then, there will be other larger scale projects. In other news, I've now pretty much finished the hull - since last update I made and installed the channels and backstay stools; put on the lower shroud deadeyes; installed scuppers and added a few more ringbolts for the ship's boat lashing, etc. Tonight I'll finish things up by adding the smaller (3mm) deadeyes on the stools for the backstays, putting on the molding pieces to hold in the deadeyes/chainplates & make the ballast port doors. The last hull elements will be the 36 sweep port lids I have to make, but to avoid breaking them off during rigging, I'm going to save this till the end.... I'll post again with photos either later this evening or tomorrow.... hamilton
-
The first of September must have seemed an eternity away! It seems I'm not the only one who can't wait between builds!! Off to a great start Augie hamilton
- 2,191 replies
-
- 1
-

-
- confederacy
- Model Shipways
- (and 1 more)
-
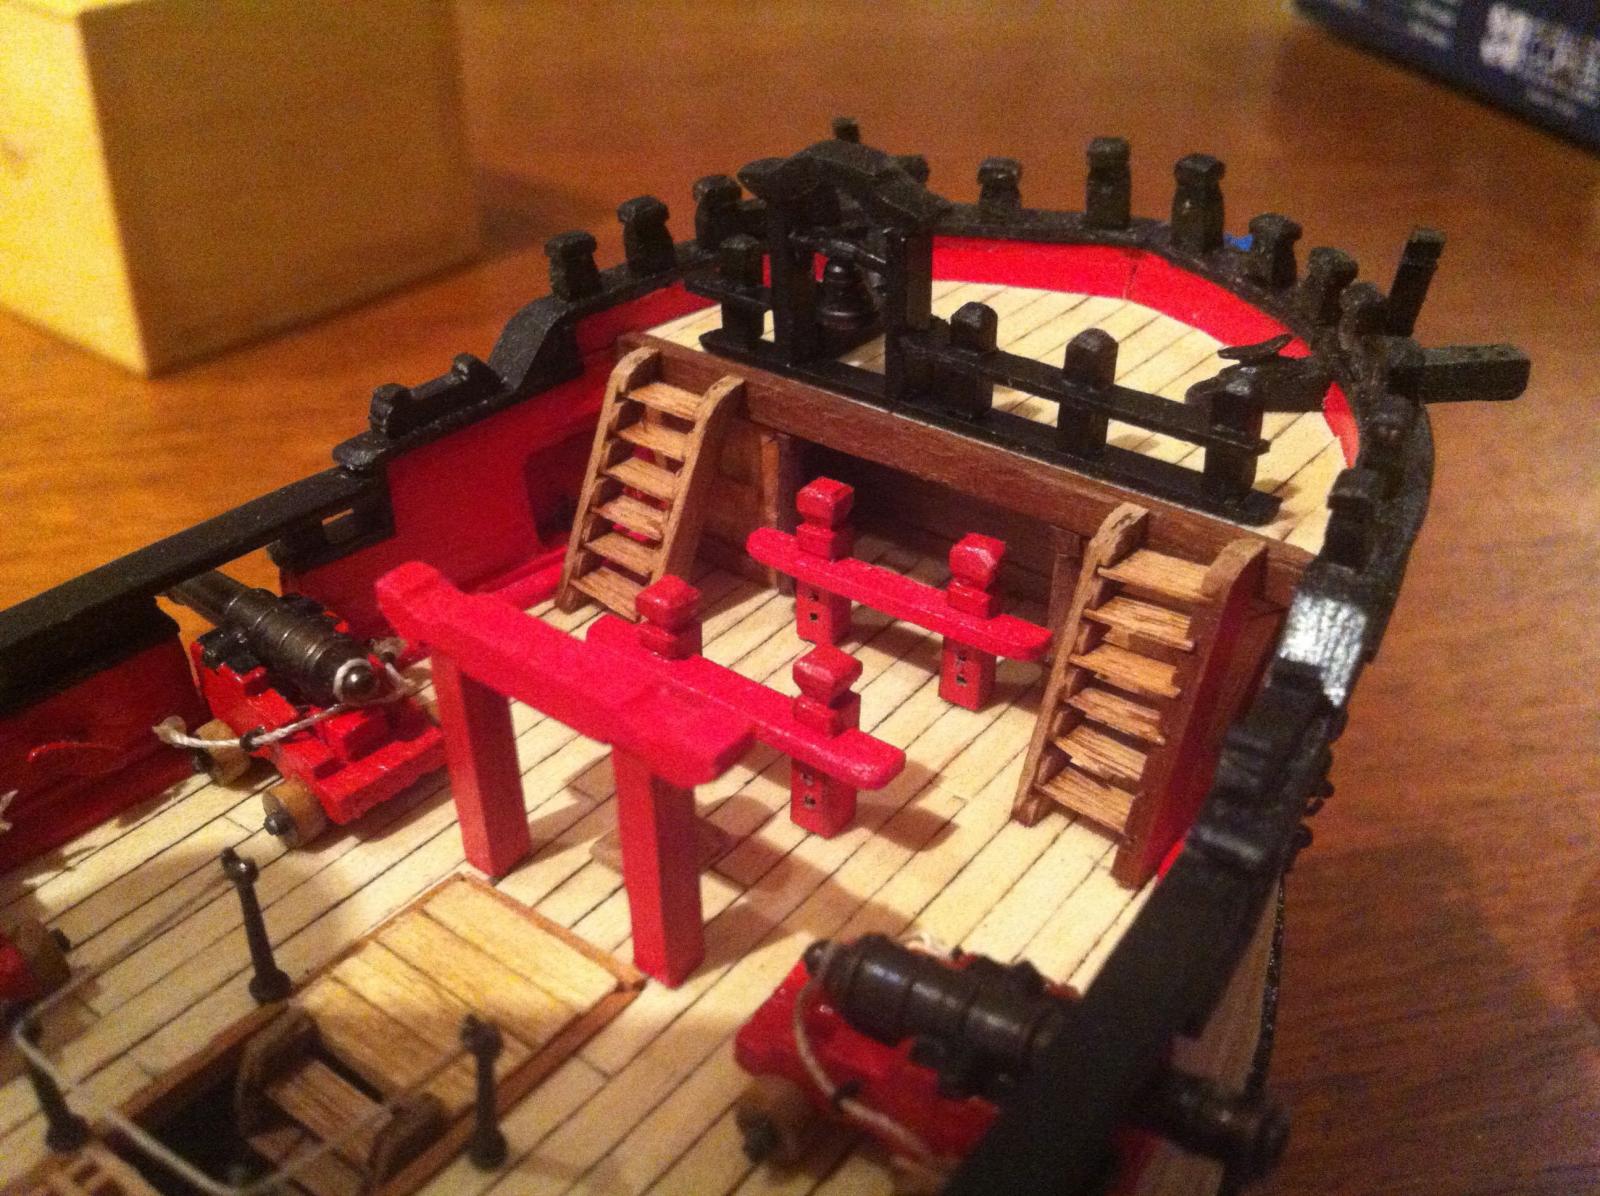
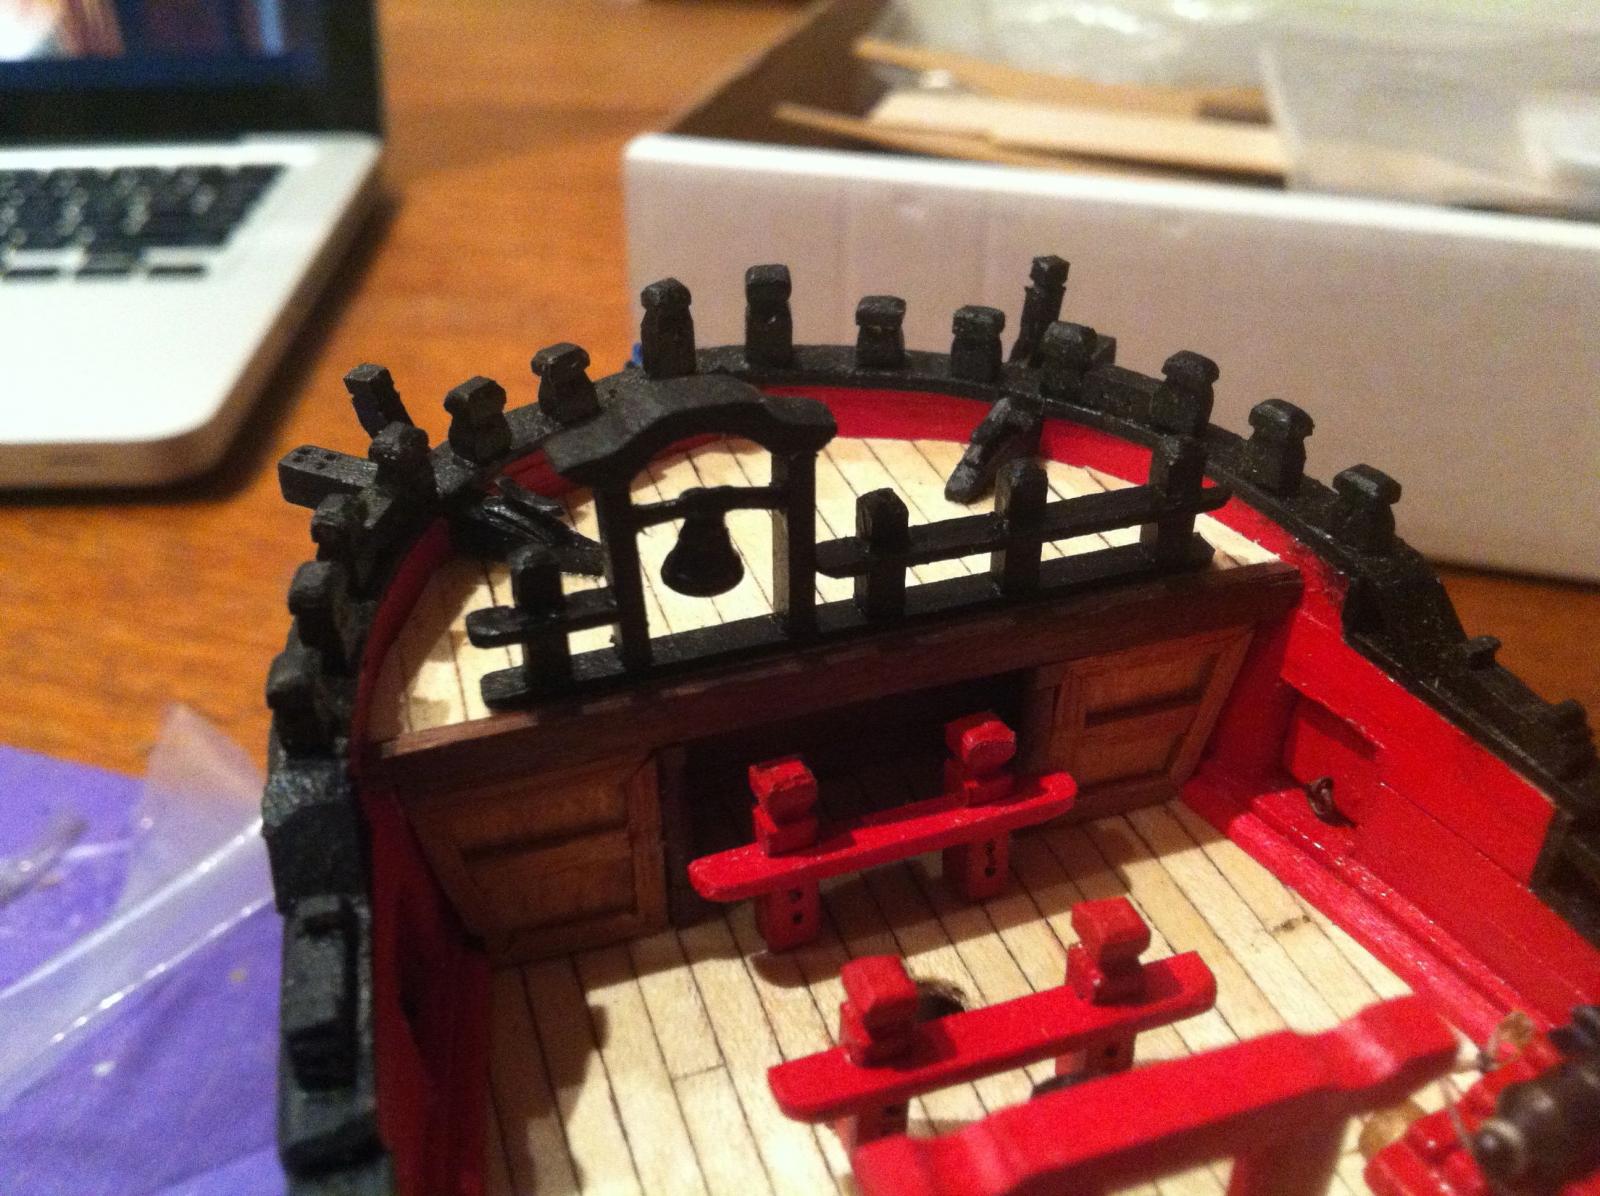
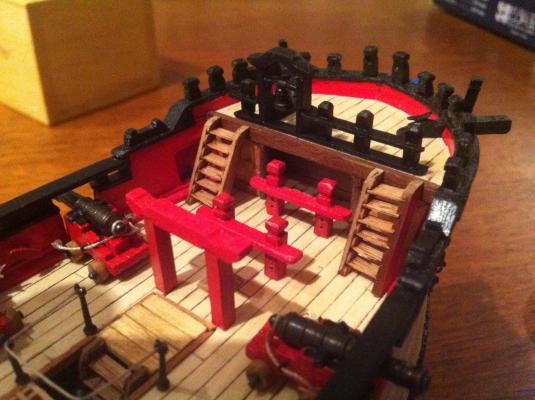
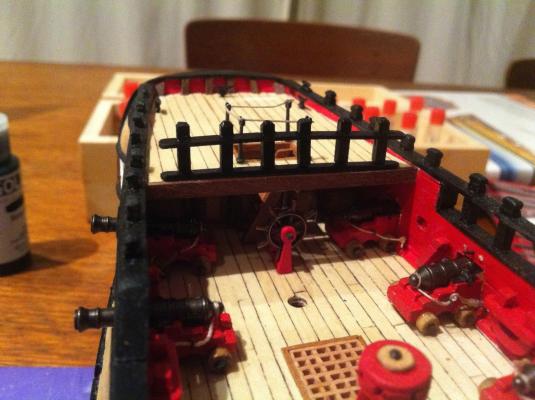
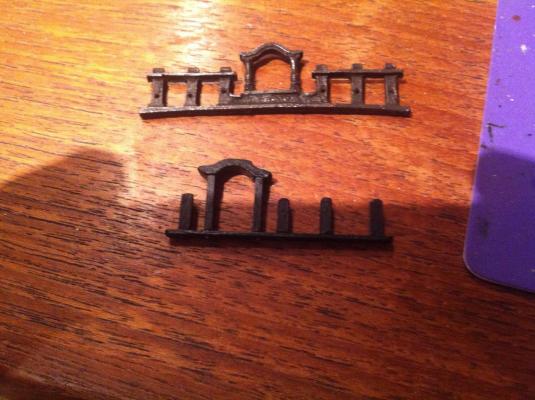
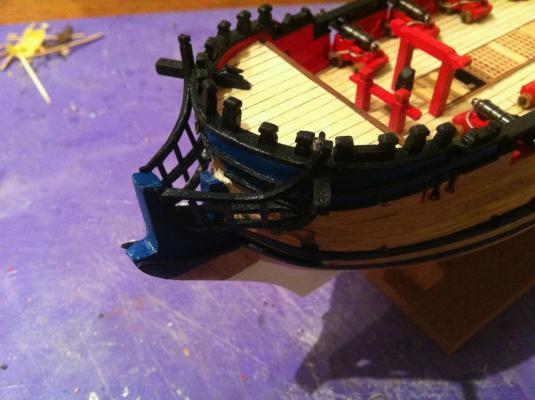
Here are a couple of shots of the completed belfry....you'll notice the knees installed in the second shot.... And finally, here's a shot of the stanchions for the rail around the aft companionway hatch on the main deck - self-explanatory.... Thanks for coming by! hamilton


-
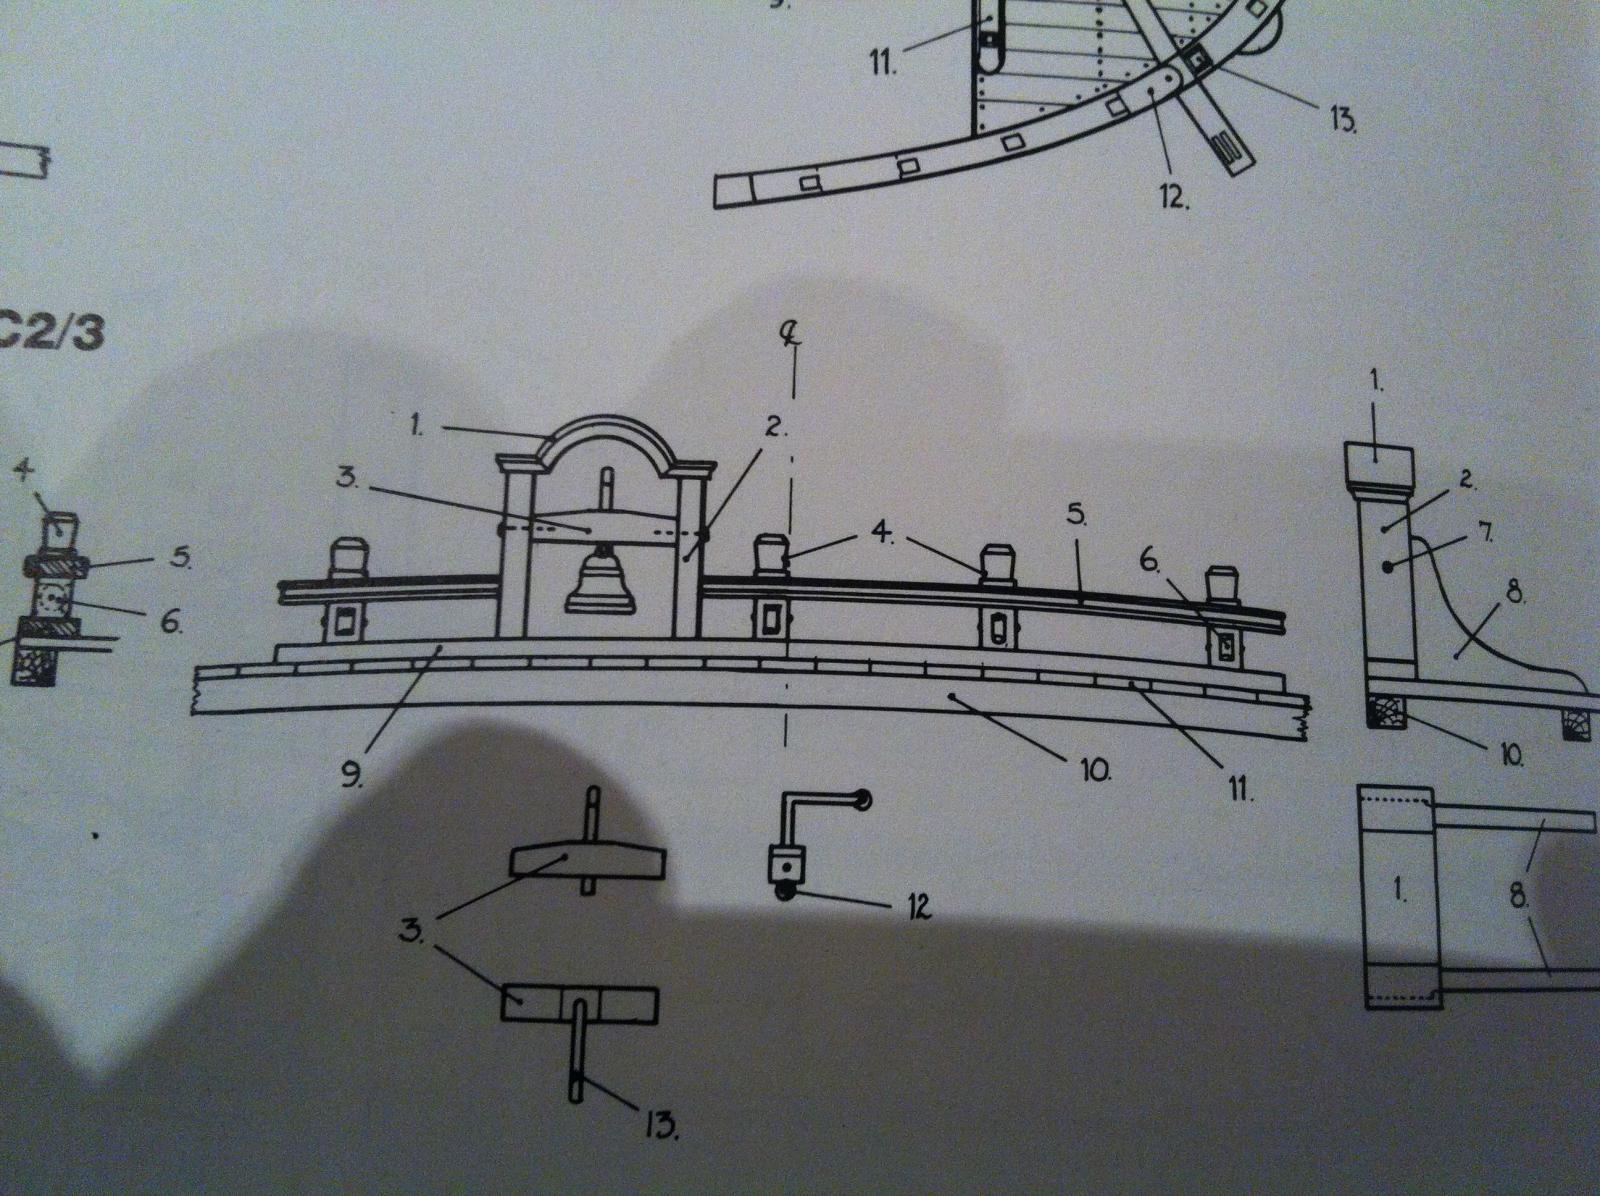
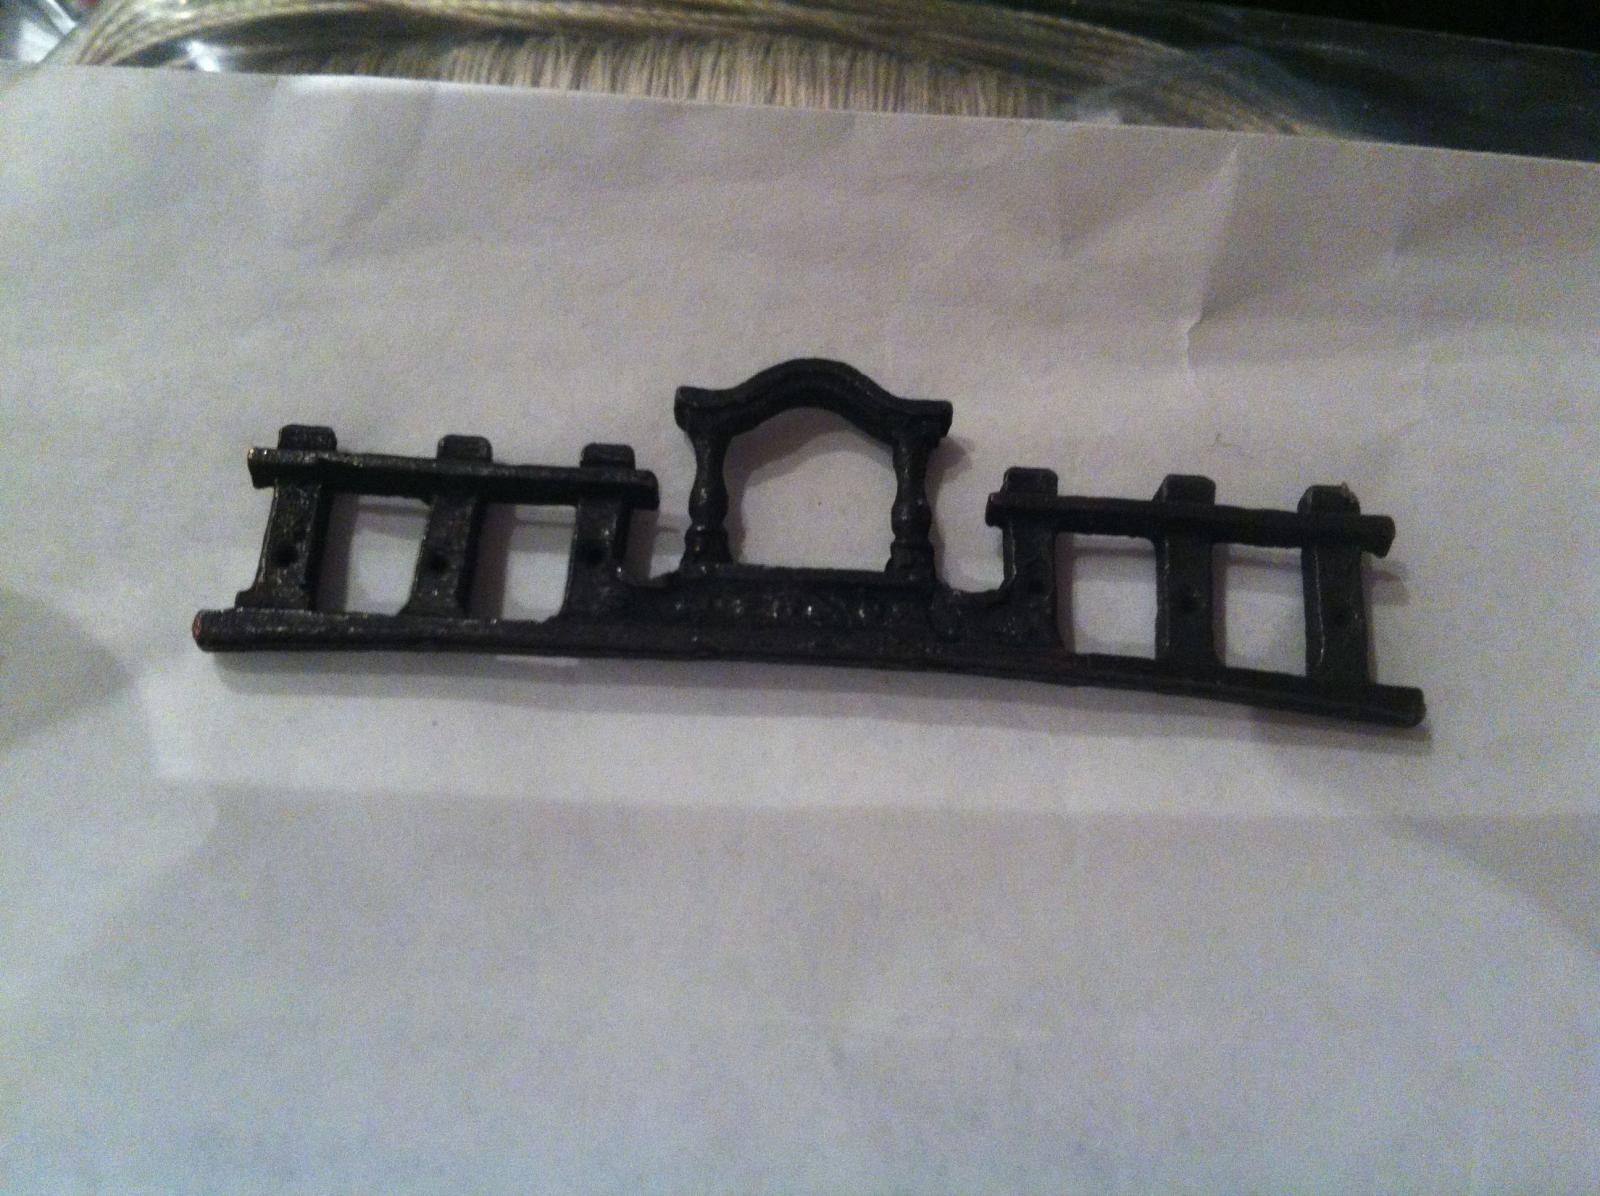
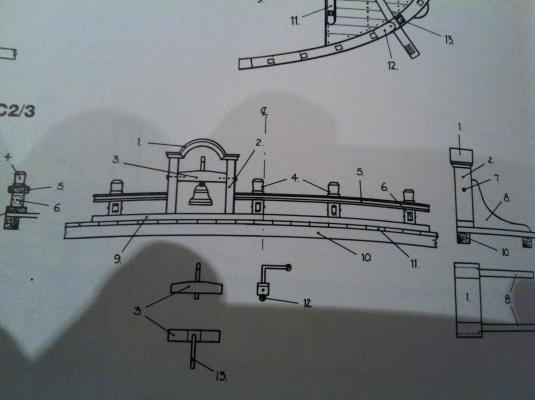
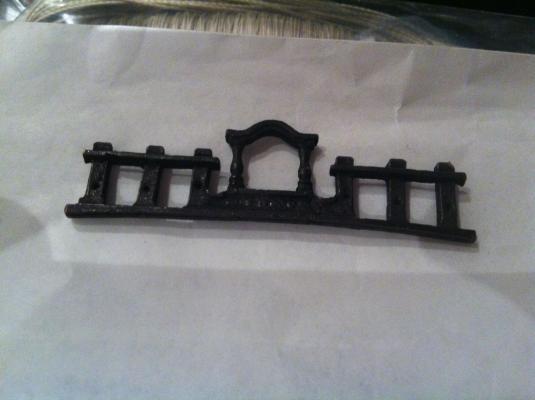
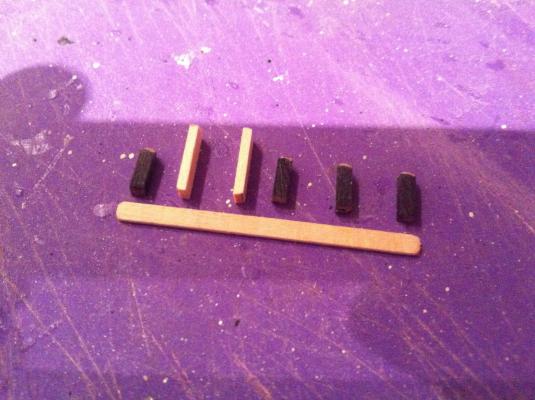
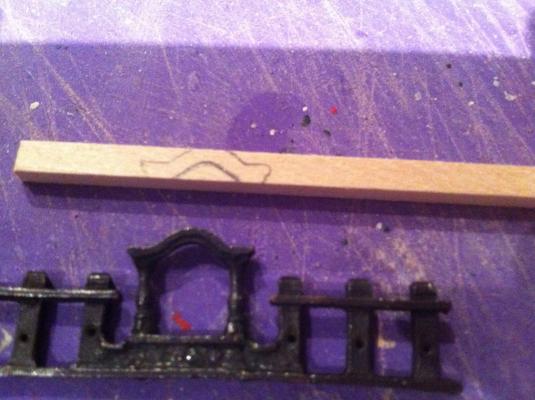
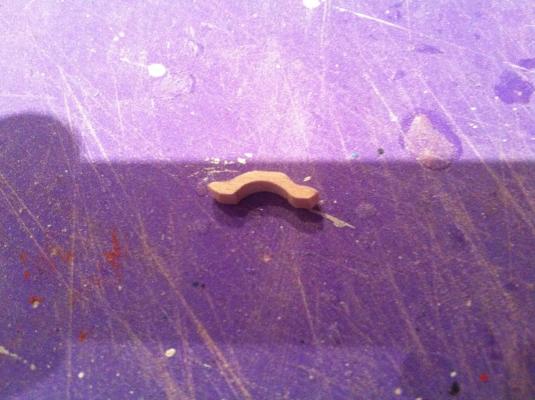
So another update - quicker than I thought.....Tonight I made the forecastle rail with belfry and installed some stanchions for rope railings around the companionway hatches - quite a bit of work. Here is the drawing of the foc'sl rail and belfry from Goodwin And here is the part supplied by Corel. The Corel part is designed to serve as the forward support for the spare spars that are used for propping up the ship's boat. Since I built a set of forward gallows to perform this function, I could easily dispense with the Corel design and go with Goodwin's drawing. I used lime throughout - 2mm x 2mm for the timberheads, 1.5mm x 3mm for the belfry posts, 3mm x .5mm for the rail and the base, and 4mm x 4mm piece shaped to make the belfry roof. Here are some of the belfry parts - very straightforward. I used the Corel belfry roof as a template for my own, laying it down on the 4mm x 4mm stock and tracing around it... I then just cut it to shape. Here is a comparison of the Corel foc'sl rail and my own, in process... It seems I'm unable to upload any more photos with this post, so I'll continue in a new one hamilton
-
Thanks for the kind words, Andy! I definitely appreciate this coming from you! hamilton
-
Hi Jim: I'm happy you're continuing your SF - it is shaping up to be a beautiful model. As for the nail heads - right now they might really stand out and you might be tempted to "hide" them. But as the build proceeds they will probably become less obvious and more "ambient". I'd leave them as is - they look great and will add something to the build for sure. hamilton
-
Hi Max: Whoa! I do recall shedding blood on the Phantom (in fact on all my builds so far - except the latest one....) but nowhere near stitches!! Funny you mention using CA to patch yourself up, since I believe that CA was first developed for just such a purpose for field medics....but maybe you knew this already! Hope you're healing up well - and congratulations on lasting till now with no stitches - my first were at age 4 - right along my hairline on my forehead. The family joke is that it's my lobotomy scar..... hamilton
-
Hi Andy: Great shot! Your rails look perfect - I wish my build was as clean as yours....The real issue for me is maintaining the overall colour scheme and not adding anything new in one section of the build that isn't reflected elsewhere....I had thought about staining the rails with Golden Oak, and using black (or blue) on the vertical timbers, but this went out the window once I decided to use the Corel flexible beech instead of cutting the rails from a thicker sheet of lime.... This is certainly a tricky part of any build and I look forward to an opportunity to do better! hamilton
-
Thanks Augie - after following your Syren I'm pretty positive you could do the head rails! In fact - won't you have to do them for the Confederacy? I'm sure you'll nail them hamilton
-
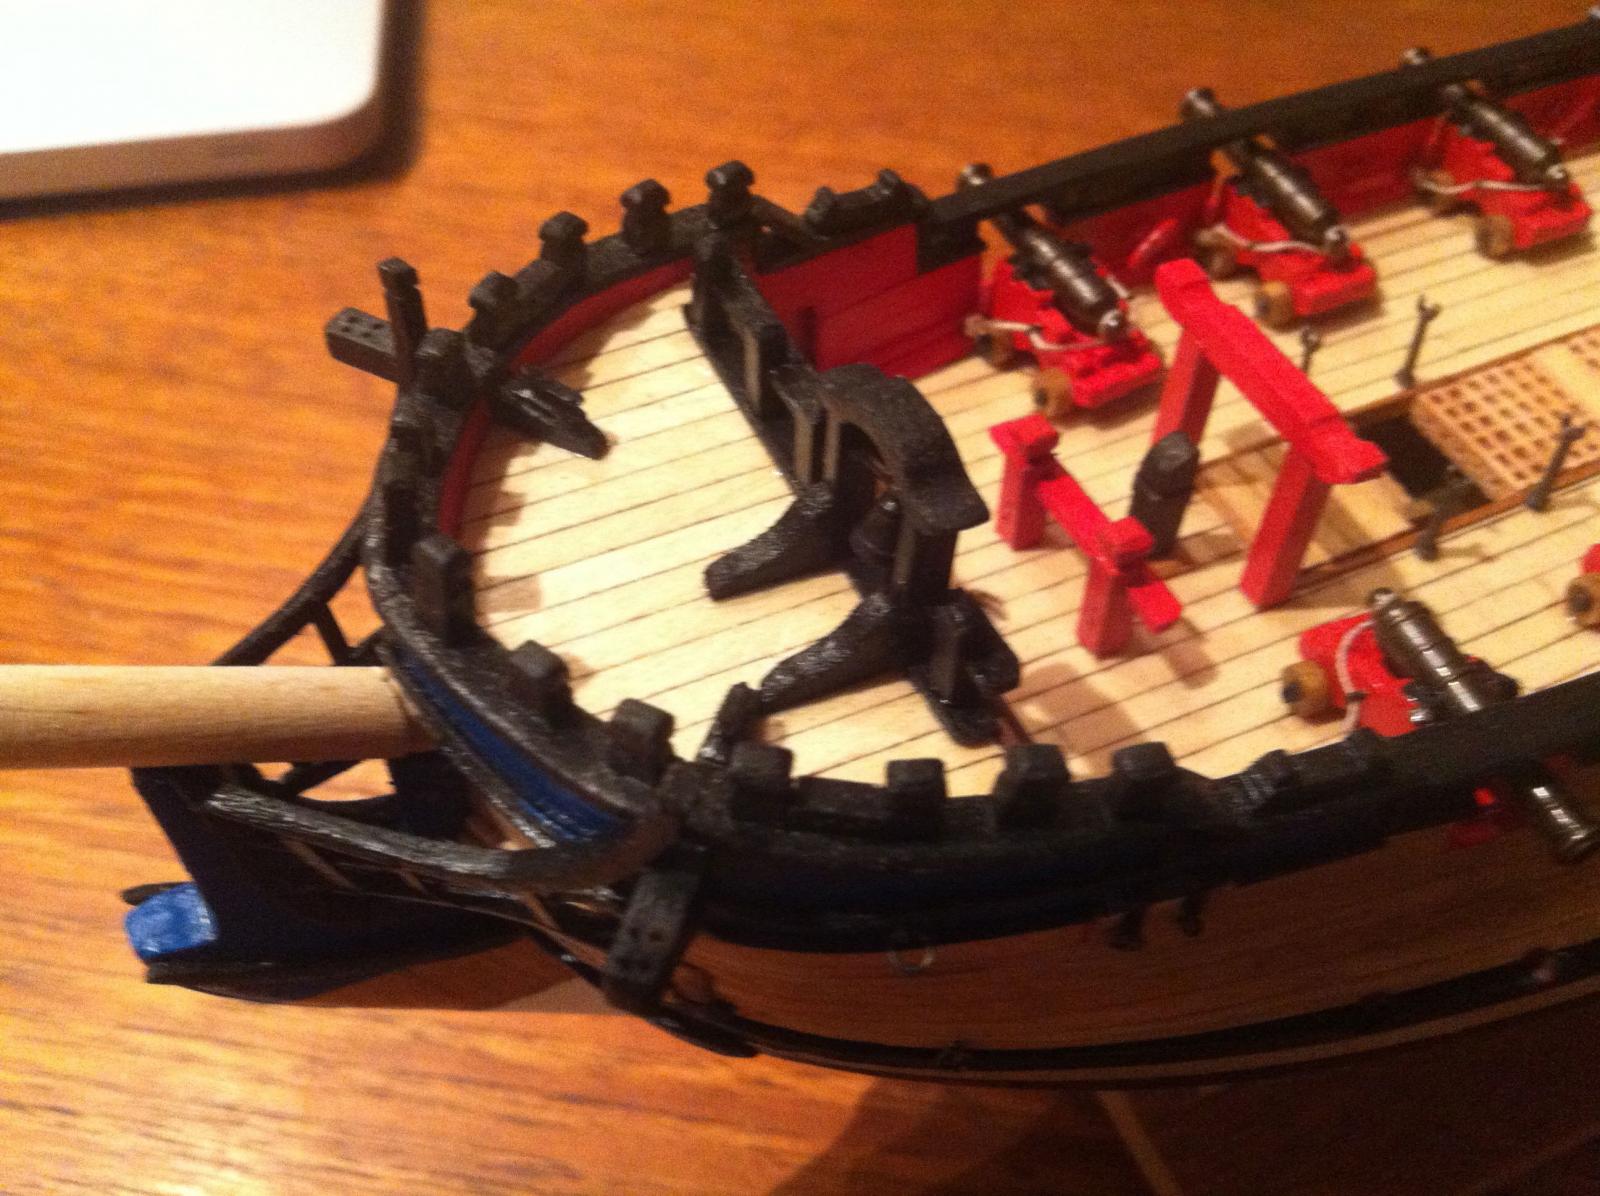
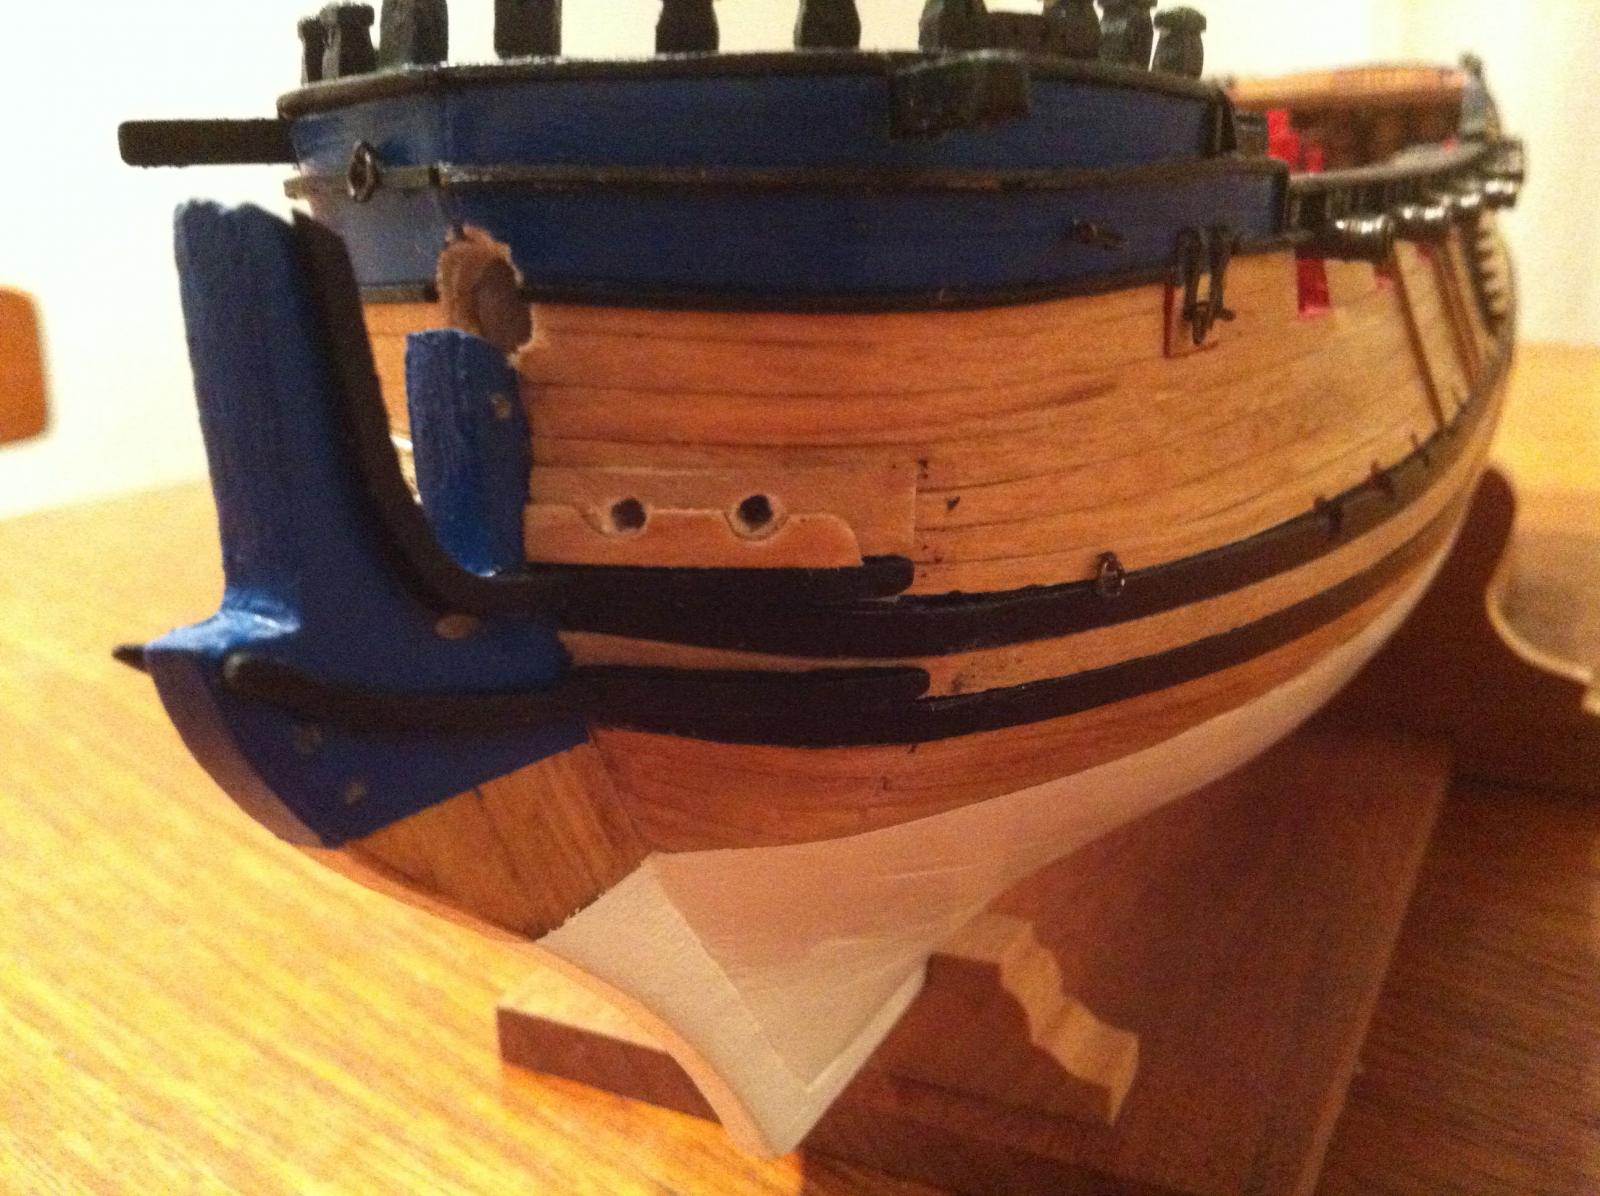
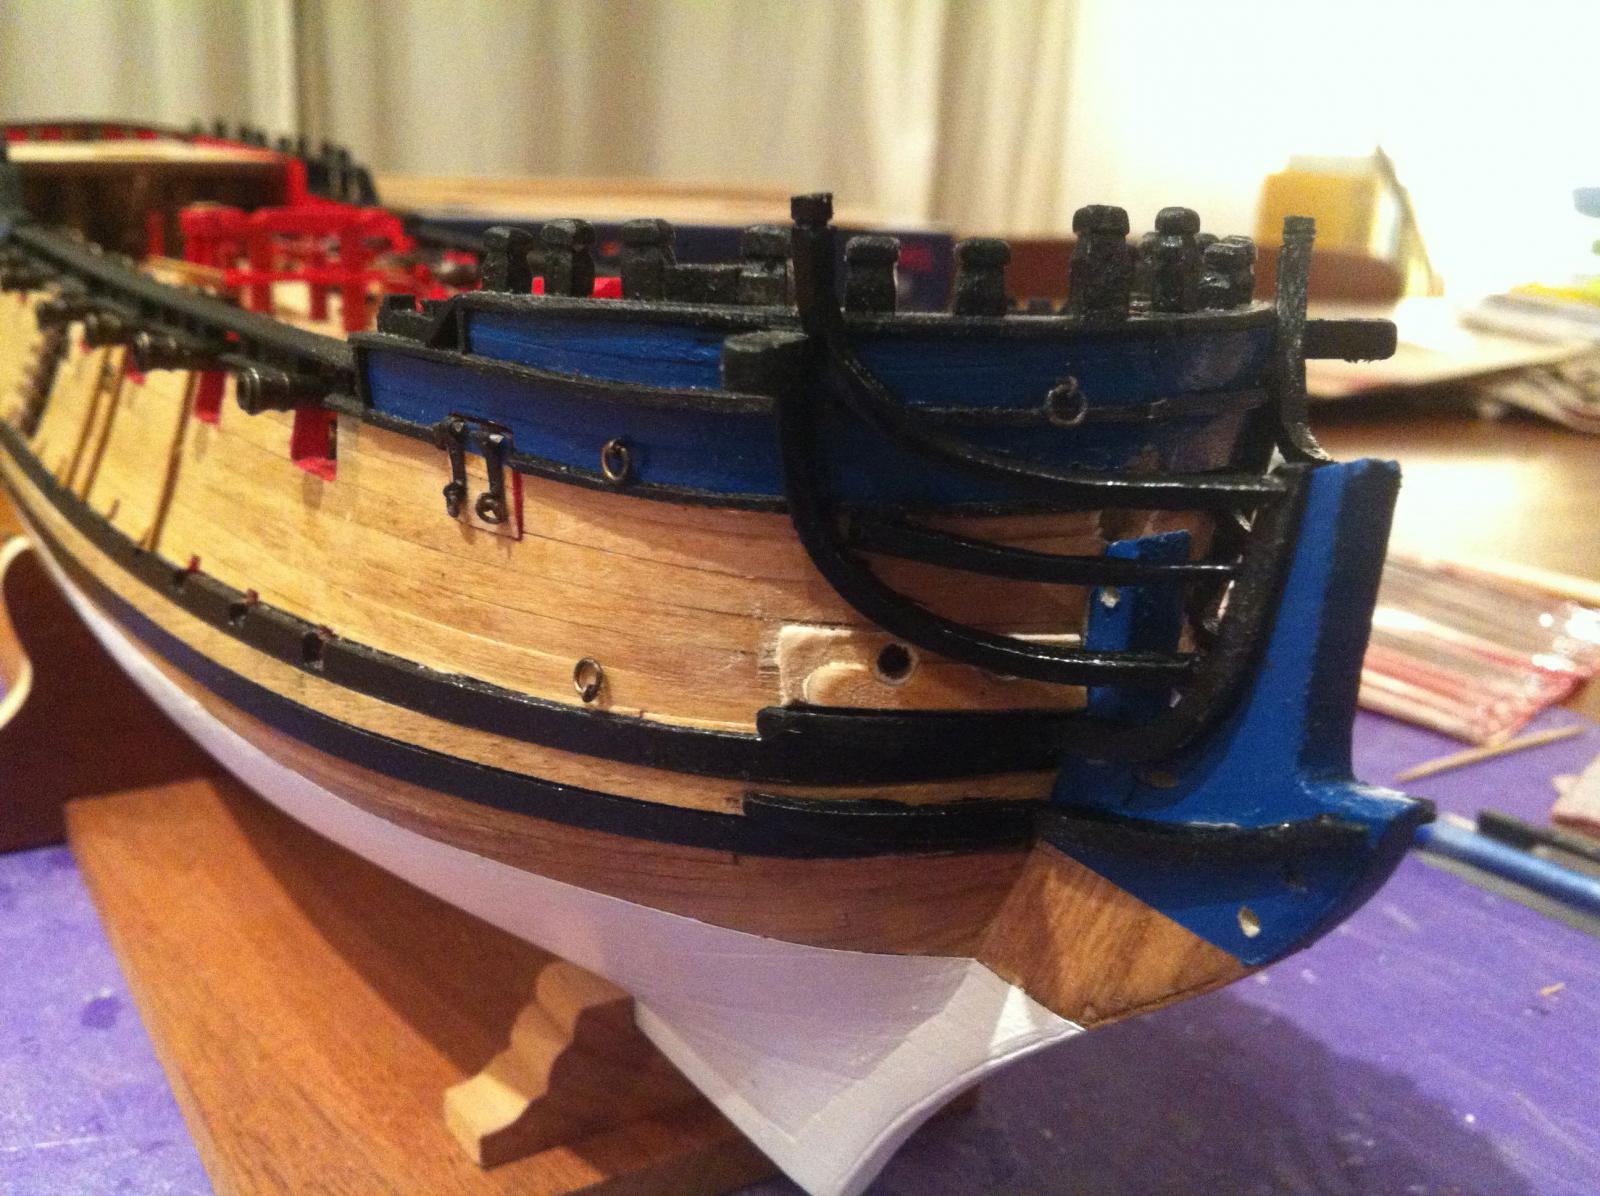
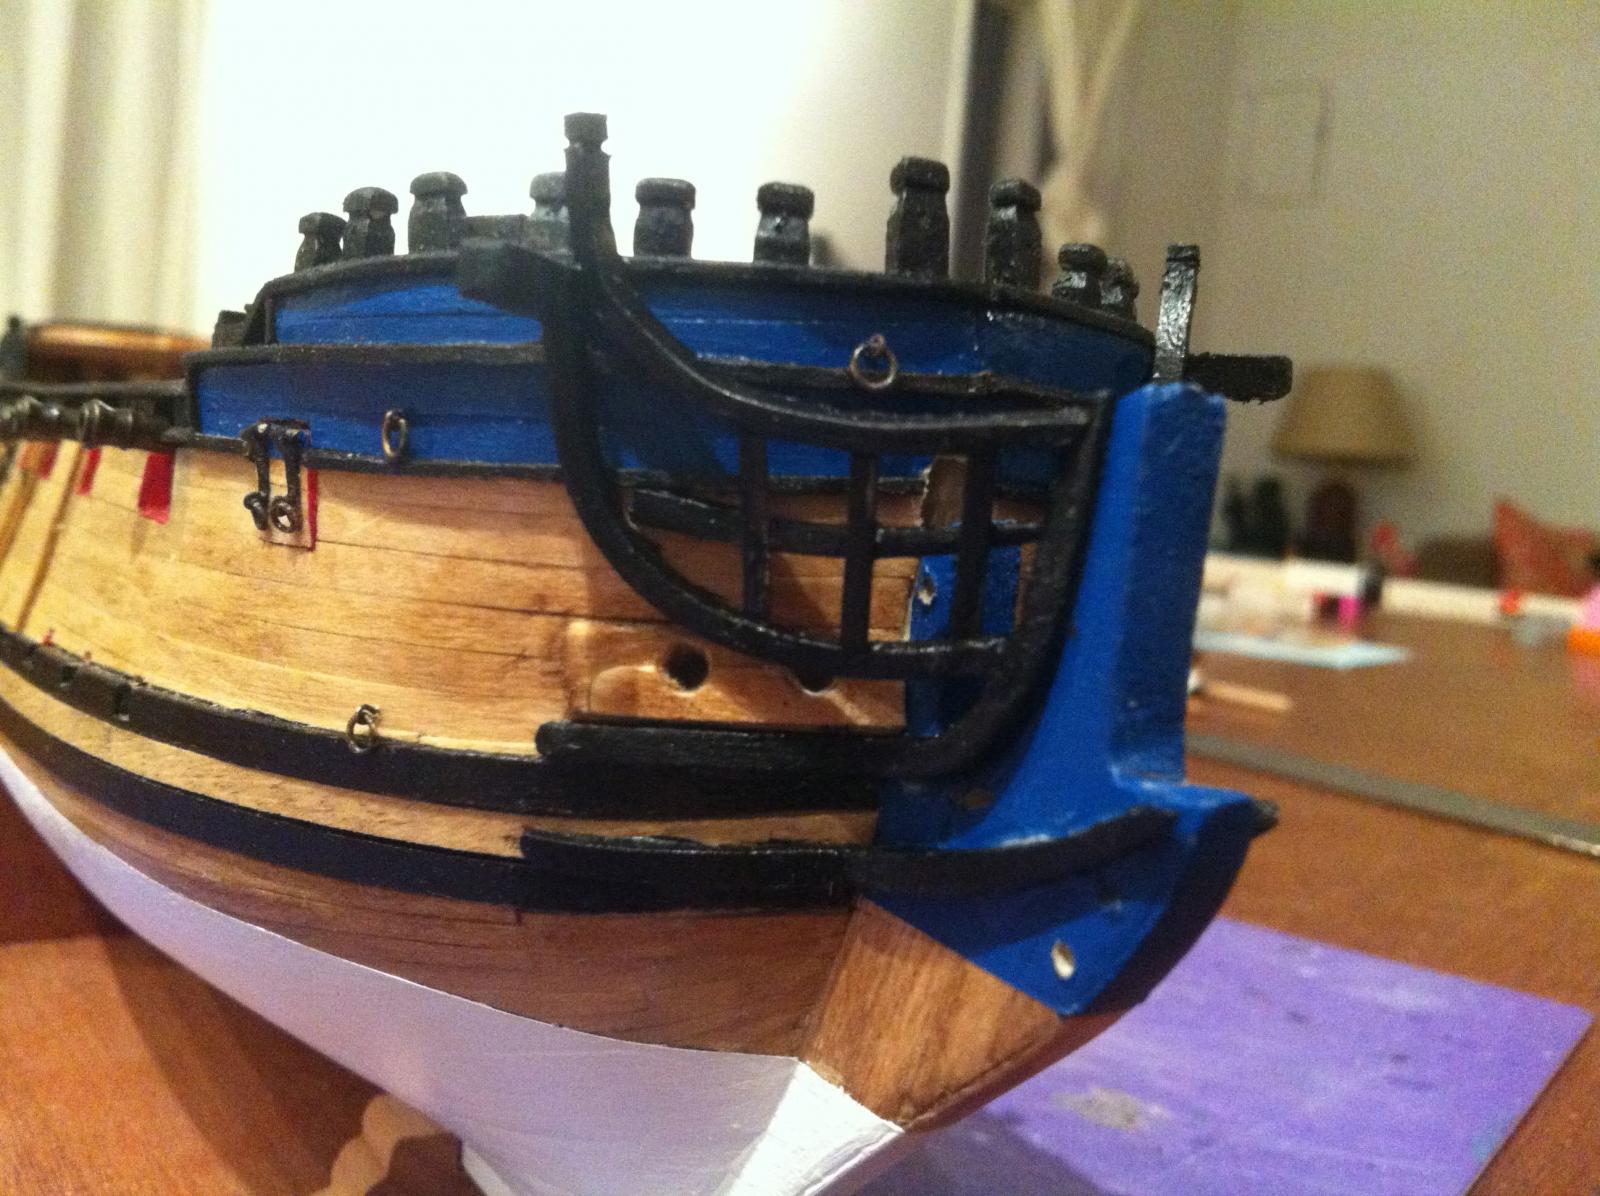
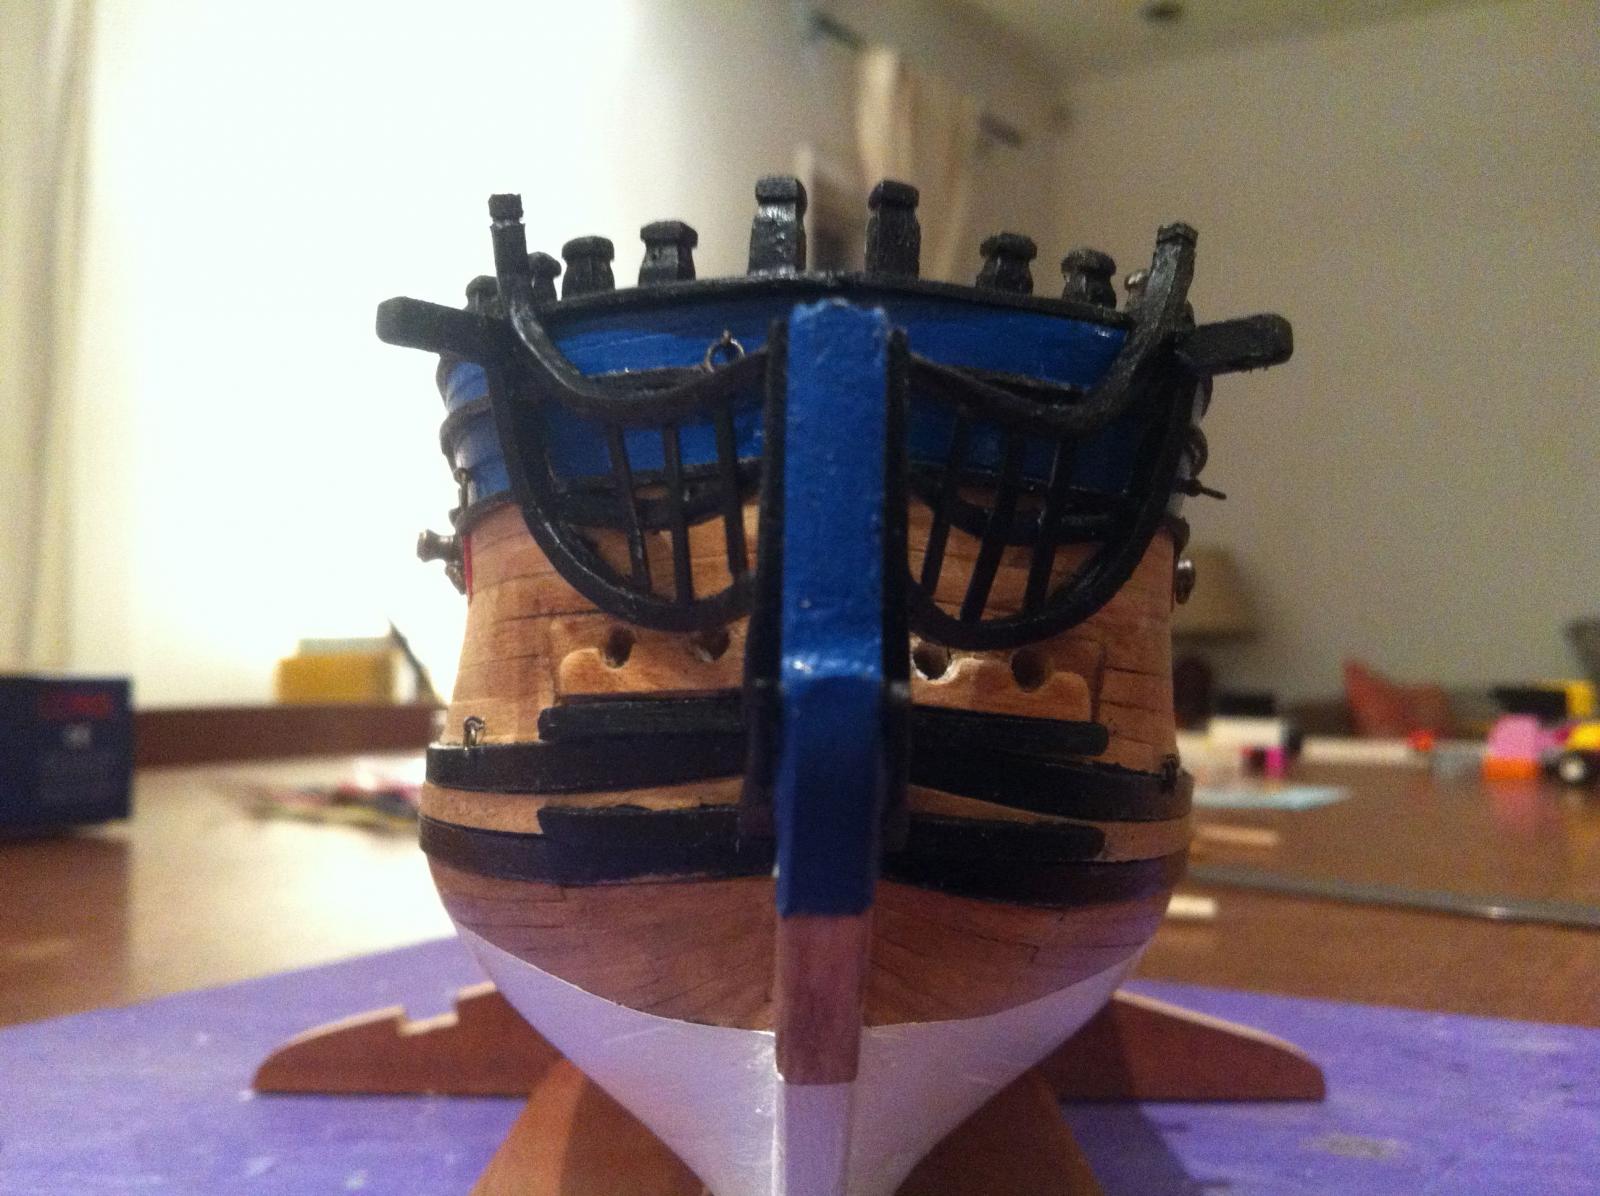
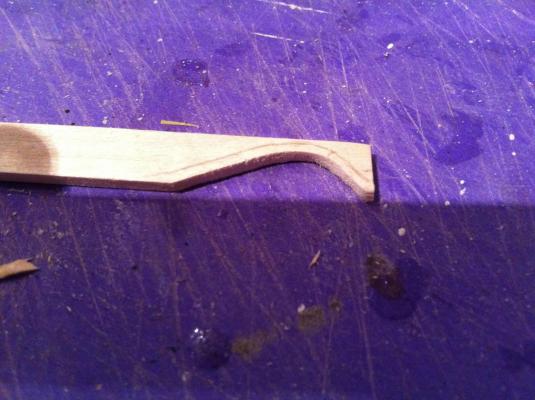
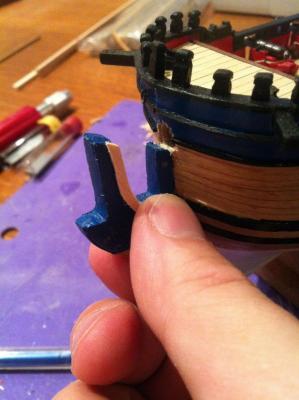
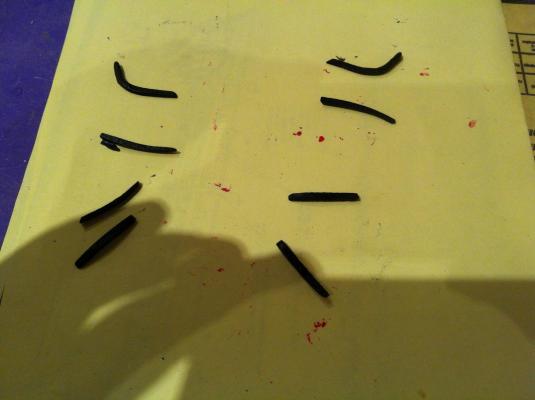
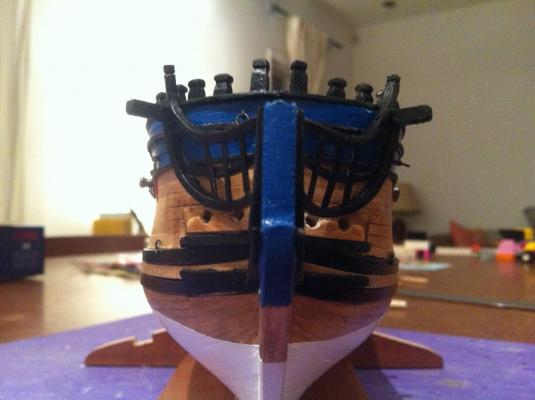
So I've spent the last few days on the head of the ship - a scary part of the build for me, seeing as I have only ever built one set of head rails in my time and that was on my second build, the Sultana, about 3 years ago..... Seeing as I had scratch built all of the cast parts to this point, I could not possibly use the metal cast head rails....at the same time, getting the right curves and overall shape into the rails was a bit difficult to conceive and to plan out. In the end, I used lime for the head cheeks and cheek knees, which ended up coming out fine. For the rails themselves I used some 4mm x 1.5mm beech left over from the Corel Toulonnaise build. This stuff is a special "bendable" beech that Corel included in that kit for the cap rails (and that I think is also included in the Bellona). I had to trim it down to 2mm x 1.5mm and taper and bend it to an appropriate shape, but I think they came out ok. For the head timbers I used 1/32" thick brass strip, blackened and then painted. At this scale I think the result is ok - and less crazy-making then trying to custom fit little pieces of wood! Cutting corners again! It was difficult to think of how to finish the rails. Painting them a yellow ochre would have looked out of place (since there is no other yellow ochre on the build). I had thought black with a recessed molding painted yellow ochre, but in the end decided on just a straight black - if anyone has suggestions for adding colour details on the rails I would love to hear them - I don't think it's too late to take a stab at it.... Strangely, the element that ended up being most thorny in this part of the build were the hawse timbers. From Goodwin, there seemed to be a backing piece ( a simple rectangle) fronted by another smaller piece with half-round sections filed out for the hawse ports. As you'll see from the photos below, when I first installed them they looked really clunky and bad. I trimmed them down a bit and restained them and widened the holes and now they look better, though still far from perfect. Unfortunately, I do not have photos of the construction process for the head rails - my phone was inaccessible while I was working and it's my only camera. In any case, here are the photos I do have....enjoy! hamilton 1. I traced the inside line of the stem post on a piece of lime and carved it out. Then I traced the line with a compass set to 2mm 2. The head cheeks and cheek knees were then painted black - here you can see how rough the hawse timbers turned out at first.... 3. Head timbers installed and unfinished 4. head rails finished 5. head timbers installed


-
AAAAAAAAHHHHHHHHH!!!!
-
Hi Andy - I know it seems weird to go back and build something again...but when I consider the beauty of the vessel and the deficiencies of the Corel kit, and the existence of the Goodwin book....it is a tempting idea....anyway, such a project would be impossible for me at the moment....I have a few kits left to build and a lot of tools to buy (not to mention a bigger house with a proper workshop)..... hamilton
-
Thanks BE, Ferit, Augie & Andy for the comments! Much appreciated - yes this is a very small scale to work in....at some point in the far far future I'd like to scratch build this from the Goodwin book at 1:48 scale - it would be a bit of a monster, but would be a lot of fun! hamilton
-
Hi Mark - I do feel myself to be dangerously close - and dangerously unprepared!! Soon....but not quite yet! hamilton
-
Hello Jim: I'm so sorry to hear about this diagnosis. I cannot begin to imagine what you must be going through, but I do know that it's best to reach out to family in such moments and discuss your feelings openly with them. Do not think of it as burdening them, but as a way of drawing closer at the most needful time. My thoughts are with you. hamilton
-
Beautiful work! hamilton
-
Looks great! The bulwarks look to be at a perfect thickness - I sped through mine a little too hastily (first build, and all) and though the result was fine, this outstrips it by a long mile. hamilton
-
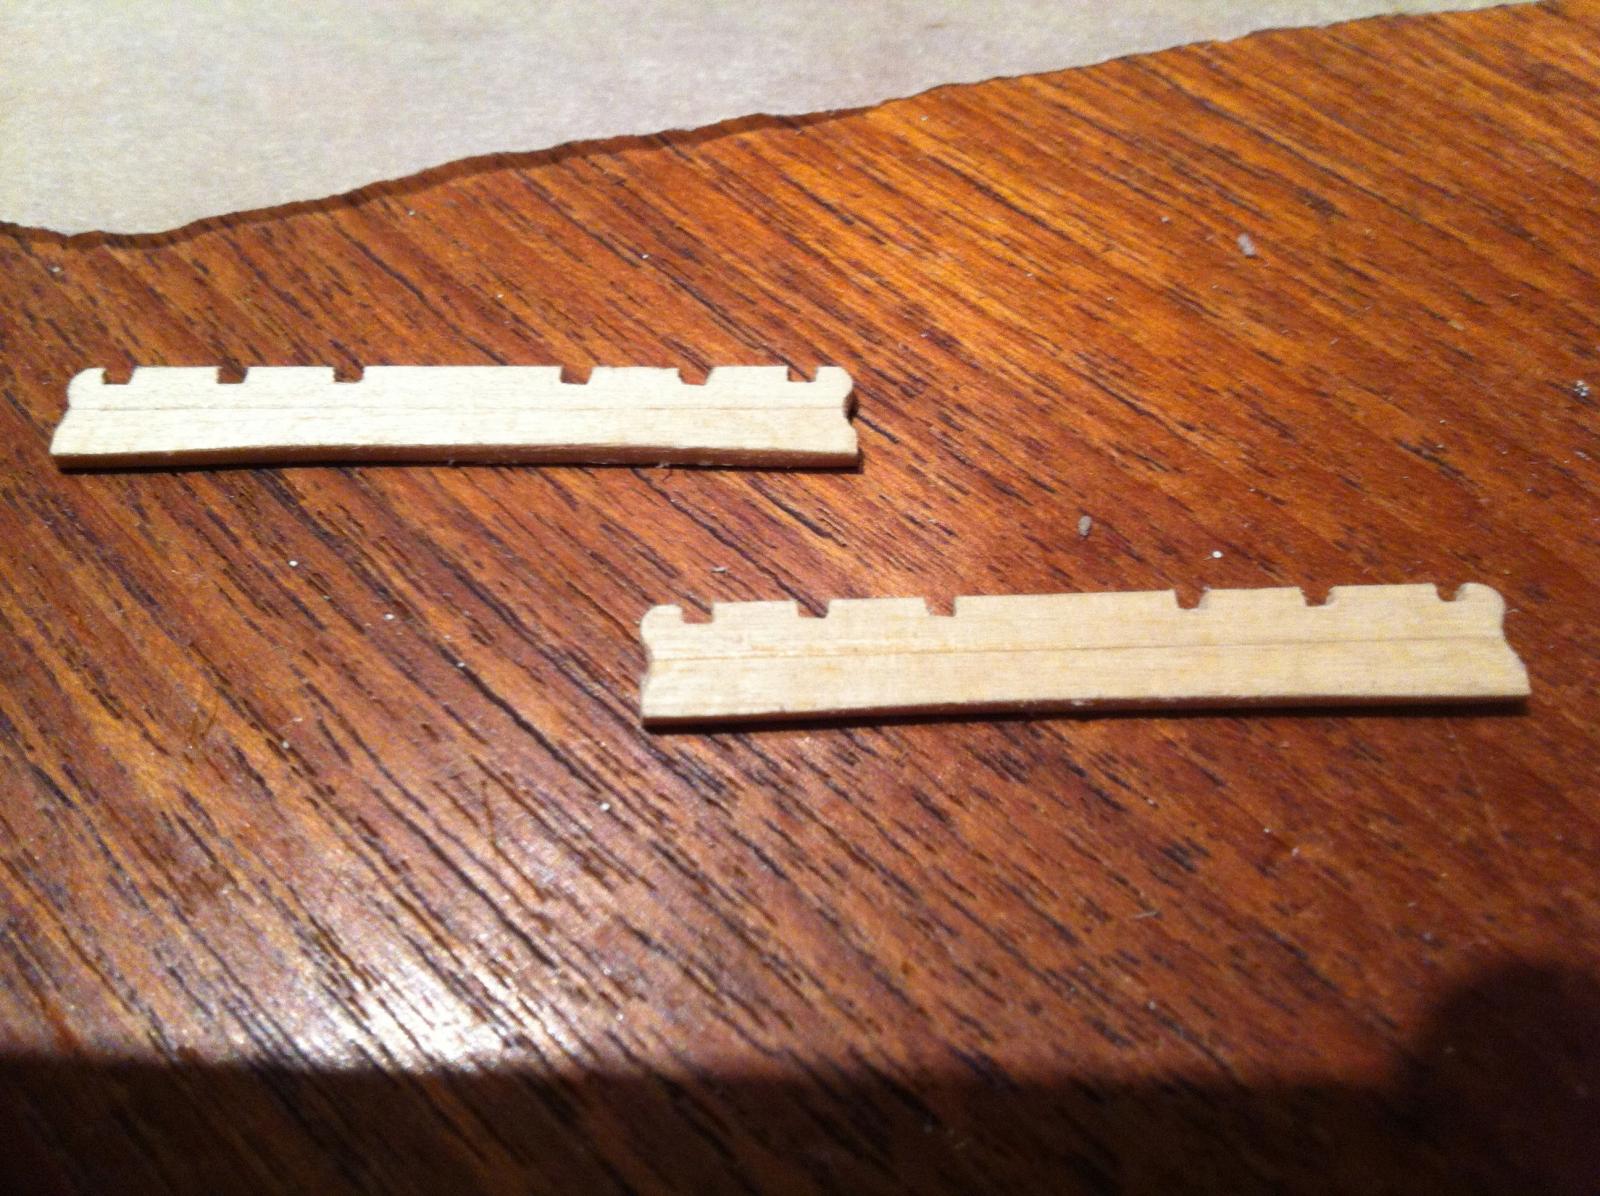
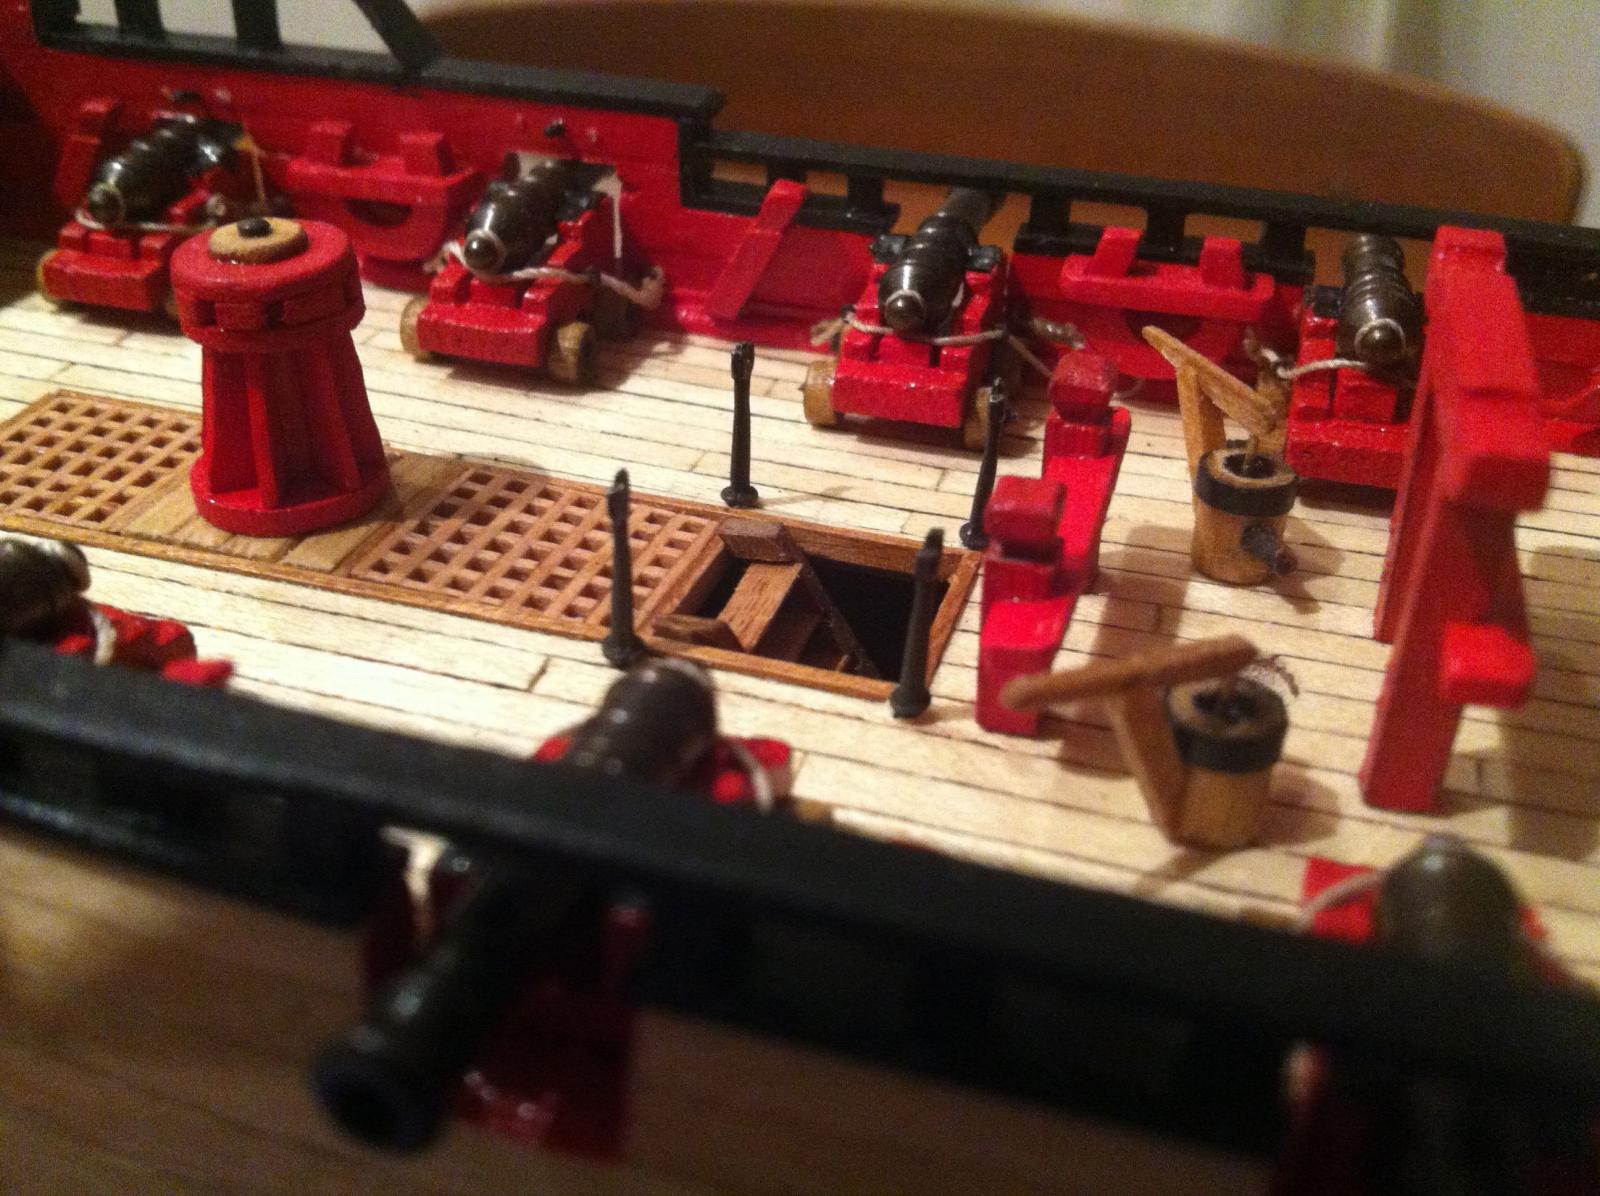
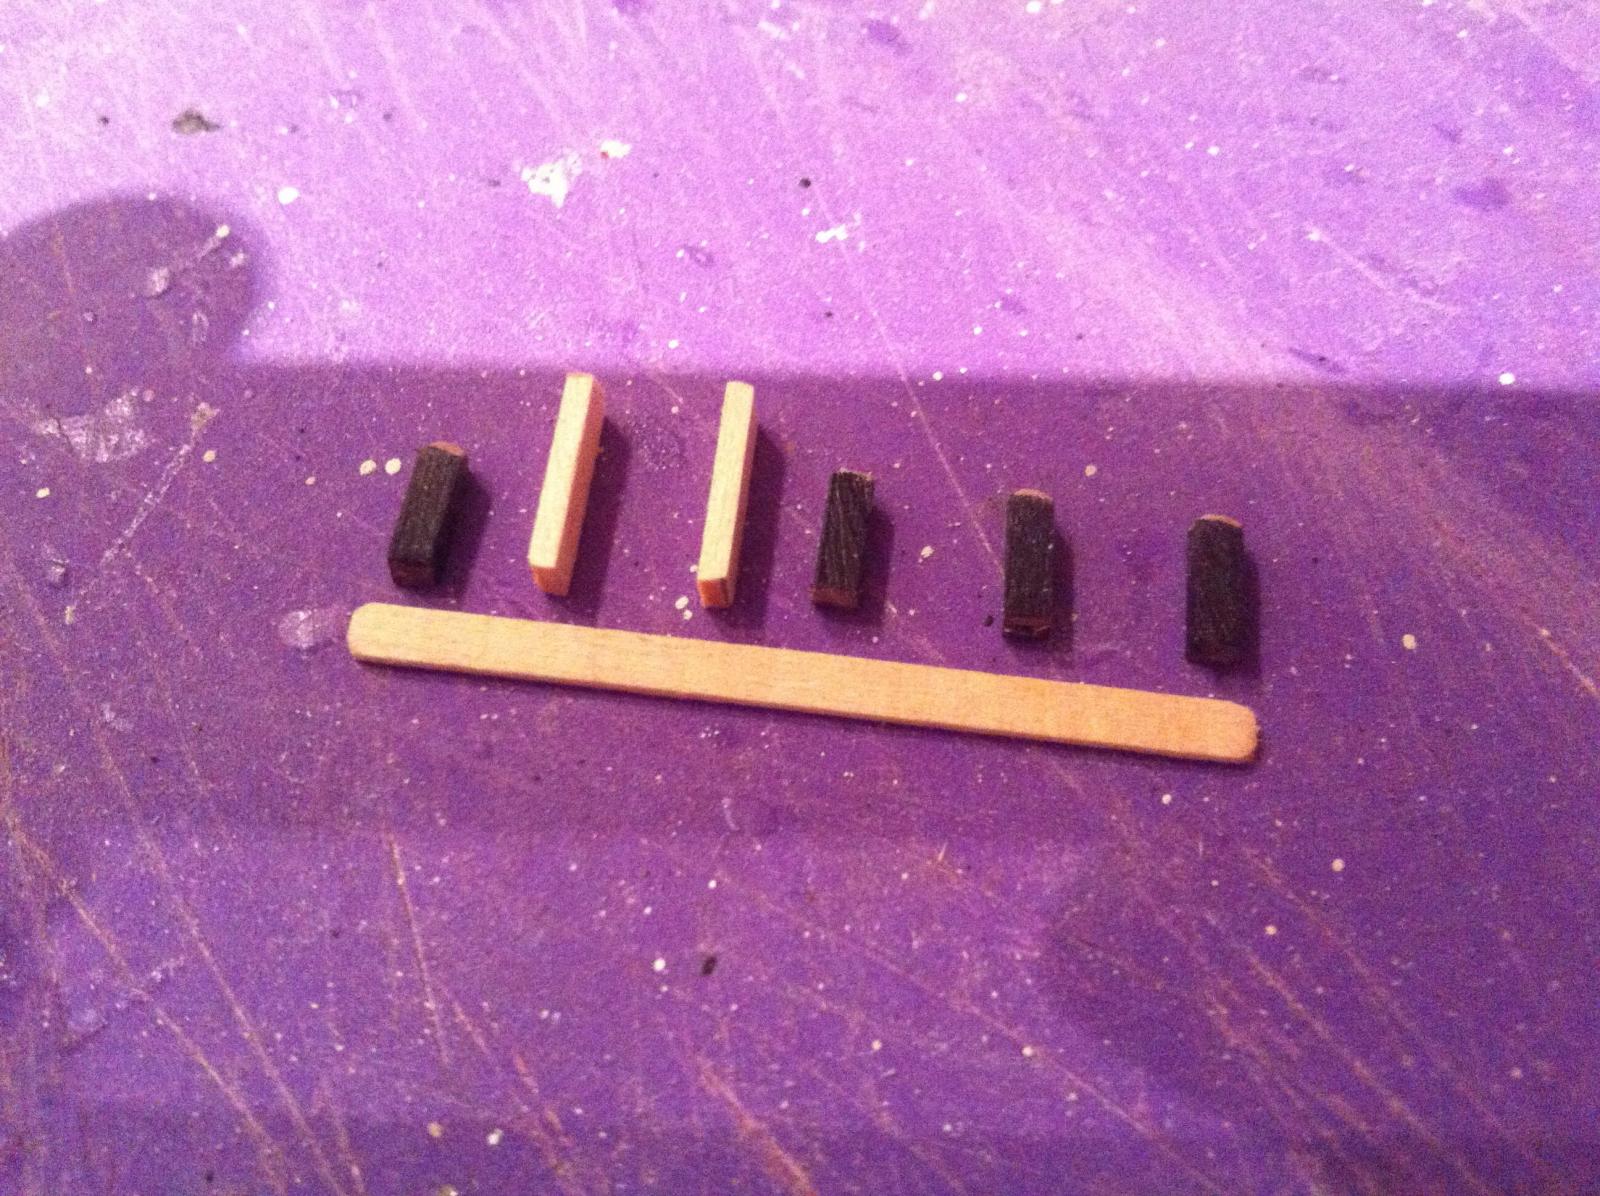
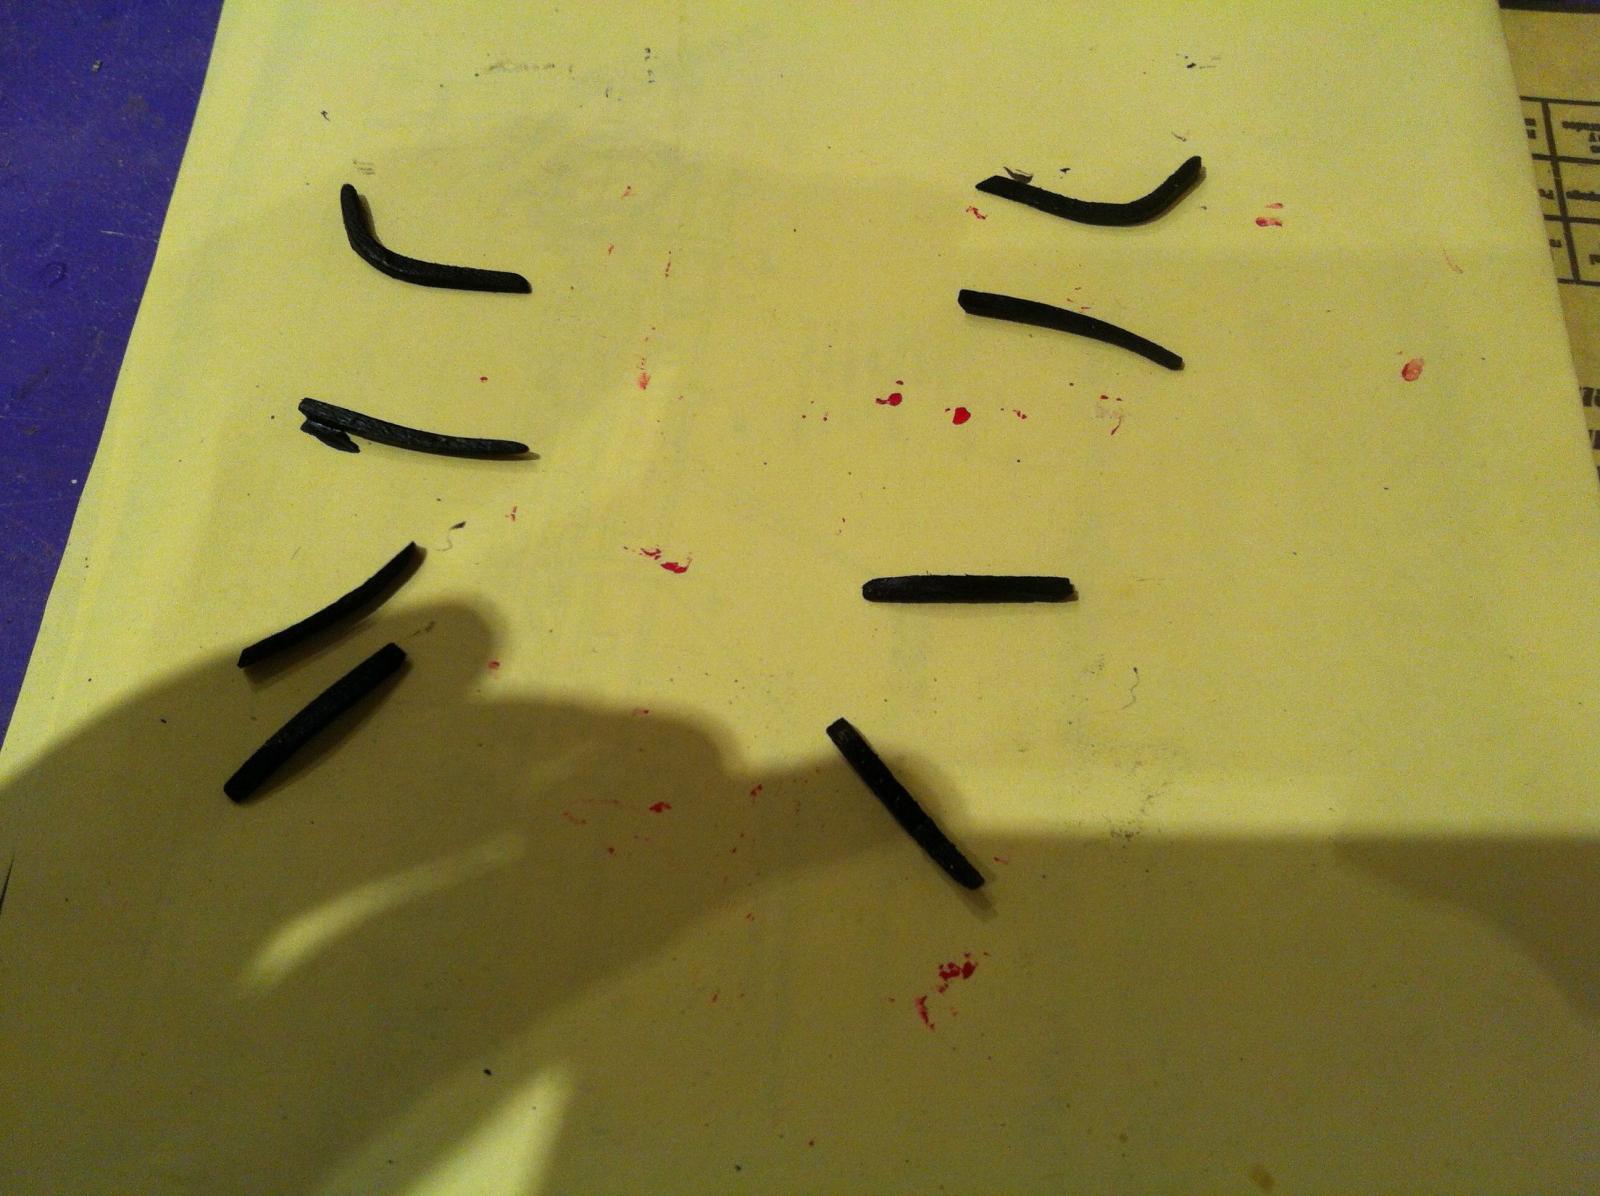
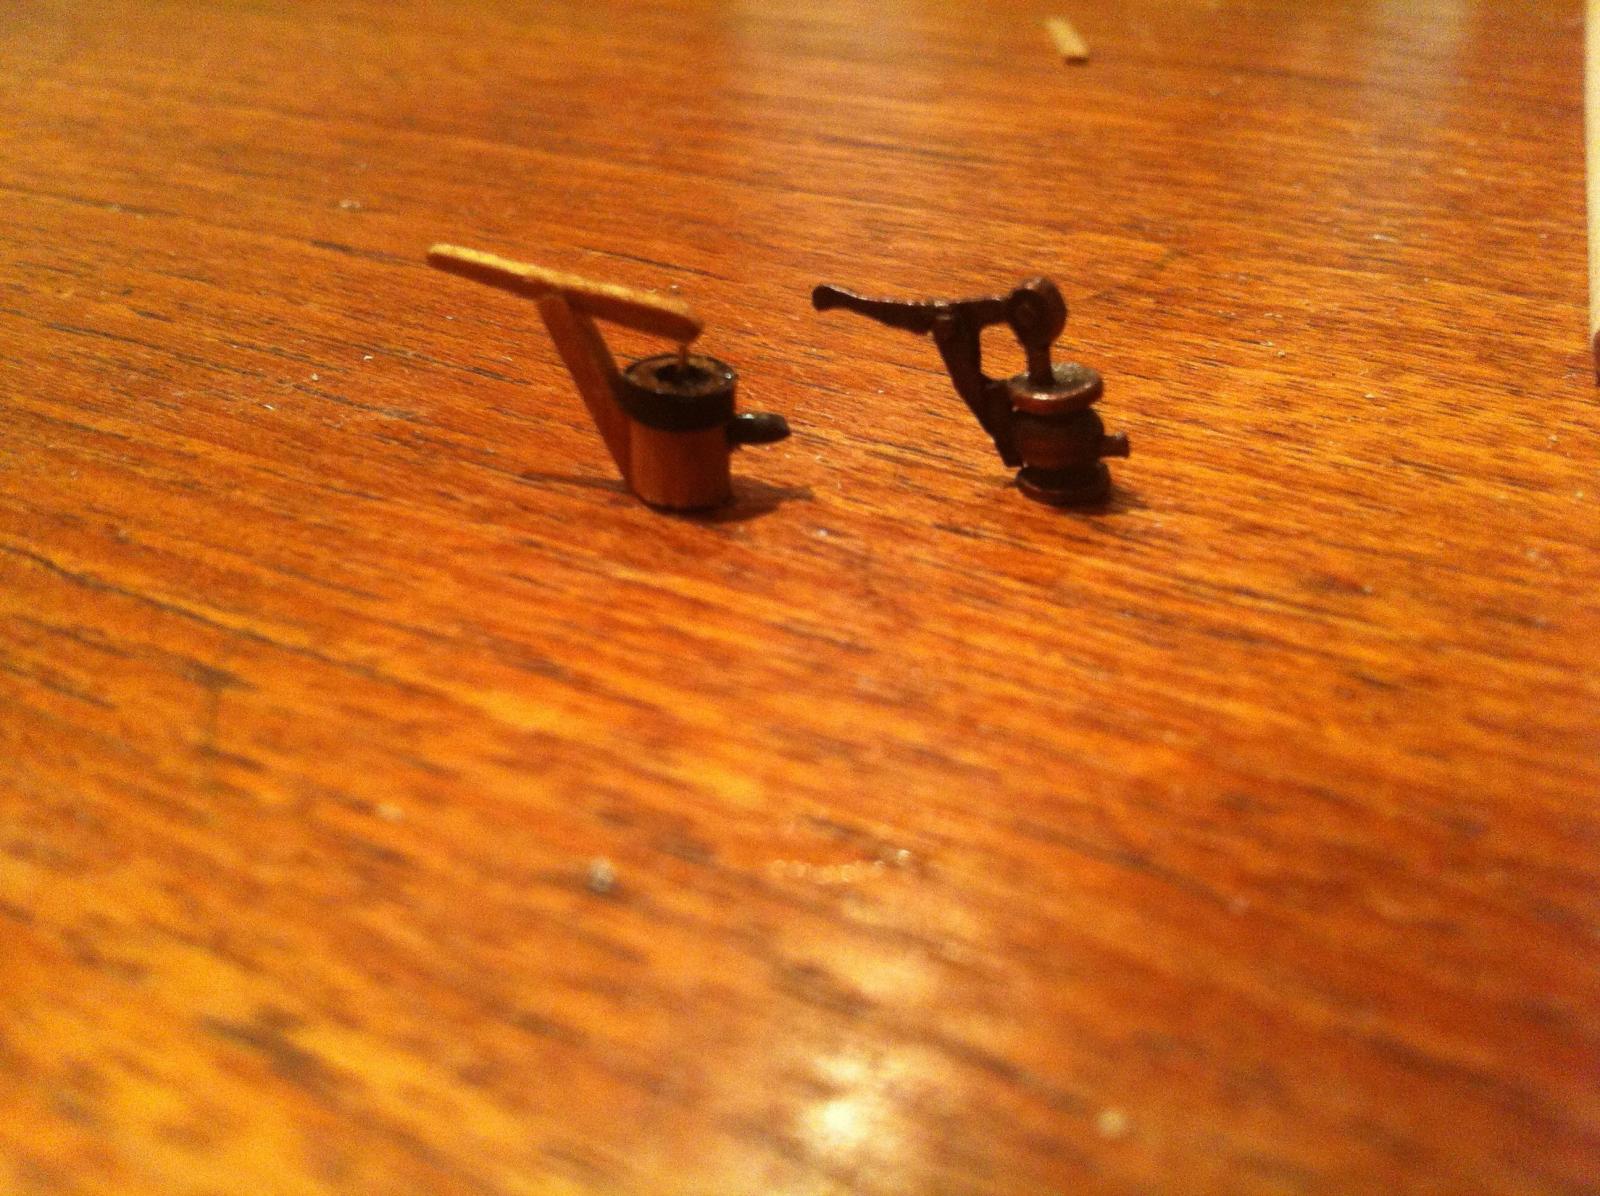
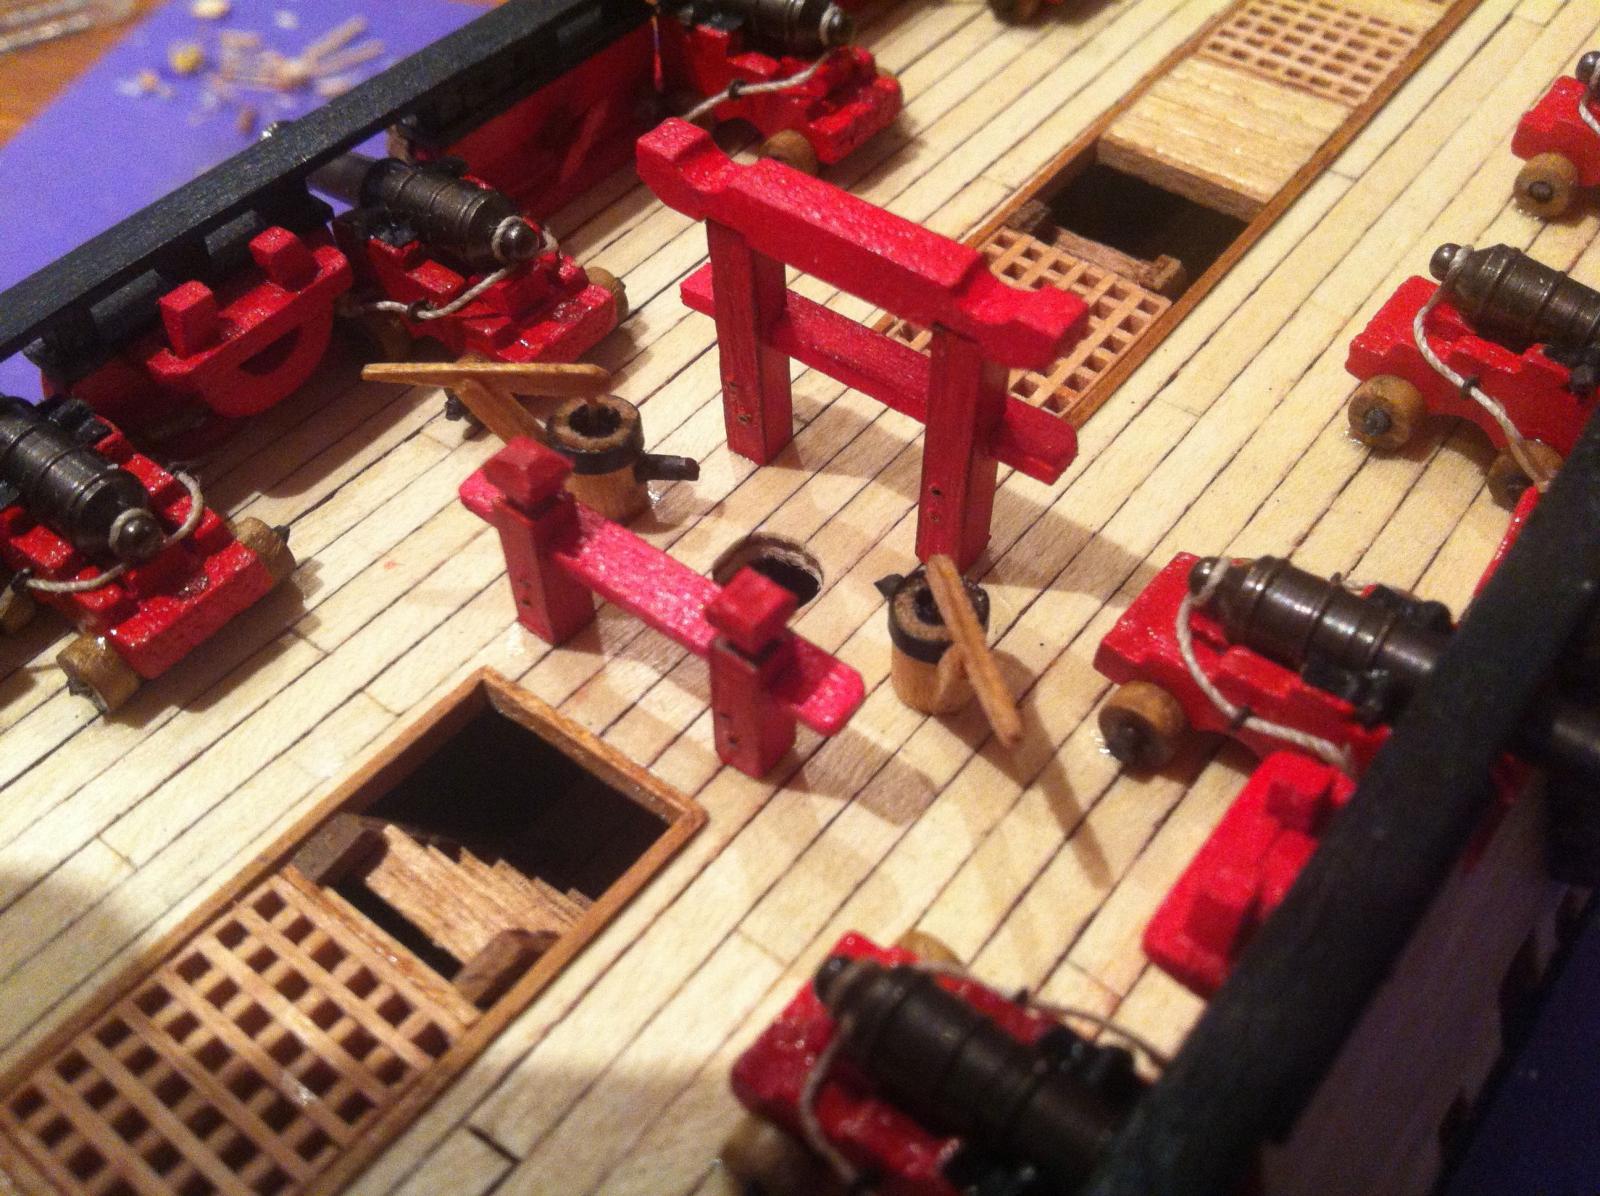
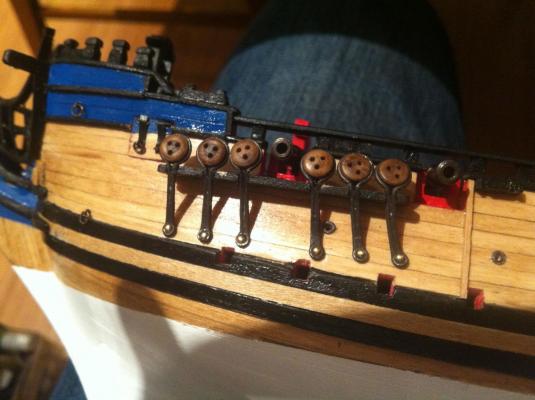
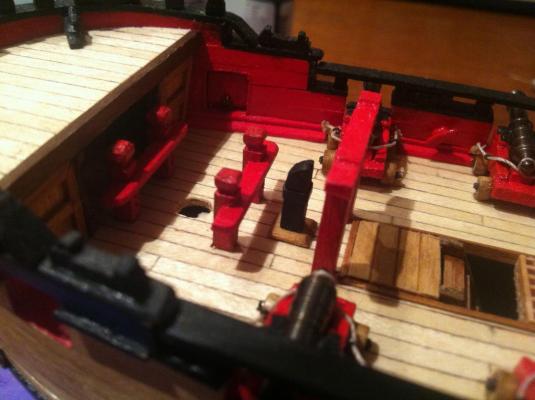
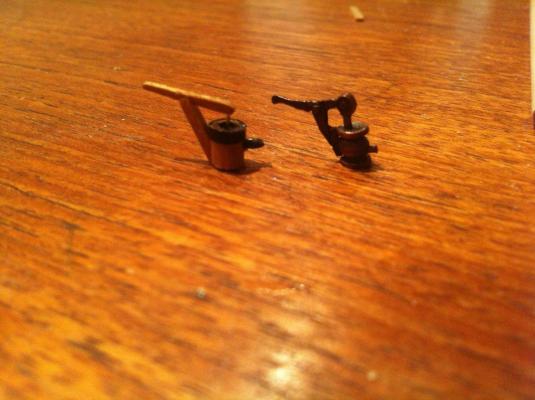
The galley stack was quite straightforward. I constructed it out of a single 3mm x 3mm strip of lime, shaped according to the drawings in Goodwin and painted black. I drilled and filed out a hole for the actual funnel, but it's barely noticeable...I cut and stained a 6mm x .5mm piece of lime for the base and wrapped some pinstripe tape around it to simulate an iron band that Goodwin shows just below the outlet. Here it is. I was a little worried about the pumps but they ended up not being too difficult to make. I used 2mm x 2mm lime, with a section filed out at the end for the pump bracket, and 3mm x .5mm lime (shaped) for the handle. Here is a shot of some of these parts beside the kit-supplied metal part. I used a 4mm dowel for the pump barrel. I drilled a hole in the side for the spout, which I made from a piece of brass rod. I drilled another hole in the top and painted the interior black to simulate a well. A bit of pin stripe tape wrapped around the top simulates an iron band, and a small piece of wire set in the well and propping up the handle completed the assembly. Here is a comparison with the Corel part.... ....and here are mine installed on deck.... hamilton


-
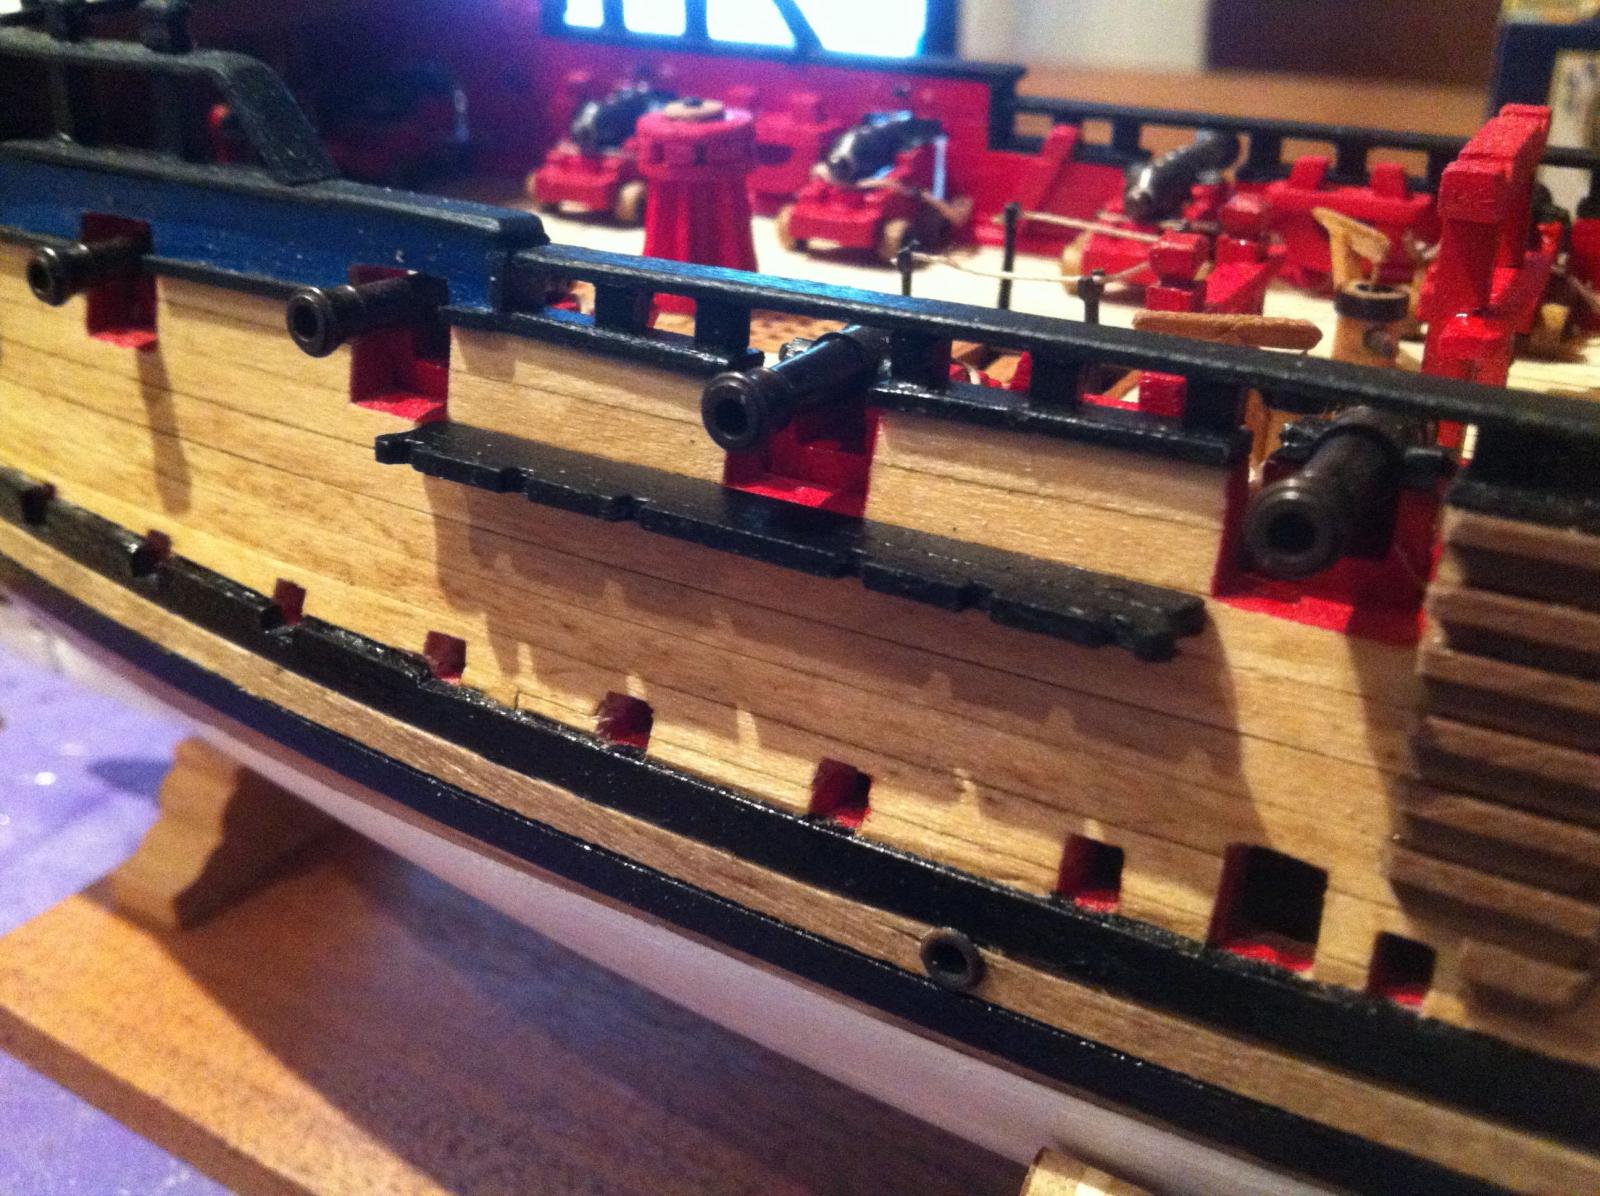
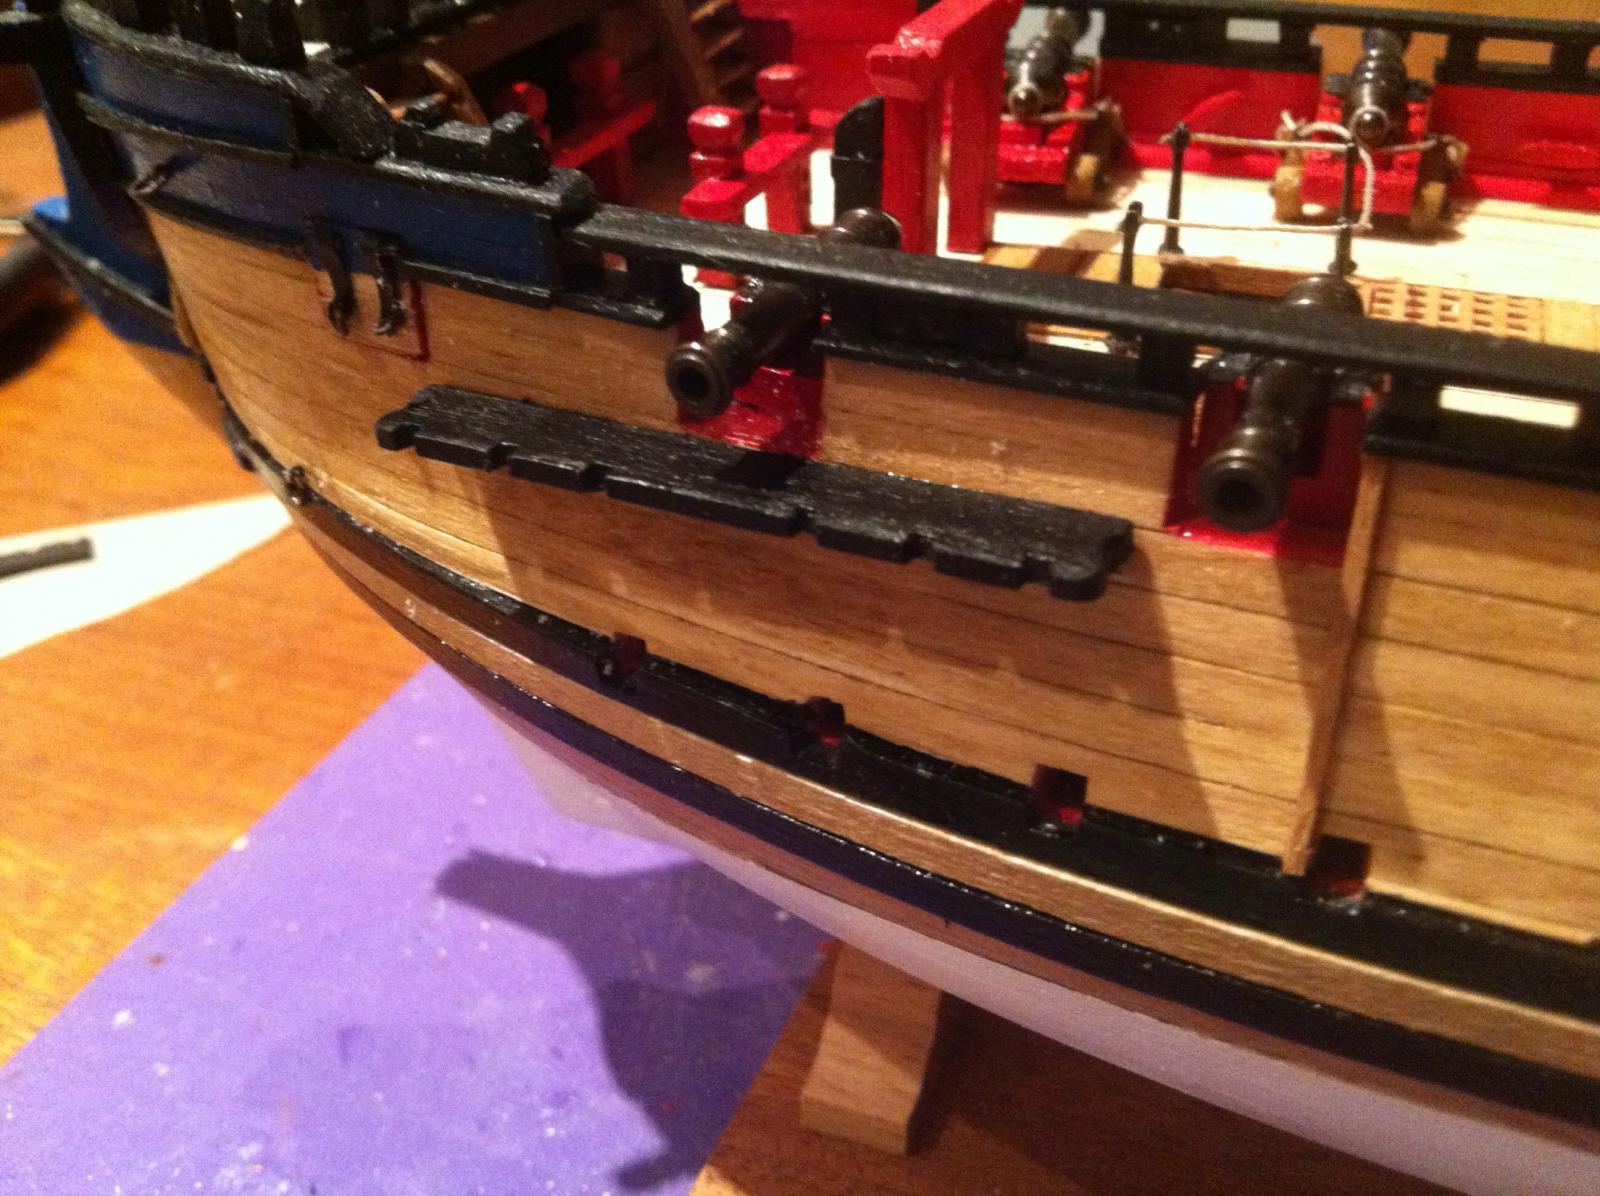
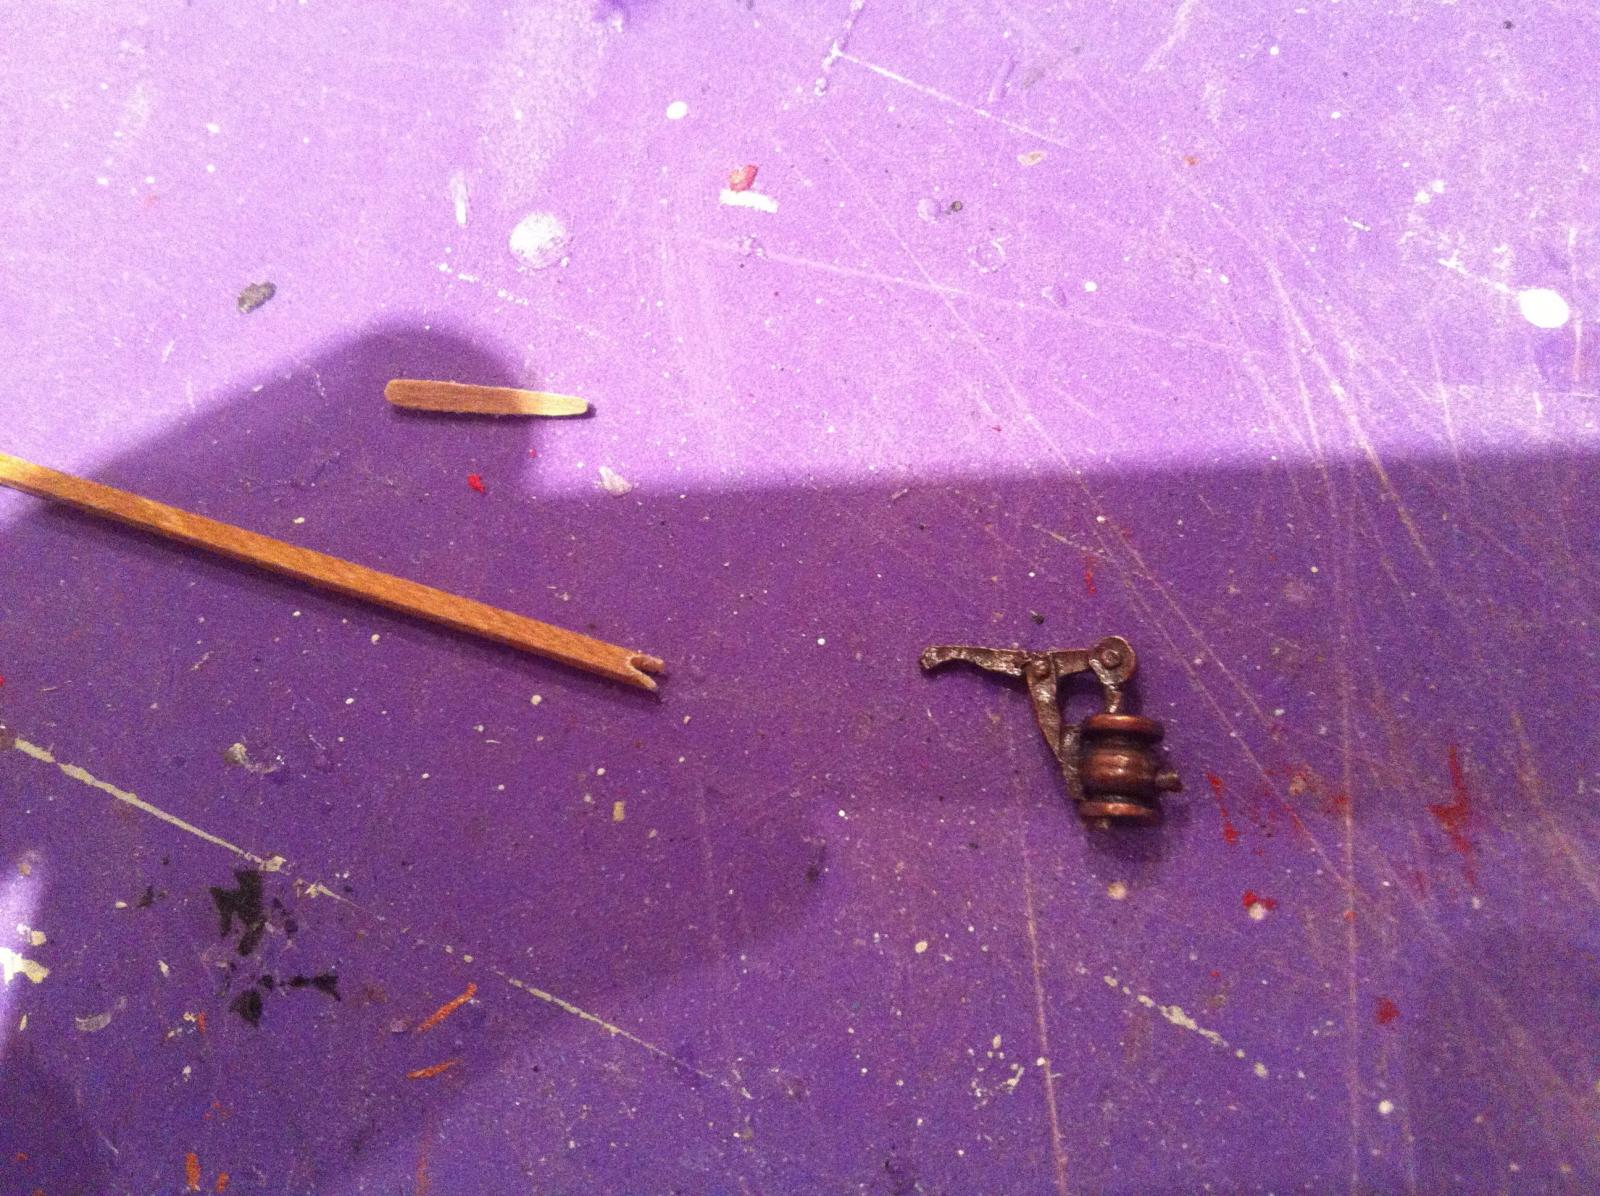
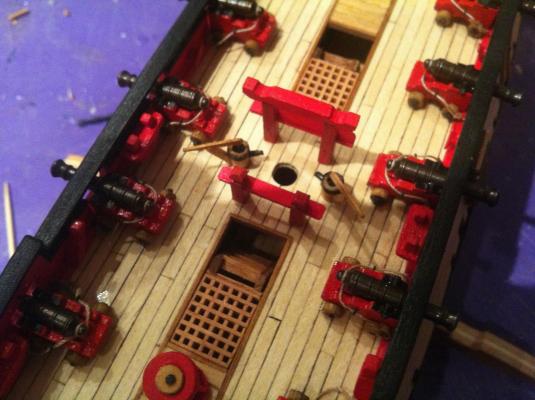
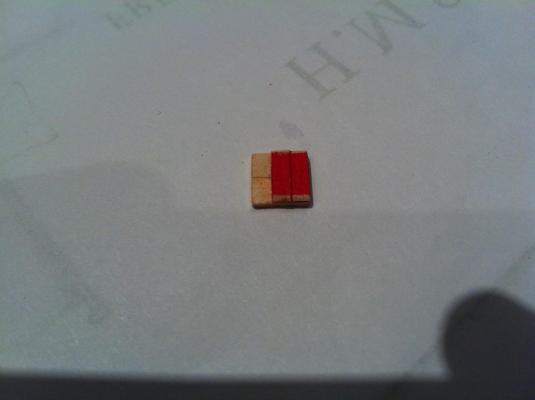
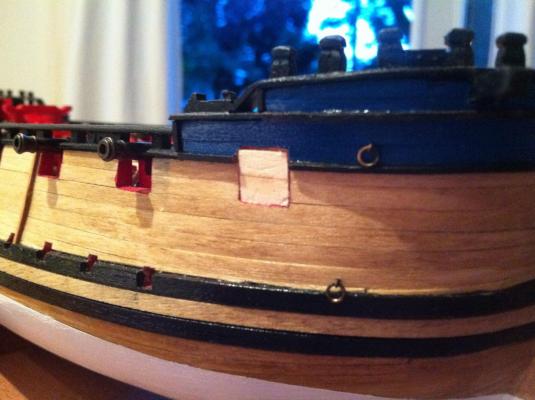
Well I have a couple of updates - one documenting the bridle port lids and the other documenting the galley stack and the elm tree pumps. Here goes. The bridle port lids consist of 2 layers of planking - a horizontal (outboard) layer consisting of 2 6mm x 1.5mm lime and a vertical (inboard) layer consisting of 3mm x .5mm lime, painted red. Here are a few shots of the process. It took a bit of filing to get the port lid to fit, but eventually I got it.... I bevelled the inboard layer of planking and added a ring bolt in the lower centre. I also used 1/16" pinstripe tape and blackened brass wire to simulate the hinges and hinge pins outboard - they're a little large for scale.... Here's the finished product. hamilton


-
Thanks Ferit! And you're welcome here - if you don't mind the rain! hamilton