niwotwill
-
Posts
597 -
Joined
-
Last visited
Content Type
Profiles
Forums
Gallery
Events
Everything posted by niwotwill
-
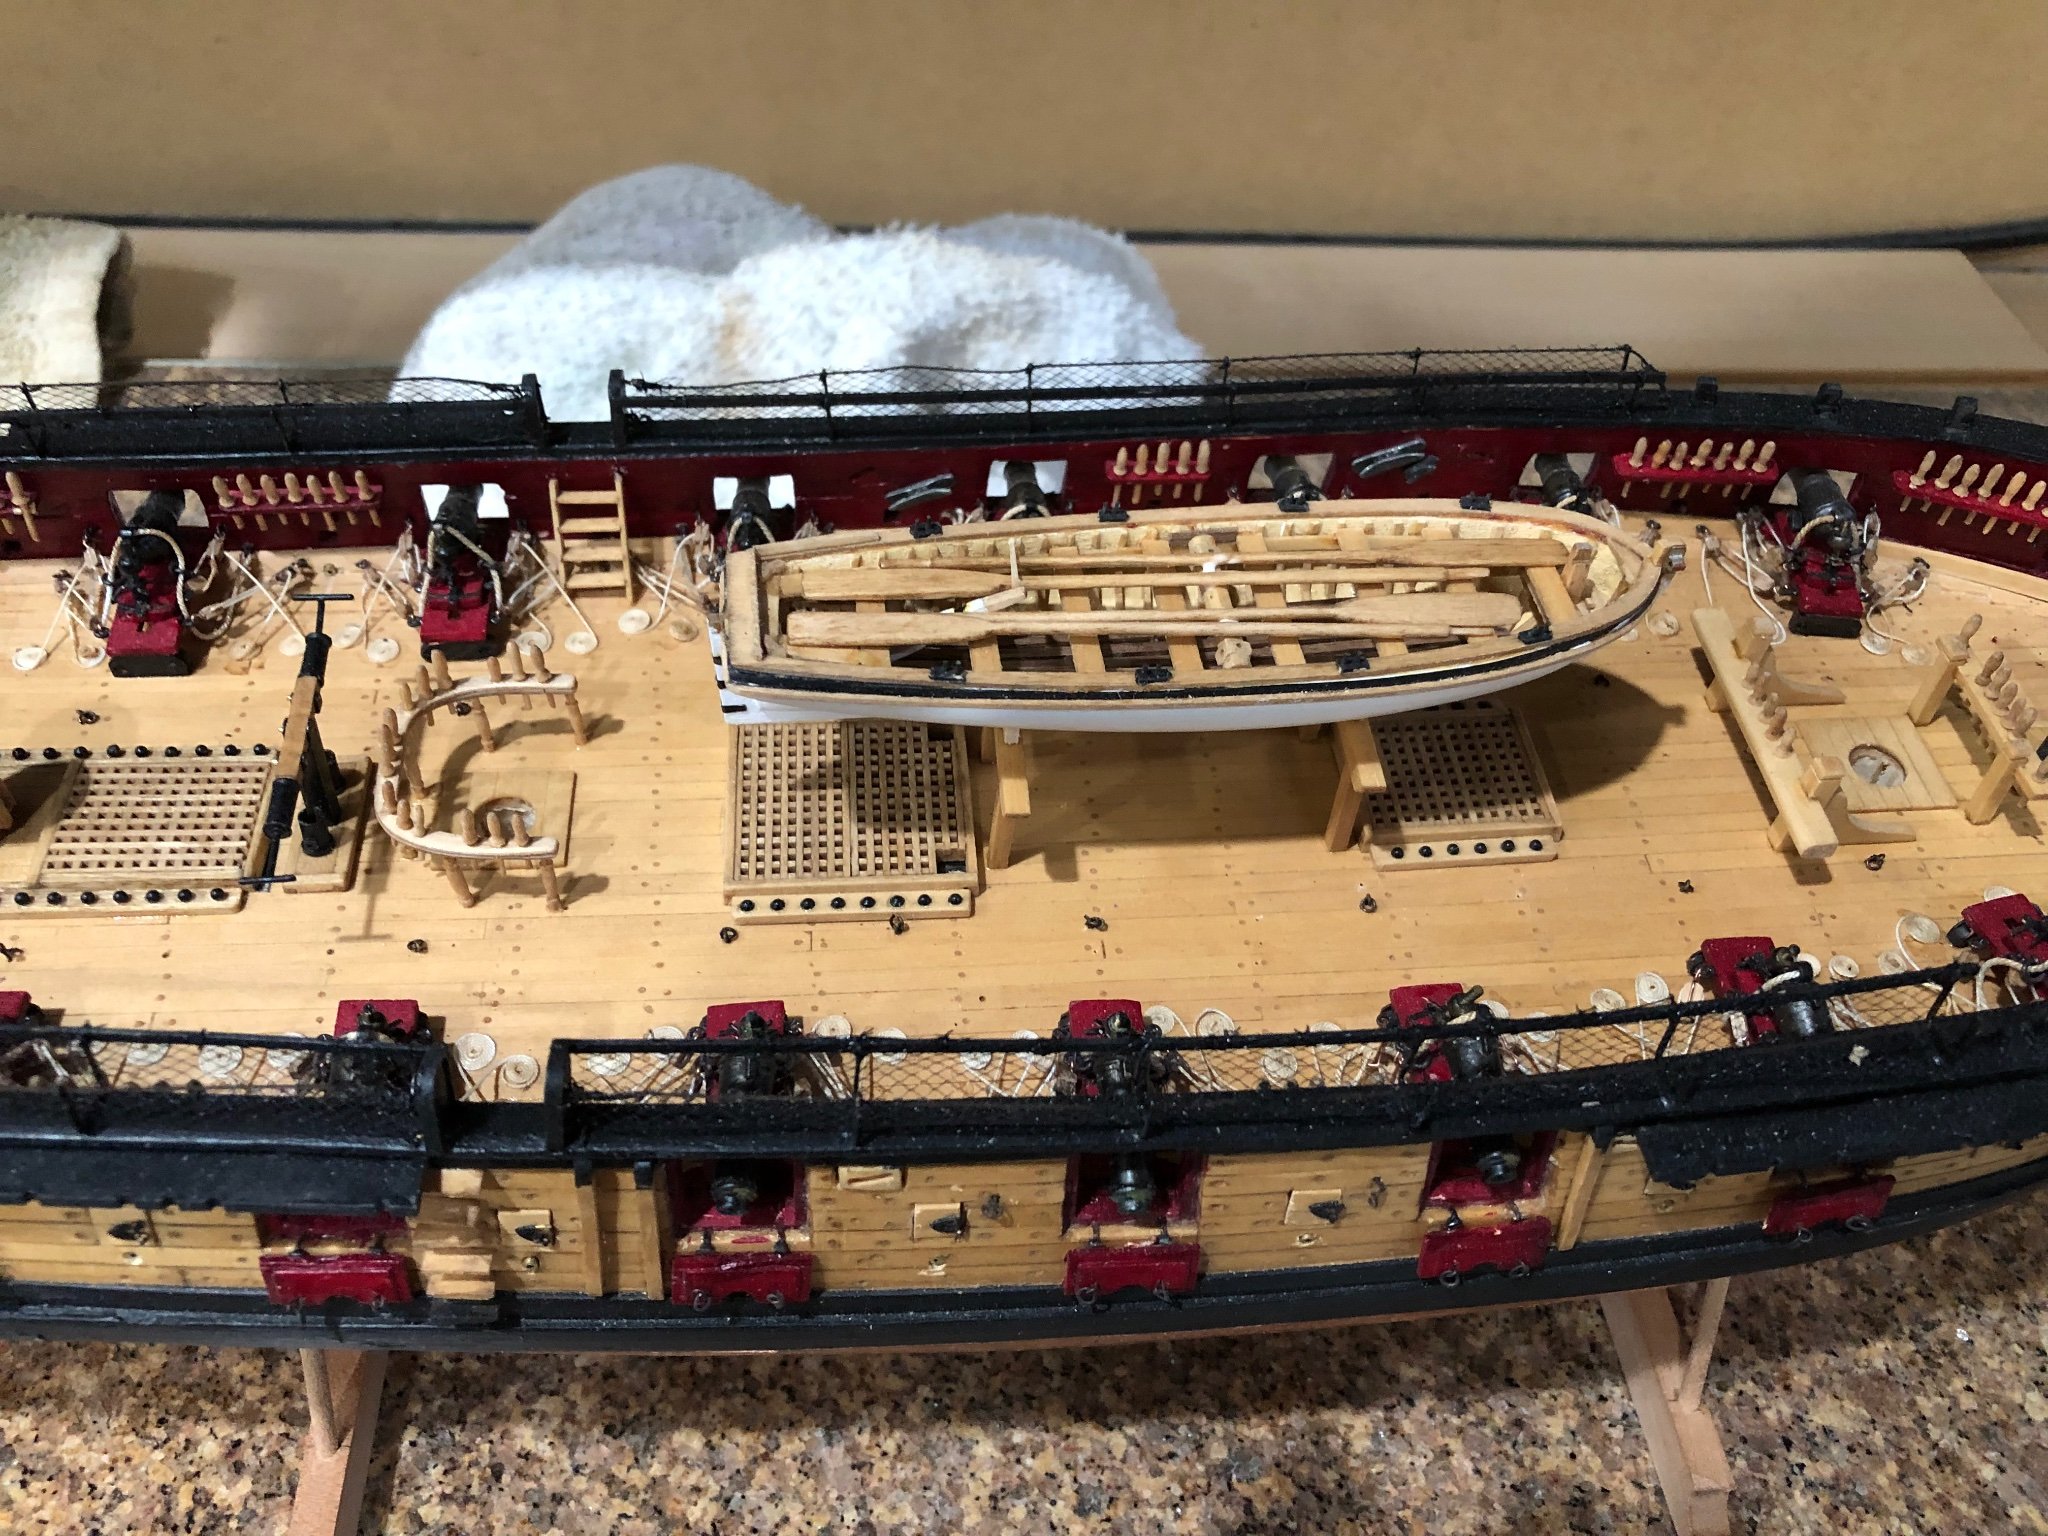
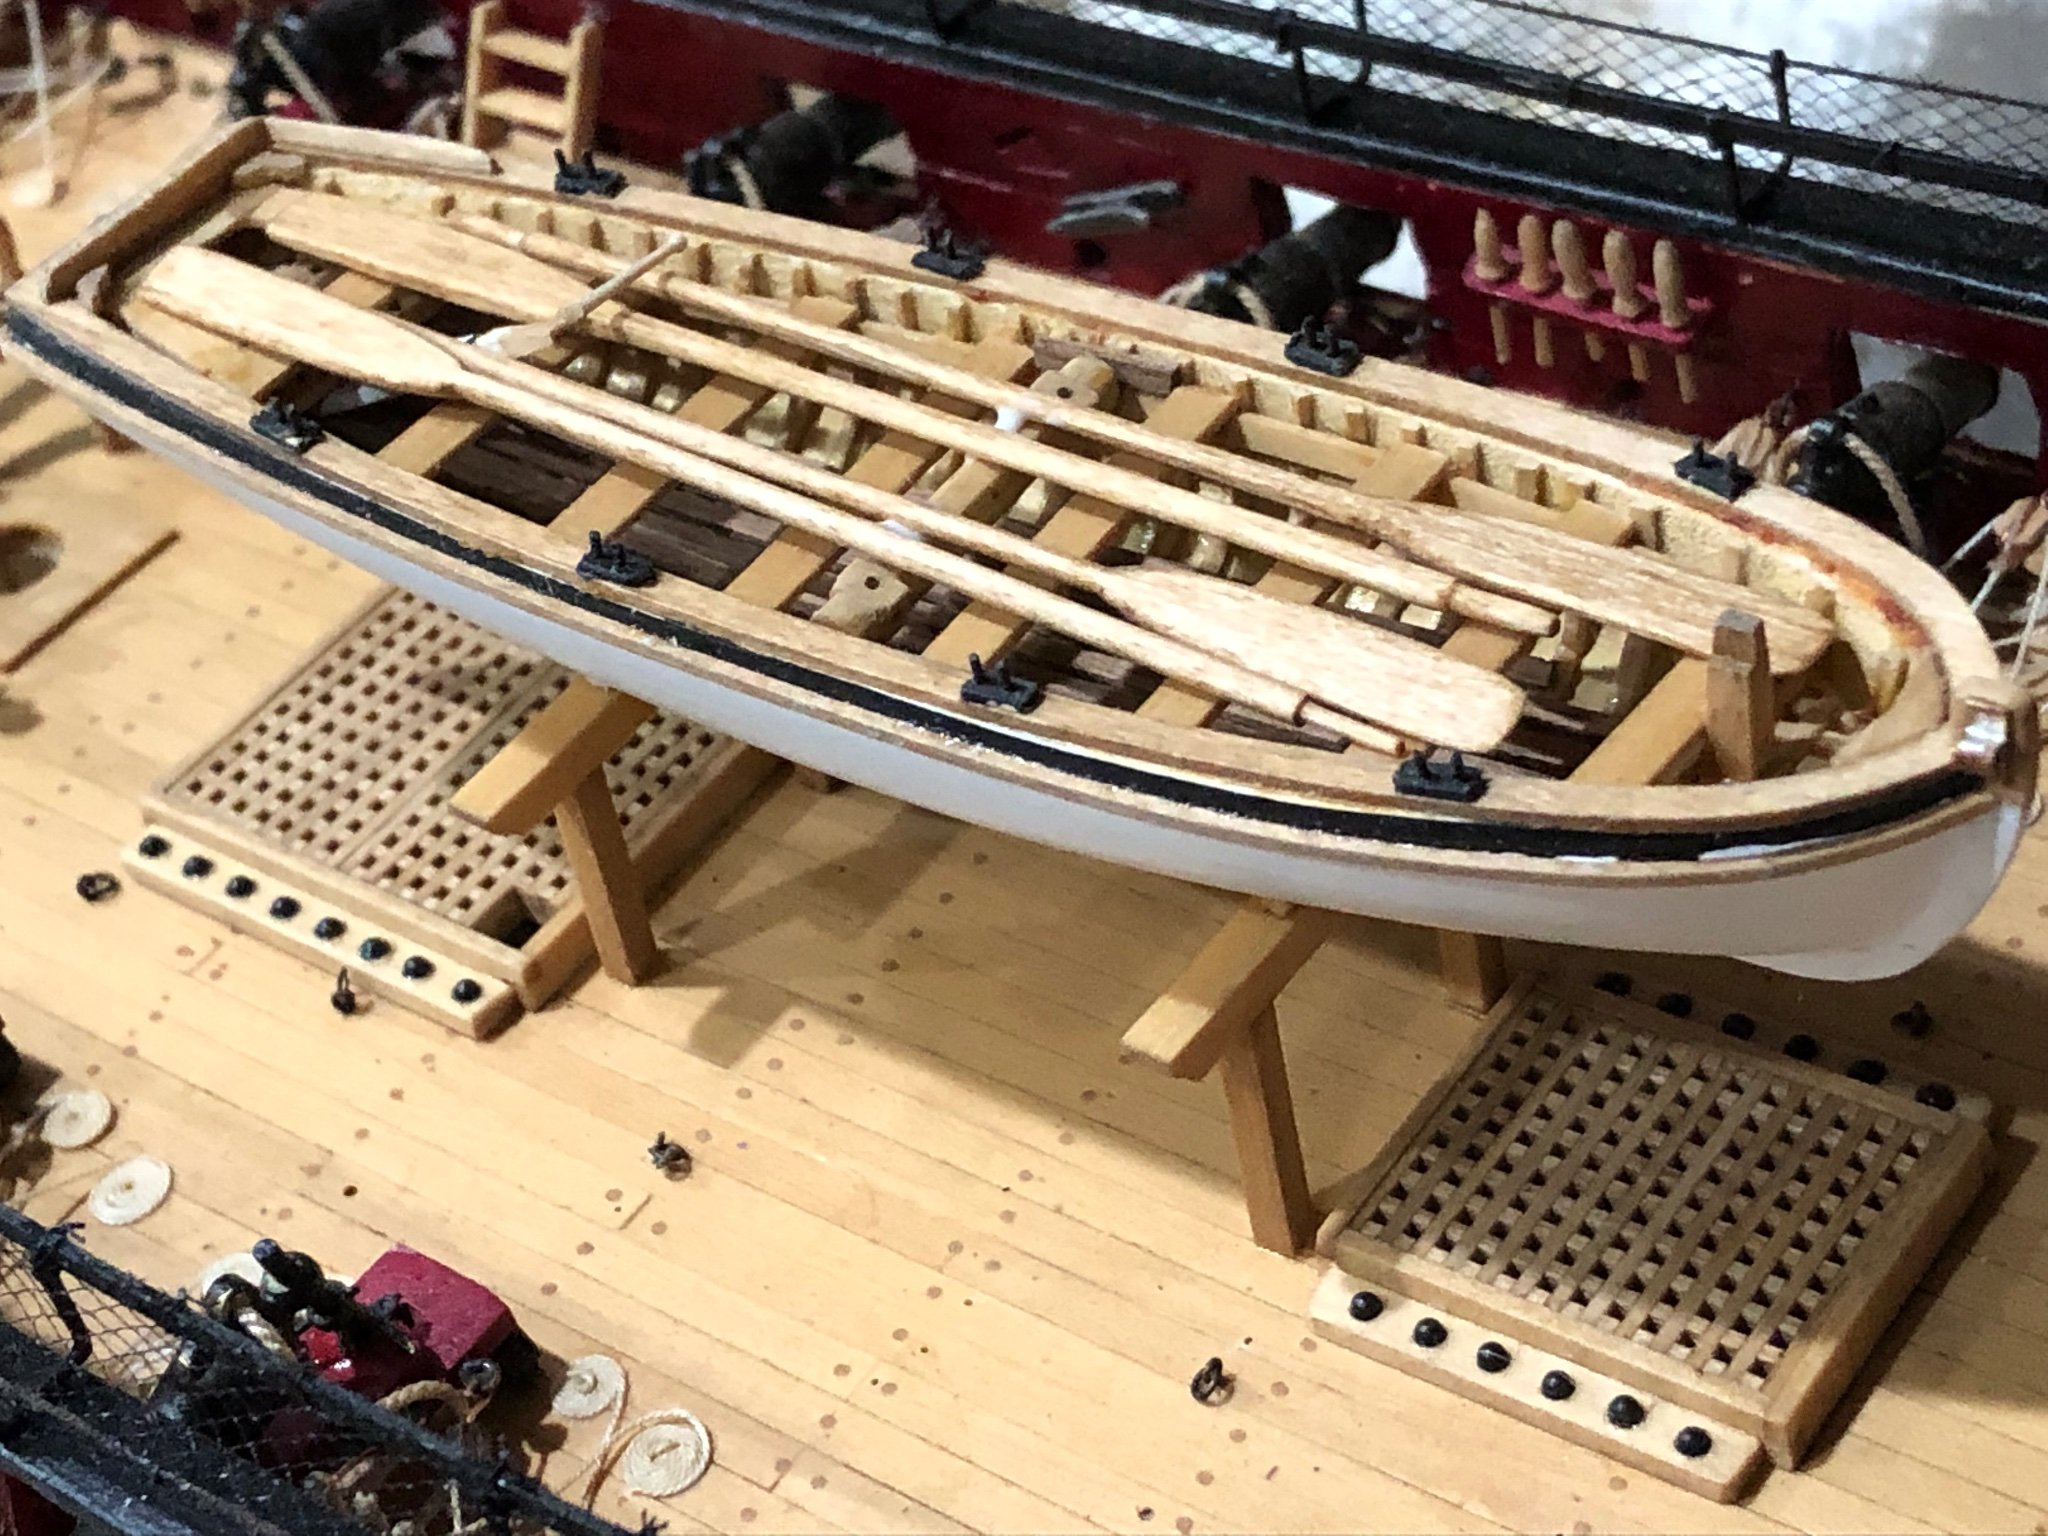
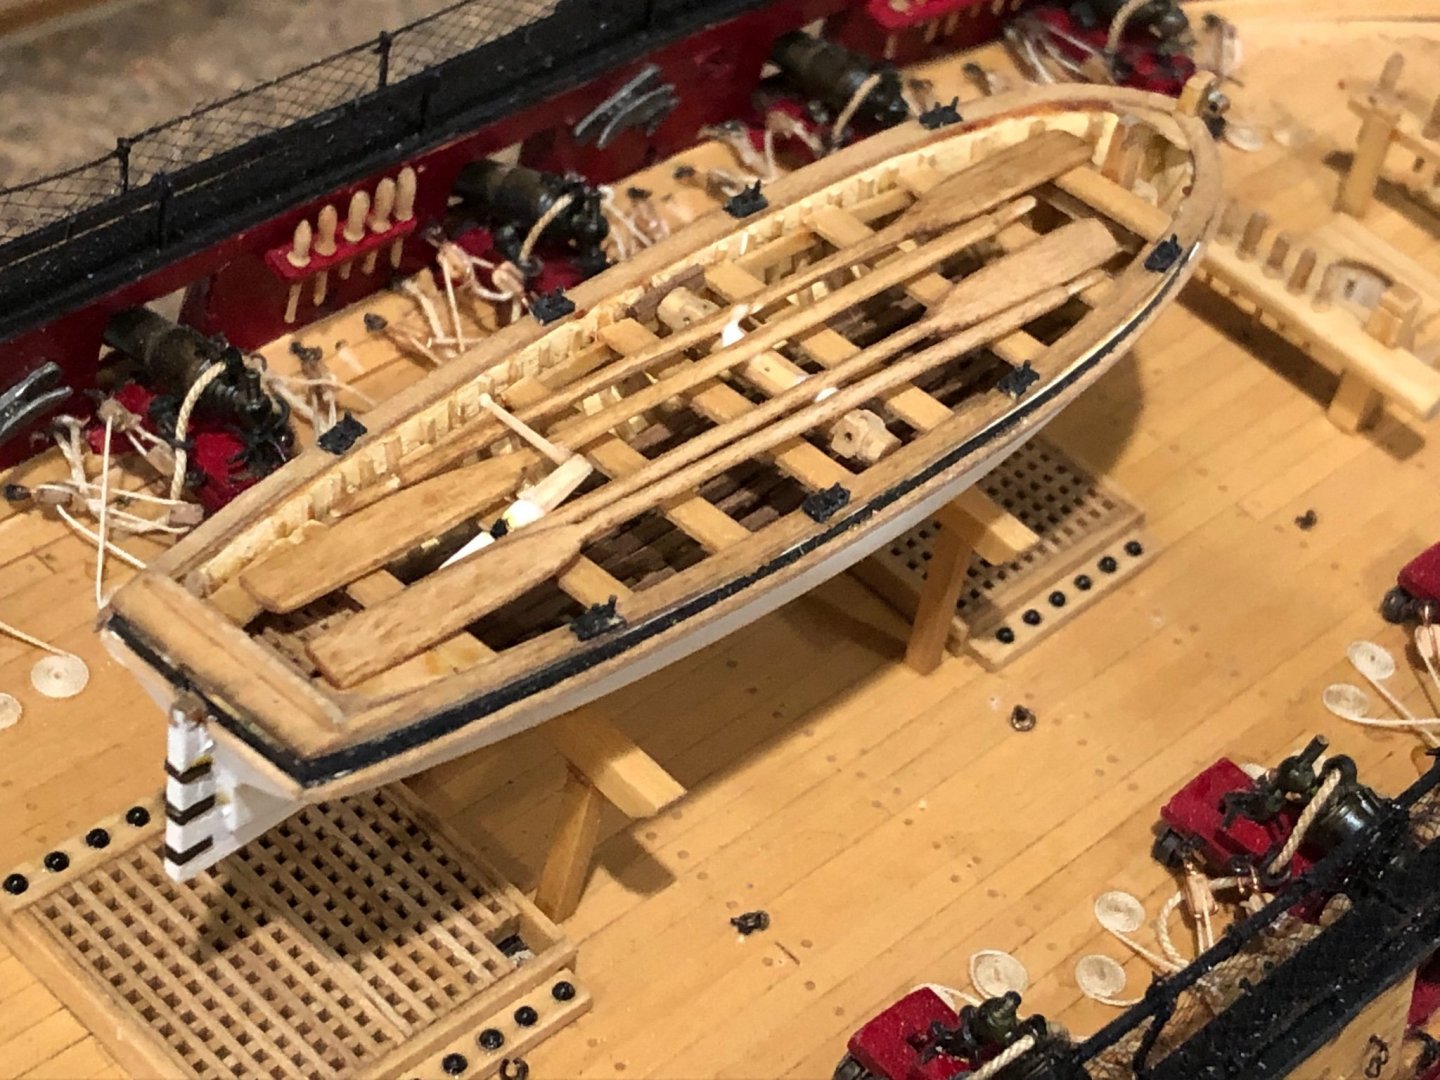
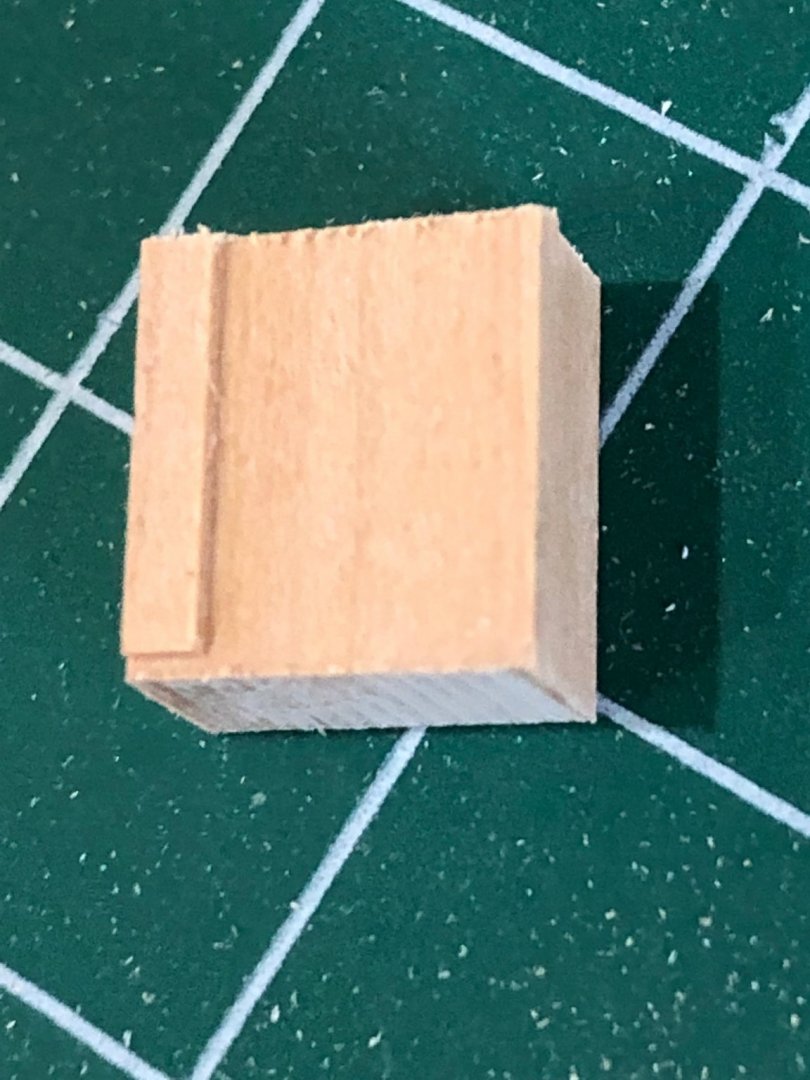
 Slow progress with the little fiddly bits for finishing the longboat but there are finished. Spent a couple days making the sweeps and oars and I'm so glad for spares. Finally got all 4 oars and 16 sweeps finished yesterday and stained them this morning. Got the copper gudgeons and pintles colored black (liver of sulfur) and glue in place. Making the oarlocks was a bit of a challenge as I didn't trust my ability to glue the wood on the top cover and then free hand drill the holes with any kind of accuracy so I took a different approach. I took a block of wood the same size as the oarlock pad and made a set up in the mill to drill the holes deep enough to make 8 oarlock pads. Leaving the block of wood in the setup I sliced of .025 layers like bread. Painted the oarlock pads and glued them to the cap rail and was able to insert .026 copper wire. That done more liver of sulfur to make everything black. (side note LOS does not stain wood or paint) I made chocks to mount on the gallows for the longboat to rest and glued it in place. Tomorrow once the glue has set I lash the sweeps in place and secure the longboat to the rings on the deck.

-
Maury that's a lot of accurately place holes. I've had a similar problem with stanchions where I drilled a pilot hole the dia of the stanchion and then squaring them with a square swiss file. If your stanchions are rectangular keep working the edge to elongate. Keep in mind files only cut in one direction so the going is slow and I used a #0 cut file to prevent exit edge breakout. Just how I did mine but hope all works out. The work your doing is looking good and it showing on how well ECB is coming along. On a side not I'll be in Mystic next month and am working on getting aboard ECB. So far they have not said no and I'll seep trying.
-
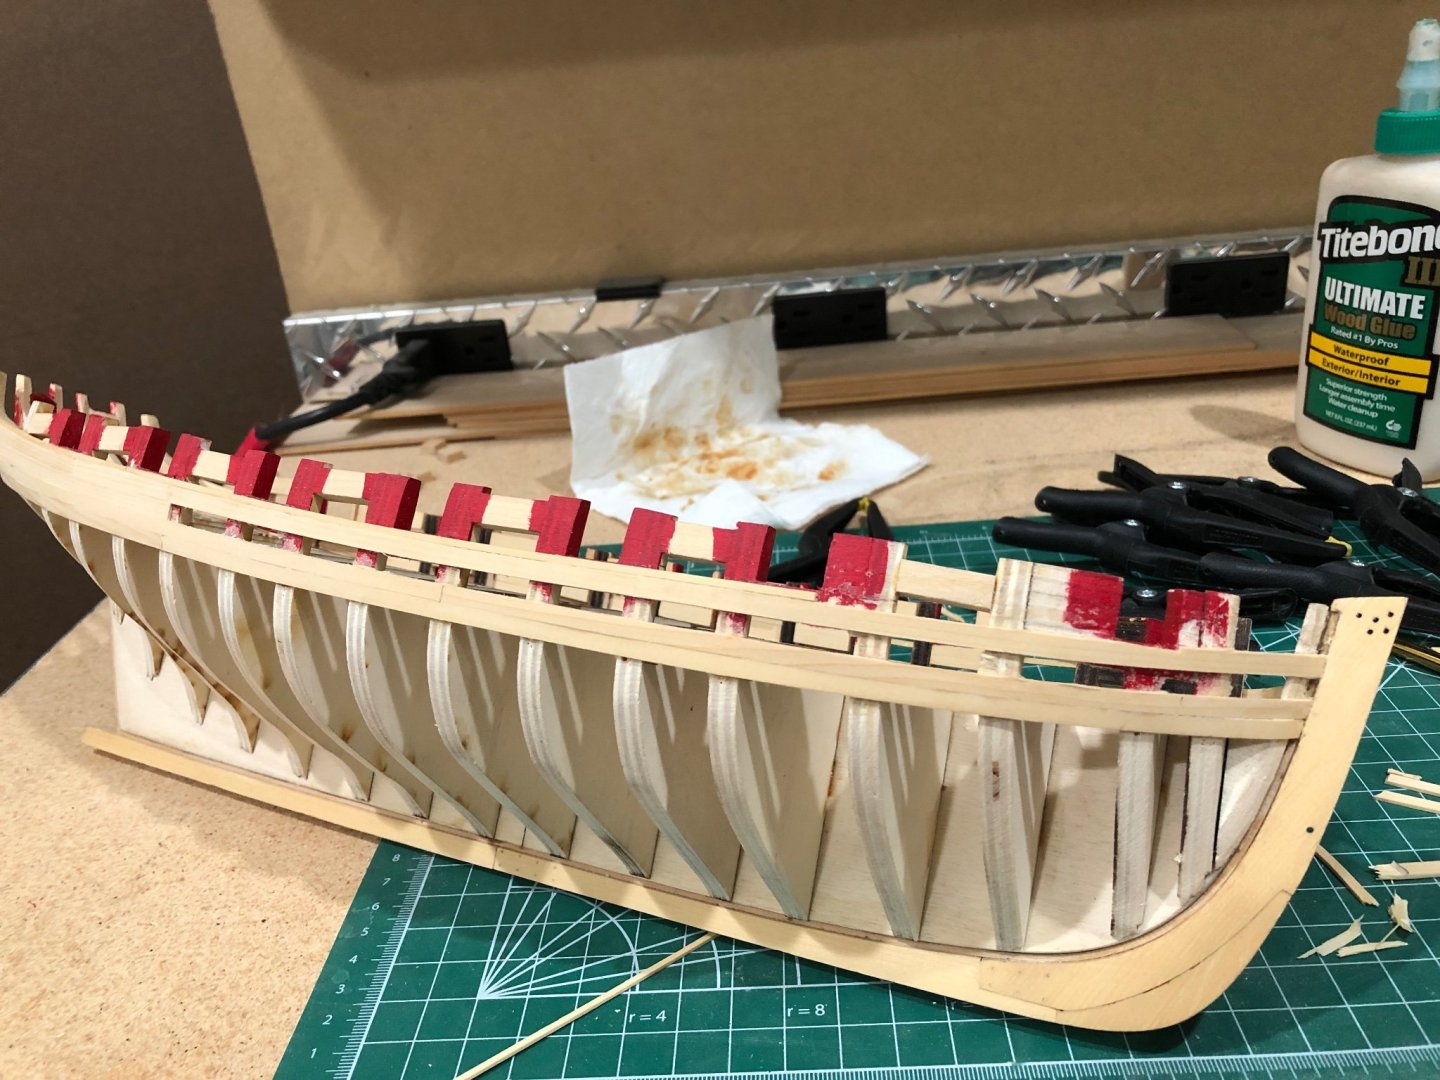
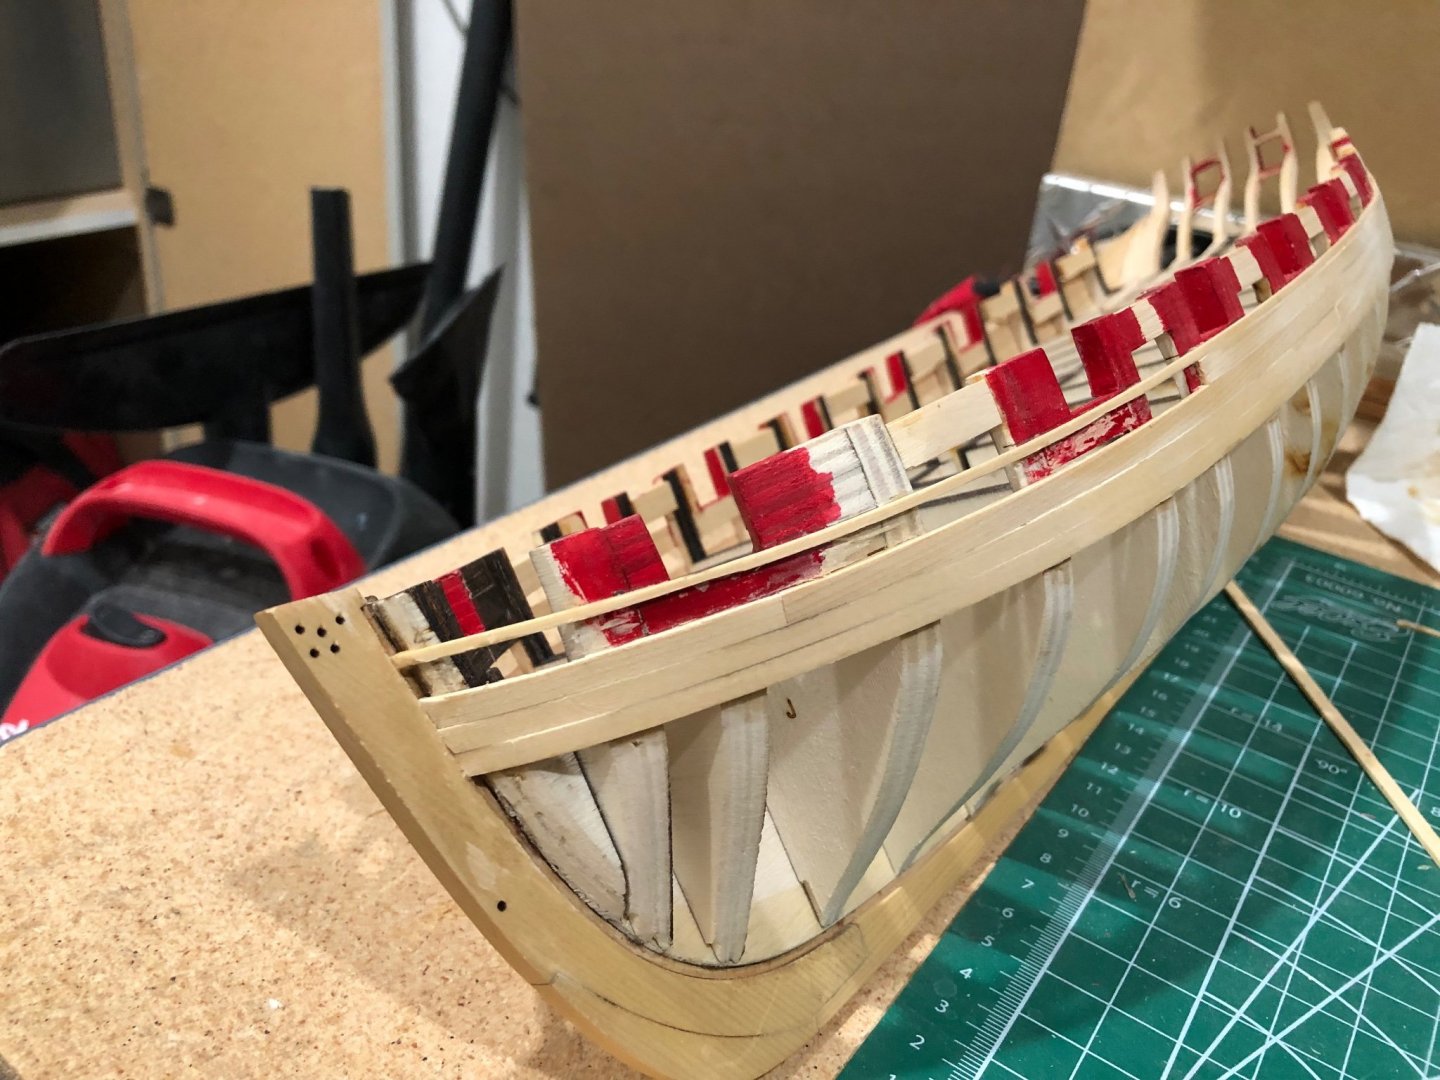
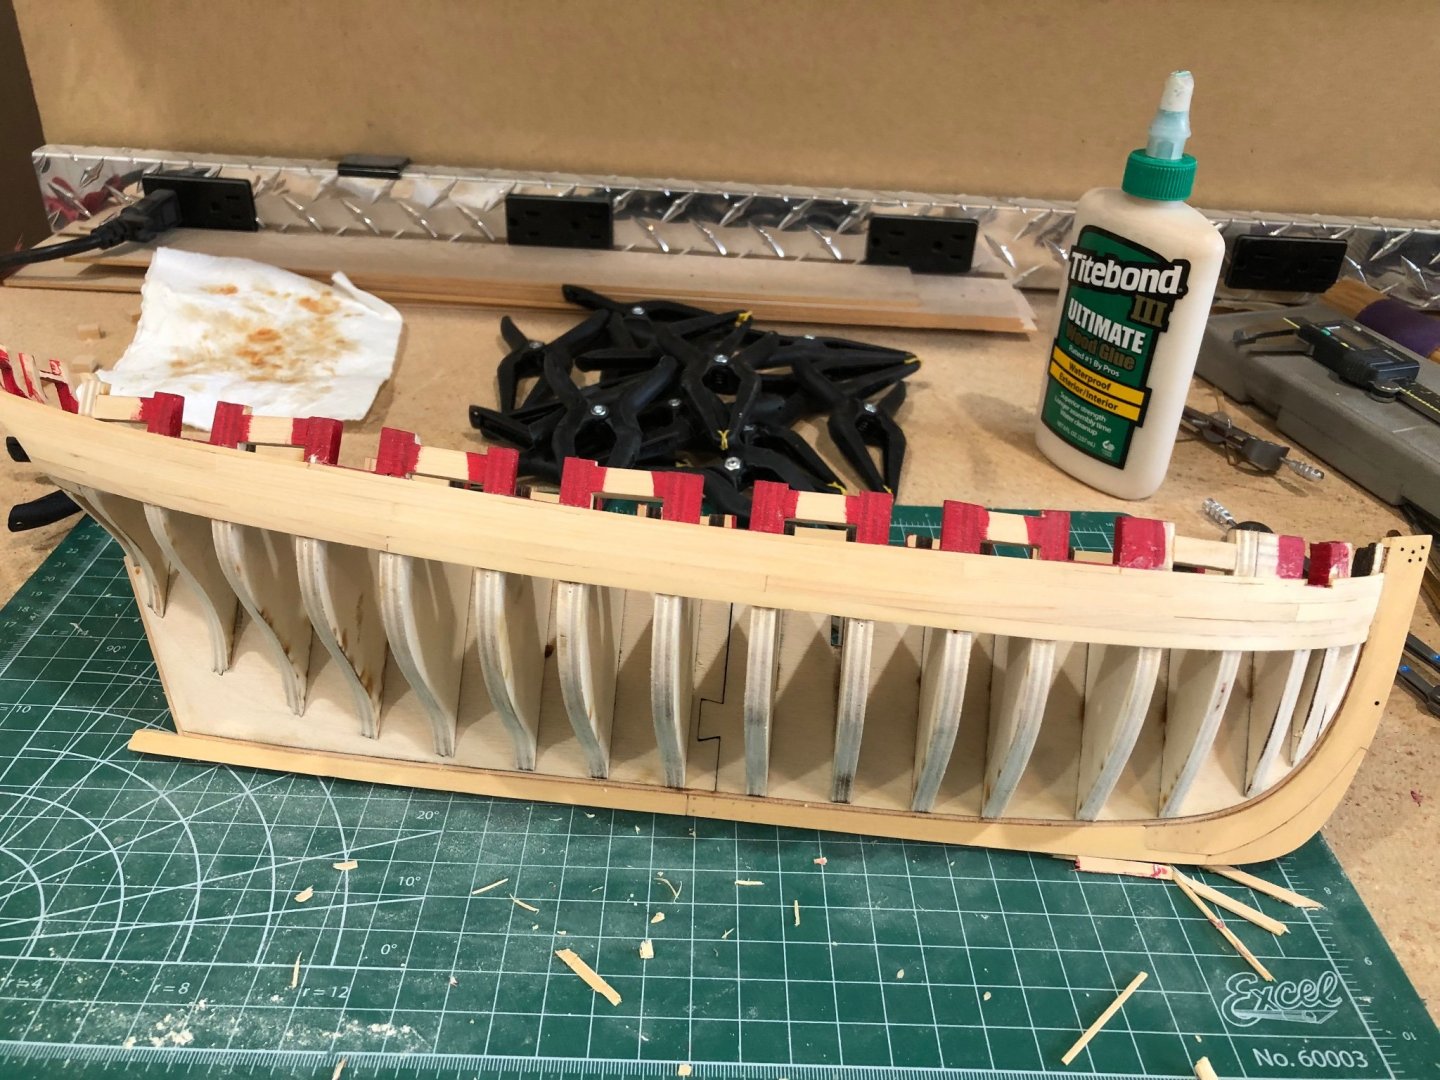
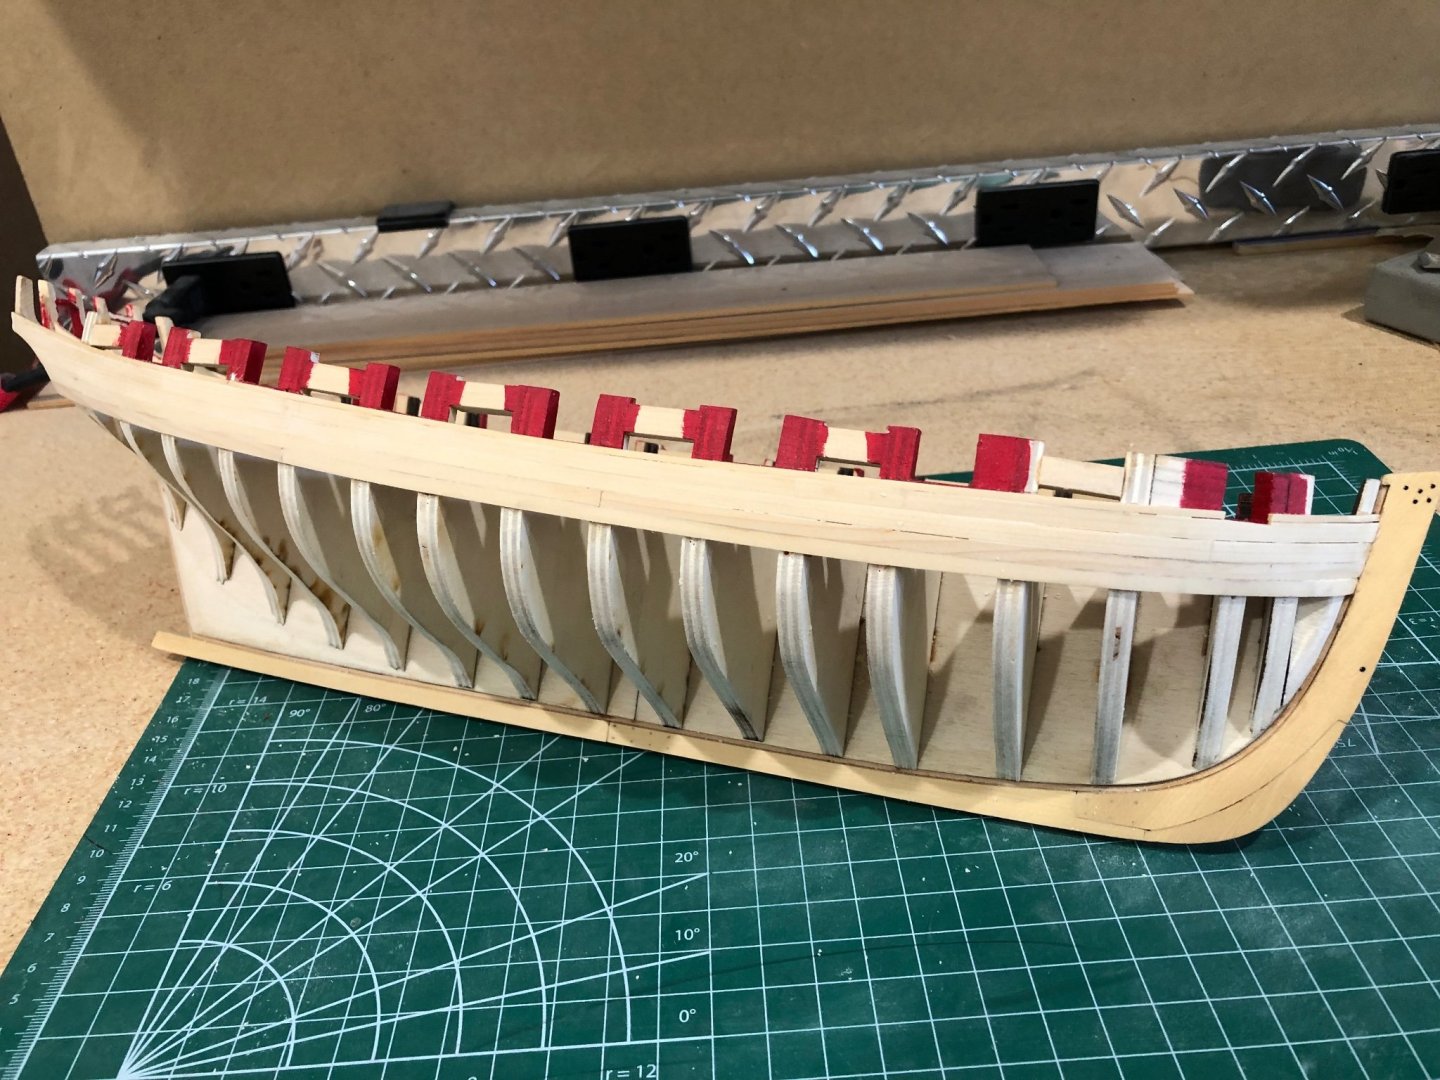
Just a quick update with not much to share. Starting up to the sheer planking and as it has been said before it tedious work. Learning to do over if not happy with result has considerably slowed progress. Cut, fit, glue and do it again. I'm starting to make progress with the fitting and less redo but it is still tedious work. Took a break and planked from the aft port to transom for relief and visual satisfaction. Port side planking My therapeutic visual planking Liking what progress I've done but waiting to see the how WOP looks when its finished is hard.
-
Again I want to thank everyone for following and the likes, comments and suggestions. Completed the planking from wales to gunports 1/16 strip. On the port side I even had to remove the aft section of the wales and planking above. I think the planking is looking pretty good except a small gap on the top wale and first plank of about .01" but I think it will be covered with the second layer of wales. I'll keep looking at it and decide as I go on. I've learned a lot during this process so I'm not too concerned as I know I can fix it if needed. Also knowing I can fix planking allows me to continue planking up to the sheer so I guess that is the next step. completed planking port side completed starboard side
-
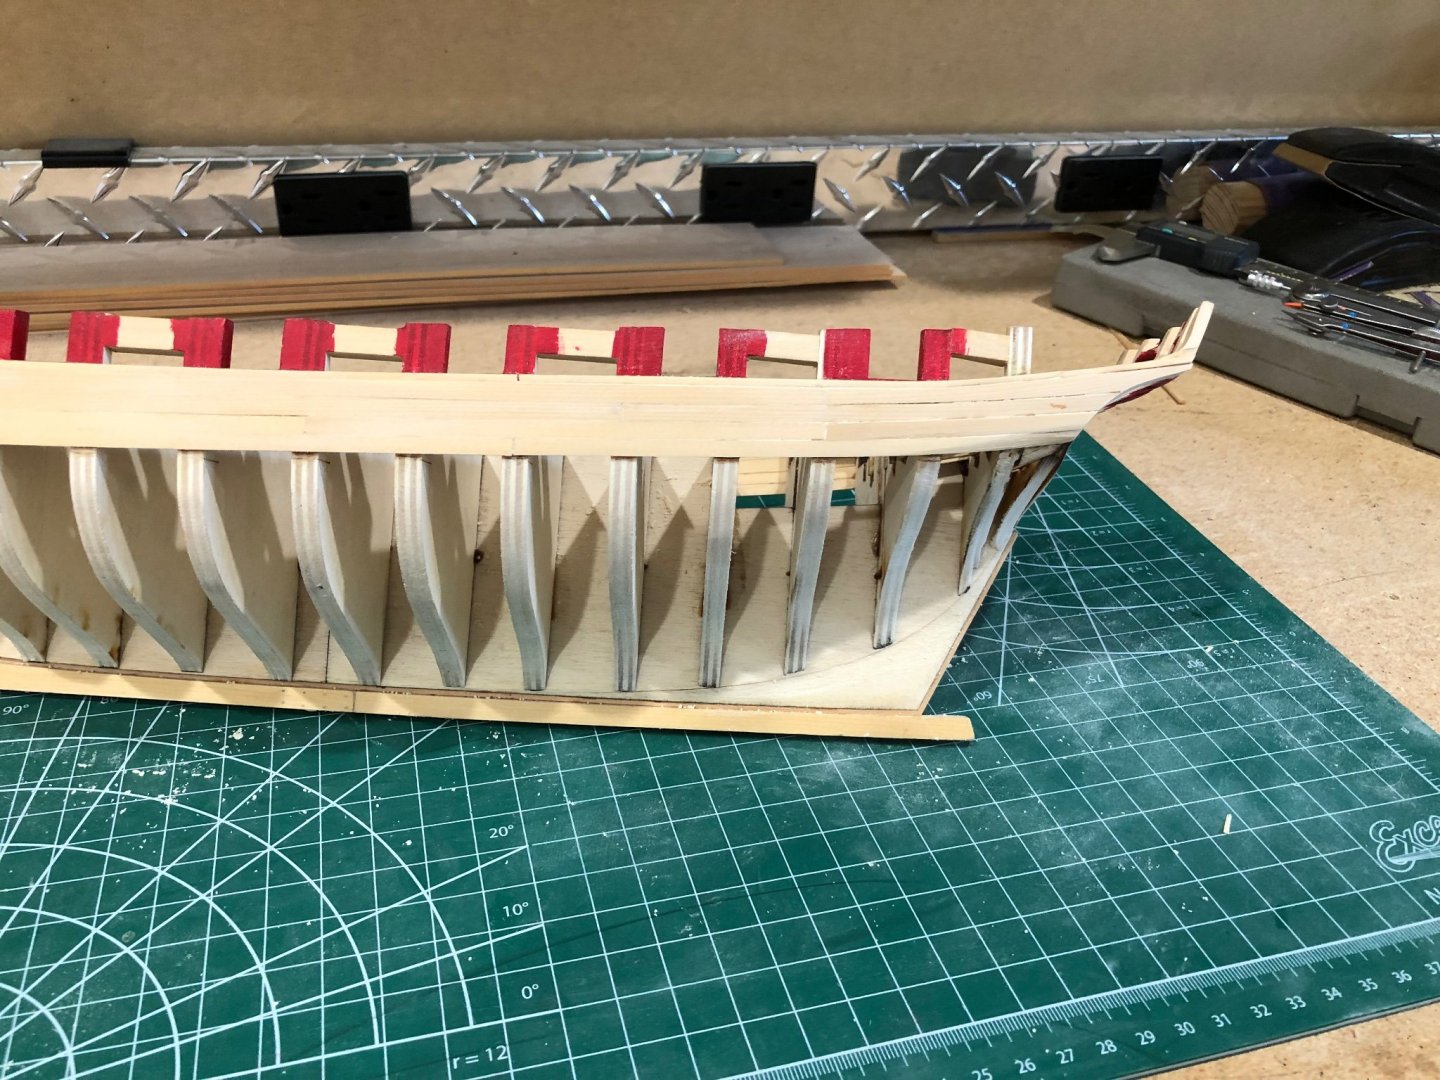
I took option 3 from previous post and removed everything to start a new port sill and sides. I had been wondering how I had gotten the sill off location by 1/32" on the aft end but when I got everything off my marks were still visible and in the correct location. HUH! Made a new sill and how I had forgotten the difficulty to get the sill properly aligned. The sweep of the bulwarks and the upward angle all made for each end to have a double angle cut to fit against the bulwarks. Everything in the proper position and location now to finish sanding and painting. While I have the paint out I'll add a couple of coats to all the ports. Picture of the port removed. Not very pretty. Sill and side back in place with alignment jig in place Ready to finish and paint after installation and fairing Painting tomorrow and then on to planking again for the third time


-
Chuck and Glenn thank you for your sincere and honest comments which I have taken to heart. This morning I ripped off the offending planks and started the process of preparing the bulwarks for new planks. The first strake and 1/16" trim removed from the starboard side. I tookthe advice to not use alcohol or heat to loosen the glue joints. First using a #11 blade to free the plank from adjoining planks then a sharp chisel to dig out the plank. Surprisingly how easy the glue joints broke apart and then pulling the plank free. Same process for the port side Both side from stem Planks added using spring clips to hold while glue sets on starboard side Finished starboard side with no offending gaps Now on to Chucks comment about the sharp rise aft of the last gunport. This created a perplexing conundrum to study and finally solve. Measuring and checking plans along with both sides I finally saw that problem. The sill on the last gunport was not following the true flow of the deck and wales. The fix won't be so easy as I see three ways to approach. 1. Since the forward edge of the sill, where it attaches, to the bulwark is the correct height and the aft edge is too low a tapered shim might be placed correcting the angle to match. 2. Use a paring chisel to shape the existing sill and then add a shim of the correct thickness. 3. Remove the sill and add a new one in the correct location and angle. Not sure how this happened but then maybe I don't need to know just fix the problem and move on. Planks removed ready for fixing the sill , cleanup, paint and planking. During this process I've learned that it is better to fix the problem and sometimes the problem is worse than the fix. I have a few areas on the wales that I'm not happy with but there will be a second layer to cover these areas so I decided not to fix the minor gaps along the wales. Again thank you Chuck and Glenn you've made me realize that I'll be much happier with my Cheerful model without the good enough attitude. As I progress I'll be looking for any and all input you might offer.


-
Short update on a lot of work. Finished planking above the wales to the 1/16" strip. I measured each bulkhead and divided by 2 and then took a strip and laid out the measurements for shaping. It took what seemed to be forever to get the strips shaped to fit in the space but when done the results were ok. Hoping the wipe on poly will darken the joints and make gaps appear less prevalent. I've debated for two days if I should rip off the planks and even at a dark point to order a new one and start over. Pictures are of planking with light amount of sanding. Continuing on with the planking to the sheer


-
Thanks to everyone for the comments and likes. Glenn I looked at the skylight photo and could see the need for planks underneath. The side 1/64" rabbits have still to be beaten into submission on another day. Well I did overthink the 1/16" moulding and 1/64" rabbit my little jig blocks worked nicely. I didn't glue them on the sills rather held them and drew a very fine line with a 6H lead sharpened in a drafting pointer. The 6H lead left a line and a small indentation in the soft AYC but not the plywood. I just painted a fine line of glue and aligned the strip using the drawn line as reference. So overthinking again reminded of one of my past engineering manager who said "Its become time to shoot the engineer and go to production". I went through the supplied 3/16" sheets and found several at .188 thick when ripped to strips and placed between the wales and moulding they fit perfectly but will have to cut to fit as the gap narrows. Tomorrows job. I'm really enjoying this part of the Cheerful build especially after reading about the rabbits around the ports and critical distance between the wales and moulding. It is fun to watch it become more of a ship that bare bones. My thinking of the 3/16" strakes is as follows: 1. One long strake 2 Shaped to correct width at each former 3, edge beveled 4, bent per Chucks method 5, verify fit after bending 6, cut to correct lengths 7, installed Ideas, comments, suggestions appreciated Couple moulding photos
-
With the port and starboard first layer of wales completed it was on to ripping 3/16" wood into 3/64" strips and 3/64" sheet into 1/16" strips. I'm a little concerned about the 3/16" material when measured it is .182 to .184 thick when it should be .188 thick. It doesn't seem like much but when you have multiple strakes or in this case 2 that adds up to be short .010. When I roughed measured between the wales and the top of the sill 2 .188 strakes + 1/16" + 1/64" fit perfectly. If I'm Short I'll soon know because It'd leave a .010 gap. As I was told I might be over thinking this but I'll see tomorrow. Ensuring a 1/64" (.0156) rabbit below the sills and the sides of the ports was causing me a challenge. I made a small set of jigs to create the gap. I rummaged through the scrap and found a piece of boxwood that I surfaced using the mill and then made another cut leaving a .016 tall lip. I've used glue sticks to temporally fasten pieces while working. A little water or alcohol will loosen the bond and the parts come apart leaving the sticky glue to be cleaned. Both port and starboard wales Spent some time touching up paint on the capstan and skylight that I built why I was away and decided I'd have some fun with them 1/64" alignment jigs Aligning the sill Aligning the sides Tomorrow we'll see it my jigs idea will work. Fingers crossed


-
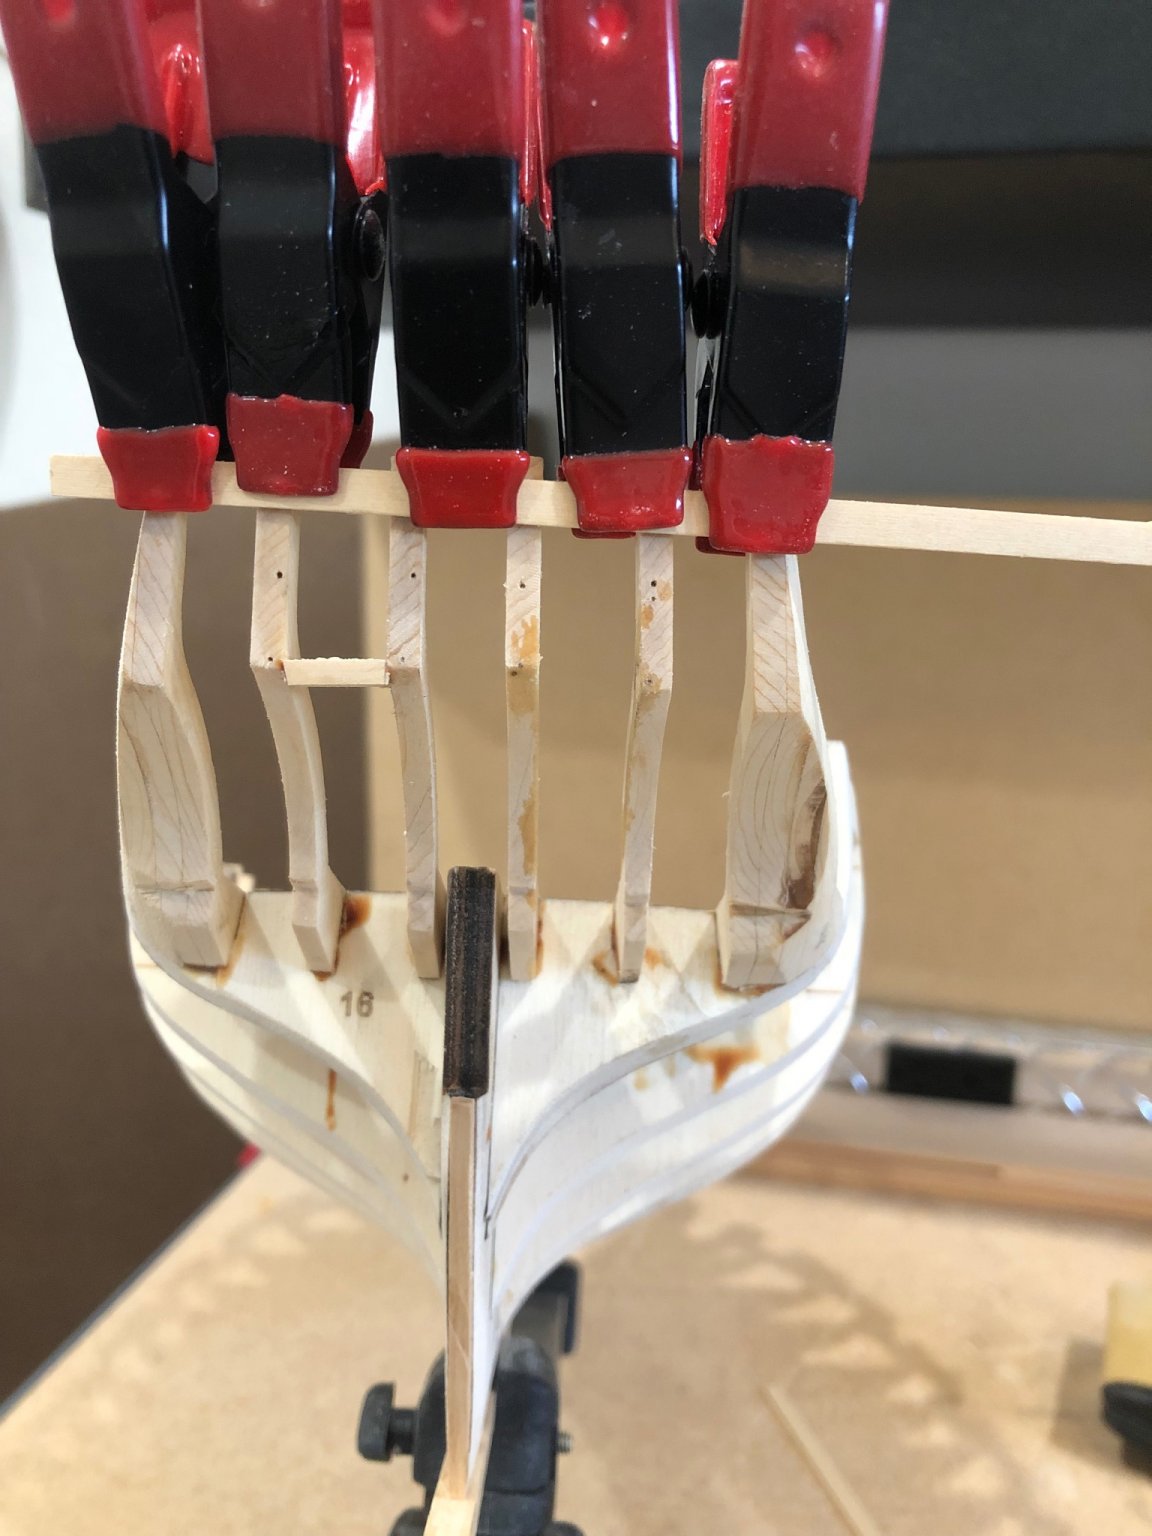
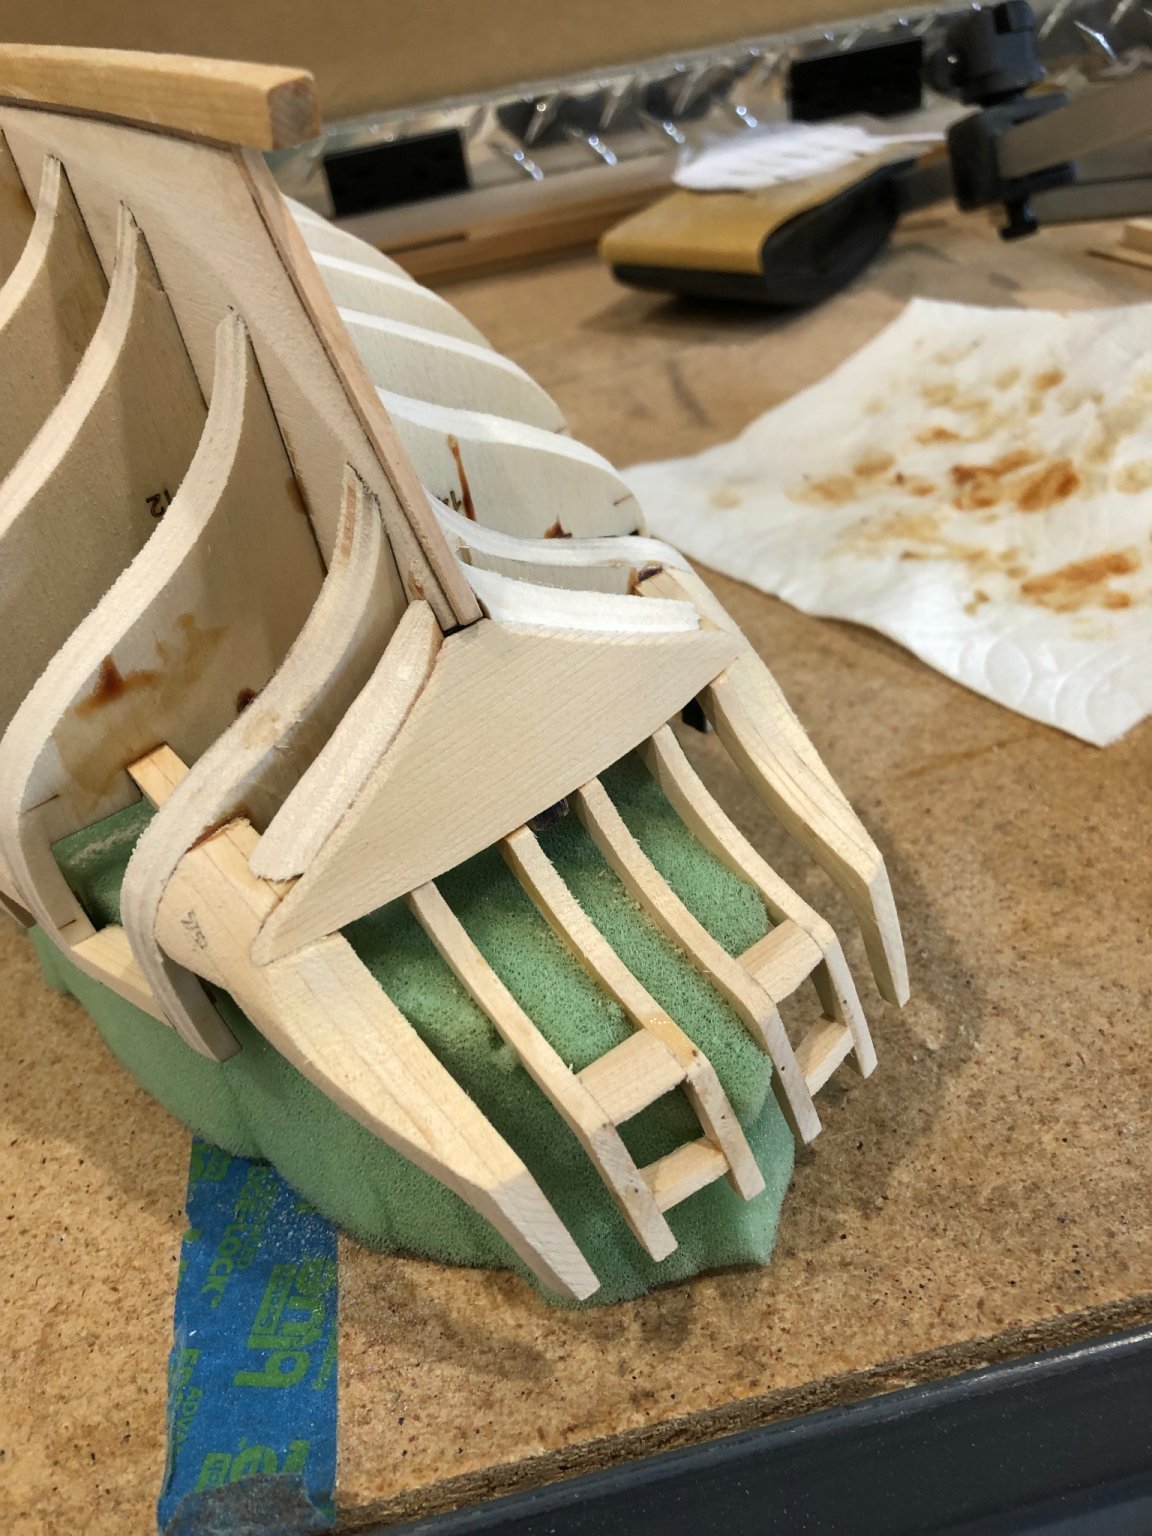
Hi Paul I just browsed your log and only have one thing to say WOW!!!! I only use the clamp to let things dry and keep it up off the bench. In an earlier post I had a picture of how I use a upholstery foam cushion cut to fit inside the bulwarks when I working of the bottom. This evening I'll go back to your log and have a good look.
-
We had a little 4th celebration last night and since I was away on fathers day my girls gave me a coffee mug that makes me laugh so I thought I post it. Using my new mug at breakfast

-
Looking at the pictures I forgot to mention the glue smudges will only be on the wales as they will get a second coat. Henceforth I will be more carful and if I have any I'll wash them off before they smudges set up.
-
Thanks to everyone with the nice comments and likes it really does make me more motivated to keep going and trying to be better. I look at Cheerful logs for inspiration especially Glenns Cheerful he just finished. Thanks Glenn for the hints on using ebony. My work area is an enclosed single car garage that I've made into a shop with airconditioning and separate air filtration. I alway use the dust vacuum system whenever cutting or sanding but I be extra careful with ebony. Now onto Cheerful wales. I put the starboard side wales on today without any trauma. I used large elastic bands to hold the strakes in place while the glue set. It was very easy to plank after all the fairing i'd done the first strake laid down perfectly flat along the marks and the second snugged right up and also laid flat to the frames. What a pleasure to work on and look at the results of my hours of fairing. As people say time spent paying rewards. The side view From the stem from aft view I haven't done any sanding yet I think I'll wait until above the wales is completed. Happy 4th of July to all


-
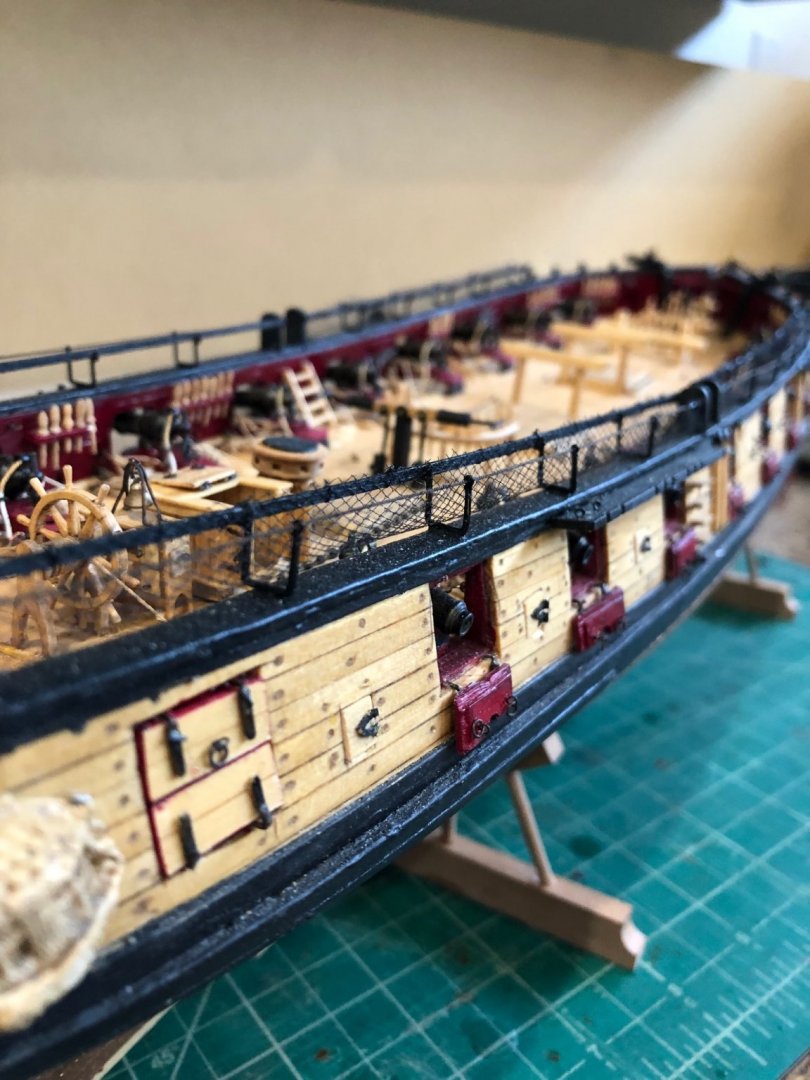
Were home from Colorado. Spent quality time with friends and enjoyed the beautiful scenery and weather. Spent the day tying knots and lacing the netting on the hammocks. I had ALMOST completed the longboat awhile back but now that the netting is done its time to finish. All the little parts need to be made so I slowly got going again. Just a picture of the netting completed What a job my hand are tired and my eyes are blurry so its time to rest on the 4th. Happy July 4th
-
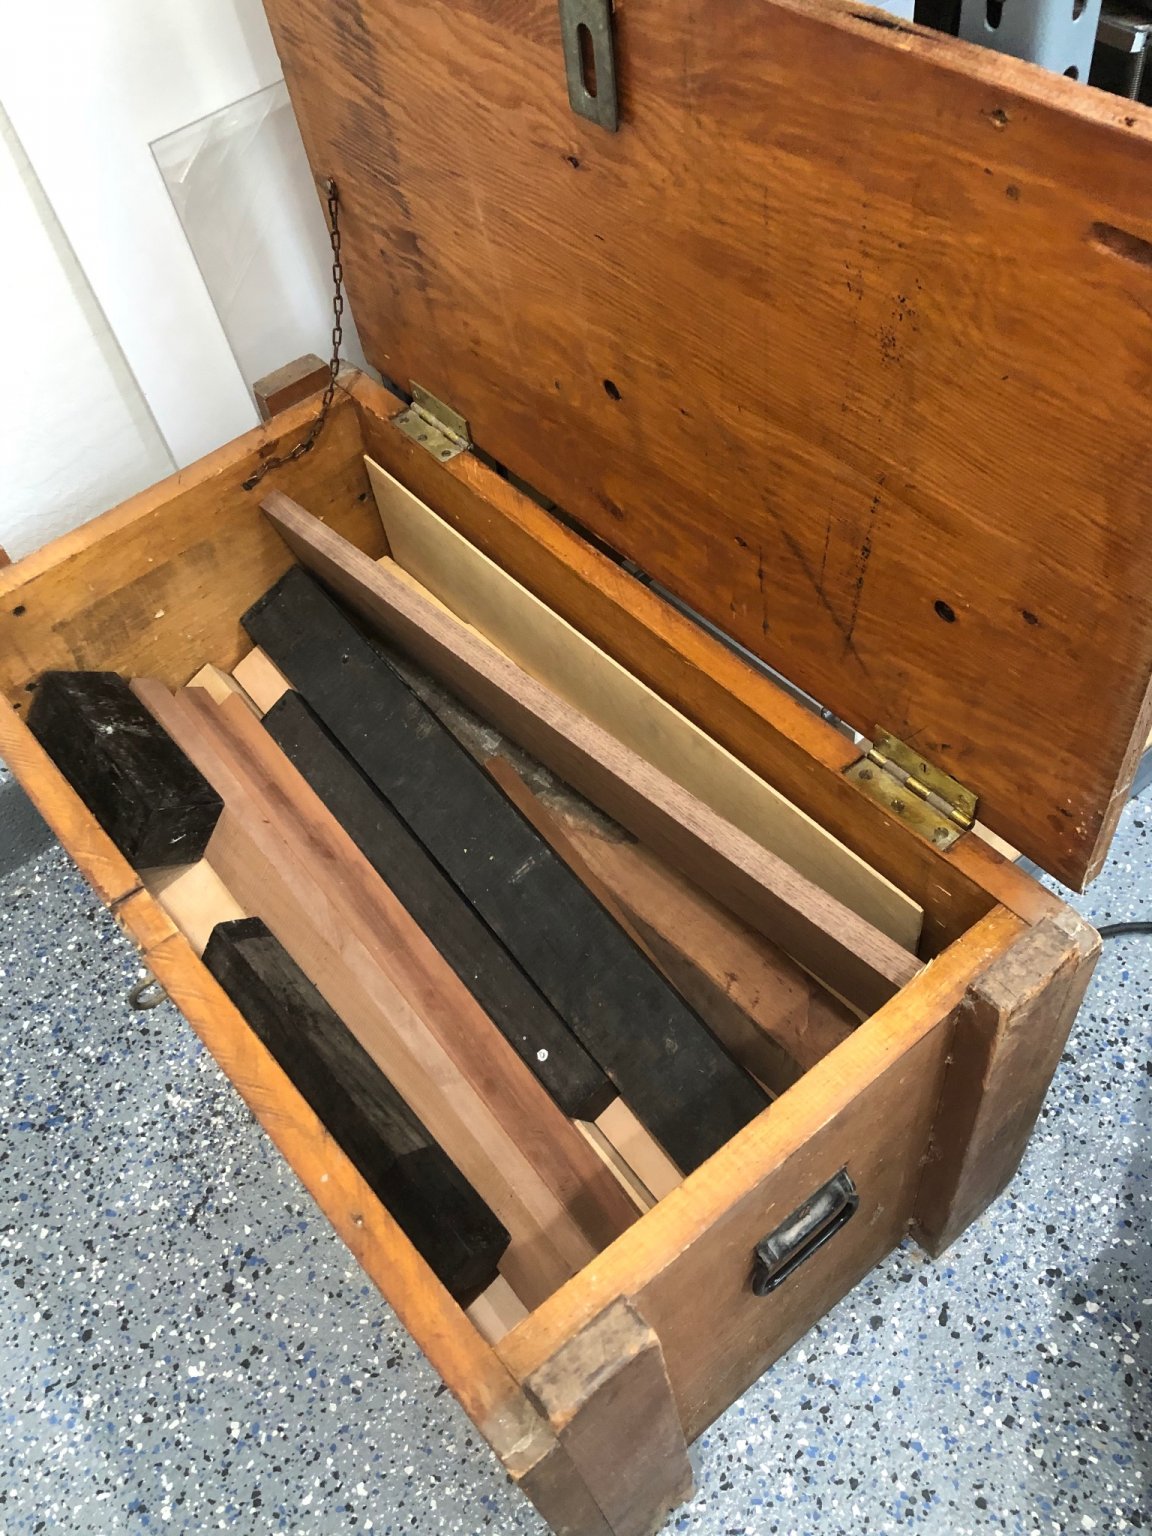
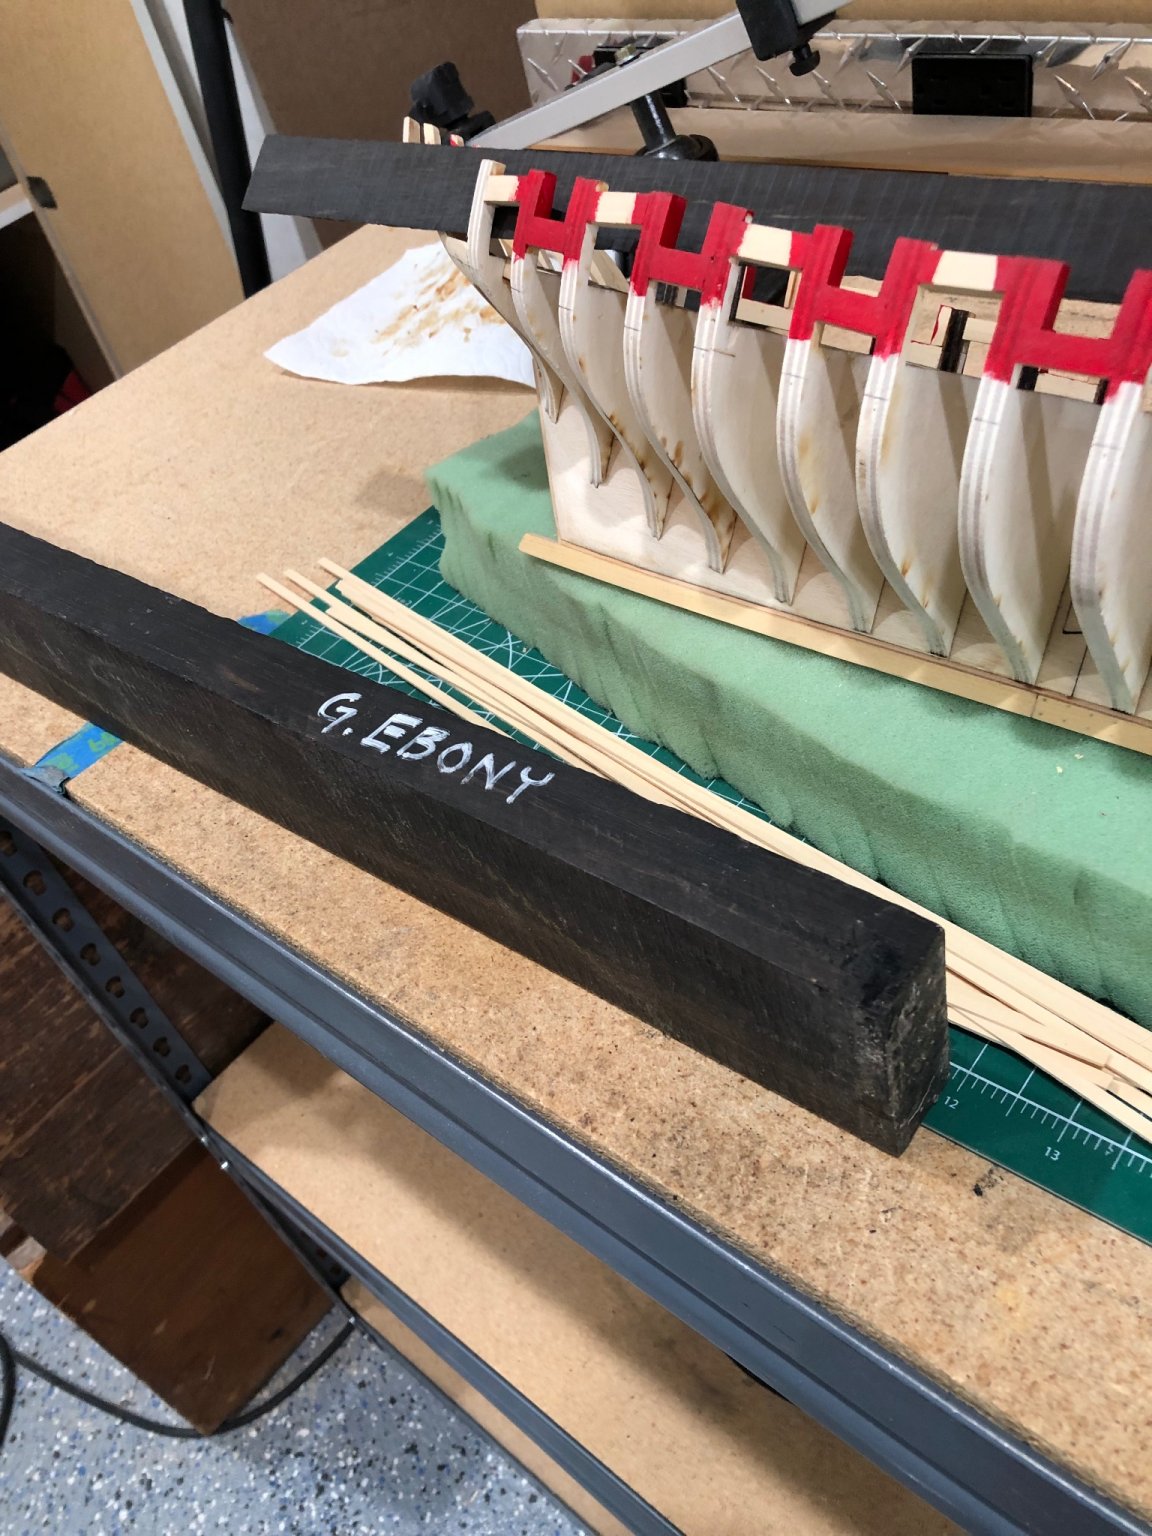
Finished painting the ports and also finished the forward most ports which I had left with the plywood exposed. Might not have been the best but it is what I did so I sanded between coats of paint and added gesso before the next coat. You can still see the plywood layers but not as visible with the surface being smooth. Now on to planking the wales and up to the cap rail. I had bought the wood from Syren to mill my own so I spent the afternoon making planking. The wales call for 5/32" (.156) by 3/64" (.047) and when I measured the 5/32" wood it was slightly oversized. Decided to use the Byrnes thickness sander to get the sheet down to .156 I know that the couple mils would creep up and may cause problems up to the sills and the 1/64th strip so anal or not I did it. Then I ripped 18 strips a little oversized so I could again use the thickness sander bringing them to .047. Tomorrow I'll start planking slow and steady here. Last year an old modeler in the Phoenix area sold me his lathe and when we were talking he said that he had box of wood I could have. I never turn down free wood. To my amazement the box was a wooden crate filled with Pear, Cherry, Walnut, Lime, Ebony and many pieces I still don't know. So I decided plank the wales second layer with Ebony. After ripping and sanding the shop was a mess of sawdust so I took a piece of ebony to the bandsaw and ripped a strip off. We will see how it goes as I've never worked with ebony. Ebony plank 2"x3-3/4"x 33 Ebony strip ready to be finished I used a covid mask when cutting the ebony any ideas of how to sand and finish for the wales


-
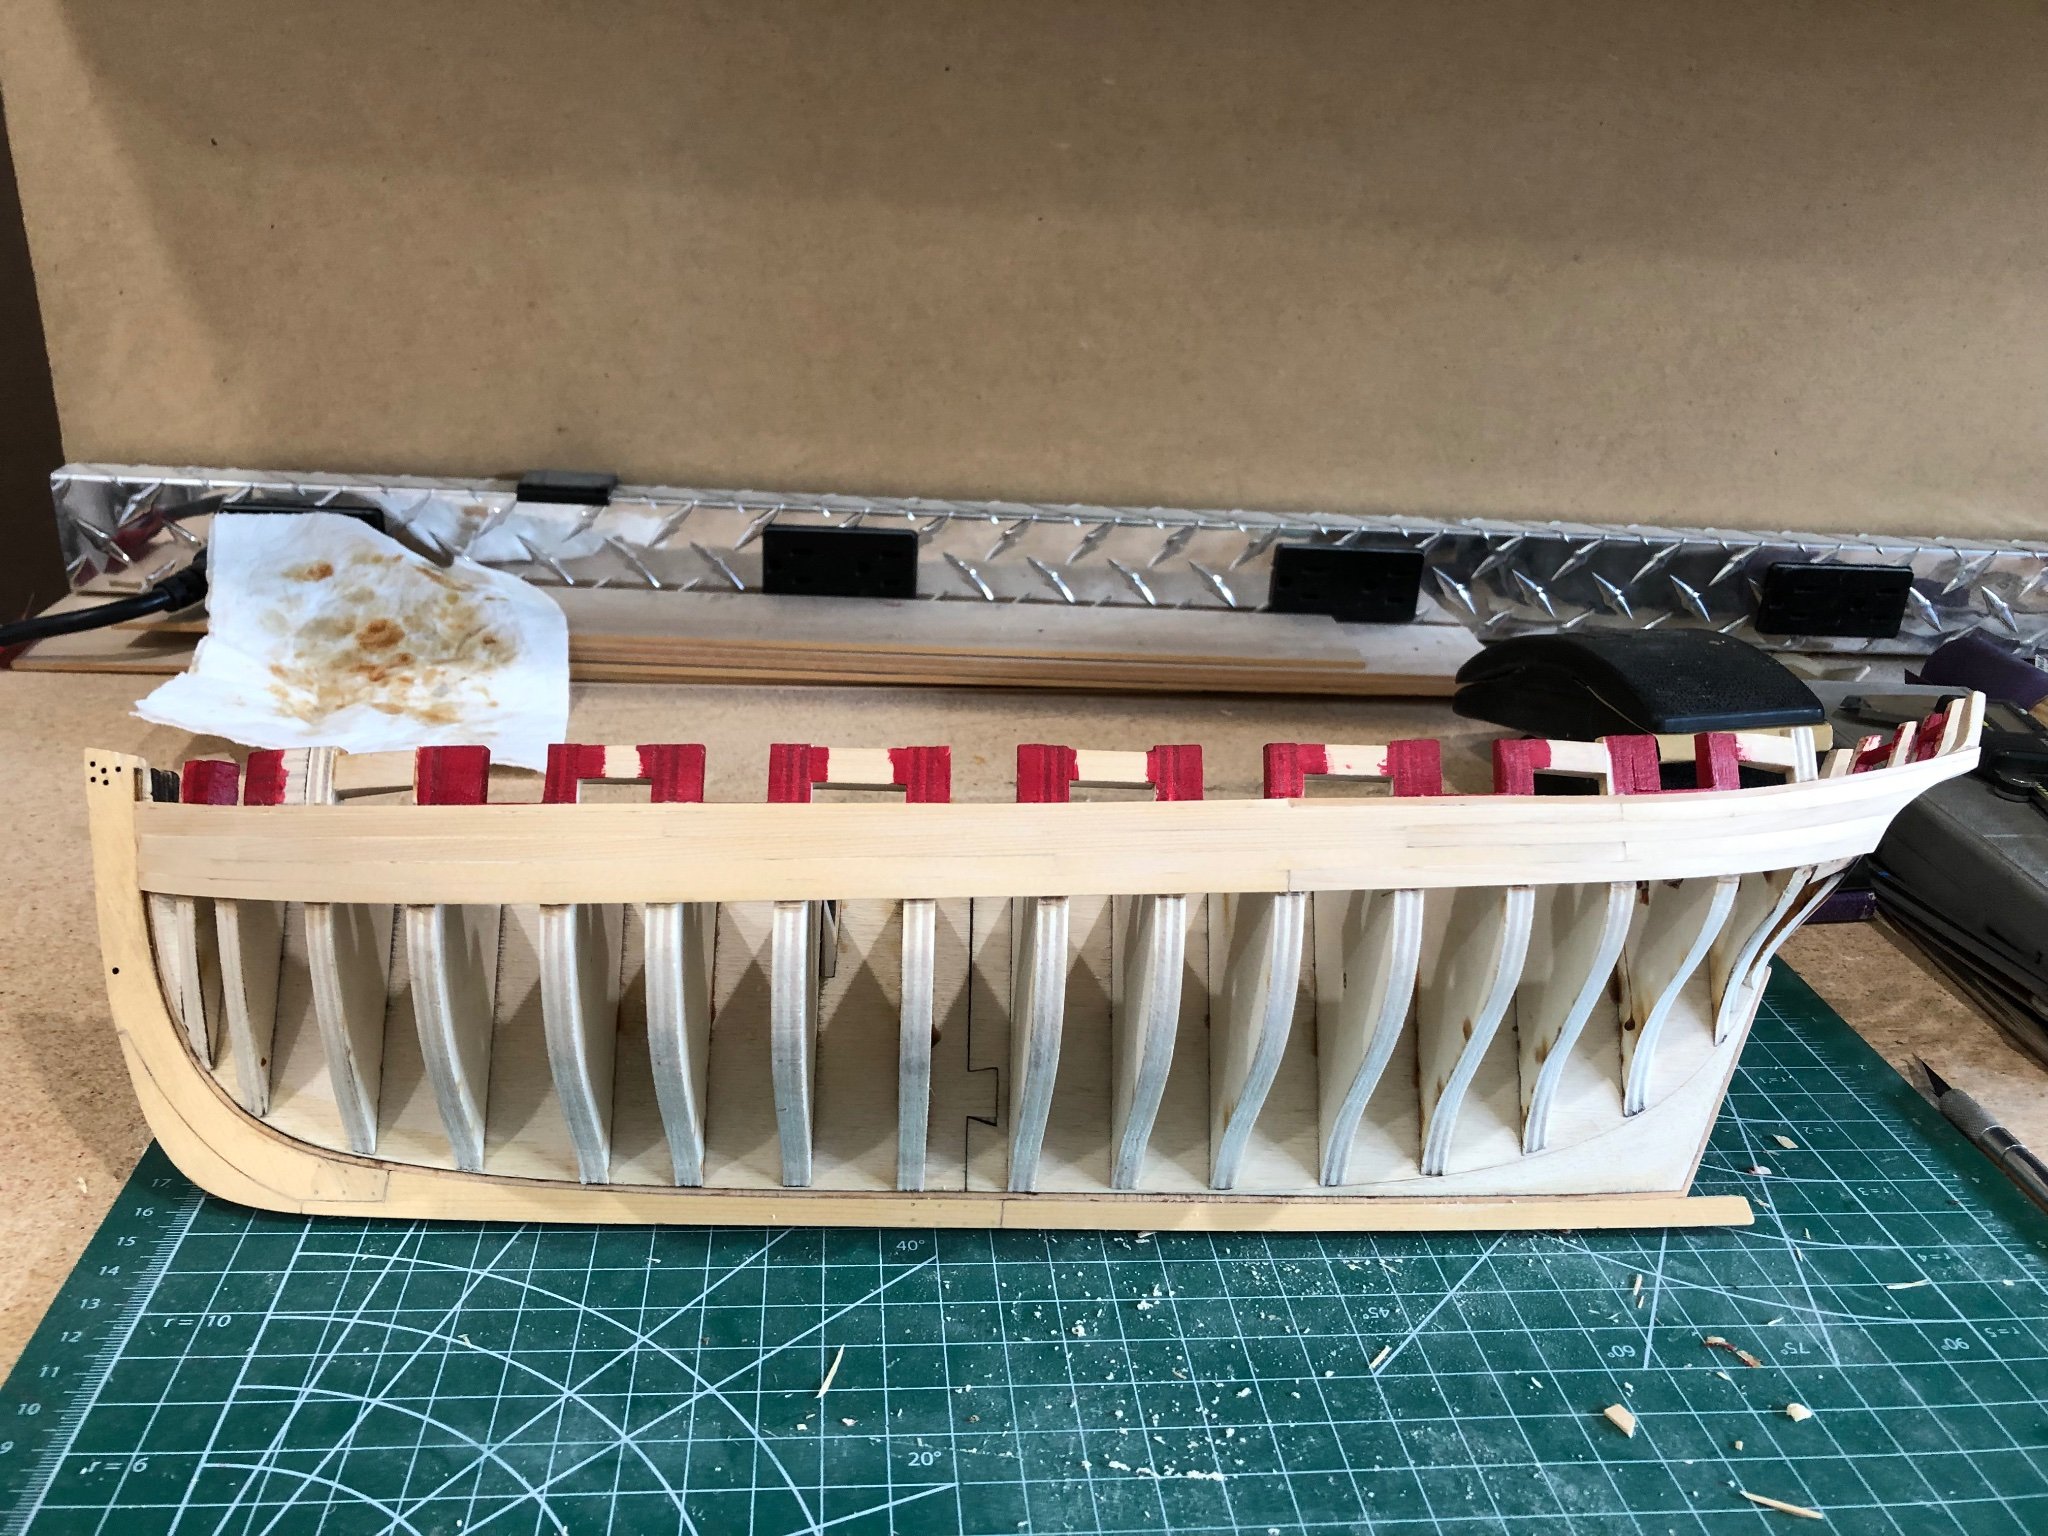
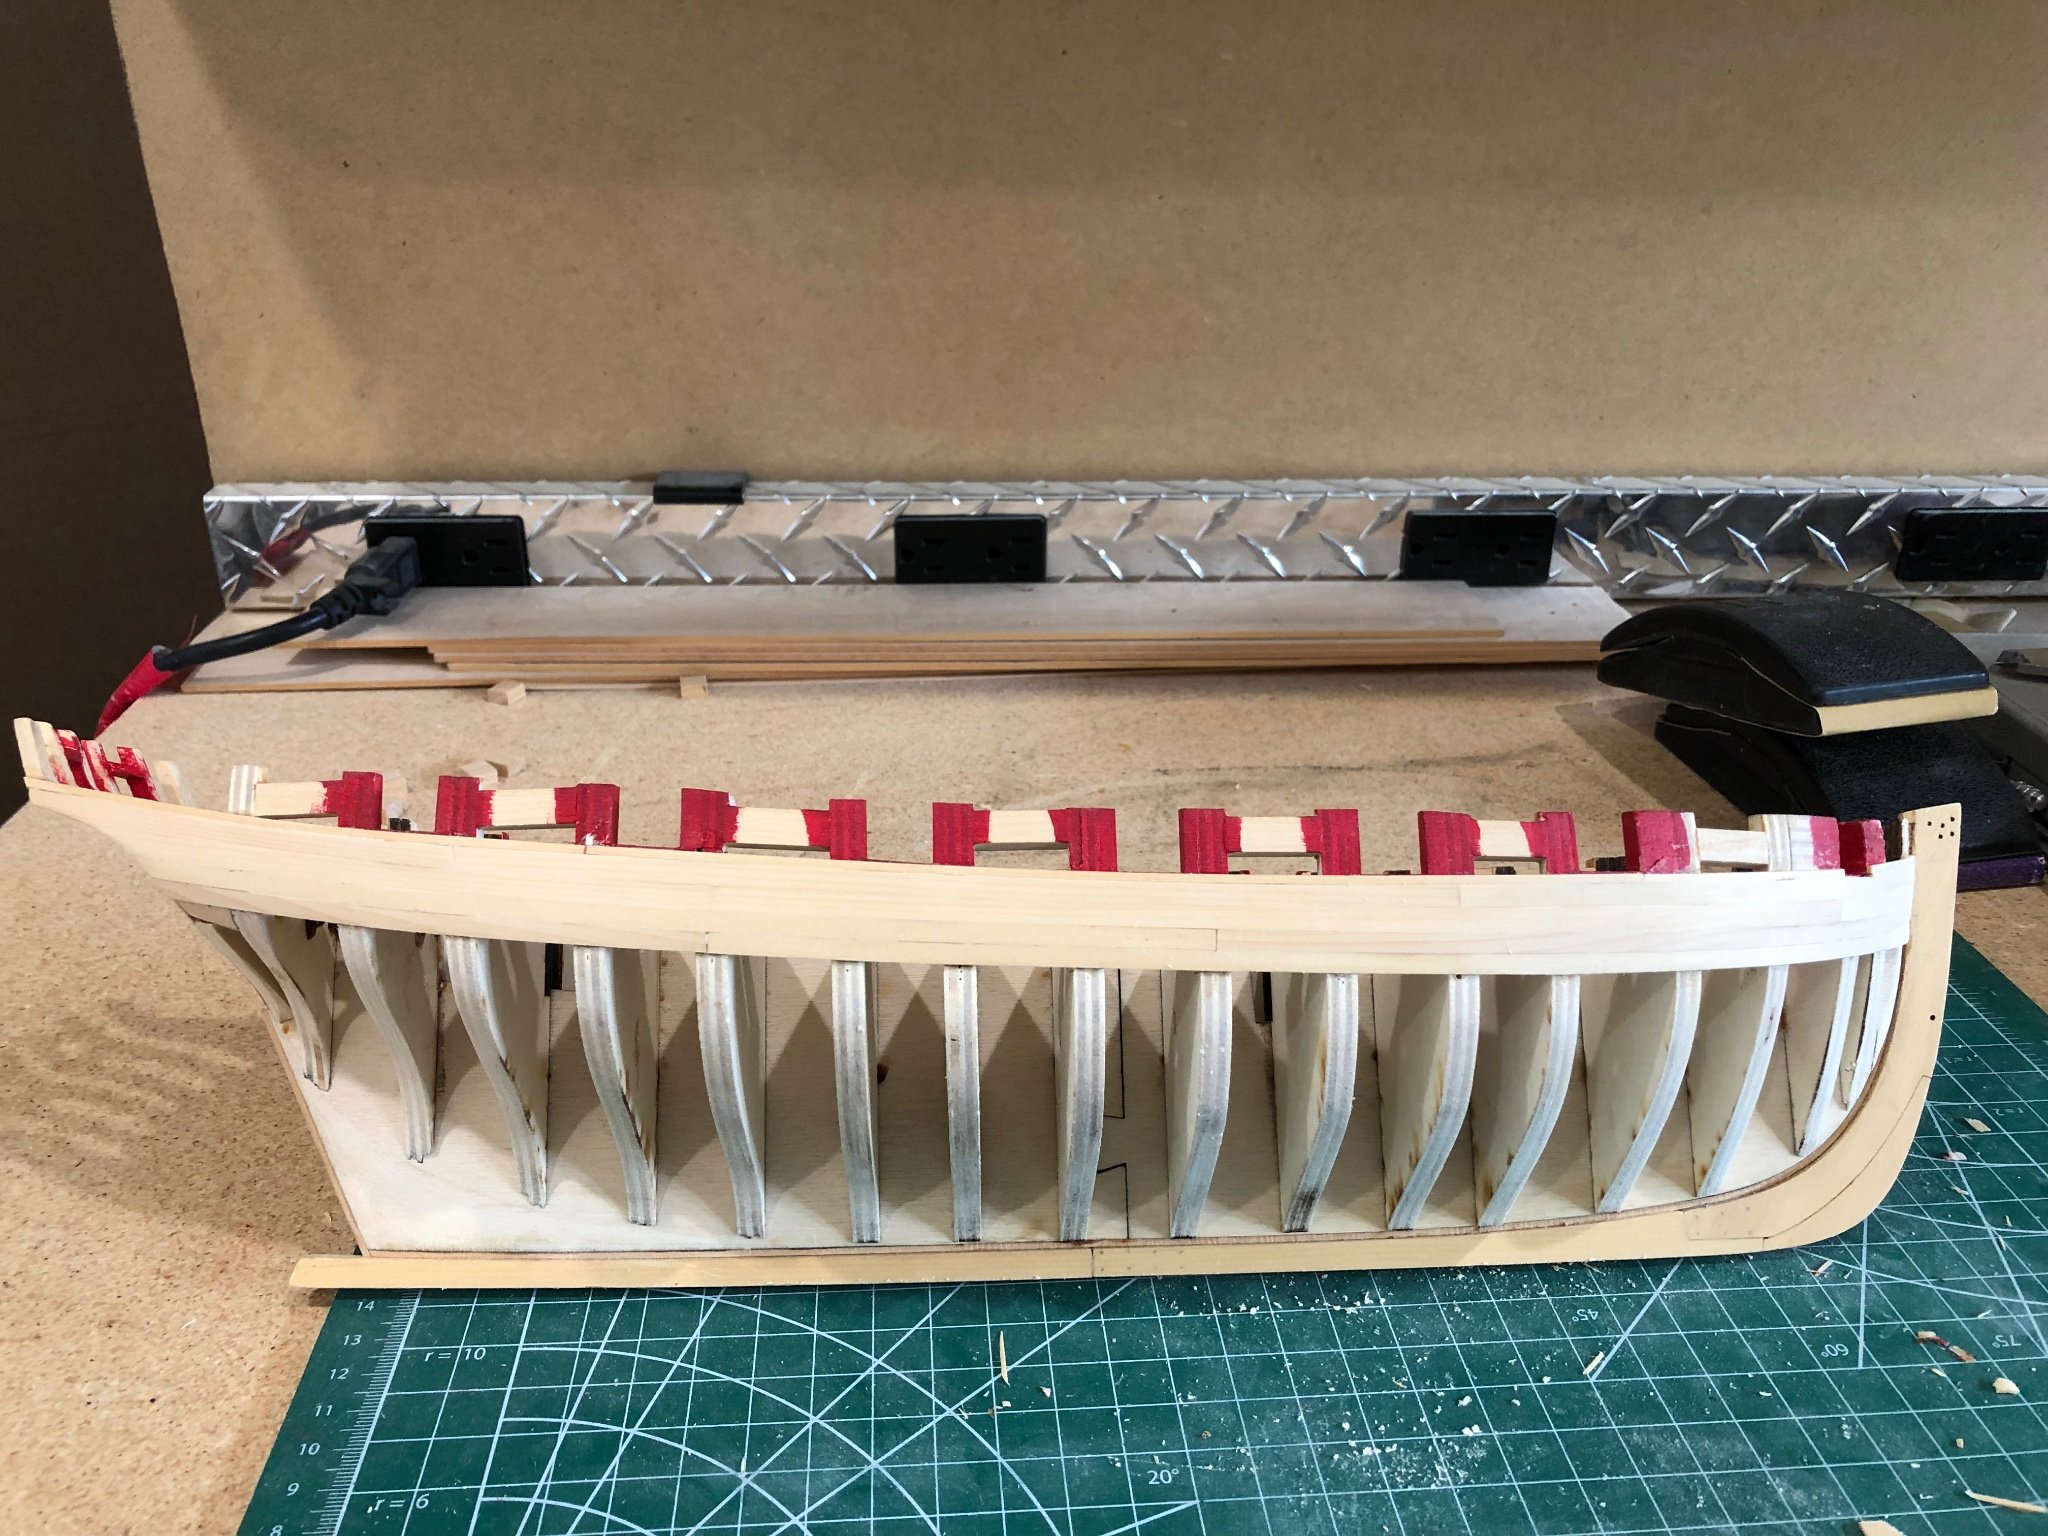
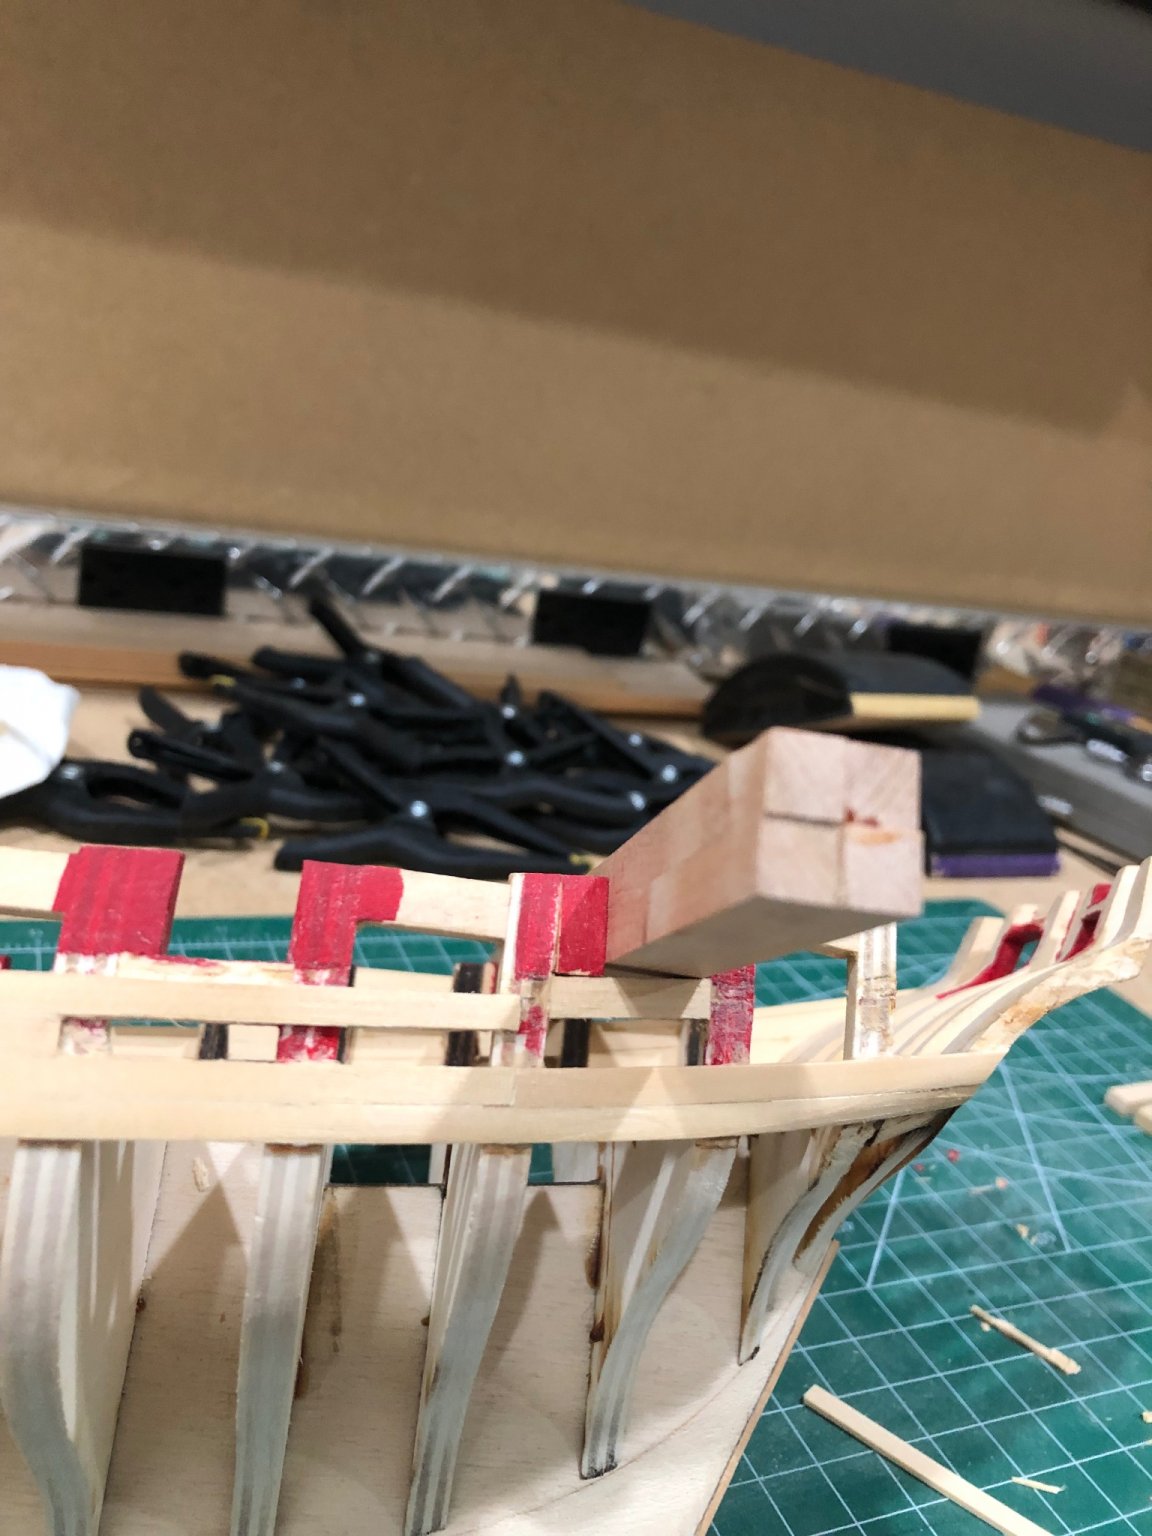
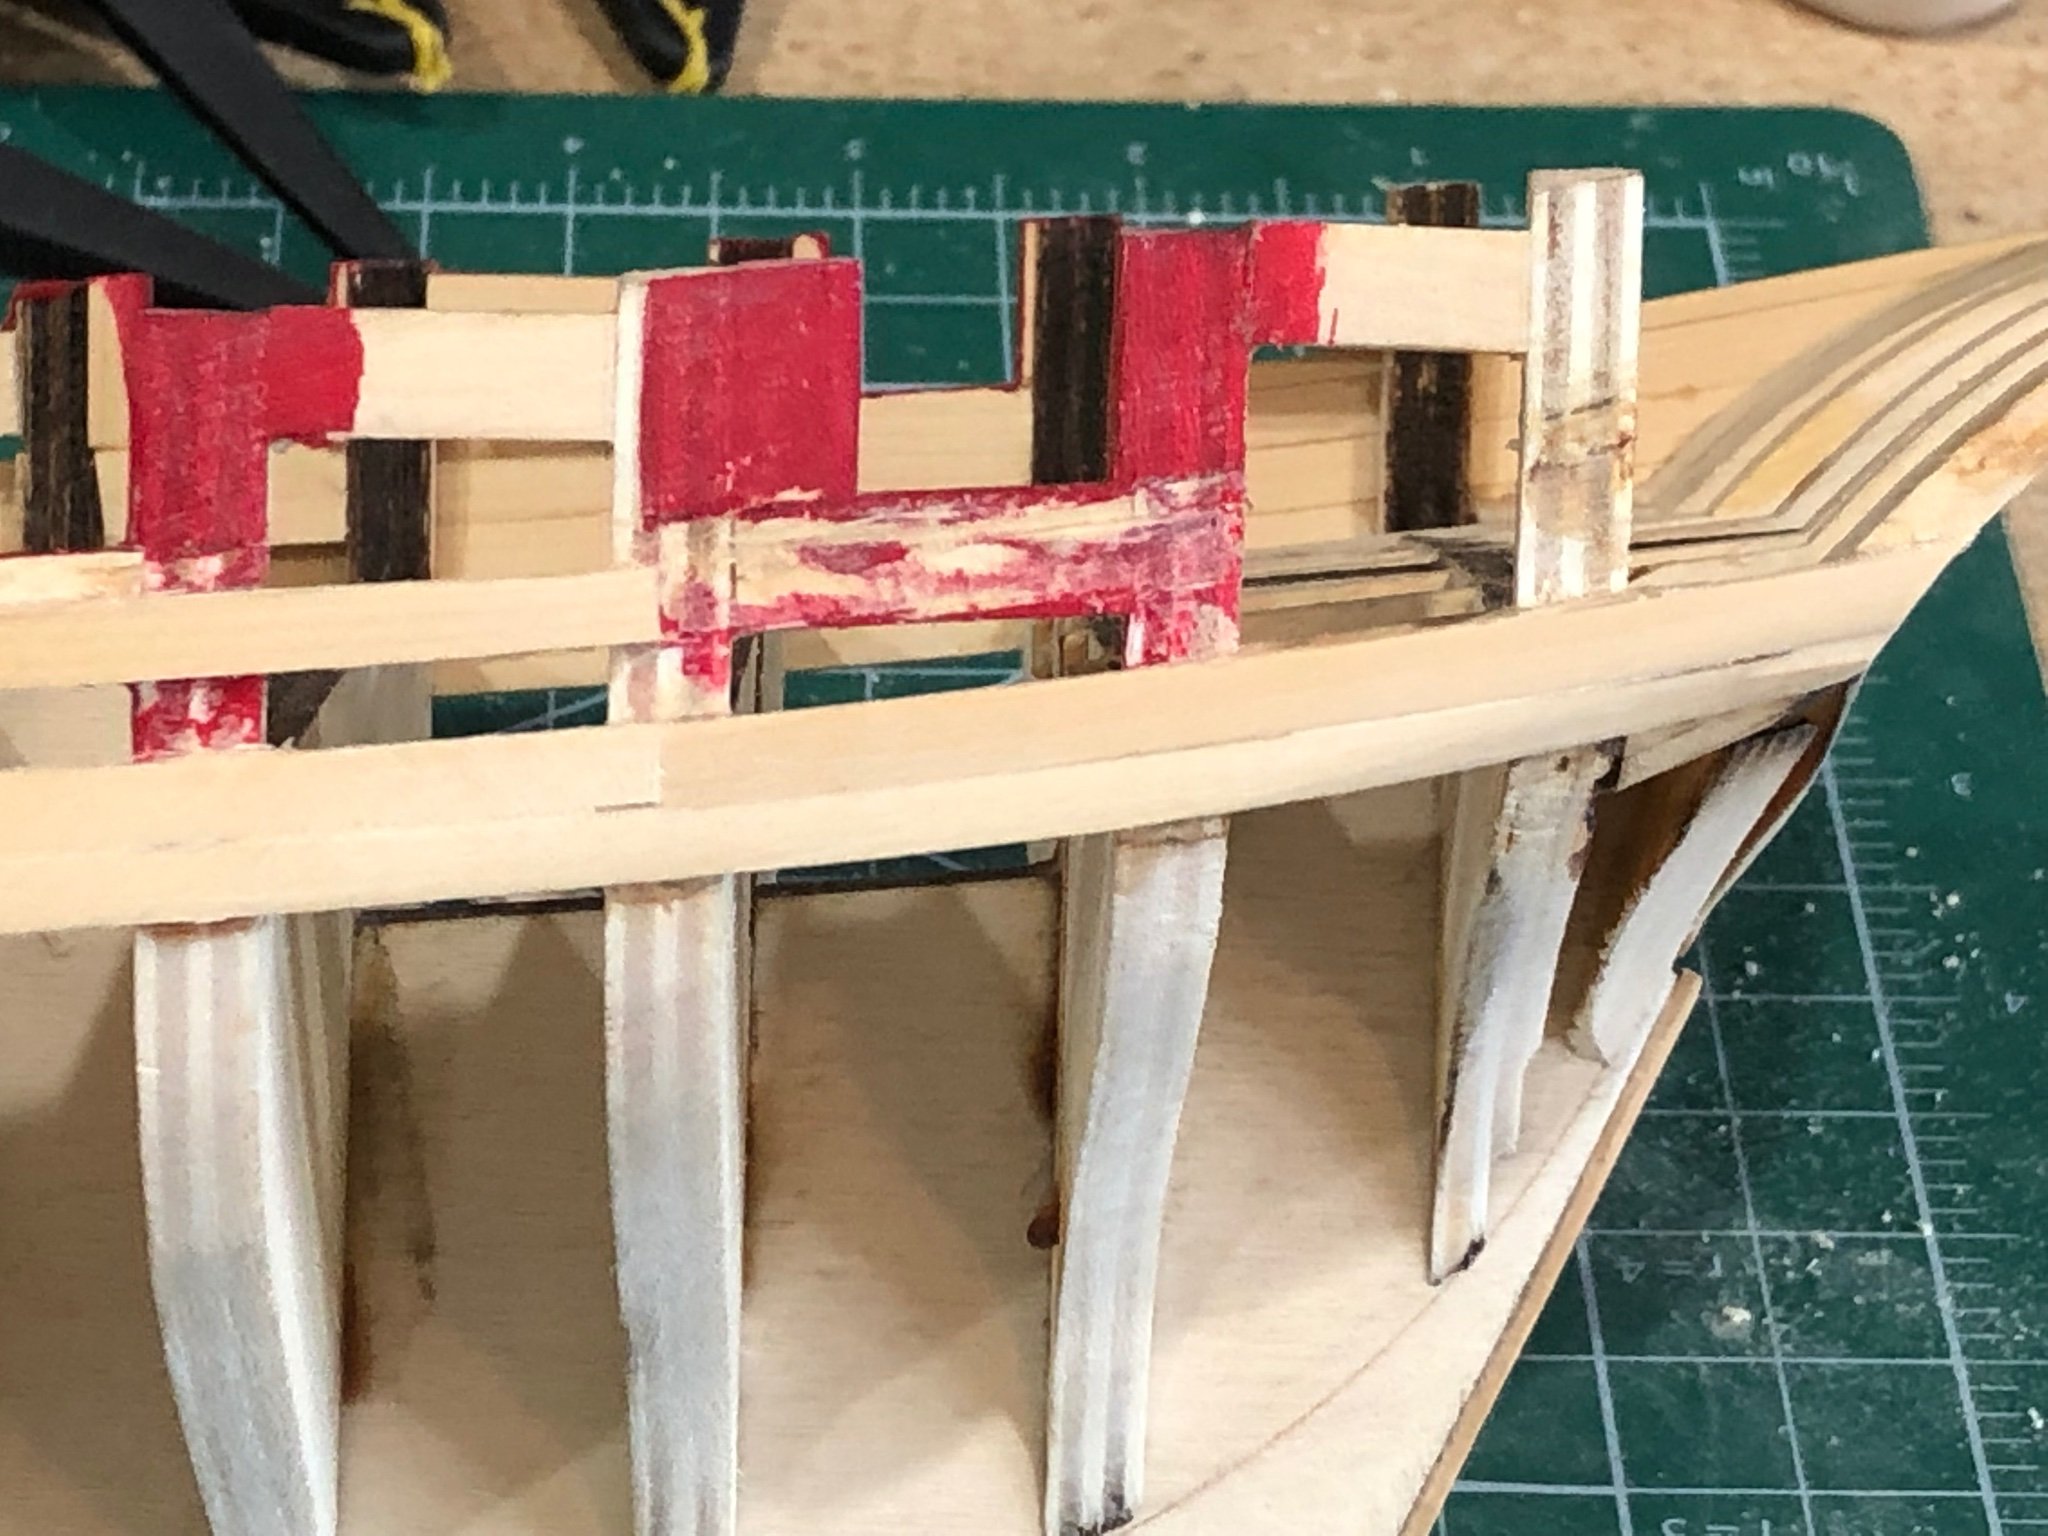
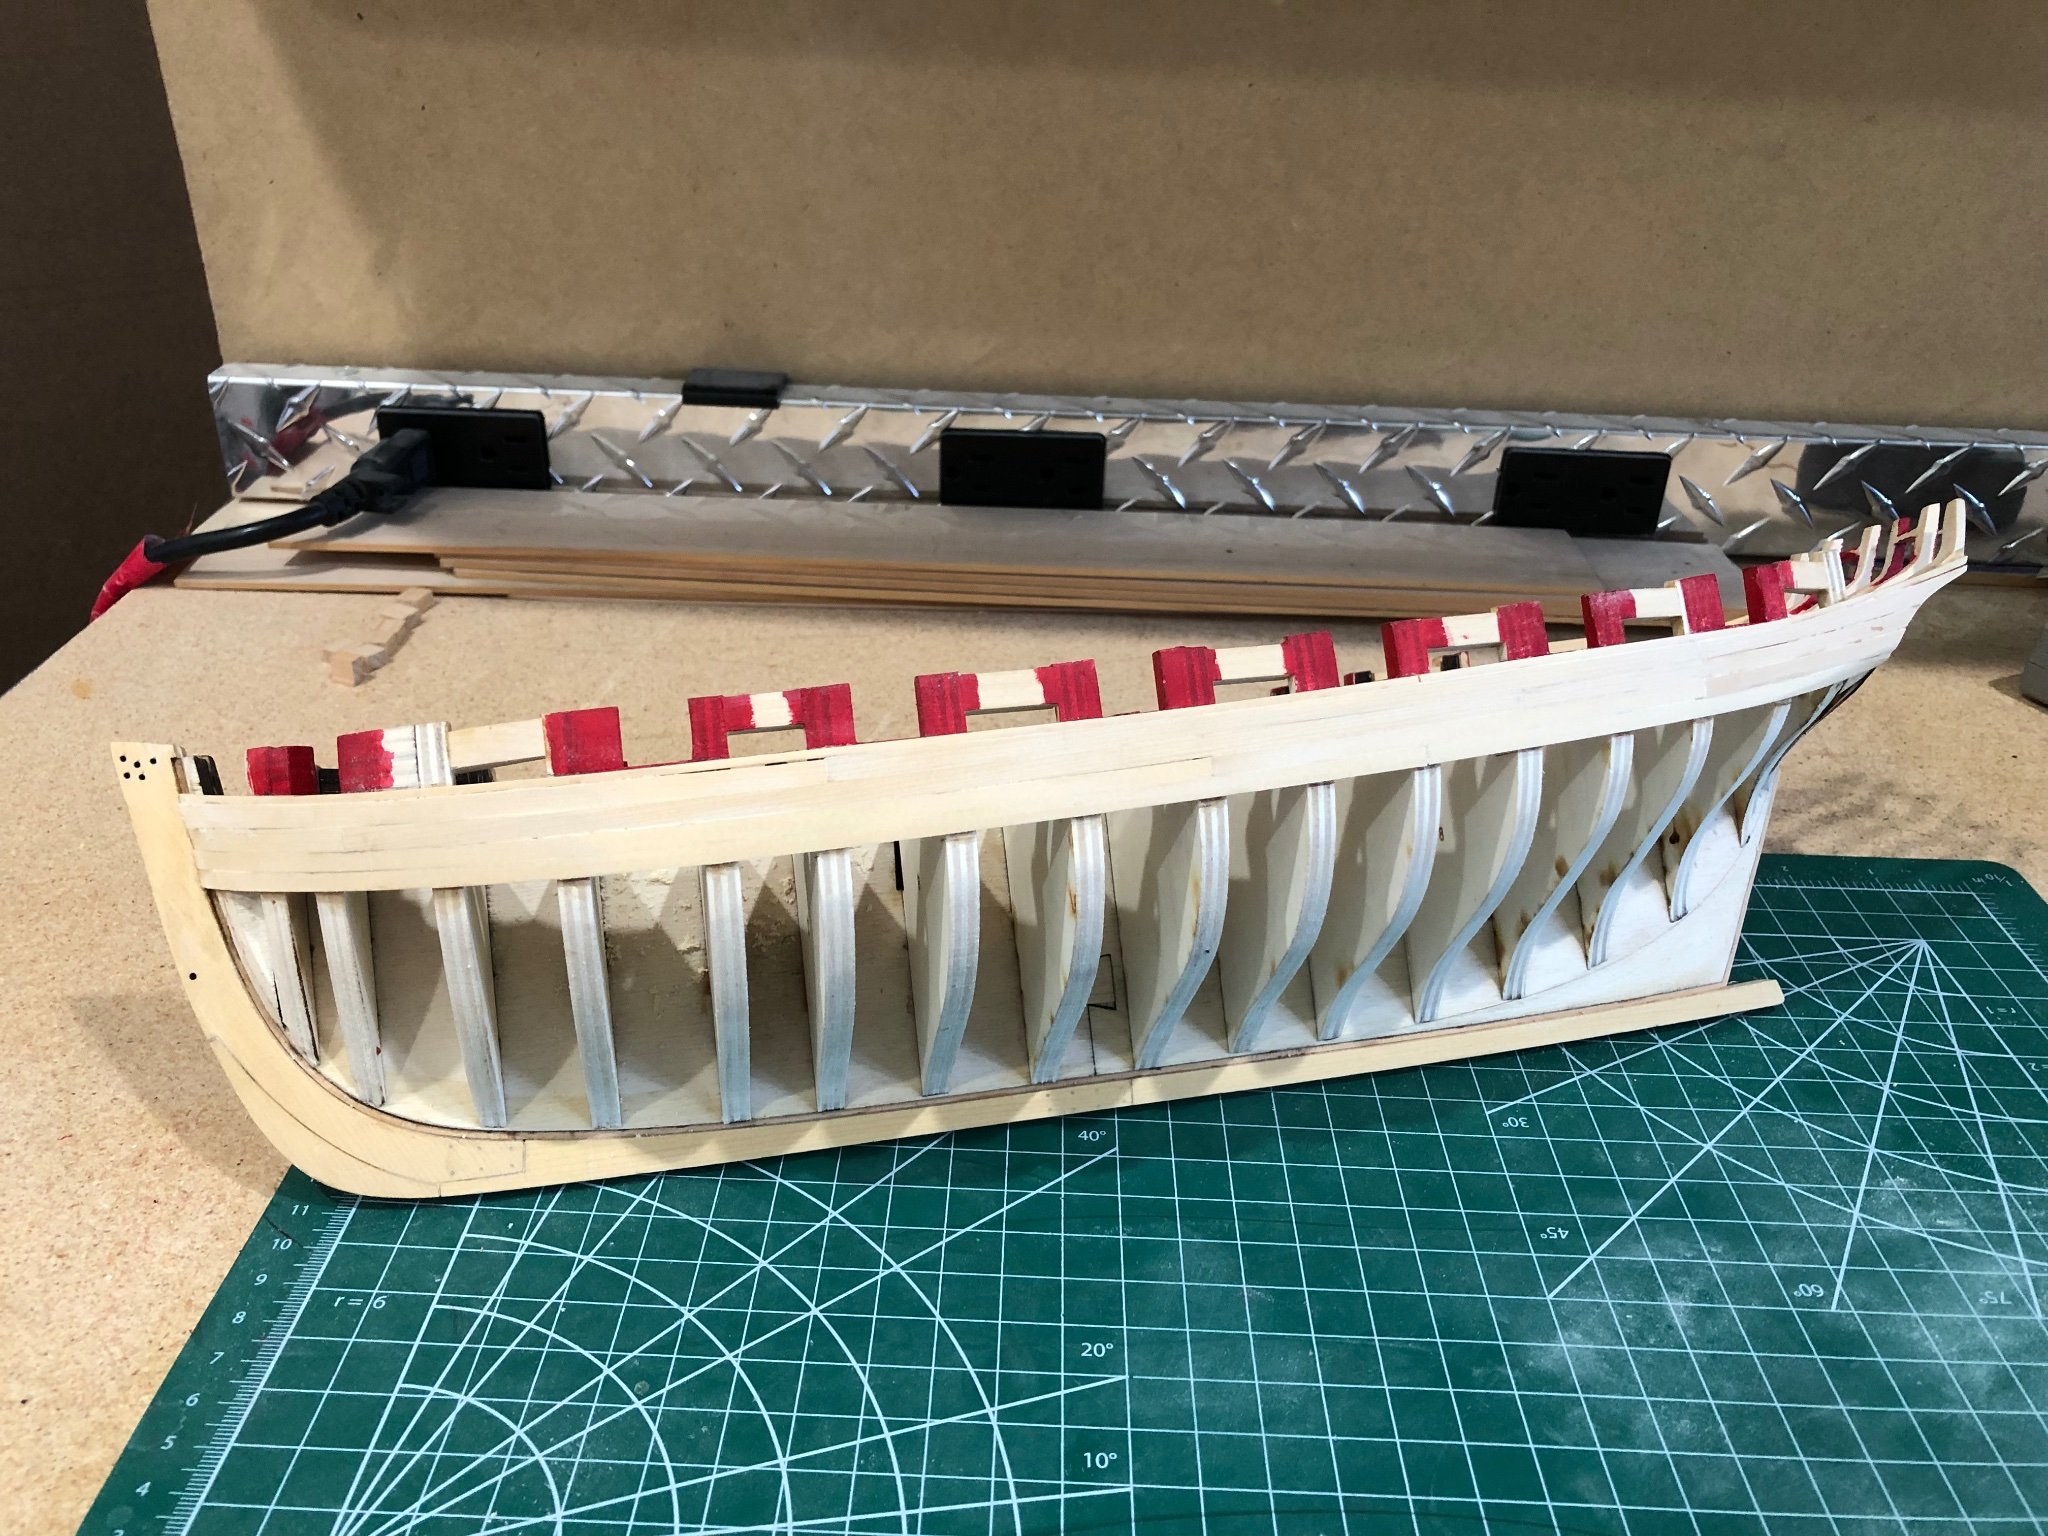
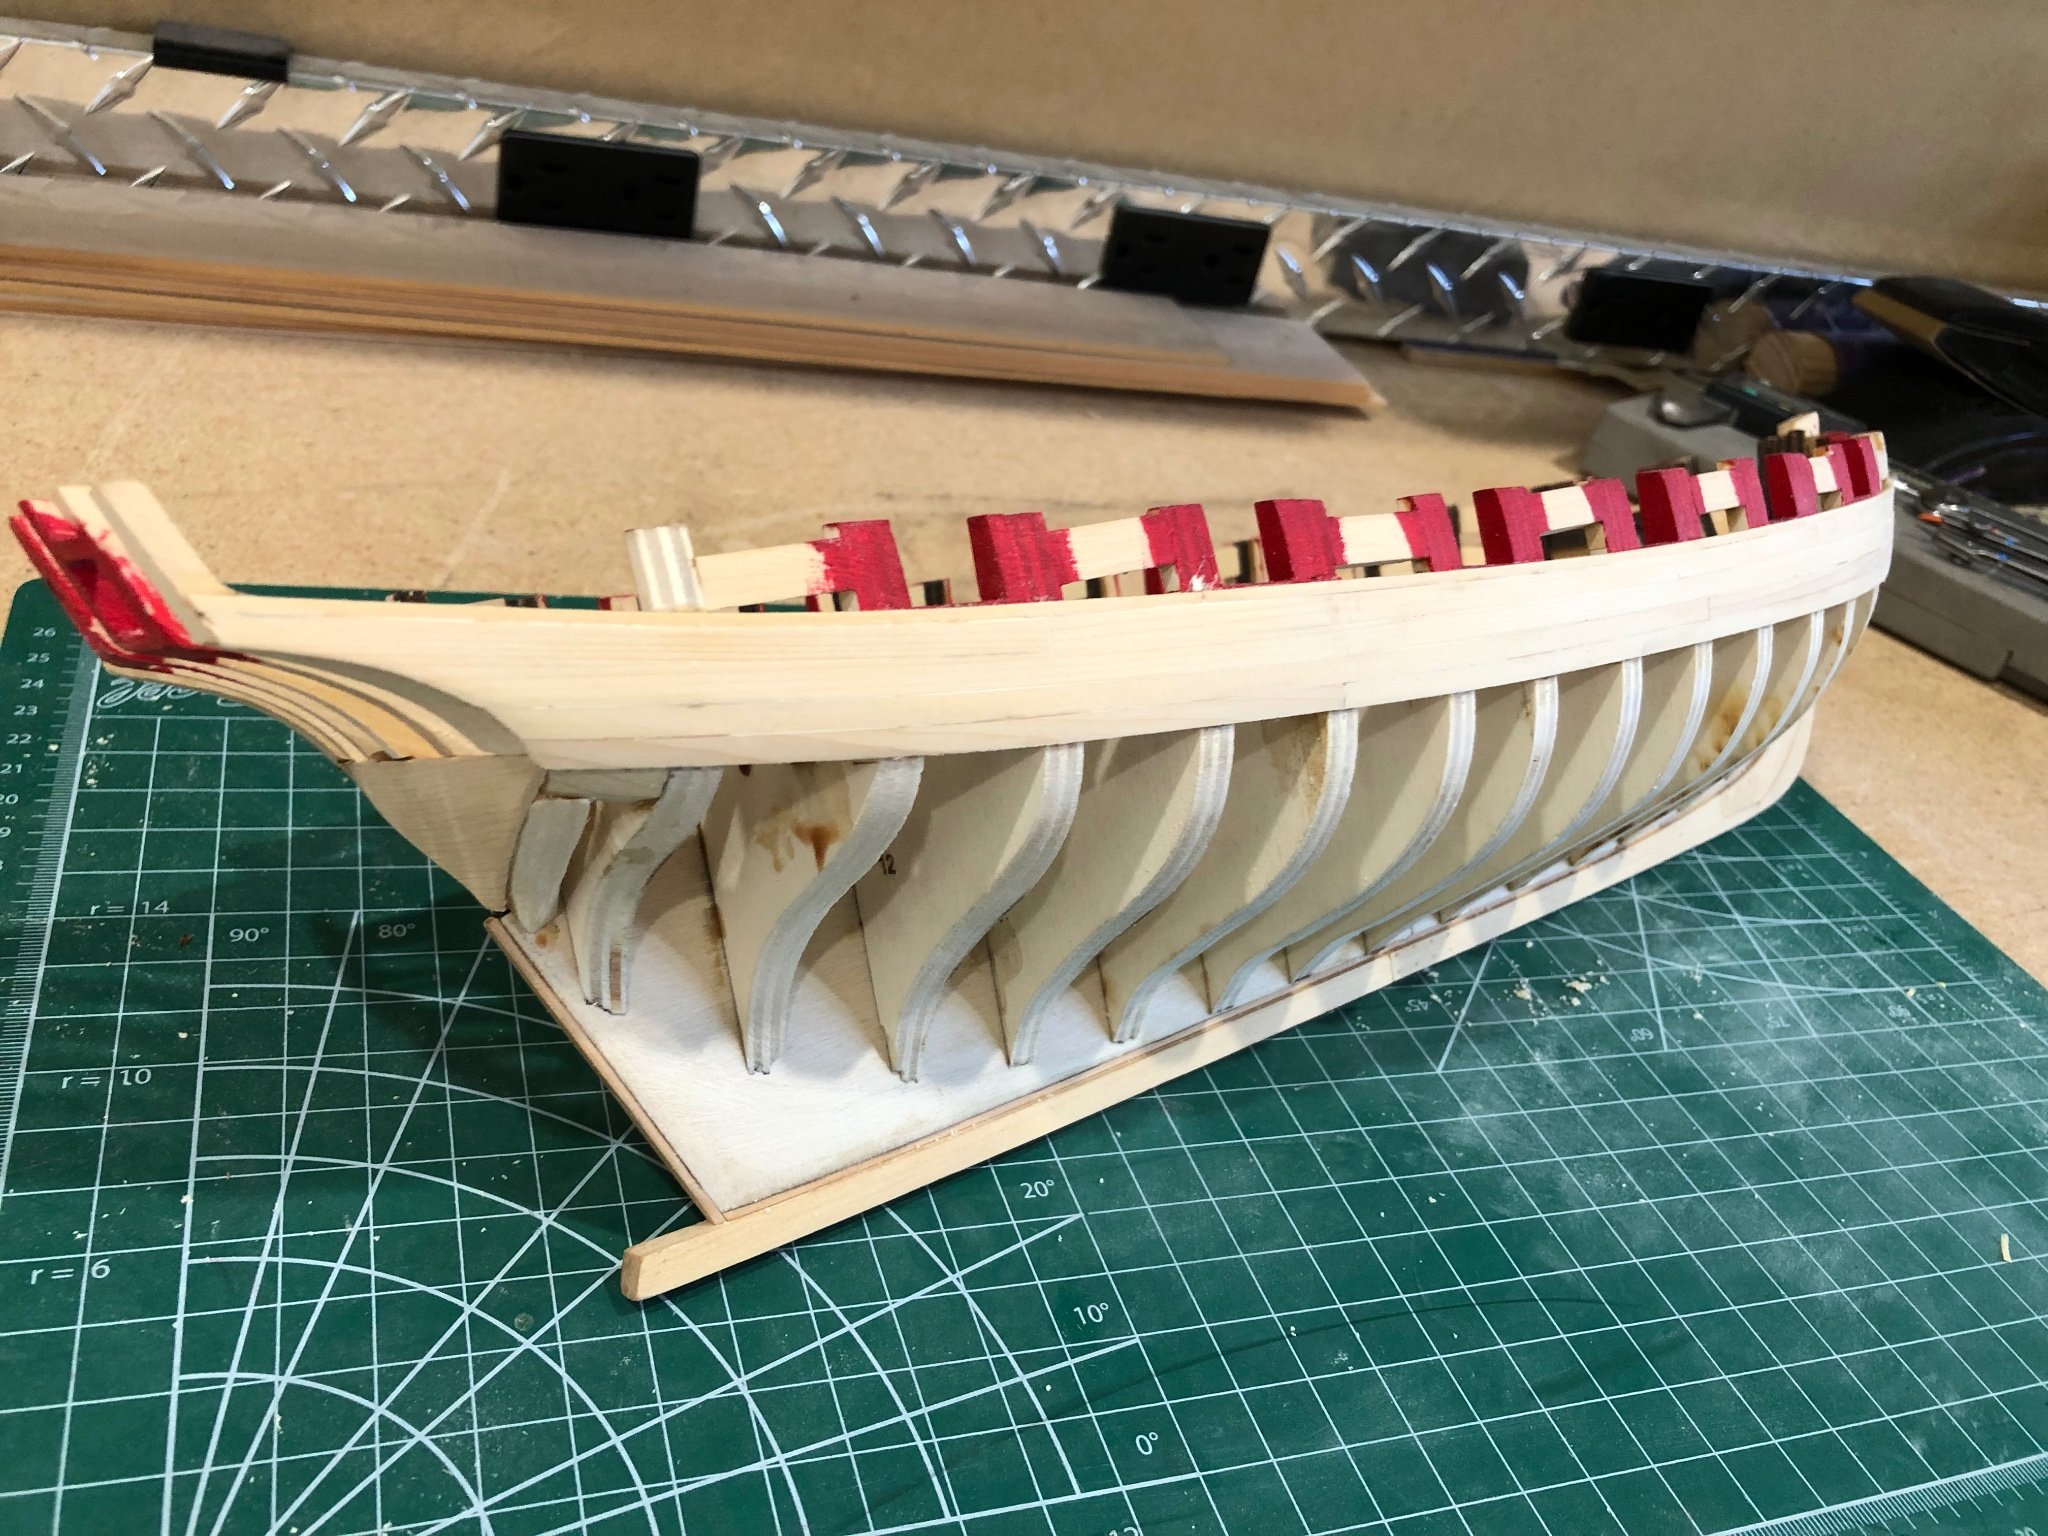
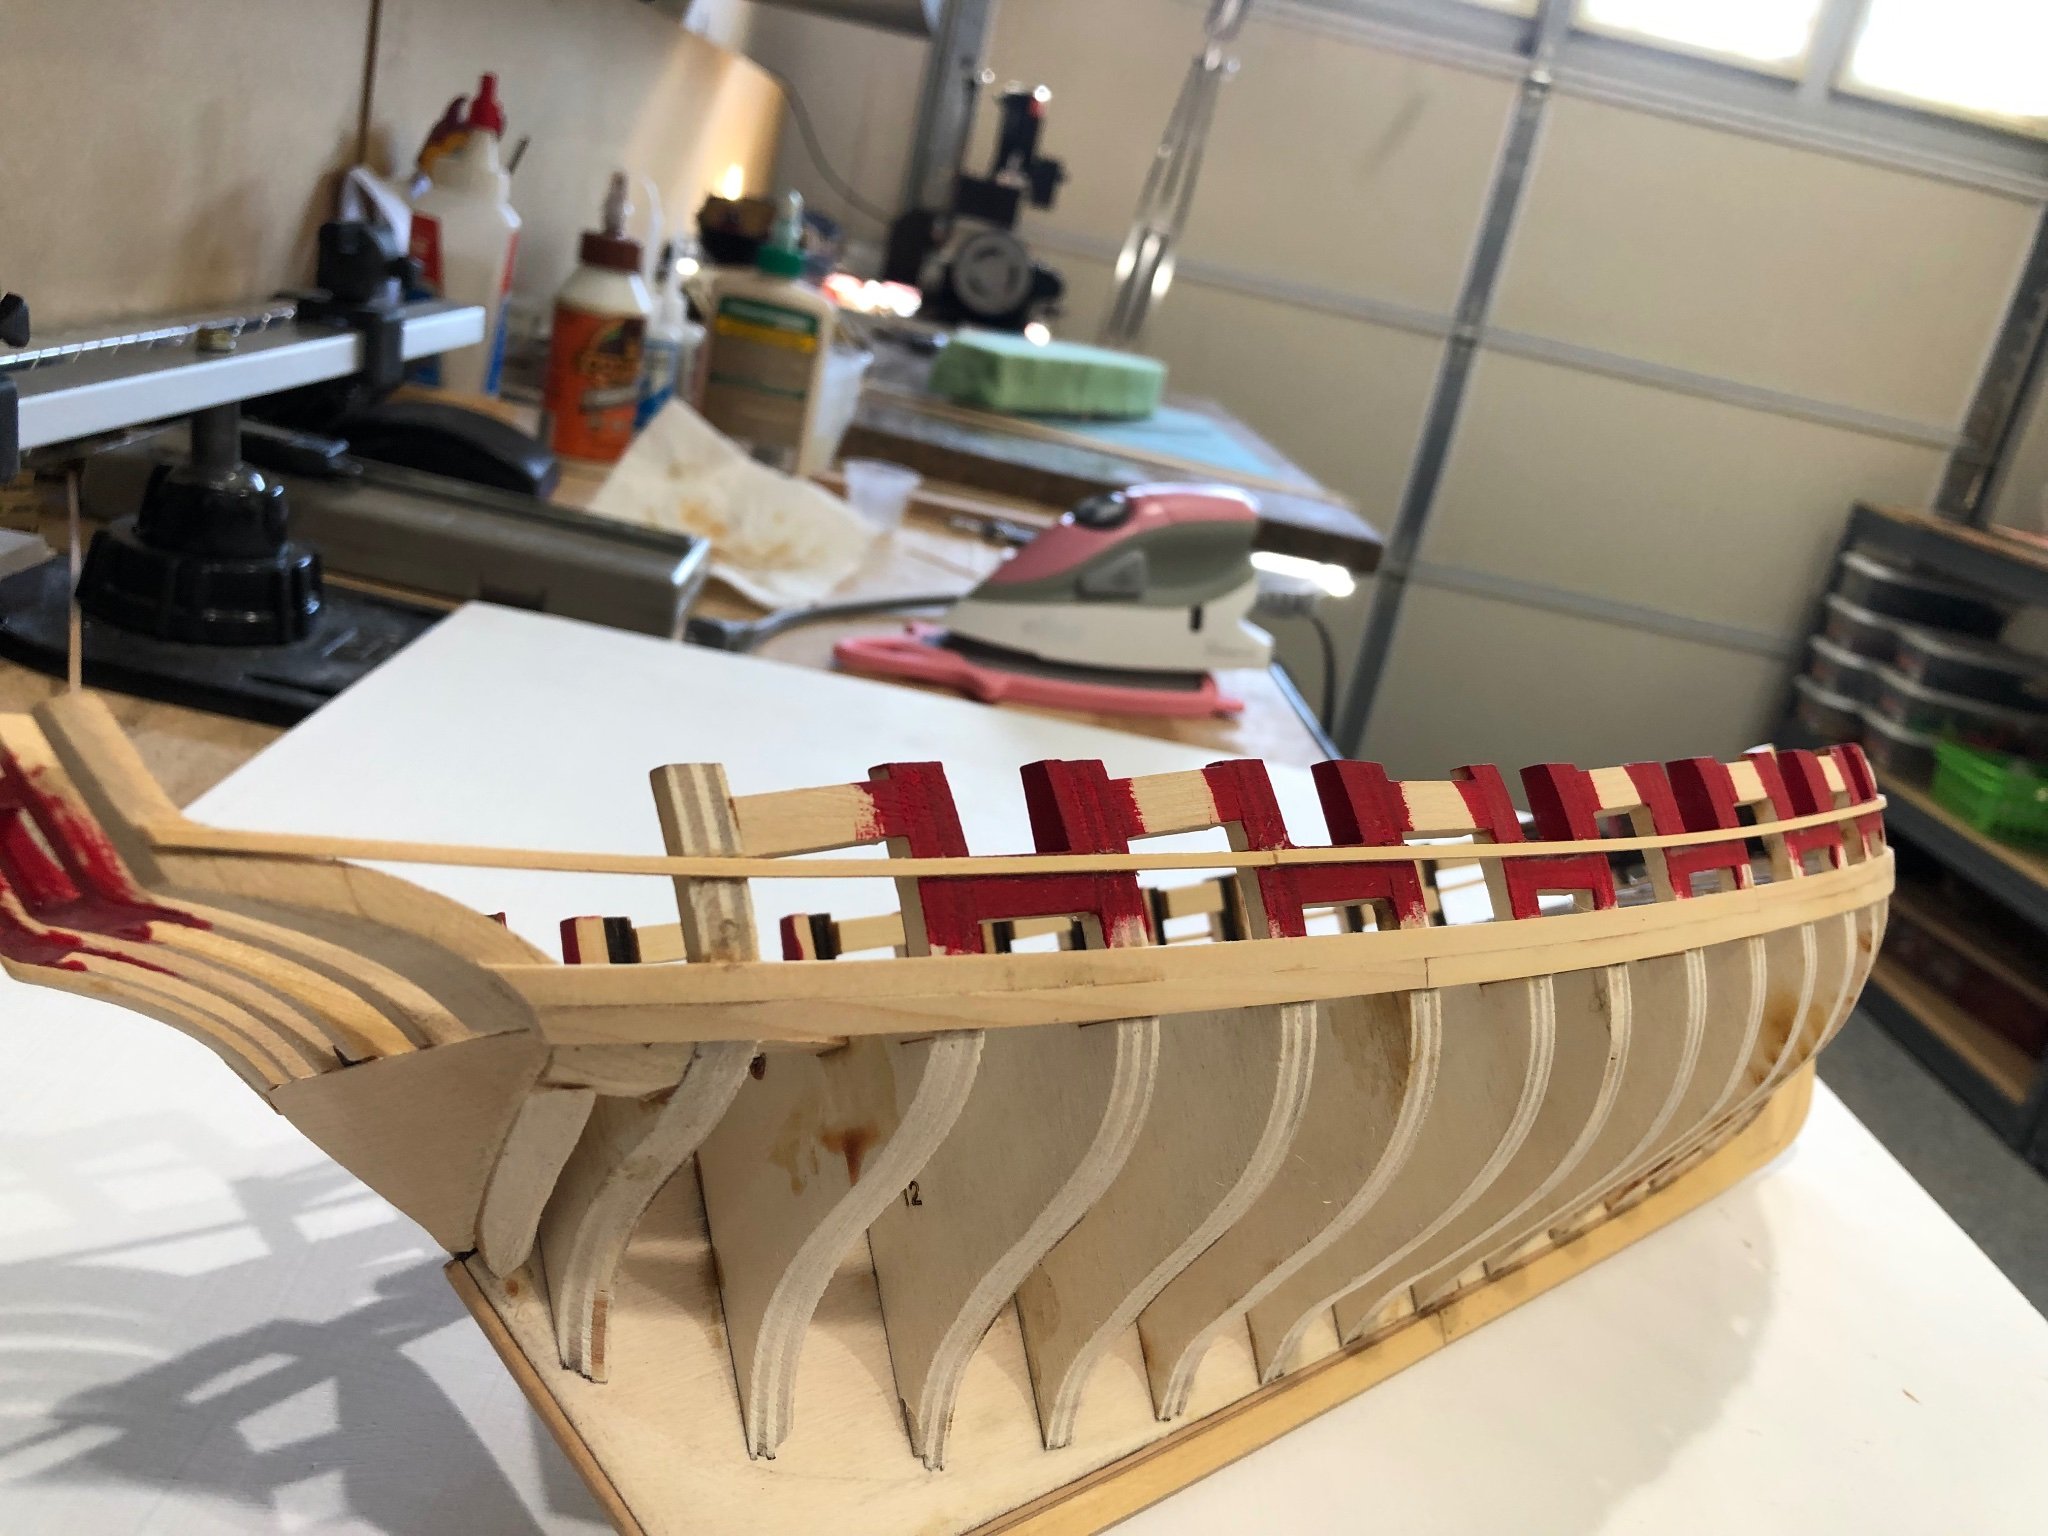
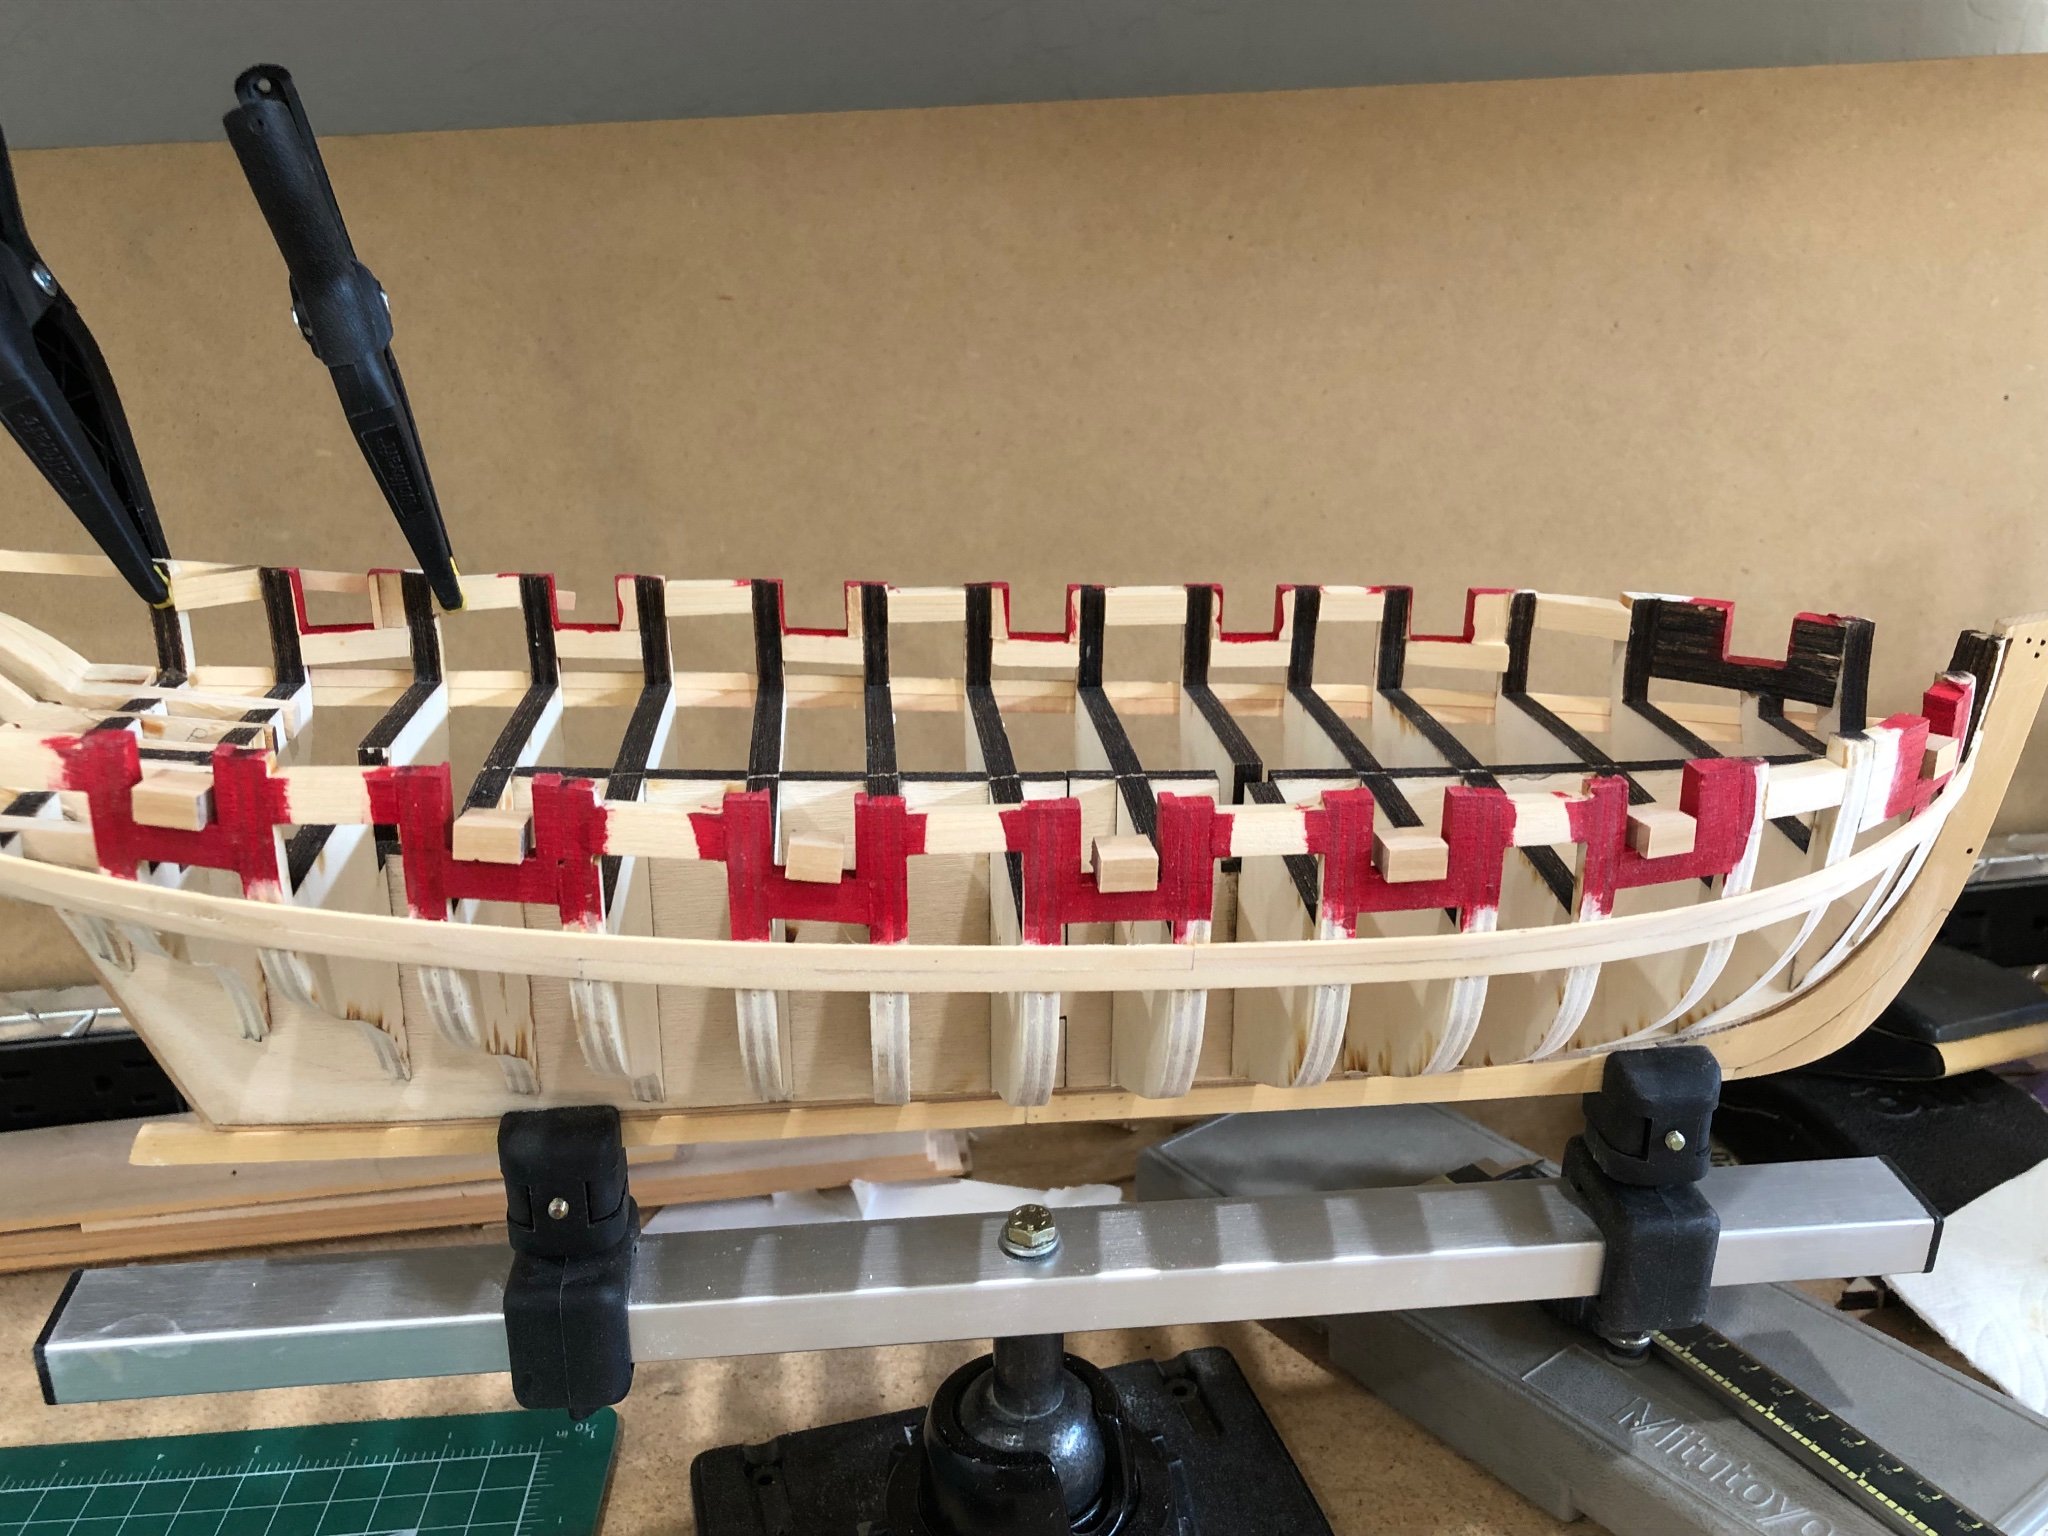
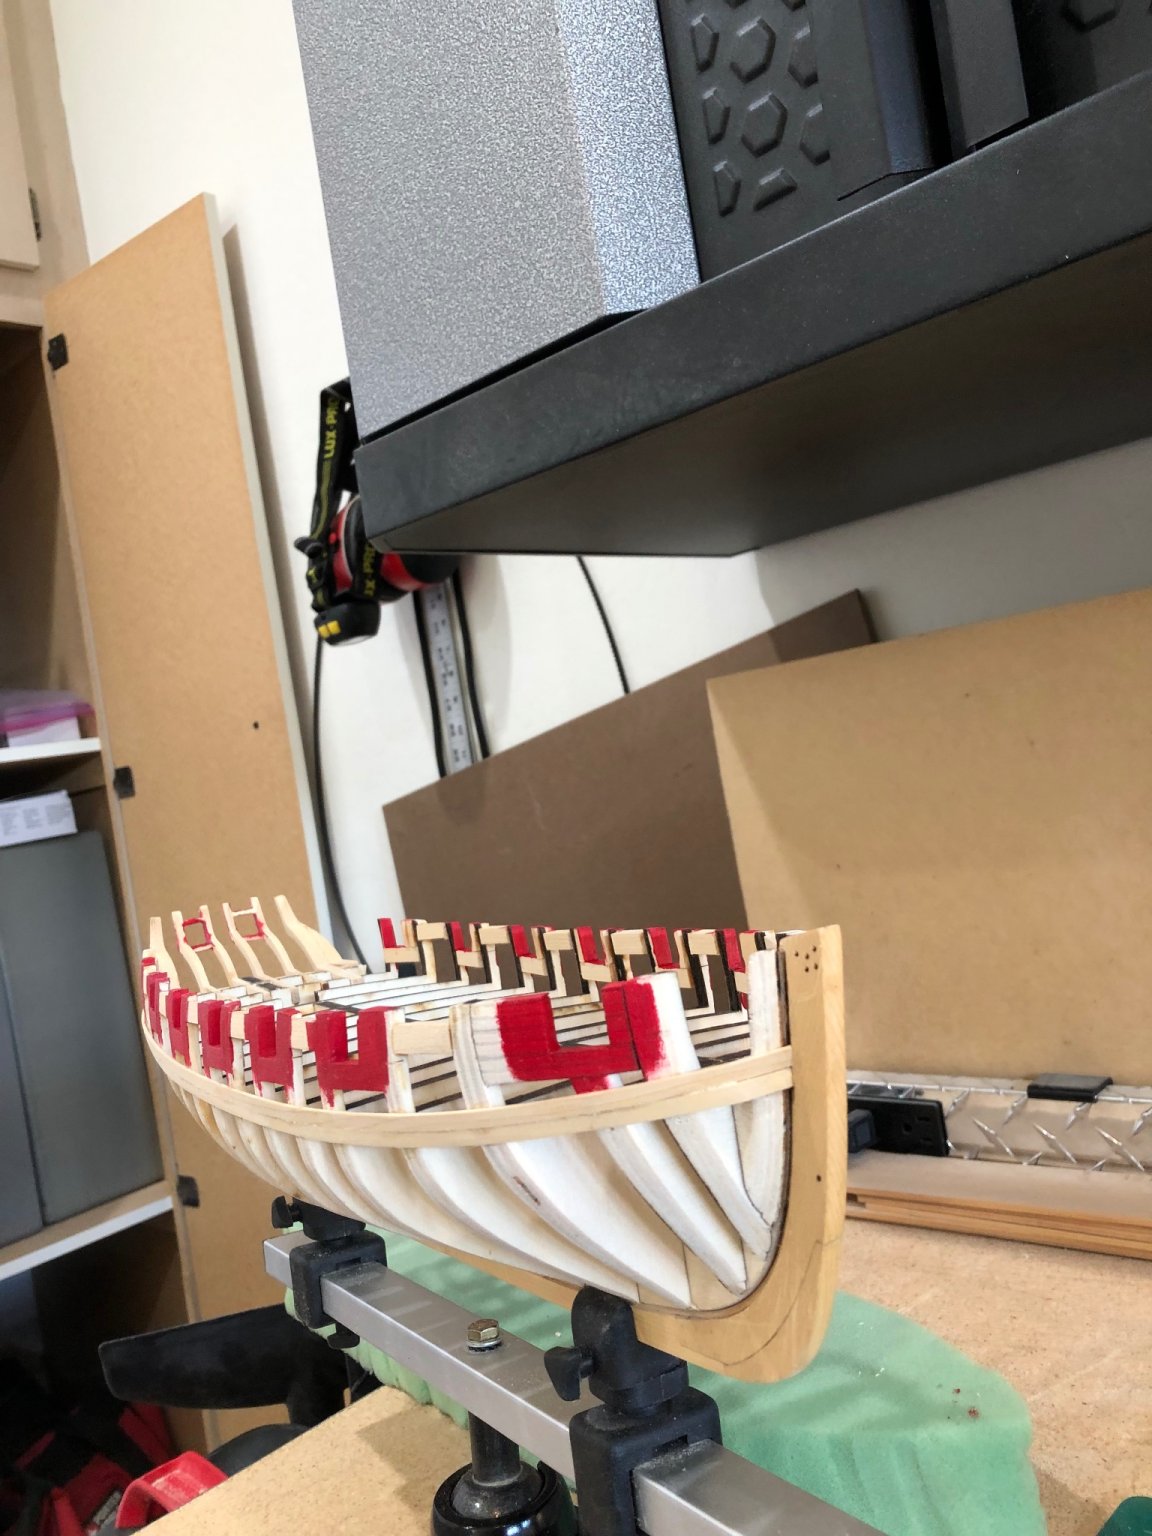
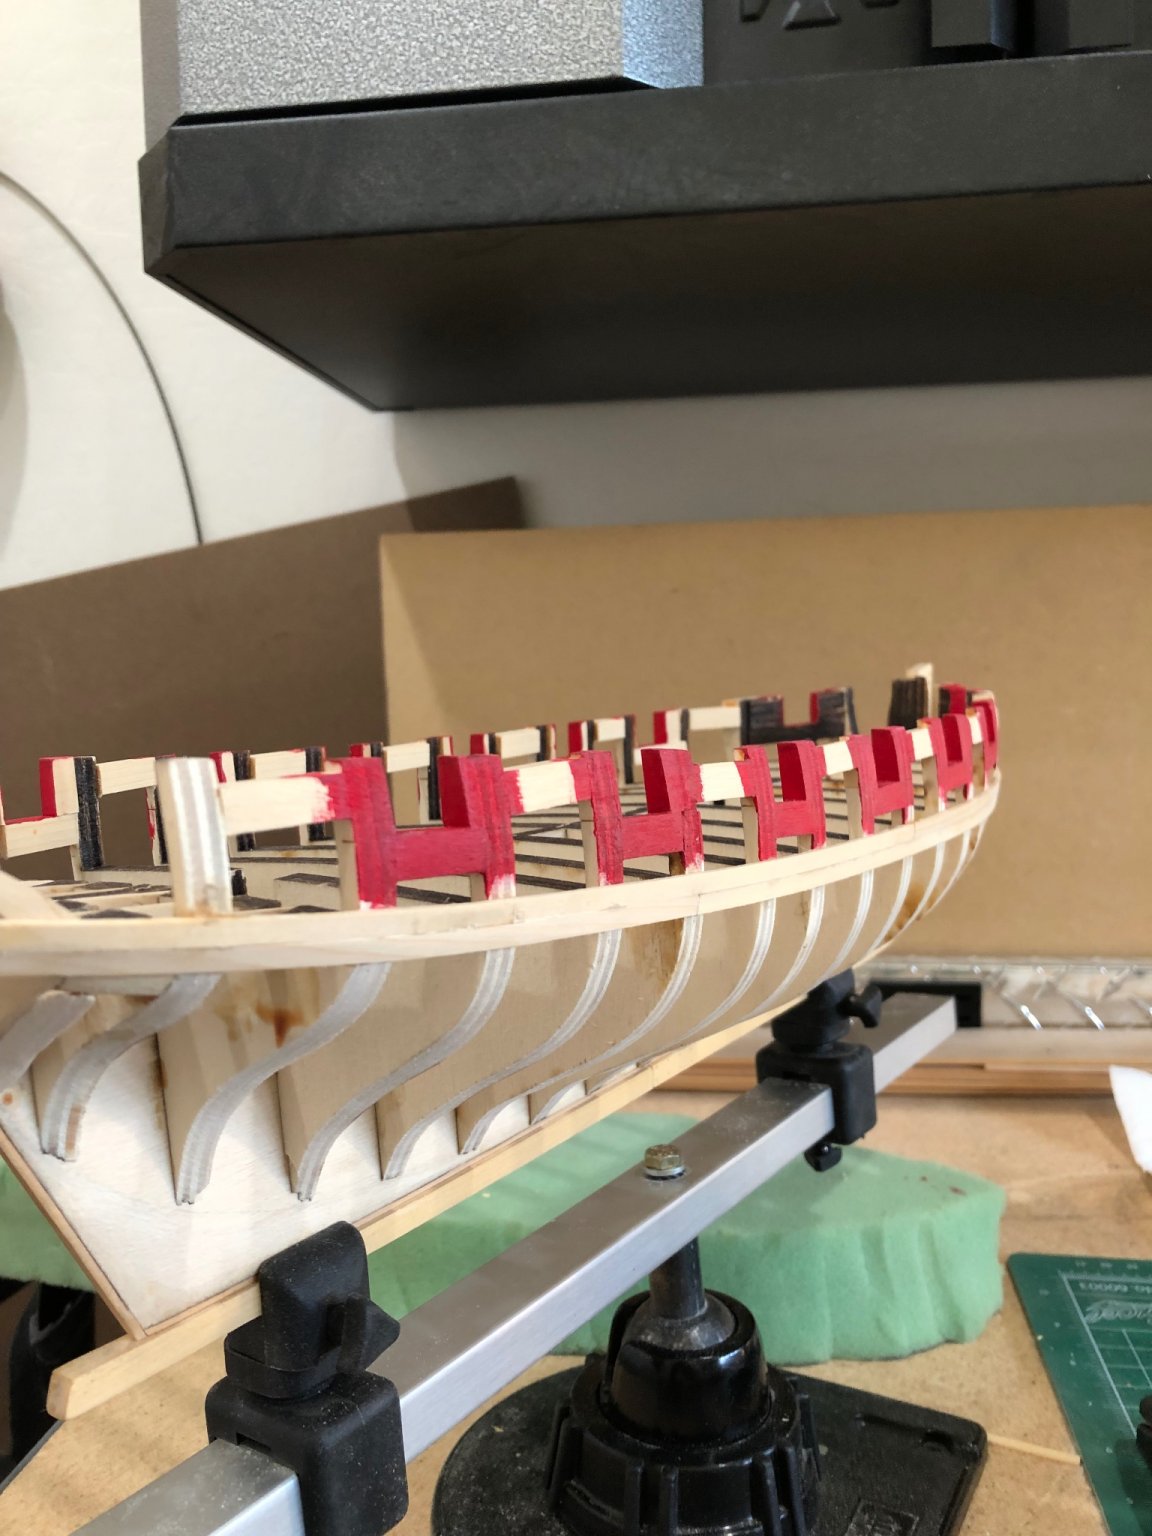
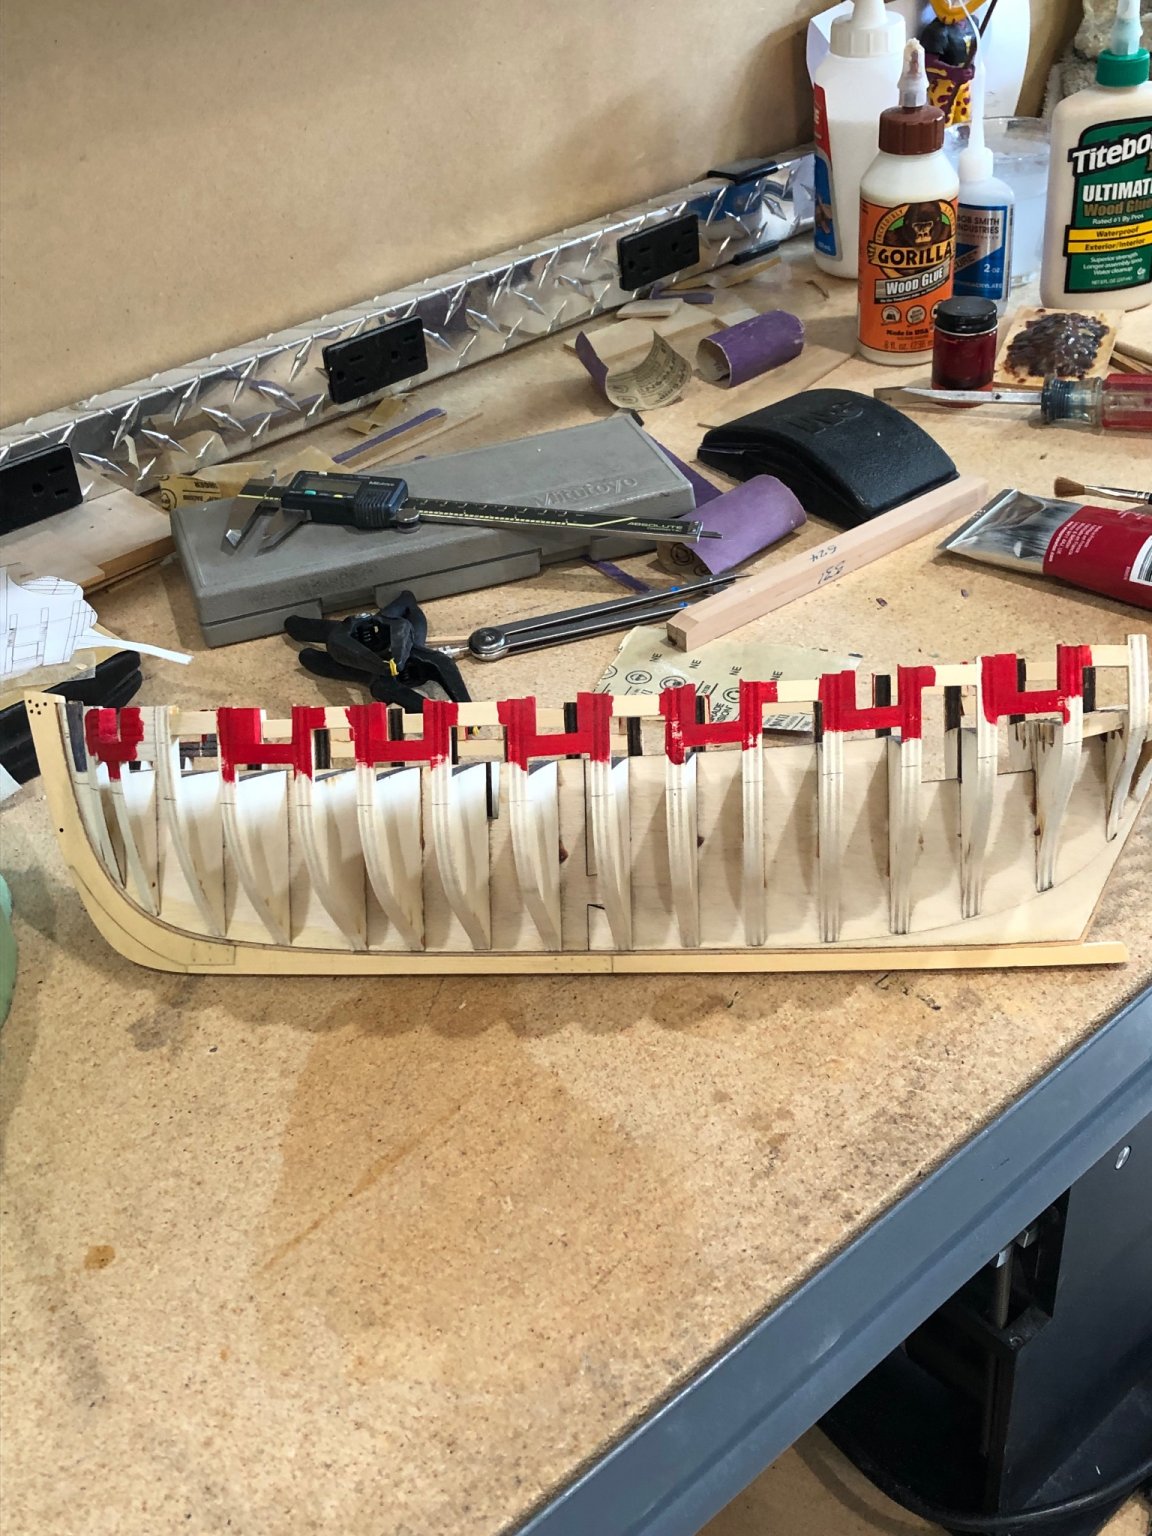
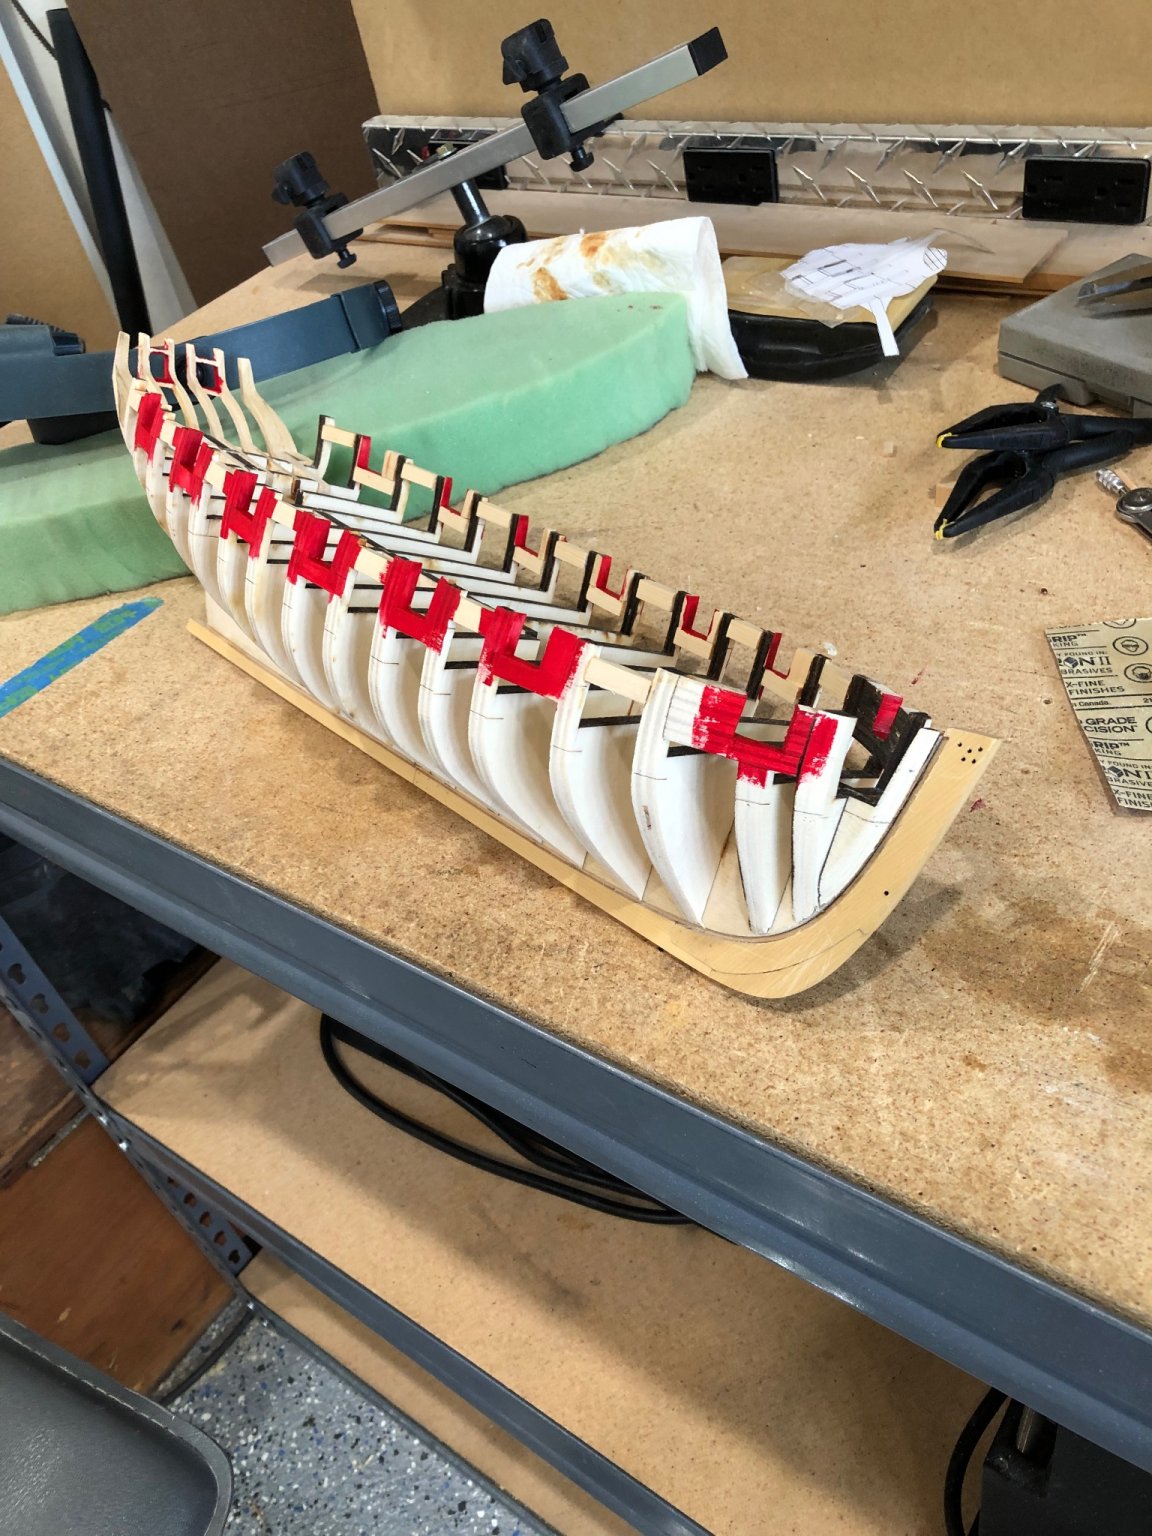
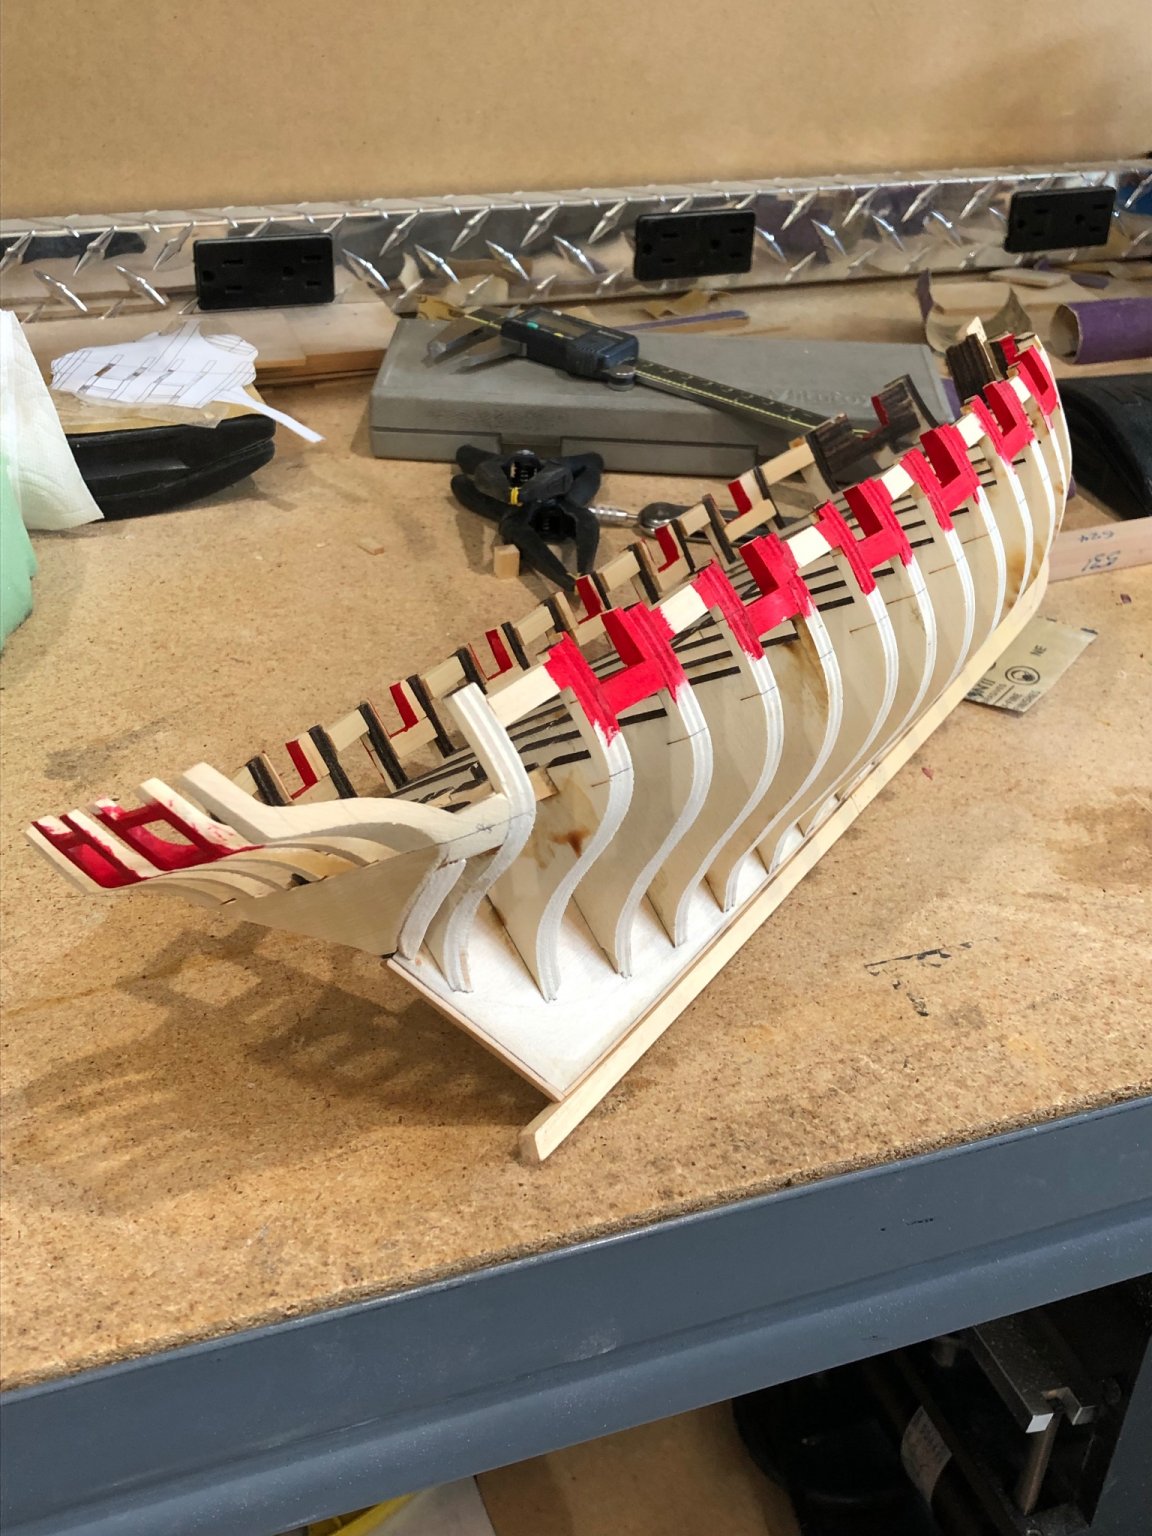
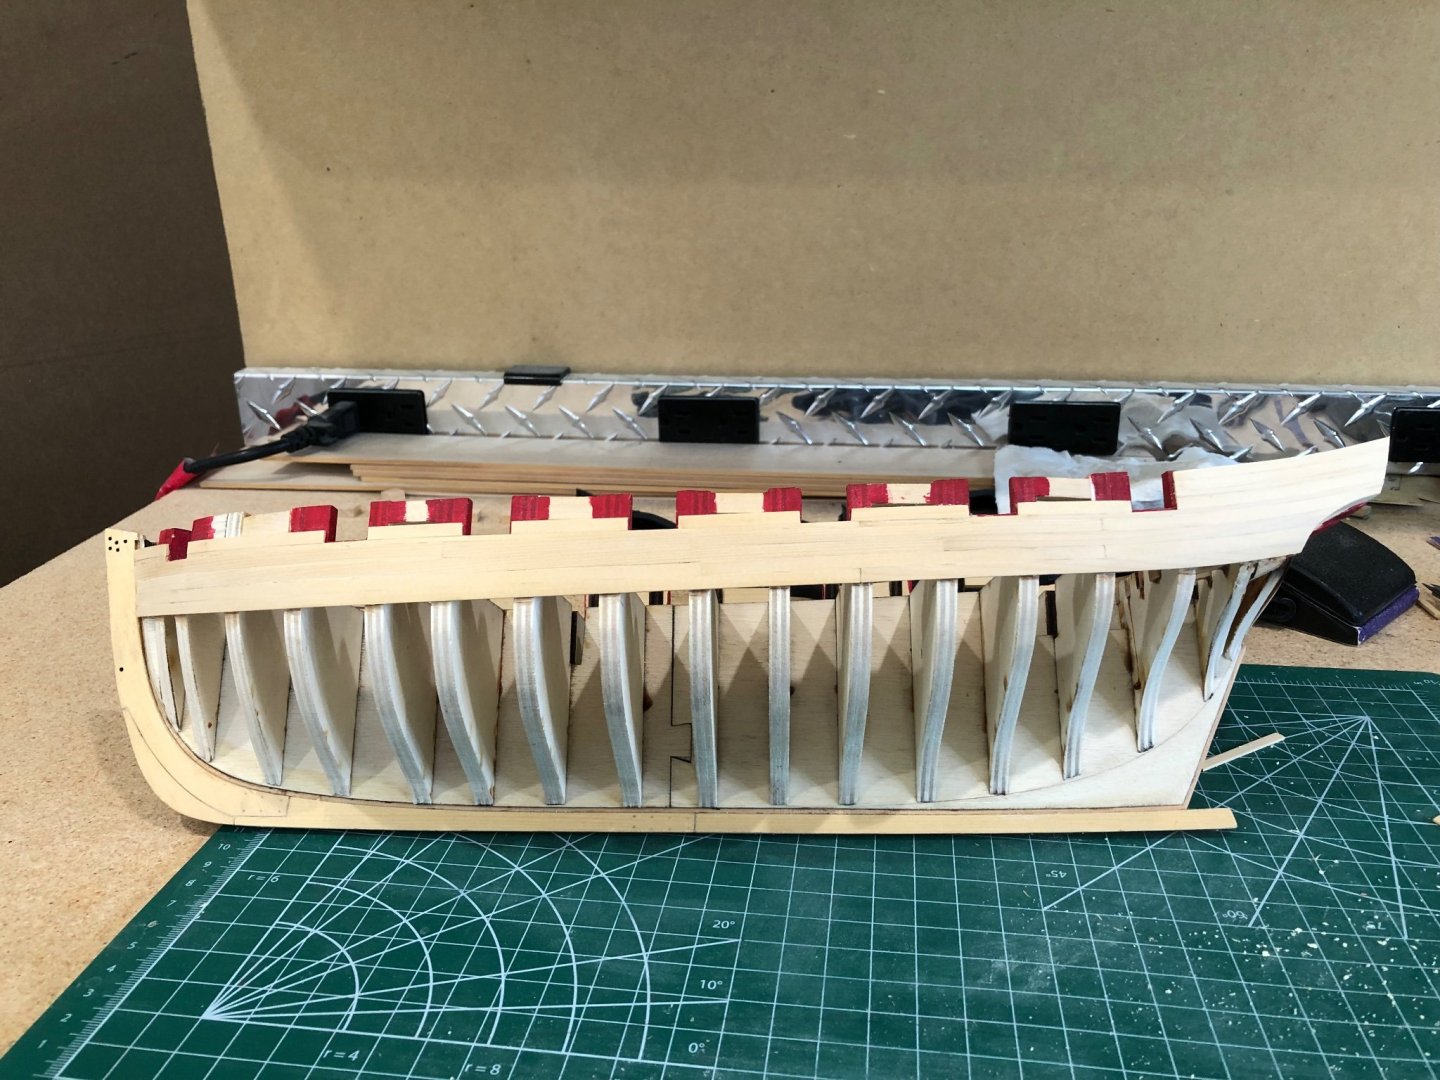
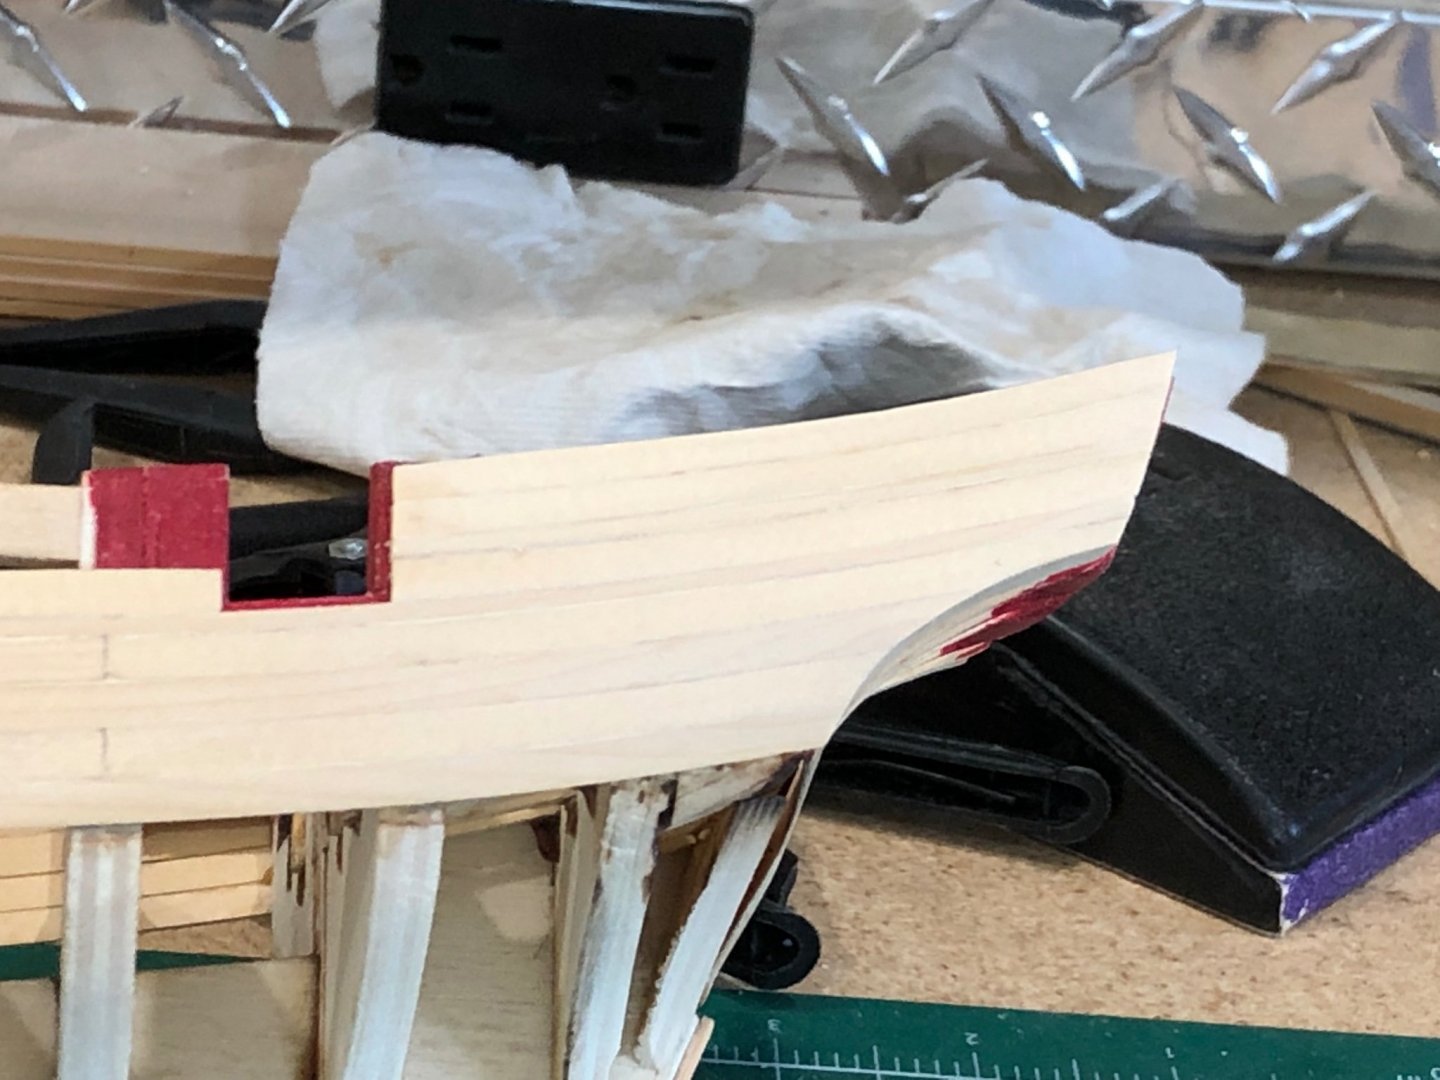
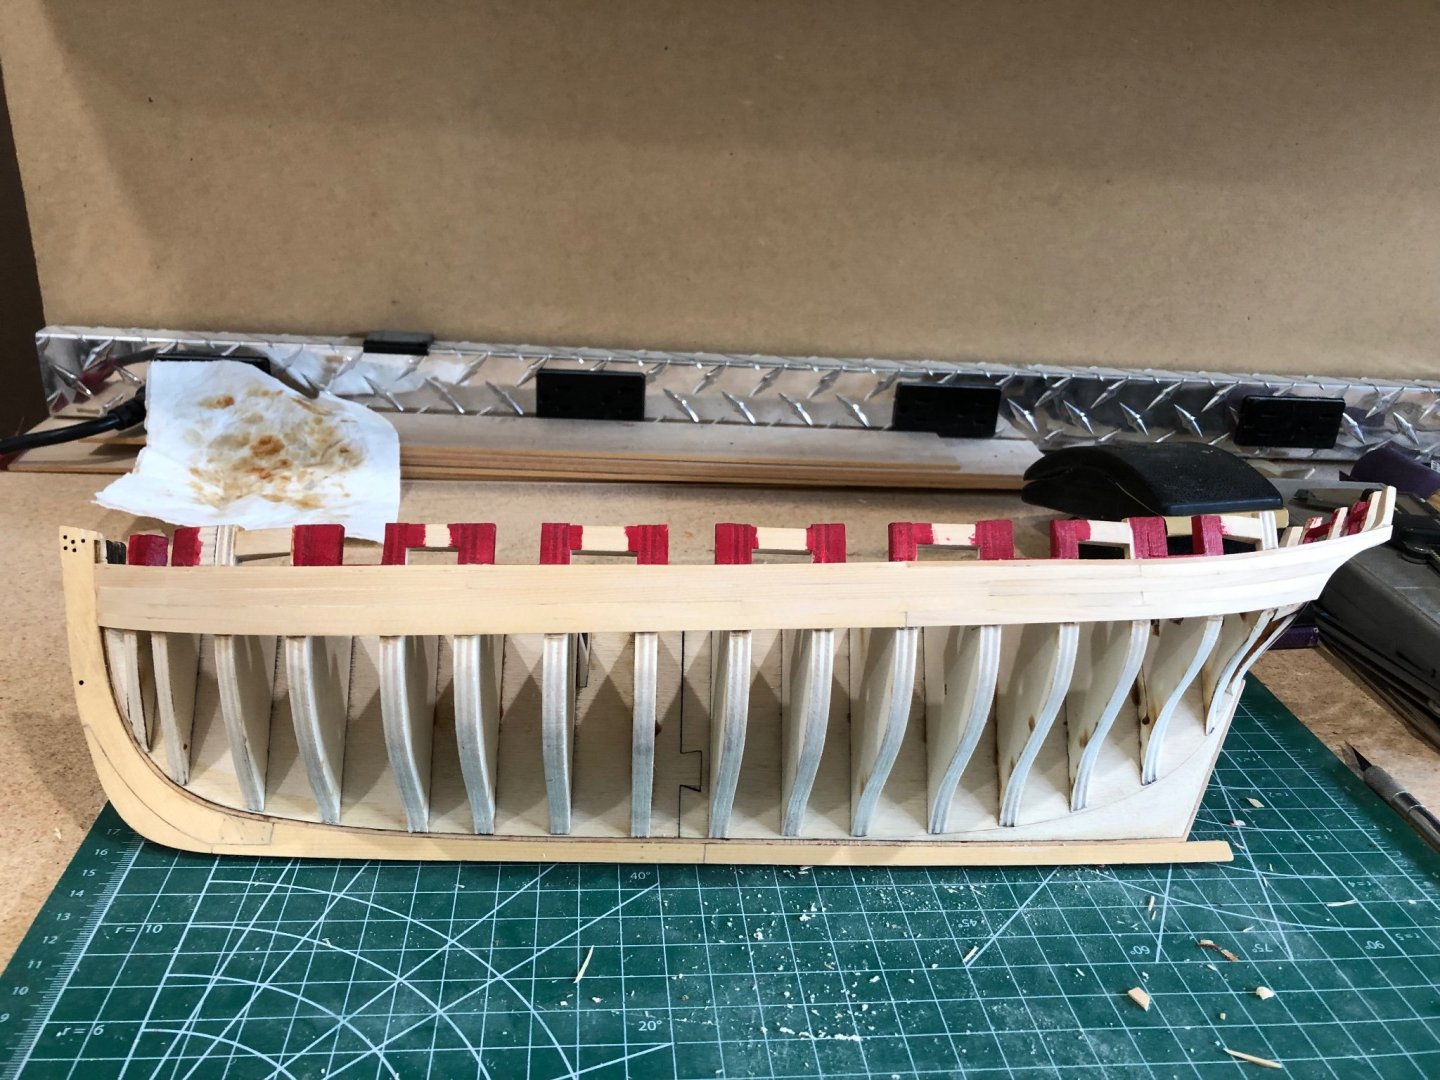
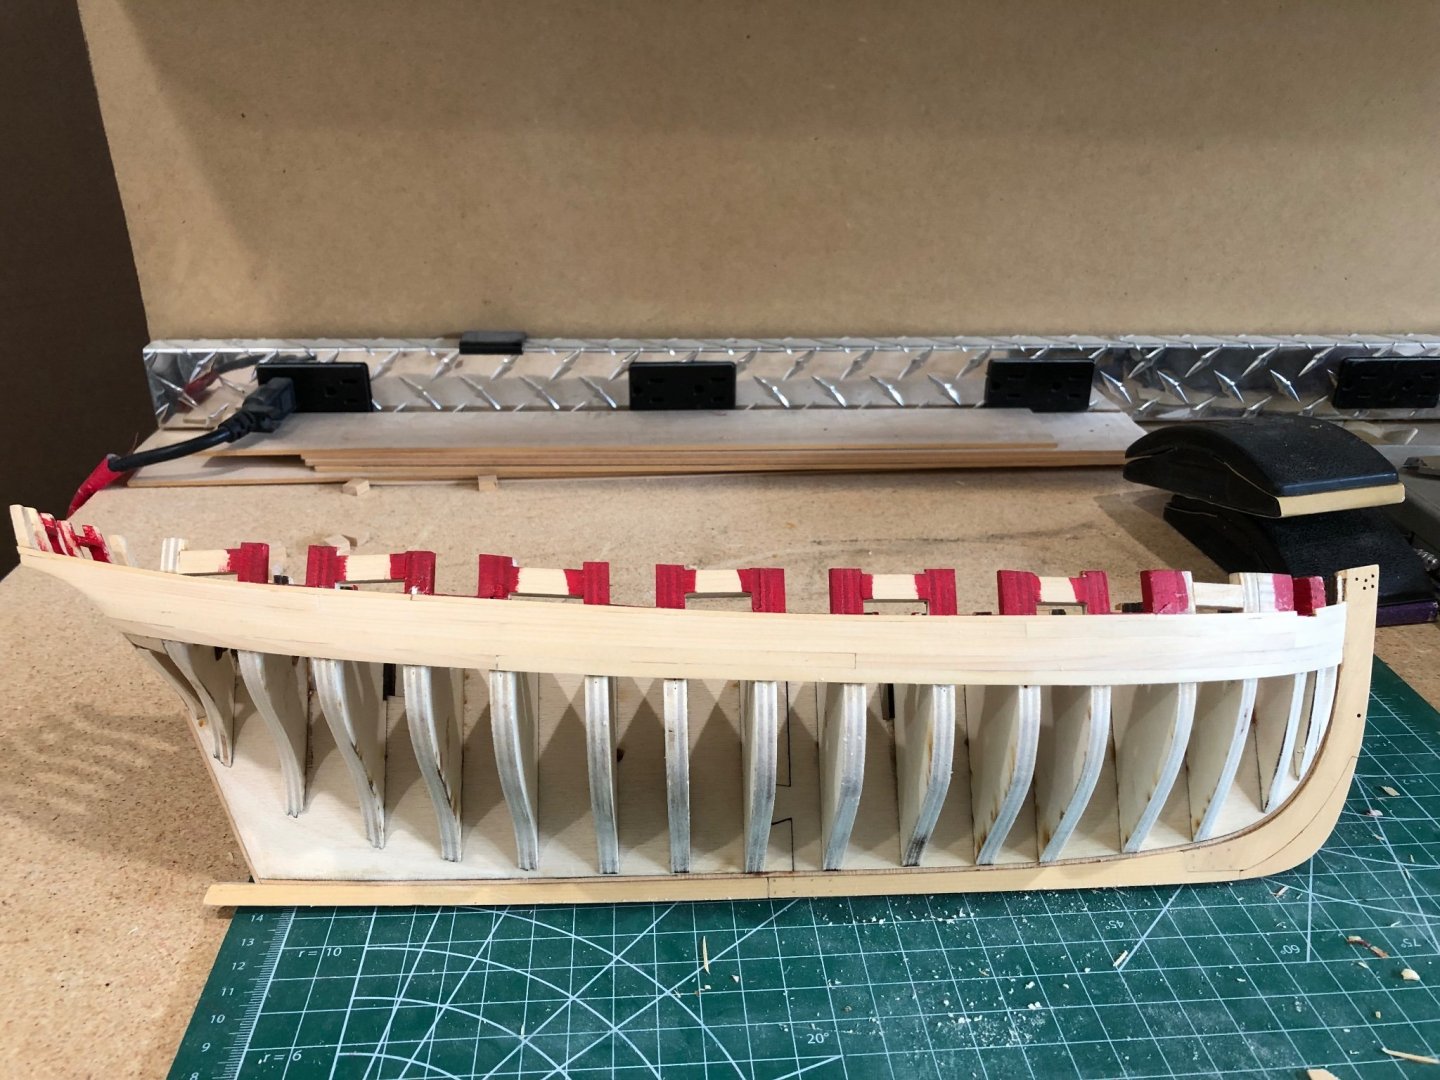
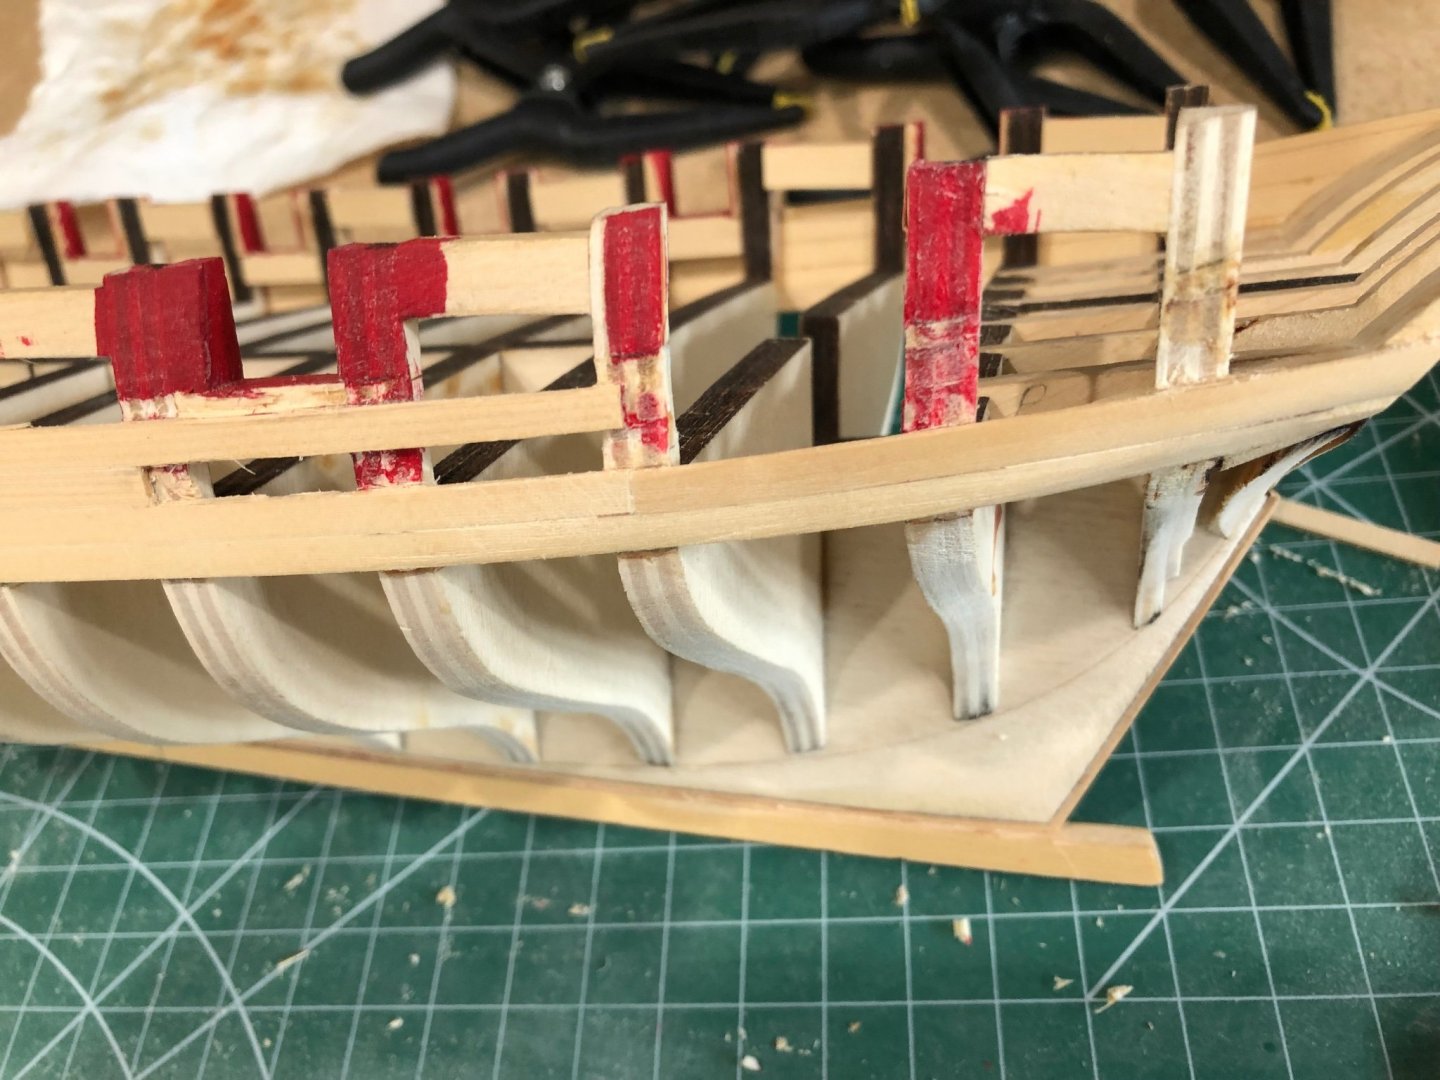
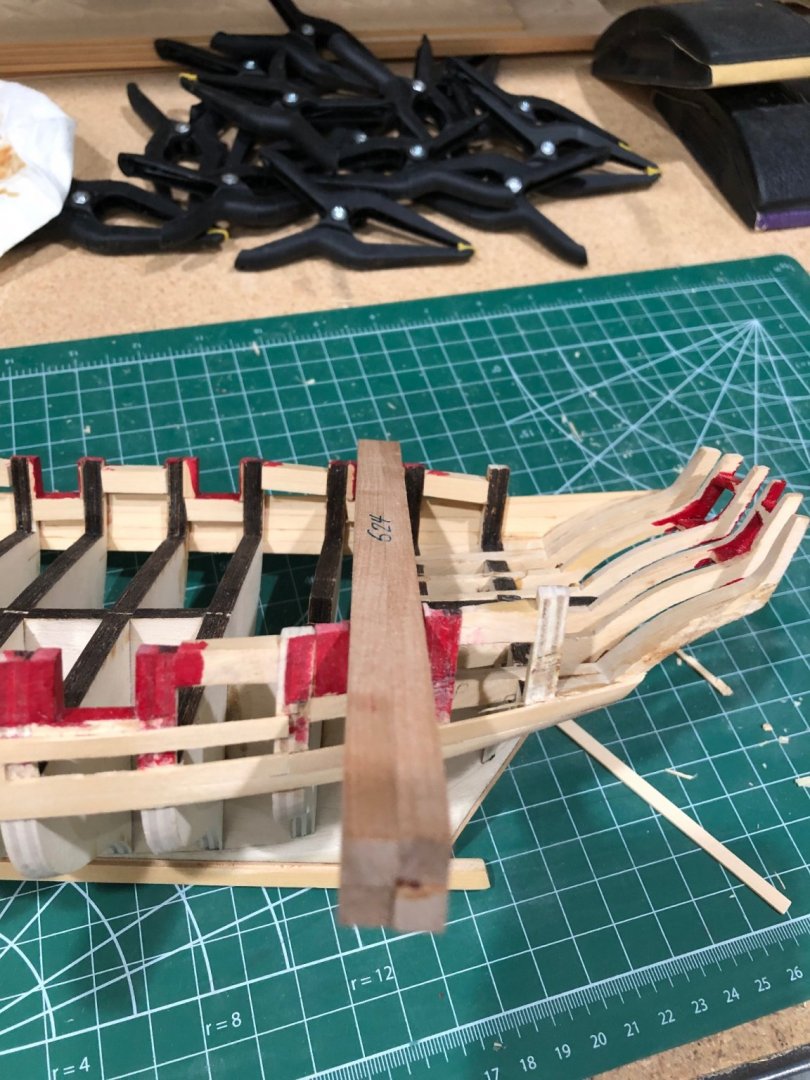
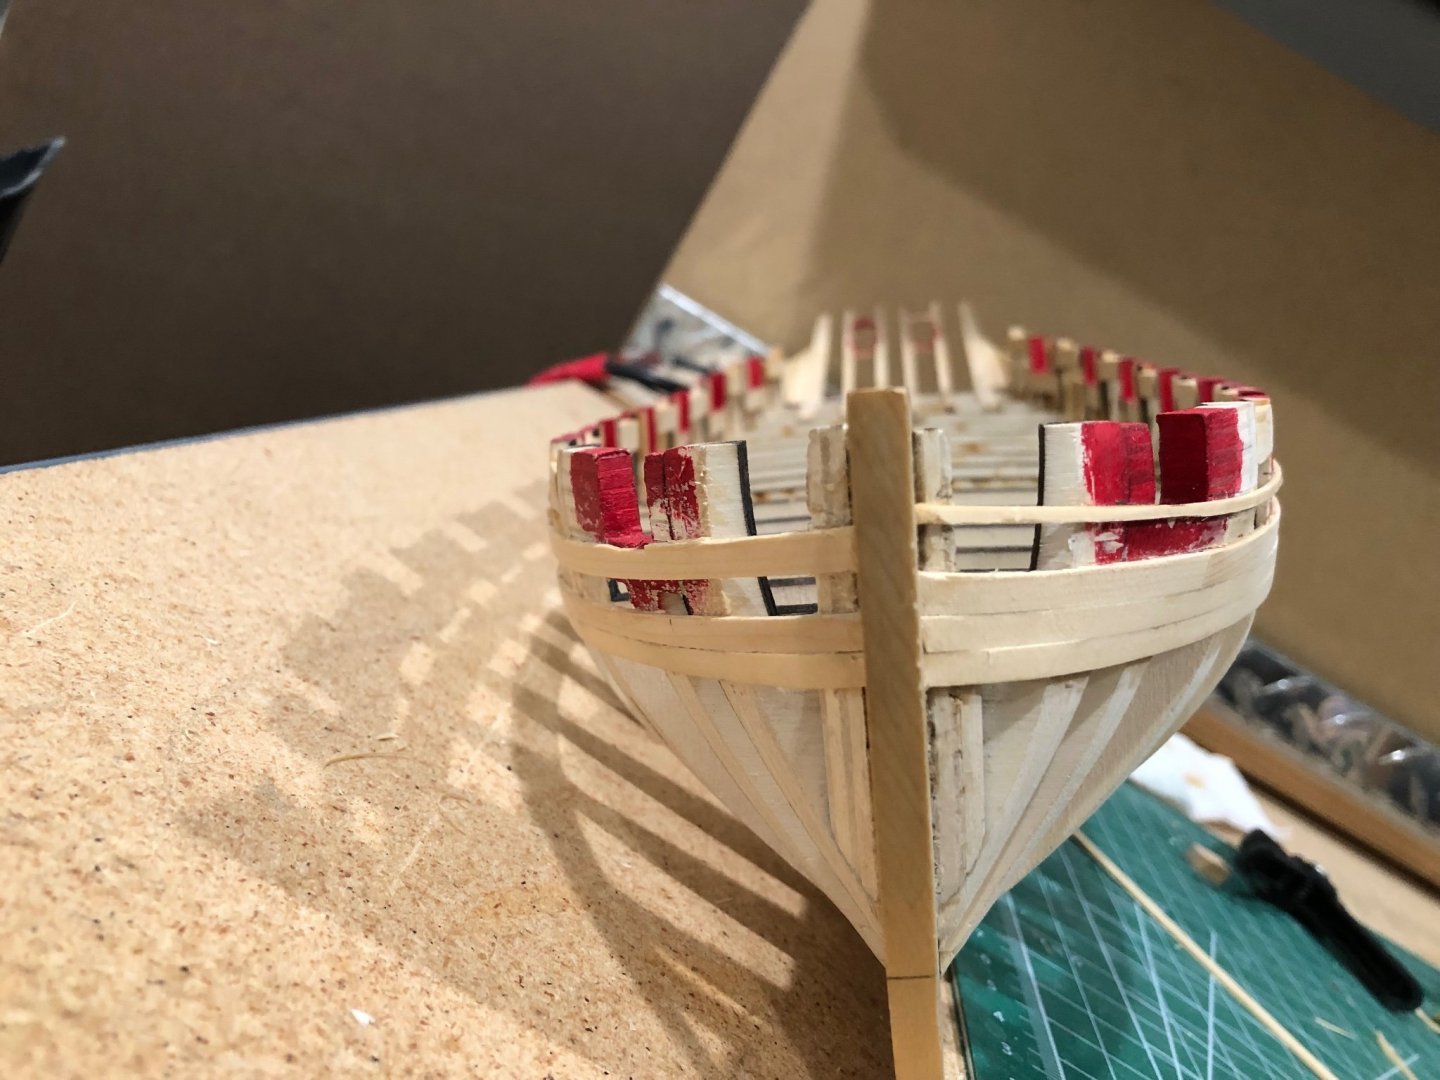
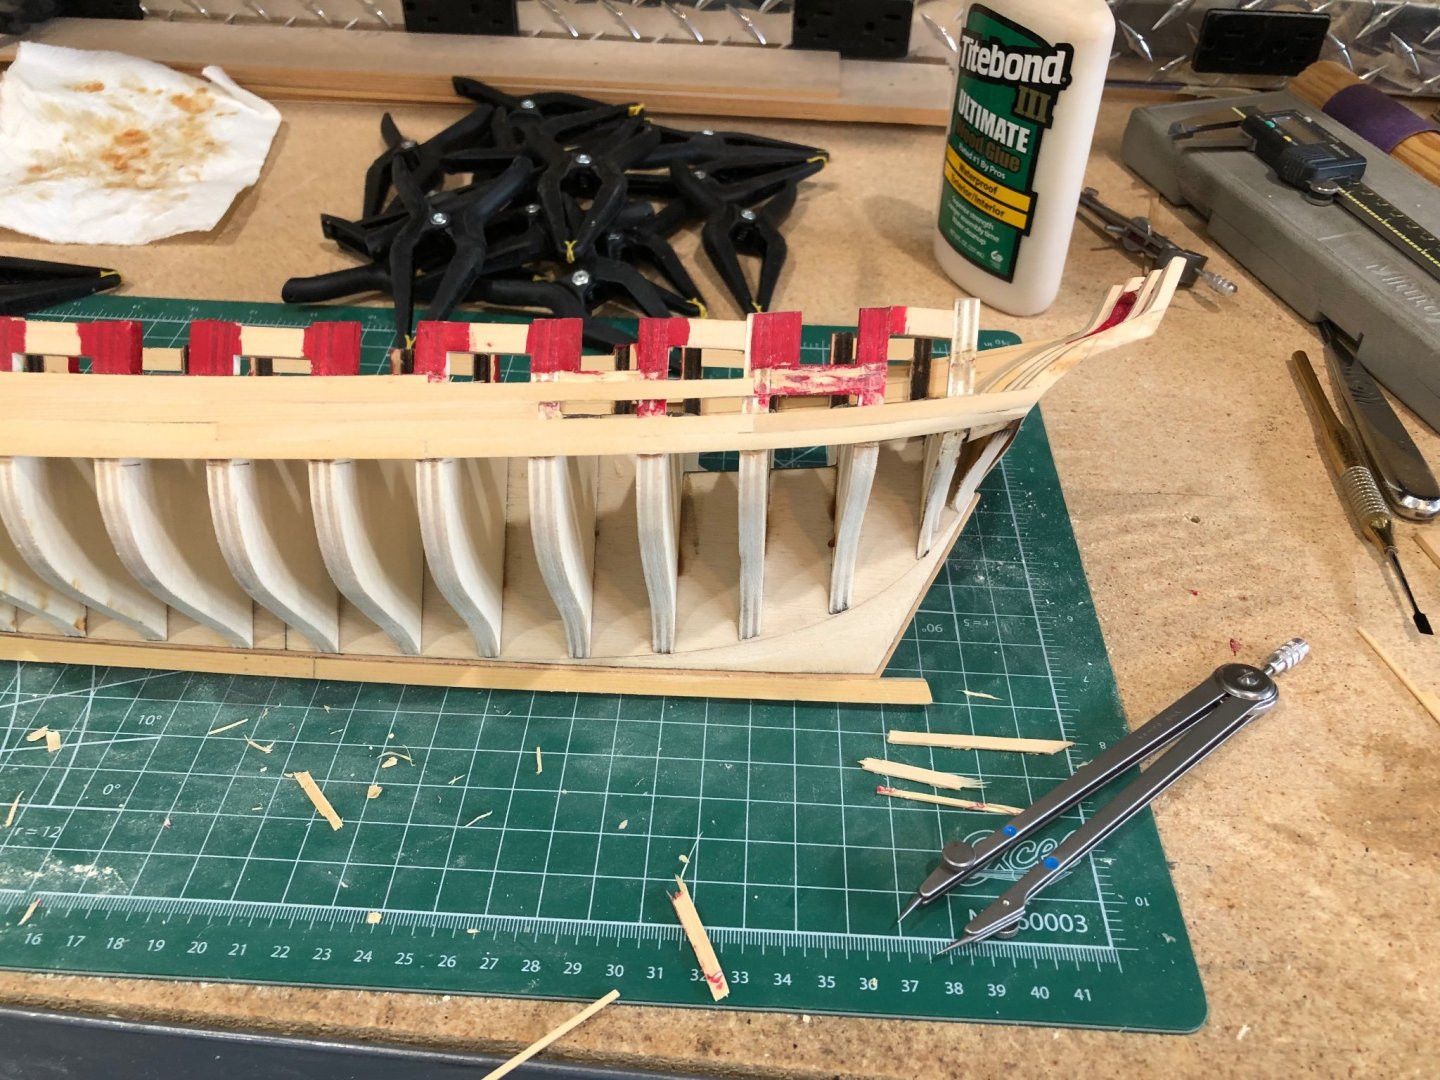
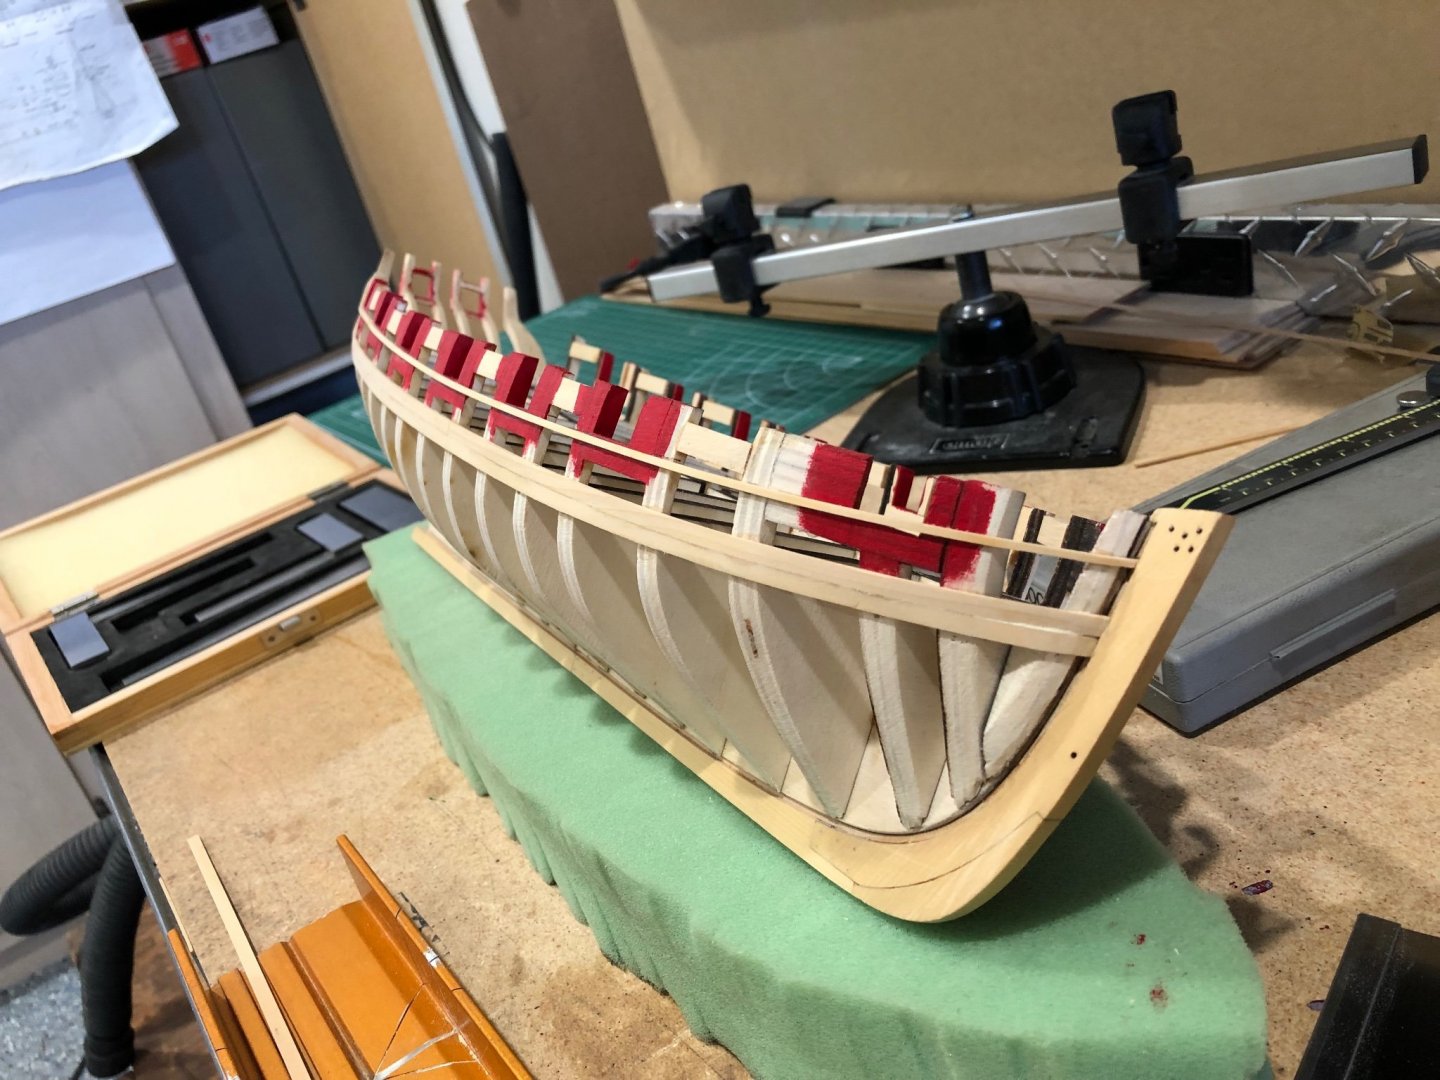
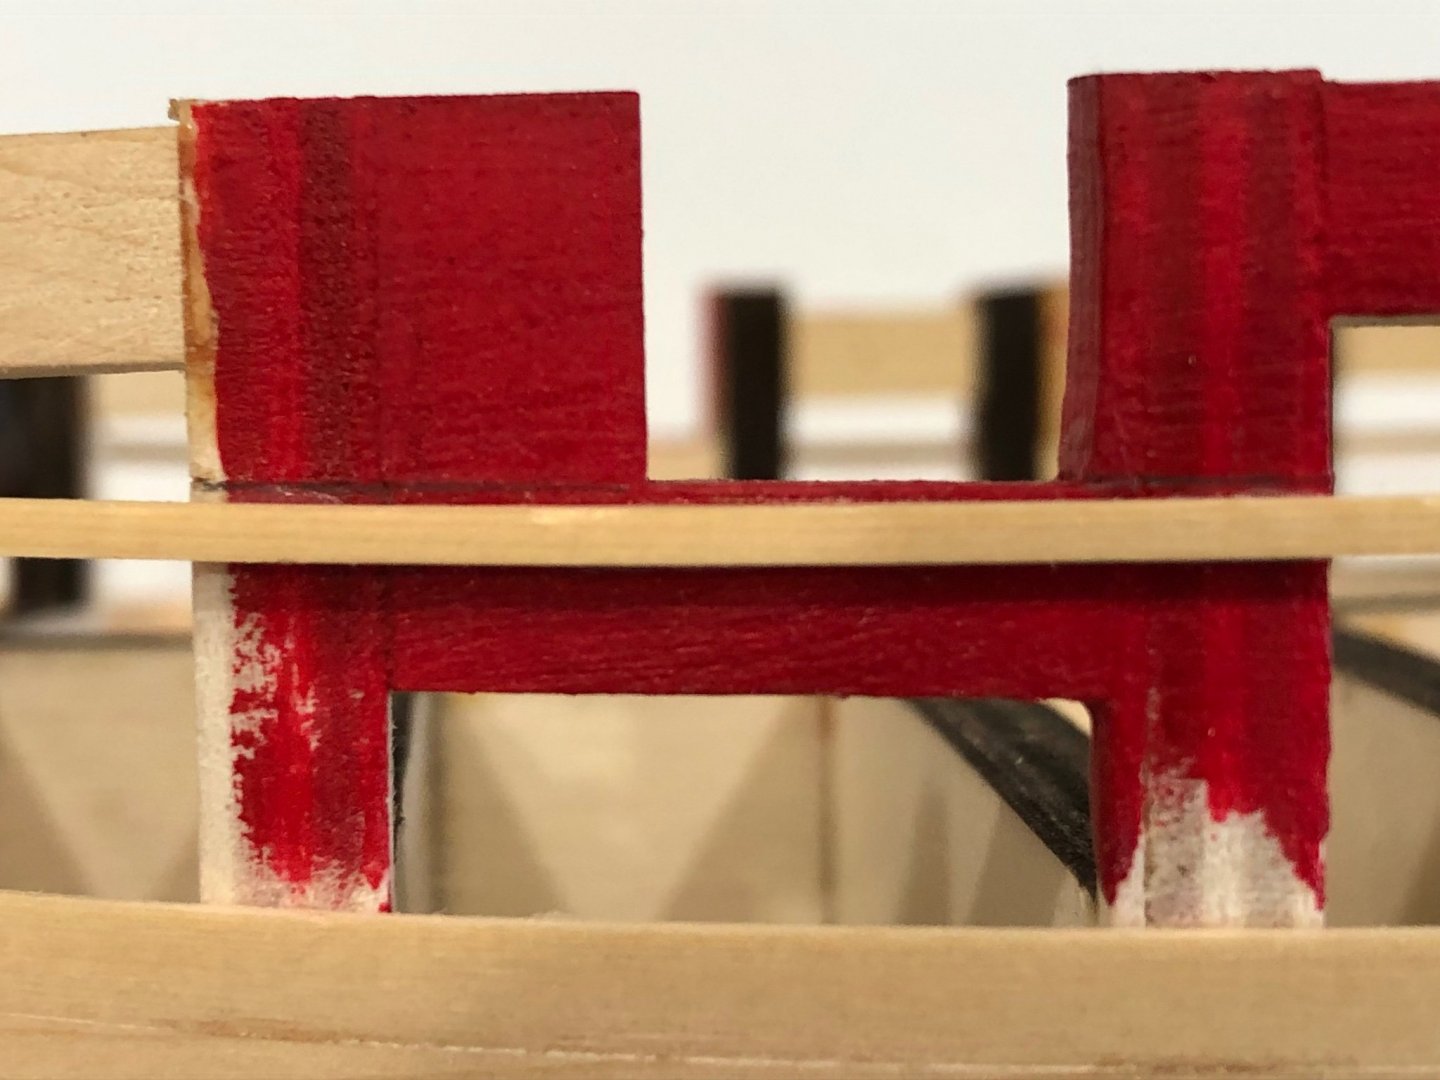
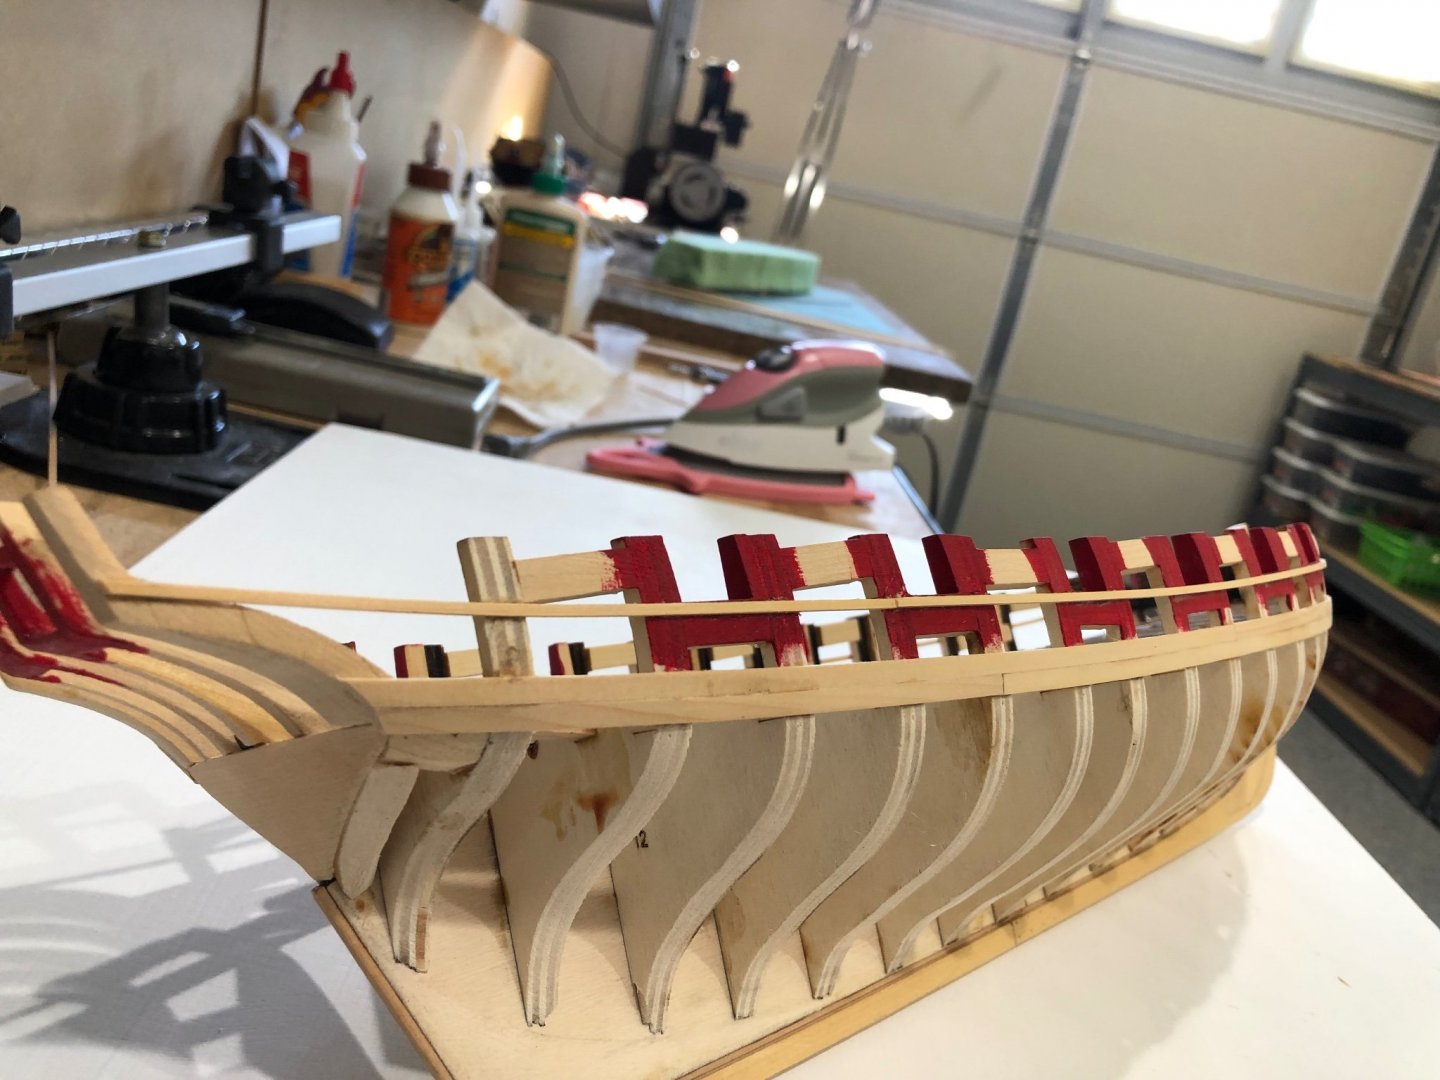
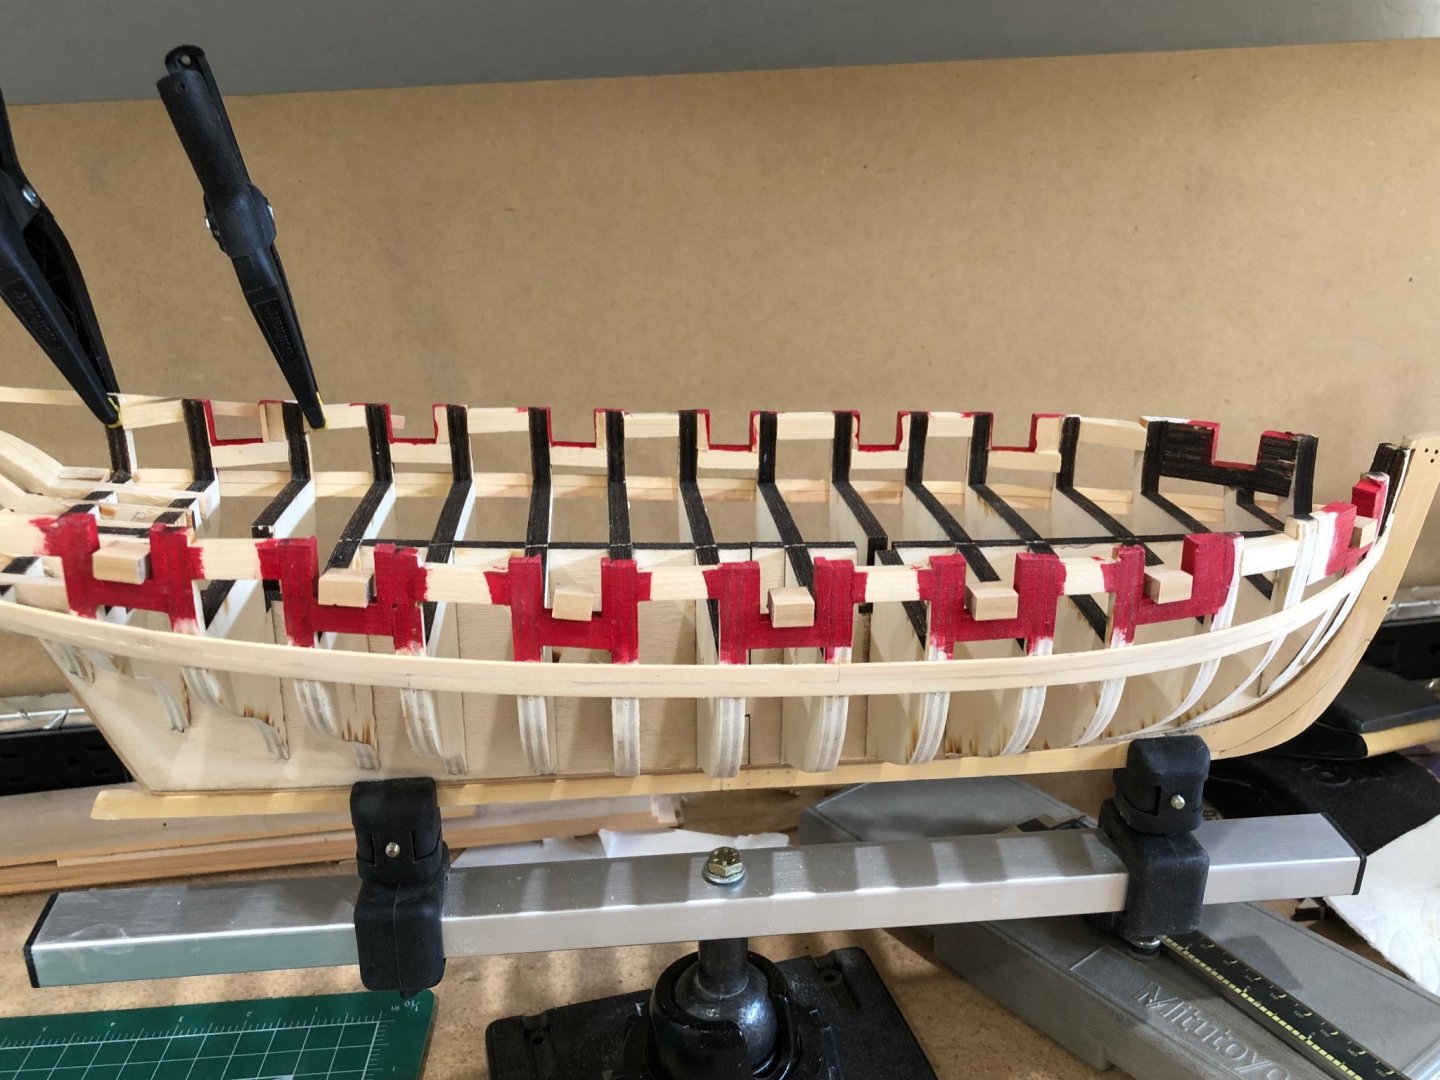
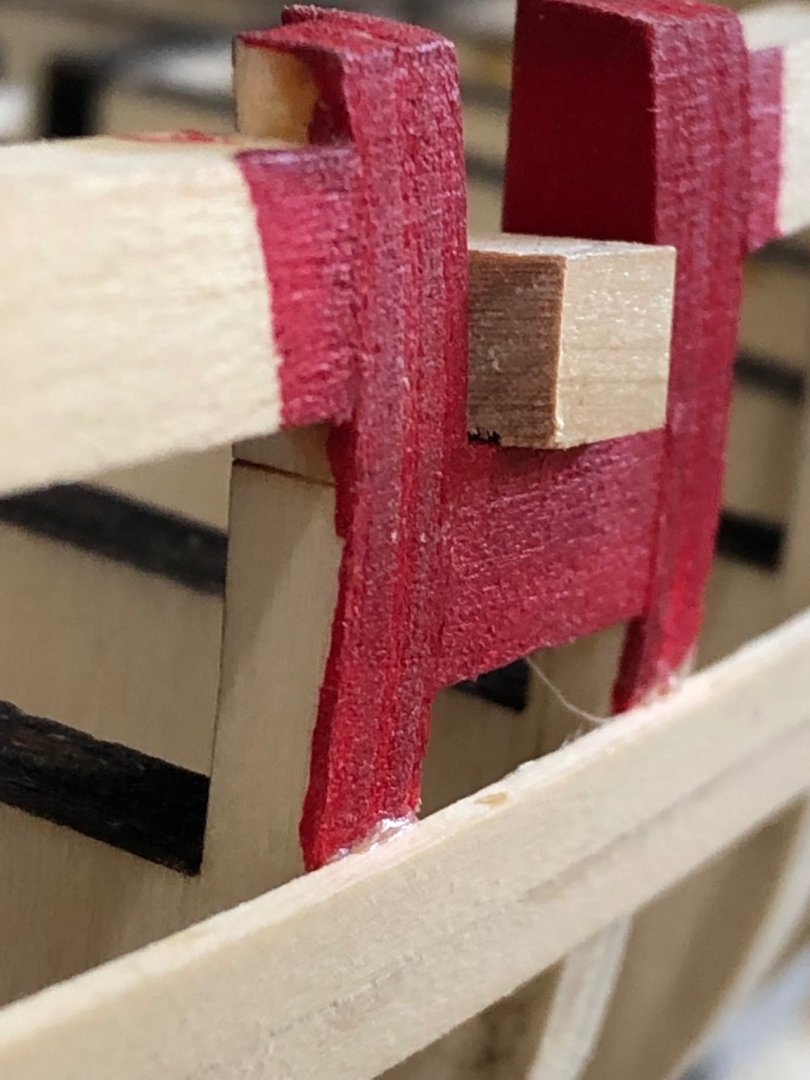
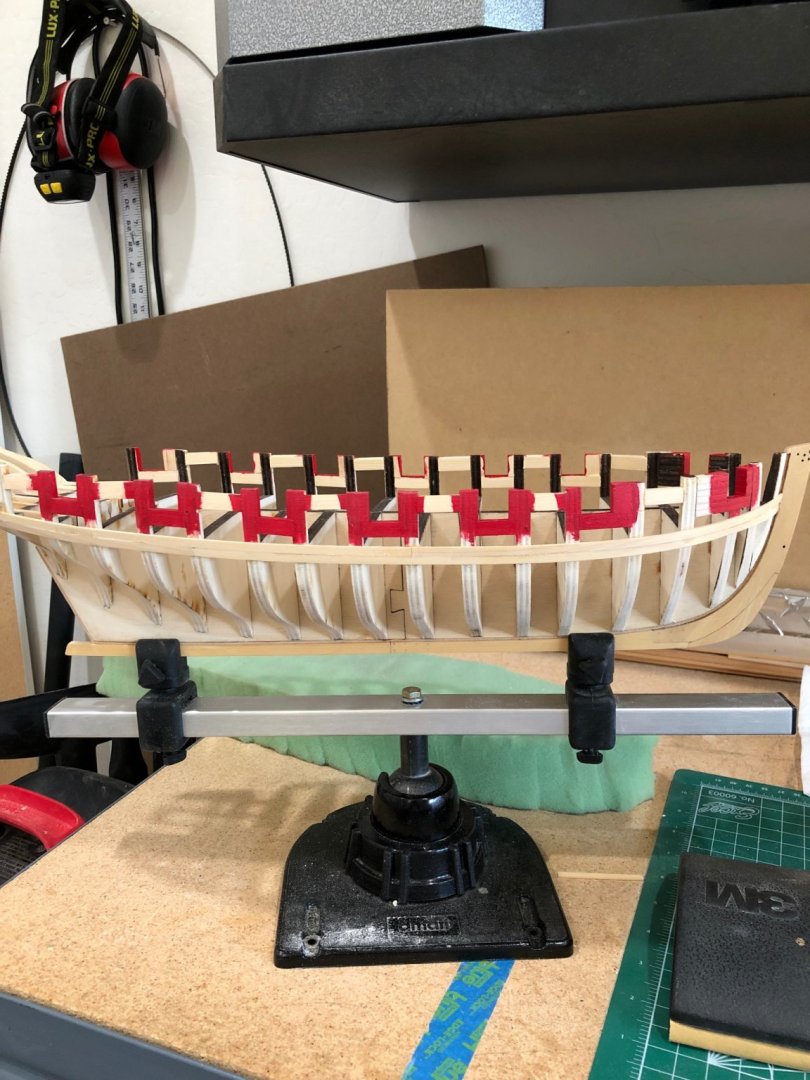
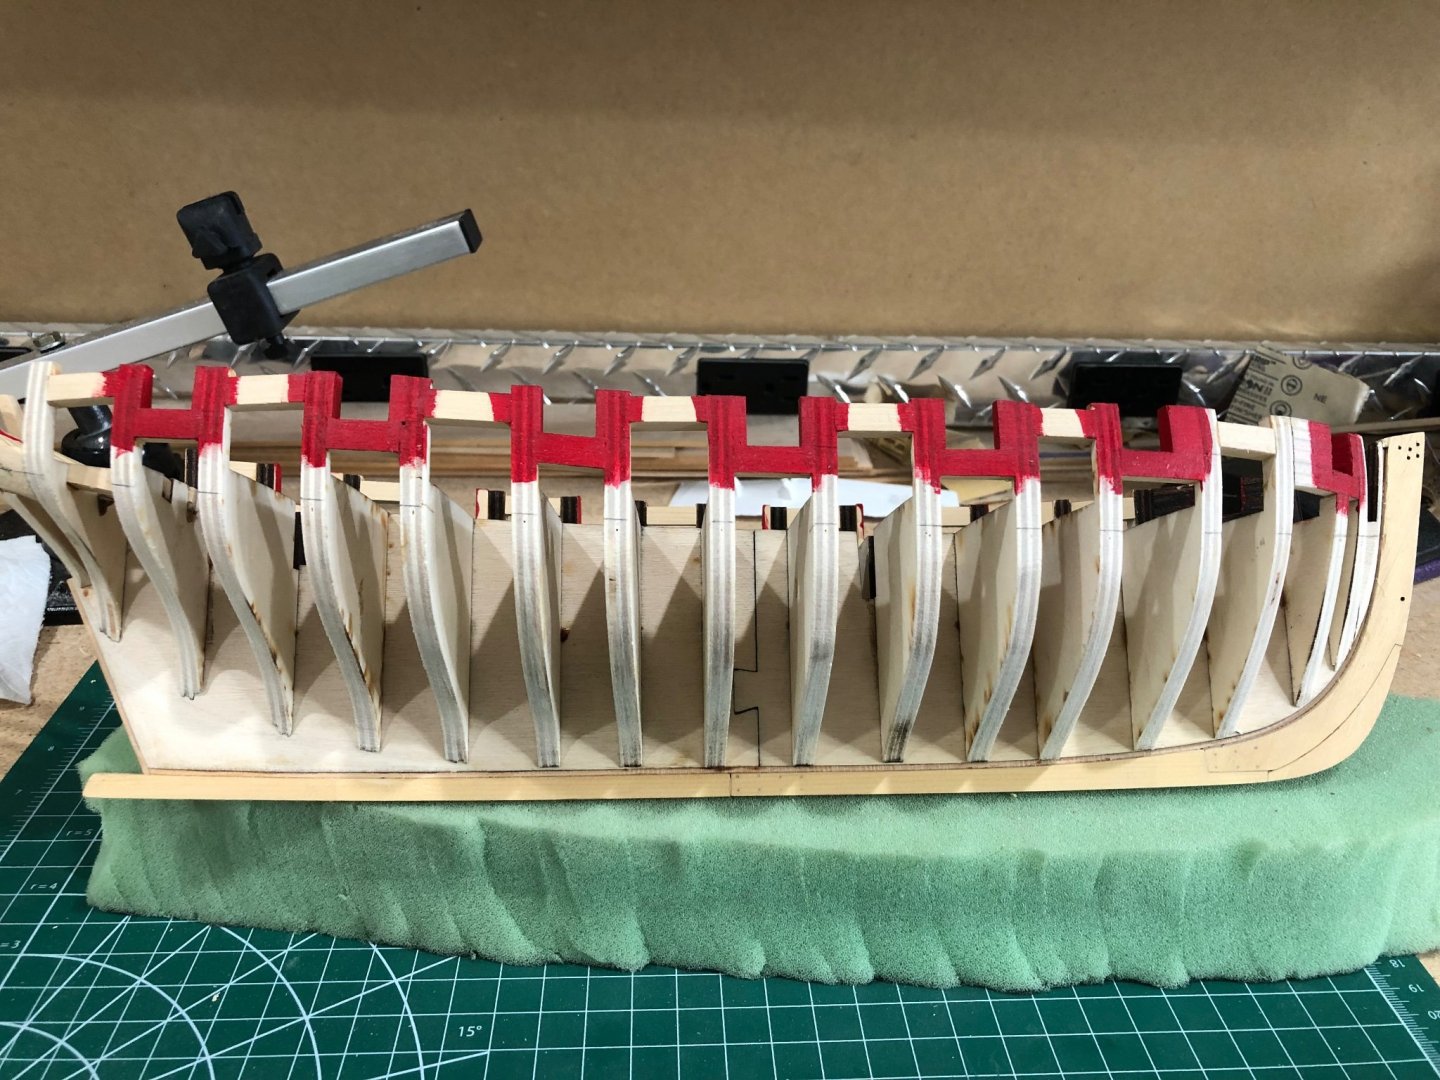
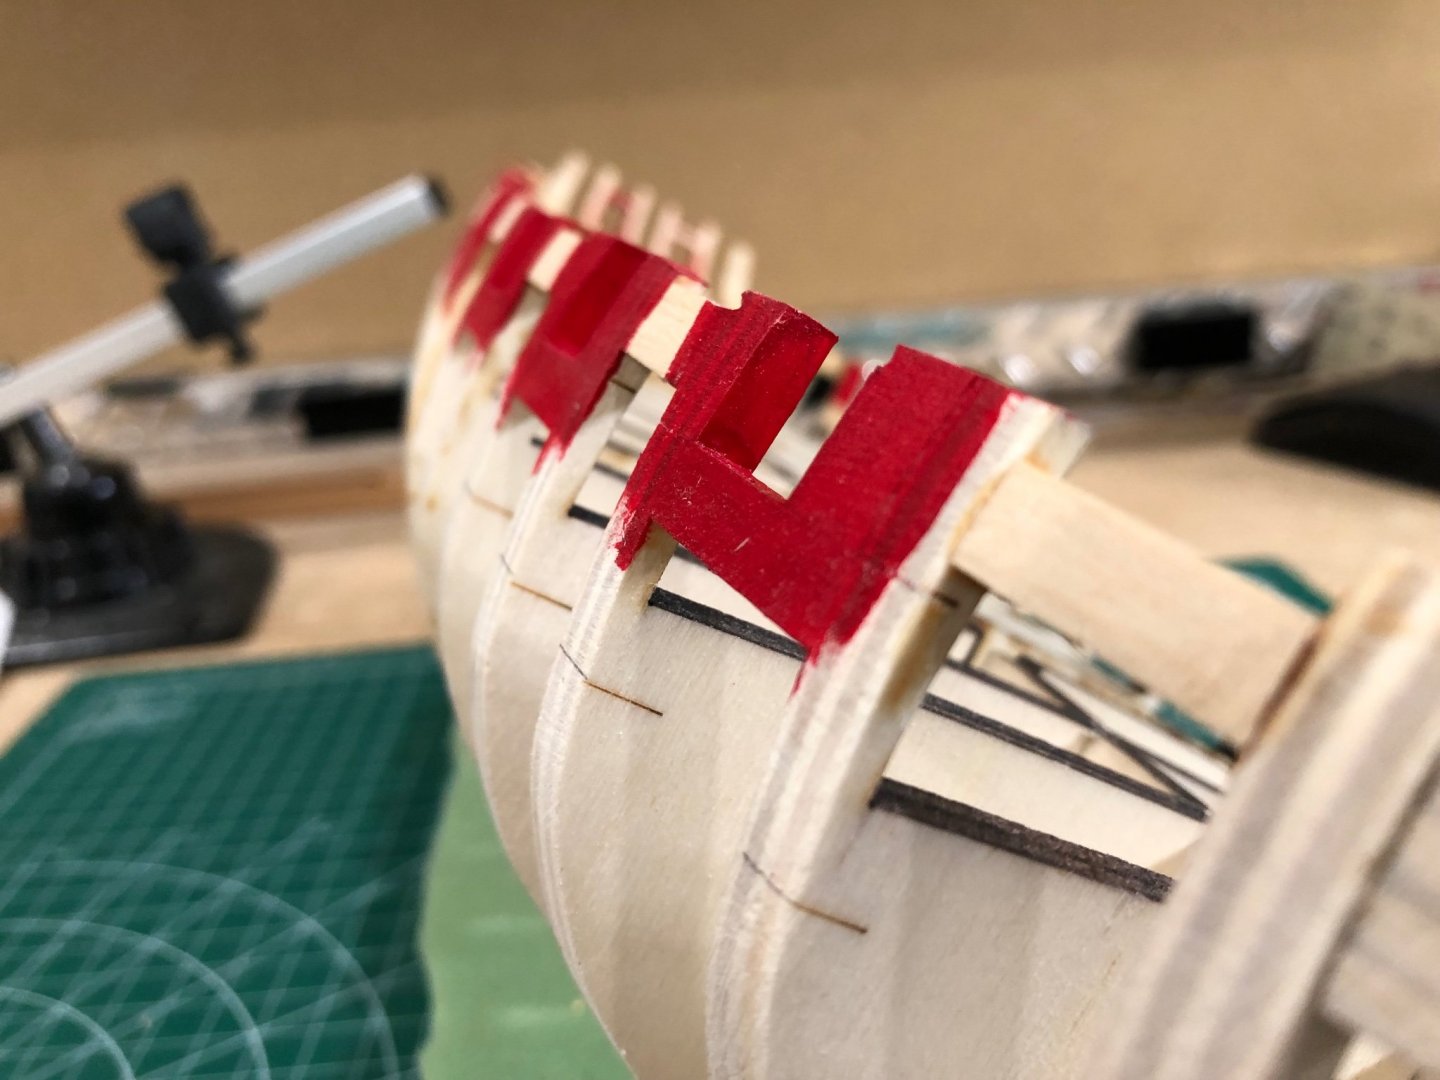
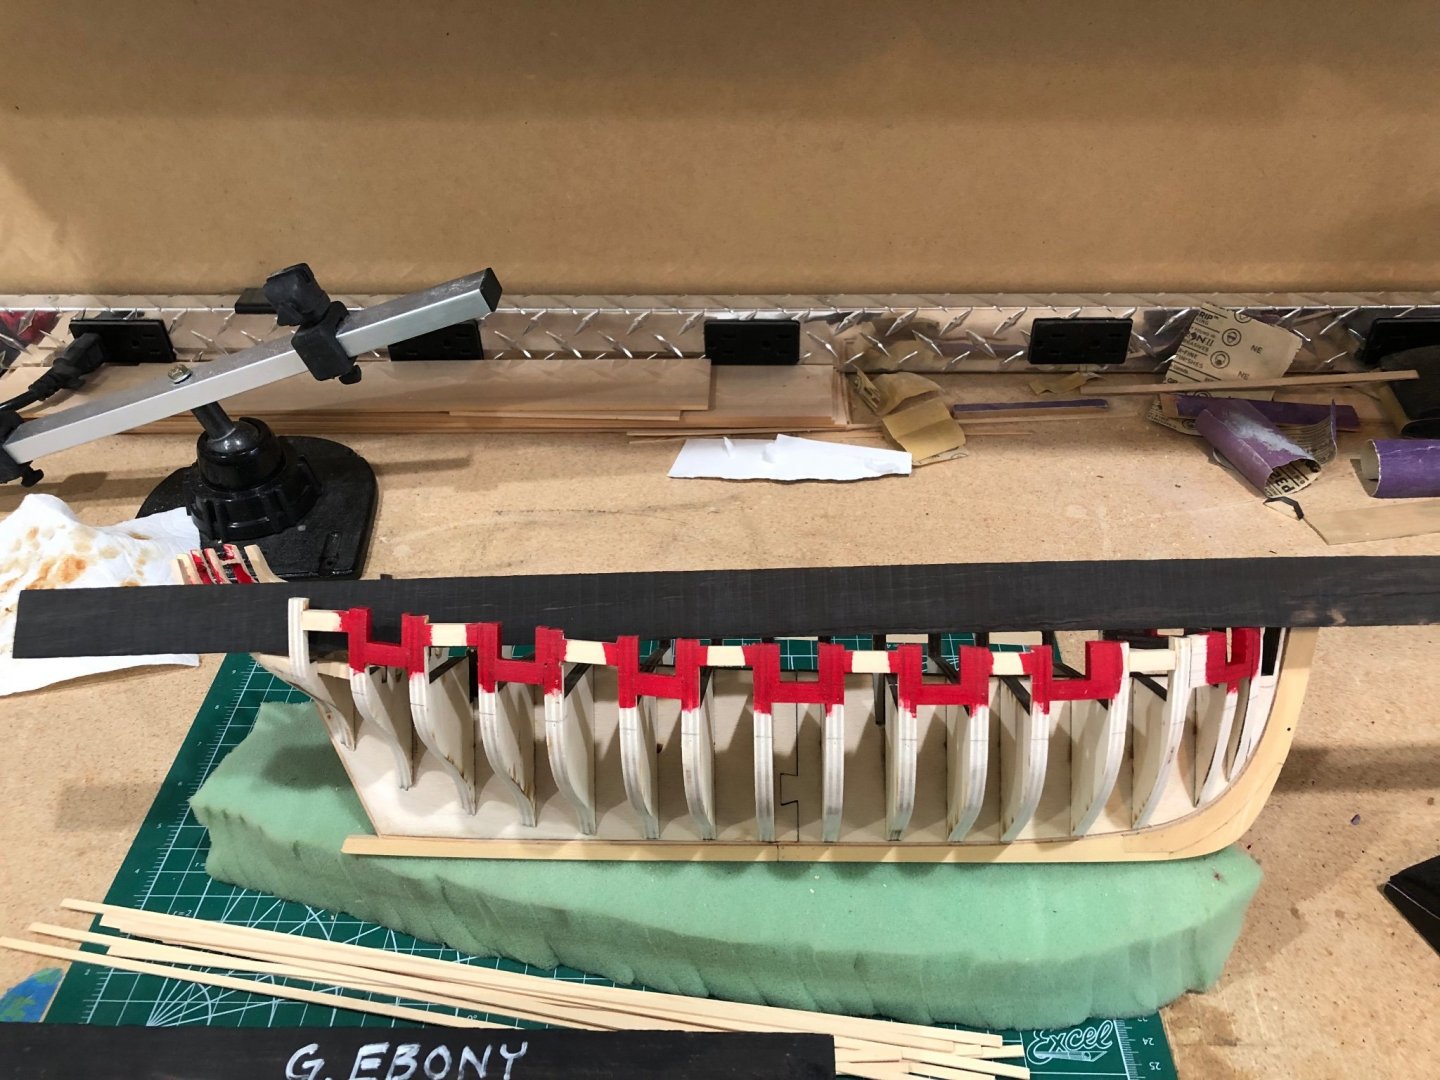
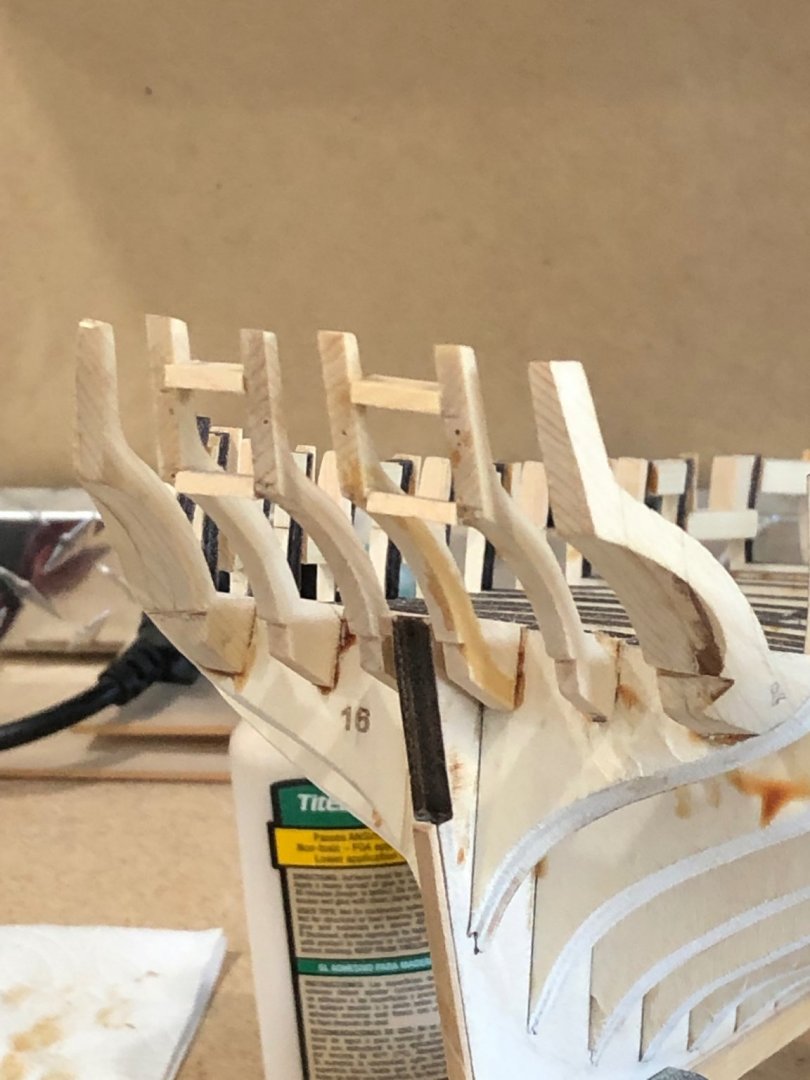
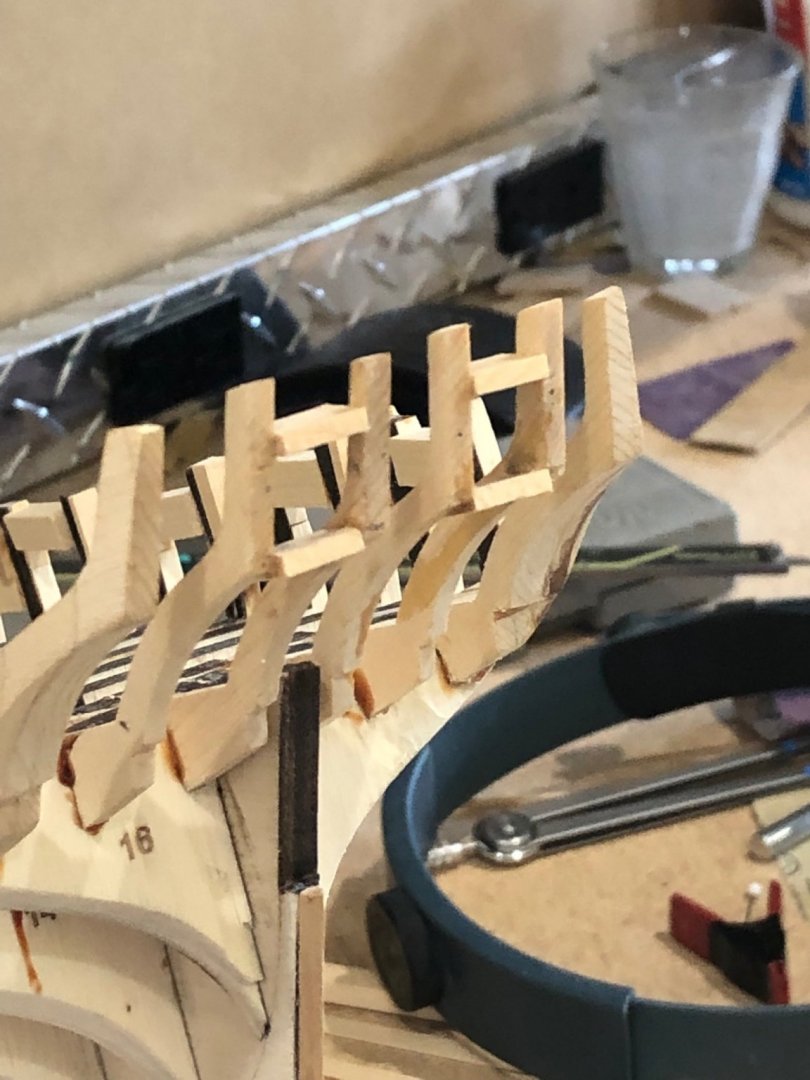
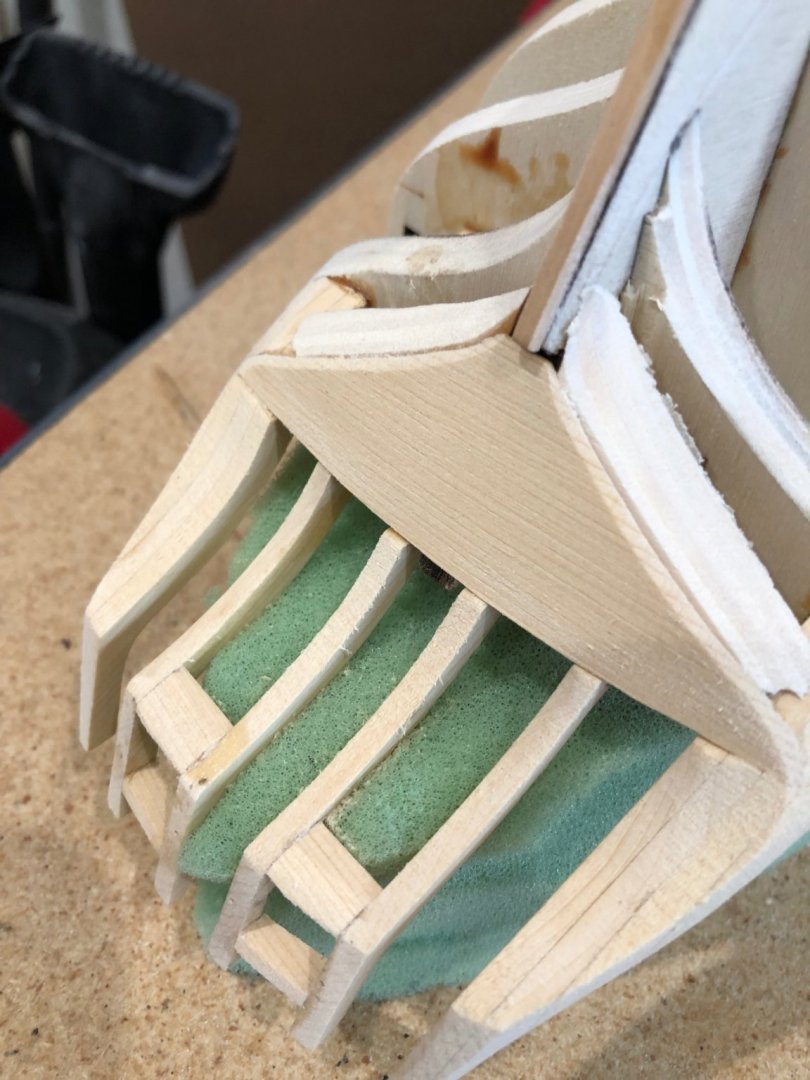
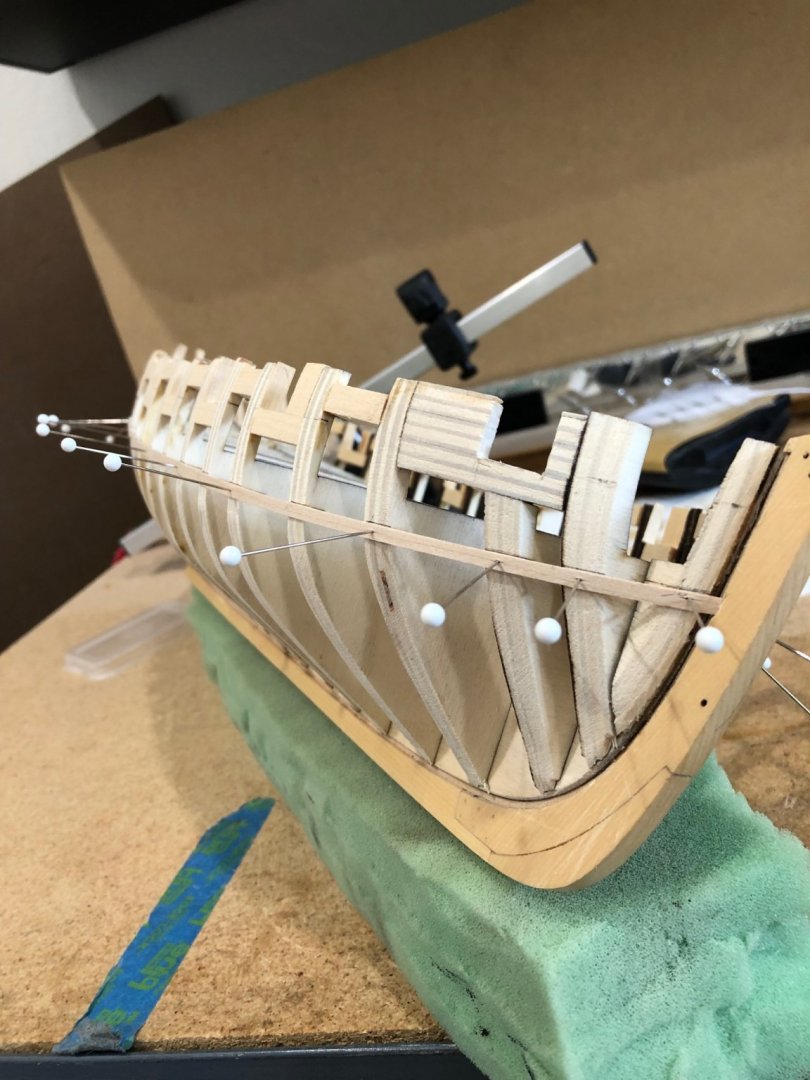
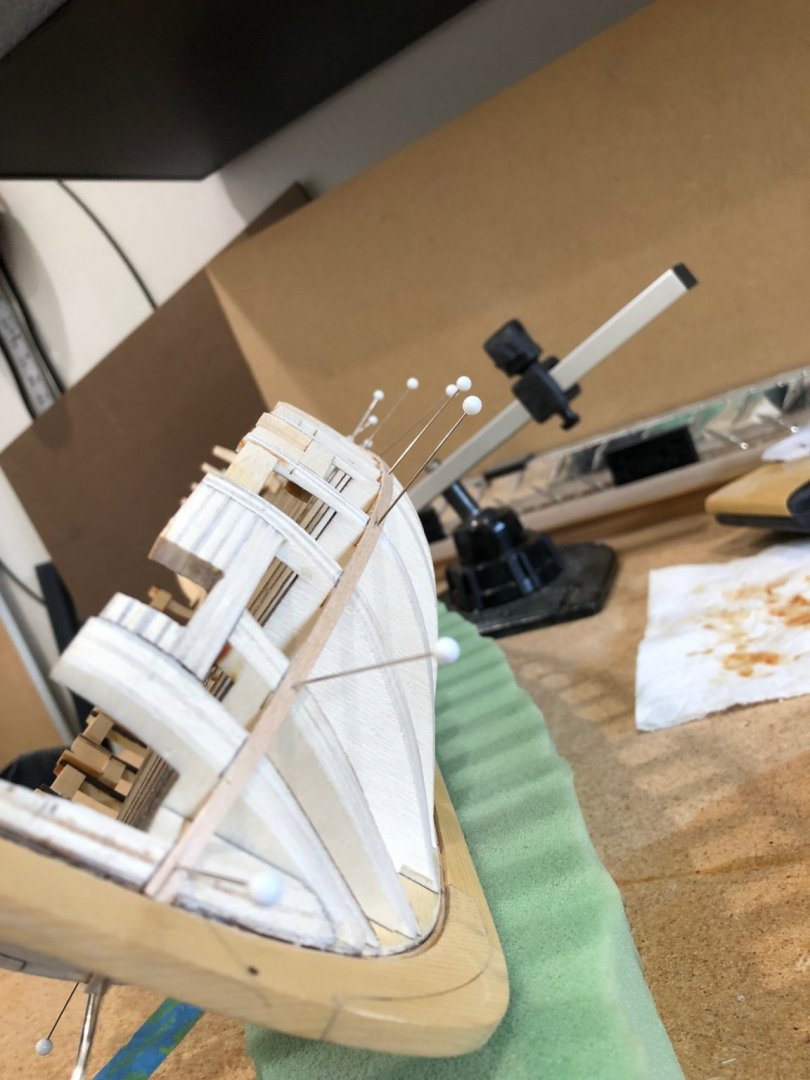
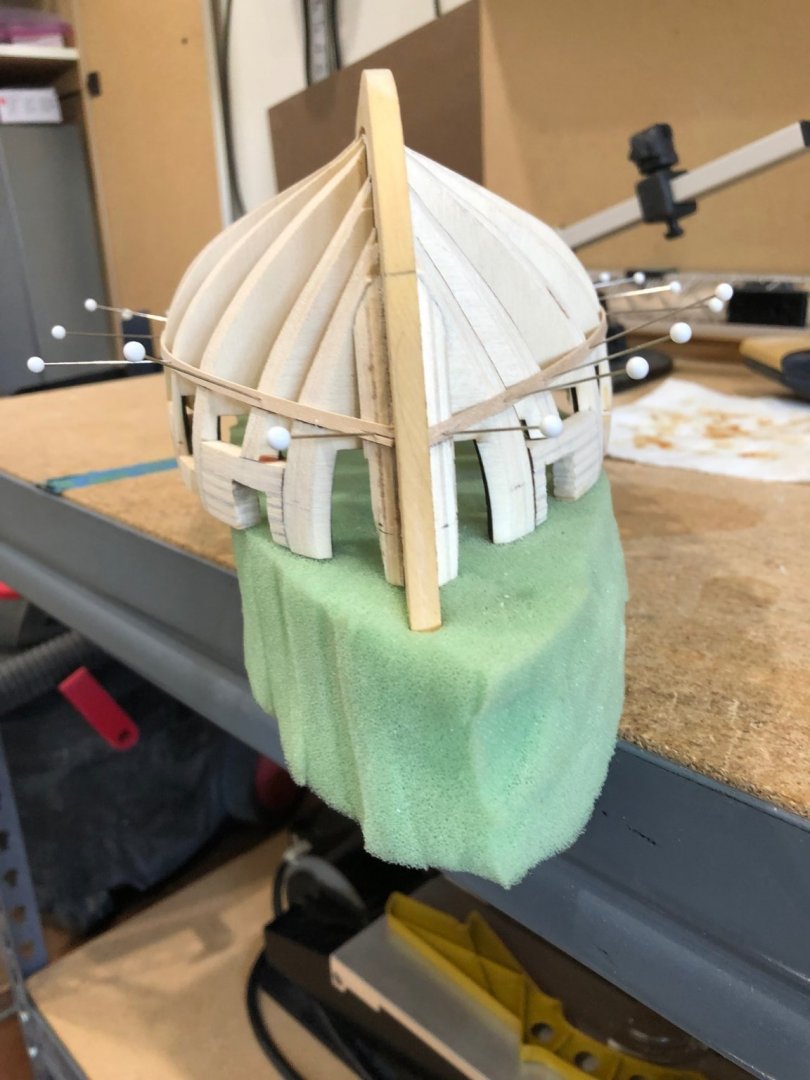
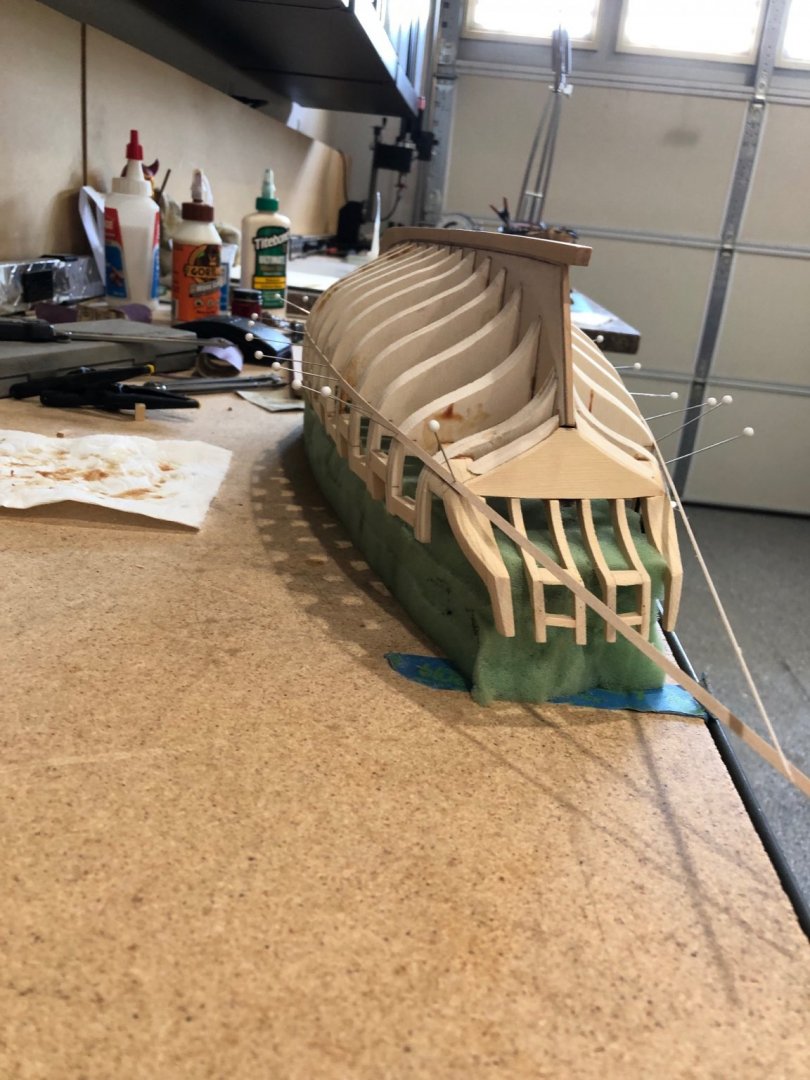
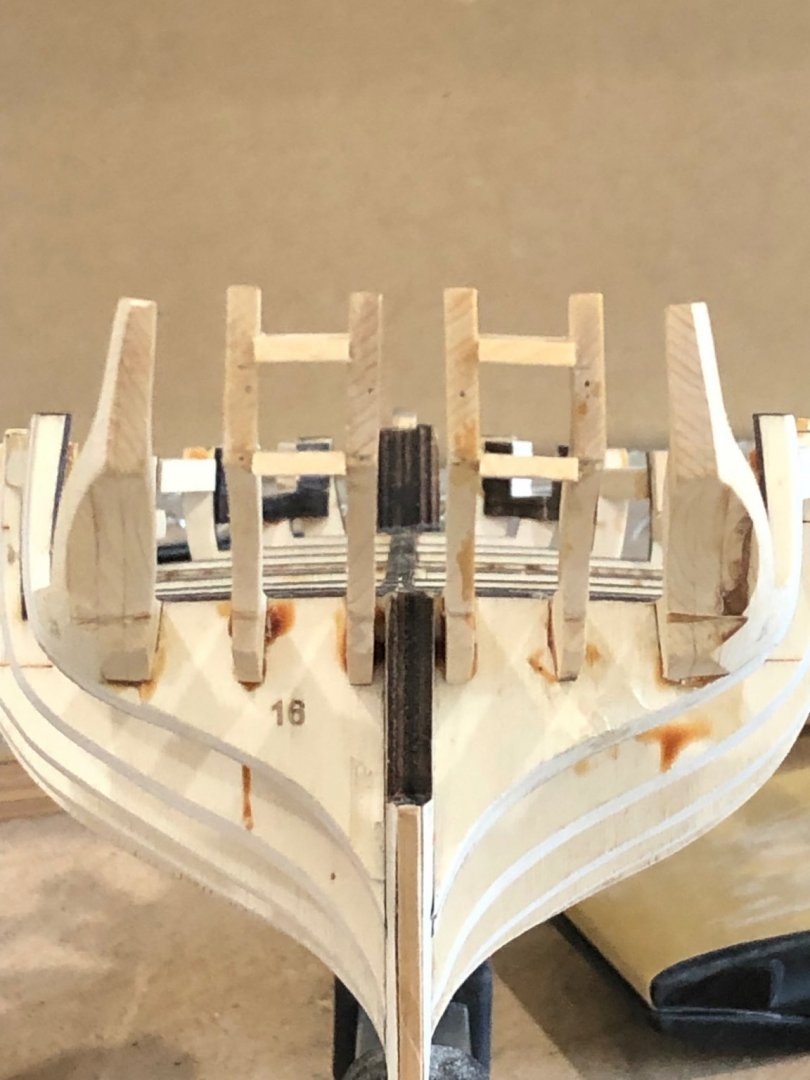
Made progress today really happy how its coming out. I faired the transom and ports installed the square tuck. Added the fillers behind the square tuck and faired them into the flow of the sides. When cutting the port sills and lintels I clipped a batten to the frames after measuring and making sure they met the plans. This made it easier to cut and trim the pieces as the frames were held in place so the sills and lintels slid in without friction. I did take a picture of a little tool I made to align the lintels to sills. It was a simple 3/8" square piece at the exact length to rest on the sills for lintel alignment. Ports before fairing Ports after fairing with square tuck placed and faired to the sides. Next the afternoon was spent marking the wale lines per the monograph. I ripped a 1/32" x 1/8" batten out of a 4" by 24" basswood sheet that allowed me to line the length of the frames. Pinning the batten showed only one minor alignment on both port and starboard sides at the same frame. It was great how the battens crossed after touching the counter and transom line as monograph described. That done I moved on to painting the ports using the crimson paint. I spent a lot of time and effort making the joints in the ports and am very happy how they came out after the first coat of paint. Waiting for paint to dry second coat tomorrow and when satisfied with painting start the planking.


-
Back from Colorado and had a great time visiting friends but the weather was hot for the first 2 weeks and then rained for the next 2 weeks as we were leaving the Colorado spring returned. A little excitement on the way to our apartment when we got a first hand look at a tornado forming and touching down. Fortunately it was in farms fields just a few buildings down but really amazing to watch. Back to the Cheerful I spent the day making the stern sills and lintels. All the angles made it difficult to get nice cleans joints but after any tries I got it done. Now to fair the counters and transom and add the 1/32" start of the square tuck. I think I need to add the filler piece behind the square tuck before starting to fair the sides. Not much to show for a long days work started at 7am and finished at 4pm Back to work tomorrow.


-
Congratulations Glenn on a beautifully done FIRST SCRATCH model. I can't believe this is the first scratch model. I've followed along since I started my Cheerful and have used your work as a guide and inspiration along with your techniques to help me along my way. Magnificant job I look forward to the closing photos.
- 778 replies
-
- 3
-

-
- cheerful
- Syren Ship Model Company
- (and 1 more)
-
Love the cat head sheaves. Glad to see you’ve found sculpy you’re right play dough for modelers
-
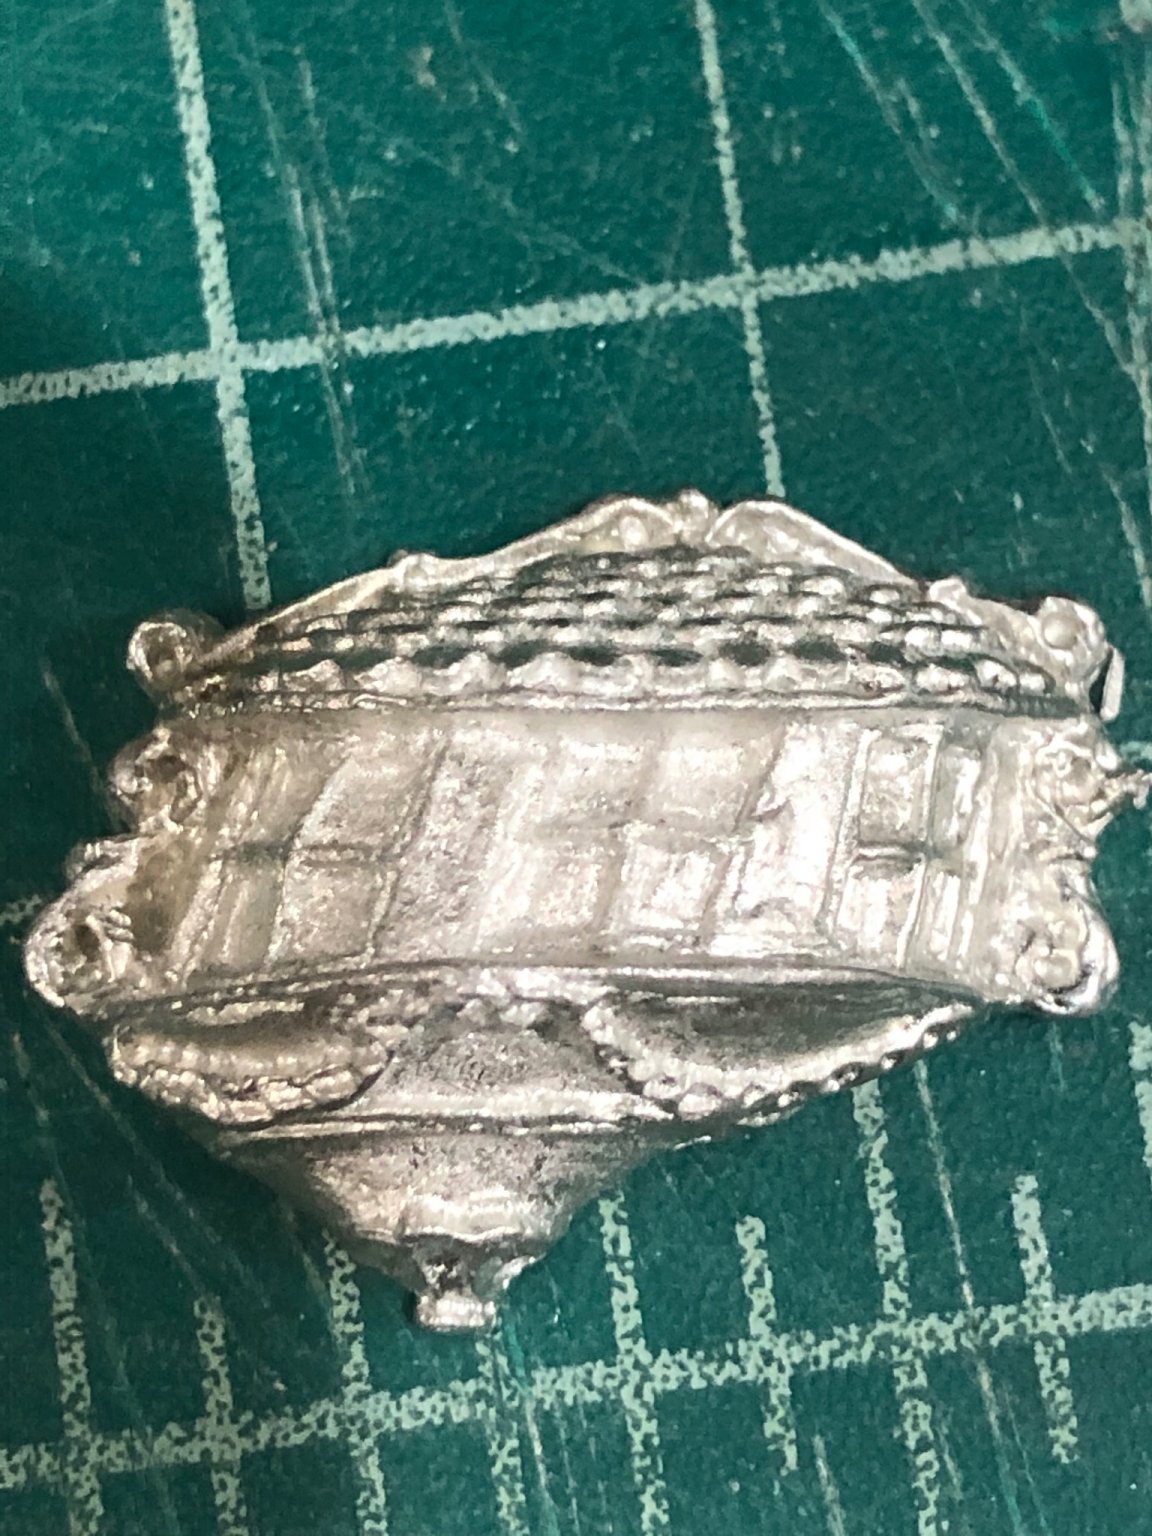
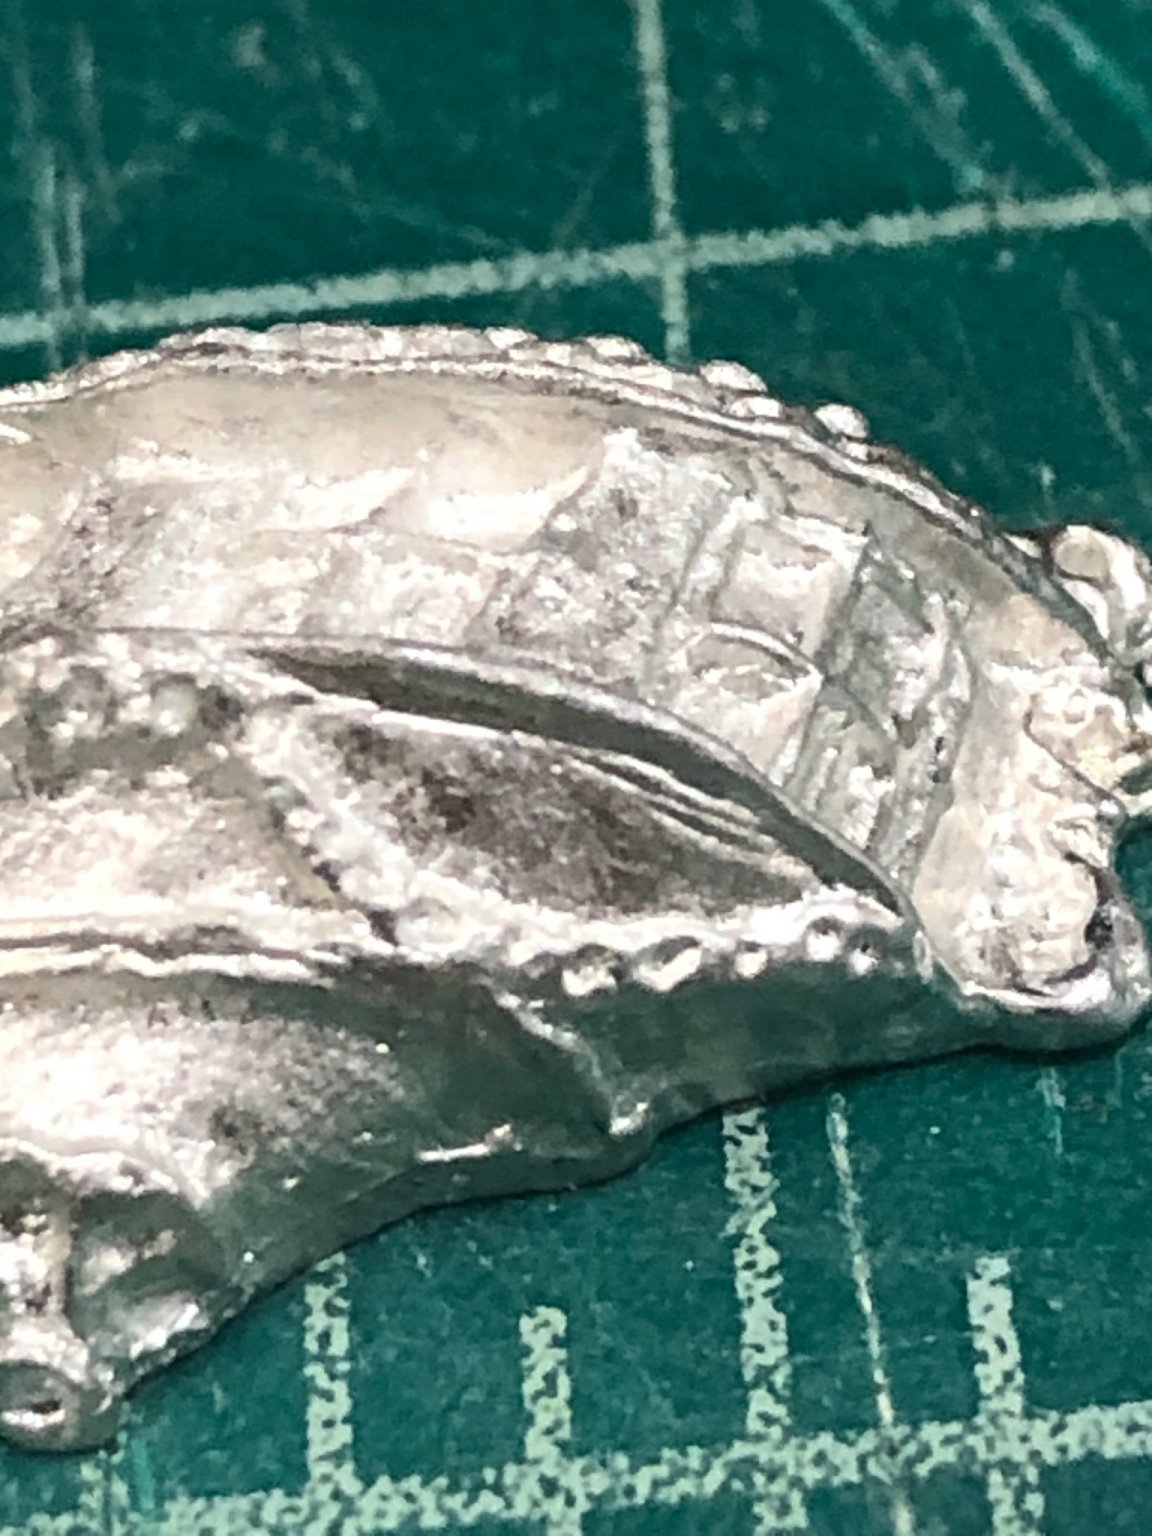
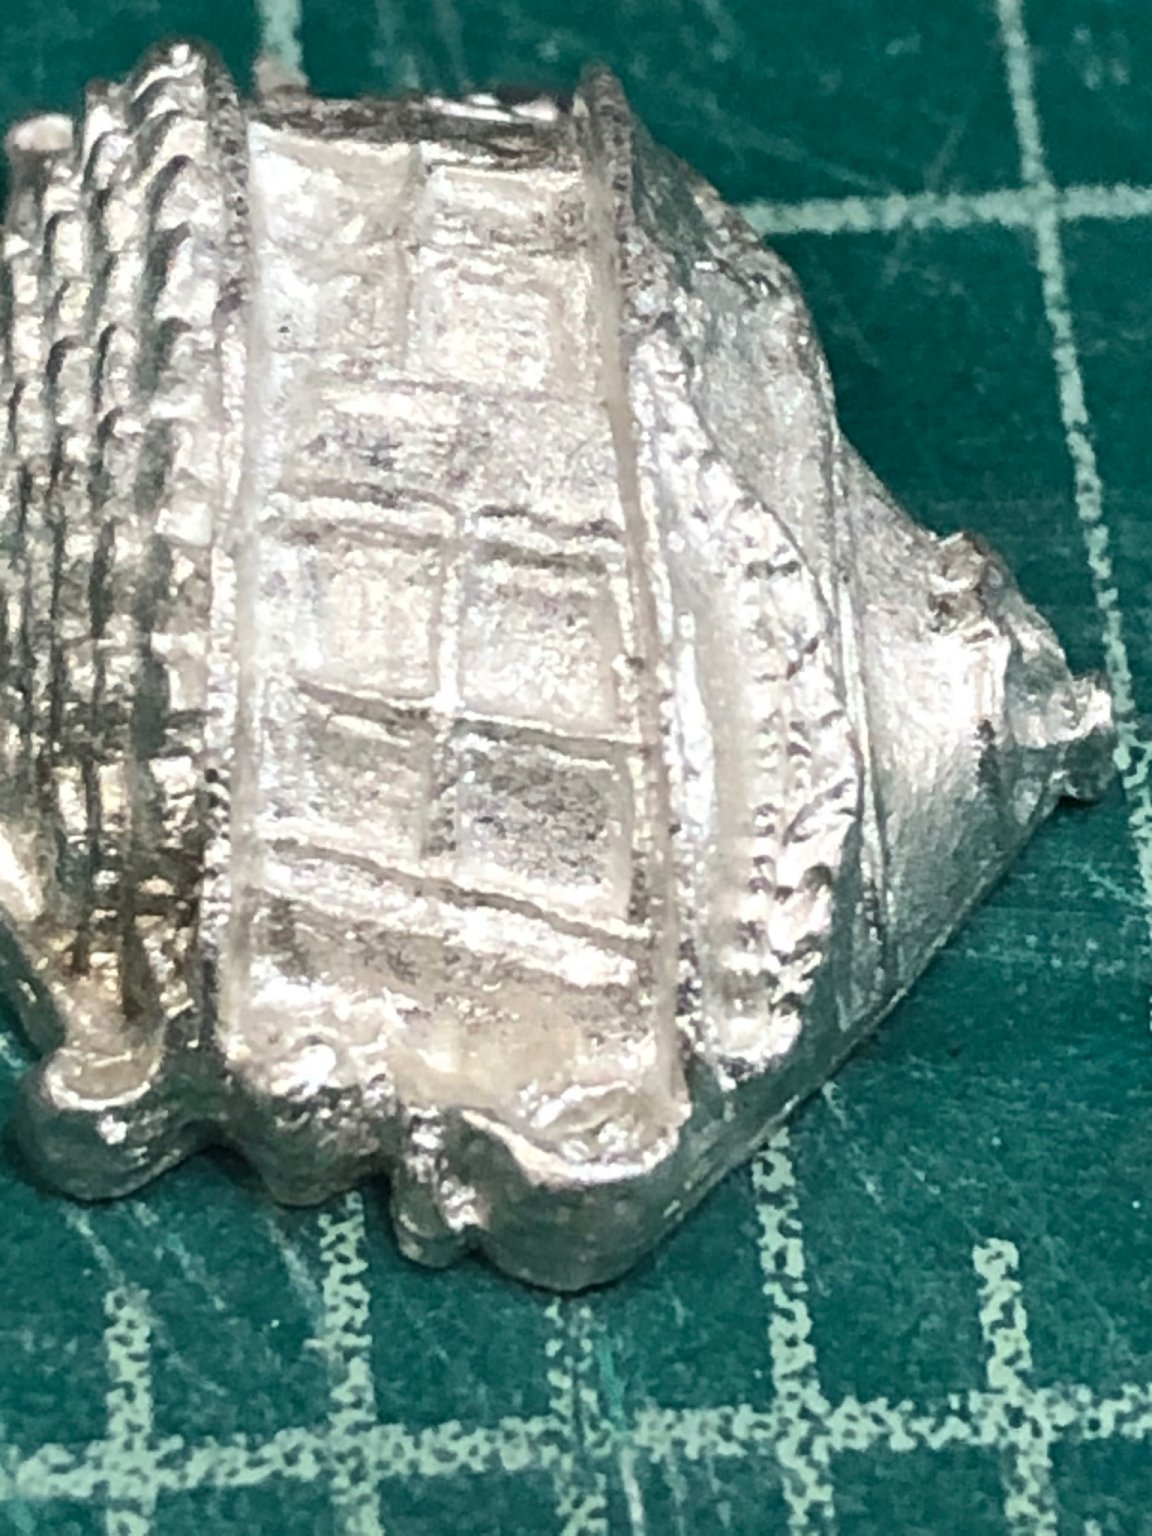
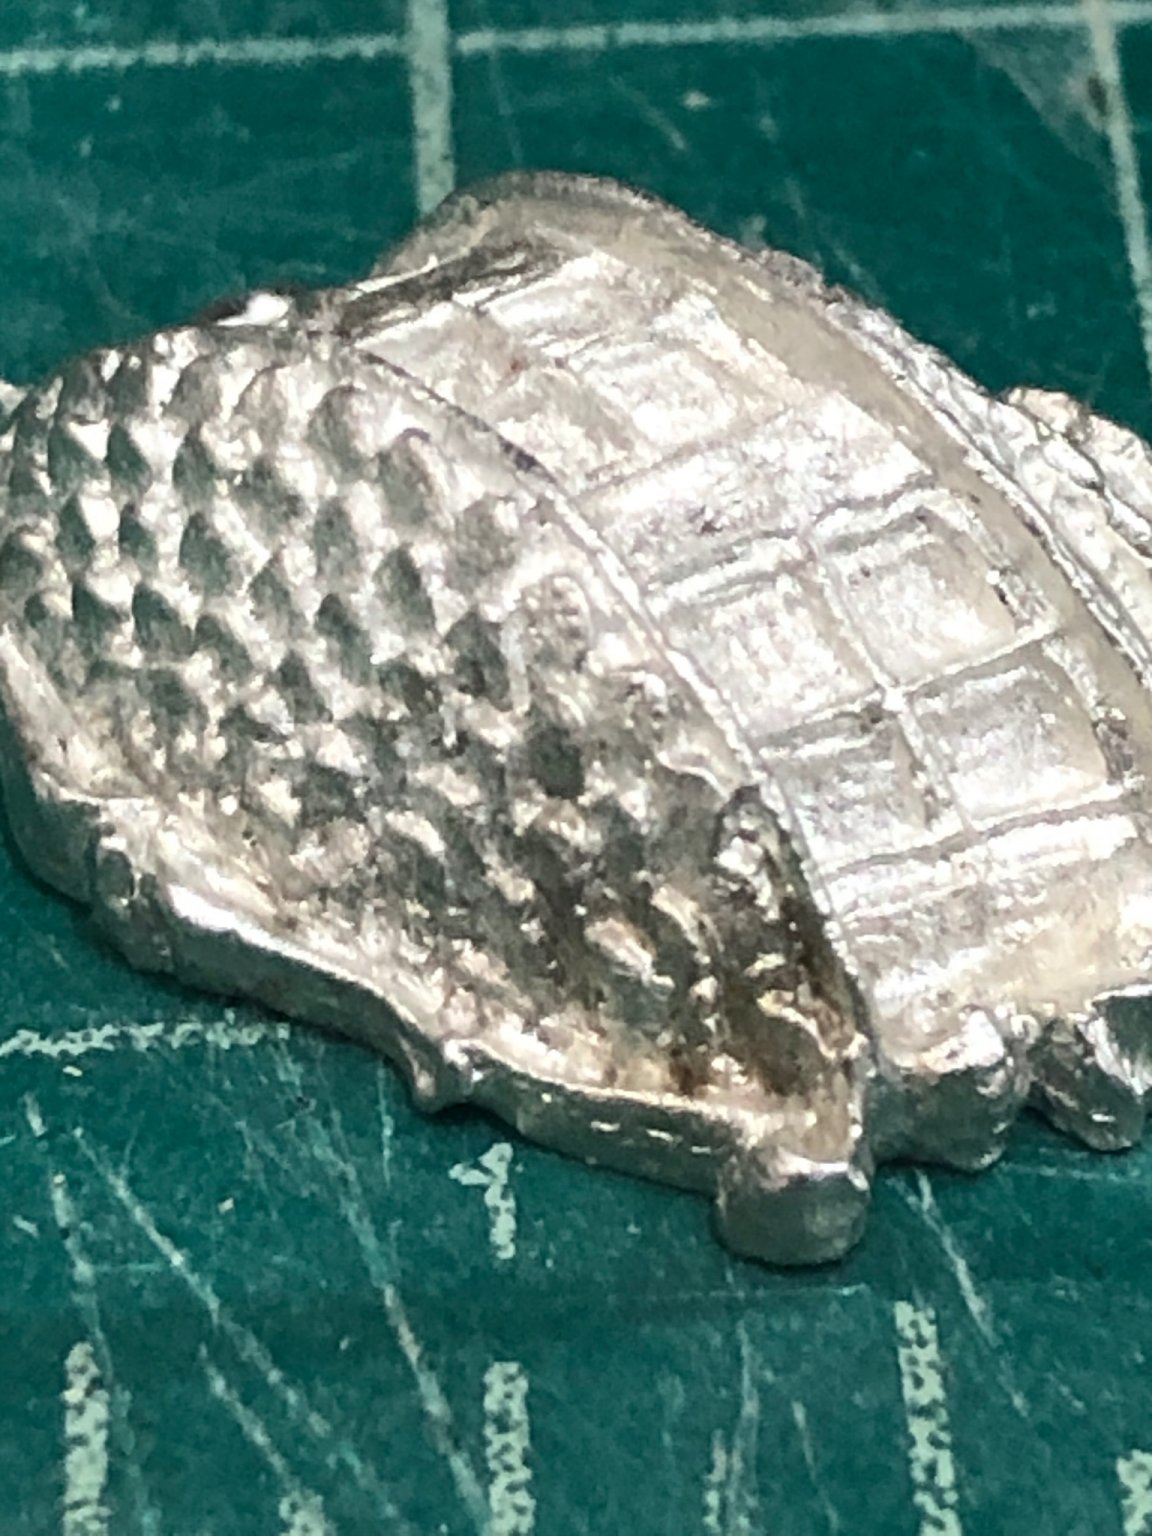
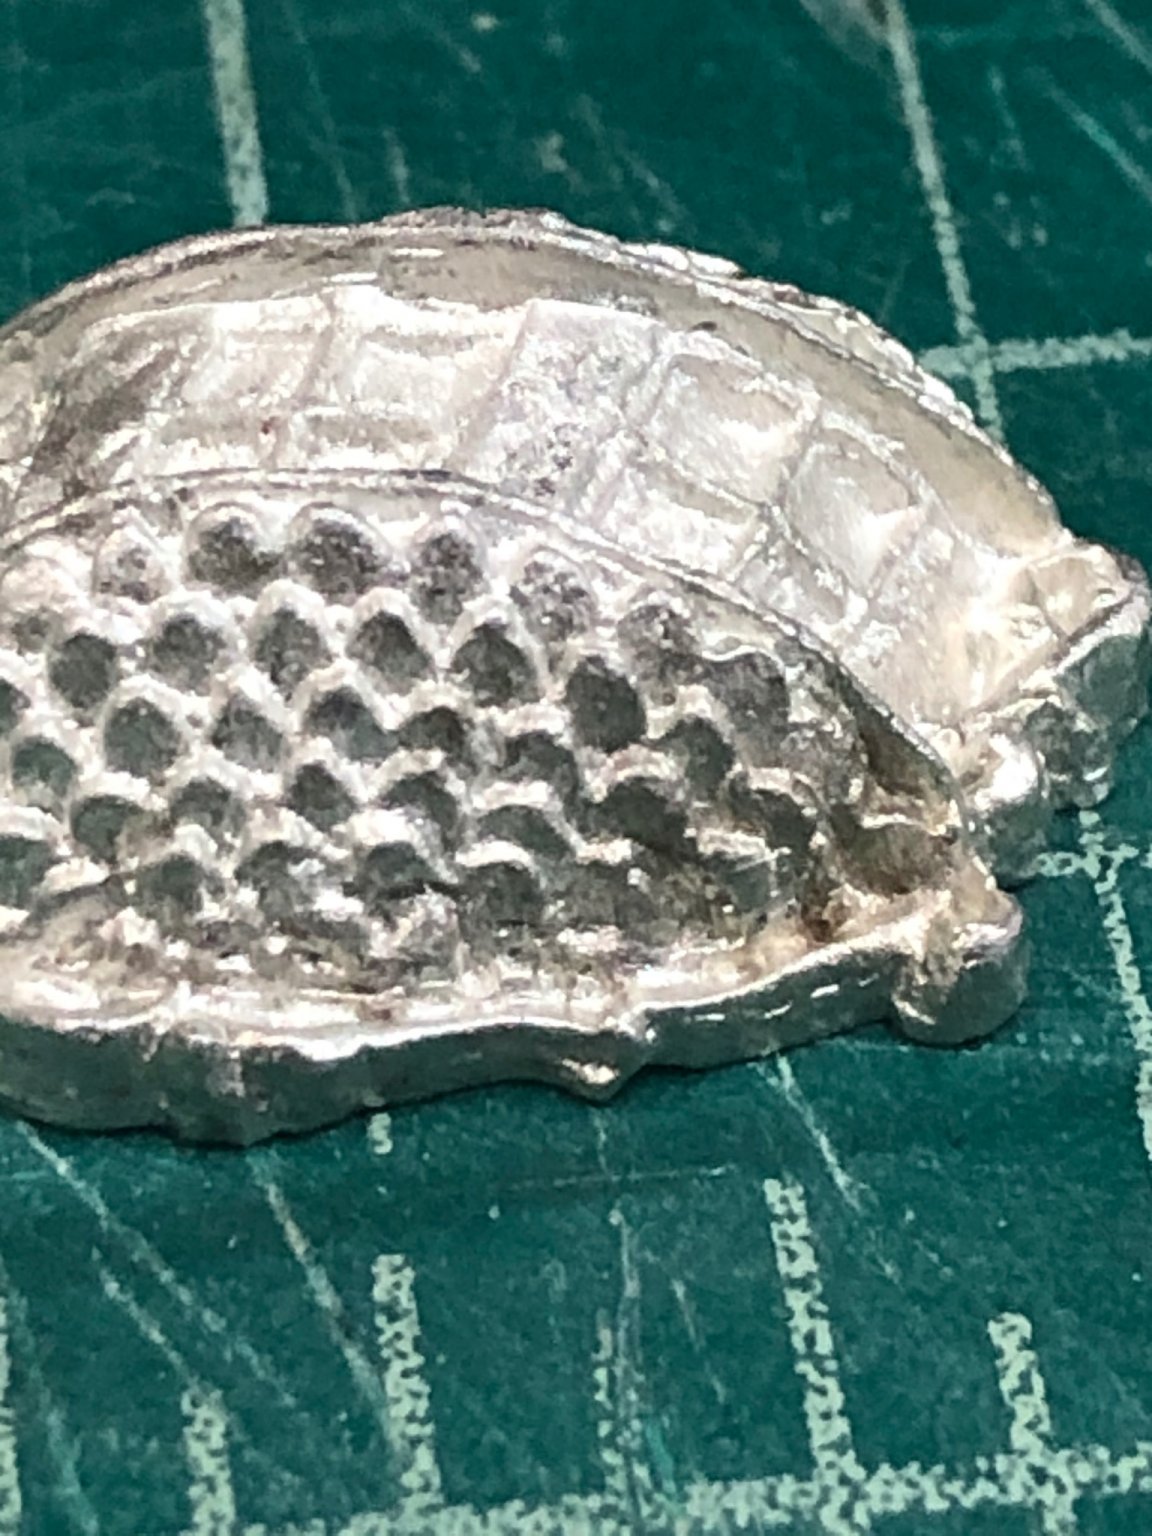
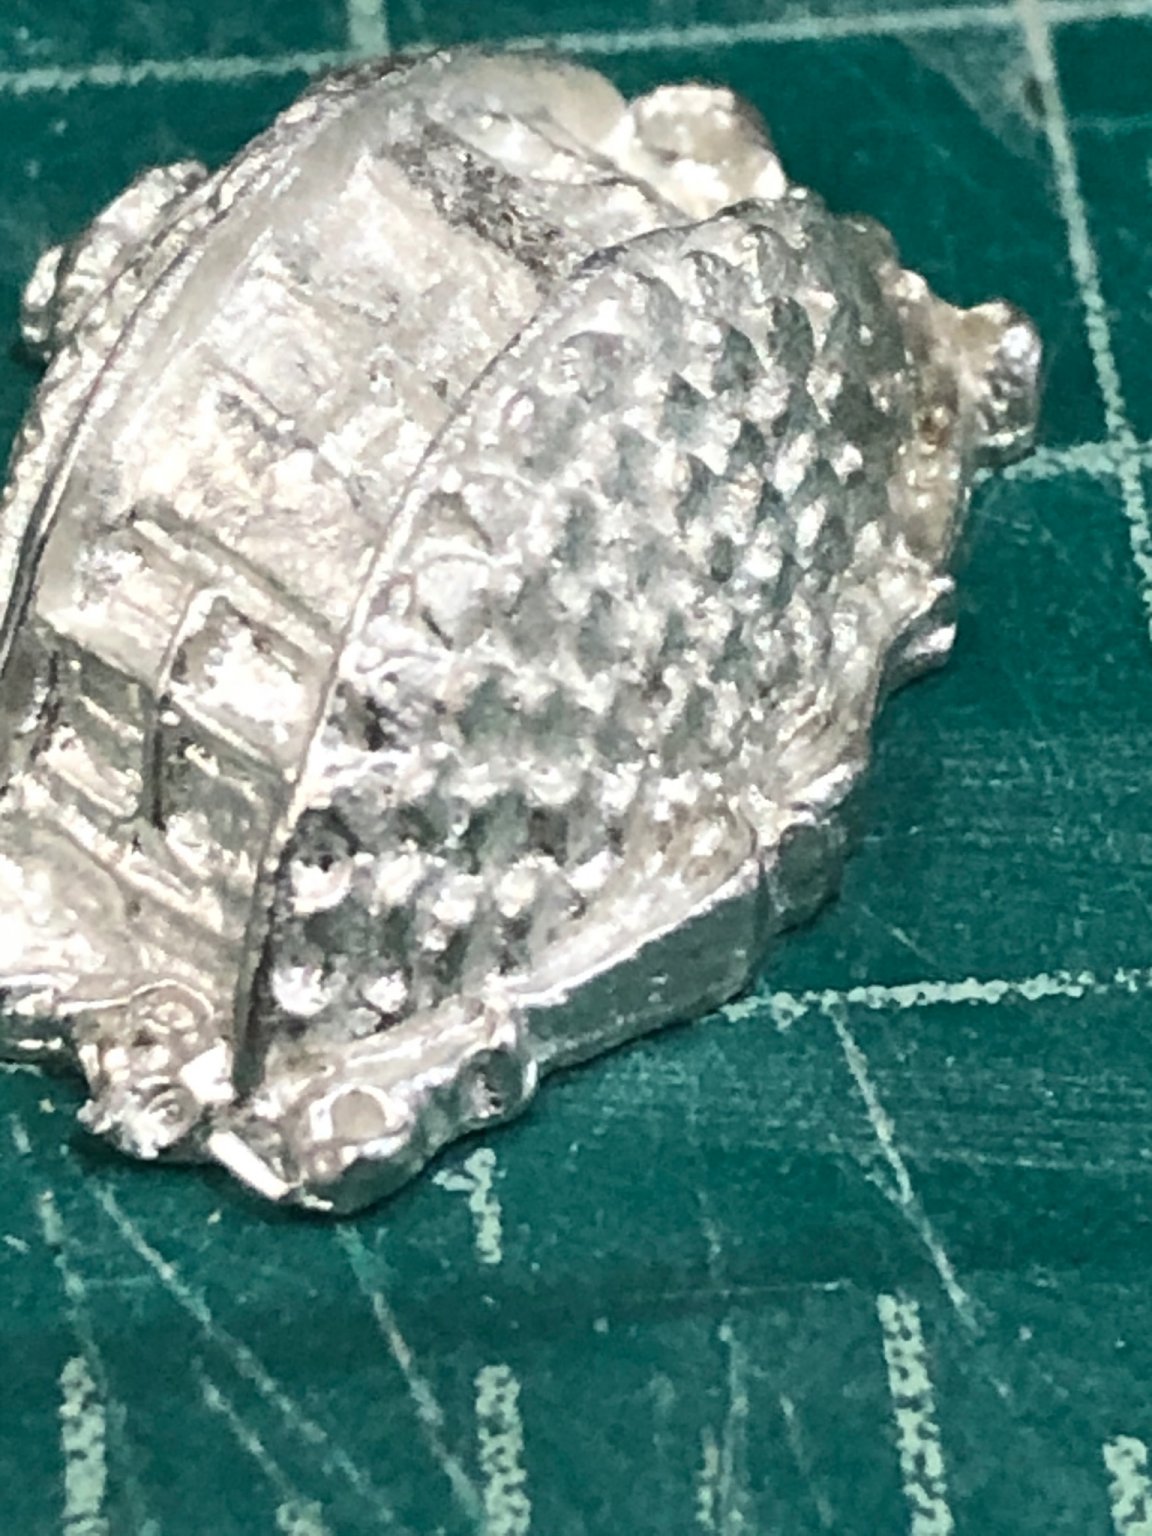
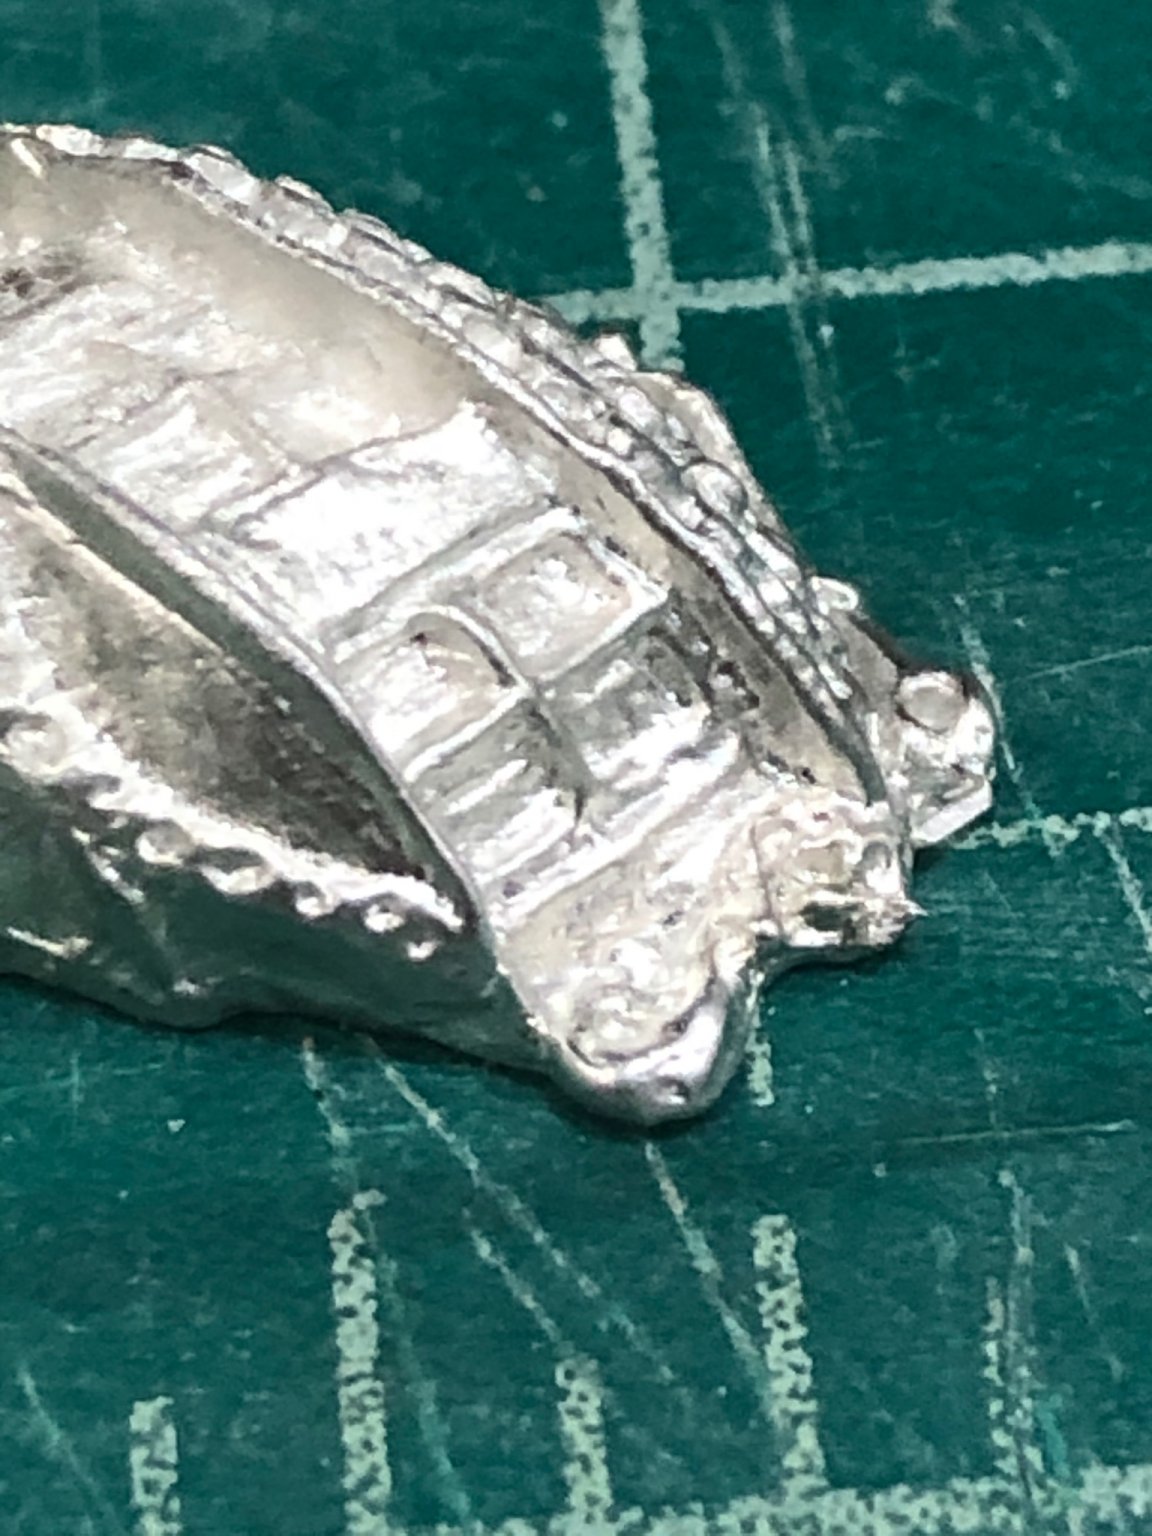
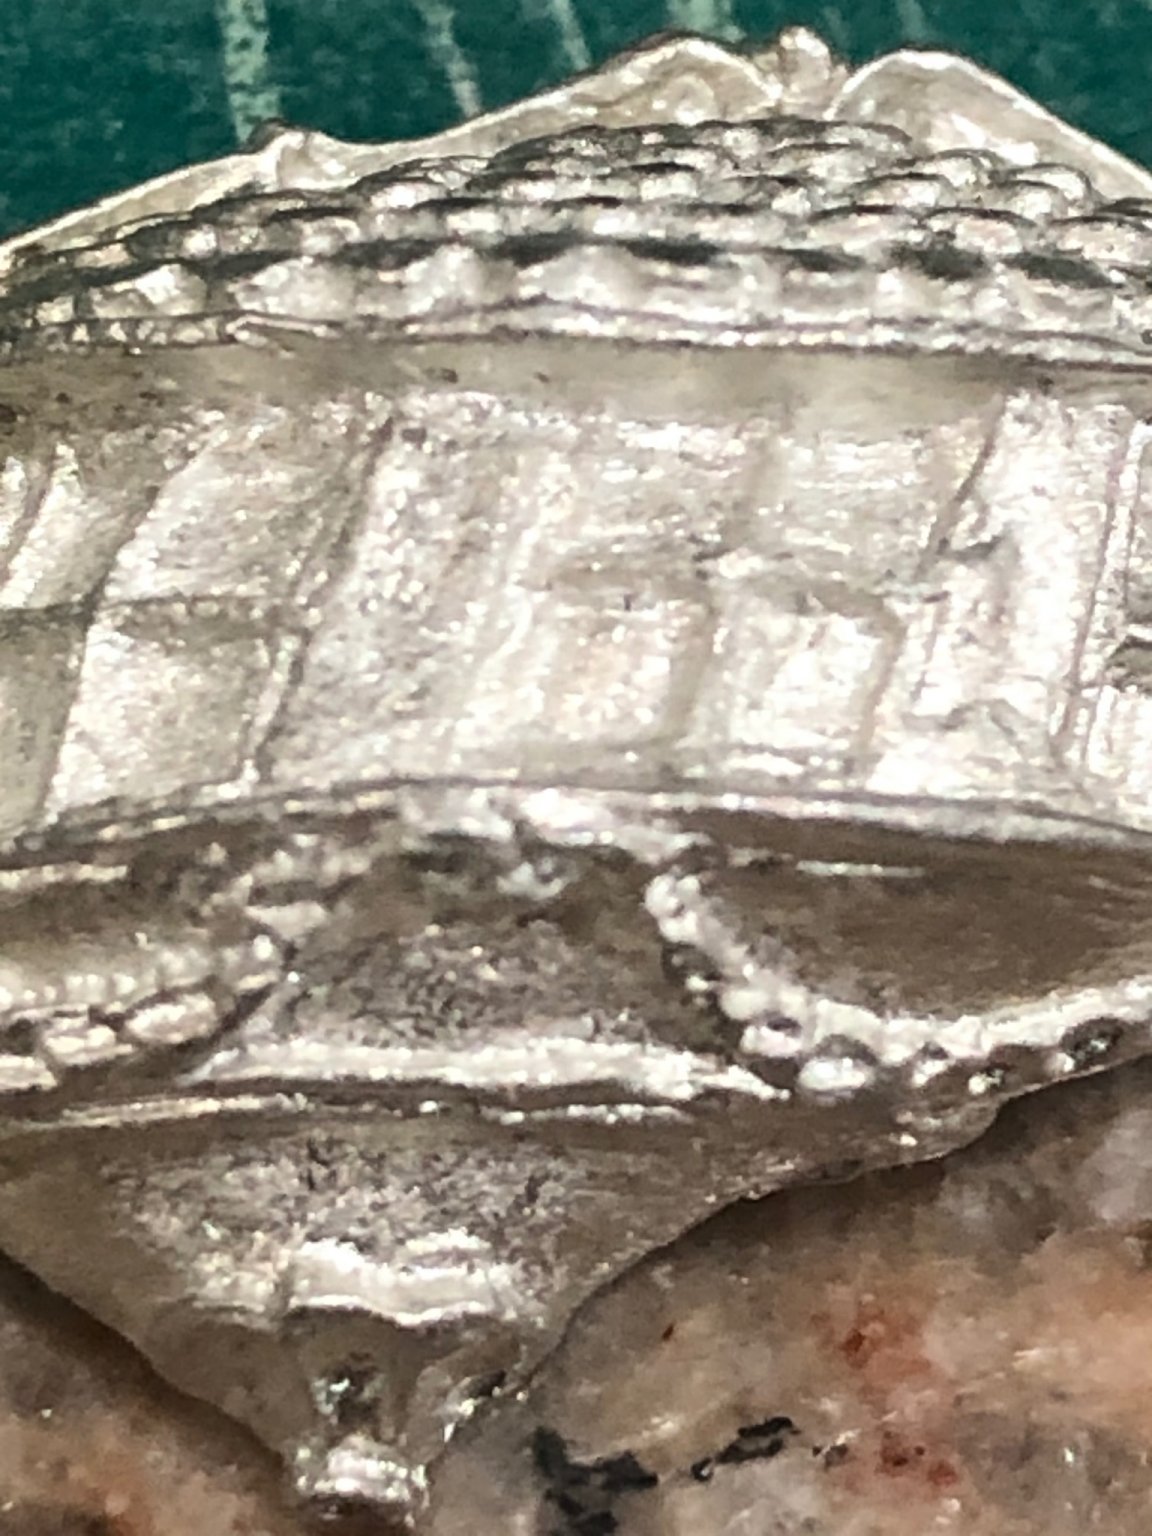
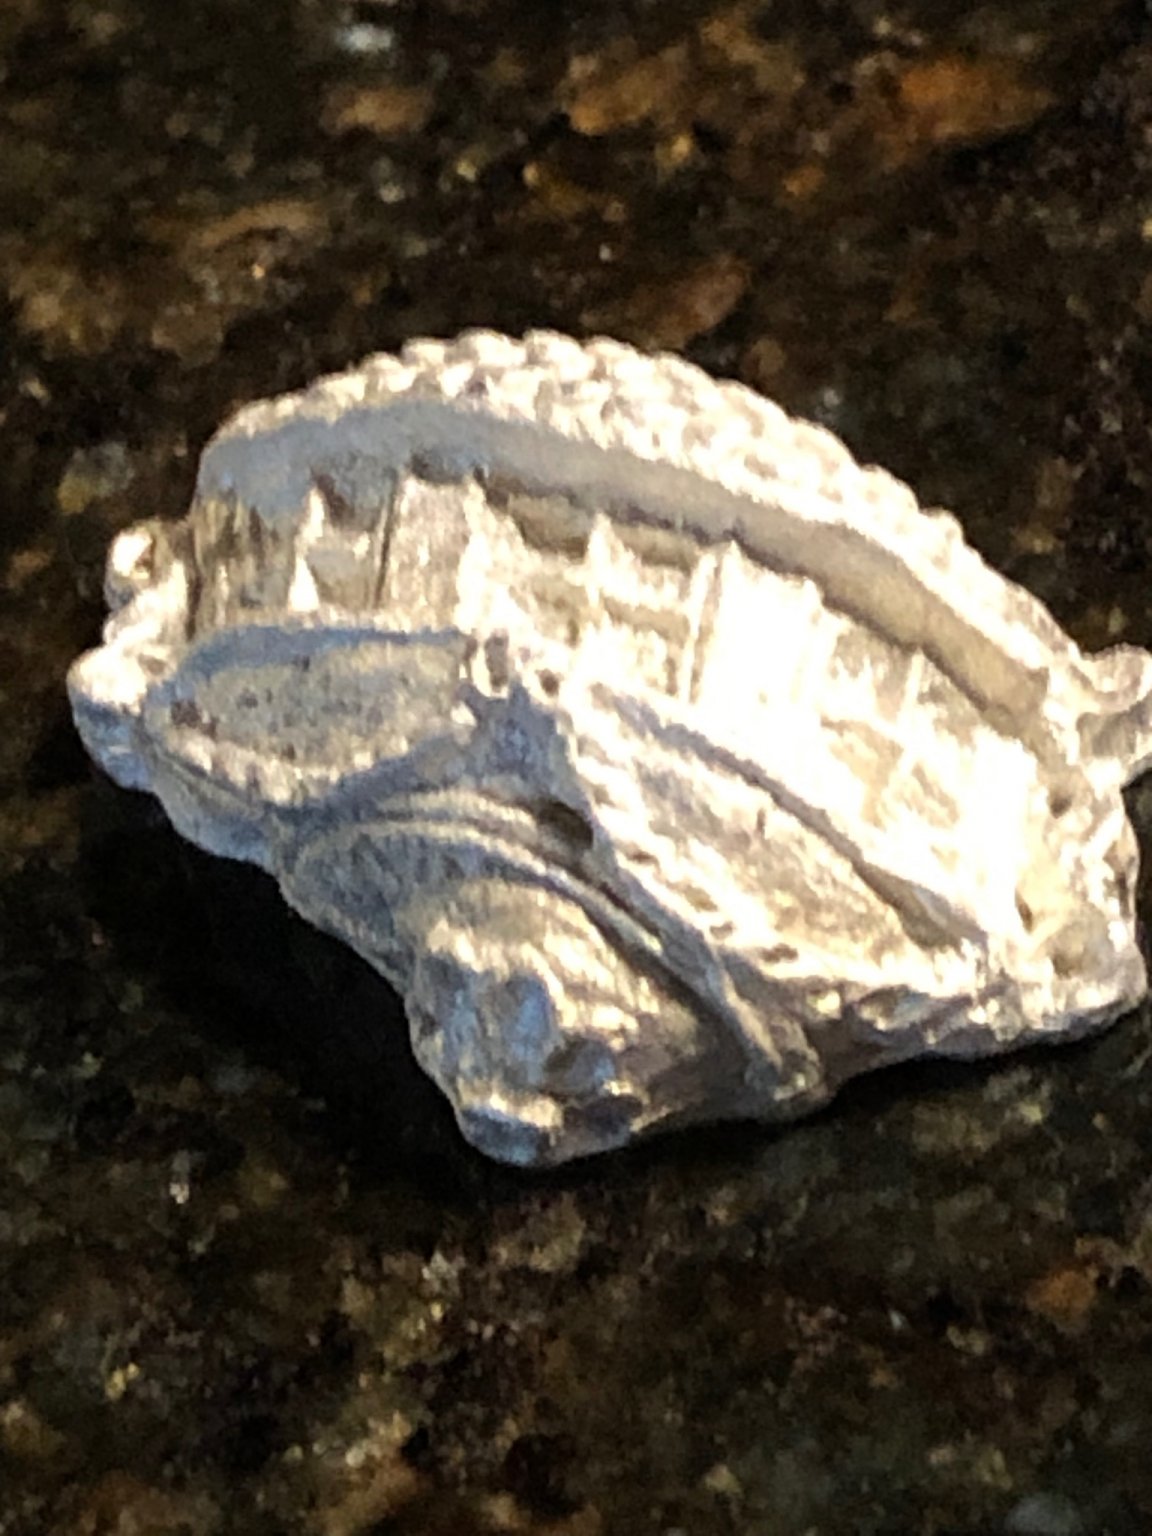
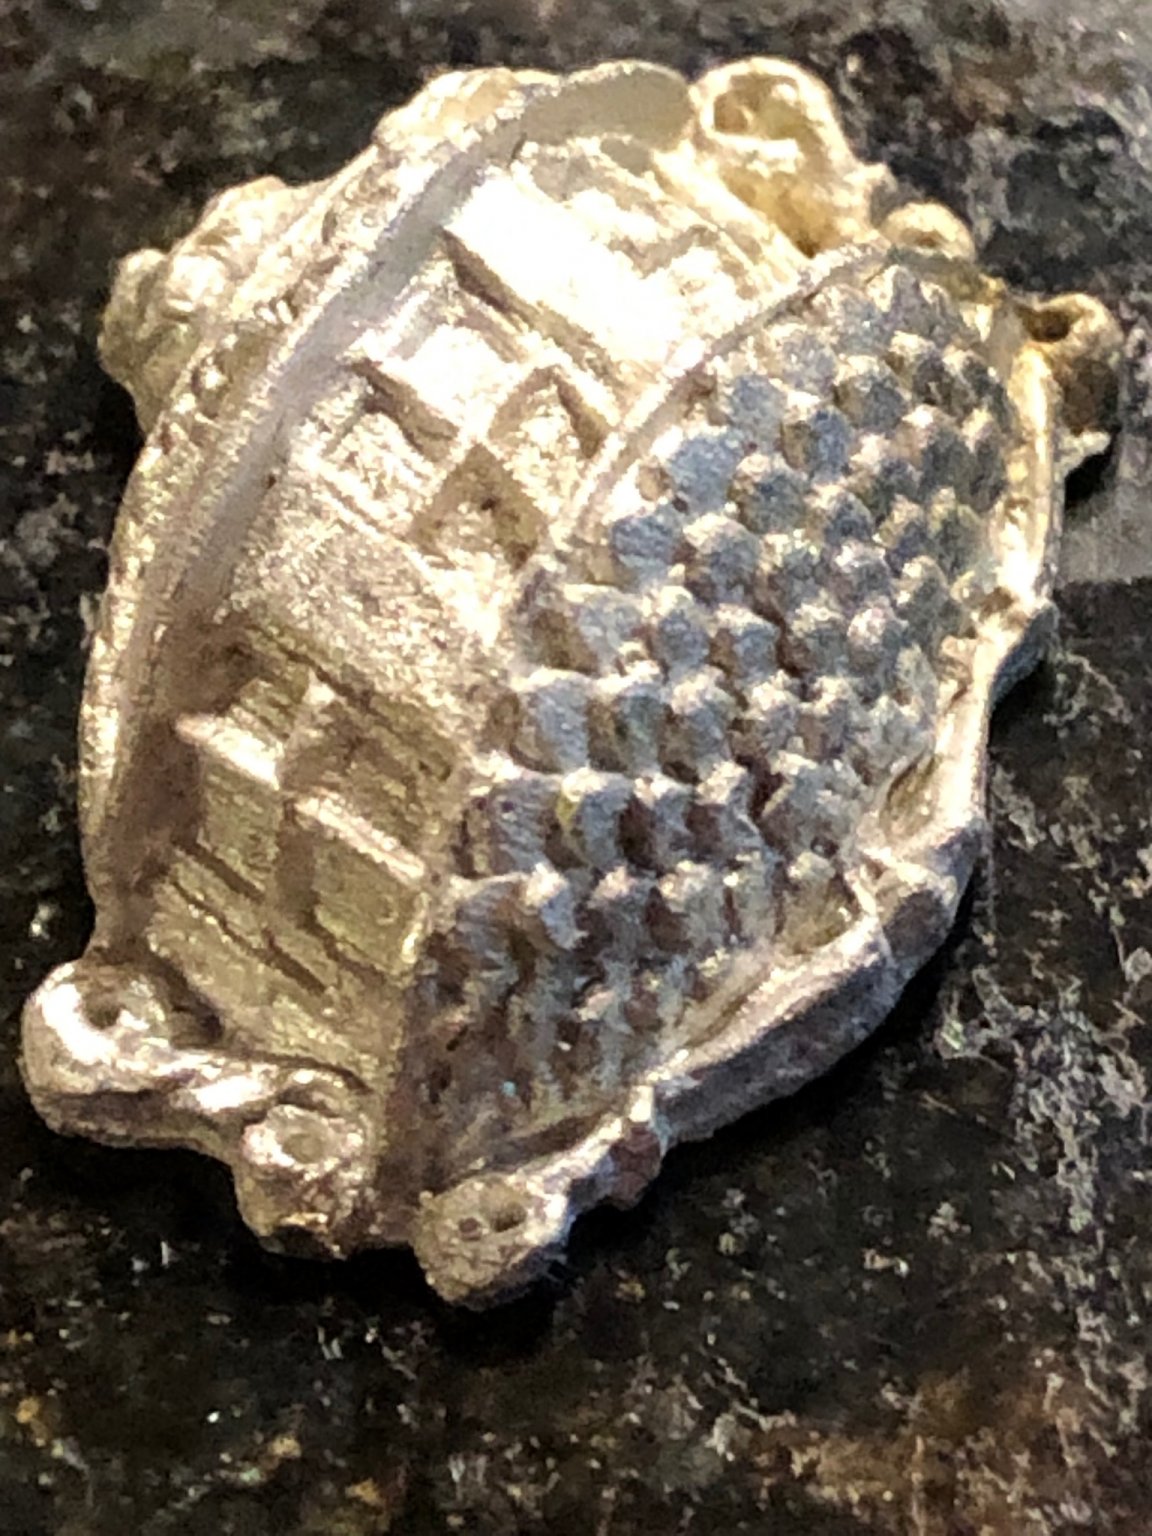
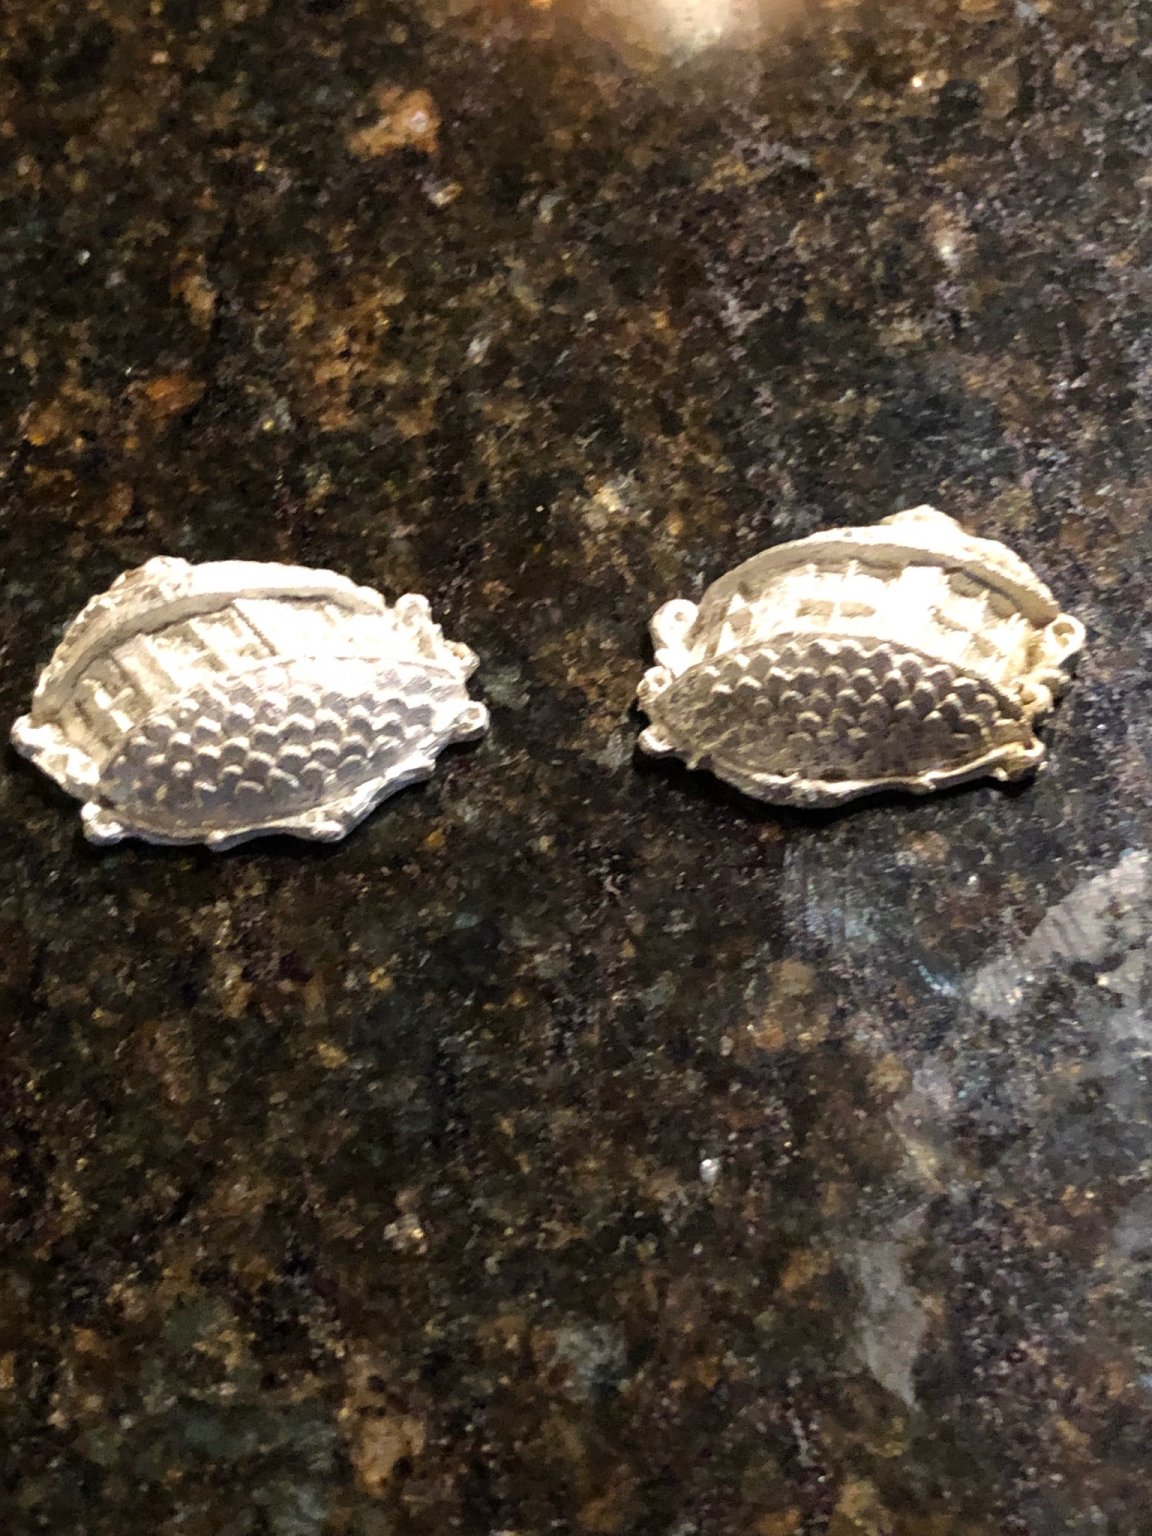
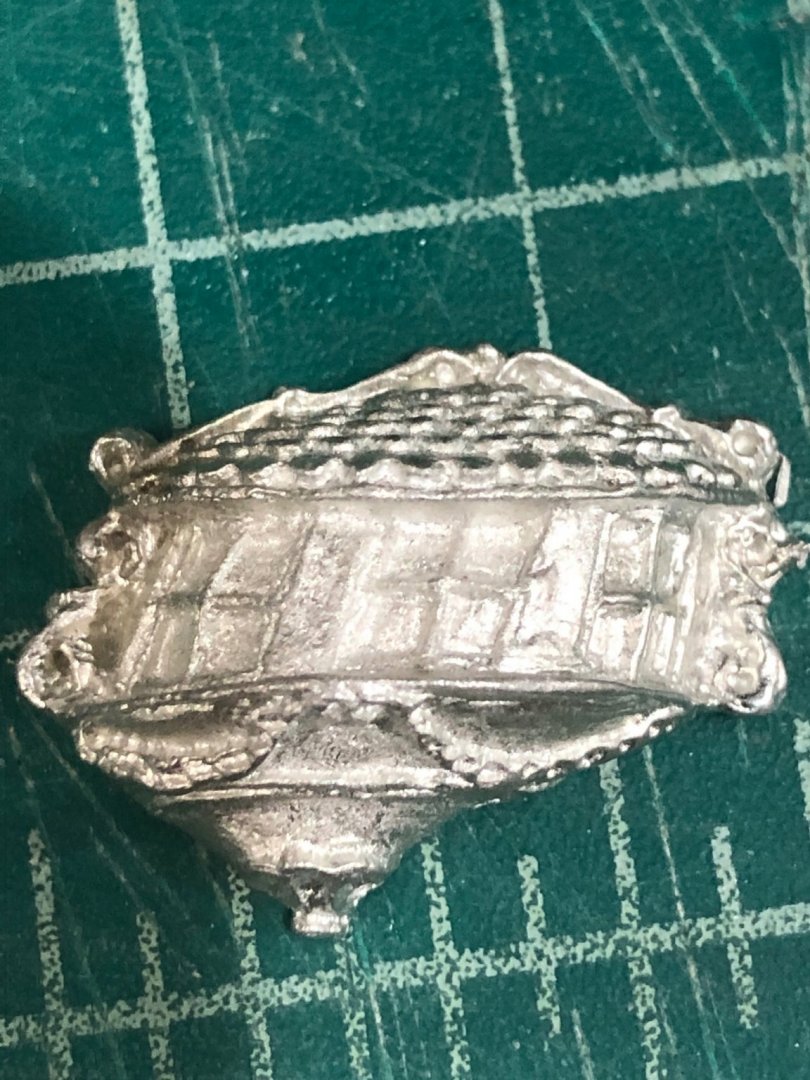
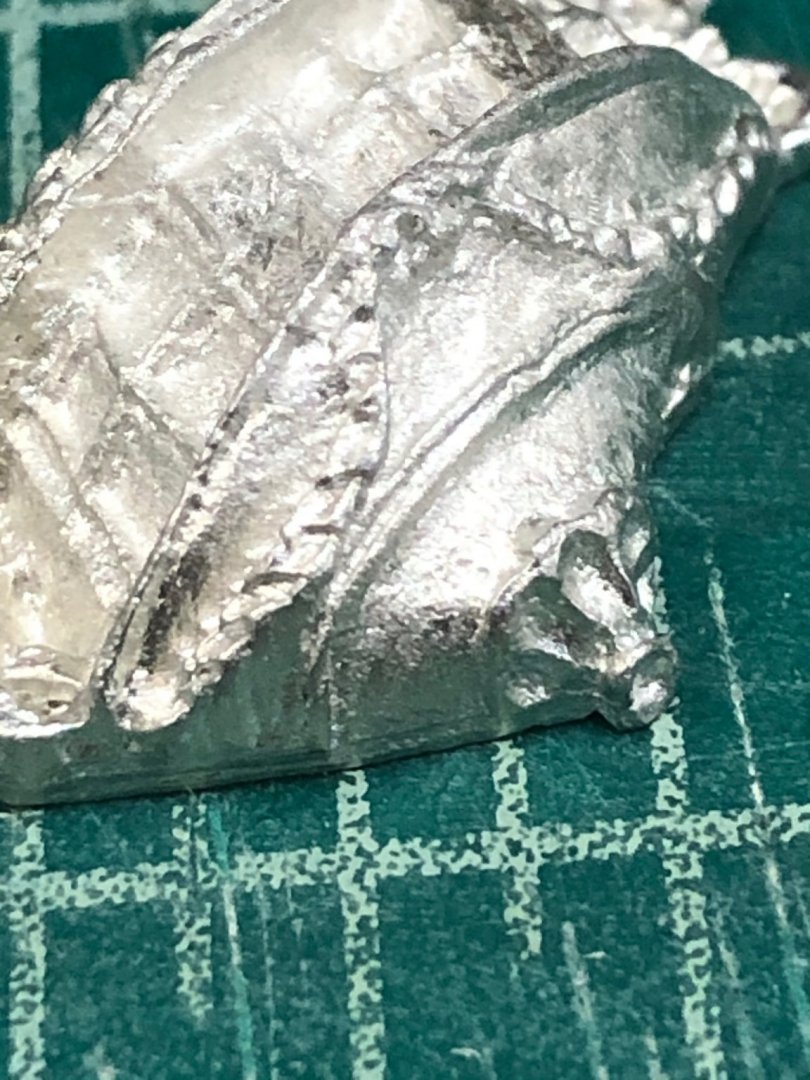
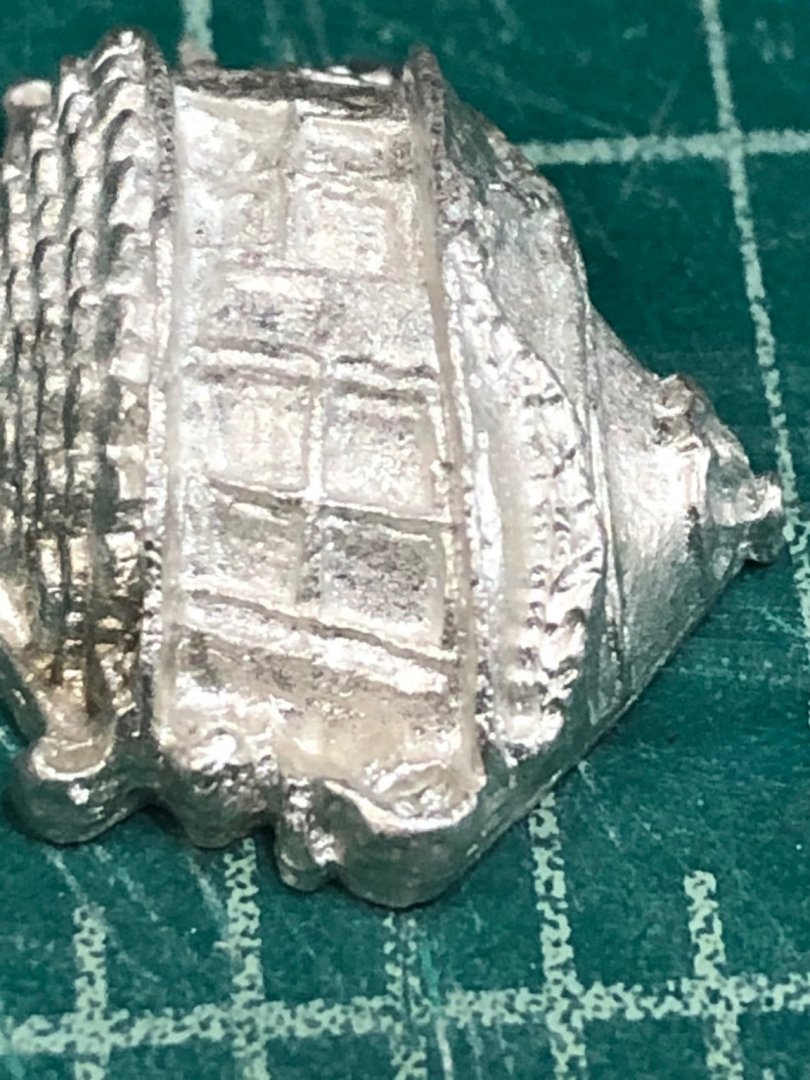
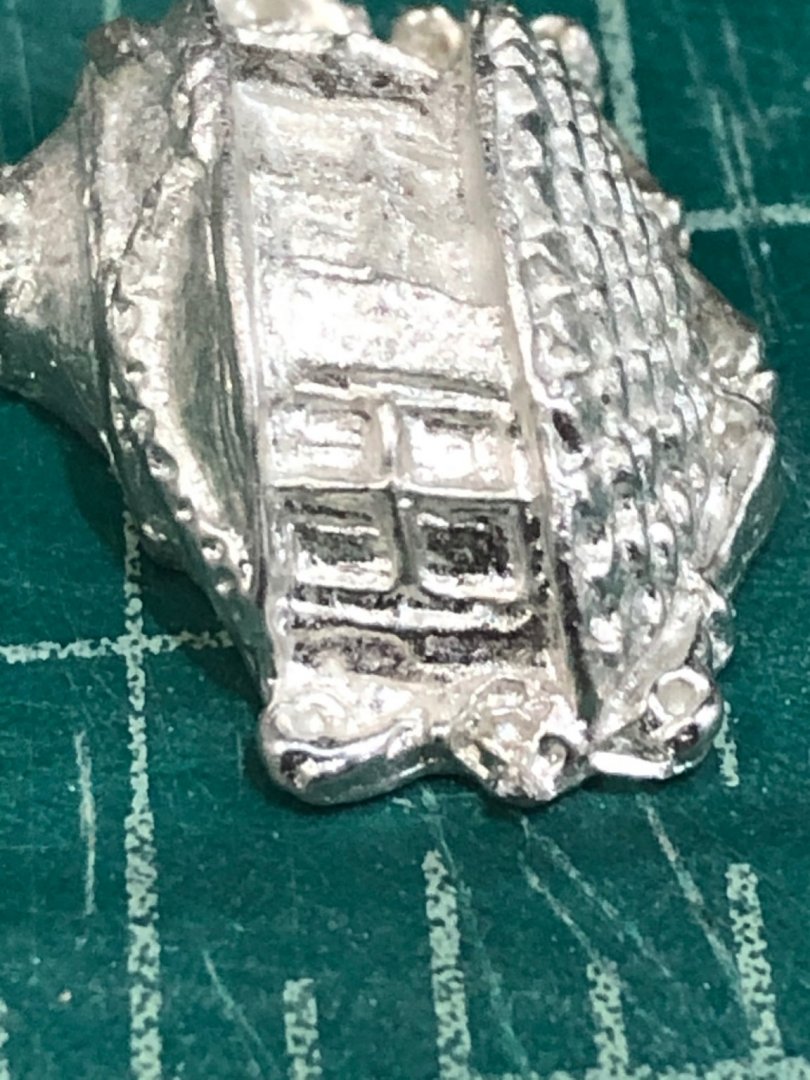
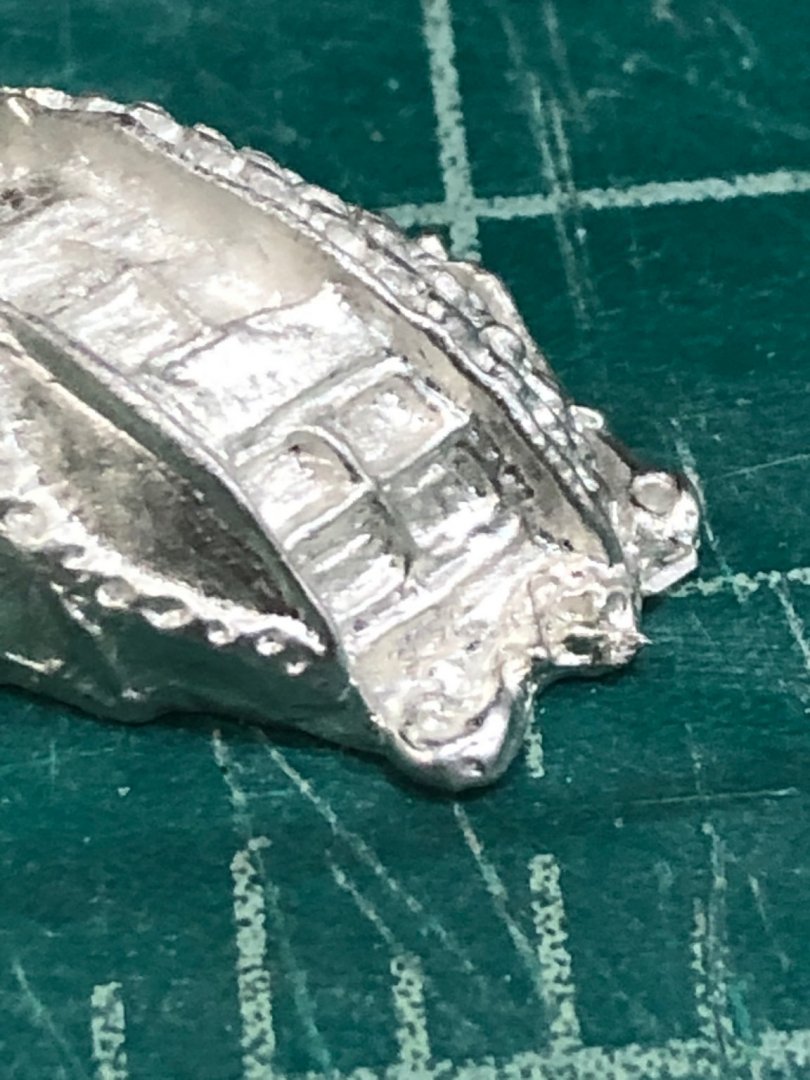
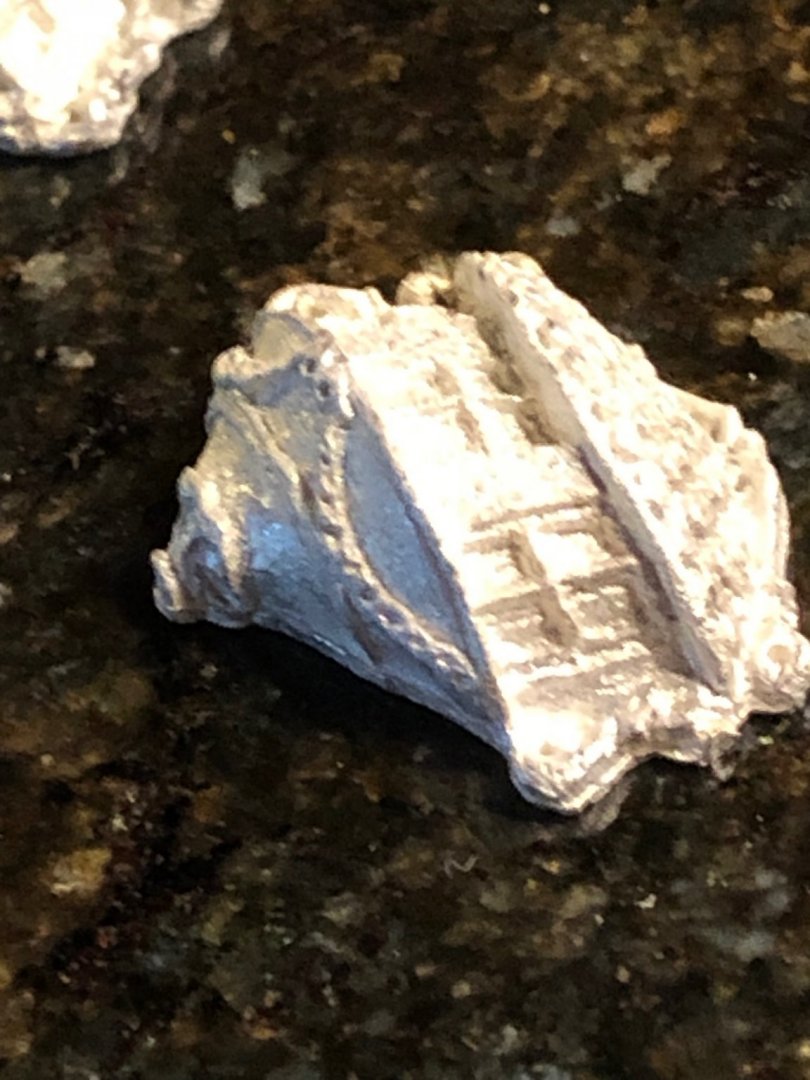
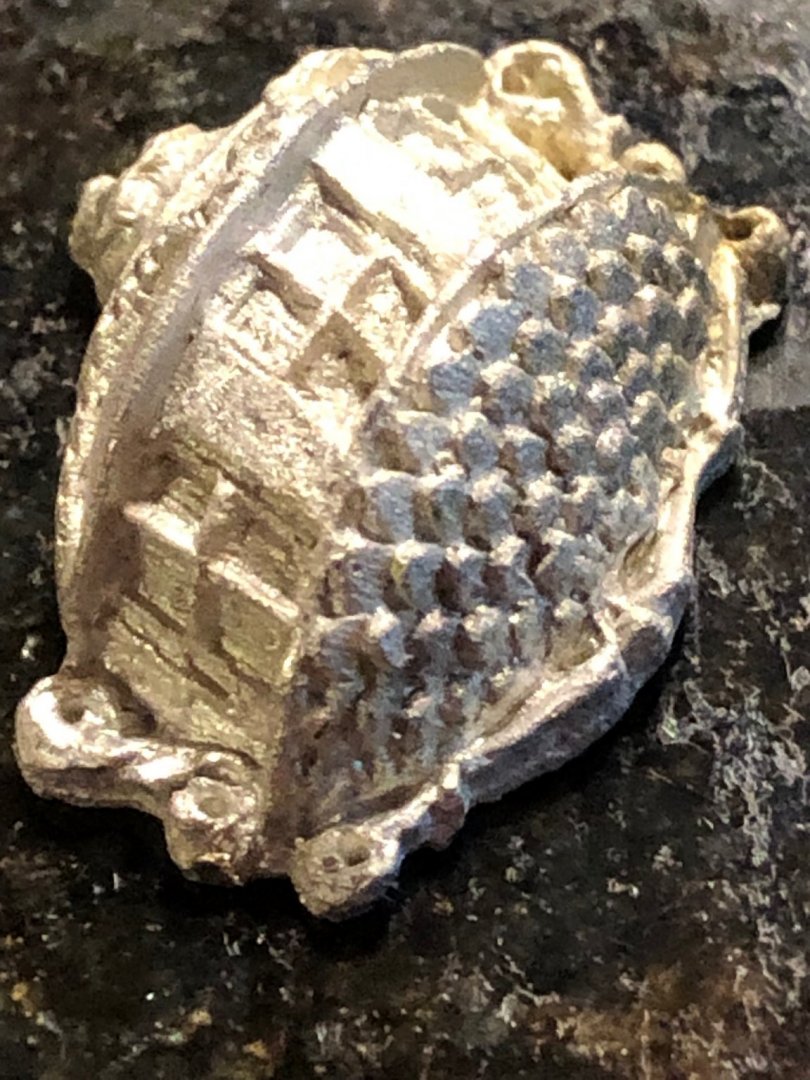
Like so many people we complain and bad mouth Model Shipways but I must say that their customer service really came through for me. I've been away for a month visiting friends in Colorado but before I left I sent a scorching email with photos to Model Shipways about the poor casting quality of the gallery windows. While away I received an email apologizing and that there would send new hand picked pieces. Today ai received the new gallery pieces of much better quality. Pictures of original pieces notice the windows filled in cornice bottom missing and floral rope not distinguishable. These are the replaced very acceptable pieces. Some cleaning and painting is all that is necessary A BIG THANK YOU TO MODEL SHIPWAYS CUSTOMER SERVICE


-
Glenn watching your work while I'm away from mine makes me want to be home quicker. I really don't know how to add any comments after all the others except I keep being amazed each time I come back and visit.
- 778 replies
-
- 3
-
-
- cheerful
- Syren Ship Model Company
- (and 1 more)
-
Sea Hoss is correct the twisted eyebolts stay in better but if glue is added they become almost impossible to take out. Make sure it is correctly positioned speaking from experience. Still like the antifouling paint that will lend itself to the diorama of being on the ways.
-
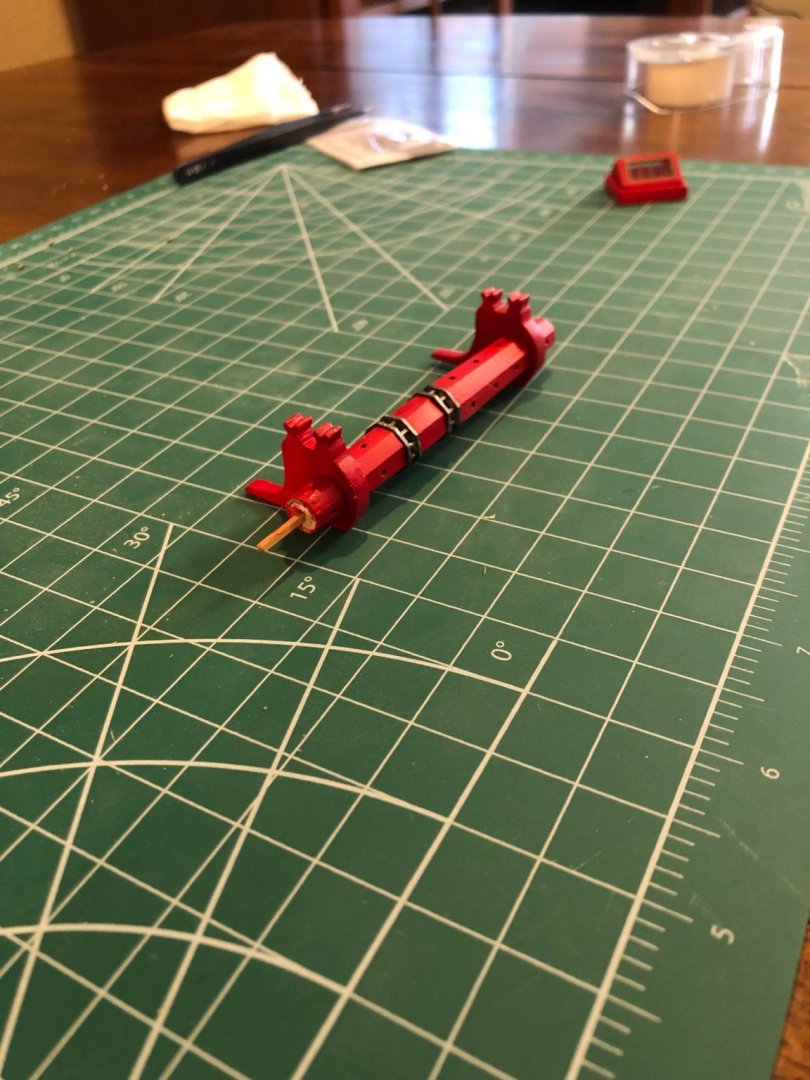
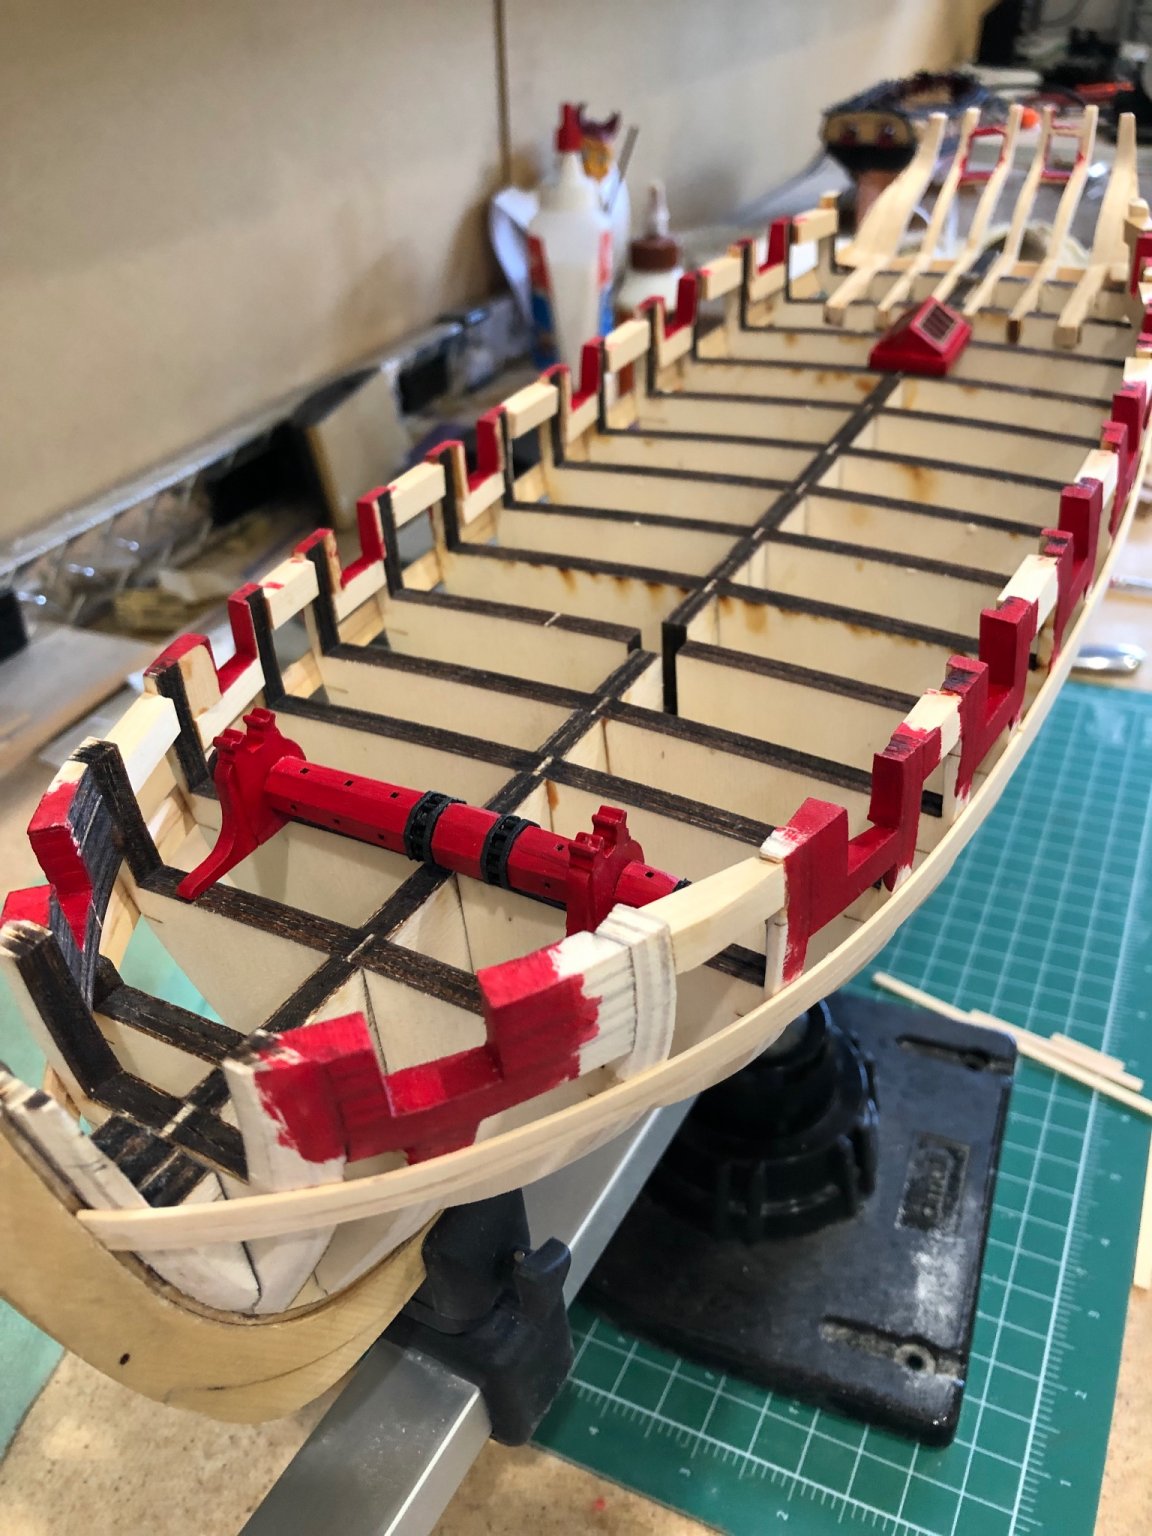
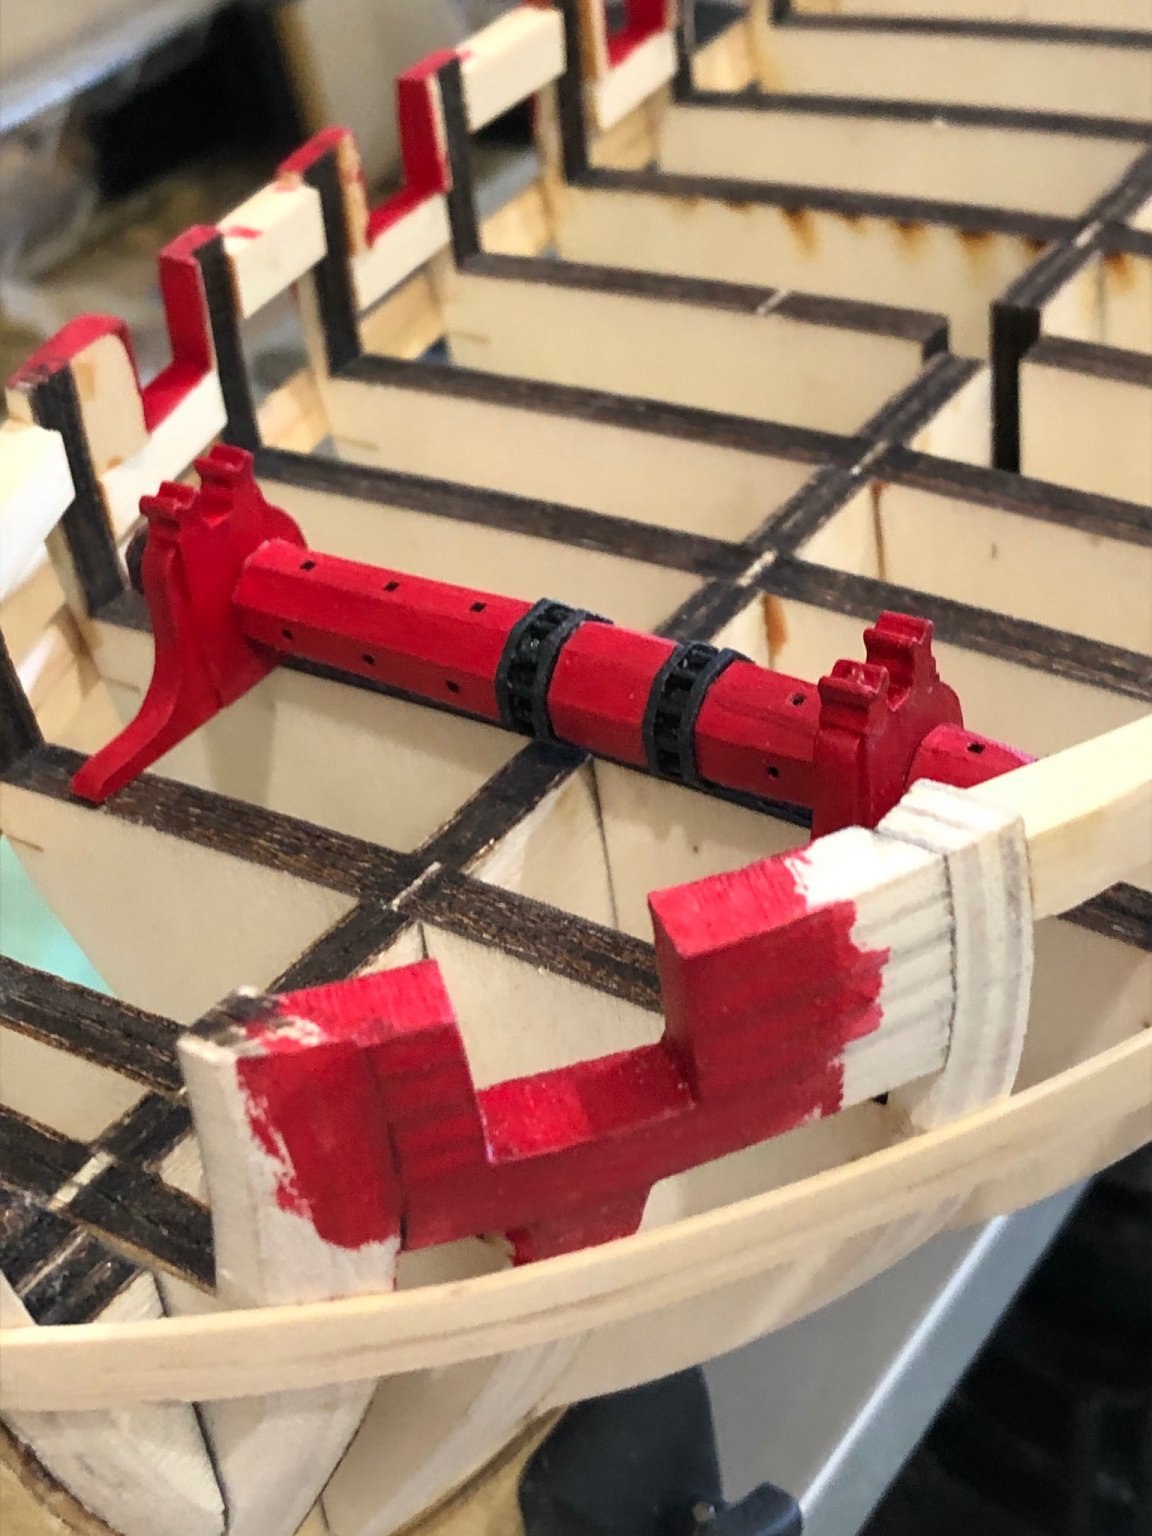
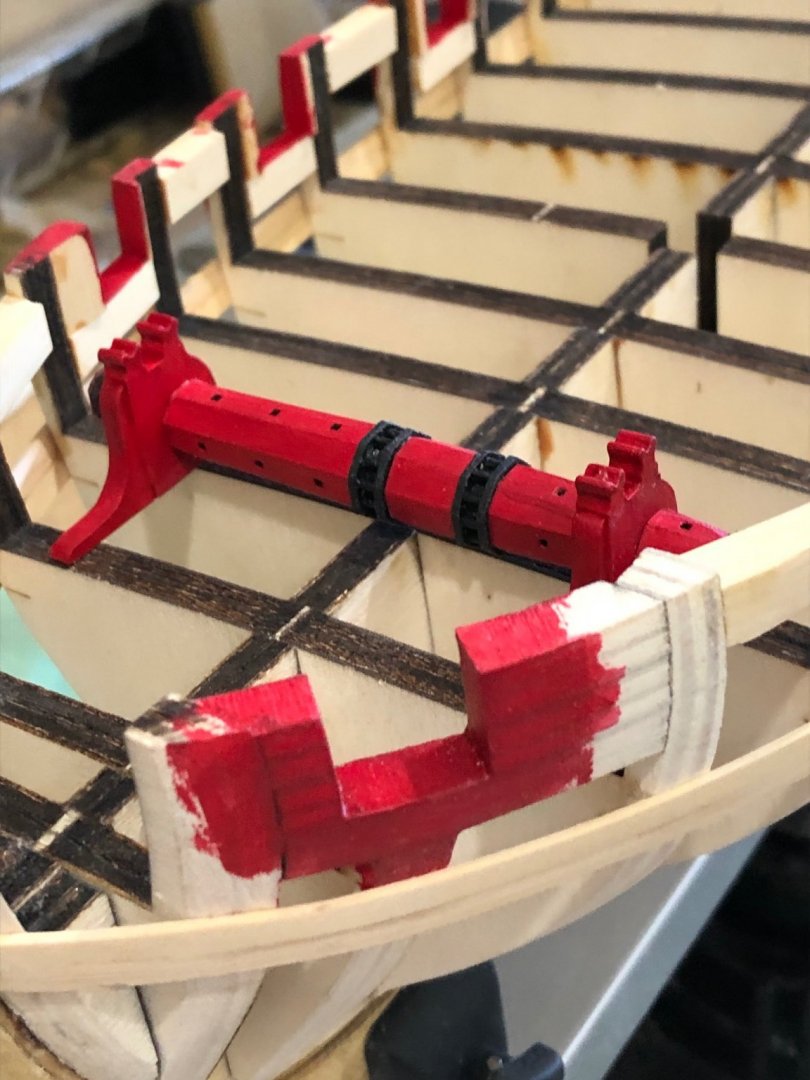
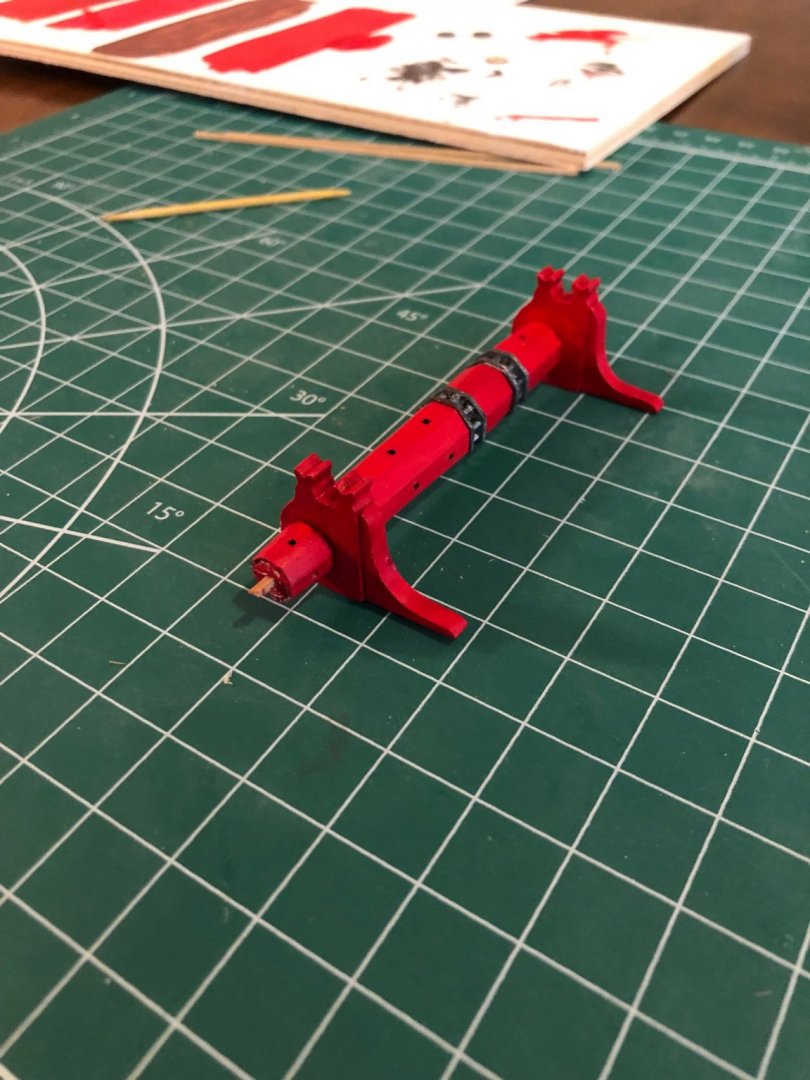
I want to thank everyone for their comments and suggestions. I've taken them to heart and bought a set of good water color brushes. I also started to use acrylic artist paint in the tubes and if the color is correct I used Winsor & Newton Crimson and a cup palette. Below is my first attempt on the Cheerful windlass mini-kit from Chuck. This is three coats and its looking like one or two more will do the trick. Again a BIG THANK YOU this forum is fantastic.
-
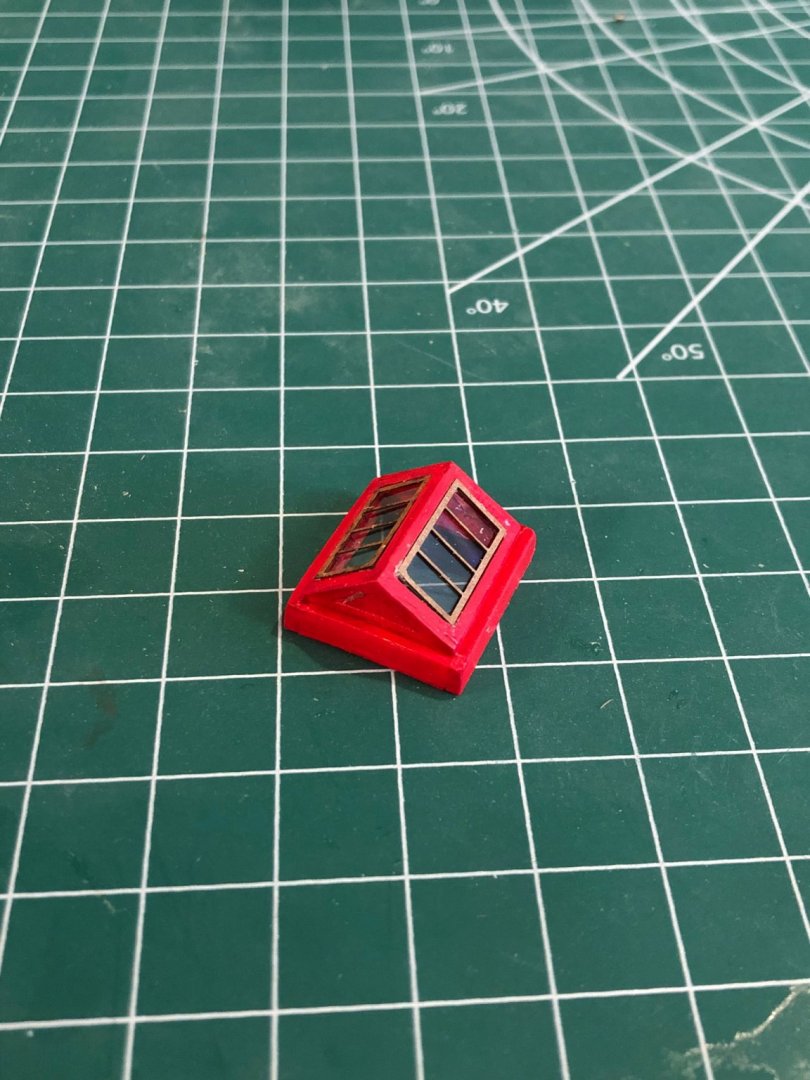
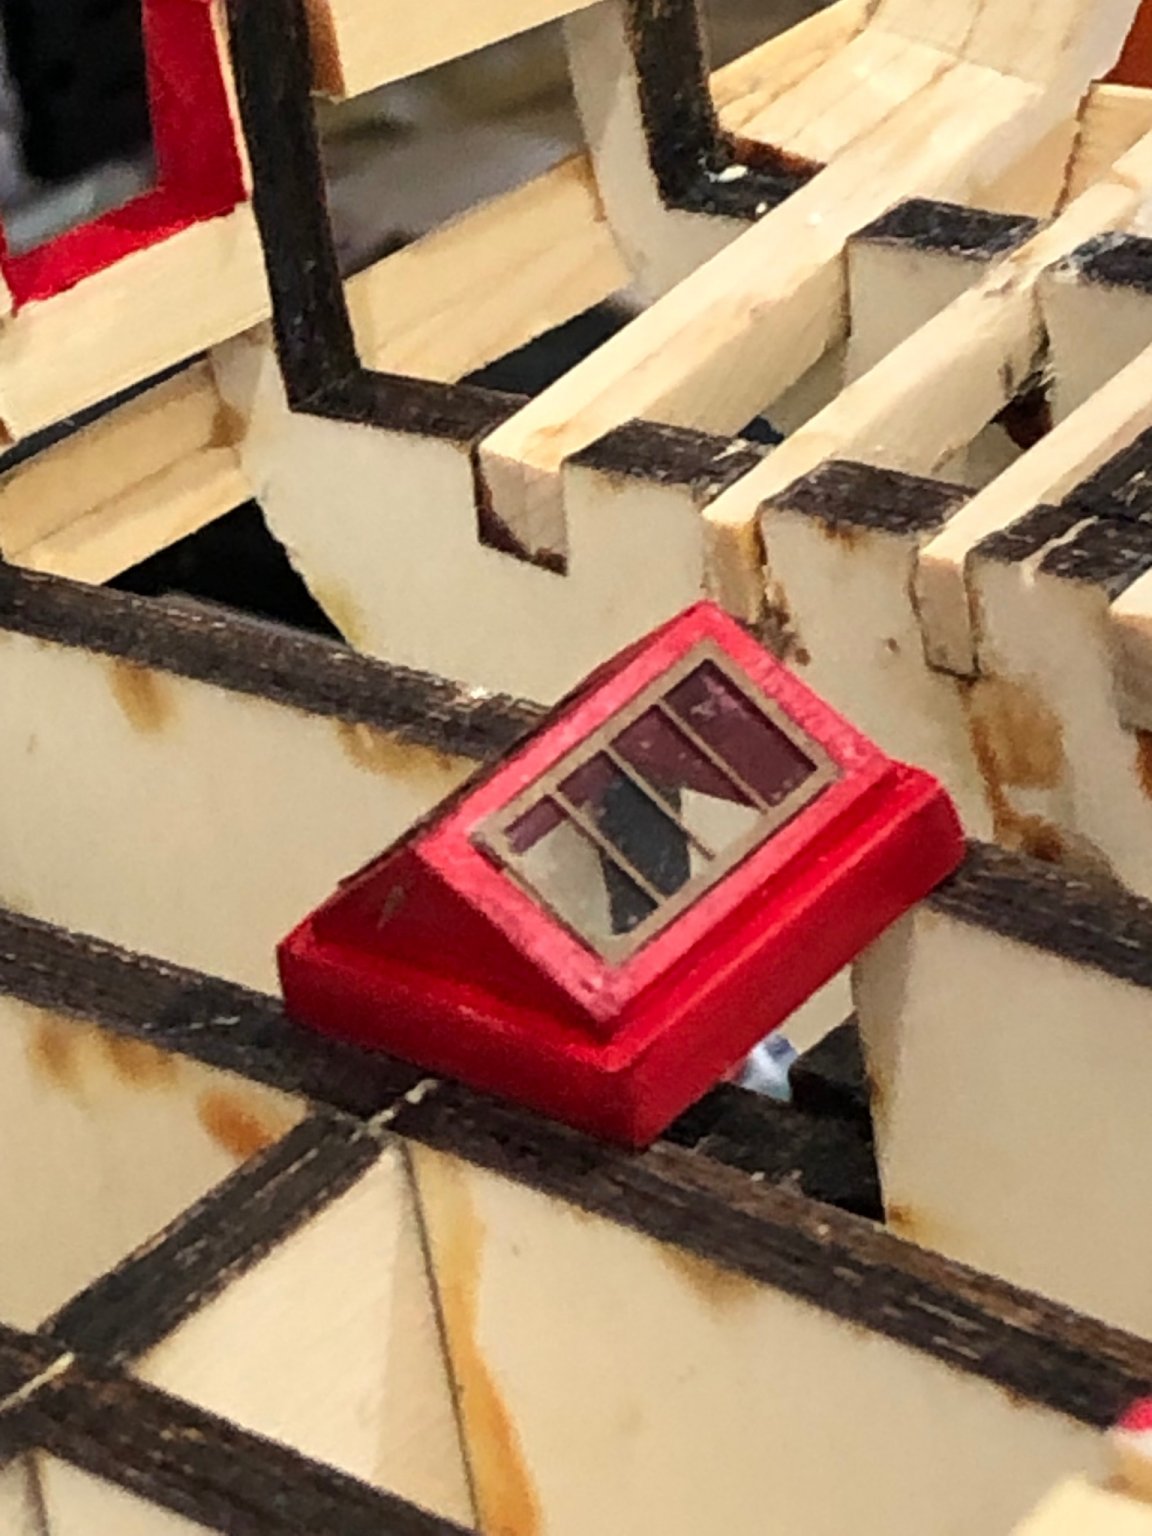
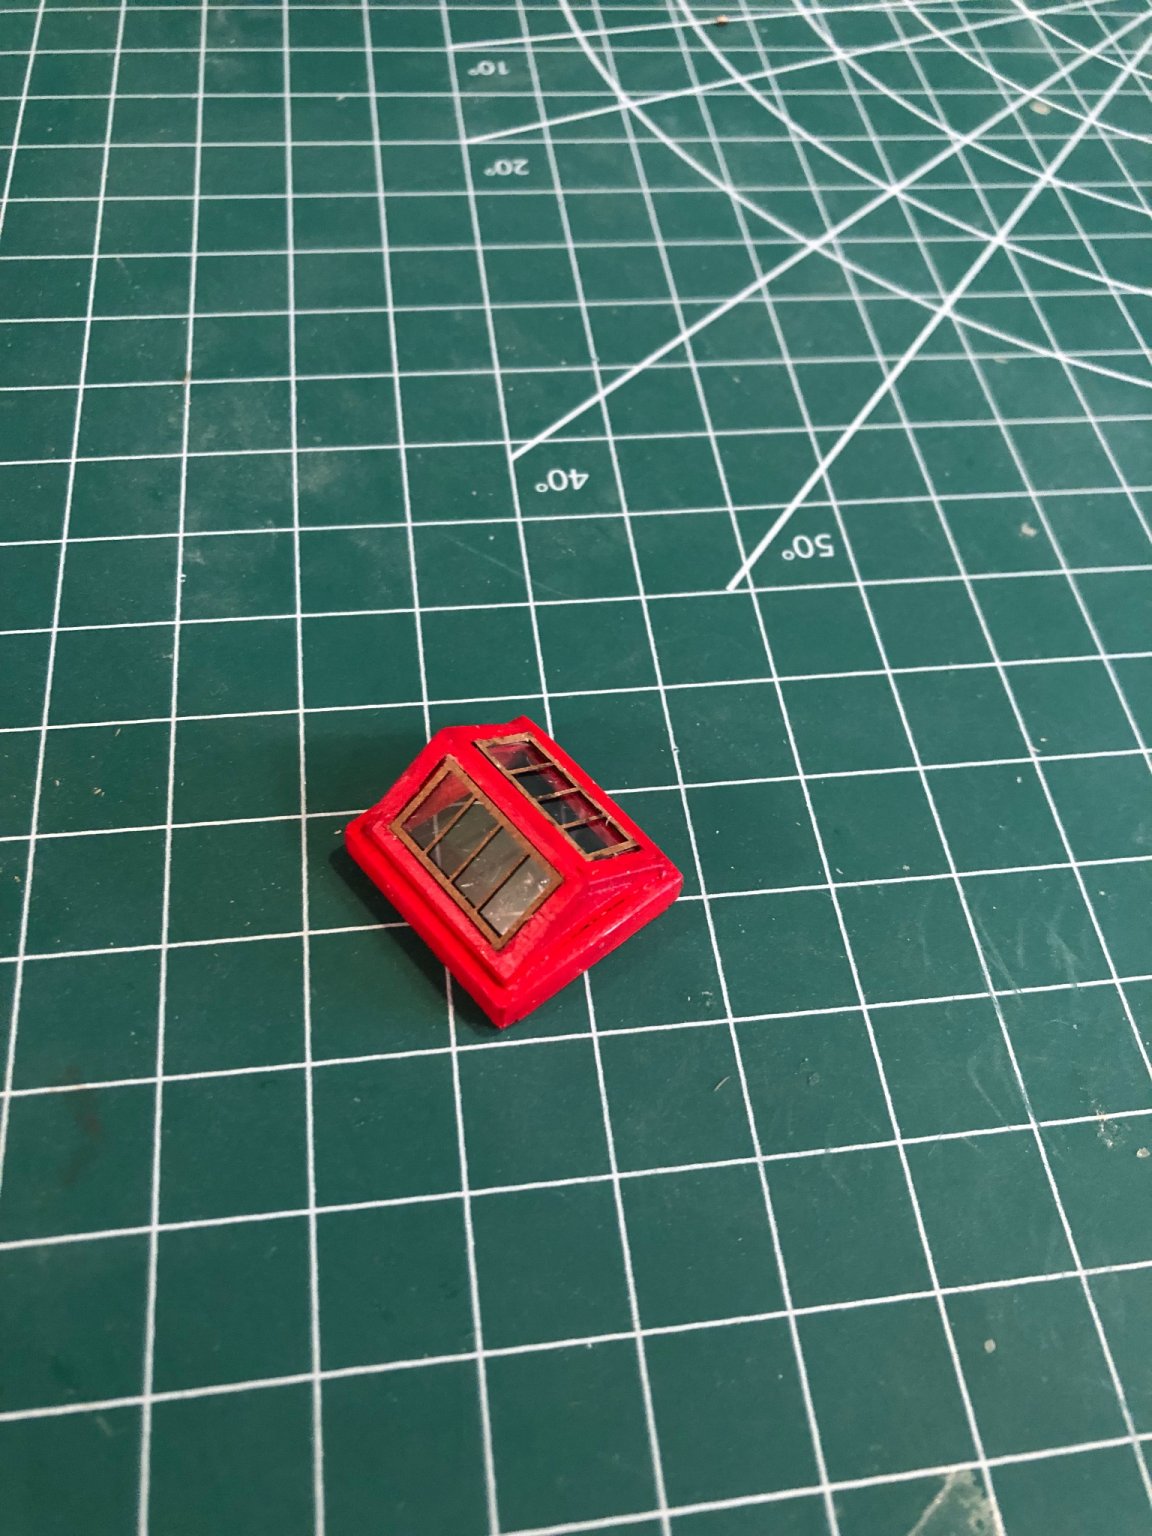
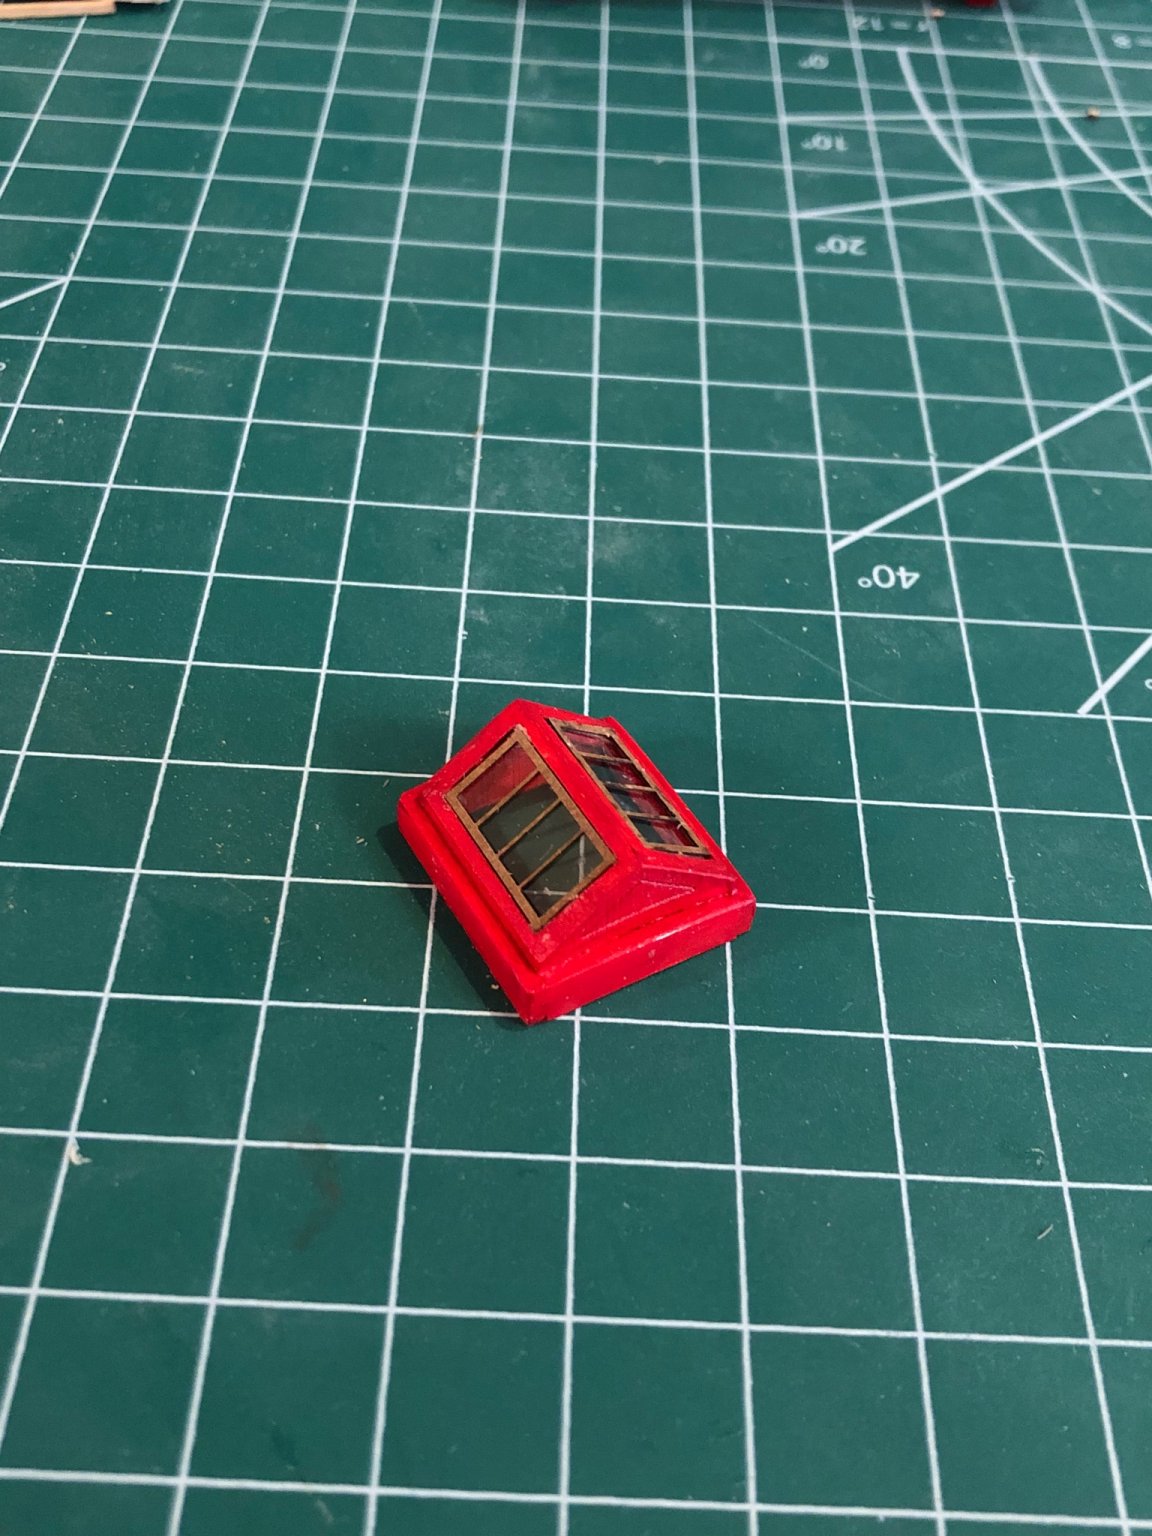
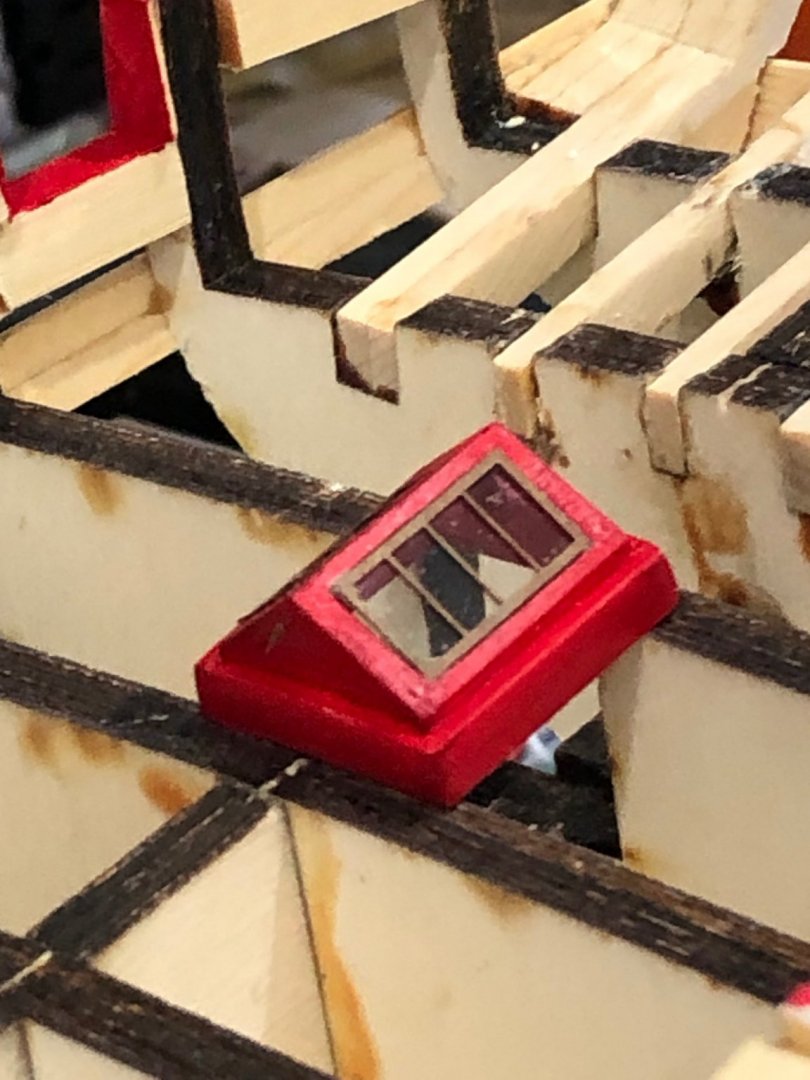
A big thank you to Glenn, Chuck and others for the nice comments and all the likes. I finished the skylight this morning and thought I say how well the mini-kit came together. I've decided to paint the Cheerful with Winson & Newton crimson acrylic paint. It is a bright color without being overbearing. Completed skylight No matter how careful I was handling the plexiglass windows you will notice I left a partial fingerprint. Oh well, recorded forever who built this Cheerful. I completed the windlass maybe another coat of paint or two and it will be done. I bought some paint locally from a hobby shop that was supposed to be cast iron block grey and it looks more like gunmetal. So because of the grey color I'll wait until I get home to paint and dust it with dirty rust powder to glue it all together. Windlass currently I brought the pump kits with me but realized that I forgot to bring appropriate sized drills so instead I'll do the anchor kit. Might have to wait to paint the windlass today as I have to do it outside the apartment (spill prevention) and its 102 degrees in the shade. Too hot for the paint to flow. 102 degrees in Colorado. Yikes