


lraymo
-
Posts
235 -
Joined
-
Last visited
Content Type
Profiles
Forums
Gallery
Events
Posts posted by lraymo
-
-
Beautiful! I'm looking forward to doing "rigging" someday. Hope it can be done as well as yours! This is a fabulous ship!
- Canute and Ryland Craze
-
 2
2
-
Hi Bob, I am following your progress closely, as I am just starting my modeling with the Lowell Grand Banks Dory. I continue to go back to your Dory blog to see how its supposed to look! And my plan is to follow in your footsteps to do the Norwegian Sailing Pram and then the Muscongus Bay (which is looking great!). Keep up the great build logs, as I am counting on them for inspiration and guidance!
-
Wow! Now I see what actual planking looks like! Amazing!
- Keith Black, mtaylor and thibaultron
-
3
-
niwotwill, your ship is amazing! The metalwork alone is stunning, but your miniature work and attention to detail are incredible. I'll be coming back to your build log just to "watch and learn", although my newbie skill level is far below attempting anything like this! (I'm impressed with the rope-making! I may have to try this sometime!)
-
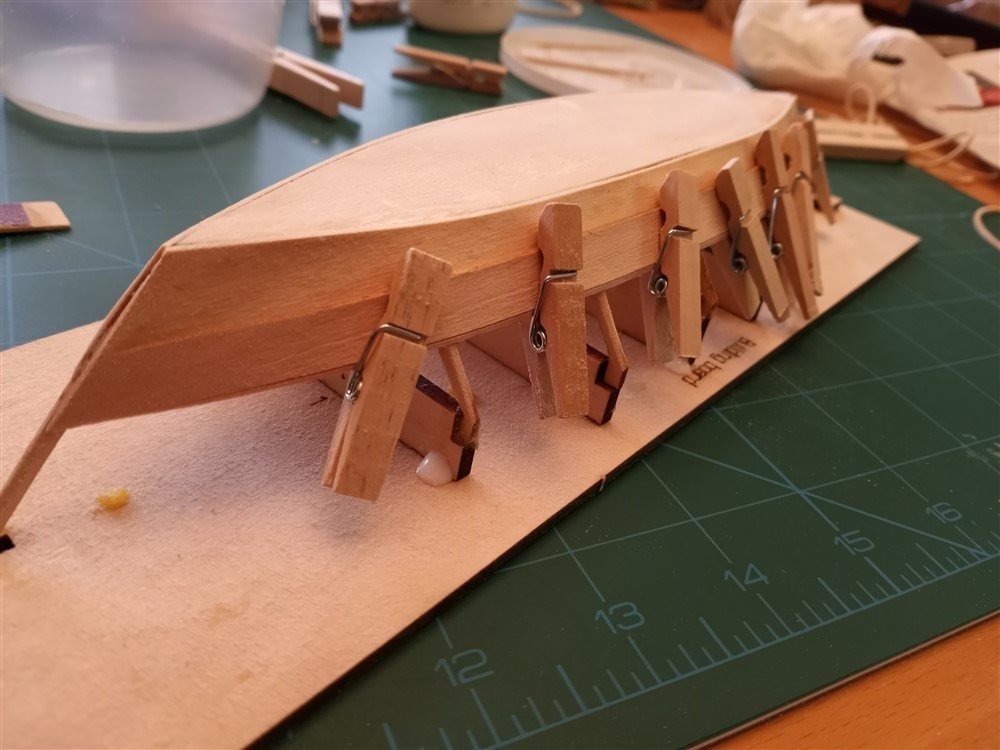
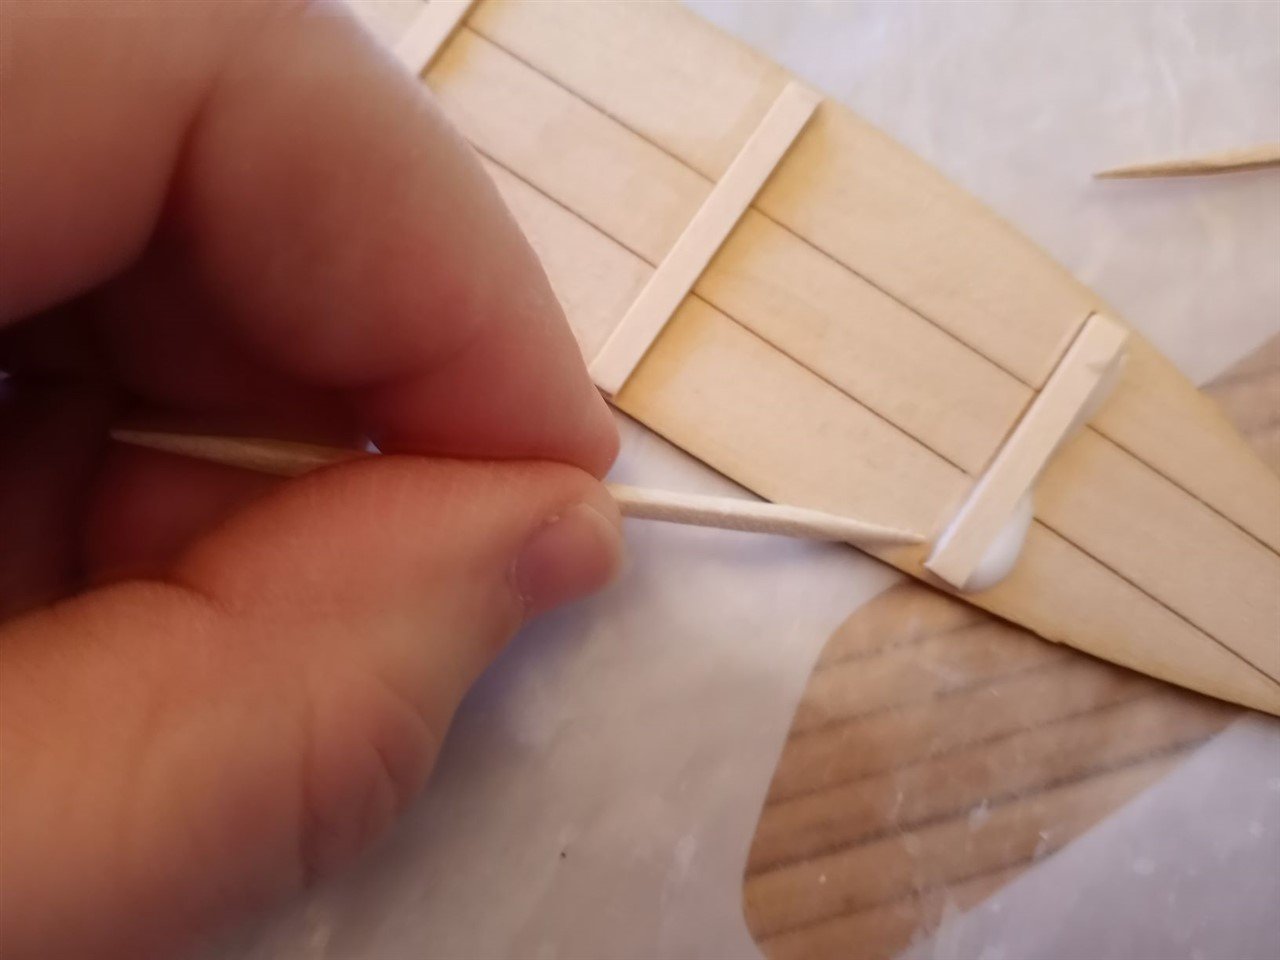
Steps 7, 8 and 9… getting there. Not getting to do as much on the model this week. It’s amazing how fast these “retirement days” fill up with other stuff to do! Bending the garboard planks went fairly well.
Gluing this first plank was a challenge.
And as you can see, I made a mess of it!
But I was happy with how it turned out, after sanding everything down. Although itn looks like it has separated from the bottom, its been tightly glued. I'm hoping the final painting will cover up this gaff!
At this point I was beginning to feel a bit more confident. Bending the Broad plank wasn’t too bad… I poured hot water from my Kuerig coffee maker onto a dinner plate, and let the wood soak for about 7 minutes.
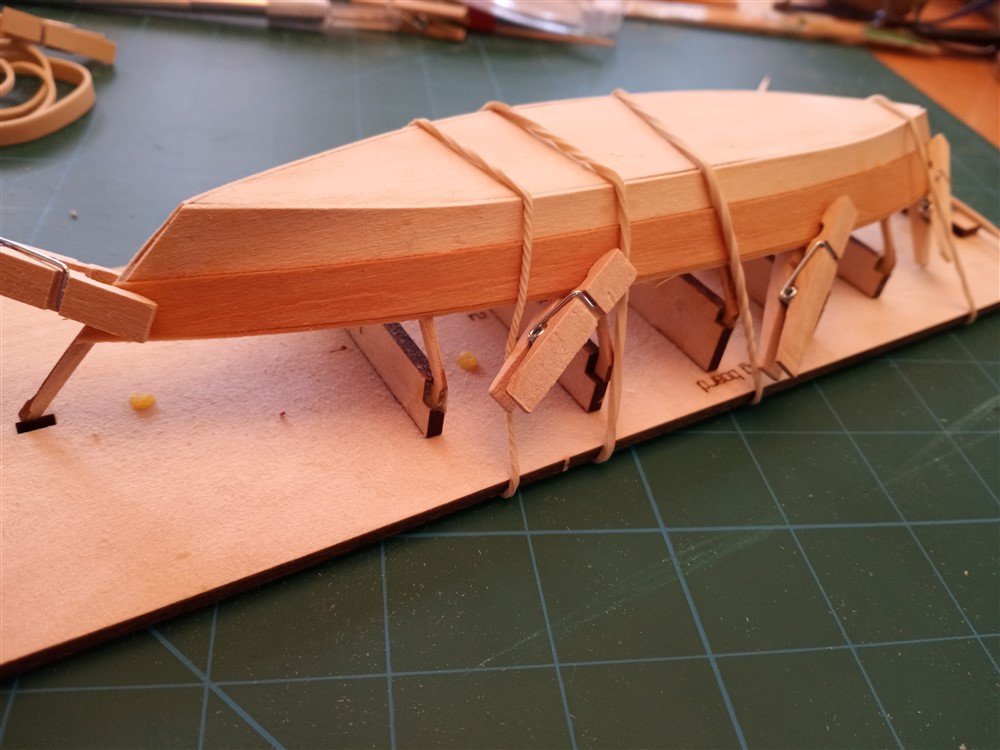
And gluing, although stressful, seemed to go a little better than the first planks. I had found all these little clothespins at Target, which are really helping to secure things. I’m happy with how this one side turned out. Now I need to do the other side.
The only problem so far... the transom is getting beat up in the process! I now plan on leaving it alone till I finish the planking, then I can hopefully sand/glue/fill any dings or problems at that time. Stay tuned!
And thanks, everyone, again for all the words of wisdom and the "likes". I've started looking at all your current projects and I am humbled, after seeing your incredibly complex models, that you would take time to comment on my little boat! I'm really impressed with this community!
- Cathead, druxey, Ryland Craze and 3 others
-
6
-
Wow, what a gorgeous ship! Thought I'd take a peek at your current work, since you've been so kind with your comments on my first little model. Your ship looks amazing!
- FriedClams, Keith Black, mtaylor and 1 other
-
3
-
 1
1
-
@Keith Black Ha! It's all I can do to work on this little model. No woodworking/refinishing of kitchen tables for me! Placemats cover a multitude of sins!
-
Starting steps 4, 5 and 6. I was nervous (again), but went ahead with the frames. I’m glad I used the drawings on page 5 of the instructions. Page 4 wasn’t sized exactly right. I’ve been using wax paper under everything to catch any excess glue (and to avoid gluing my model to my new cutting mat!) And then, I used a single blade from a box cutter to slide under the frame to disengage it from being glued to the wax paper!
I didn’t worry too much about excess glue on the frame tops, because those will be cut off later. Meanwhile, I learned an important factoid. Apparently, if you spill some isopropyl alcohol on your nice kitchen table, it removes the finish completely! (Oops!) Hence the new cutting mat!
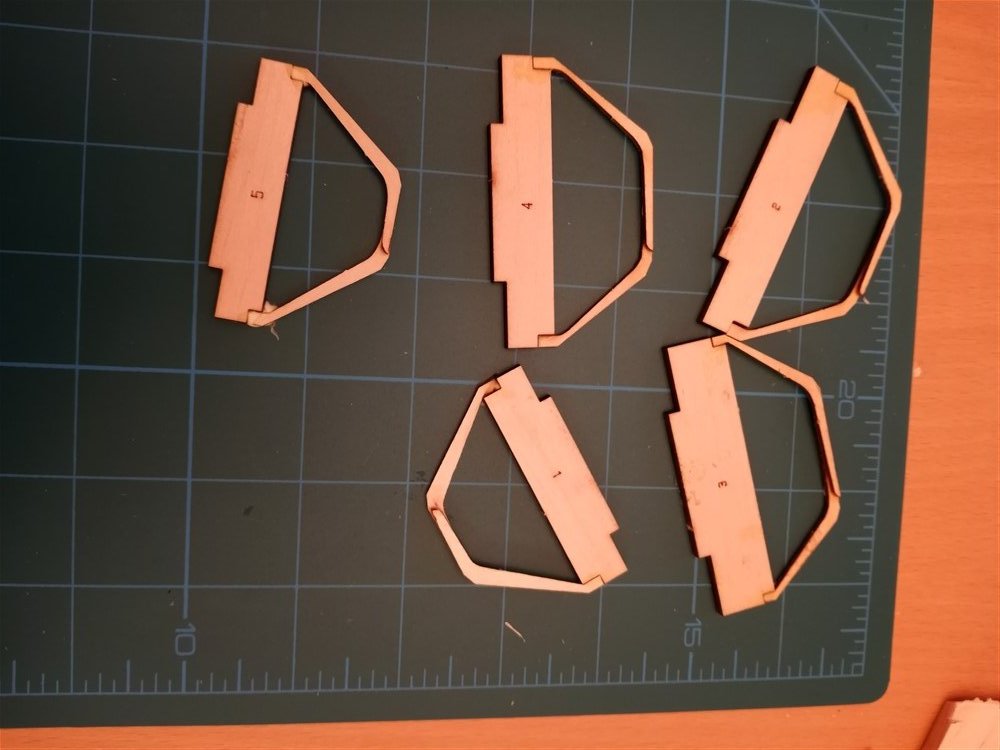
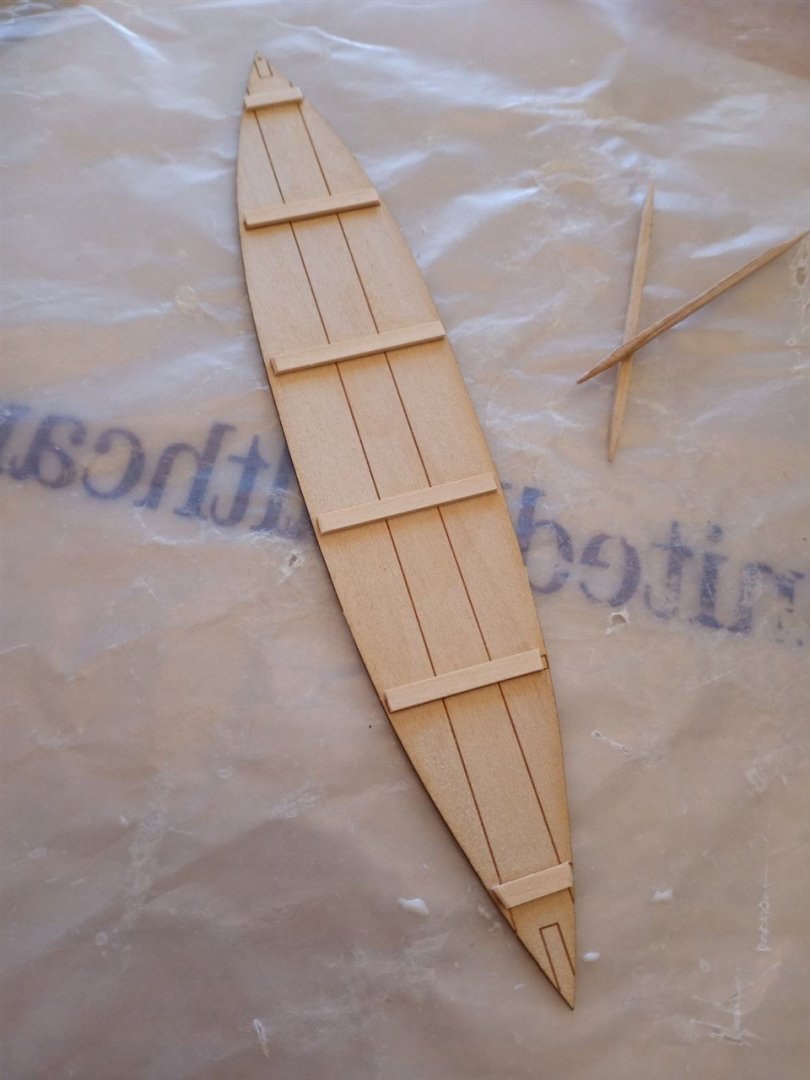
Time for the building board. Tried to sand the char off the top. Wasn’t as successful as I wanted, but I didn’t want to break anything. Everything still seems incredibly fragile! I’m hoping the planking will give the model some “substance”!
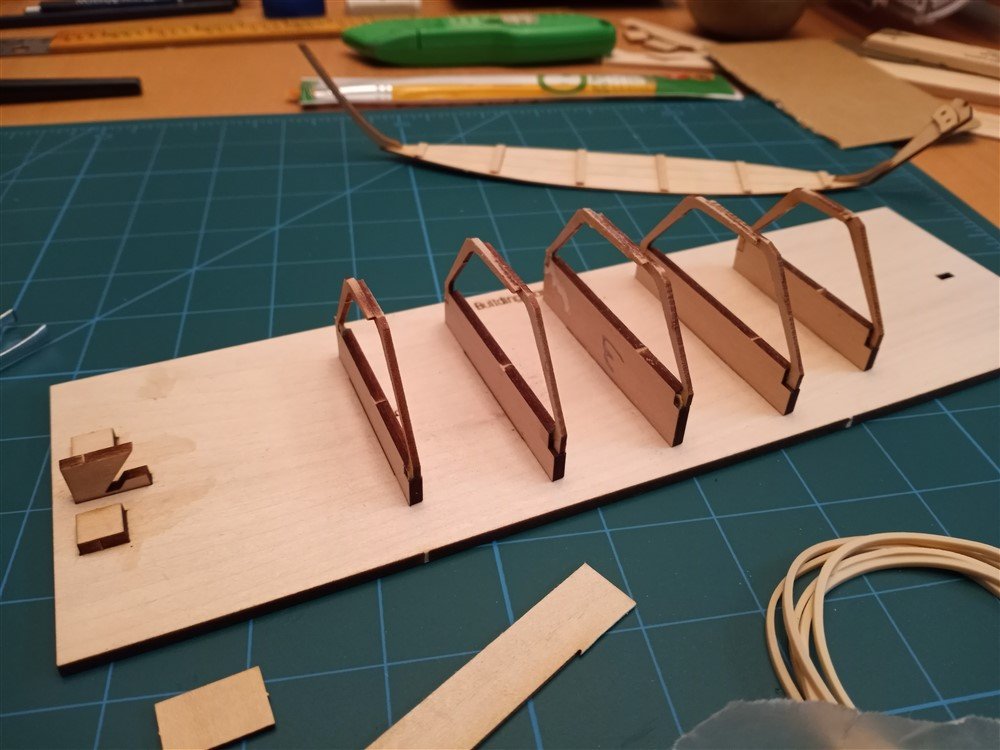
Step 6 – letting it dry. I added some weight to the top to make sure it’s all glued well. AND I switched to using yellow wood glue (which came in the kit). It seems to work better for me.
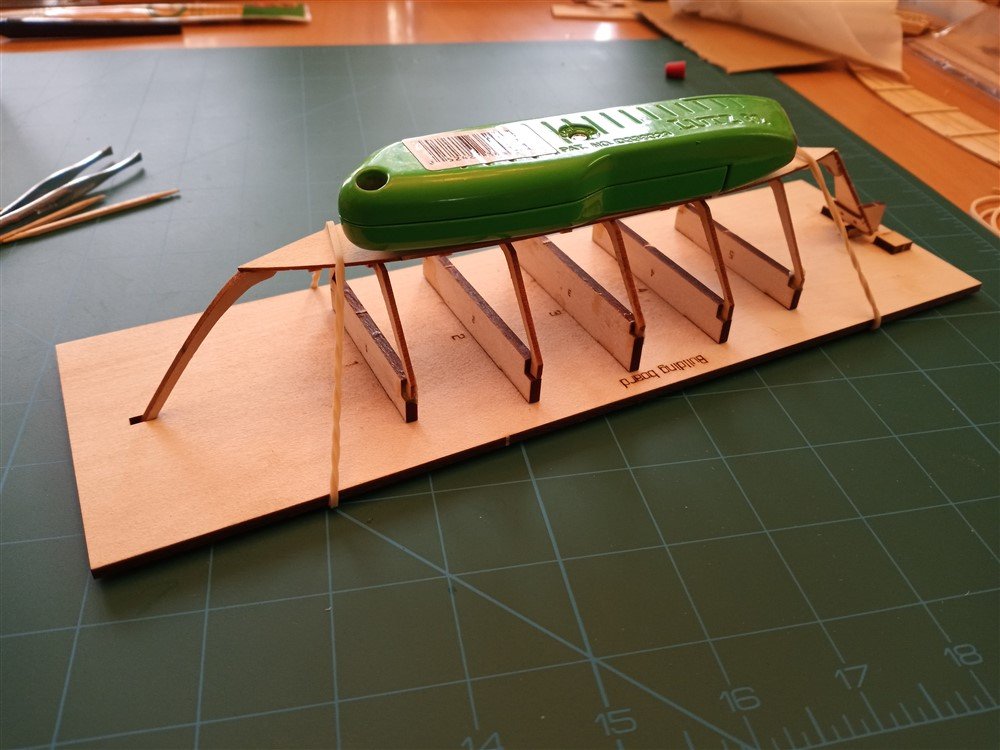
The very scary “planking” is next, but letting this dry overnight before I have to face my fears!!!
- Keith Black, Cathead, Sea Hoss and 3 others
-
6
-
8 hours ago, bobandlucy said:
I'm learning to slow down (slowly!).
I wish I could learn this trait! I get so anxious to see the next step! Your build log has really been helpful in showing me what's next and what its supposed to look like! thanks! (Oh, and I'm going to steal your idea of "staining the thwarts"... they look great!) Of course, it will take me quite a while to get to that point in the build, but I'm already checking out stain colors!
- Ryland Craze and Keith Black
-
2
-
9 hours ago, Keith Black said:
Q-Tips work great for removing excess glue.
Thanks Keith, I've also used the Q-tips.. mostly for applying isopropyl alcohol when I've made mistakes!
- Ryland Craze and Keith Black
-
2
-
9 hours ago, Ryland Craze said:
Your progress looks good and your detailed build log will help future builders of this model.
Thanks Ryland. The glue tips are helpful, as is the description of the laser beam! I'll have to pay attention.
I was thinking I was putting too many pictures up... I'm only on step 3, but hopefully the details will help other newbies!
- Keith Black and Ryland Craze
-
2
-
19 hours ago, turangi said:
Looking good! I second the opinions for using yellow glue, works much better, Titebond is a brand that has worked well for me. As for excess cleanup, I have found that if you let the excess start to setup and get a bit rubbery it is easy to cut that excess away with a sharp knife.
Thanks turangi, I'll try that method going forward!
- Keith Black and Ryland Craze
-
2
-
Thanks @druxey, @Don, @Keith Black, I really appreciate your advice! I will definitely try some combination of these (my white glue just isn't doing well , and as Don said, doesn't get the initial grab). I'll probably start using Yellow glue on the next steps!
- Ryland Craze and Keith Black
-
2
-
Question: When do I use the yellow wood glue? So far, I'm only using Elmers white glue, but it doesn't seem to hold very well. Advice?
-
On 3/9/2021 at 2:46 PM, robdurant said:
Hi all,
Just to say I've updated the pdf documentation for Picture Resizer to include the latest functionality, and I've also finally got round to writing a proper website for the application. As always, you can find it here:
https://durant.biz/pictureresizer/
Thanks
Rob
Thanks, Rob, for this GREAT program! I'm a brand new newbie, and I was having trouble because all my pics were being posted upside-down. But with your program, I was able to load my pics as they were intended! (They are a bit big, so I might resize down a bit, but this is a wonderful tool!)
-
Thanks everyone, for the tips! Ok, I THINK i've figured out the photo issues. Here goes!
I've finished steps 1, 2 and 3. I may be overdoing this blog but I've decided to post everything I'm doing along the way, with my thoughts along with it!
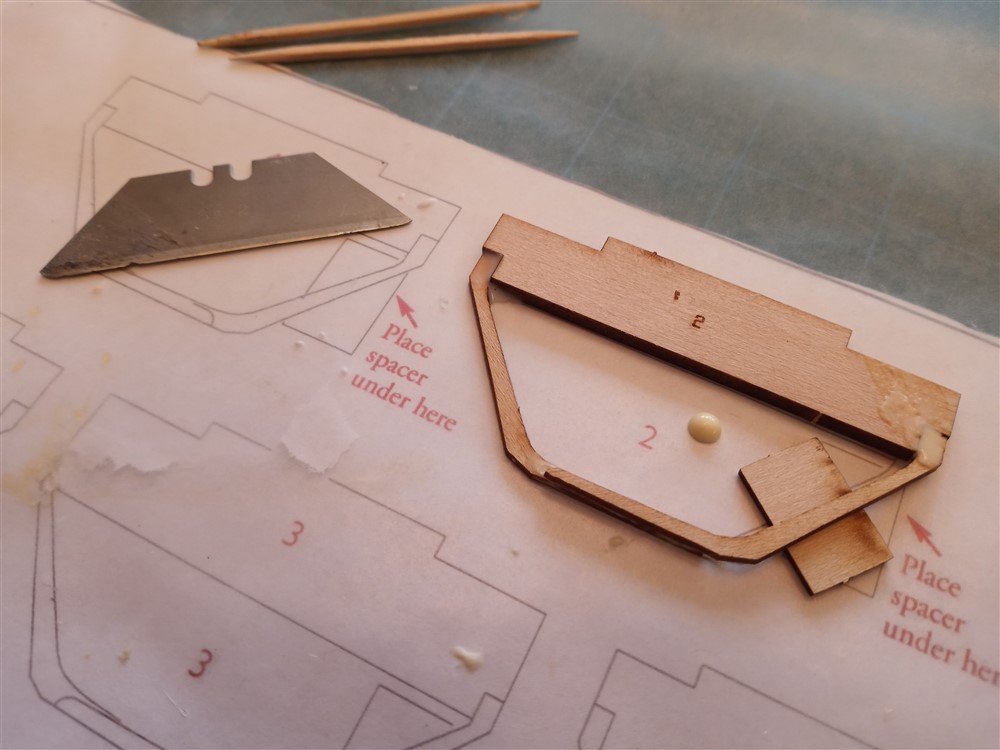
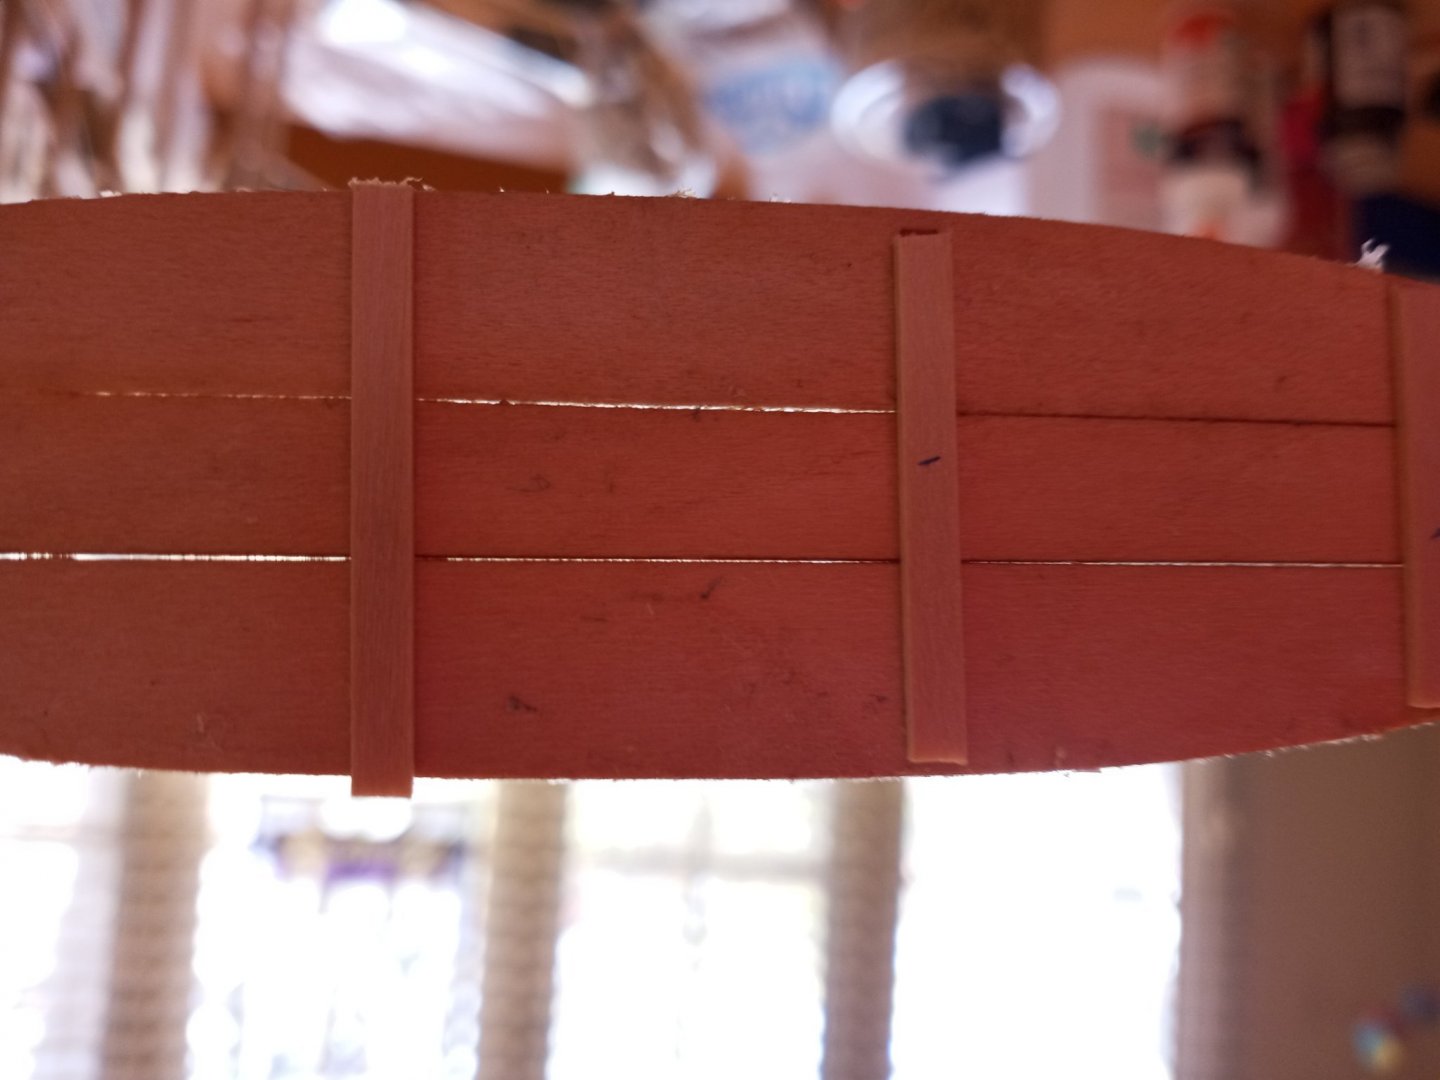
So step 1 – using the one-piece bottom, I was able to get the cleats attached (this went fairly well)
I still can’t really understand how to use “water & brush” to remove excess glue, but my toothpick seemed to work for me!
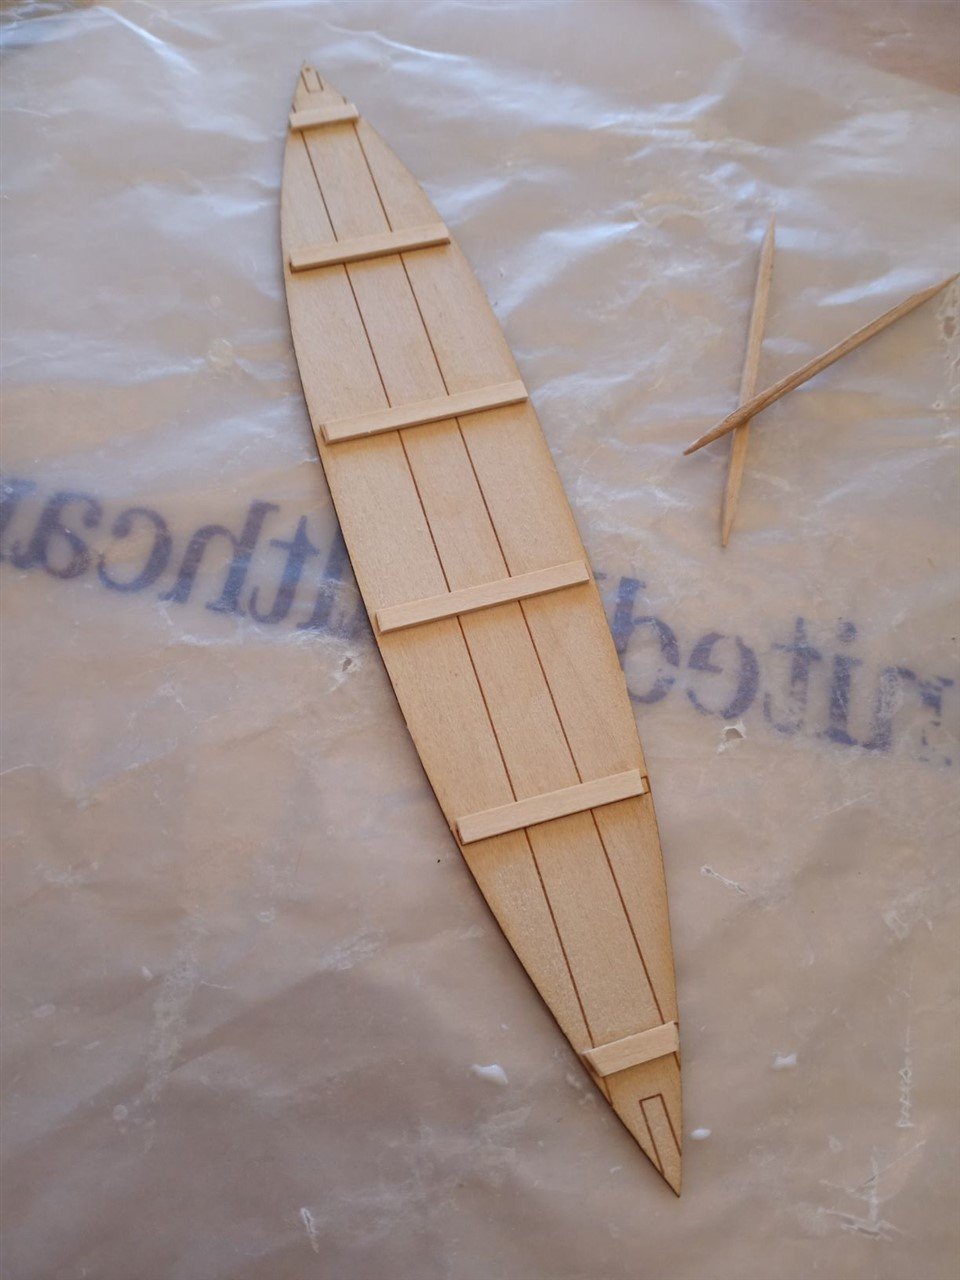
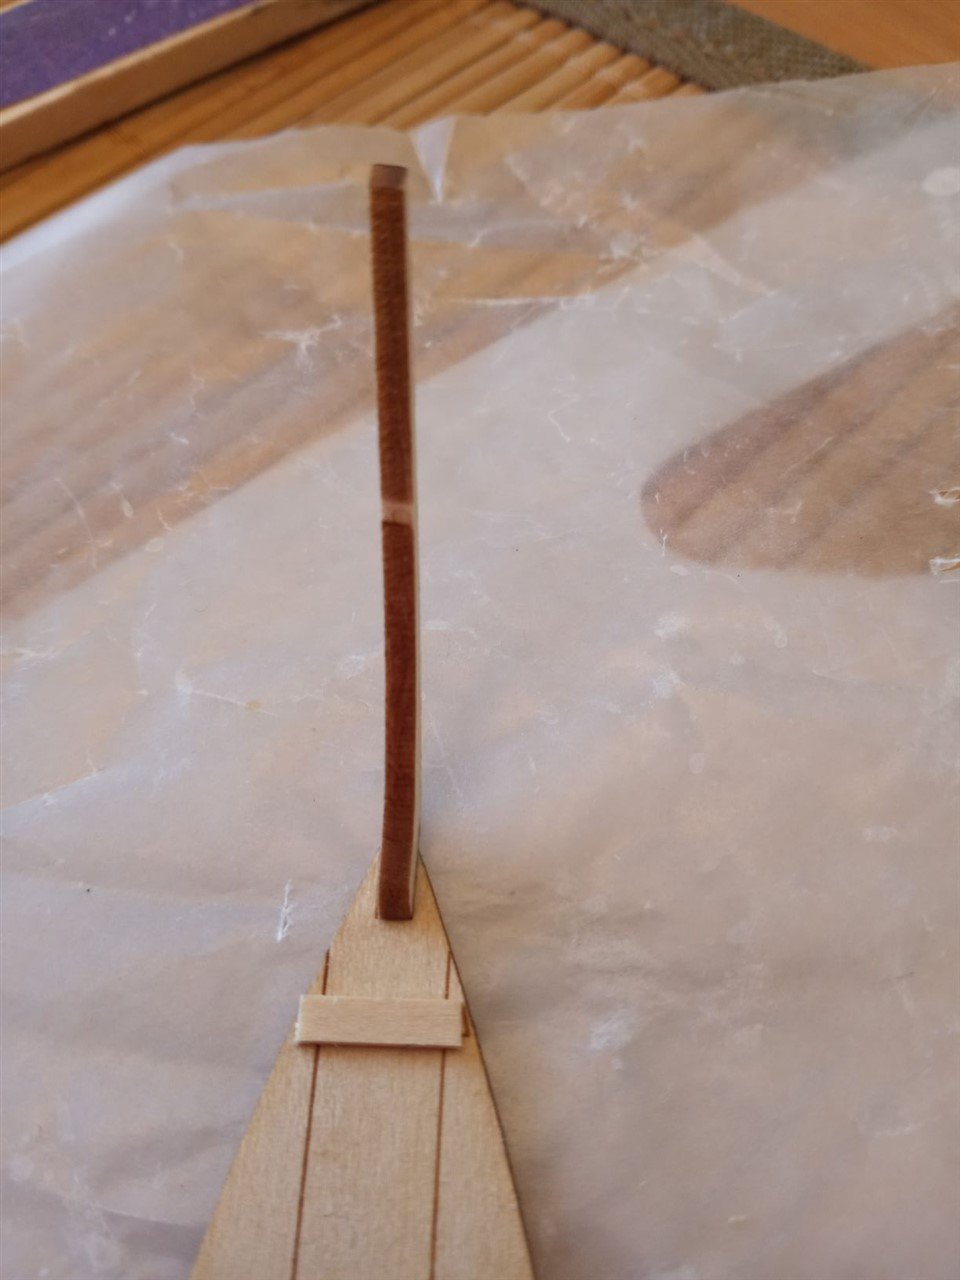
Step 2 adding the stem. I had to redo this a couple times. Glue didn’t seem to be holding.
In the forward view, it looks a bit crooked to me, but I’m hoping its just the camera angle!
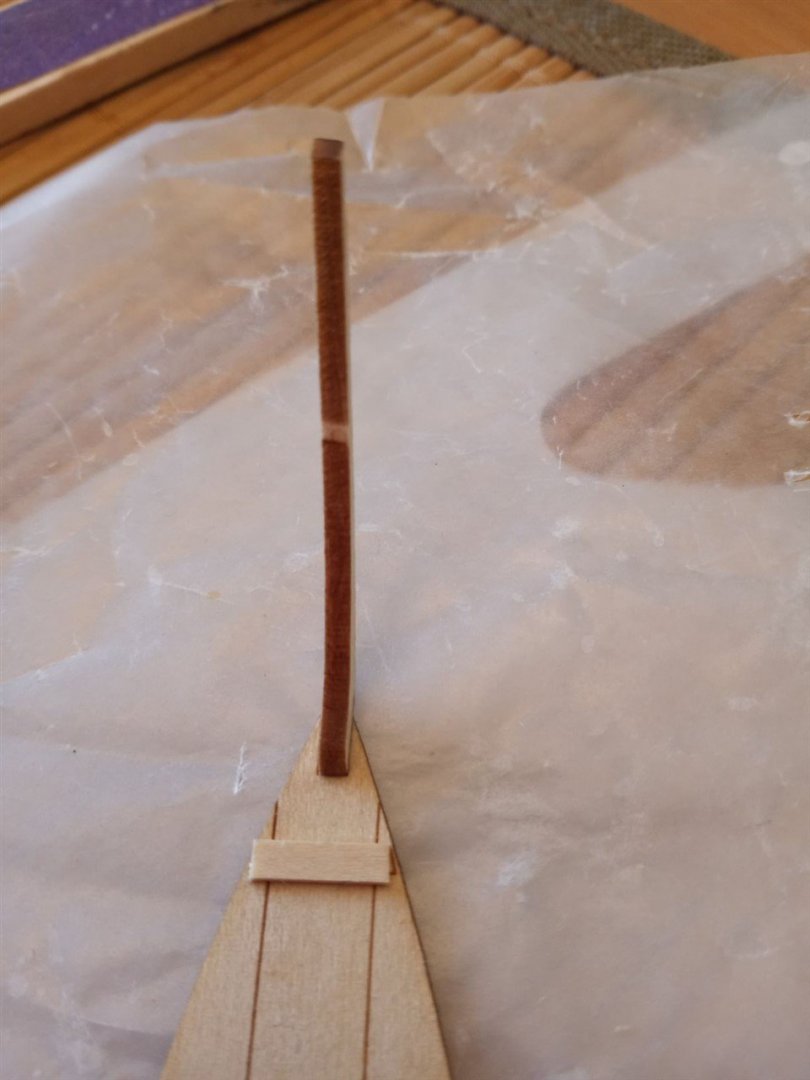
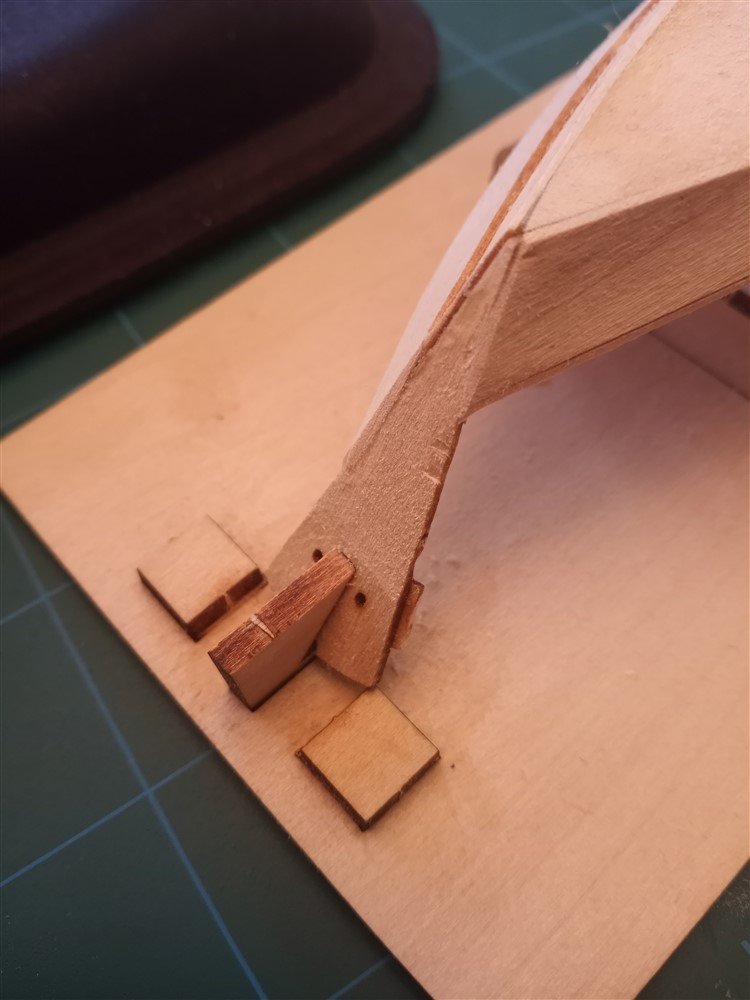
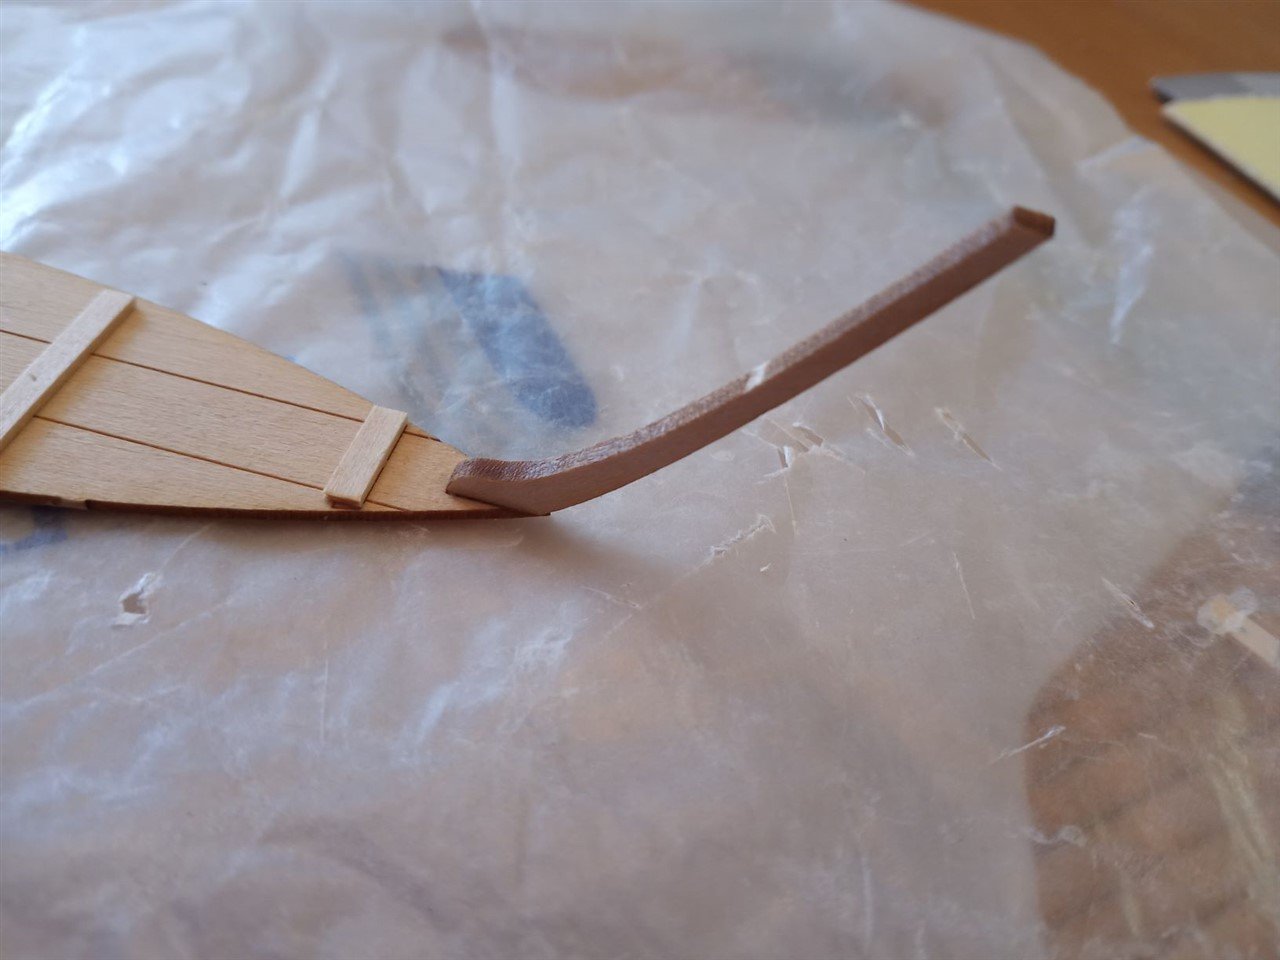
Next came the transom, stern knee, and stern cleat. I did the transom and the stern knee first, and then realized I had forgotten the stern cleat. But it seemed to turn out ok.

Side view

The next step went ok...
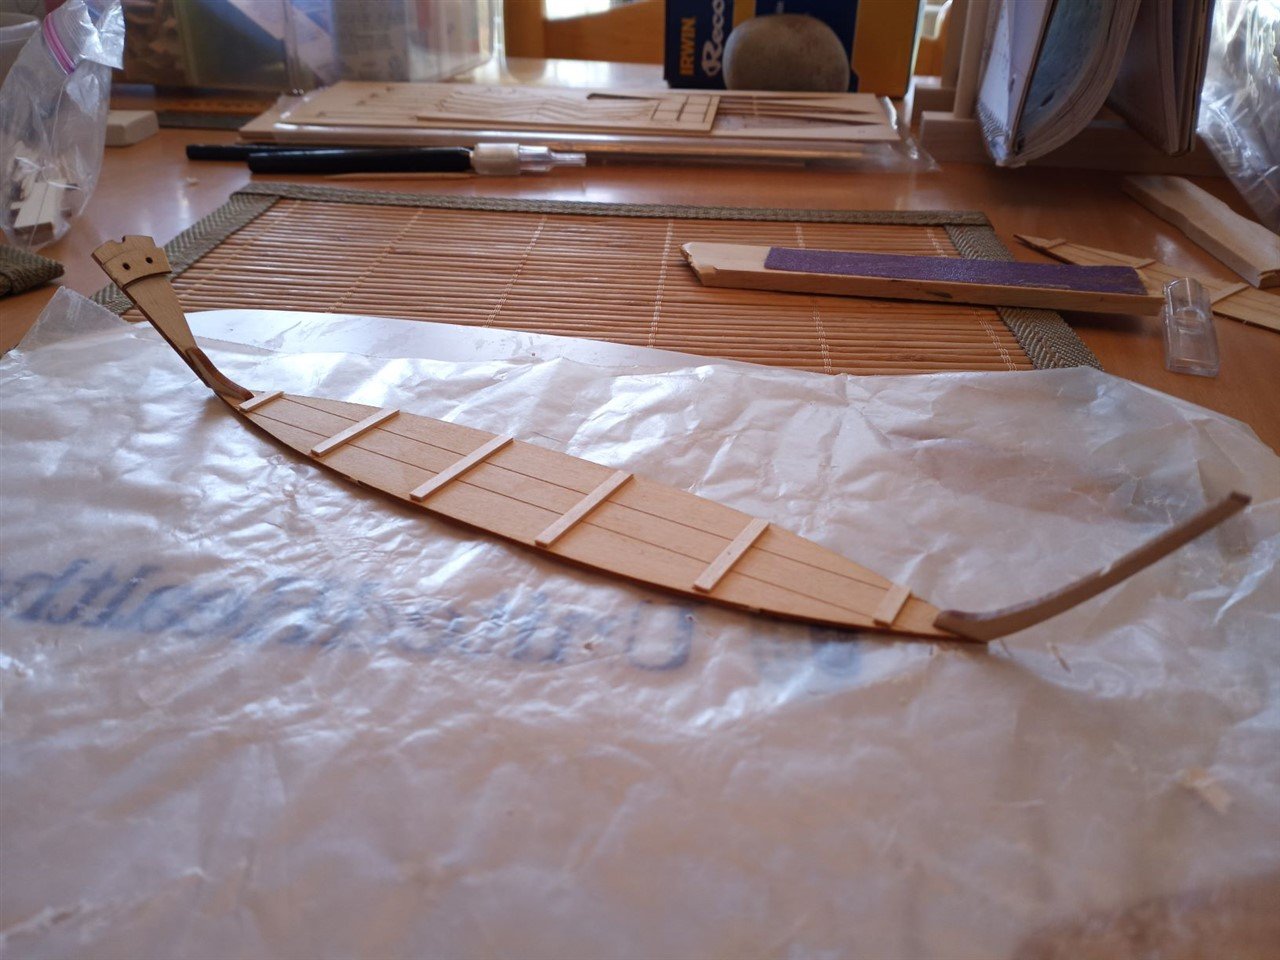
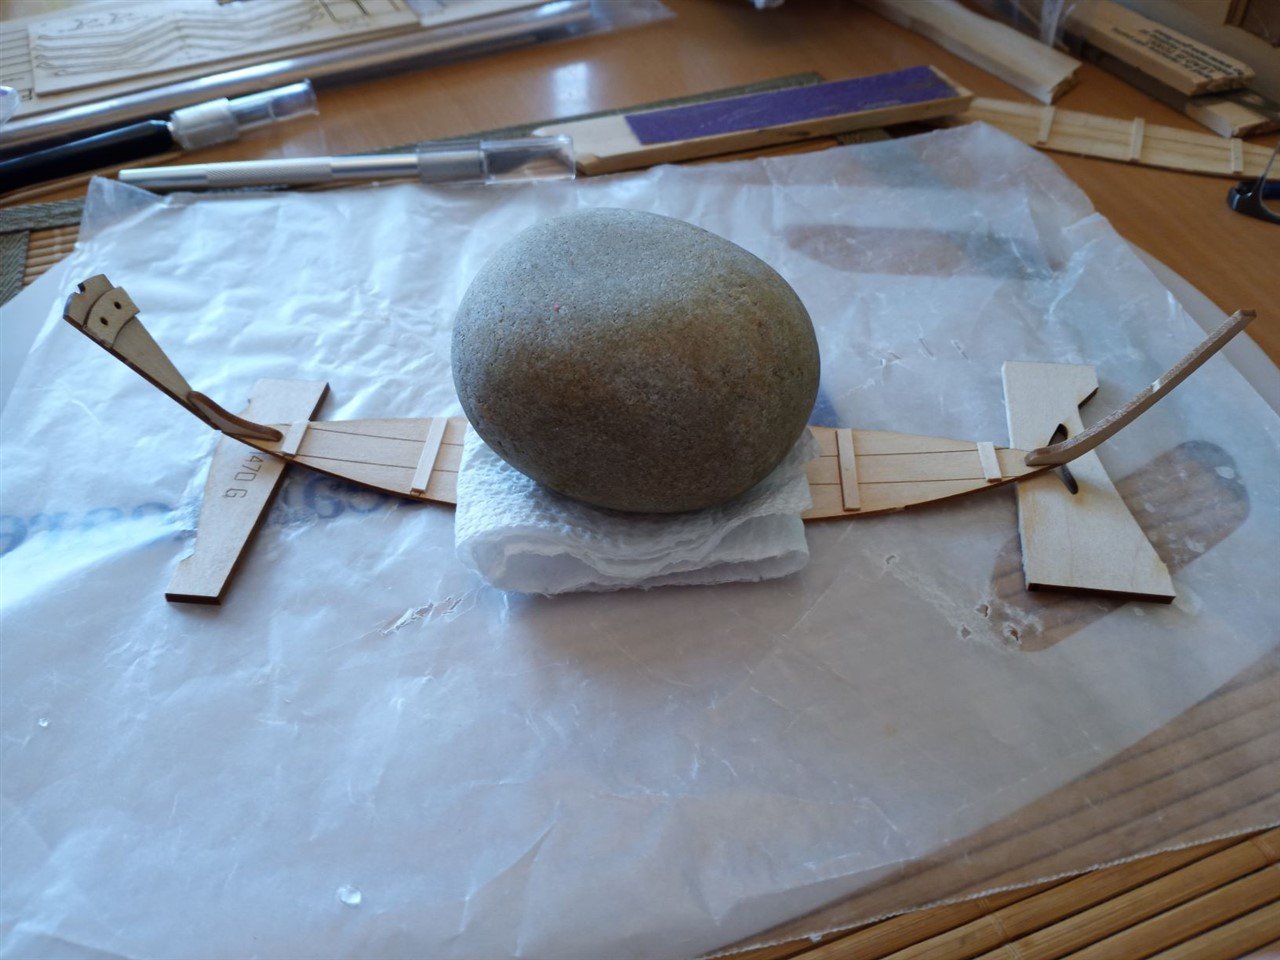
And finally, to end my work for today, I curved the bottom. At first, I was worried because the ends of the dory were much higher than 1/8" (as in this pic), but as it dried, the ends came down to where they needed to be! I am very happy with what I did today... lots to learn, but its fun!
- Cathead, Keith Black, niwotwill and 4 others
-
7
-
Thanks niwotwill, and the sawdust idea is great! I will keep that in mind!
-
I finished steps 1, 2 and 3, but having trouble inserting my pics (they are upside down!) Any ideas?
I also uploaded the pictures to postimage.org (where they were automatically rotated correctly), but I don't know how to get them from postimage.org into this blog!
Asking for help - need advice! Thanks!
-
Thanks turangi, for the sanding advice. I did exactly what you said, that is, I applied more pressure to one end! Oops! But its all part of the learning process!
- Keith Black and Ryland Craze
-
2
-
Joseph F, this is an impressive build log! i am just starting out, and reading/seeing your progression from beginning to end is going to be really helpful to me, so thanks for your log! Your Dory looks amazing!
Your pictures are great... are they from a phone or a camera? Also, when I tried to upload my pics, they posted but were upside-down. Is there a trick to getting good pics posted?
-
9 minutes ago, Ryland Craze said:
This is a good kit for the beginner ship modeler. You will learn a lot of skills that will help you in future builds. You can click on the tag that is below the title of your build log and it will bring up all of the build logs for the Lowell Grand Banks Dory that you can use as a reference for your build.
Thanks Ryland, that's good to know! I found a few build logs but I imagine there's many more! The ones I found have been helpful for me to visualize what this is supposed to look like!
- Ryland Craze, druxey and Keith Black
-
3
-
5 minutes ago, Maliba1025 said:
It happens my friend and welcome to the fun!!
Thanks, I can't believe I screwed it up, but its in the right place now. All part of the learning process! And I'm really surprised at how much fun I'm having with this!
- mtaylor, Chuck Seiler, Ryland Craze and 2 others
-
5
-
-
Ok, so this is my very first build, and here's what I've learned so far. This is going to be harder than i thought, but surprisingly enjoyable, trying to do this. Also, I've confirmed I am not a perfectionist! (this could be a blessing or a curse!)Step 1: I thought I'd try the harder beginning, that is, gluing the 3 bottom planks together. Apparently I took the instructions to "prepare & sand" the planks too literally, because they don't fit flush together. Not to worry, I used an enormous amount of glue trying to get them to stick. I tried to wipe off the excess with a brush and water, but that seemed to just water down the glue, and the pieces would not bind. So I used isopropyl alcohol, dismantled everything, and tried again. No such luck, but i found that if i placed the pieces together, ran a bead of glue over the top and let it sink in-between the planks, it might hold. As you can see in the photo, although it is "holding", there is daylight between the planks! Although catastrophic if at sea, (and I'm trying to build an "authentic" boat), I went ahead and attached the cleats (one of which is too long), just for practice. Oh, I also found that a toothpick works well in removing excess glue. Not sure if that's the right way to do this, but its working for me!I've decided to call this a 'trial run" for me to practice on, and I will now use the "backup" one-piece bottom to continue (because this first try might fall apart during the rest of the build) but at least I am learning!Next post will hopefully show a completed step one (one-piece bottom of boat with cleats!)Showing my failed trial run here... (not sure why my pics are coming out upside-down!)

- Keith Black, Cathead, druxey and 3 others
-
6


Lowell Grand Banks Dory by lraymo - FINISHED - Model Shipways - 1:24
in - Kit build logs for subjects built from 1851 - 1900
Posted
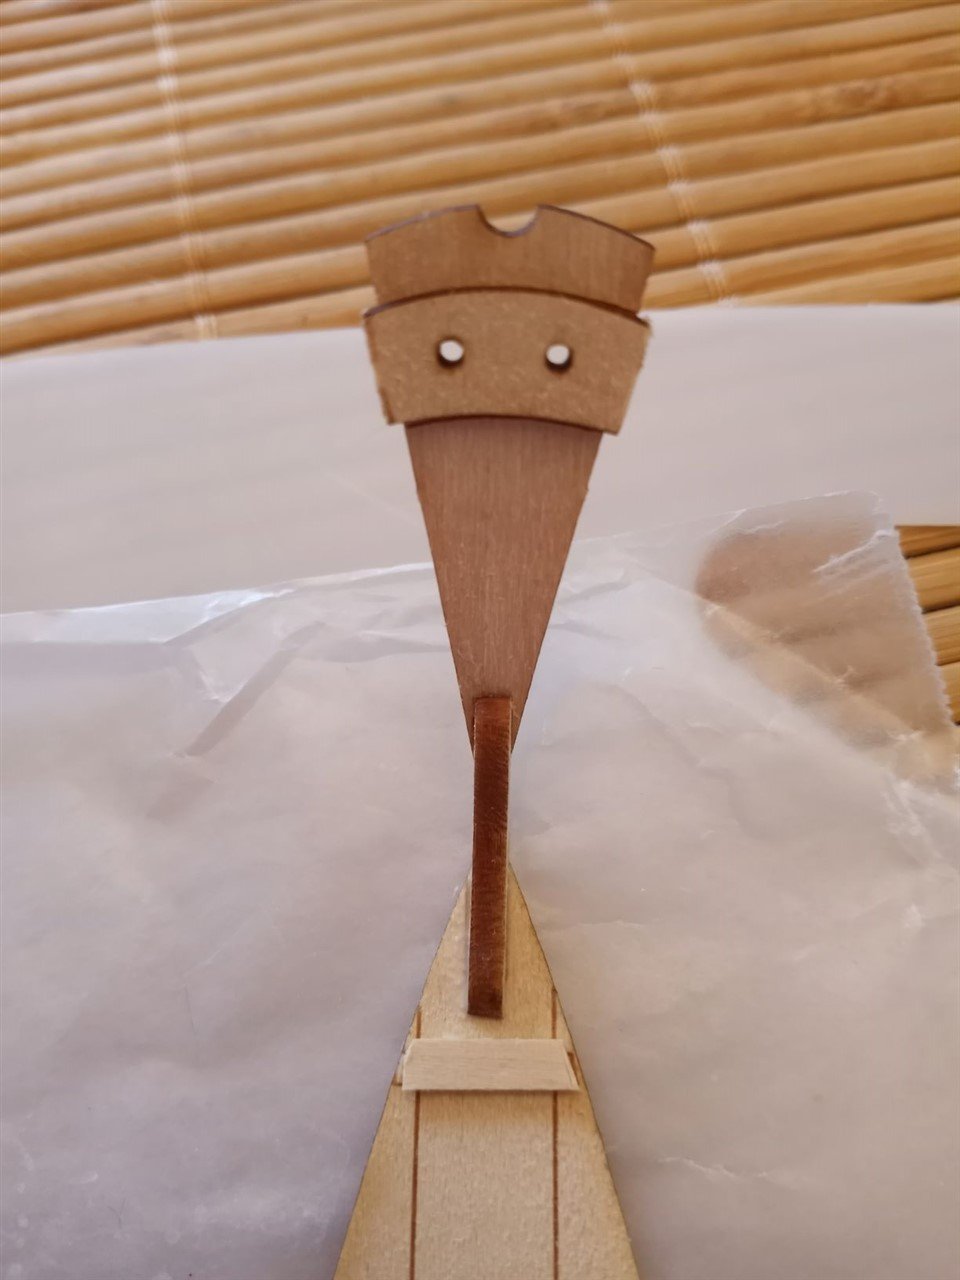
Help!. My first MAJOR mistake... I broke the Sheer Strake! Right at the bow where the hole for the becket is, I glued the sheer strake too low on the bow, so I tried to remove it. I had used the yellow wood glue, and tried multiple applications of isopropyl alcohol, but when I tried to lift it off the broad strake, it broke. Any ideas on what I need to do to fix this? (Will Model Shipways send me a new piece? Can I use wood filler or putty (neither of which I know how to use)? Looking for advice.. I'm really discouraged...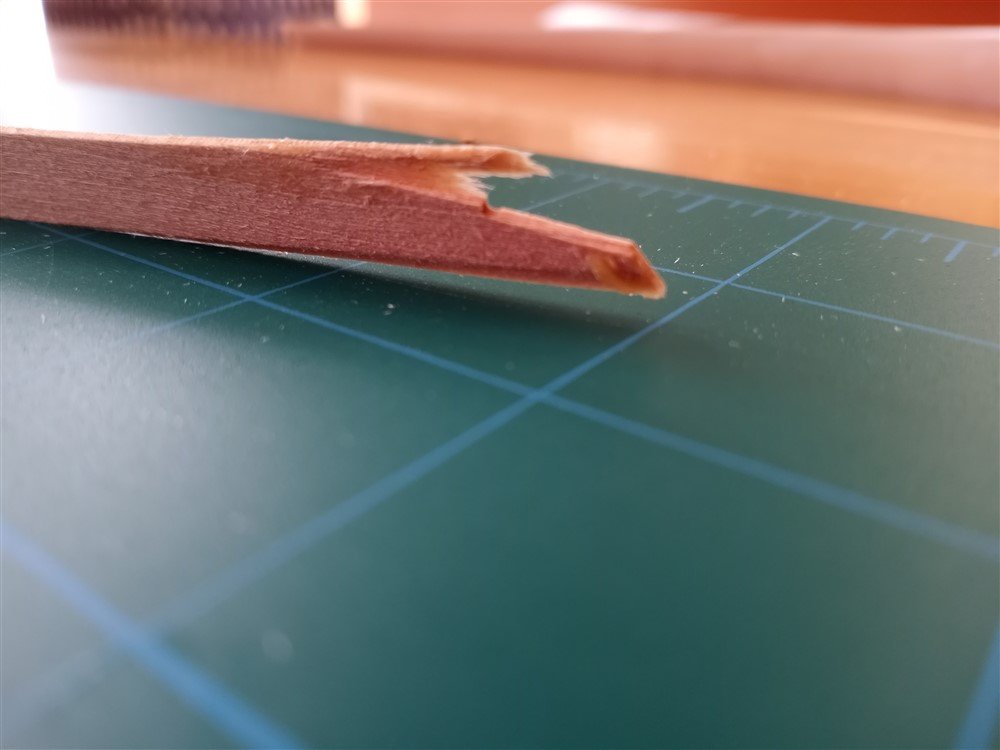
What can I do? You can see that part of the sheer is still glued to the broad strake. I really made a mess of this! And is the alcohol supposed to work on Yellow glue? Or just the white? Thanks for any suggestions!