

blackjack40
-
Posts
65 -
Joined
-
Last visited
Content Type
Profiles
Forums
Gallery
Events
Posts posted by blackjack40
-
-
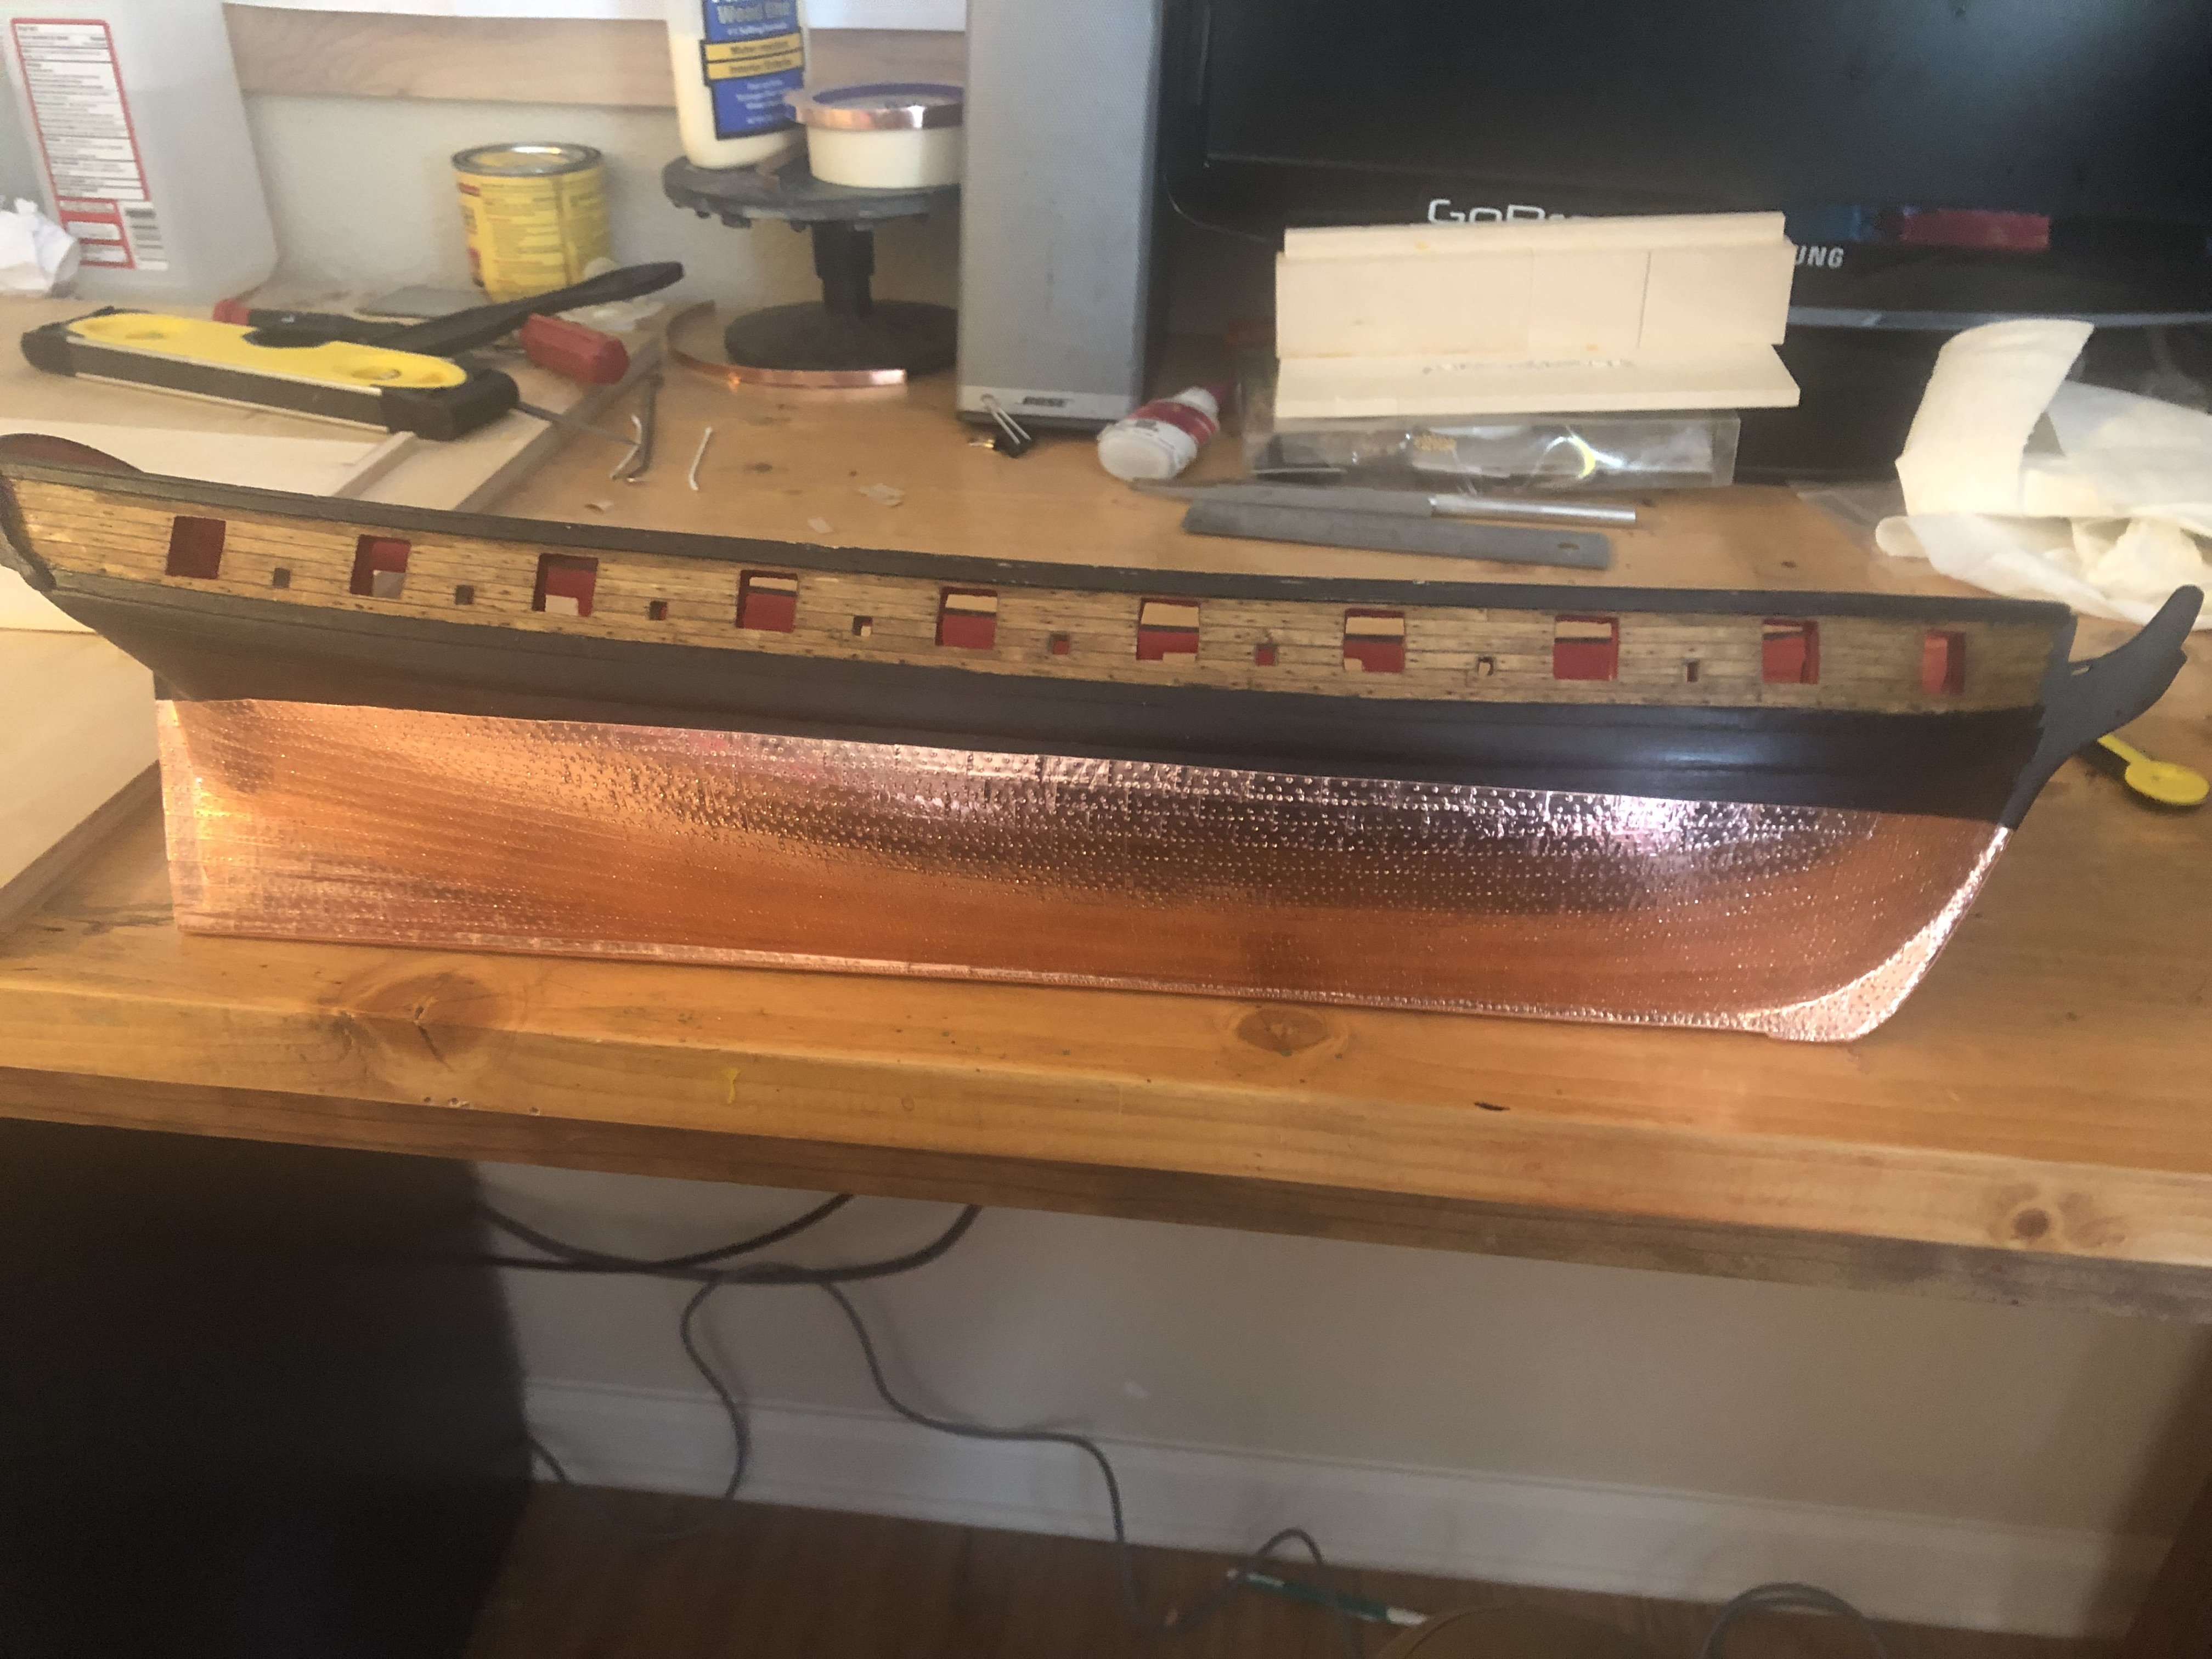
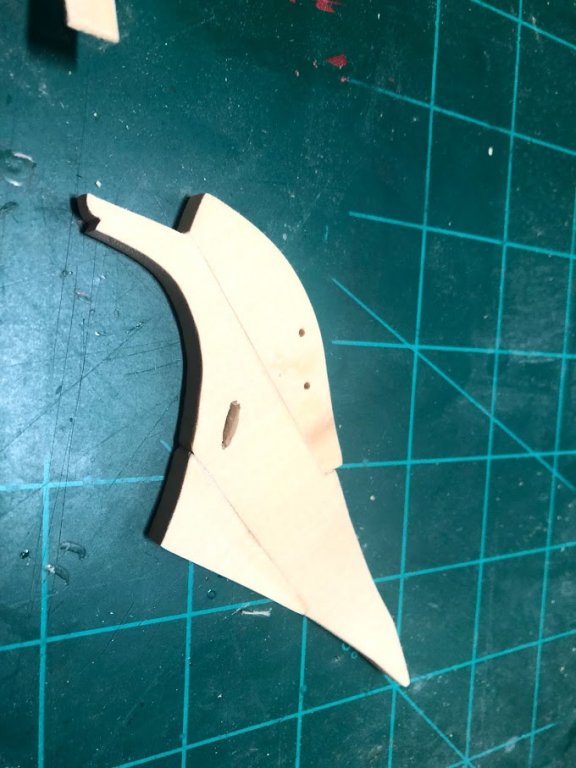
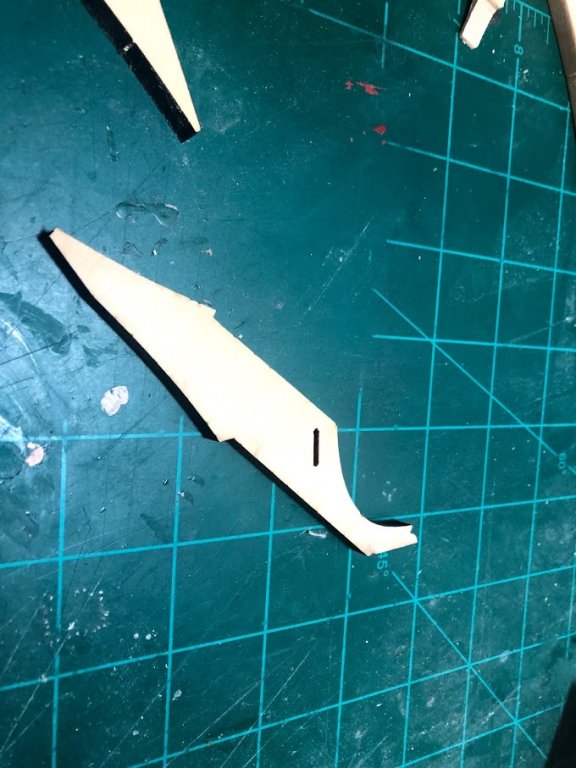
My first attempt at the Knee is complete. Honestly not very happy with how the edge darkening turned out, seems to pronounced to me. I think I need to get more precise fits along the seams and use the lighter #2 pencil like the larger top pieces. Serves me right for switching pencils half way through.

-Joe
- JeffT, GrandpaPhil, FrankWouts and 1 other
-
 4
4
-
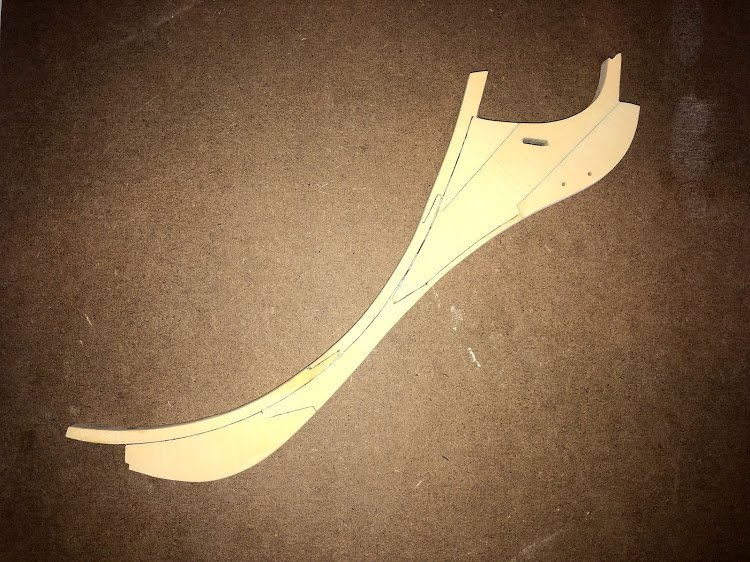
I’m Making that saw dust and improving with the scroll saw! I re-cut the false keel as I was unsatisfied with the first one. It initially looked fine but in an effort to even the bottom I sanded way too much of the aft section and it was unrecoverable. New one is cut tho and drying in my high tech clamp.
Looking at the photo, it occurs to me that in my excitement I didn’t cut the slots on the bow portion... 😑🤣. I’ll get it thou.
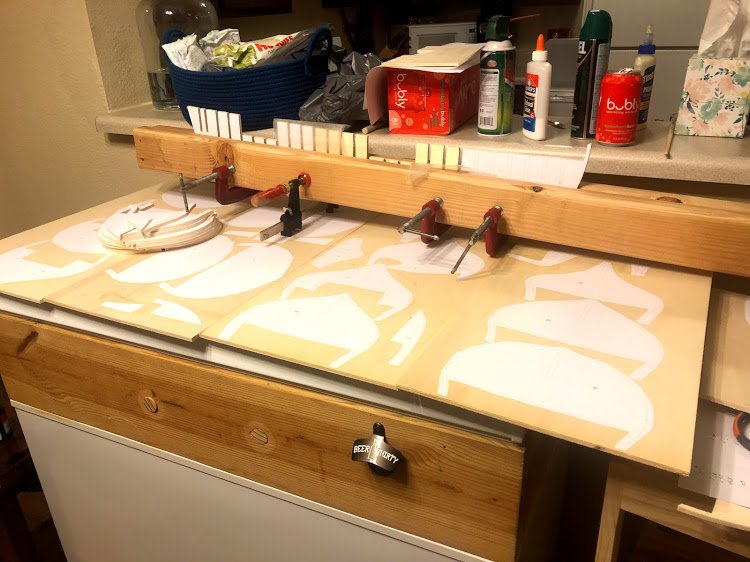
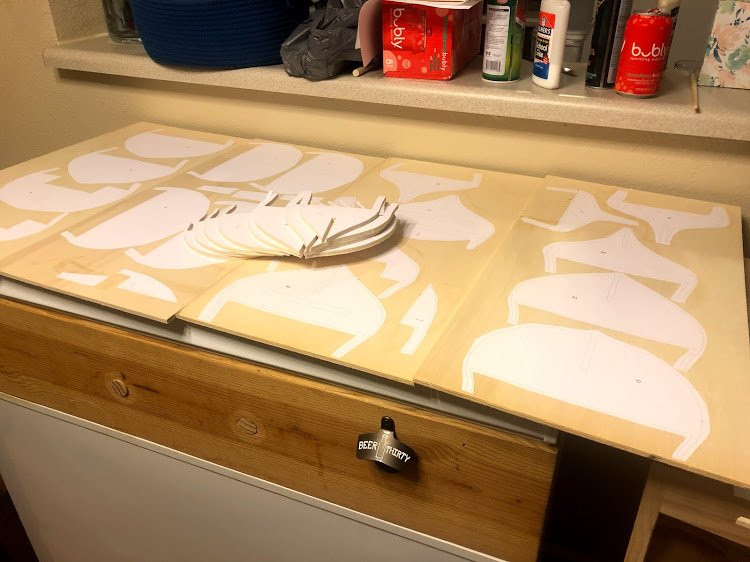
This is what I am most excited about, all my bulk heads are now either cut or ready to be cut. Working through it!
Lastly, I built my build board. Still refining this one. The initial braces we're too wide and I’m working on cutting/ sanding them down to the right size. Also planning to put one more set of braces in the middle and keel alignment bars on the bottom which are in the picture but not attached. That will be the last piece to go on after the last brace is on so that I can cut them to the right length.
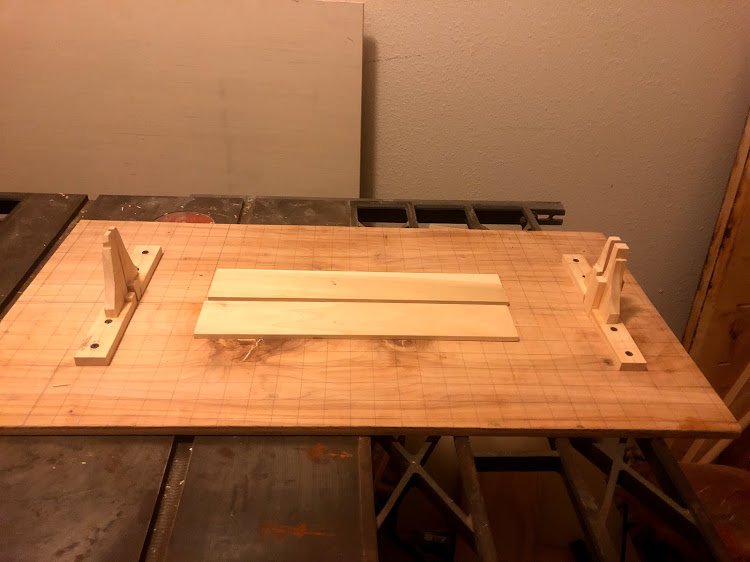
If anyone is interested I can go into how I made/making the board.
As always, open to ideas and feedback. Thanks!
-Joe
-
Great success! The false keel is cut and holy cow, I’m hooked... Also holy cow this thing is huge, already knew that but holy cow!!
That is my Syren behind it and that truly brought it all into scale for me.
Next step is it clean it up to the point I’m happy with it then glue it up!
-Joe
- FrankWouts, JeffT, Rustyj and 3 others
-
6
-
-
The anchors look awesome Jesse! Sorry to hear your not feeling good, that's always a bad time.
-Joe
- popeye the sailor, Piet, JesseLee and 2 others
-
5
-
As chuck said, having my knowledge now, not gonna waste my time on a craft center laser cutter.
Lesson learned Chuck! I’m happy with how the first one turned out on the scroll saw, if only it was the right scale. The next go will be better given the experience now!
-Joe
-
8 minutes ago, Gregory said:
That angle is common with laser cutters that have not been focused properly.. There will always be a slight angle, but negligible on a finely tuned laser..
You can diminish some of the effect of the angle by reversing adjacent parts...
Thanks for the tip, I think I’ll just re cut with the scroll saw. This whole project is about learning for me so no worries. Lesson learned.
I will keep that in mind if I have issues with laser cut parts in the future thou.
-
First blood! a minor success and a minor failure.
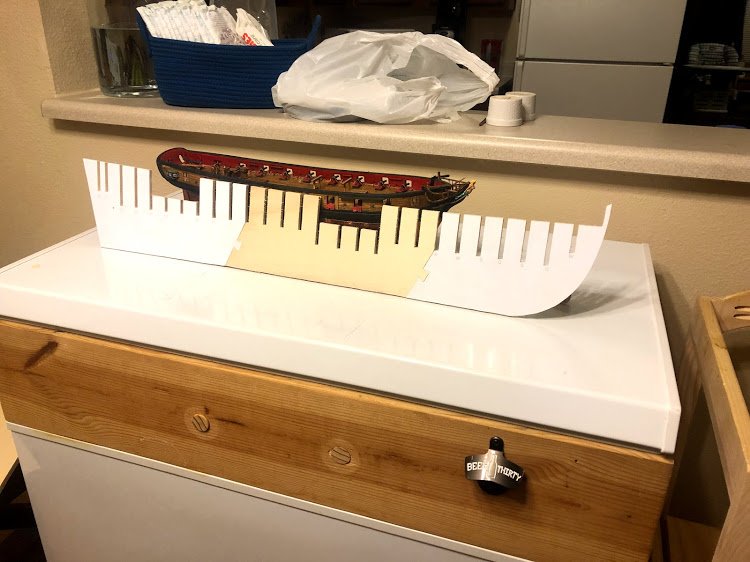
So first thing, yellow cedar, awesome! second, scroll saw not difficult but it is time consuming. I did mess up on one of the smaller pieces and had to re-cut. Not big deal. What was a big deal was when I compared my pieces to the sheet plans to start putting the jig saw together and realized it was not to scale... turns out the adobe program I had was for tablets and it printed it at 94% and didn't give me the option to change the scale. The actual adobe reader has been downloaded so this won't be an issue in the future. Chocking this up to a good practice run.
Second topic. I live on a military base and we have an arts and crafts center. Never been there before but thought I would check it out today. Turns out they do laser cutting for plaques and doll houses so I thought, maybe they could do some ship parts. brought them the stem plans and BAM they were laser cut for six bucks! great deal!
Popped out the big pieces and started to assemble and it became apparent why its only six bucks.
looks minor... its not minor... every piece is slightly angled...
The lesson, not all laser cutters are created equal... or calibrated...
so back to the scroll saw. Good news, round two should go even better... and in the right scale.
-Joe
- FrankWouts, JpR62, GrandpaPhil and 4 others
-
7
-
thanks chuck! Time to make some saw dust
-
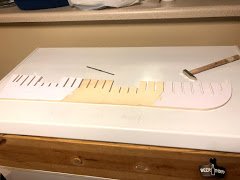
Ok, the wood is here! and so is the first hurdle... went to verify my plans before we start cutting and I seem to be off by 1/32 of an inch over the course of an inch. Not much, but over the run of the model, it will add up to a lot. I have printed the 8.5 x 11 plans and they seem to line up with my larger sheets so I'm having a bit of an internal debate. Wondering if someone more experienced could validate what I'm seeing as a print issue before I run back to the print shop to re-print. Thanks!
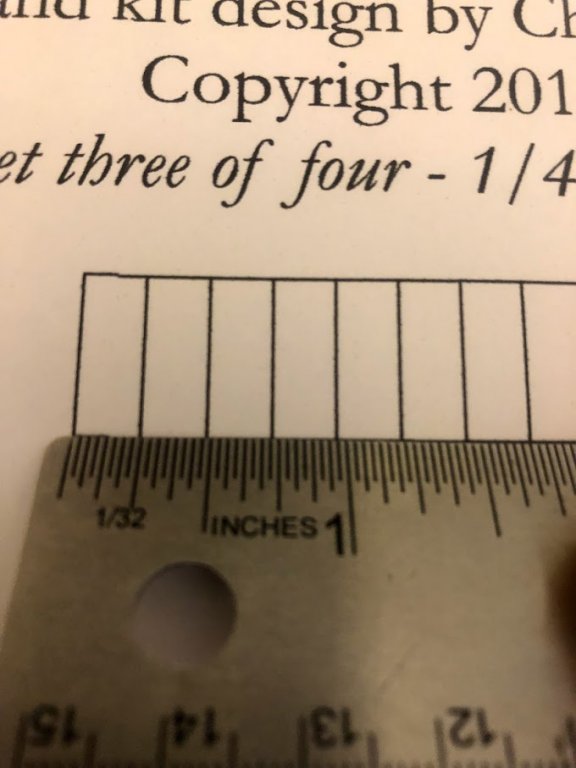
Chuck, I hope the image isn’t a problem as it only shows the scale bar. I will take it down of it is.
-Joe
- FrankWouts and GrandpaPhil
-
2
-
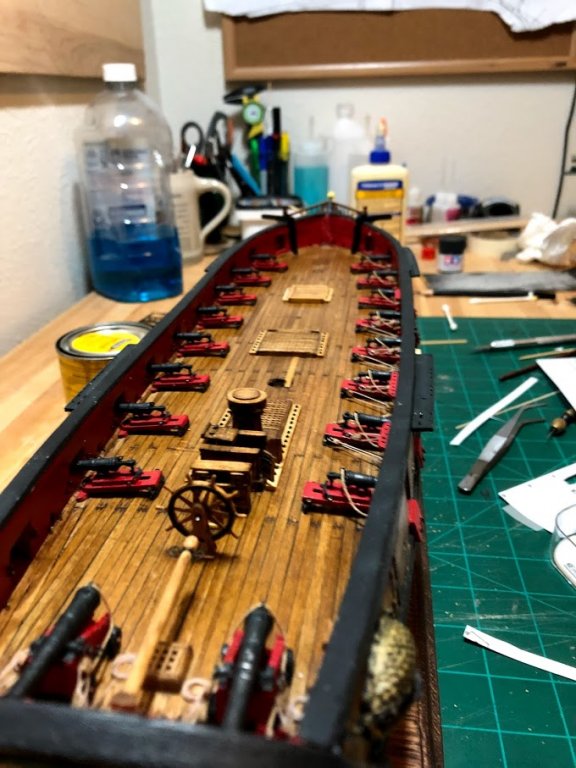
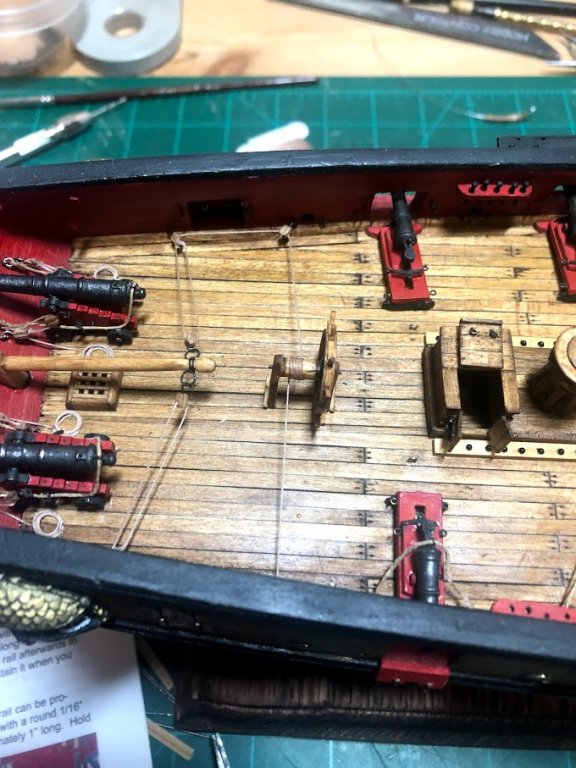
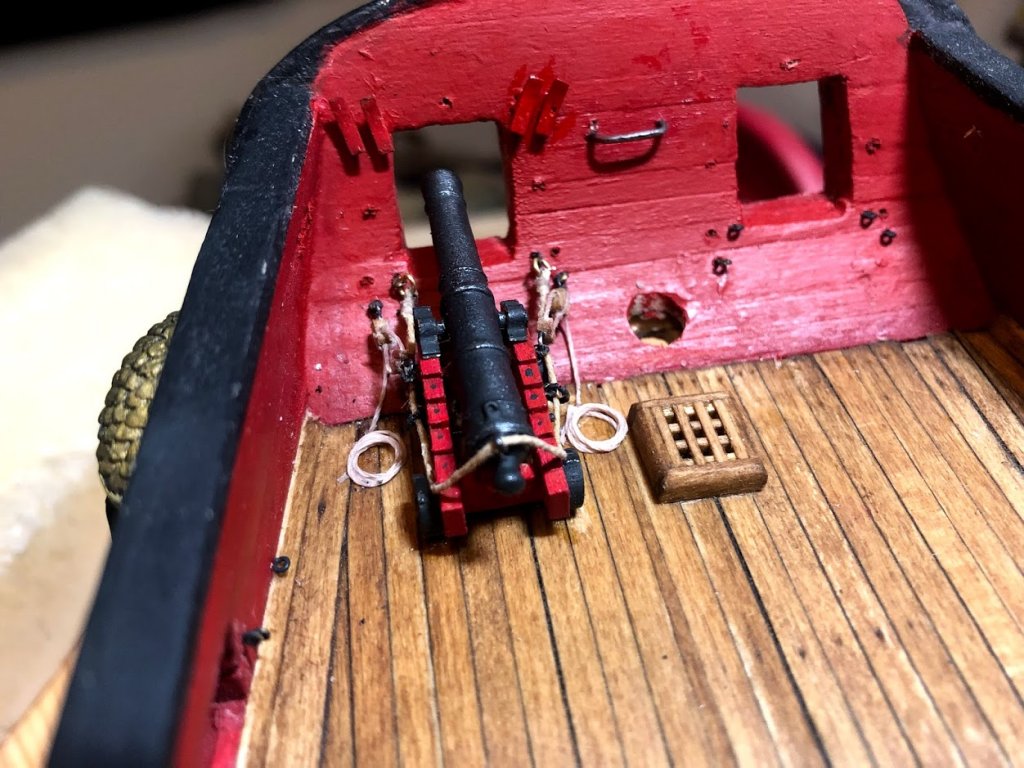
So, I've been putting it off for way to long and now I'm at the point that I can't do anything else till I'm done or I won't be able to rig them effectively. So, lets go with the guns!
Its been about four or five months since I was working on these, and it turns out you learn a lot in that time. I hated the rigging that I had done previously... so I cut it off and started over. I finished re-rigging the breach lines last night and I think the difference was worth it. Below are the before and after pictures.

It was worse than the pictures really lets on, the droop on a lot of them was almost non-existent. You can kinda see what I'm talking about on the guns on left of the pic.
Here are the new breach lines. Its not a huge difference, but its the details that matter right? I think it was worth the effort. oh yea, the new gallows are also in this picture.
Here is my first block and tackle rigging post new breach lines. Not sure I'm sold on those coils.
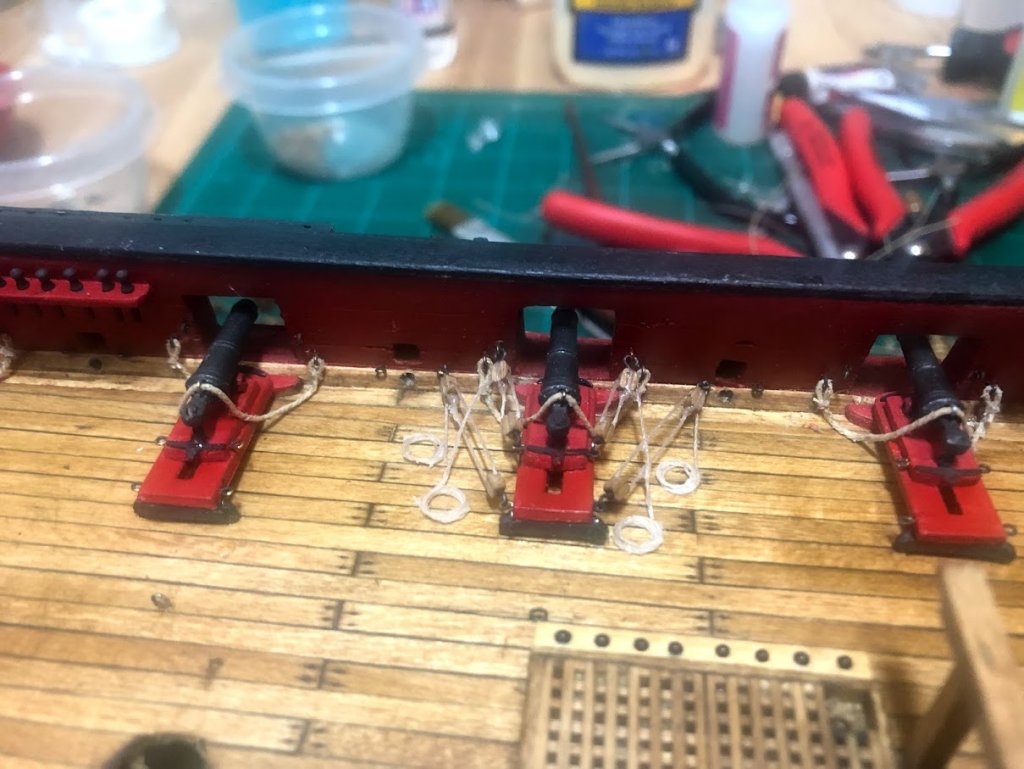
the process continues! Any feed back is welcome. thanks for looking
-Joe
Just an army dude that likes ships.
-
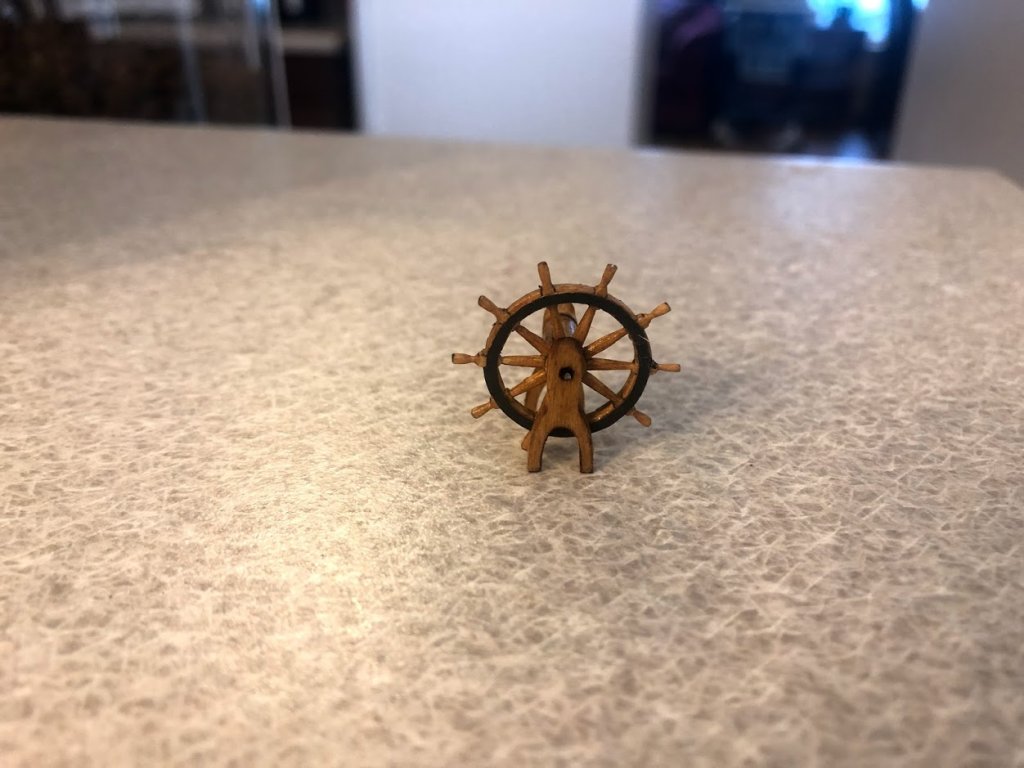
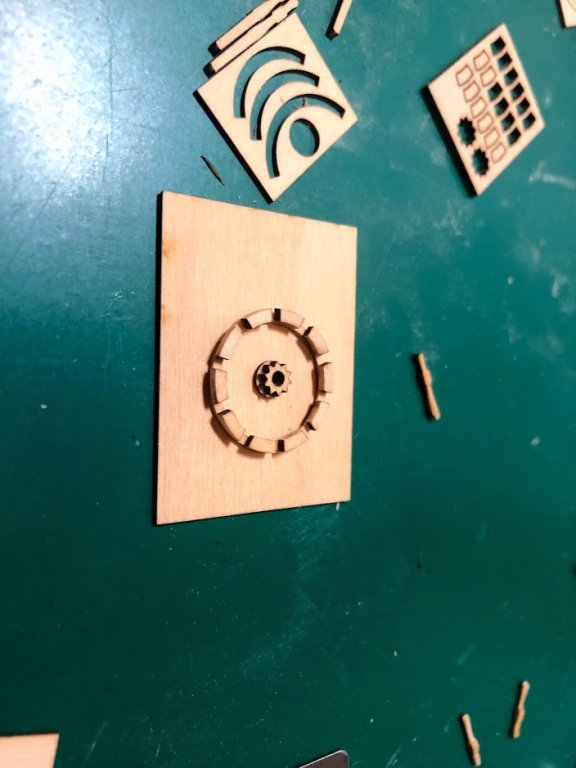
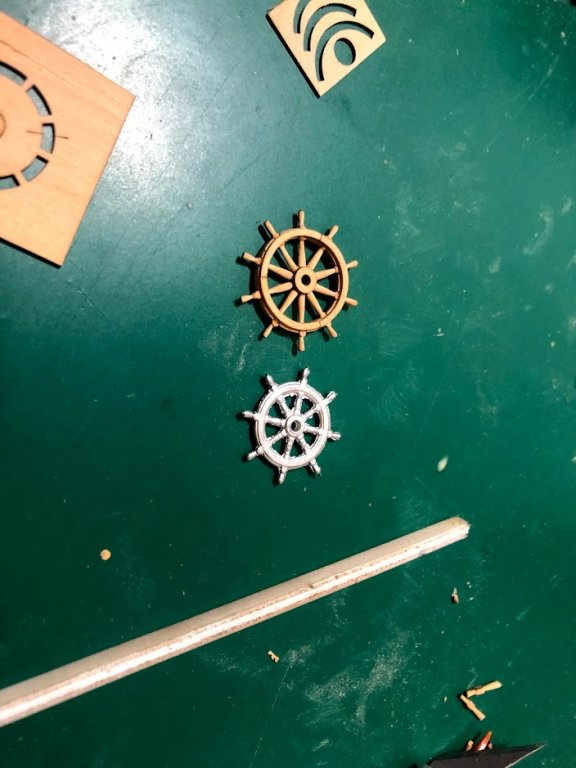
The Steering assemble is complete and rigged! A few evenings of work here but it was worth it I think. Turned the tiller using needle files on the mini lathe, built the wheel as described above.
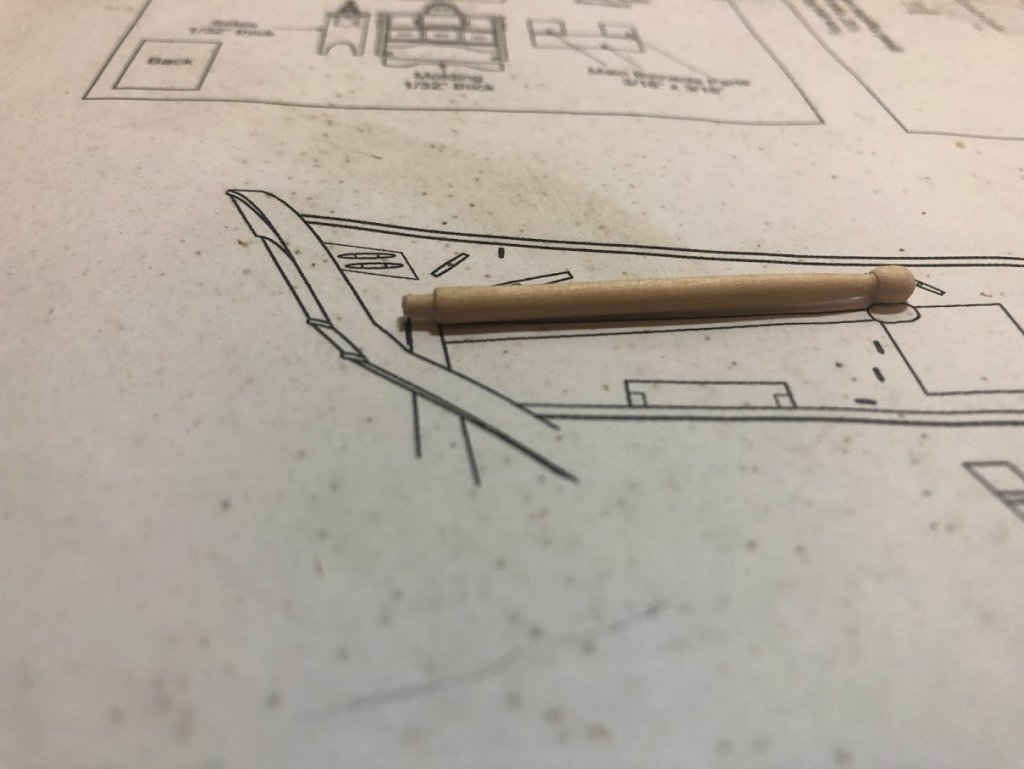
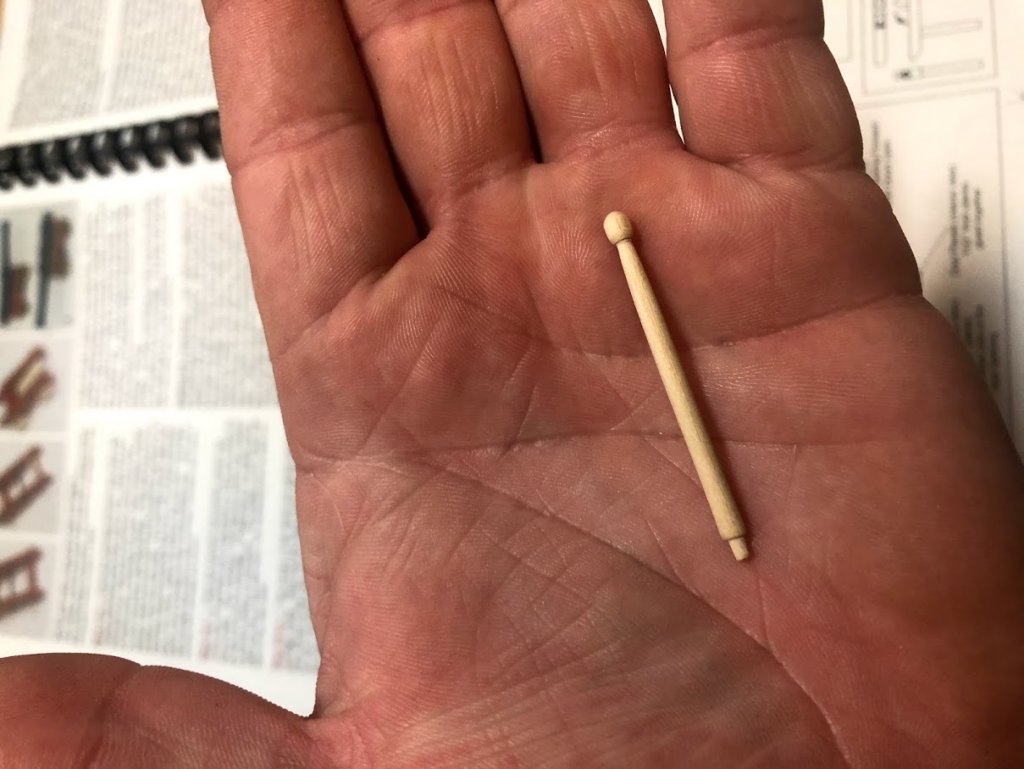
Hope you guys like it! I'm pretty happy with how its shaping up.
-Joe
Just an army dude that likes ships.
- JesseLee, Edwardkenway, GrandpaPhil and 3 others
-
6
-
Lite Ply wood from national Balsa for the bulk heads and the False Keel ordered! Printing up my plans today. I have a rotation coming up so I expect to start work on the project in September. But we'll see...
-Joe
- Chuck and FrankWouts
-
2
-
The flurry of activity is coming to close tomorrow as I come back off leave. However, I'm making more hay while the sun shines, below is the completed sub assembly for the ships wheel and the cradle stand completed!
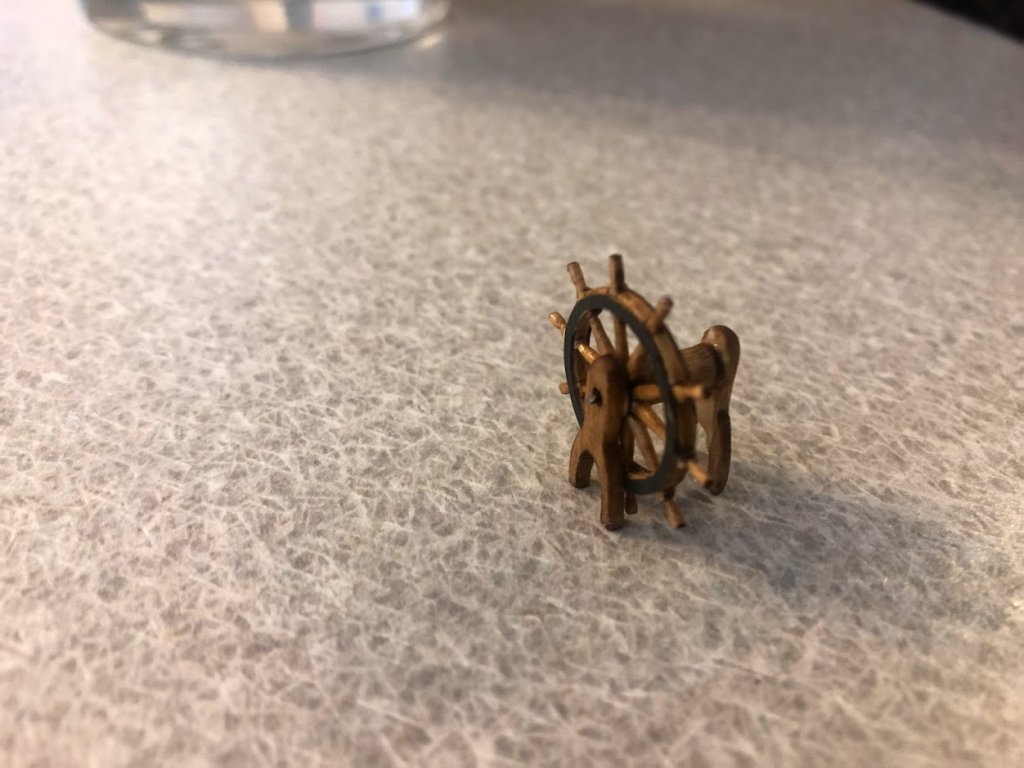
Now, back to work!
-Joe
Just an army dude that likes ships
- 0311, Matt H, Edwardkenway and 2 others
-
5
-
-
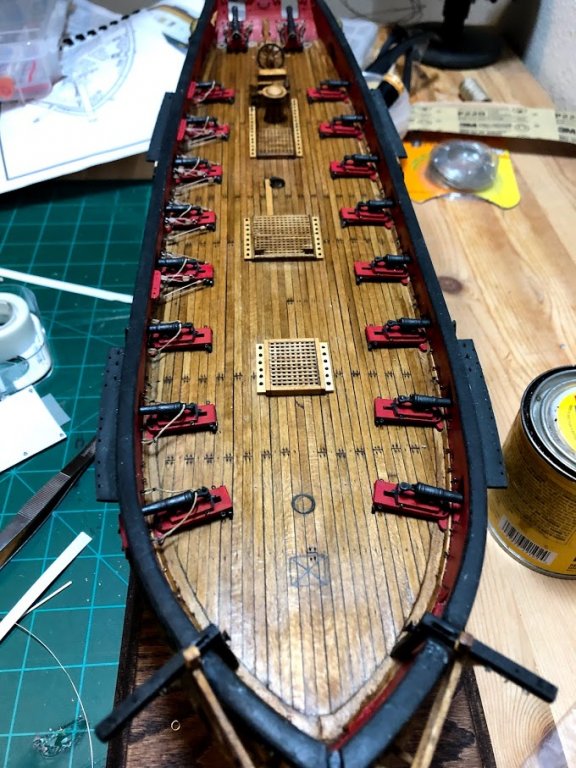
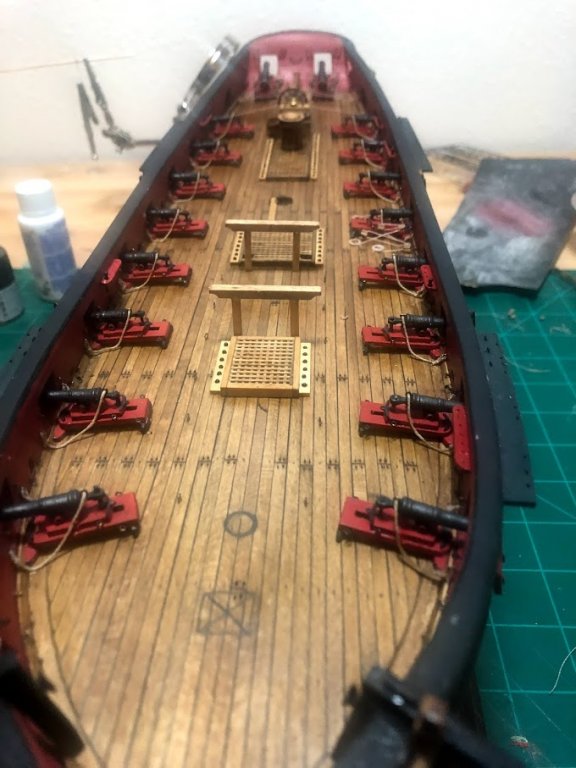
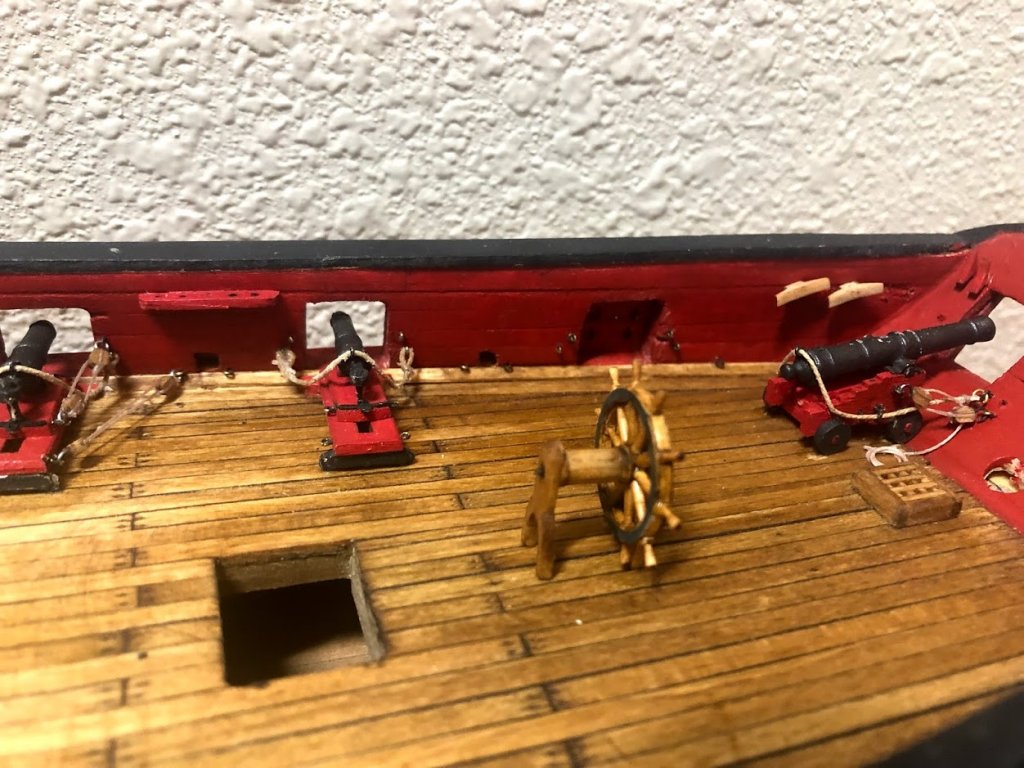
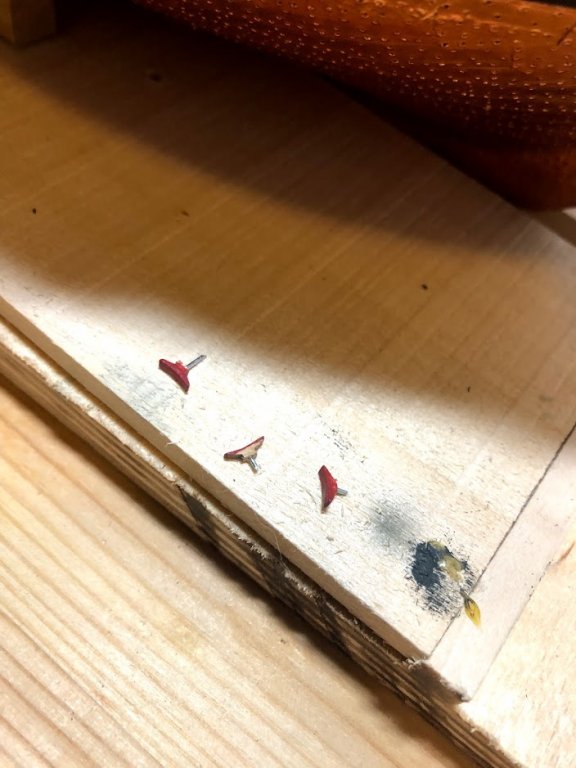
Good progress today, I worked on my cannons rigging and weathering. Bit of a face palm moment earlier reading through a build log and they discussed dry brushing the guns with gunmetal. As an armor dude mostly, I always do that to give guns a realistic look and I had left every gun simply black. I have now dry brushed all of my cannons and cannonades with gunmetal and difference is impressive. Photos will not do it justice, but I’ll post anyway.
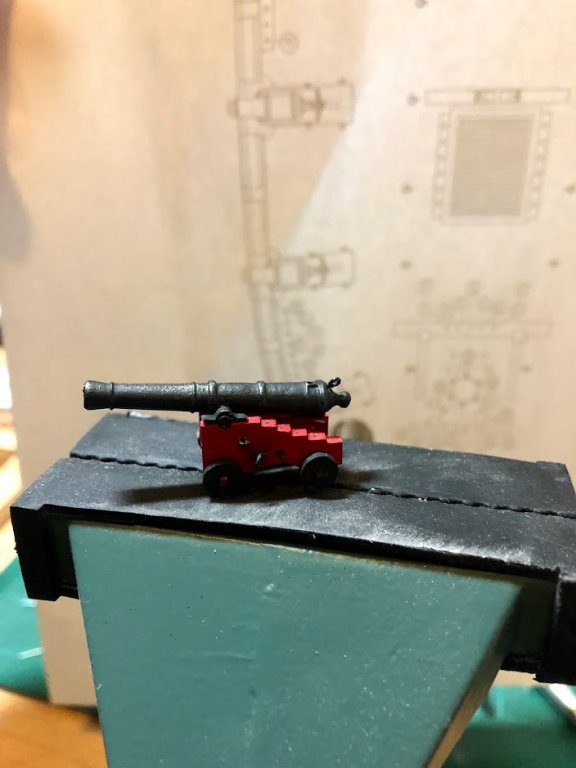
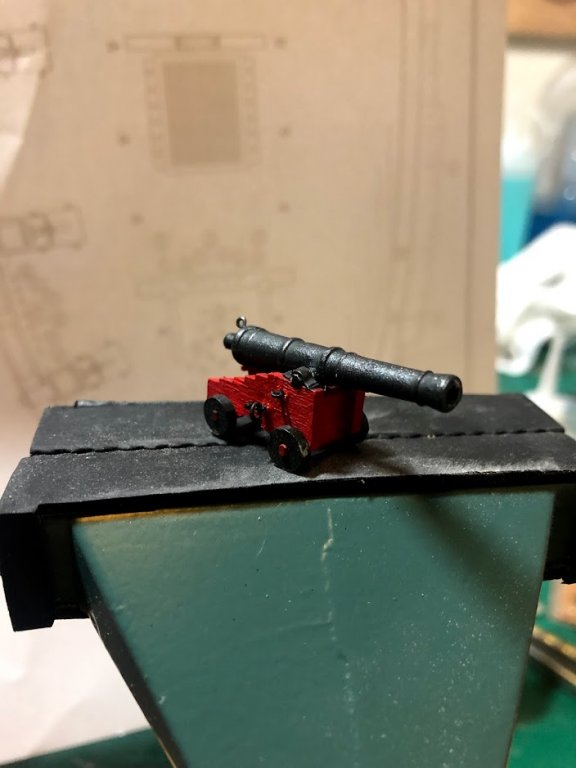
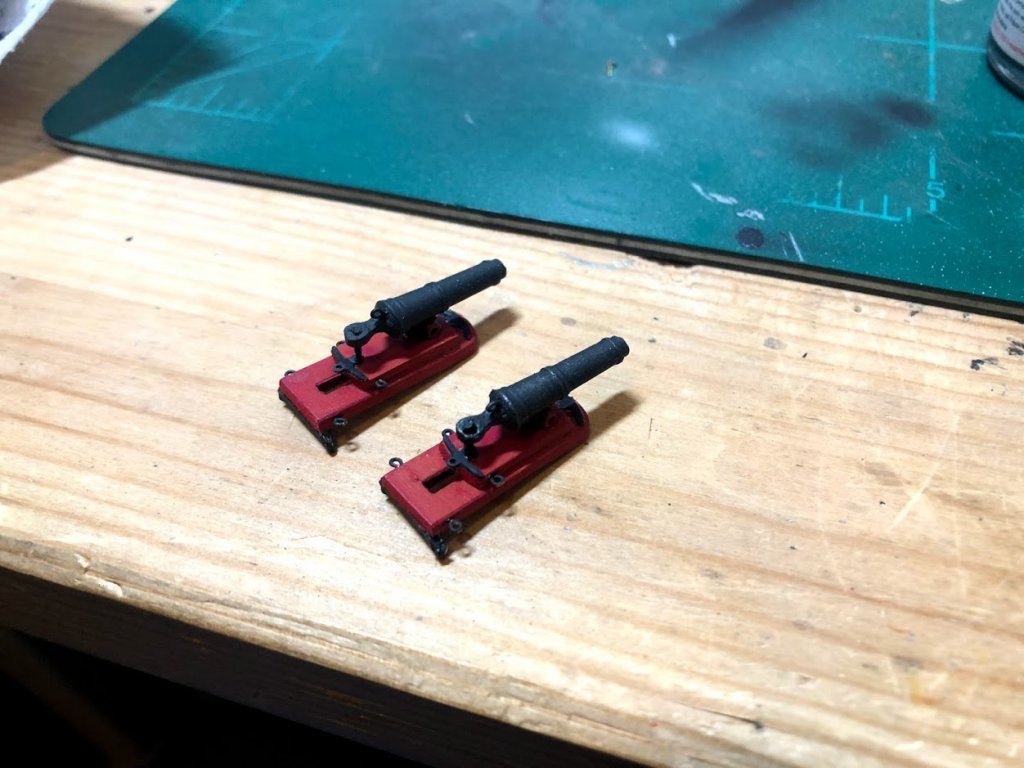
I also got my wooden cleats in the mail today to replace the terrible one supplies. I love how they look. 5mm and 9mm. I decided to pant the smaller ones red with the background, but I'm considering leaving the larger one natural. They are not glued on yet, so I’m going to live with it for a bit.
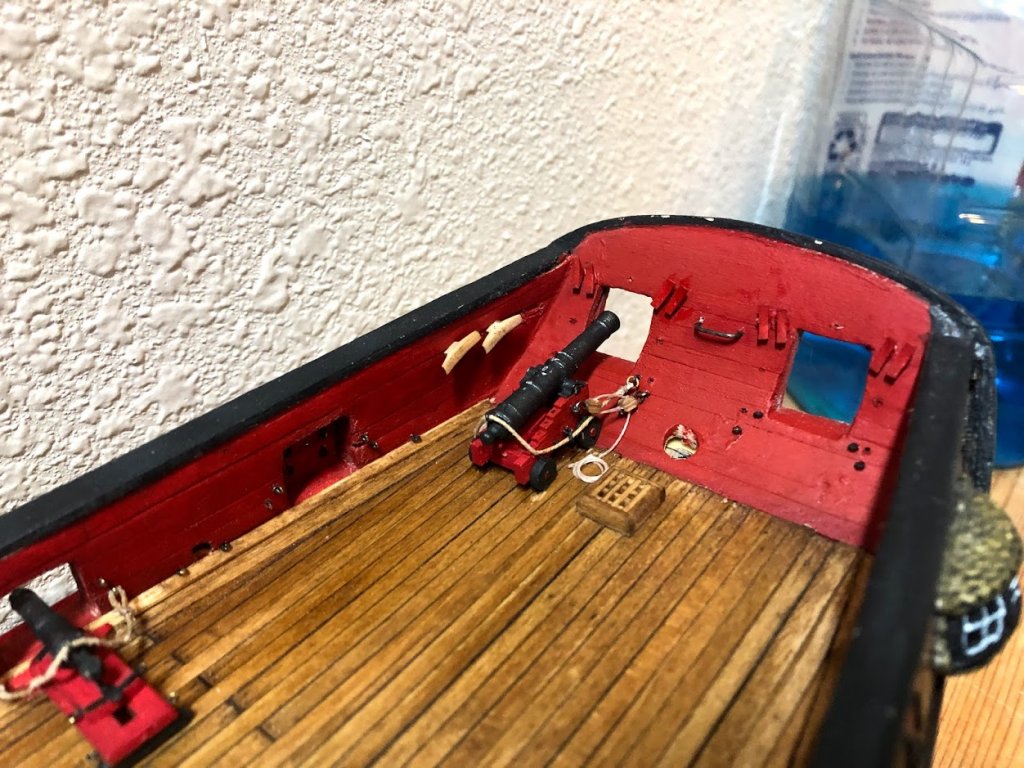
Last big thing, I didn’t like the wheel provided (noticing a trend here), so I order the 24mm kit from Syren Model Ship Company, awesome little kit Chuck. Good god, tiny parts, but the result is simply excellent.
All to do now is wait for the glue to dry thoroughly then sand it down!
-Joe
Just an army dude that likes ships.
- 0311, GrandpaPhil, JesseLee and 1 other
-
4
-
-
Thanks Chuck! For ripping my own planks, what tools do you use for that? I have never done that before. I have a scroll saw and a regular table saw, but those both seem ill suited to the task.
-
Thanks! I’m thinking yellow cedar right now.
-
Alright, I'm signed up. This will be my first time doing a scratch build and I'm going to try and do as much as I can my self and rely on as little laser cut part as little as possible. I have a scroll saw so hopefully this works out. I plan to make this a plank of bulkhead. We'll see how this goes! Thanks for the encouragement already, I'm pumped to start!
-Joe
-
I was thinking the same thing!
- mtaylor and FrankWouts
-
2
-
Chuck,
I love the job you’ve done so far. This looks absolutely awesome. I’m curious, are you planning to make this like a admiralty model or fully rig? Looks like the original is admiralty style.
I’ve been thinking of jumping into a scratch build, is this a good one to start with? I’ve learned a ton working on my Syren and this project looks awesome, but I’m not sure if it's too ambitious as a first time scratch.
-Joe
Just and Army dude that likes ships
- FrankWouts, mtaylor and Rustyj
-
3
-
Team,
Need some help. I’m trying to build a cradle style stand for my ship. In Chuck’s build log he mentions a template for one he designed that was very nice. Unfortunately those files have been lost to time. Wondering If anyone has a copy that they could share? Or plans for something similar. Also open to ideas on how to go about it without a template or plans.
Thanks in advance.
-Joe
Just an Army dude that likes ships.
-
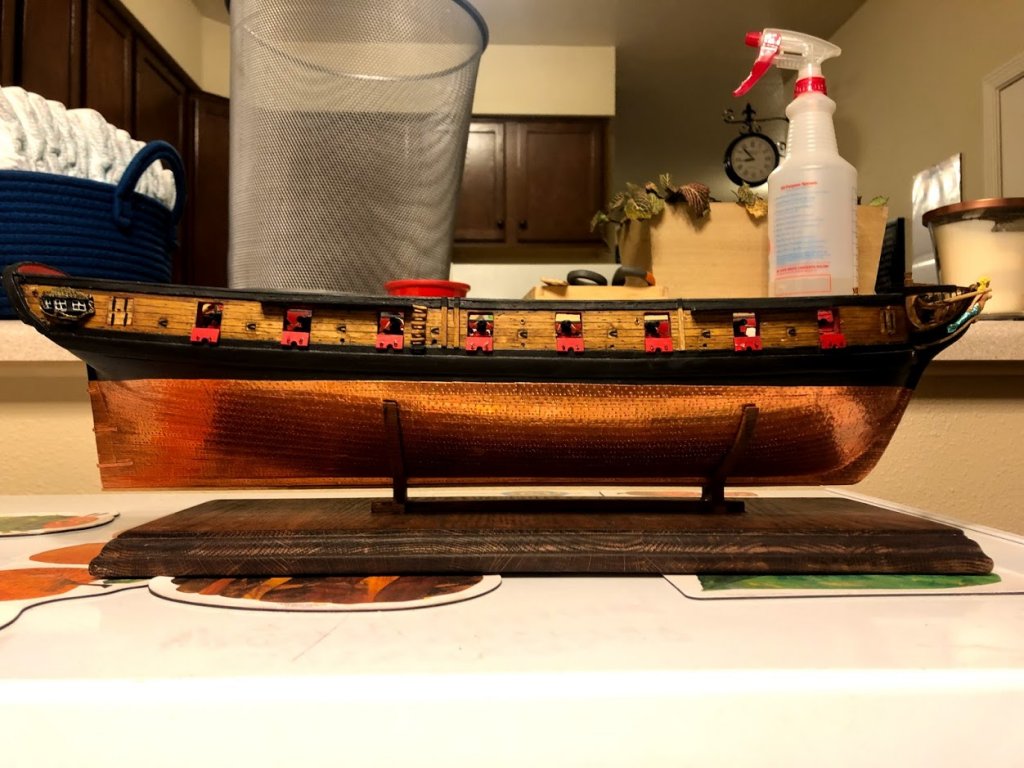
Team,
It has been a while since my last update. I've been very busy with work but I did find time to finish my ships boat. This was an adventure... first time building a boat like this, I spent weeks trying to build the necessary skills. Lots of frustration but I think I have a good finial product. At least I'm happy with it.
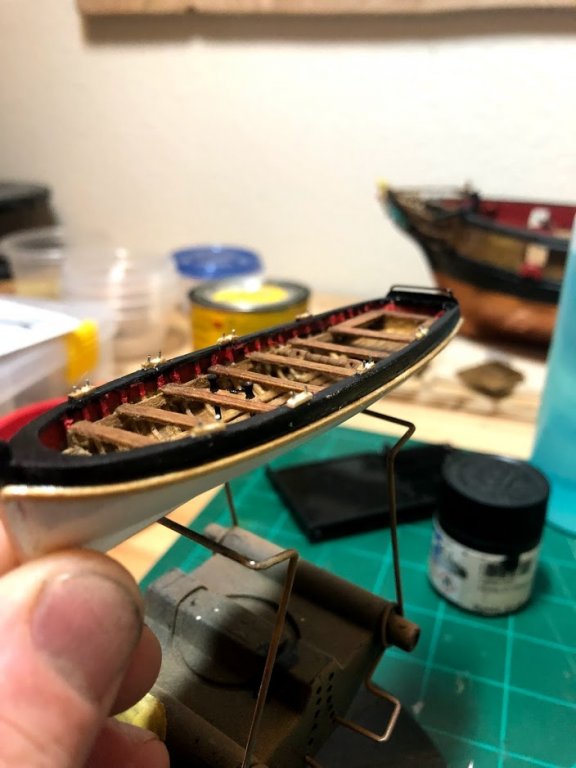

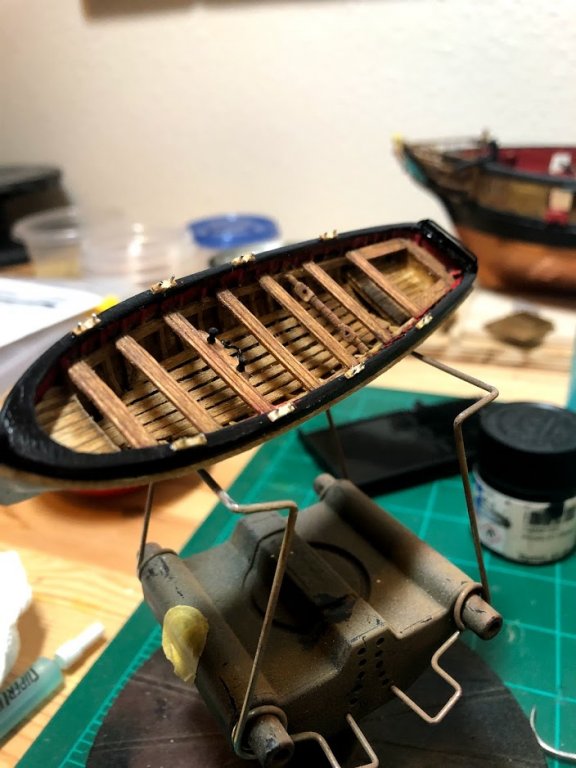
-Joe
Just am Army dude that likes ships.
HMS Winchelsea 1764 by Blackjack40 - 1/48
in Member Build logs for the HMS Winchelsea
Posted
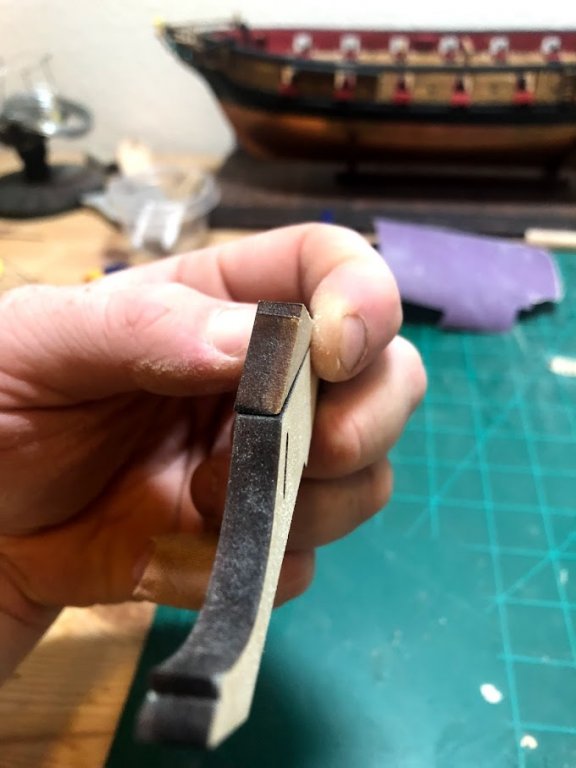
Good point chuck, I was thinking about that earlier today. I really like the look of the seams I’ve seen on yours and other models, it makes it feel more real. I’m also not convinced that the historical color scheme is the direction I want to go just yet.
With that in mind, do you think it’s worth cutting it again and try to get a tighter fit?
-Joe