HOLIDAY DONATION DRIVE - SUPPORT MSW - DO YOUR PART TO KEEP THIS GREAT FORUM GOING!
×


src
-
Posts
2,300 -
Joined
-
Last visited
Content Type
Profiles
Forums
Gallery
Events
Everything posted by src
-
Nothing serious I gather? Just painful? Take your time we will wait. What! Your not done yet?!?!?!?!? Sam
-
Rich, We have a saying at work; "If it was easy, anybody could do it!" I am telling myself that repeatedly as I try to learn how to properly strop a block..... I am starting to think Constructo kits exist solely for hose of us who are masochist! She is looking great! Sam
- 1,756 replies
-
- 1
-

-
- constitution
- constructo
- (and 1 more)
-
Sjors, Nice looking sails!! And after stropping my first block over the last couple of nights I have a renewed appreciation for your rigging!! Sam
- 1,873 replies
-
- 3
-
-
- occre
- san ildefonso
- (and 1 more)
-
Wow Russ, very nice. Excuse my ignorance, would the pilot stand off to the side to steer? I would assume so otherwise they couldn't see where their heading? Sam
-
You've been back over 24 hours and no update???? Sgh... Welcome home. Sam
- 2,191 replies
-
- 2
-
-
- confederacy
- Model Shipways
- (and 1 more)
-
Wow Rich, That all looks great!! I am jealous. Sam
- 1,756 replies
-
- 2
-
-
- constitution
- constructo
- (and 1 more)
-
I couldnt agree more. My Better Half tells me I am the oddest. As far as the rope goes, to me at least, that sounds like an awful lot of work. This is supposed to be a hobby But then....we are all odd arent we?? Sam
- 569 replies
-
- 2
-
-
- shenandoah
- corel
- (and 1 more)
-
Steve, Unless the idea of making your own rope really appeals to you, why not check out chucks Syren Ship Modeling site. I have bought some if his rope already and can tell you it looks great. The prices seem reasonable to me. Especially when you consider what goes into baking your own rope. Whith the amount of raw material you would need to buy plus your time, I expect you couldn't make it any cheaper. Sam
- 569 replies
-
- 1
-
-
- shenandoah
- corel
- (and 1 more)
-
Hey all, I have a question regarding the size (diameter) of gun tackle and breaching ropes for the 6 pound guns on my 1790 Enterprise. "Arming and Fitting" says on pg 141, 4" circumference breaching ropes for 6-9 pound guns then goes on to say a 2" diameter rope for gun tackle. That would make the training tackle larger in diameter than the breaching rope. A 4" circumference rope is about 1.25' diameter. One of these appears to be a typo, I am thinking I am looking for something more like a 2" diameter tackle and a 4" diameter breaching rope. Thanks for any input. Sam
-
Rich lately its been 15mg of miloxocam in the morning and Tramadol a couple of times a day. And I am not even 51 yet!!!!! Sam
-
Rich, Carl, thank you!!! Always appreciated. I epoxied my trucks on last night, left them in the oven with the pilot light on most of th cured up just fine. A couple didn't. Depending on how they are this evening I may have to re-glue them. Ole me sciatica grumbled at me as I sat there setting trucks, looks like it's going to be rigging carriages instead of finishing my windows, I think I can do that standing. This getting older is bs. I want my youth back!!!!!! But I want it with wisdom and financial security that come with age!! Is that asking too much, Sam
-
Rich, Am I understanding correctly, your using the beeswax/turpentine mixture to glue your hammocks down?? I have only used that concoction as a wood finish, how does it work as a glue? Sam
- 1,756 replies
-
- 1
-
-
- constitution
- constructo
- (and 1 more)
-
Slog, Looking good from here. I have never built a card model before and it looks like this comment is too late for the hull but maybe something for the future. Is part if the glue drying too fast because the paper is absorbing moisture? Is it possible to roll/brush a thin coat of pva as a primer let it dry and then re-glue and install? Just thinking out loud here. Sam
-
Nothing wrong with photos Steve. Looks great like always. Sam
-
Slog, How thick are the lower skins? Can you do the wall paper hangers trick and slice through both? Then would your parts lay flat? or will you end up with a gap from the blade thickness? Sam
-
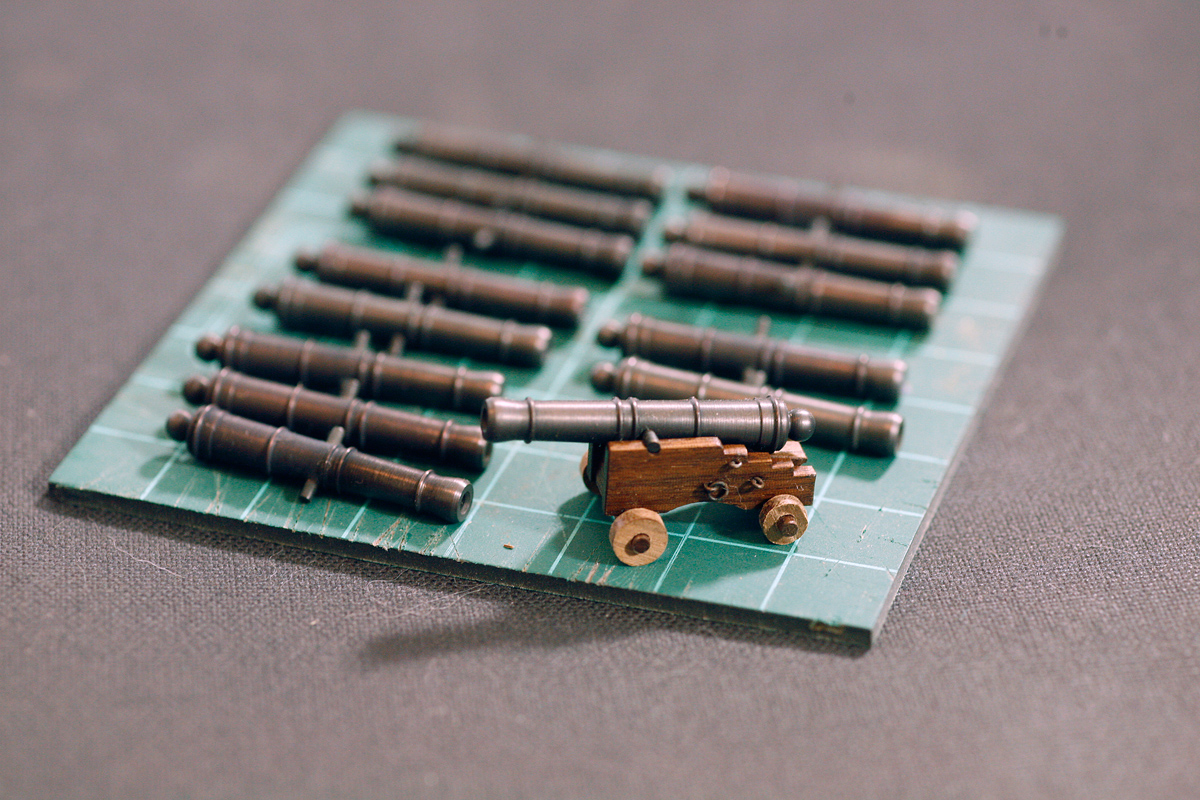
All, Thanks for the likes and comments, always appreciated. Rich, me too, this sucks! Your extra cannons are to try blackening? Nice! Pictures! Slog, me too, I feel they have just the right amount of sheen. Sjors, No paint on this build. I used the same Varathane Dark Walnut stain that is on the wales and other Manzonia parts. Then boiled linseed oil and beeswax. Wayne, Thank you! I kind of liked the first go, they had a bronze-ish look to them. I like these much better though. I have stained the trucks this weekend. I will get those glued on and then start rigging, unless my back eases up then I will go back to the windows, I REALLY want to see those finished! Then I will have to build a PWM flicker circuit for the "candles". I was thinking of a MagicGadgets flicker unit till I looked at the prices, $400.00+ U.S. for something that most likely will only get used once in a while. But you can get a very nice candle flicker out of them. They are here for those interested: http://kayelites.com/osc/index.php/manufacturers_id/62 Sam
-
Rich, A soak in some black tea might work to tone down the white. As far as turpentine and beeswax, just dissolve the wax into it. The more wax the thicker it gets. Here is a link to several finishes: http://www.kramers.org/formulae.htm Sam
- 1,756 replies
-
- 1
-
-
- constitution
- constructo
- (and 1 more)
-
Very nice Vivian. Looks like you have a very nice place to do your work also. Love the aged concrete. Sam
-
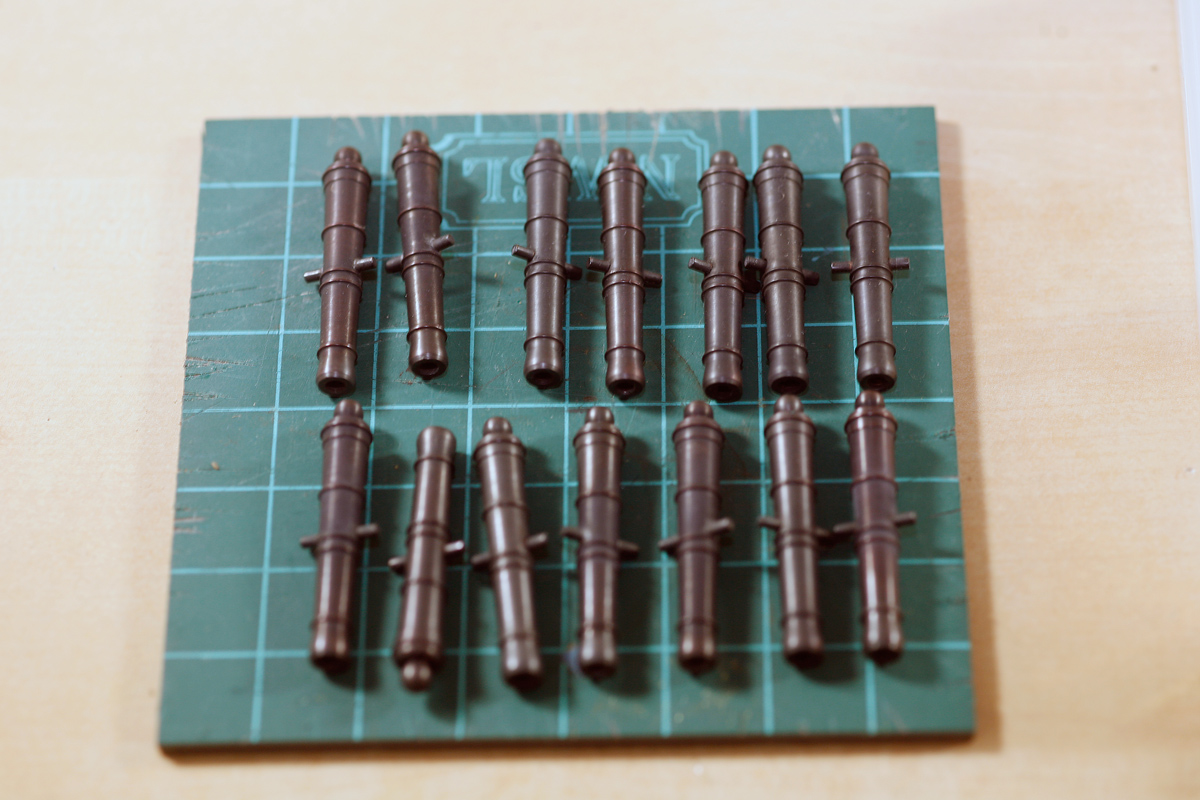
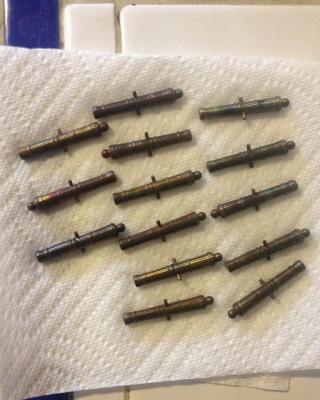
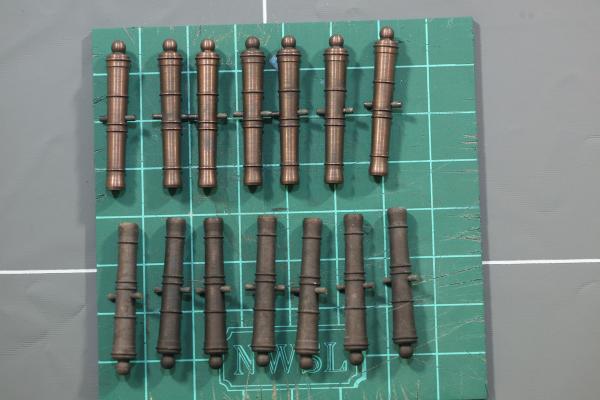
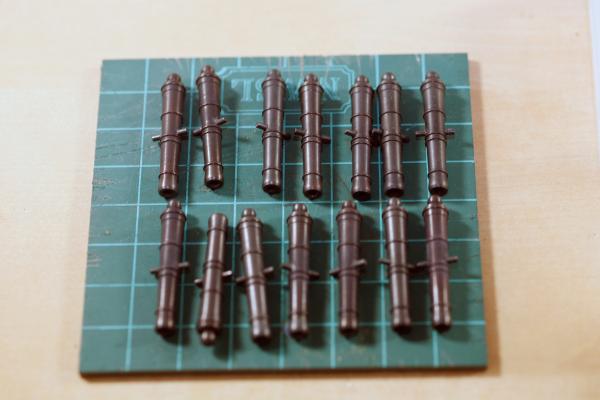
Carl, Yes but I have the last laugh, them Dodgers just took their division! Back to building. My Arch Enemy Mr Sciatica has paid me a visit and is interfering with my build time again. Not to mention work, I just spent the last two nights "wading with pirates" in a theme park attraction whose name I am not allowed to mention. Since Ole Mr Sciatica wont let me sit for long periods I have put my windows on hold. Instead I have been doing things that can be accomplished while standing. On a positive note I am making progress on my carriages and cannons. I think I am finally getting the hang of this blackening process! I started out soldering the trunnions in and filing them to a constant length. I just used soft solder - they were a press fit and wont be under any stress. After a good going over with a purple scrubby pad and brass brush I cleaned everything up in soap and distilled water with a distilled rinse. Then into the ultra sonic cleaner. My little Harbor Freight cleaner works pretty well but I wish there was a way to run for more than a 3 minute cycle. I ran it for 10 cycles then rinsed in distilled water. After that it was into a 50/50 solution of distilled water and muratic acid. I intended to leave them in for 30 minutes but the Better Half came home and we went to lunch. They ended up being in the acid till the next morning when I woke up and went "Oh NO!!" I ran outside and pulled them out afraid of what I would find. Other than being discolored they were fine. A quick dip in a baking soda solution and a final rinse on distilled water, into the blackening solution they went for ten minutes. They looked good while wet but when they dried not so good. The top set are after cleaning but before the second soak. I recalled Russ saying he blackens his parts several times so I took 1/2 of them and rubbed them down with a scrubby pad and back in they went for a bout 15 minutes. This second soak was much better so I did the other half.They look pretty good to me, a nice black with a satin sheen. While all this has been going on I have finished staining the carriages and applied a coat of linseed oil with beeswax. Once that dried for a couple of days I buffed them up and finished drilling for my hardware. I felt they needed some more oil and wax but wasnt sure how to go about that with the hardware glued in. I noodeled on it for a bit and hit on my dremmel with a buffing wheel. I rubbed a bit of oiled with a q-tip and then buffed them on a low speed. It worked so well I am going to go back and re-do my other small parts, I was never really happy with the sheen, they just do not match the hull. I still have to make cap squares as well as finish cleaning up the trucks and get some stain on them. then I can start rigging these things. I think next build I will opt for lighter colored wood, all my hard work kind of disappears into the darker mahogany. I am getting there, slowly!

-
Slog, This build continues to amaze me. Have you considered stainless steel tube for your punch? Just this last week at work we had to make a bunch of rounds and squares (100's!) out of .010 acetate. We started with brass and found the same thing you did, they have to be constantly re-sharpened. Stainless was harder to sharpen but lasted longer and didnt bend as easy. One of the more industrious fabricators filled all but the last 1" of his punch with an epoxy we use gallons of, that helped to bring the bending down to almost nothing. If you stay with brass most of those hobby tubes have a matching tube that will sleeve either on the inside or the outside, it should be an easy thing to solder in a sleeve to stiffen up your punch. Just a thought. Sam
-
Sjors, is this waht you are looking for? http://modelshipworld.com/index.php/topic/3944-landlubber-mikes-technique-for-furled-sails/?hl=%2Bfurled+%2Bsails
- 1,873 replies
-
- 3
-
-
- occre
- san ildefonso
- (and 1 more)
-
Very impressive sjors!! After doing this, would you do it again? Sam
- 1,616 replies
-
- 1
-
-
- caldercraft
- agamemnon
- (and 1 more)
-
I guess I'll do anything to put off the serious rigging of the ship. Its going to be great, you worked out all the other intricacies like the port lids and carriage rigging. Dont Fear the Rigging, Rich. (apologies to B.O.C.) Sam
- 1,756 replies
-
- 1
-
-
- constitution
- constructo
- (and 1 more)
-
Russ, So nice to see you getting some build time in. Those small parts sure look good. Sam