HOLIDAY DONATION DRIVE - SUPPORT MSW - DO YOUR PART TO KEEP THIS GREAT FORUM GOING! (Only 13 donations so far - C'mon guys!)
×


src
-
Posts
2,300 -
Joined
-
Last visited
Content Type
Profiles
Forums
Gallery
Events
Everything posted by src
-
Vivian, Thats frustrating, but its how we learn - well at least it how I learn... sort of, I usually have to make the same mistake 2 or 3 times first . I have a similar problem with my build IE; holes in the decking, perhaps you can employ some of the same fixes I am planing - ropes, buckets mops? There is a thread here in the decking forum that may help. http://modelshipworld.com/index.php?/topic/4526-on-deck-brick-a-brack/ Shes looking good though, you will work through it And yes there are some great build/tutorials here. Sam
-
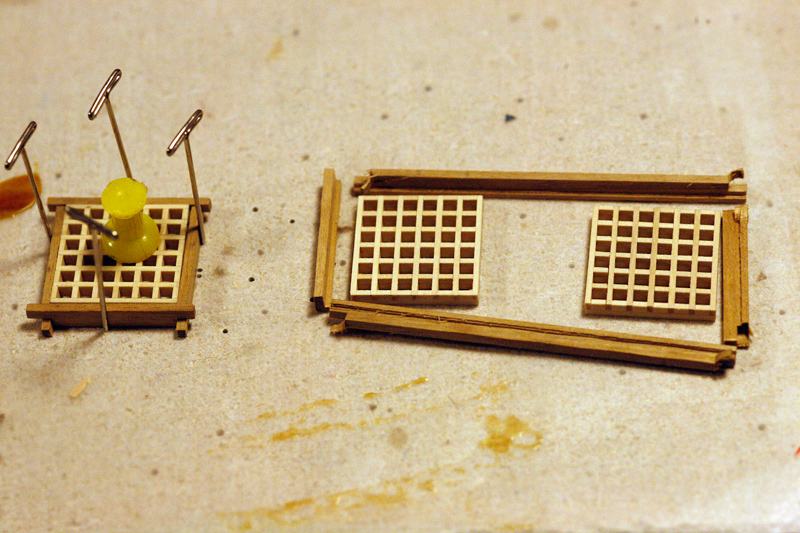
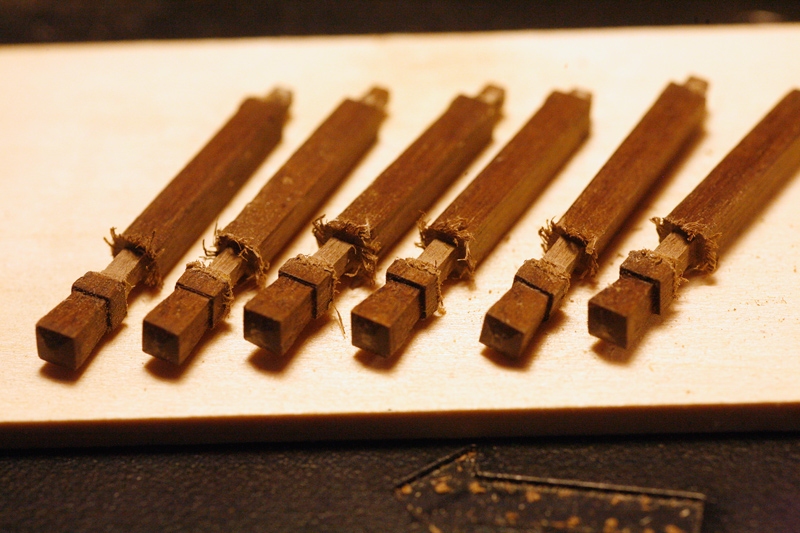
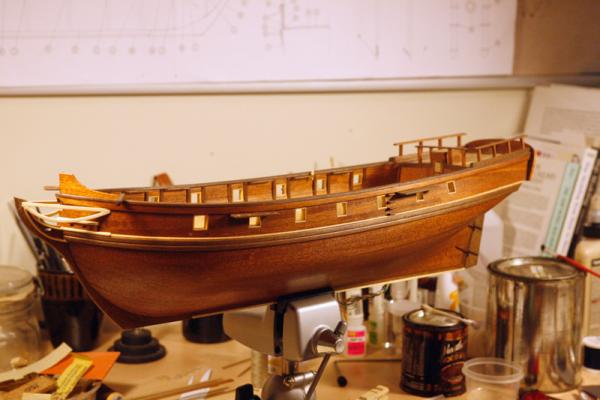
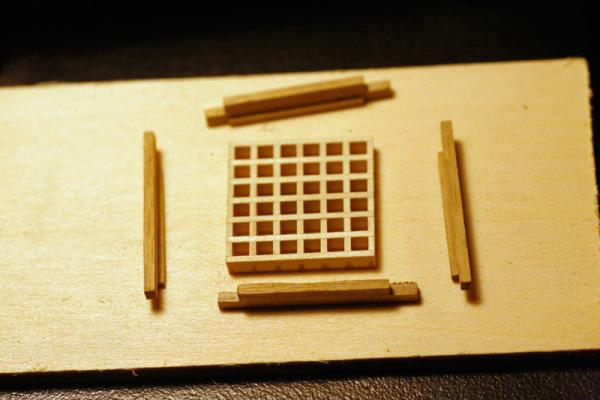
Robbyn, Most likely it will be ropes and buckets, but, I posted a question in the deck fittings forum and got some great ideas. One is a gun repair scenario that has me really intrigued. I dont know if where the third hole is will lend itself to that or not but it bears looking into I think. I tore out the offending timber heads, they came out disturbingly easy. Minimal damage to the deck and cap rail. The cap rail re-stained well; you can barely tell its been touched up. Some plugs in the deck and I can move on. I am using the old timber heads over since there is nothing wrong with the caps, just needed some tenons cut into them with the router. Looks like I need a new bit though, not a very clean cut. It should clean up with a file ok. I finished installing the pin rails and started in on the hatch coamings. I used the table saw for the rabbet but chose the dremel router for the lap joints. I have not made a sled for the saw yet and have found the miter attachment is not very stable; there is a bit a play to it. This is where she site today, a little different that the last full hull shot in September, not much but a bit. Sam

-
Sjors, at least you caught it now instead of later. Much easier to fix now I imagine. Take your time, make it right. Taps foot impatiently waiting for pictures........ Sam
- 1,873 replies
-
- 1
-

-
- occre
- san ildefonso
- (and 1 more)
-
Vivian, Looks good! Where are the mismatched pieces of wood you are talking about? Sam
-
that makes more sense, thanks Sam
-
Household Ammonia
src replied to Q A's Revenge's topic in Building, Framing, Planking and plating a ships hull and deck
Jan, Nice bend. It made the walnut brittle, interesting, I wonder if it is oxidizing the wood. There are a couple of chemist here, hopefully one of them will have something to say. Sam -
Z, Very nicely done! Sam
-
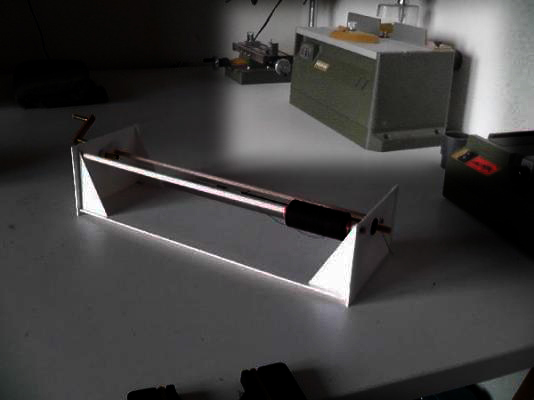
Very nice Sjors! I dont see any gears on your serving machine, I seem to be missing something, how does your work? Most of the pictures and plans I have seen there are gears and such. Hhhhmmmm a serving machine, does that mean Anja doesnt have to cook or clean anymore? Sam
- 1,873 replies
-
- 1
-
-
- occre
- san ildefonso
- (and 1 more)
-
Rich, good to hear. THat sucks about your heater. I used to have to travel back East for work. Most trips they would bring a car up from Richmond VA to whatever city I was working in. One trip somebody forgot to drain the water or add a different windshield cleaner to the windshield wiper reservoir...in December. I got about halfway between Philly and Bethlaham when everything started icing over. I am a west coast boy, didnt realize what was happening right away. Here in LA you can just hit the ice with your cleaner for the wipers. Not a good idea when the ambient temp is below 20 IIRC and your driving 65!! HA! Good times!! From the sound of it your Niagara arrived ok then? Sam
-
On Deck "Brick-A-Brack
src replied to src's topic in Discussion for a Ship's Deck Furniture, Guns, boats and other Fittings
So many great ideas! Hmmm RUM Kegs, nice! Too bad tequila is inappropriate. Mark, the cannon idea crossed my mind last night although I didnt think of the wheel to cover the hole. Liking the sail idea too, may have to wait till I get further along to decide and see how much room I am going to have. Both holes are fairly far forward and the gun barrel will come into play also. I will try to get a picture up in the morning to give an idea. Thanks everybody, Sam -
Household Ammonia
src replied to Q A's Revenge's topic in Building, Framing, Planking and plating a ships hull and deck
Brian, what does ammonia do to the ebony? Simply lighten it or?? Sam -
Meredith, Meredith, Meredith! Really?!?! The Future Admiral is SO going to hate you!! This place looks better than Japanwoodwrker.com, I see a whole lot purchases from Germany in my future. Thanks(?) Sam
-
On Deck "Brick-A-Brack
src replied to src's topic in Discussion for a Ship's Deck Furniture, Guns, boats and other Fittings
No problem Larry, I appreciate the input, its something I wouldnt have thought of. Sam -
Ron, Nice clean crisp work. I wish I worked as "slow" as you. what you did in one day would take me 2 weeks - and it probably wouldnt look as good as yours to boot. Sam
-
On Deck "Brick-A-Brack
src replied to src's topic in Discussion for a Ship's Deck Furniture, Guns, boats and other Fittings
Thanks everybody, some great ideas. Thats one of the things I love about this site; ask a question and you get way more than you ever expected. Larry, as Russ pointed out the area in question is too far forward and I have already added in drainage. I had originally considered the bucket and or mop. I had posted this to find out what else might be on deck and wasnt disappointed. Mark, I am really liking the spliced rope idea, it gives the rope a reason to be laying out on deck. Maybe with a little three cornered stool for my non existent deck hand to sit on. Sam -
Sjors, Thanks. Wacko is correct in english its called a shaper. I see where confusion can come in with translation. In a wood shop we will frequently run material through a planer, joiner or shaper and call it milling. Its all good. To me Klomping is a slang to describe a "stomping" kind of walk, but from you I learn Klompen is something somewhat different. No wonder there are still wars. Looking forward to more pictures. Sam
- 1,873 replies
-
- 2
-
-
- occre
- san ildefonso
- (and 1 more)
-
Sjors, This tool. It looks like a shaper/router table to me. Sam
-
On Deck "Brick-A-Brack
src replied to src's topic in Discussion for a Ship's Deck Furniture, Guns, boats and other Fittings
Was it common for rope coils to be "laying about"? -
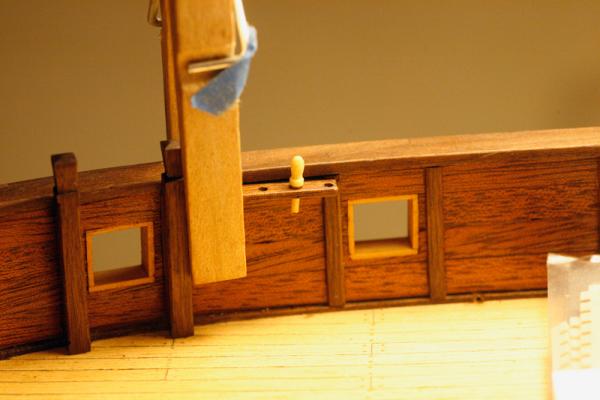
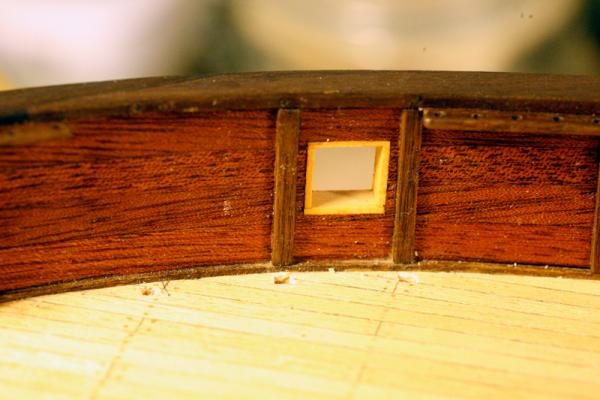
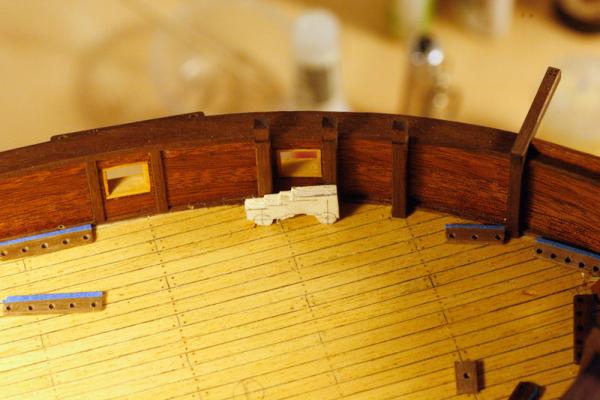
I have a couple of ooppses in my decking that need to covered up/hidden. My instructions called for the timber-heads to penetrate the deck just inboard of the hull. I foolishly followed the instructions and questioned it after I installed them! The more I think /dwell on it the more I want to correct it. The problem is, I morticed them into the deck and now I will have 6 .125" holes to patch and hide. I can hide four of the patches with gun carriages, the other two will be in plain sight. What items would normally be found on deck in a non combat, day to day setting? Buckets, brooms and mops come to mind. Coils of rope perhaps? Anything else? Thanks in advance, Sam
-
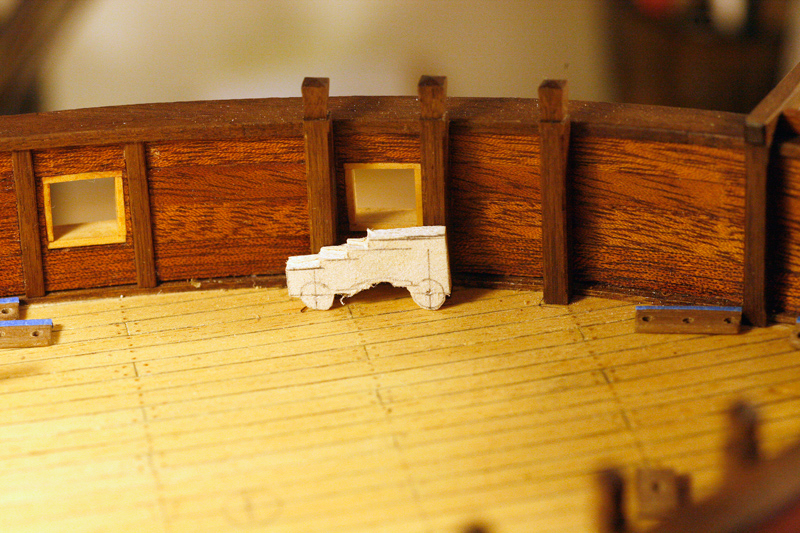
The Gremlin has been sitting on my shoulder and grumbling about the timber head locations. I may have found a work around to shut him up. Since I bought correct cannon barrels for this ship I have been planning on lashing them sideways instead of the more common run out position. It hit me suddenly that I might be able to hide four of the mortices with the carriages so I made a very crude carriage mock up based on the plans in the database here. If I can remove the timber heads reasonably cleanly it looks like it will work. I can cover the forward most hole with a bucket or broom or something. Restaining the cap rail could be problematic, got some 'speramentin' to do. Stupid Gremlin wins again! Sam

-
Harvey, Thanks for stopping by and the compliment. Always nice to see new faces. I dont know what you mean by turning blocks. Do you have a drawing or picture you can share? Feel free to post it here or a link is fine also. Thanks, Sam
-
Popeyes right, where are the Bits -O-Wood and string and such? Are you slacking off on us? Its good to have friend like Mobbsie. Is that a Proxxon shaper I see in the back ground? You likey? Sam
- 1,873 replies
-
- 1
-
-
- occre
- san ildefonso
- (and 1 more)
-
Slog, She looks great, really like the ships boat. Looks like the experts have chimed in so I will keep my very experienced foot out of my mouth and follow along quietly. Sam
-
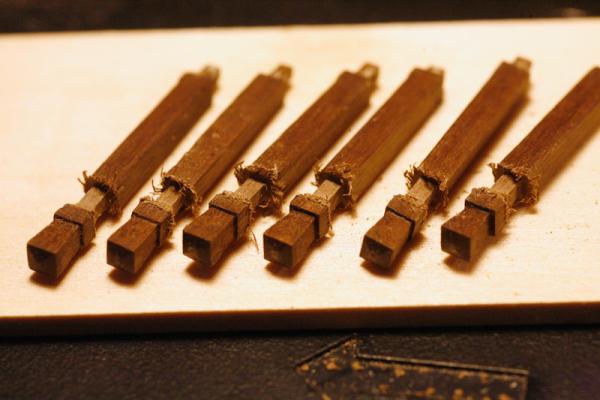
Robbyn Thanks. I have reached the point I no longer trust the instructions or the pre-fabed parts. I went through the "Fully Framed" series, "Masting and Rigging" as well as a couple of other books looking for dimensions. Either I am not qualified to to research this or the information isnt in those books. Most likely me as I have found other information I have searched for at a later date. I may need to make a trip to the hobby store and find me a 1/48 scale period sailor figure and do like other builders do; use the figure as a reference and check. A 1:48 figure will be a tad large for 1:51. A five foot sailer is 1-11/64" at 1:51 scale and 1-1/4" at 1:48 scale, only a 1/64" difference. Sam
-
Robbyn, I cant say why the kits have us do this for sure. After surfing and lurking here for a while I have seen several Constructo kits, they have similar premade parts like the pintles and gudgeons, belay pins thread etc. I get from a manufacturers point of view that is a lot of parts to keep in stock. As far as the bits timberheads I think its lazyness or lack of research. If it wasnt for MSW I would never know they were wrong - I also wouldnt have the build I have today. I also would be done with this build, either as a completed model or in the trash bin, not sure which. The FA went away for T-day and left me to my own devices, Foolish Mortal! I spent part of the day working on my pin rails and have the Starboard side ready to glue on. Now of course after all that work I am wondering if the pins are a little out of scale, they look kinda beefy to me. They measure out at 0.399 long - about 20" the fattest point is 0.0895" - about 4.5" Dia. That doesnt seem unreasonable in my mind, they just look a bit big, I have nothing to compare to though. Sam