


CiscoH
-
Posts
235 -
Joined
-
Last visited
Content Type
Profiles
Forums
Gallery
Events
Posts posted by CiscoH
-
-
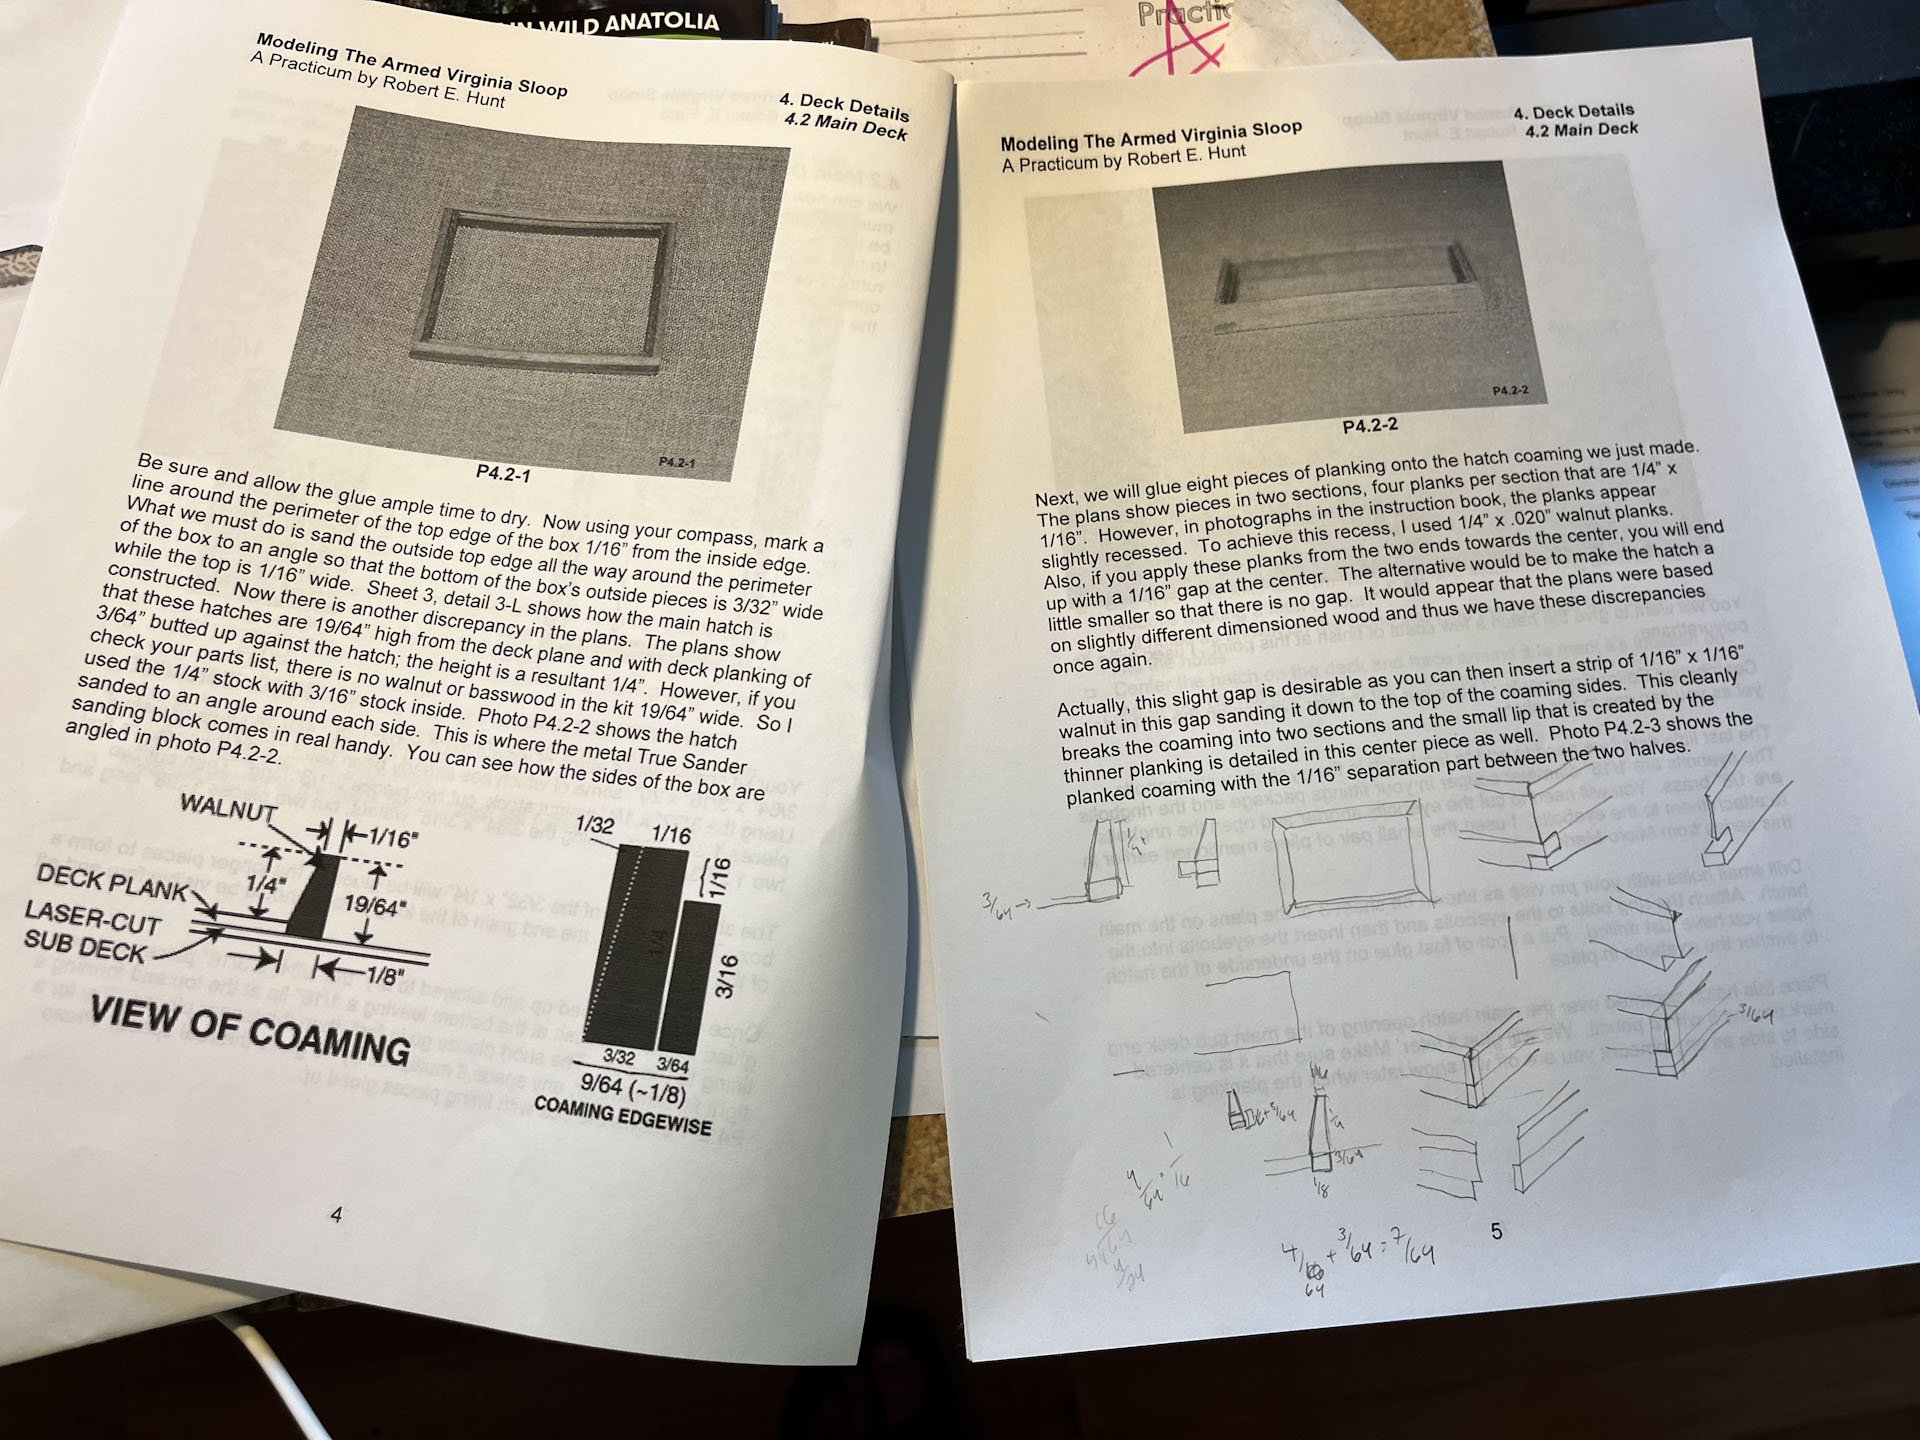
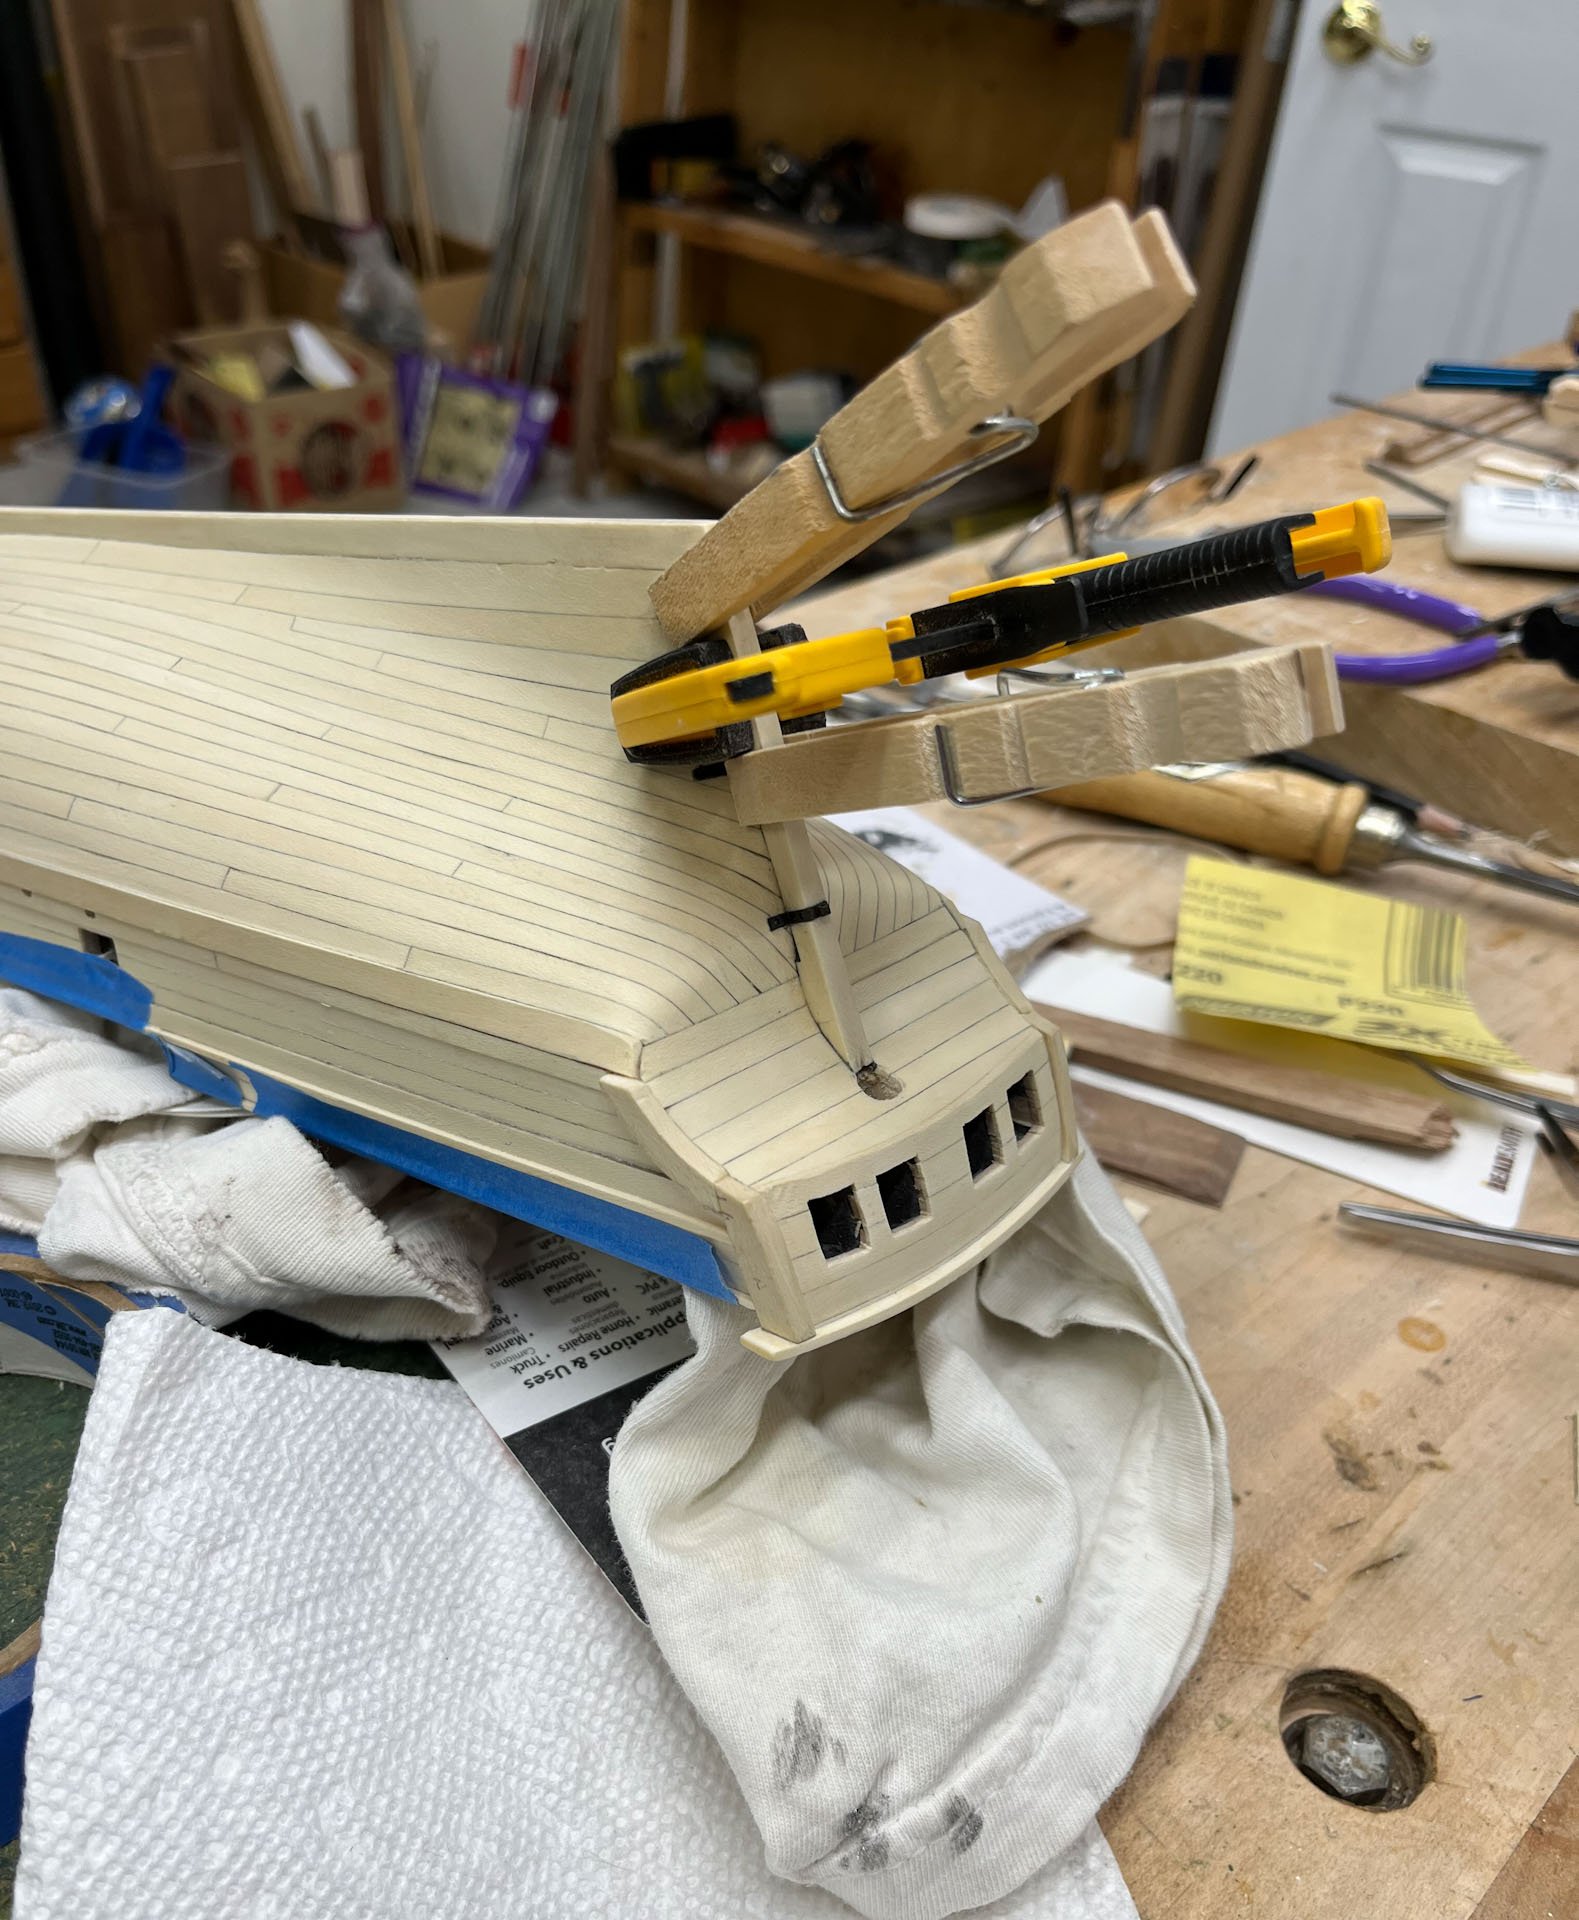
Happy Memorial Day all. Here in Delaware it is, once again, raining. A good excuse to plunge into my next project - the main deck hatch coaming.
I haven't built anything like this before. My Robert Hunt practicum shows 2 ways to make it- the default is with butt joints and looks straightforward. Those with a bit more confidence could do mitered joints. Hmmm...
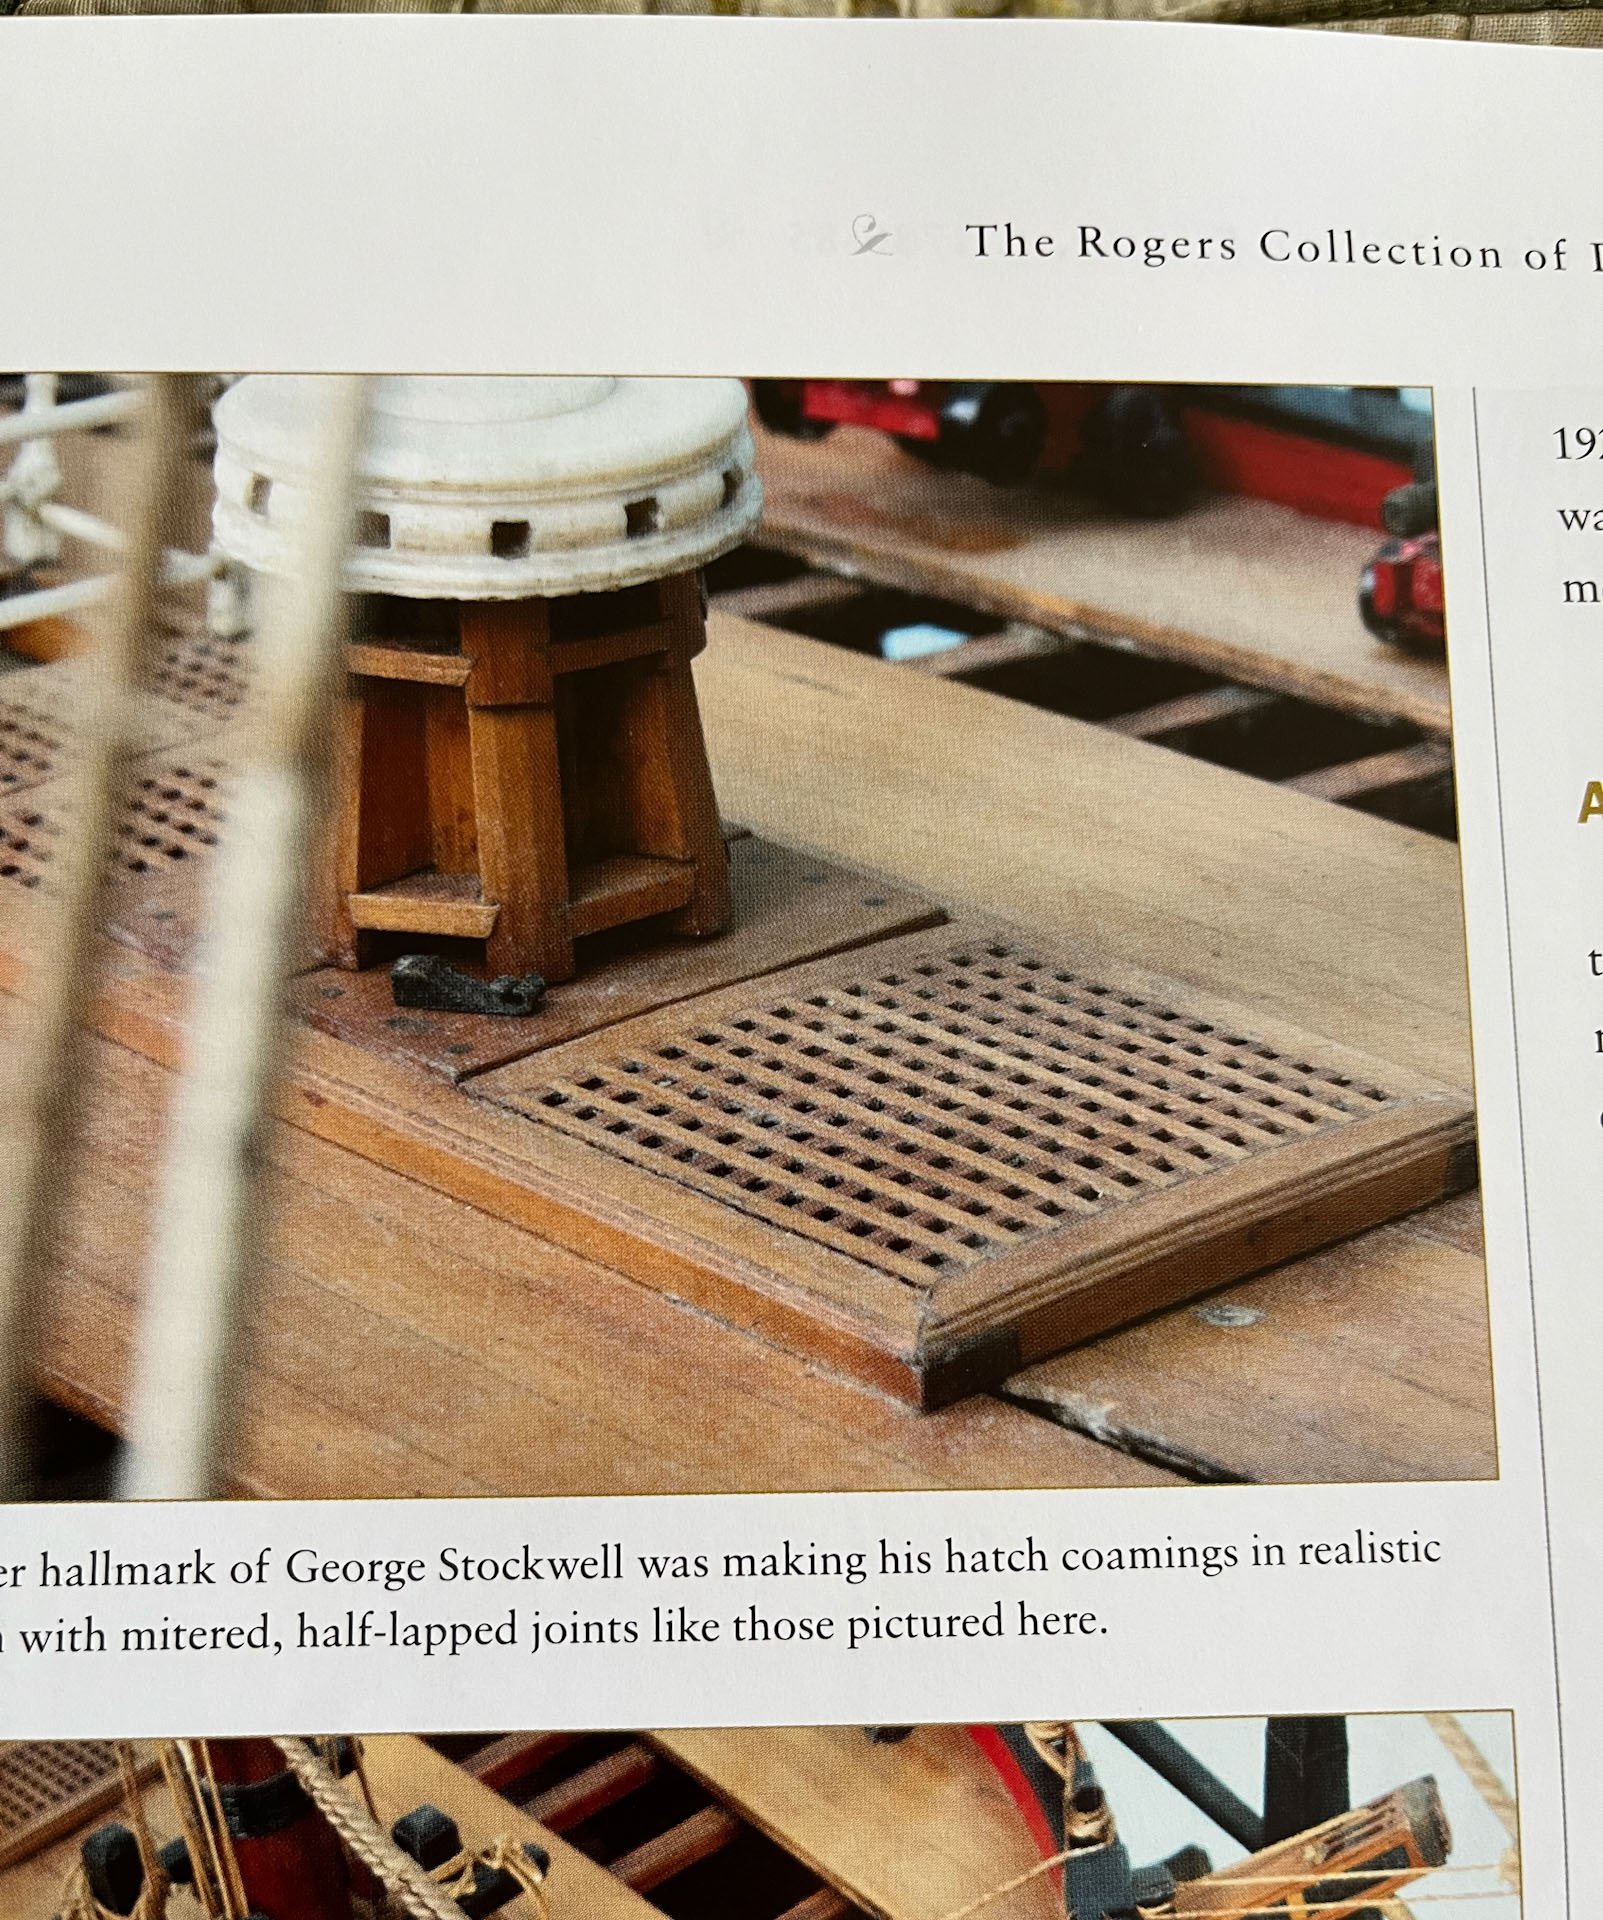
But then I happened on a picture in Grant Walker's Volume 3 and it all went to heck.
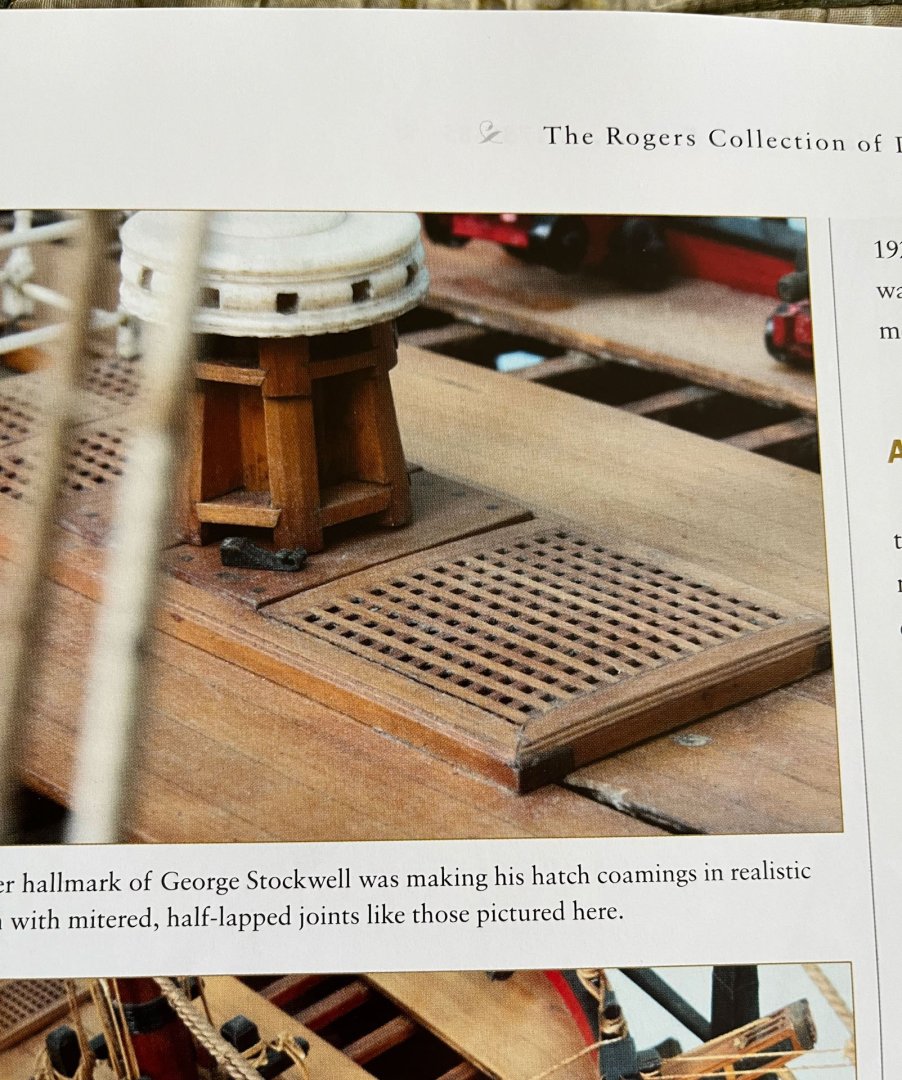
Mitered half-lapped joints? sweet. The George Stockwell coamings above are lower, whereas the one I'm attempting to make are tall and tapering but I thought I could figure it out.
Right from the outset I was having trouble visualizing what the joint pieces would look like. My cartoons mostly confused me even more and looking at them now I realize I initially added an extra butt joint. Even with revisions I was still not clearly visualizing the joints and especially how to make them.
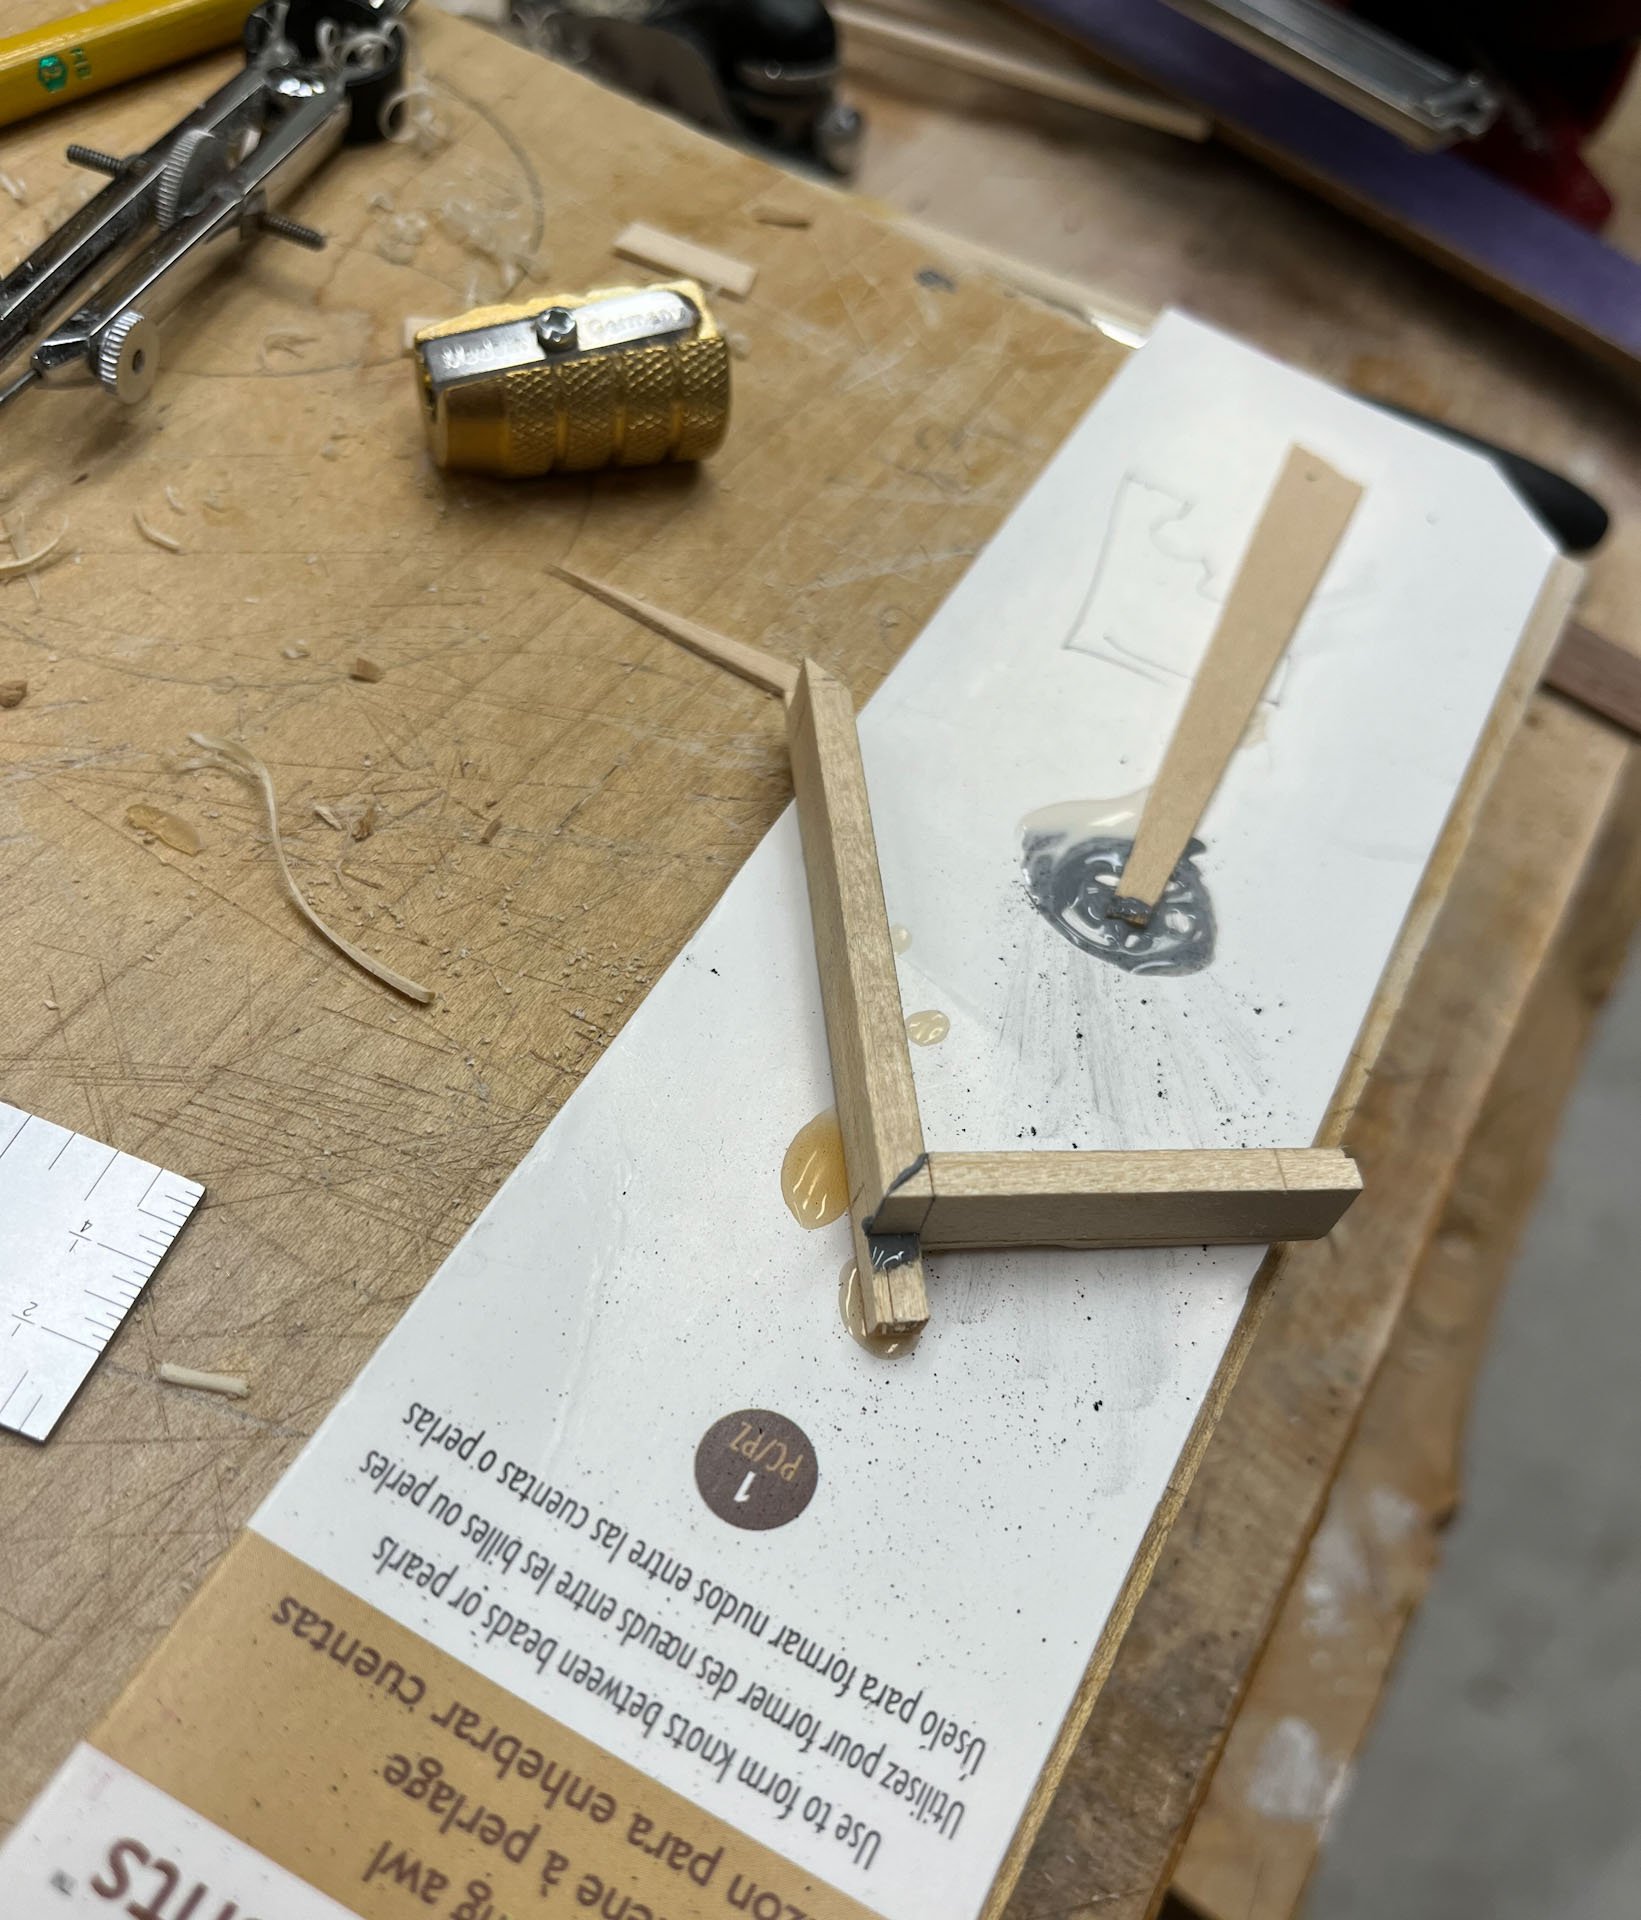
The coaming is supposed to stick up 1/4" above the deck, and my deck planking will be 3/64" thick, so my wood stock will be 1/4" + 3/64" = whatever that adds up to. I wanted some of the butt joint to be visible above the decking so I decided to extend it 7/64" high and start the taper a 64th above. This was a lot of thinking and measuring with calipers and math.
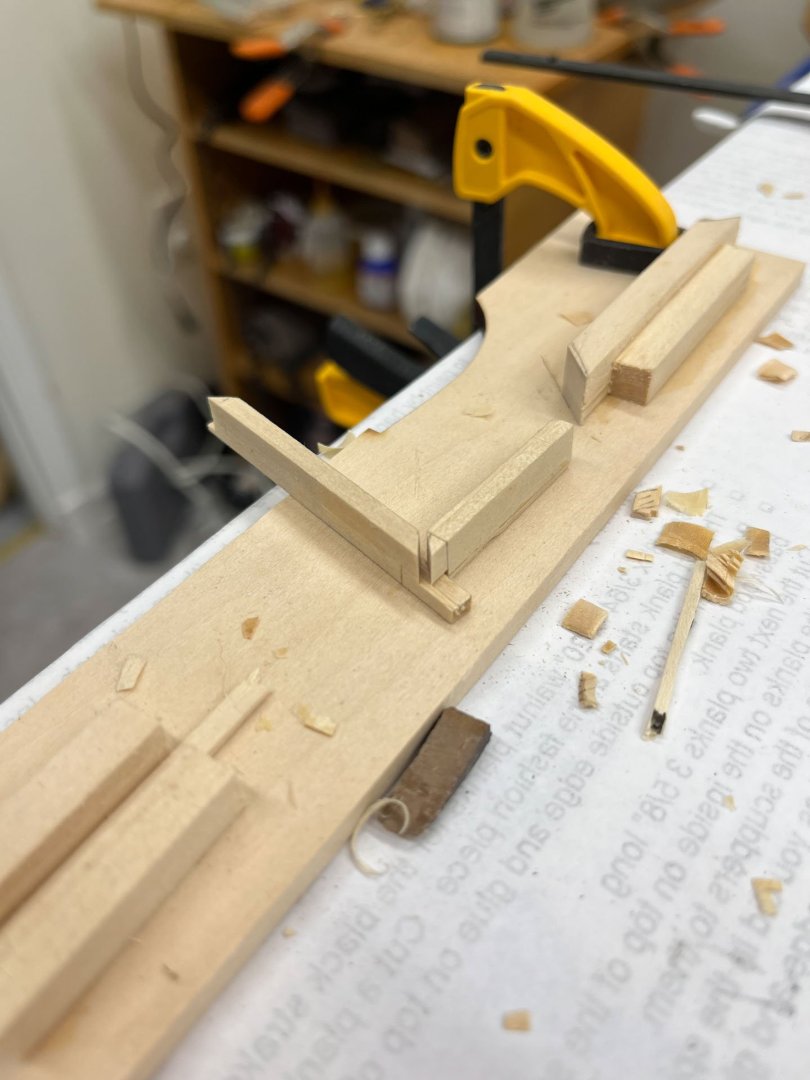
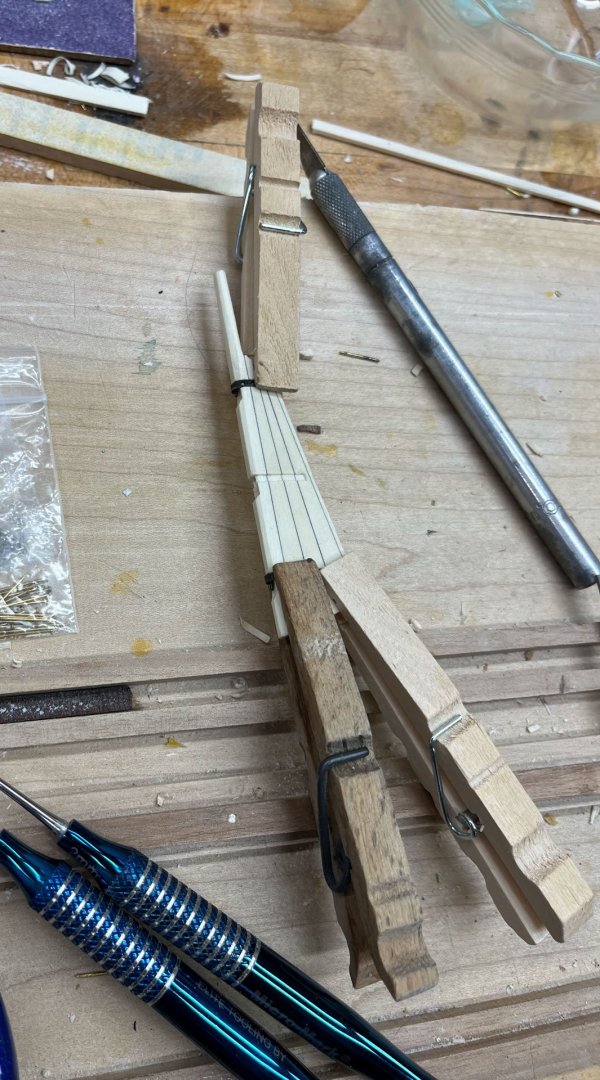
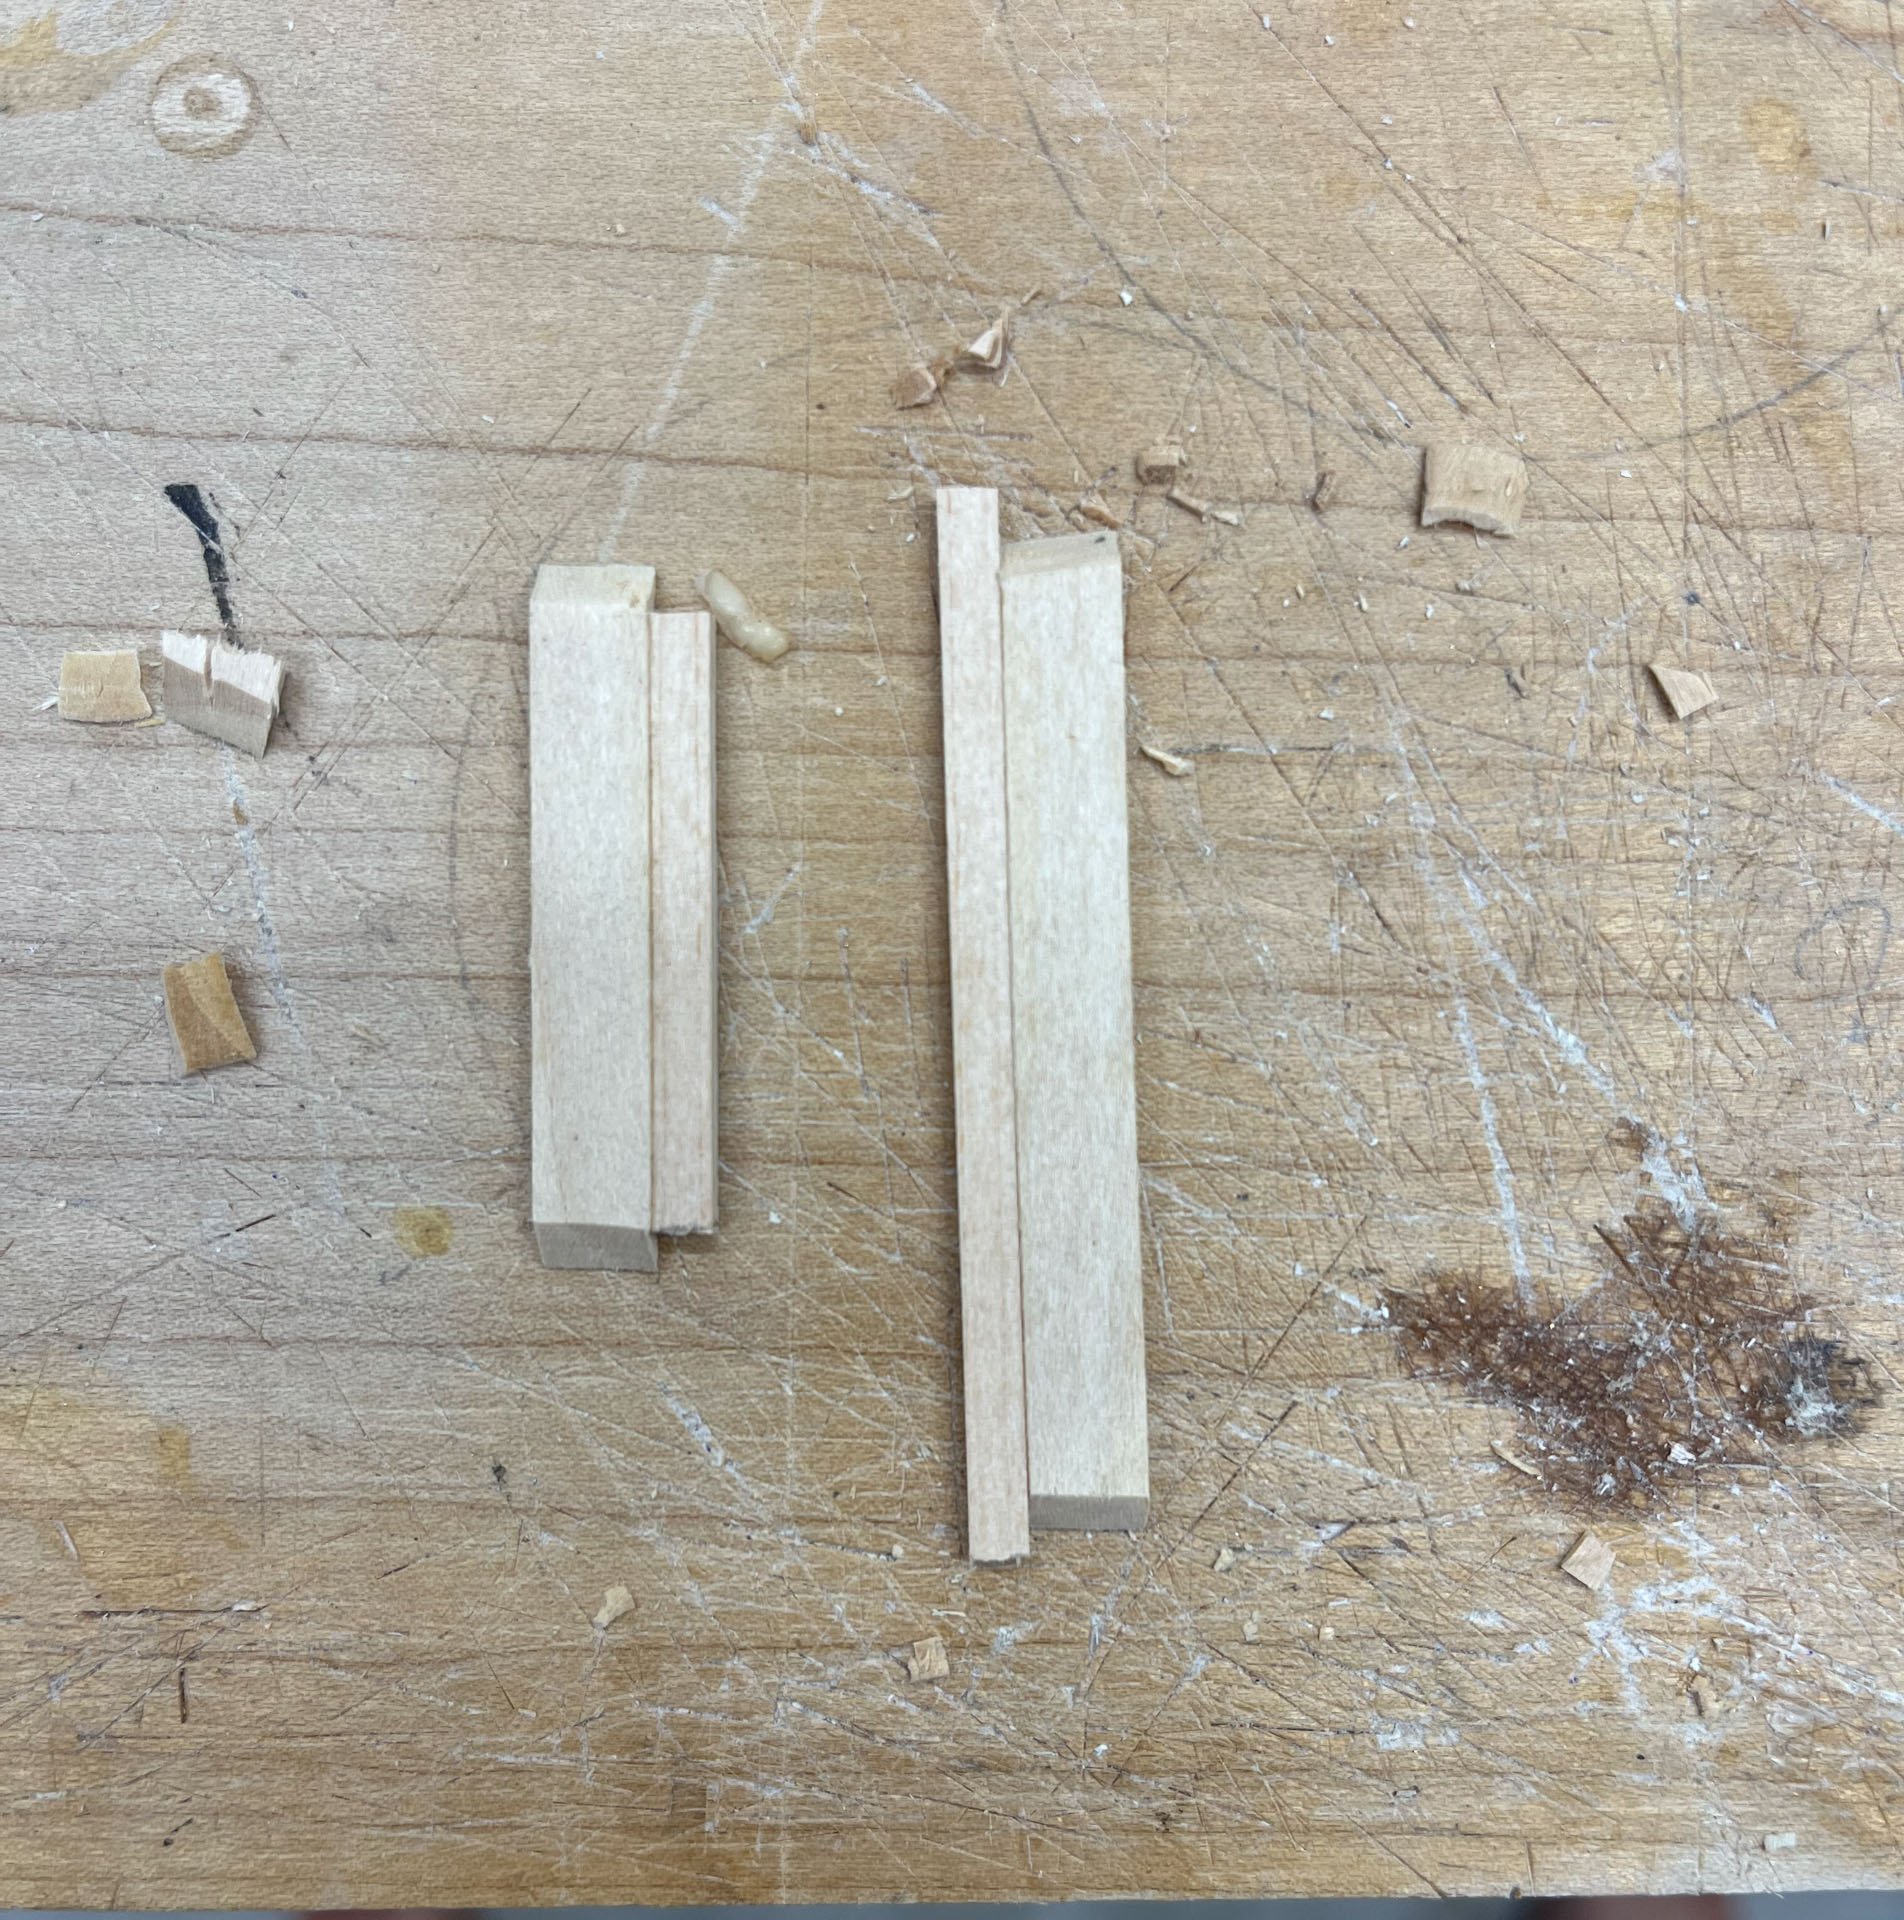
Below is my first test pieces, made from the kit's limewood. These were not measured and only served to help me visualize the shape of the joints. I glued various pieces of stock wood together; there wasn't an exact match in the kit. I also have the hand powered Ultimation Sander (which works very well) and I used it to make the 45 degree miters on the short pieces (left) below. It can't be used for the long pieces (right) below as the butt joint part of the coaming stick out.

The practicum and the pictures in Grant Walker's book both show the endgrain of the butt joint being oriented fore-aft so thats what I did as well.
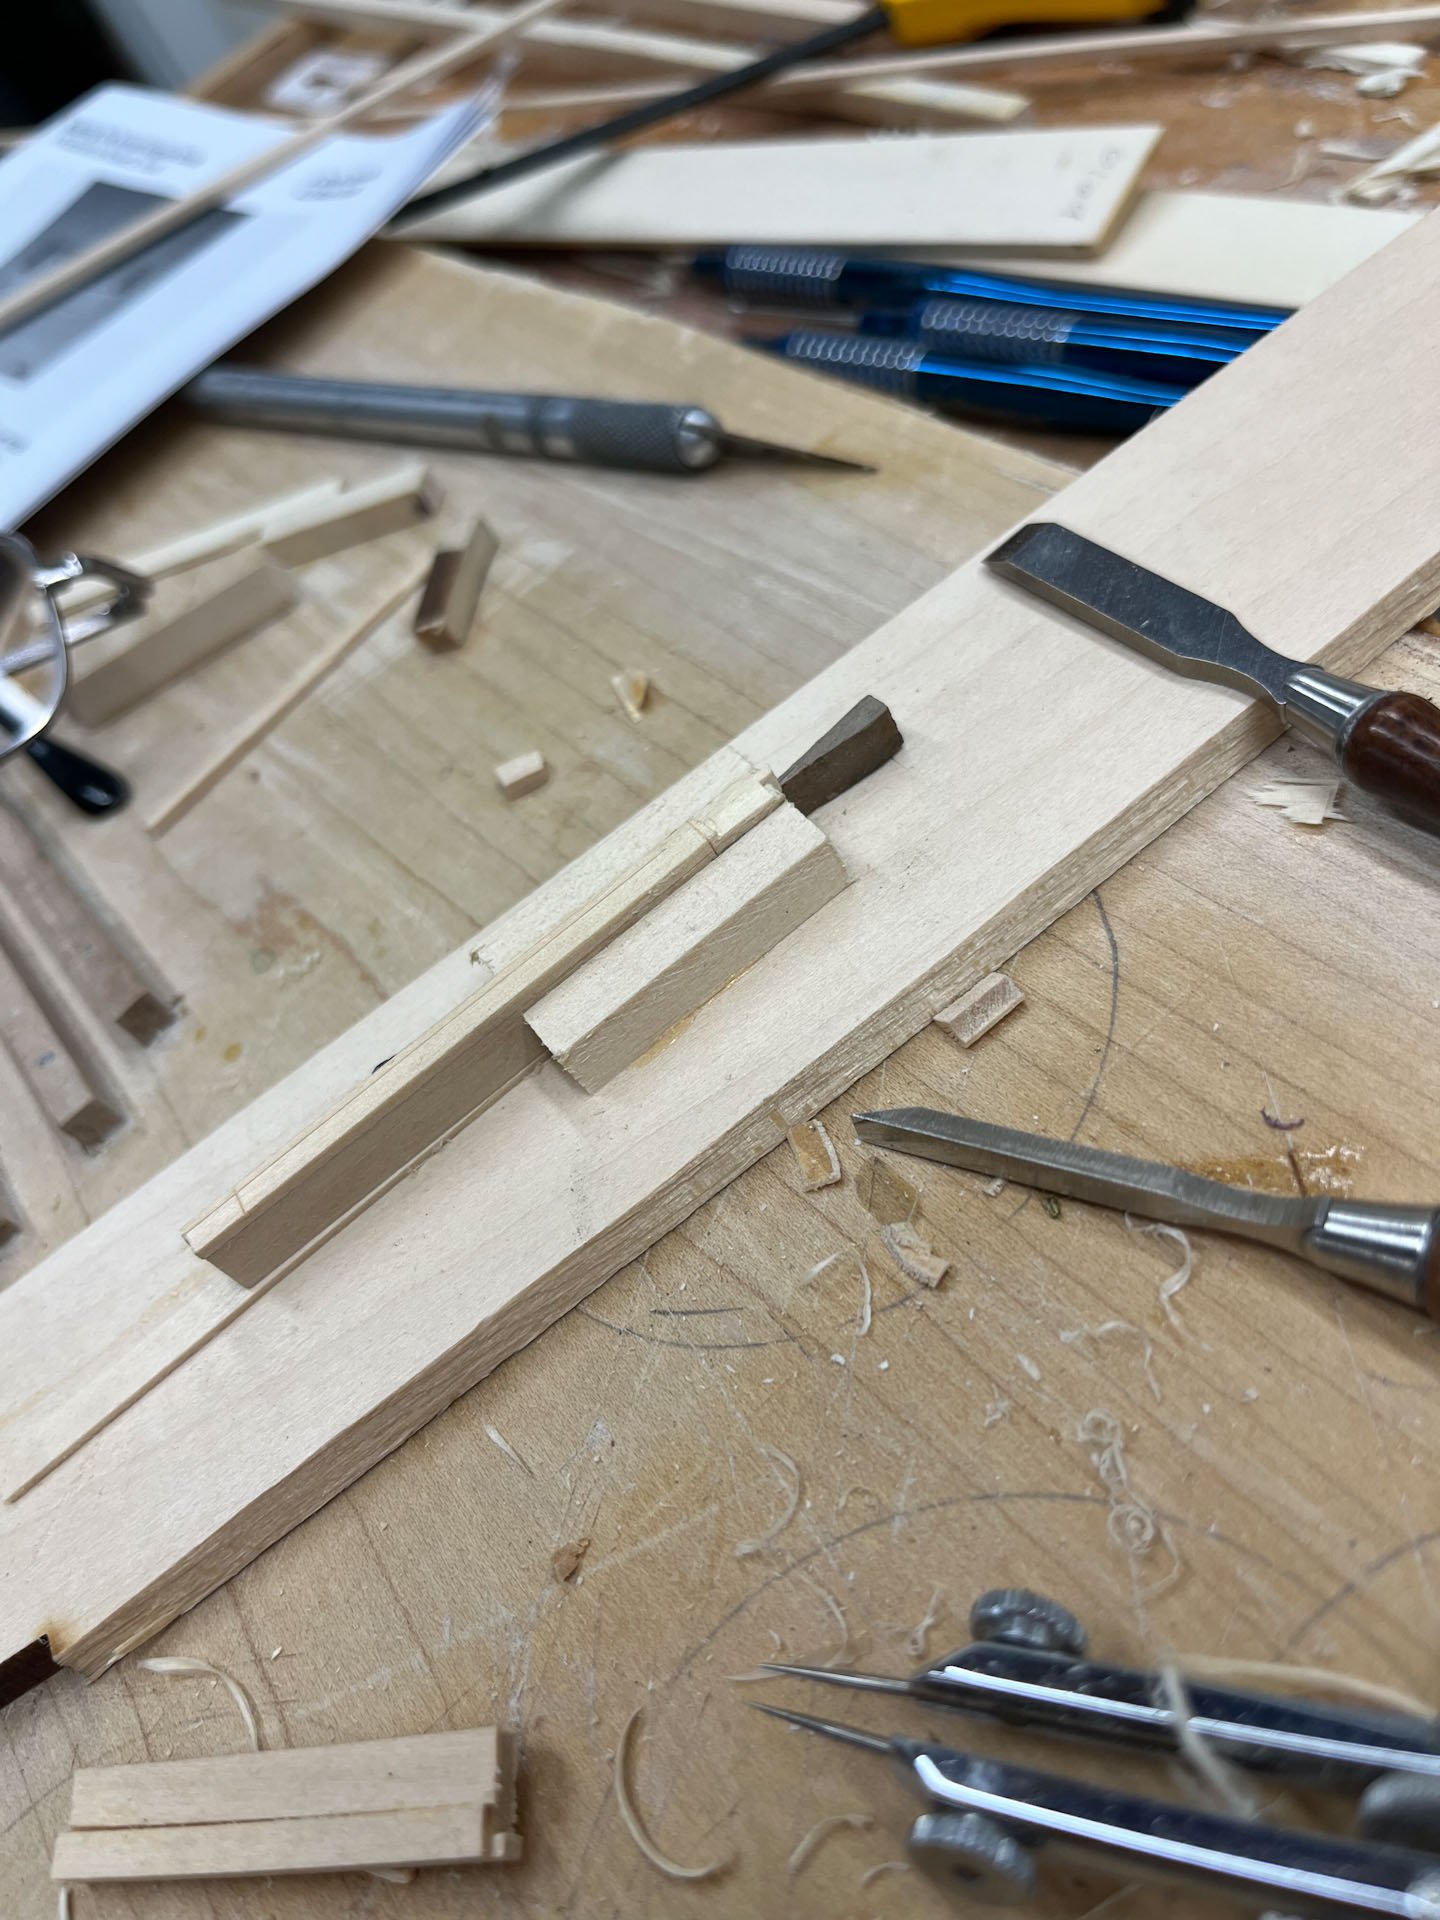
Miters are challenging at any scale; I needed to cheat, so I made some jigs. The sections in David Anscherl's and Greg Herbert's various book about making lites was very helpful. I am still making test pieces here and I didn't take pictures of every step but I will do a better job with the actual holly stock.
Below I glued 2 pieces of rectangular wood to my board and put 2 pieces of thin strip below the test stock to raise it up so exactly 7/64" stuck up out of the jig. Some walnut wedges kept it from shifting. I had used my smallest square and a scalpel previously to incise the edges of the butt joint; then I used the edge of my chisel held flat on the jig to incise a fine line on both sides which defined the rest of the butt joint. Then I gradually chiseled out the waste. This made a very square and flat joint.

As before these test pieces are made up of several glued up smaller pieces.
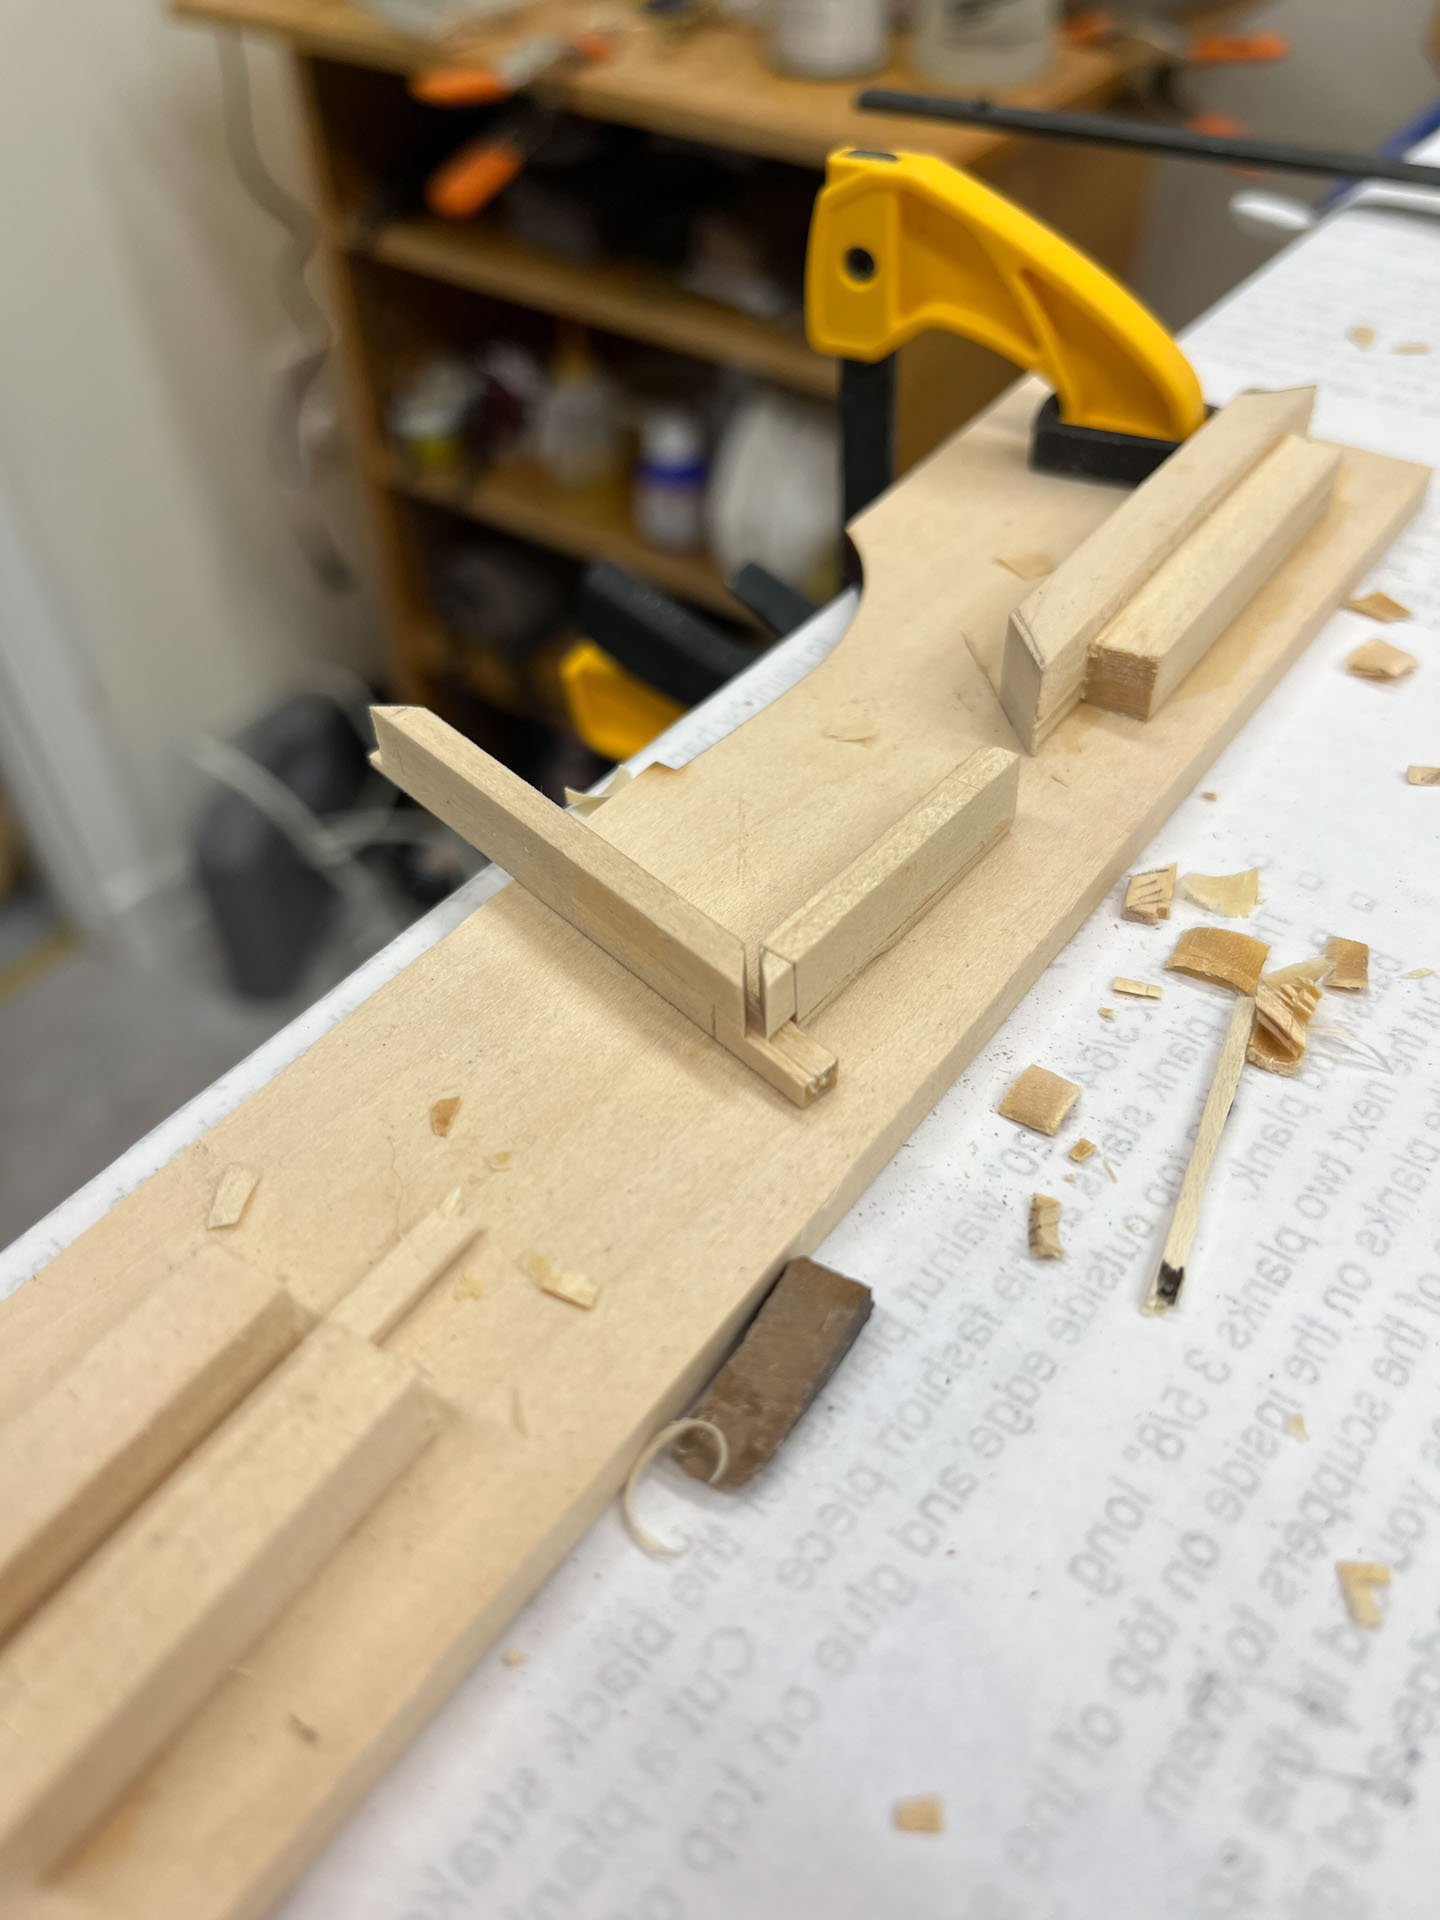
Below you can see my miter jig. I clamped the long piece of coaming to the jig and holding a flat chisel against the jig used it to cut the miters. I didn't take pics of this process but I will next time.
and here's another pic of the joint

All good so far. I glued it together with yellow glue mixed with a little graphite, same as I have previously done on my scarf joints.

And finally I drew some lines with my compass marking out the taper and first chiseled then refined the coaming's taper with sanding sticks. The camera kept insisting my fingers were more interesting than the wood joint I was holding, sorry about that.

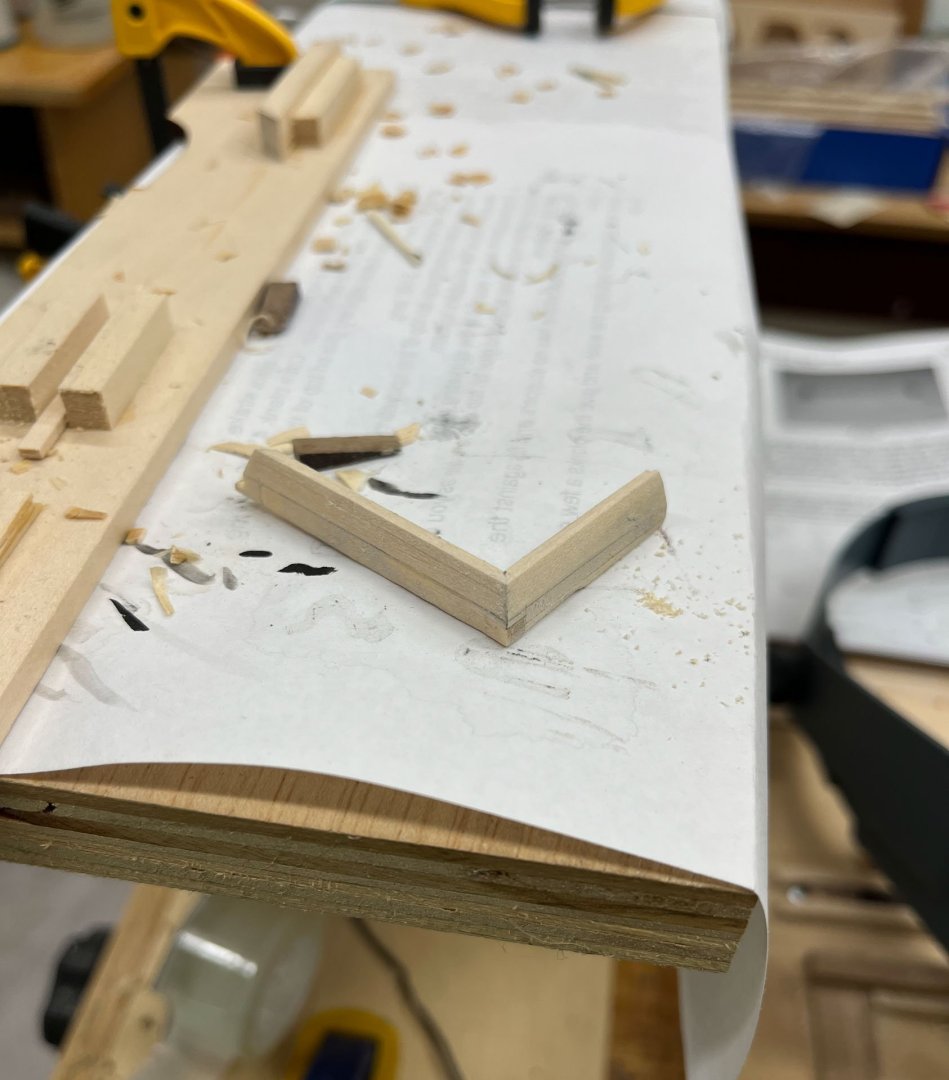
And there is my ever first mitered butt joint. Next up is preparing my holly stock and doing it for real.
Thanks for reading
Cisco
-
-
-
i would vote natural, red trim with natural, or red. But i think any of the example colour schemes would look great
- Beckmann, Keith Black, mtaylor and 2 others
-
 5
5
-
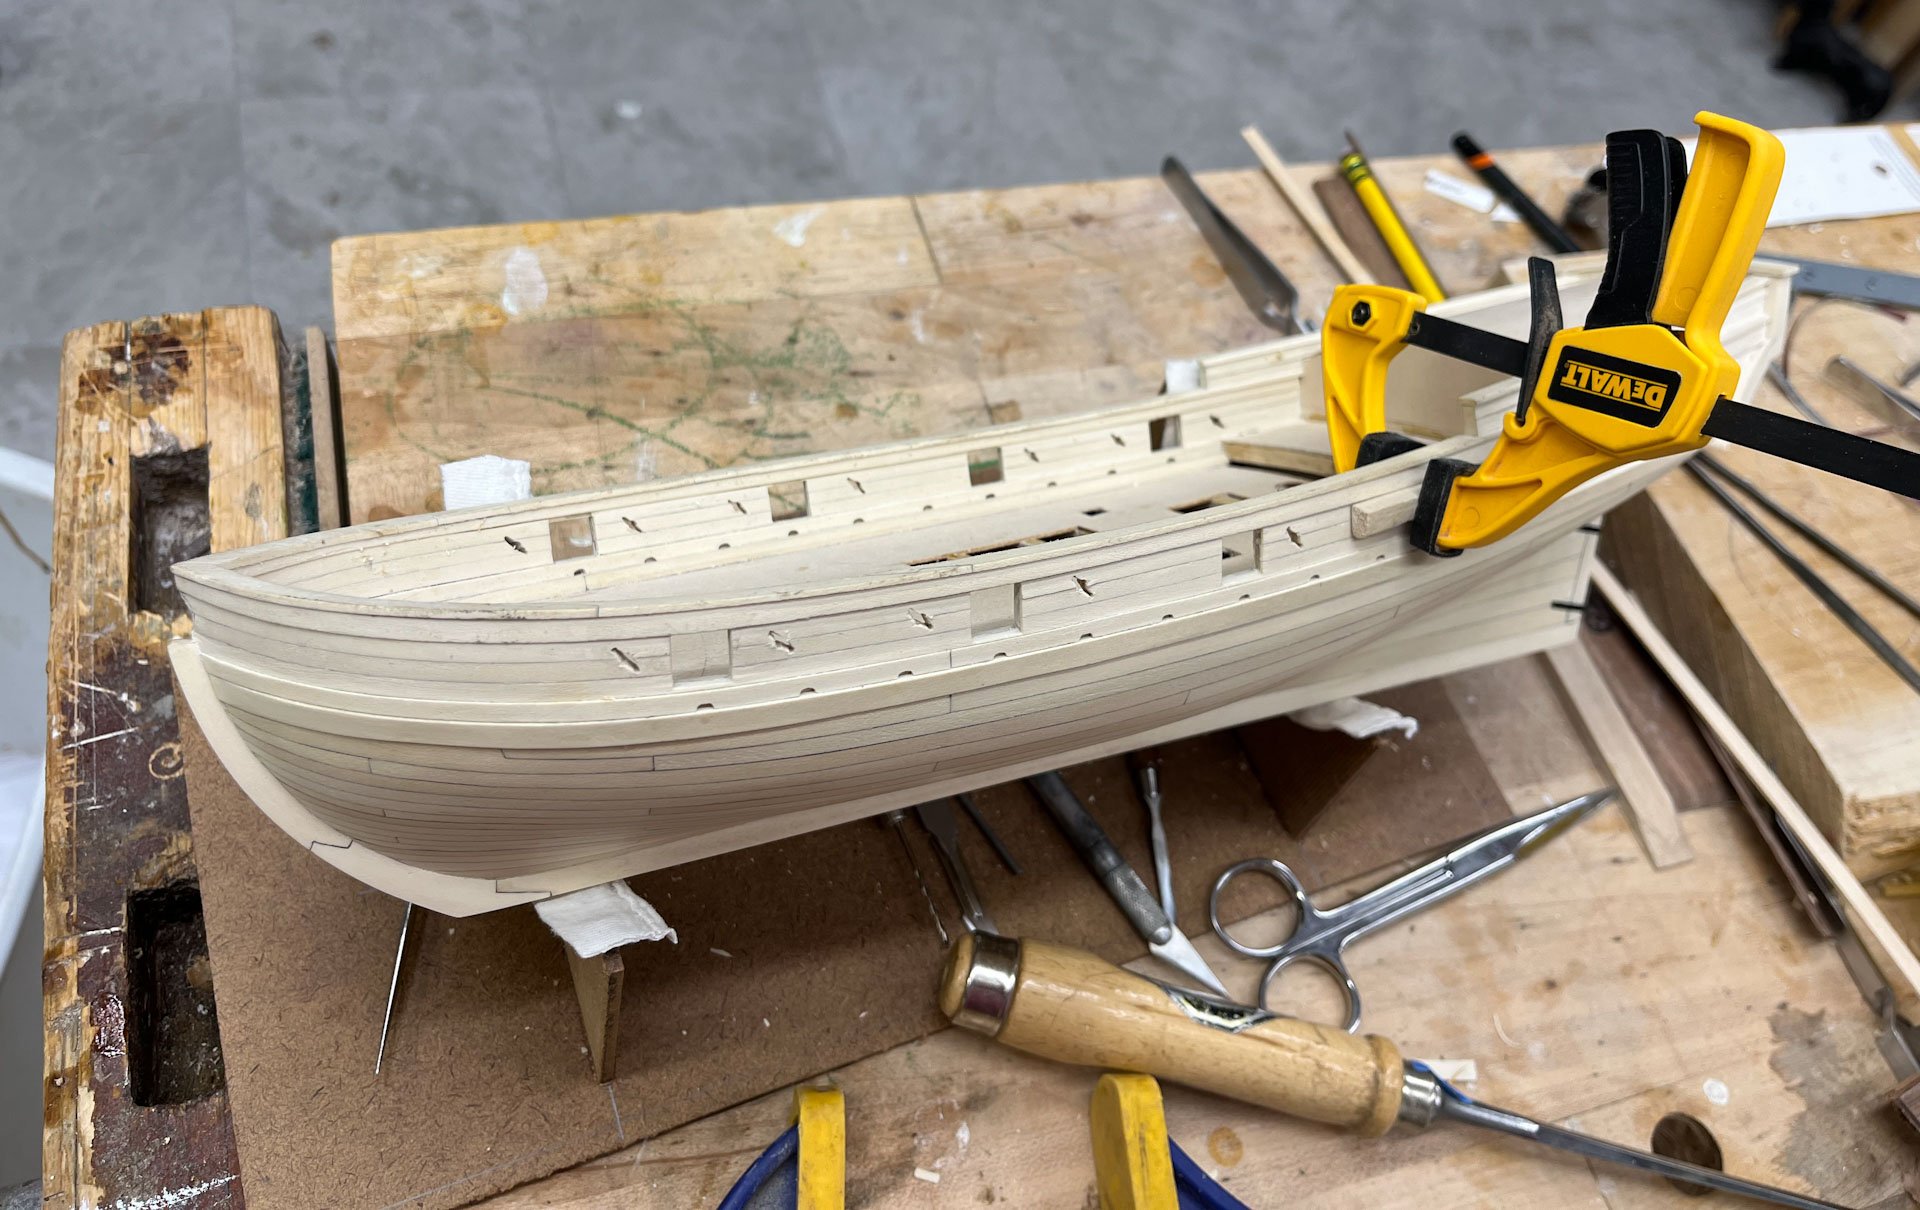
Good early afternoon all. Its spring here in Delware, everything is growing, it won't stop raining, time for an update.
I finished the rudder. After all my trials trying to blacken the brass strips I ended up painting. Abbadon black, which covers very well. Paint definitely obscures some detail but I'm going to live with it.

After all that work drilling holes, and as I suspected would happen, its hard to see the bolt heads. I do think my stern/rudder gap is satisfyingly small, the rudder does swing side to side, and I will take it as a win and Finally Move On. There will be a touch-up painting later on but for now I removed the rudder and stored it in a hopefully-safe-but-not-so-safe-that-I-can't-find-it-later location.
I had planned to build the ship's base and brackets next but hadn't been able to work up much enthusiasm. So instead I built a work/storage cradle, a much simpler task.

It holds the ship quite securely (we have "hey lets knock this over" cats who don't respect anything or anyone) and I don't know why I didn't make one before.
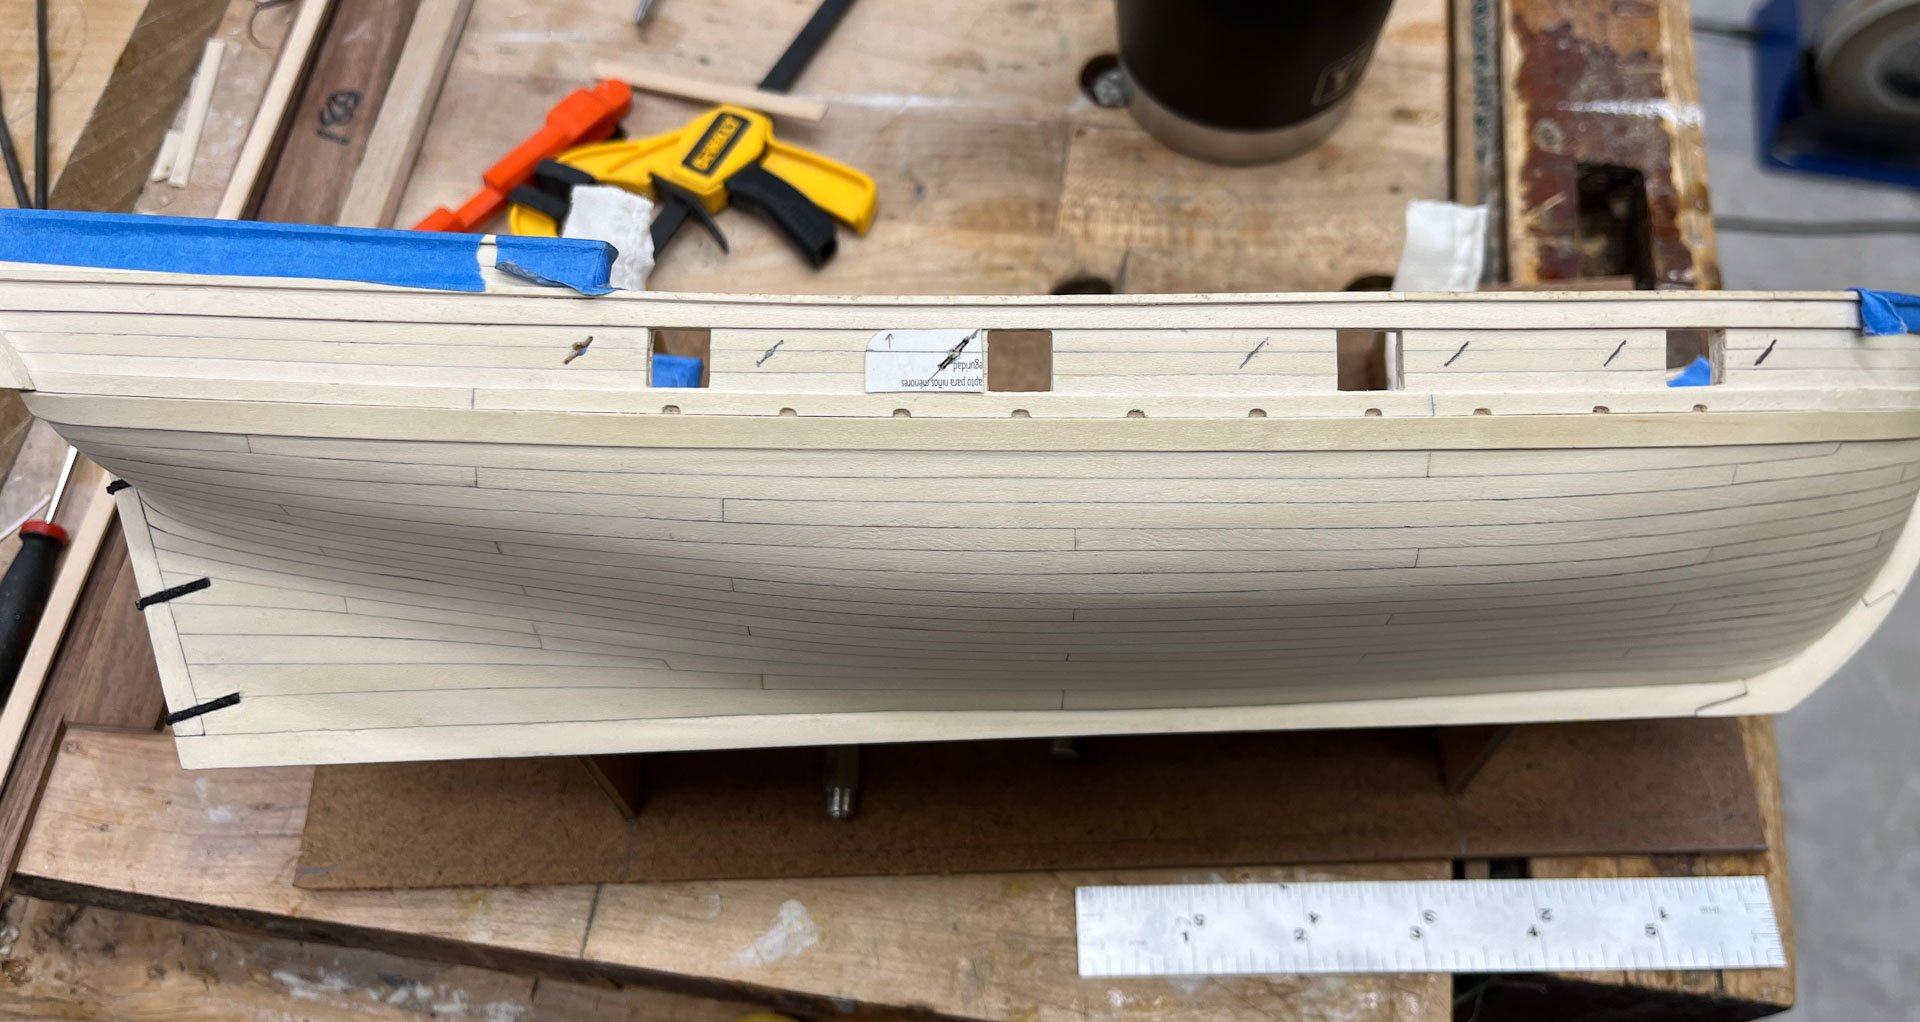
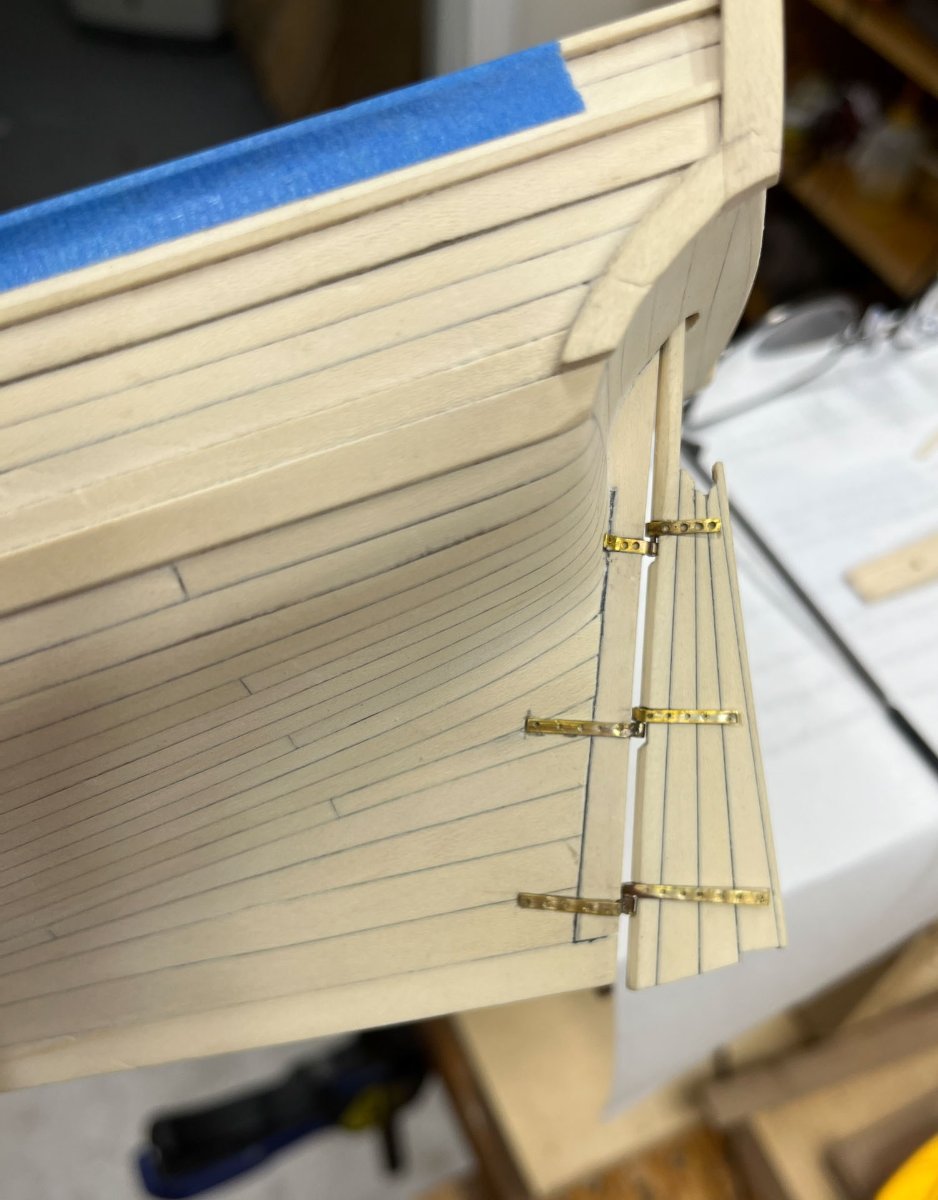
Next up per the Lauk Street Practicum is making the oar ports. These are a nice feature that reminds you of the smaller size of this model and I like the diagonal placement. Each port is located about 1/4" from a gunport. I cut out a strip of cardboard, drew a 45 degree triangle and cut out a strip the correct length of the port. Push the template up against the sheer strake and draw the line. For the port side I flipped the template over. Easy.

Then drill holes- smaller ones at each end and a bigger one in the middle. I clamped a piece of backing wood to the inner bulwarks while drilling to minimize tearout, which mostly worked. The small bits go right through the backing wood no problem so watch your fingers; I poked myself twice by holding too close to where I was drilling. Then I used a combination of my smallest Veritas chisel, a new scalpel blade, my smallest round file, and cloth backed sandpaper I cut into very thin strips to further refine the holes.

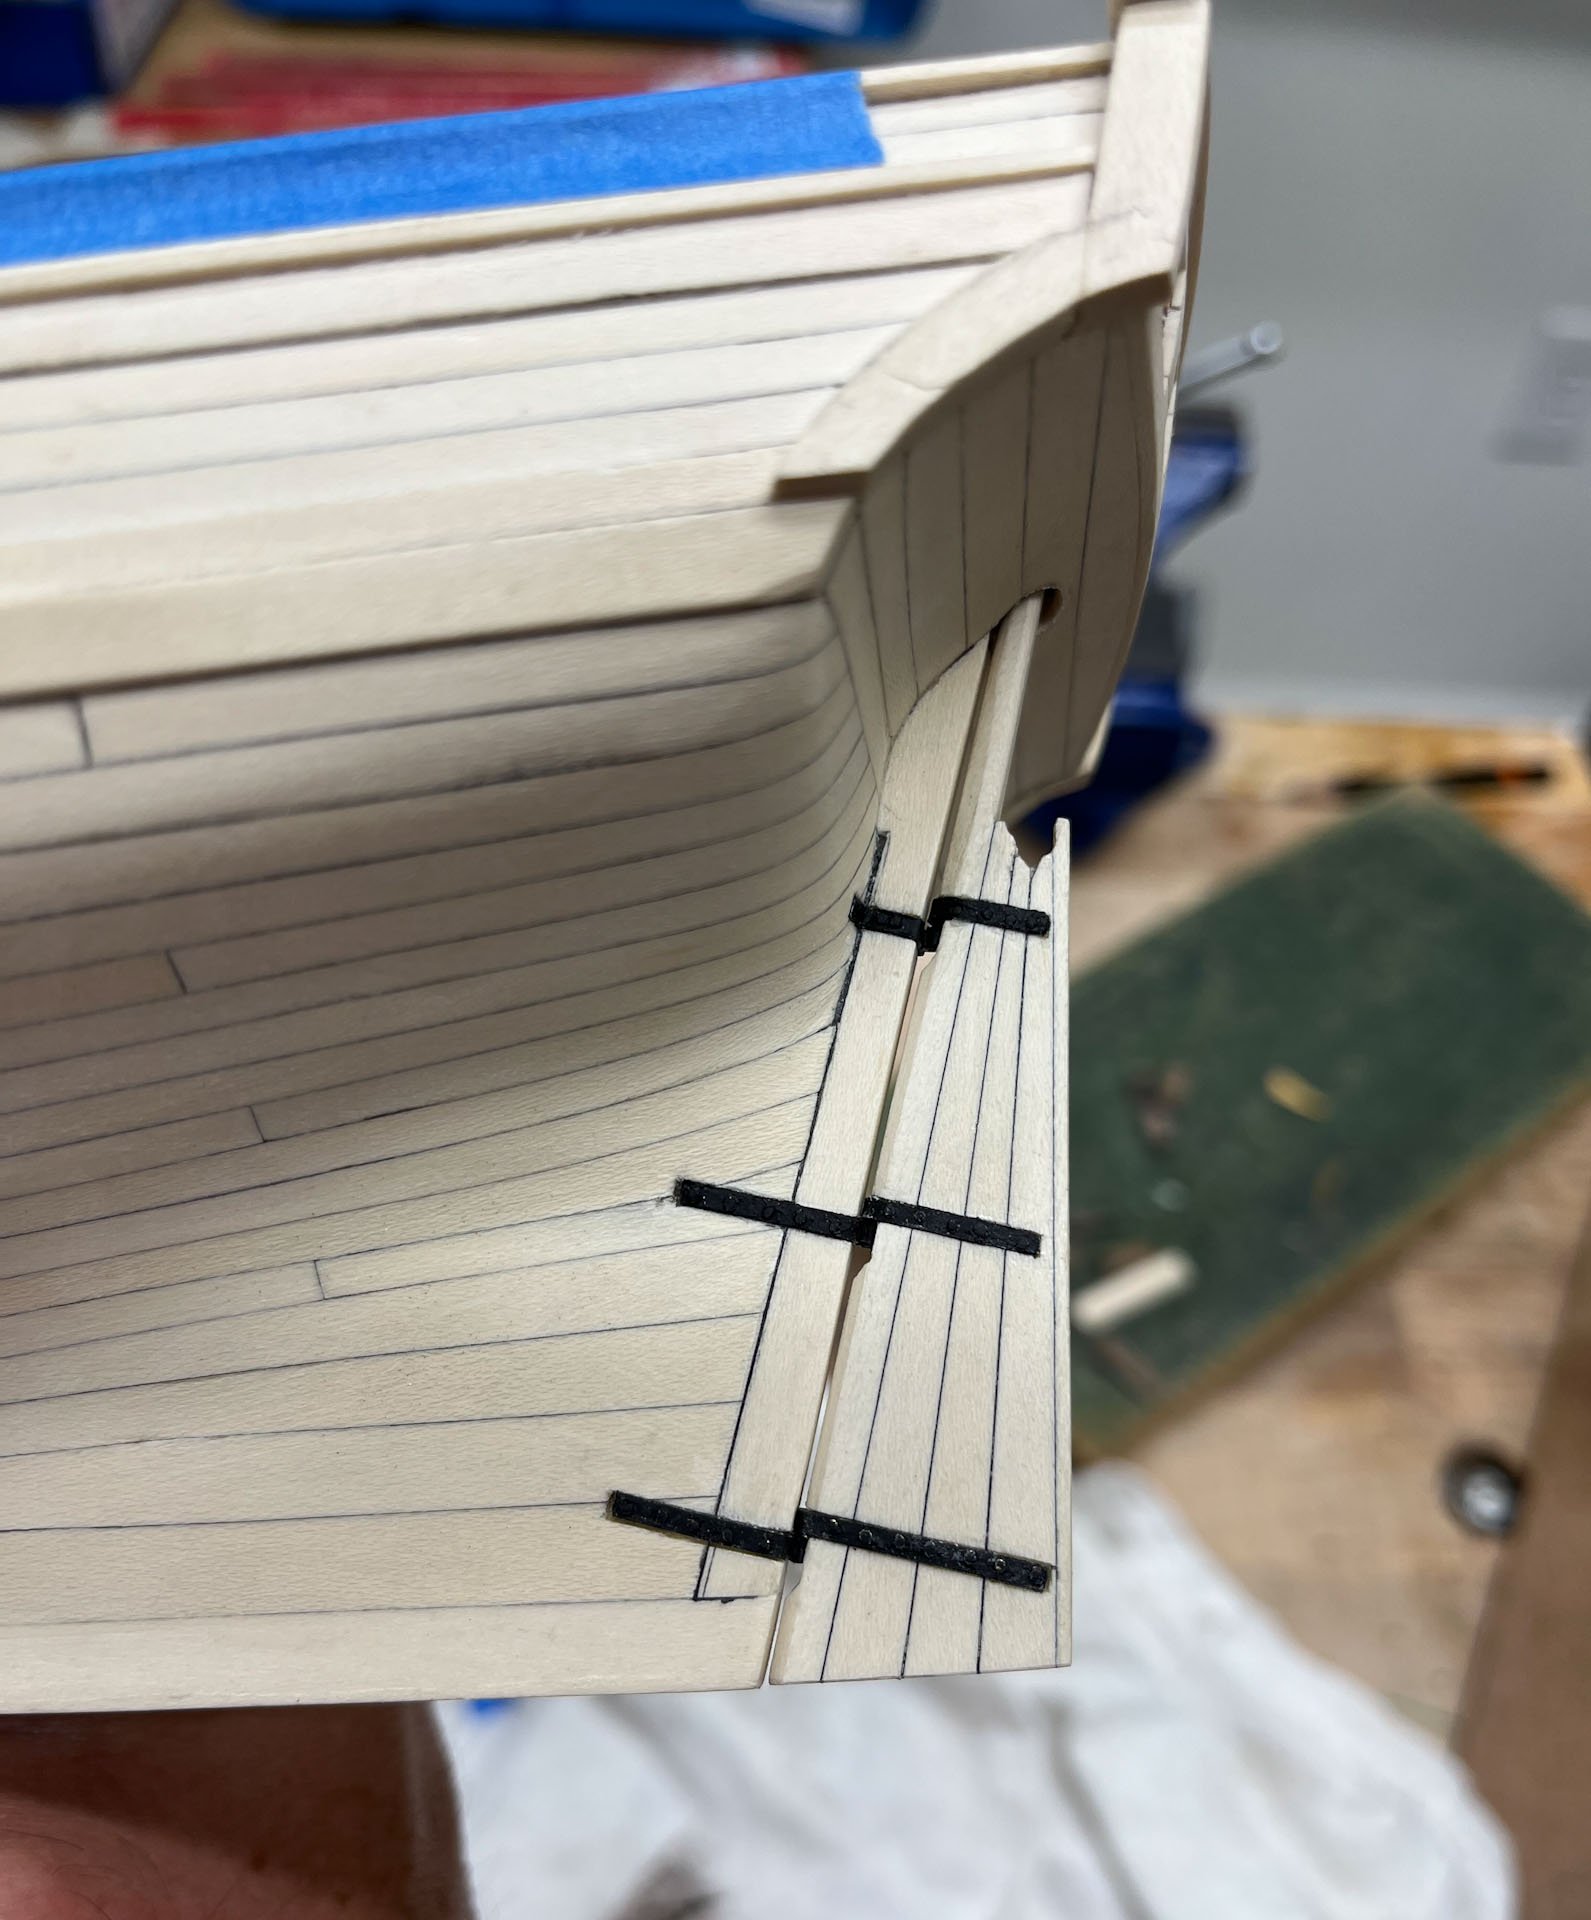
Of some concern is the condition of the deck railing, which has been covered with blue tape for months. It has some dents and some tape adhesive "grunge" to be dealt with. I do NOT want to remake these so It'll be very light coats of alcohol to dissolve the glue residue followed by gentle water and my trusty mini-iron (usually used for plank bending) to see if I can swell out the dents. I said it before; I should have waited to put the deck railings on. Or at the very least not sanded them down to finished width until I was done handling the hull so much. Next time...
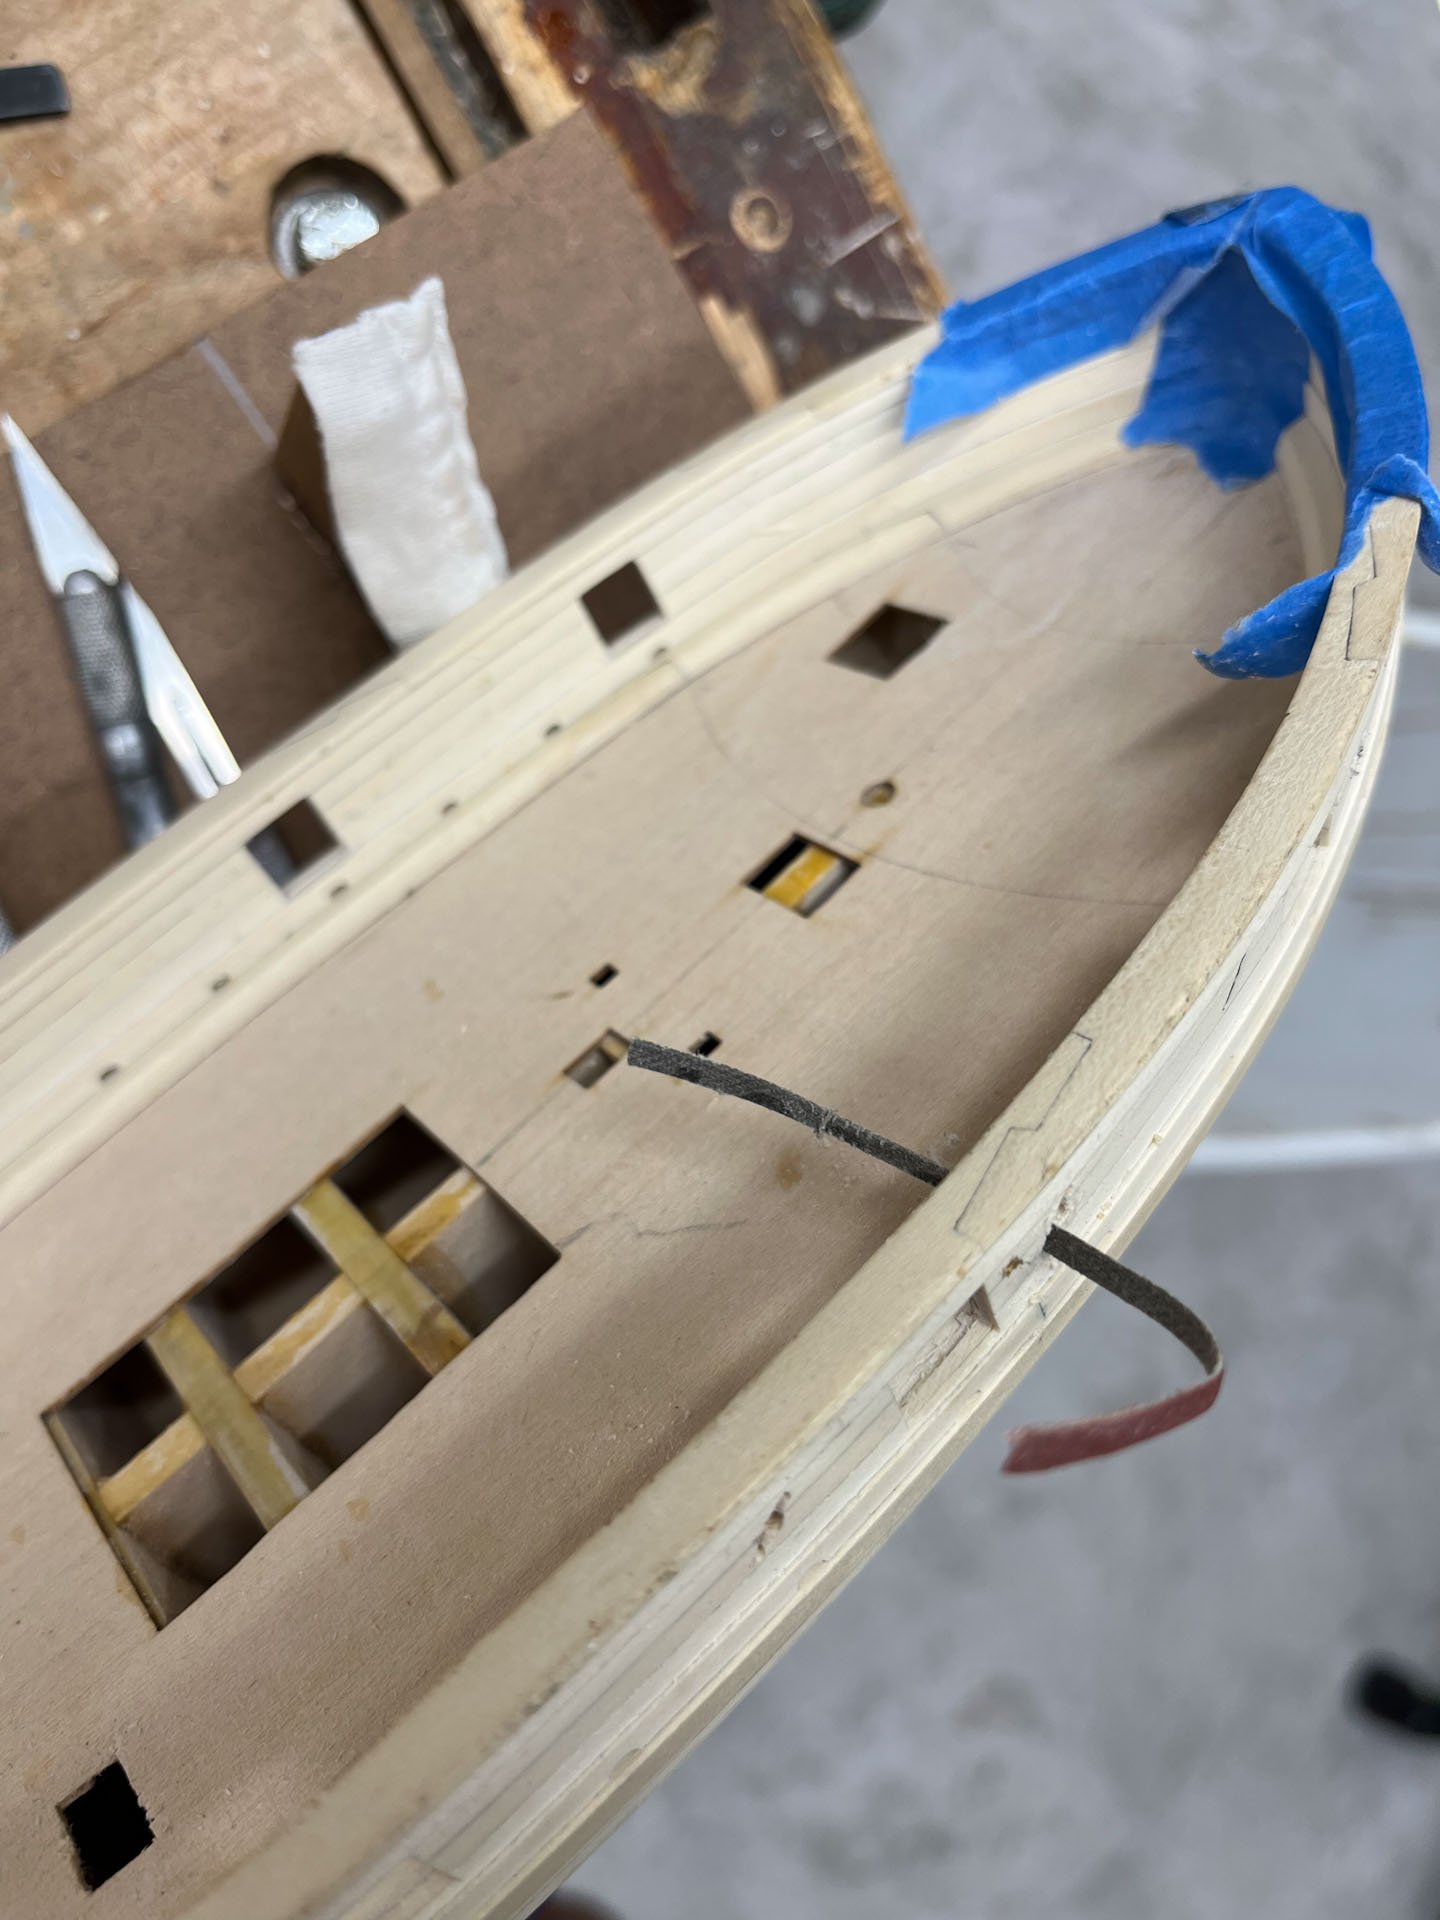
I did pop a short, not well attached, piece of inner bulwark planking out while drilling, which I am gluing back into position below.

And thats where my AVS stands today.
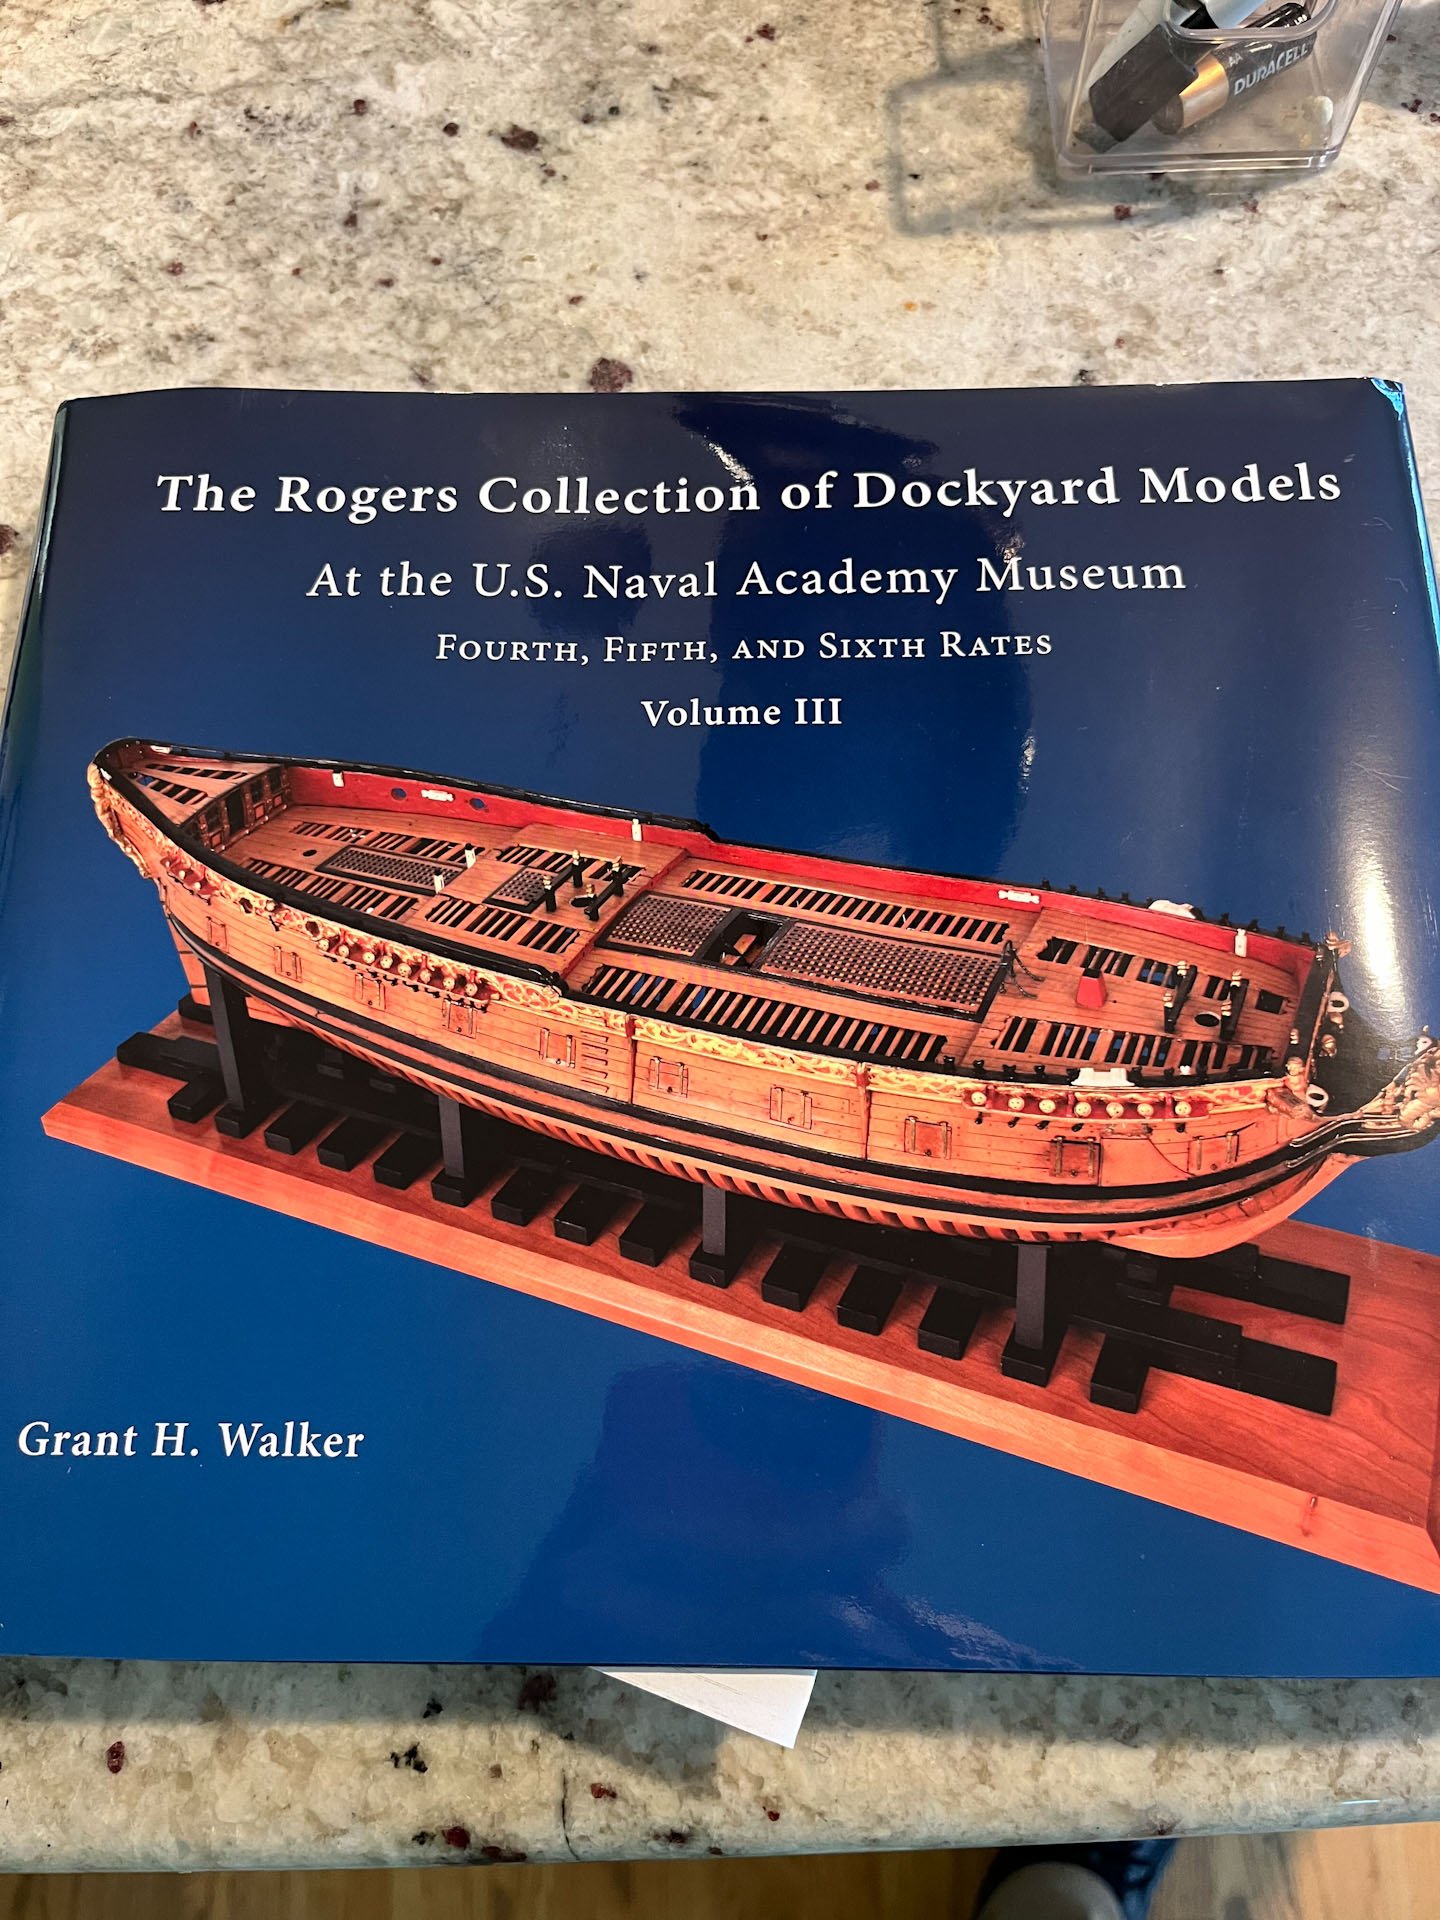
And finally, reading material. I have been going 1 chapter a night for a while in Grant Walker's new book; it is amazing. Heavily researched, lots of great close-up shots of the exterior and endoscopic shots of the interiors as well. Can't recommend it enough. And he talks about an upcoming 4th volume...

Ok thats it, have a peaceful evening. thanks for reading
cisco
- Gregory, Ryland Craze, JpR62 and 15 others
-
18
-
-
Ron it was great to finally meet the person behind such a sweet build! Your Oneida is even more impressive in person.
cisco (john)
-
-
-
got mine today. its huge and packed to the gills with pics and info. well worth the wait
- Canute, SeaWatch Books and mtaylor
-
3
-
i planned out the planking on my ship (armed virginia sloop) exactly the same way Mugje- split the hull into symmetric bands with blue tape strips and sighted from the side and especially from behind and in front until the curves looked smooth. for me the hardest part to plank was the sternpost/counter junction area; all the planks went from wide amidships to skinny at the quarterdeck area into a wider trapezoidal shape at the stern. while at the same time curving upwards. lot harder than it looked before i started. i used mostly Chucks mini iron bending method.
your planking is looking great
- Mr Whippy, mugje and chris watton
-
2
-
 1
1
-
i agree the tissue paper looks good. very defined and distinct
- mtaylor and jpalmer1970
-
2
-
-
Good Wednesday evening everyone. Today's progress report is trying to finish the rudder. Still.
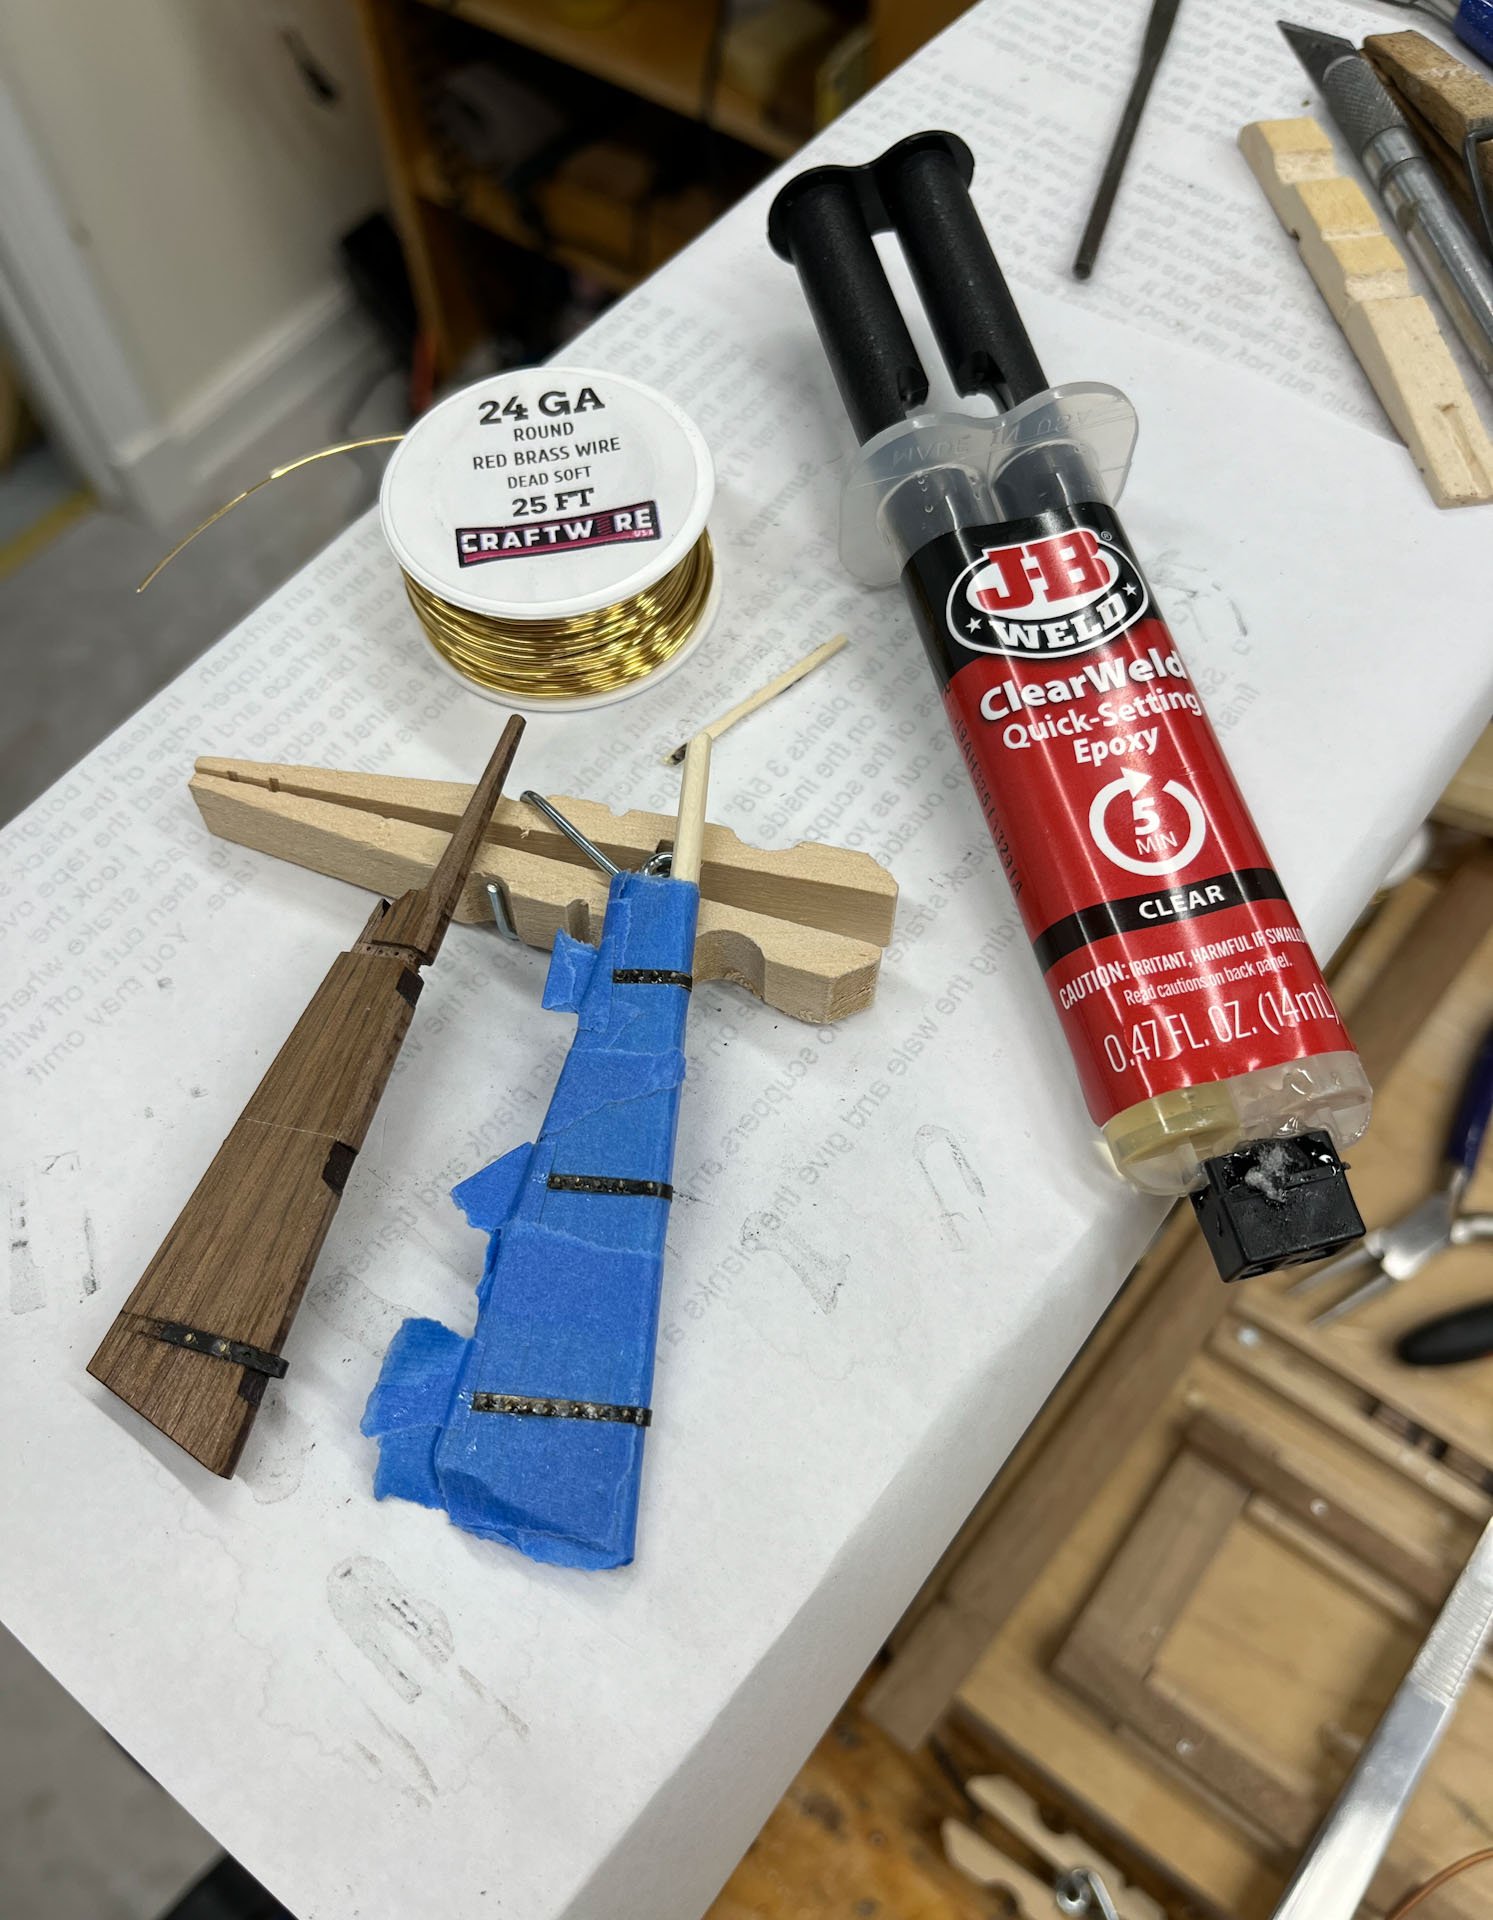
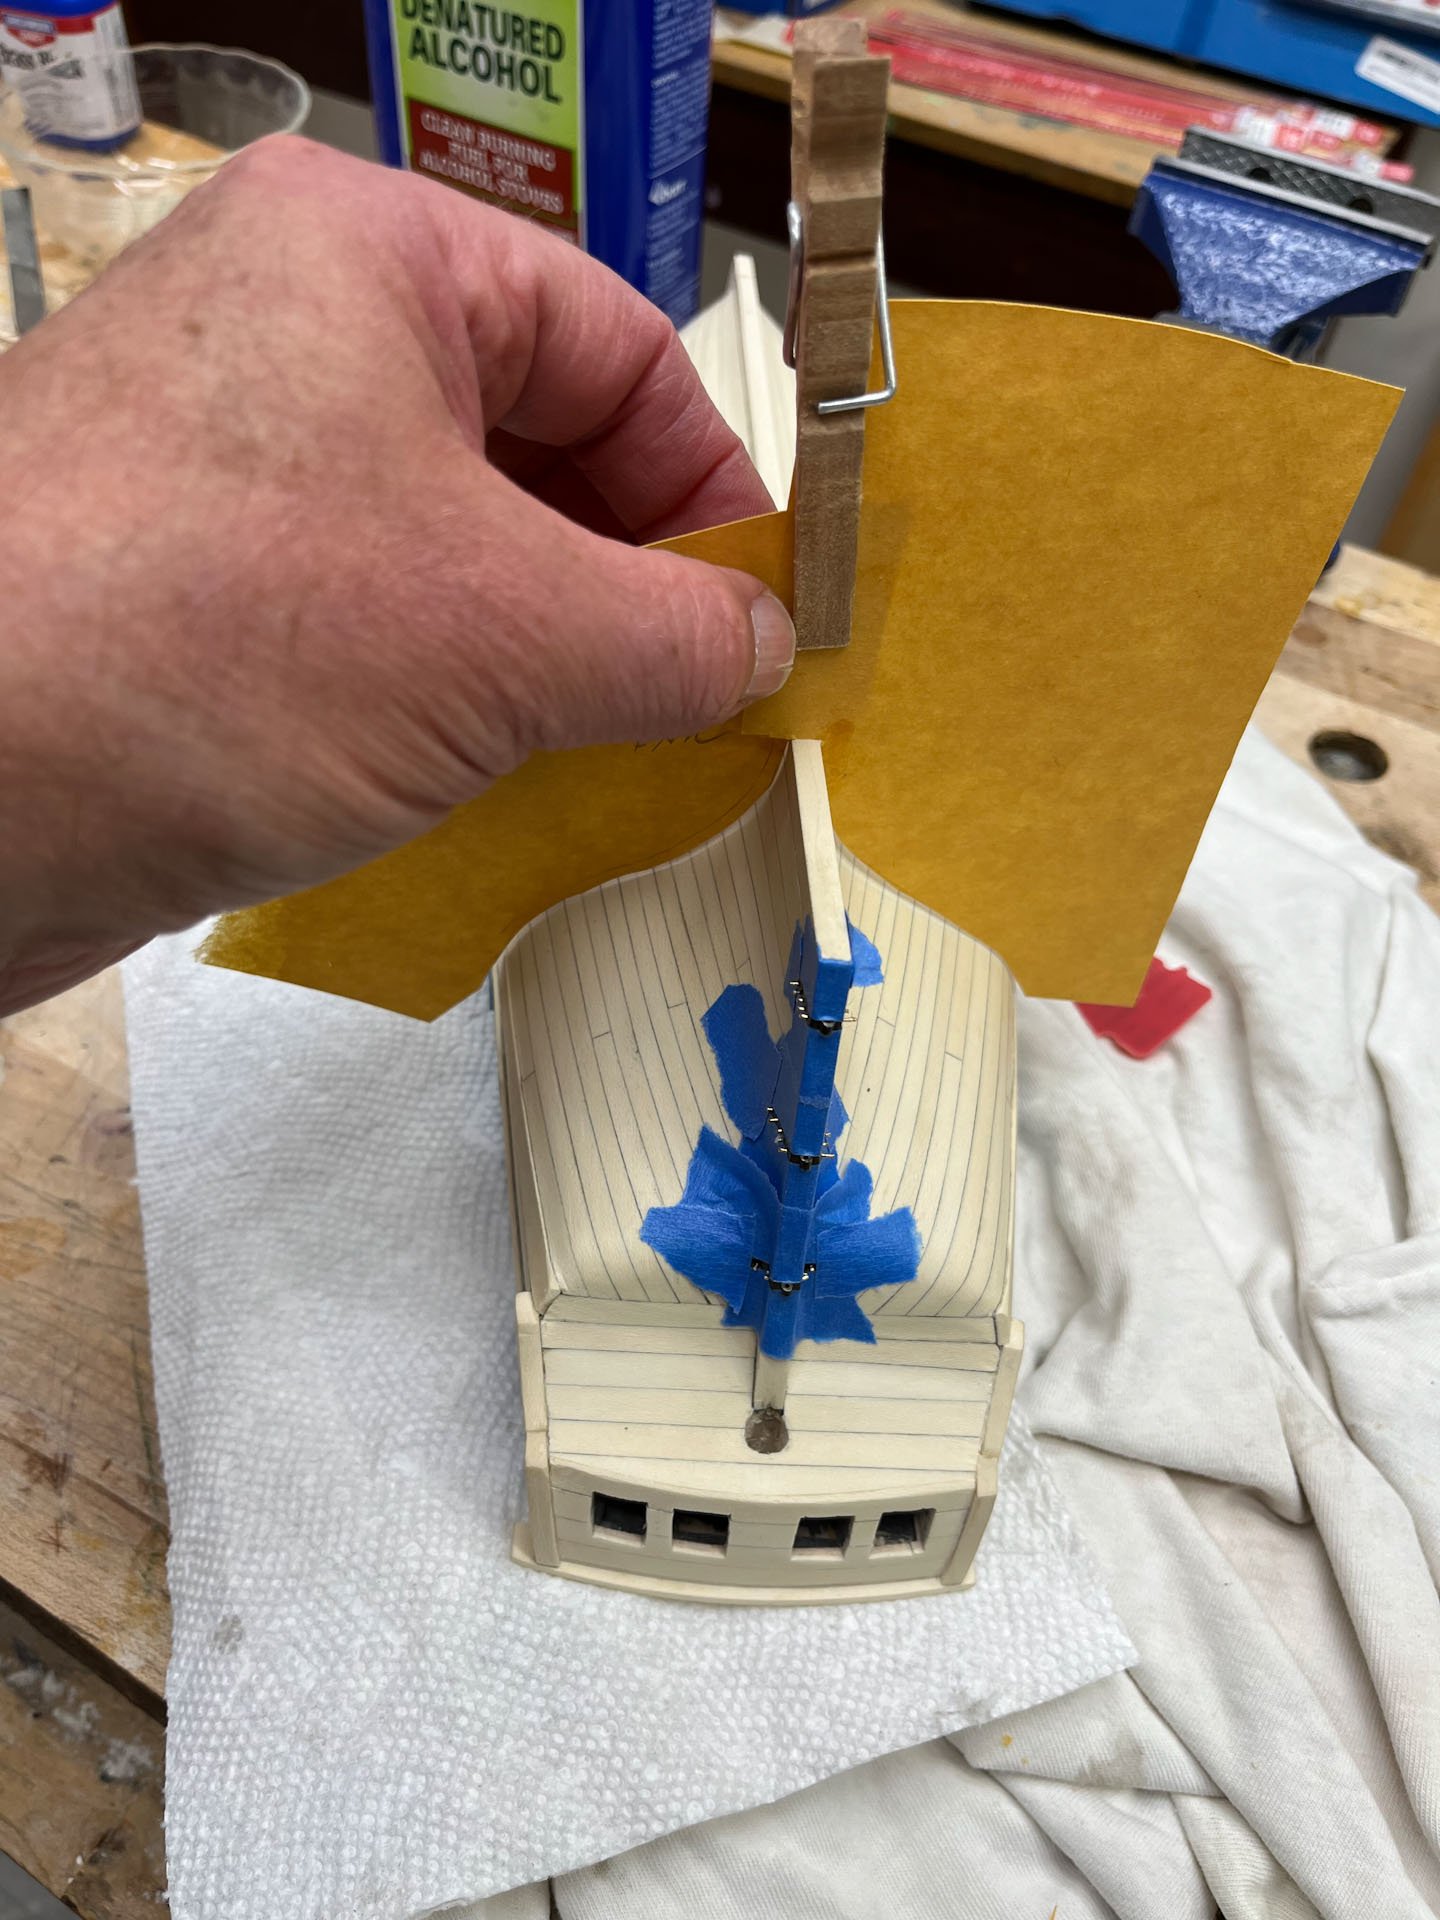
Last report I had shaped and drilled holes in the pintles and gudgeons, then balckened them. Next step was attachment. I used 5 minute epoxy which it turns out is very messy. I should have lined my parts with tape; that stuff gets everywhere including your fingers. Below I am gluing on the rudder pintles. I did the top and bottom first to make fitting easier.
Same for the hull; it is not easy getting the brass pre-shaped so it fits well but not too snug or it snowplows all the epoxy out of the rabbits. I had to do some gentle scraping of the surrounding hull after everything dried to get the shiny epoxy off areas it managed to migrate to.

It was a Christmas Miracle! The rudder could be slid into place with only a little adjusting on the first try. I was honestly shocked. The top pintle has a small gap that we are going to live with. No way I am redoing the rudder at this point.

My blackening was starting to wear off from all my handling. It too liked to get everywhere. see previous statement - I should have taped around my hinges.
Next up was adding the nails/bolts/whatever you call them. I had given up trying to modify the brass nails I had from the kit and some smaller ones from my 18th Century Longboat kit. They were simply too big. So, once again using the hapless kit supplied walnut rudder, I tried the simpler method of inserting short lengths of 24g brass wire, dipped in epxoy, into each hole. Once dried they were very solid and amenable to filing them down. In the pic below the wire is drying in the holly rudder and I haven't filed it yet.
And this time I used plenty of blue tape to mask the parts.

The epoxy dried shiny but I plan to paint the boltheads and touch up any bare areas with black paint.
And finally here is the sternpost with its epoxied porcupine-like bolts drying. And I have started making paper templates for my stands.

thats it for tonight. Once the epoxy has dried, at least 24 hrs, I will flatten all the bolts down and paint.
thanks for reading
cisco
- Thukydides, Chuck, Paul Le Wol and 11 others
-
14
-
better and better! amazing job
- mtaylor and BLACK VIKING
-
2
-
do you know if Mr Tarjack is still building model ships? if its the same person he hasnt updated his royal caroline bone ship in several years
- Keith Black and mtaylor
-
2
-
-
-
on my first ship i simply painted the brass black, which worked fine but felt like cheating. on my current build i spent a lot of time using various blackening chemicals which seem to wear off quickly with any manipulation. i think i may go back to paint. have you had a similar experience?
-
Thanks Thukydides. I am trying to get over this brasswork hump which I feel has slowed my enthusiasm and progress more than I'd like.
Probably because the pintles and gudgeons have taken way more work than I planned. This weekend I spent a couple hours fine-tuning. All the pieces fit mostly, but lots of slightly lengthening or widening mortises, slightly shortening and rounding off the ends of the strapwork, and chiseling holes to allow the rudder to be seated with the smallest gap possible. Heres where I started; to me the gap was too wide and the top pintle a little too high. Not much I can do about the high pintle at this point but I can work on the gap.

I also noticed all my handling and fitting of straps was getting the holly dirty.
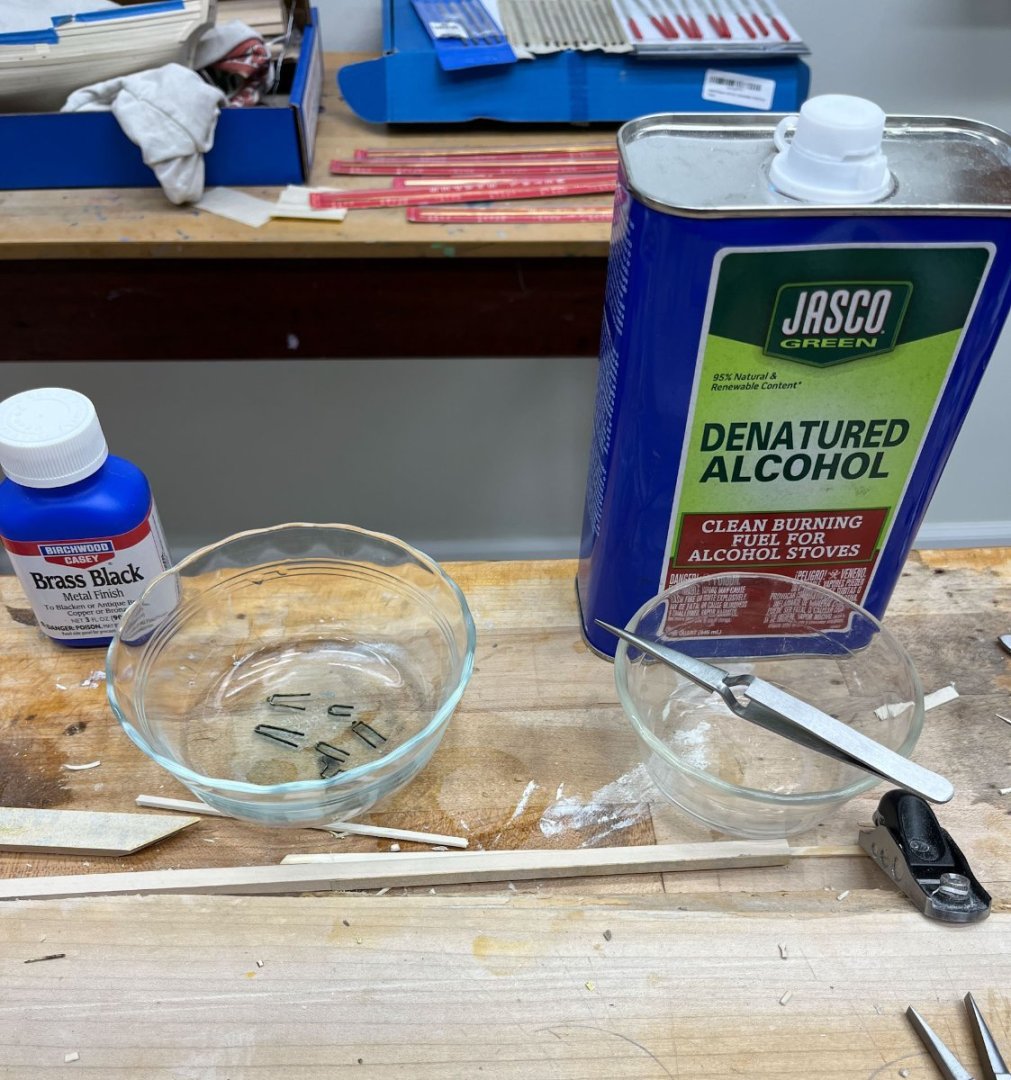
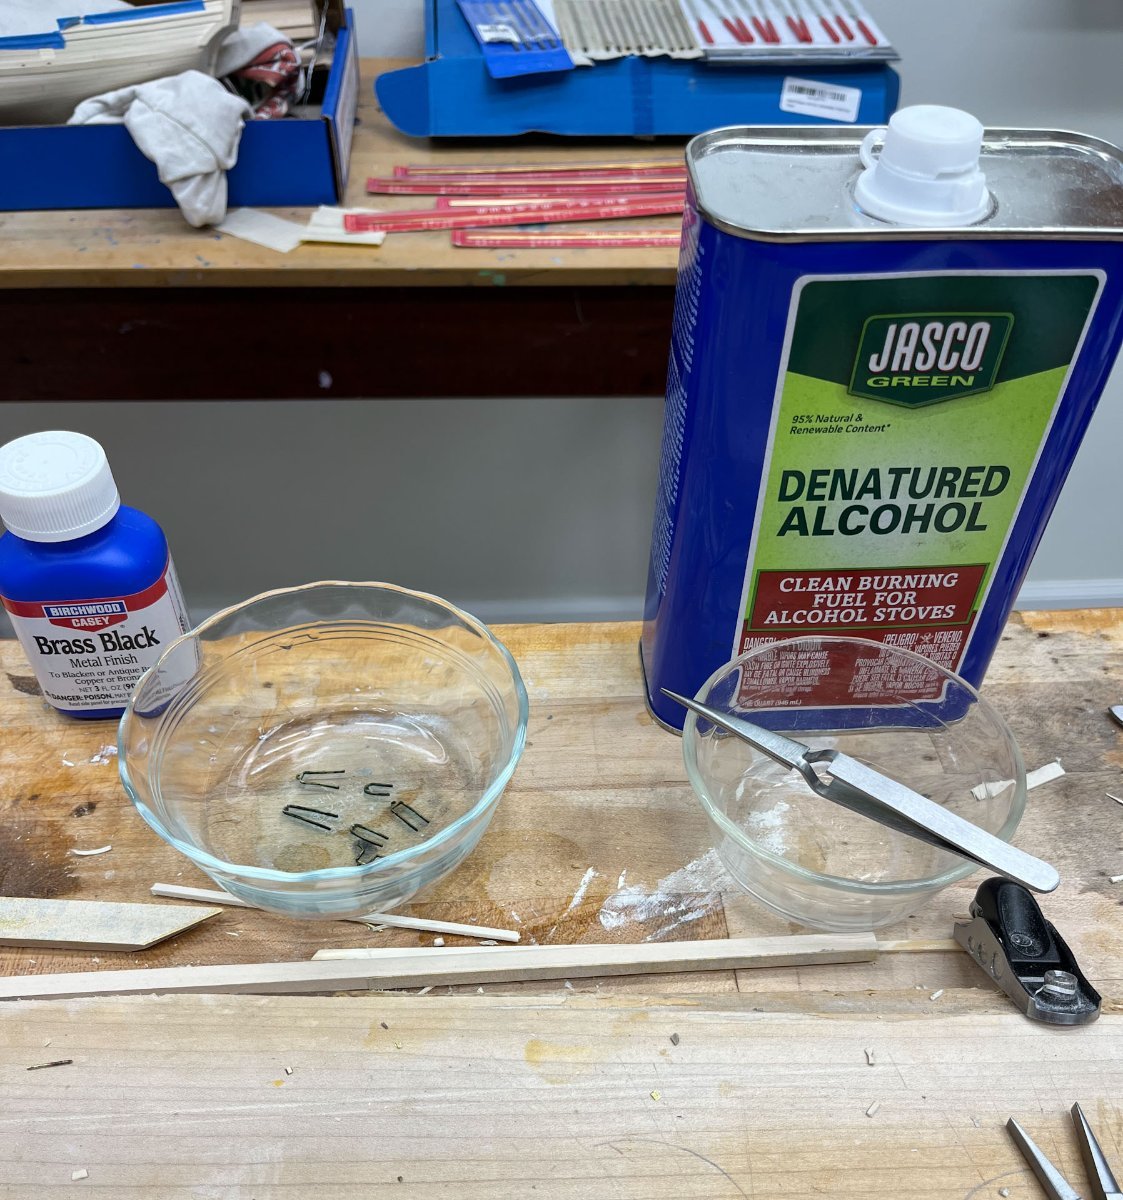
After this final futzing I washed the brass in isopropyl alcohol for 20 minutes, then moved them with stainless steel tweezers to a aprox 1:8 brass black to water for 15 minutes.
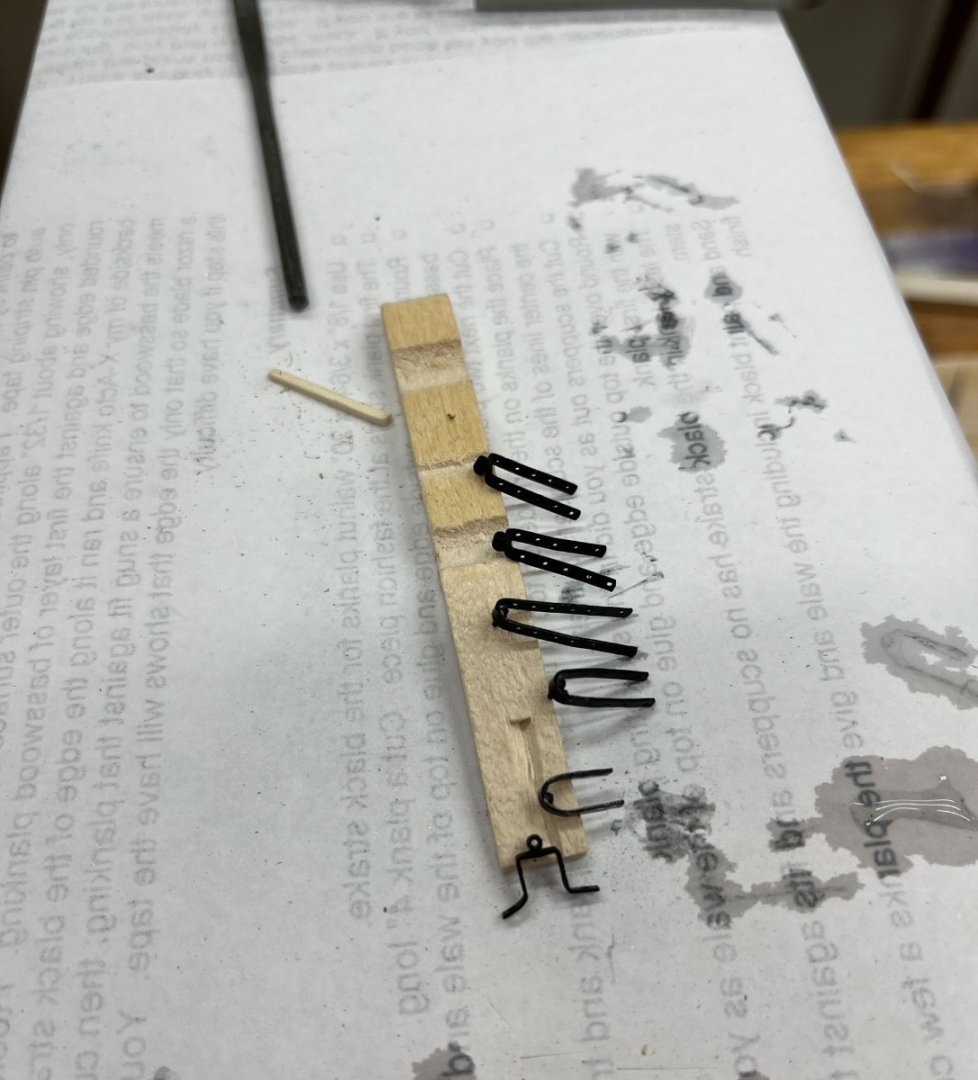
Here they are drying, about 99% coverage. 1 spot on a gudgeon that will need paint. I haven't handled them yet to make sure the blackening sticks but I am optimistic.
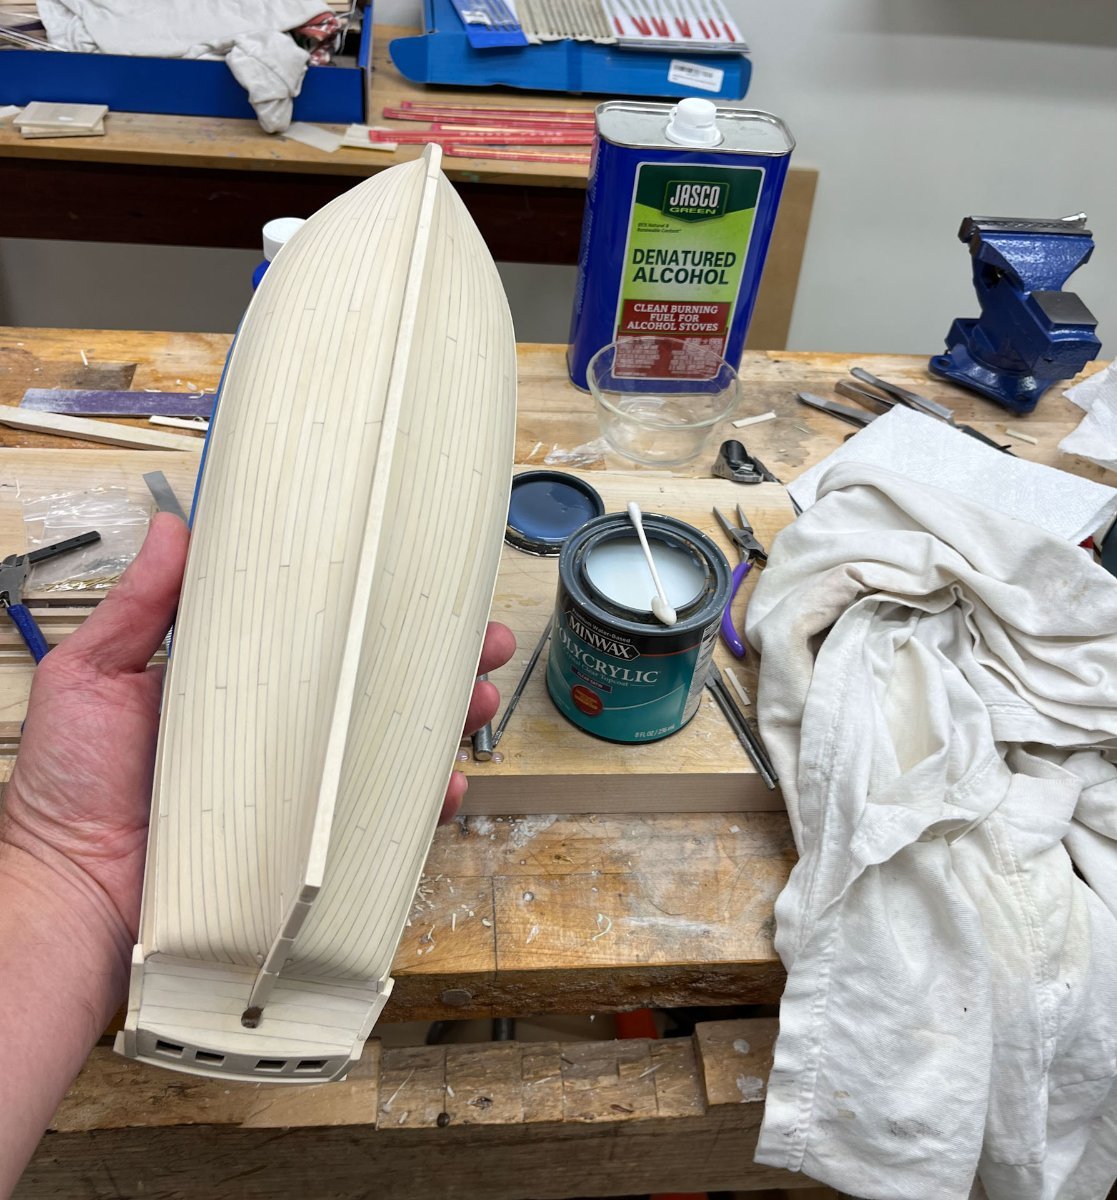
And finally I started with the hull's finish coat. After sanding off any marks on the sternpost from fitting the brasswork I applied the first coat of Polycrylic (water based polyurethane that doesn't yellow) with a qtip, the immediately wiped it down with a old cotton t-shirt. Most of the finish comes off so its a thin coat, but the tshirt smooths quite nicely. I'm guessing I'll do 3 or 4 coats. I have to test some of my discarded blackened brasswork to see if it looks ok covered with this finish; if not I'll put hinges in after finishing.
Here's the hull after its first coat. It looks almost identical to before I finished it, which is the point.

thats it for me. Monday is fast approaching and its off to mentally prepare with some hot chocolate and a book before bed.
thanks for reading
cisco
-
-
i like the shape of the tombstone cutaways. very elegant
- FrankWouts, Jack12477 and Chuck
-
3
-
-


Armed Virginia Sloop by CiscoH - Model Shipways - 1:48
in - Kit build logs for subjects built from 1751 - 1800
Posted
Gregory- as per Rogers Collection of Dockyard Models V3 by Gran Walker, pg 322, George Stockwell was a ship modeler from Sheerness who was active 1750s-1800. Apparently one of his hallmarks is the mitered half-lapped hatch coamings. Its not clear if this was an accurate representation of hatch coamings (if so its seems like not many contemporary modelers fitted their models this way) or an affectation. I don't know enough either way to have a weighty opinion; to me it simply looks cool. And since the AVS is a made up ship I'm enjoying trying whatever strikes me.
If I hadn't done the half lapped miters I would have done Chuck's Cheerful version as you posted above. I already copied his hull planking plan in place of the kit's version.