MORE HANDBOOKS ARE ON THEIR WAY! We will let you know when they get here.
×

.jpeg.7d7eba14c97a2e1d9f79cd2c97f6424a.jpeg)
EricWilliamMarshall
-
Posts
986 -
Joined
-
Last visited
Content Type
Profiles
Forums
Gallery
Events
Everything posted by EricWilliamMarshall
-
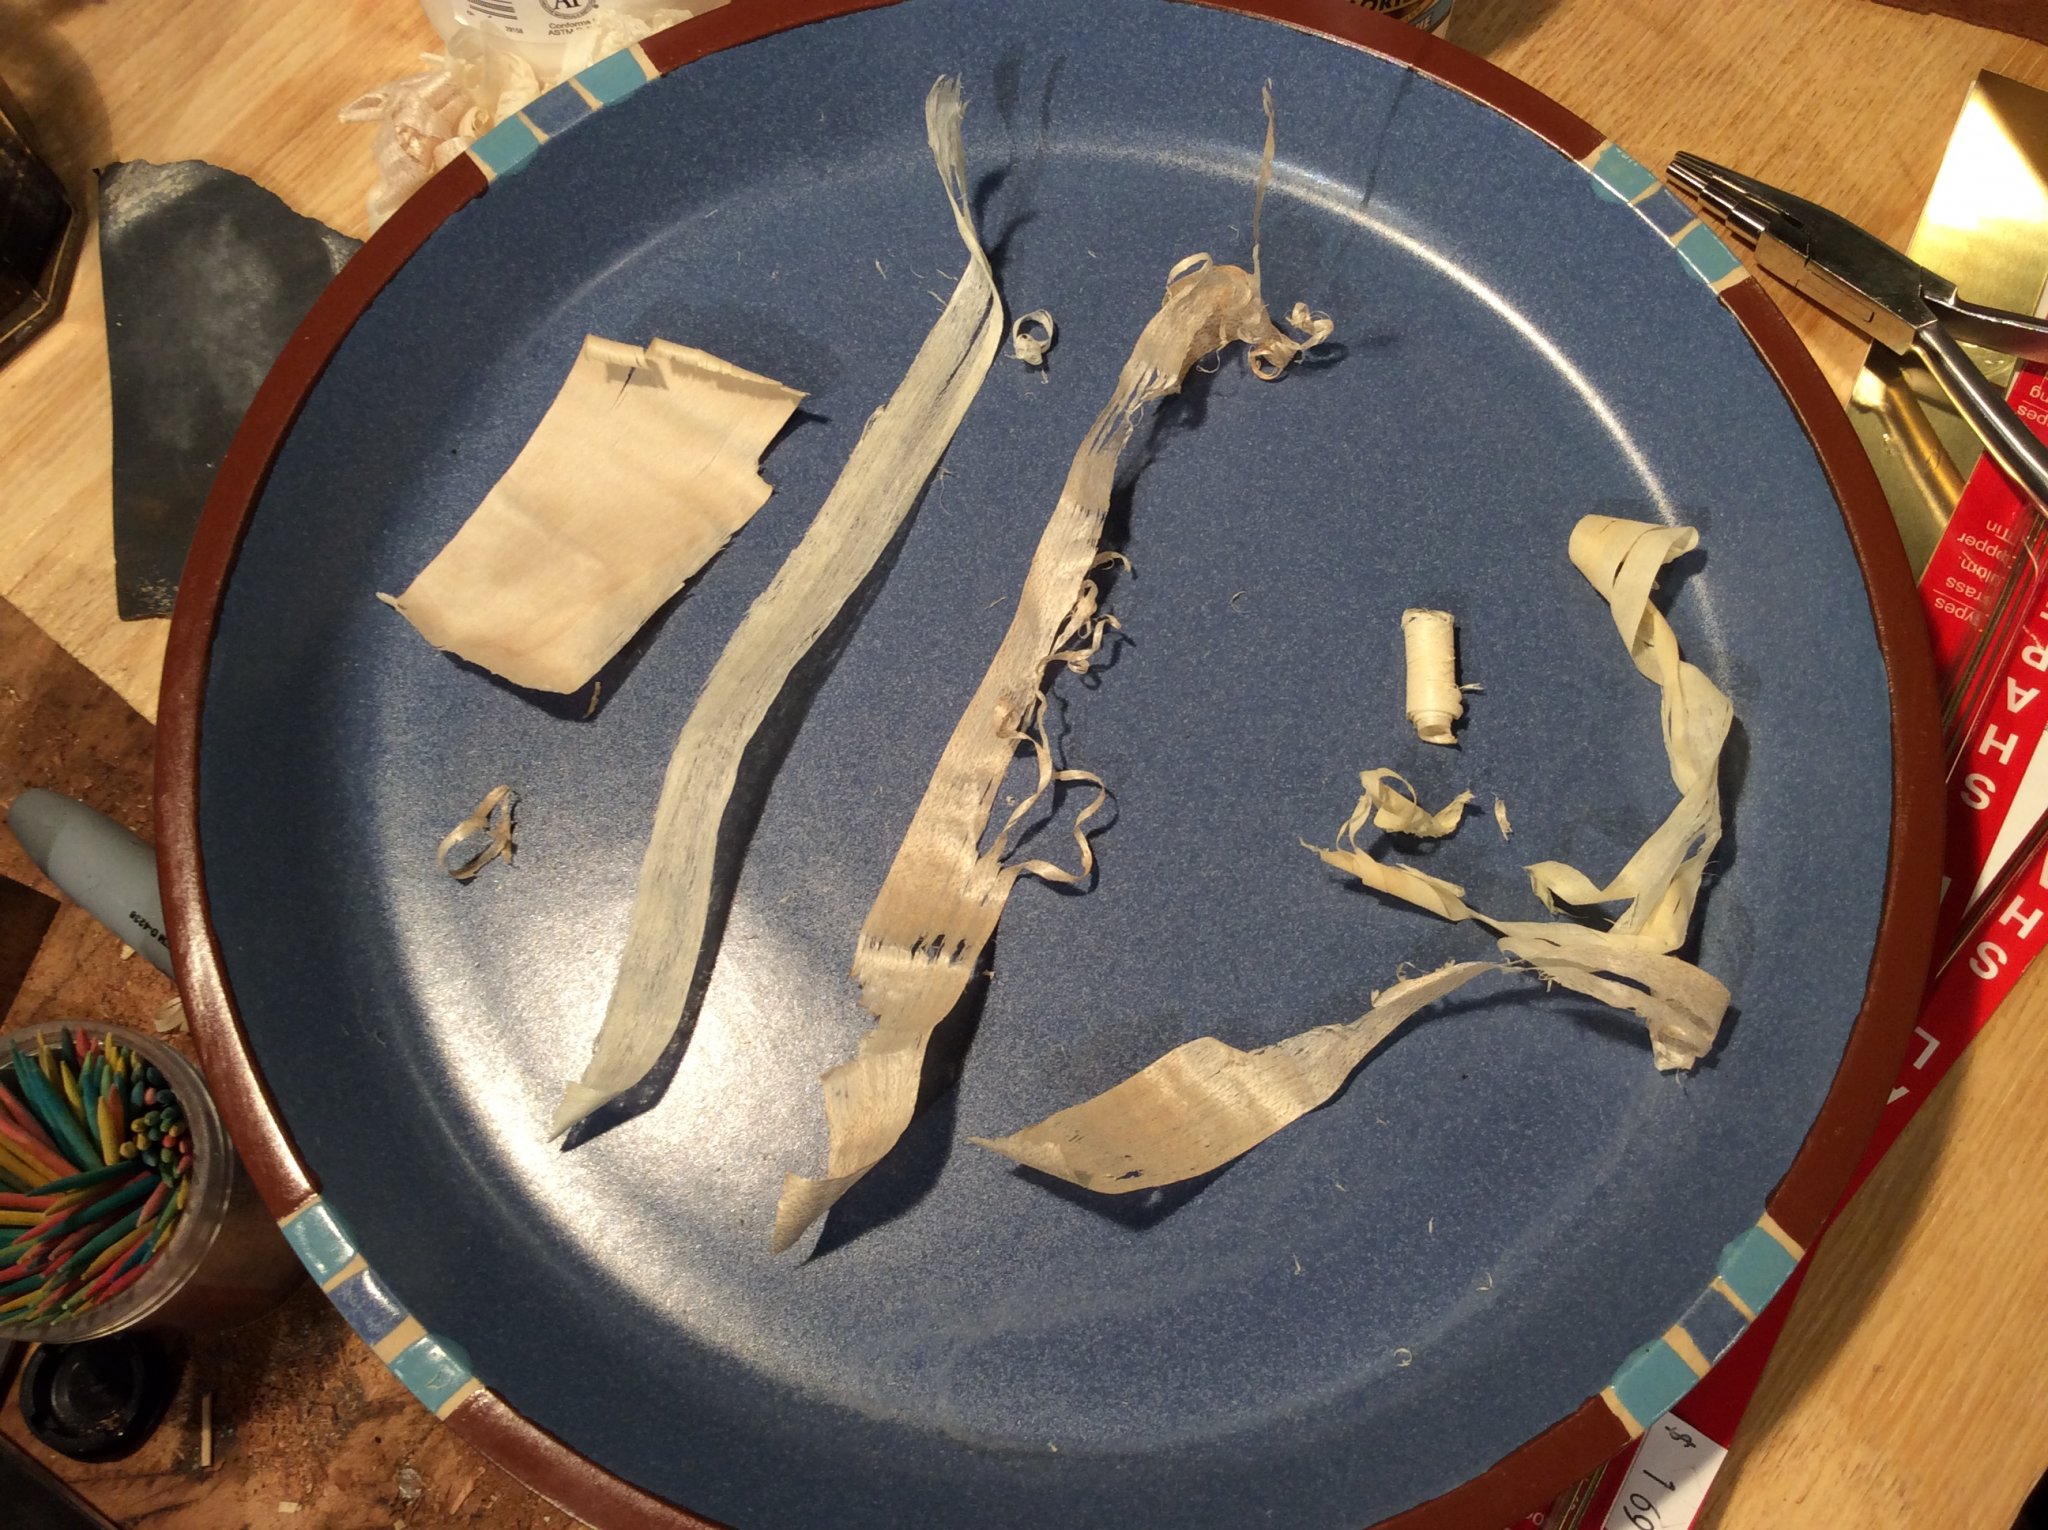
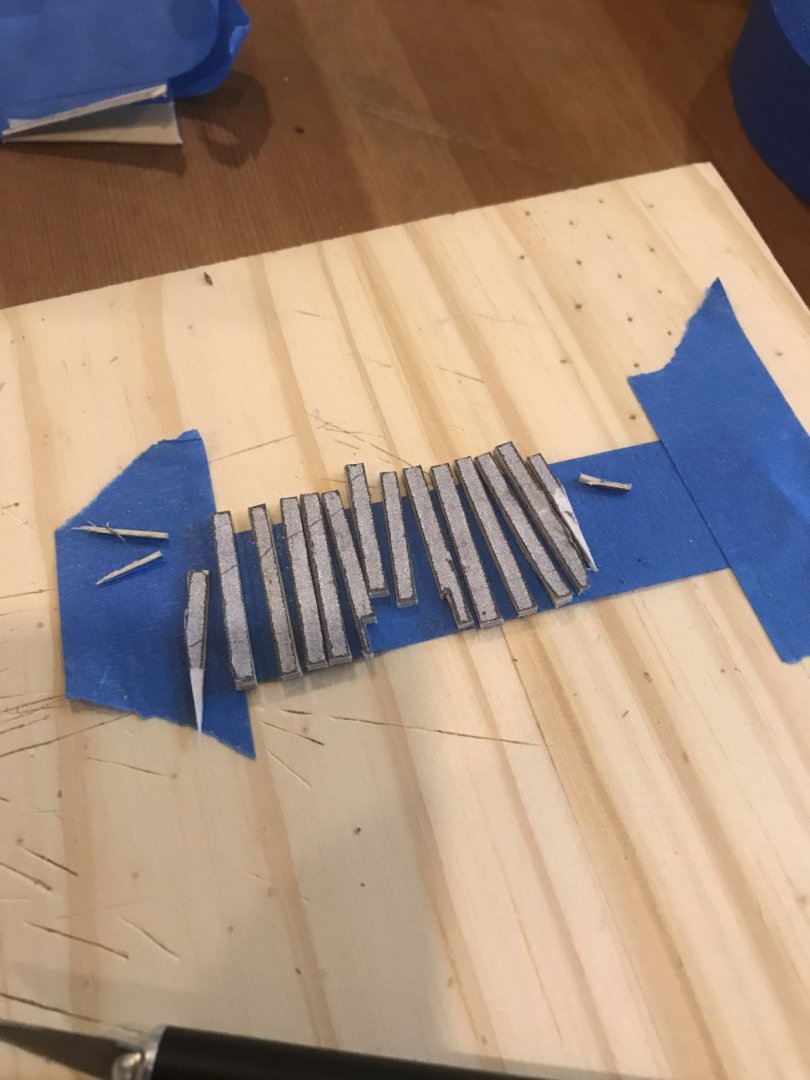
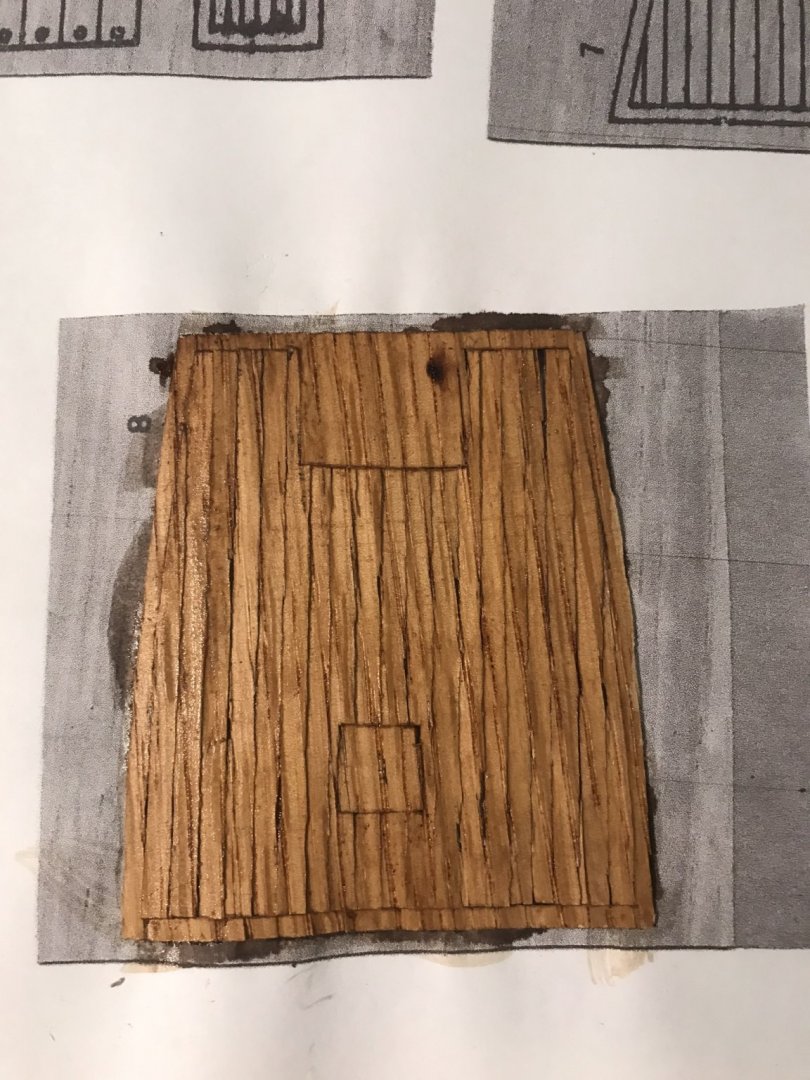
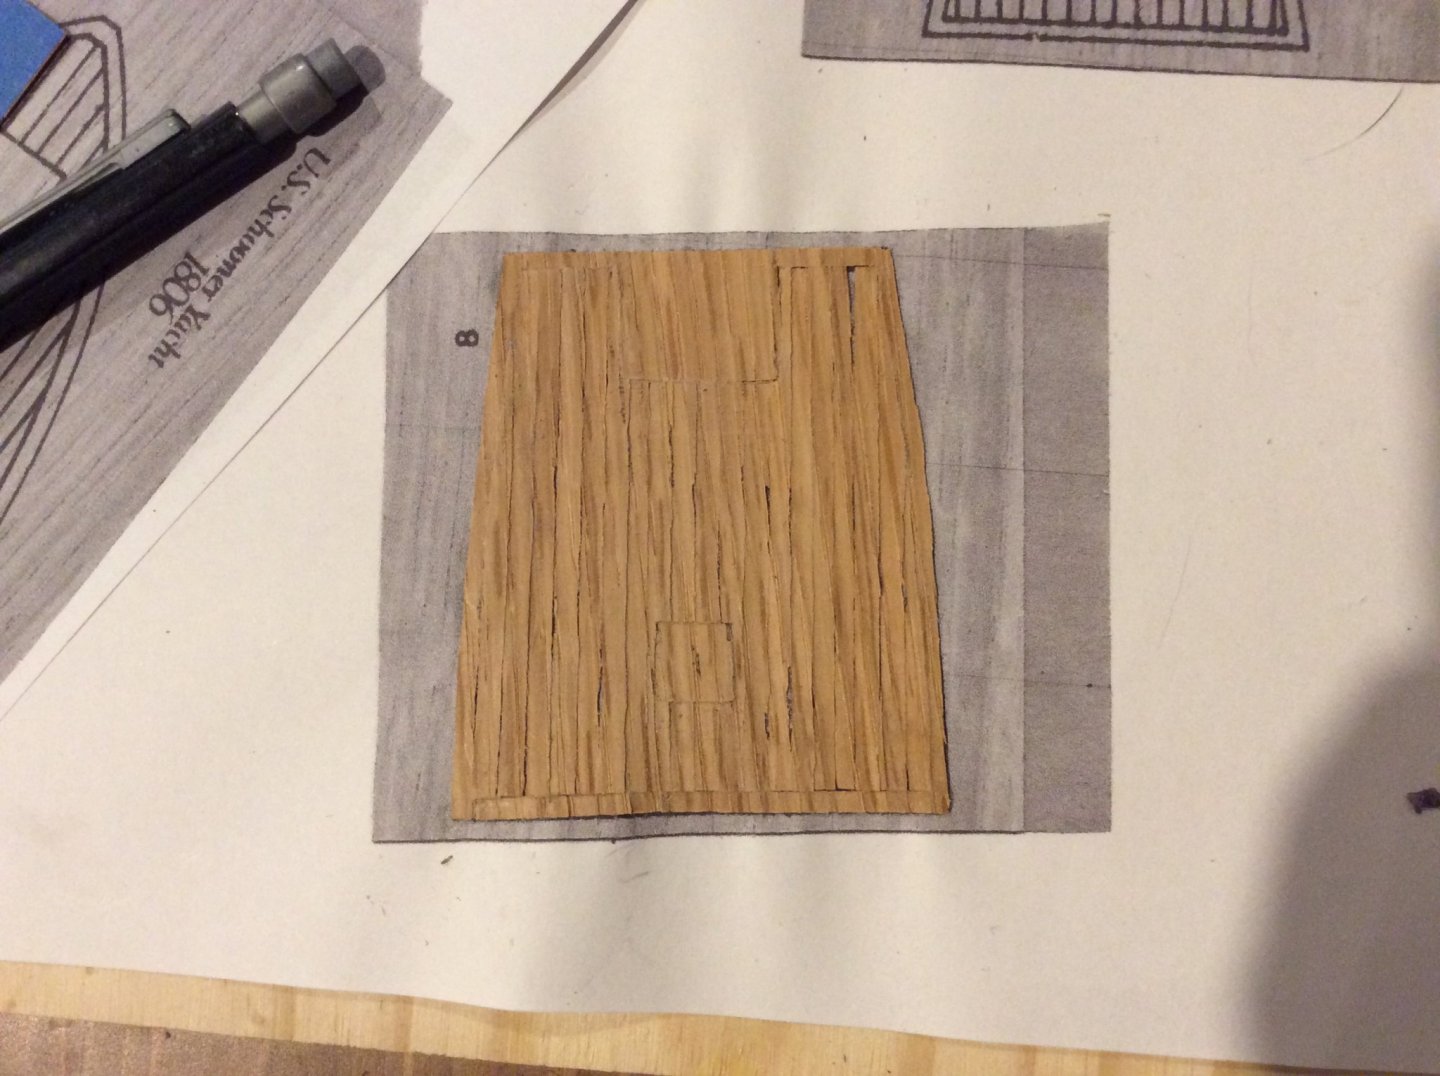
.thumb.jpeg.fc5d633a7b34428fcf19419a73d56d55.jpeg) I’ve attached all the slivers to their proper places on the decks. Then I used a cotton cloth and some hot water to remove the remaining paper. I think it looks better than the printed oak sheet but not as nice as I hoped. It looks better in the photo than the real world. C’est la vie! I going to sit on my hands for a day or two before deciding to proceed or try again.
I’ve attached all the slivers to their proper places on the decks. Then I used a cotton cloth and some hot water to remove the remaining paper. I think it looks better than the printed oak sheet but not as nice as I hoped. It looks better in the photo than the real world. C’est la vie! I going to sit on my hands for a day or two before deciding to proceed or try again.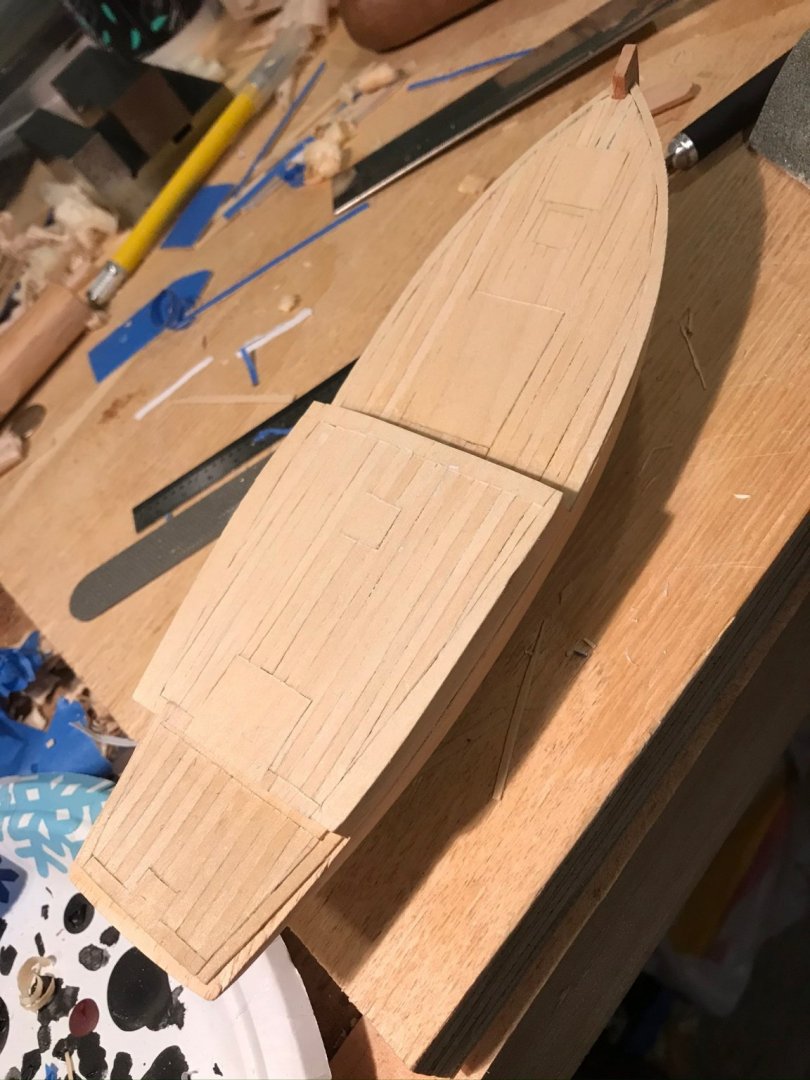
- 155 replies
-
- 6
-

-
- opium smuggler
- Authentic Models
- (and 1 more)
-
Apologies, the last photo shows the photocopied paper still attached to some of the wood! Thanks for the advice though - I agree,
- 155 replies
-
- 1
-
-
- opium smuggler
- Authentic Models
- (and 1 more)
-
Just amazing work!! I’m curious; what references or plans did you consult while building your ship?
-
Ha ha, for better or worse, this is how learning works. Keep at it! Regards, Eric, destroyer of wood, fabric, rigging, paint, etc.!
-
And some more decking. My process is borrowed from marquetry; one of the side effect is you get two sets of decking to chose from! After cutting, bit of warm water removes the paper.

- 155 replies
-
- 6
-
-
- opium smuggler
- Authentic Models
- (and 1 more)
-
As for myself, I found looped needle threaders better than needles, but I found 'cord needle' even better! For me, applying the CA to about 1/4" inch of the thread was the best length of glue; if it was too long, the coated part would bend in weird ways and if it was too short, I couldn't make use of it. So keep an eye on that and play a bit with it. If you go with the old-school 'spit' approach, be aware of tiny, near invisible 'mini' threads which will make it harder to thread small holes.
- 120 replies
-
- 2
-
-
- crabbing skiff
- Chesapeake Bay crabbing skiff
- (and 3 more)
-
I'm impressed by the research! I need to work on that (among many other things..) I wish you full steam ahead!
-
Newbie bashing an old Baltimore Clipper kit
EricWilliamMarshall replied to Brewerpaul's topic in Wood ship model kits
While it sounds like you have your heart set on the Dos Amigos, you may wish to peak at: and Those two sets of posts narrowed my scope for kits to start working on. I suggest getting the Dos Amigos model but hunt around for an easy starter model, like one of the Midwest kits or a simple Model Shipways kit; something quick and fun. Also I suggest creating a build log; folks here are friendly and are full of helpful suggestions! -
Those flecks are rays. See https://en.m.wikipedia.org/wiki/Medullary_ray_(botany) for more detail. If you alter the angle of your cut they will be more or less visible.
-
If you use shellac and want to dull the shine, I suggest steel wool (OOOO grade- 4O is the finest steel wool that is easy to get). In either case, be careful of your edges; edges are the easiest place to cut through the finish. Great work!!
-
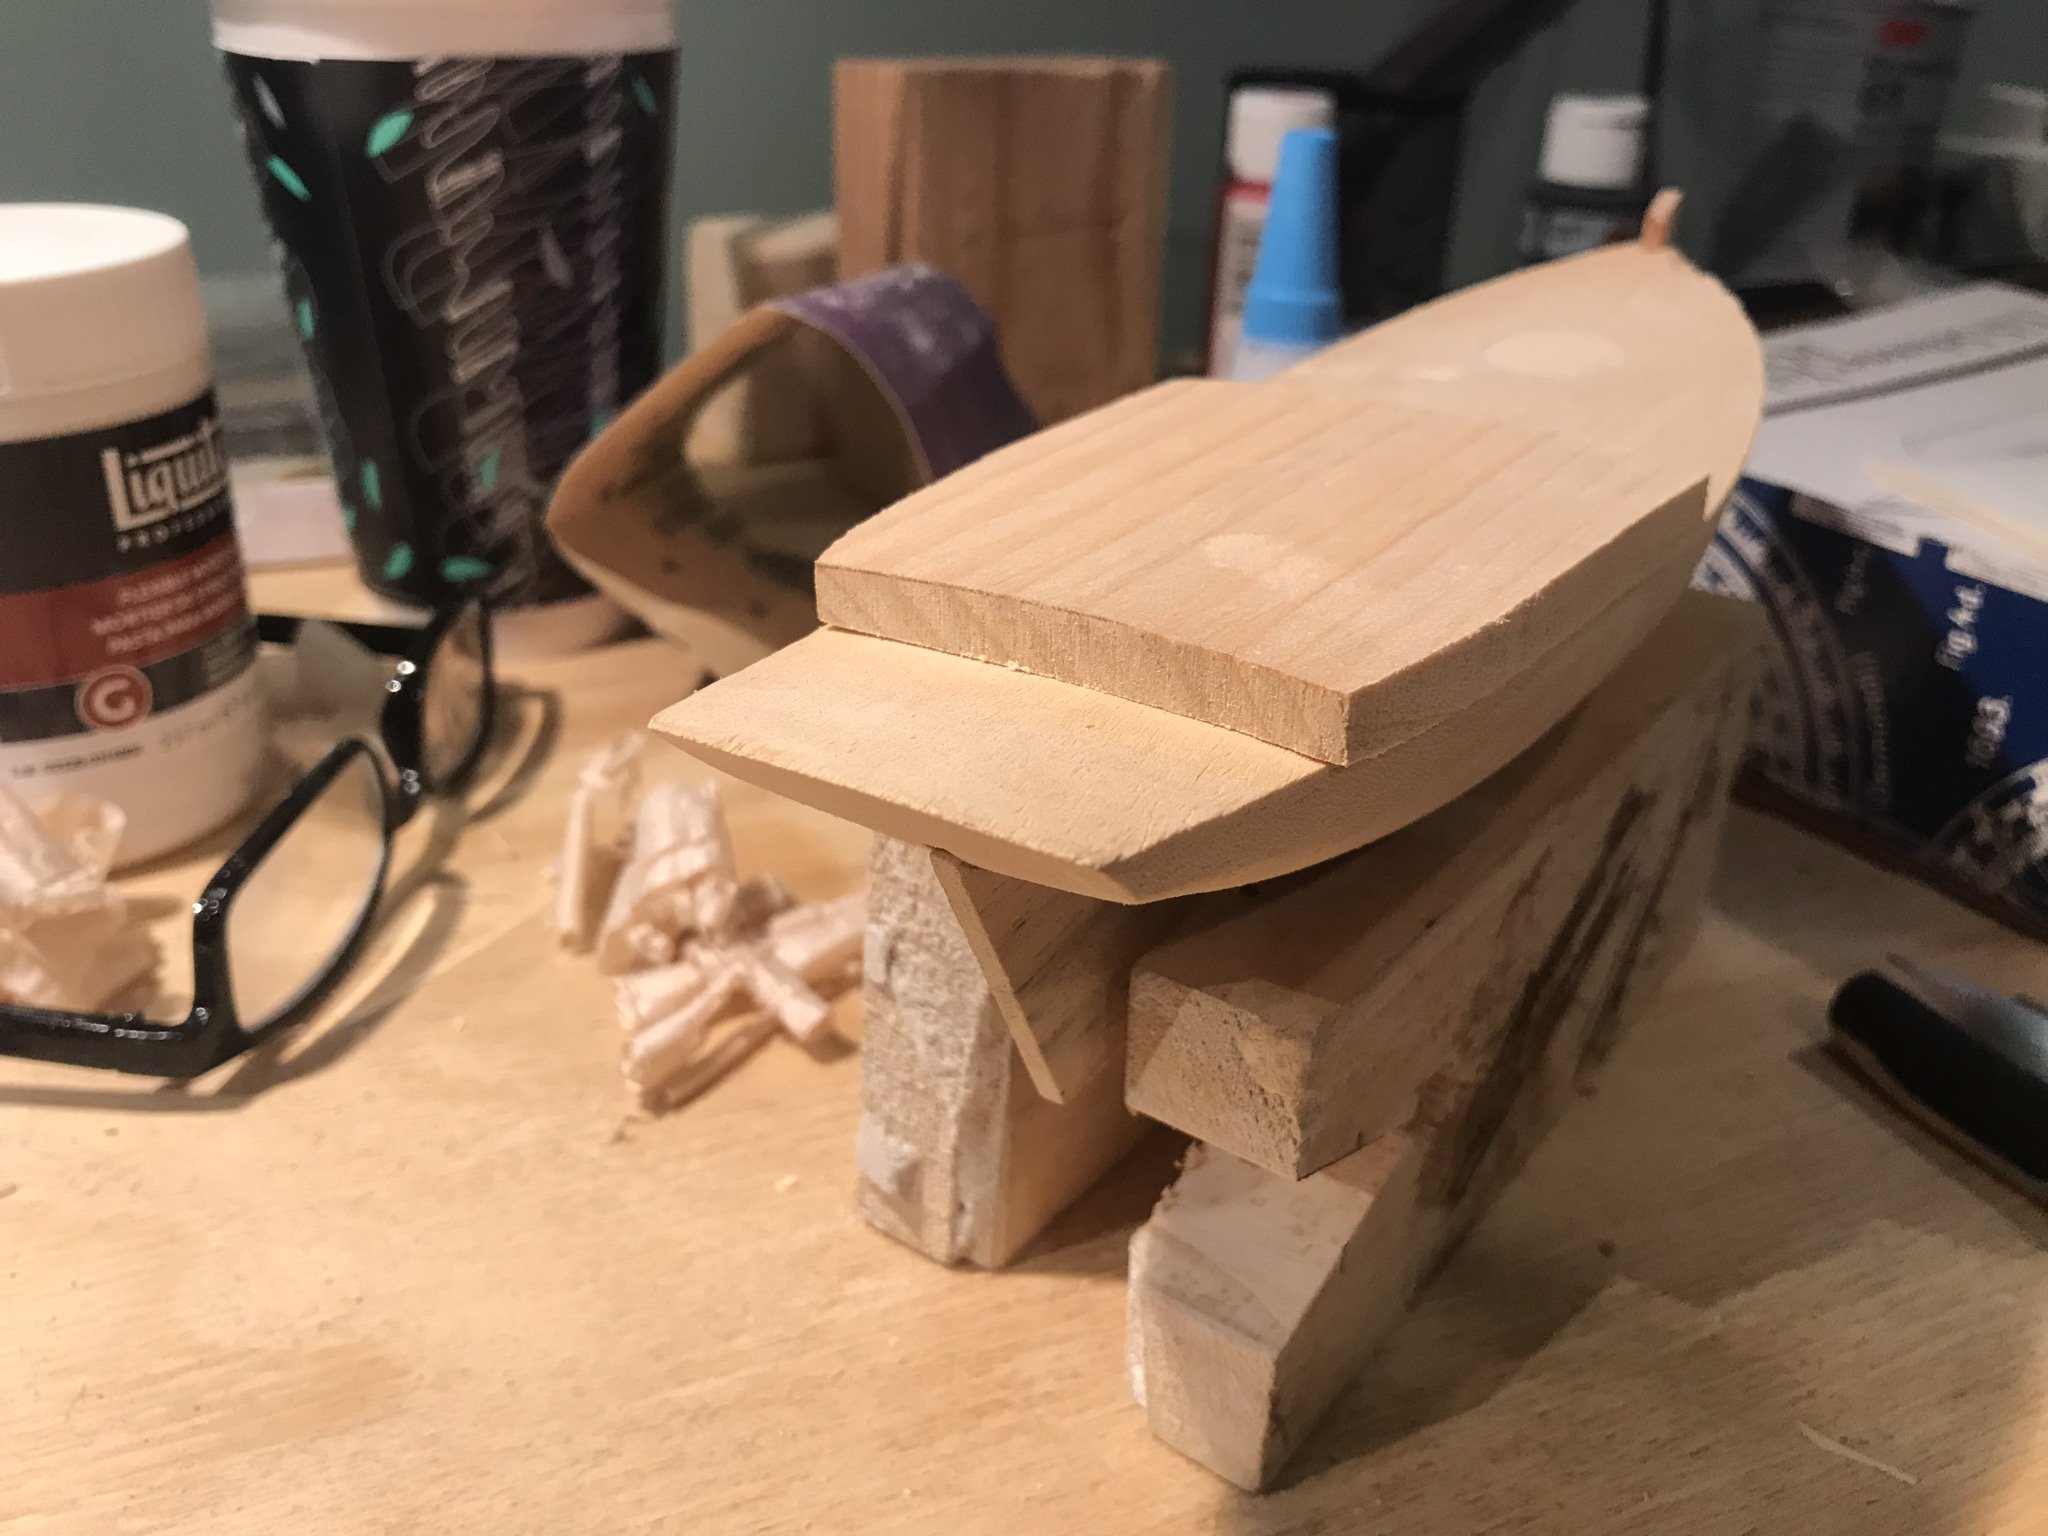
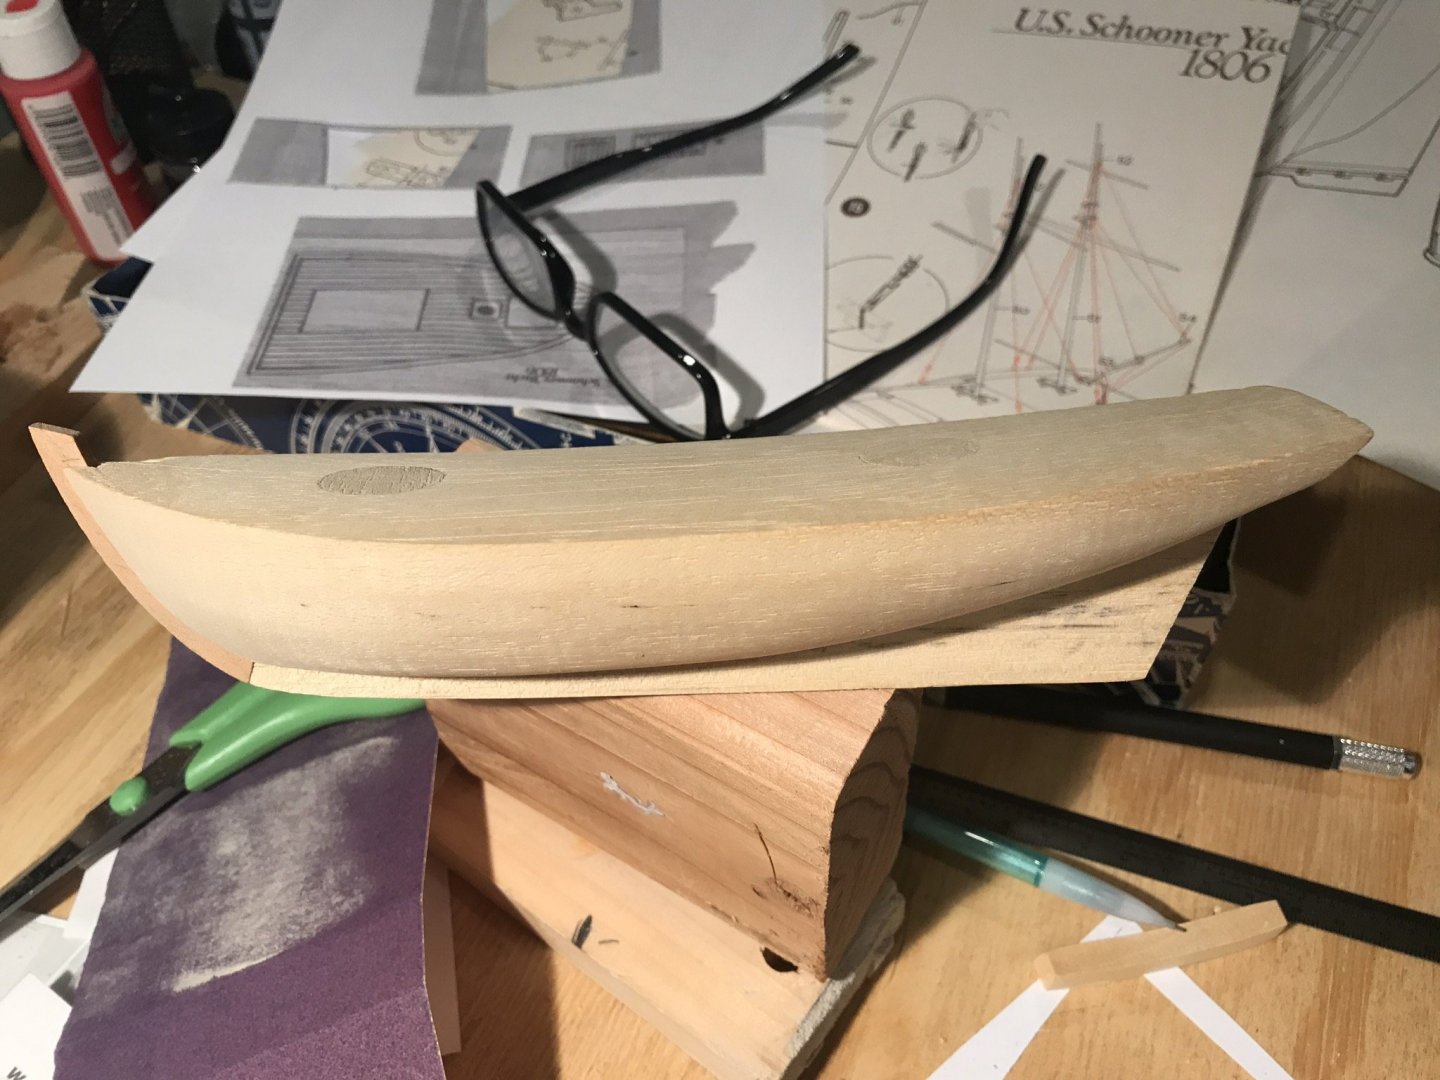
Warning exotic tool use! (Cont’d) Now that I have correct dimensions roughly, I needed to add the curves to match the sweep of the hull. For the lower half of the deck house slab, I could have used a wide gouge, but I happen to have some old-school molding planes - what folks used before machine routers, from a project to make porch rails with my kids. I took my widest one and dished the center of the curve and then used sand paper wrapped around my mis-cut piece to create the concave curve. I did that twice because I penciled the curves to be cut to match my mis-cut piece instead of the hull. Once that matched, I used the block plane to round the top convex curve. Note: all the curves fan out slightly as the width of hull changes; a few diagonal swipes were used to handle that. For the bottom curve, I then used the hull as a sanding block to match the hull curve. I included a few photos in ‘raking’ light so show the tool marks before sanding and after, so folks have an understanding of how messy (or not) the process is.


- 155 replies
-
- 7
-
-
- opium smuggler
- Authentic Models
- (and 1 more)
-
Warning exotic tool use! Having mis-cut the boat house slab, I needed to replace that kit part. The company seems to have departed this mortal coil, so I went and made a replacement. I took a scrap piece of pine and penciled in my dimensions. I used a small saw to cut across the grain (since my scrap was twice as thick as I needed) down to just above my desired depth. I then used a flat chisel and a mallet to wack out the waste wood. The cross cuts allow the waste wood to pop out quickly. It also means the chisel doesn’t have to be razor sharp. The whole operation took four or five minutes (plus time for finding the tools). I then used a block plane to flatten the slab.


- 155 replies
-
- 6
-
-
- opium smuggler
- Authentic Models
- (and 1 more)
-
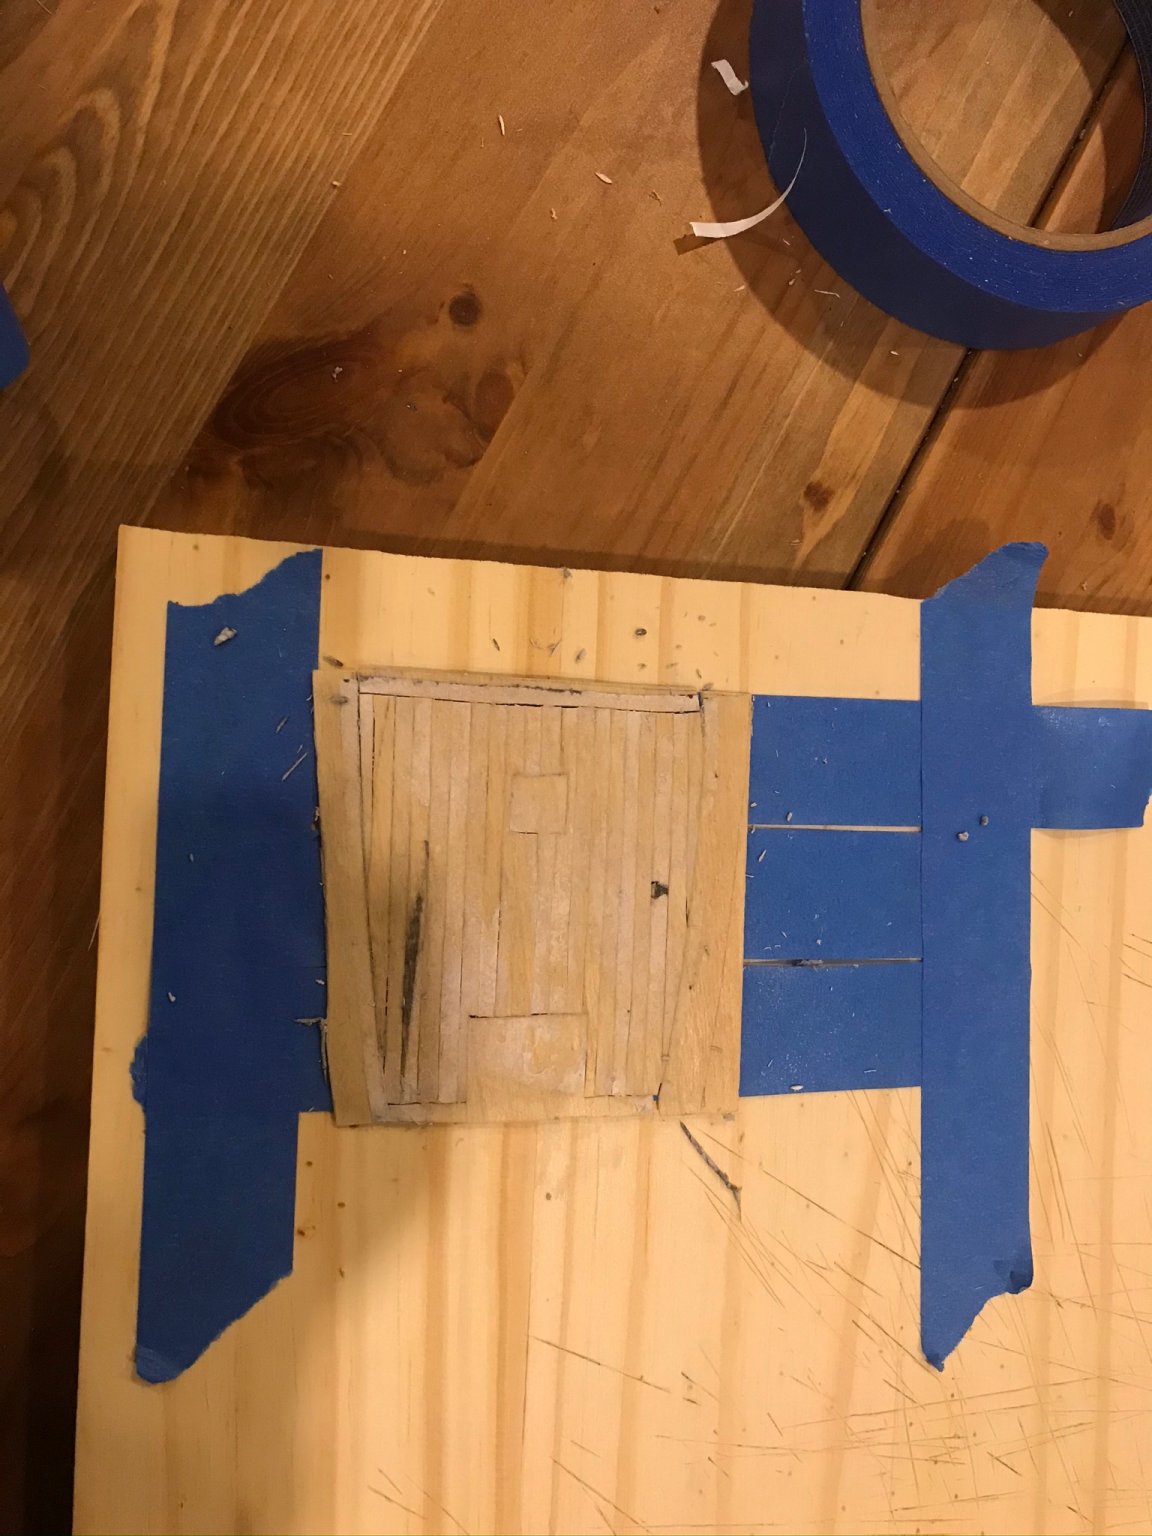
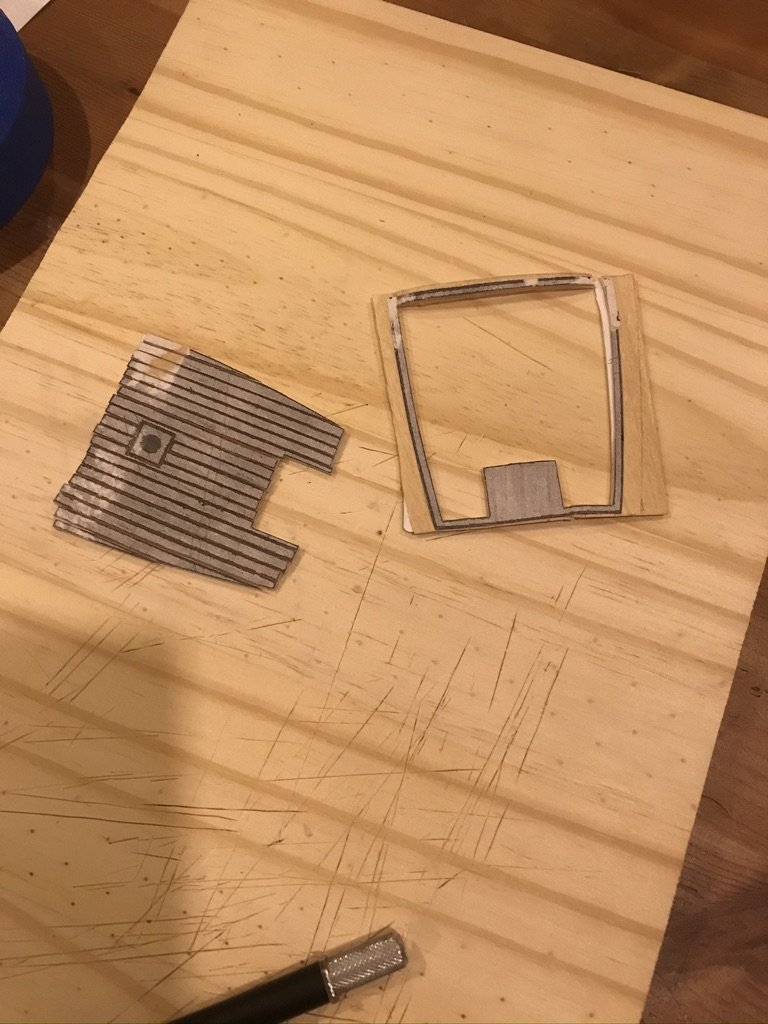
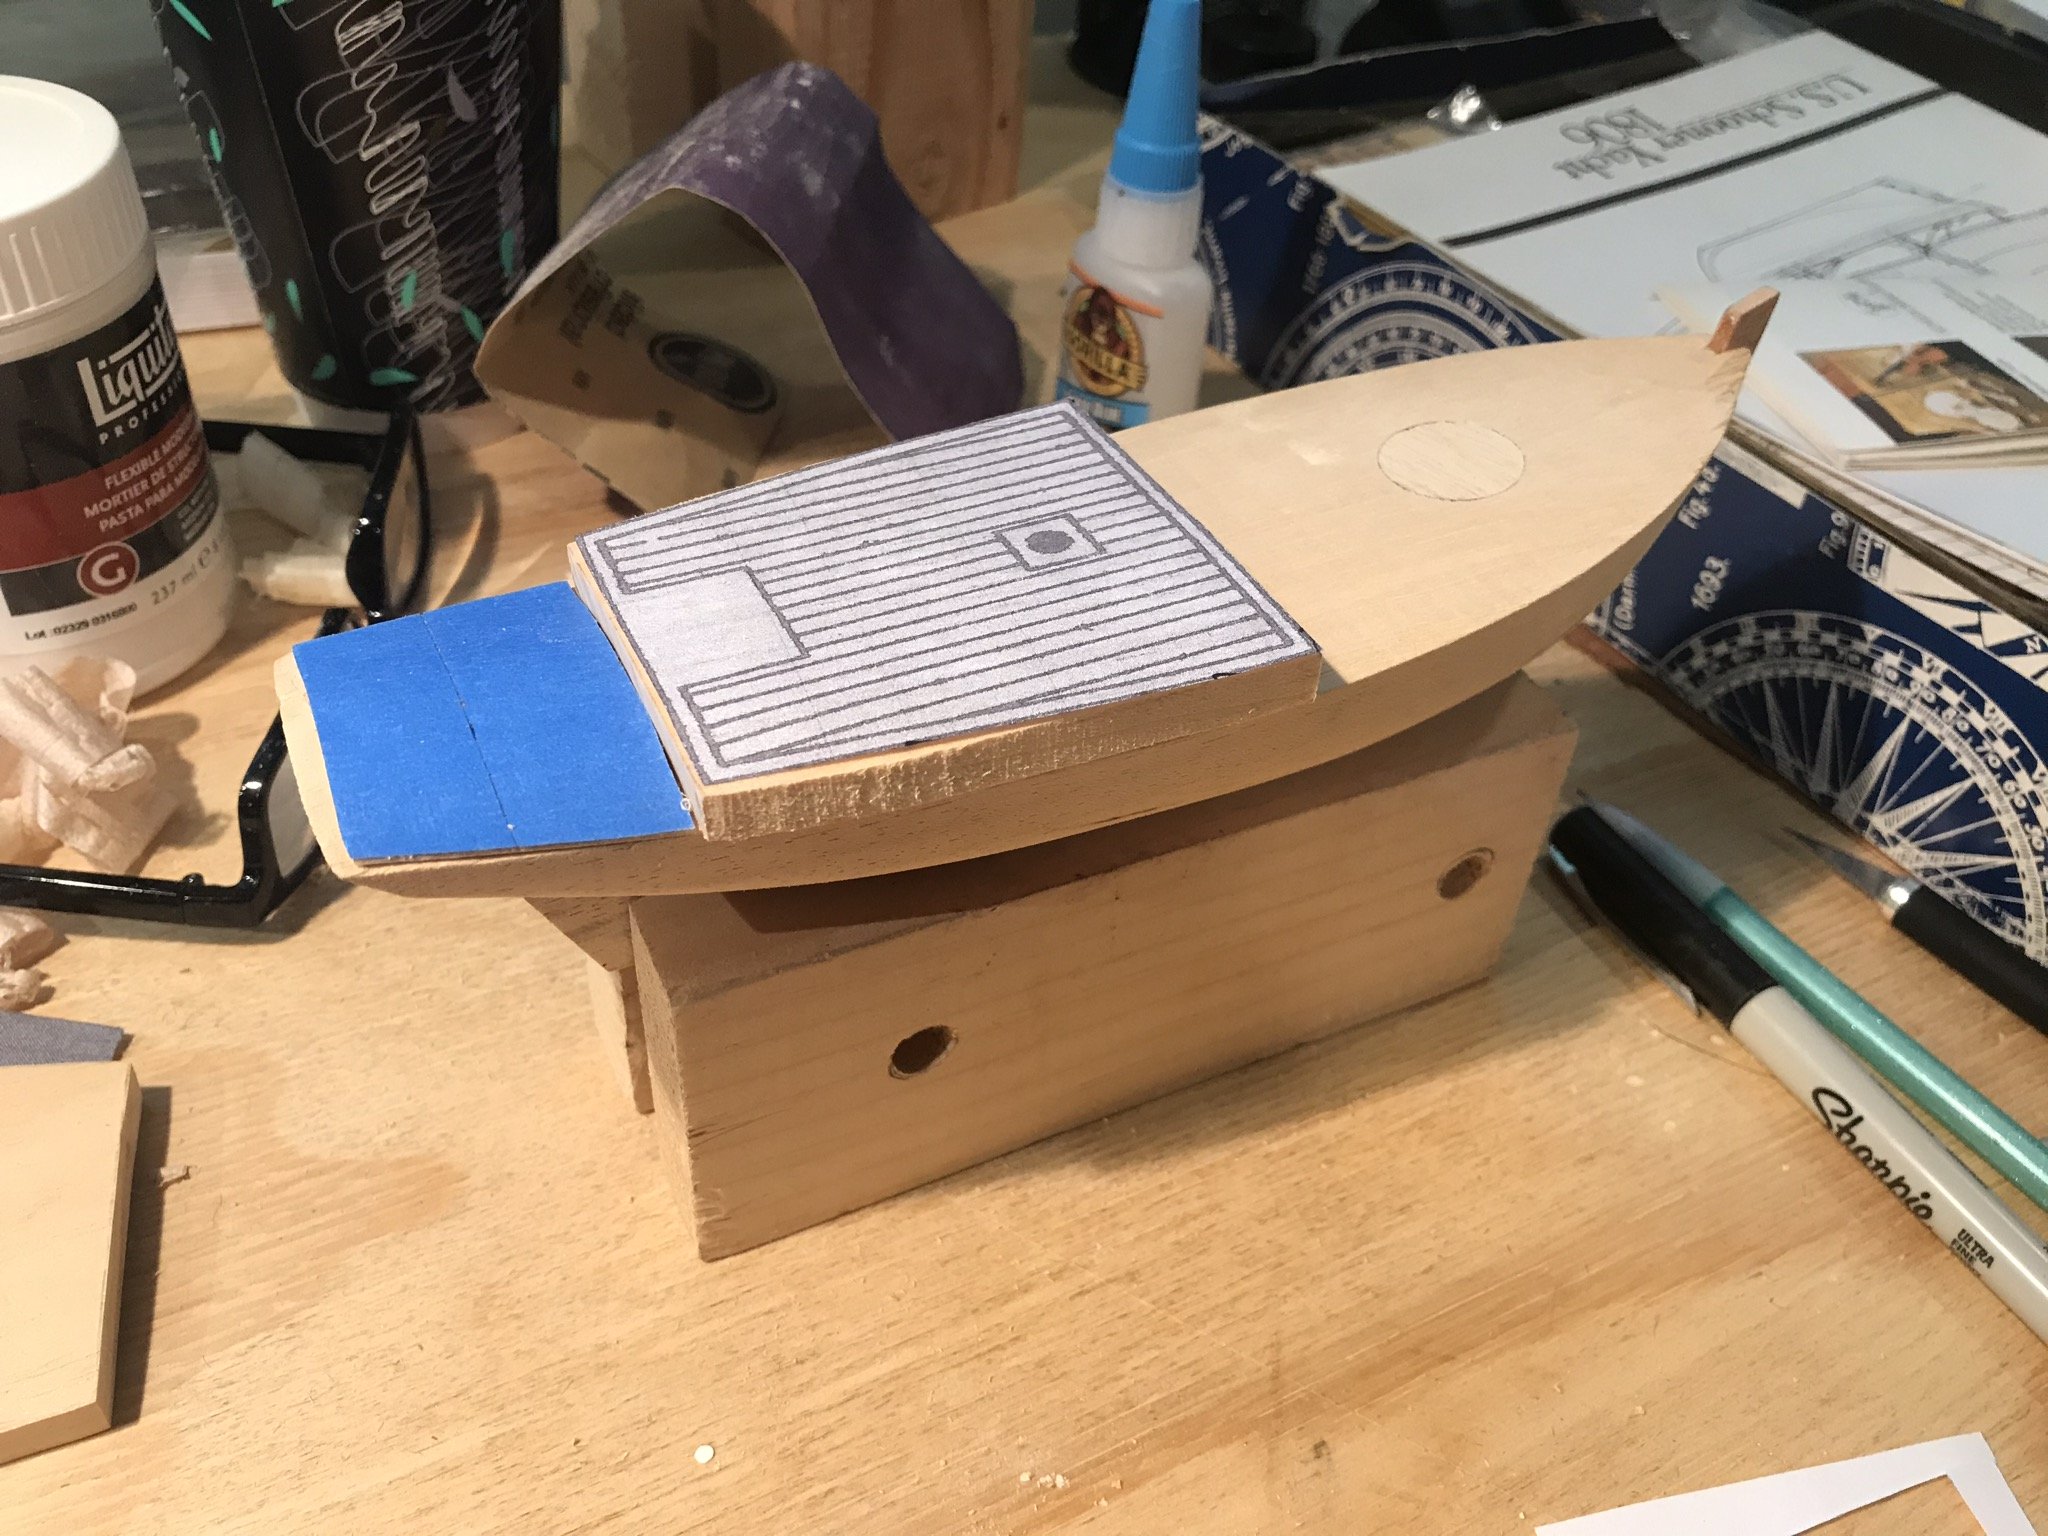
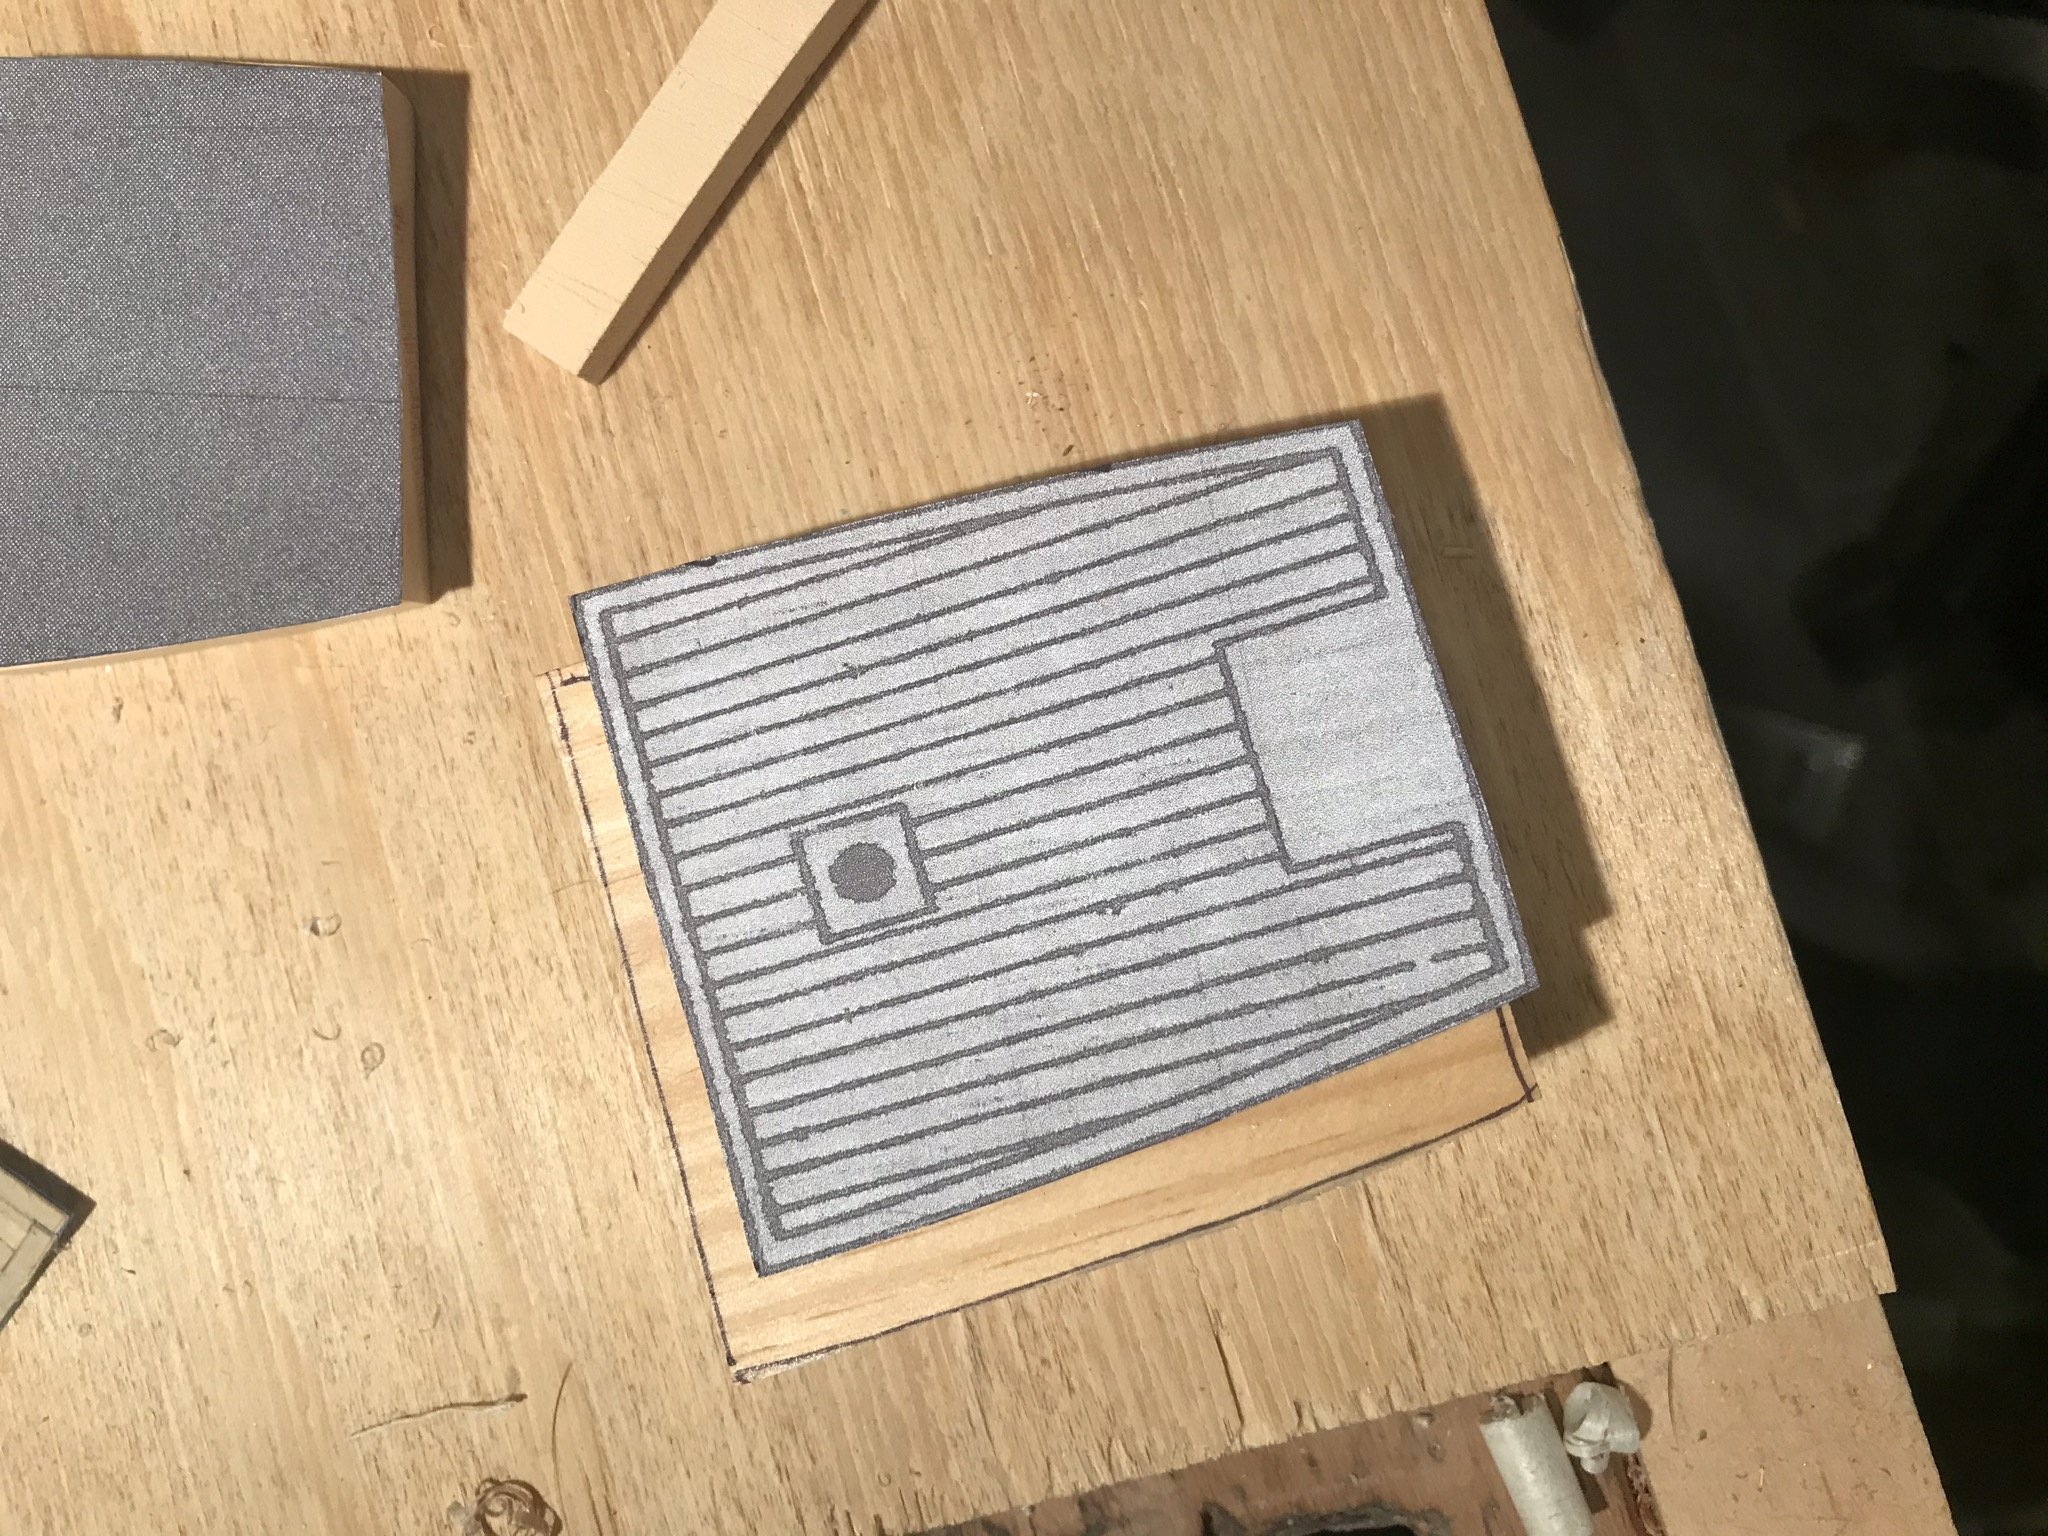
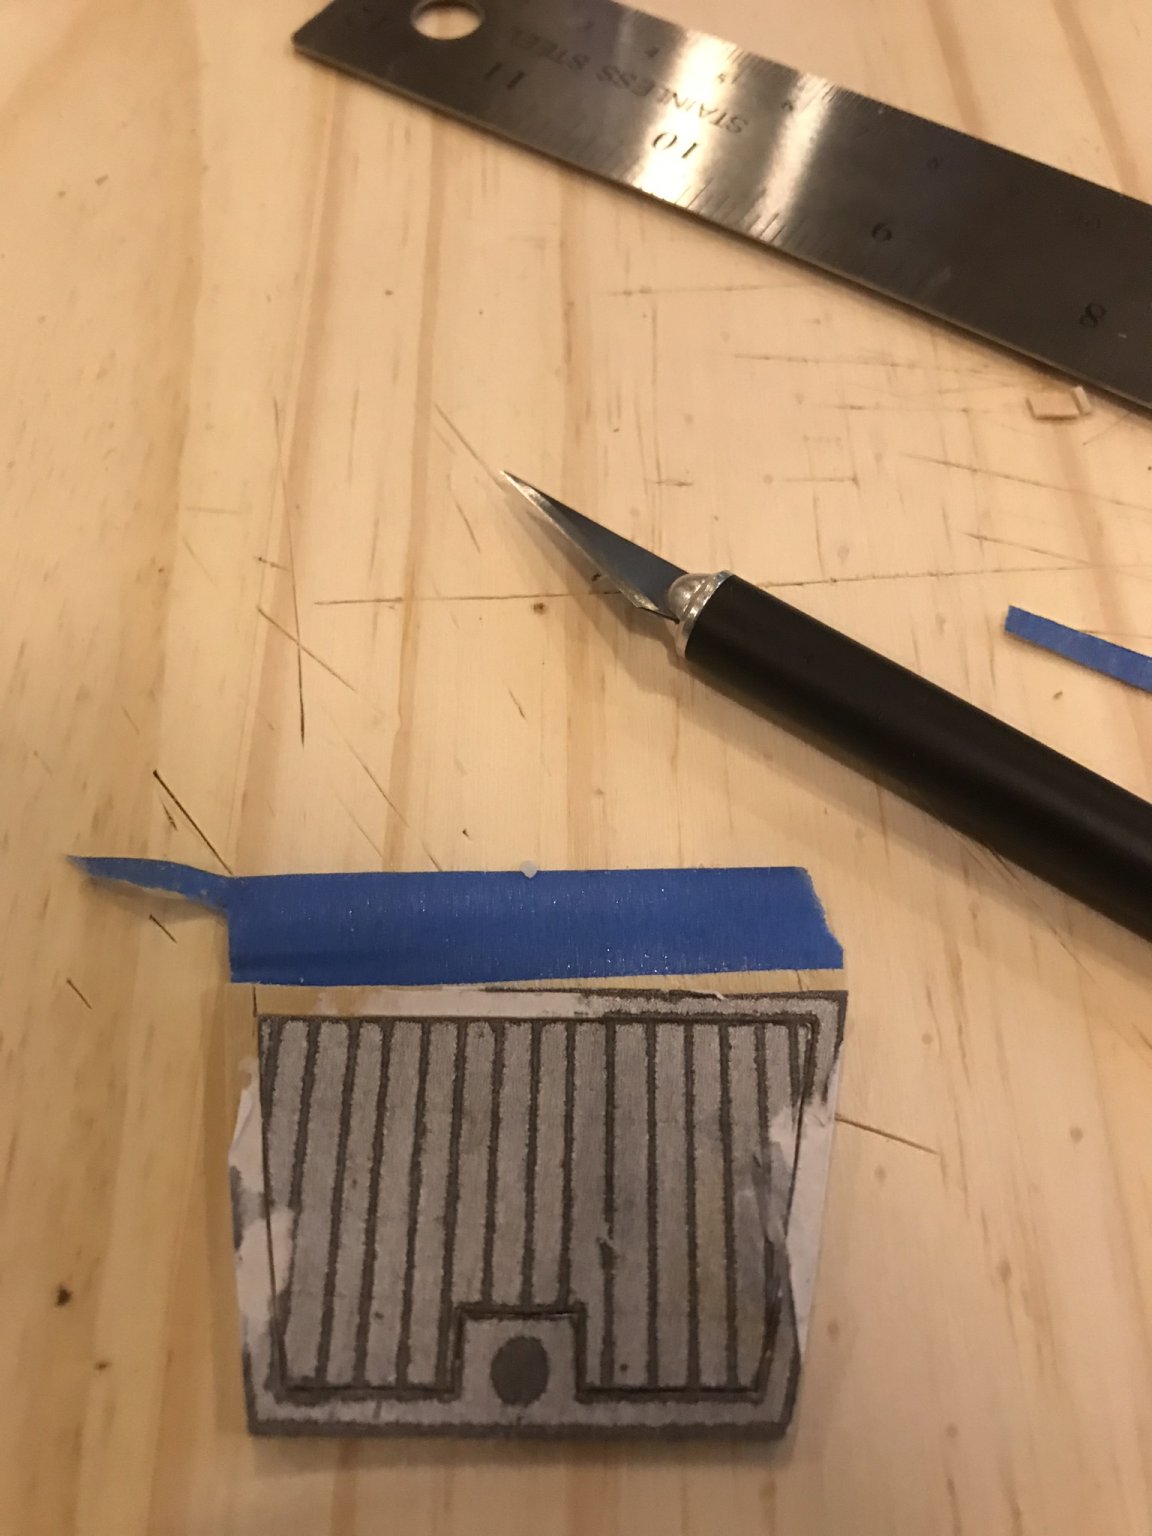
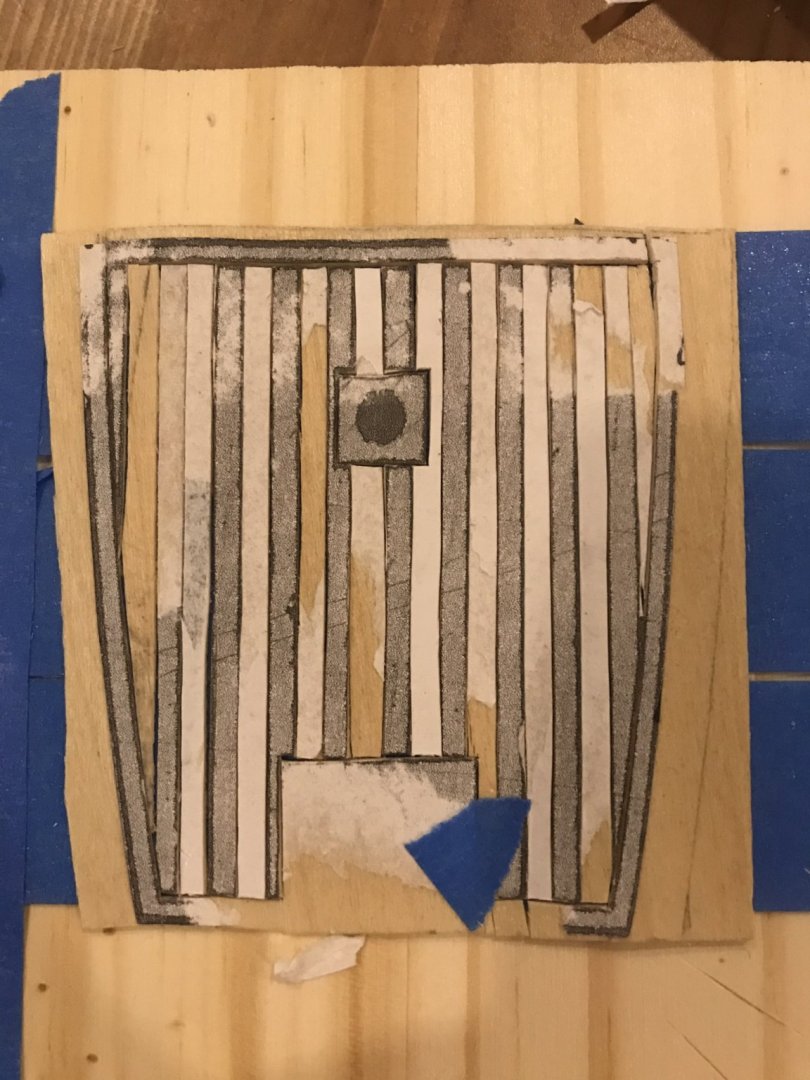
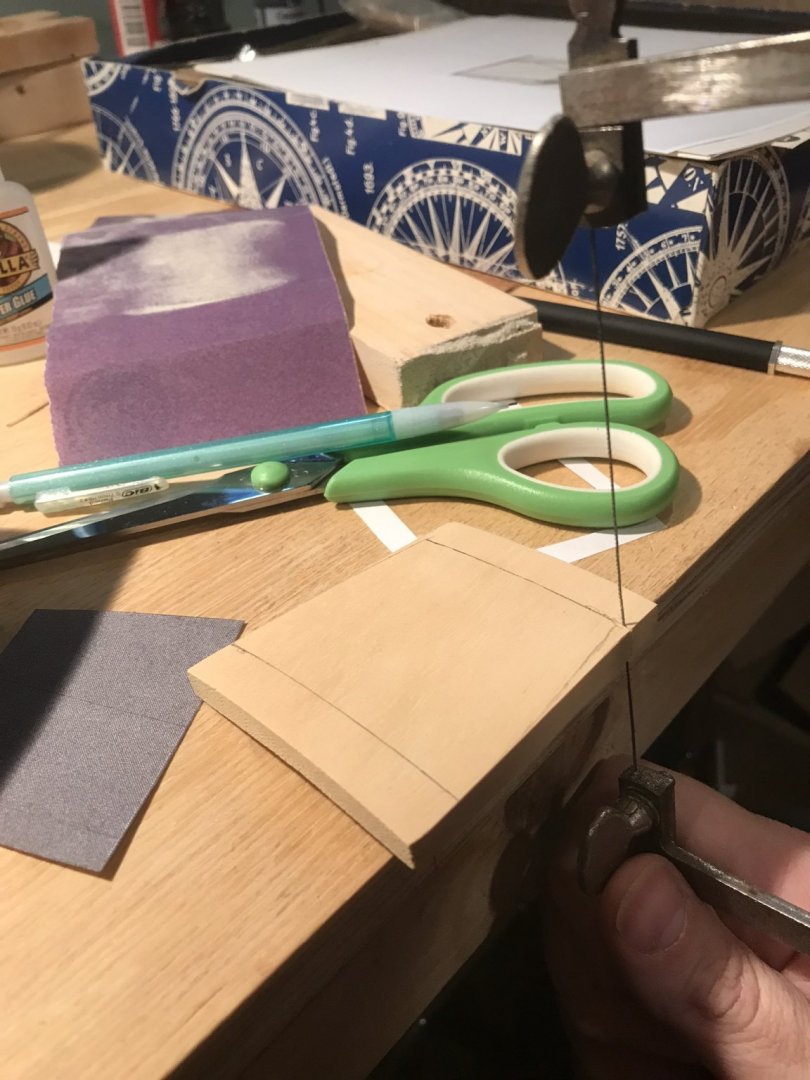
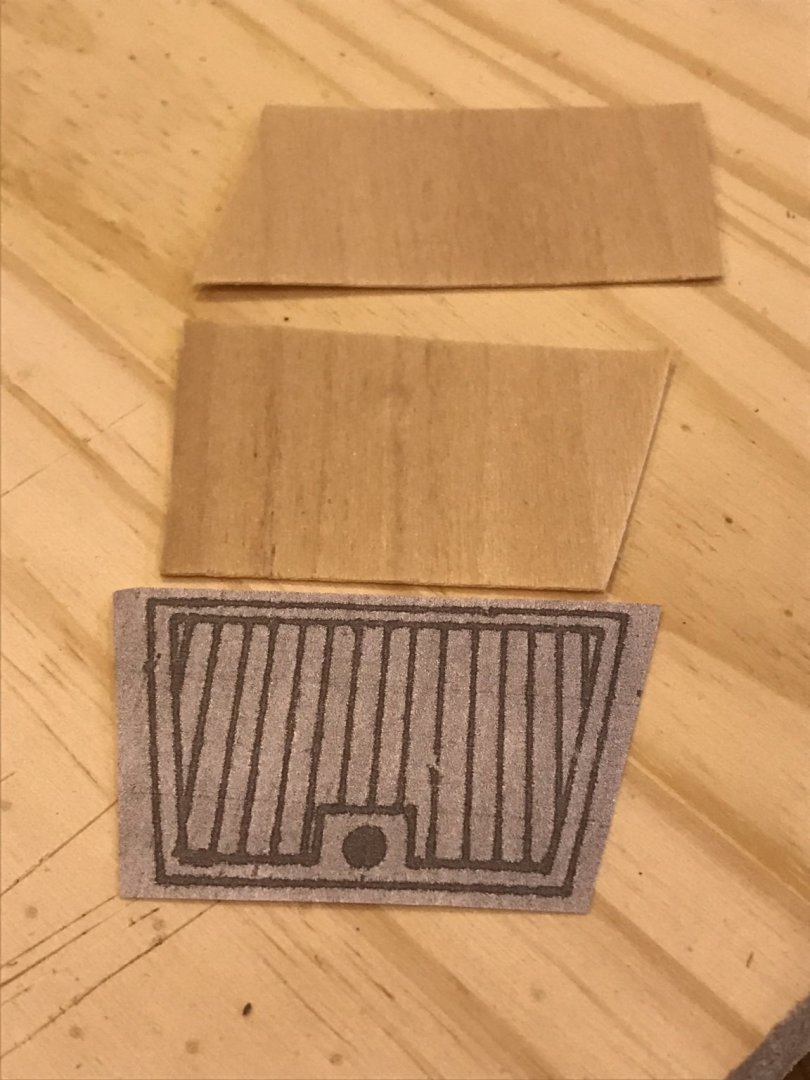
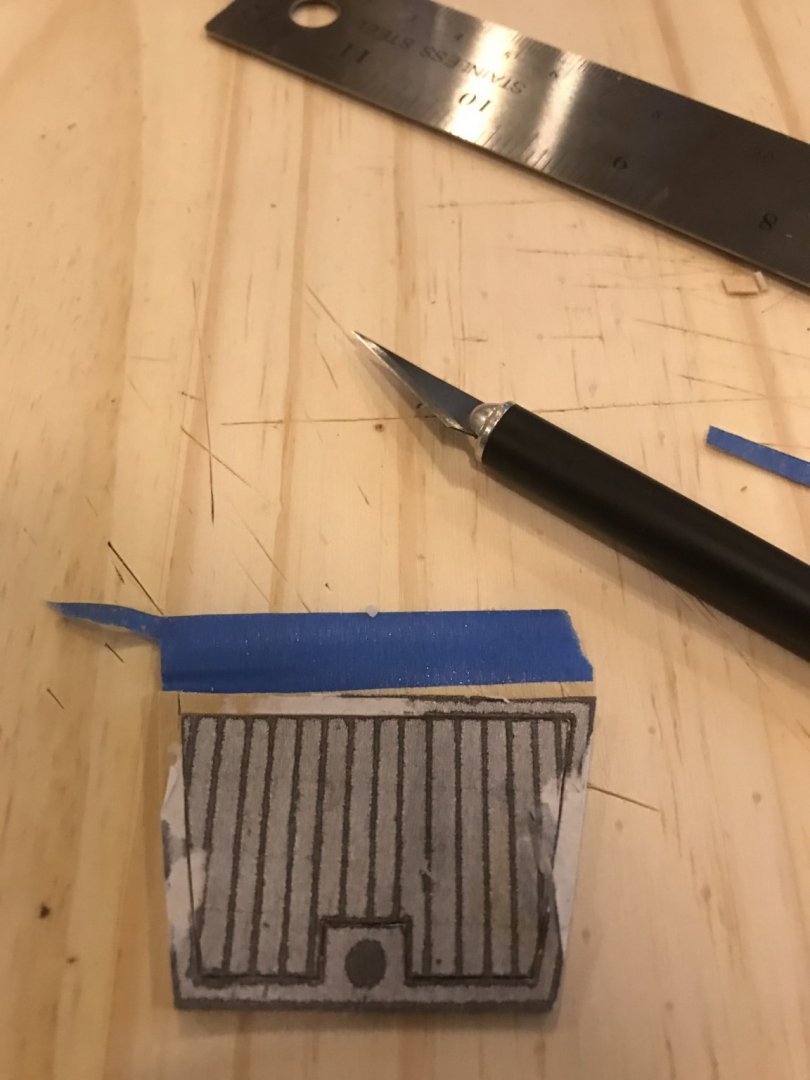
The template in the kit for the deck house wrong, way wrong! I should have caught that but I didn’t. Even the most causal observer will note the difference in the gray cut out and the photocopy with decking (except me; I missed it until it was too late).

- 155 replies
-
- 4
-
-
- opium smuggler
- Authentic Models
- (and 1 more)
-
Amateur, it isn’t exactly in the middle nor was the slot cut a snug fit! So I used one error to compensate for the other error. I glued the keel to one side of the slot and used shavings to wedge it to keep it tight while gluing. I will adjust the curves of the hull before I work on the bulwark. It’s not a great plan but it is the current one.
- 155 replies
-
- 1
-
-
- opium smuggler
- Authentic Models
- (and 1 more)
-
I’ve made a bit of progress on the hull well. I won’t use the term ‘ship shape’ but I’ll say I’m missing by less!
- 155 replies
-
- 6
-
-
- opium smuggler
- Authentic Models
- (and 1 more)
-
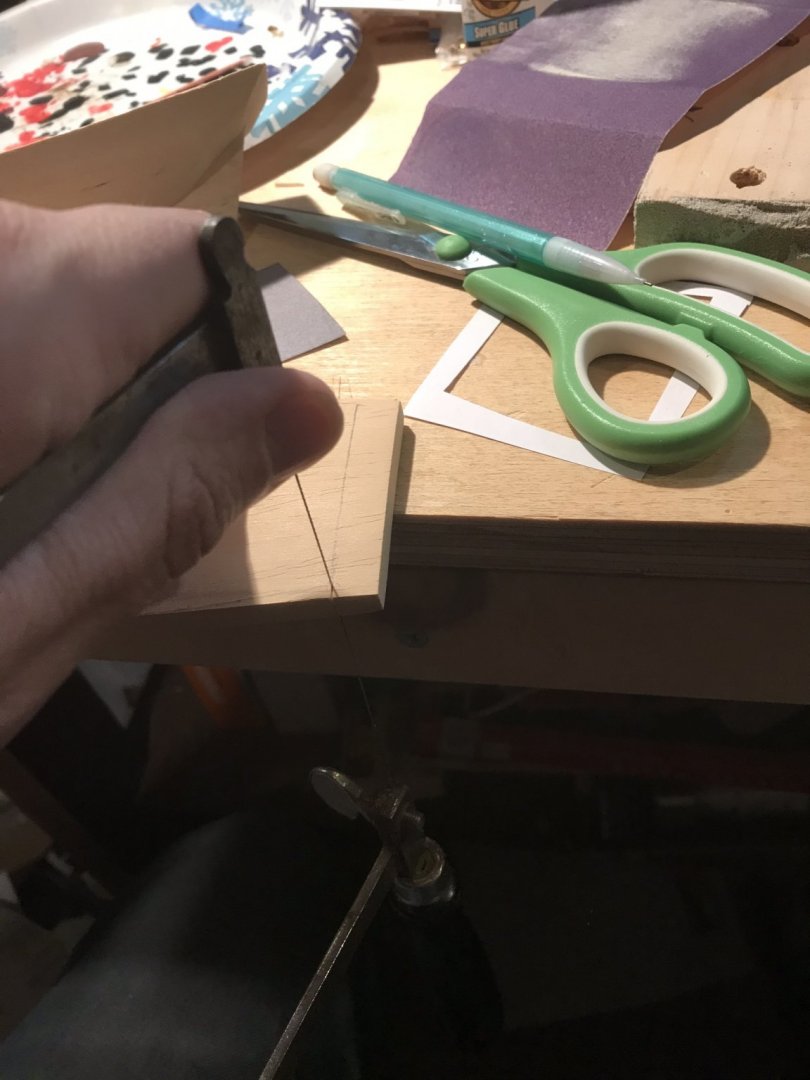
Cut out the pattern for the boat house and have trimmed the plank accordingly. The supplied plank has the compound curve “pre-cut” so just a small bit of trimming and sanding was necessary.

- 155 replies
-
- 8
-
-
- opium smuggler
- Authentic Models
- (and 1 more)
-
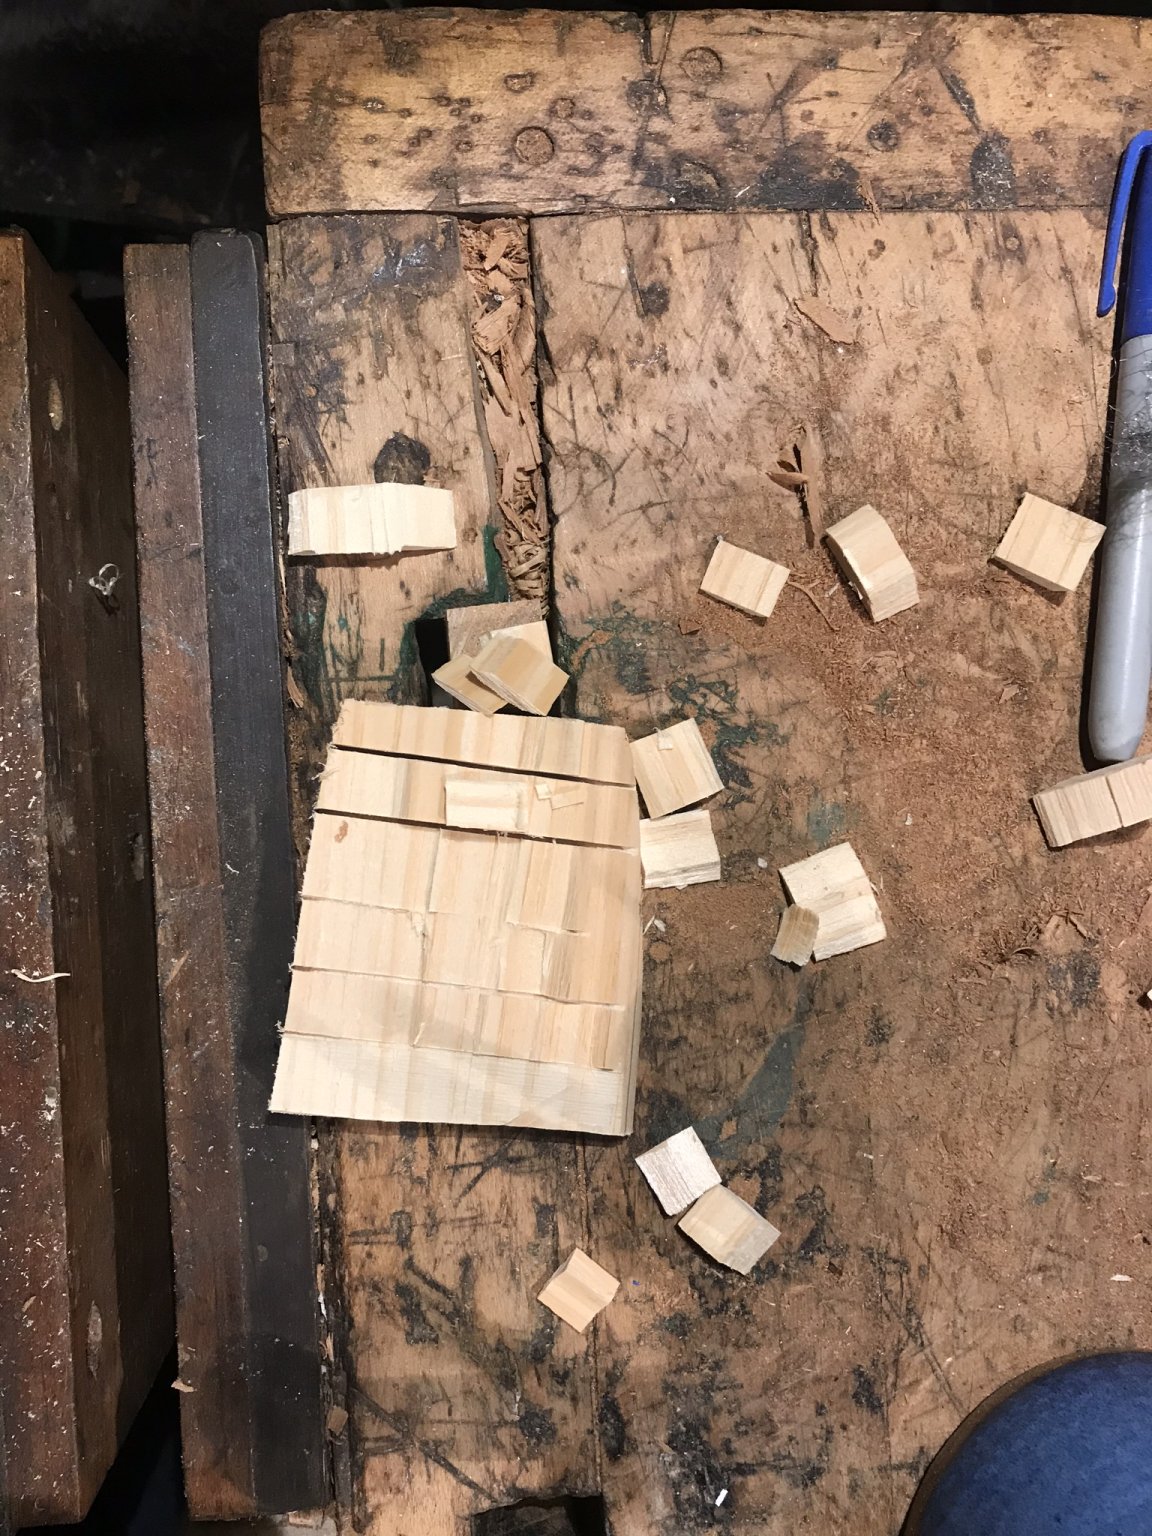
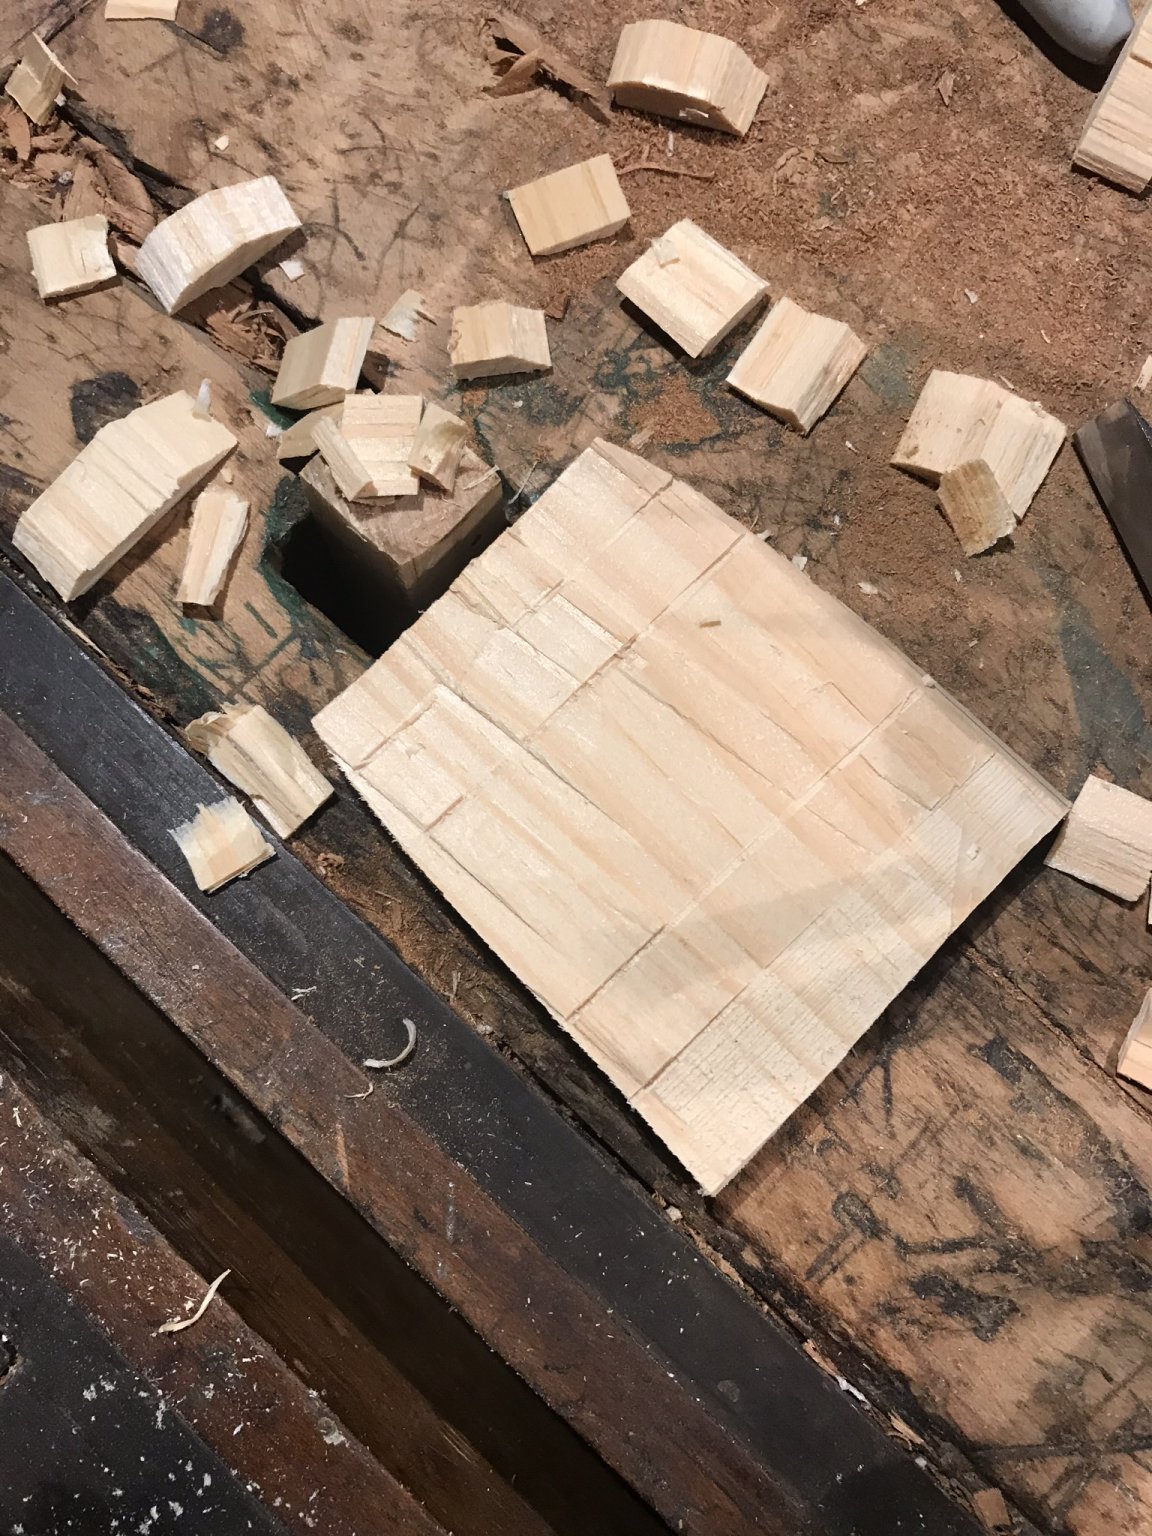
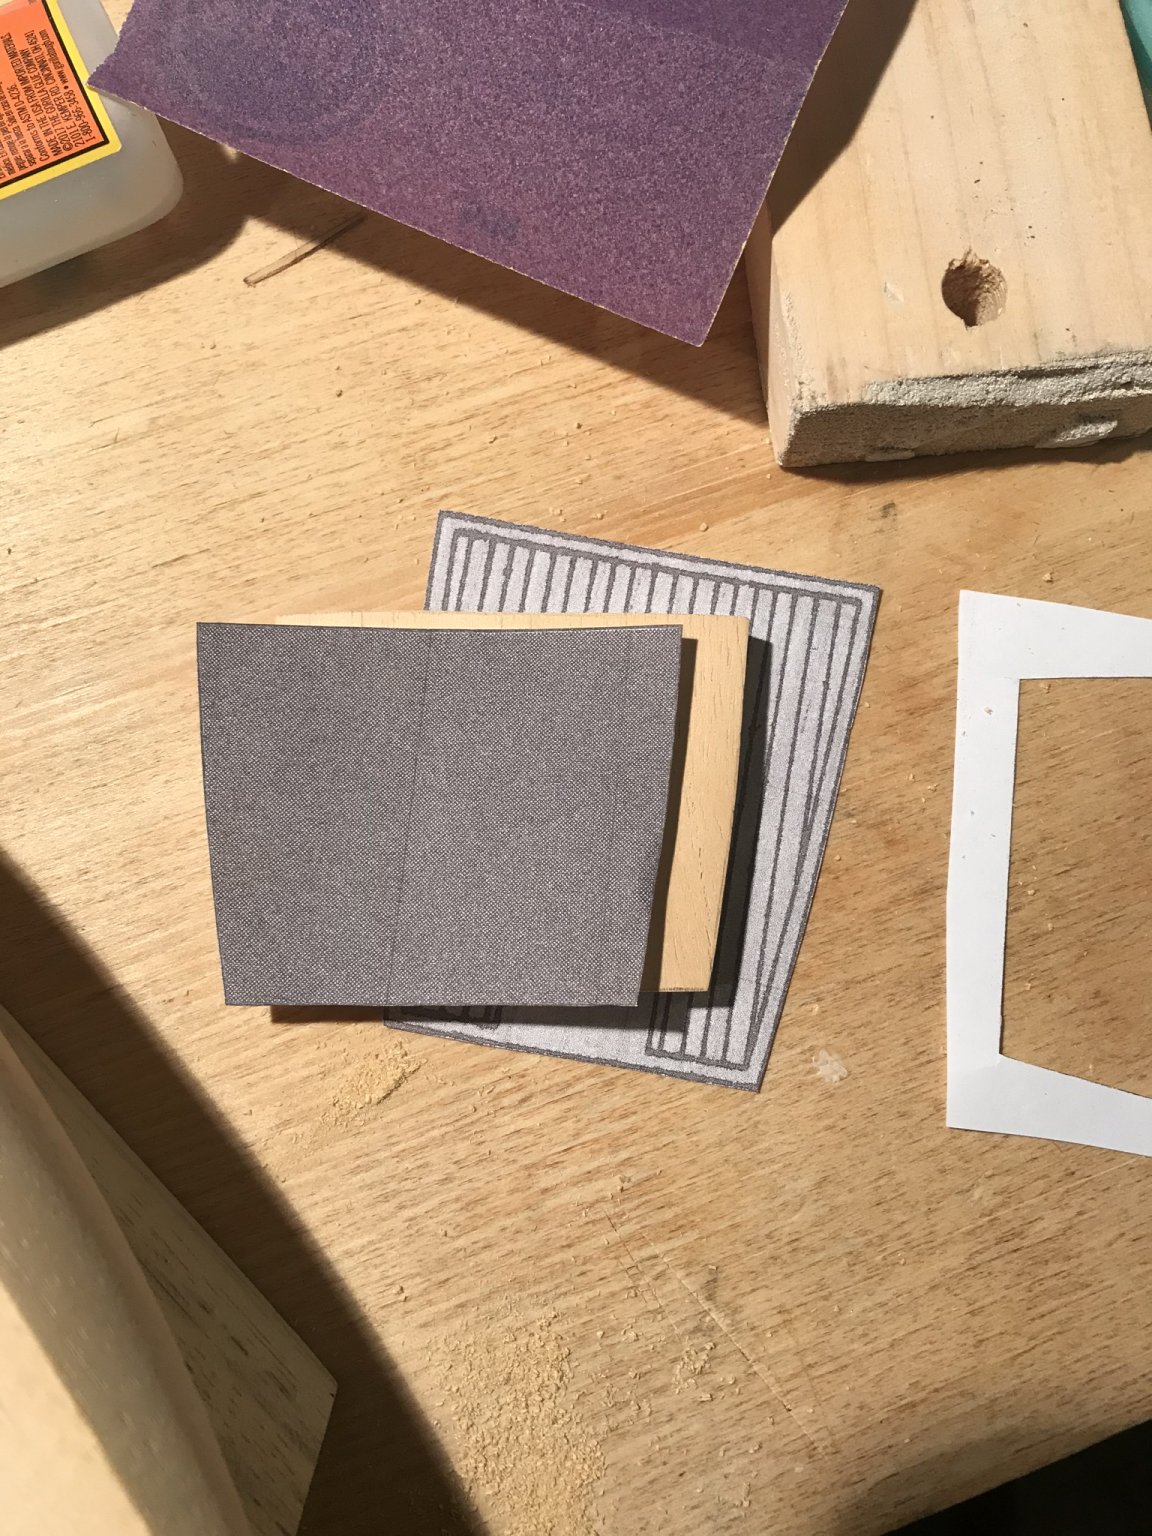
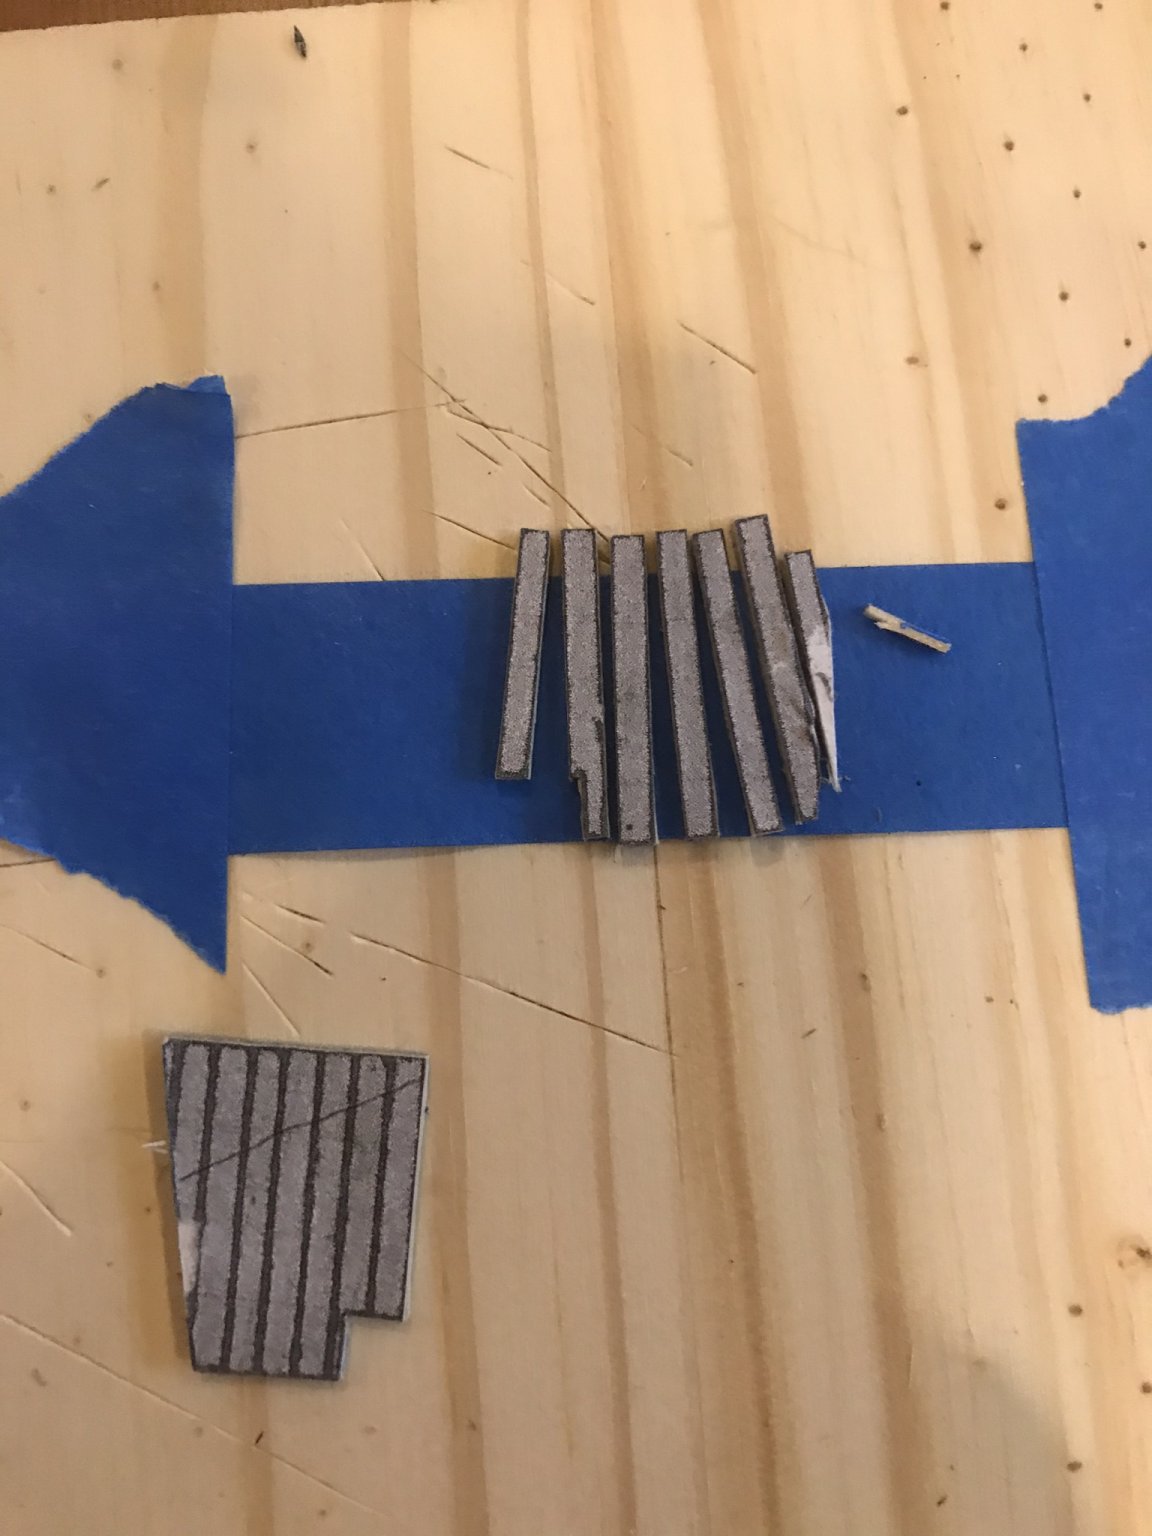
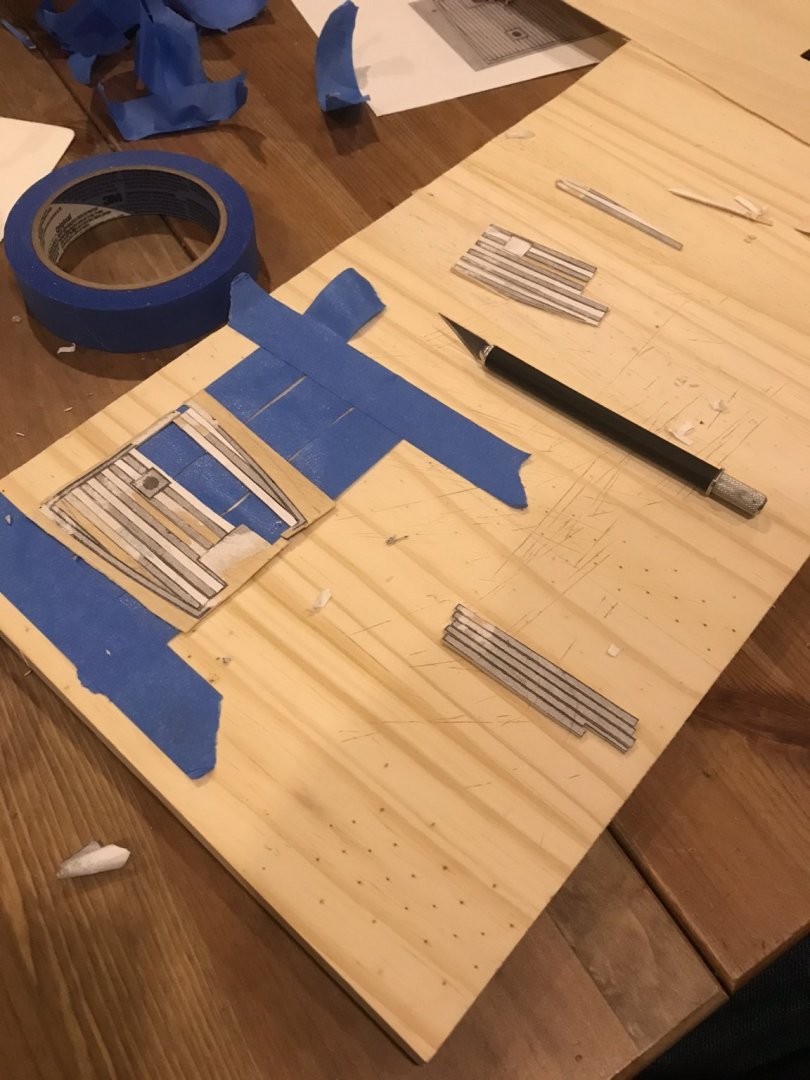
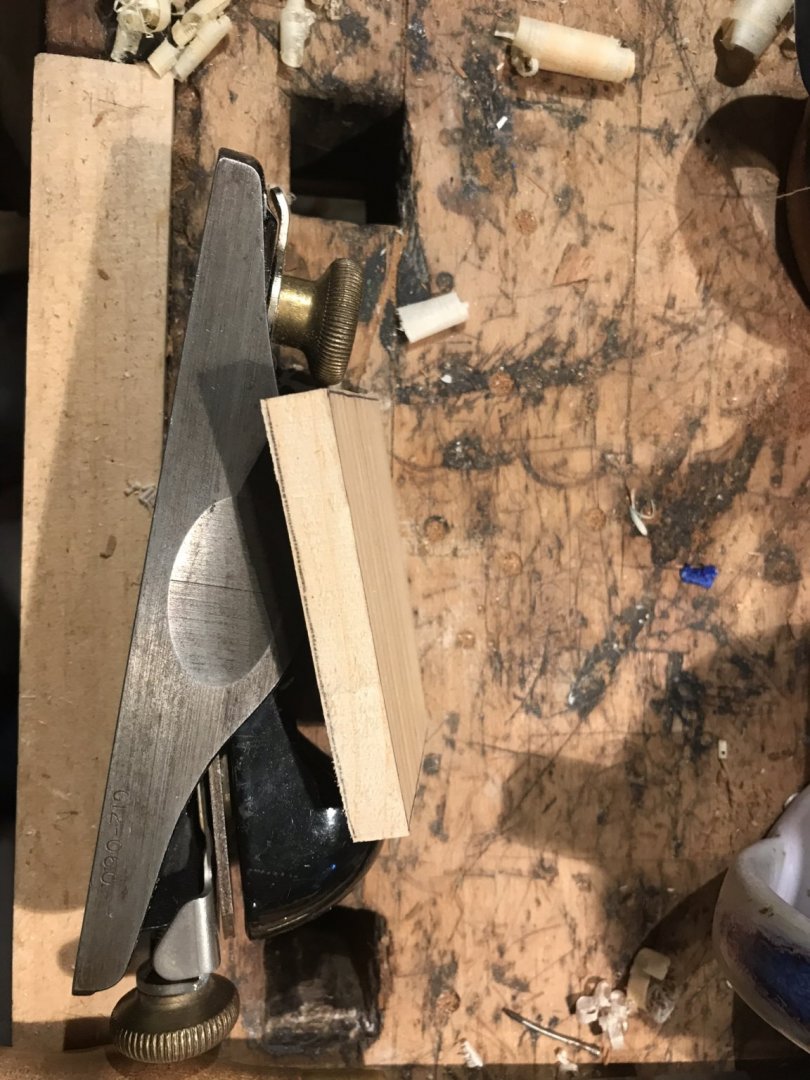
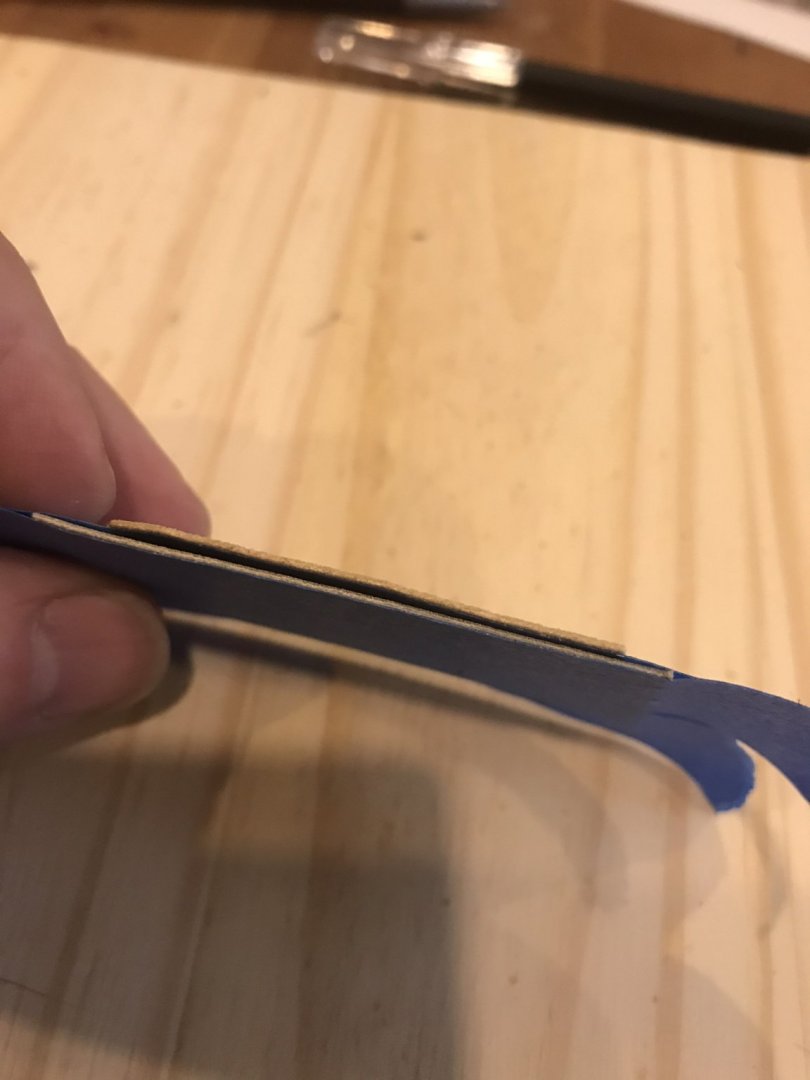
I tried again with two sheets this time so I could mix and match pieces to break up grain patterns. I used birch instead of the kit’s oak. I taped one sheet on top of another and cut them with an x-acto blade at the same time.
- 155 replies
-
- 6
-
-
- opium smuggler
- Authentic Models
- (and 1 more)
-
A test of the deck with a little bit of stain. The grain of the oak over powers the planks.
- 155 replies
-
- 3
-
-
- opium smuggler
- Authentic Models
- (and 1 more)
-
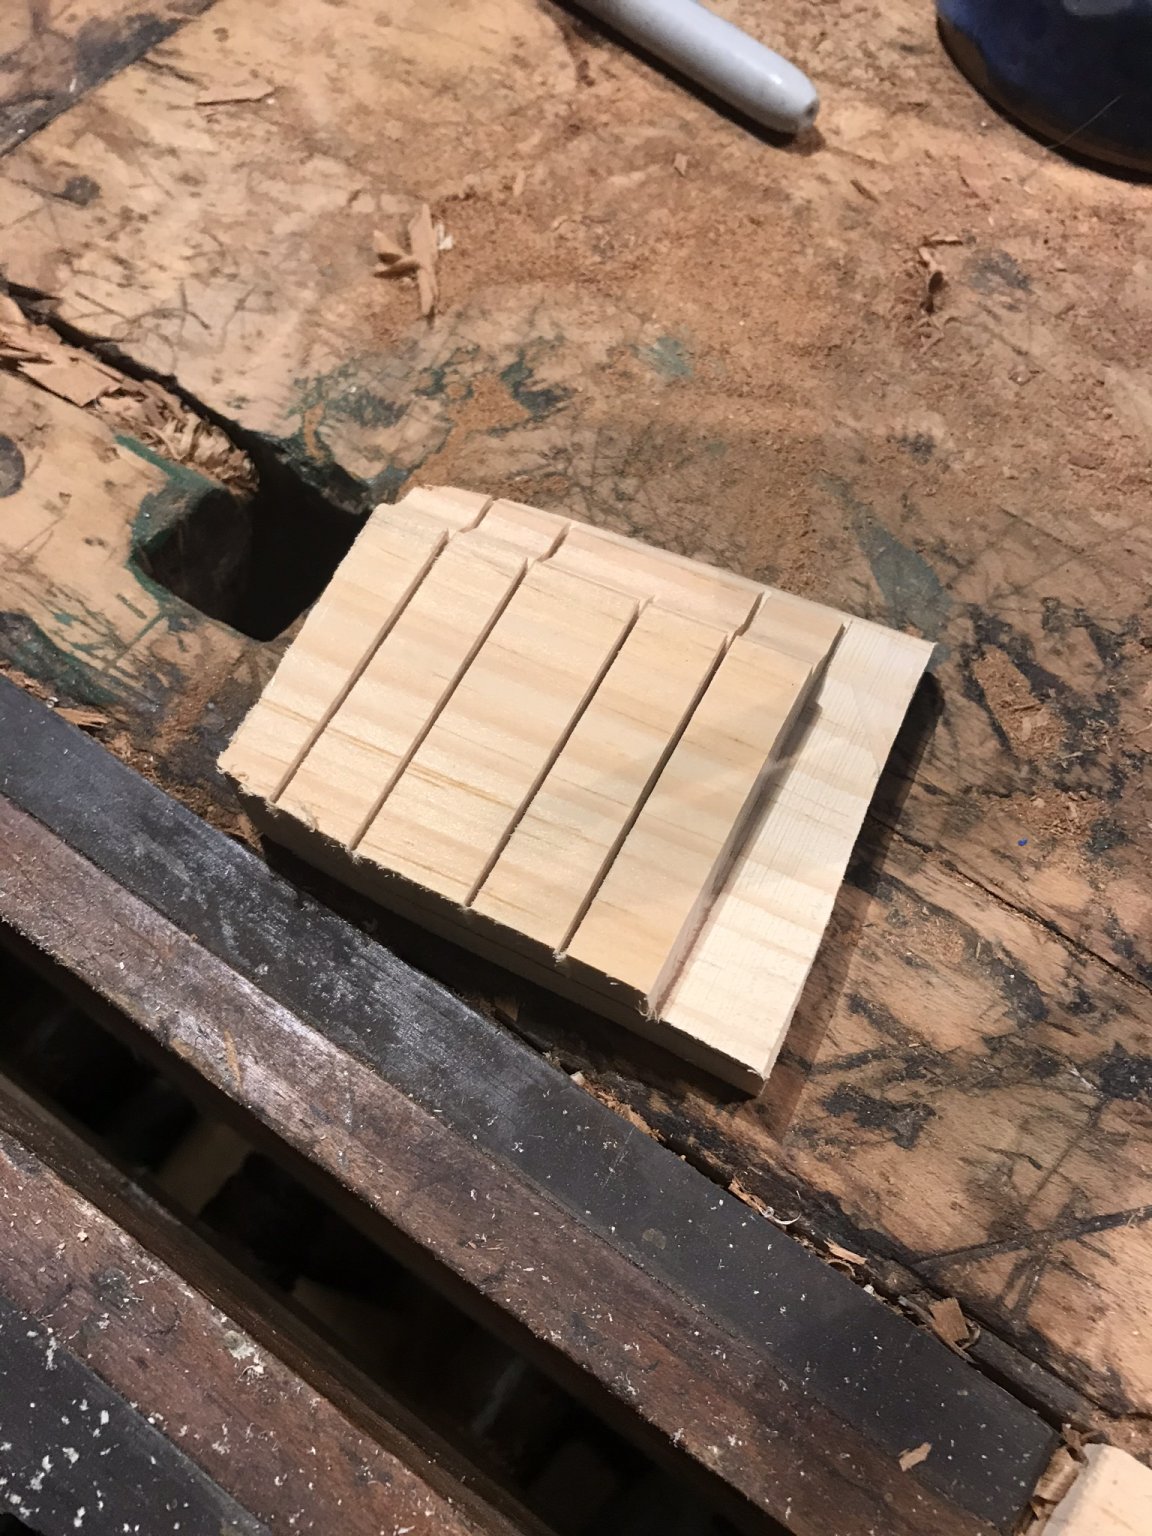
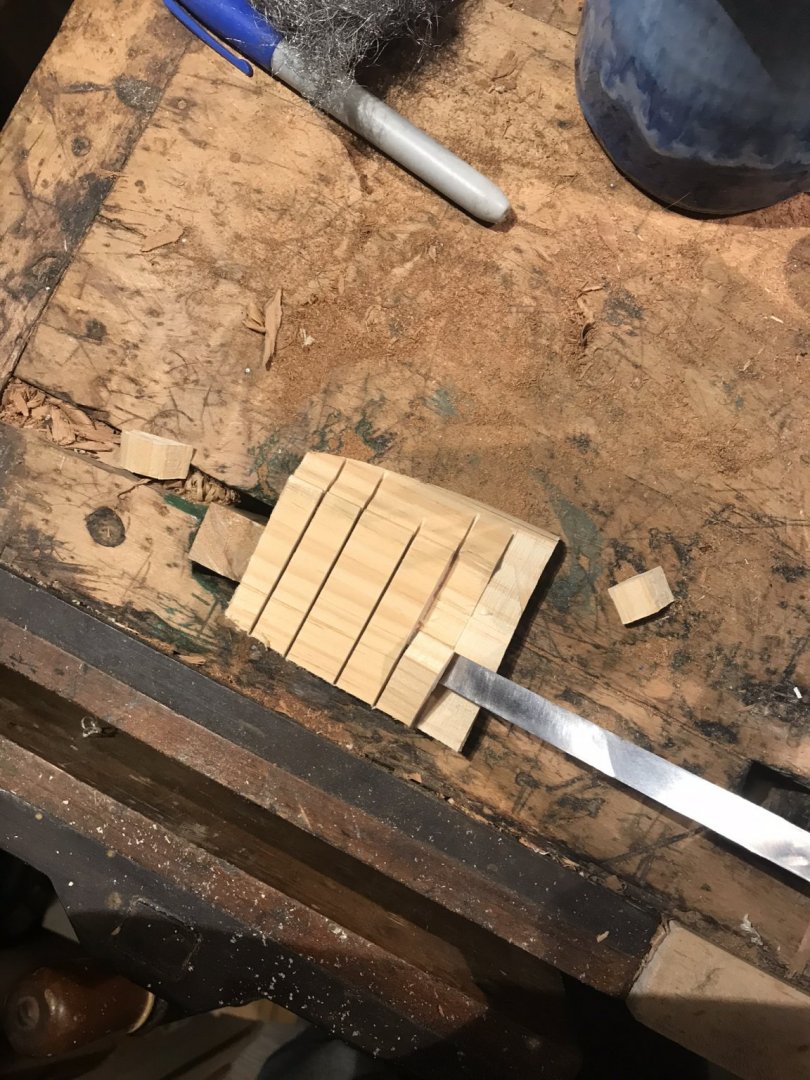
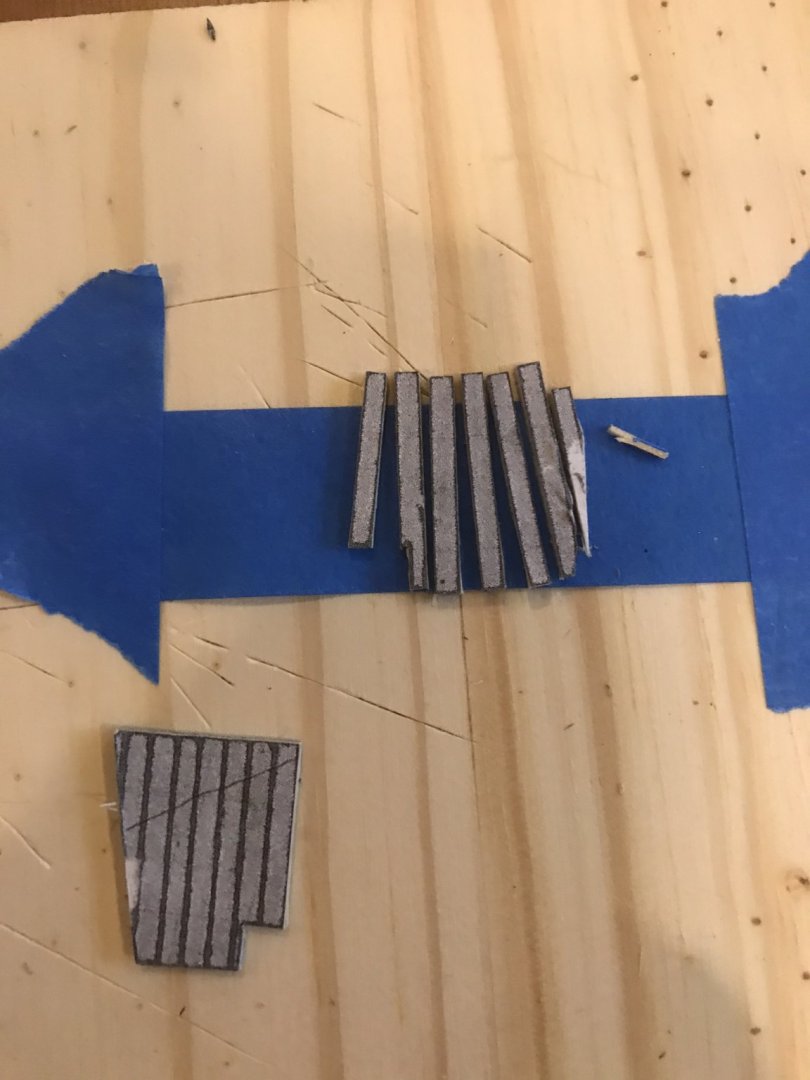
I also tried cutting apart the given deck and cutting individual planks. The first pass isn’t what I hoped it would be.
- 155 replies
-
- 2
-
-
- opium smuggler
- Authentic Models
- (and 1 more)
-
Delightful! I've ordered a copy and it will be next in my reading list (I'm currently at the end of the Aubrey–Maturin series).

- 155 replies
-
- 1
-
-
- opium smuggler
- Authentic Models
- (and 1 more)
-
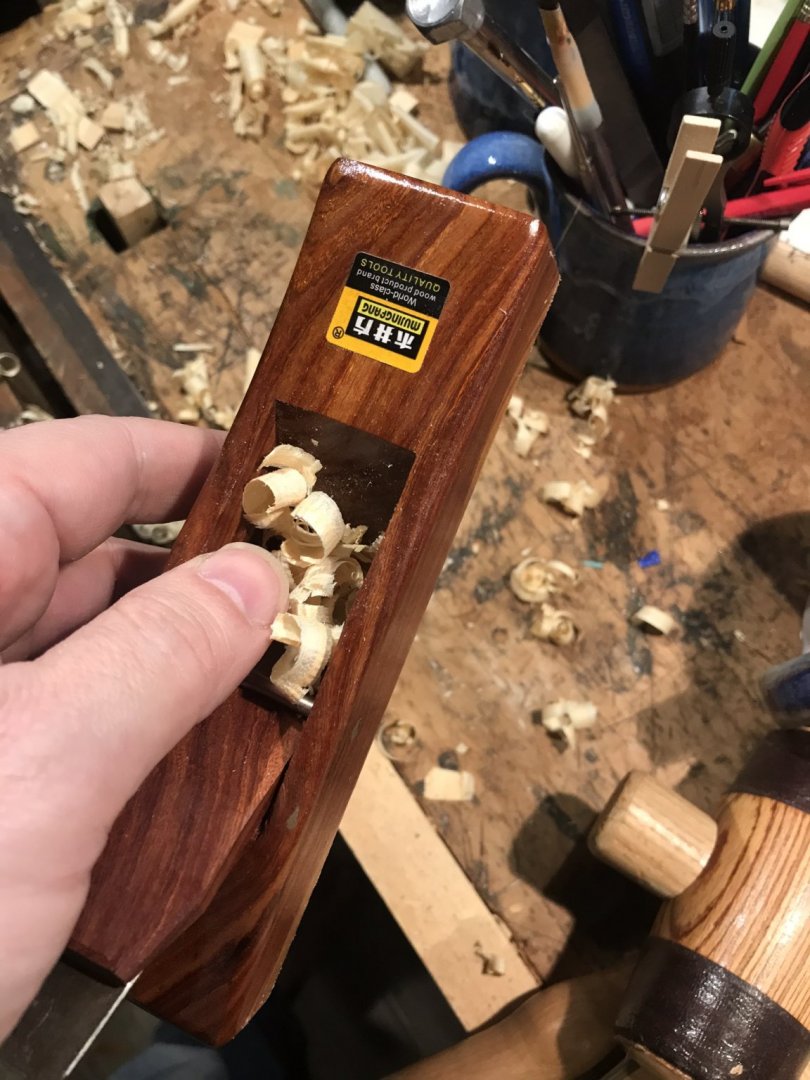
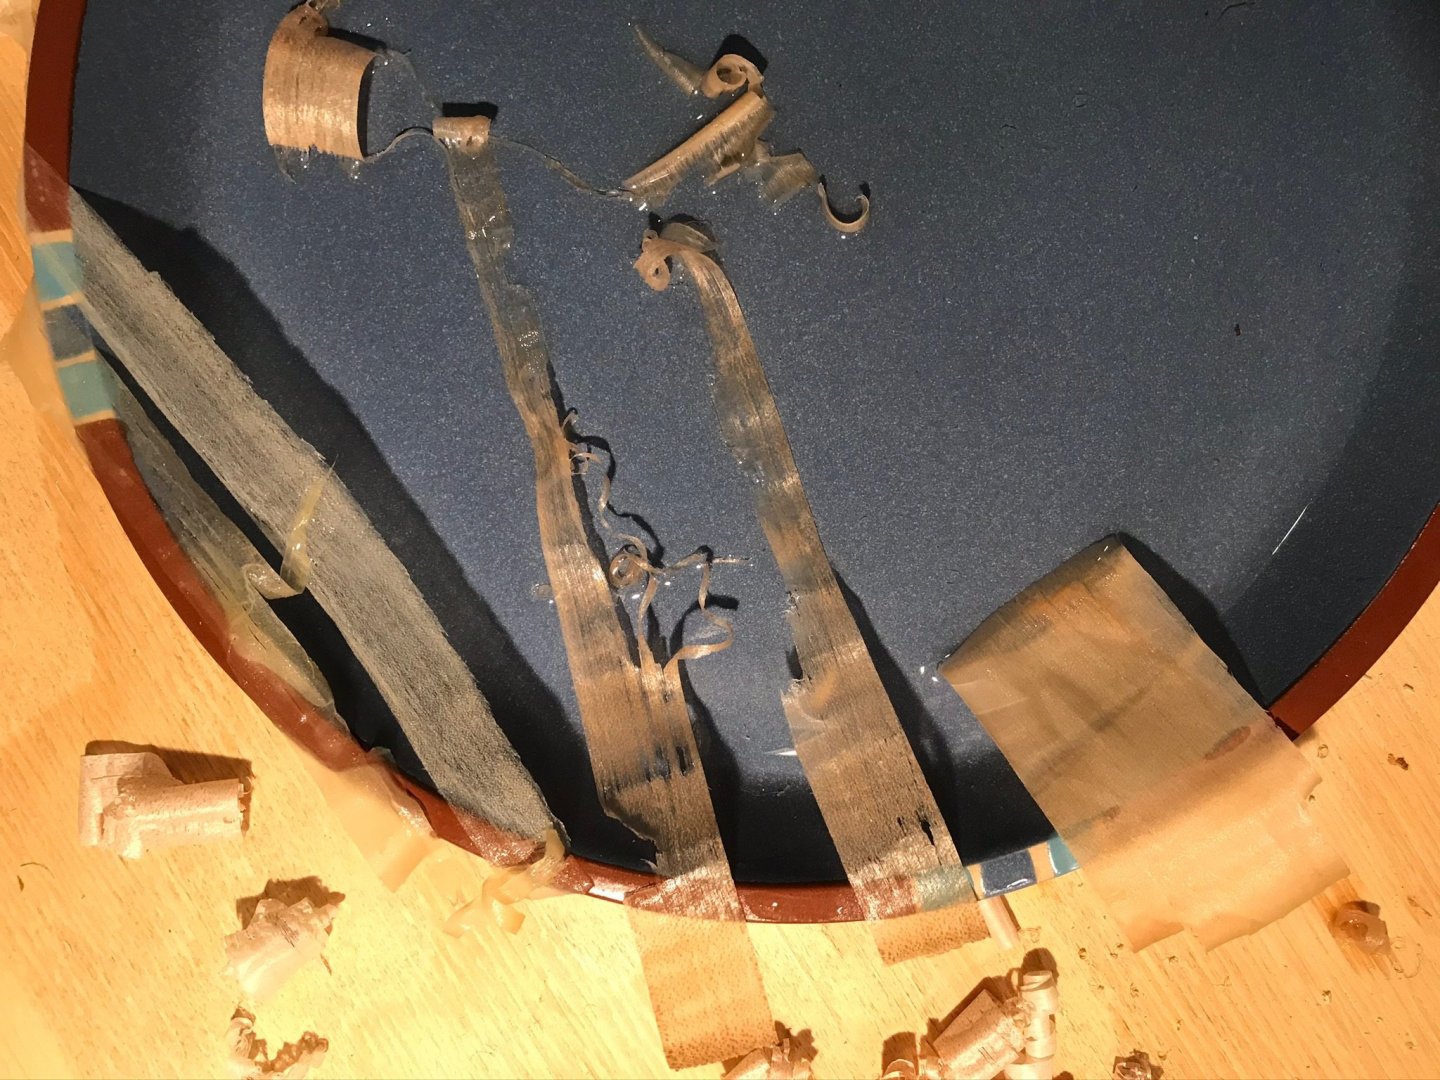
For the dried shavings, they are flatter:
- 155 replies
-
- 5
-
-
- opium smuggler
- Authentic Models
- (and 1 more)
-
No, no one can tell you what square dowel is... The word oxymoron jumps to mind.
-
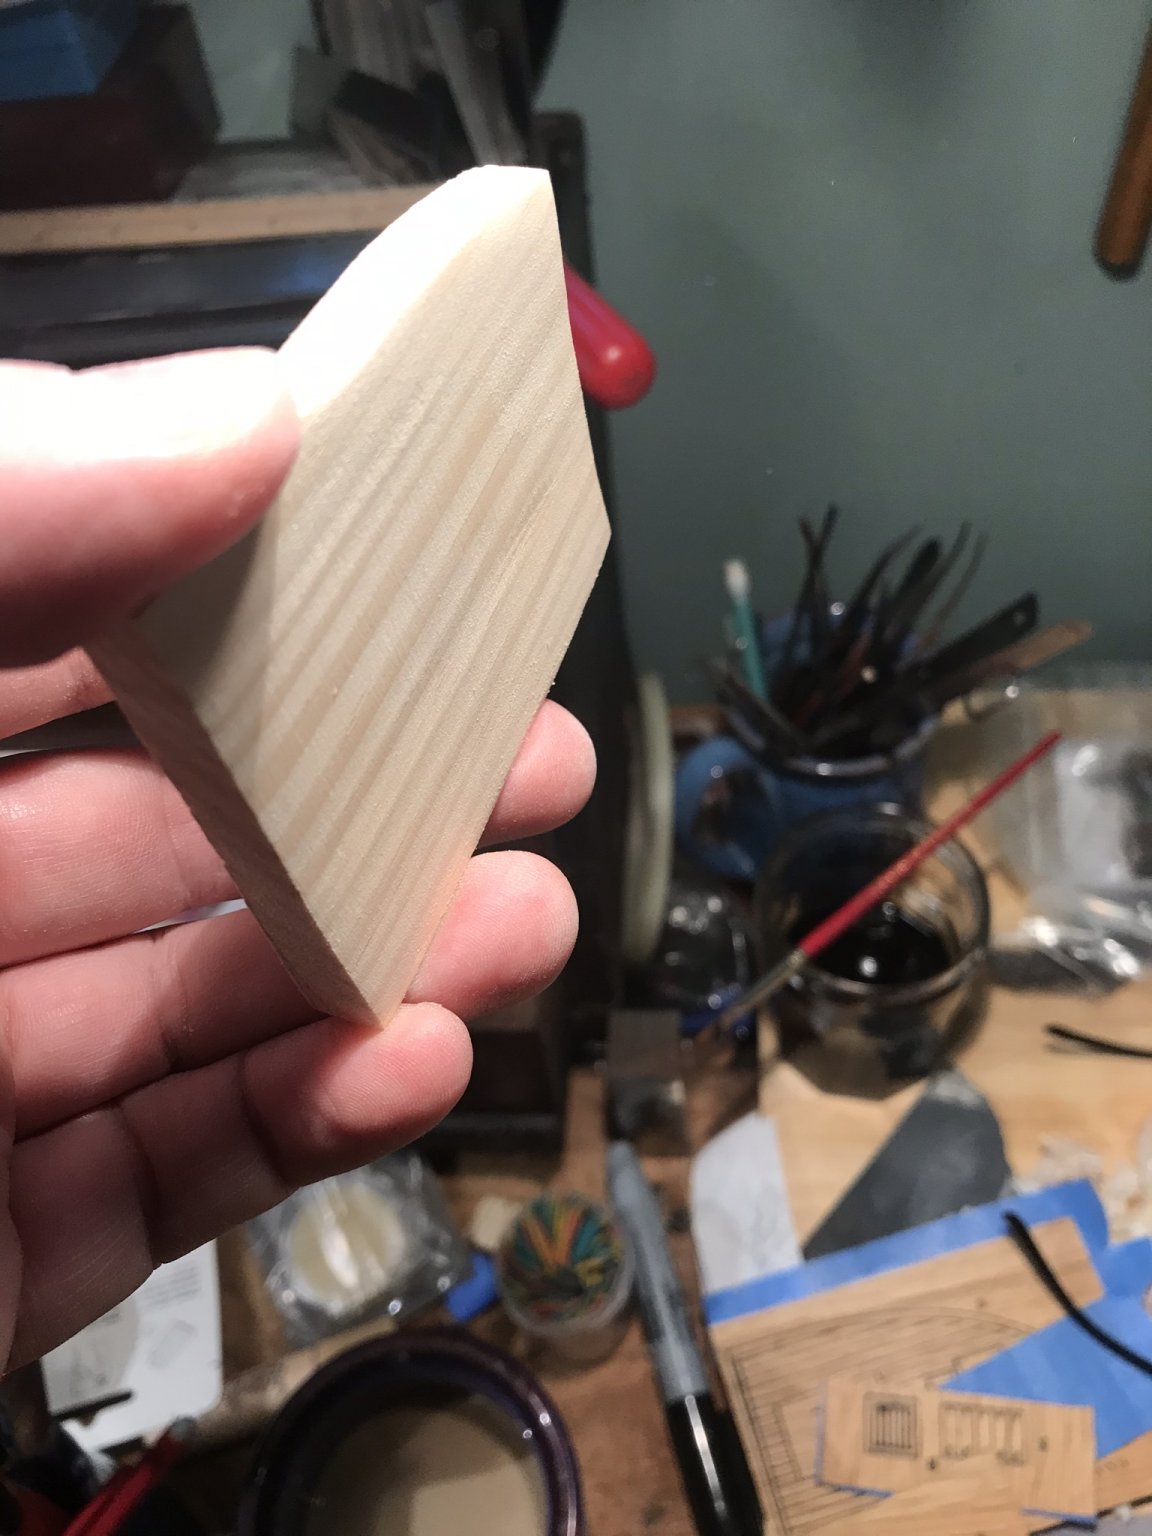
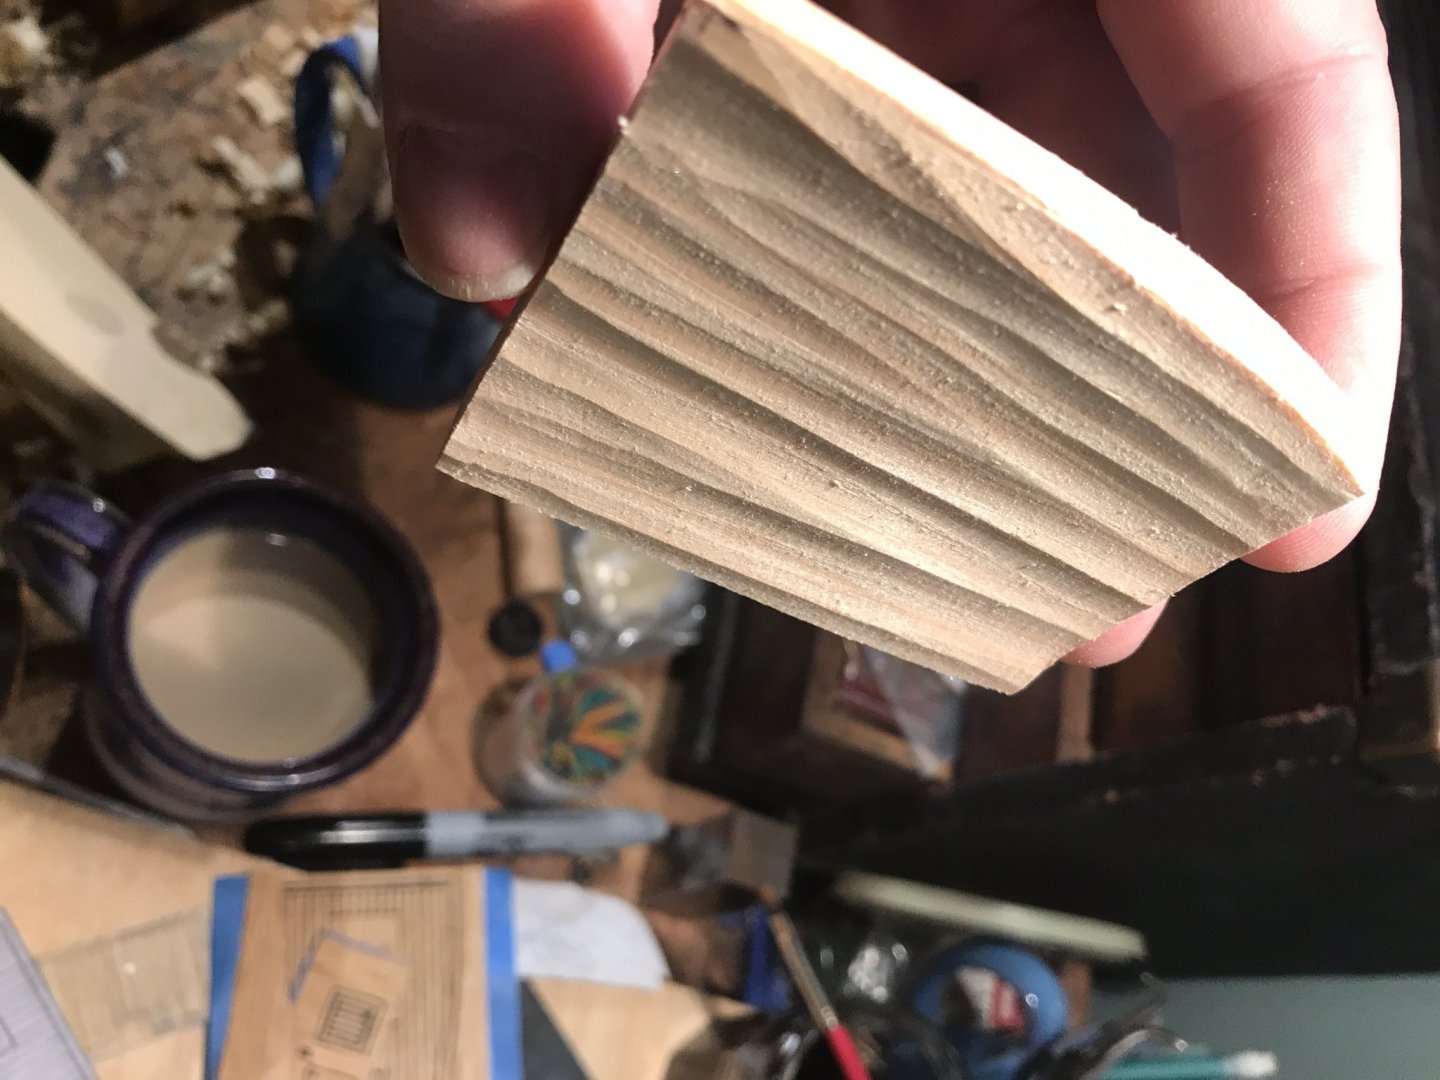
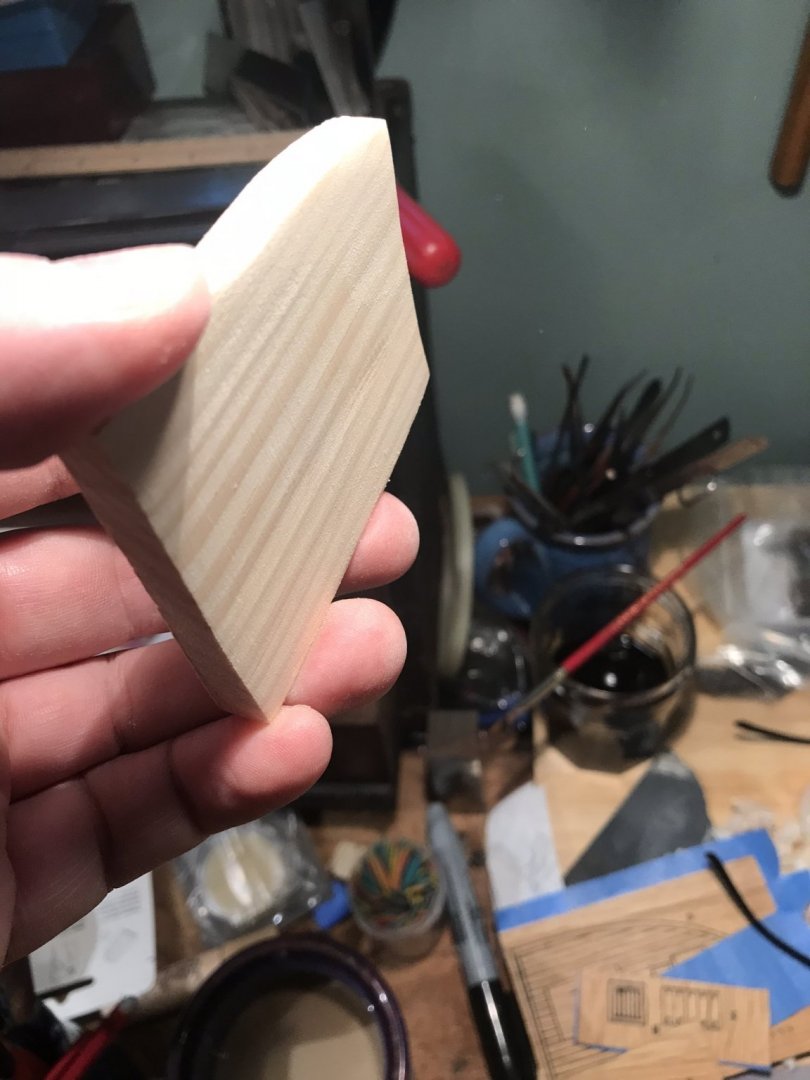
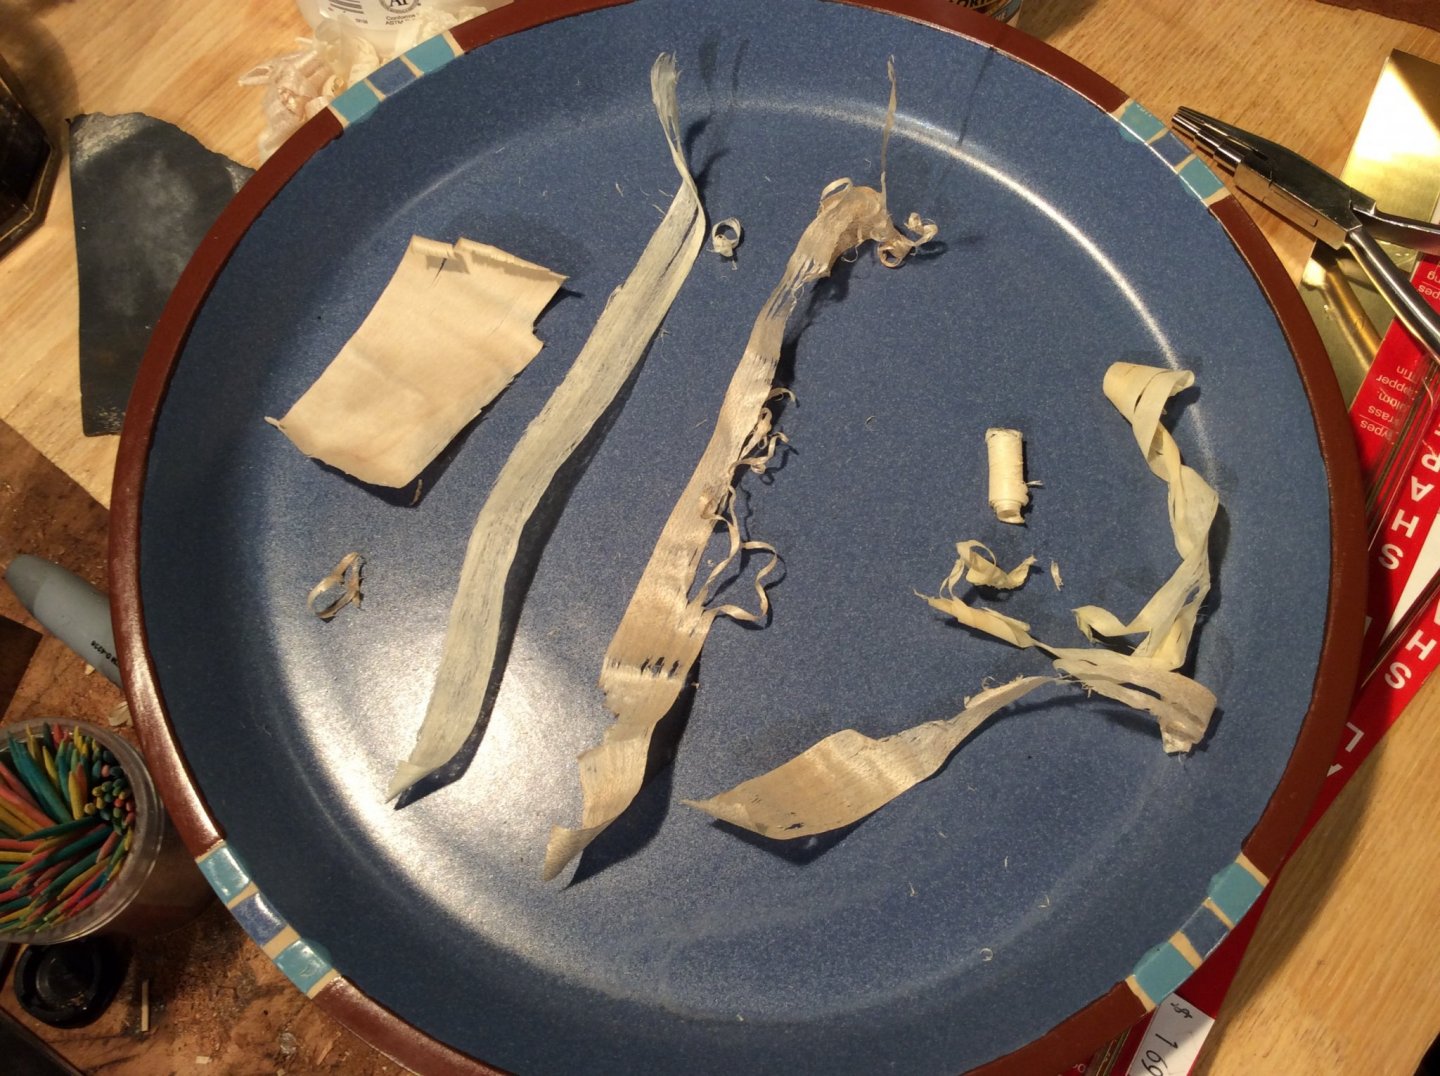
I’ve also tried to produce shavings similar to a technique used by Phillip Reed for his small scale models. He backs the shavings with paper and then glues the paper-side down to the ship for planking and for decking. He doesn’t go into detail so I’m merely experimenting based on his idea. Using a wood plane, I made shavings of white pine, popular and maple. I then used hot water to help flatten them. I’ll report back when they have dried.

- 155 replies
-
- 6
-
-
- opium smuggler
- Authentic Models
- (and 1 more)