Supplies of the Ship Modeler's Handbook are running out. Get your copy NOW before they are gone! Click on photo to order.
×

.jpeg.7d7eba14c97a2e1d9f79cd2c97f6424a.jpeg)
EricWilliamMarshall
-
Posts
986 -
Joined
-
Last visited
Content Type
Profiles
Forums
Gallery
Events
Everything posted by EricWilliamMarshall
-
.thumb.jpeg.fc5d633a7b34428fcf19419a73d56d55.jpeg) Me too! When I was young, I worked in NYC repairing 18th-century furniture, some of which was once owned by nobility. Unfortunately, the economics of that industry is exactly the same as the one you lament (to some degree here). On the plus side, I have a stupid amount of strange hand tools to bring to bear on ship modeling! Were/are you a furniture maker as well? (Yet another hobby requiring eight-foot wall-space lengths per project!)
Me too! When I was young, I worked in NYC repairing 18th-century furniture, some of which was once owned by nobility. Unfortunately, the economics of that industry is exactly the same as the one you lament (to some degree here). On the plus side, I have a stupid amount of strange hand tools to bring to bear on ship modeling! Were/are you a furniture maker as well? (Yet another hobby requiring eight-foot wall-space lengths per project!) -
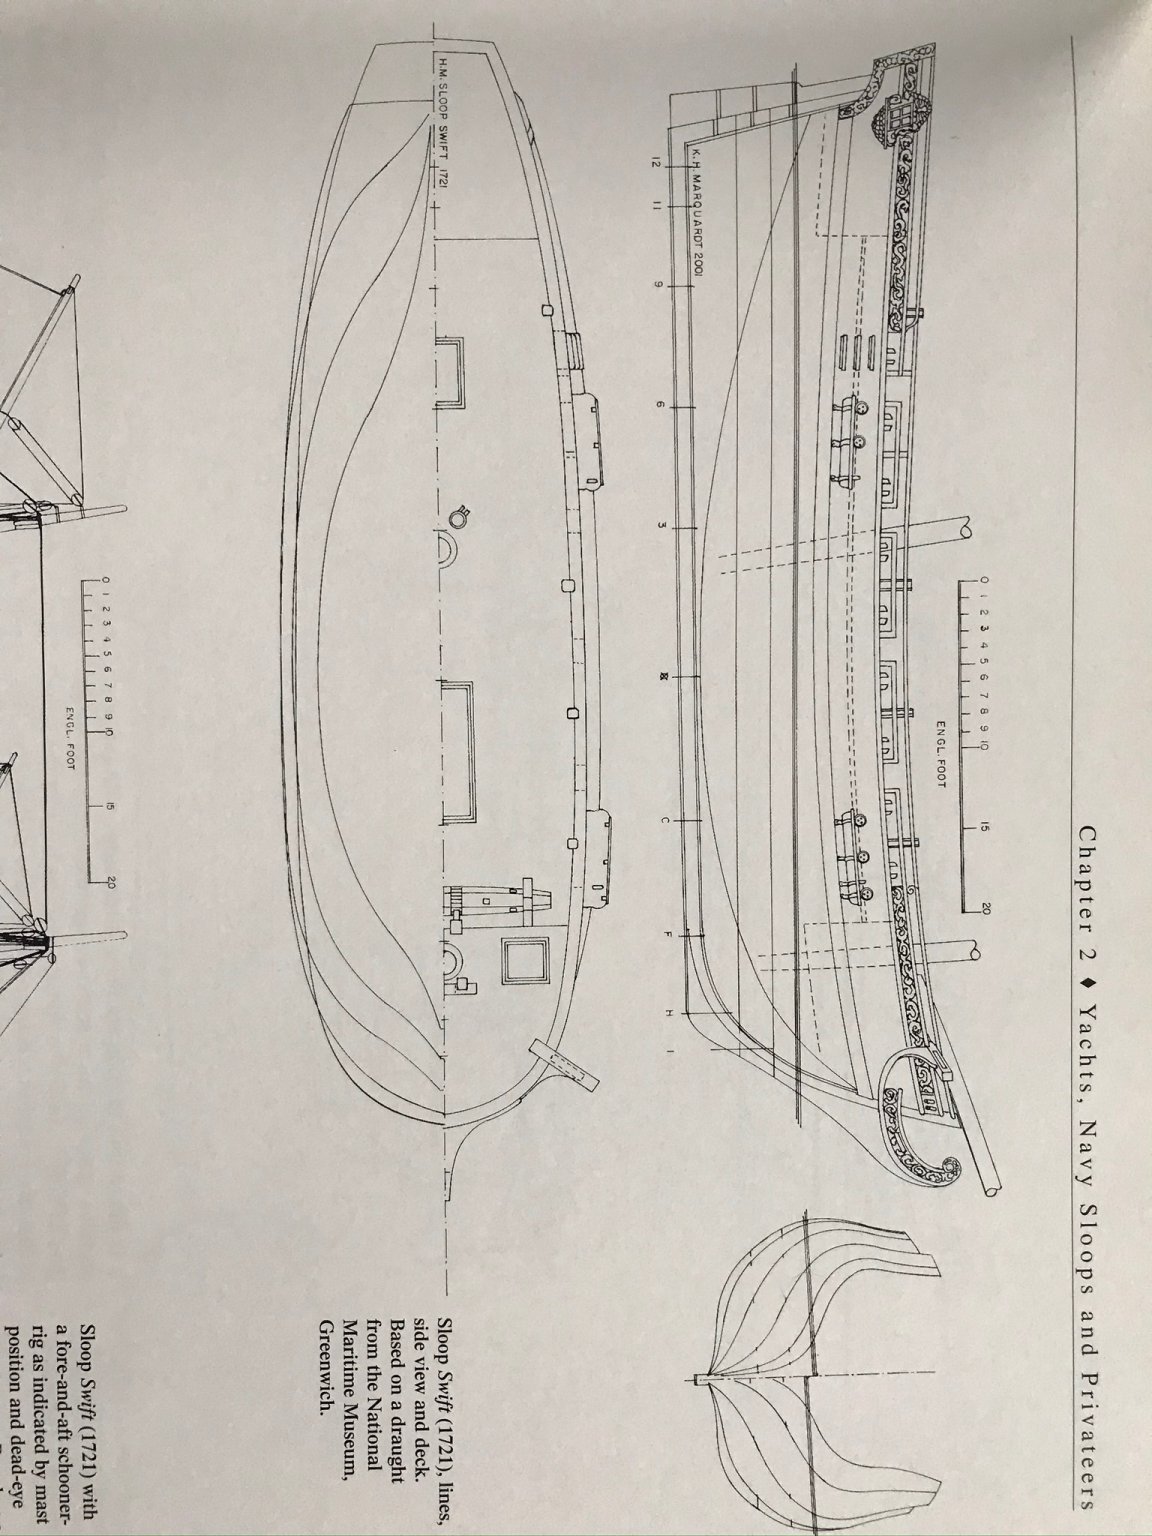
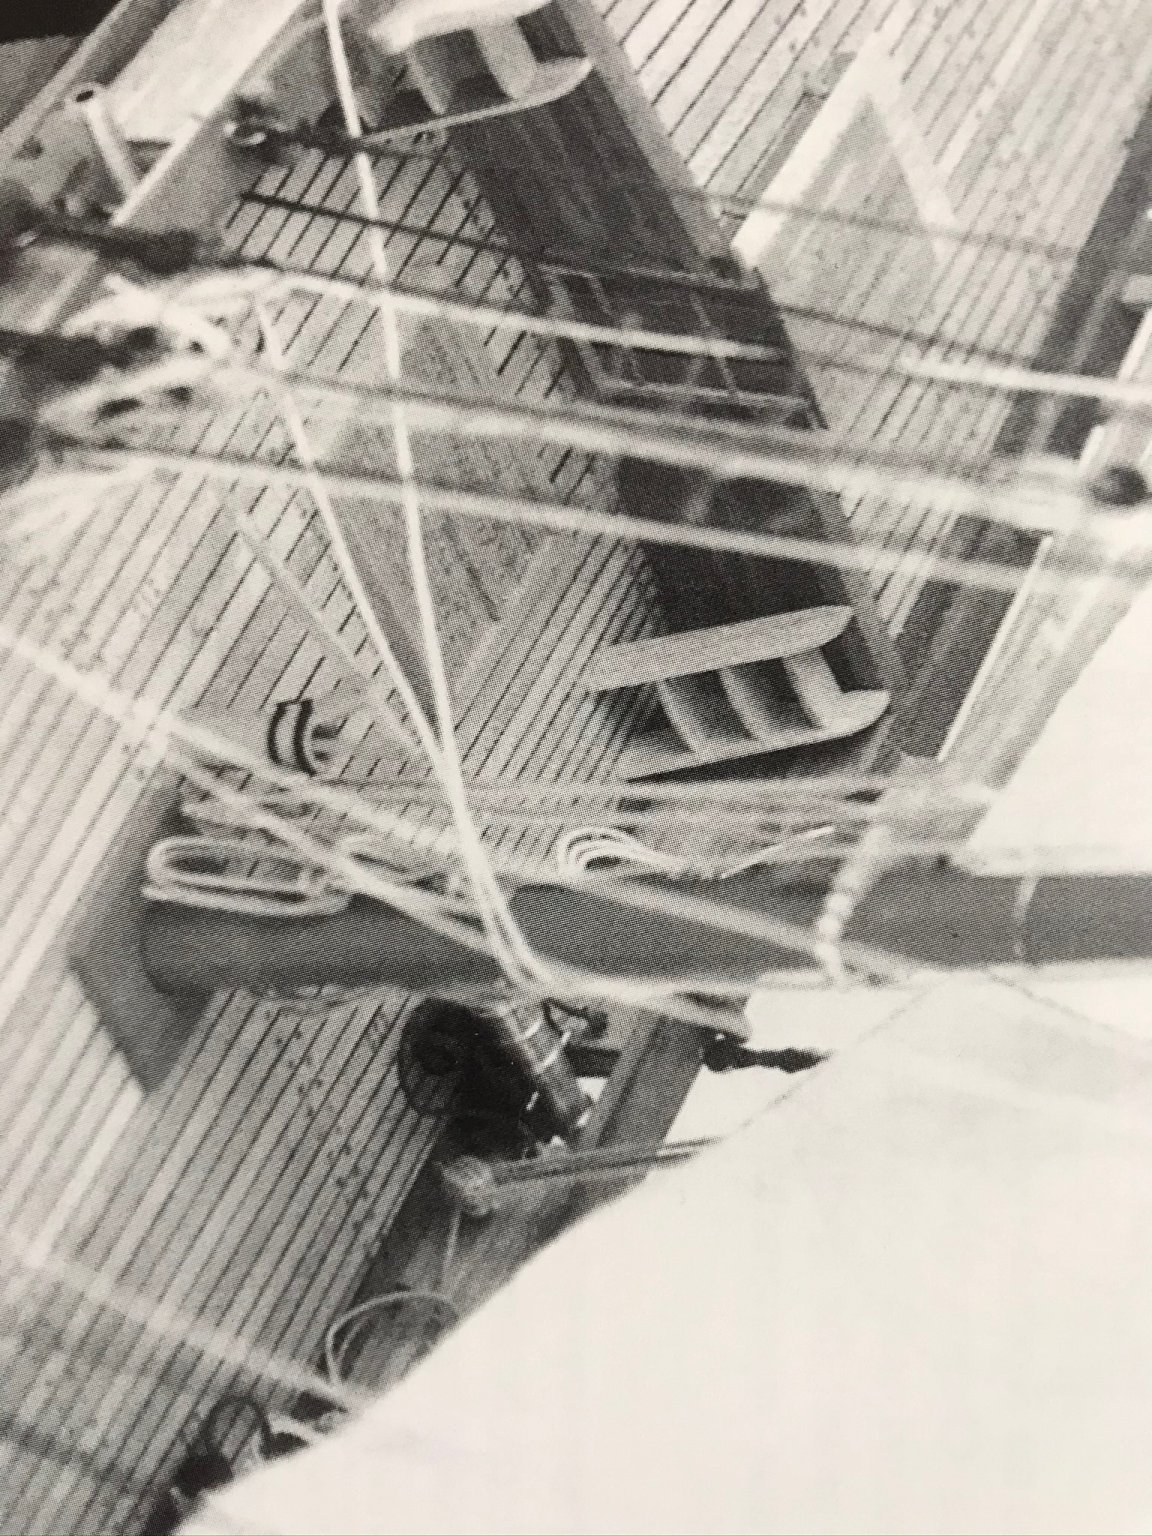
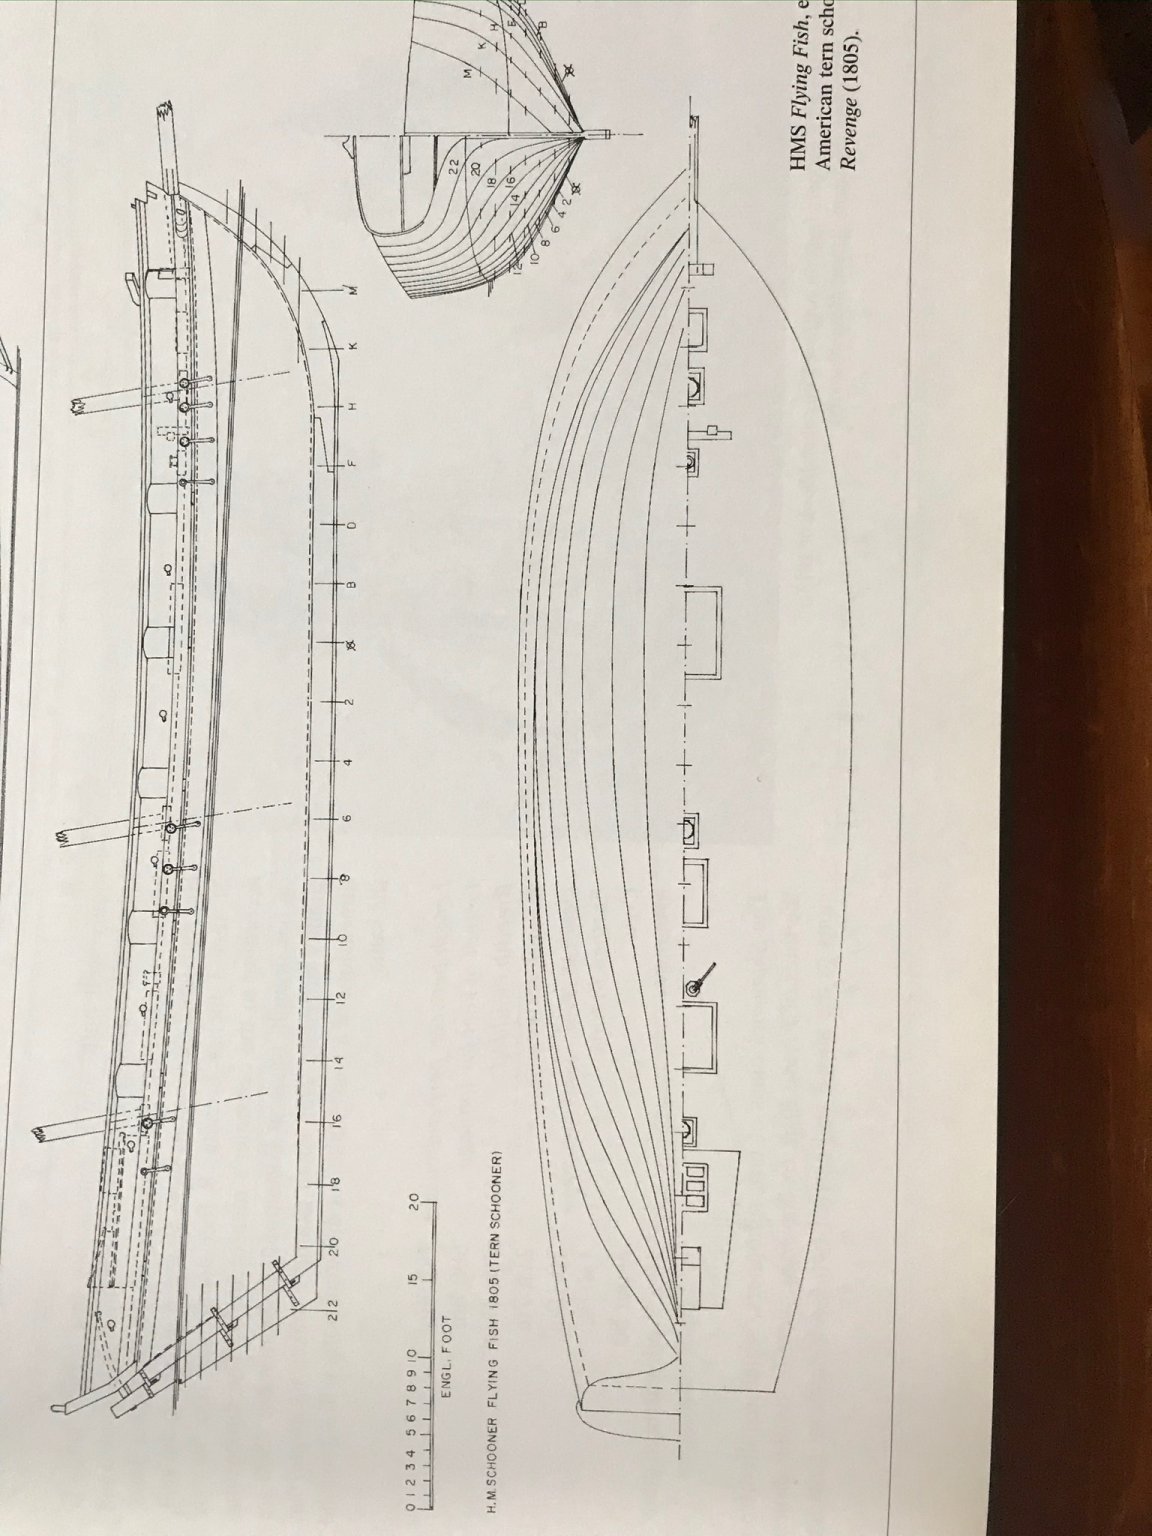
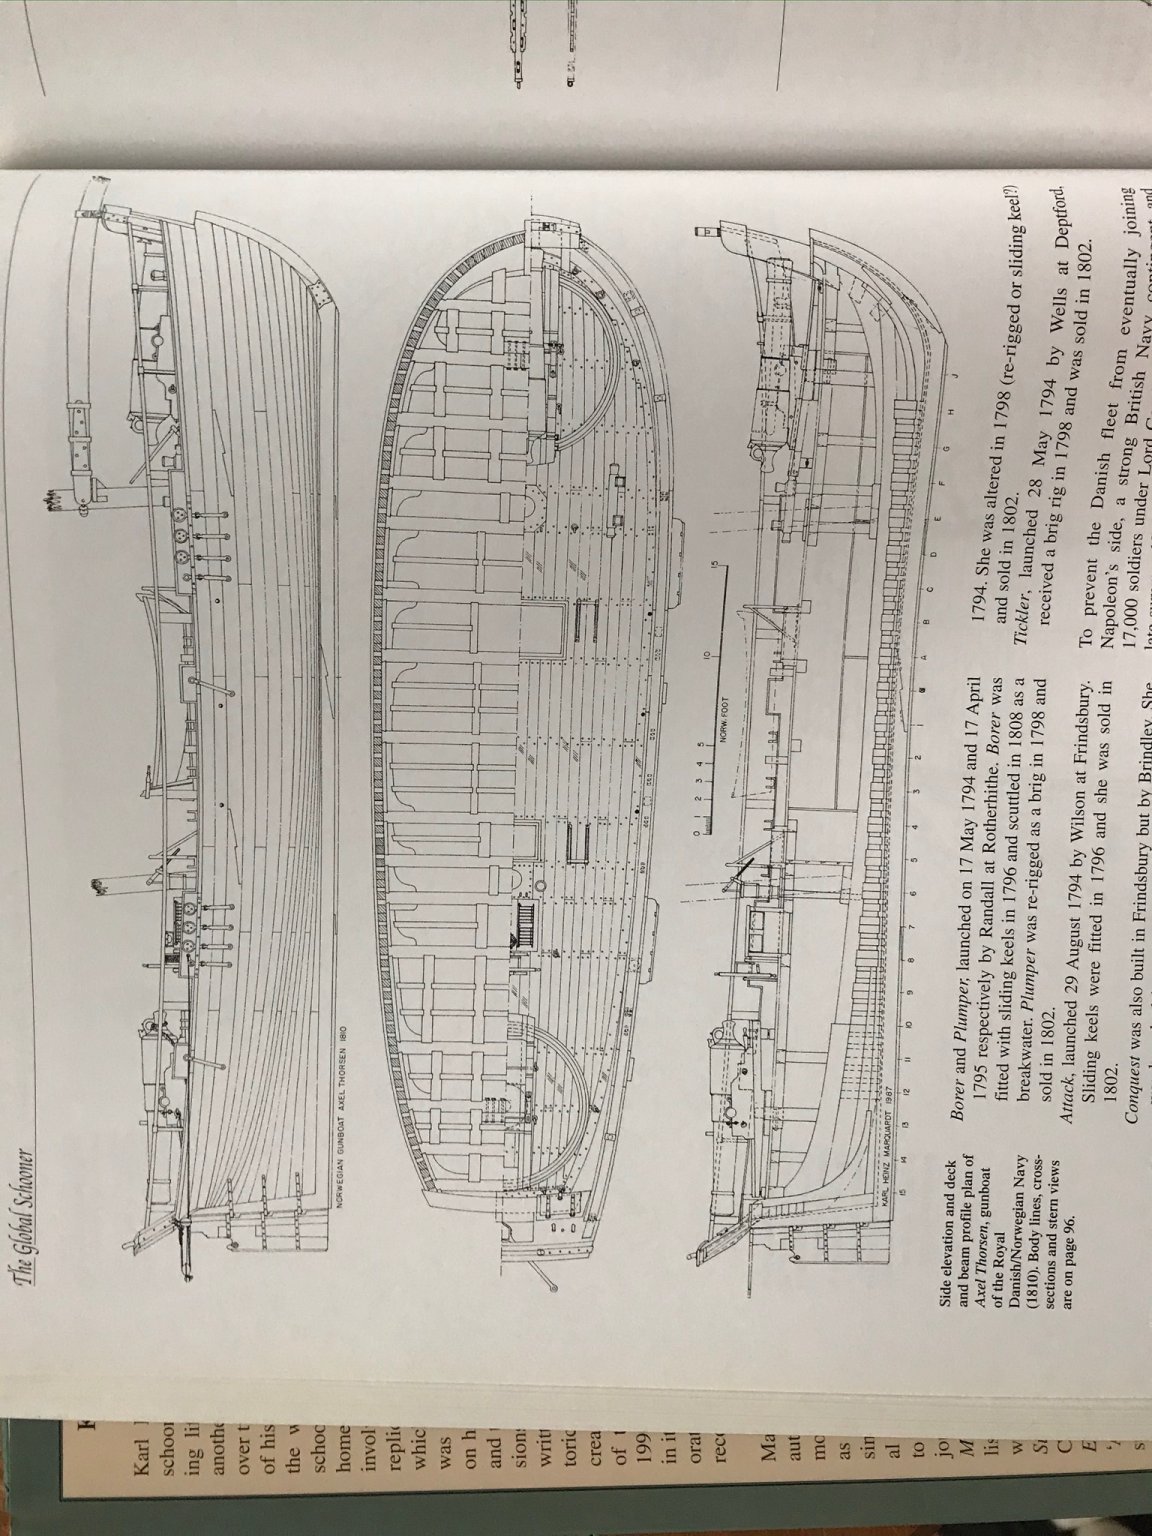
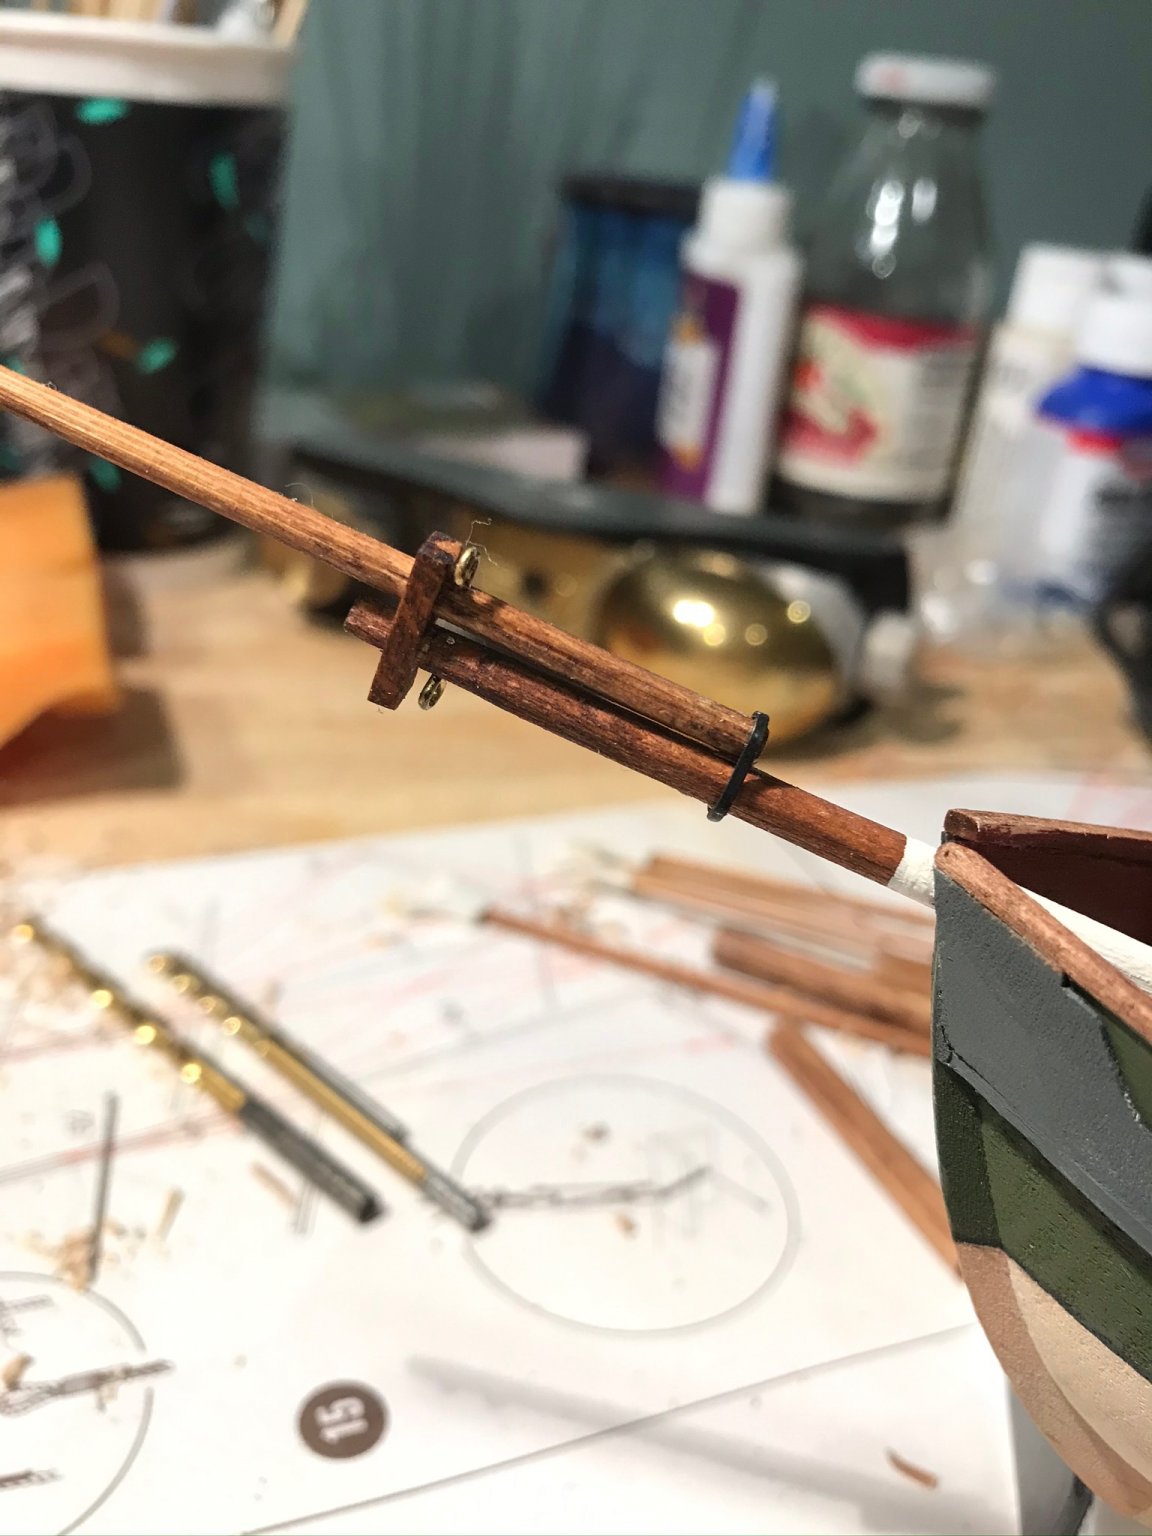
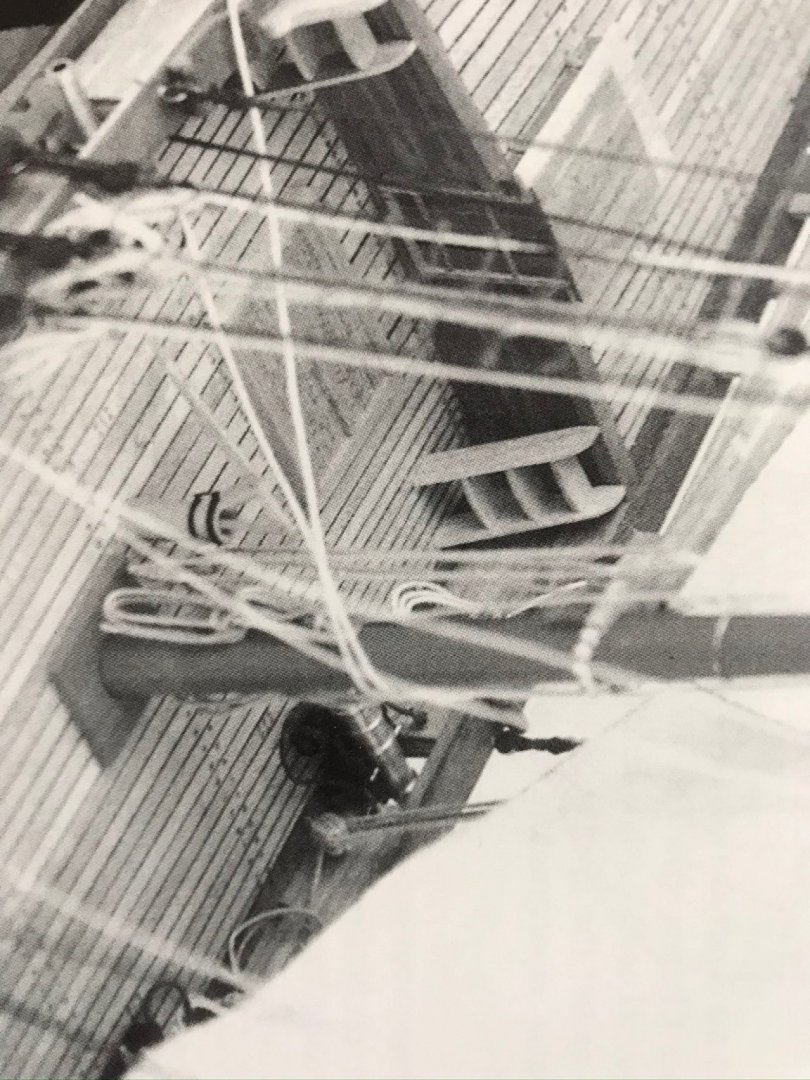
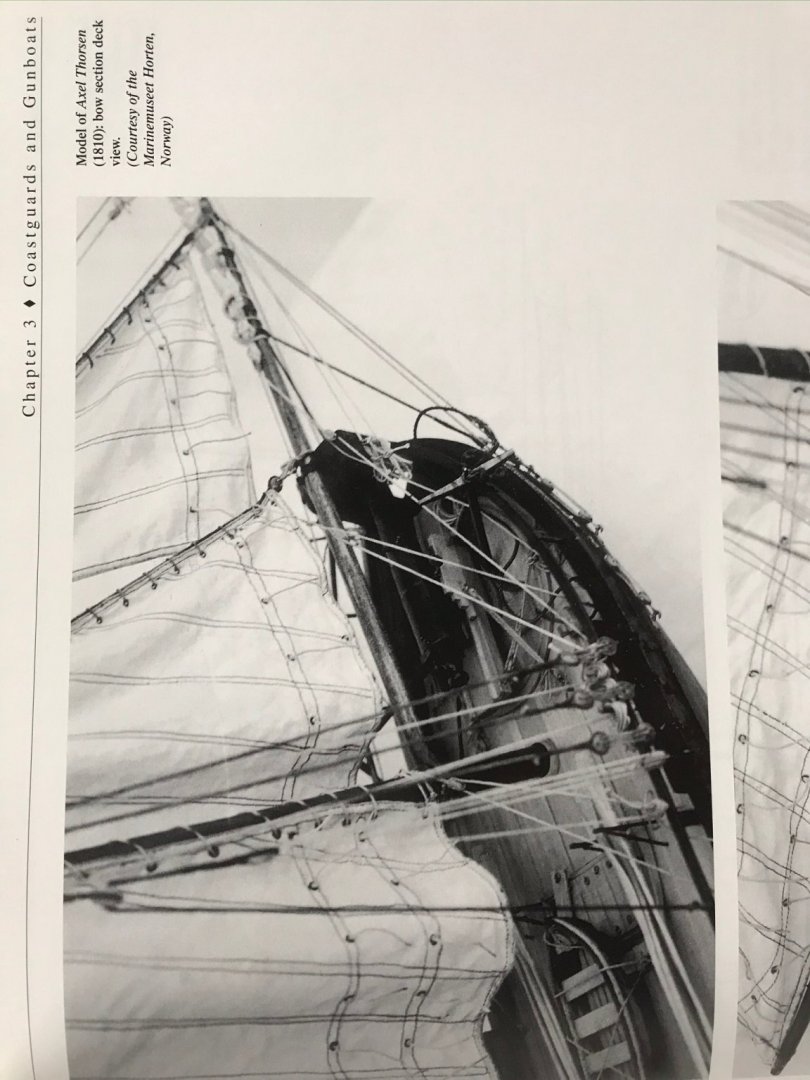
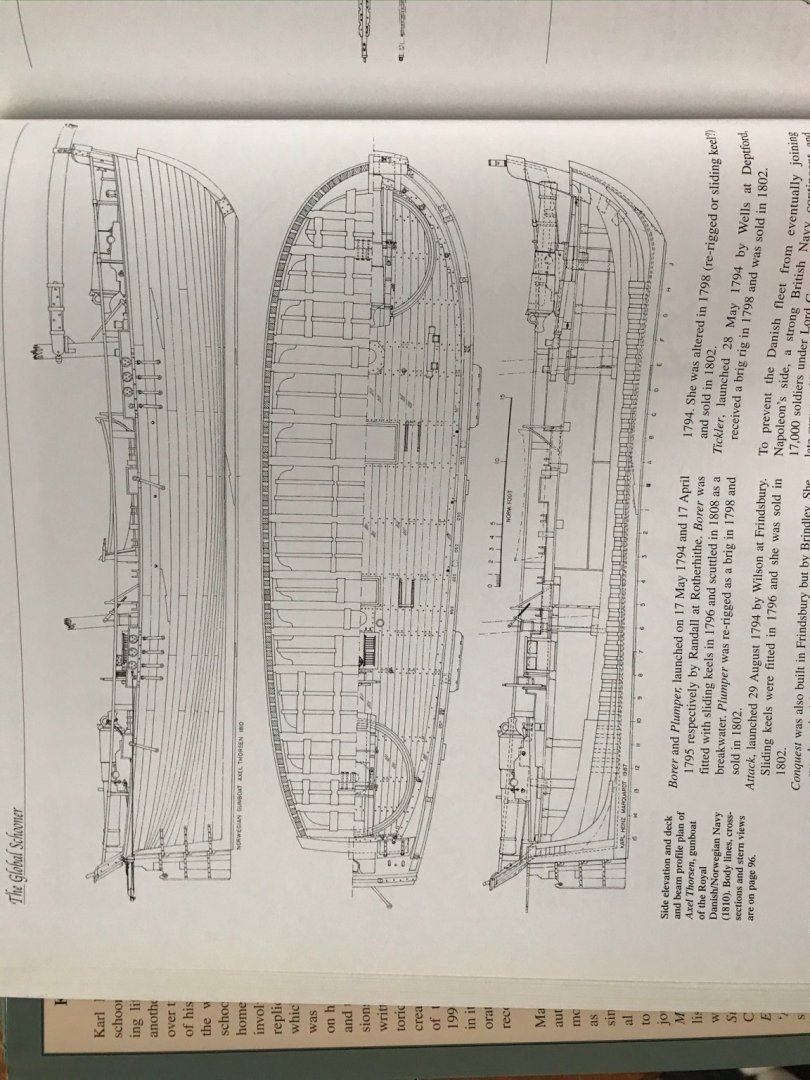
Here are a few images from ‘The Global Schooner - Origins, Development, and Construction 1695-1845’ by Karl Heinz Marquardt. This material is under copyright to Karl Heinz Marquardt and Conway Maritime Press (2003) and used here only for educational purposes. A variety of square, round and even octagonal ‘boots’ for your viewing pleasure! I’m going with square and perhaps a tiny ring above it, if I can pull it off.


- 155 replies
-
- 3
-

-
- opium smuggler
- Authentic Models
- (and 1 more)
-
Some days those are the only kind of solutions I seem to have! I’m looking forward to having the sage insight and skills that so many here seem to have. But I’m in no rush. I’m enjoying scenery so far. necessity is the mother of invention!
- 155 replies
-
- 2
-
-
- opium smuggler
- Authentic Models
- (and 1 more)
-
Great news! I’m so glad to hear they arrived safely back!! While half-a-month quarantine is tough, at least you know where they are and you can chat with them!
-
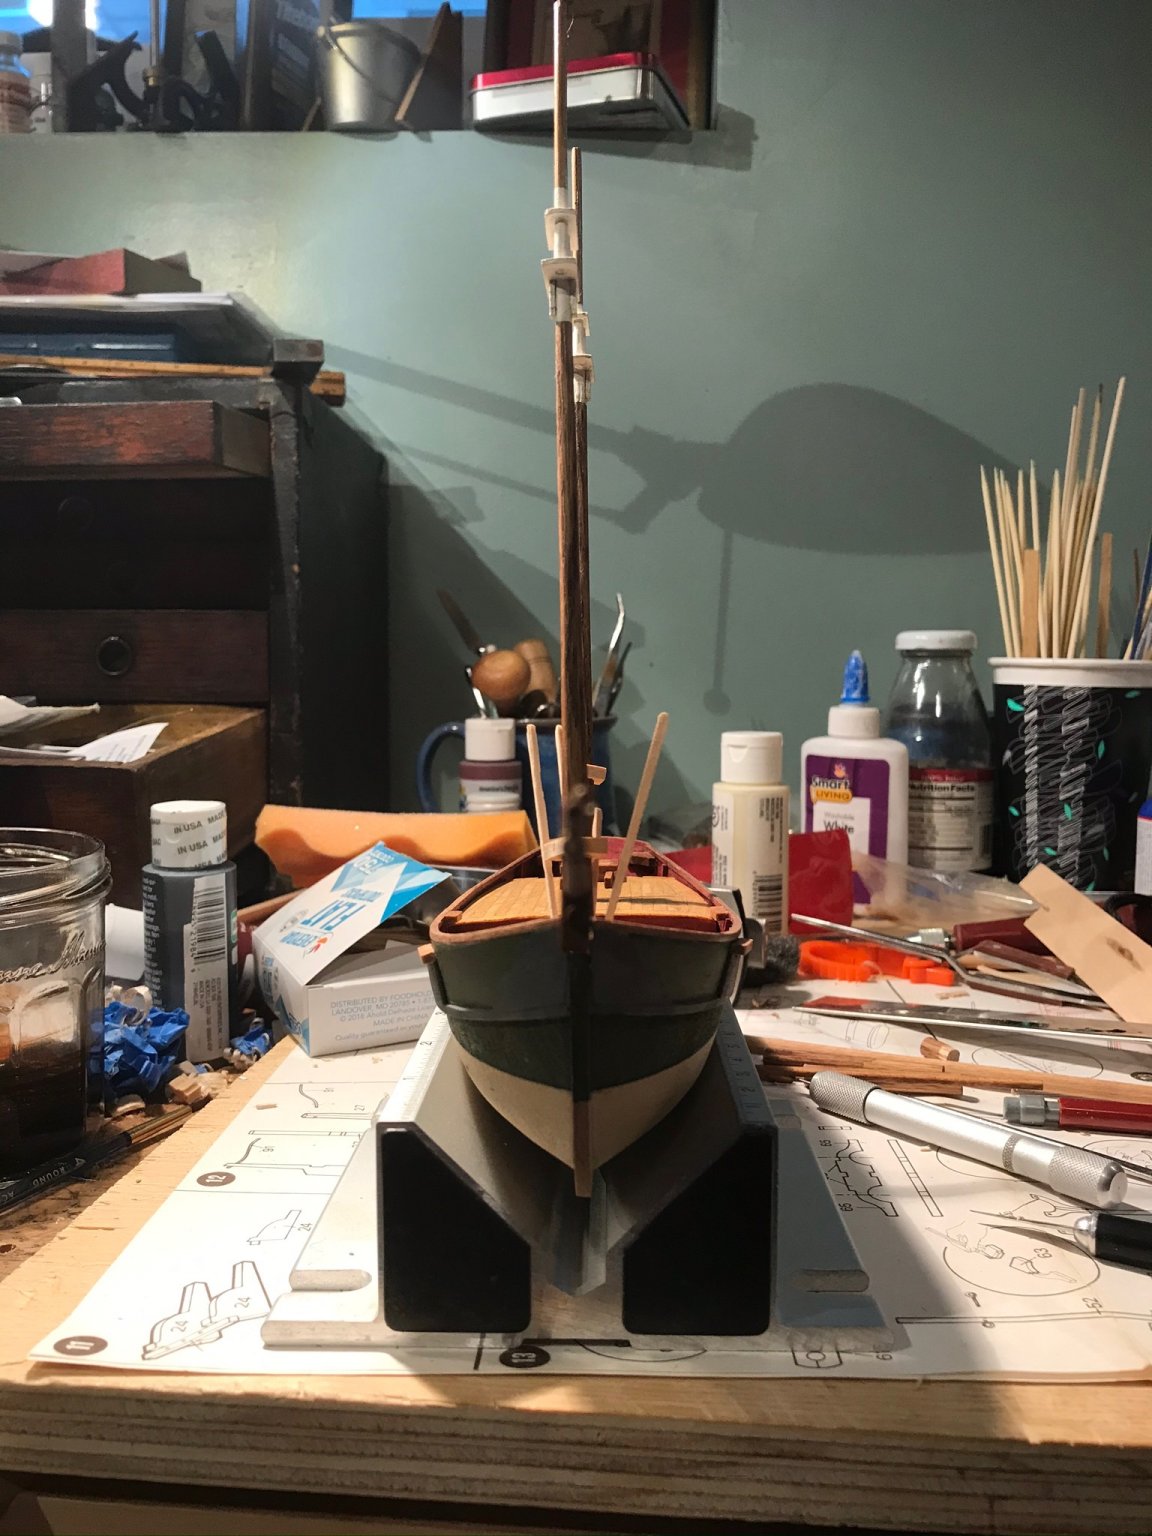
I see the challenge you have just in the taking of the photos. We can clearly see how tight space is in your workshop. You need a patron! Some Lord or billionaire who loves your work! My personal list of ‘grade A’ patrons is empty.
-
I just opened my version of the kit and reading through the directions. I didn’t realize how much extra you brought to the table! Great going!
-
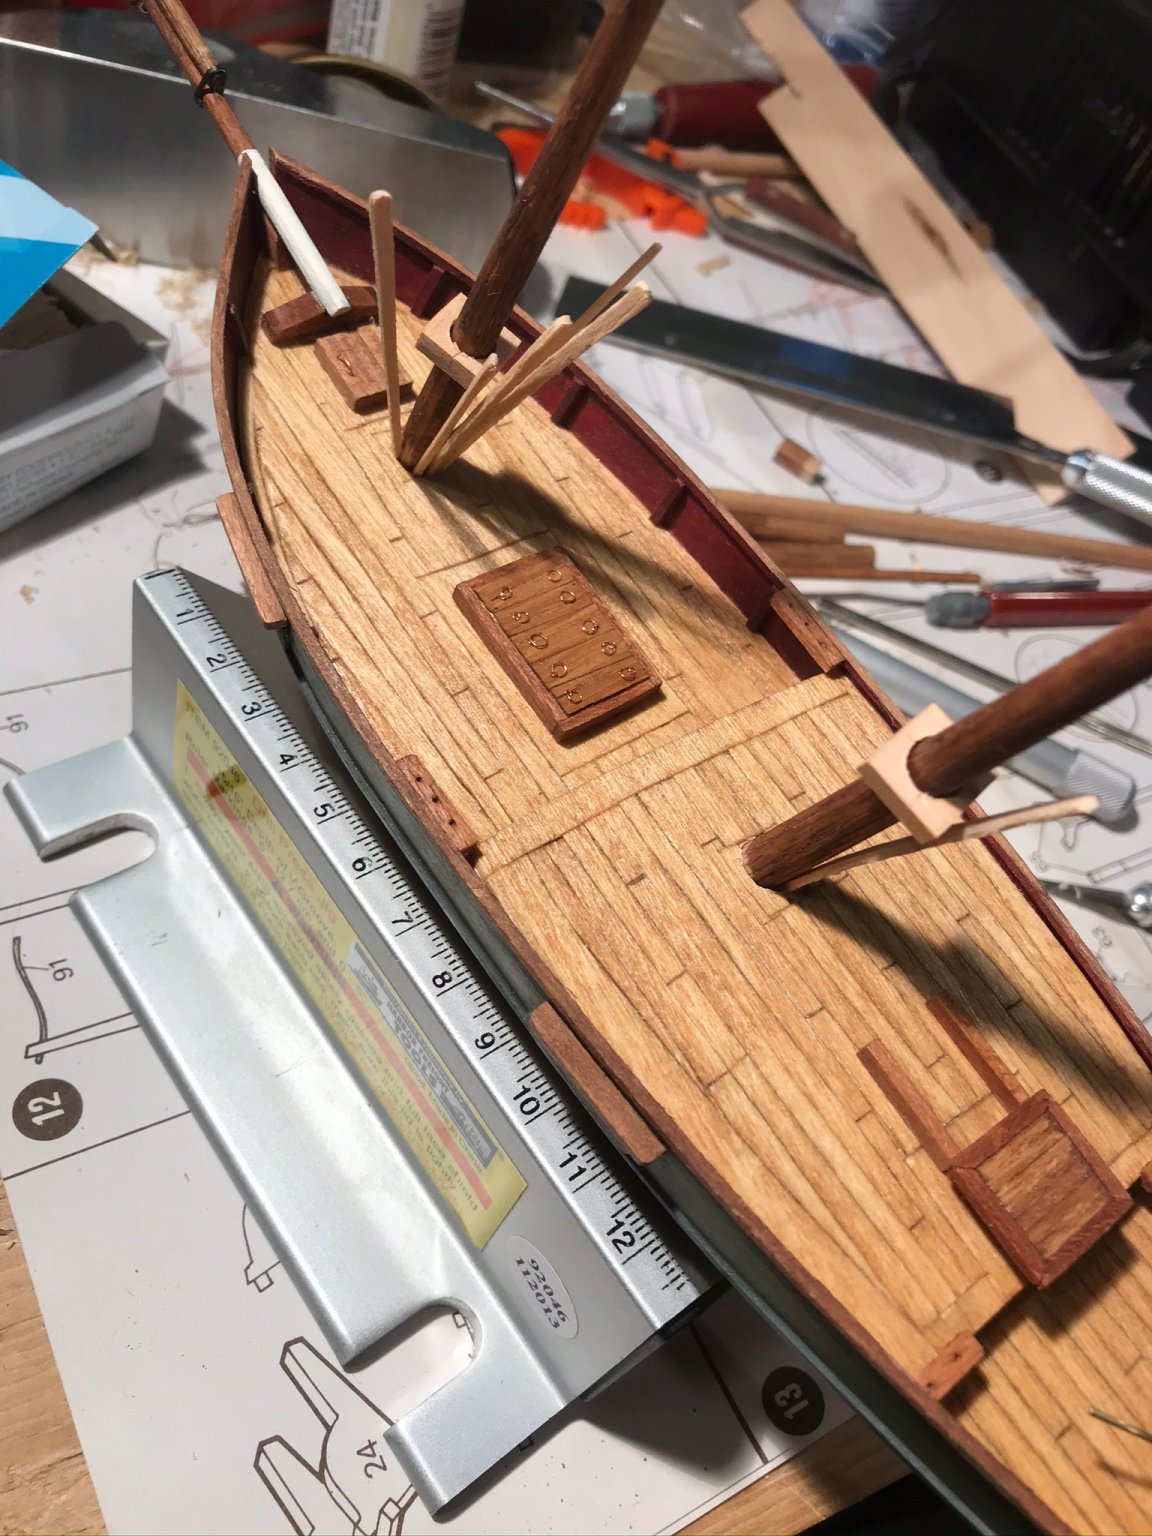
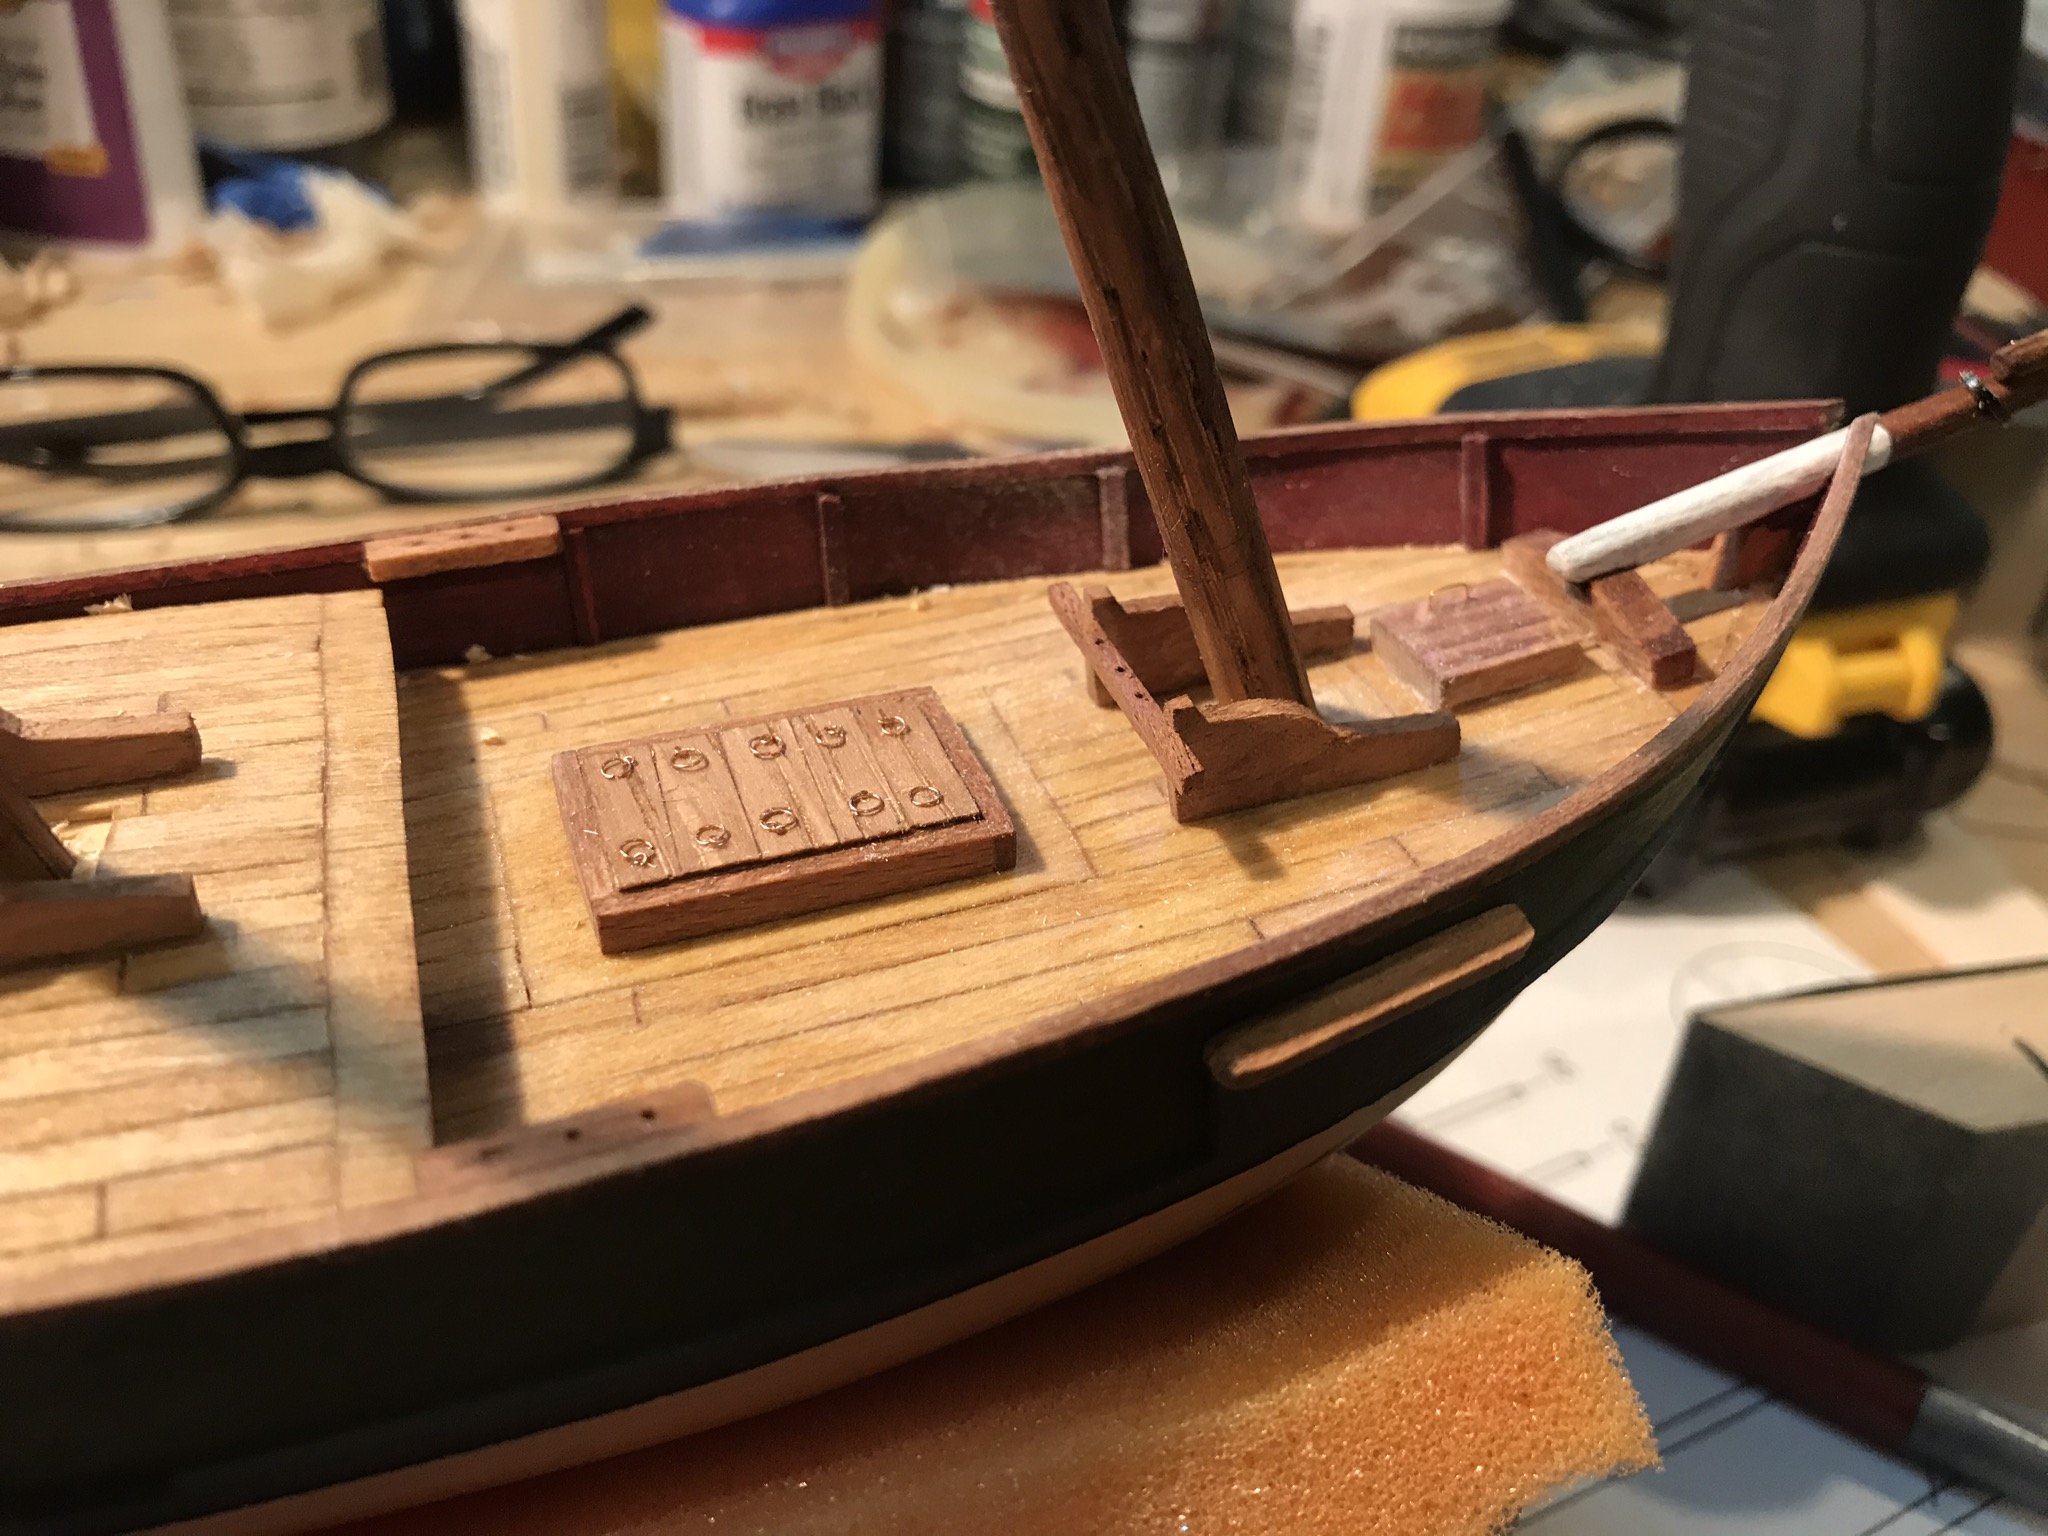
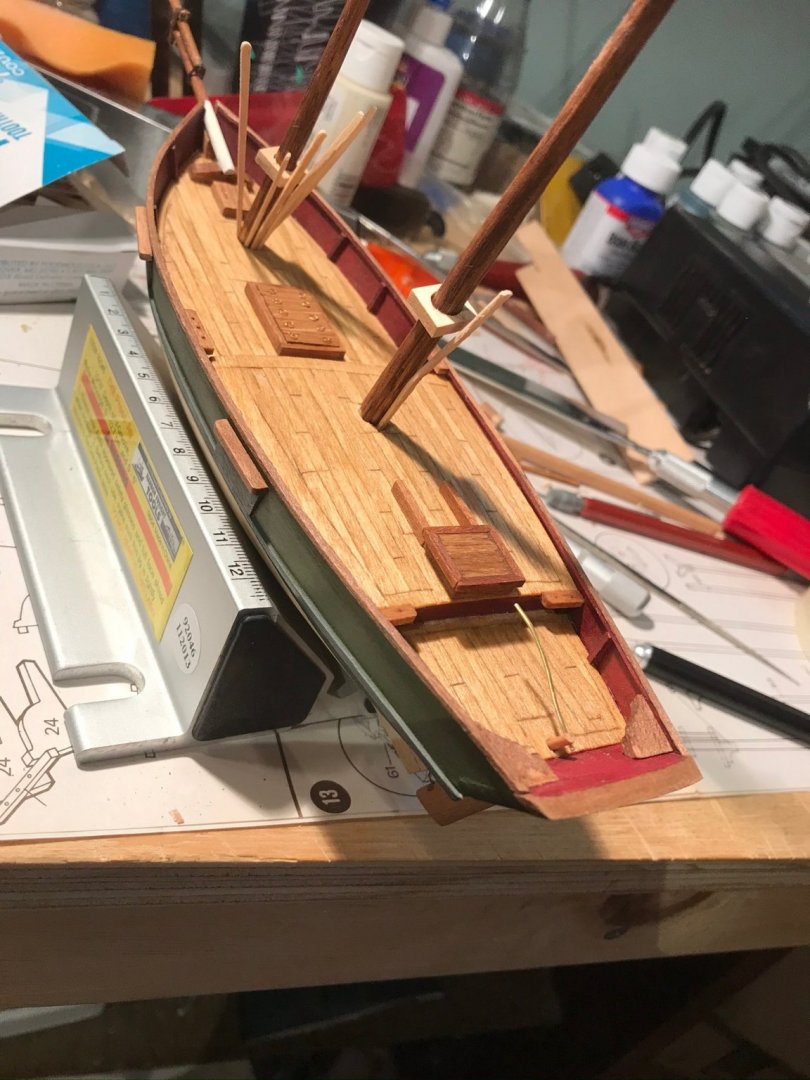
As suggested by VTHokiEE and Art, there is a variety of options regarding the mast to deck intersection! I found round and square “boots” occurring in the few plans I could find. So, I going with the easier to cut square boot, which still has a chance to be historically correct (although I left that district a while ago). You may notice the square “boots” raised out of the way on the masts in the photos. I also have attempted to attach the masts (and shimmed like demon), hoping to correct my issues the drilled holes I mentioned earlier.


- 155 replies
-
- 7
-
-
- opium smuggler
- Authentic Models
- (and 1 more)
-
I was able to tweak the bow to some degree as Chuck and Chris suggested. The shim is made from a flat tooth pick. I also sneaked in some white paint that I should have done earlier.

- 155 replies
-
- 5
-
-
- opium smuggler
- Authentic Models
- (and 1 more)
-
I can make room in my house...
-
Nope, not at all!! It can be very useful! I find myself, not just using the scrap for the build but also for testing stain or risky procedures. I have found myself using the scarp from my previous build on the current one!
-
I feel for your frustrations but from here, I just see beautiful work!
- 170 replies
-
- 1
-
-
- medway longboat
- Syren Ship Model Company
- (and 1 more)
-
1:100 RC DKM Scharnhorst
EricWilliamMarshall replied to Peter Papa's topic in New member Introductions
Welcome aboard from another from Jersey! I'm not an R/C person (yet!) but since you are in NJ, you may wish to check out https://www.facebook.com/GSMB.NJ/ Garden State Model Boaters -
Richard, how did you get into the metal working side off things? Your work on your Bluenose is a joy to behold. For the rest of you kind souls who are reading, check out his build log! Right now! I’ll wait...go!
- 155 replies
-
- 2
-
-
- opium smuggler
- Authentic Models
- (and 1 more)
-
I started with pin vise with a 1/16” bit (1.6 mm) and then a larger and a larger. Then next to last I used a hand-cranked drill. And the last pass, with a cordless drill since the hand-cranked drill was pulling off target at slow speeds. The holes were undersized compared to the masts. And, yes, spent more time on this then should have, especially given the results.
- 155 replies
-
- 1
-
-
- opium smuggler
- Authentic Models
- (and 1 more)
-
You are too kind. I love your Bluenose build!! Your work with metal is the standard I hope to achieve!! To anyone reading this build, stop right now and check out Richard’s build log:
- 72 replies
-
- 1
-
-
- Chesapeake Bay Flattie
- Midwest Products
- (and 1 more)
-
Many, many thanks. I found a number of your suggestions on Amazon and now await there arrival! Jim, welcome to MSW! I assumed you were a old timer around here; I do hope you try your hand at build log. I’ve found the folks here downright supportive and knowledgeable - a great combo!
- 72 replies
-
- 1
-
-
- Chesapeake Bay Flattie
- Midwest Products
- (and 1 more)
-
New Member from Brooklyn, NY
EricWilliamMarshall replied to Jim Cricket's topic in New member Introductions
I guessed from your bench holds. I have a friend who taught a craving workshop there a while back. I humbly suggest you start build log for project; it’s a great way to get suggestions and tap the collective wisdom of MSW. Your work is beautiful; I look forward to seeing more! -
New Member from Brooklyn, NY
EricWilliamMarshall replied to Jim Cricket's topic in New member Introductions
Welcome! I'm former Brooklynite myself. I believe you have come to the right place. I'm guessing you are a fan of Gramercy Tools, no? -
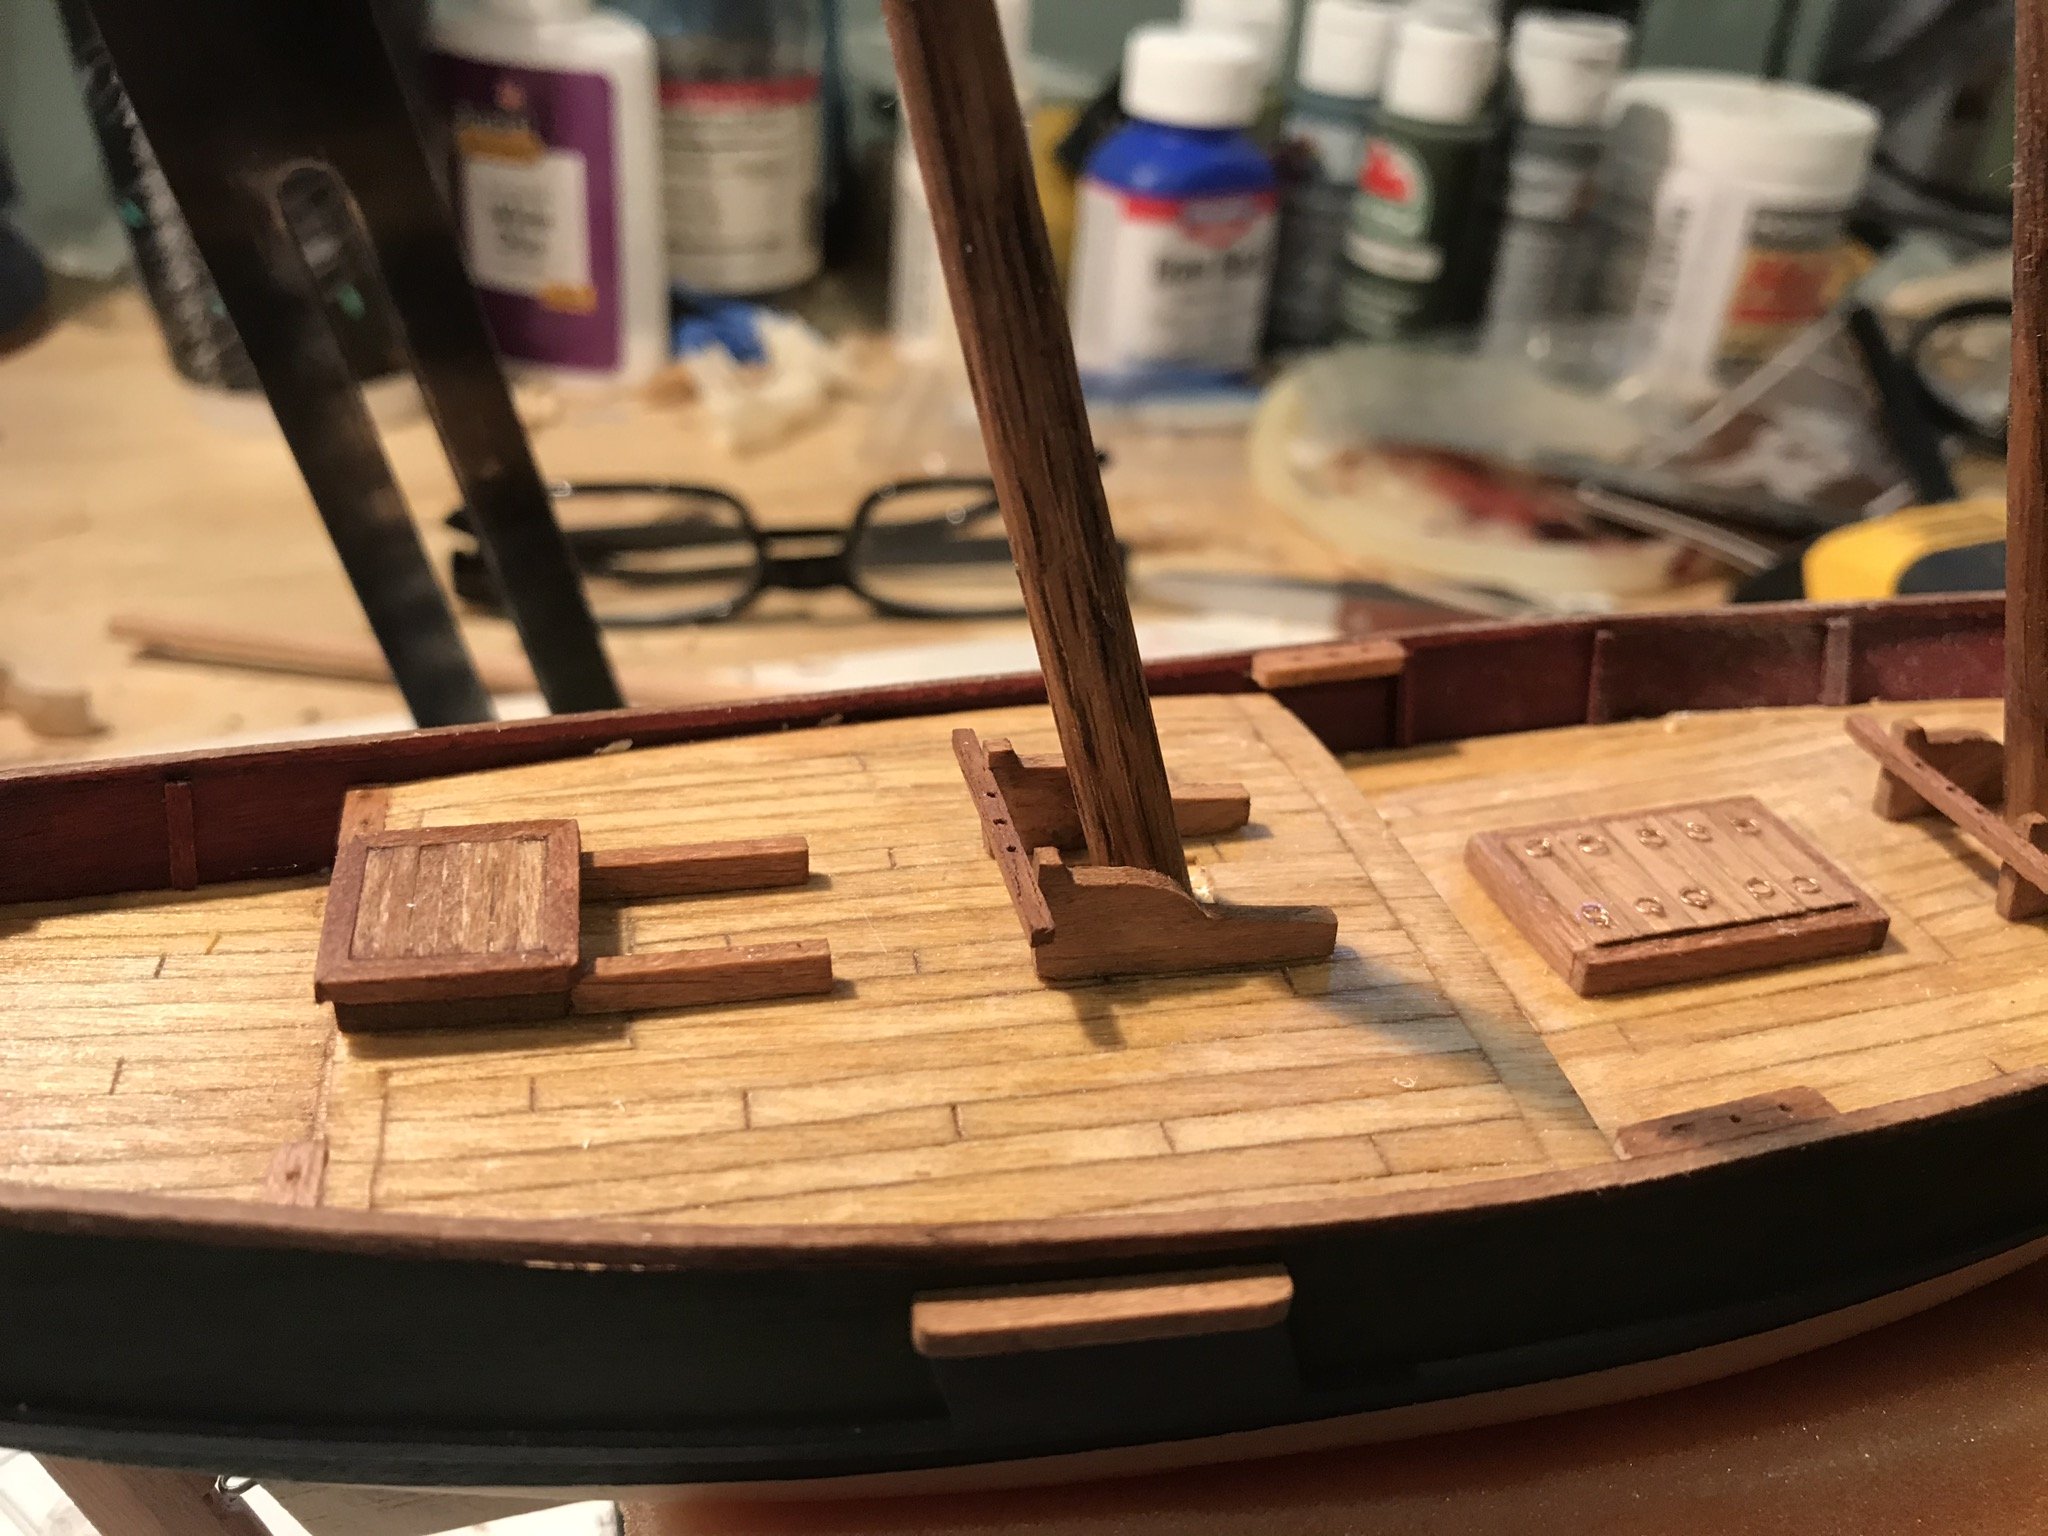
As promised, the pin racks unglued just placed on the deck. There is a nub missing from the masts that the boom will rest against (and a bit of paint work as well.)


- 155 replies
-
- 6
-
-
- opium smuggler
- Authentic Models
- (and 1 more)
-
I should have mentioned - the masts are just a dry fit. I’ll have to figure out a way to tweak the angles. I think can repair the decking. And now that folks mention it, perhaps I can ‘enhance’ that area of the ship. There is little bit of ‘furniture’ the goes around the mast for ropes and pins not shown. I’ll take a photo of that when next at the bench. VTHokiEE - I see what you mean (and nice work, I’m going to steal your scupper jig idea for my next builds!) Osmosis - beautiful work; the stand is a very nice addition to your model! As for my books, I didn’t find anything to draw on and, after a while, I let it be. The closest thing I found are either pilot boats or cutters from the early 1800s or schooners from later in the mid-1800s. Neither being a clear match to steal from. The kit is meant to be simple and I’m not clever enough (yet) to work too much around that. (I did add a planked deck, rails, and bulwarks though.) I clearly see some MSW builders can pull info from Steel or James Lee; I’m not there yet. Thanks for the help!
- 155 replies
-
- 3
-
-
- opium smuggler
- Authentic Models
- (and 1 more)
-
How is it going?
-
Woo-woo! The build is coming along nicely!
-
Looks amazing! Can you describe a bit how you fit your planks?