realworkingsailor
-
Posts
3,248 -
Joined
-
Last visited
Content Type
Profiles
Forums
Gallery
Events
Everything posted by realworkingsailor
-
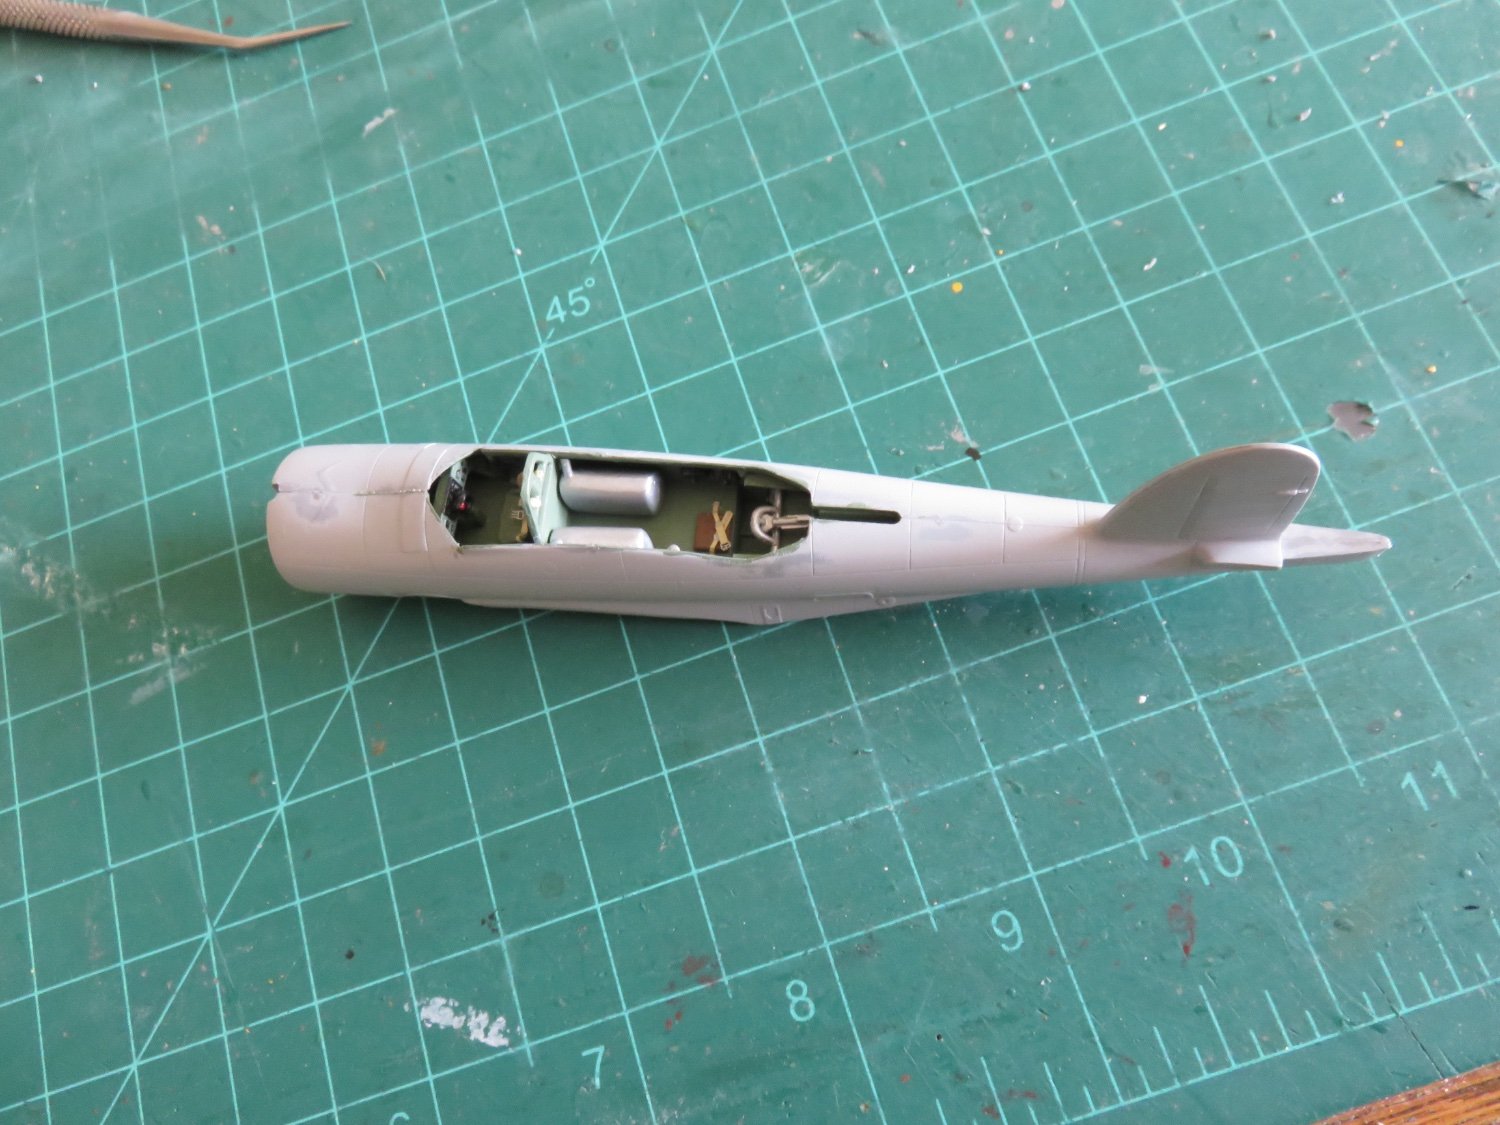
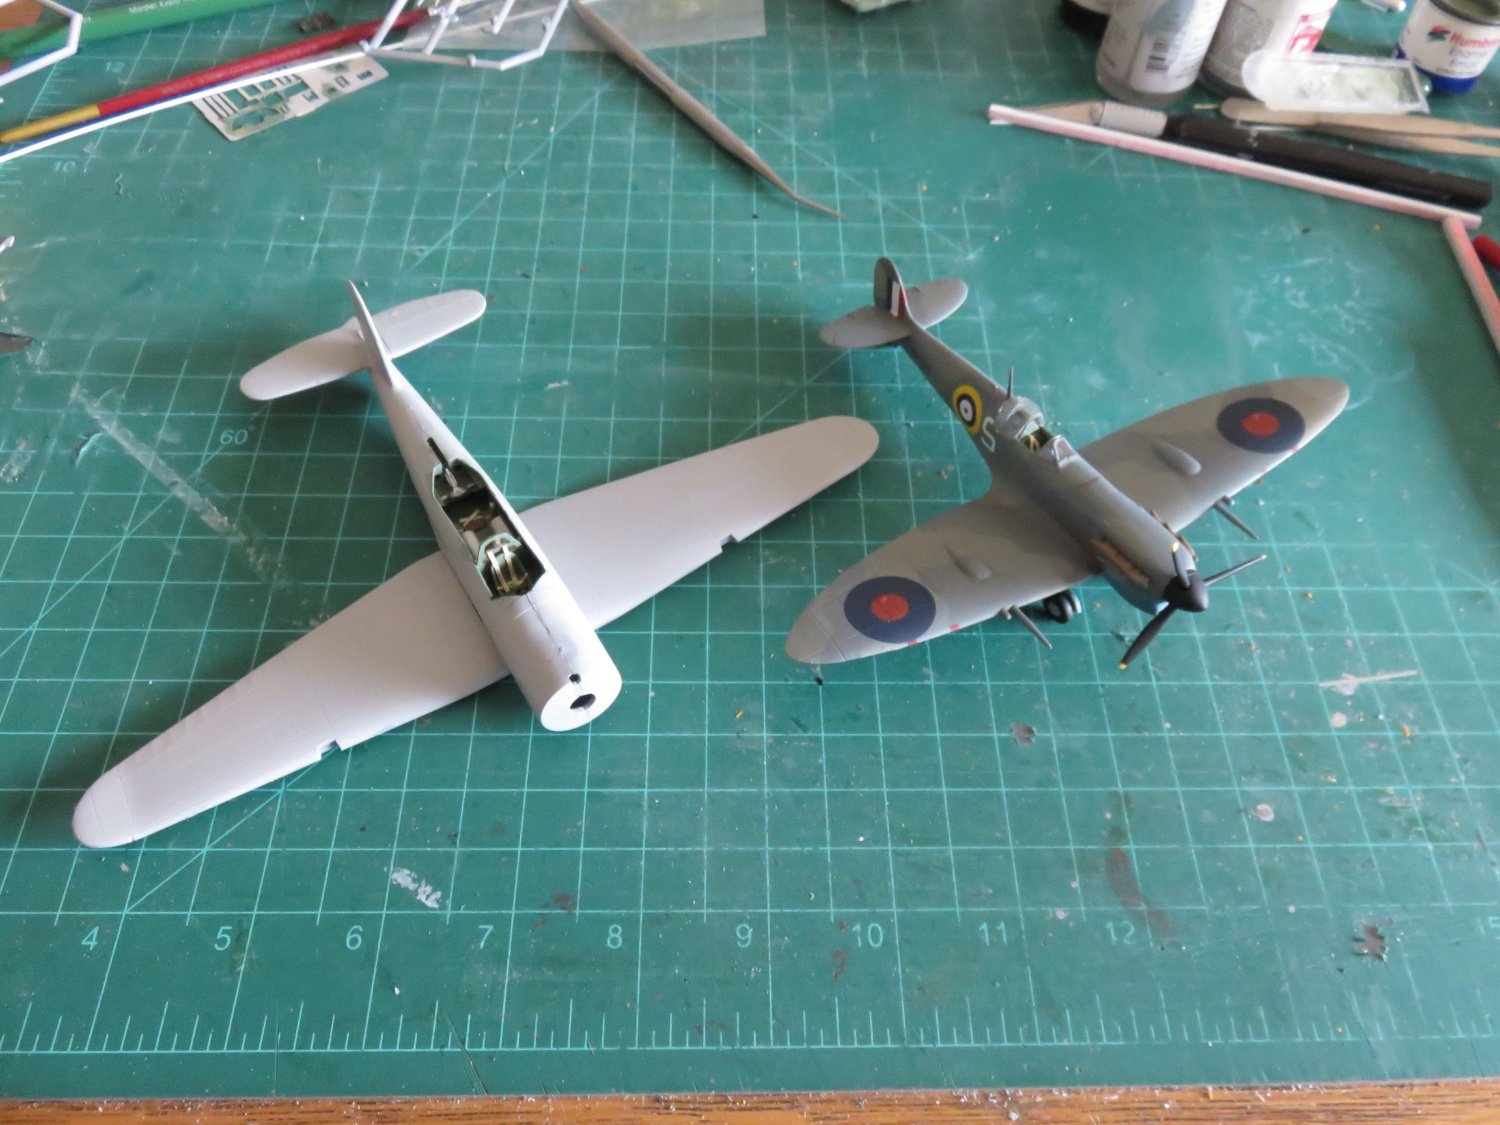
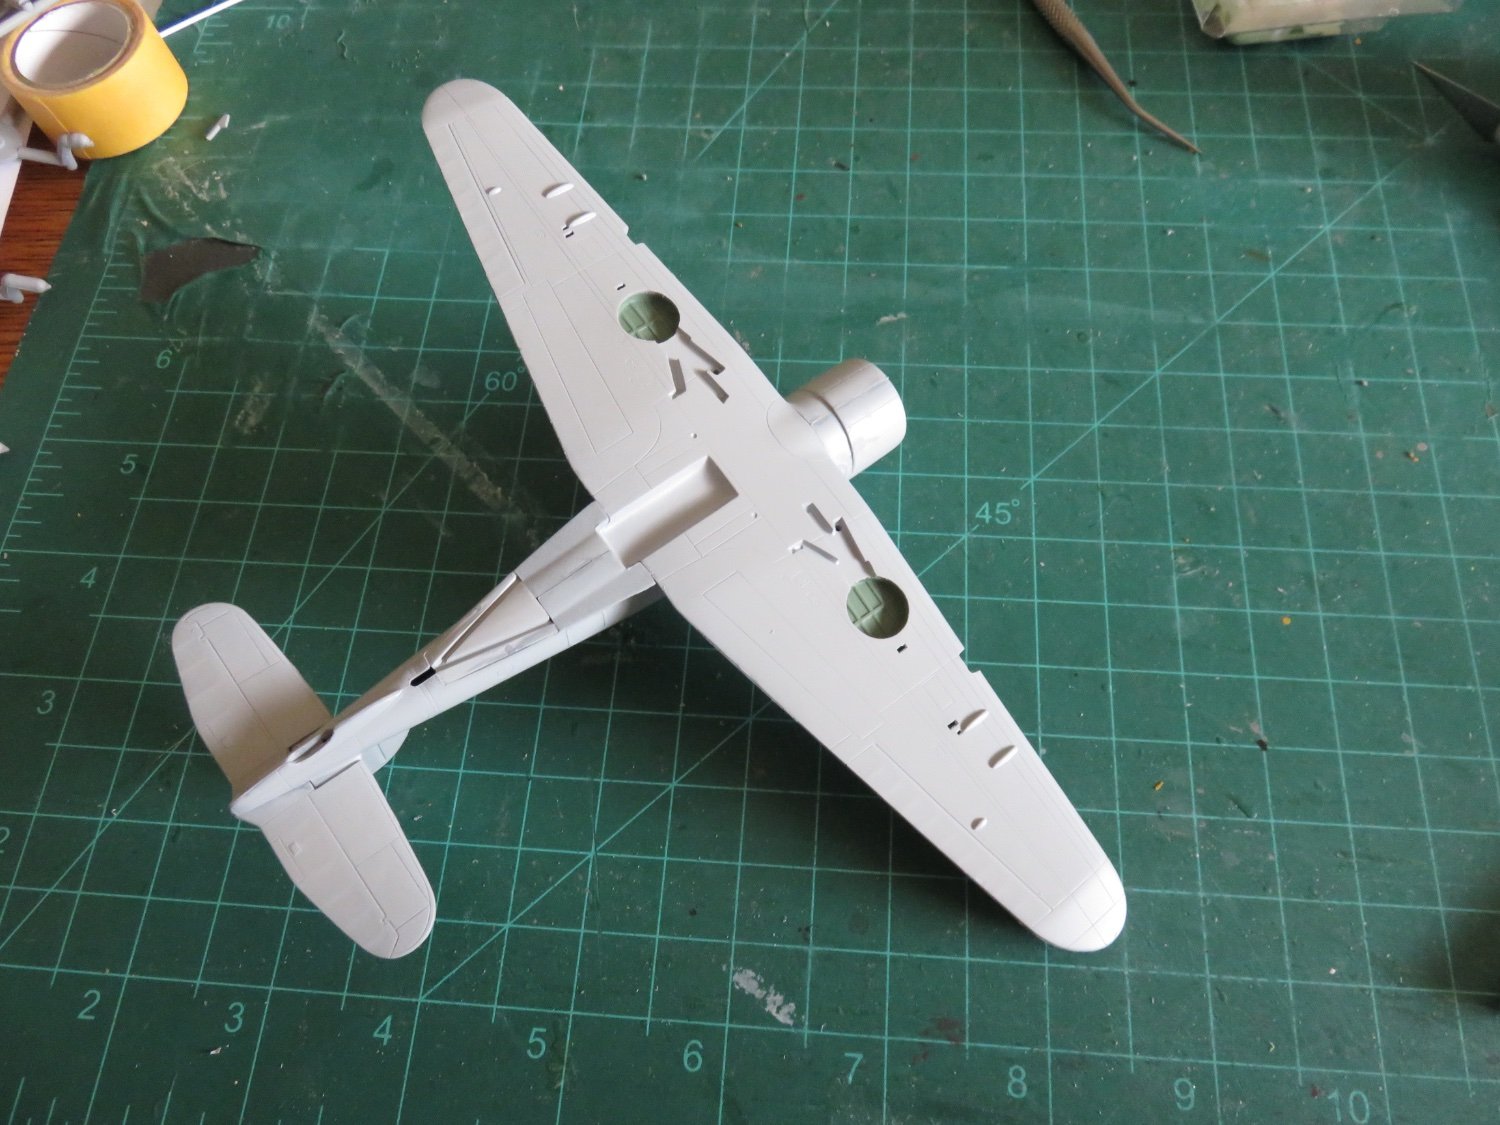
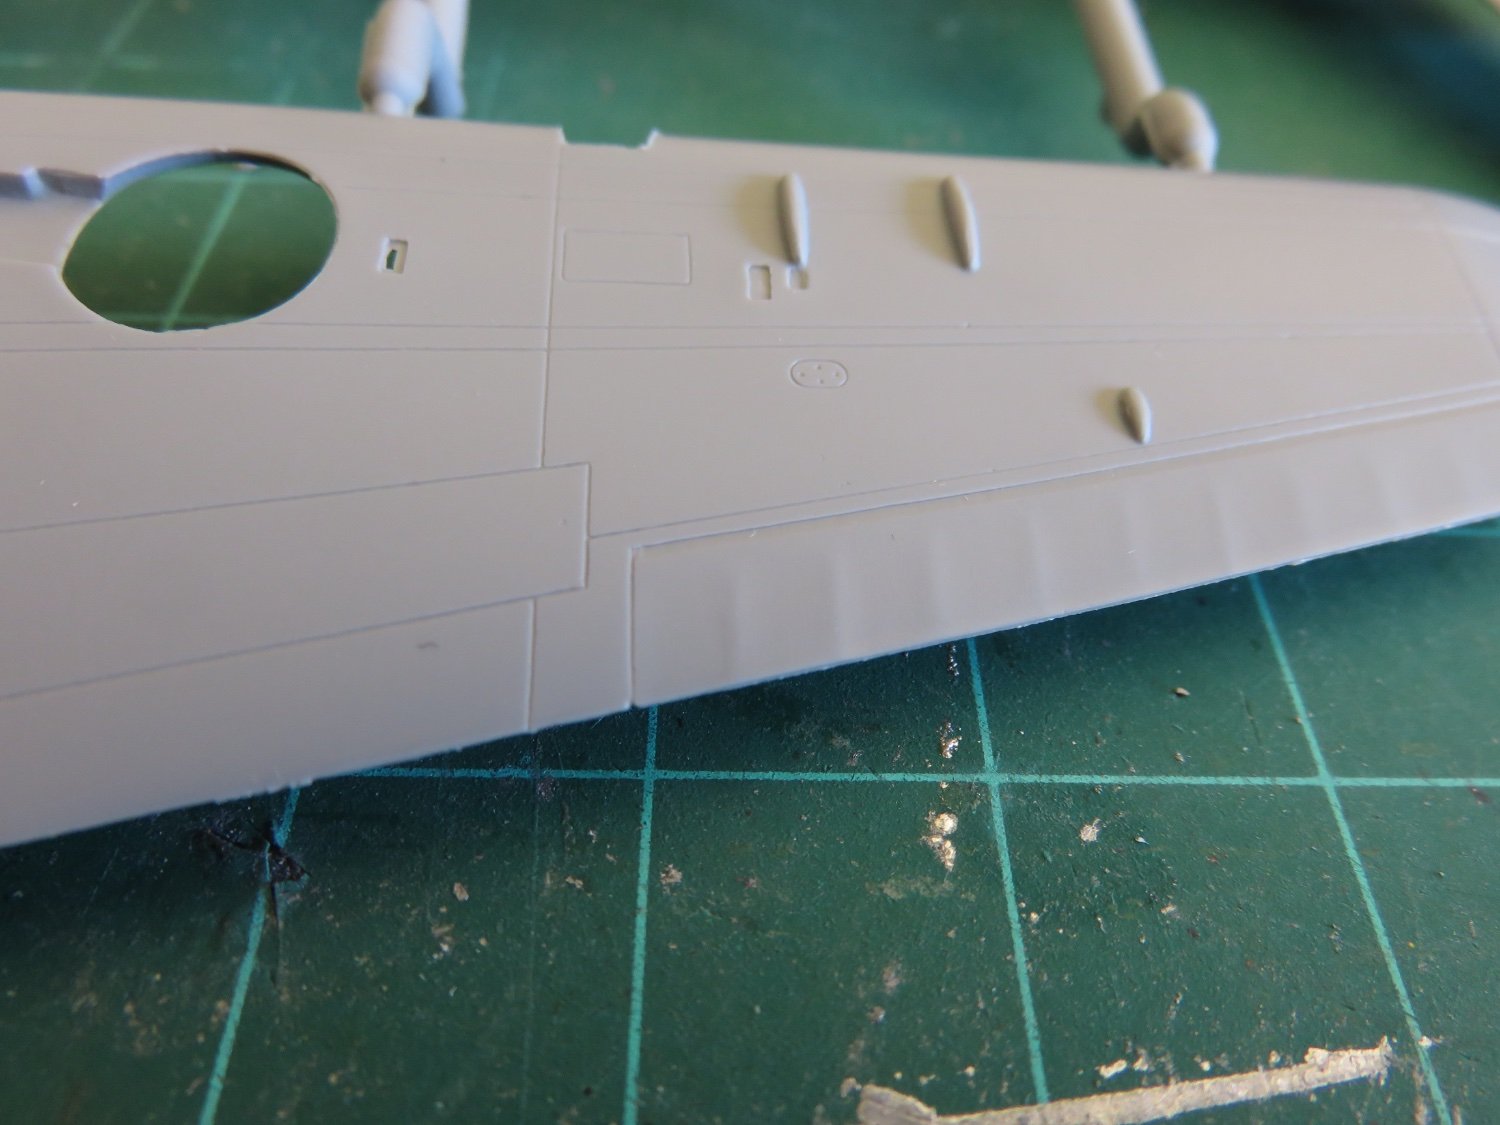
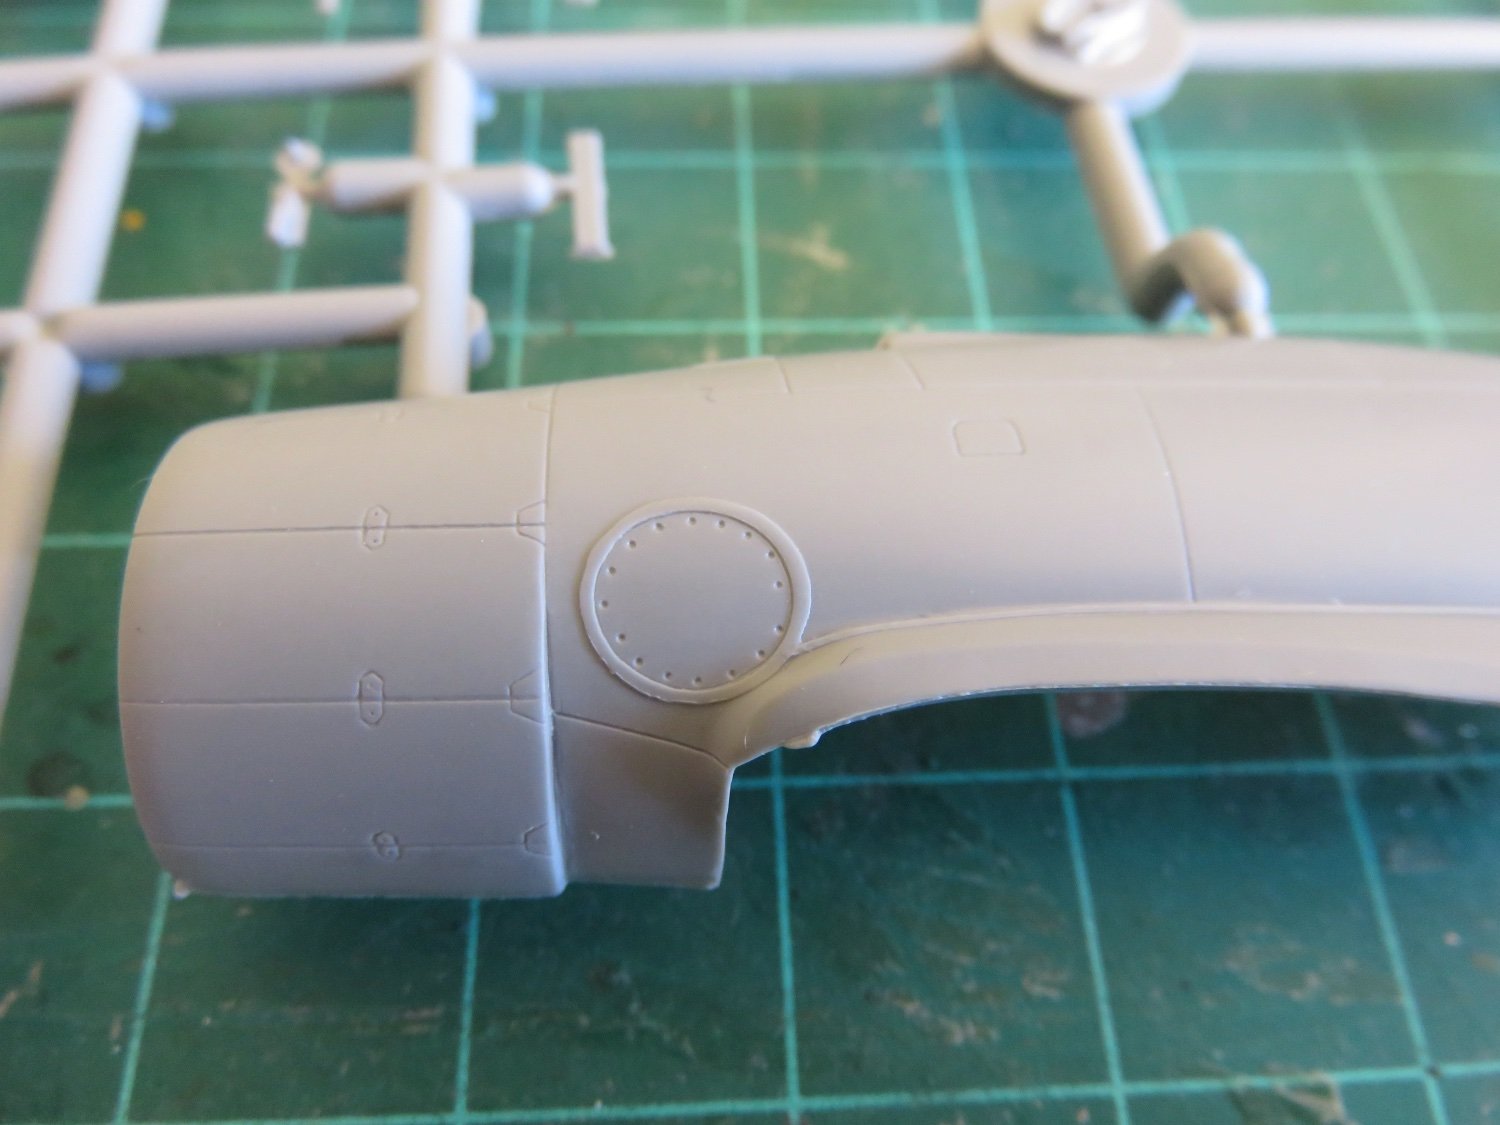
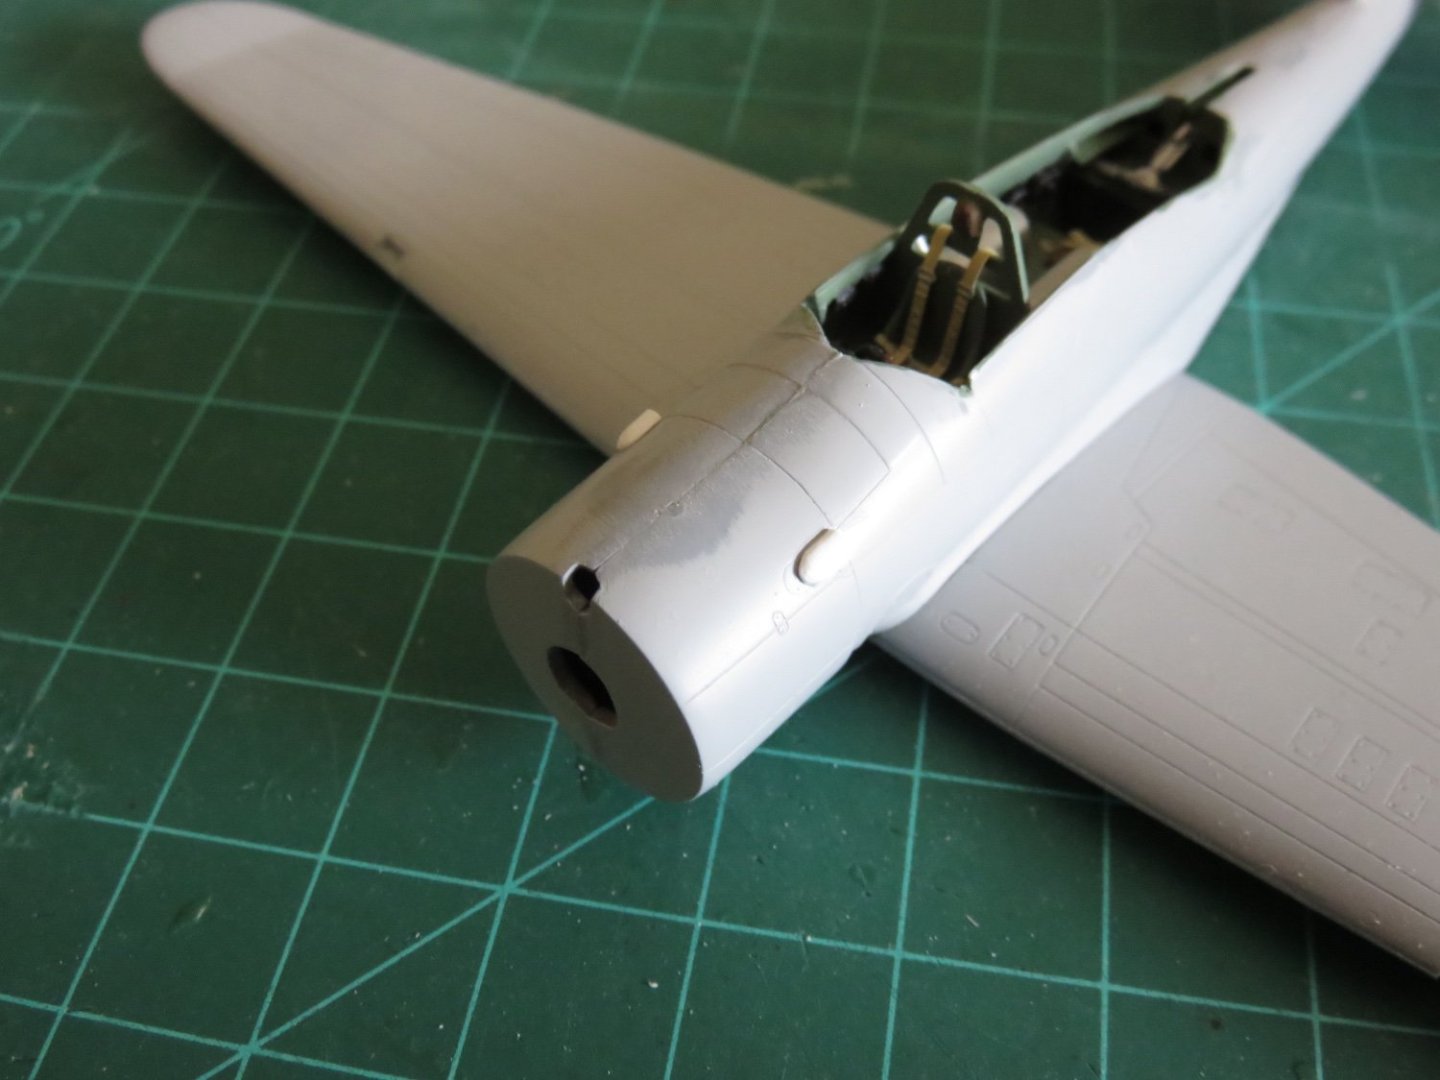
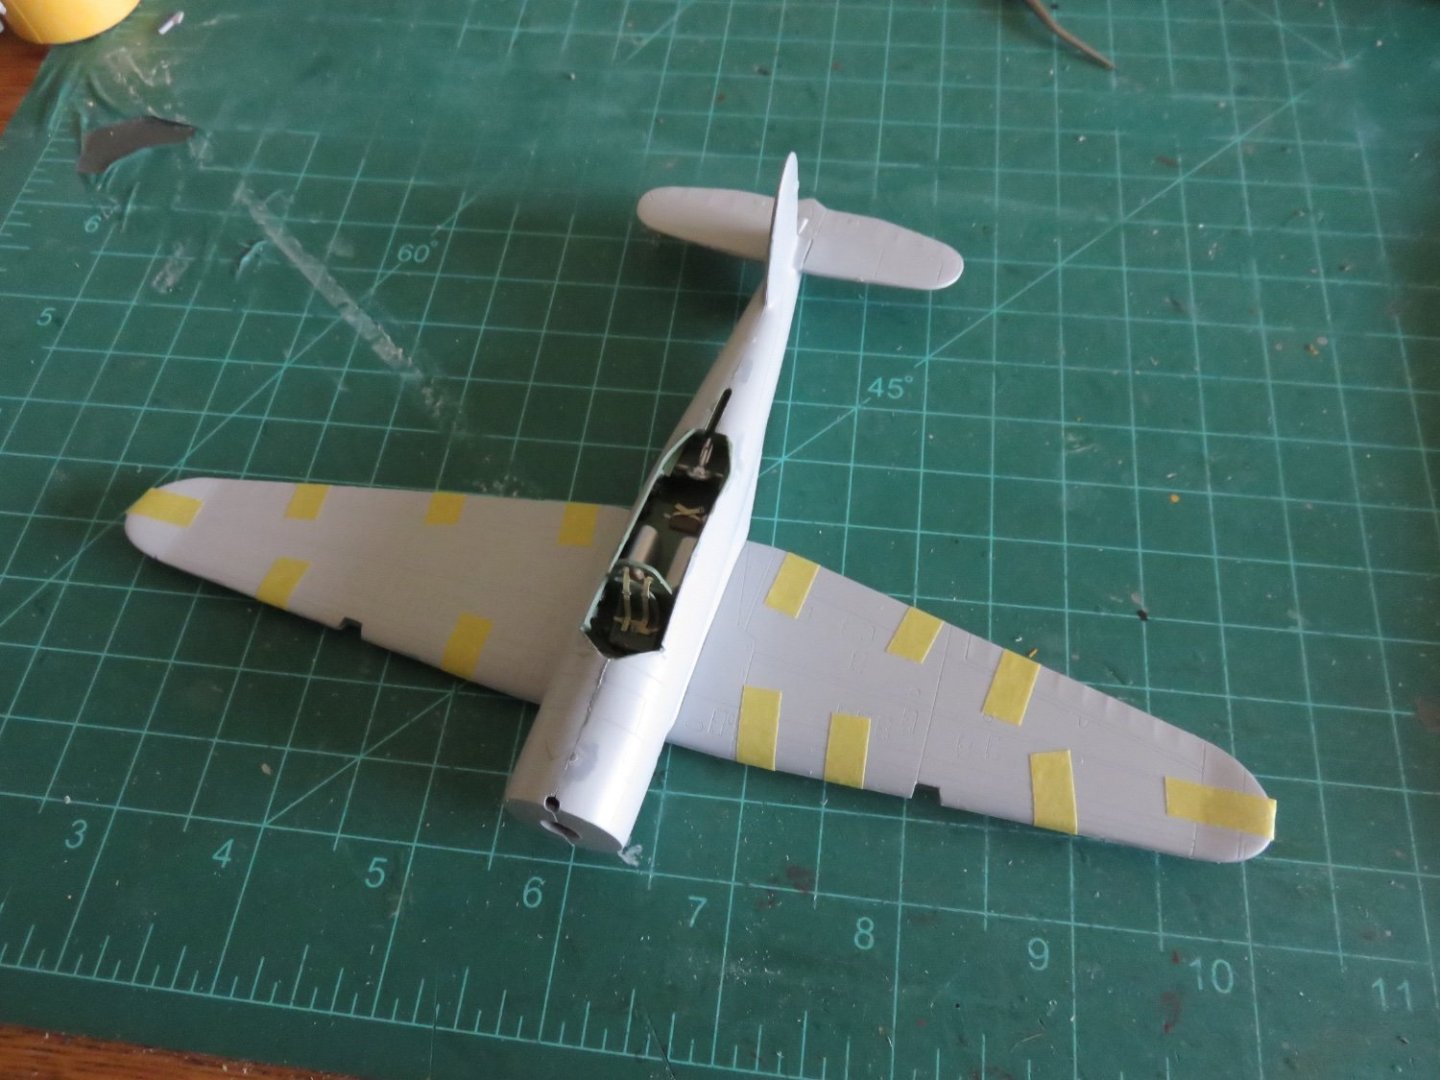
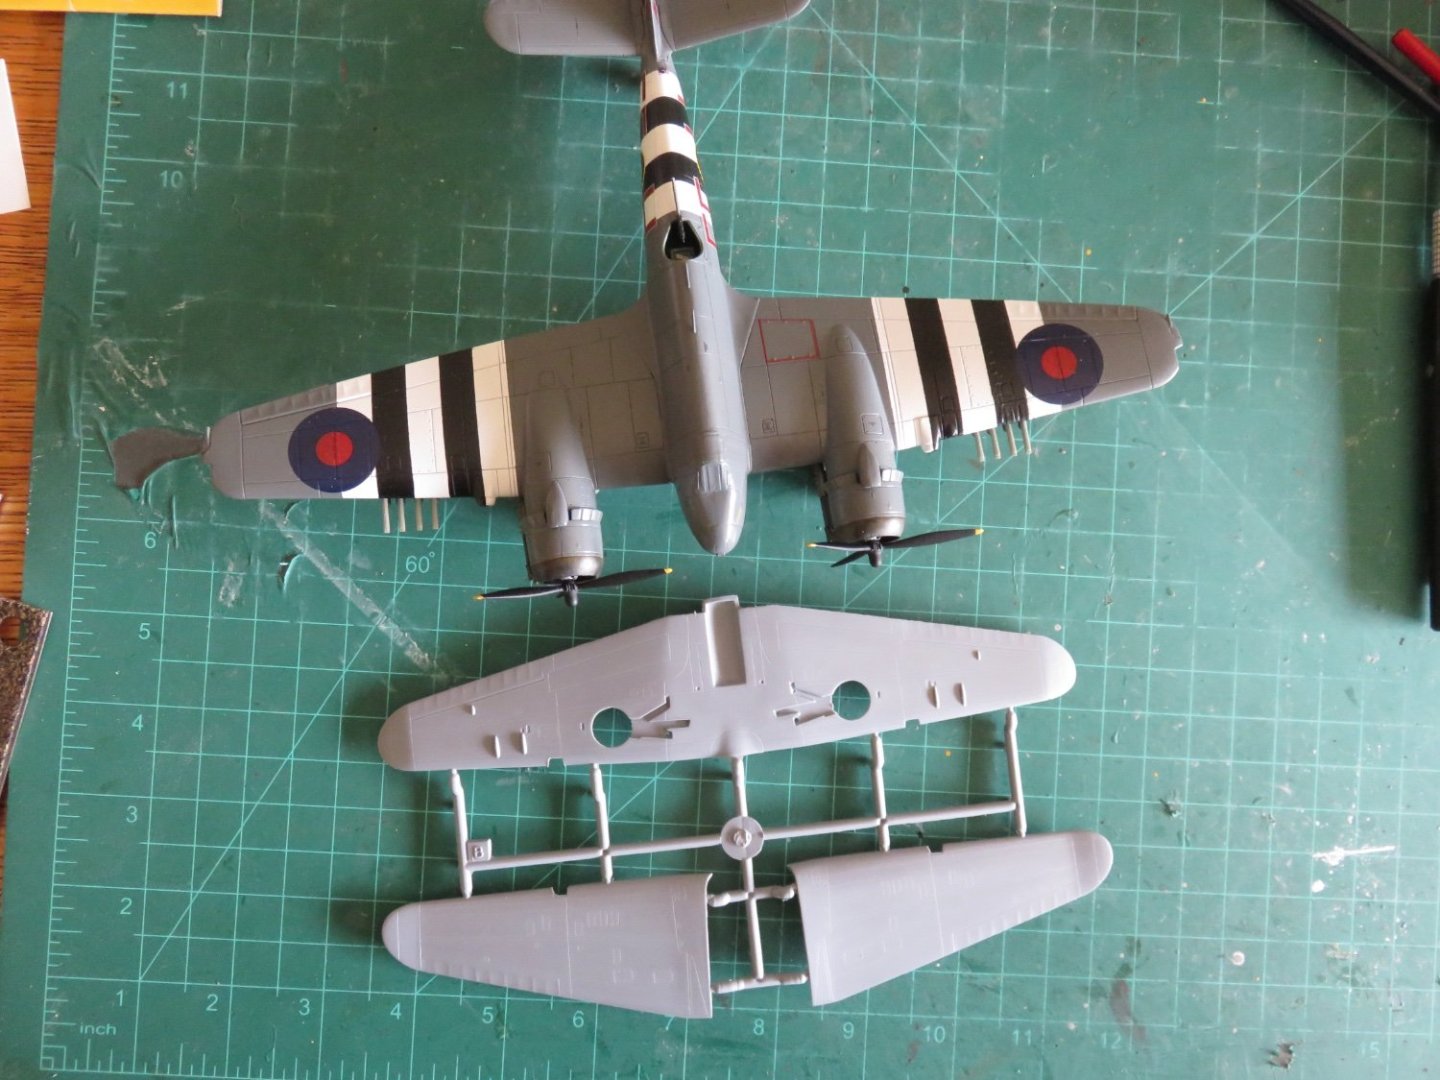
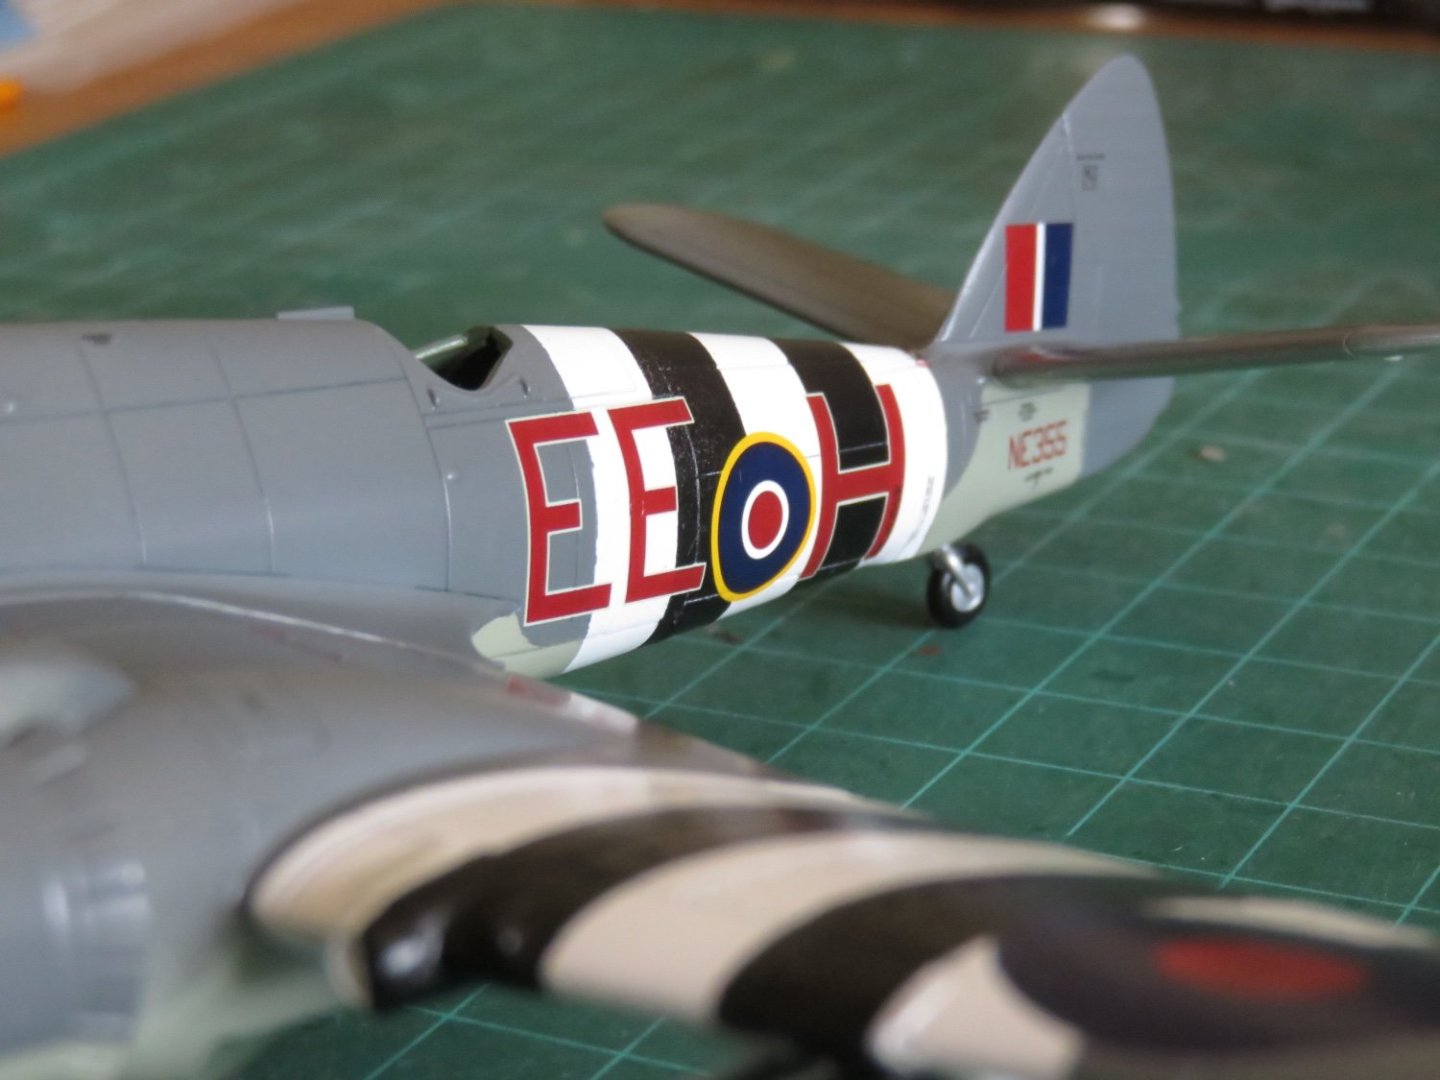
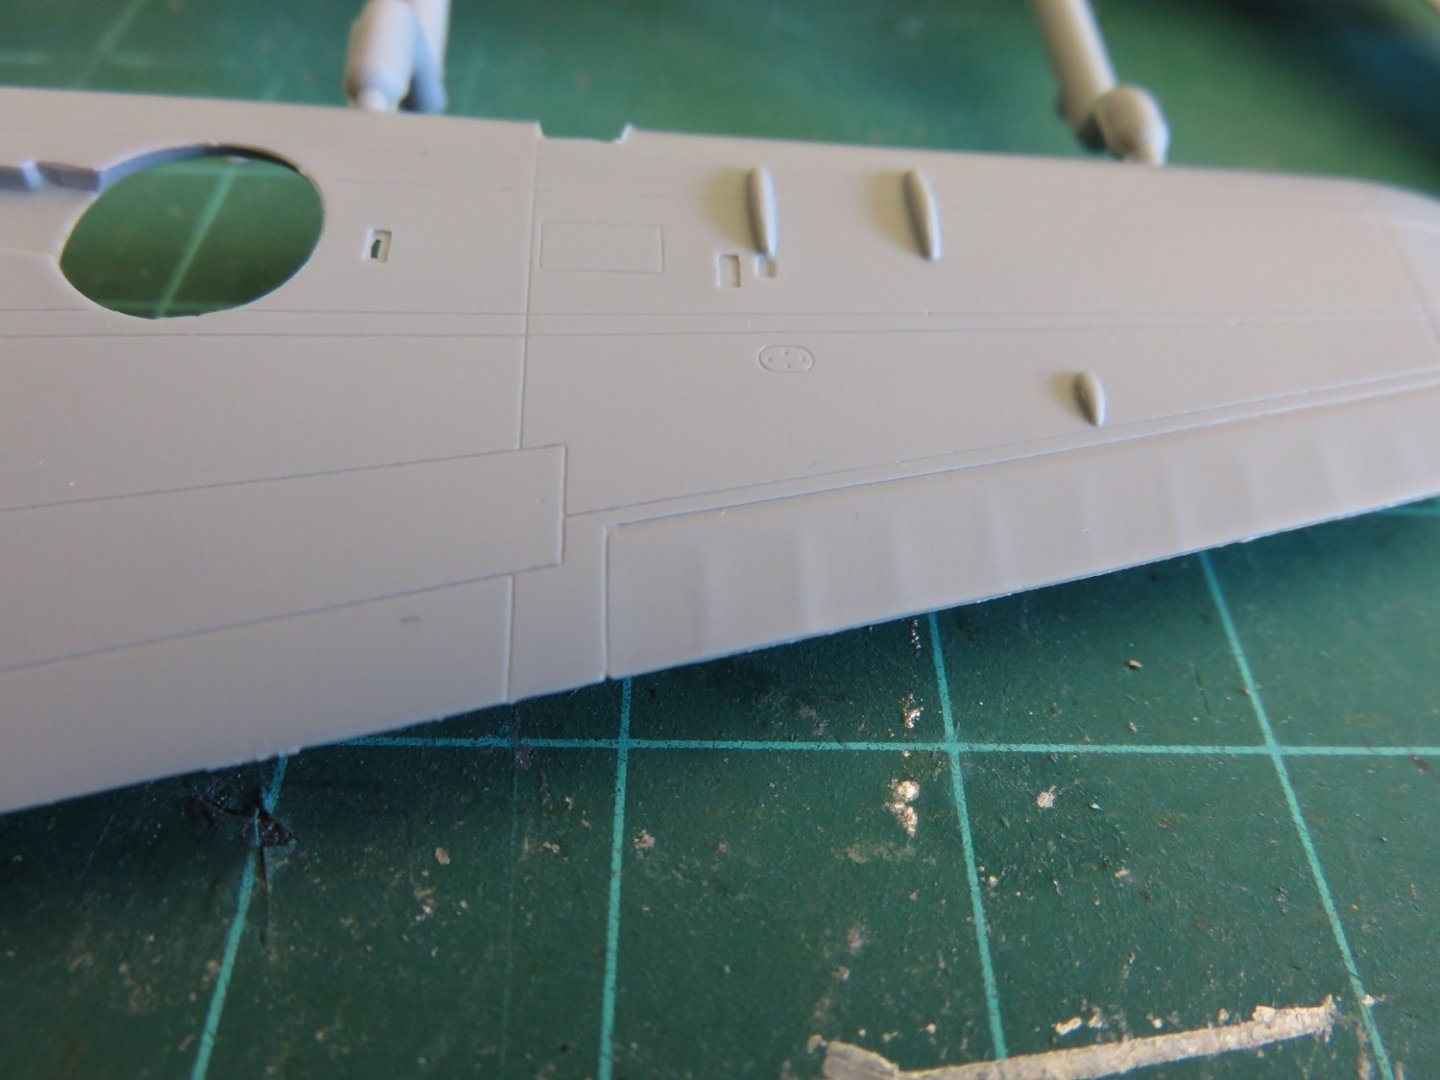
 Thanks, everyone for the continued interest! I have been moving right along, now that most of the cockpit is out of the way. The fuselage halves have been closed up, they went together fairly well. I was worried about maintaining alignment, but things fit fairly well, I guess the little locator nubs did do something after all! A little tape was used to hold everything in place while the glue set. After assembly, the second fuel tank was added to the interior. The Skua had at least three fuel tanks that I'm aware of, the two in the cockpit and one ahead of the pilot. This gave an endurance of over 4 hours at cruising speed (a "head spinning" 187 mph!). As impressive as that endurance may seem, the Skua did not have anything near a great rate of climb. Its service ceiling was reported as being just over 20,000 feet, but it would take the Skua almost 45 minutes to get there (!). After the fuselage, I moved on to assembling the wings. The kit provides a couple of circular inserts for the landing gear bays, these must be thinned in order for the upper wing pieces to sit correctly. There is a little cutout notch in each insert to accommodate a moulded bulge from recess for the landing gear legs, so sanding the inserts had to be done from the top. This was only a minor inconvenience, and some 100 grit sandpaper made short work of it, and soon the wings were assembled. There are, once again, no locating pins or nubs, so care must be taken to align everything. Luckily the Skua featured upturned wingtips, so there was just a hint of a positive position indication! The fit between the wings and fuselage was very snug, and some sanding was necessary, mostly at the forward end, as well as at the rear. A bit odd, as the bomb recess moulded on the wing underside, fits inside the fuselage. The tailplane was next. The tailplanes were moulded as one piece and a little sanding was once again needed to get it to sit properly. I skipped ahead a bit in the instructions, and finished closing up the fuselage with a small piece with the recess for the arrestor hook. Overall there are very few areas in need of filling, mostly just the aft end of the bomb recess, and as you can see above, the underside of the tail plane will need some attention too. There were virtually no gaps at the wing roots, and only a little light sanding will be needed to clean up the remaining seams. I'm somewhat impressed. This is were I came to the second error in the SH kit. If you look at this photo I've borrowed from John Dell (Dinger's Aviation Pages), you can see there was a vent of some sort that stuck out prominently: SH neglected to mould these vents (there was one on the opposite side as well, however they took the time to scribe a panel line in the shape of the vent (although it, and the other panel lines are somewhat in the wrong location!). Anyway, I replicated the missing vents out of some spare styrene stock: I also scribed the panel line along the top of the nose (as was helpfully pointed out in the reference photo too. A couple passes with my knife, followed by a couple more passes with my scriber and we should be good to go. It's also worth noting that Skuas from serial number L2933 and higher had only one landing light in the port wing. SH supplies clear glazing and wing cut-outs for two lights, so I took this opportunity to add the clear part on the starboard side and sand it smooth with the wing, it will be painted over anyway. One more size comparison for you all, this time it's Skua vs Spitfire: And I still need to add the engine and front cowling! I am still enjoying this project, and I do recommend this kit for anyone who wants to put their modelling skills to the test. Andy
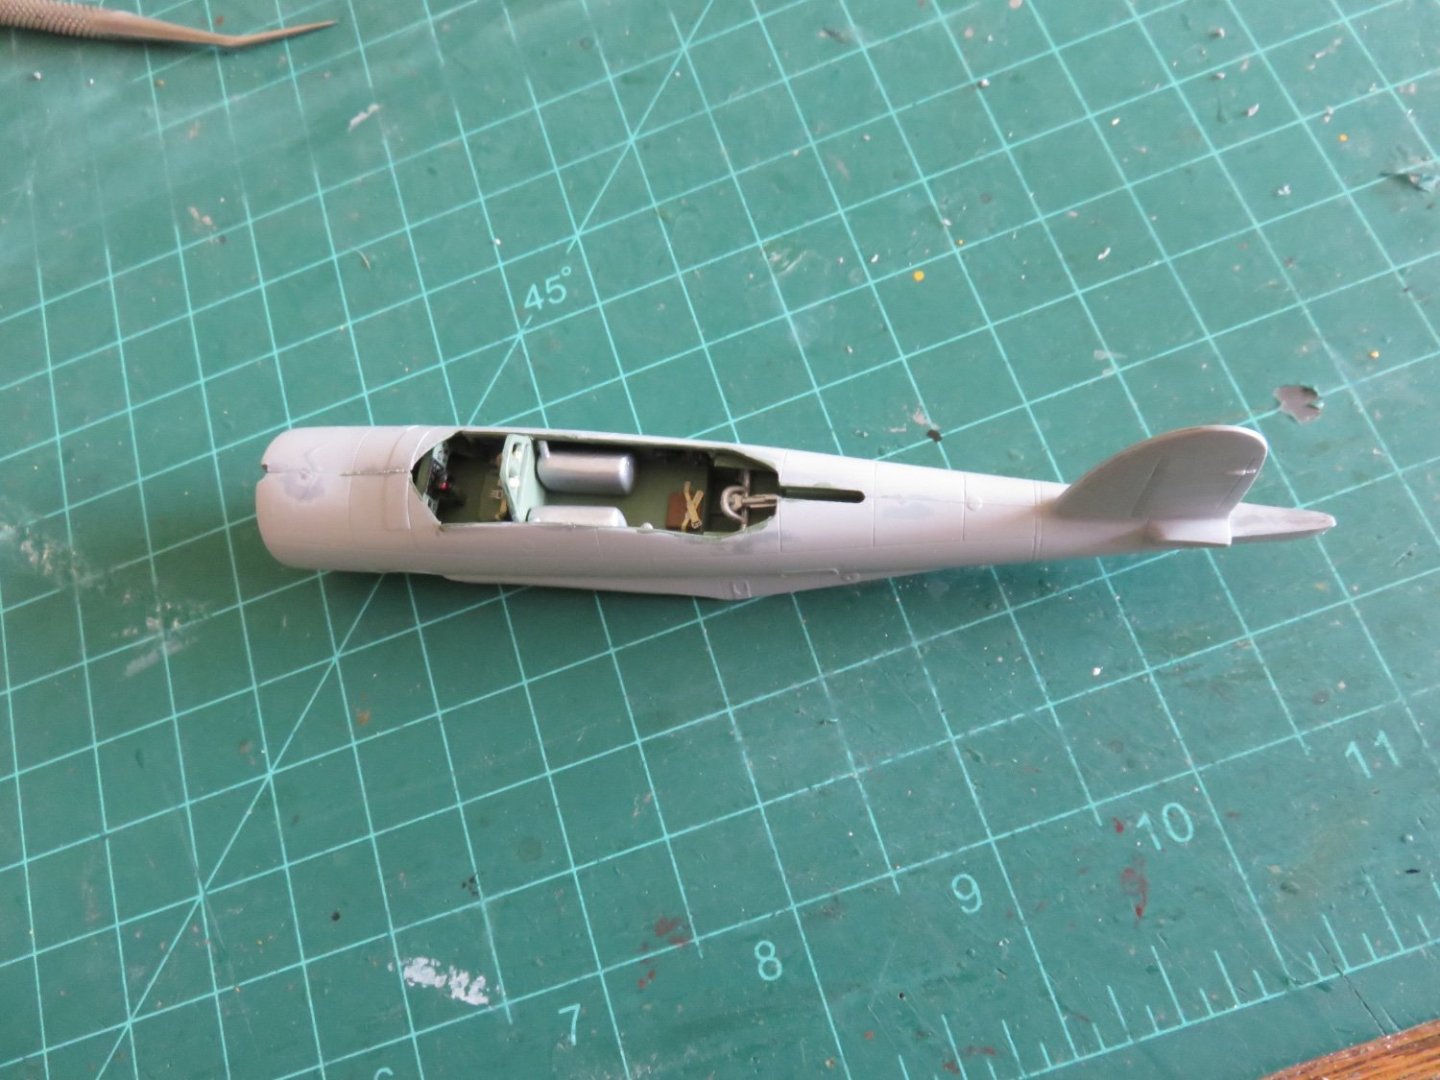


- 24 replies
-
- 10
-

-
The Skua had some interesting features, for sure. The area below the cockpit was subdivided into two watertight compartments. If the compartments were undamaged, the airplane could remain buoyant after ditching. During the war at least a couple of aircraft were recovered just because of this feature (one in Norway, the other off Bermuda). Having the watertight compartments necessitated moving the fuel tanks into the cockpit. Although it’s worth noting they were not self sealing, and there was little to no armour plating, so…… Andy
-
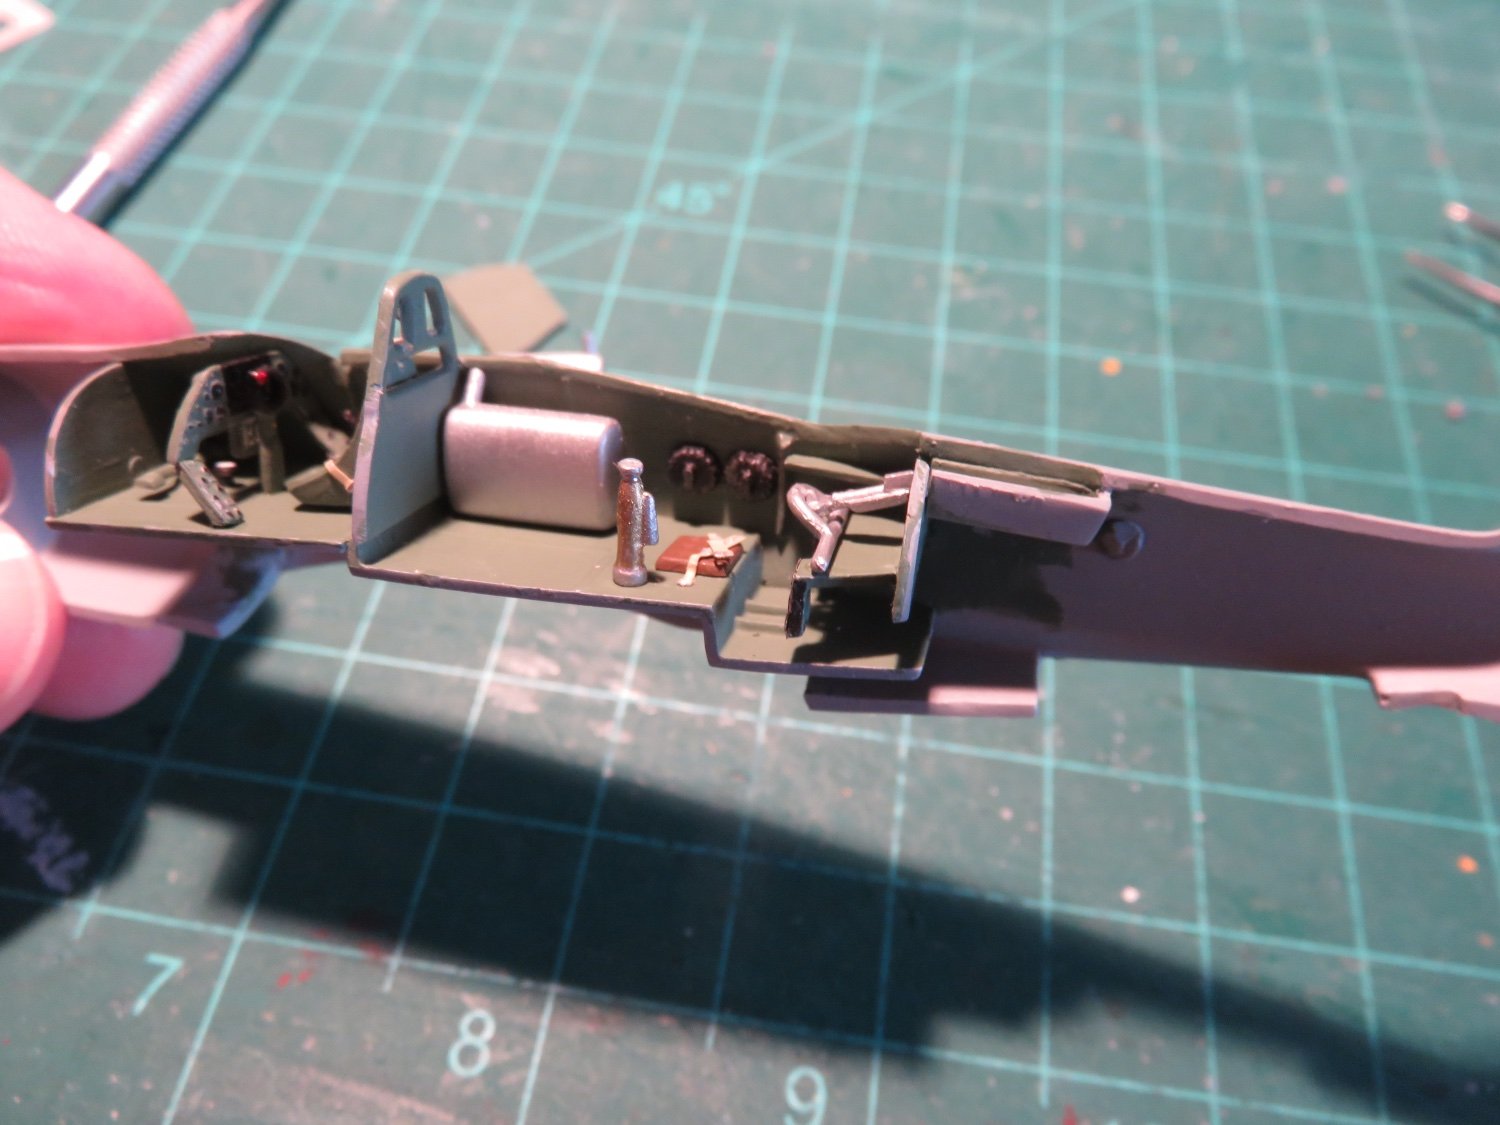
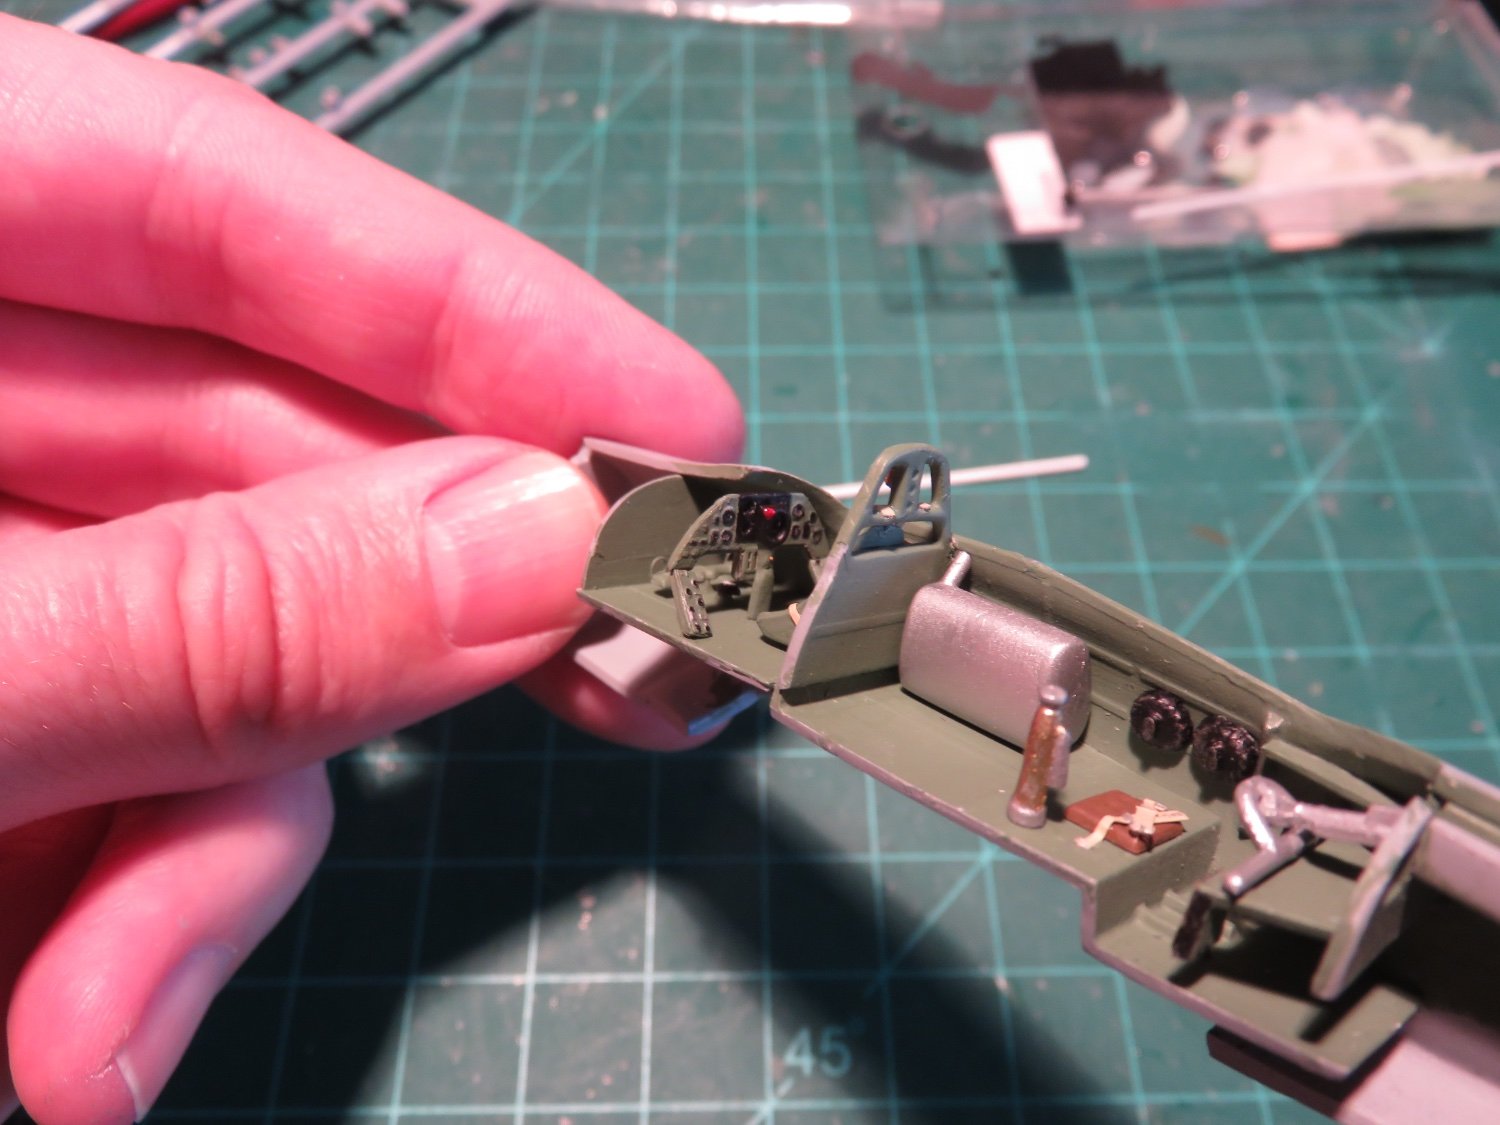
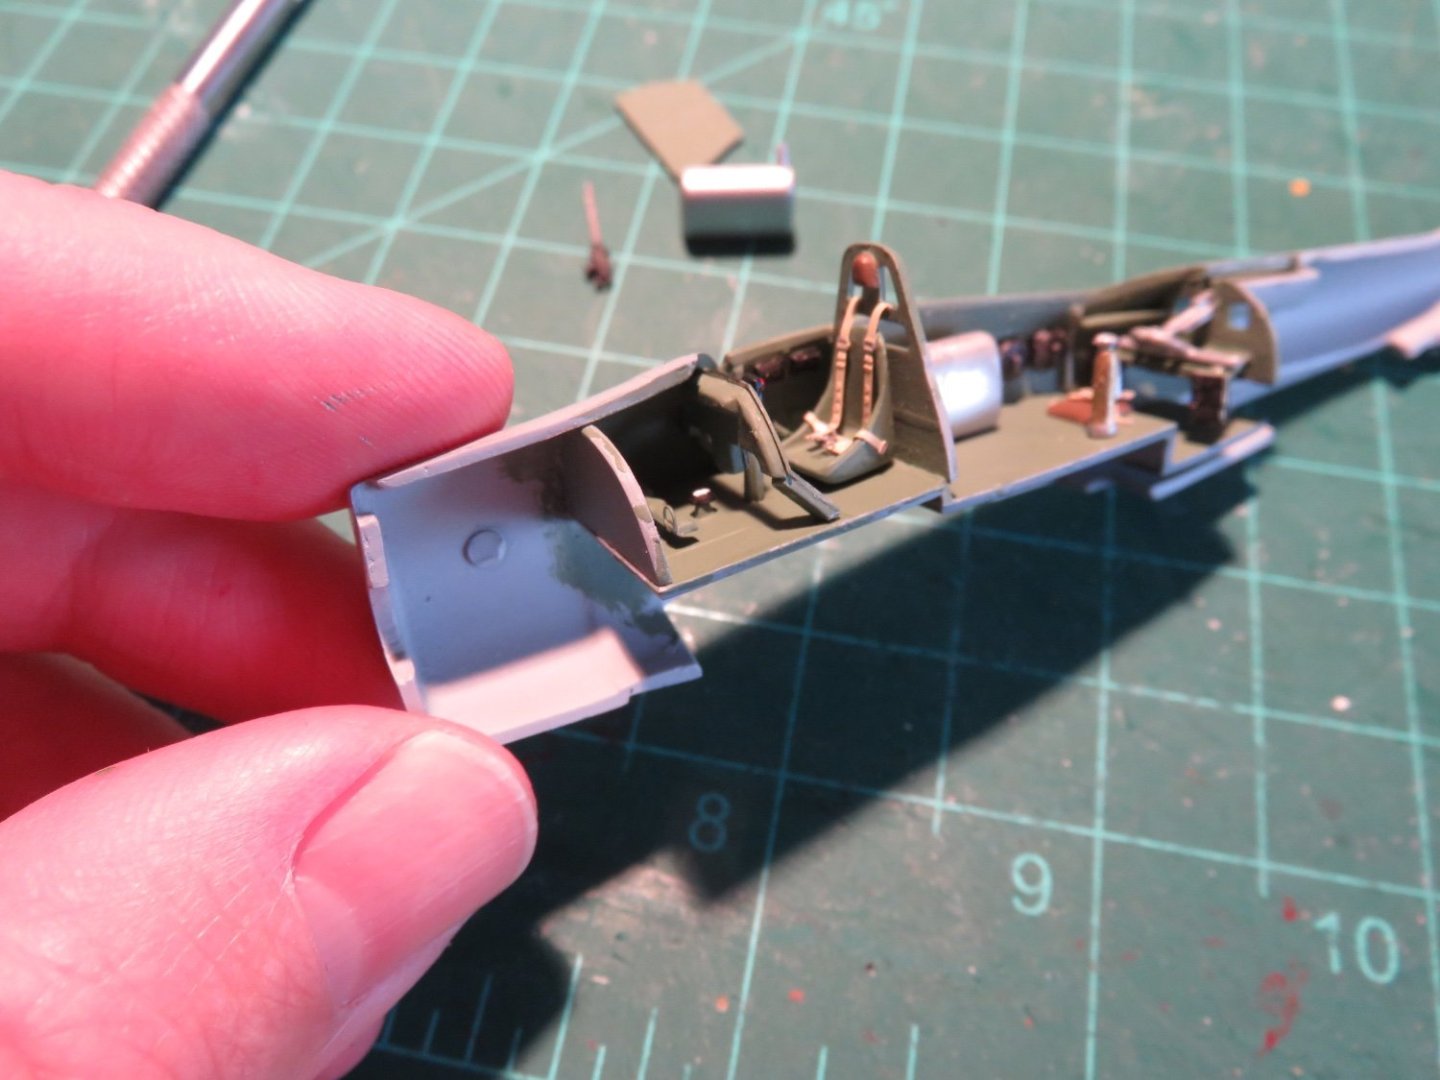
Thanks everyone who's joining in on this interesting little airplane. Actually, it's not that little: The wingspan of the Skua looks something like 2/3 that of a Beaufighter, this was no small plane! So far I've found the build of this Special Hobby kit to be not too bad. The instructions could be clearer, and they really could have done a better job with the locating nubs. Calling them "pins" really does other modellers a disservice, in that they really serve are general sort-of guidelines that maybe a part is supposed to go here or maybe not. I think a medium to slow curing CA is your friend here as trying to figure out how everything lines up takes time, and the odd reposition. I initially tried using regular plastic cement, but the SH kit plastic is a little soft, so it quickly turns into a gooey mess. I figured before I made a total bodge of everything that I should change glueing strategy. I will resume using styrene cement with items who's alignment is not called in to question. There's quite a lot going on in the large cockpit, and lots of small details to be worked out. Following the advise from one of the Britmodeller builds, I elected to assemble the cockpit in one half of the fuselage, rather than having things flying around in mid air. Starting from the forward bulkhead and installing the floor and working my way aft. There is an error in the kit (again, this was pointed out in one of the Britmodeller builds). The SH kit includes a bulkhead and seat back for the TAG (that's what they called the rear position), in reality this did not exist. The gunner had nothing but a slightly padded bench, and allegedly no seatbelts either. Easy enough to fix by just omitting the extraneous parts, but I felt bad leaving off the seatbelts. I find that a bit hard to believe given the rough carrier landings the Skua would have been required to perform, to say nothing of the acrobatics when being used as a fighter, or when dive-bombing! The poor TAG would have been tossed about like a rag doll, and probably barely conscious (or knocked senseless) after landing back on the carrier! So a bit of an explanation to the acronym "TAG". Despite entering service in the late-is 1930s, Skuas still communicated with morse code, and only with ship/shore stations. There was little to no communication to other planes in the flight, other than by hand signals. So in Skuas the rear seat occupant was known as a Telegraphist/Air Gunner (TAG). Also, despite plenty of references, unlike other two seater airplanes of the Fleet Air Arm (such as the Fairey Fulmar), the TAG did not perform any navigational duties, beyond the attending to the radio. Getting back to the model, as I noted earlier, there is plenty of detail in the cockpit, a large amount of which will not be seen once the plane is assembled, but I like to know it's all there. The instrument panel is in three pieces, the main centre section and two angled sections at the sides. For the most part the pieces are fairly well moulded, although the details some of the plastic parts a a little soft, the spare ammo drums on the fuselage side, for instance. The Skua had two internal fuel tanks in the cockpit, I have installed one, but will wait to install the second until after I've closed up the fuselage, so I can insure the filler neck isn't "disconnected". The large brass thing is apparently a fire extinguisher, the poor TAG really had it rough if things went bad. So this is about as far as I've made it on this build. I should be glueing the two halves of the fuselage together soon. Repeated dry fitting hasn't revealed any problems in that respect, so things should continue to go relatively smoothly. This has been a bit of a learning experience, and AIrfix kit, this definitely isn't! However once the foundations are established, things do go together well, and I think having some experience with wooden ship kits is a great benefit, in so far as having some familiarity with vague instructions advising you to "put this part in this general area". Andy


- 24 replies
-
- 10
-
-
Nicely done Nils! You may wish to add a couple of side doors to your wheelhouse, so the Captain can get out to the bridge wings! Andy
-
The prototype would have been tar paper. I’ve seen many modellers replicate the effect using tissue paper (kleenex) using just black paint to adhere the tissue to the surface. Great job on your build! Andy
-
Thanks for all the kind comments and "likes", it's great motivation to keep building! Among the last remaining items to add were the lights and the gunner's canopy. I discovered that on this airplane, the aft wingtip lights had been painted over, while the kit makes no mention of this, it was evident in prototype photos. As a little extra touch, I drilled a small hole in the aft end of the forward light and added a little red or green paint, as appropriate, to simulate the navigation light bulb. Well, I think I'm going to call this build provisionally finished. I'm planning on coming back to it and adding a bit of weathering, but for all intents and purposes I'm finished. Thanks to everyone who has been following along, and especially those who took the time to comment and/or "like". A few final photos for everyone to enjoy: Thanks again, everyone! Andy


- 38 replies
-
- 14
-
-

-
Amazing job you’re doing, especially all your little mods and tweaks. I wonder, though, that you tried to install the resin drops on the wrong side? Even though the side profile matches that of the draught. Just curious, you’ve made a decent job of your correction. Andy
-
From a few builds and reviews I’ve seen, it’s one of the better SH kits as far as fit goes. There are a couple of nice builds over on Britmodeller that seem to have come out okay (actually quite nicely): https://www.britmodeller.com/forums/index.php?/topic/234952011-172-special-hobby-blackburn-skua/ https://www.britmodeller.com/forums/index.php?/topic/235100266-heathers-workbench-sh-172nd-blackburn-skua/ If they can manage it, I should be able to make a go of it. Having some experience with wooden model ship kits, we should be used to parts not fitting quite like they show in the instructions! 😆 Andy
-
From what I’ve read/heard it was a bad batch of glue (or errors in the gluing procedure) that gave the Mossie a bad rap in the PTO, but the biggest advantage the Beaus had was that Australia was building them, parts and replacements didn’t have to be shipped half way around the world. Either way, thanks for your kind comment! Andy
-
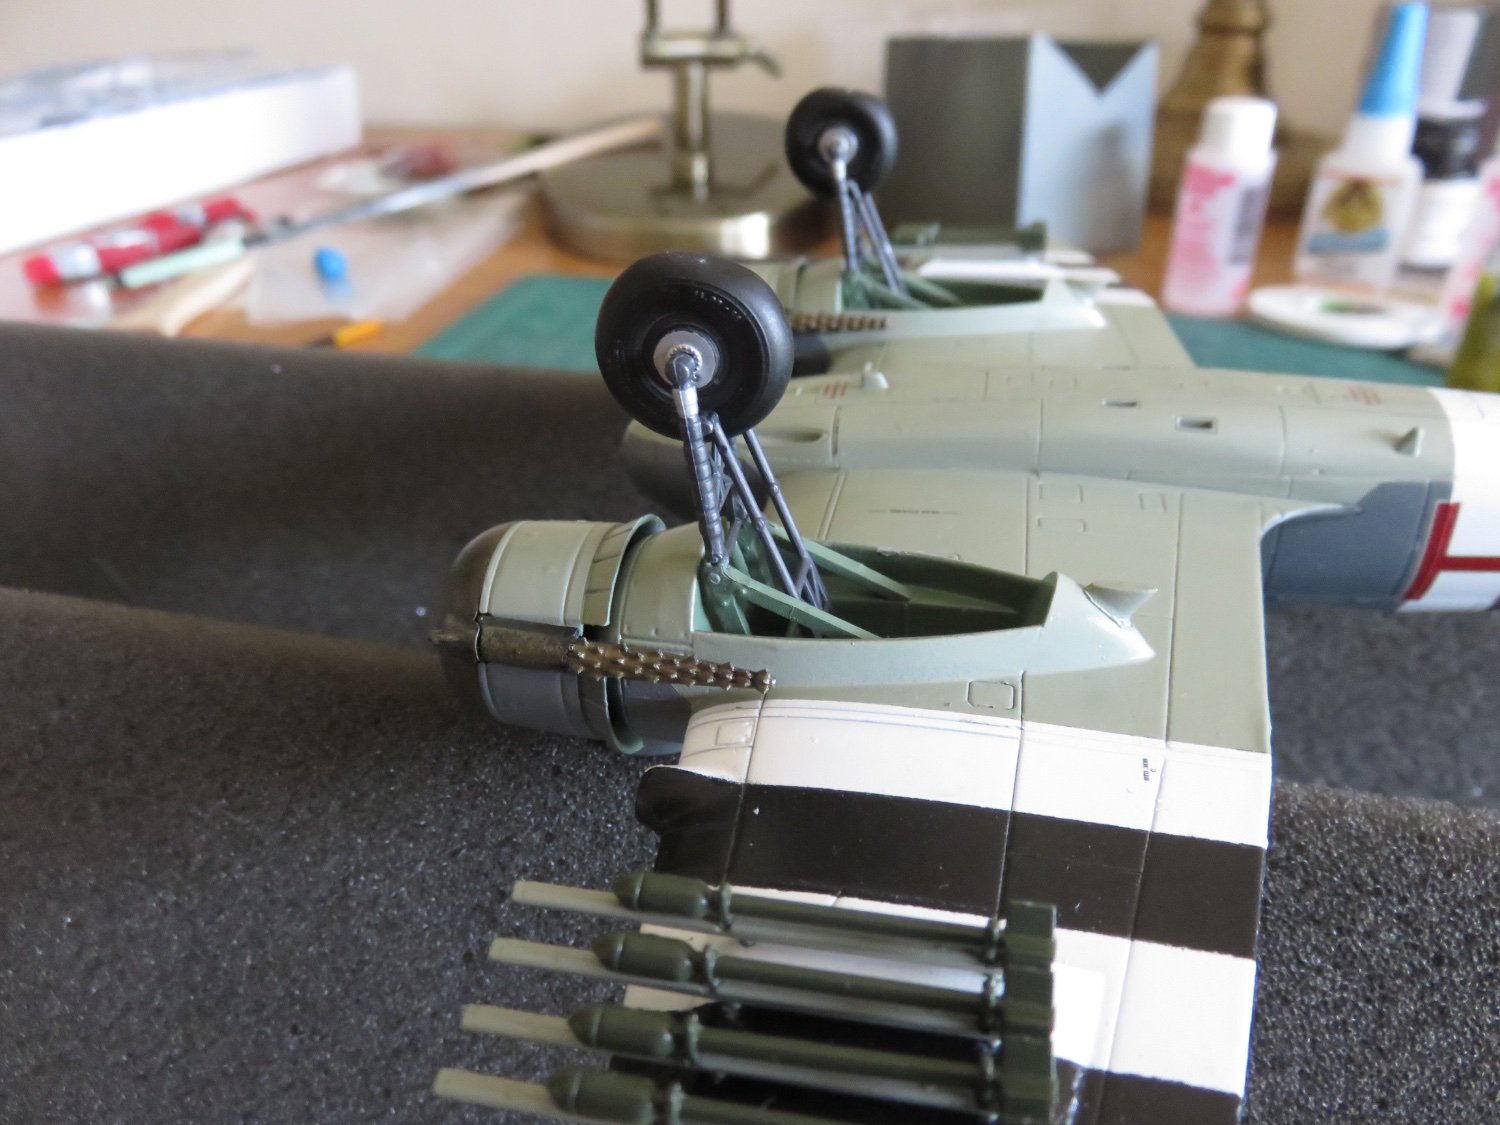
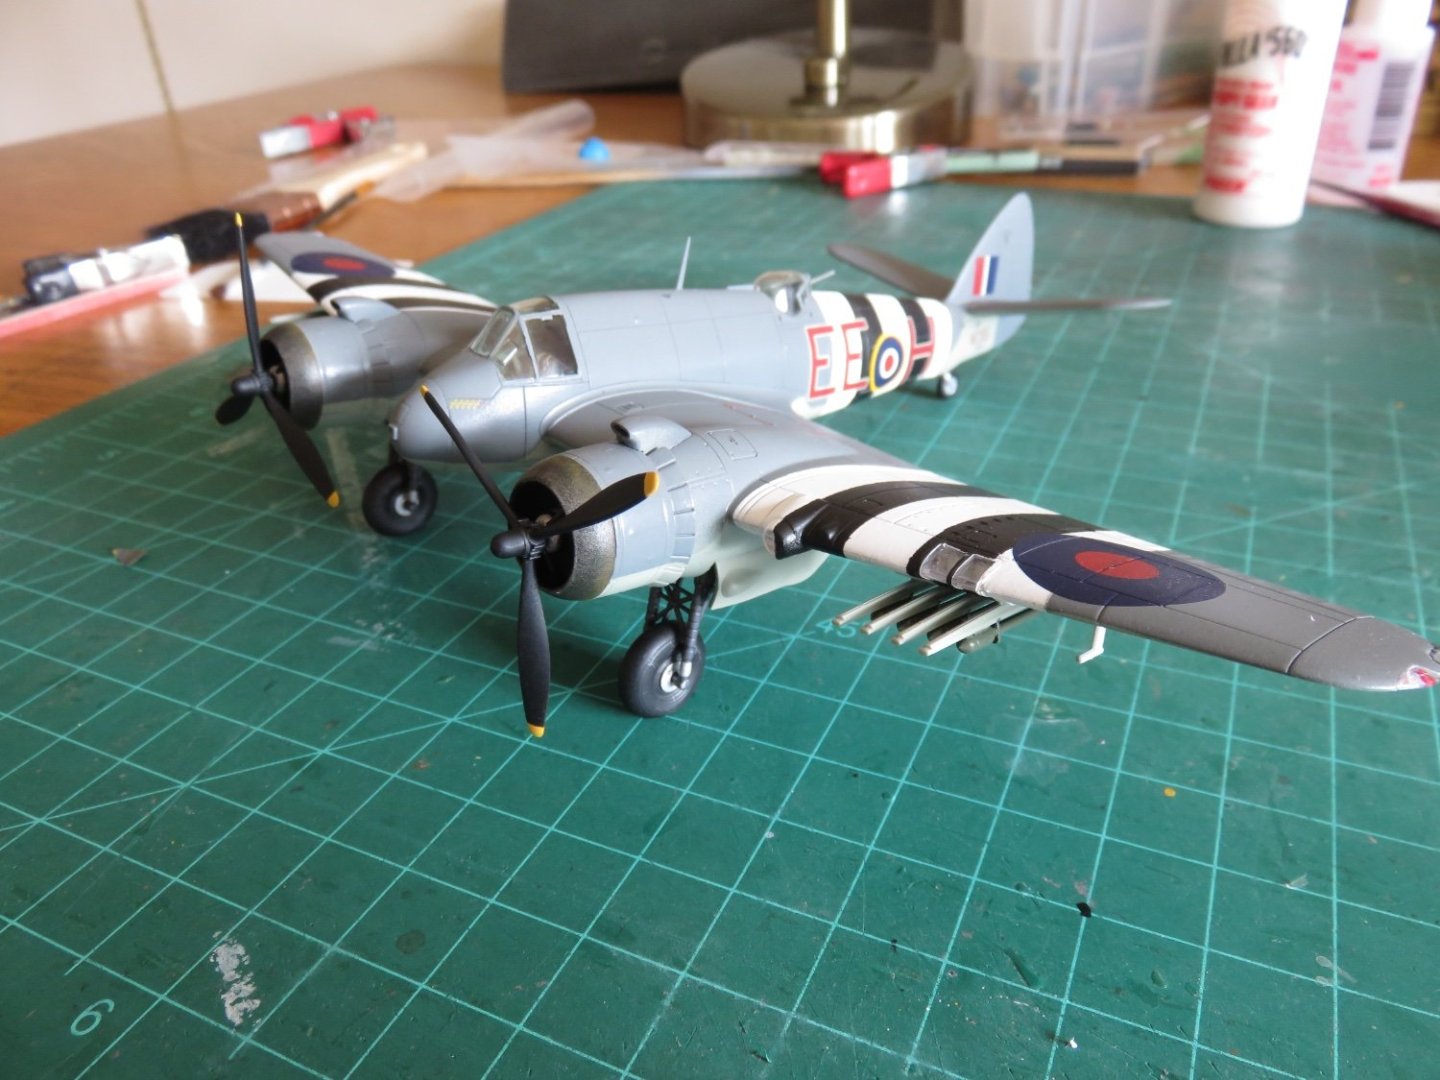
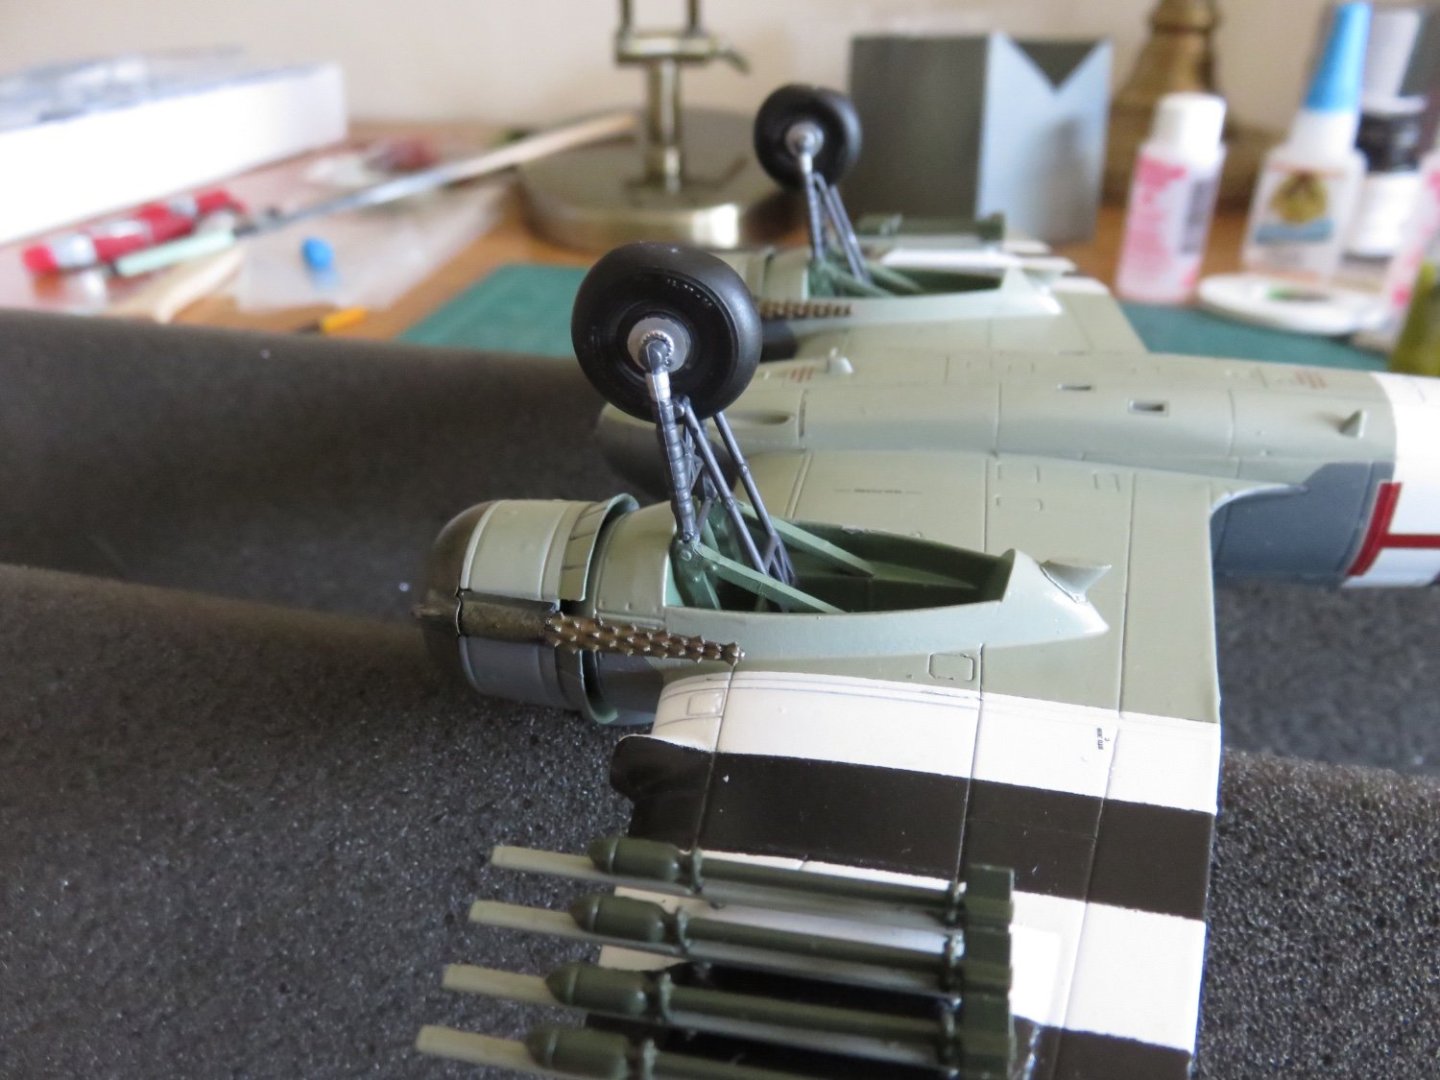
Thanks to everyone for your kind comments, likes and continued support! The last few days have been rather productive. The lettering has now been finished, I must say there was an absolute plethora of stencils on this one! I just about went cross eyed trying to decode those microscopic hieroglyphics! A testament to the quality of Cartograf's printing that they were all legible. There was only decal I decided to leave off. Apparently the prototype airplane must have suffered some flak damage, and there was a large patch on the fabric of the lower part of the rudder on the port side. I guess the idea was to replicate the colour of the dope used to seal the repair with a decal, but it was printed in the same shade and intensity red as the squadron/airplane codes on the side of the fuselage. It looked like someone had hopped into MS paint (remember that old program?) and just created a red blob. It really doesn't look very good at all, so I've omitted it entirely. It's funny, the colour pallet of red/gold/black and white almost looks a little Christmasy (I mean, I swear I've seen Christmas wrapping paper with almost that exact colour pallet).... After the lettering was finished it was time to move on to the landing gear, and get this bird standing on it's own feet! That was probably the most intricate and tricky landing gear I've built yet! The wheels are the final aftermarket detail from CMK. The tires are a little wider than the kit supplied parts, and it's a snug fit where the retracting struts meet the main struts, but they went in ok in the end. After the landing gear bay doors were added, it was time for the propellors: A little careful filing in the holes in the engines, but they eventually slid snugly in to place. And they spin freely too! (A little hot air power!) I am currently getting the last few little details set up, and ready to do. A few can be added first before I seal everything up with some Dullcote. I should have this build wrapped up in fairly short order! Andy

-
Try here too: https://plasticworld.ca They have a large selection of various types of plastic sheets in a variety of thicknesses. Looks like they offer custom cutting too. They’re in Toronto, but if they don’t ship your way, maybe they know of something in your area. Andy
-
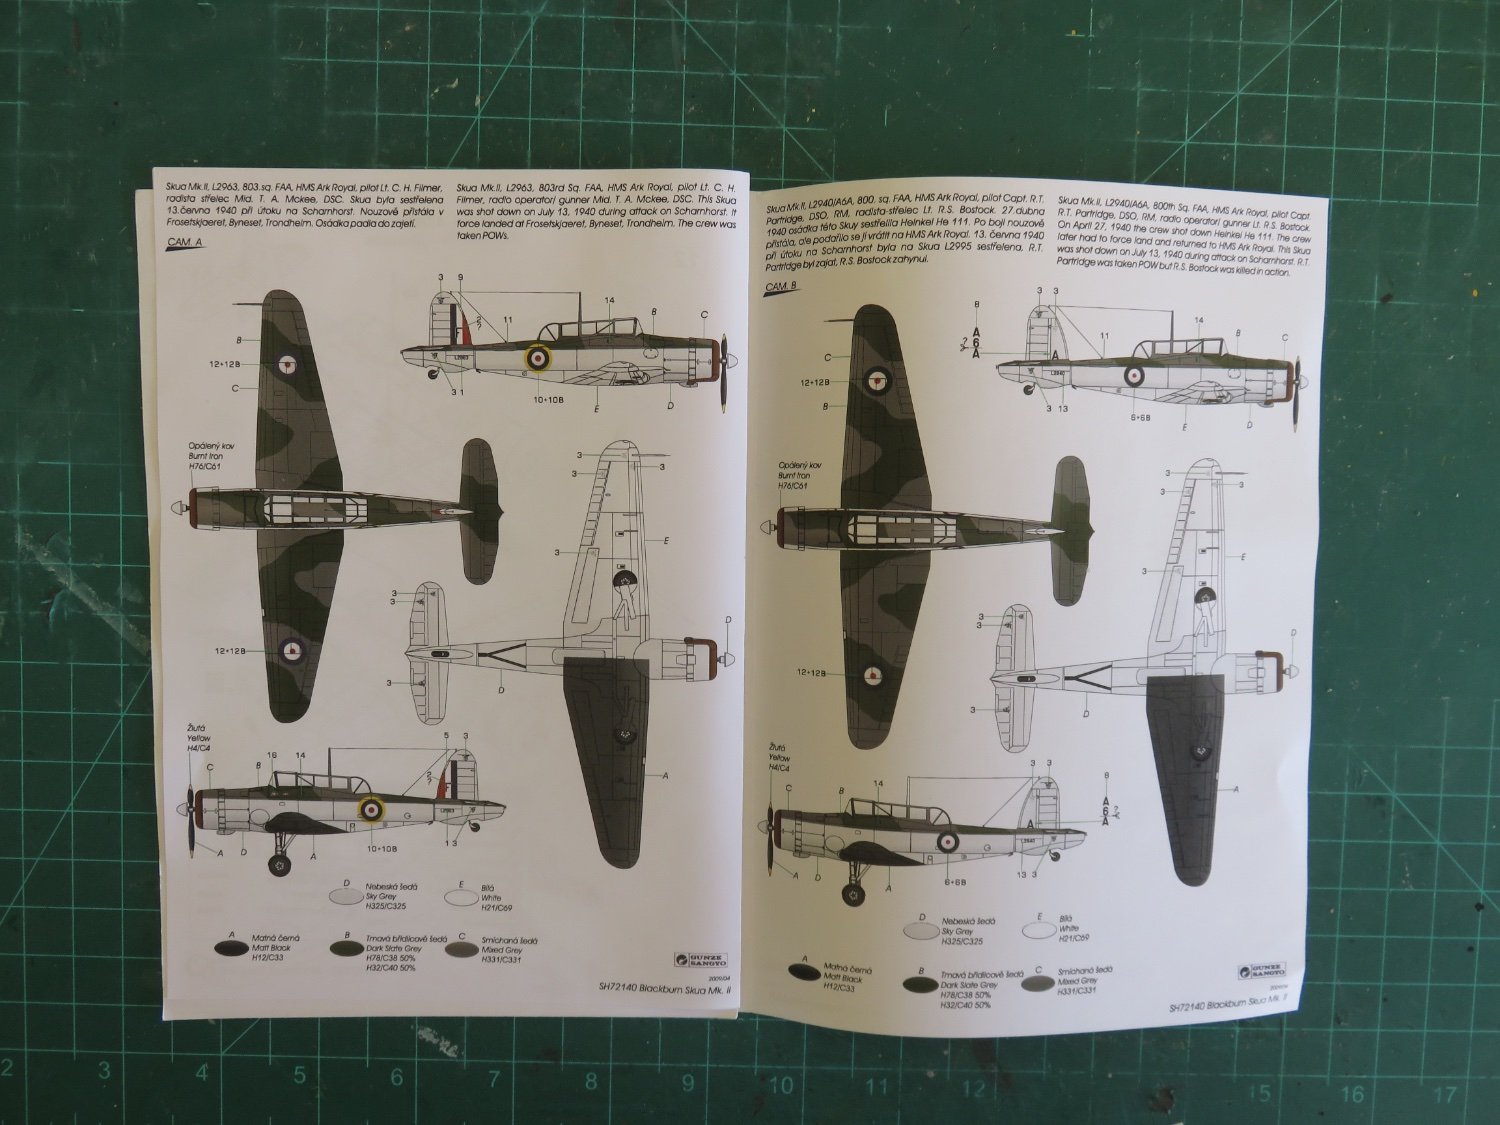
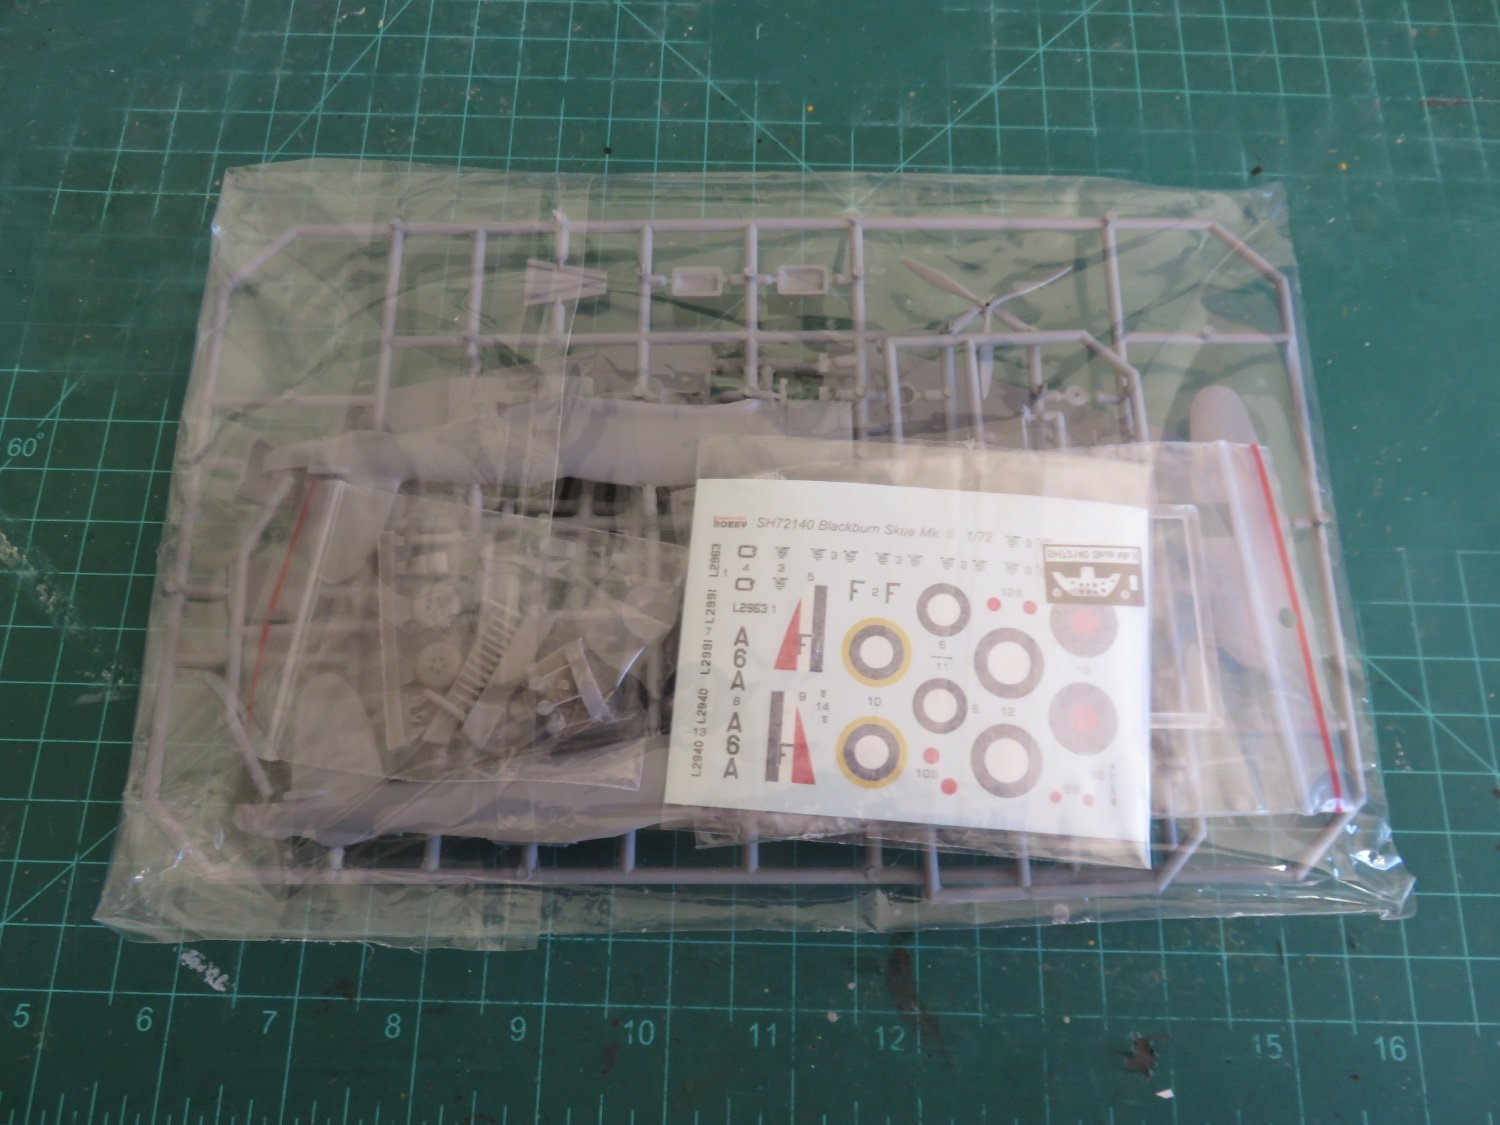
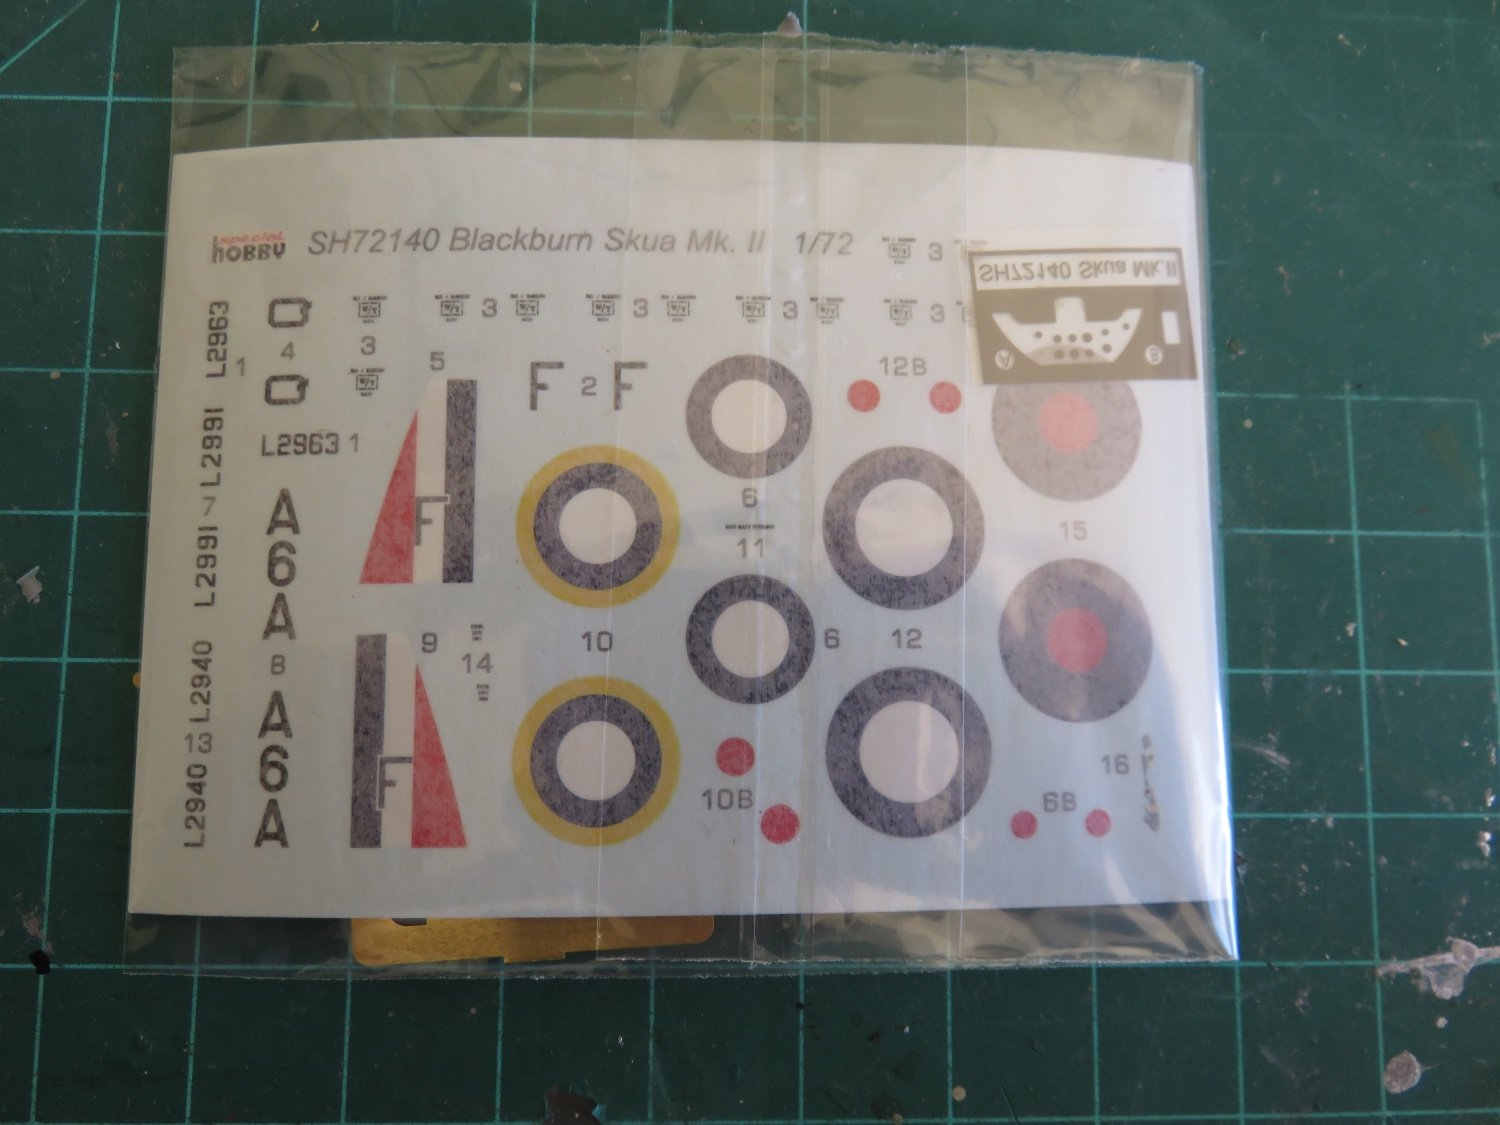
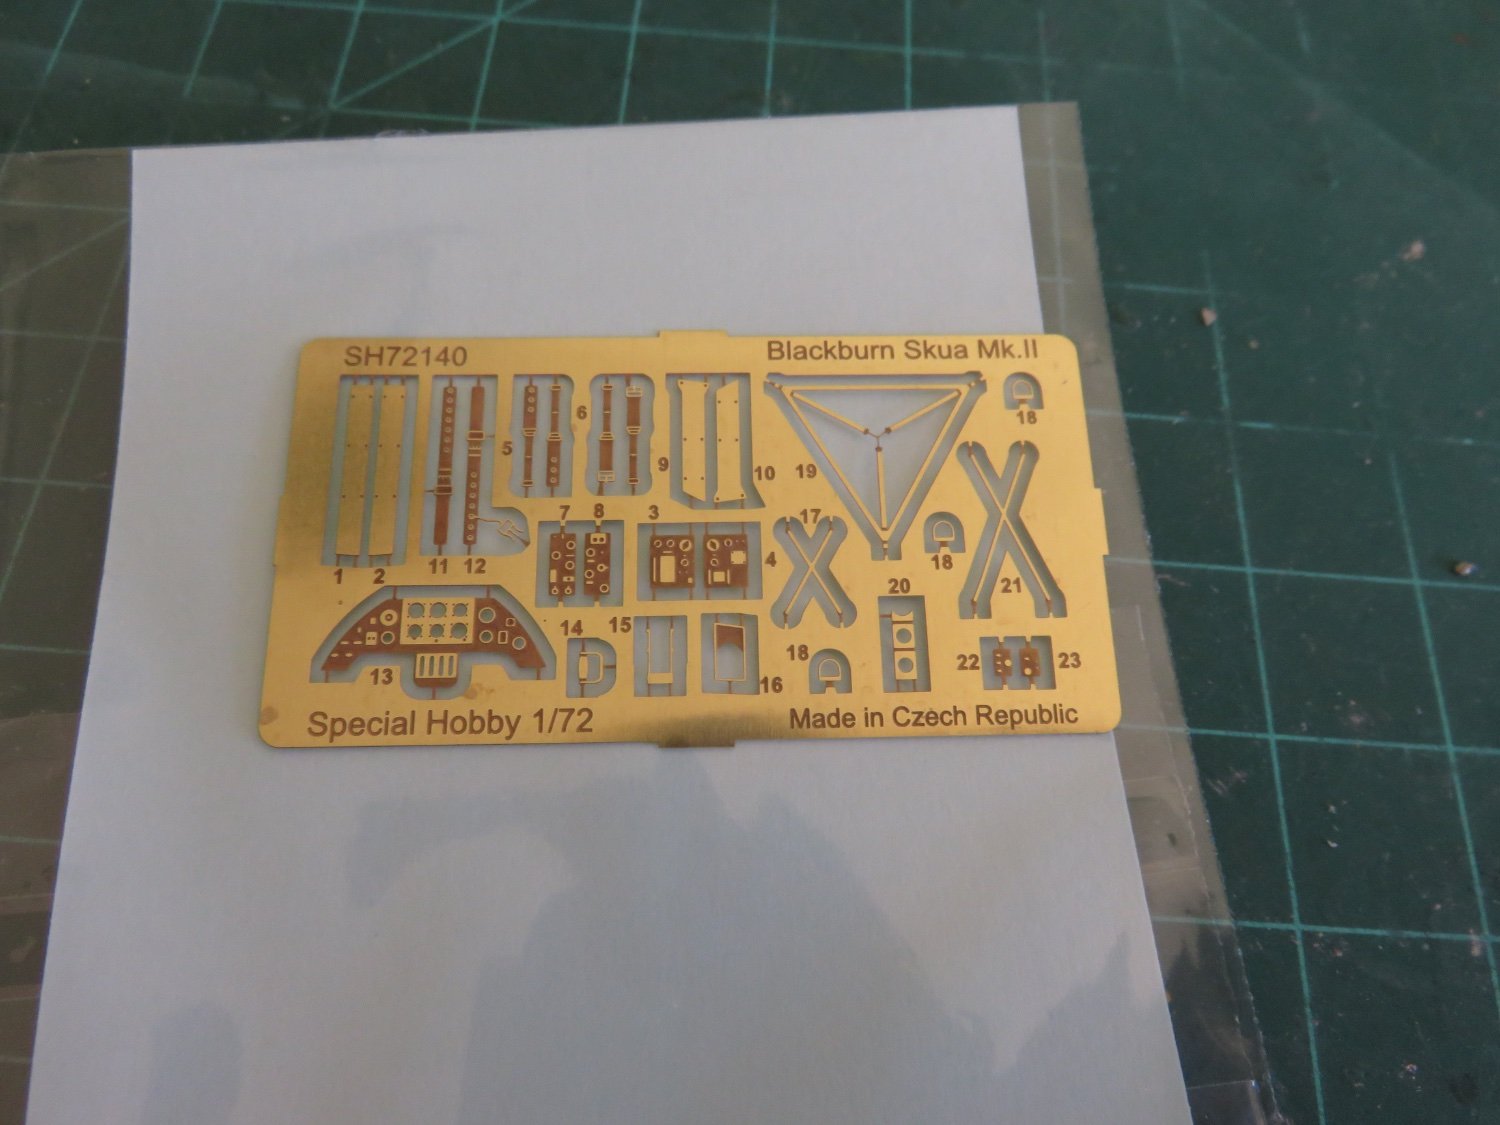
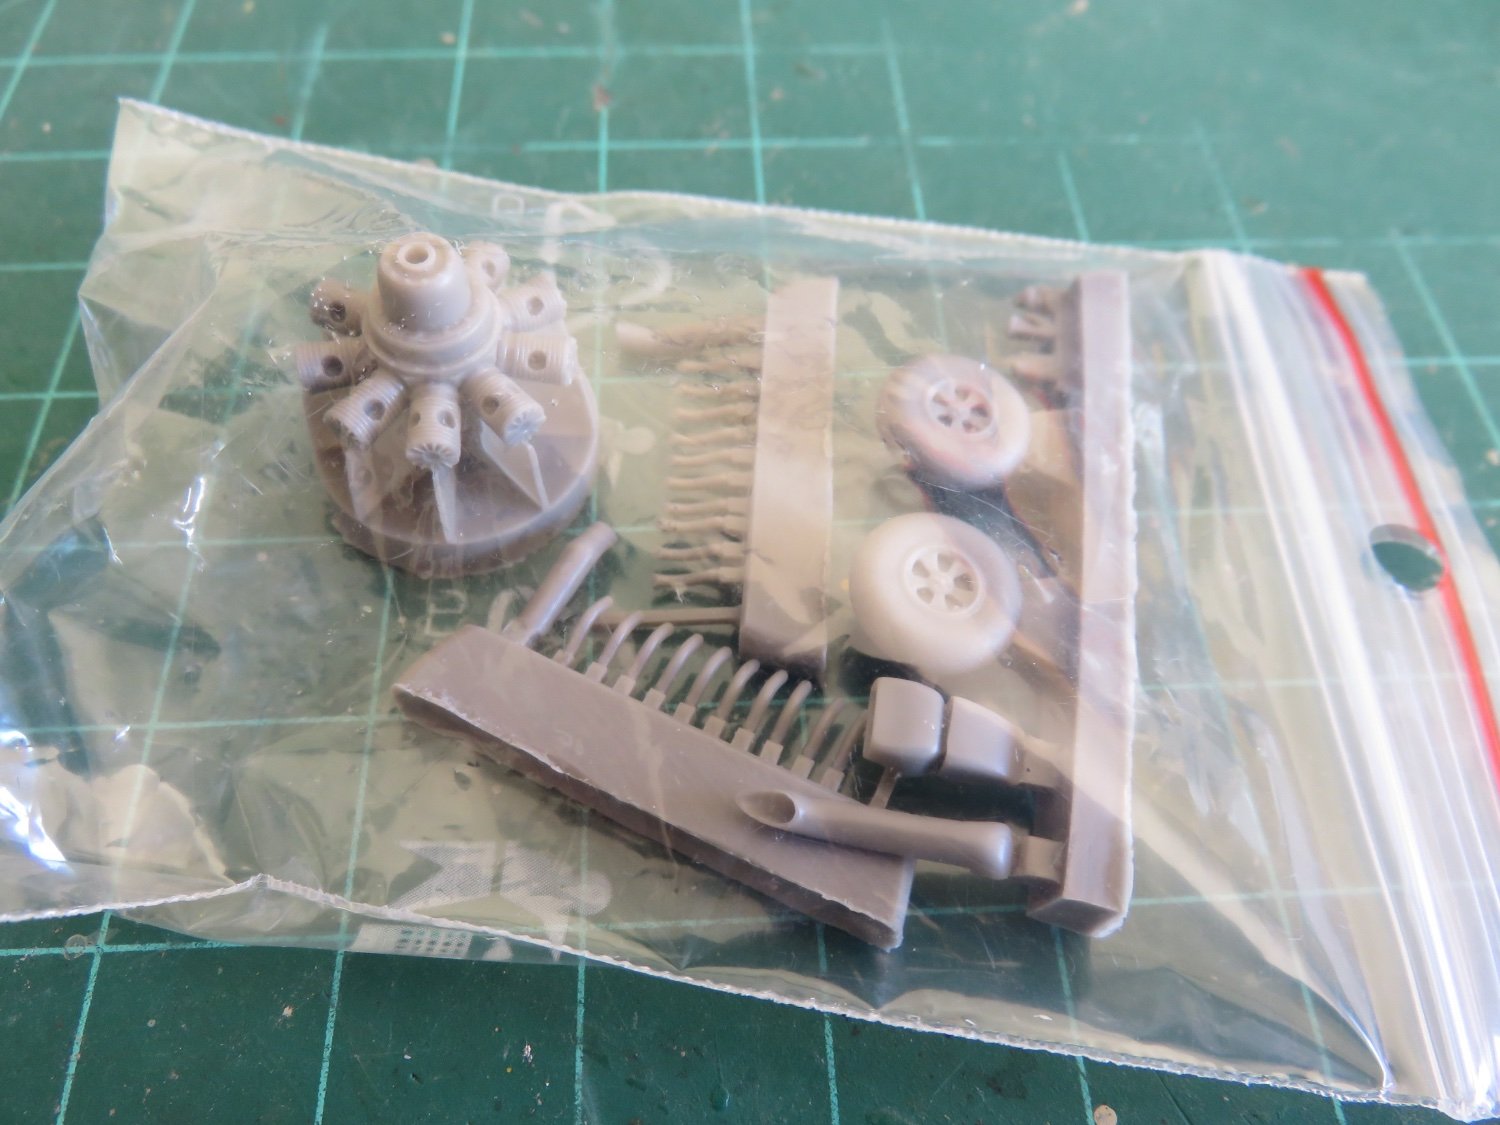
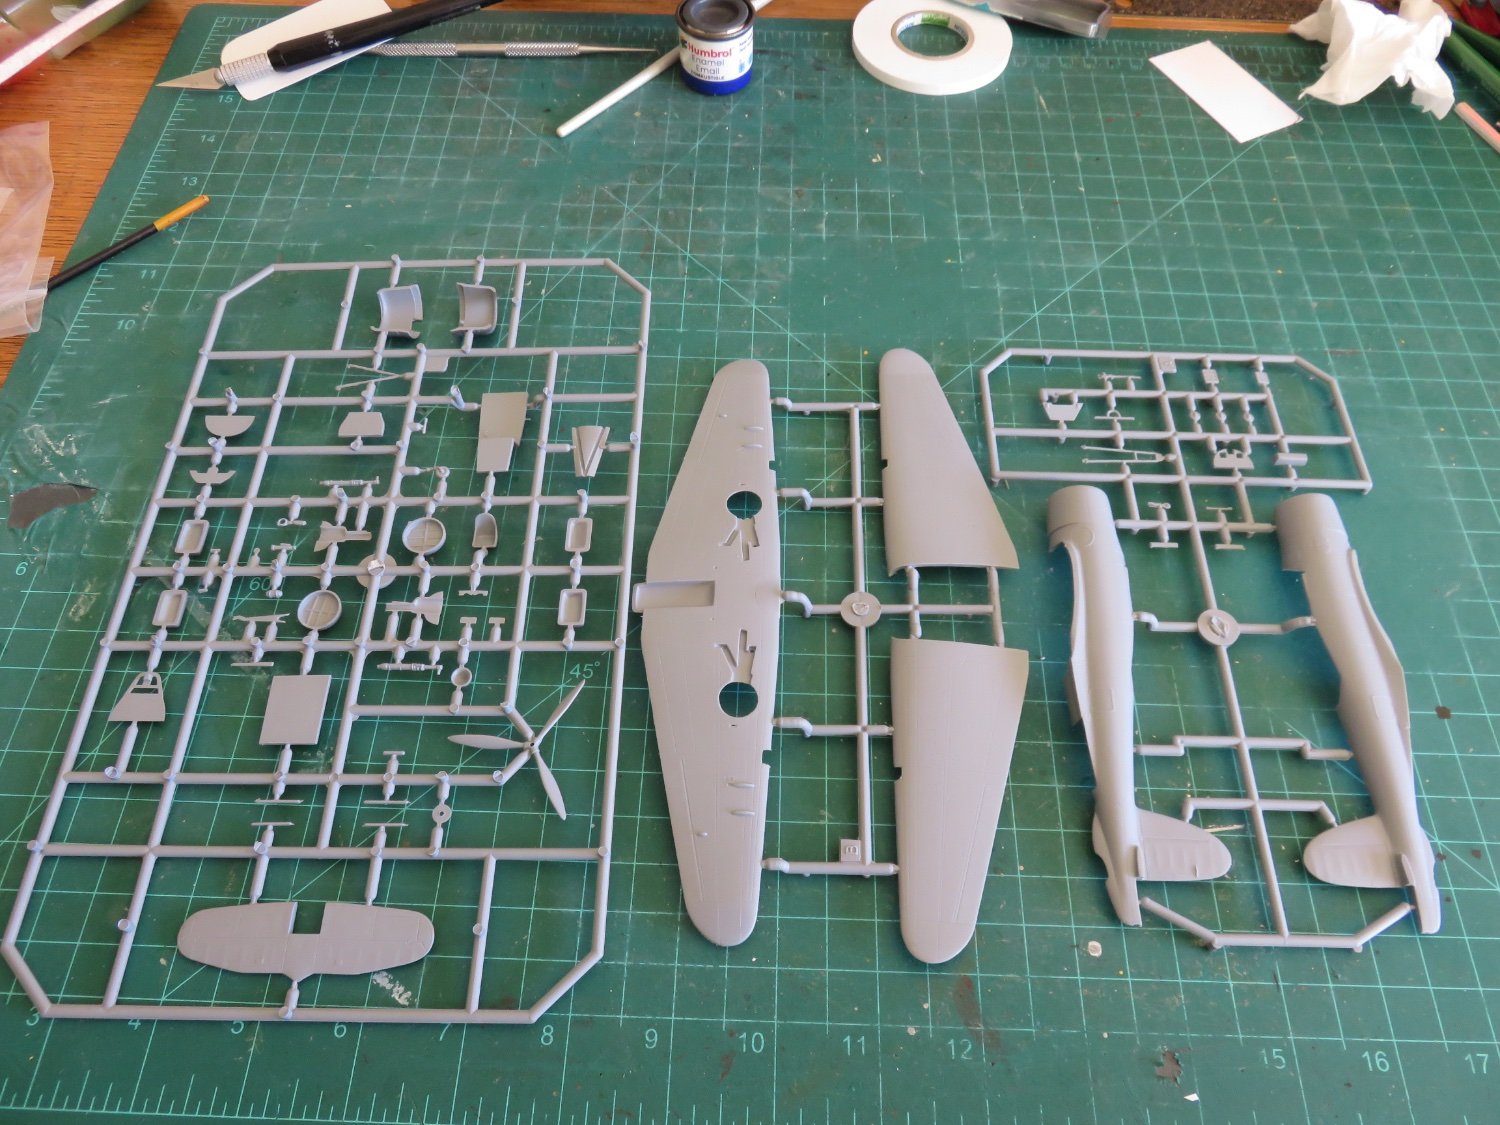
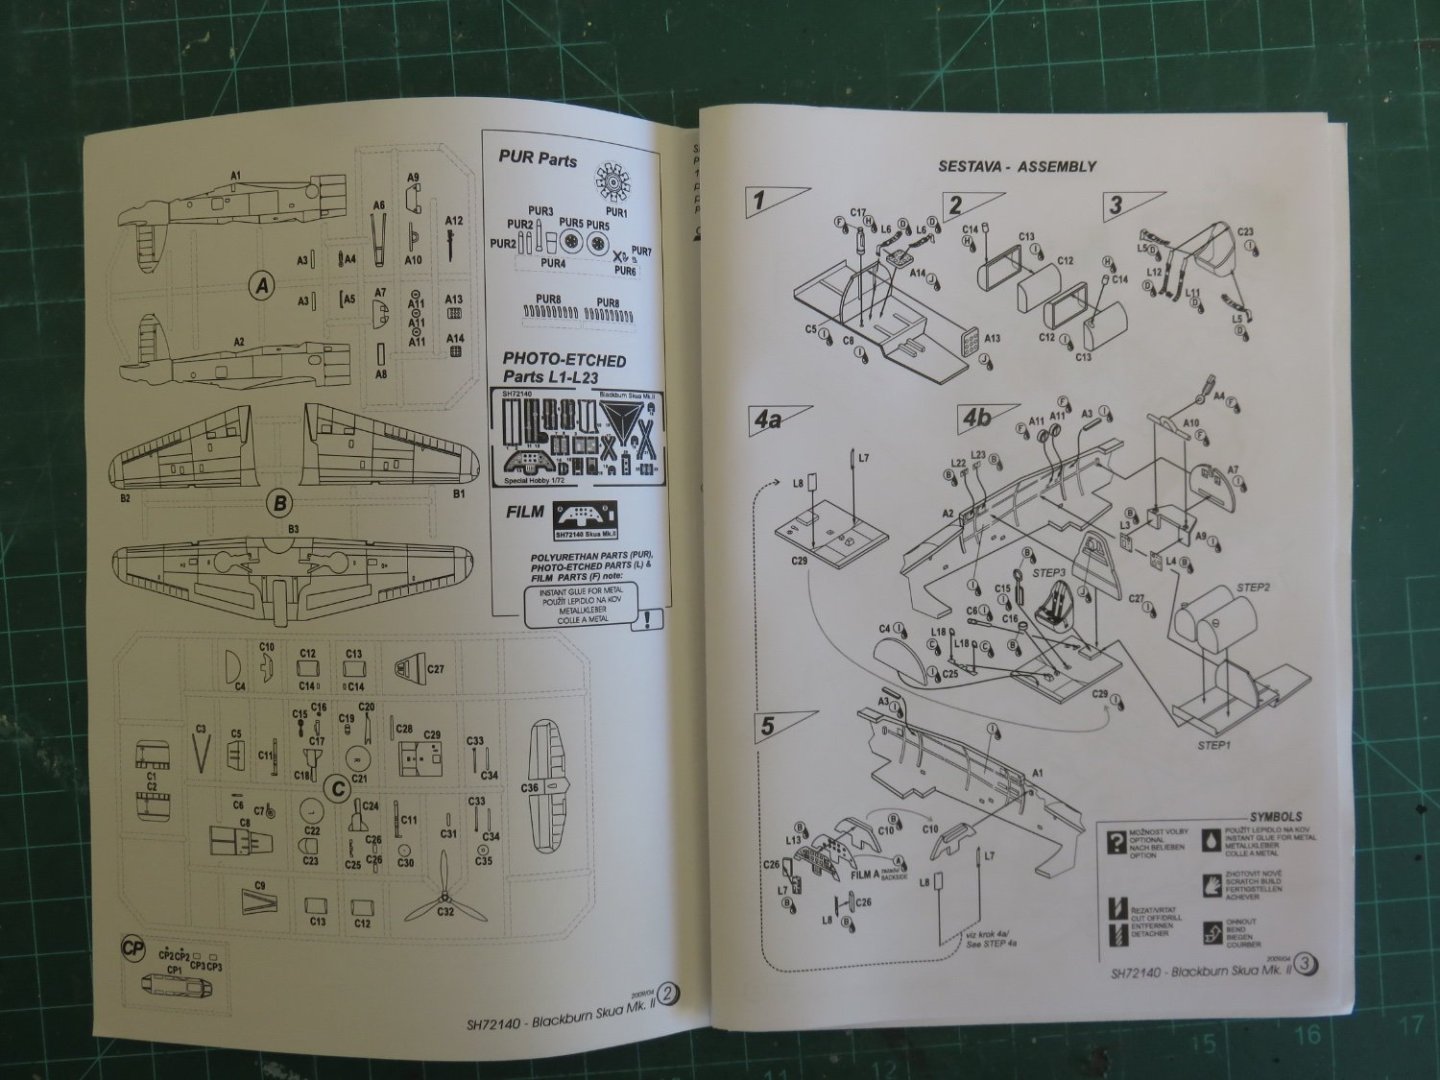
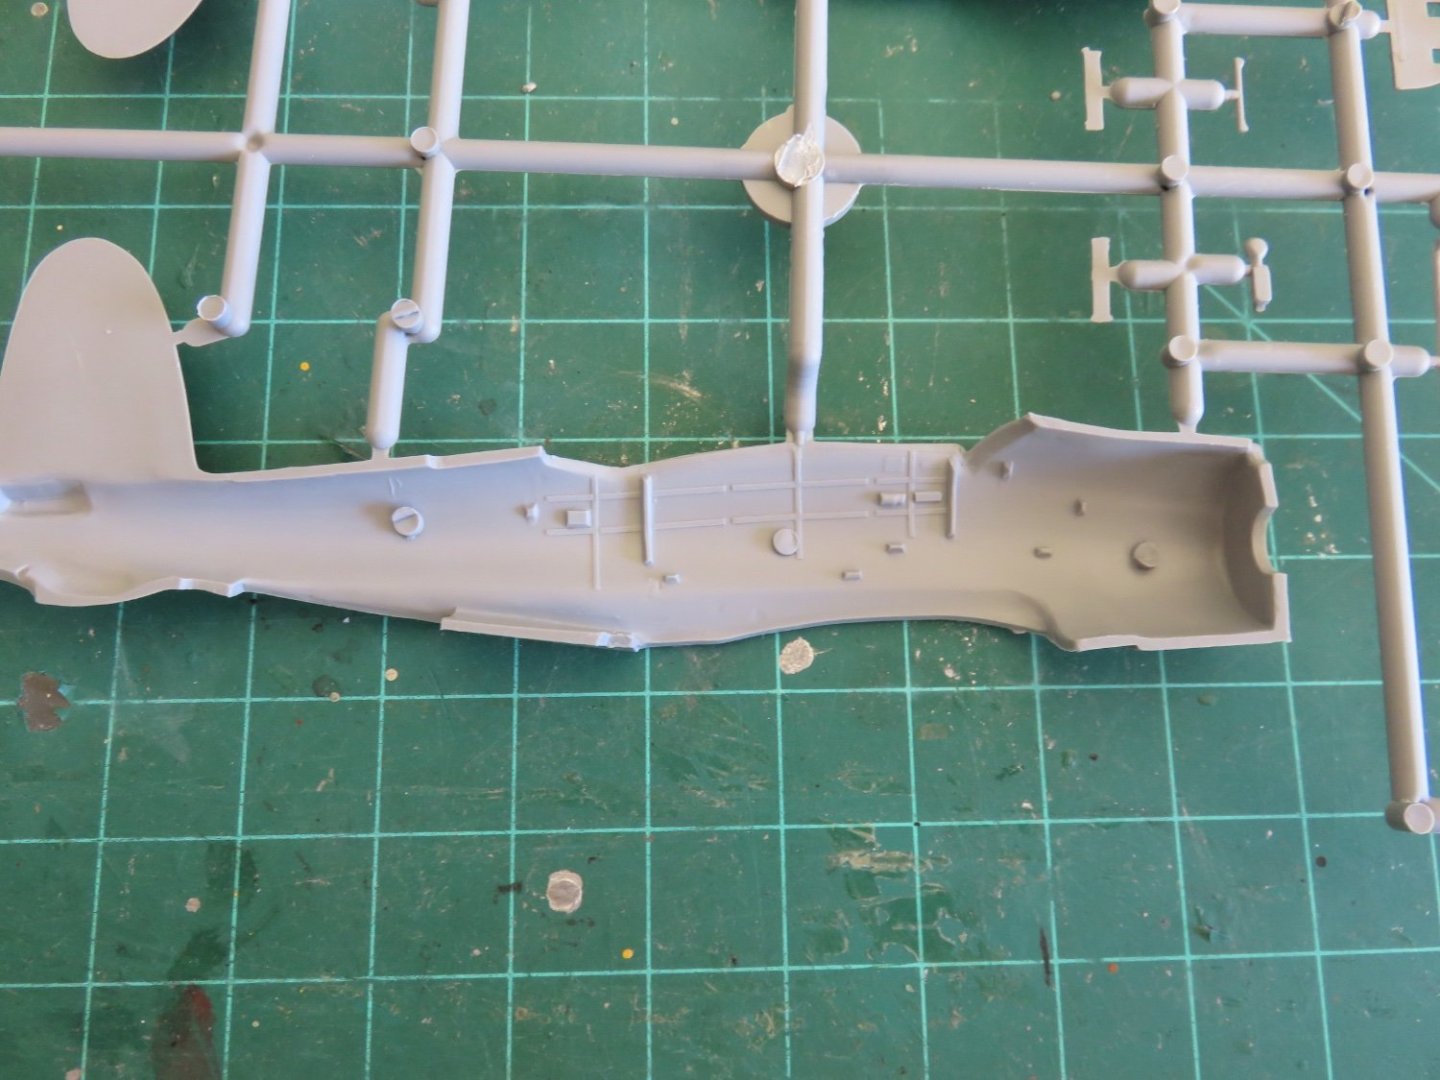
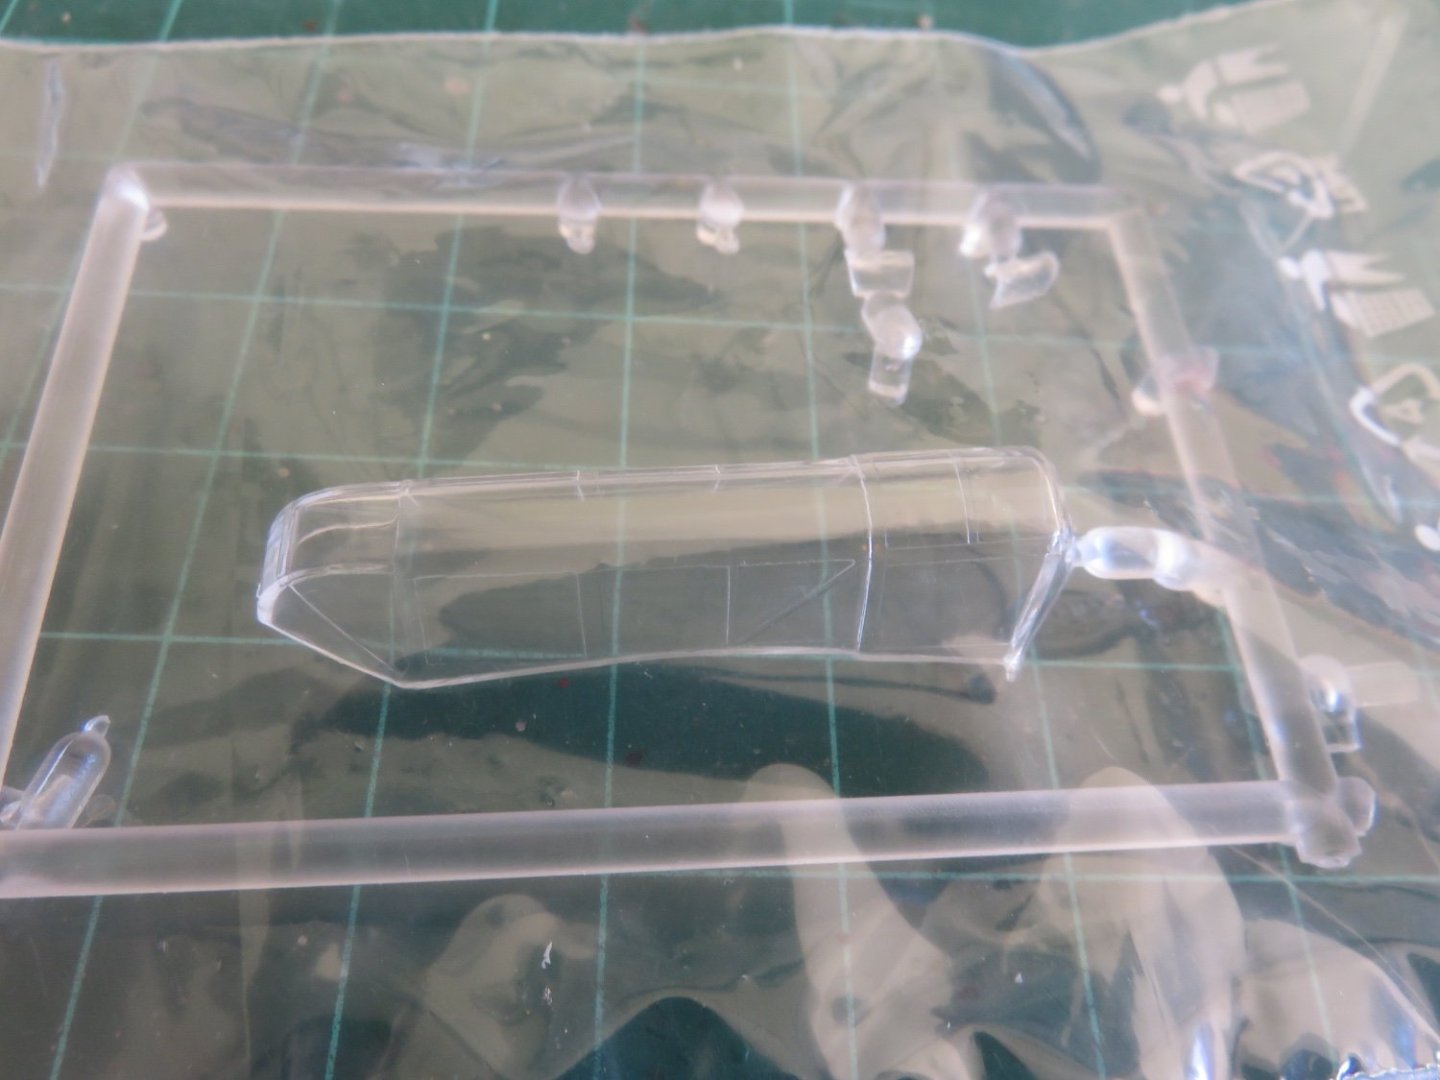
While I'm waiting for the Glosscote to dry over on my Beaufighter, I thought I would start a bit of a place-holder log for my next planned build. From the company that would, one day, produce this: Came this, largely forgotten, early workhorse of the Fleet Air Arm: (See any family resemblance? I dunno... maybe it was adopted) The Blackburn Skua. The first all metal, low cantilever wing carrier based monoplane in the Royal Navy. Based on a 1934 specification that called for a combination fighter/dive bomber, it would prove to be a somewhat mediocre fighter, with a top speed of only around 225mph, but a better dive bomber. Skuas scored the first kill by any British airplane in the war on September 26, 1939, by downing a Dornier Do 18 (a kill claimed a few days earlier by a Fairy Battle was not confirmed until later), and over the course of its approximately 2.5 year front-line service life, a few pilots actually became aces in Skuas. The Skua was also responsible for the first sinking of a warship by air attack in wartime, when on April 10, 1940, 16 aircraft from 800 and 803 squadrons sank the German cruiser Konigsberg in Bergen harbour. The Skua was withdrawn from frontline service in 1941, as its performance shortcomings where becoming increasingly harder to overcome, however it continued in service throughout most of the rest of the war (until March 1945) in trainer and target tug roles. A much more noble end than its turret-equipped stablemate, the Blackburn Roc, some of which were shorn of engines and landing gear and placed at airfields to be used as anti-aircraft installations. There's a great photo of a grounded Roc on Dingers Aviation Pages: The Special Hobby kit. The SH kit was tooled in 2009, although not that recent, it's still appears to hold up fairly well. I have read a few online reviews and a few build logs over on Britmodeller, and while not without its challenges (to be expected for short run kits), it is buildable with a little patience and perseverance. The instructions come in a little folded booklet. After presenting a brief overview of the prototype, the instructions begin with a sprue map (very important as none of the parts are numbered on the sprue!). For the most part the instructions are a little more complicated than those I'm used to with Airfix, but they seem to be fairly well inline with some of the instructions I've seen included with Eduard PE sets, so they shouldn't prove too much of a hinderance. The last few pages are given over to full colour callouts for the paint and decal schemes included in the kit. The kit parts come packaged in the usual clear plastic, with the decals, PE, Resin and clear parts bagged separately within: Looking first at the styrene plastic parts: There are three dark grey plastic sprues which include the wings, fuselage and detail parts. For the most part the moulding is crisp and the panel lines are quite fine. There is a small amount of flash to be sanded off in places, and some openings will need to be cleaned out (like the bullet casing ejector ports) There is some basic cockpit framing on the fuselage interior, but there are more details to be added later. There are some rather large ejector pins that will need some attention, but the real indicator that this is not a kit for beginners is the complete absence of locator pins on the insides of the wings and fuselage. I may have to delve into my scrap styrene collection to make some kind of tabs to help, we shall see! The clear parts appear nicely moulded. I haven't noticed any visible flaws in the canopy glazing, although somewhat unfortunate that it's moulded in one piece, rather than being able to model the cockpit open, or with the gunner's clamshell hood rolled back. The decals look fairly decent, although I intend to supplement these with an aftermarket set from Xtradecal as I prefer the duller red, and I'm not sure about the shade of yellow of the one roundel. There's also the film for the instrument panel gauges here. On the other side of the bag with the decals is a small sheet of PE parts including the instrument panel itself, seatbelts as well as other fine details, such as steps and brackets (I believe the X braces are for the bomb crutch). Finally there's a bag with resin parts, wheels, exhaust and the Bristol Perseus engine. It's going to be fun installing all those exhaust little pipes on the cylinders! Overall this should prove to be a fun build. The kit looks to be about the right amount of challenging to not be a total turn-off. For anyone looking for more information about the Skua, I strongly recommend Dinger's Aviation Pages. I have found a treasure trove of information about the Skua and includes a very detailed look into the paint schemes, notes about the more significant Skua actions, and a huge collection of photos. Andy


- 24 replies
-
- 13
-
-
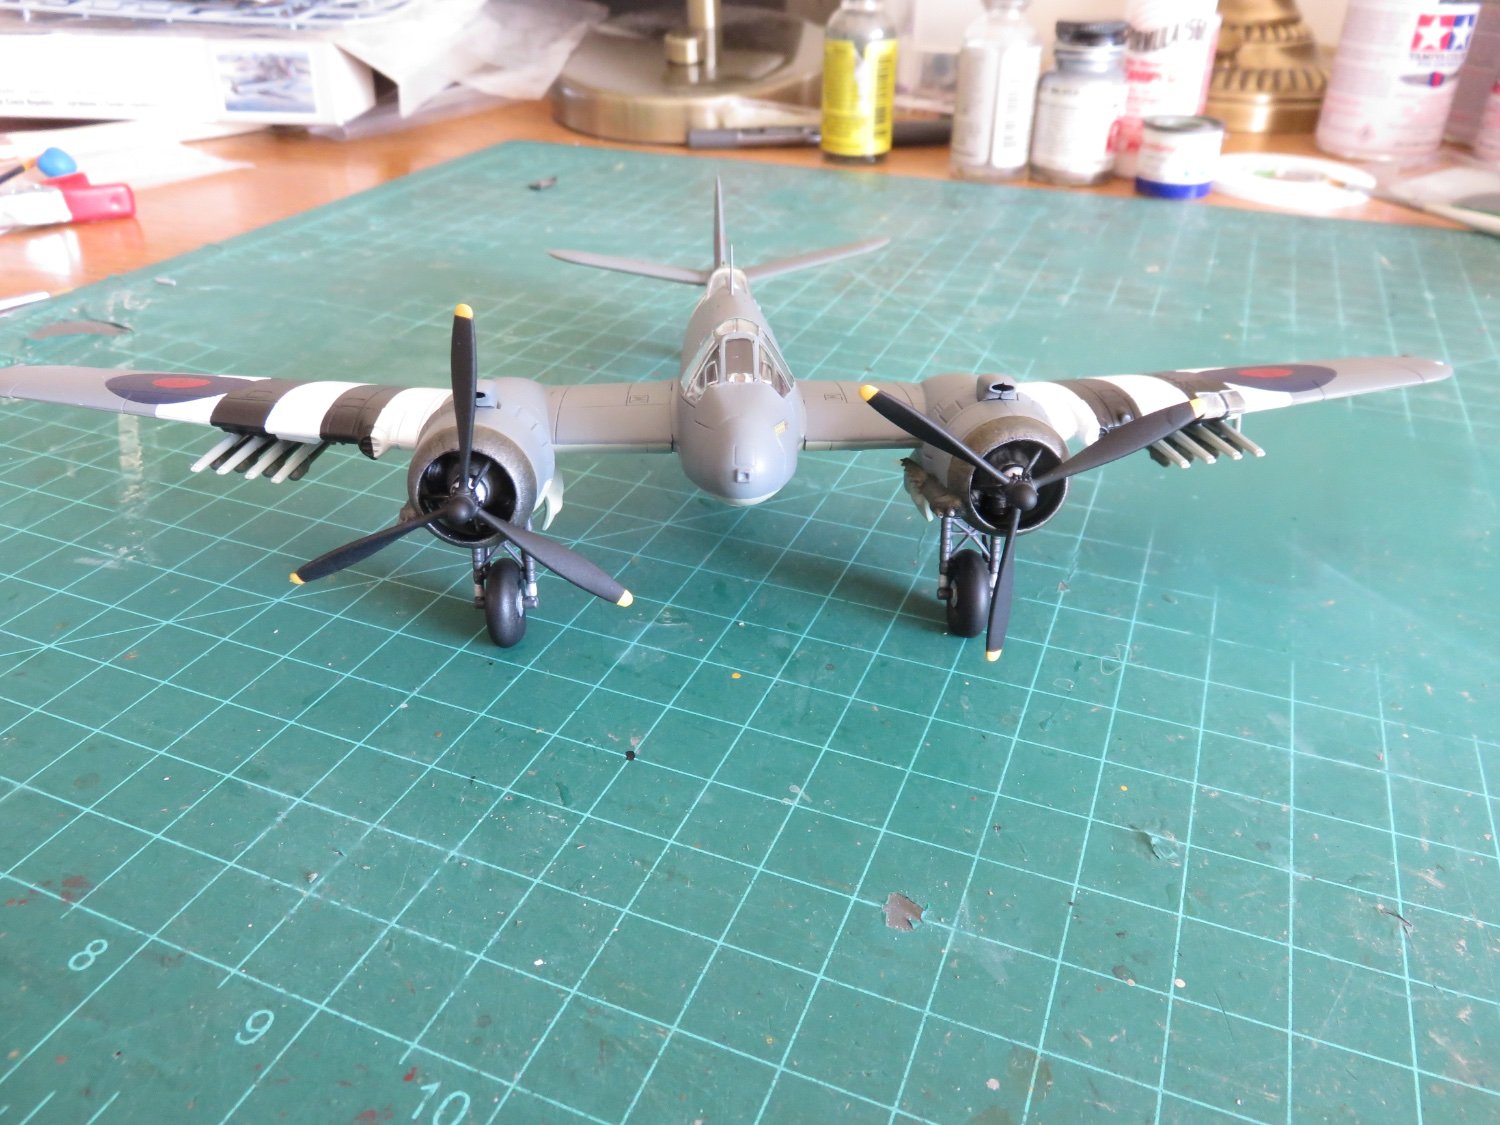
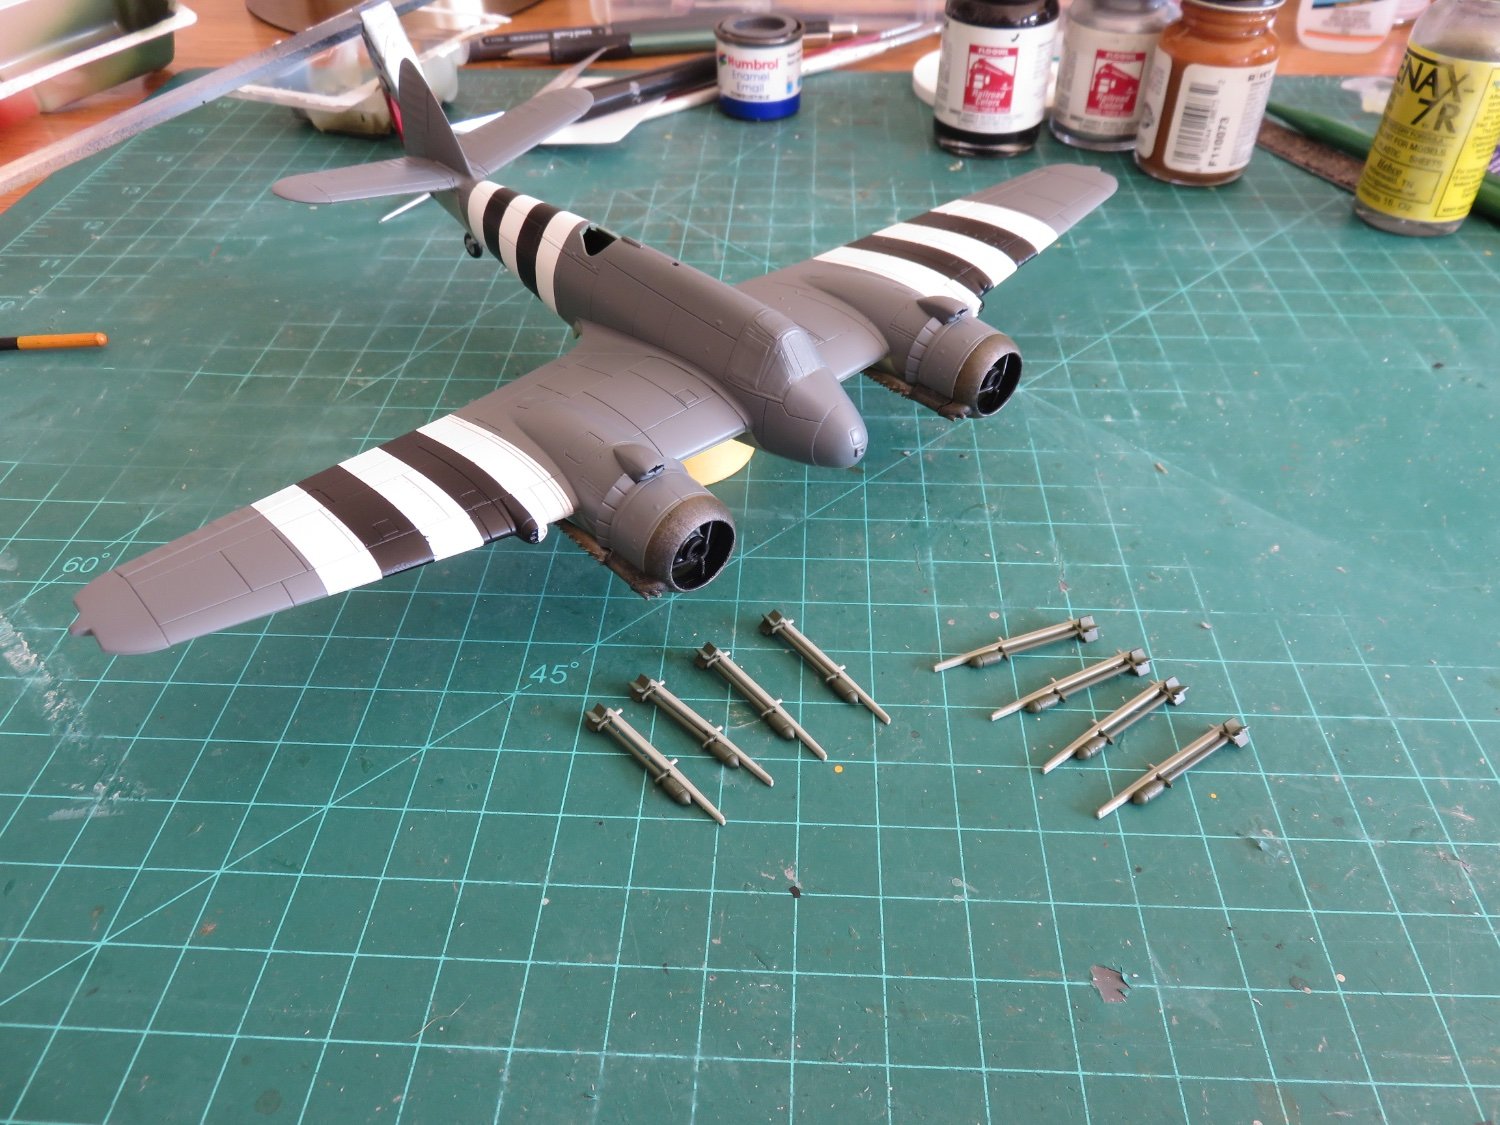
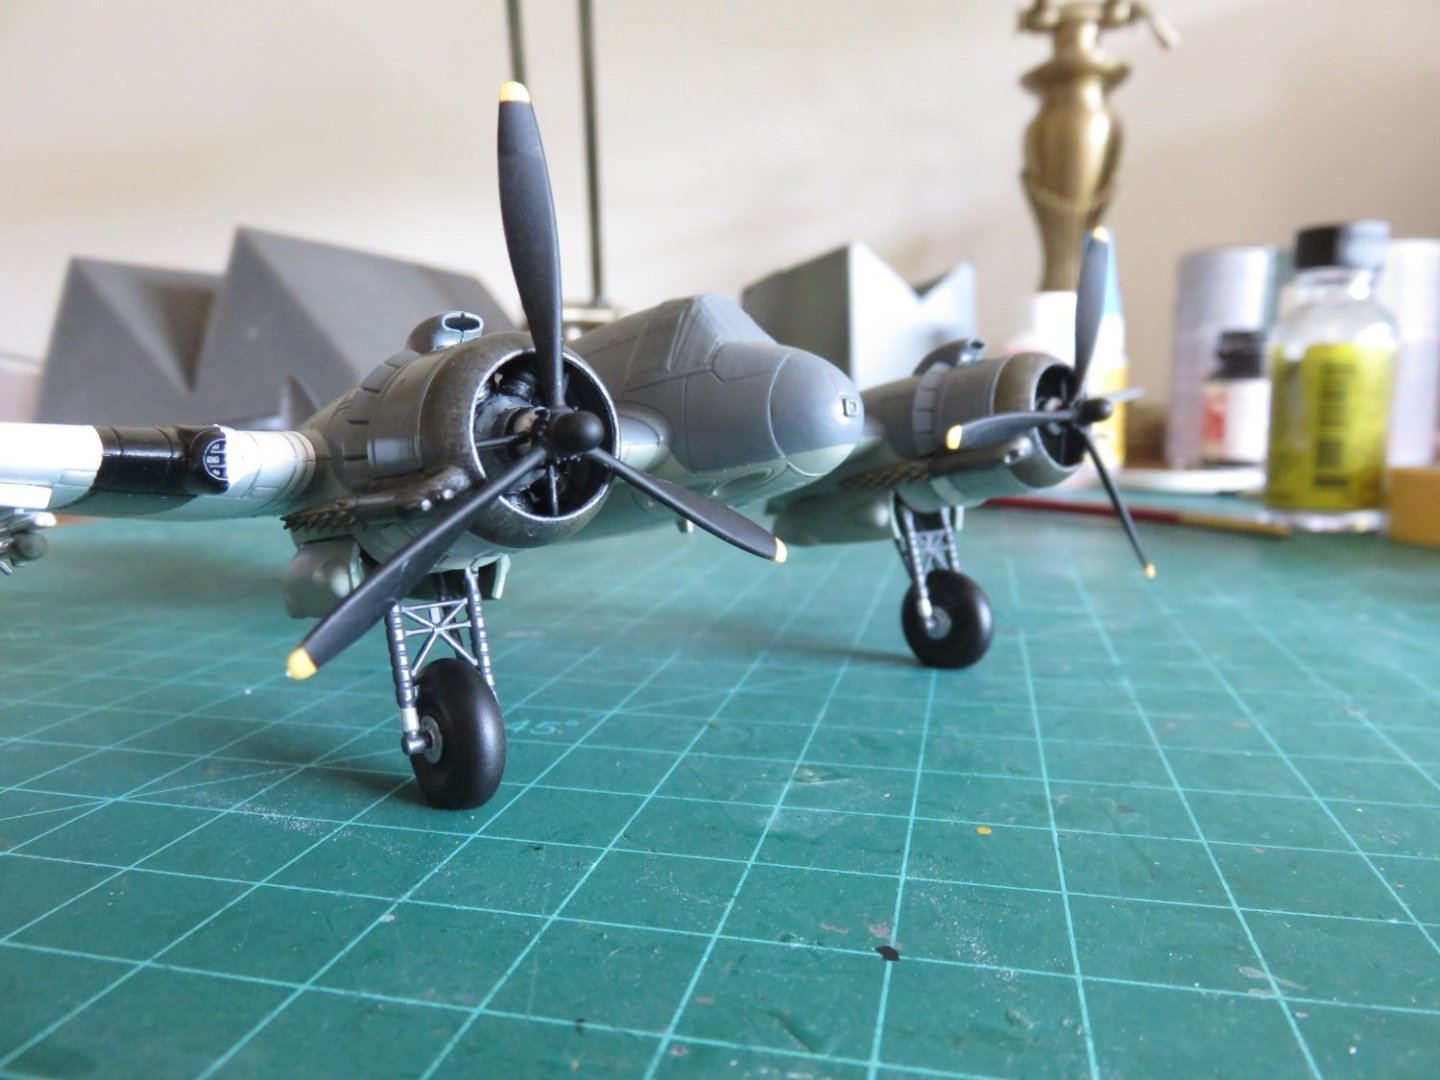
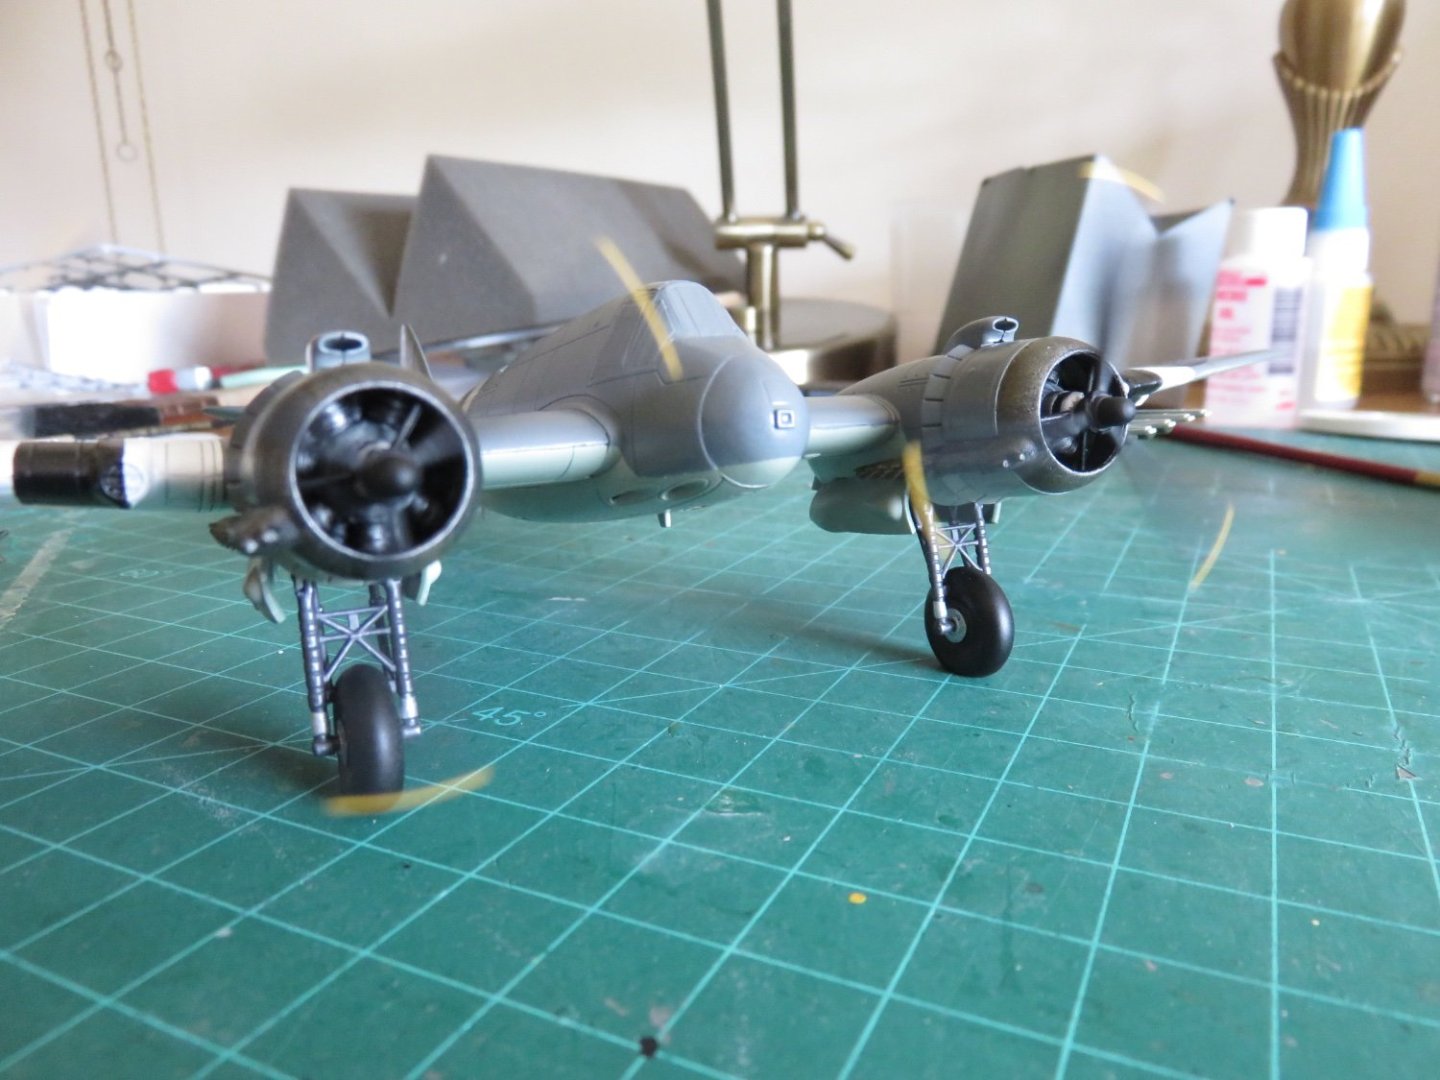
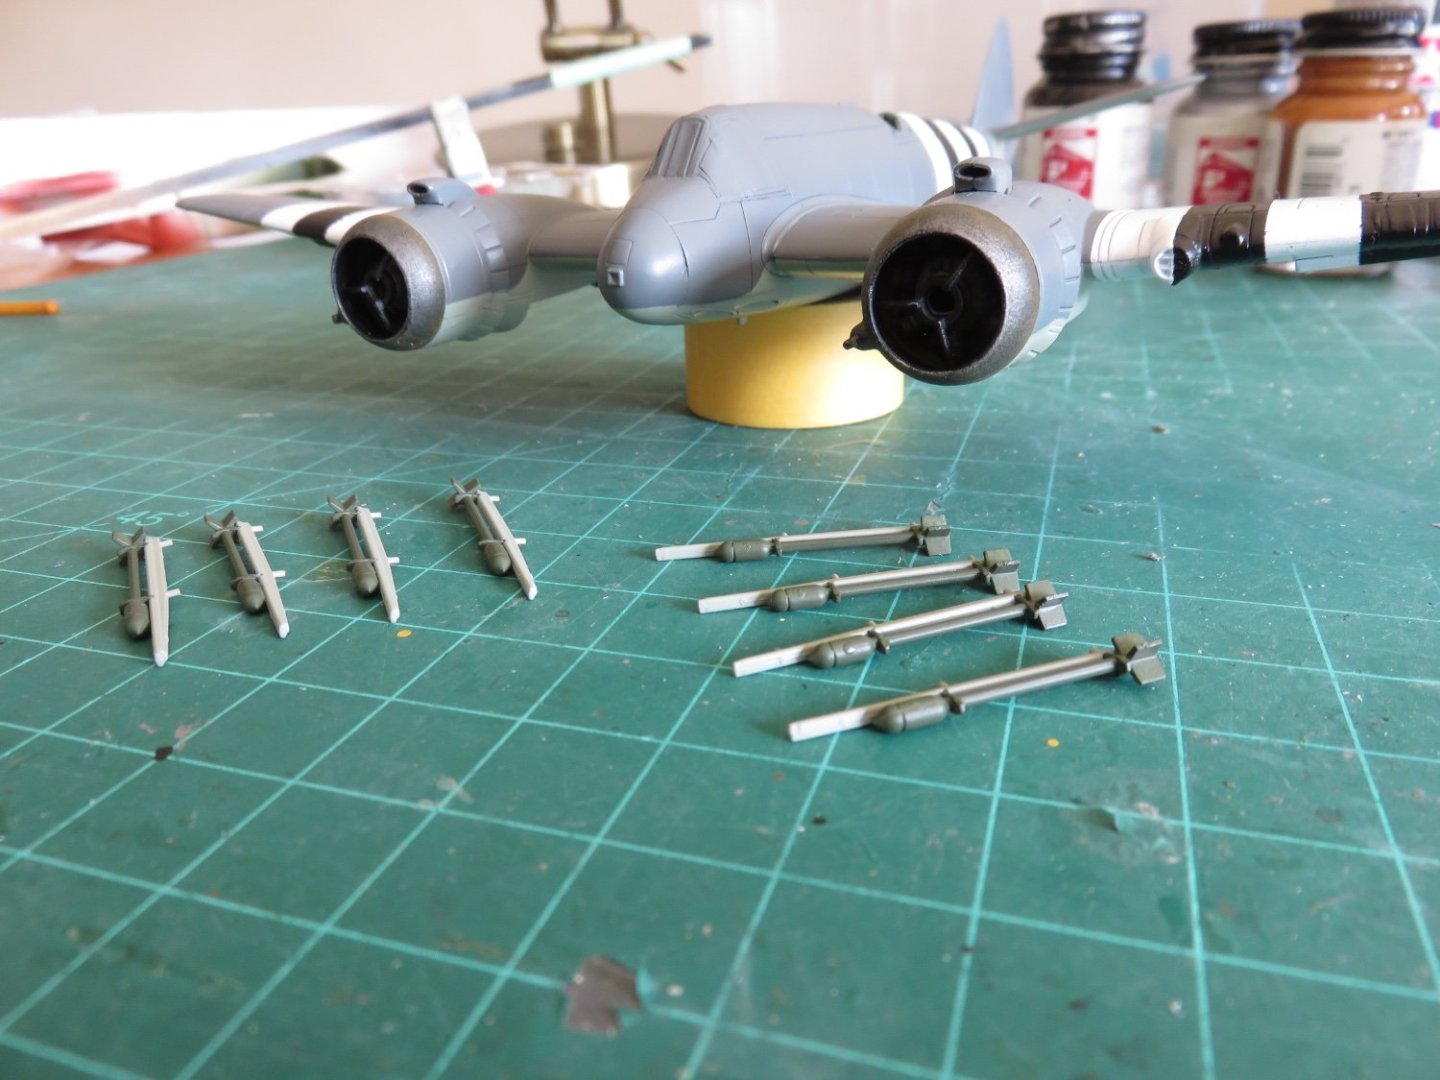
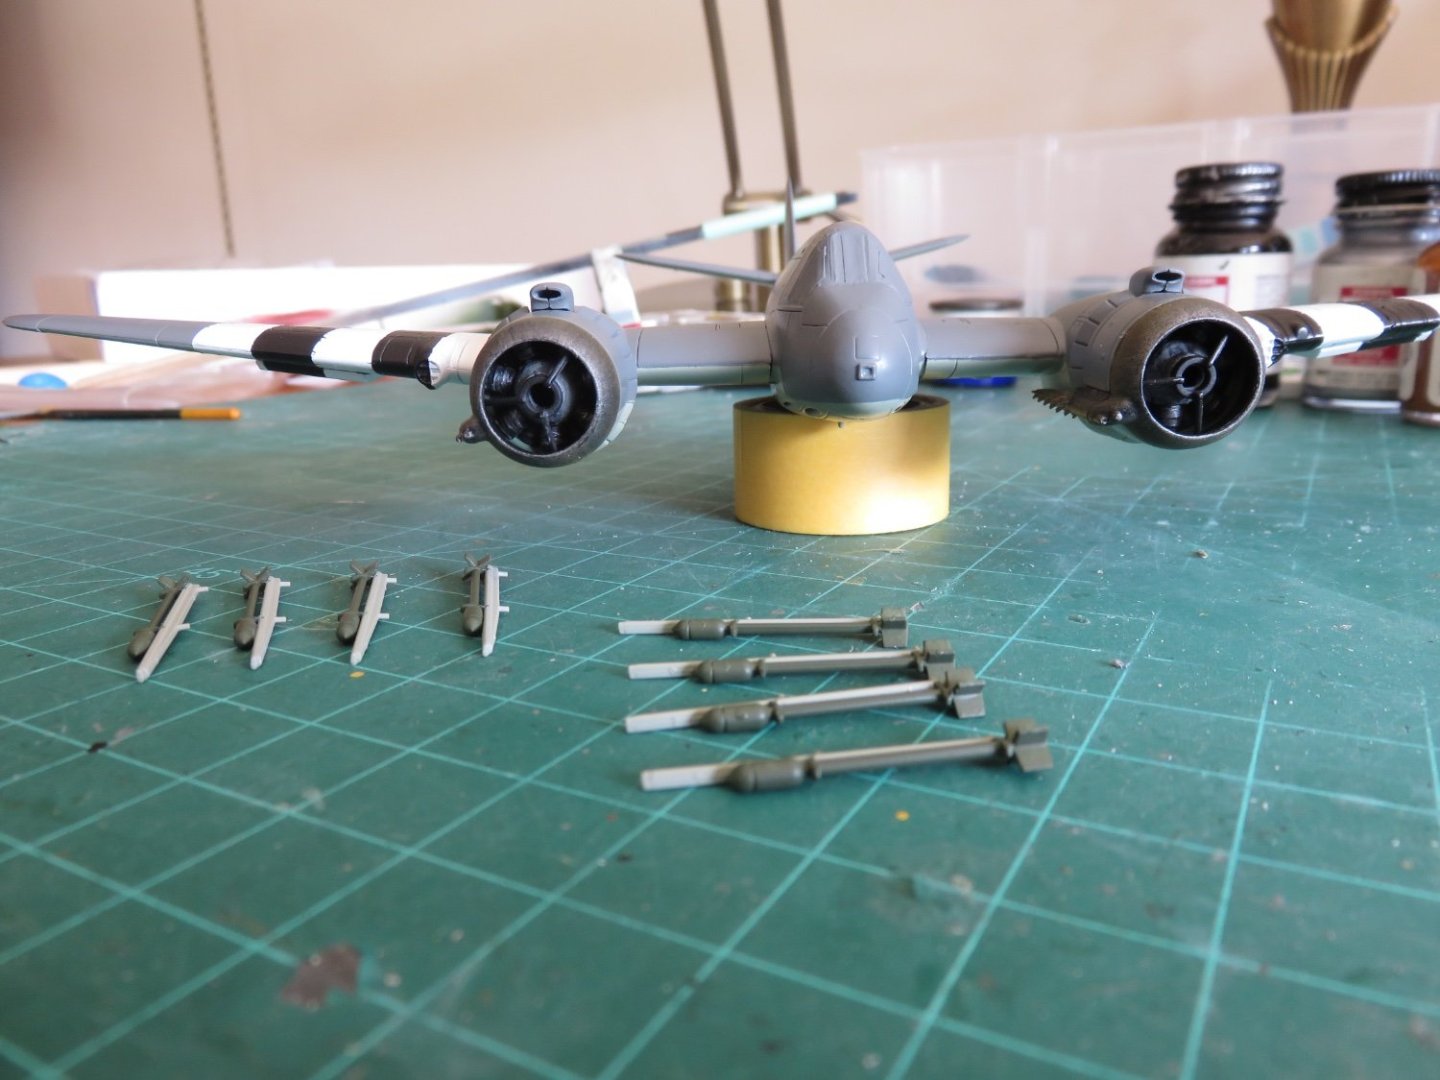
Thanks everyone for the "likes"! Proof that my latest flurry of activity was not a one-off. The engines are now installed and work has been progressing on the external armament (the RP-60 rockets). I had assembled the engines and the three-part cowlings off the airplane, but left off the exhaust collector ring. This allowed me to press fit the engines on the nacelles in order to mark off the demarkation line for the paint, once again without having to resort to excessive masking. Once painted, the engines were glued on with CA. The exhaust collector rings were next. The instructions say to paint them black (as, I believe, is found on at least one of the preserved Beaufighters), but in reality the collector rings were bare steel, discoloured by the heat from the engine exhaust. To try to replicate this to some degree, after laying down a base layer of black I dry brushed on a thin layer of Humbrol #53 Gunmetal, followed by an identical treatment of Floquil Rust. I think is gives a somewhat convincing appearance. After I decal and seal the model, I will add a good amount of exhaust smudges and streaks to blend everything in. Prior to installing the collector rings I added the "hedgehog" exhaust diffusers. The diffusers were aftermarket parts from CMK, as the kit supplied parts are softly moulded and lacked depth. The resin parts are much sharper. They were first painted in a similar fashion to the collector rings and glued into place. I should mention that before I did all this, having followed the kit painting guide, I found the engines got lost in the darkness. I felt things needed to stand out a bit better so, again, I turned to dry brushing to highlight some of the details using gunmetal as well as silver paint. Finally a wash of medium sea grey was also added to the reduction gear. Of course, the camera does a poor job of picking out these details, but they are there and I'm reasonably happy with the way things look. I am just about finished with the touch-ups, so after that and adding the rockets it will be time for a layer of gloss and then the fun of adding the decals. Andy

- 38 replies
-
- 12
-
-
-
As a correction/addendum, (and a largely forgotten bit of lore) the cam style clamps are properly called Kestner clamps, and the patent for these clamps dates to 1947: https://patents.google.com/patent/US2583053A/en Andy
-
A trail of empty model boxes works well too….
-
Wuh oh….. I don’t think there are adequate words to describe the depth of the rabbit hole you now find in front of you…. 😆 Andy
-
Thanks EG! Yeah, I’ve seen a variety of different recognition stripes (like those on the early Tiffies). The challenge isn’t so much applying them on a flat-ish surface, but where there’s a taper (like the leading edge of the wings, or the relatively conical shape of the rear fuselage) that causes the headaches. If you want to kill some time, have a look on YouTube for LPJ models, he has an amazing ability to add an staggering amount of depth to an otherwise monotonous paint job: I lack the tools and skills to even attempt to approach that level… Andy
-
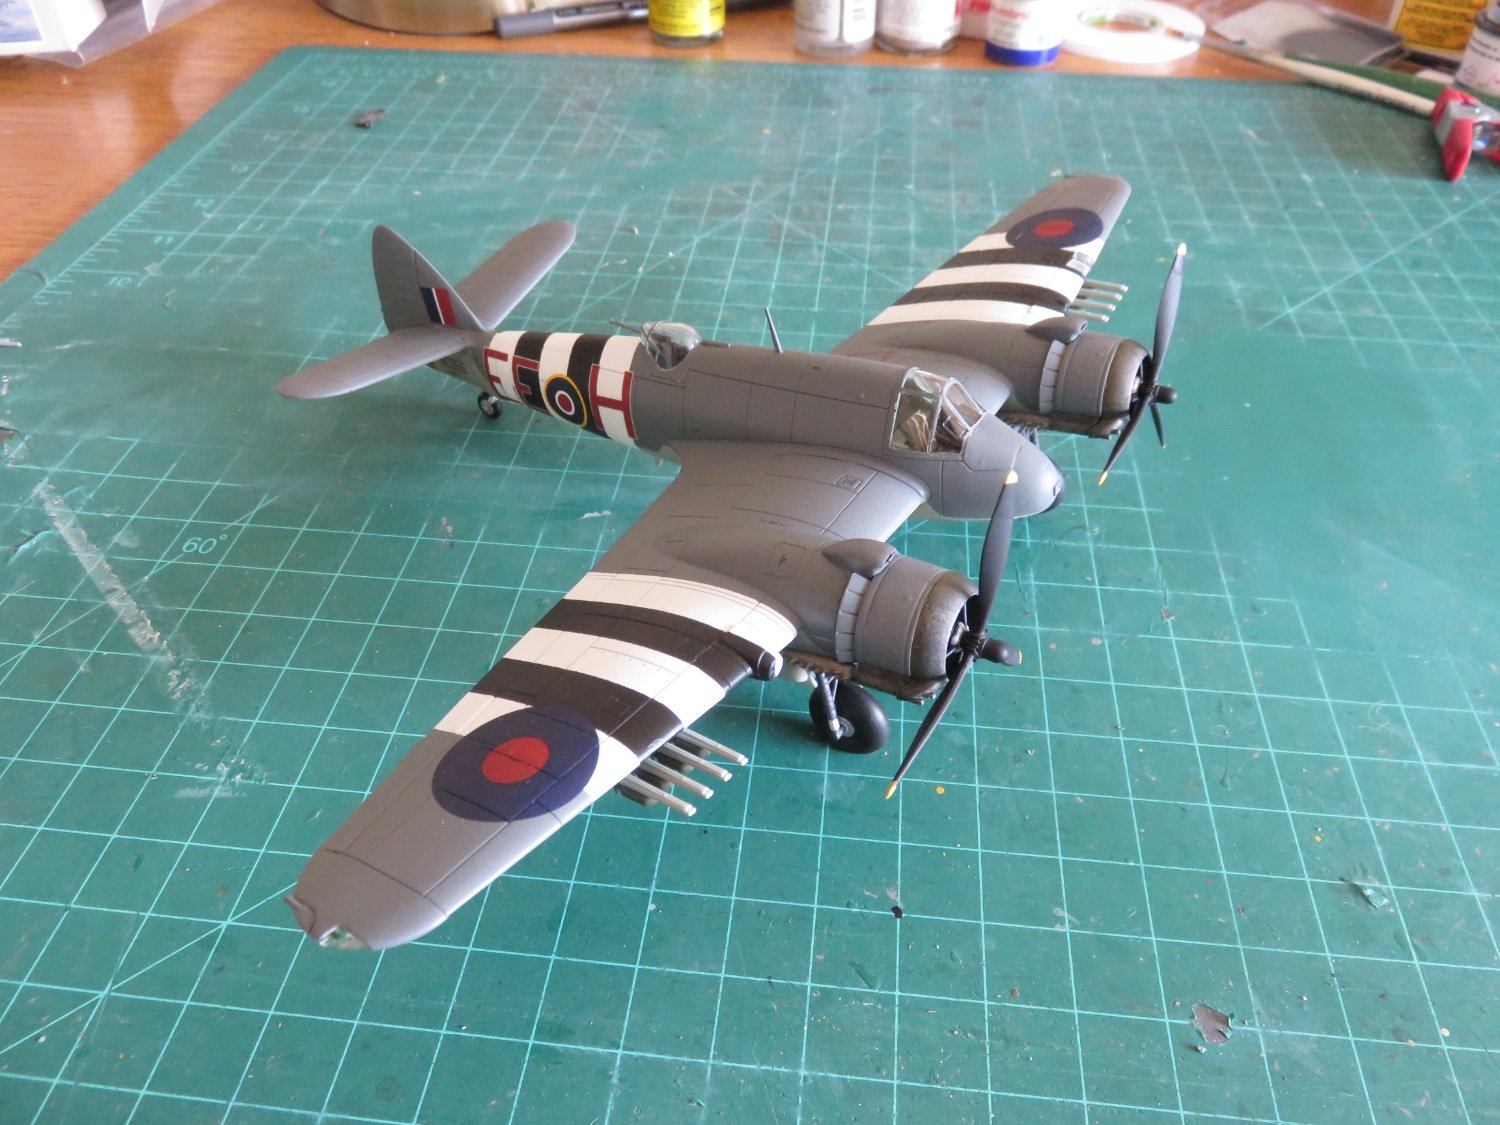
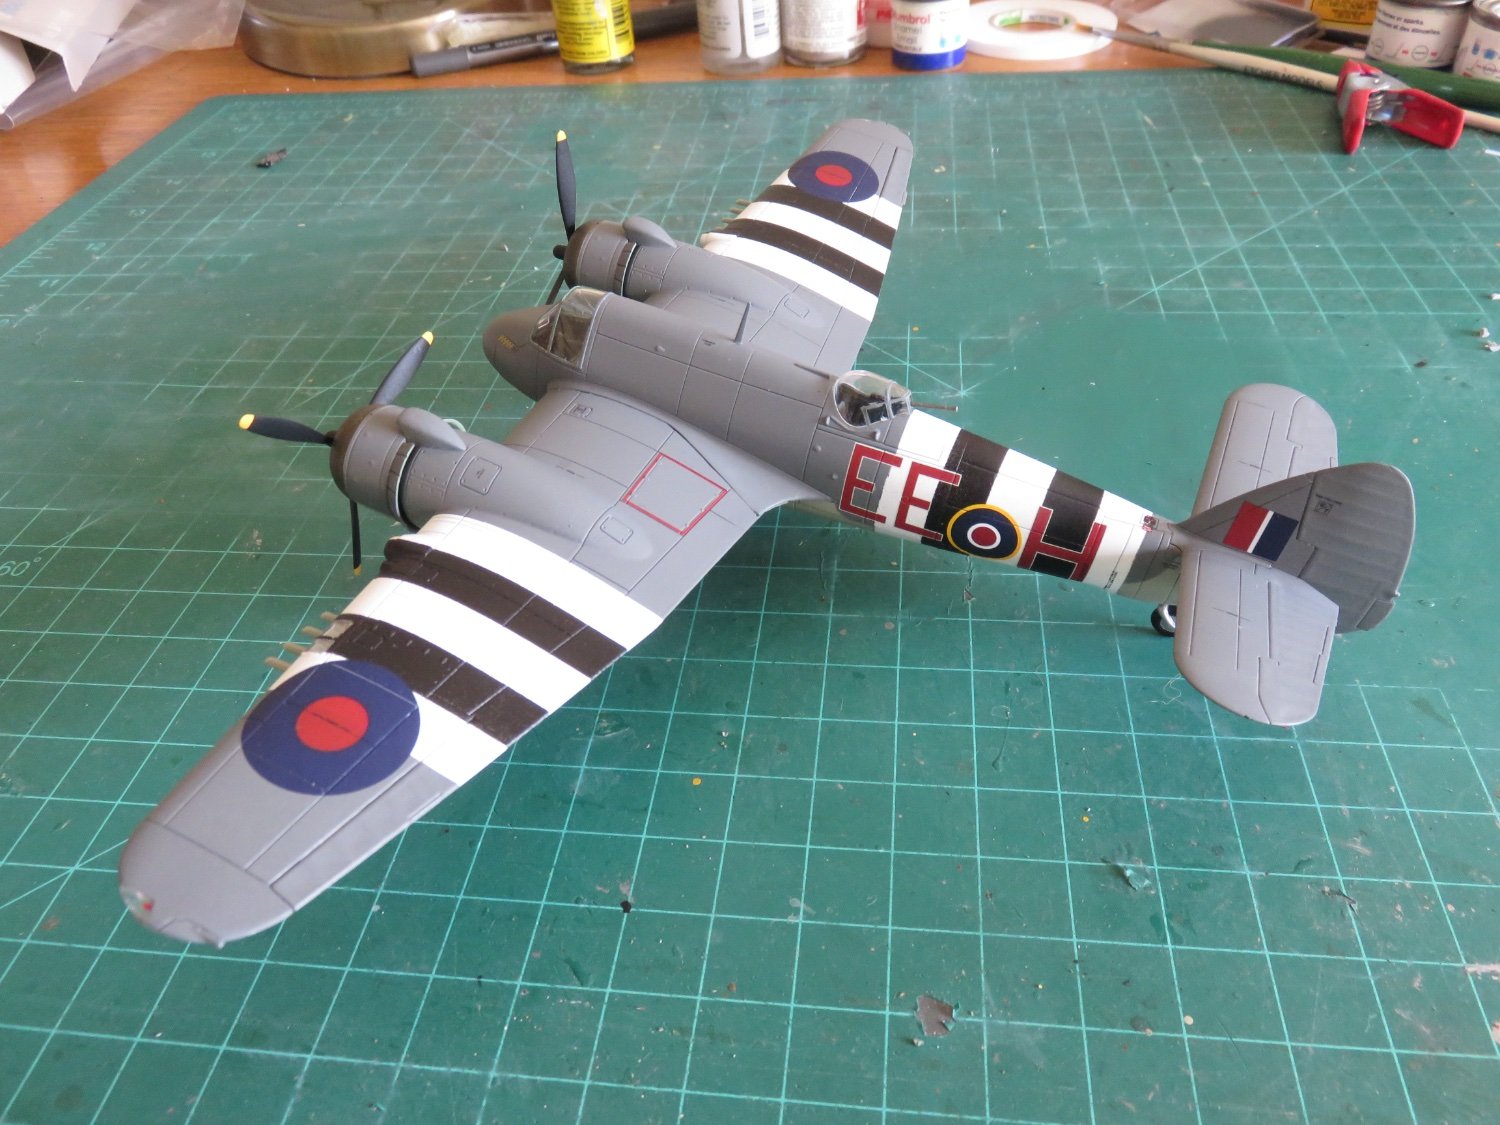
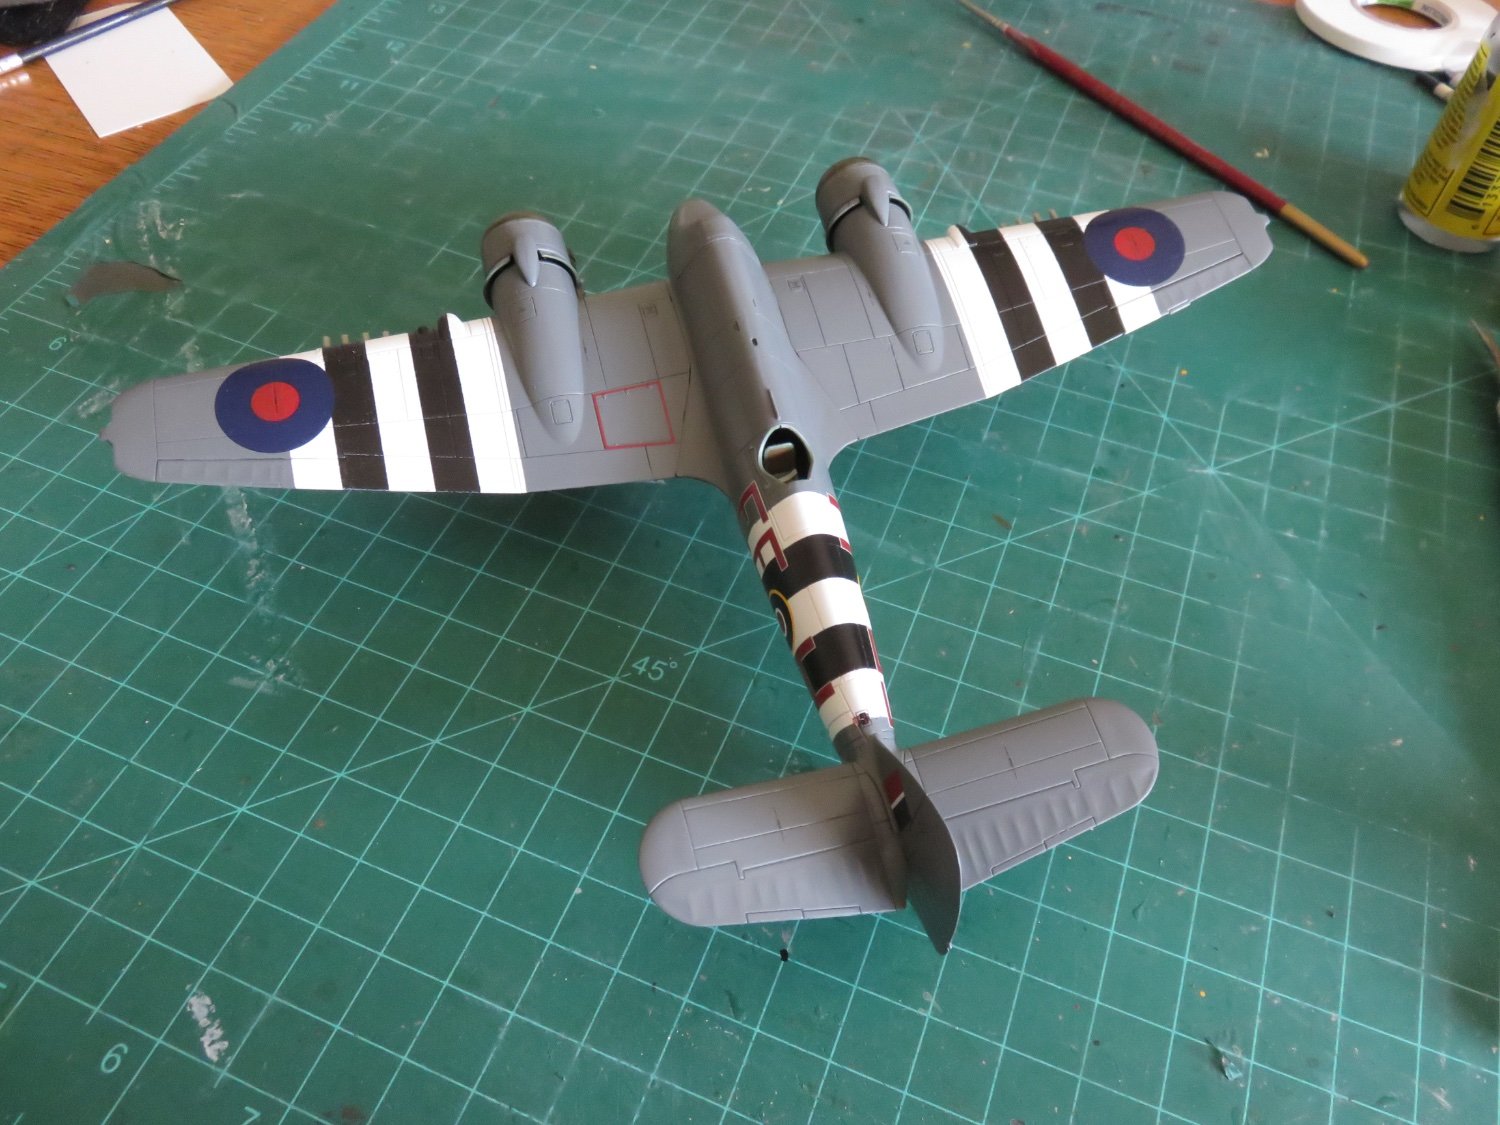
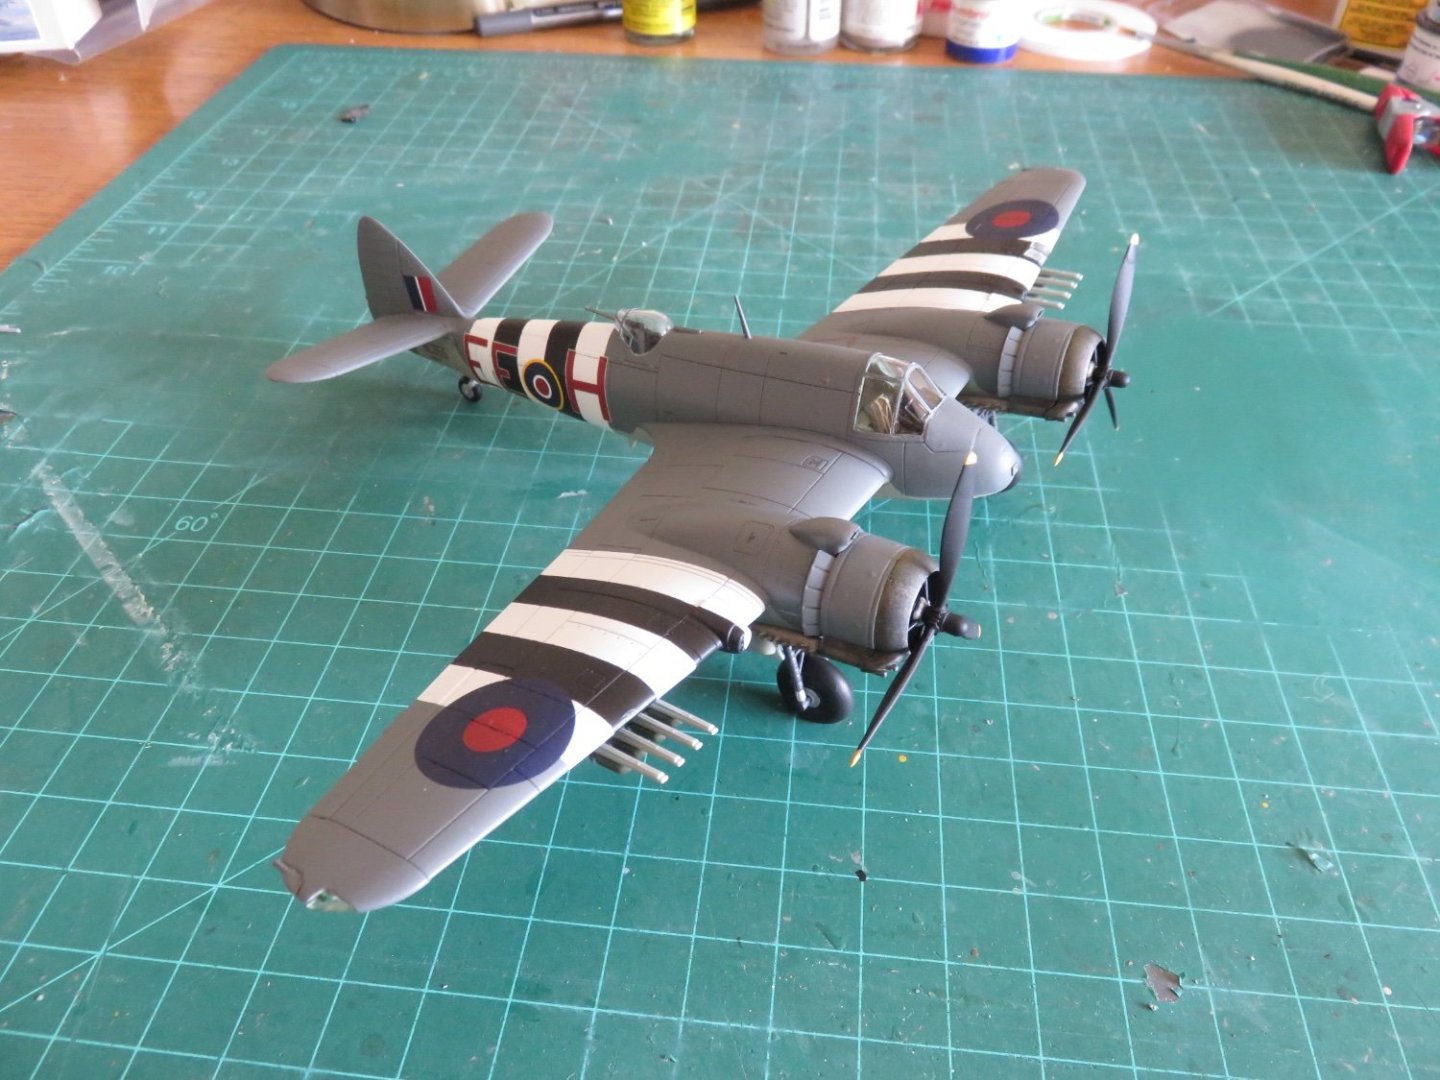
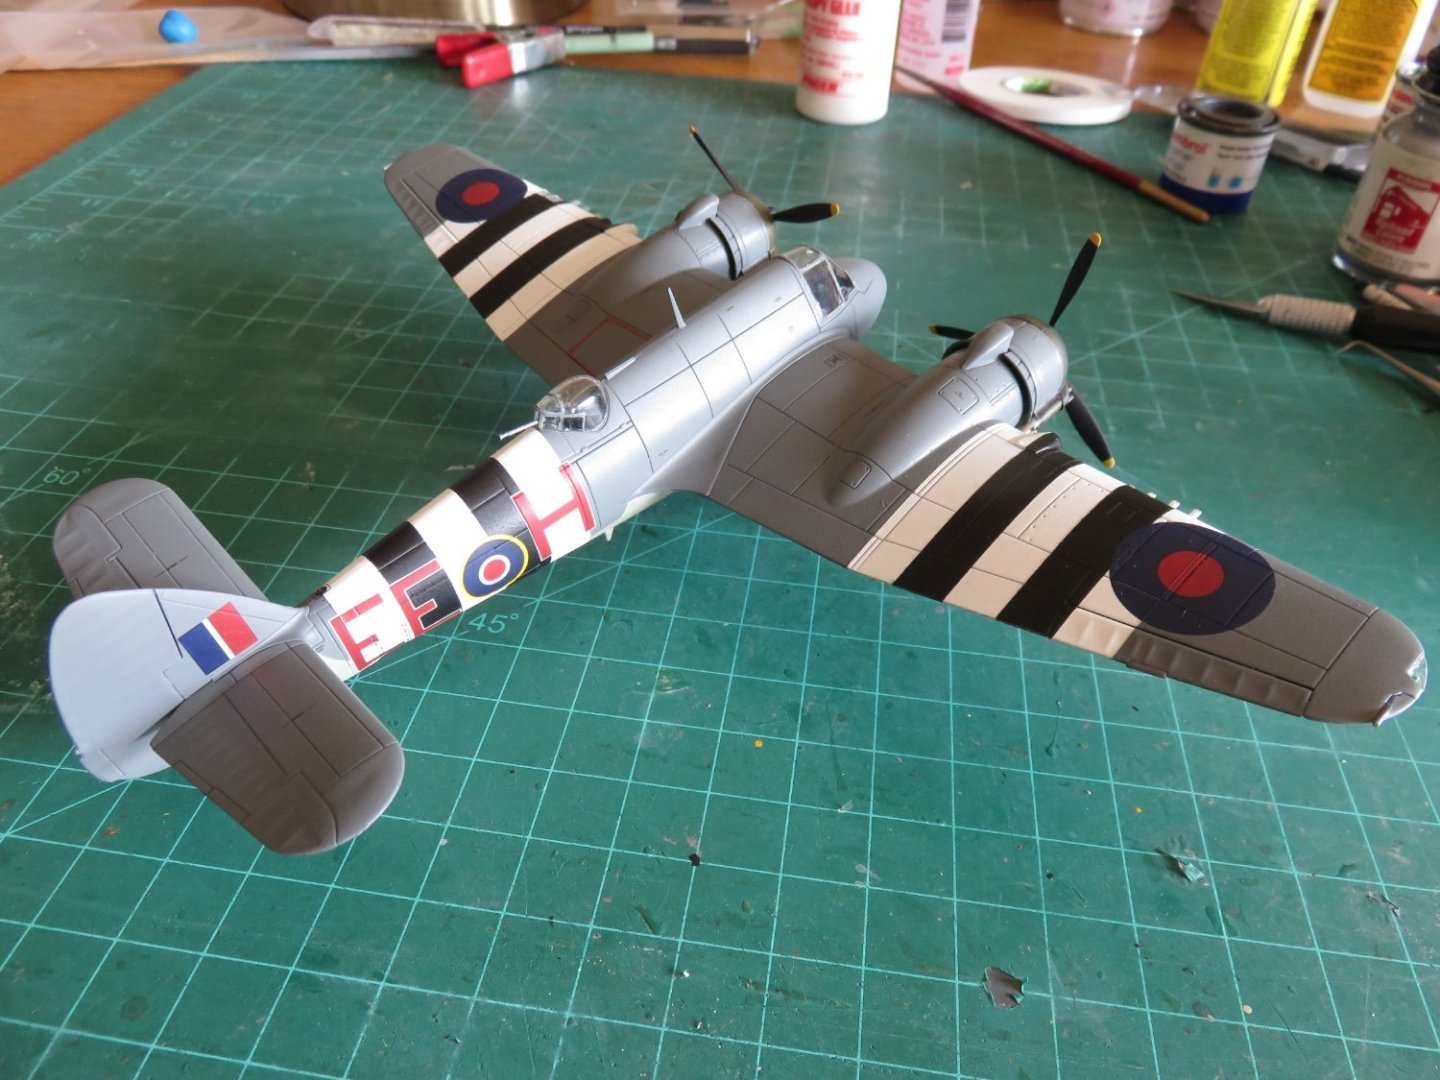
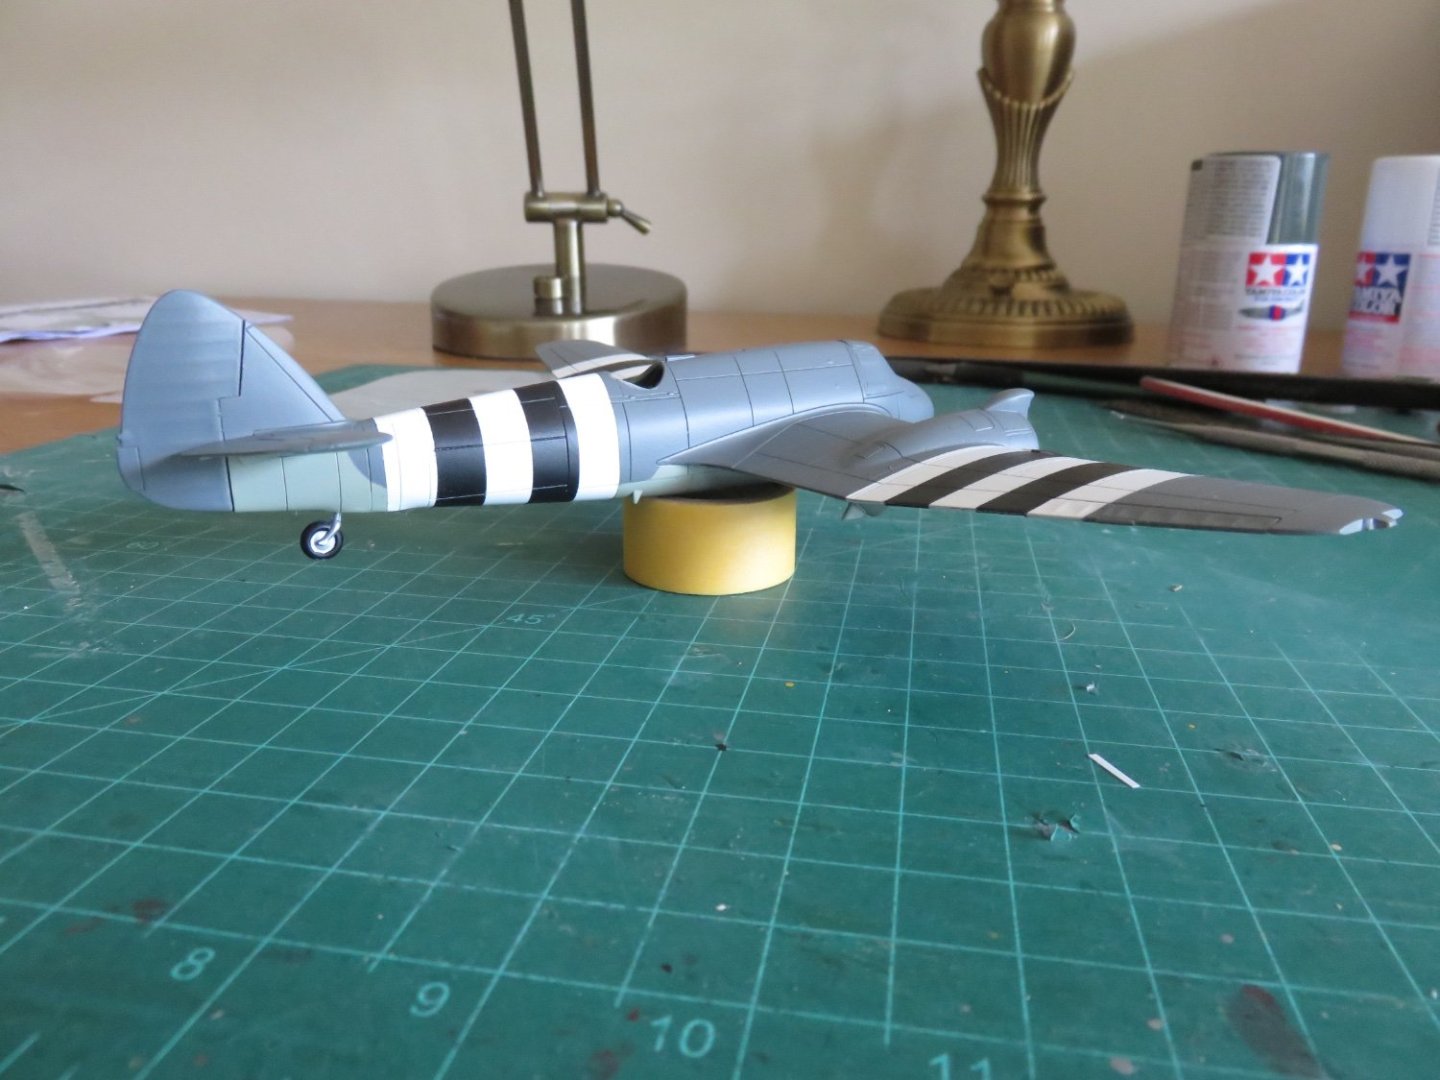
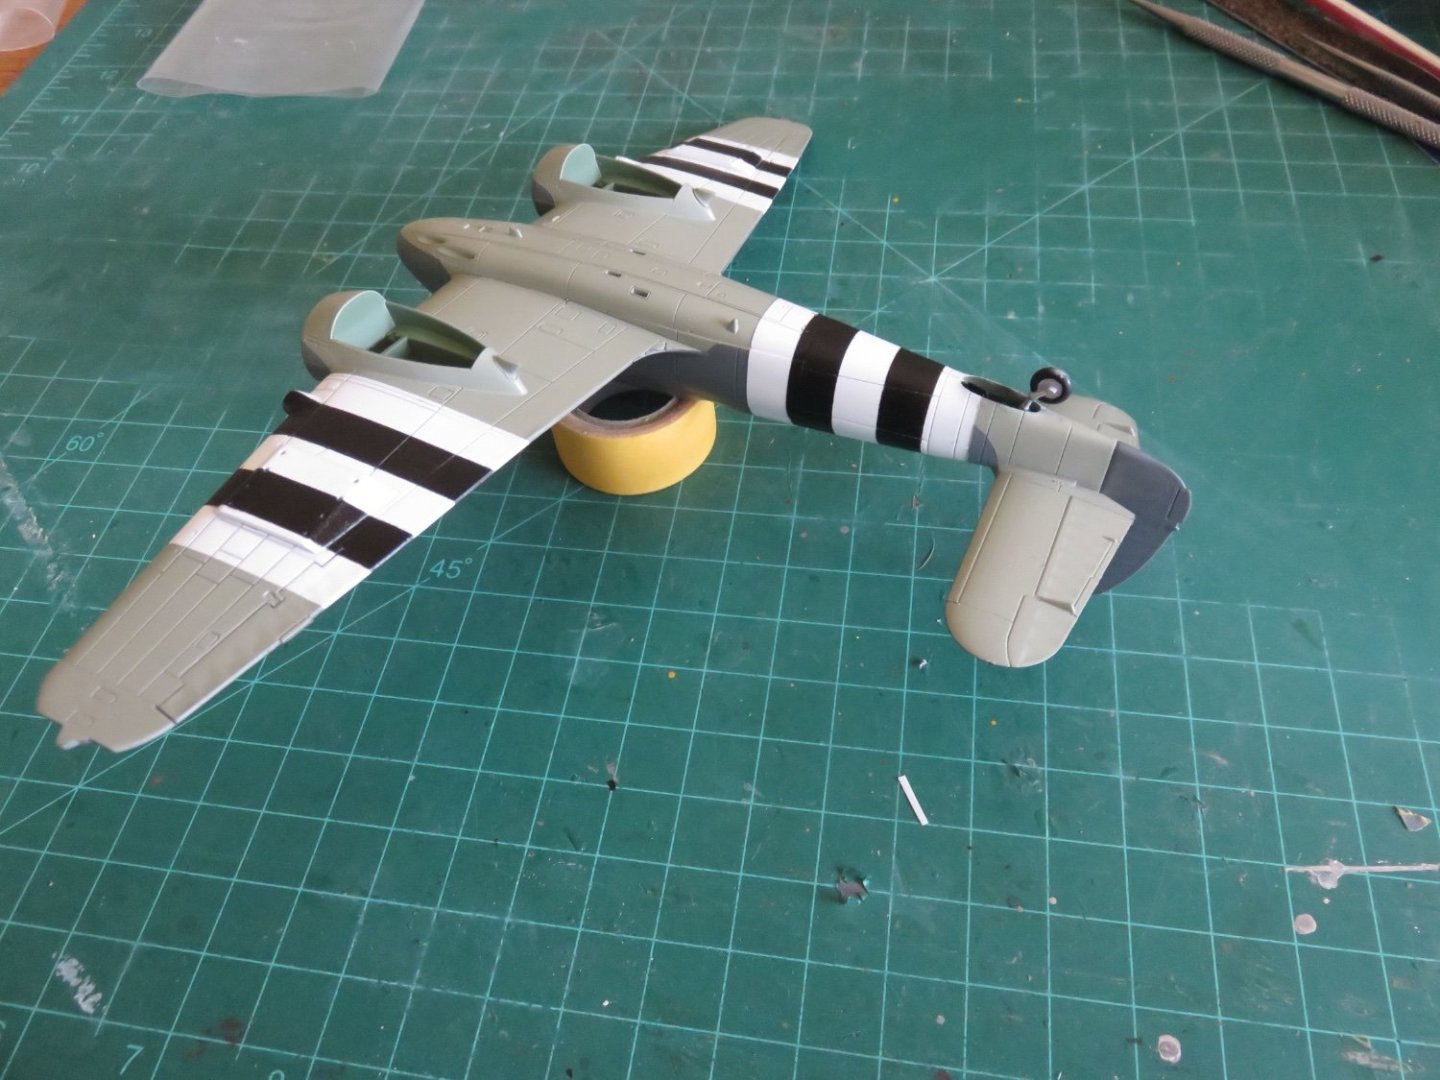
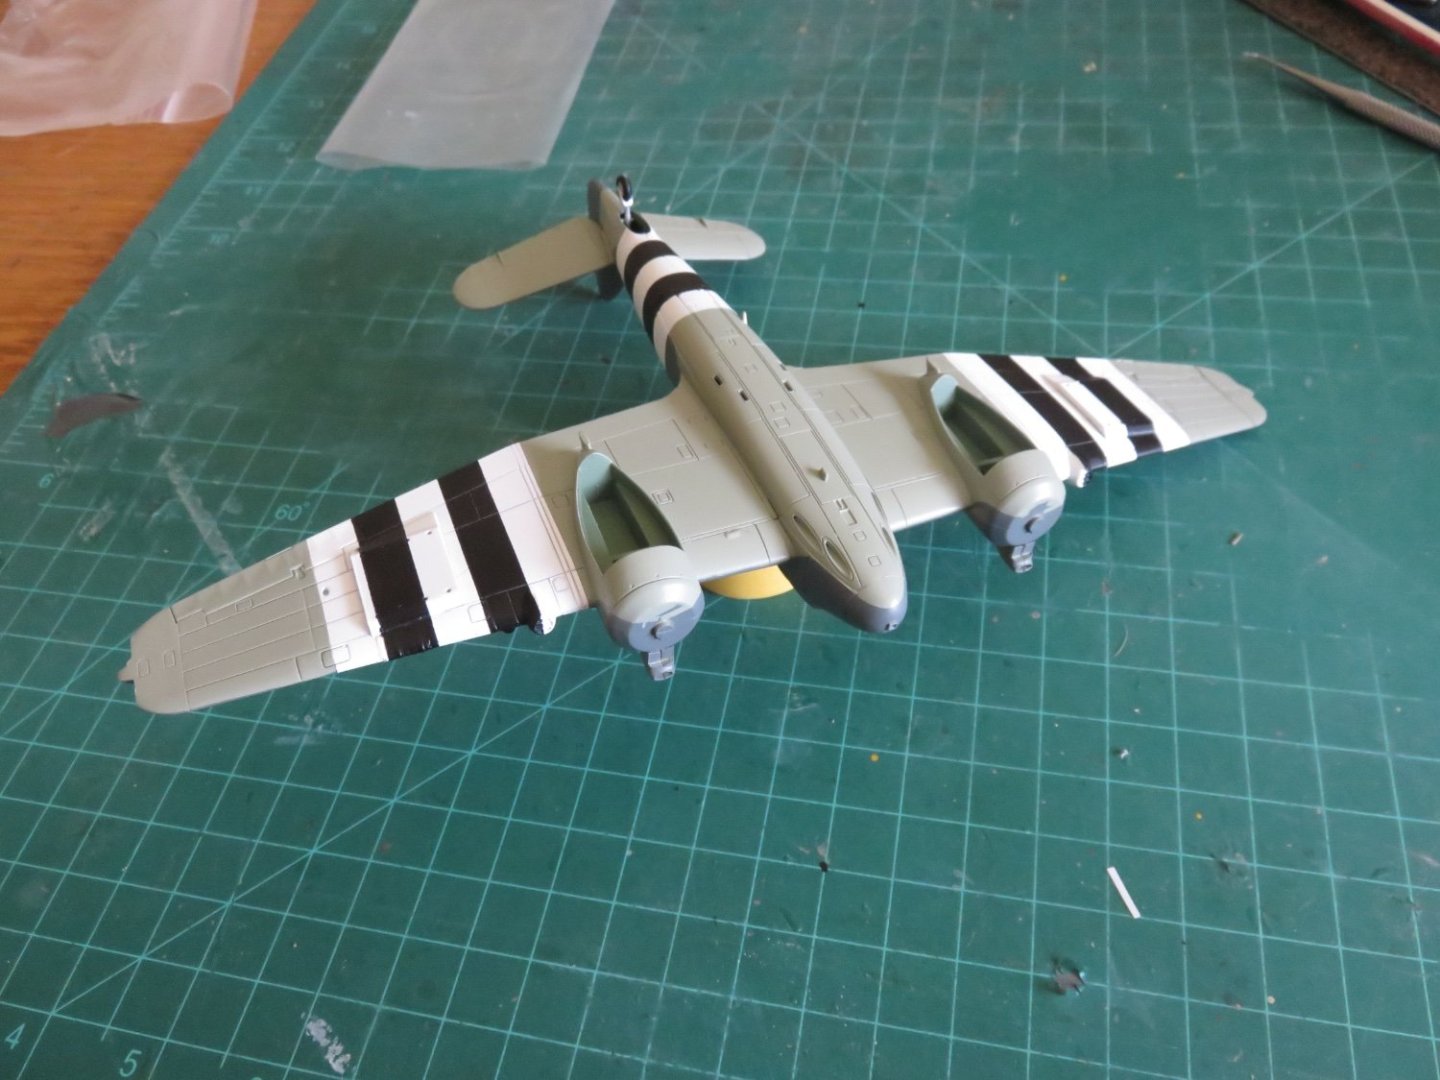
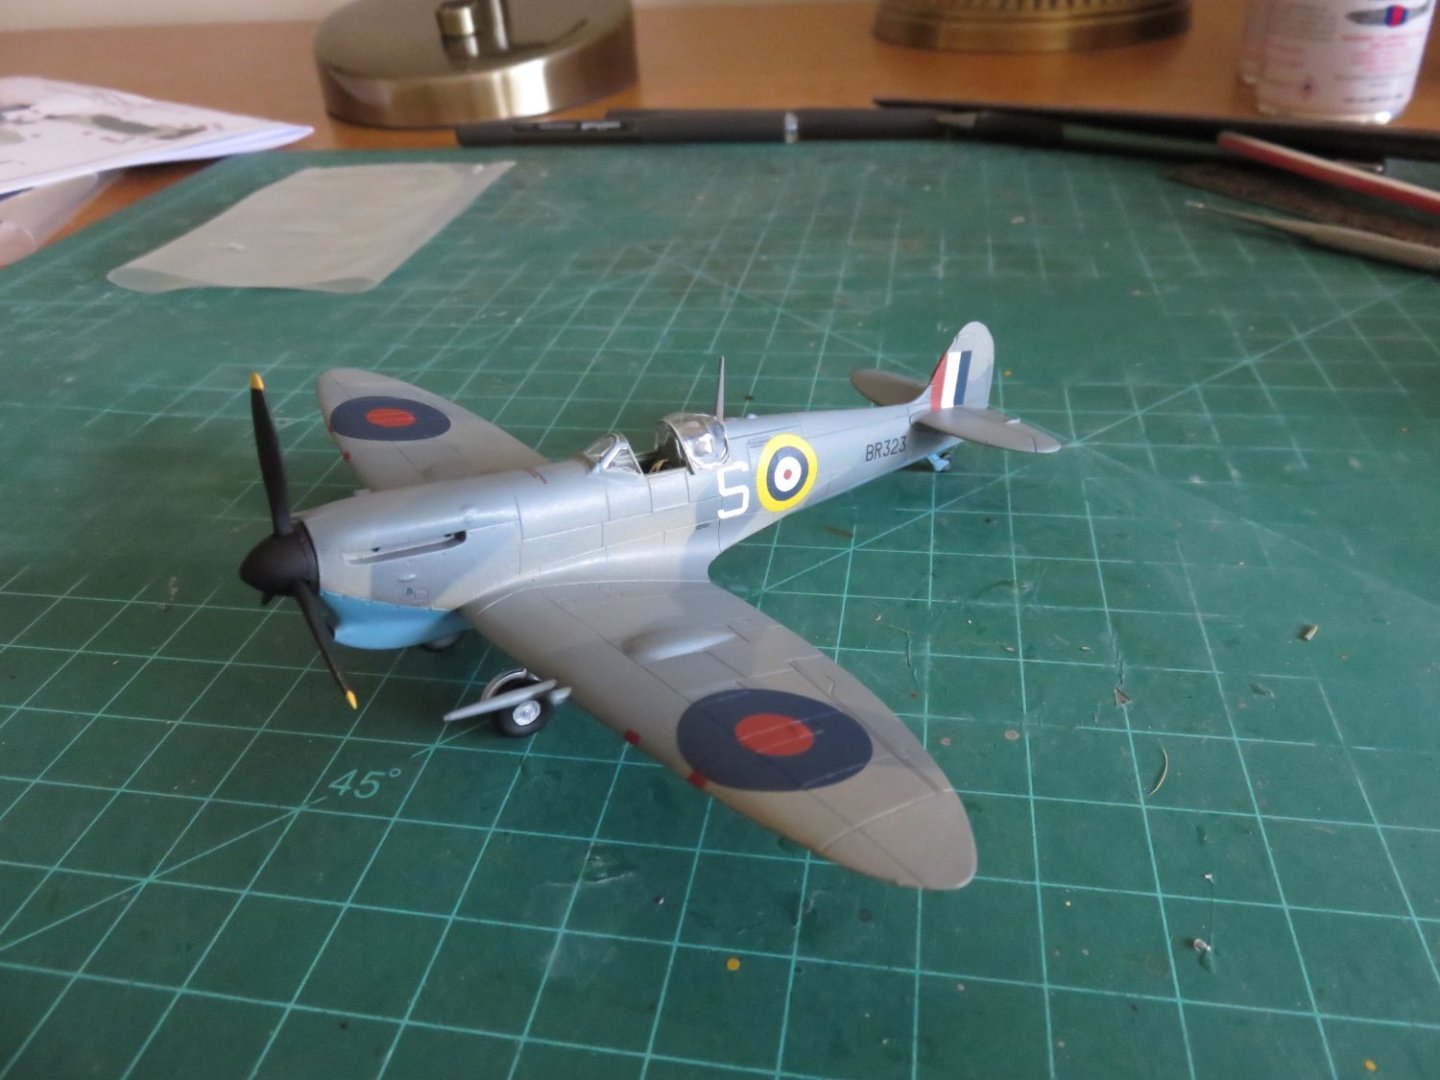
Well, it certainly has been a long few months. Where did summer go? Work has resumed, finally, on my Beaufighter project, although I needed a bit of a mojo build to get things rolling again. Over the extended summer break, I did manage to get a start on painting the invasion stripes called for in the kit scheme. May this be the last time I ever make a model with them..... for a good while, at least. 🙄 For those who are curious, I've found that painting the invasion stripes first, significantly reduces the amount of masking needed. With the stripes painted first, I only need to mask them before proceeding on to the main paint scheme. Doing them afterwards requires masking the entire airplane before adding the stripes. Seems kinda like a no-brainer to me, but everyone has their preferences and there's no one right way. This is one of these tasks where an accurate scale diagram would go a long way to making this easier. Unfortunately the kit only supplies a 1/2 size (?) painting diagram with some basic dimensions, which for someone lacking really hyper precise measuring instruments, is really next to useless. The diagram called for invasion stripes 8.4mm wide for a total band width of 41.8 ..... To heck with it, I'm rounding up to 8.5 and 42, respectively (although even measuring 8.5 is not without peril). Suffice it to say, I had to take a break and haul out the other kit I had in my stash, the Spitfire Mk Vc: This kit went together surprisingly well, and I've managed to get it almost finished, just need to add the exhaust, glue down the main canopy part and give it a dose of weathering. When I'm done my Beaufighter, I will post images and a full explanation of this build in another topic. Anyway, diversion over, I felt refreshed and ready to tackle those invasions stripes, and in only a couple of days I finally had them done. The last few days I've been busy laying down paint and this afternoon I pulled all the masking off, hoping and praying things hadn't gone pear shaped. The main scheme for this plane is EDSG over Sky type S: So, I'm breathing again (especially since the paint fumes have cleared 😜). Things seem to have come out alright, a couple of minor touch-ups but nothing untoward. For something that, invasion stripes notwithstanding, looks like a simple paint job, there are a surprising number of annoying little challenges to deal with. The curvy "swoop" lines where the EDSG meets the Sky undersides ahead of the tail and on the engine nacelles and forward and aft of the wings (as well as the "chinstrap" under the nose) took a fair amount of fiddling around to get them looking somewhat symmetrical-ish (?). Again, a scale diagram could have proven useful to trace out the shape of the curve more accurately, but I had to go with what I had. I will say that the invasion stripes do add a considerable amount of visual interest to an otherwise nondescript paint scheme. So in the end, all the faffing about and the odd, no...frequent, spate of cursing, and a healthy dose of self-criticism (which primarily resulted in the previous day's work being peeled off after a new approach was dreamt up), was worth the effort. But as I said before, it will be some time before I consider making another model with invasion stripes. My Typhoon was a bit of a trap, in that respect. It made things seem easier than they really are. Andy

- 38 replies
-
- 11
-
-
-
Glad to see you’ve found a solution! It matches nicely! Hopefully things get smoother from here 🤞 Andy
-
Seems like every card model presents different challenges! Would it be an idea to fill in the frame/wing filet area with some balsa and sanding to shape before wrestling with the outer skins? Andy
-
The British 1/76 scale is more correctly called OO scale, but it runs on HO gauge track (hence the presence of British made Peco track in the US market). There was also an American OO scale as well (can’t recall the exact particulars, but it differed from the British), this scale largely went extinct with the increasing popularity of 1/87th HO scale. Andy
-
Victory 357 Hawk Ekranoplan by RGL - Paused
realworkingsailor replied to RGL's topic in Non-ship/categorised builds
Thunderbird? I dunno… looks maybe more like an Edsel… 😳 Andy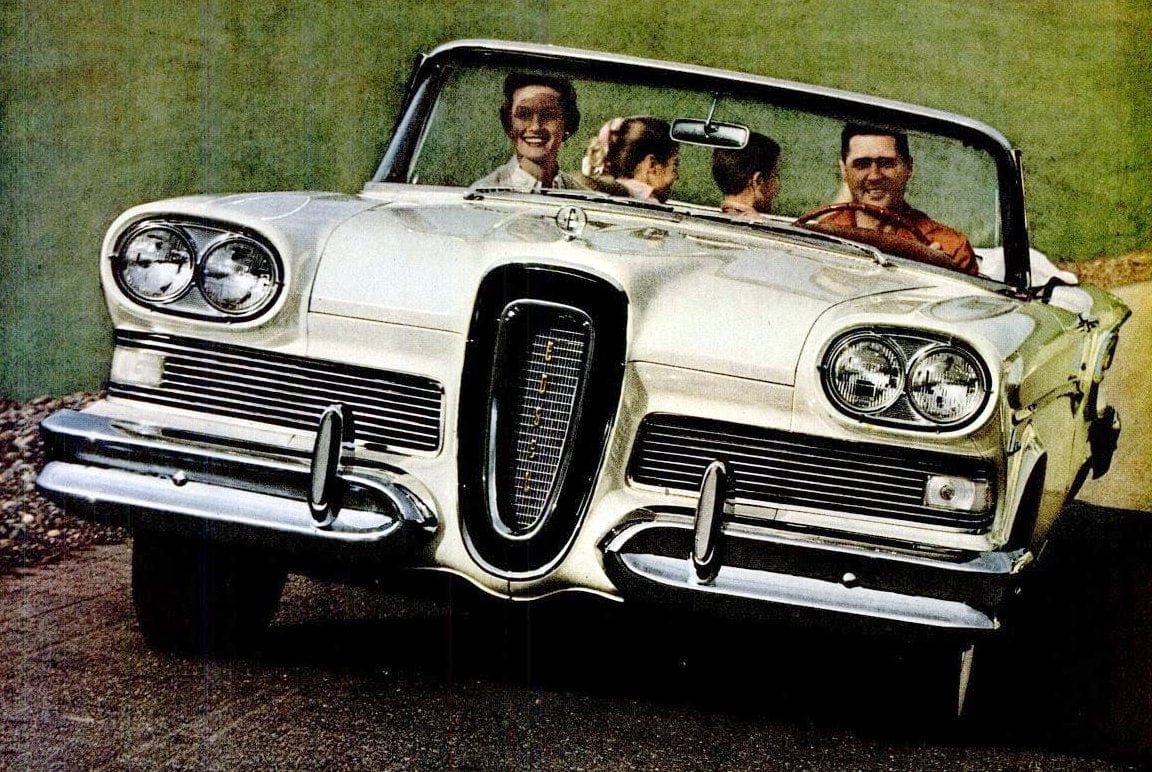
-
Another radial engined bird? You are a glutton for punishment (even if you only make the single bank version) 😜 Can’t wait to see how you master this one! 😁 Andy
-
Hi Nils! Your latest post about the crow’s nest got me thinking about your mystery cabin. I’m fairly certain both might be elements of Hollywood-isms (where the movie plot overrides reality). The crows nest definitely fits in that category, by the 1950’s period of the movie, that feature was laughably obsolete on most ships, but in the vein of Moby Dick, or Titanic, a “crew member” high up in his crows nest lookout on the lookout for the MacGuffin sure helps the plot (a MacGuffin is a device or contrivance that drives a movie plot). I was looking also at your picture of the “radio cabin” and the construction doesn’t really look proper for a steel ship. It looks a little “wooden”. The corner seem to looks like nothing more than thin metal flashing nailed to some plywood to give an appearance of being part of the ship. The roof also looks a little plywood-y too (with a valance of 2x4s. Again there may have been some plot point in the movie that required a crew member to be seen banging away on some piece of radio equipment or some such, and Hollywood being what it is, there are typically multiple takes from multiple angles (and all the other nonsense that goes with making a film). If you’re modelling the ship as it appears in the film, you’re likely going to run into many of these questions. Hollywood is a great manipulator of reality in its quest for “the perfect shot” Andy
-
Probably the captain’s cabin and radio operator’s cabin shared the small structure below the wheelhouse, on the forward end of the boat deck. I’ll check my model when I get home, but pretty sure the coal bunker hatch was located between this part of the superstructure and the funnel. It would be hard to see as there is no coaming. Aft of the funnel is the engine room skylight. Andy